My NativeScript learning conspectus.
Maximilian Schwarzmüller NativeScript Lecture
- 1. Introduction
- 1. Course Introduction
- 2. What is NativeScript
- 3. Under the Hood of NativeScript
- 4. What is Angular & Course Requirements
- 5. Our First NativeScript App!
- 6. Course Outline
- 7. How To Get The Most Out Of The Course
- 2. Optional Angular - A Quick Refresher
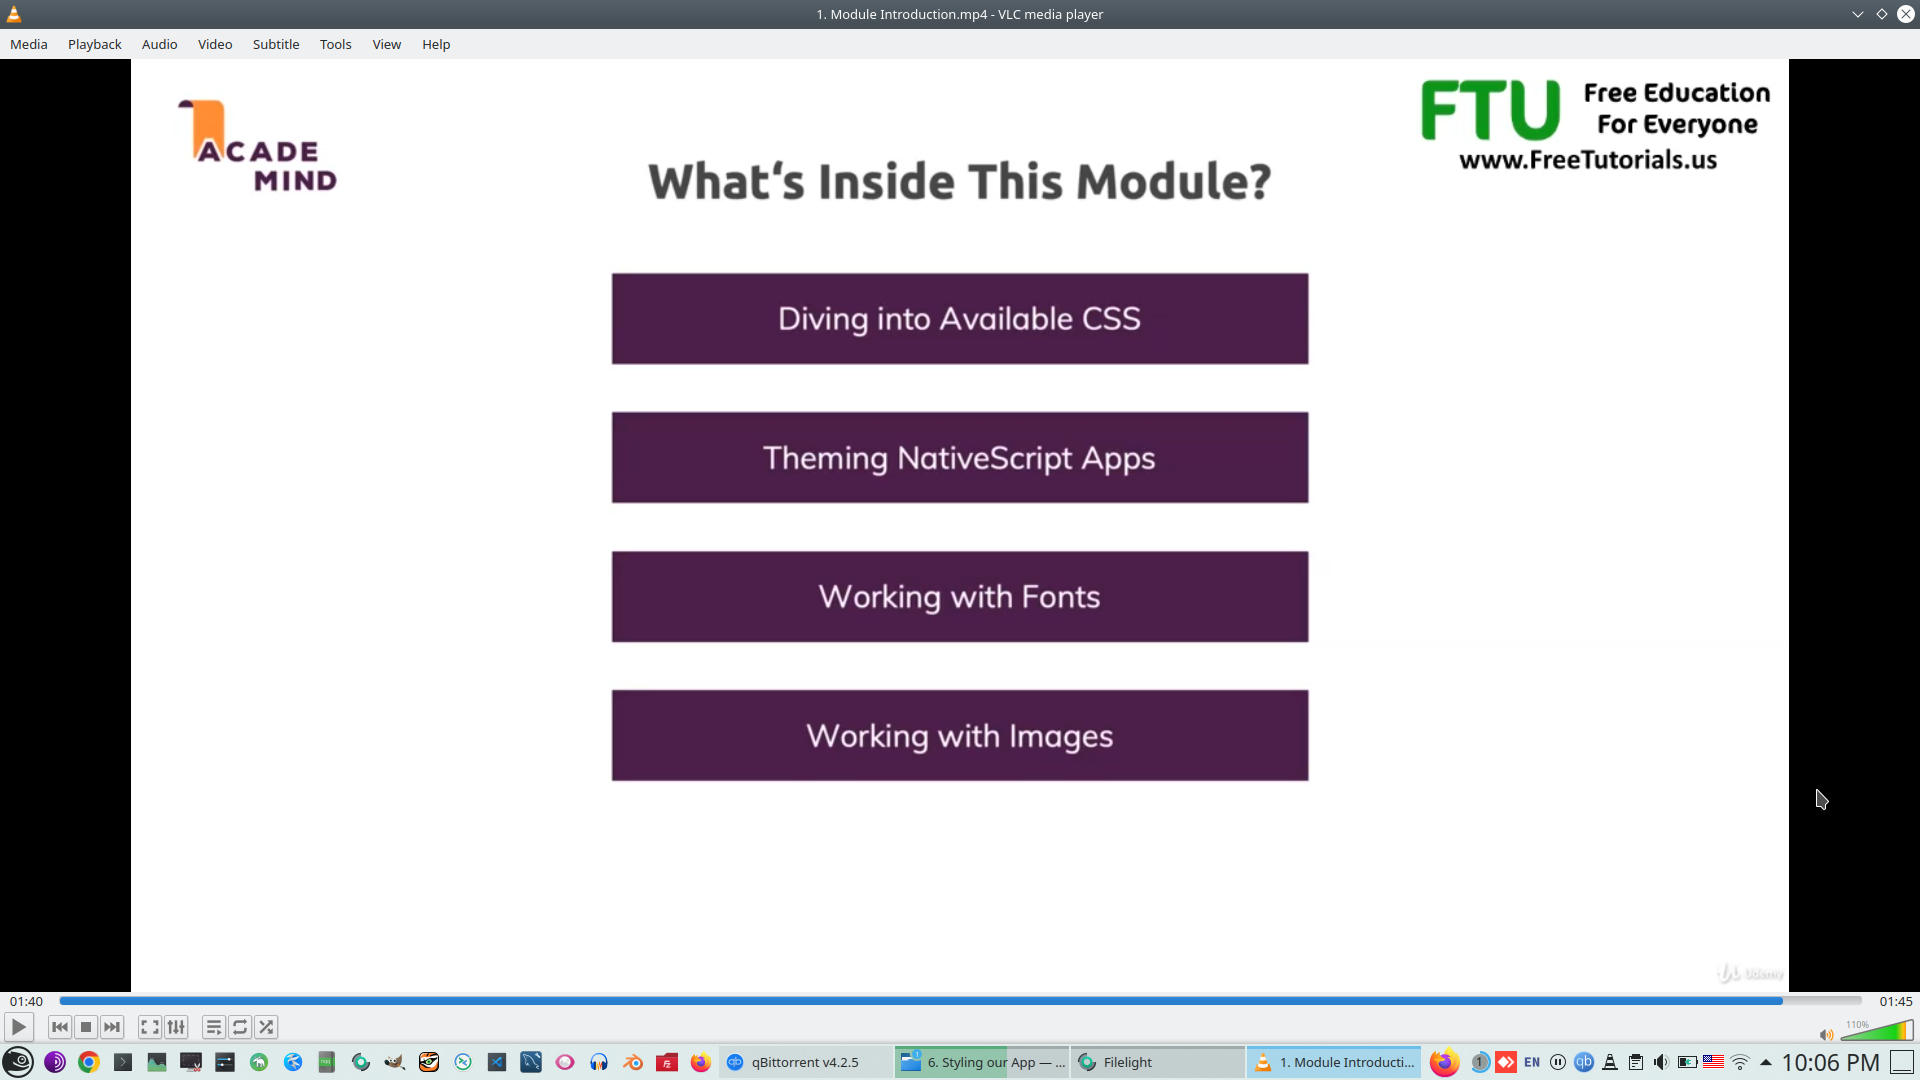
- 1. Module Introduction
- 2. What is Angular
- 3. Single Page Applications (SPAs) in Angular & NativeScript
- 4. Understanding Components
- 5. Installing Angular with the Command Line Interface (CLI)
- 6. Installing our IDE
- 7. Understanding the Angular Project Folder Structure
- 8. The App Component
- 10. Cross Component Communication with Property Binding
- 11. Understanding Directives & String Interpolation
- 12. Handling User Input
- 13. Understanding Event Binding
- 14. Executing Methods with Local References
- 15. Understanding Two Way Binding
- 16. Passing Data Up With a Custom Event
- 17. Implementing Routing
- 18. Setting Up Services
- 19. Using the Service with Dependency Injection
- 20. Working with Lifecycle Hooks
- 21. Adding a Person with Services
- 22. Navigating Between Components
- 23. Removing Items On Click
- 24. Implementing an Active Push Mechanism
- 26. Sending HTTP Requests
- 27. Showing a Placeholder Whilst Waiting for a Response
- 28. Wrap Up
- 3. Setting Up the Development Environment
- 1. Setting up NativeScript on macOS
- 2. Setting up NativeScript on Windows
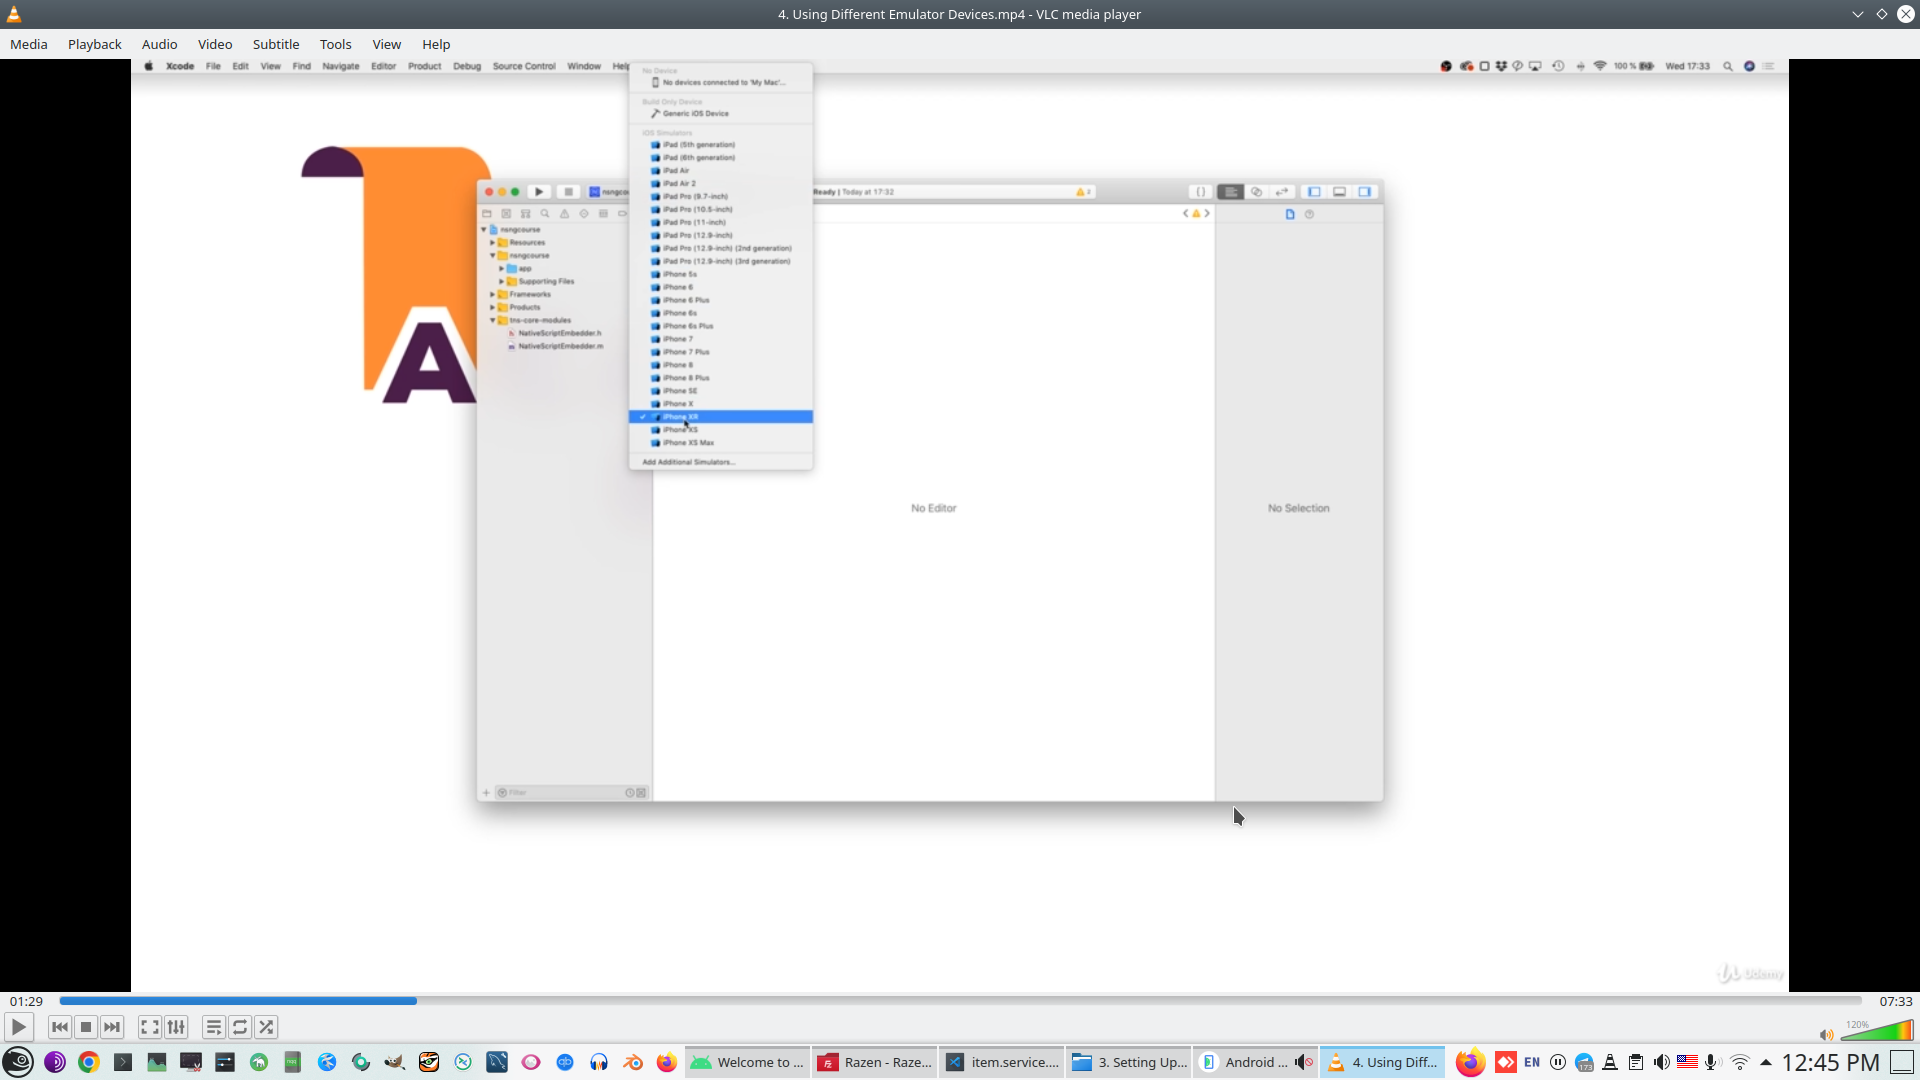
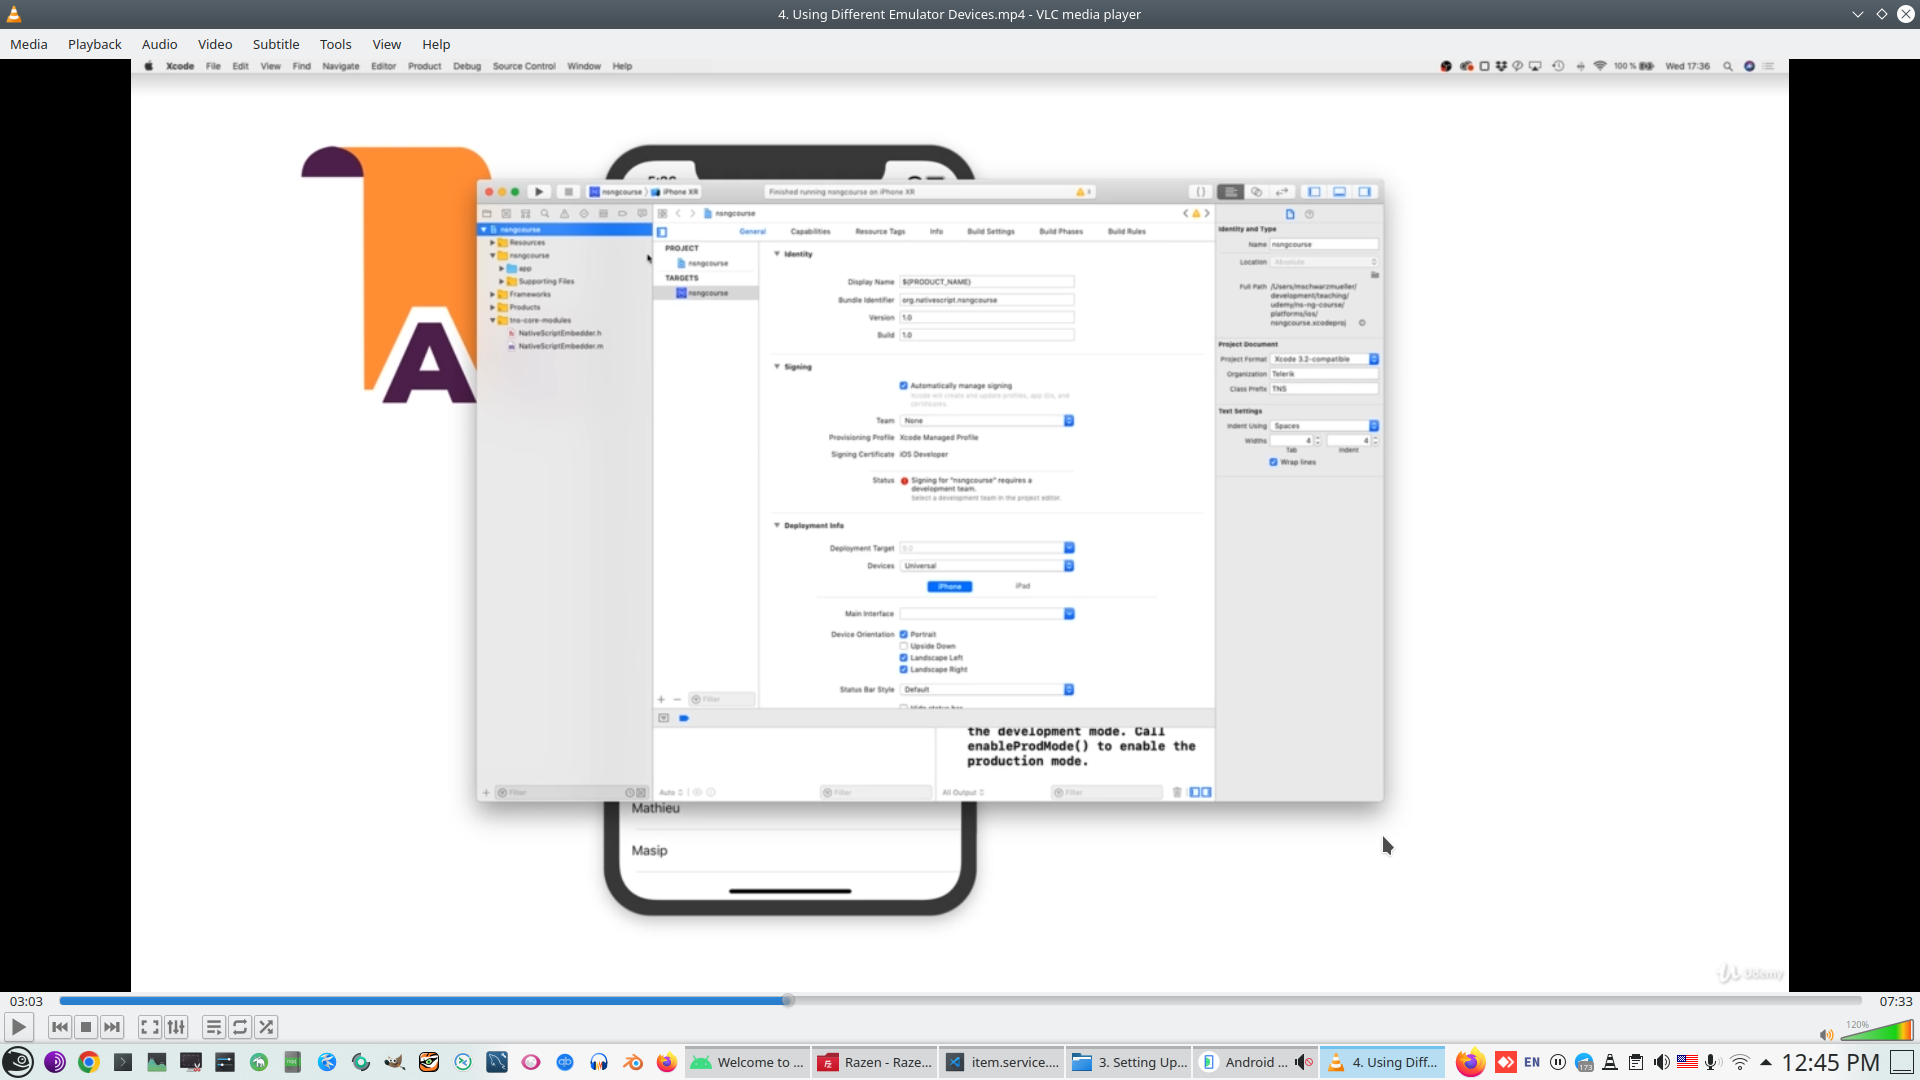
- 4. Using Different Emulator Devices
- 6. Running the App on a Real Device
- 7. What's Up With The Extra .js Files
- 4. Understanding the Basics
- 1. Module Introduction
- 2. Starting the Emulators
- 3. How Does The App Start
- 4. Understanding Components & Layouts
- 5. Building our First own Component
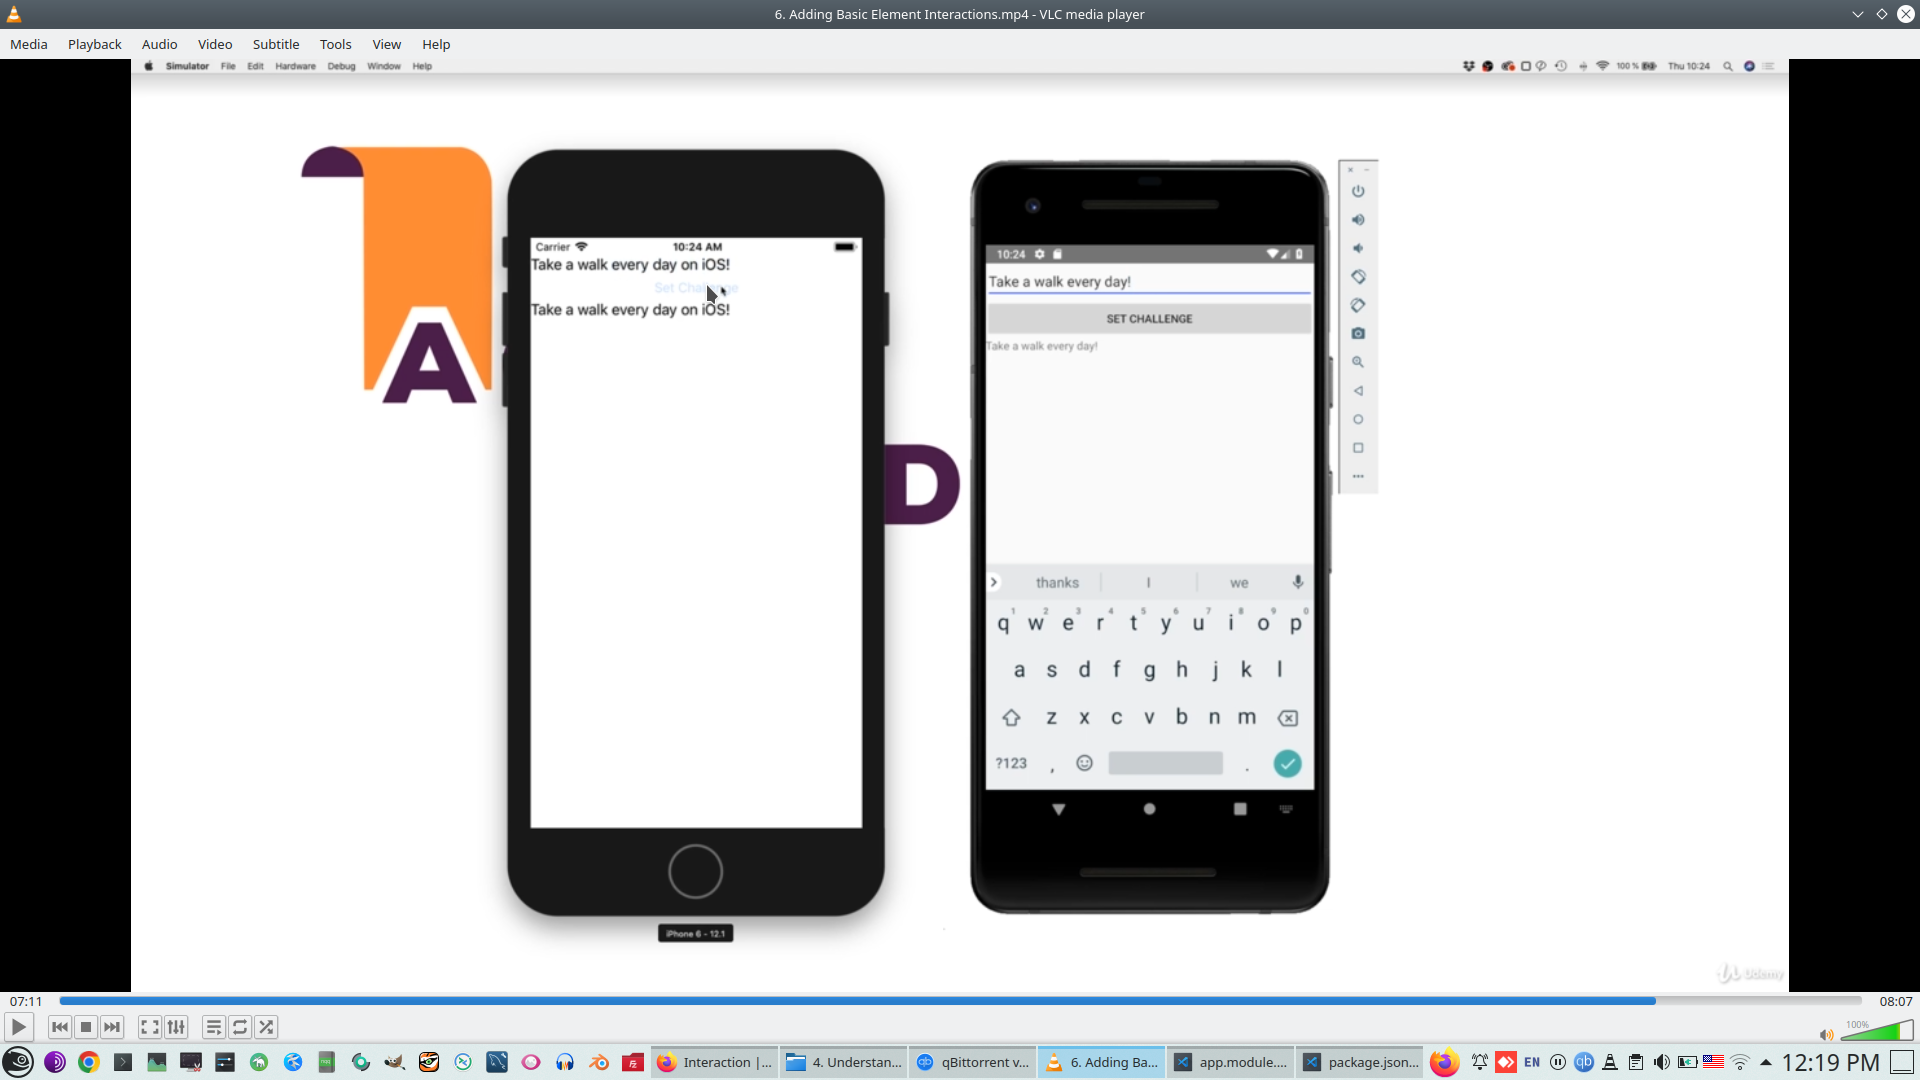
- 6. Adding Basic Element Interactions
- 7. Understanding the Styling Basics
- 8. Styling a Button
- 10. Understanding Layouts - Theory
- 11. The StackLayout
- 12. The FlexboxLayout
- 14. The GridLayout
- 16. Understanding the AbsoluteLayout
- 17. Implementing the Grid Layout in the Course Project
- 18. Splitting our App Into Components
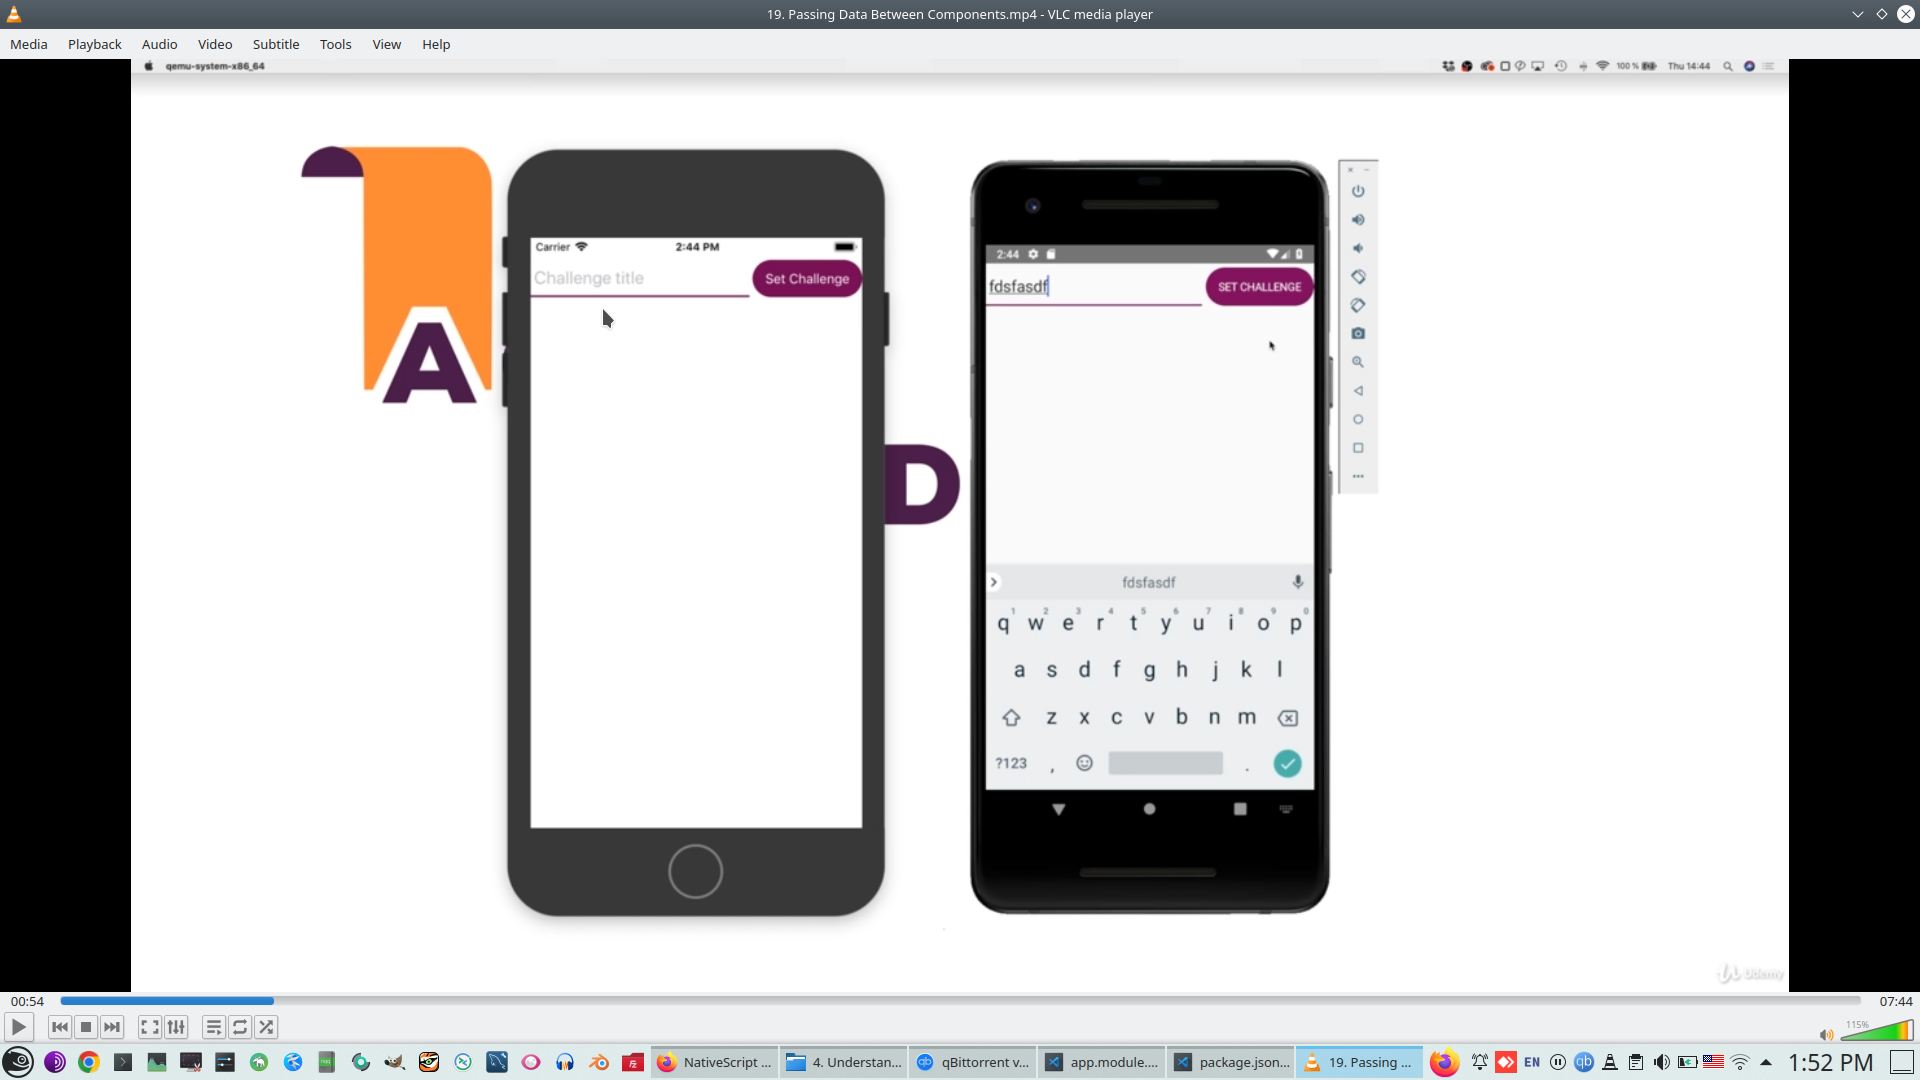
- 19. Passing Data Between Components
- 20. Creating a List of Items
- 21. Making the List Scrollable
- 22. Using the ListView
- 23. Extracting & Rendering Dynamic Values
- 24. Debugging our Application
- 26. Wrap Up
- 5. Diving Into App Navigation
- 1. Module Introduction
- 2. Understanding the Different Navigation Options
- 3. Planning the App
- 4. Creating the App Pages
- 5. Adding our First Route
- 6. Implementing Page Navigation
- 7. How to Add Forward & Backward Navigation to our App
- 8. Understanding the Router Object
- 9. Working with the nsRouterLink Directive
- 12. Adding an Actionbar and a Back Button
- 13. Creating a Shared Component for the Back Button
- 14. Adding Logic to the Back Button
- 15. Overwriting the Default Transition Effect
- 16. Adding the TabView Component
- 17. Displaying Dynamic Routing Content in the Tabs
- 18. Highlighting the Currently Active Tab
- 19. Adding a Sidedrawer
- 20. Adding the Sidedrawer Icon
- 21. Rendering the Button on Android Only
- 22. Forwarding the Button is Pressed Info to the App Component
- 23. Displaying the Sidedrawer
- 24. Implementing the Logout Logic
- 25. Passing Around Dynamic Data
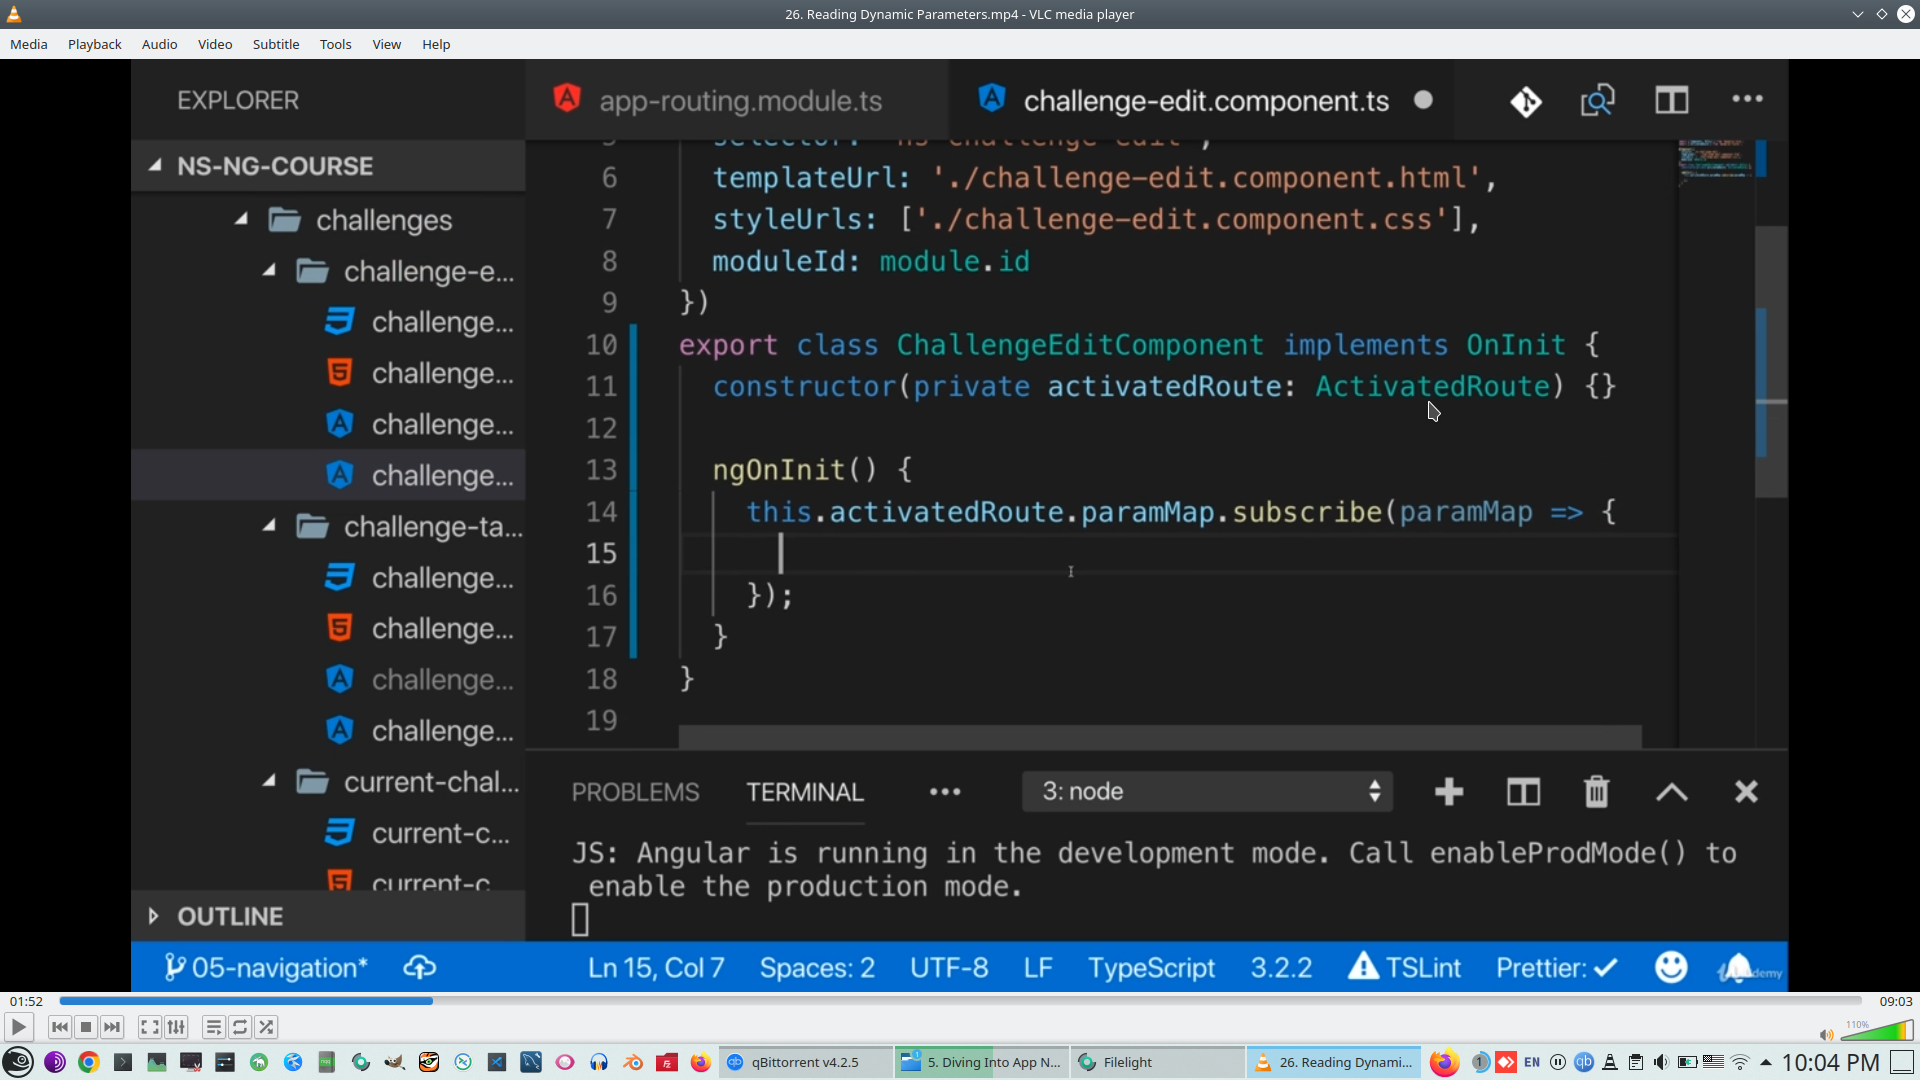
- 26. Reading Dynamic Parameters
- 27. Using the Dynamic Parameter
- 28. Injecting Dynamic Values Into the Action Bar on Per Page Level
- 29. Opening a Modal
- 30. Getting Access to the viewContainerRef
- 31. Passing Data Into the Modal
- 33. Loading Routes Lazily - Theory
- 34. Implementing Lazy Loading
- 35. Loading Additional Modules Lazily
- 36. Adding a Missing Schema
- 37. Wrap Up
- 6. Styling our App
- 1. Module Introduction
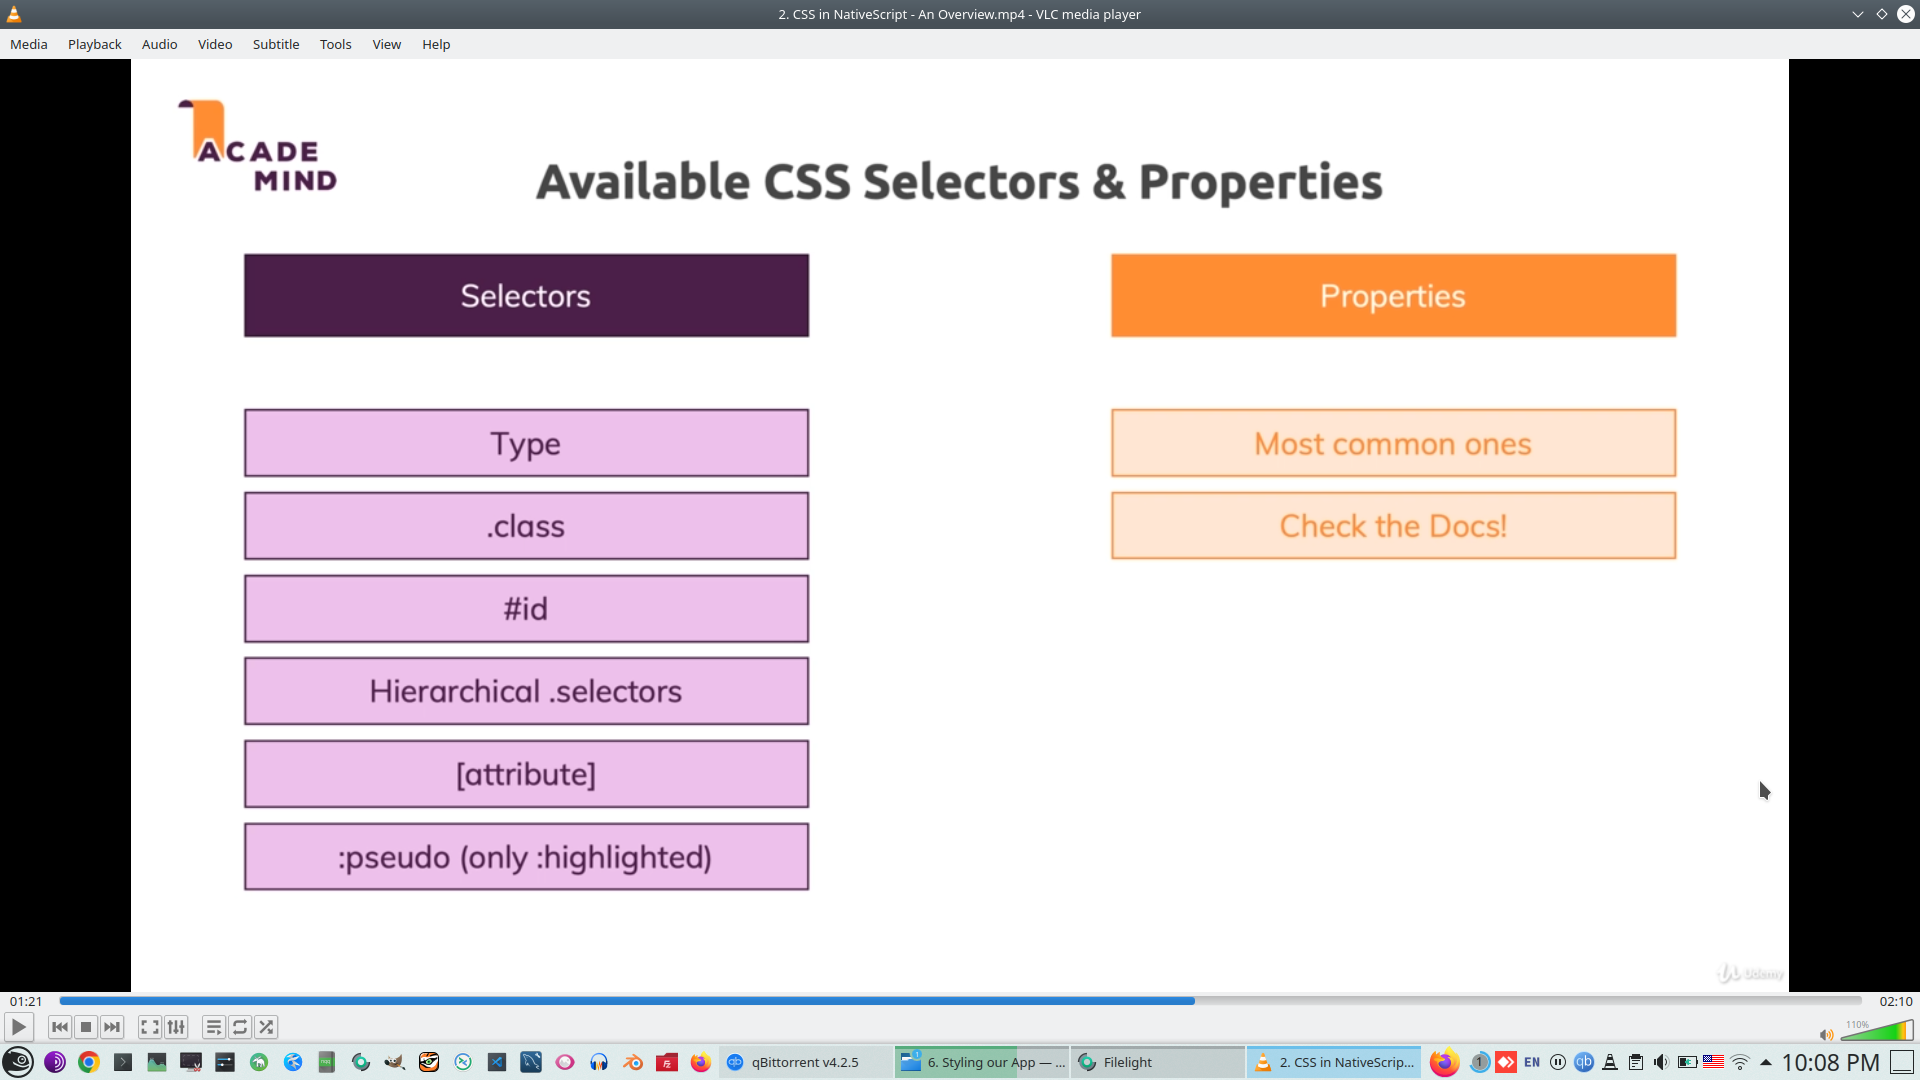
- 2. CSS in NativeScript - An Overview
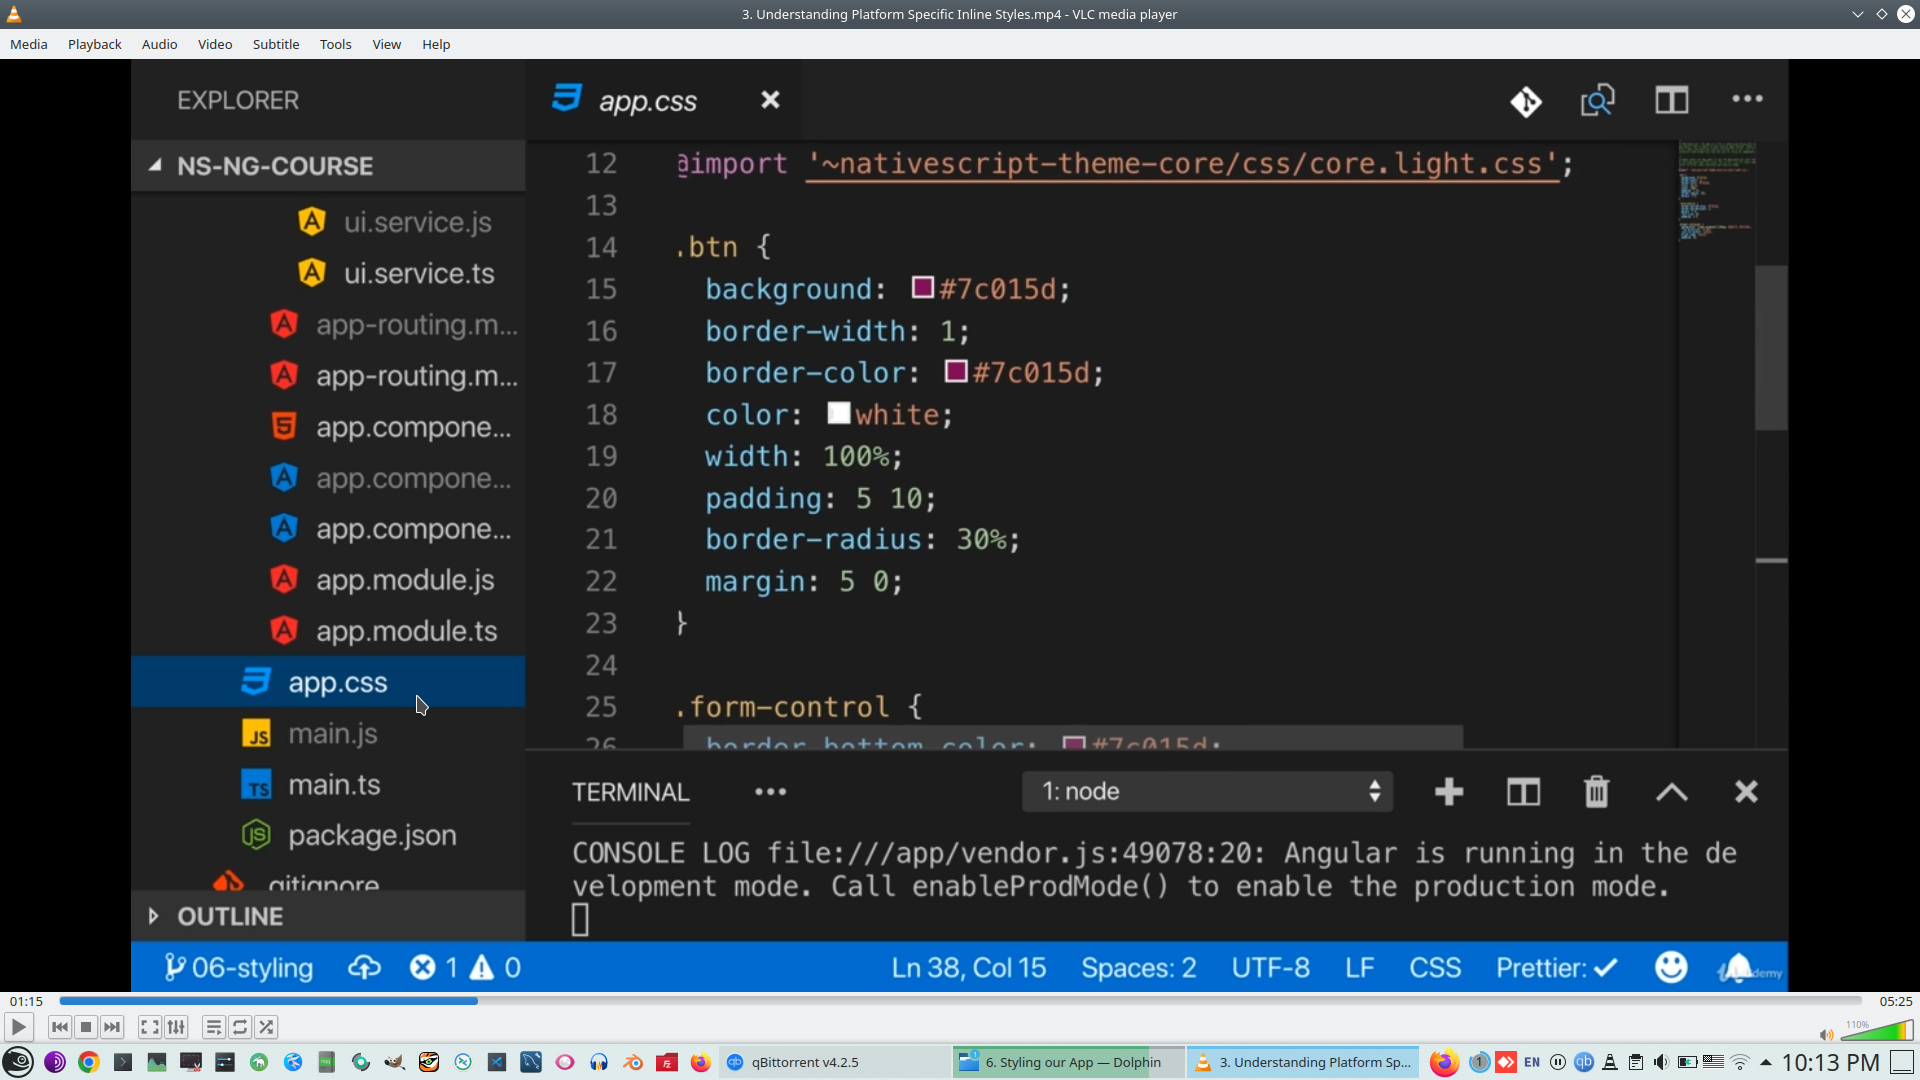
- 3. Understanding Platform Specific Inline Styles
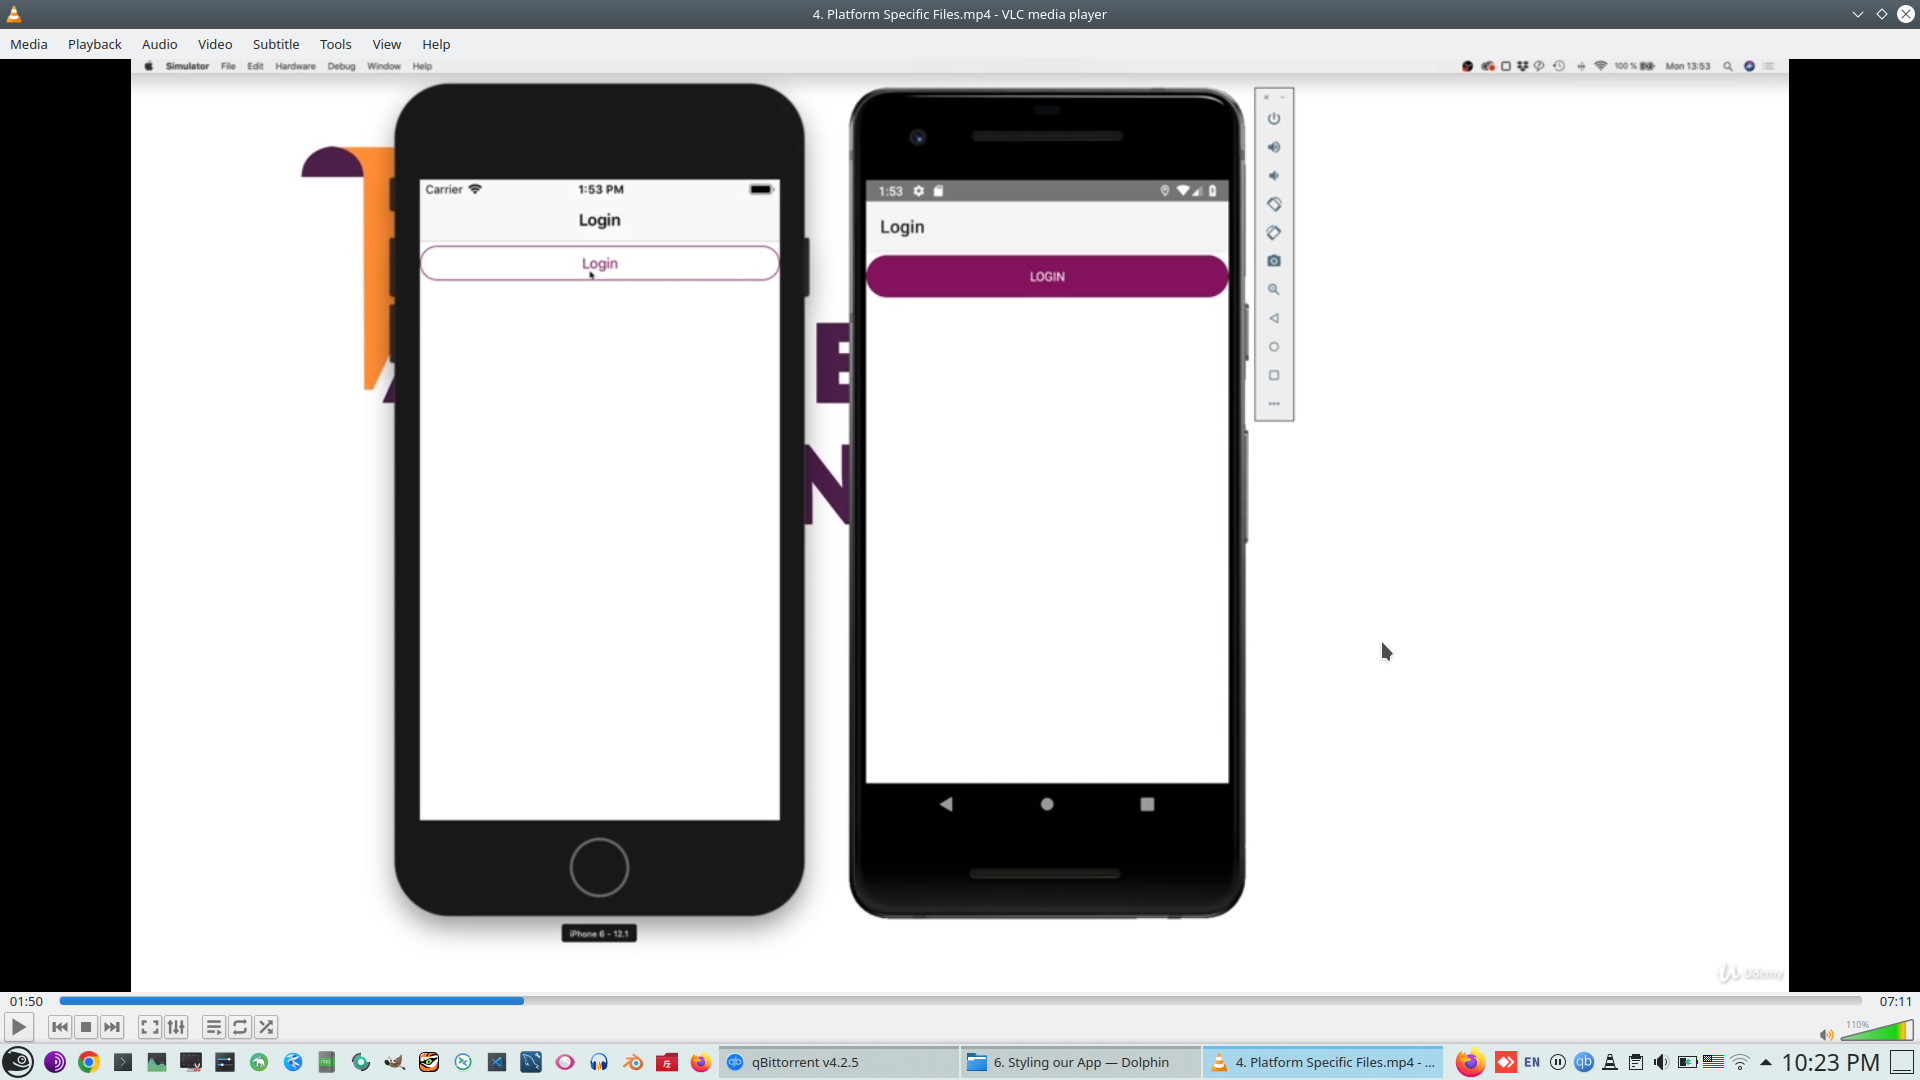
- 4. Platform Specific Files
- 5. Setting Properties Via CSS
- 6. How CSS Works Behind the Scenes
- 7. Using a Theme
- 8. Working with SASS Variables
- 9. Styling the Action Bar10. Preparing the Form Styling
- 11. Centralizing Common Styles
- 12. Styling Today's Challenge
- 13. Working on the Current Challenge
- 14. Adding the Grid to the Current Challenge
- 15. Populating the Grid
- 16. Styling the Grid
- 17. Opening the Modal when Tapping a Day
- 18. Fixing the Sidedrawer Button & Adding Icons
- 19. Adding Text Fonts
- 20. Integrating Images
- 21. Adding Icon Images
- 22. Improving the Logout Button Look
- 23. Wrap Up
- 7. Adding Forms
- 1. Module Introduction
- 2. Configuring Form Inputs
- 3. Adding Form Validation
- 4. Did you Solve your Challenge
- 5. Submitting Form Inputs
- 6. Adding a Login Form
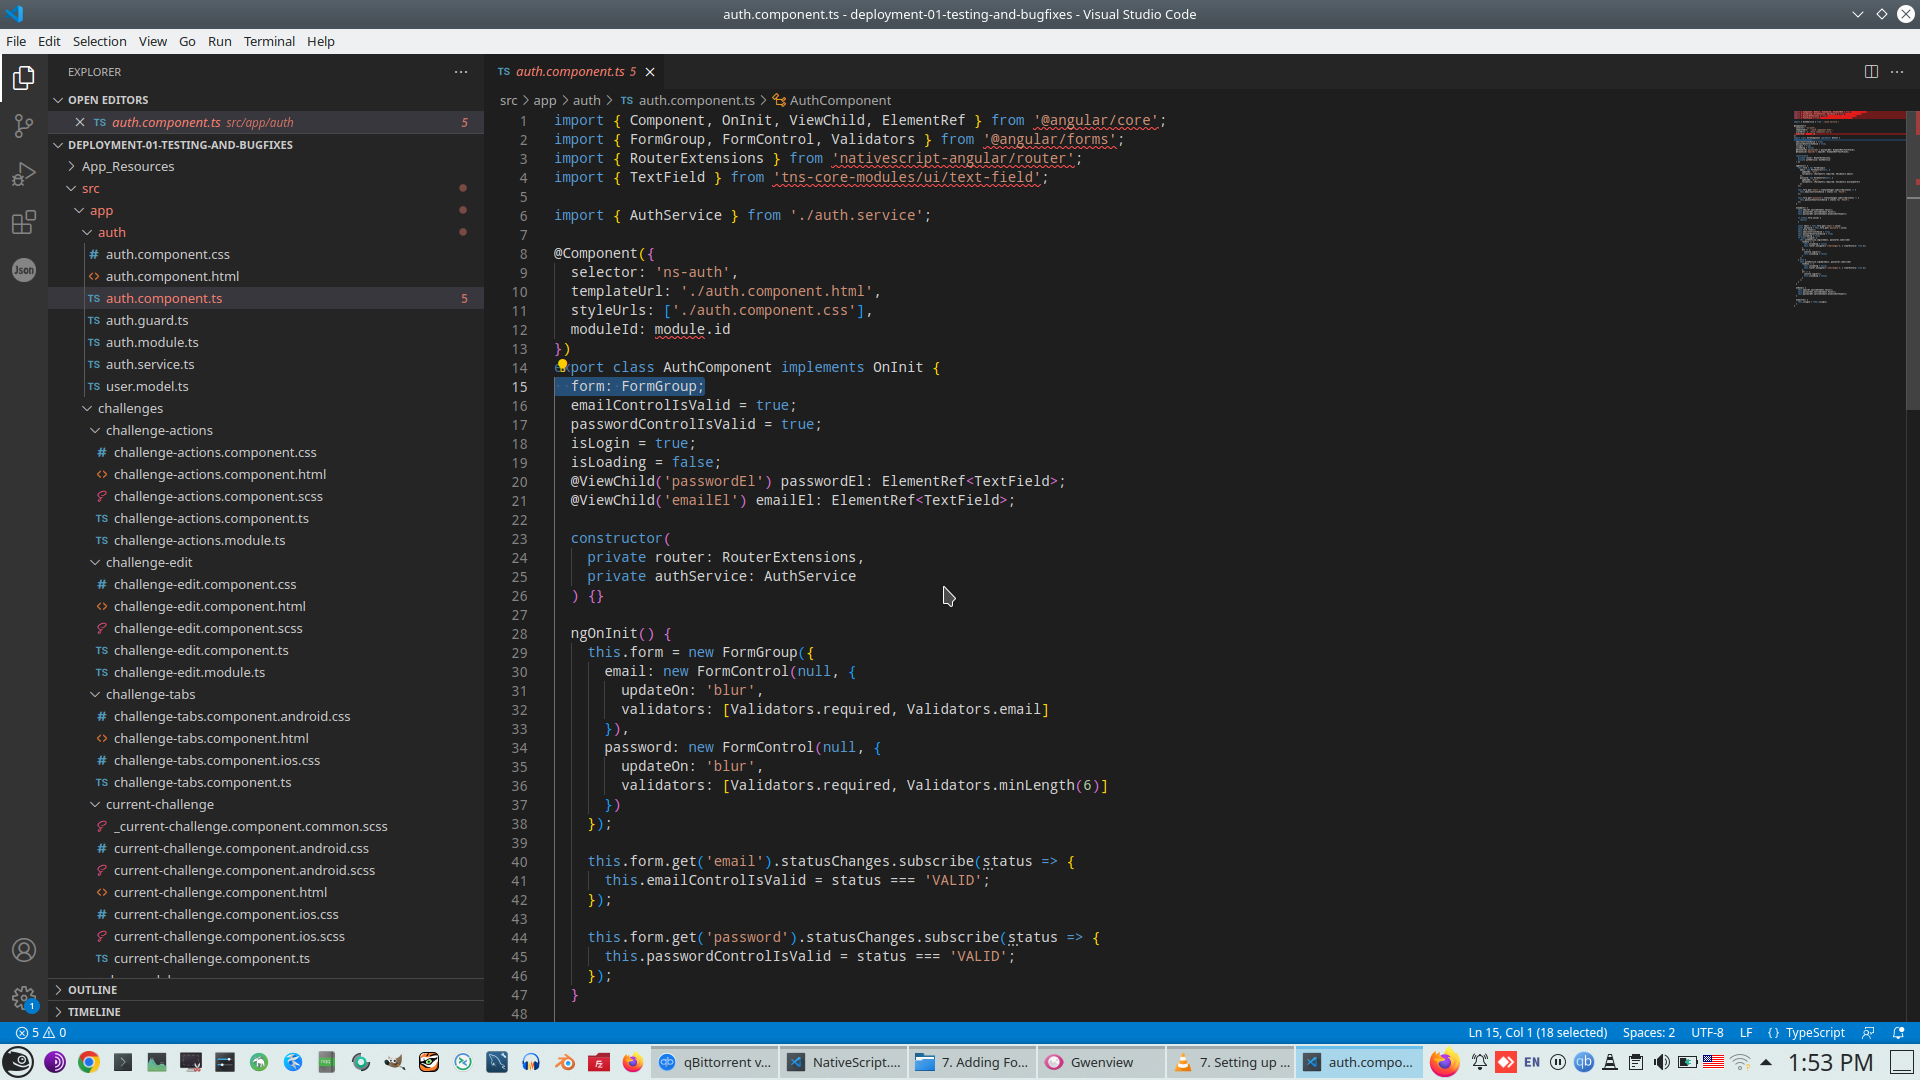
- 7. Setting up the Reactive Form
- 8. Adding Validation & Reading Form Values
- 9. Showing the Validation Text in the Template
- 10. Switching Between Login & Signup
- 11. Wrap Up
- 8. Understanding State
- 1. Module Introduction
- 2. Analyzing the Requirements
- 3. Working on the Challenge Service
- 4. Adding the Challenge & Day Models
- 5. Using the Challenge Model
- 6. Using the Challenge Service
- 7. Rendering the Current Challenge
- 8. Working on the Today Page & State
- 9. Preparing the Update Day Status Logic
- 10. Updating the Day Status for Today
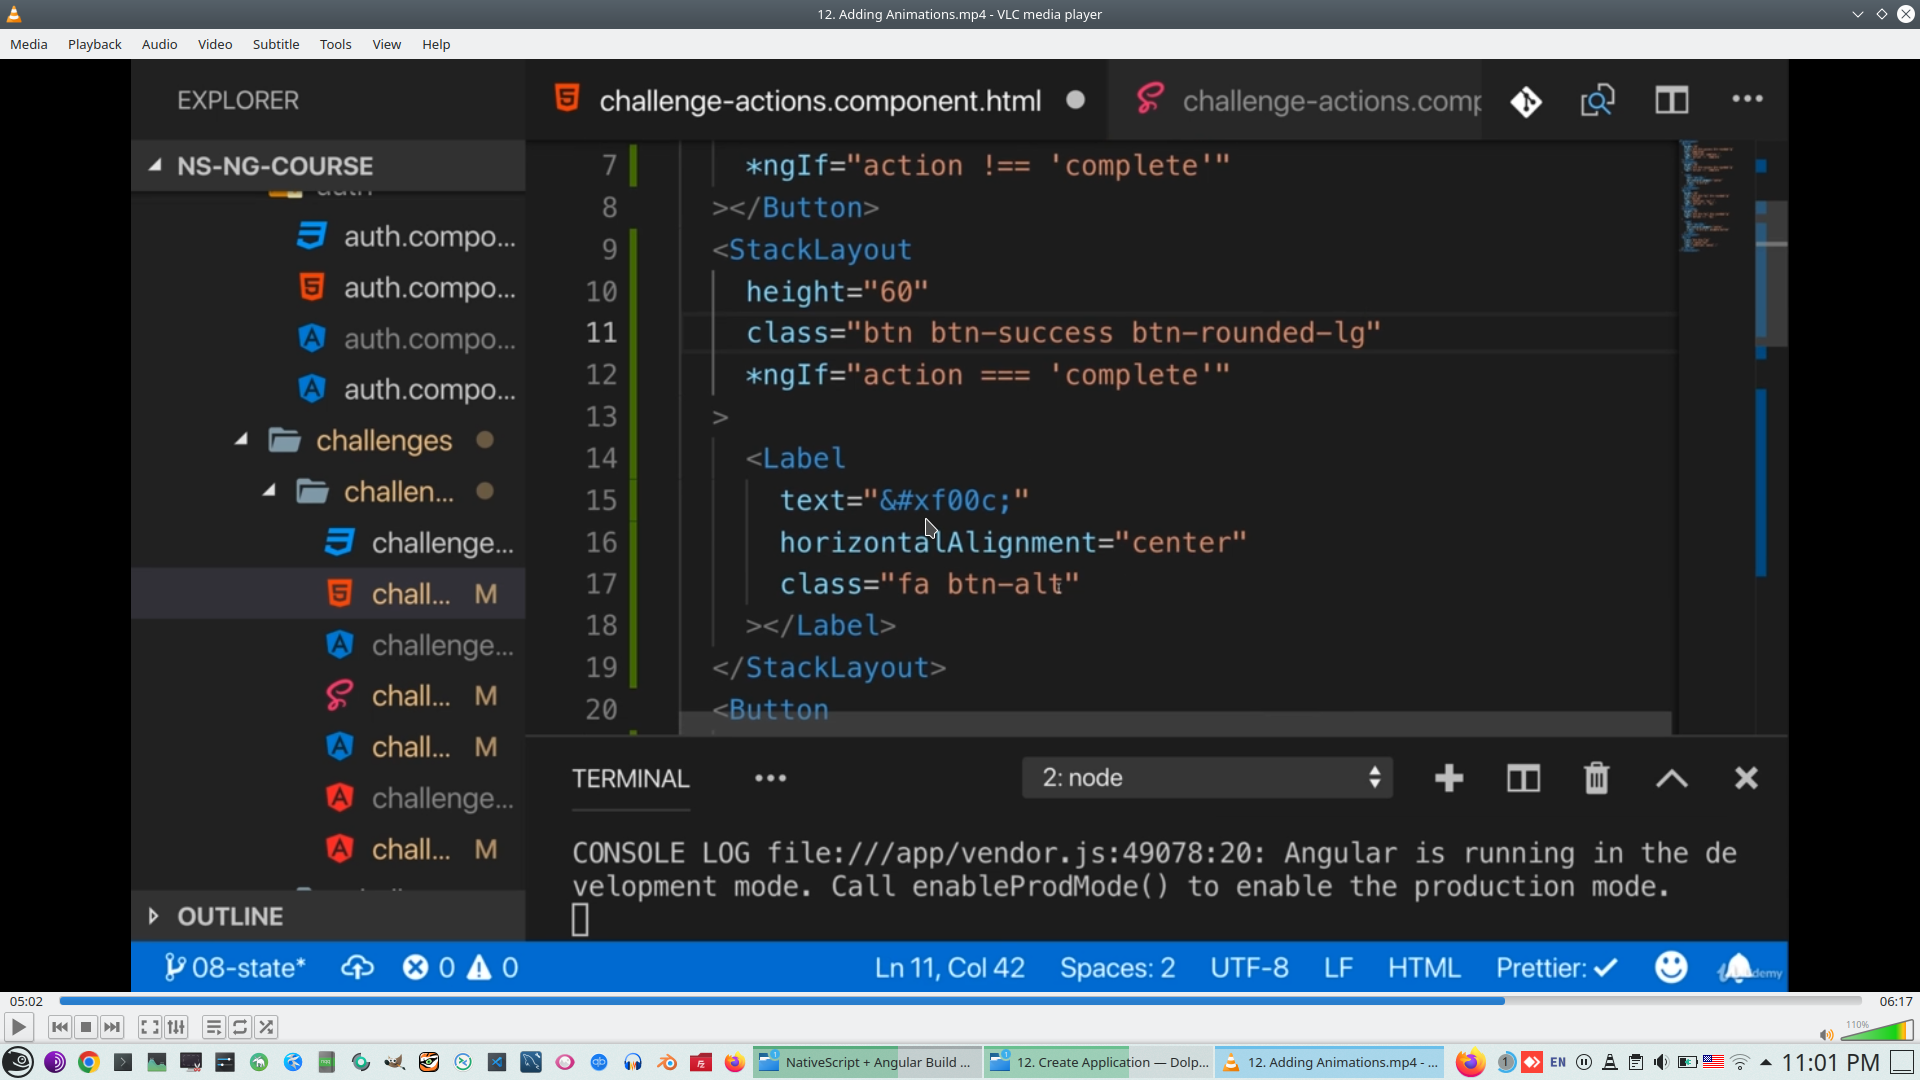
- 11. Reflecting the Day State on the Action Buttons
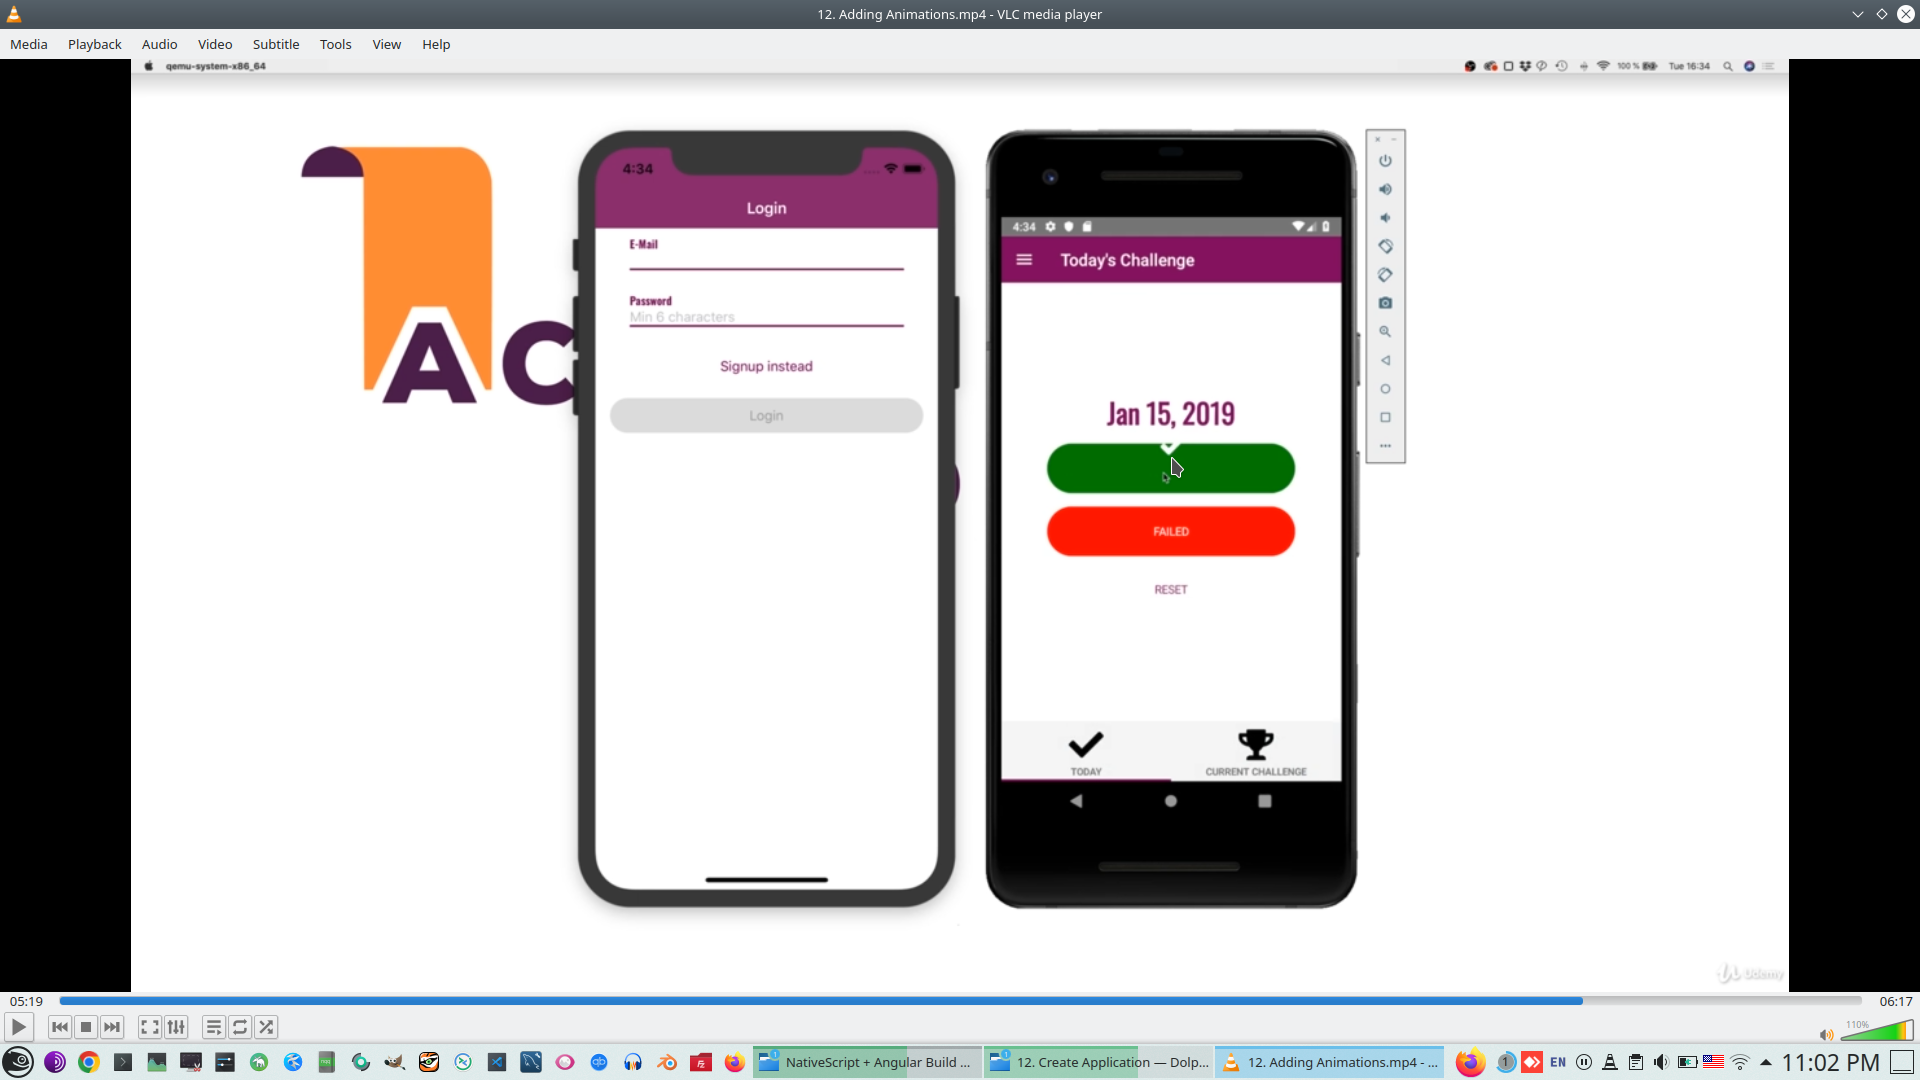
- 12. Adding Animations
- 13. Controlling the Settable Days
- 14. Setting the Day Status via the Modal
- 15. Reflecting the Current Day's State
- 16. Changing the Cancel Logic in the Modal
- 17. Resetting Today's State Correctly
- 18. Updating an Existing Challenge
- 19. Disabling the Edit Button
- 20. Wrap Up
- 9. Storing Data on the Backend
- 1. Module Introduction
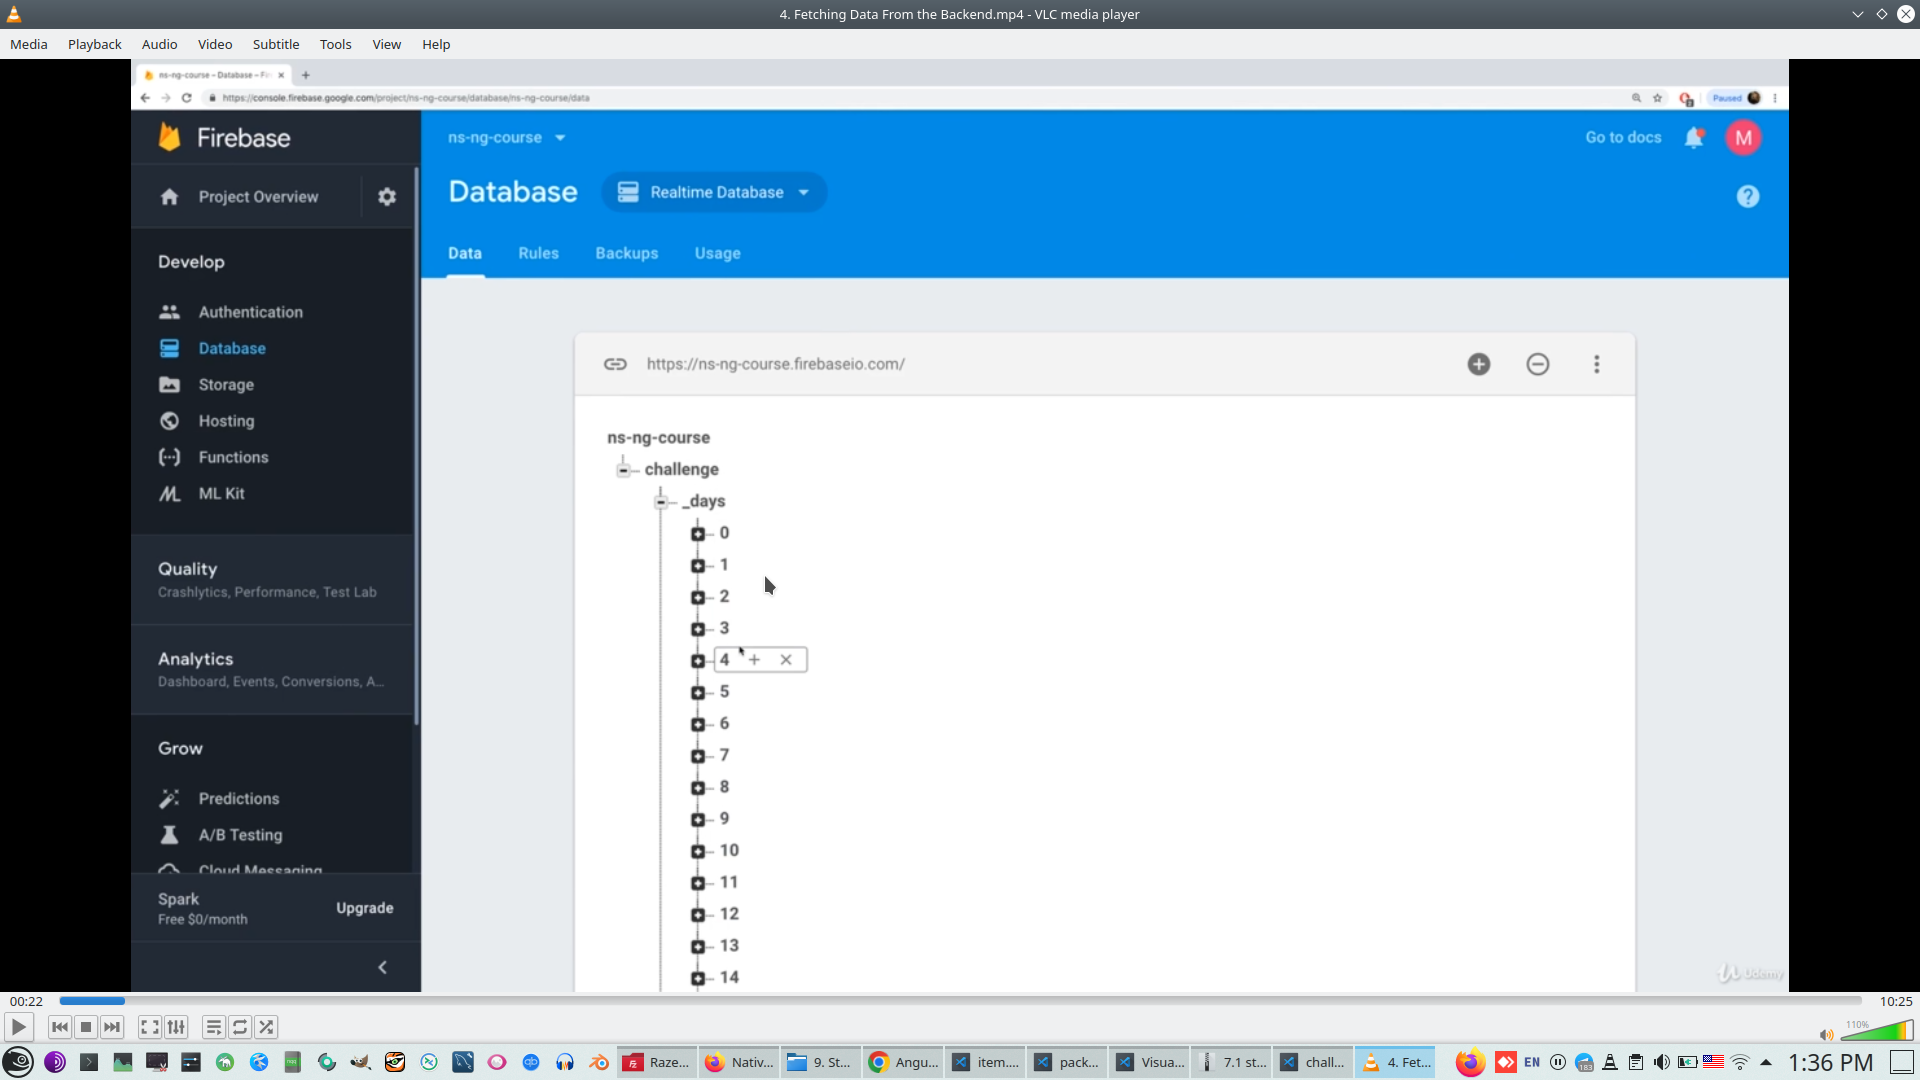
- 2. Setting Up the Firebase Database
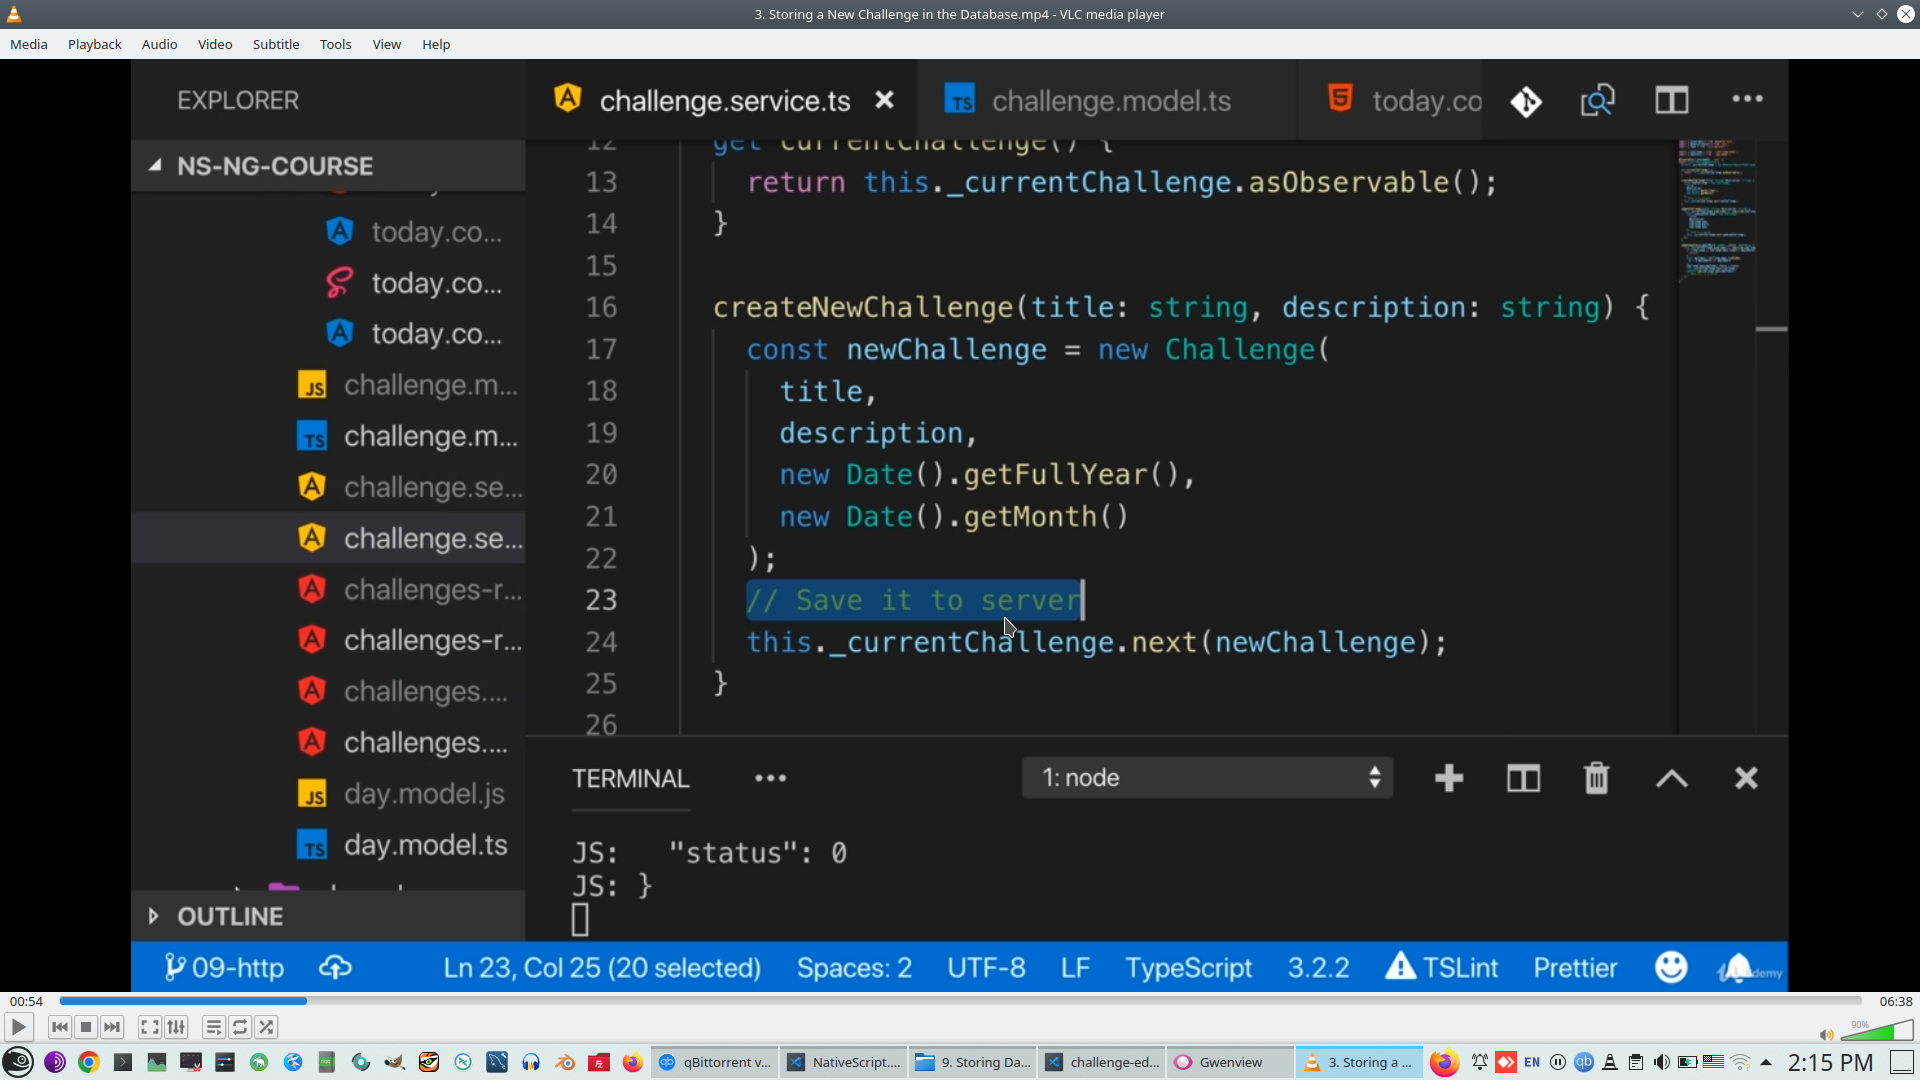
- 3. Storing a New Challenge in the Database
- 4. Fetching Data From the Backend
- 5. Displaying the Loaded Data
- 6. Updating Challenges
- 7. Disabling the Failed Button
- 8. Wrap Up
- 10. Adding Authentication to our App
- 1. Module Introduction
- 2. How Authentication Works
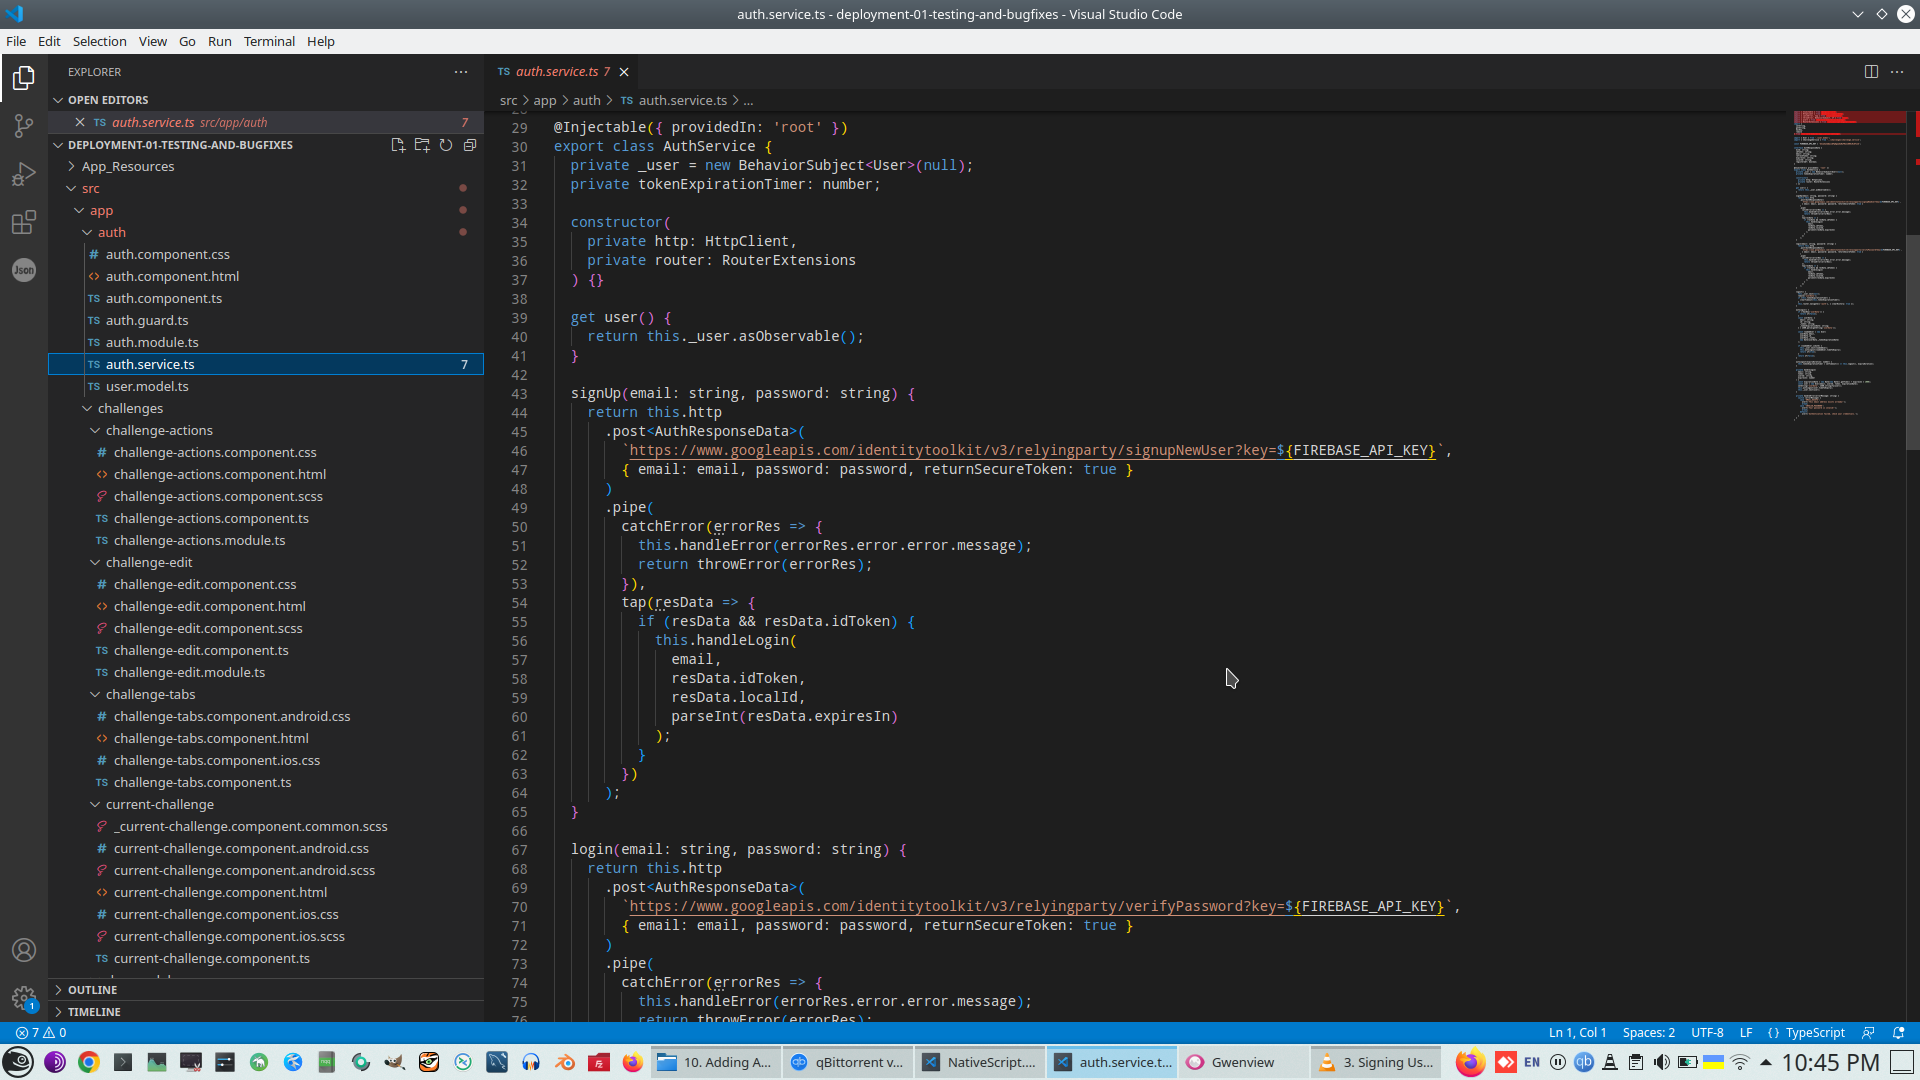
- 3. Signing Users Up
- 4. Logging Users In
- 5. Handling Errors & Showing Alerts
- 6. Creating a User Object & Storing the Token
- 7. Managing the User in the Auth Service
- 8. Attaching the Auth Token to Requests
- 9. Authenticating All Requests
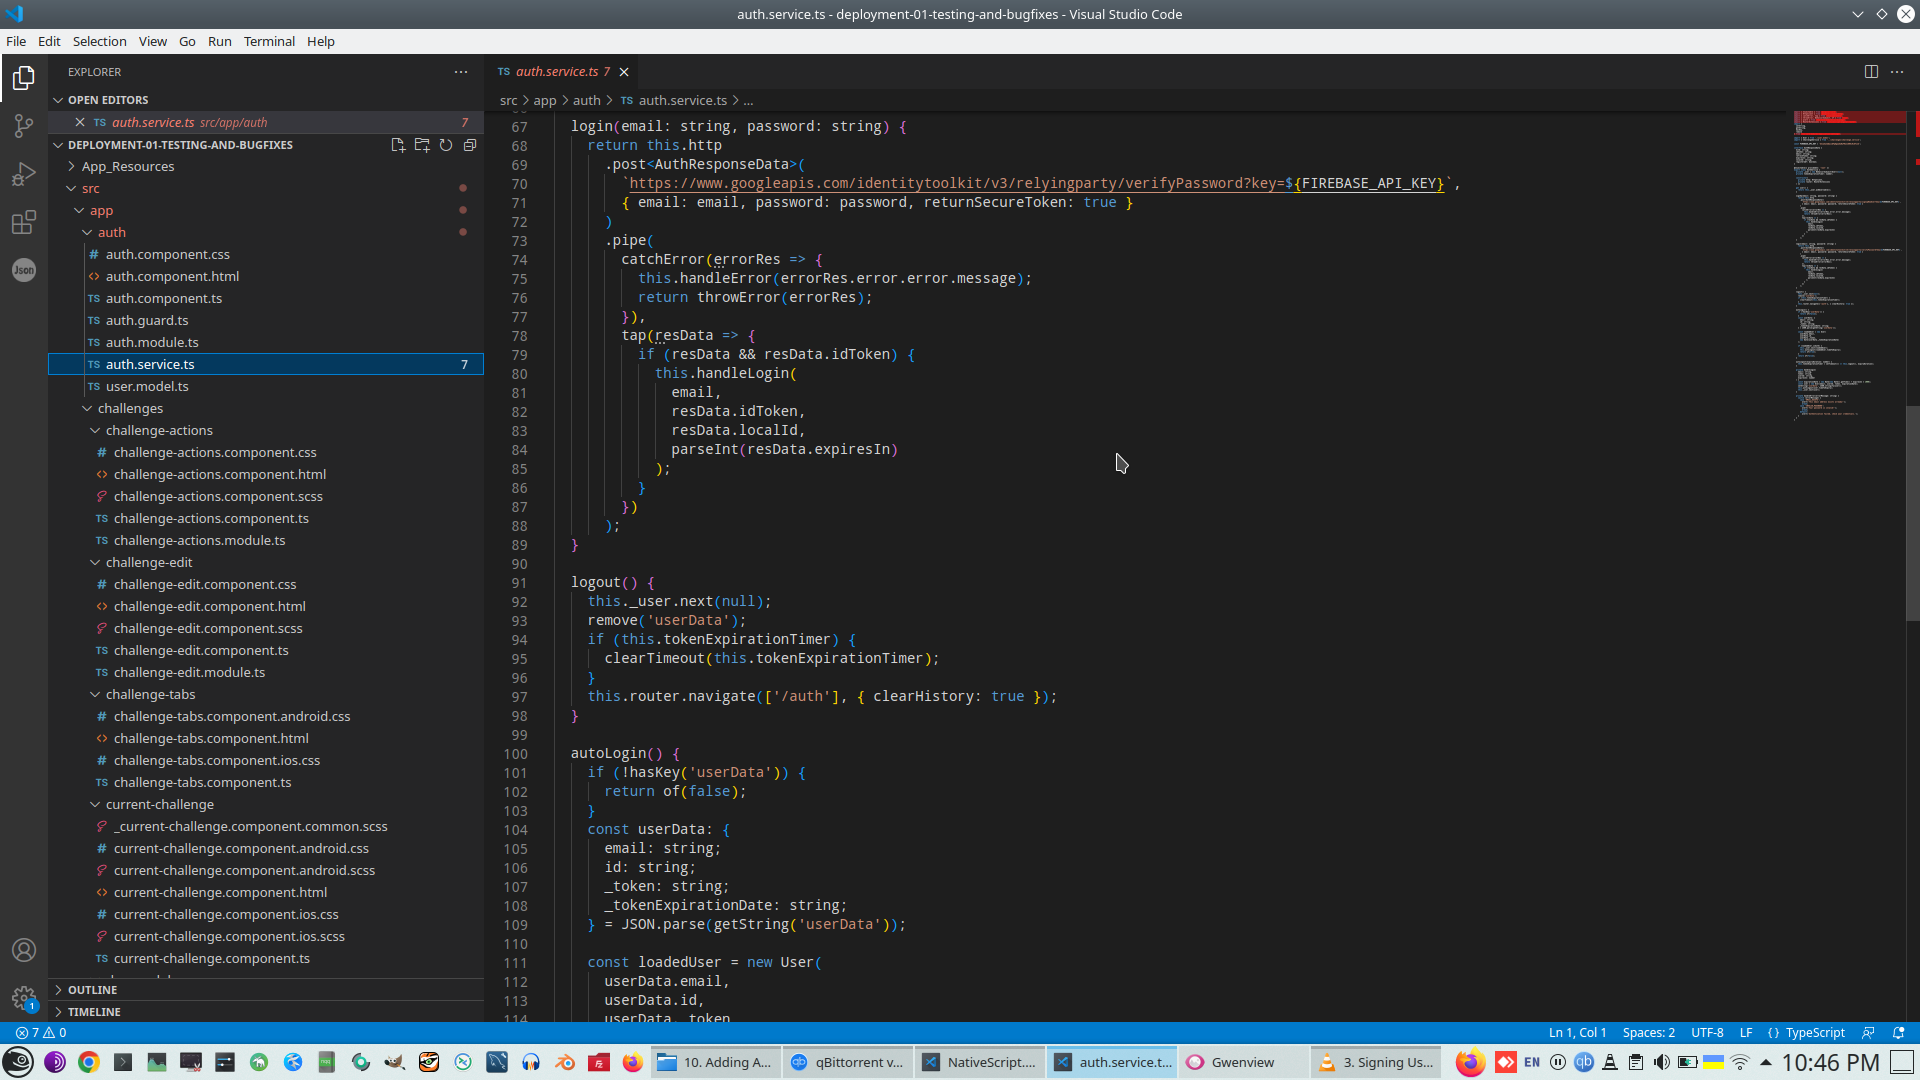
- 10. Adding Logout
- 11. Checking the Authentication State
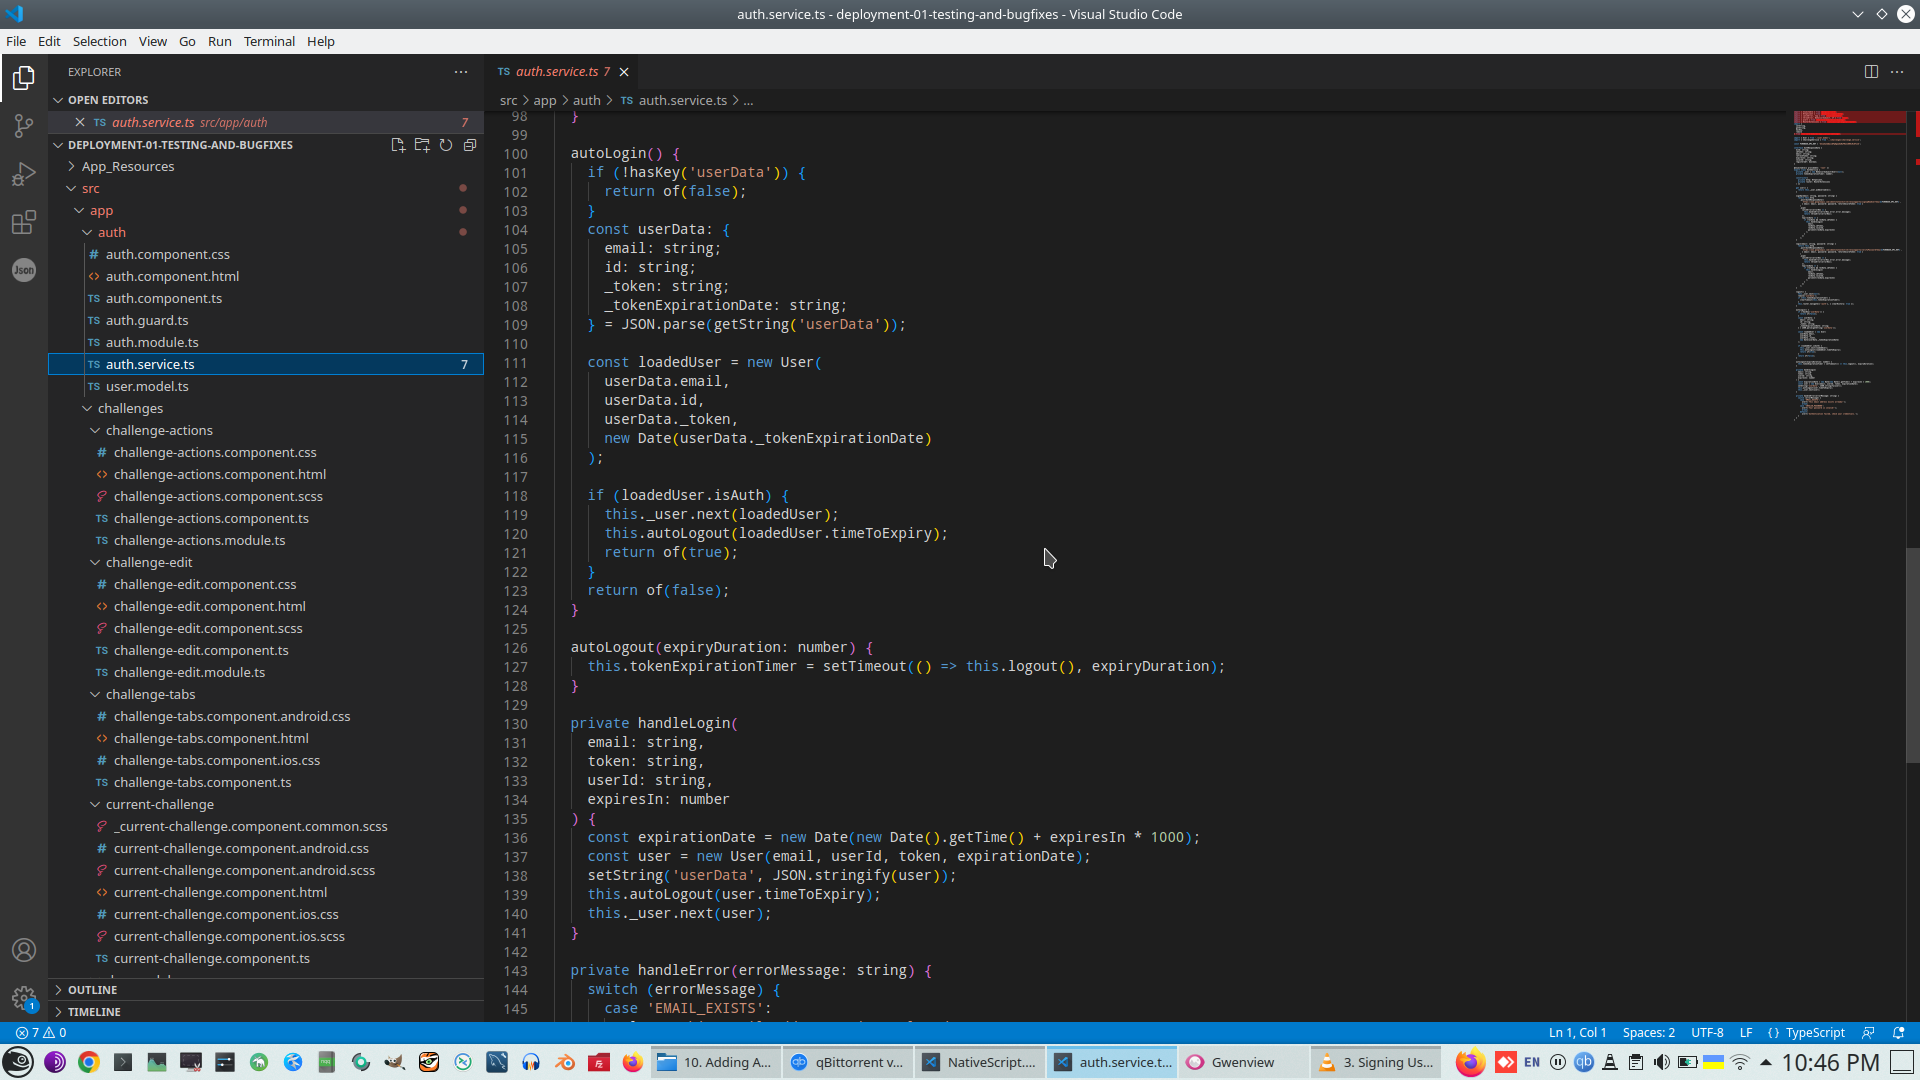
- 12. Adding Auto Login
- 13. Adding Auto Logout
- 14. Adding an Authentication Guard
- 15. Fixing the Redirection Path
- 16. Adding Authorization
- 17. Wrap Up
- 11. Deploying our App
- 1. Module Introduction
- 2. The Publishing Process
- 3. Testing our App on Different Devices
- 4. Adding the App Icon & Splash Screen Icons
- 5. Further Resources
- 6. Publishing the iOS App
- 7. Publishing the Android App
- 12. Code Sharing
- 1. Module Introduction
- 2. How Code Sharing Works
- 3. Creating a Shared Project
- 4. Analysing the Project Structure
- 5. Running the Apps
- 6. Adjusting the Auth & App Modules
- 7. Using Helper Services
- 8. Finishing the Auth Component & Adding Styles
- 9. Working on the Auth Form Styling
- 10. More Auth
- 11. Adding More Helper Services
- 12. Finishing the Authentication Part
- 13. Starting Work on the Challenges Part
- 14. Working on the Today Page
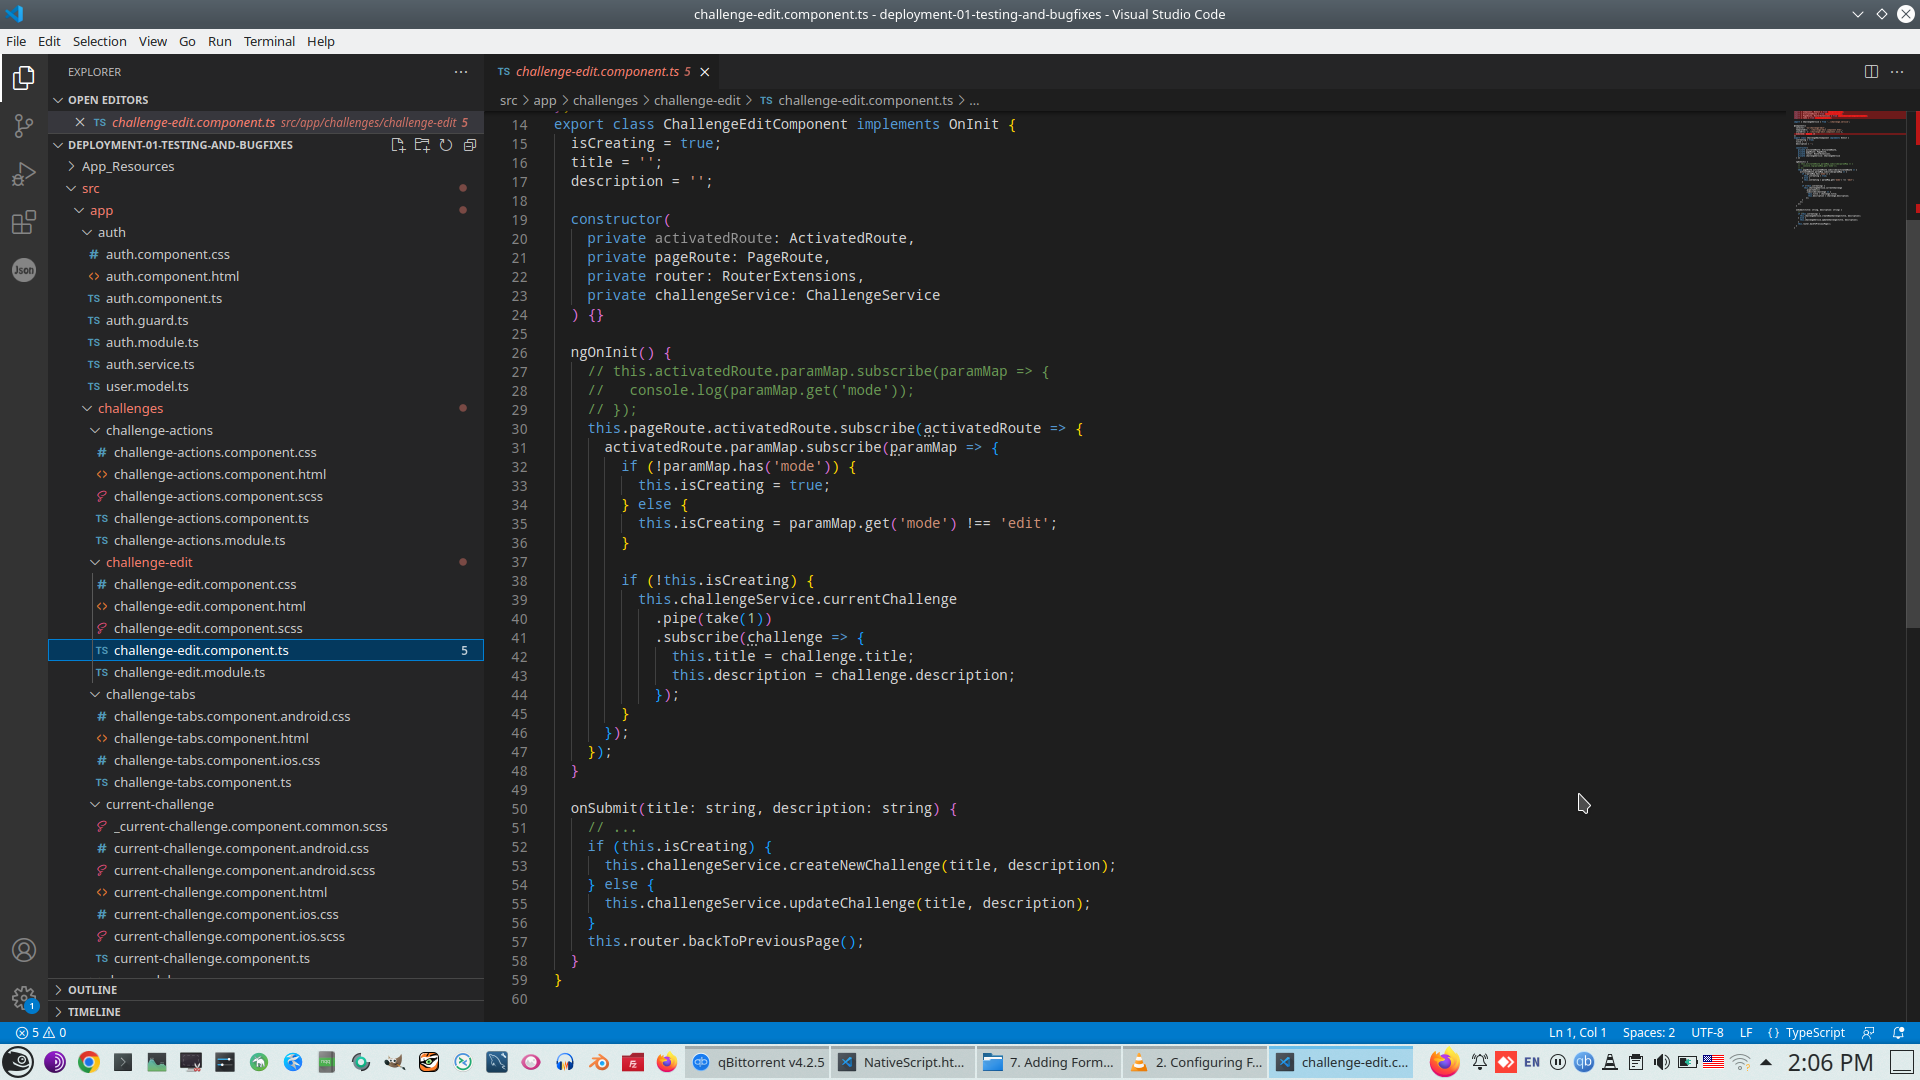
- 15. Working on the Challenge Edit Component
- 16. Fixing the Challenges Filenames & Imports
- 17. Adding the ActionBar
- 18. Reaching the Challenge Edit Page
- 19. Adding the Auth Guard & Auto-Login
- 20. Working on the Current Challenge Page
- 21. Adjusting the Styles
- 22. Resetting the Editing Page Correctly
- 23. Fetching the Current Challenge on Multiple Pages
- 24. Adjusting the Navigation Items
- 25. Navigating Back (Correctly)
- 26. Adding a Web Modal
- 27. Adding a Backdrop for the Modal
- 28. Adding Modal Actions & User Interactions
- 29. Reflecting the Day Status in the Modal
- 30. Populating the Grid Correctly
- 31. Logging Out
- 32. Adding a Loading Indicator
- 33. Finishing the Mobile Apps
- 34. Wrap Up
- 13. Roundup
- 1. Roundup & Next Steps
- 2. Using the Official Resources
Key futures
- 1. NativeScript project overview
- 2. Code sharing
- 3. Debug
- 4. Demo project overview
- 5. NS Layout is position, Layout has no refletion to Android and IOS, its only absttaction.
- 6. NS Components
- 7. Common developmet workflow on NS Angular.
- 8. Create your first NS component
- 9. Styling app
- 10. Communication between components - Event emitter
- 11. ScrollView UI component
- 12. Manage state, Services
- 13. Service
- 14. RxJs component - BehaviorSubject (asObservable)
- 15. Special Navigation for Mobile Phone - Stack based, Tab based, Drawer based>
- 16. Platform depended future - we will create special navigation icon for Androis only and tune it style
- 17. Continue improve app navigation
- 18. TabView navigation
- 19. Styling
- 20. Animation
- 21. Forms
- 22. Working with backend, This project use Firebase
- 23. Spiner
- 24. Authentication
- 25. NativeScrip Alert finction is working!
- 26. Start Authorization on Firebase, unlock databases for Users
- 27. Create persistent UserId
- 28. Create Lazy loading AuthModule
- 29. And finally made authorization on Firebase, each user has own chalenge in Firebase.
- 30. Deploynment.
(*) Also need to take EggHead lecture:
- Create Native Mobile Apps with NativeScript for AngularNathan Walker・43m・Course
- Create Angular iOS and Android AppsNathan Walker・1h 9m・Course
1. NativeScript project overview
3-rd party library (Dropdown, Firebase, Calendar and so on)

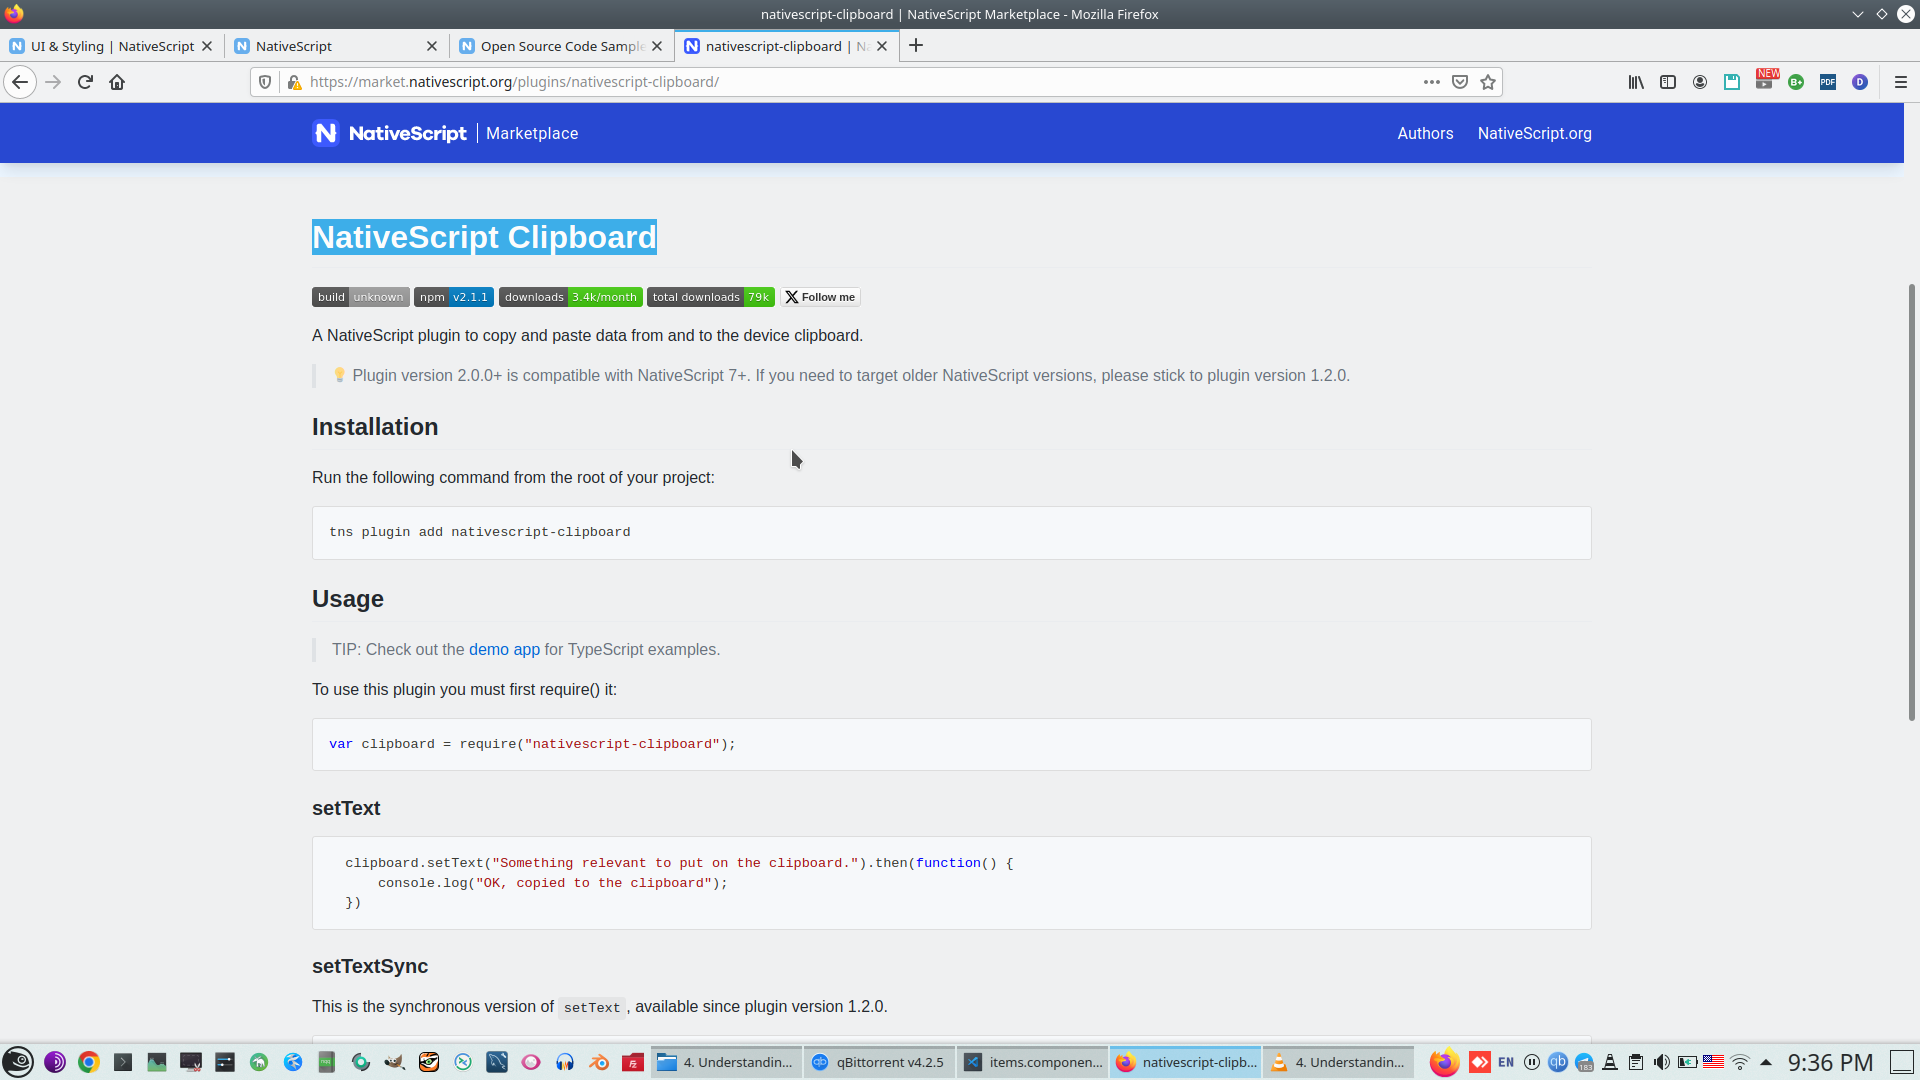
NS Clipboard component
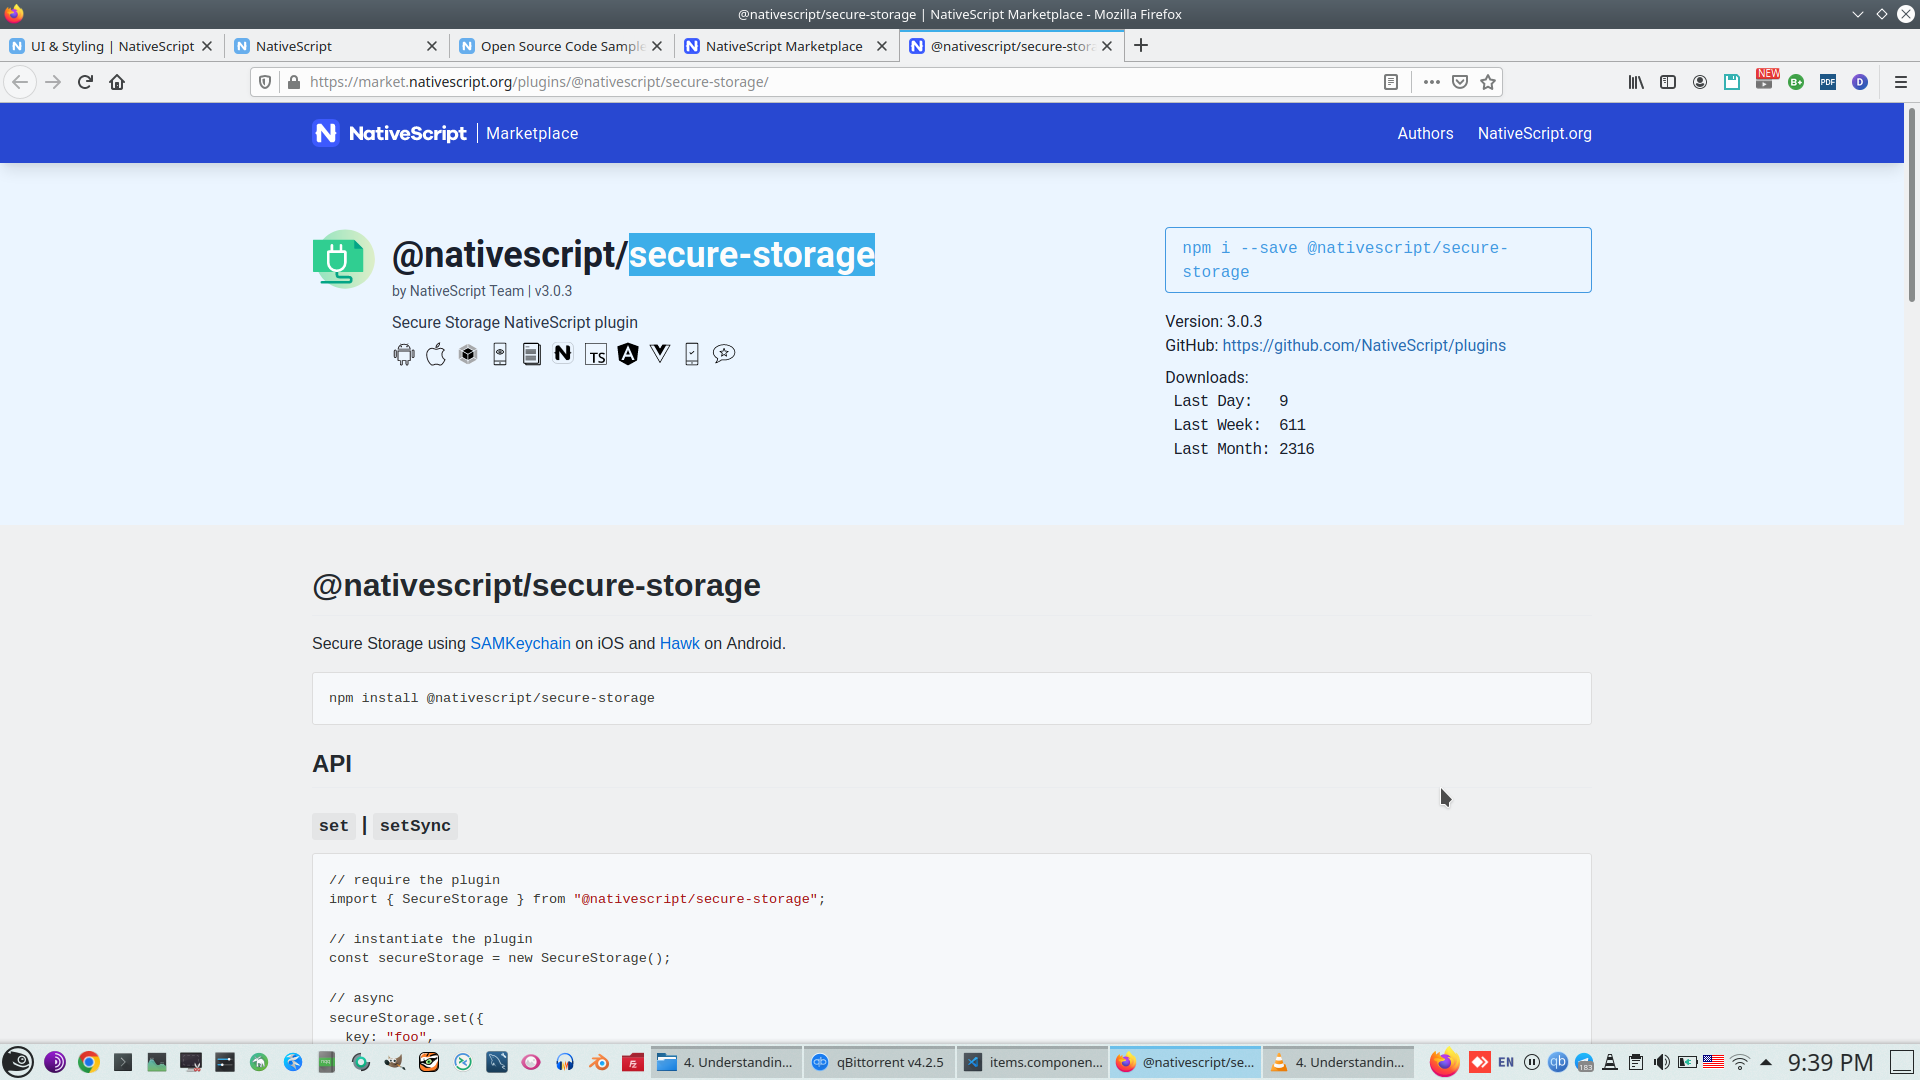
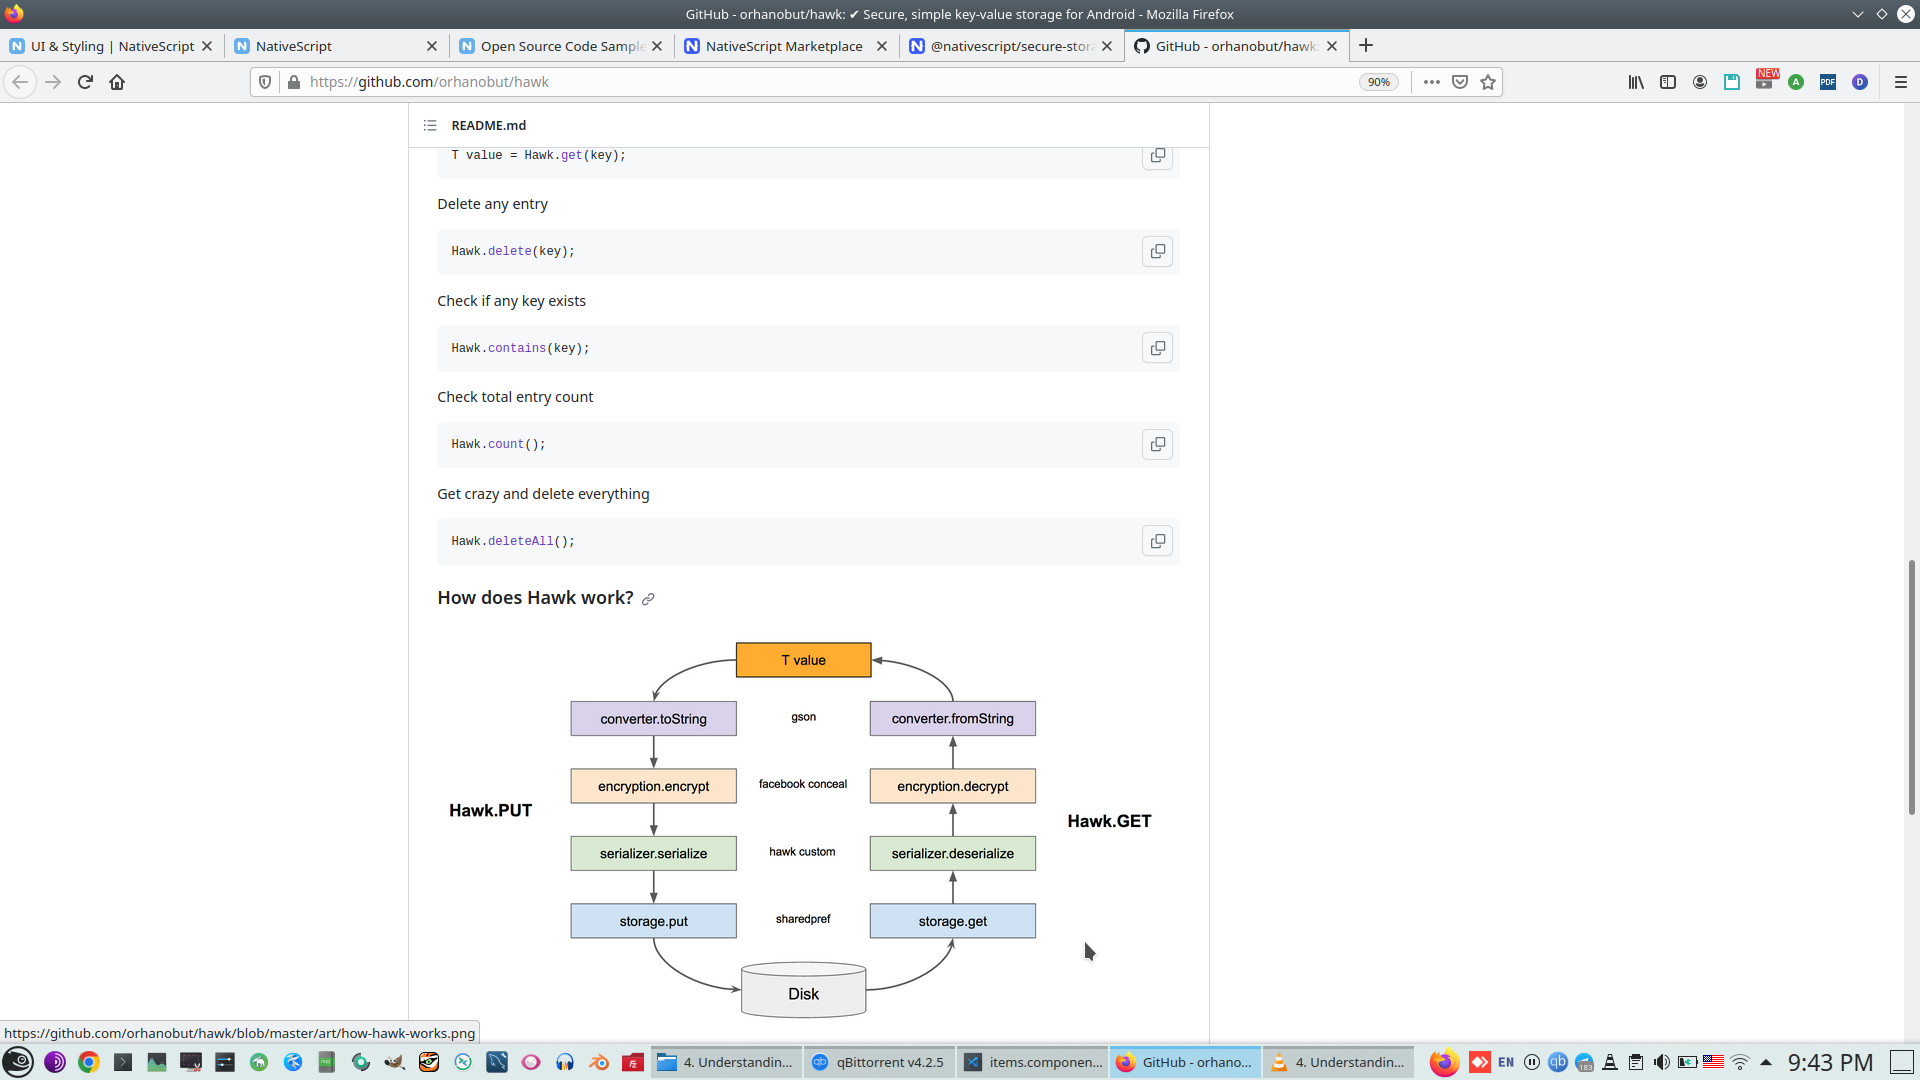
NS Secure storage component, Android Hawk
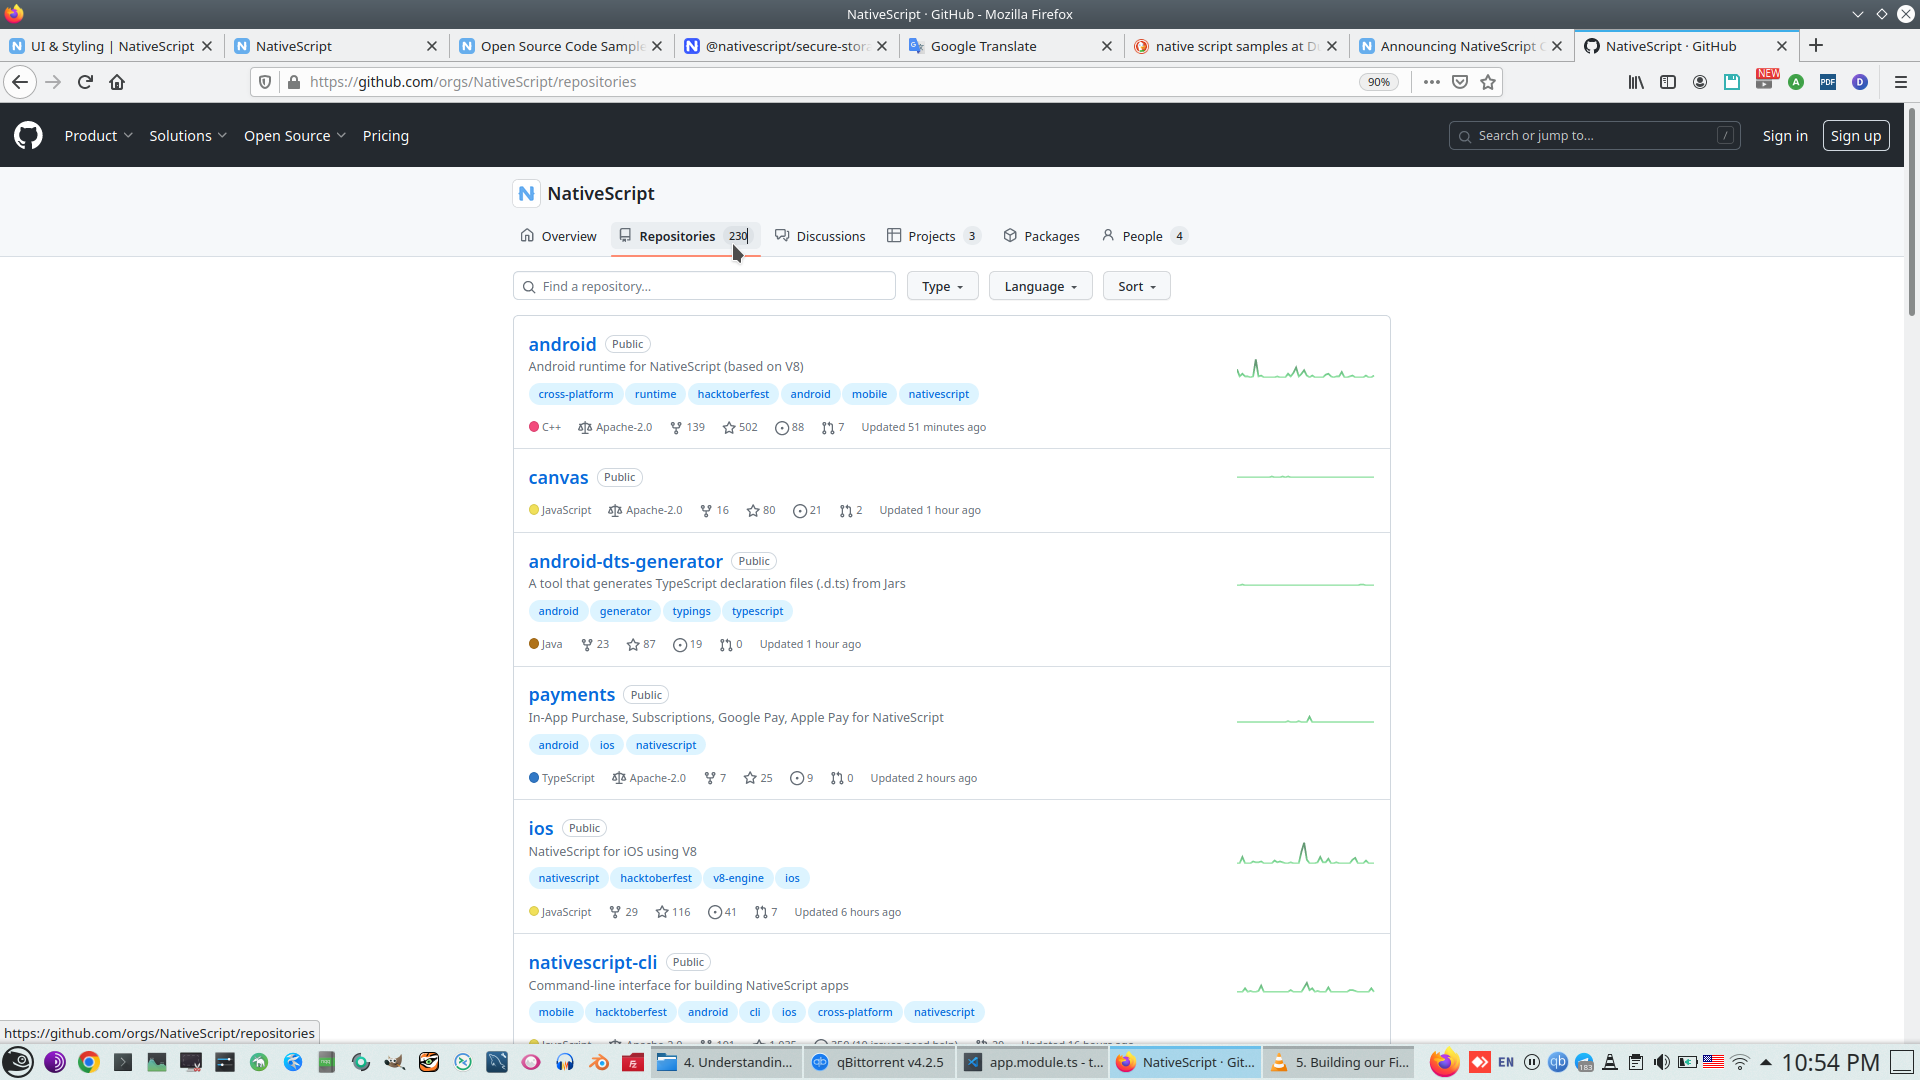
NS repository (230 items)
SqLite
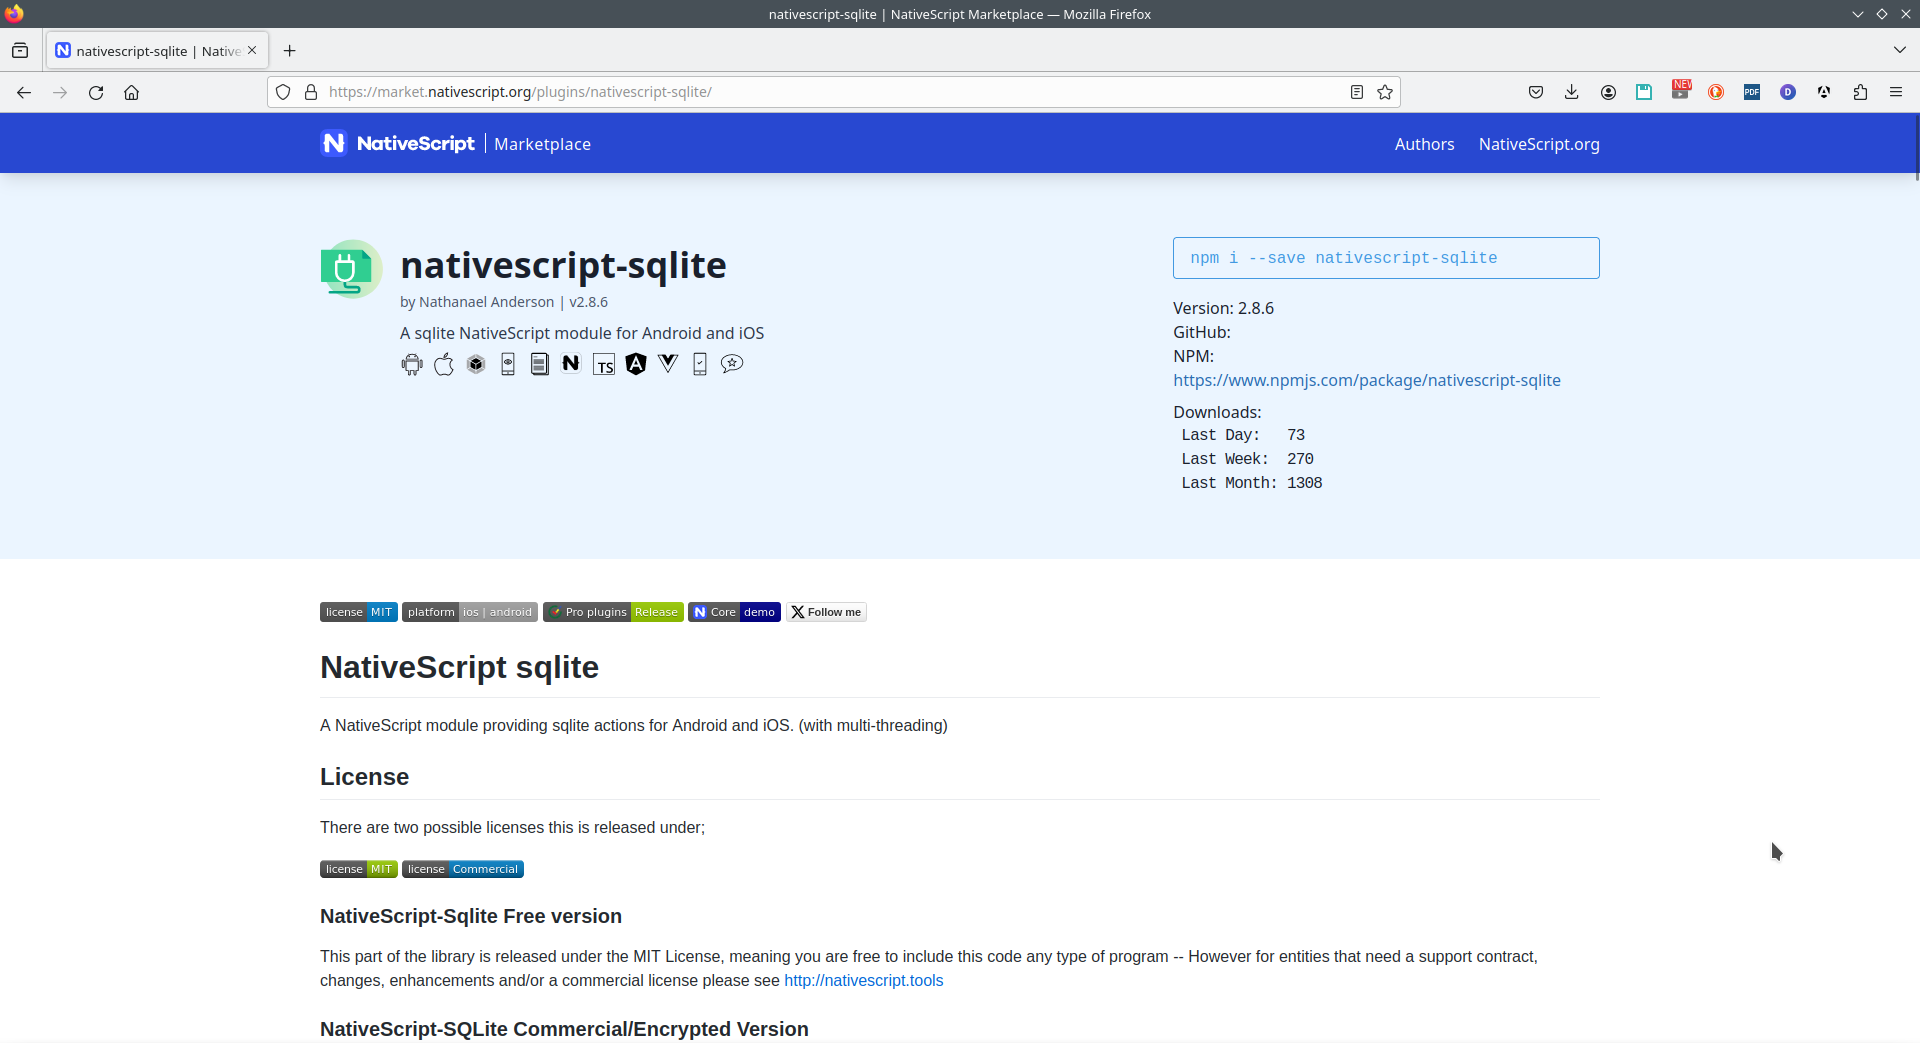
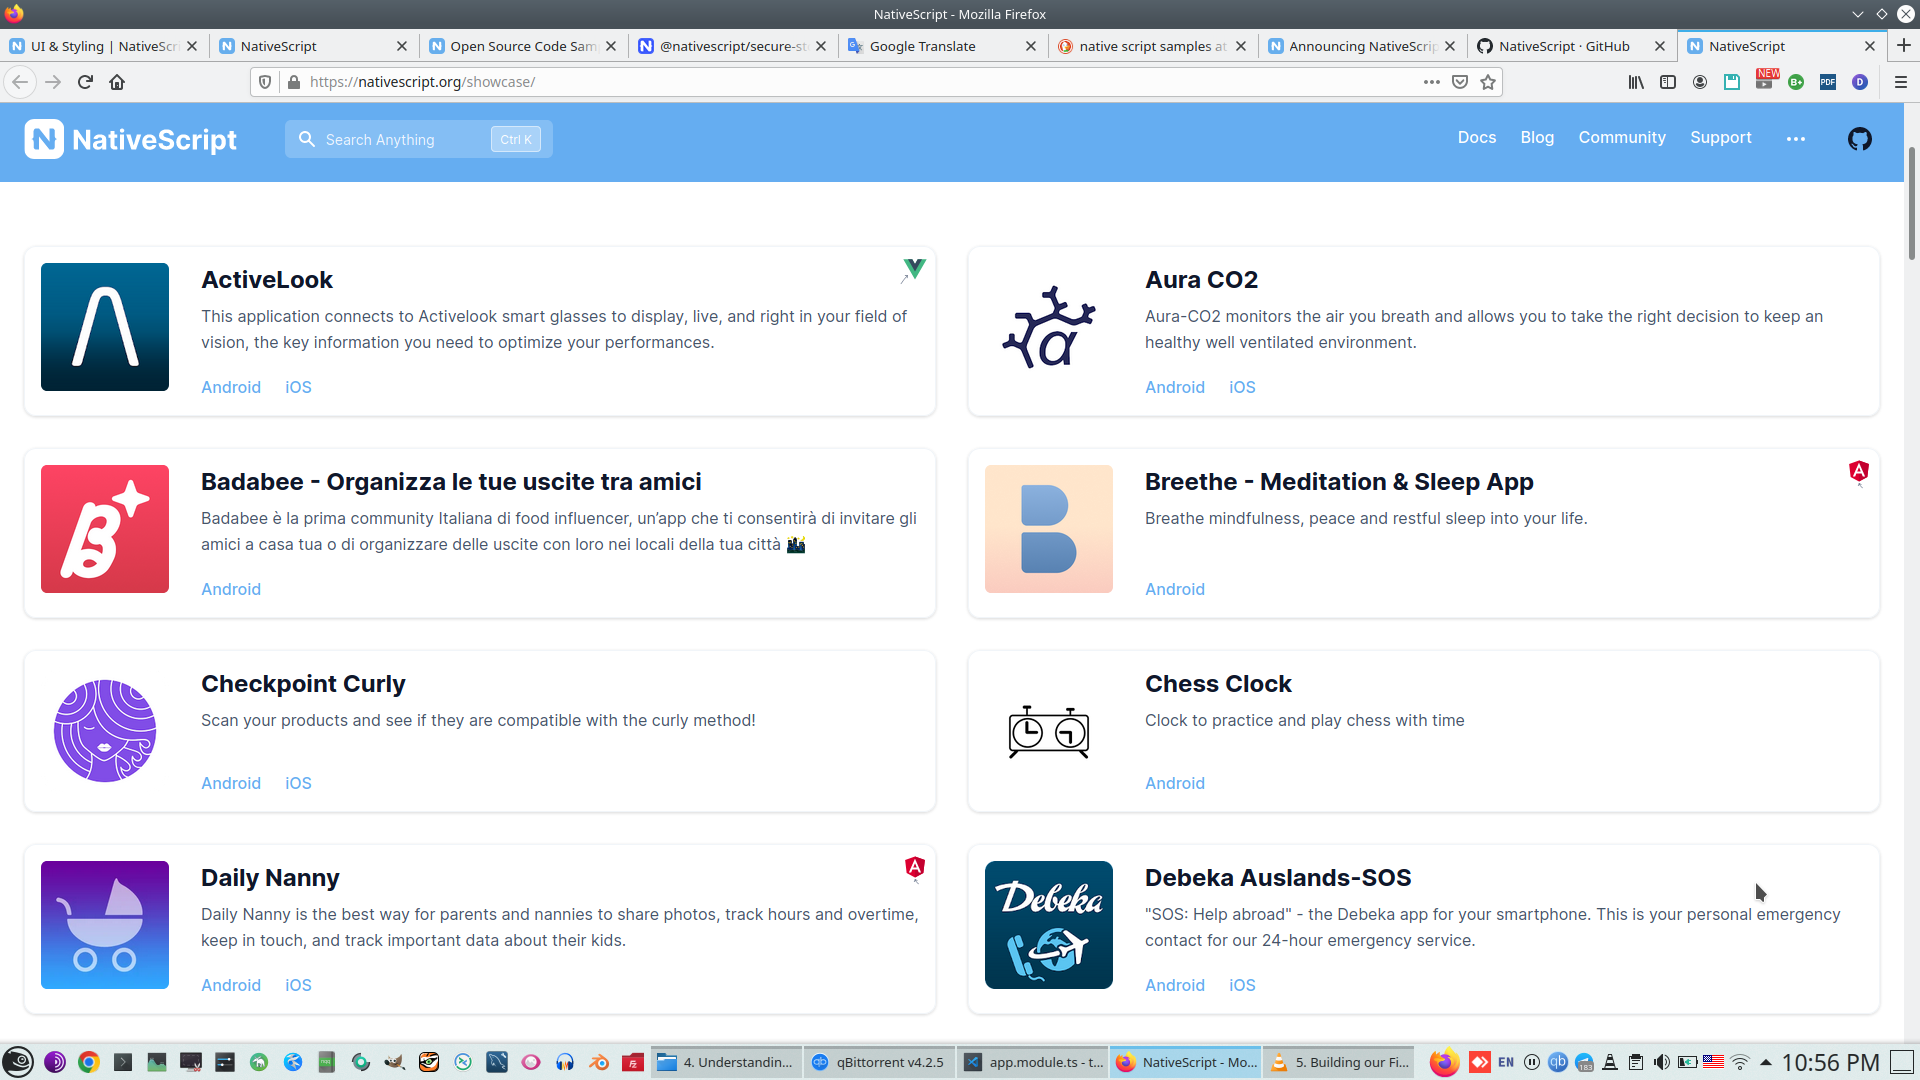
NS Showcase - Project builded on NS
Stackblitz
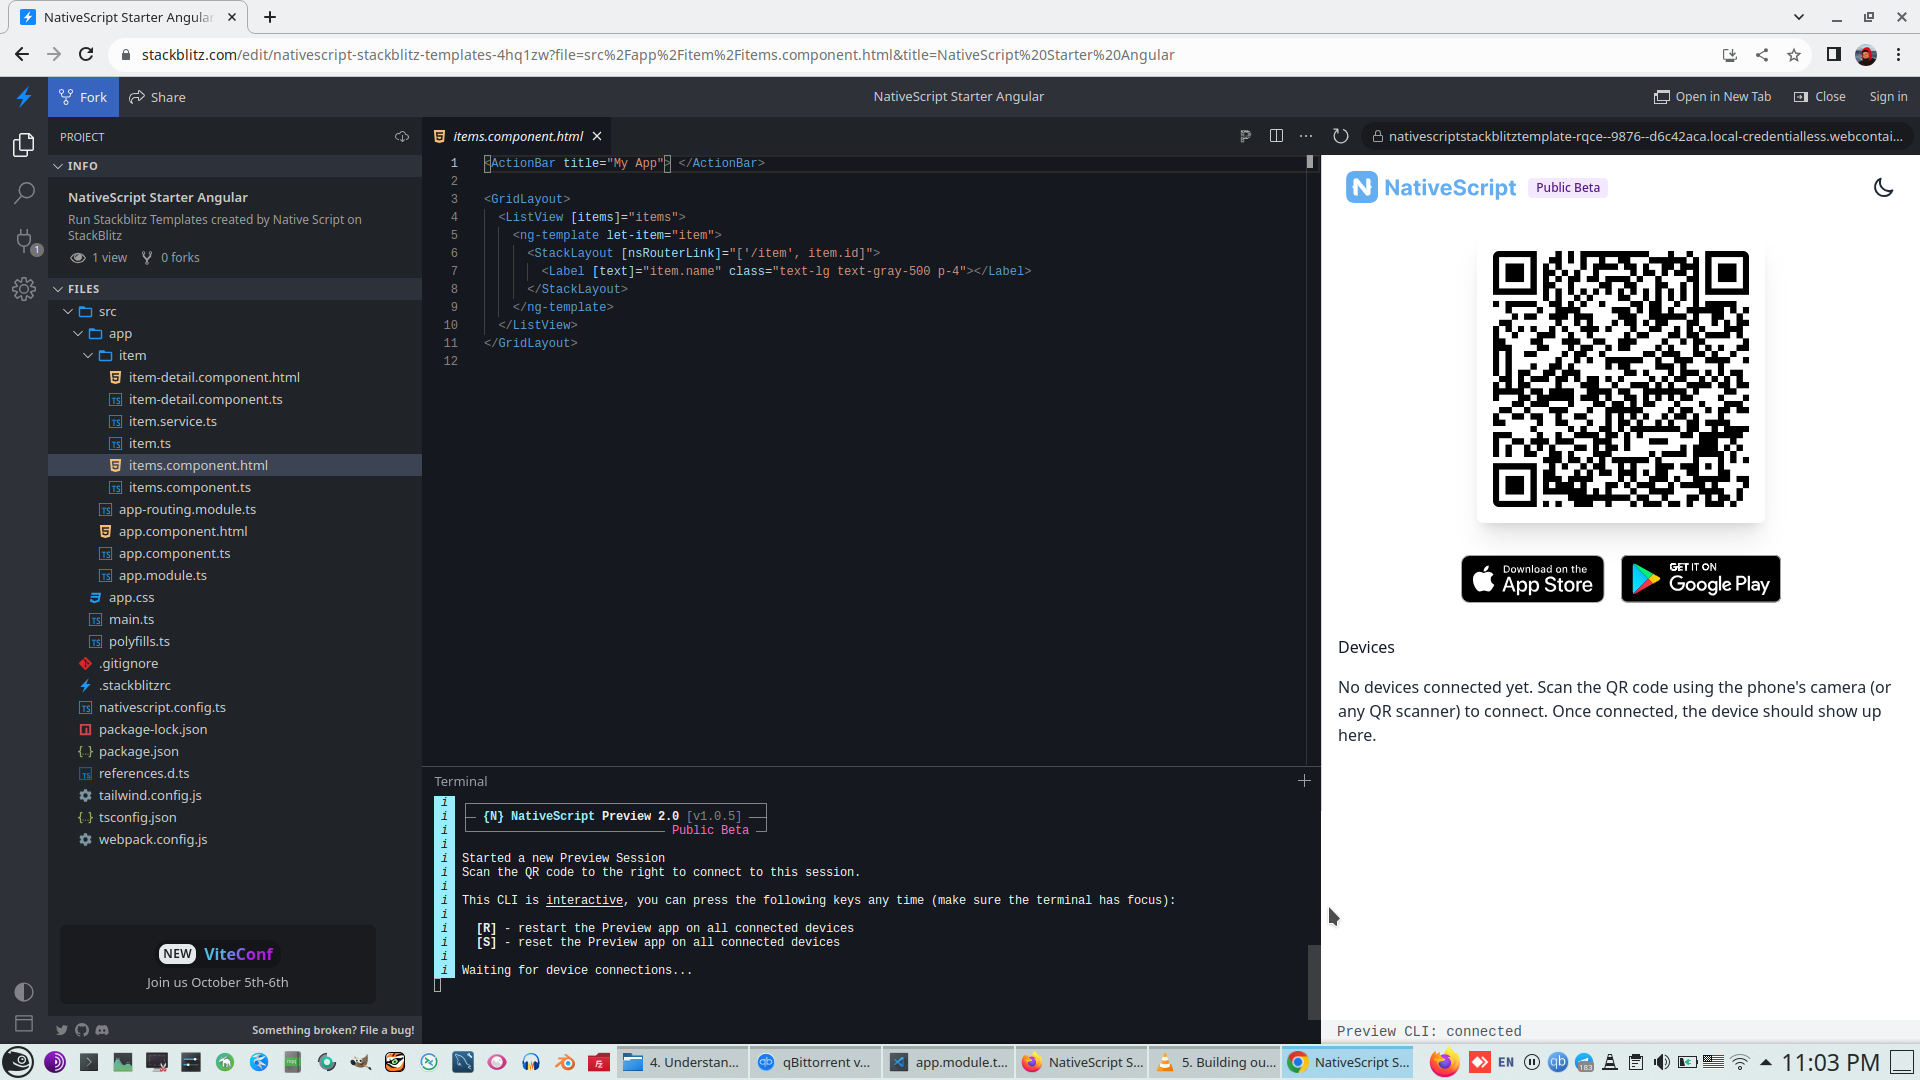
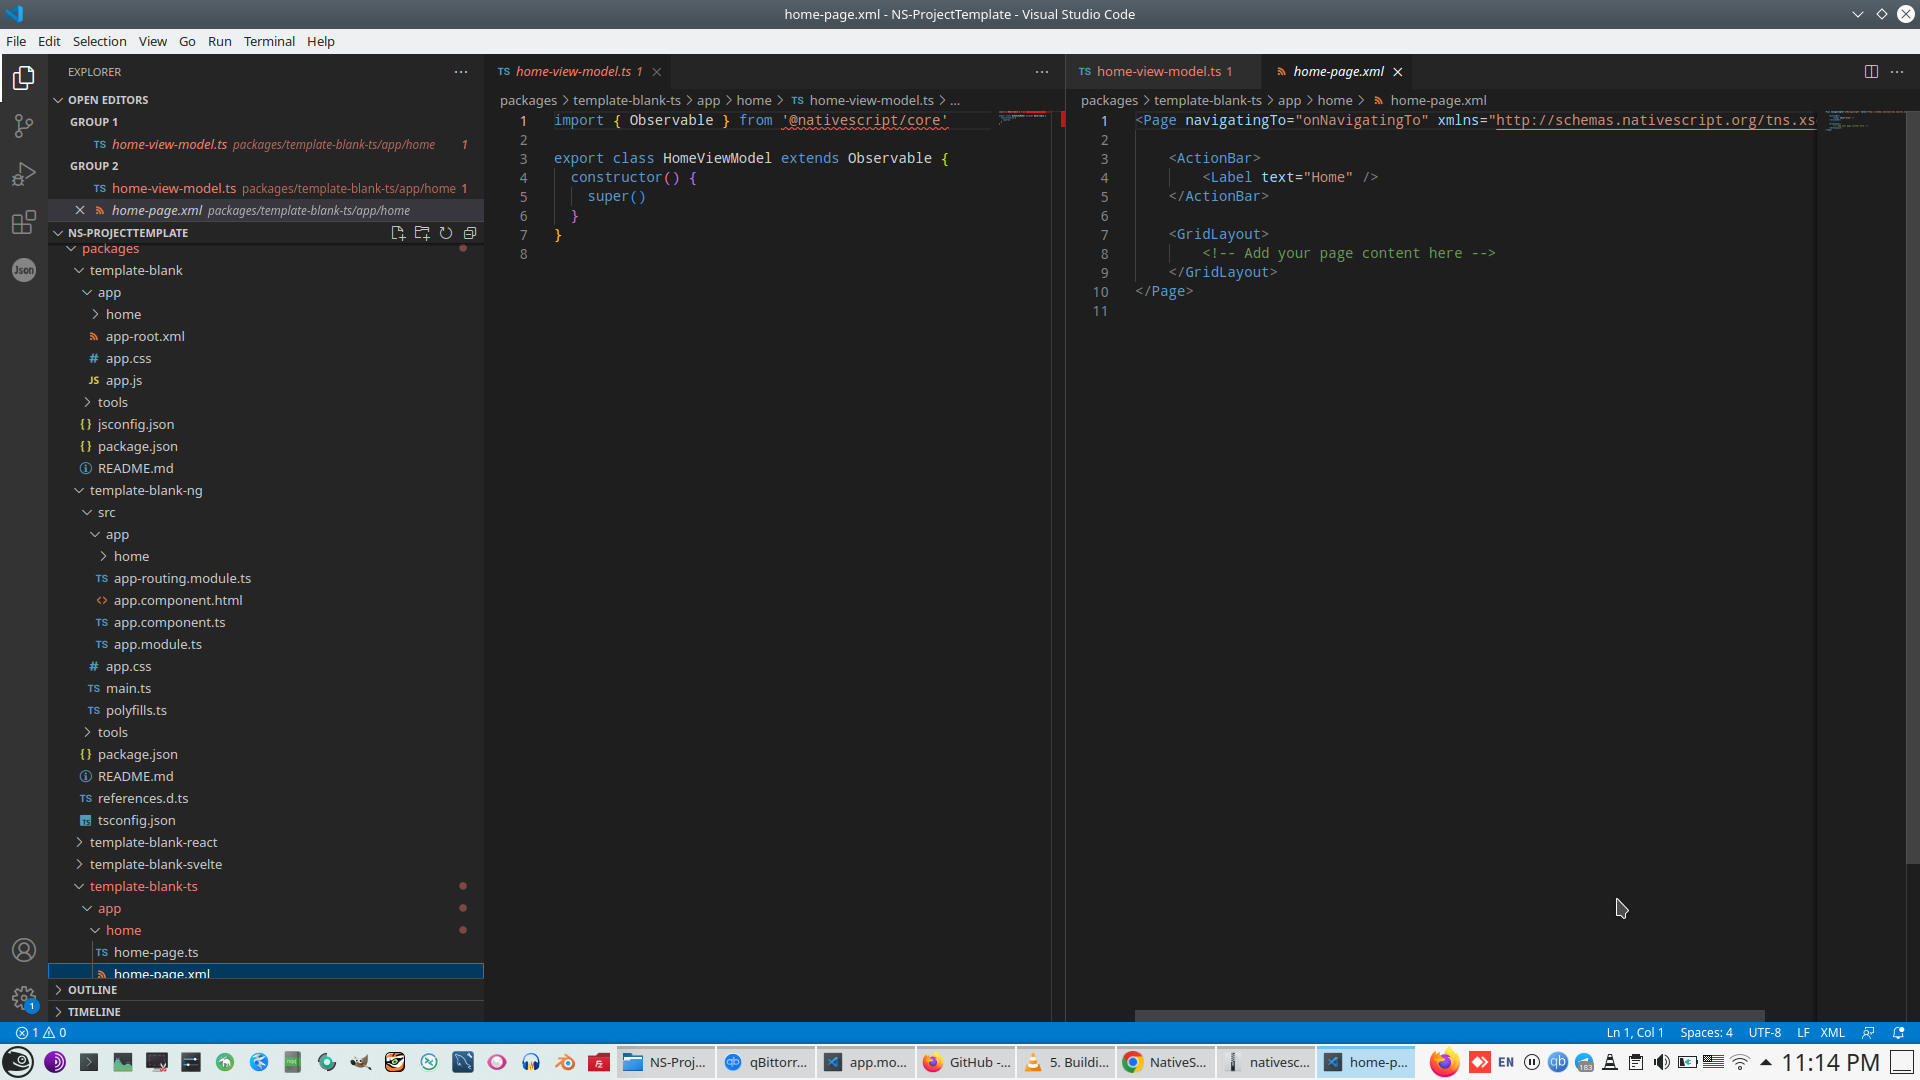
6 main NS template projects on Ts and Angular, Ts without Angular projects
Code for this lecture

2. Code sharing
- 1. Module Introduction
- 2. How Code Sharing Works
- 3. Creating a Shared Project
- 4. Analysing the Project Structure
- 5. Running the Apps
- 6. Adjusting the Auth & App Modules
- 7. Using Helper Services
- 8. Finishing the Auth Component & Adding Styles
- 9. Working on the Auth Form Styling
- 10. More Auth
- 11. Adding More Helper Services
- 12. Finishing the Authentication Part
- 13. Starting Work on the Challenges Part
- 14. Working on the Today Page
- 15. Working on the Challenge Edit Component
- 16. Fixing the Challenges Filenames & Imports
- 17. Adding the ActionBar
- 18. Reaching the Challenge Edit Page
- 19. Adding the Auth Guard & Auto-Login
- 20. Working on the Current Challenge Page
- 21. Adjusting the Styles
- 22. Resetting the Editing Page Correctly
- 23. Fetching the Current Challenge on Multiple Pages
- 24. Adjusting the Navigation Items
- 25. Navigating Back (Correctly)
- 26. Adding a Web Modal
- 27. Adding a Backdrop for the Modal
- 28. Adding Modal Actions & User Interactions
- 29. Reflecting the Day Status in the Modal
- 30. Populating the Grid Correctly
- 31. Logging Out
- 32. Adding a Loading Indicator
- 33. Finishing the Mobile Apps
- 34. Wrap Up
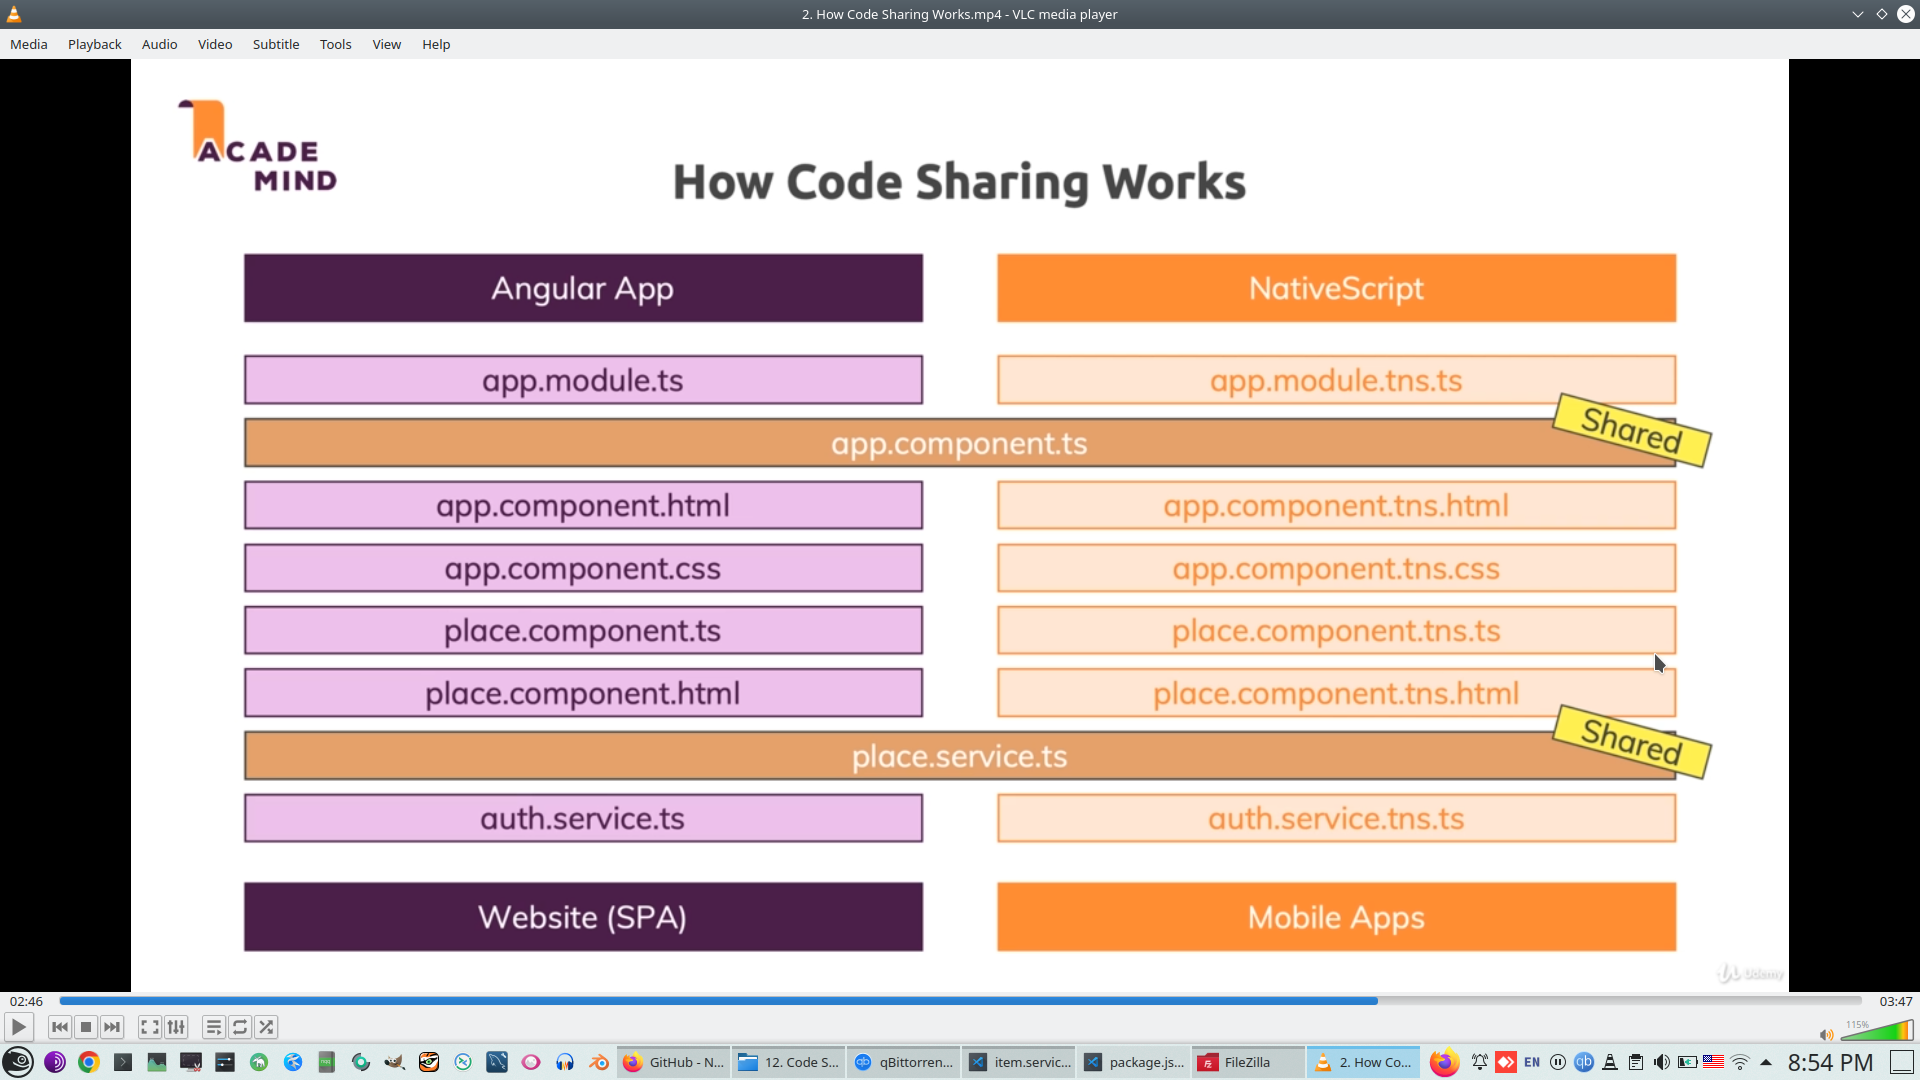
tools - share code between mobile apps and Web
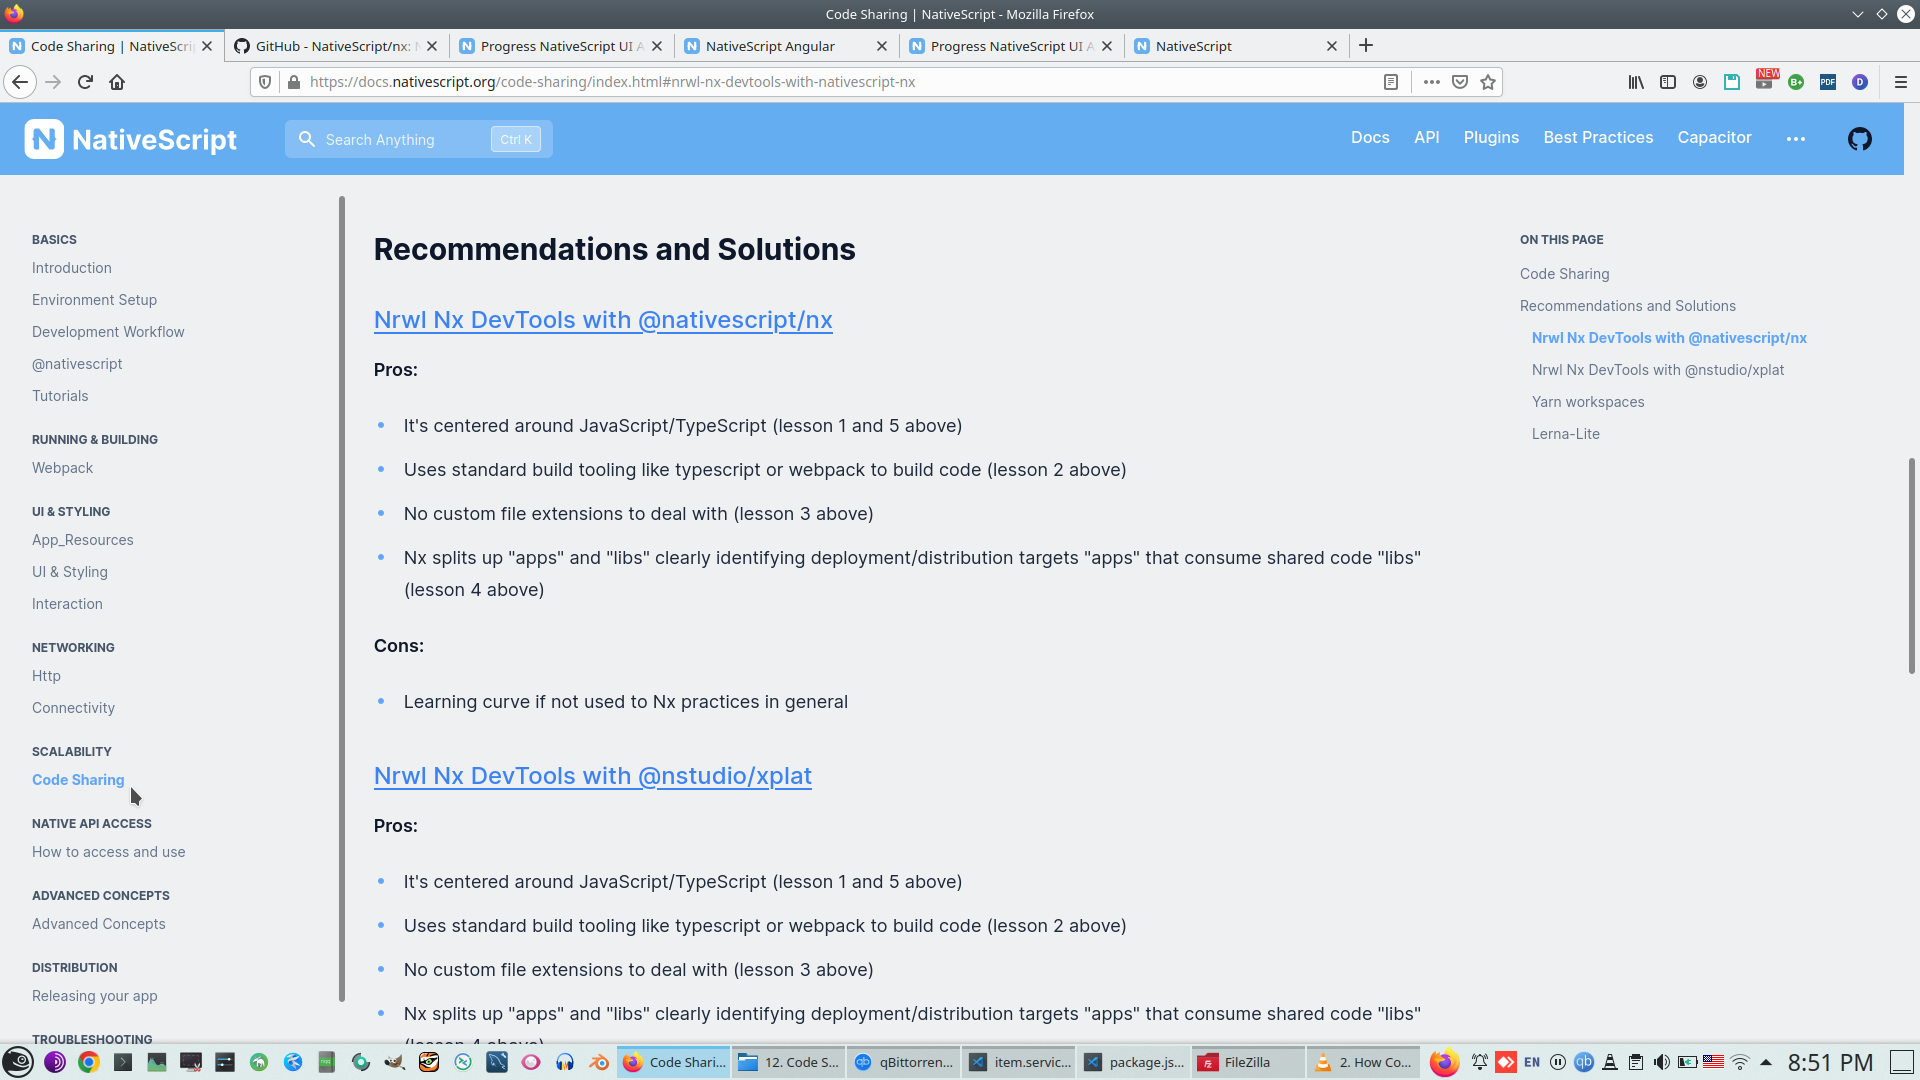
NativeScript library
3. Debug
'ns debug --bundle' compose all together
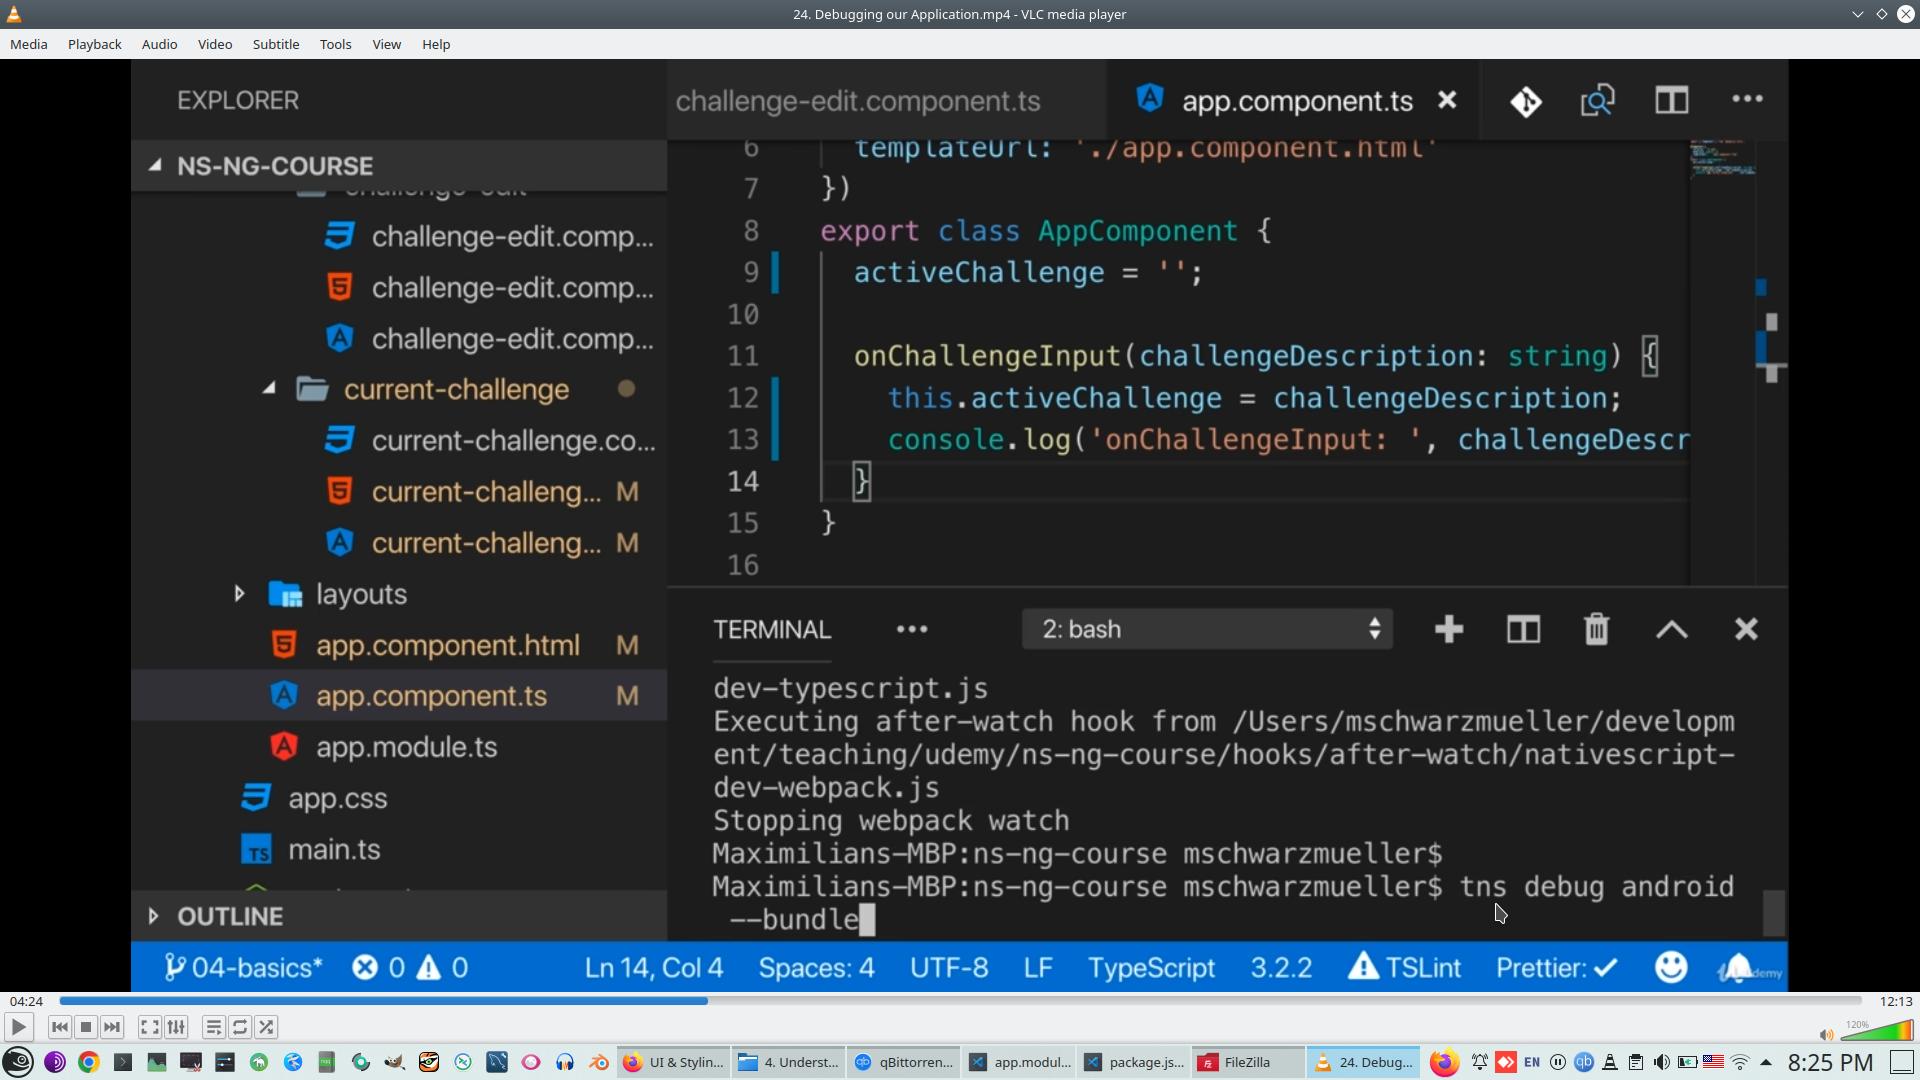
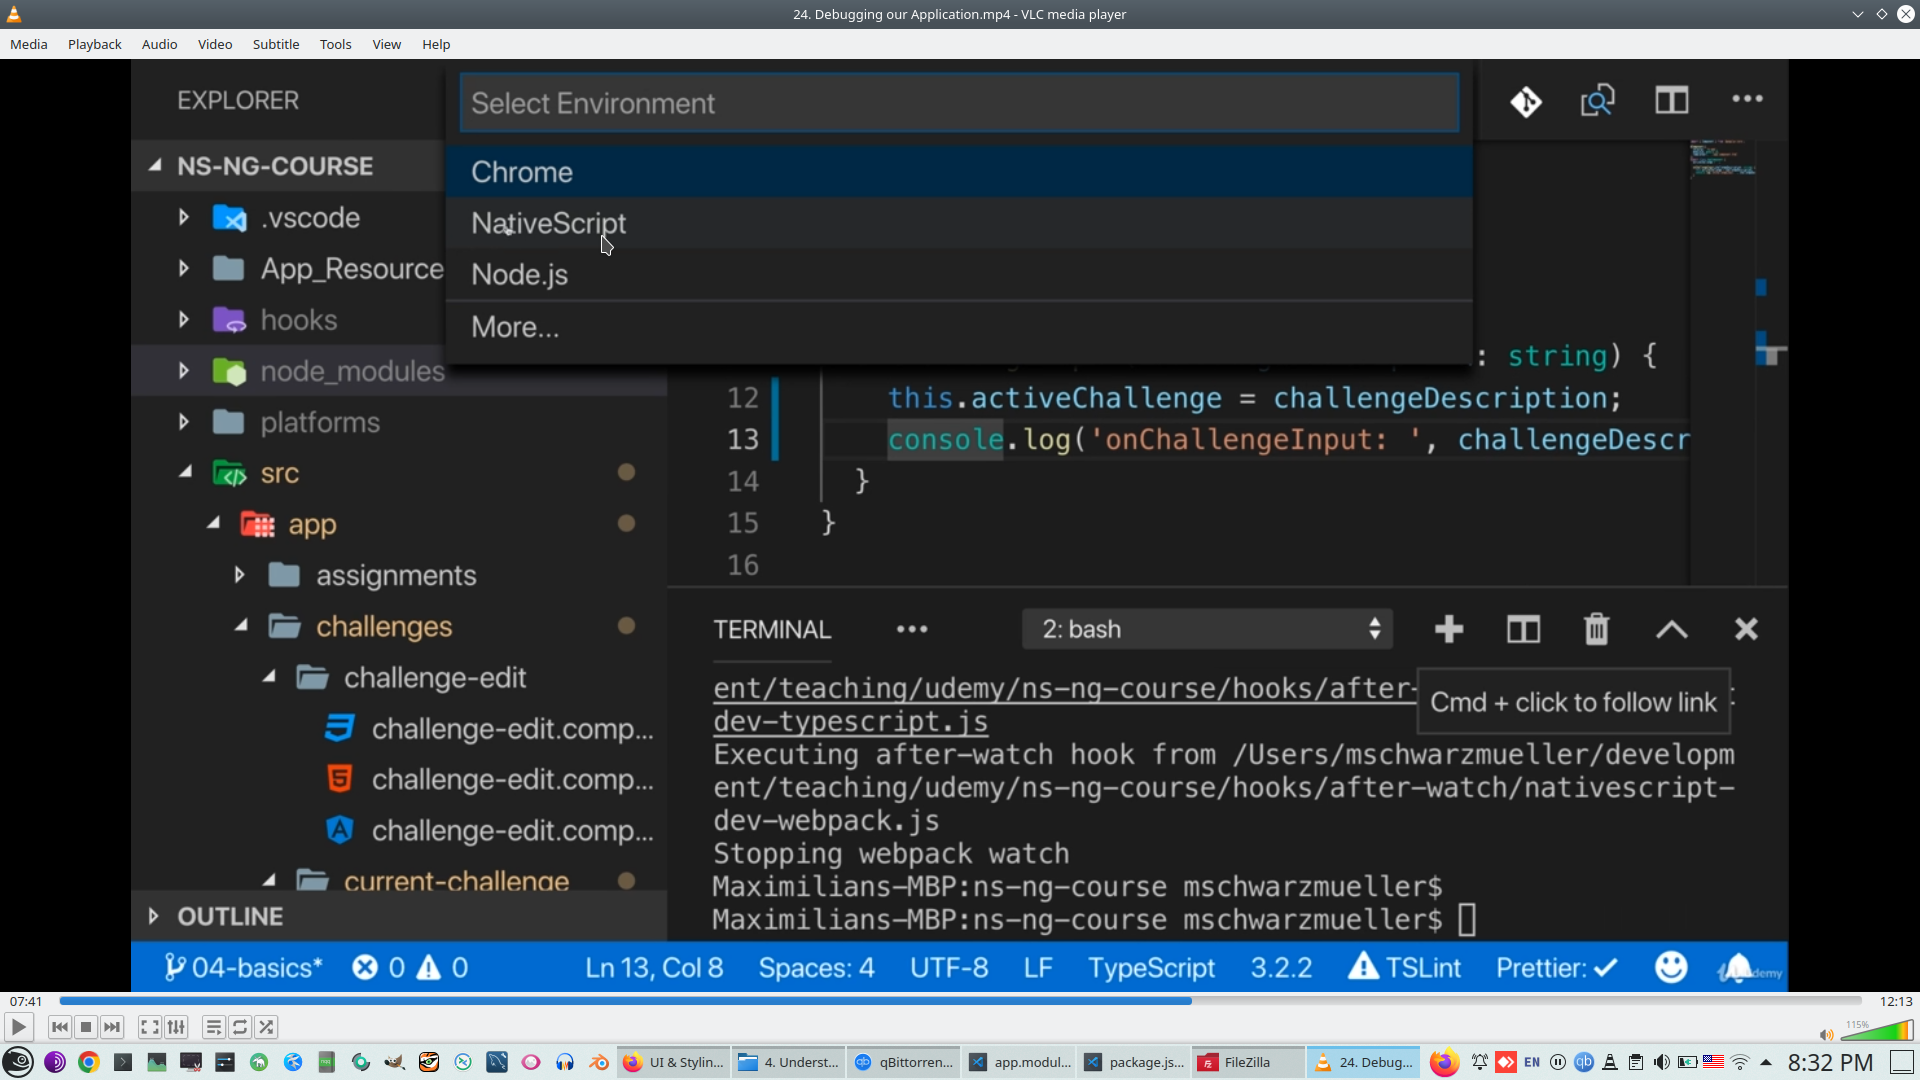
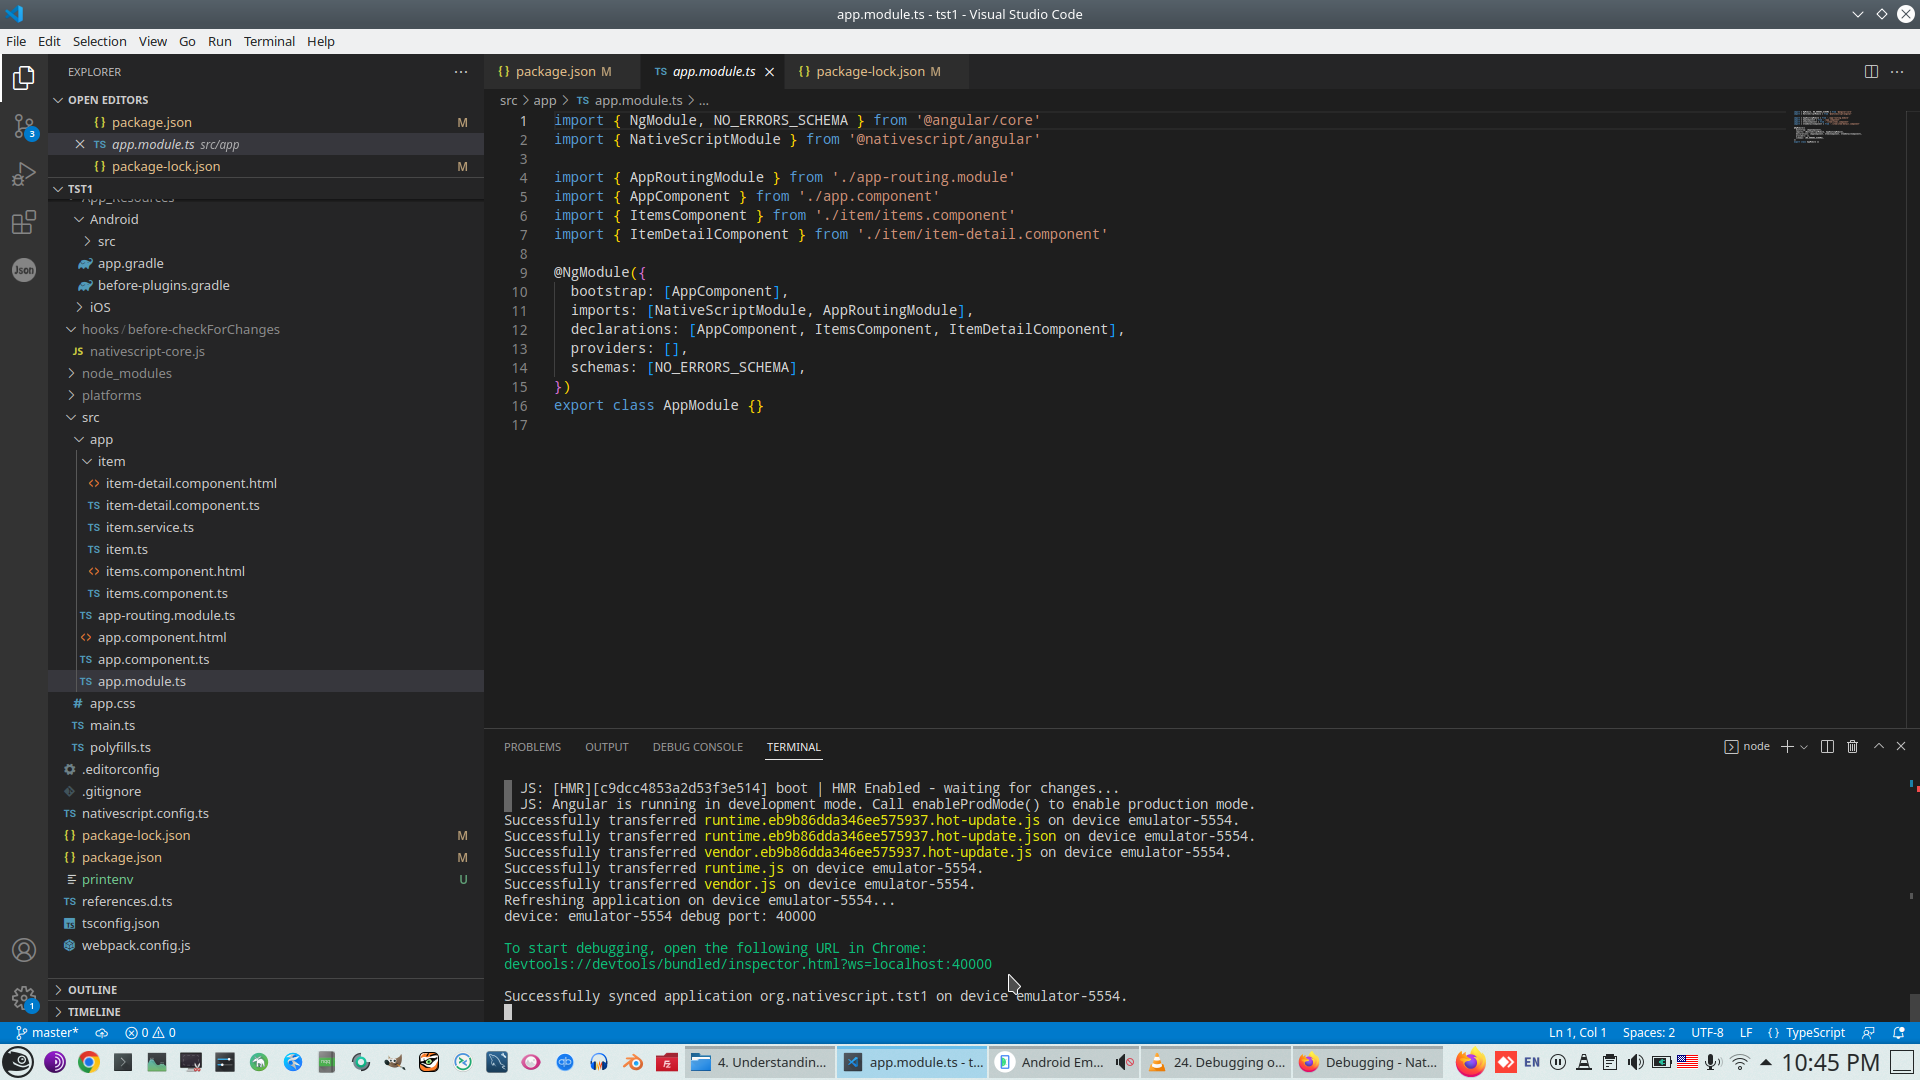
Start debugging
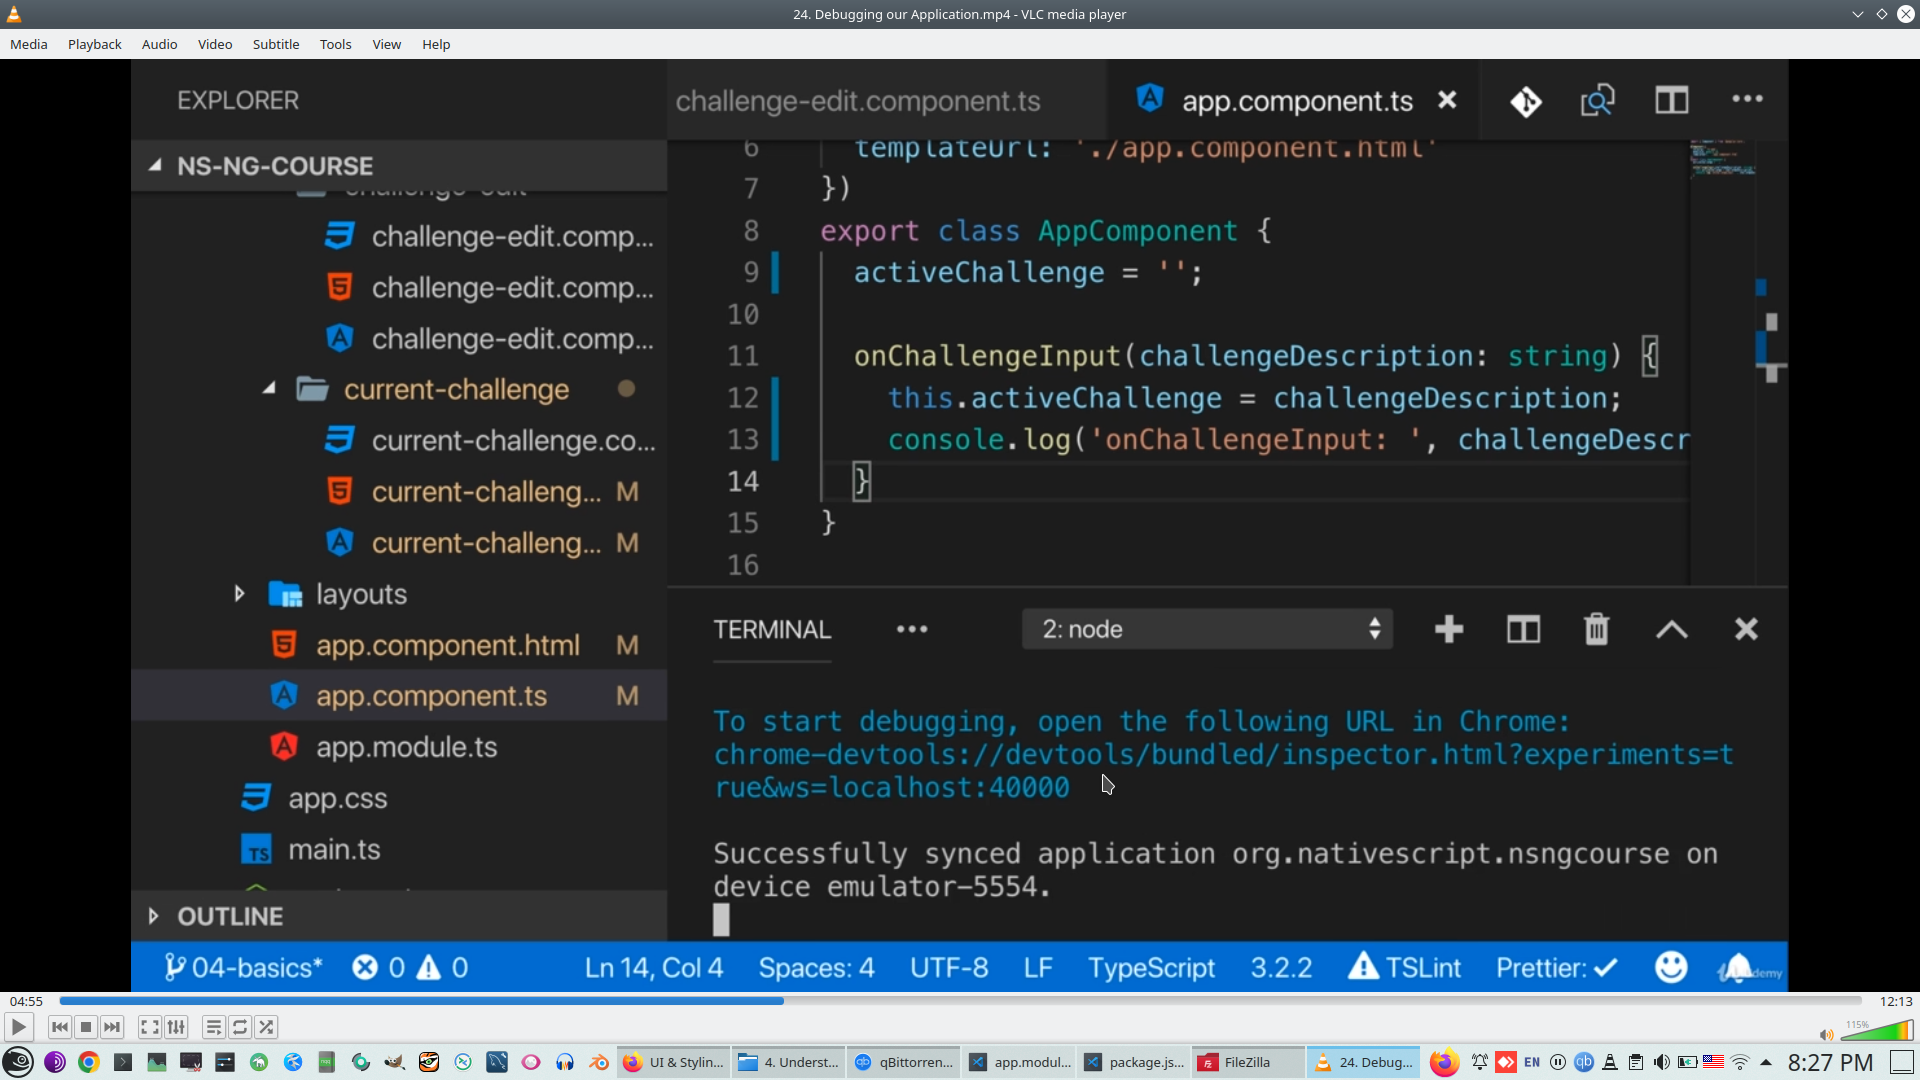
Chrome Debugger
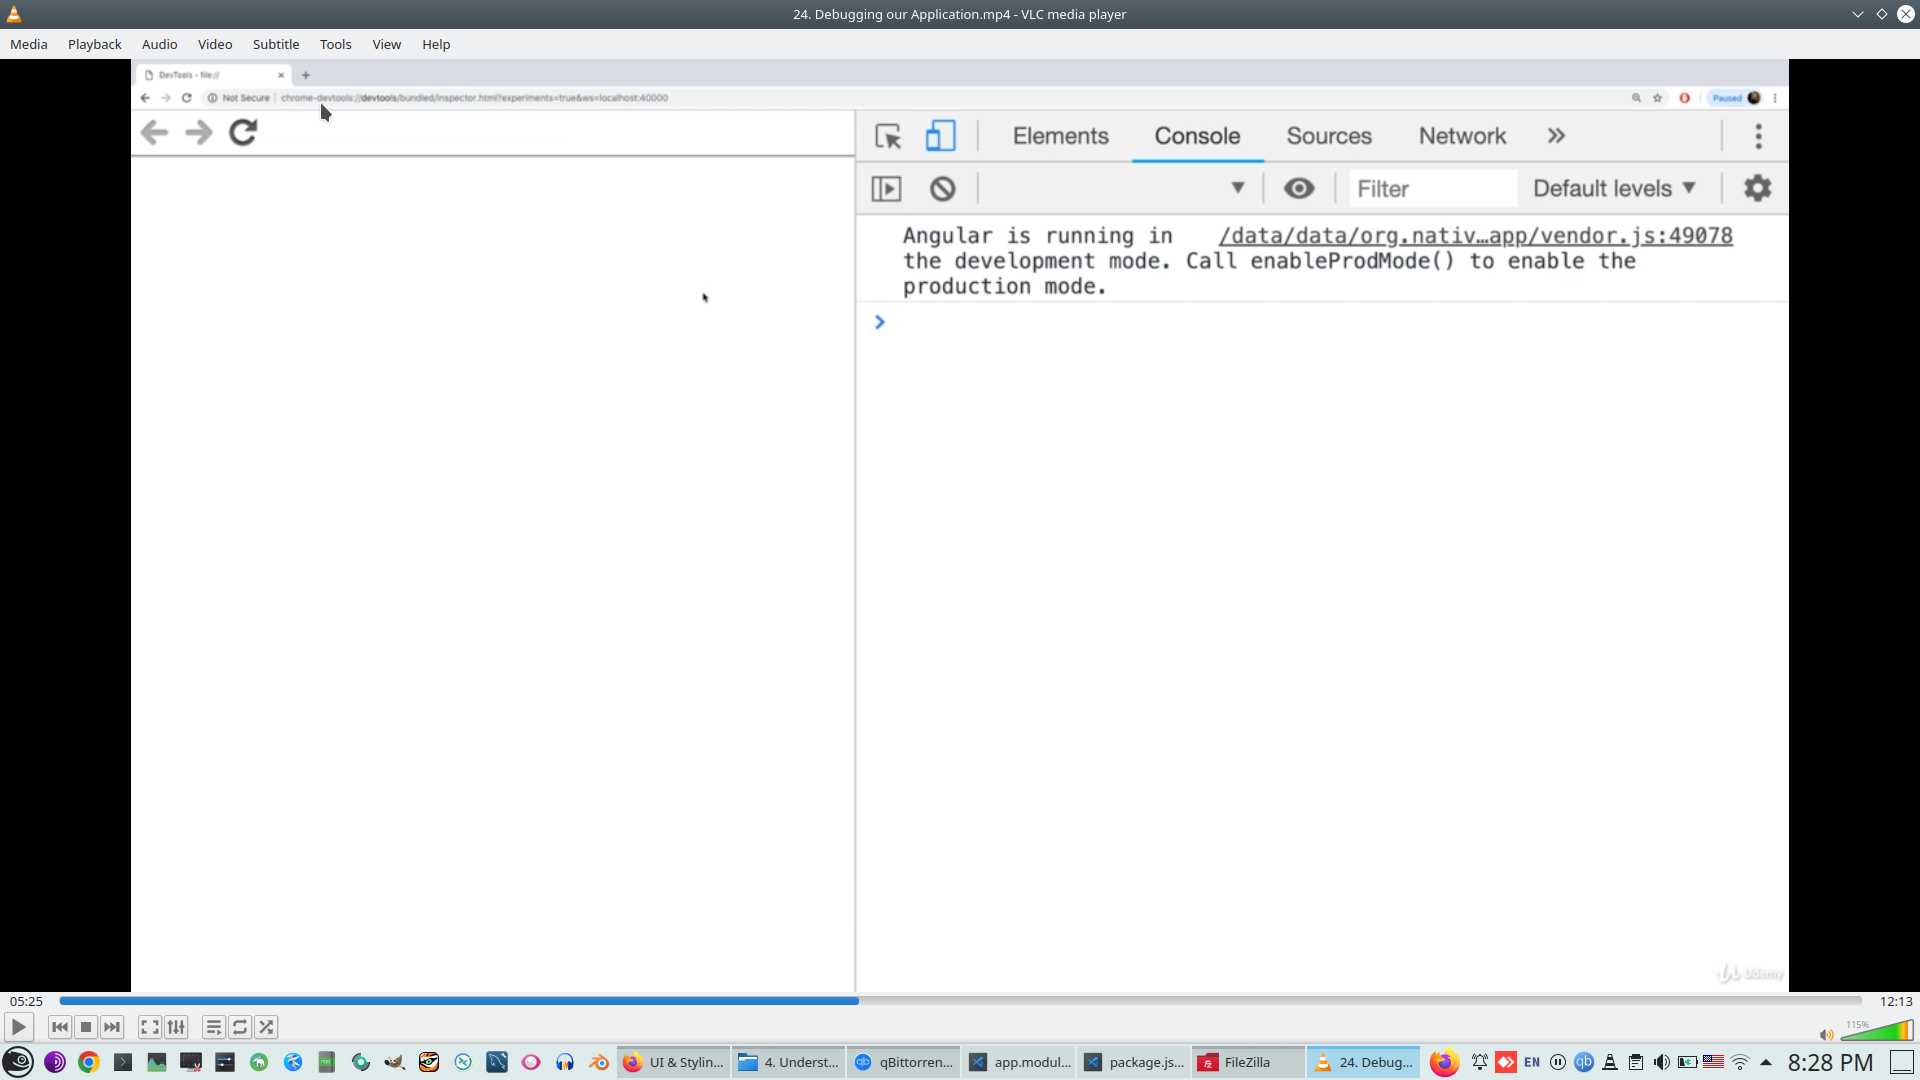
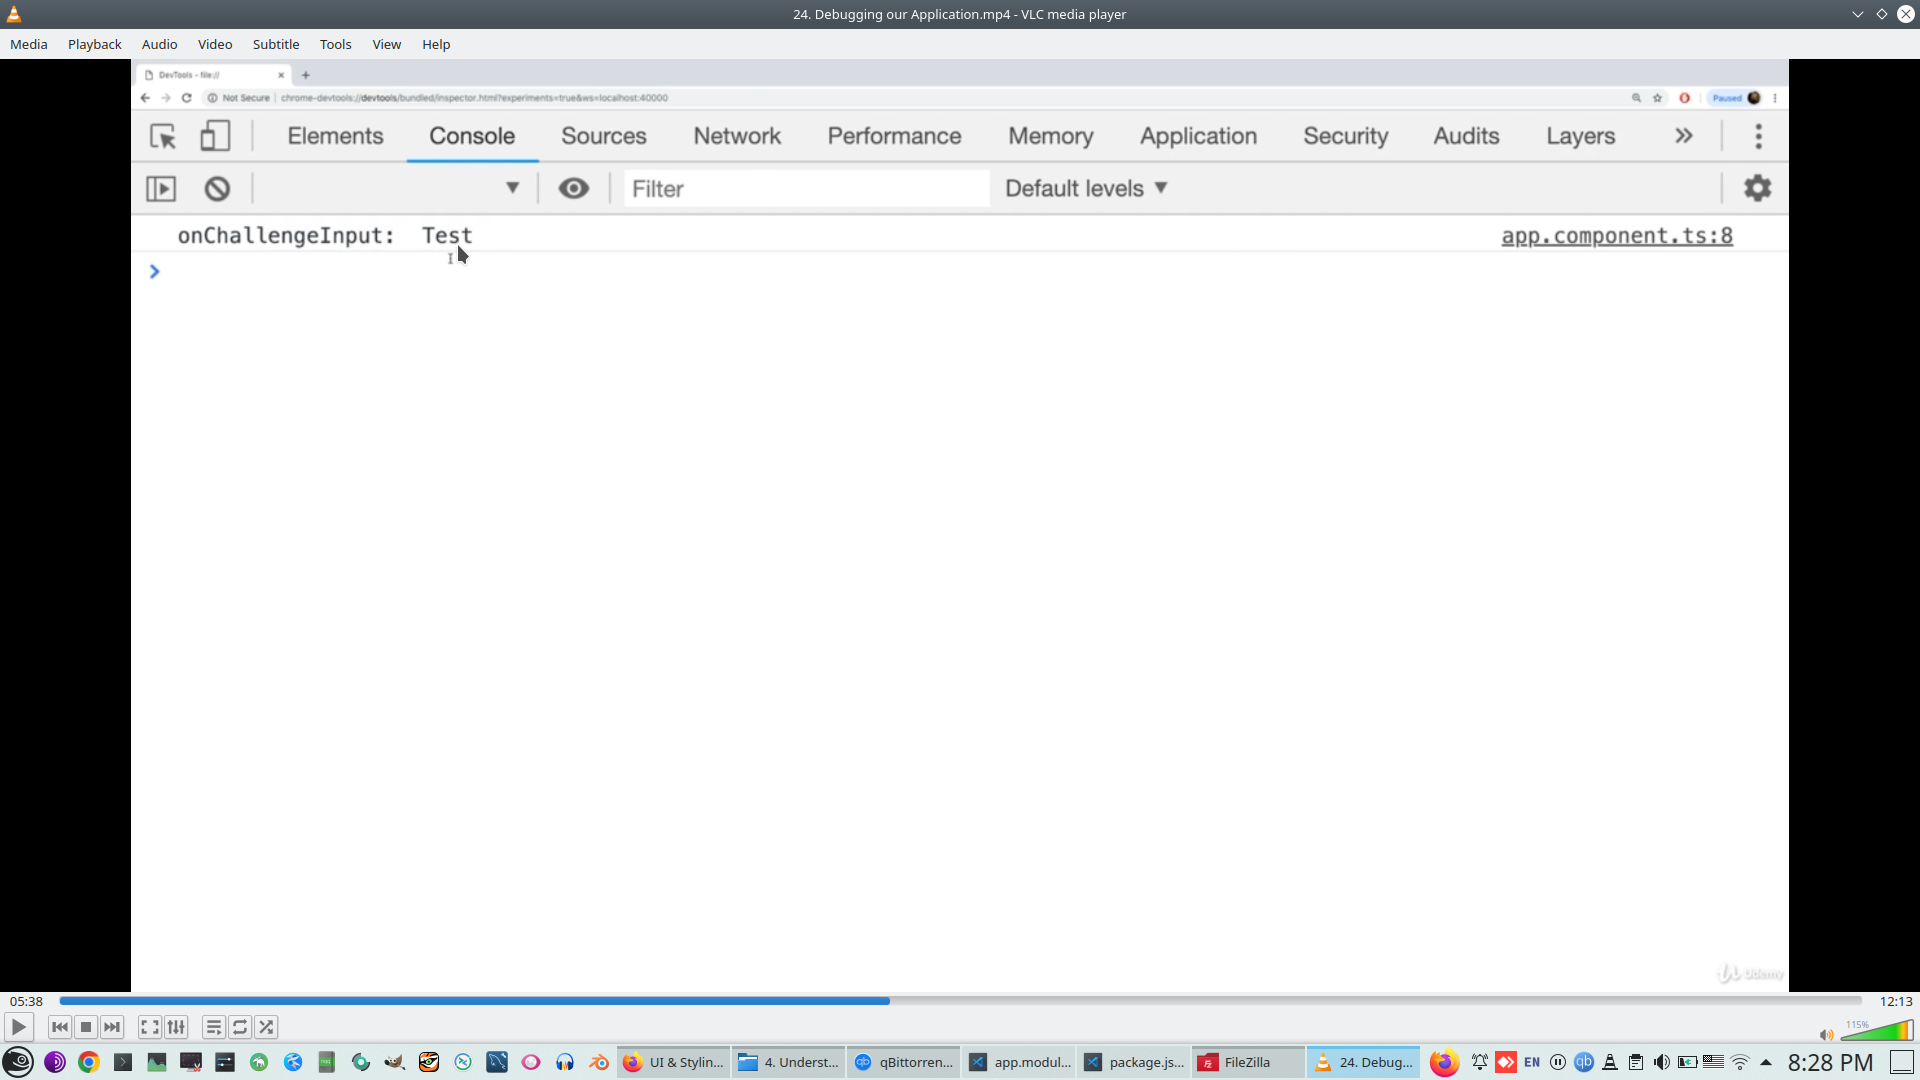
Console log redirect to Chromw debugger
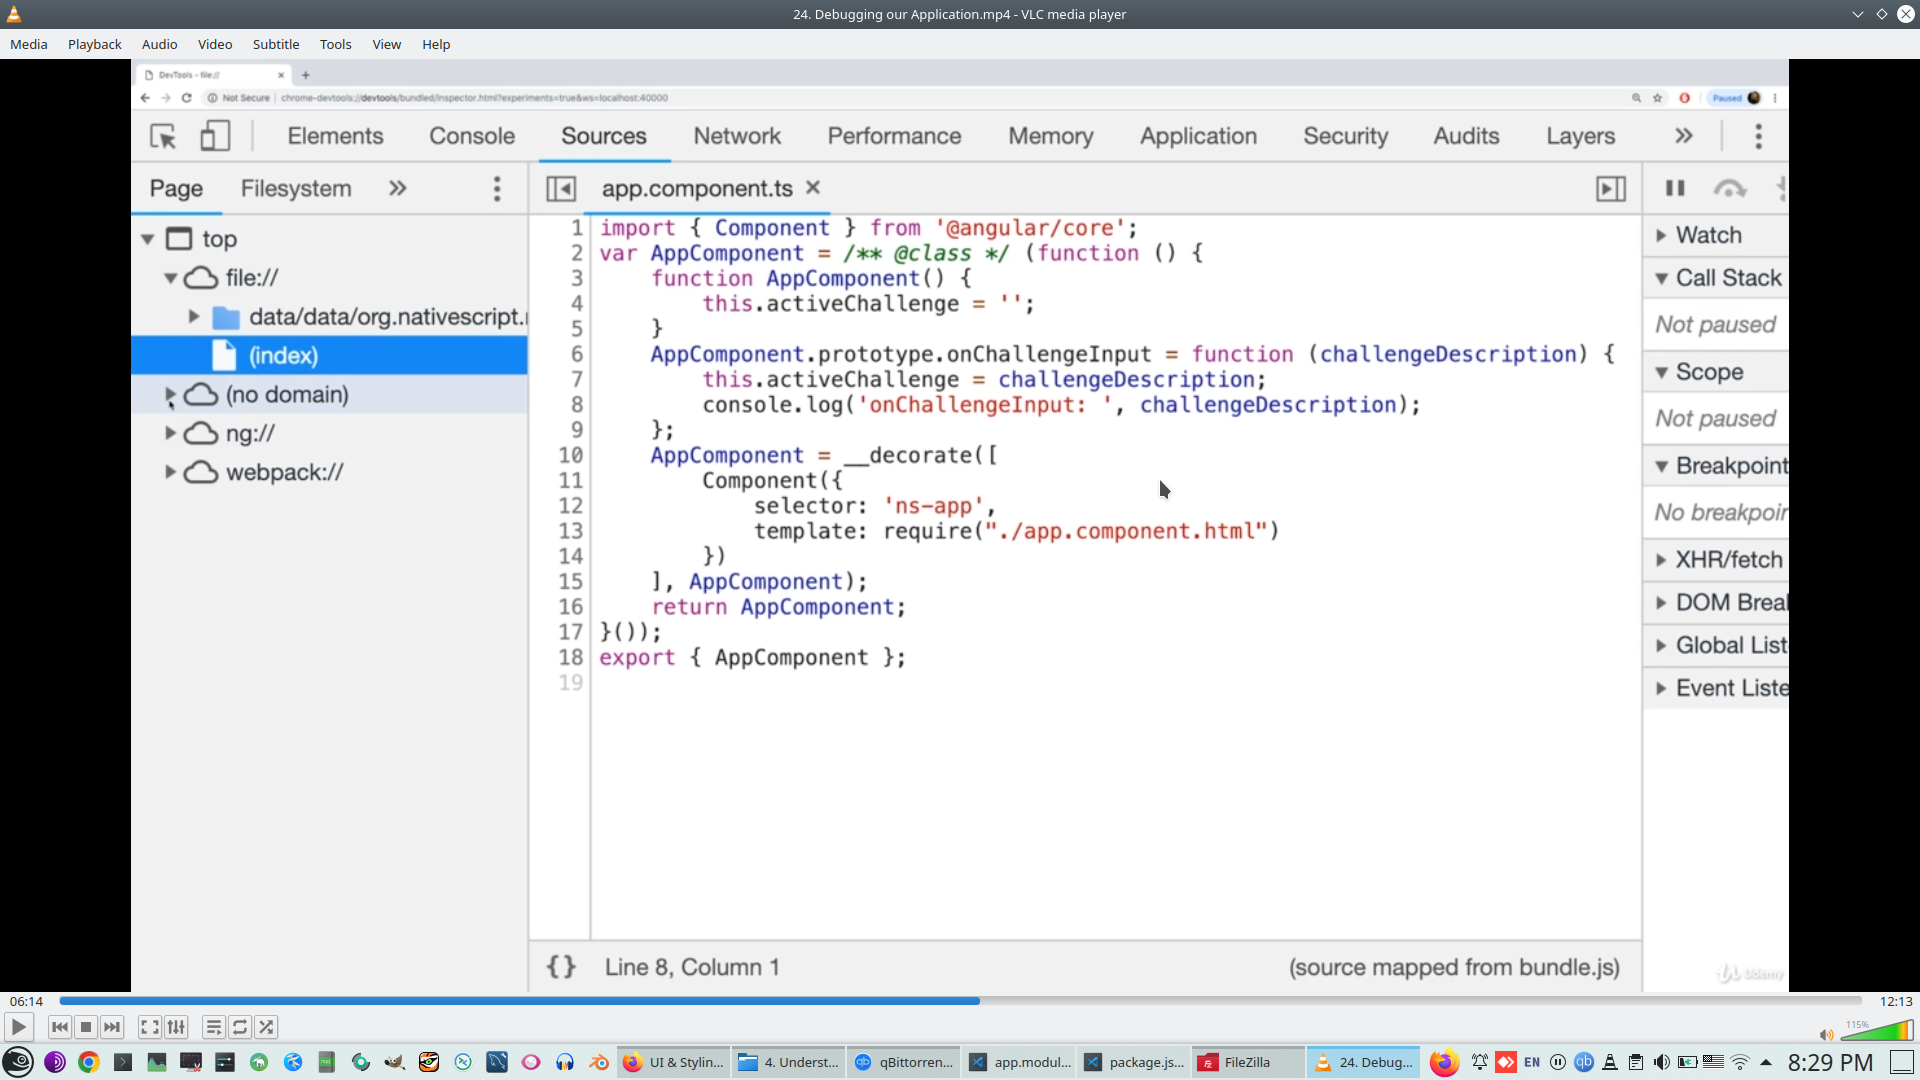
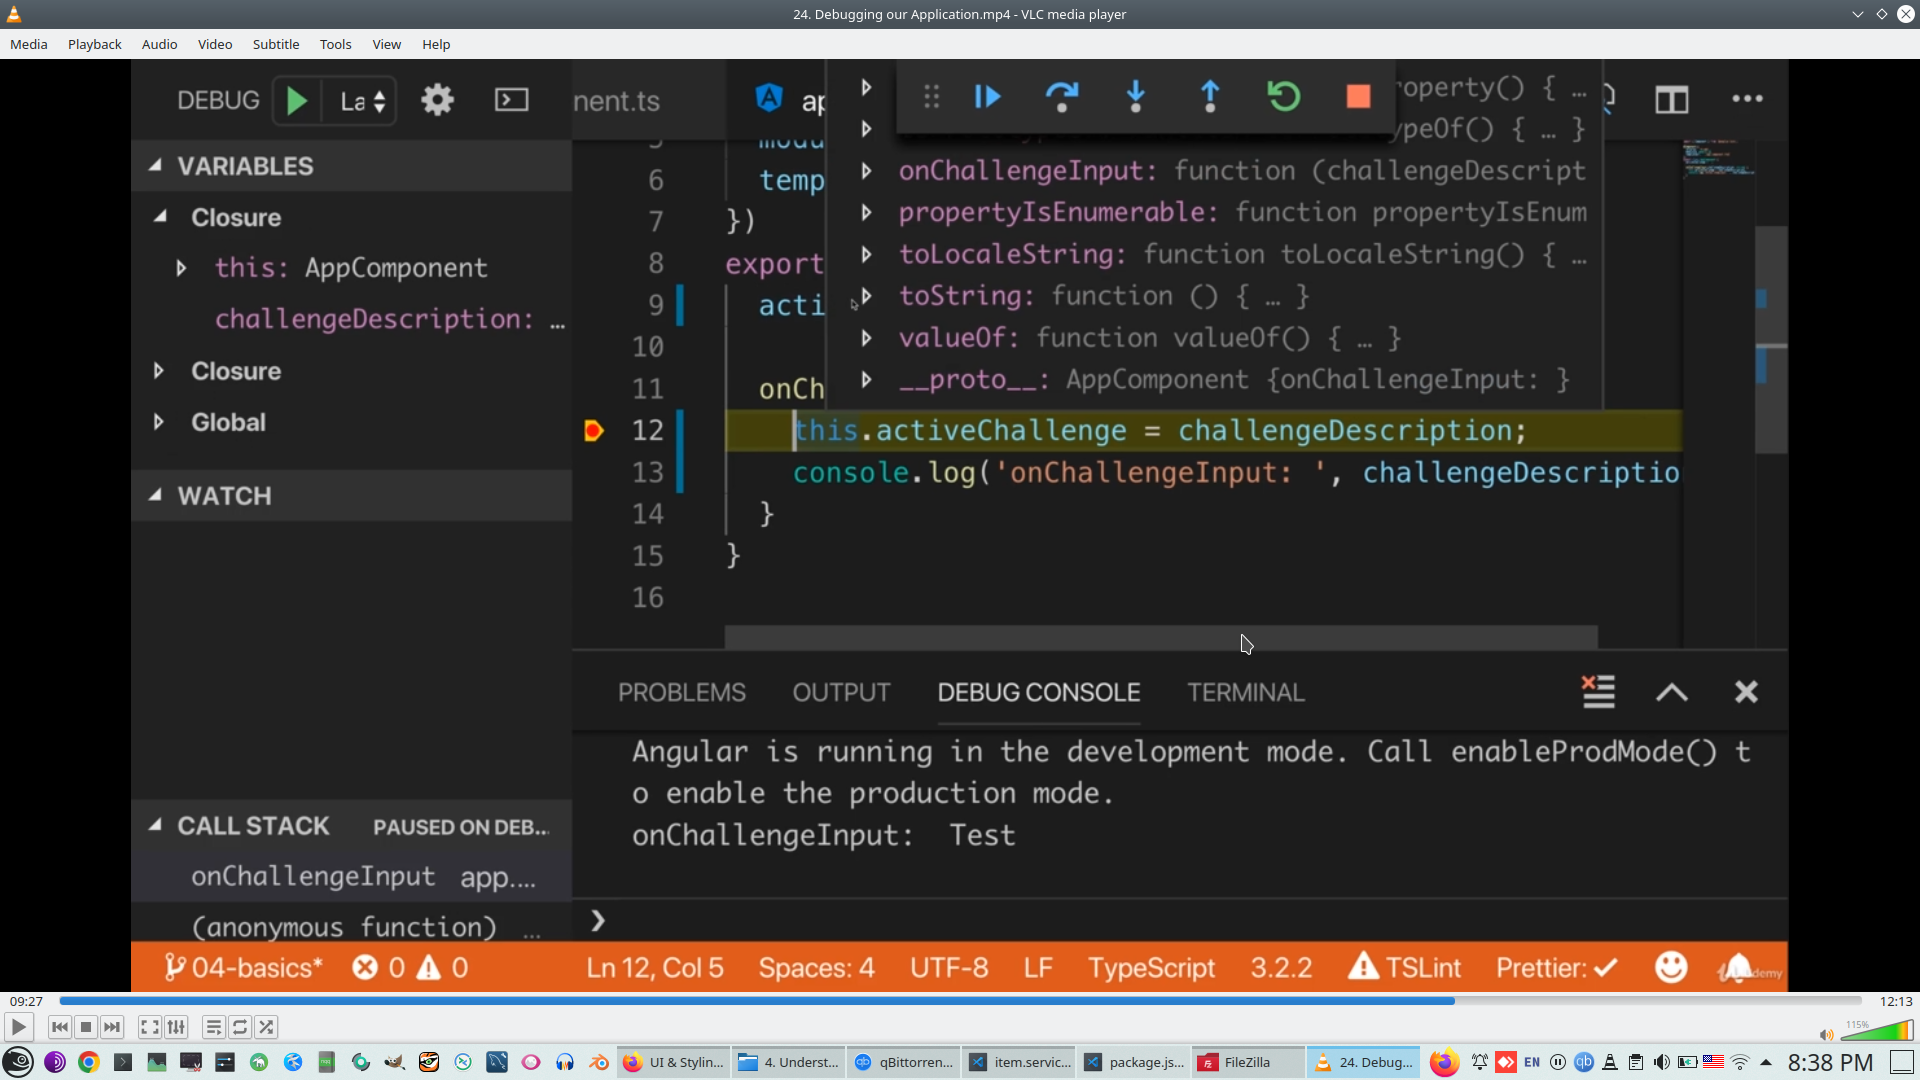
Look to TypeScript code on Debugger
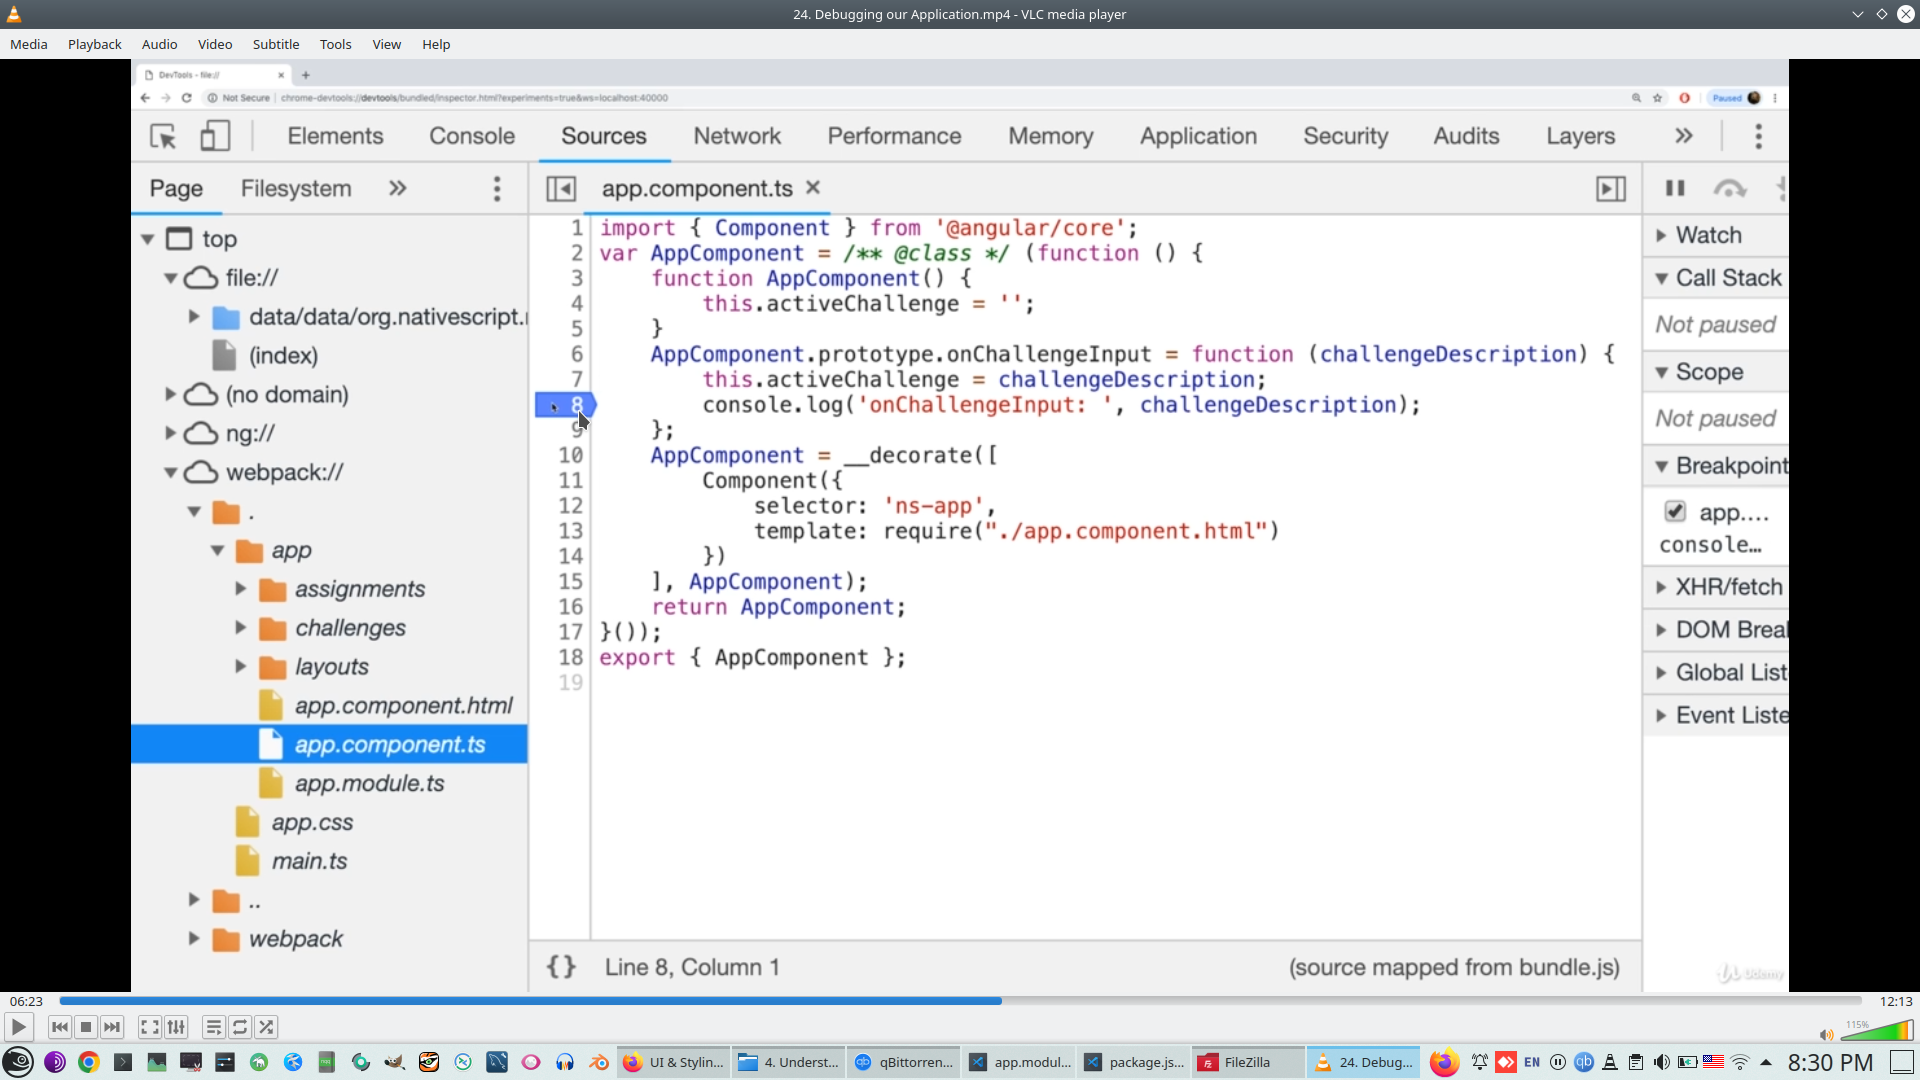
Set Breakpoint
Debug inside Vs Code
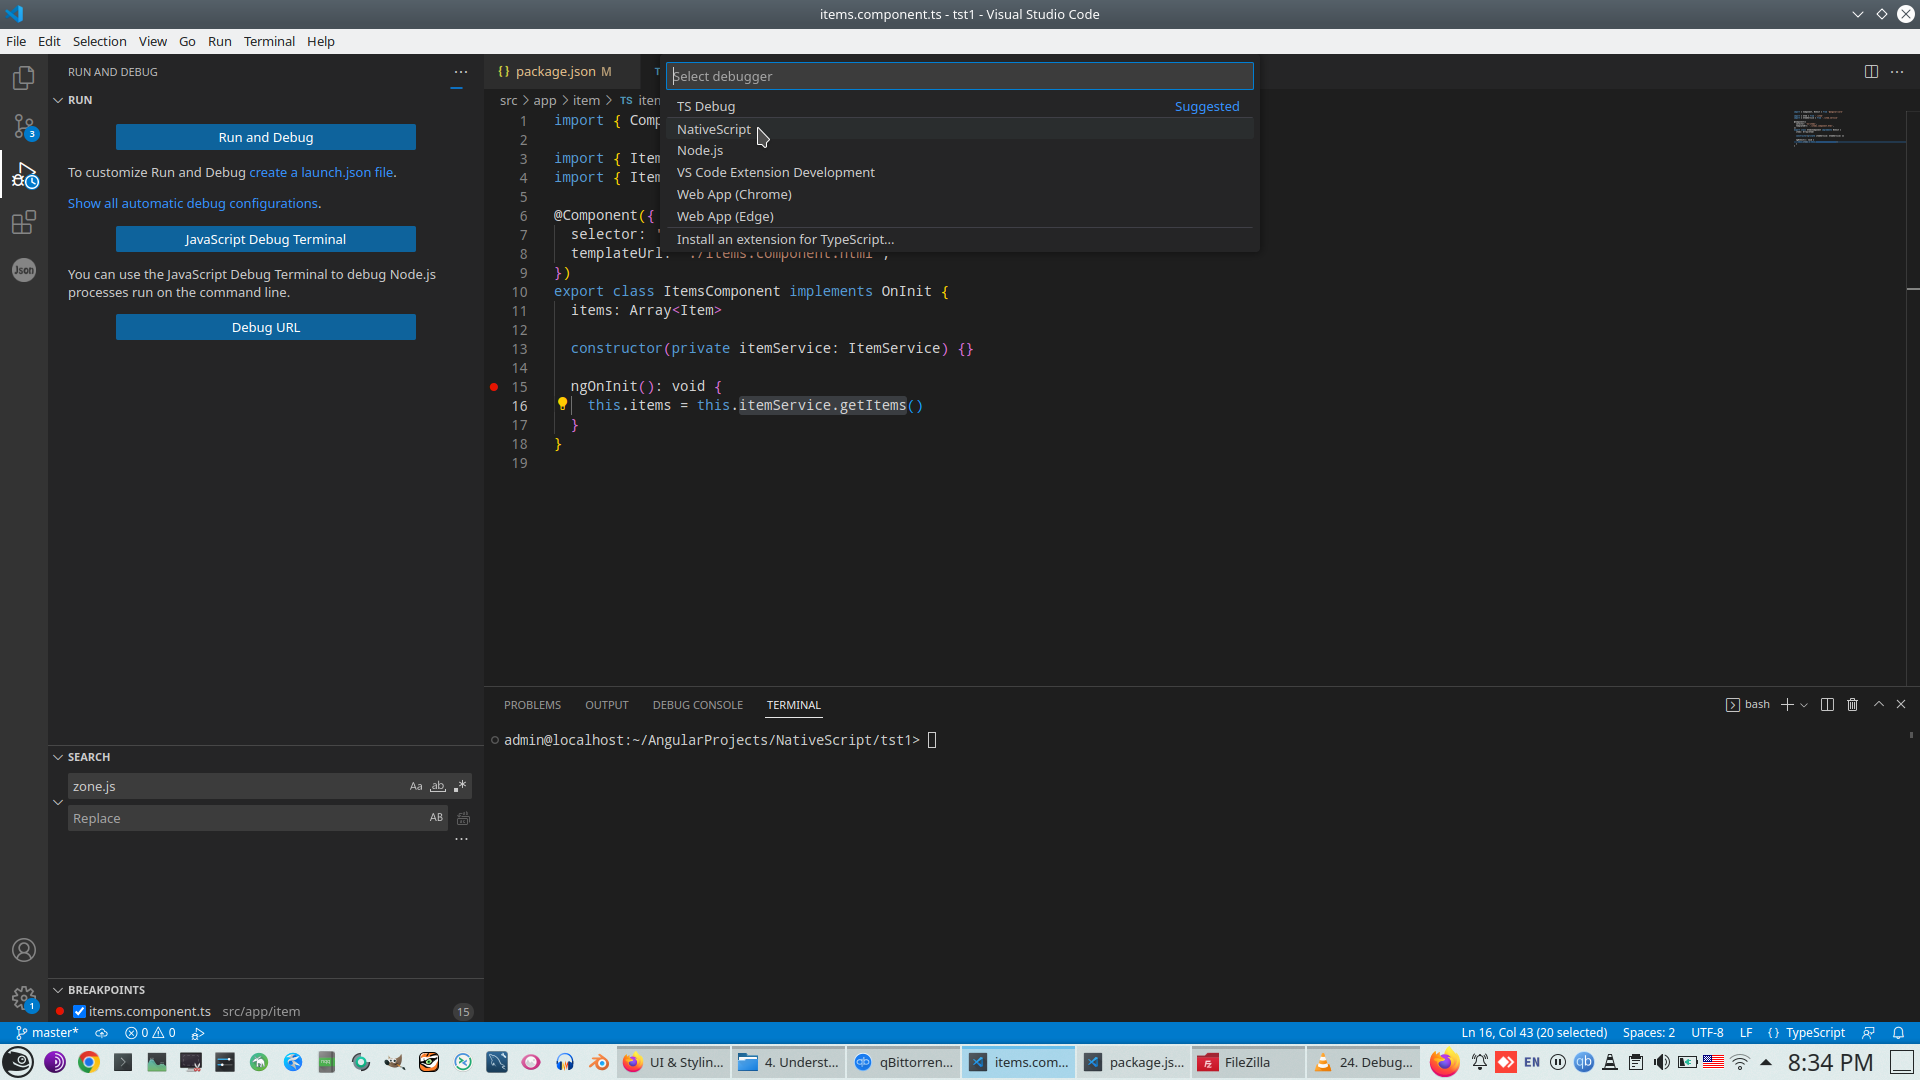
Breakpoint inside Vs Code
4. Demo project overview
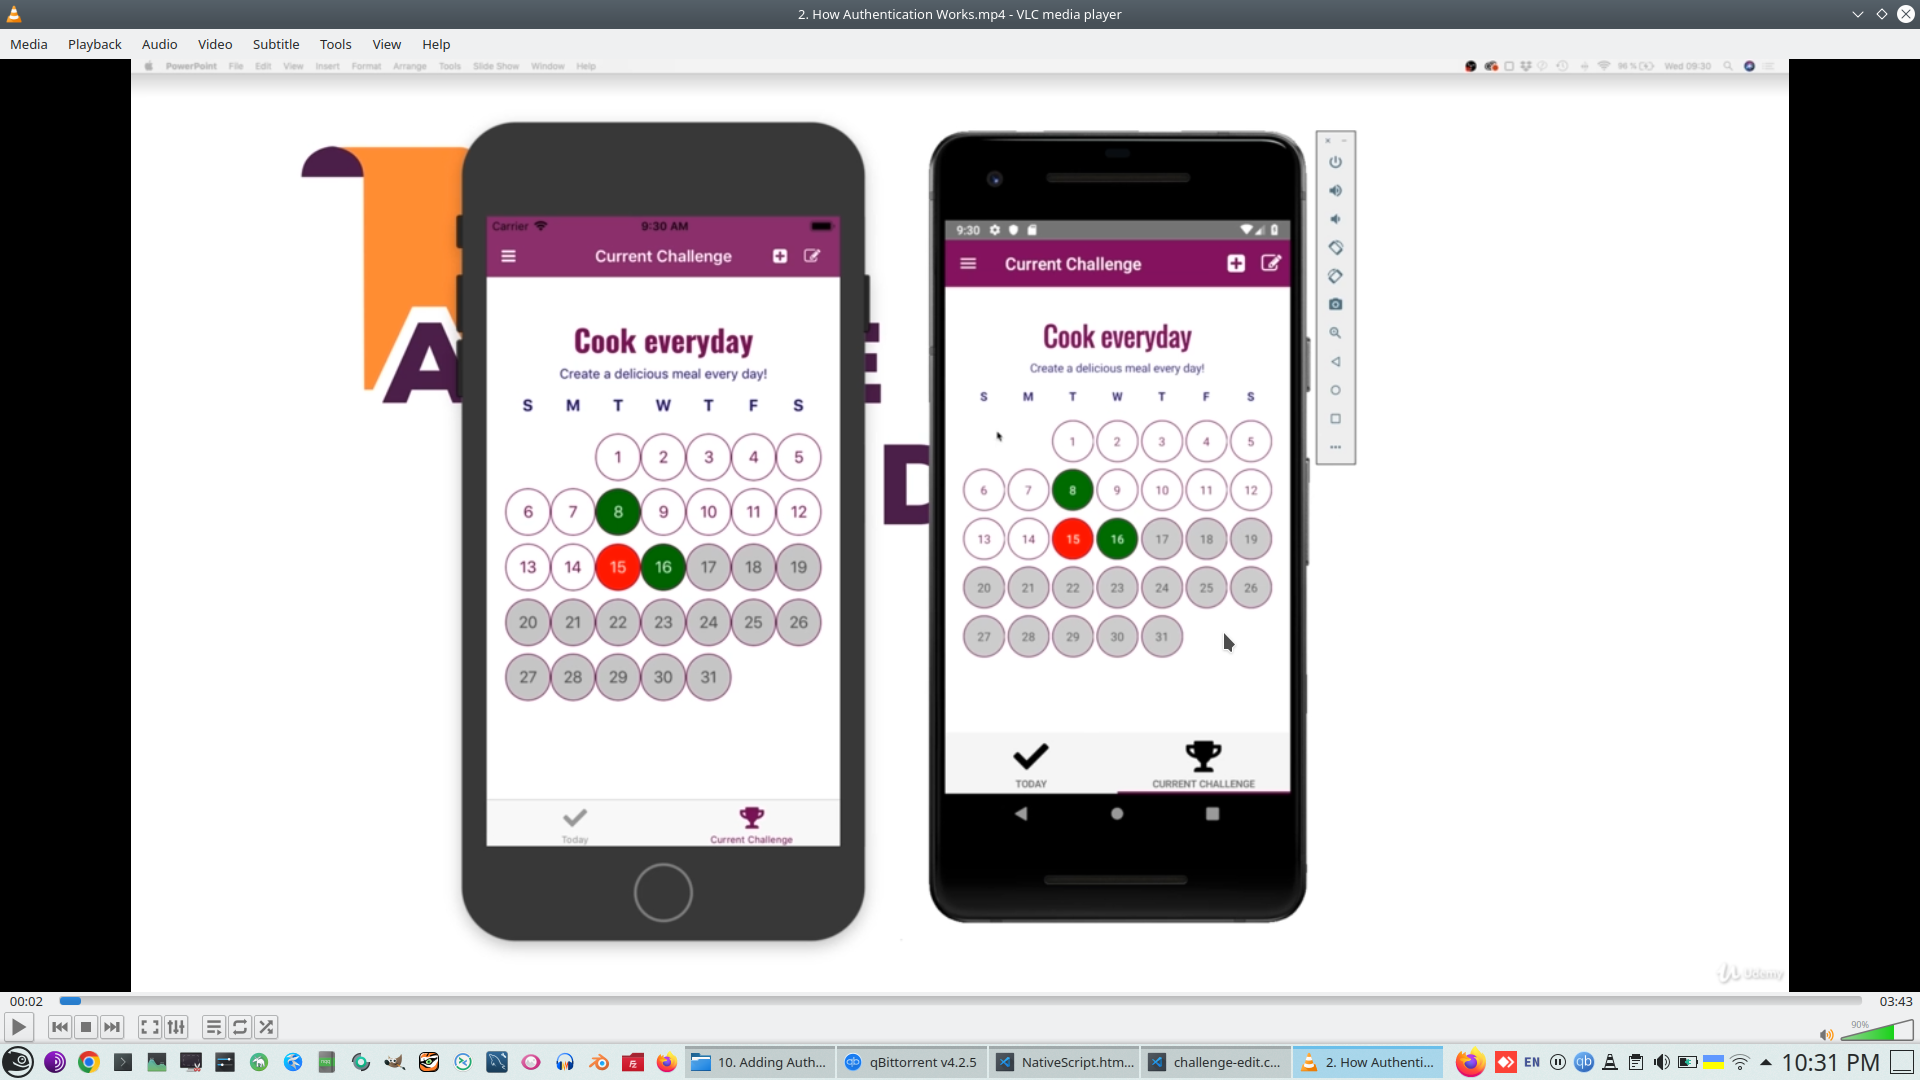

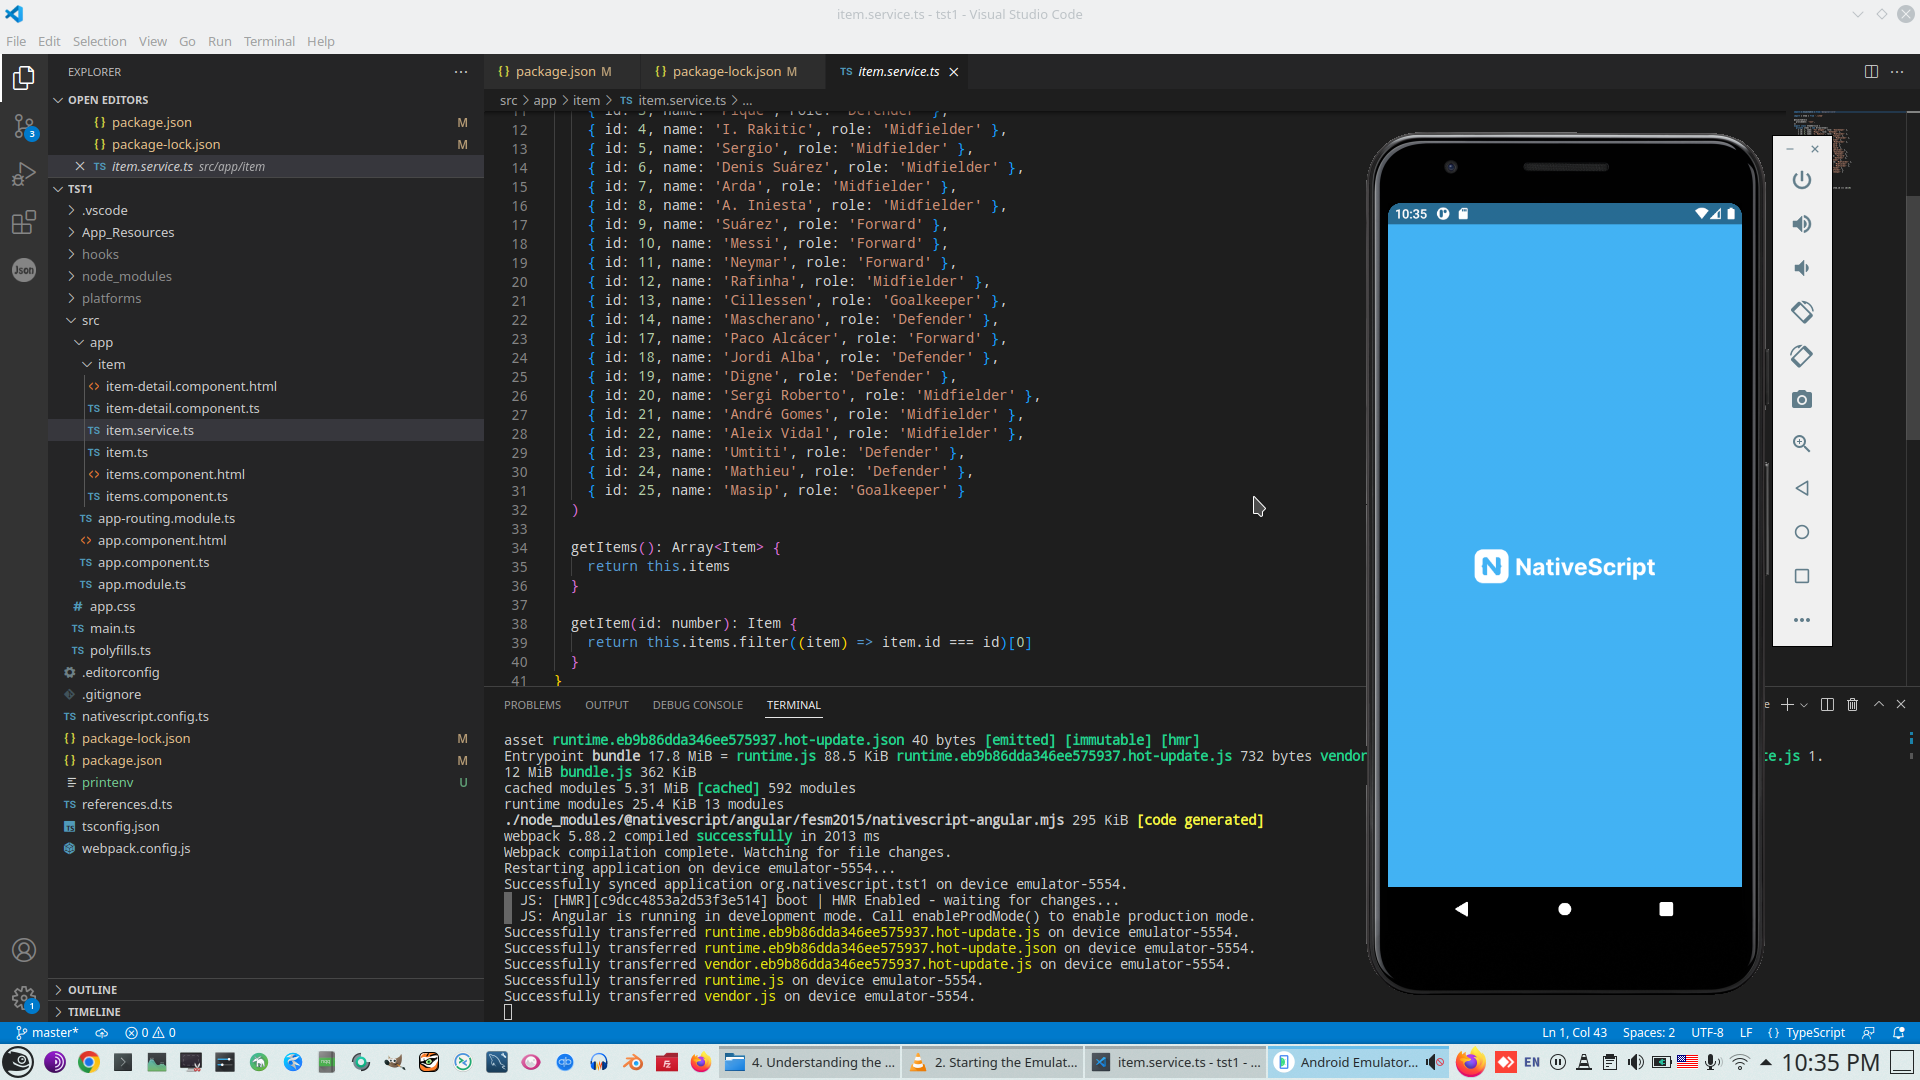

Details
Required library
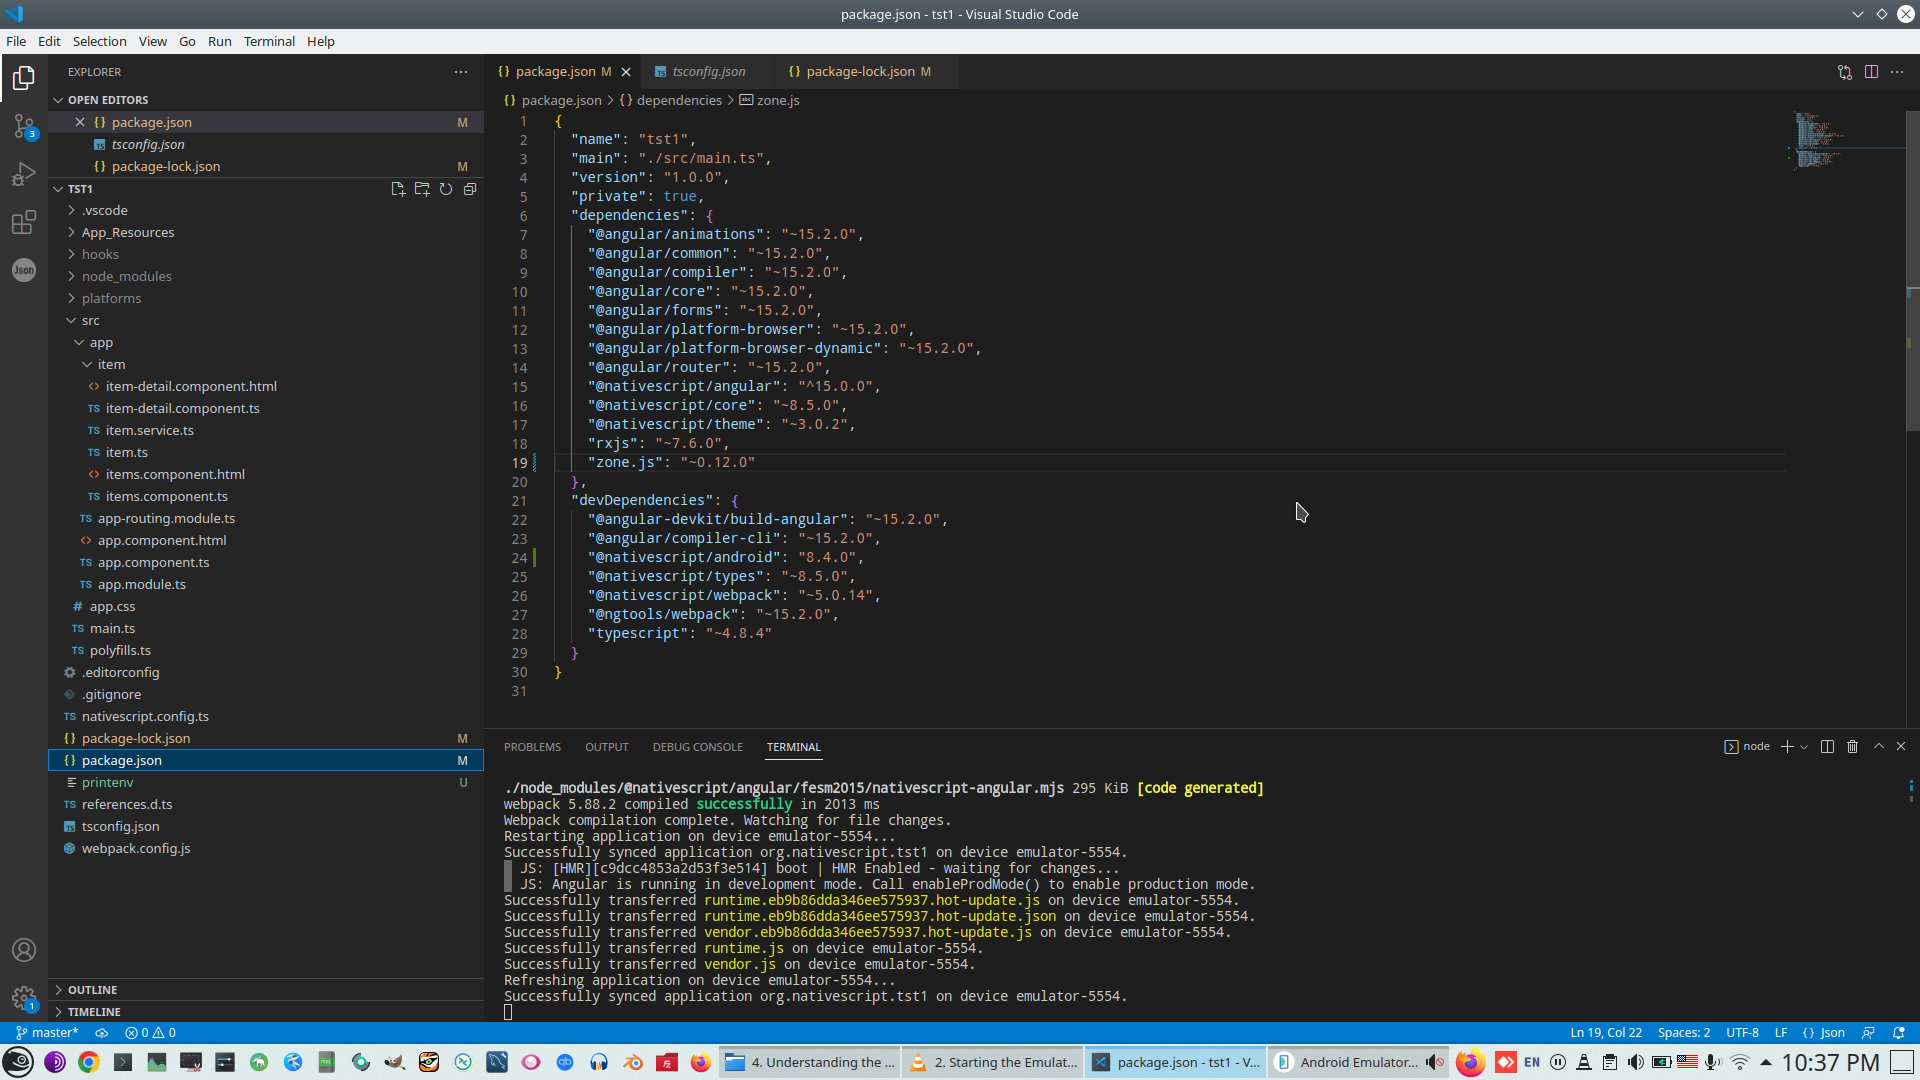
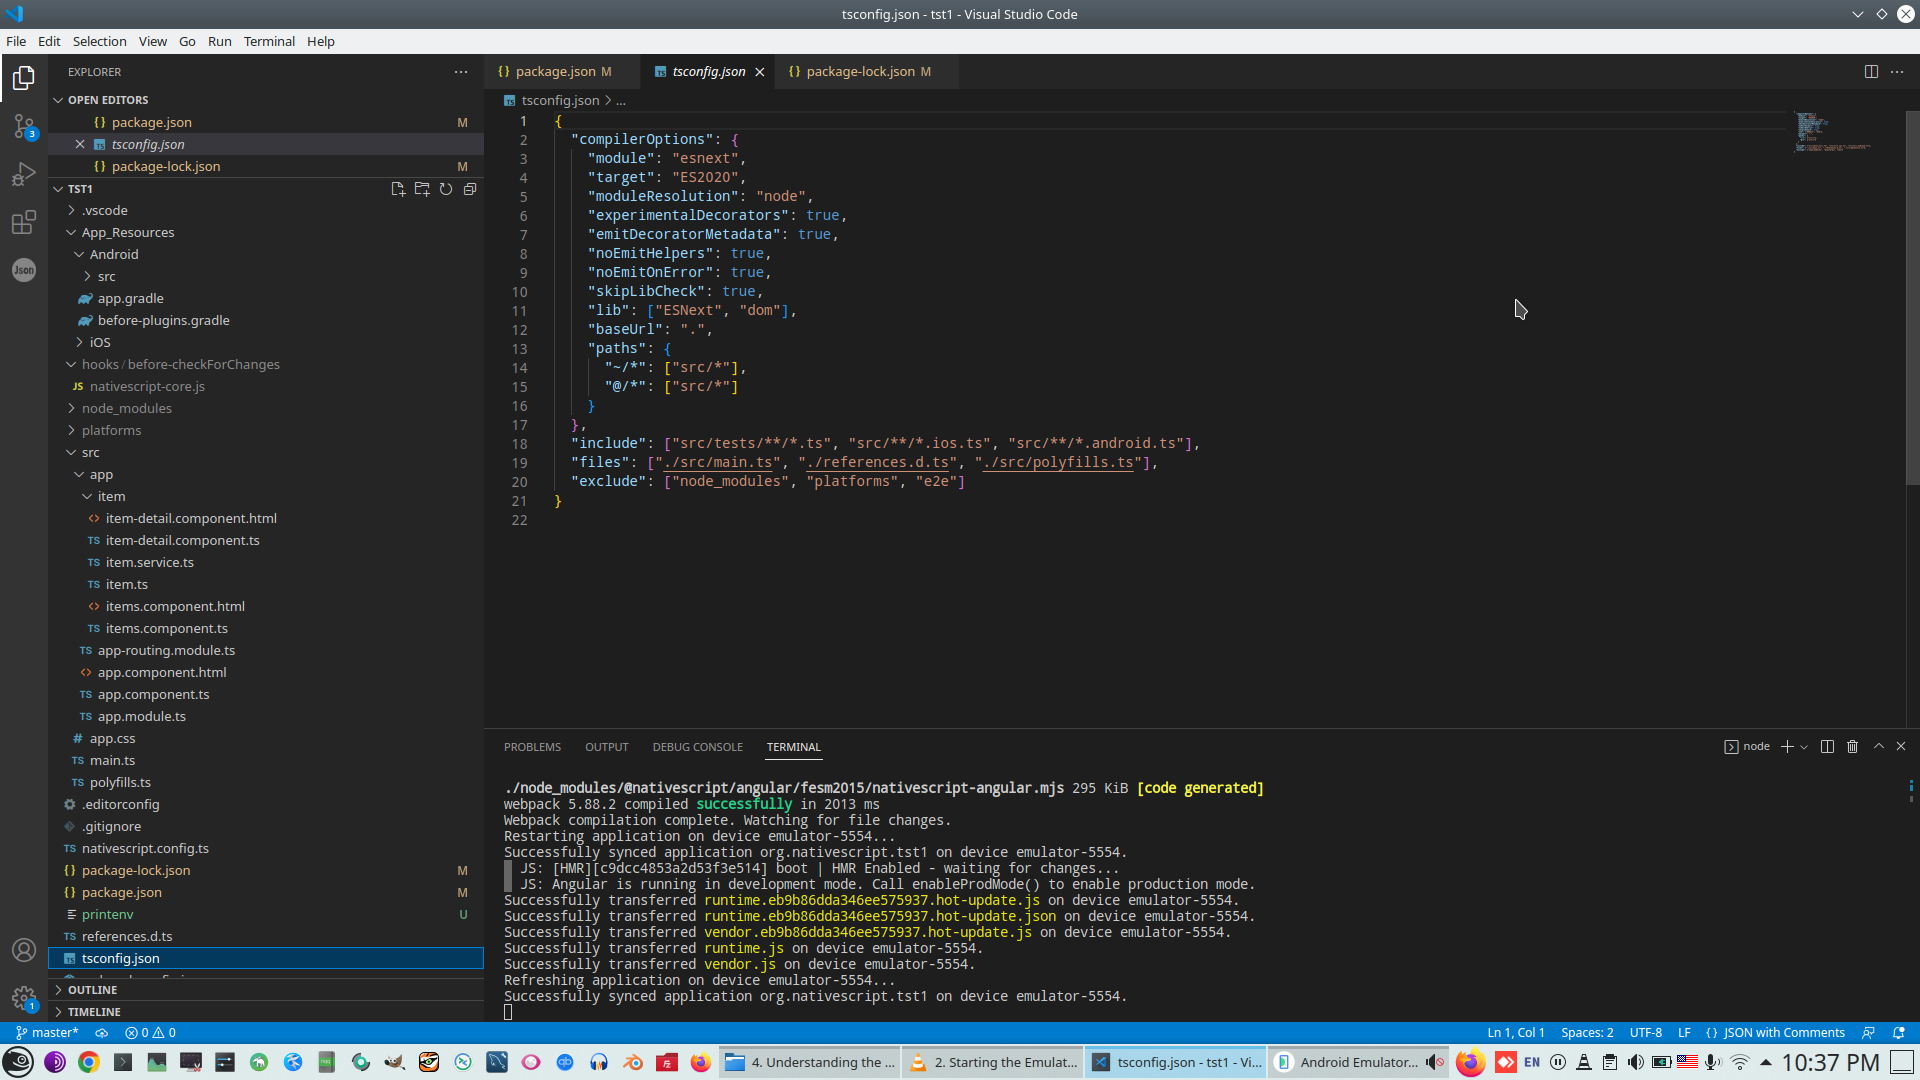
Compilation options - target and other
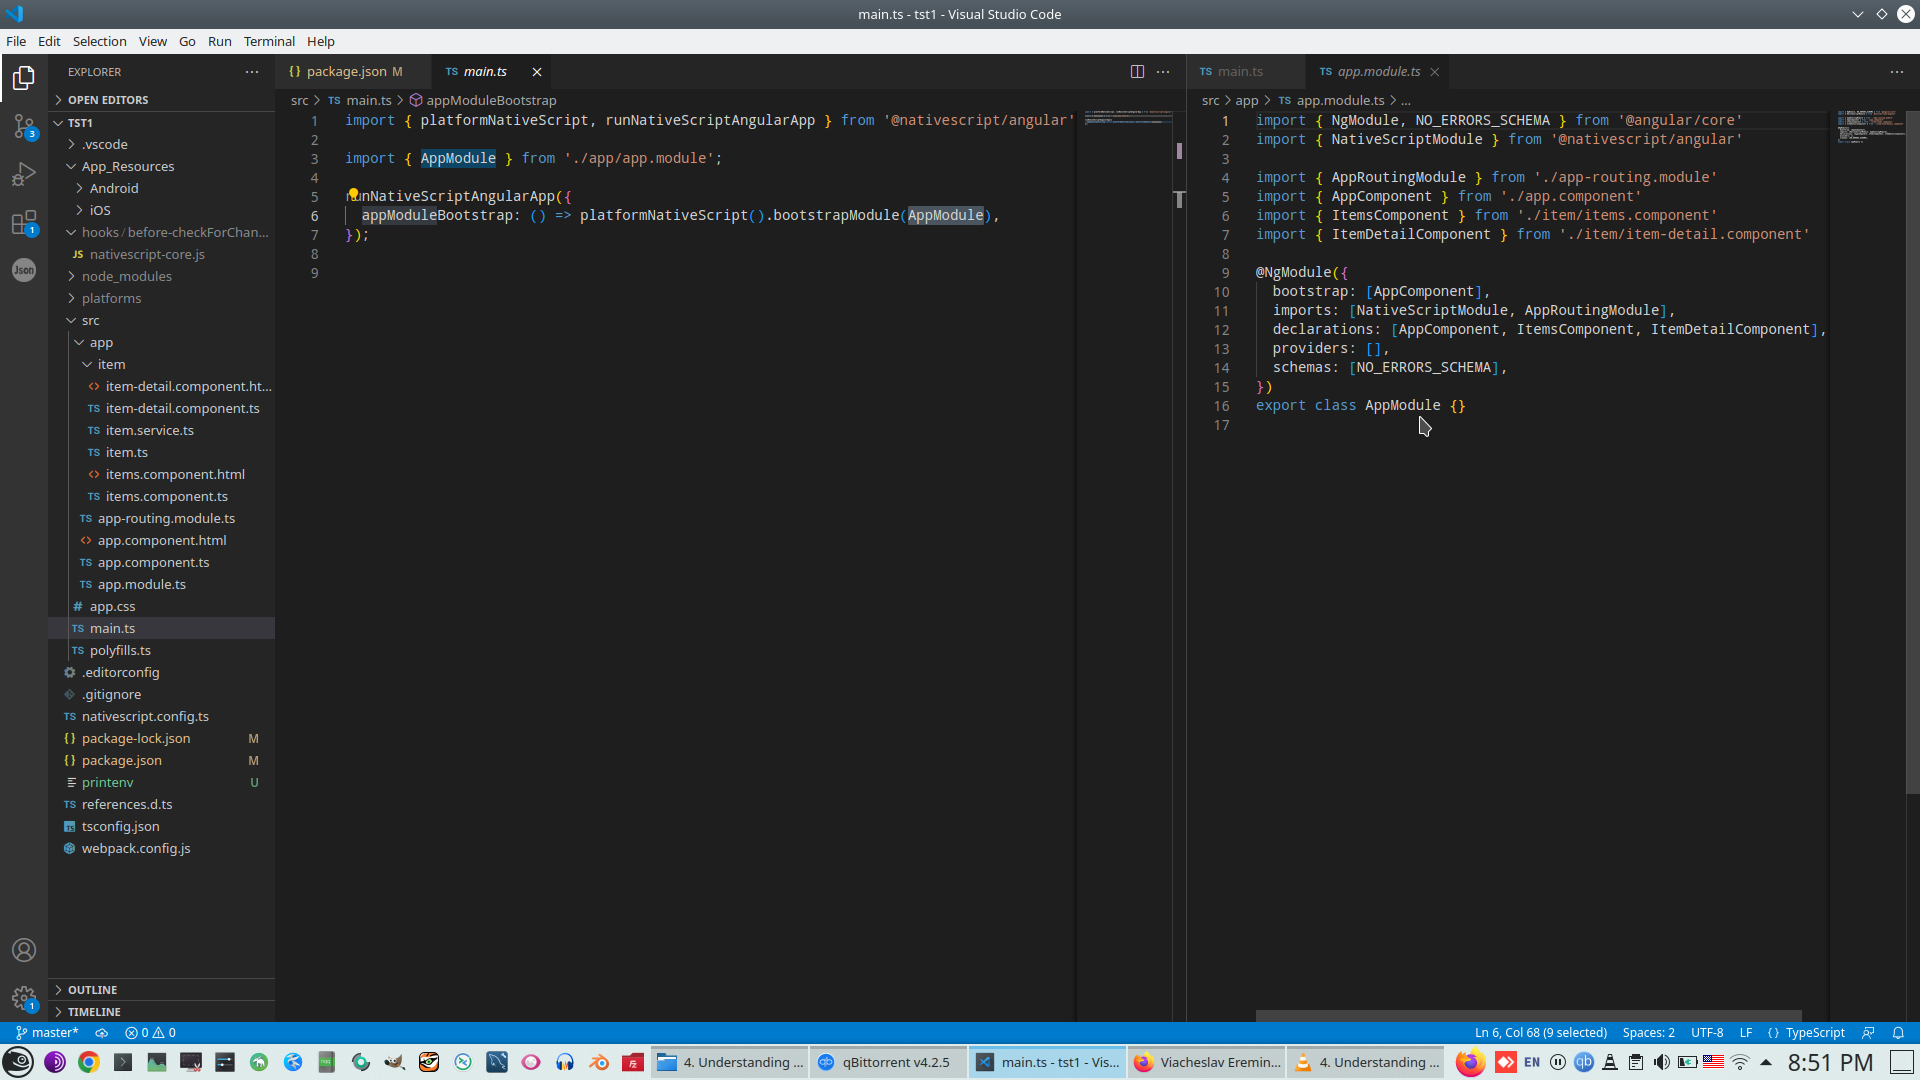
Starter
DevTools inspector
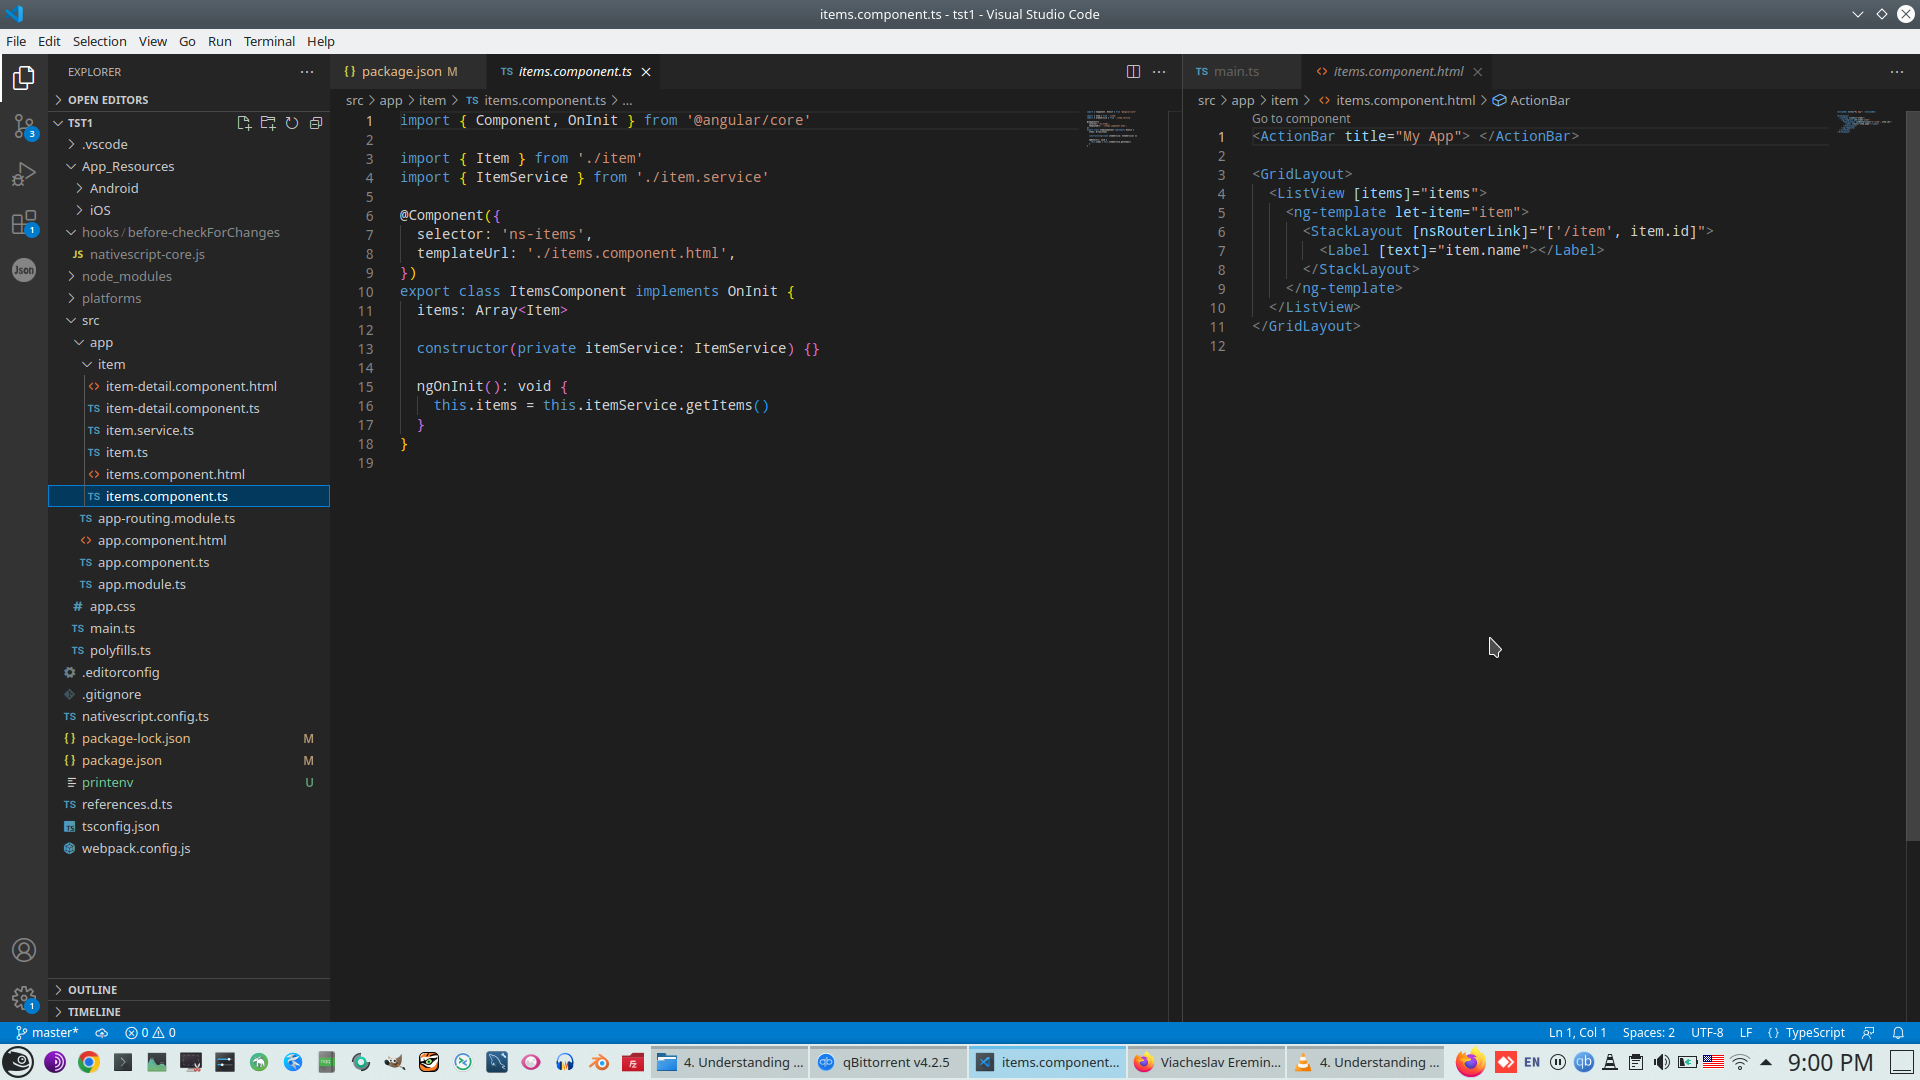
Router and main component
Item component and router link
Service to generate data
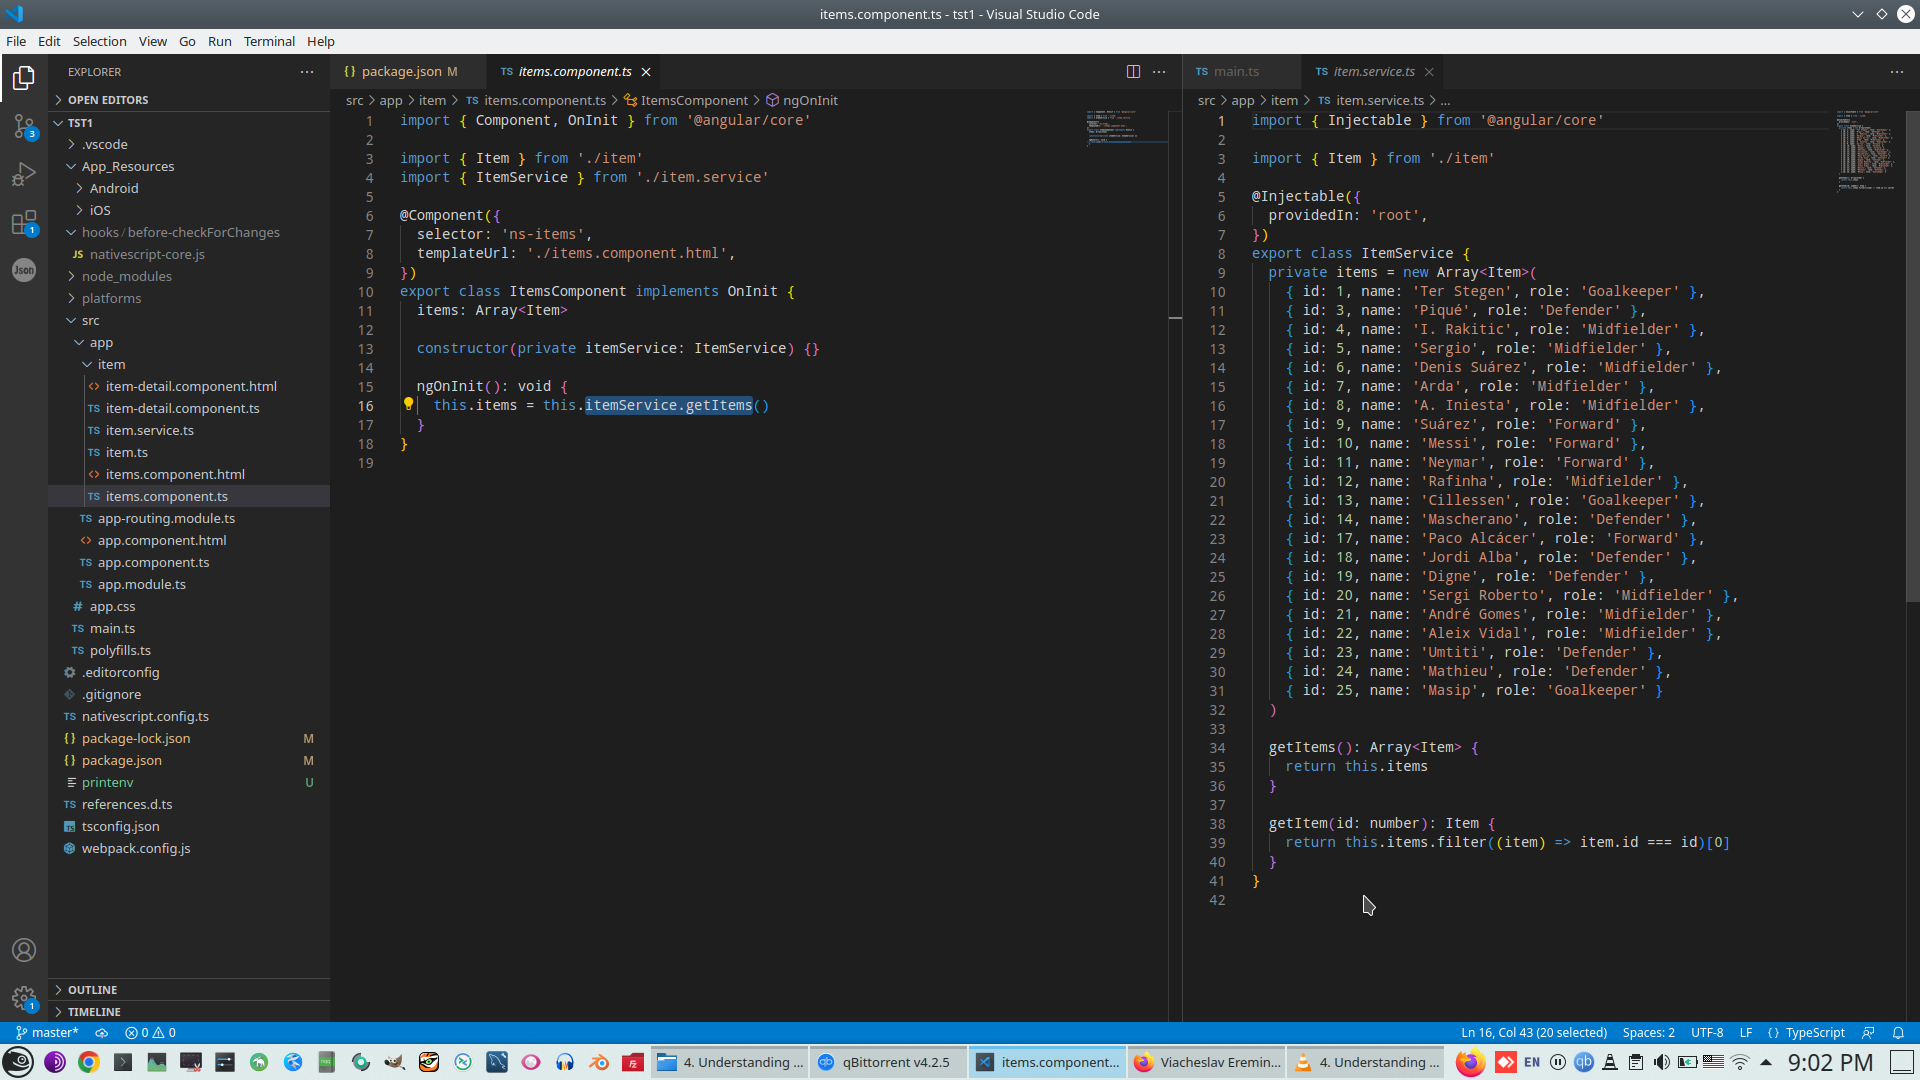
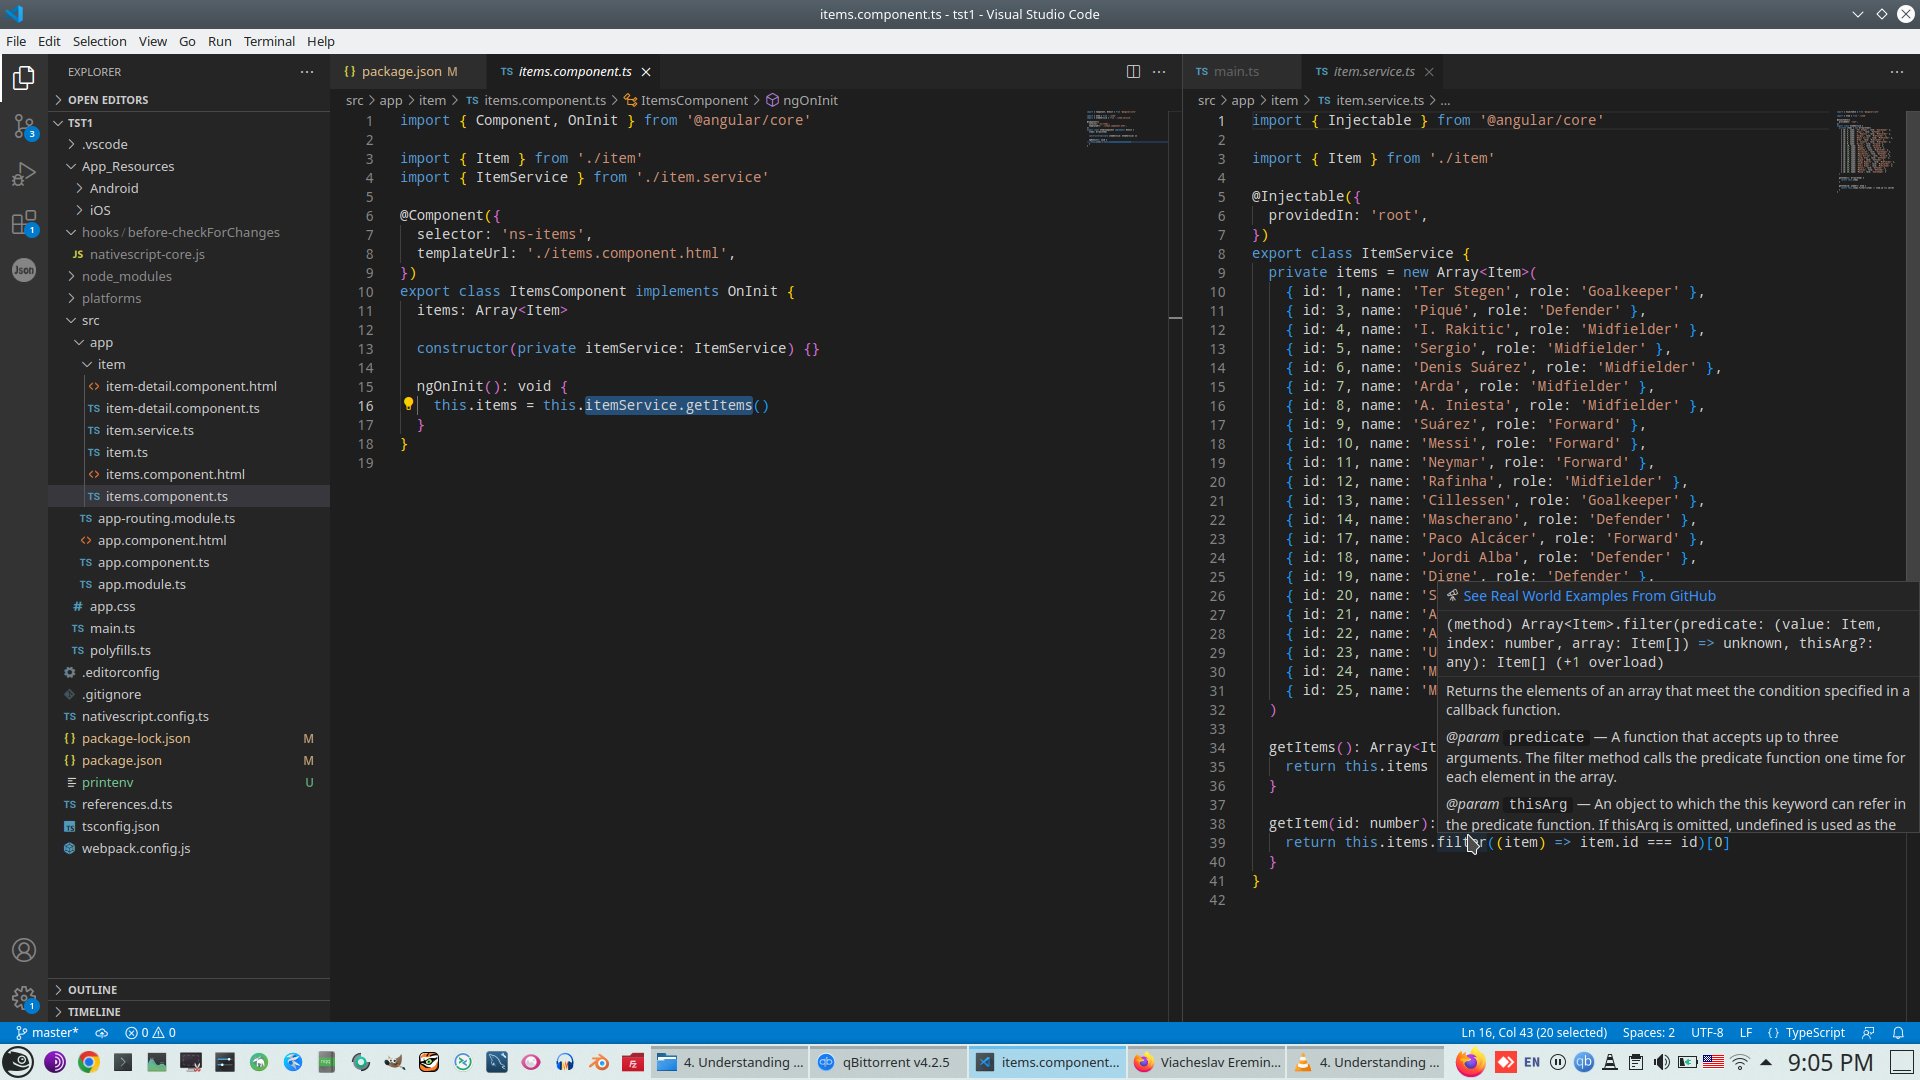
Array.Filter
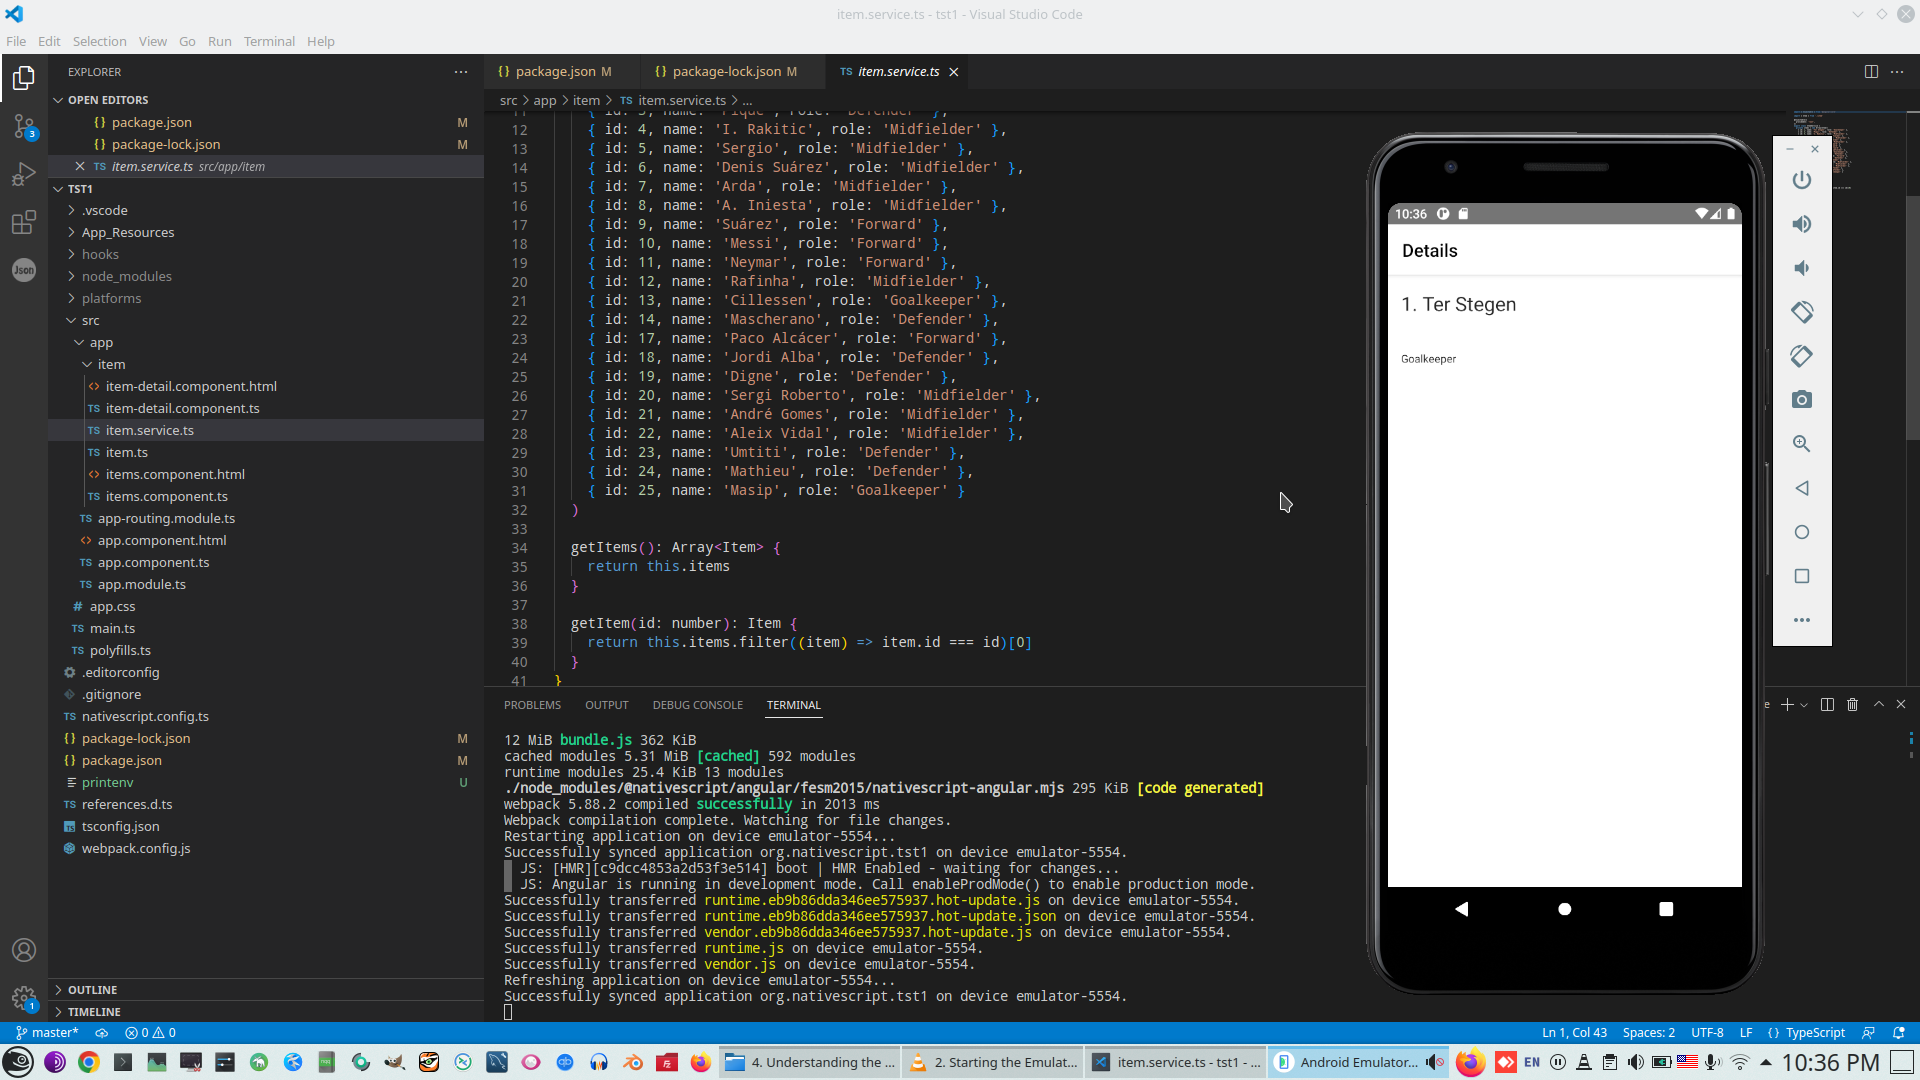
Detail component
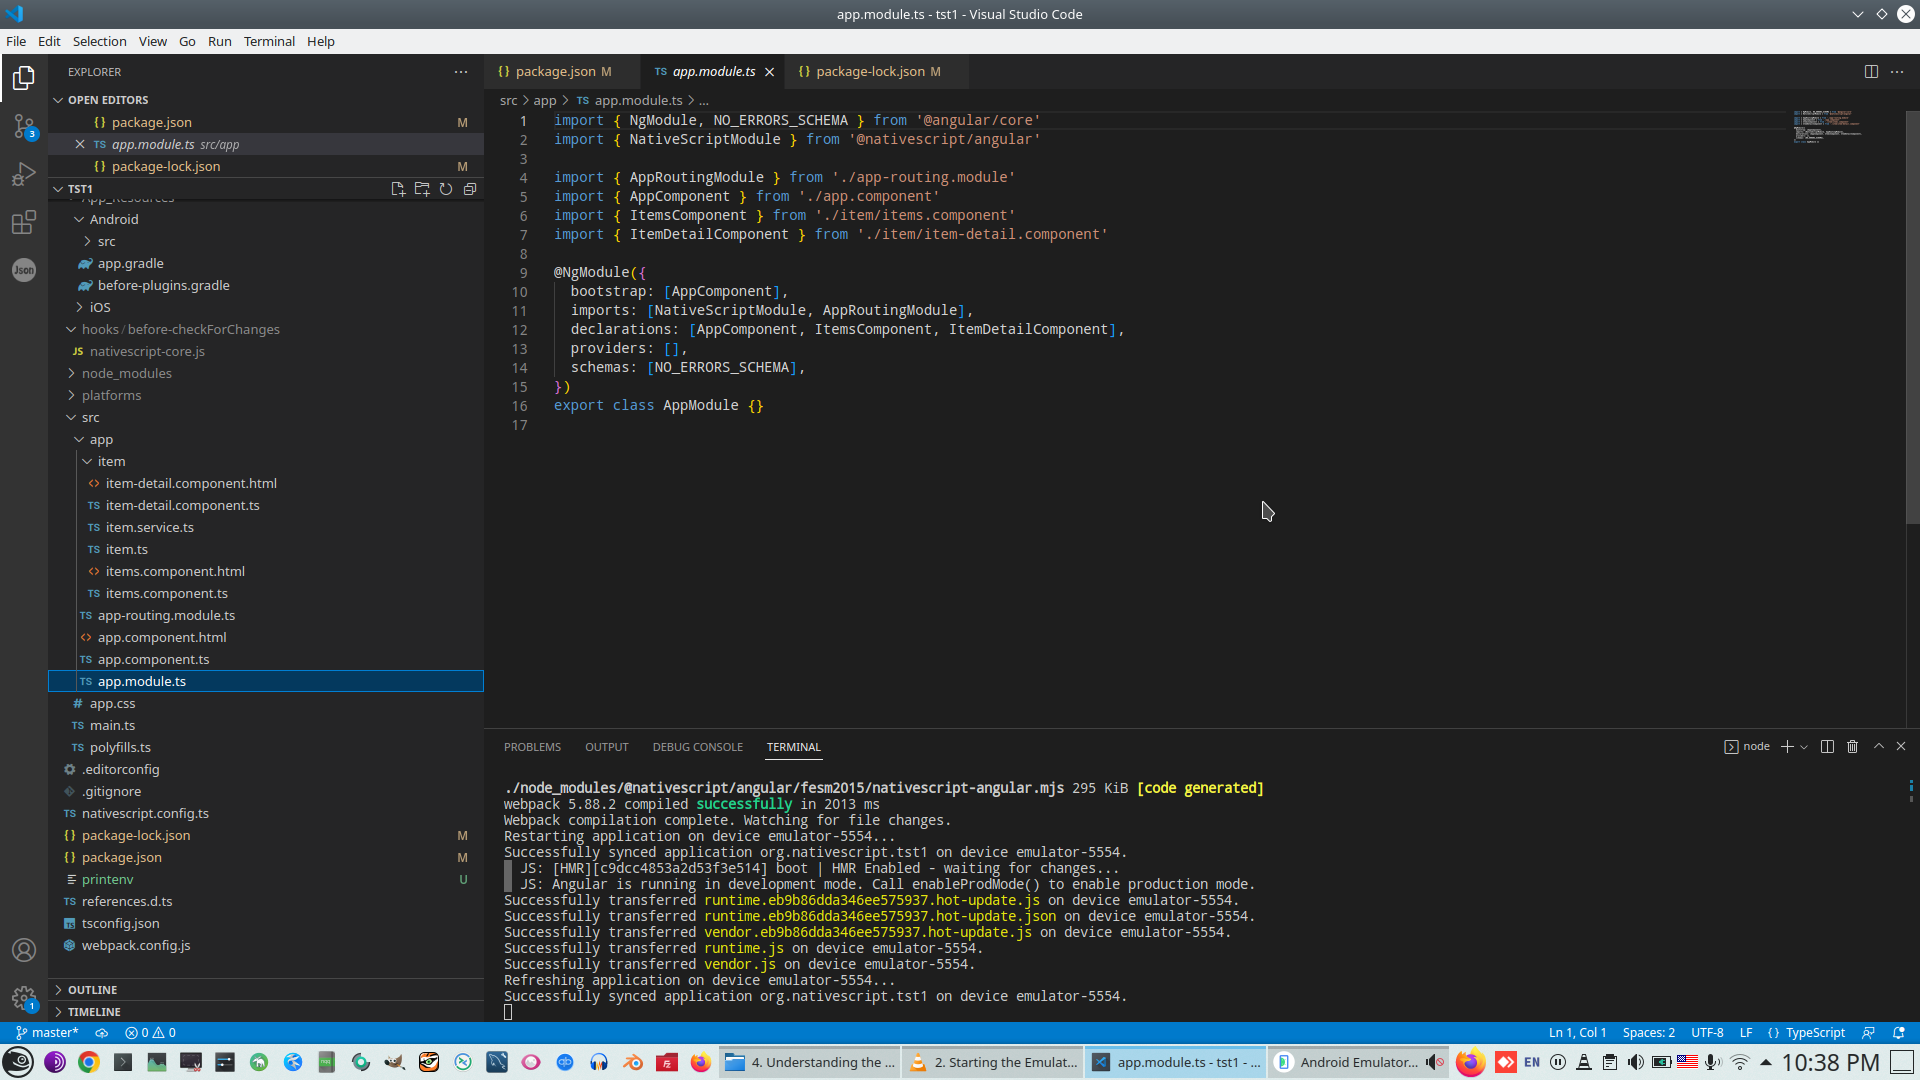
Bind all component together
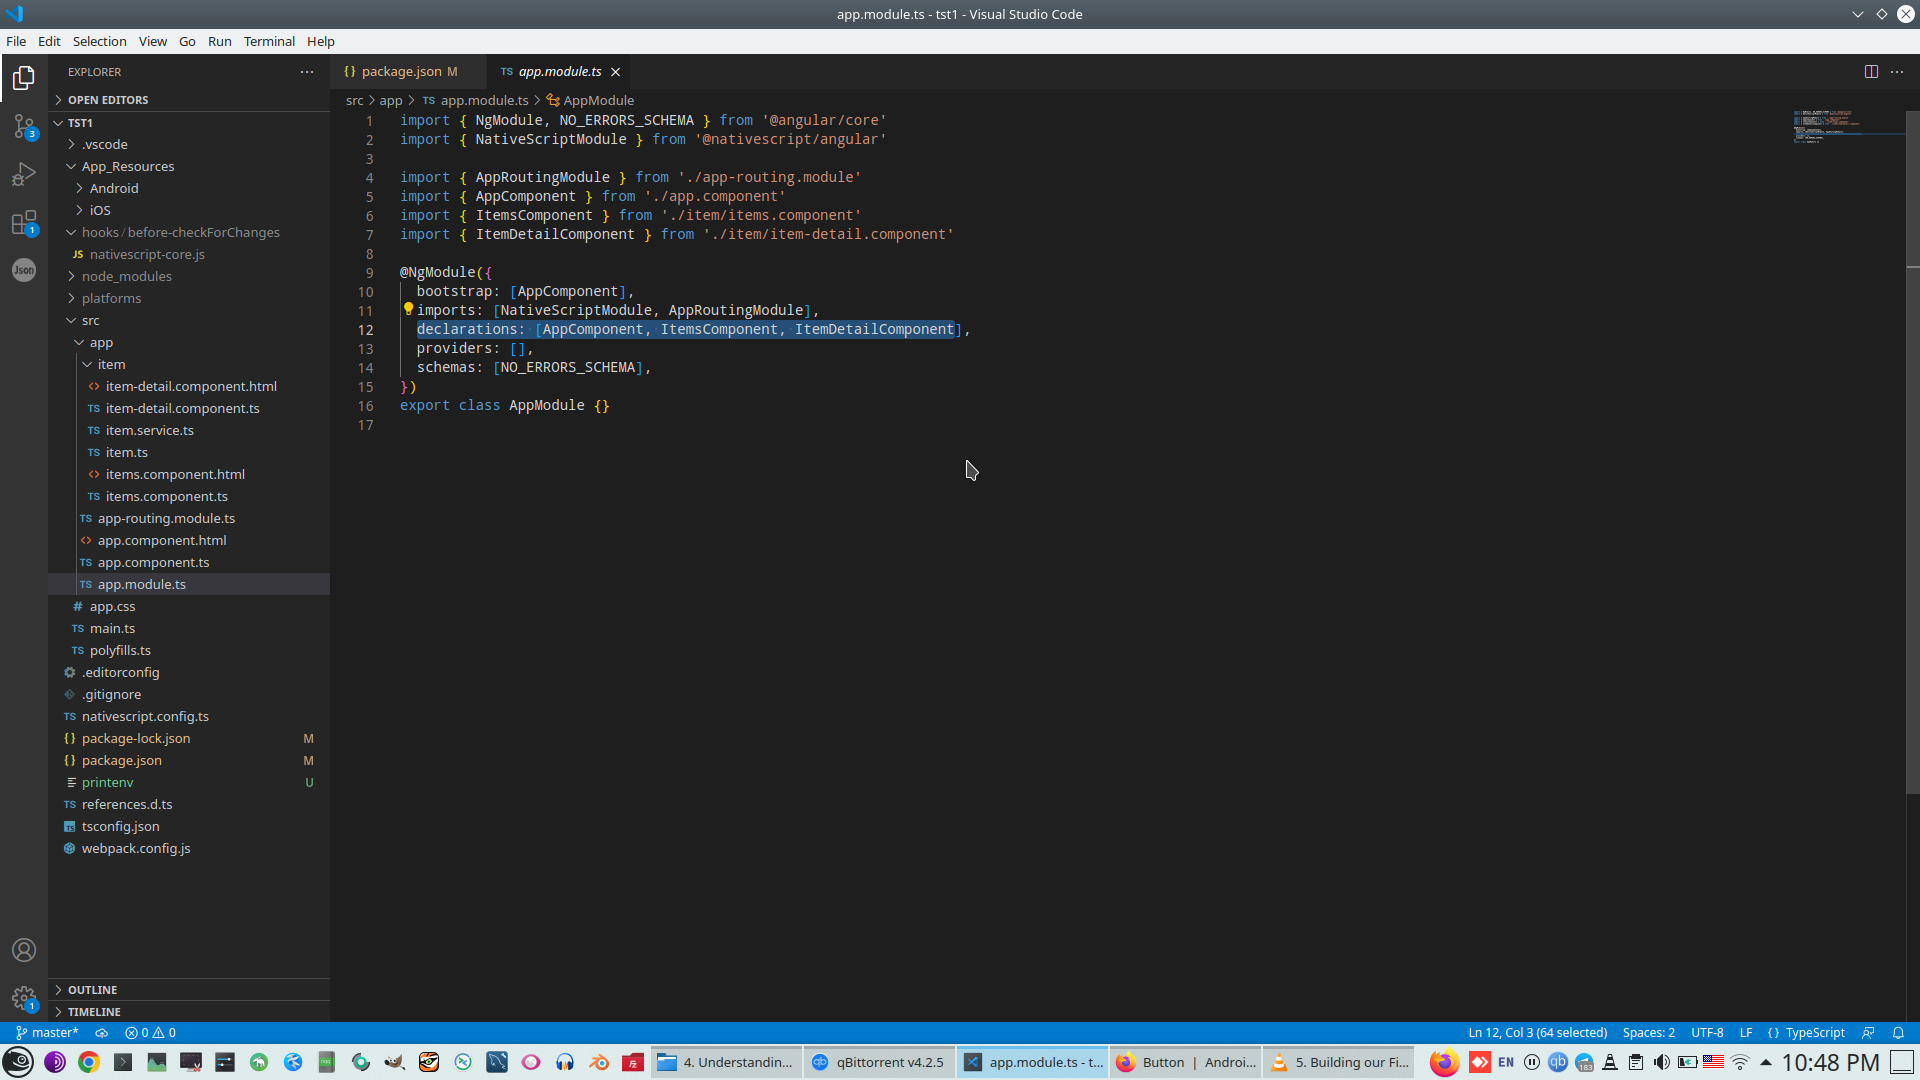
This is way to avoid Angular engine finding Html and checking it
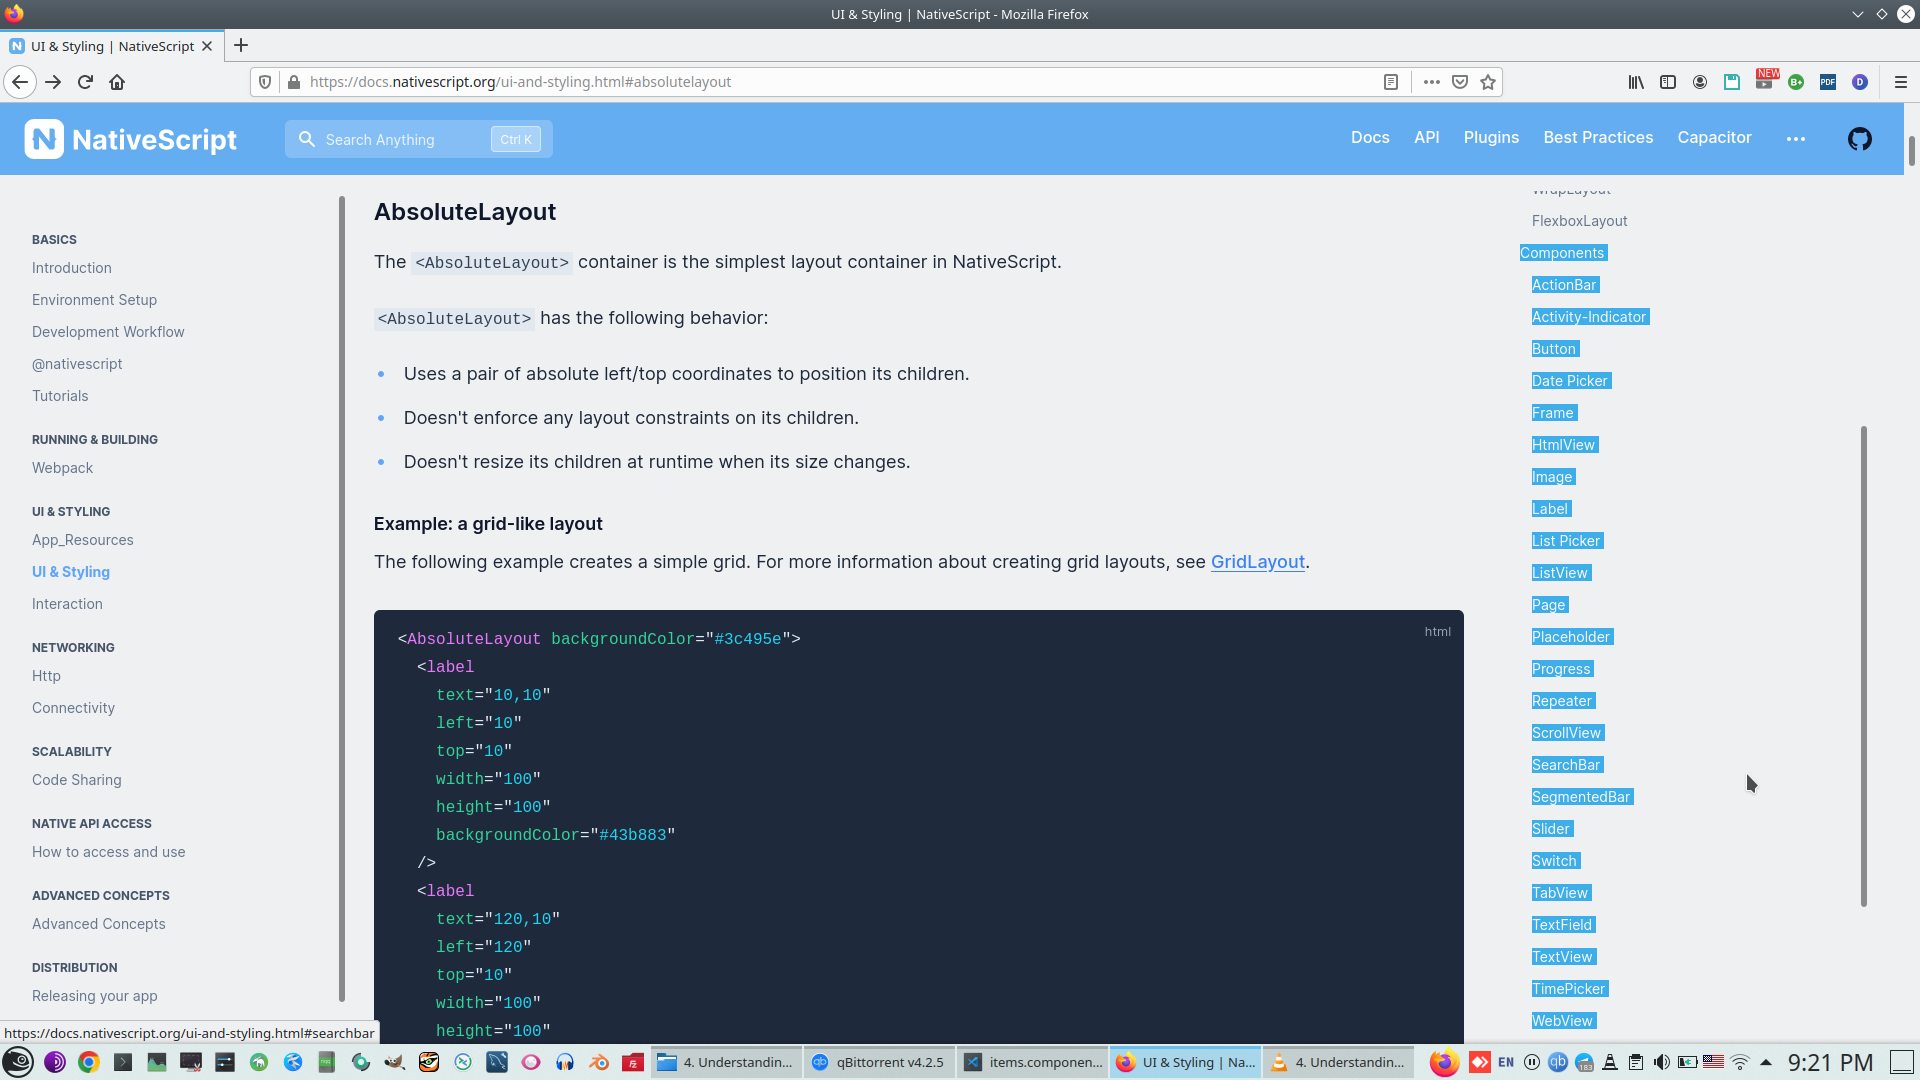
5. NS Layout is position, Layout has no refletion to Android and IOS, its only absttaction.

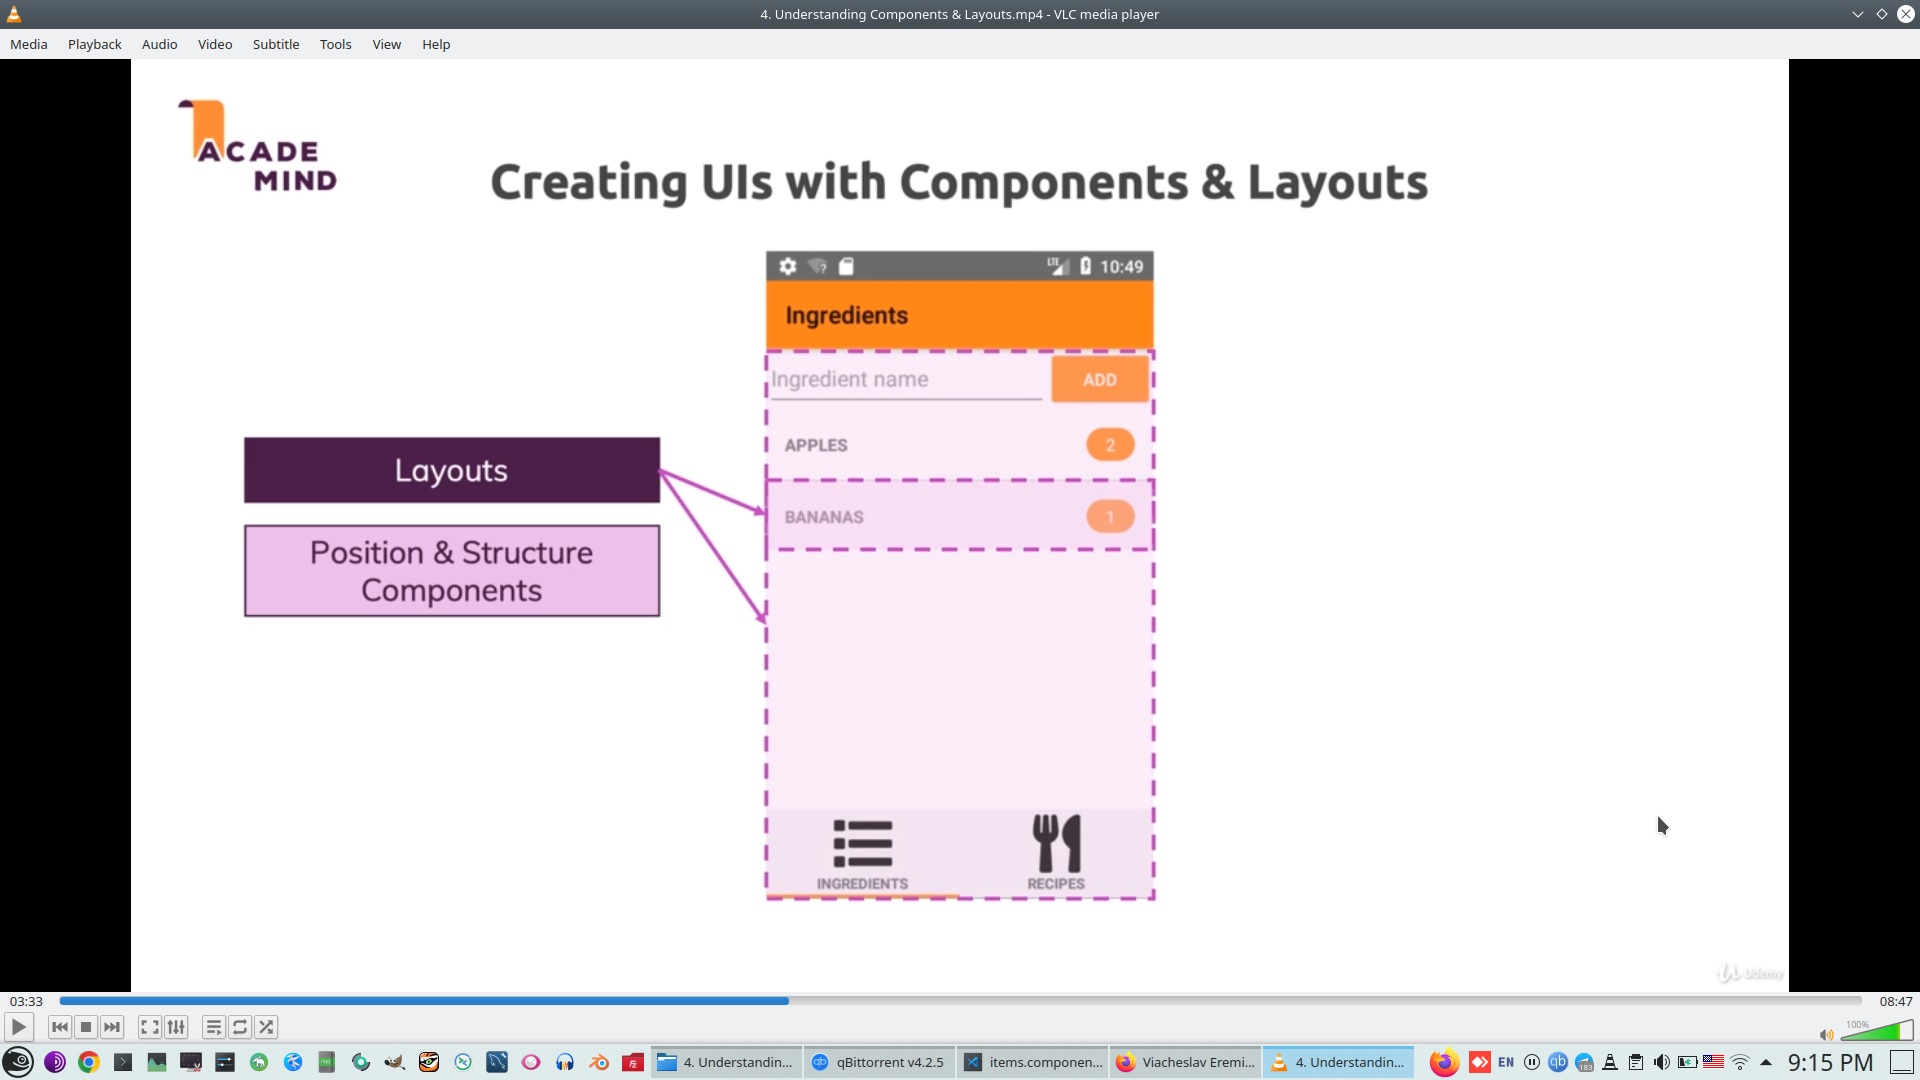
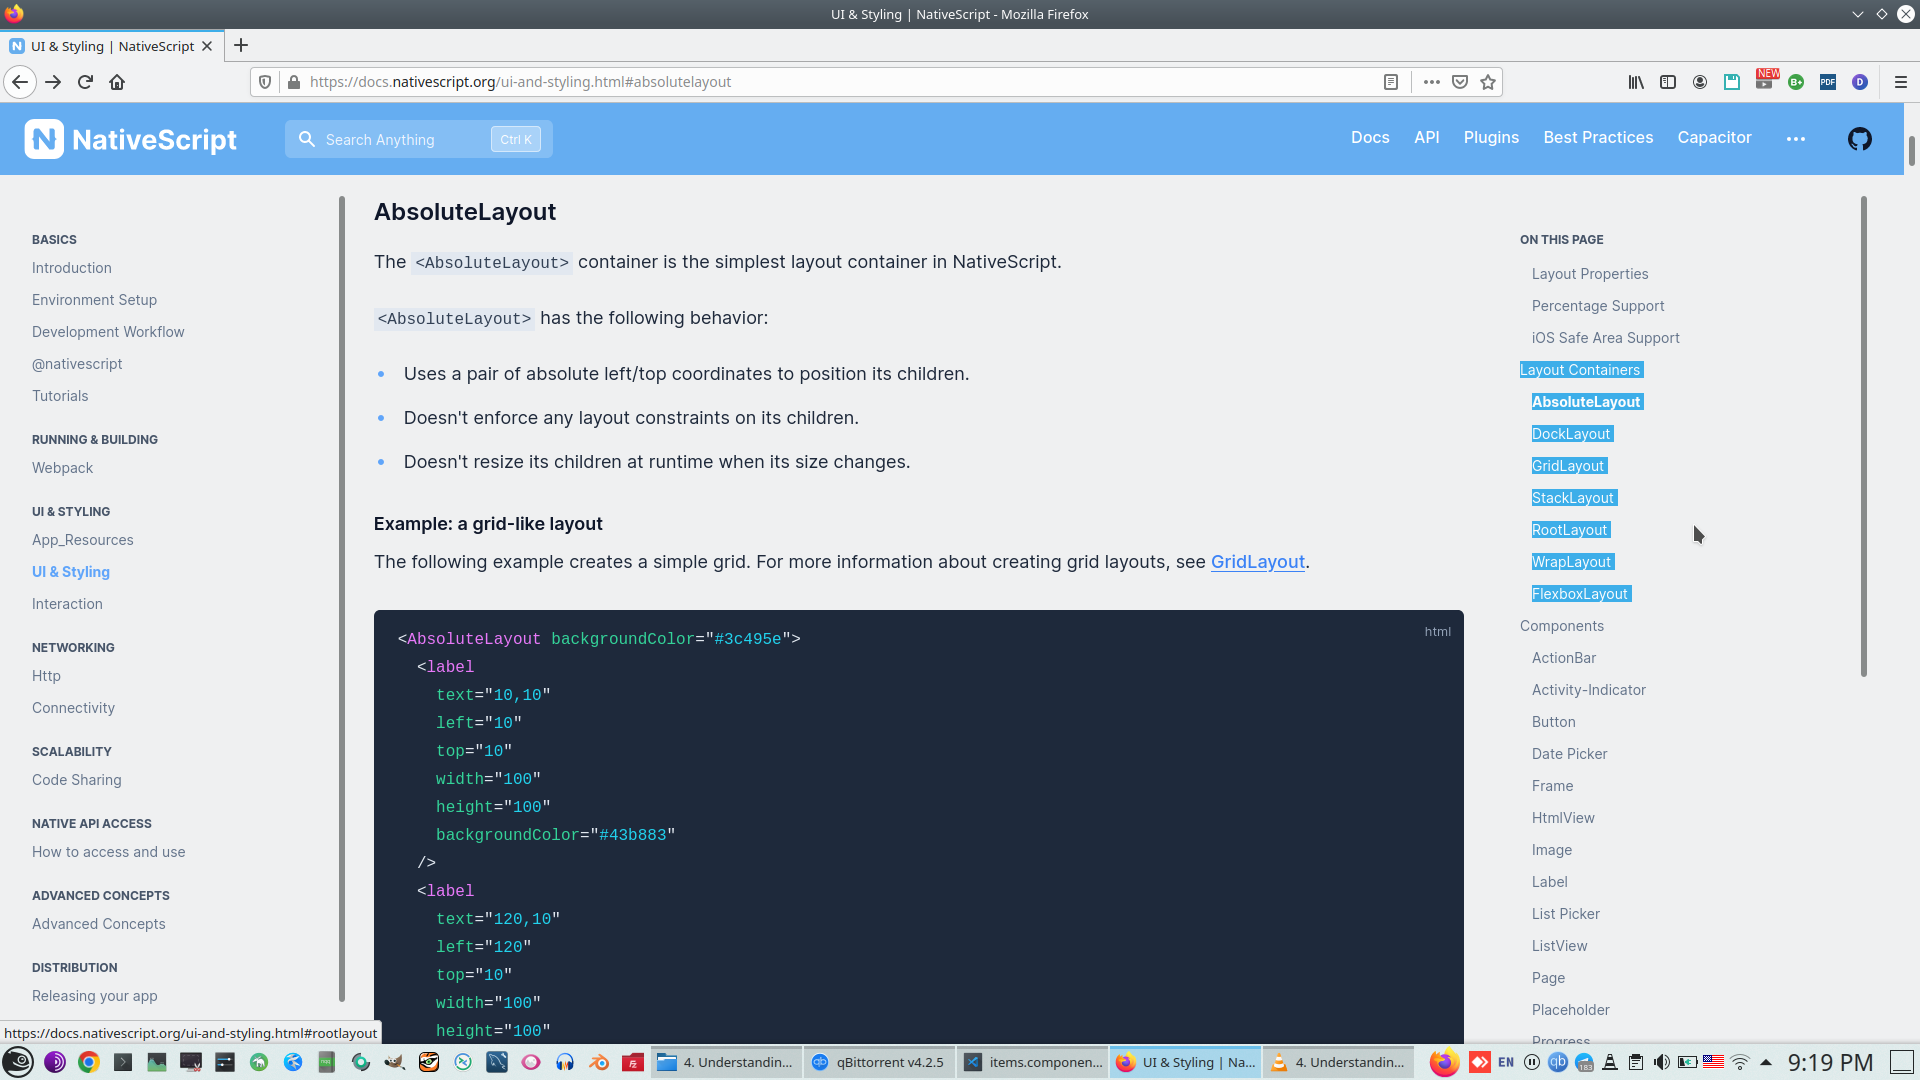
Layout types
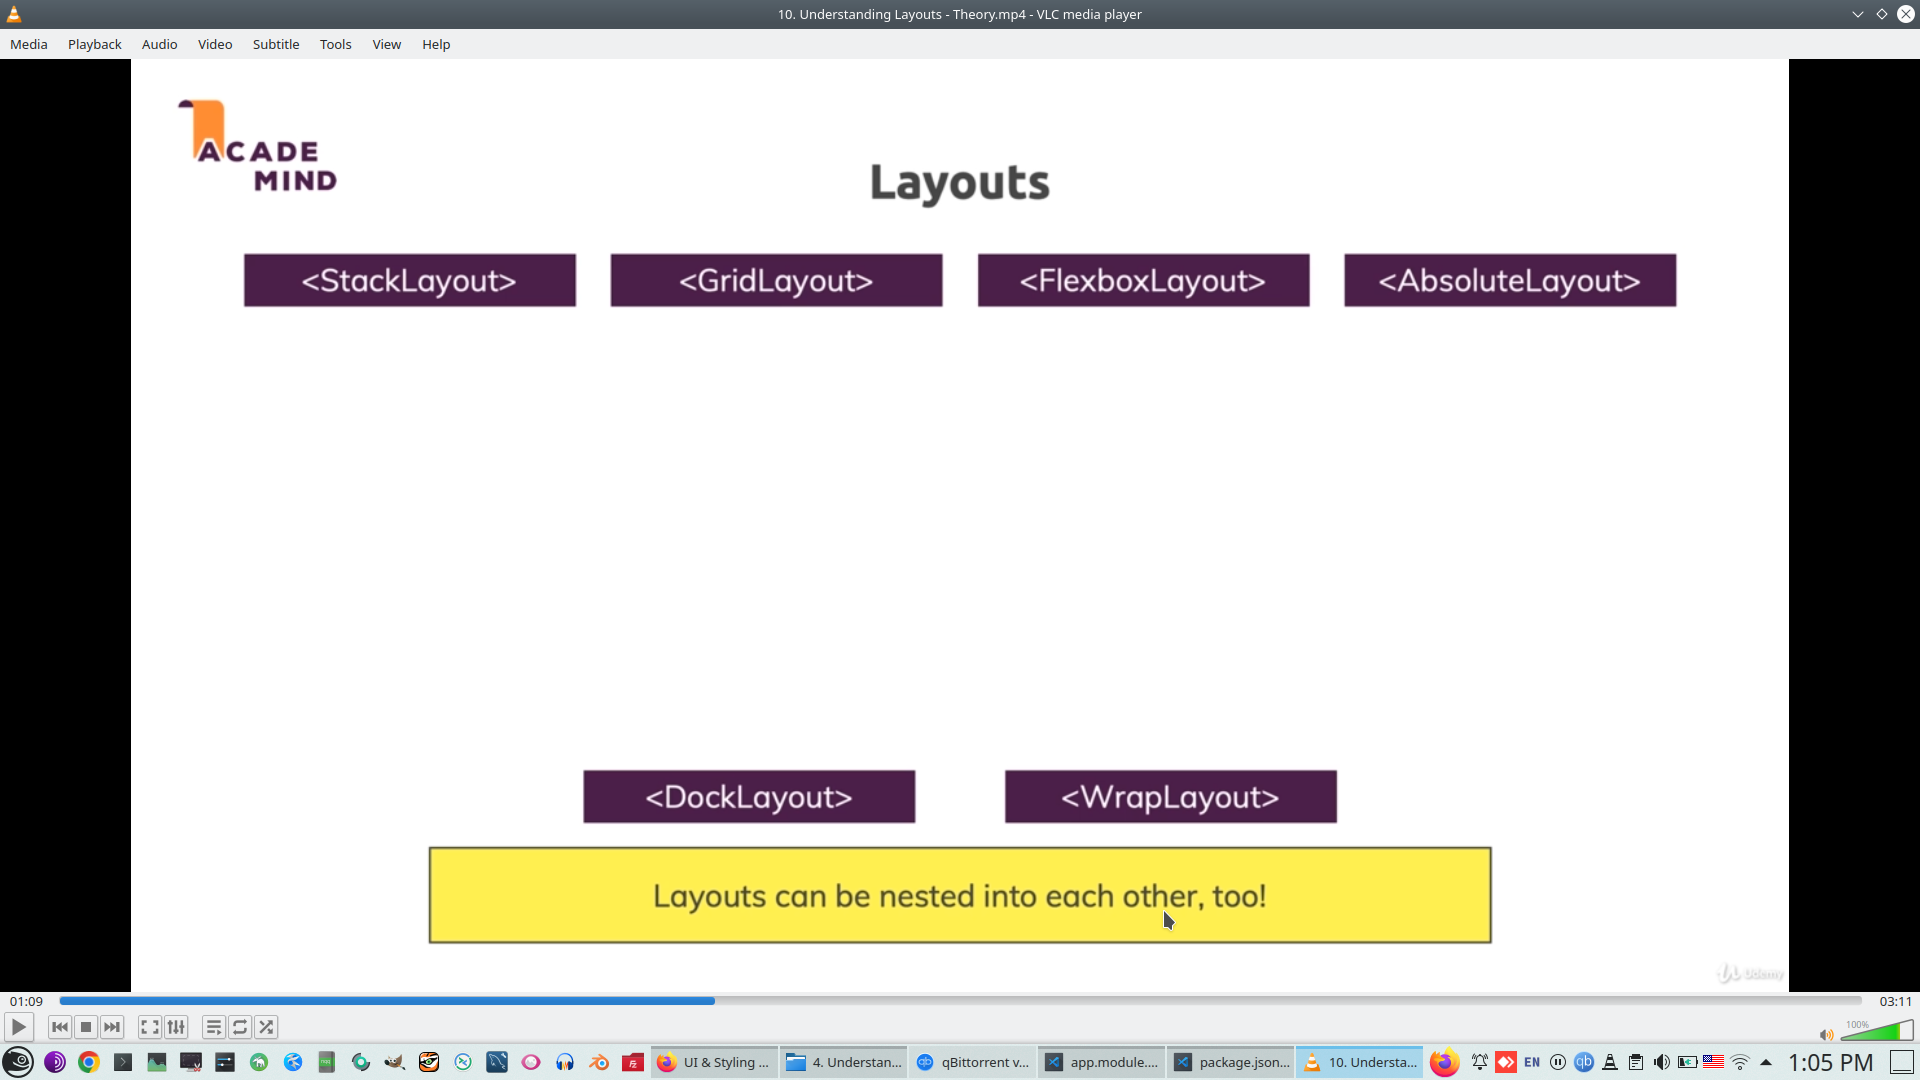
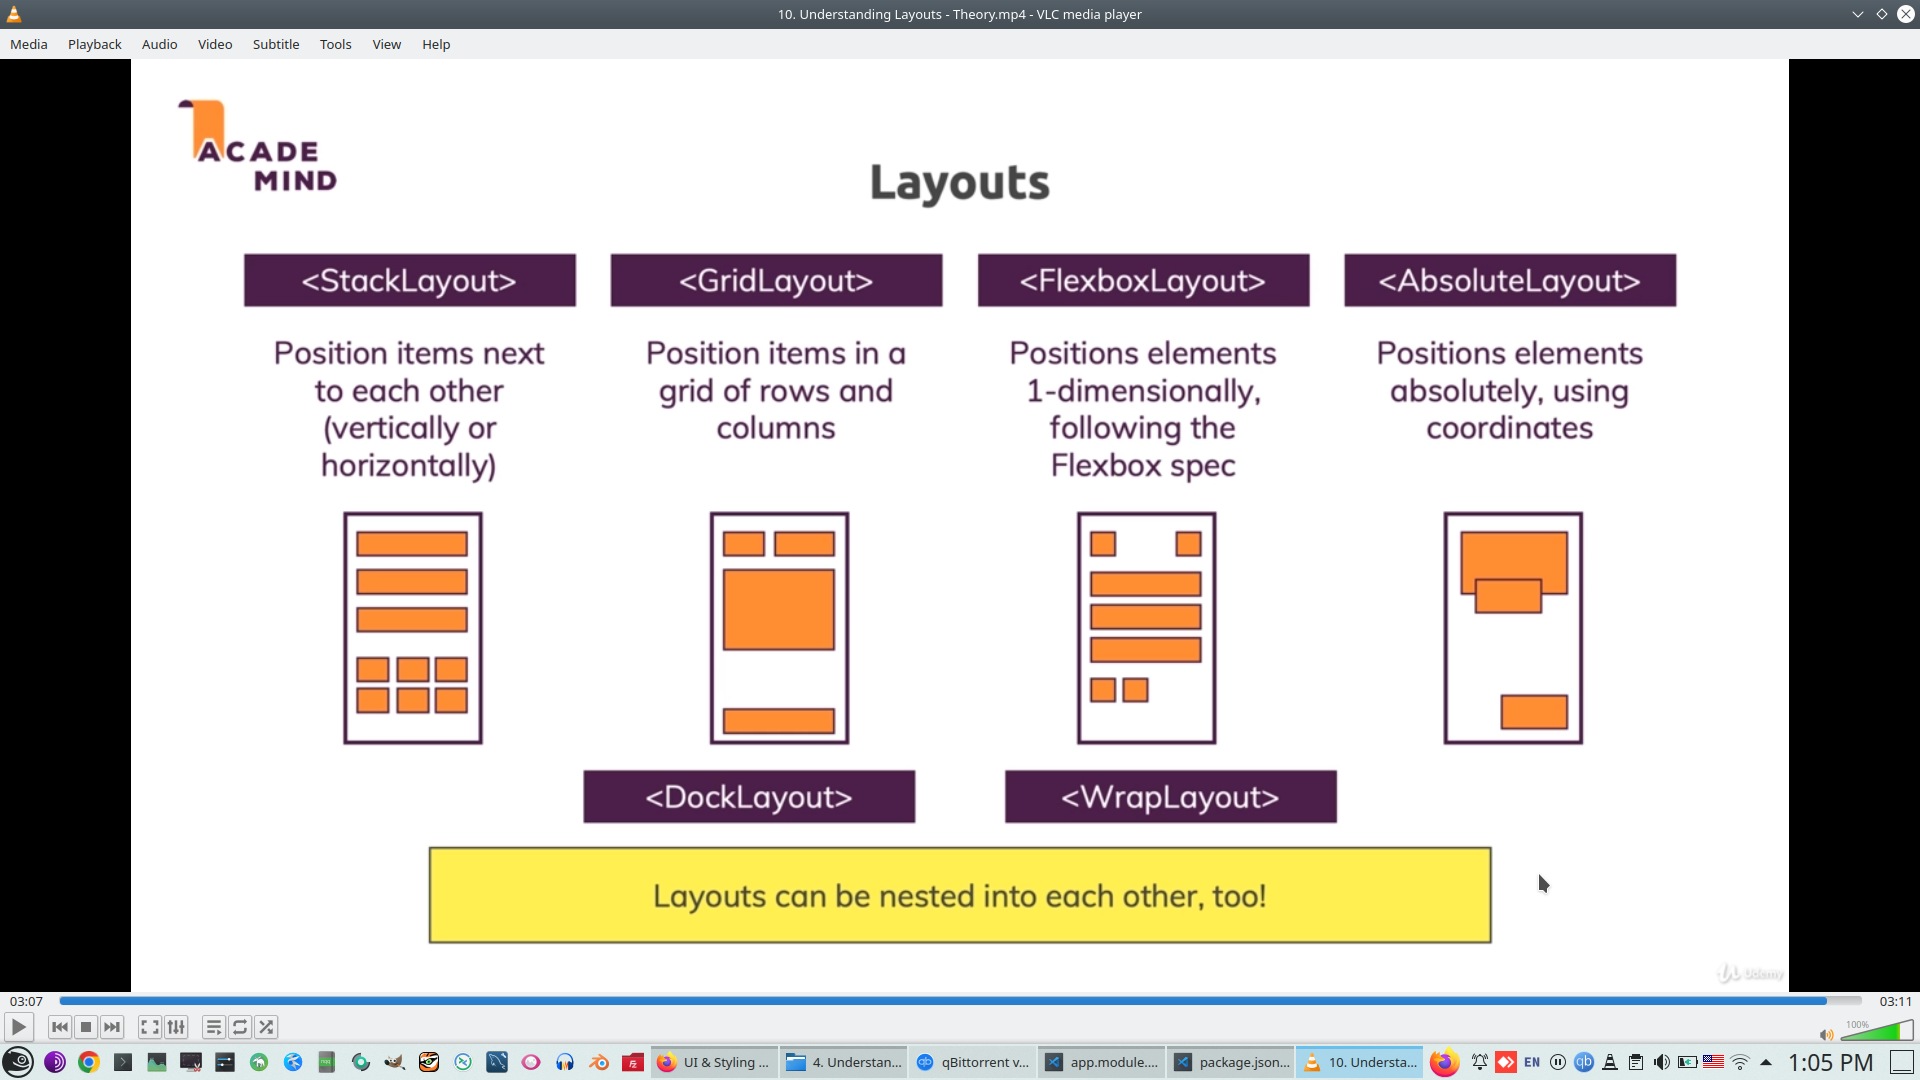
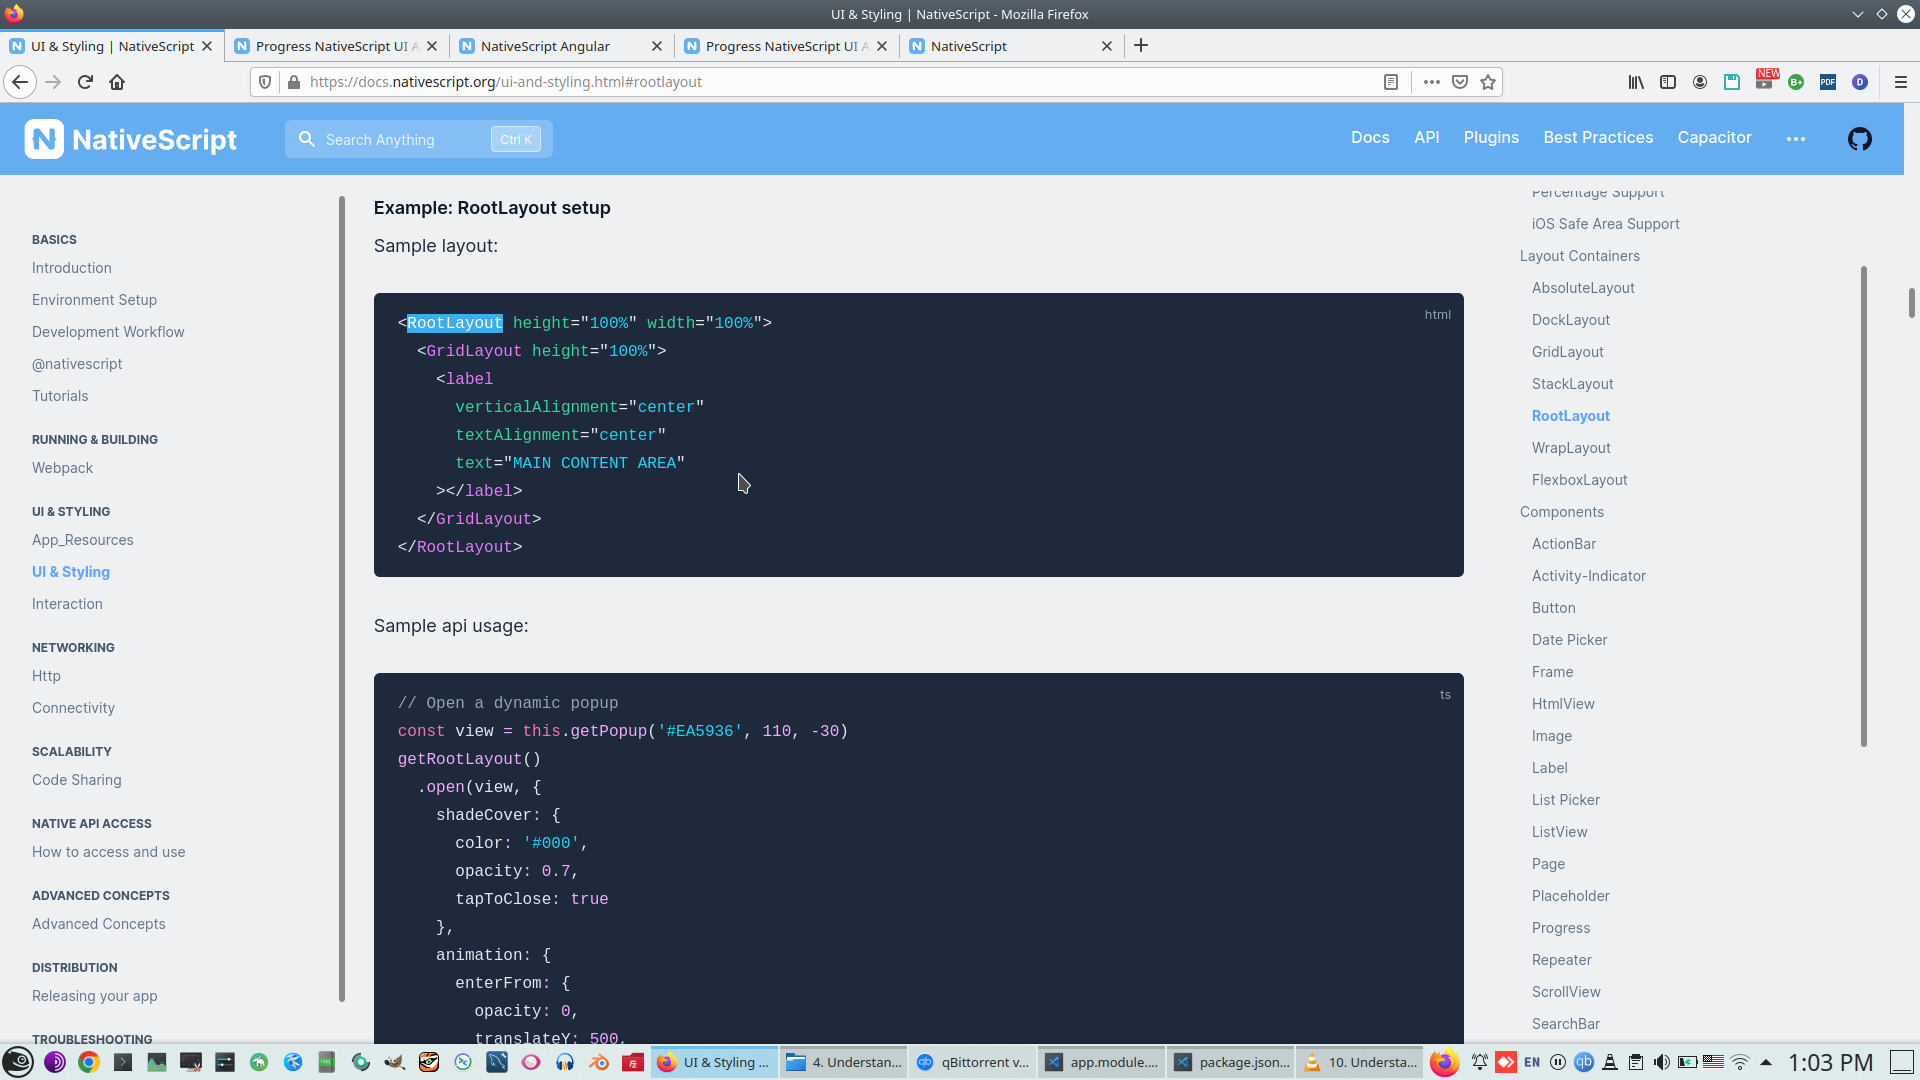
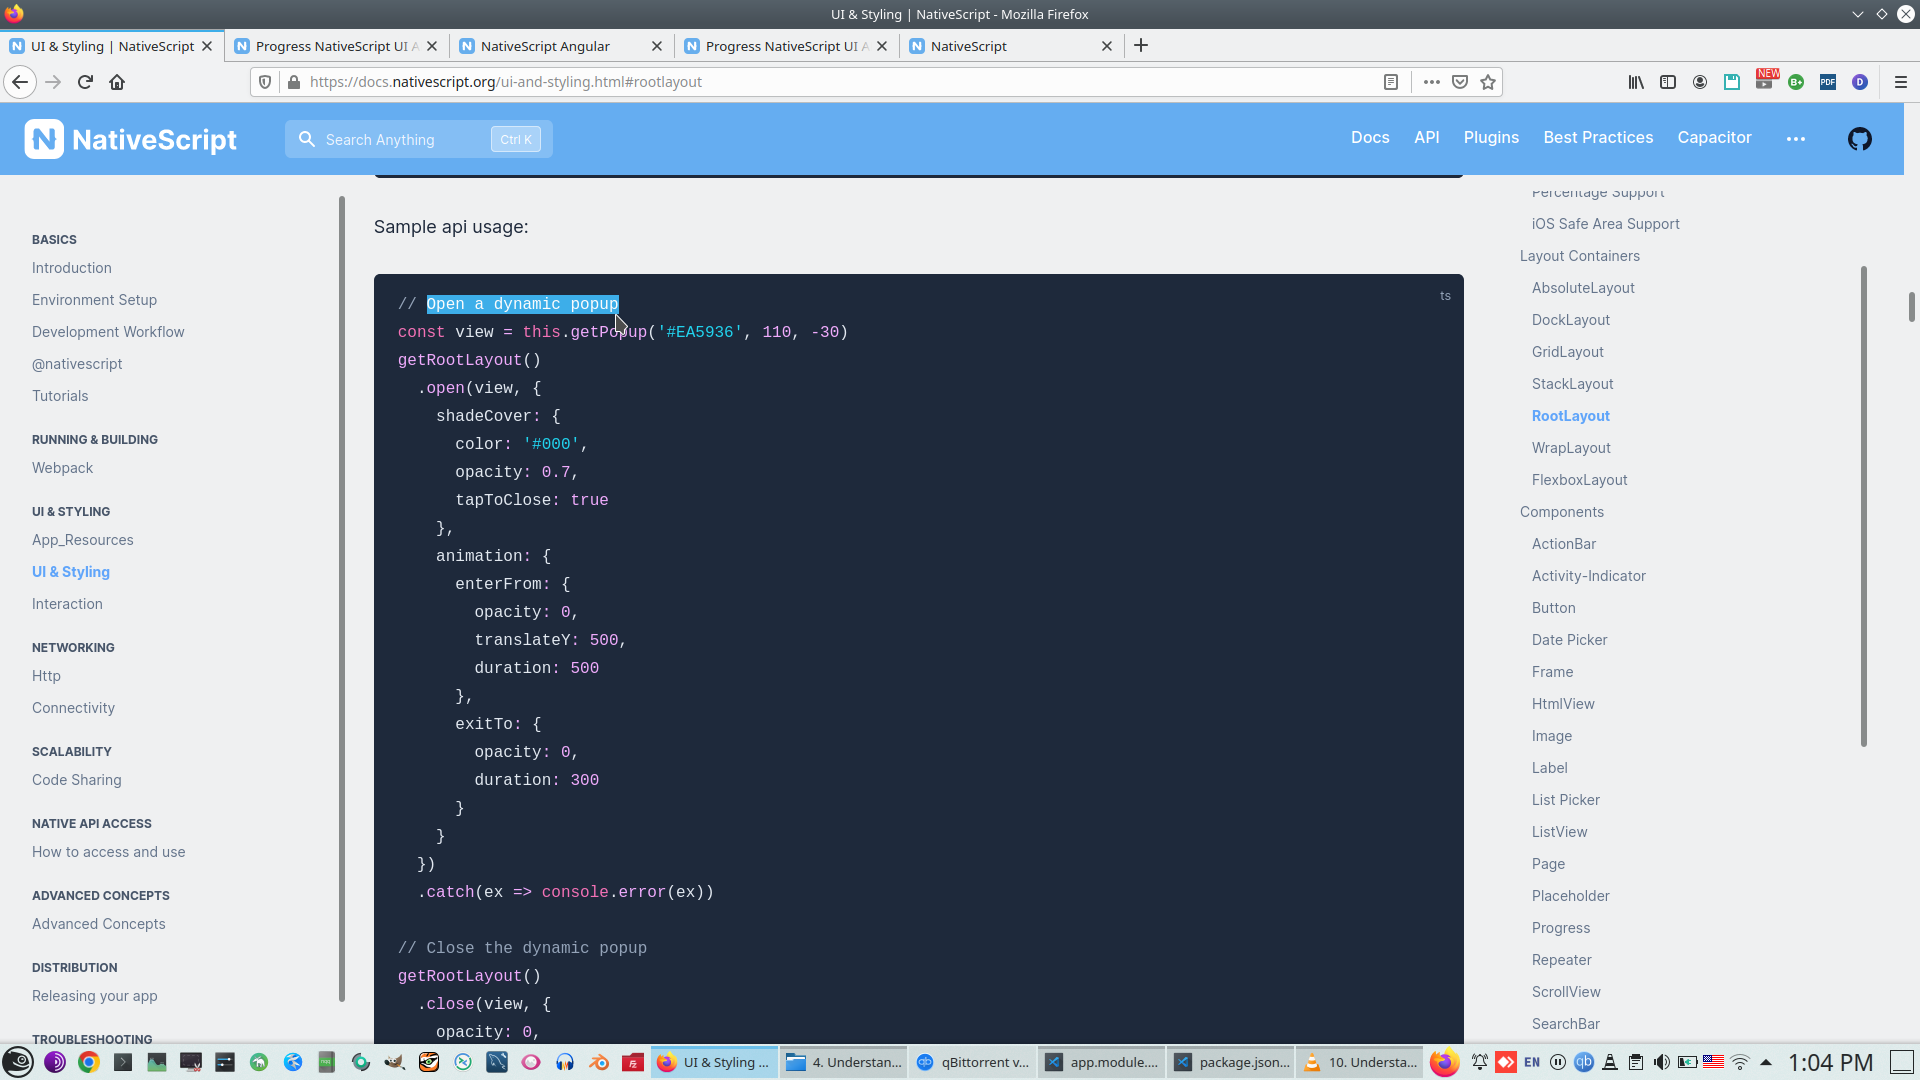
Plus Root laout in other version
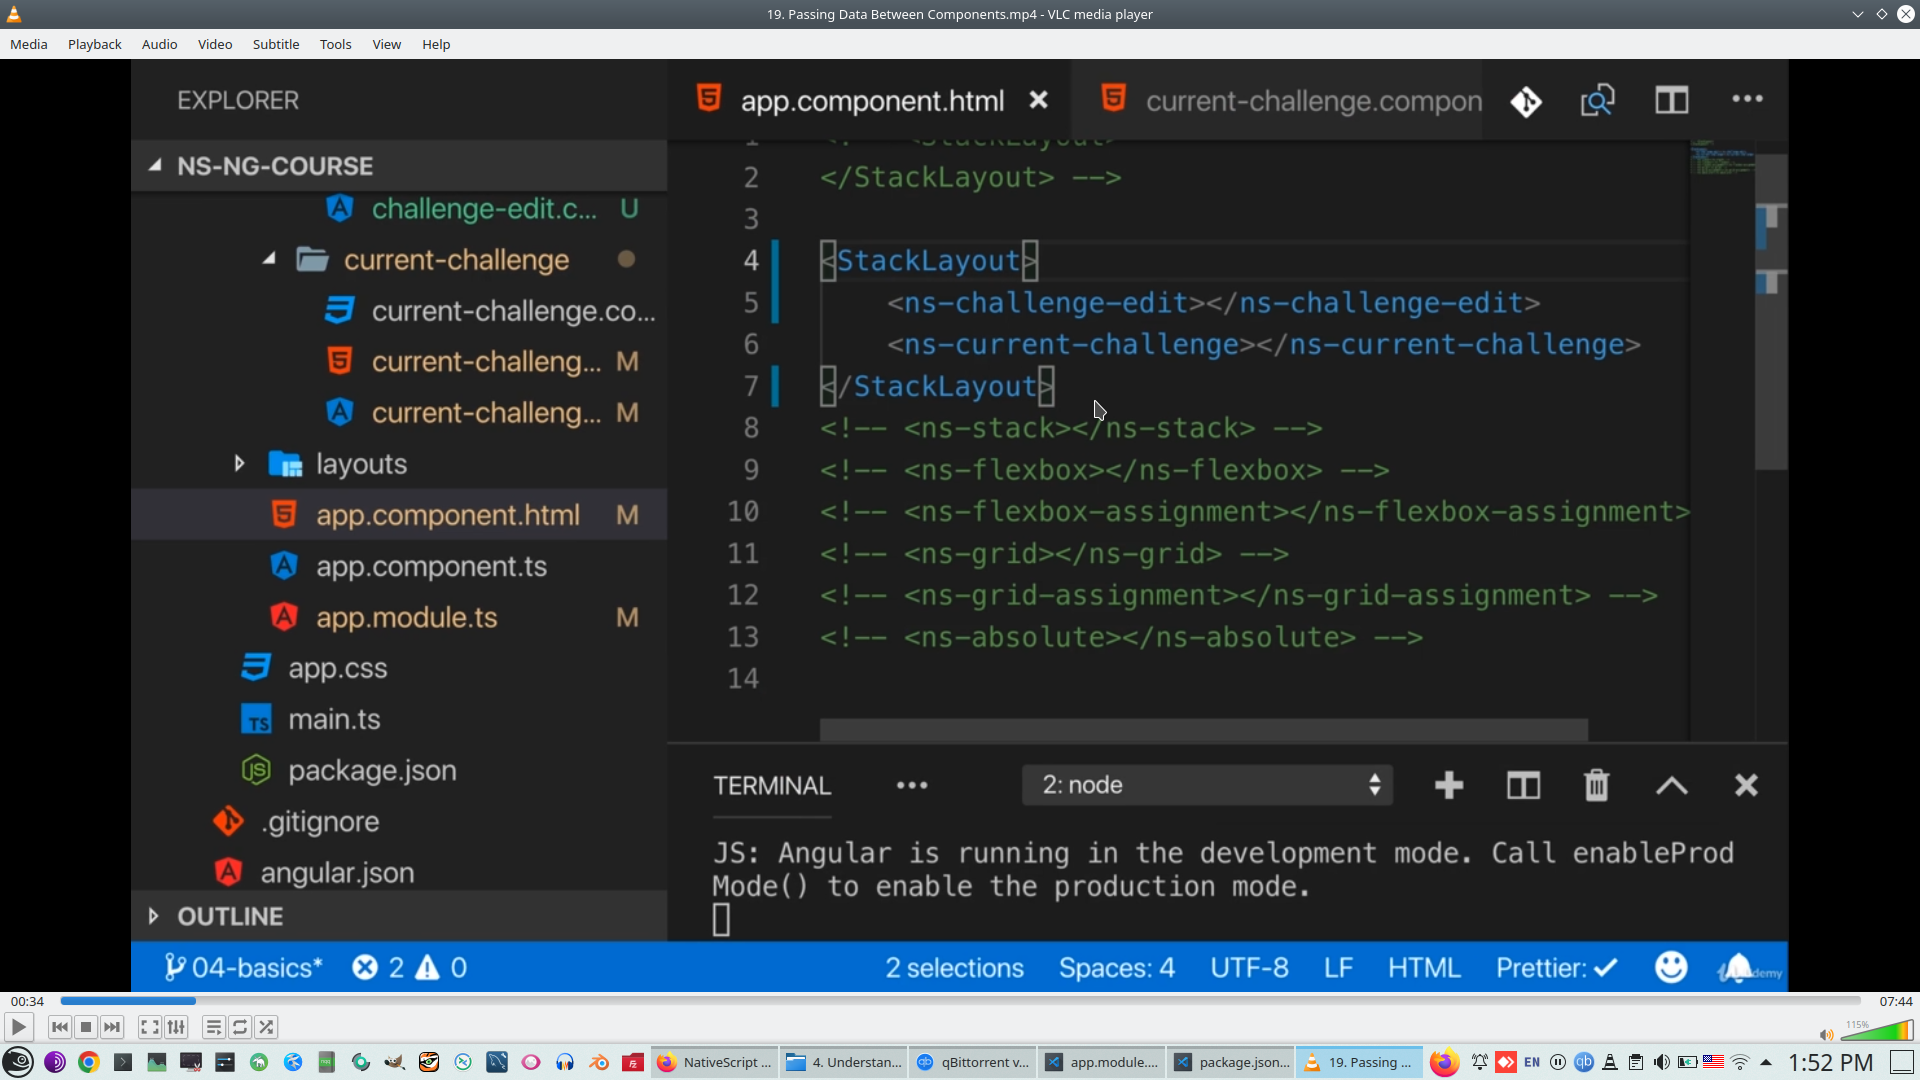
More details how to use GridLayout, column property, try to insert two component to Grid

Return to Stack
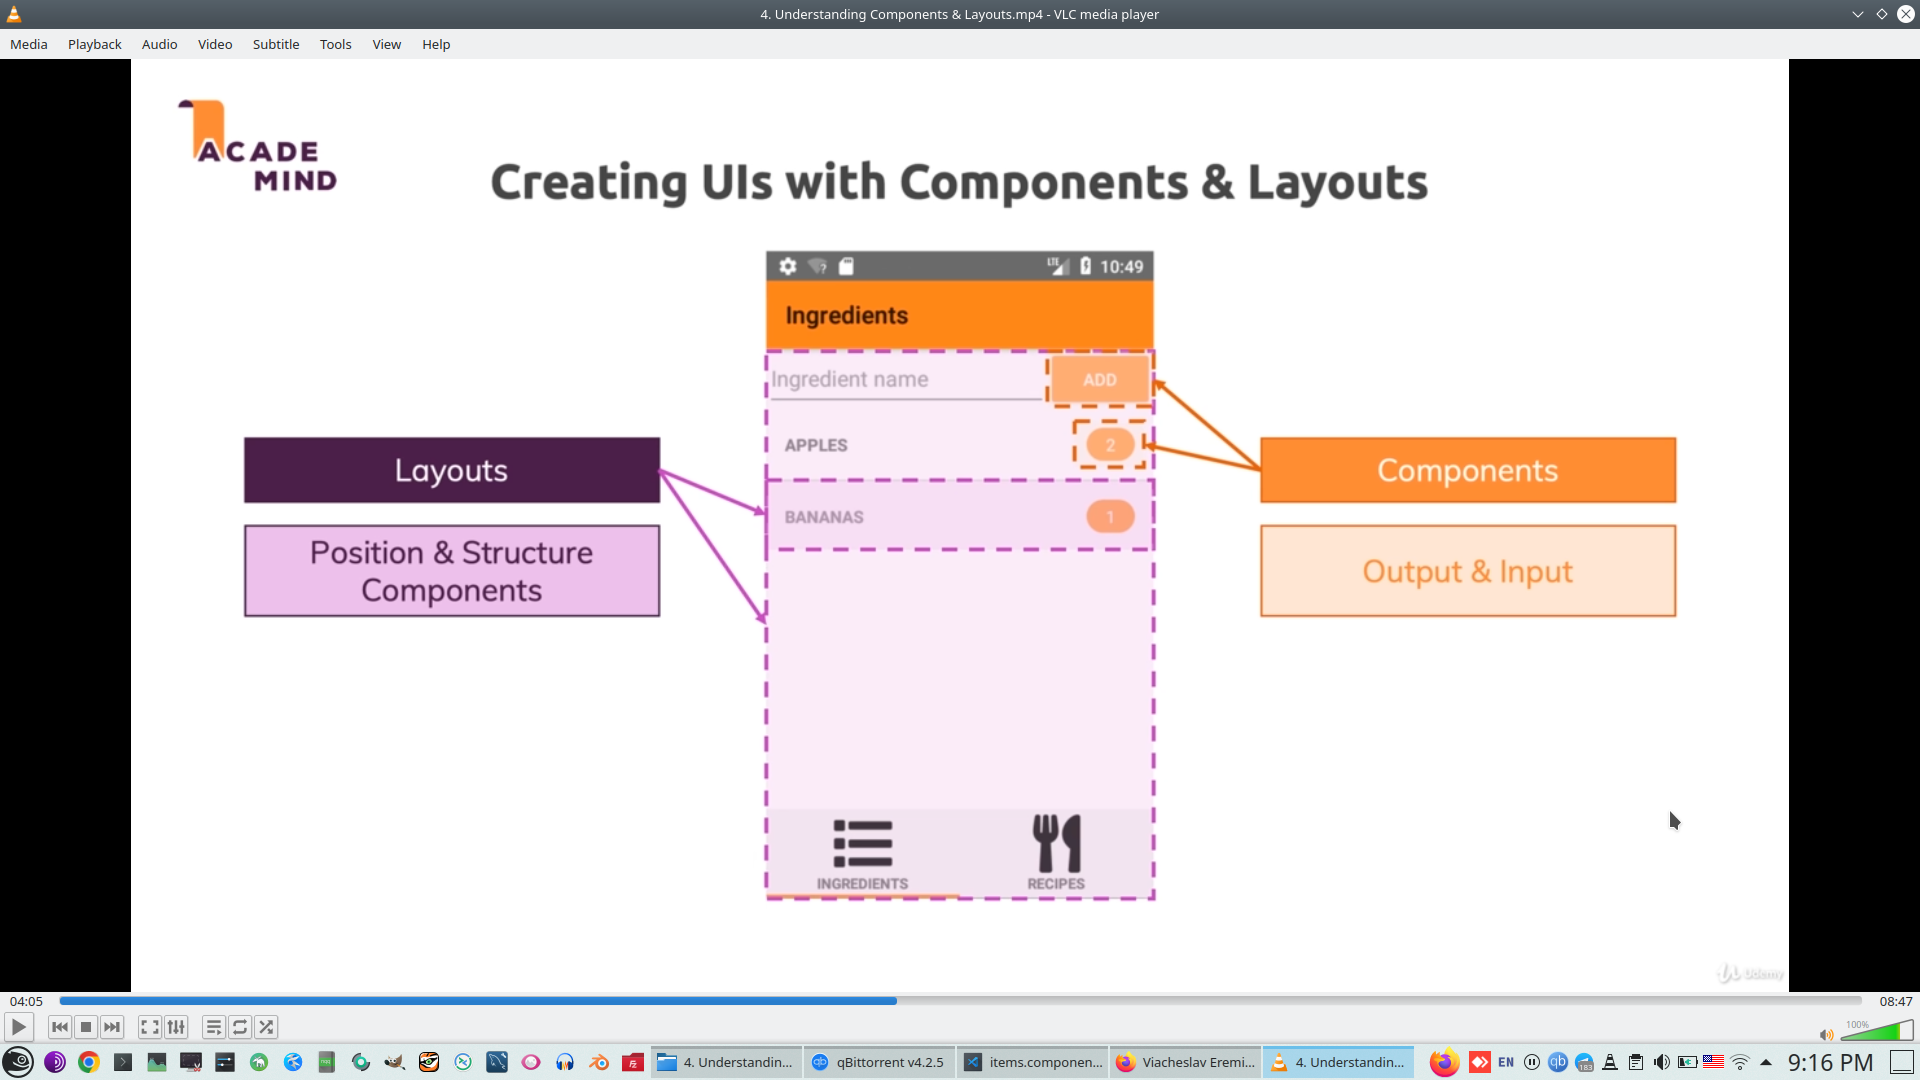
6. NS Components
How components translative to Native
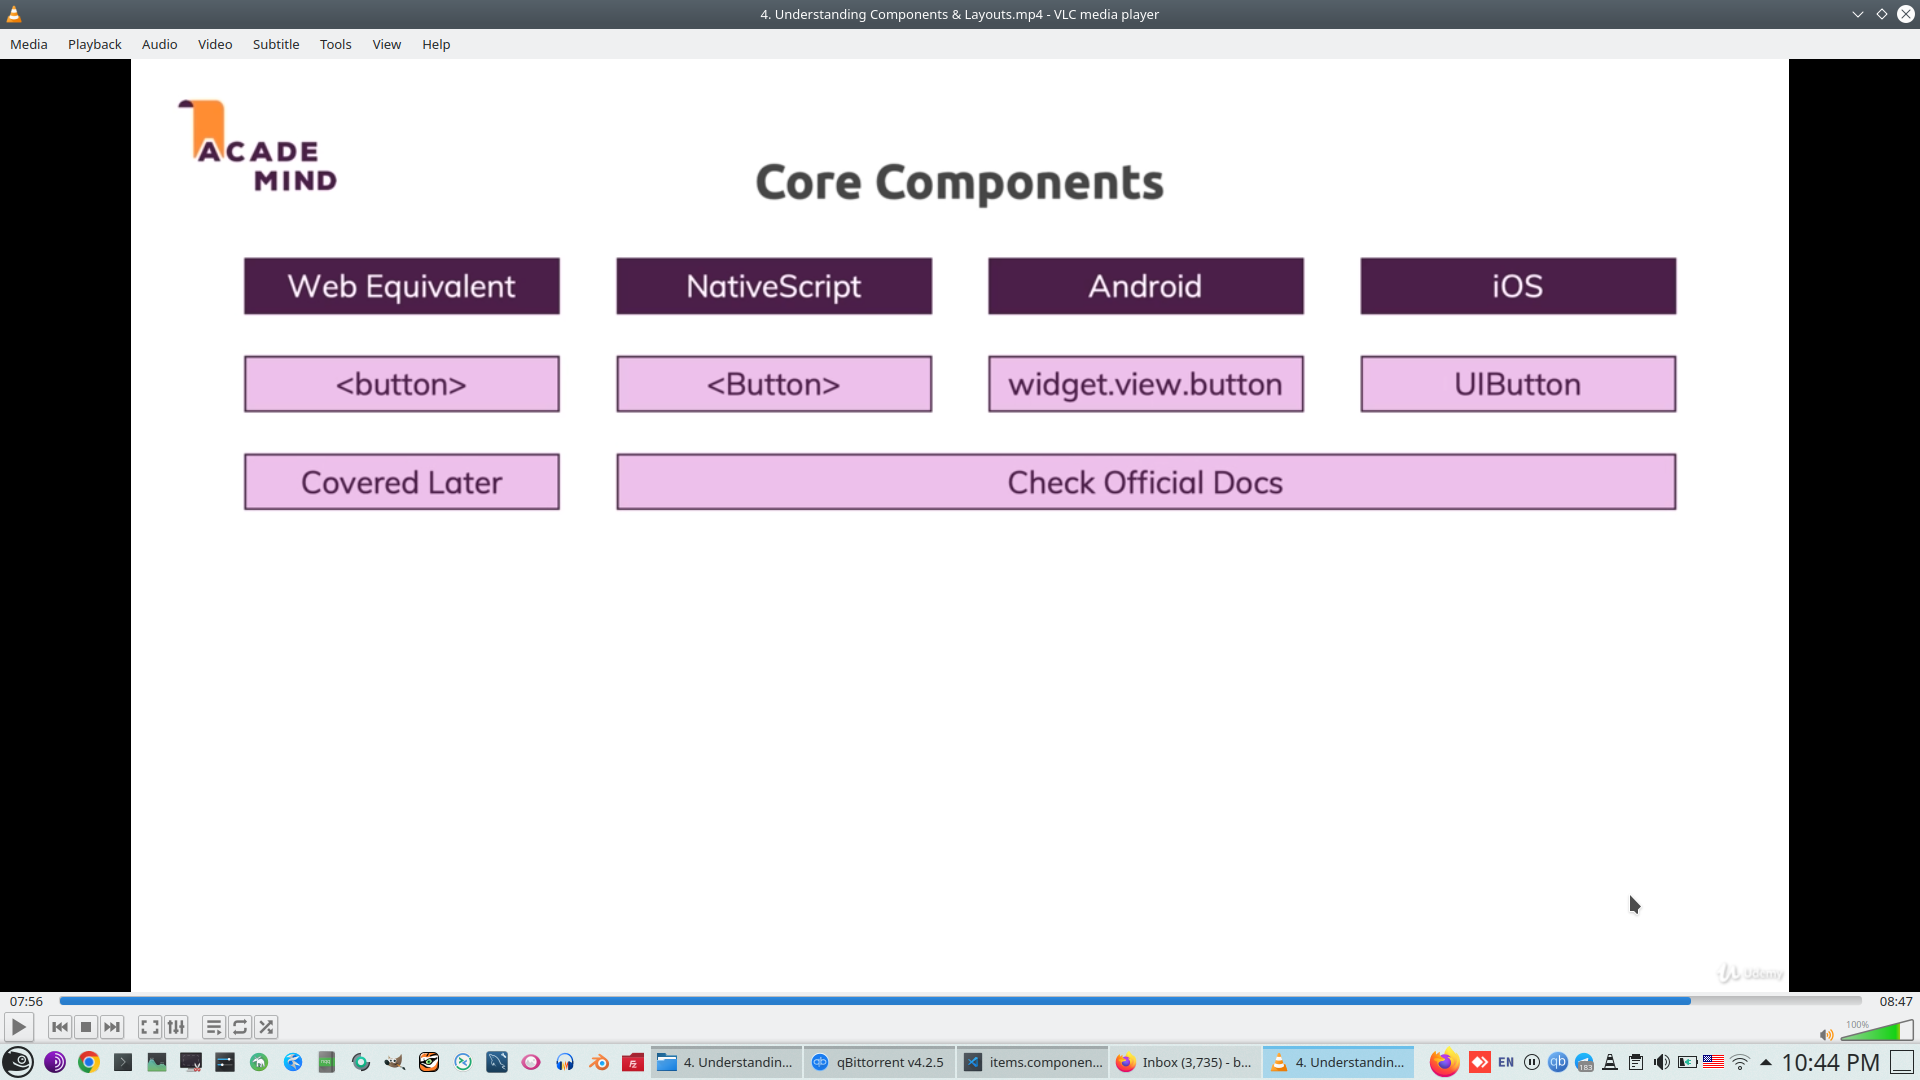
All UI components
Reflect NS component to Native (Android, IOS)
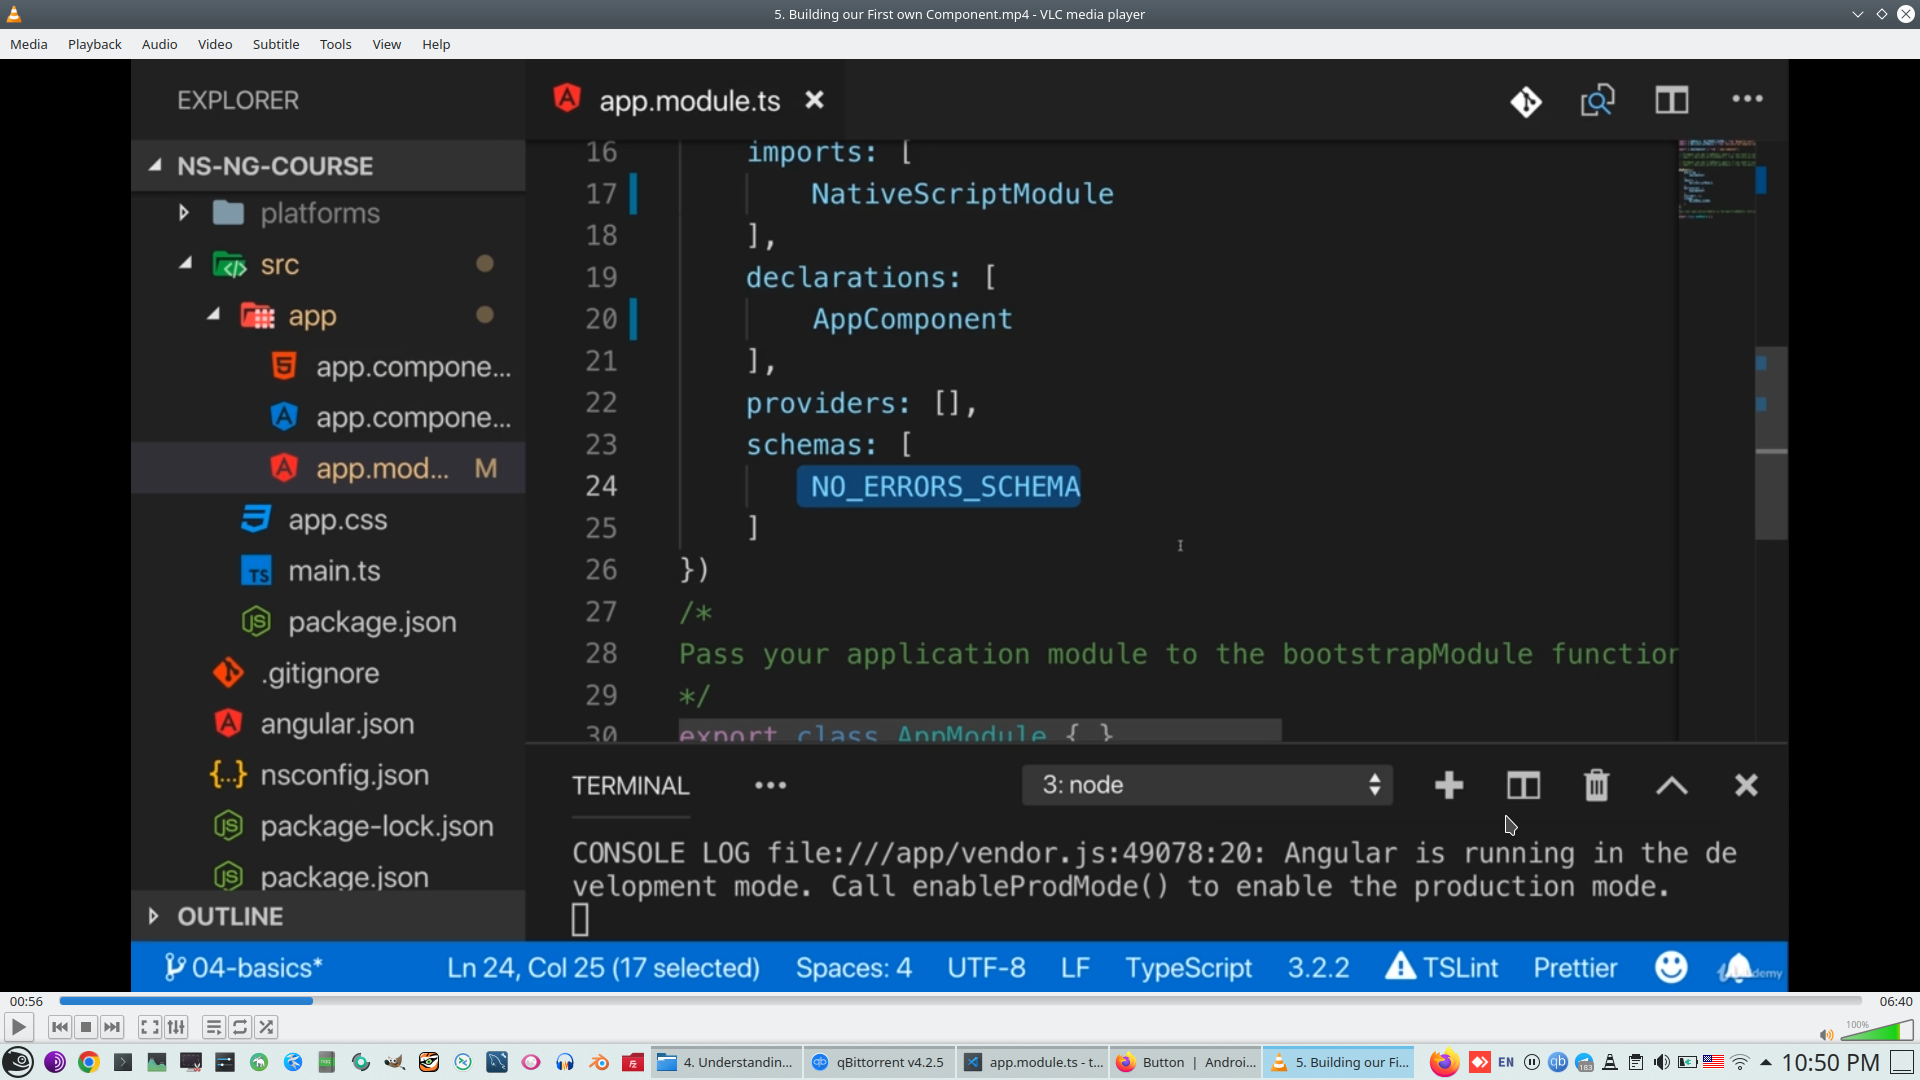
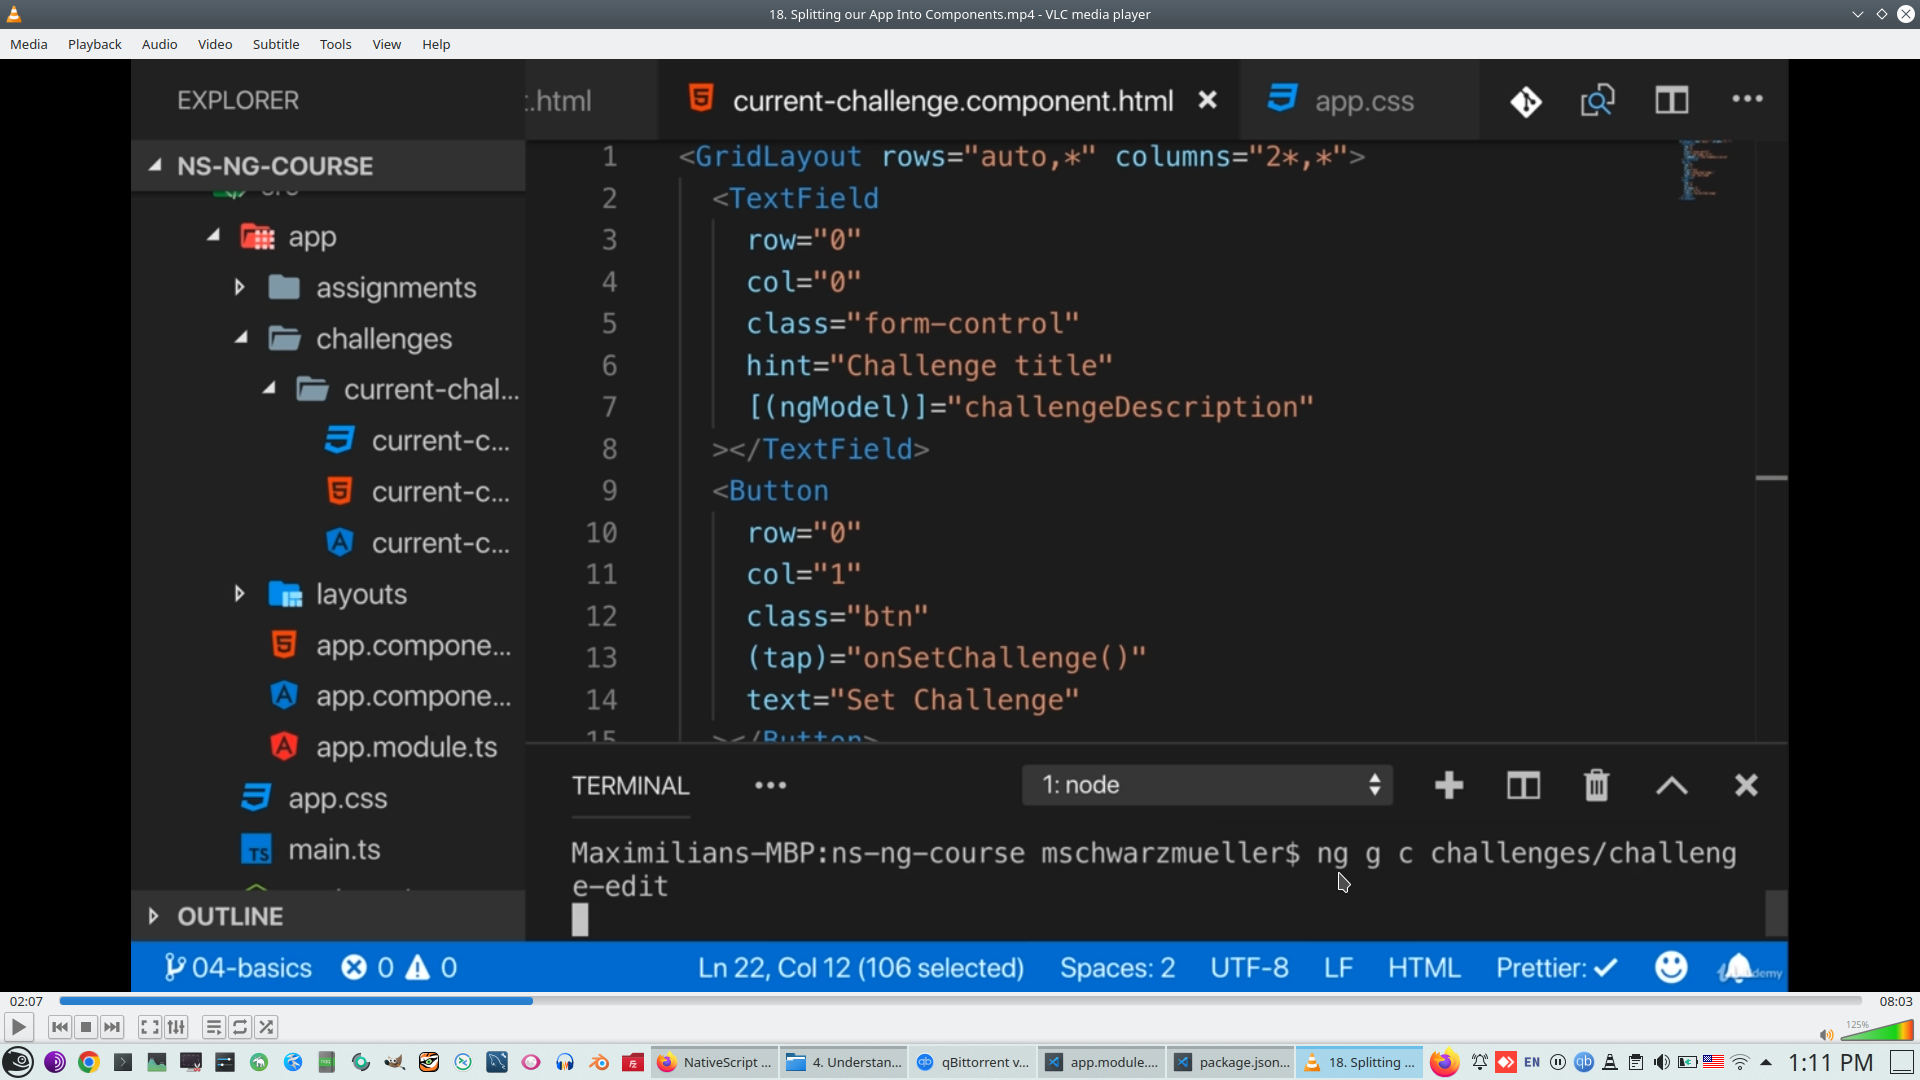
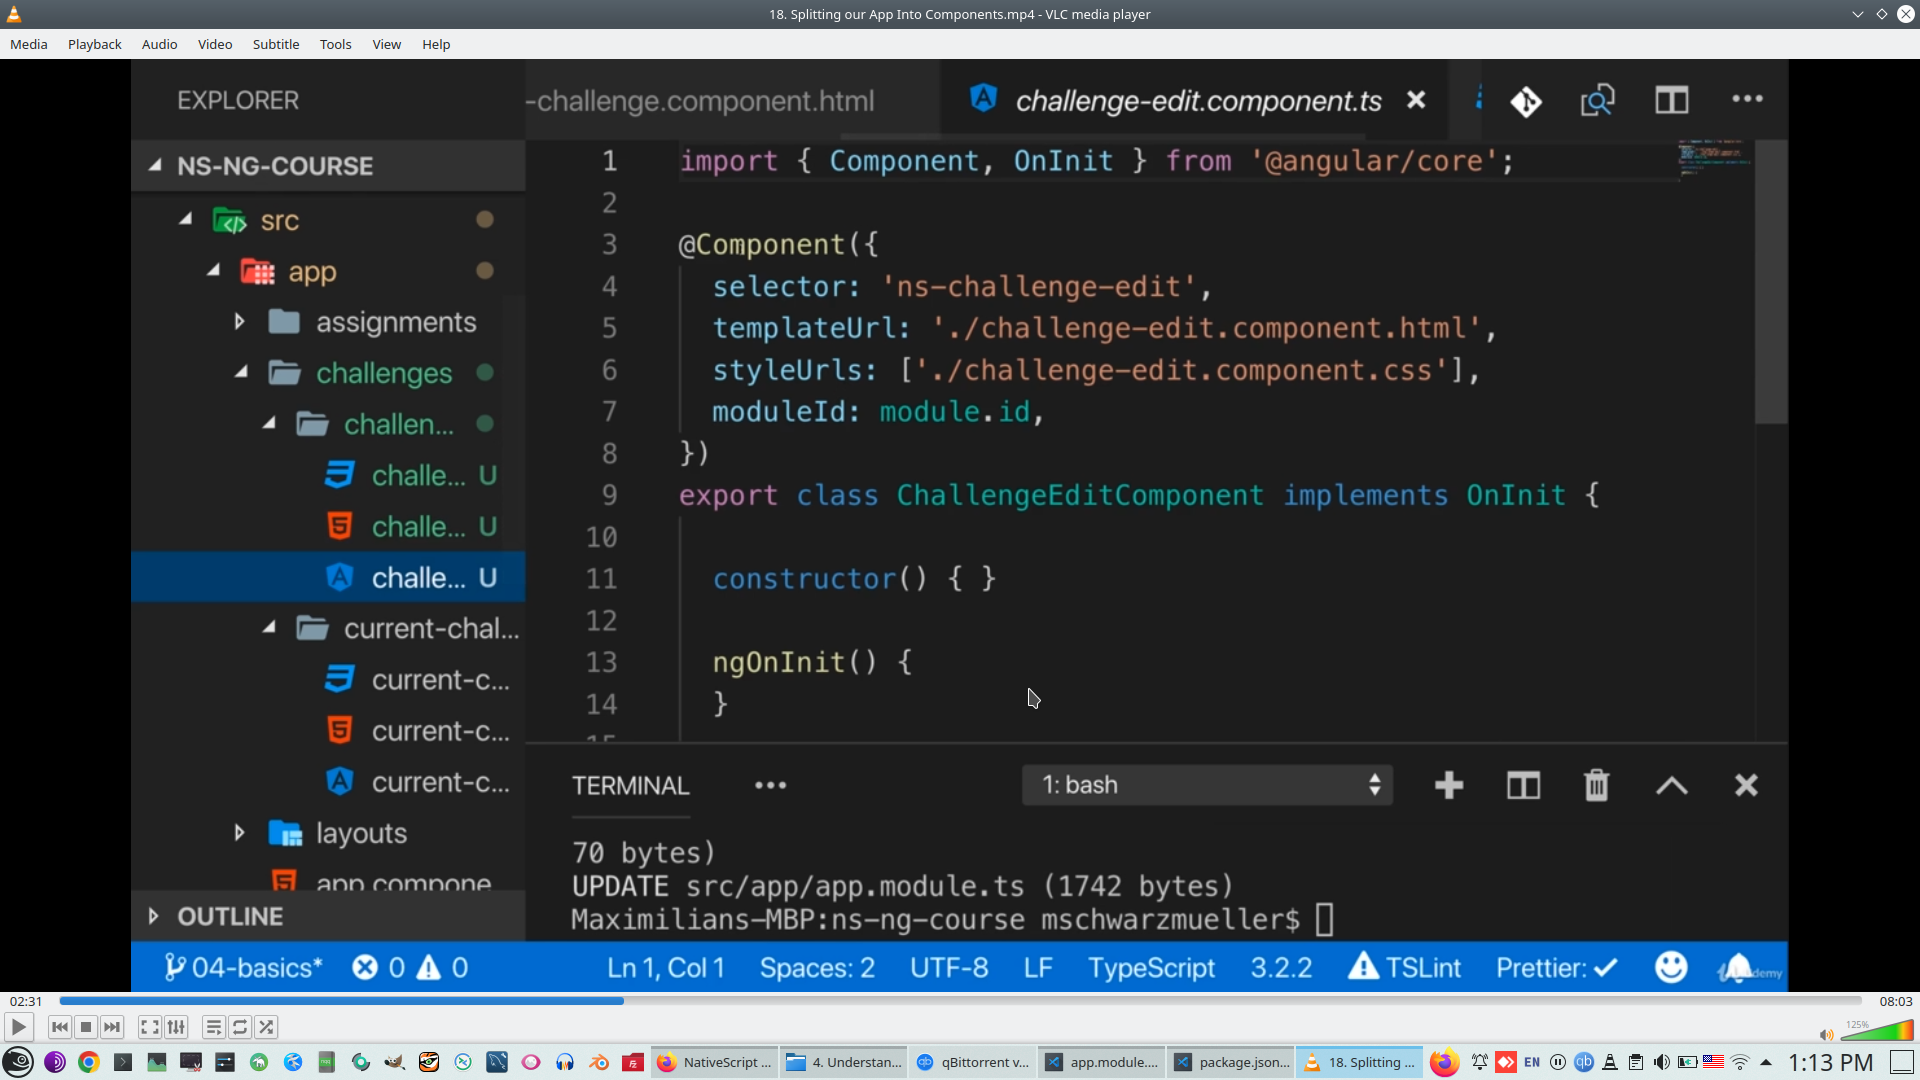
7. Common developmet workflow on NS Angular.
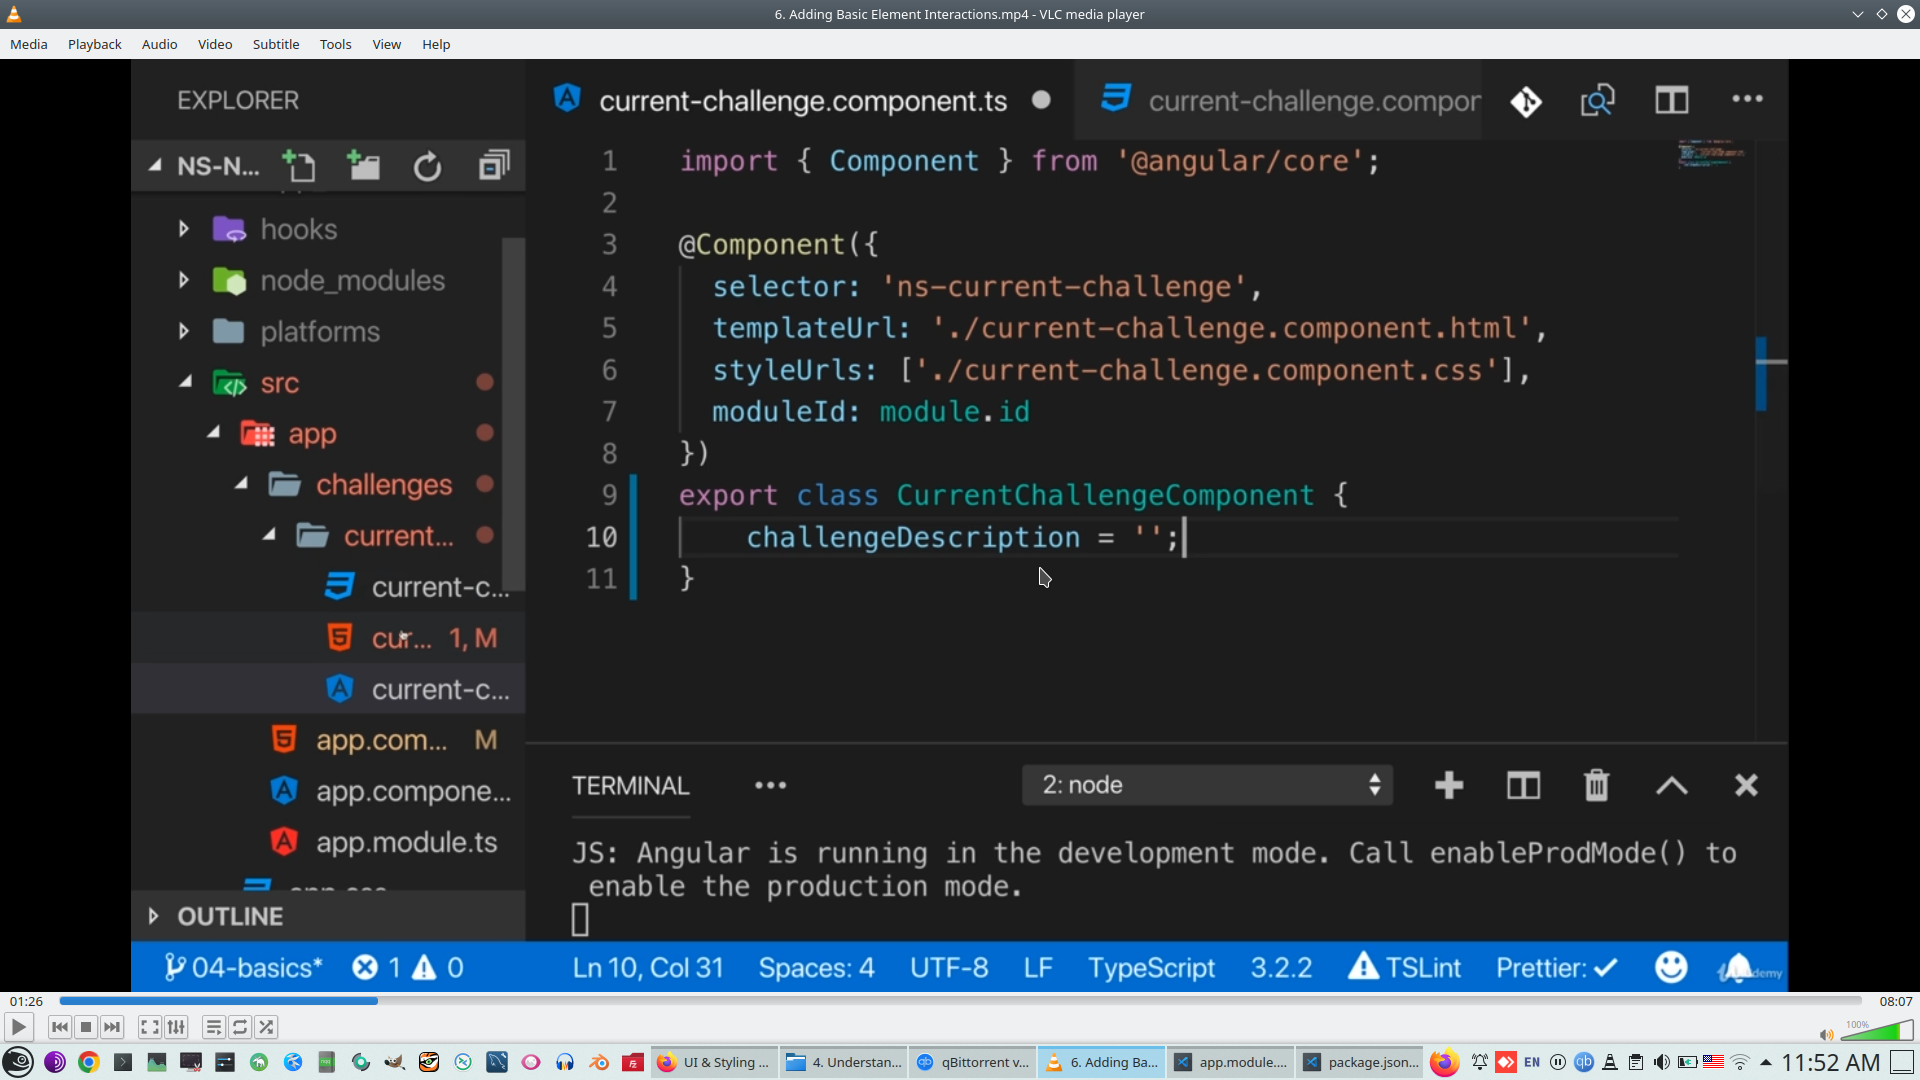
Create component without NG G, create 3 files - *.html, *.ts, *.css
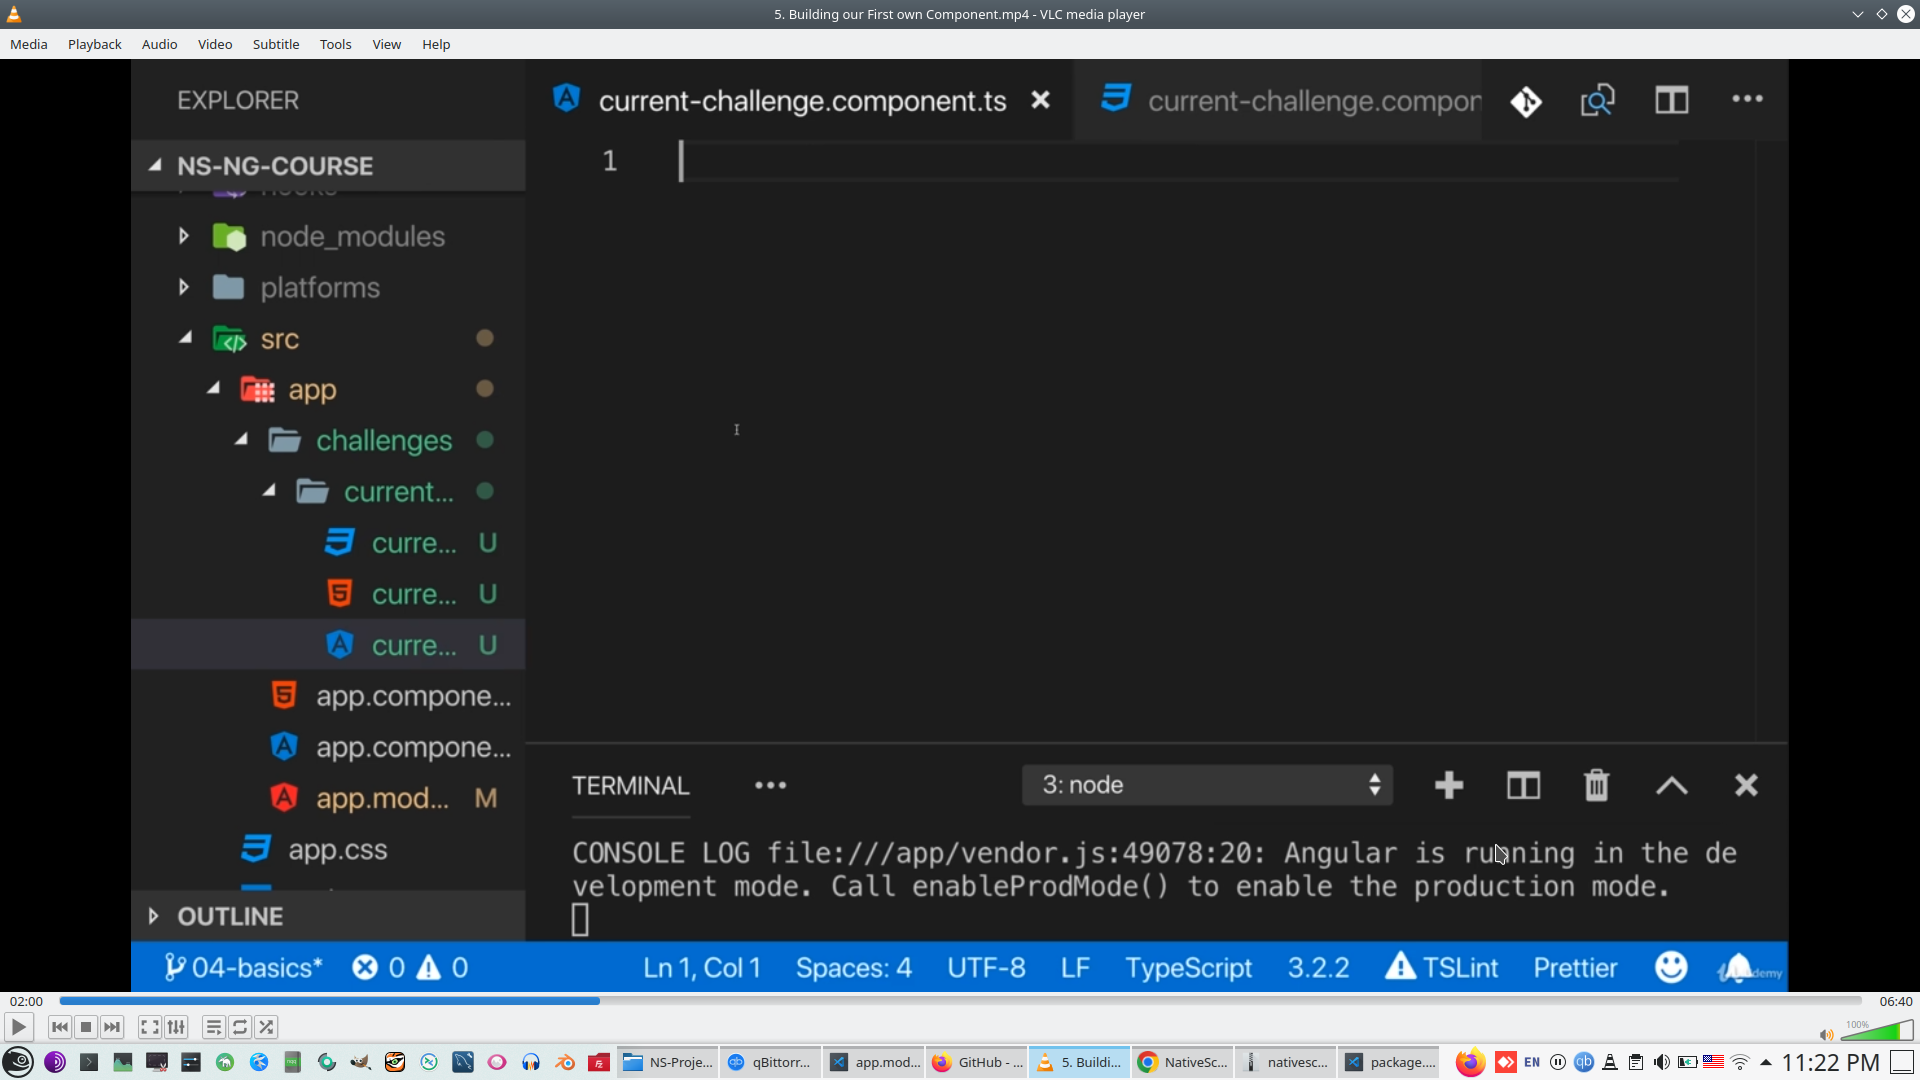
Export class

Add component decorator
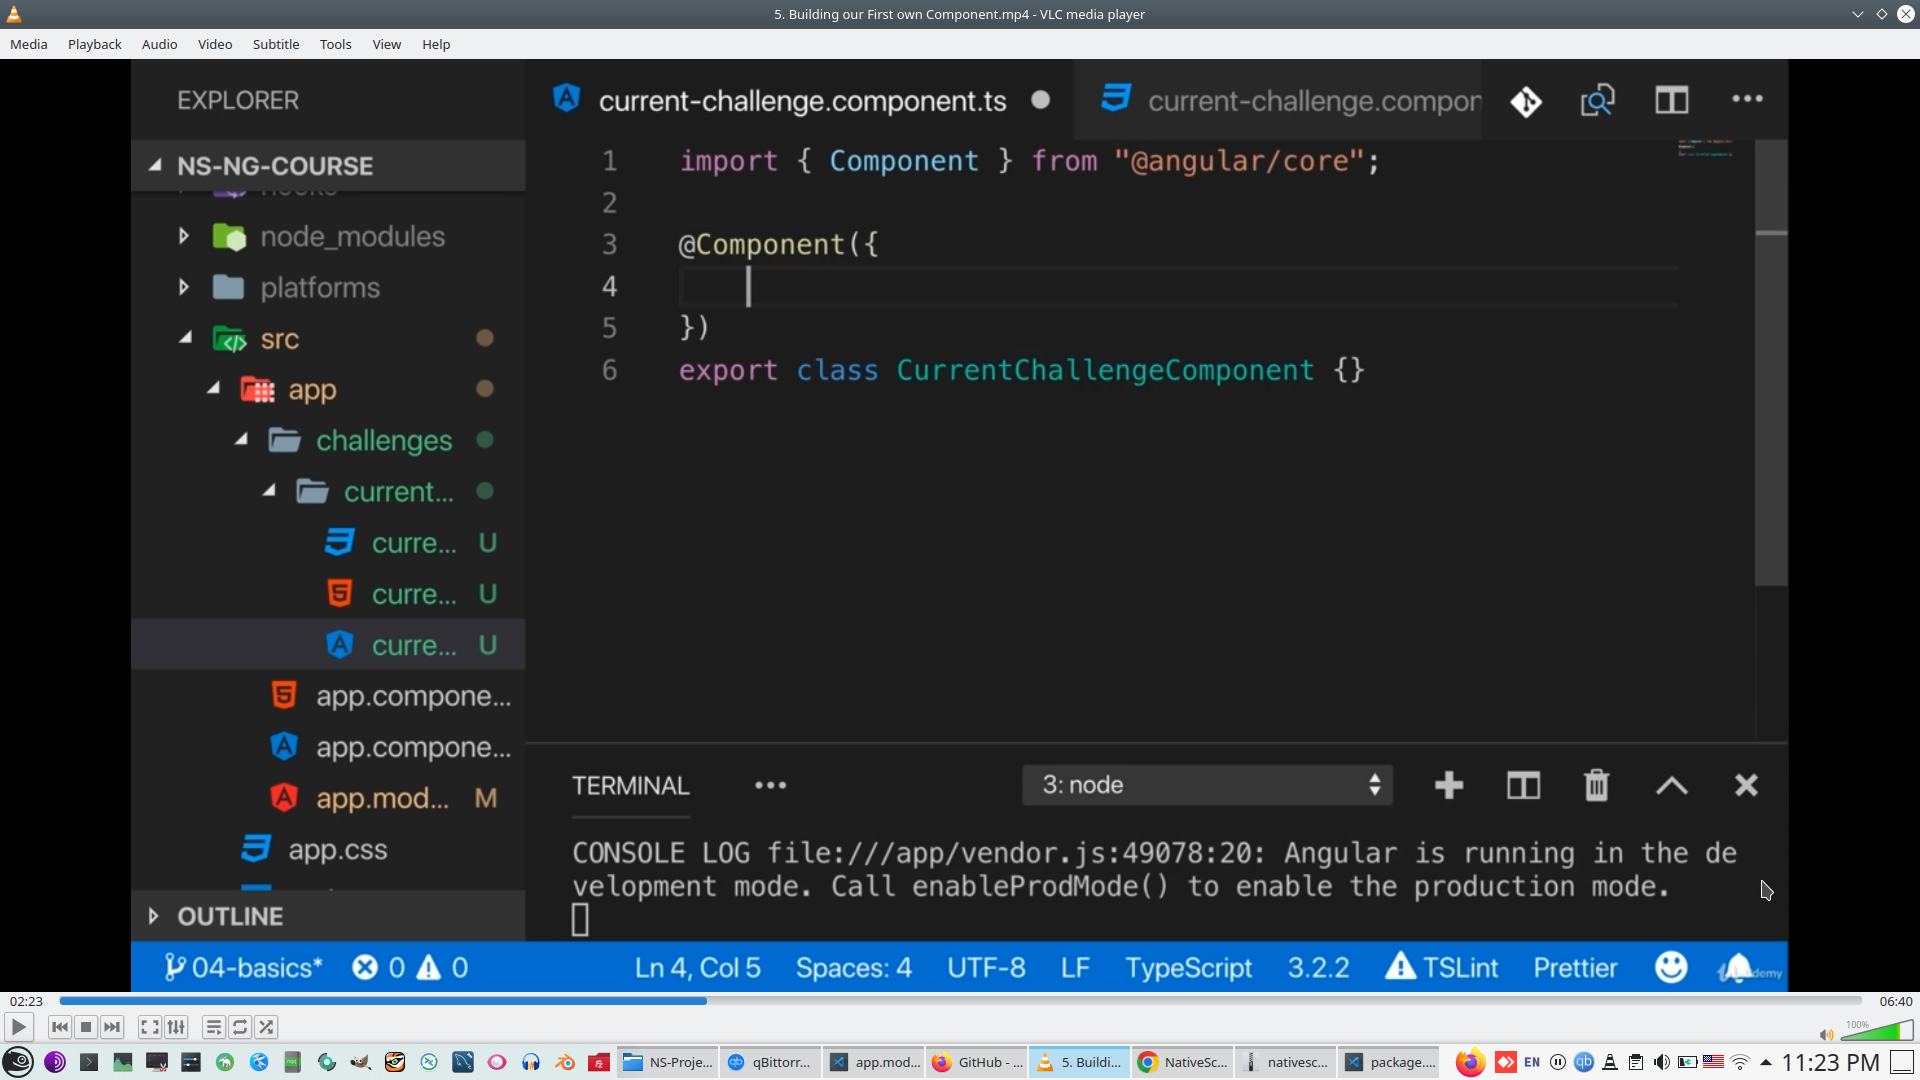
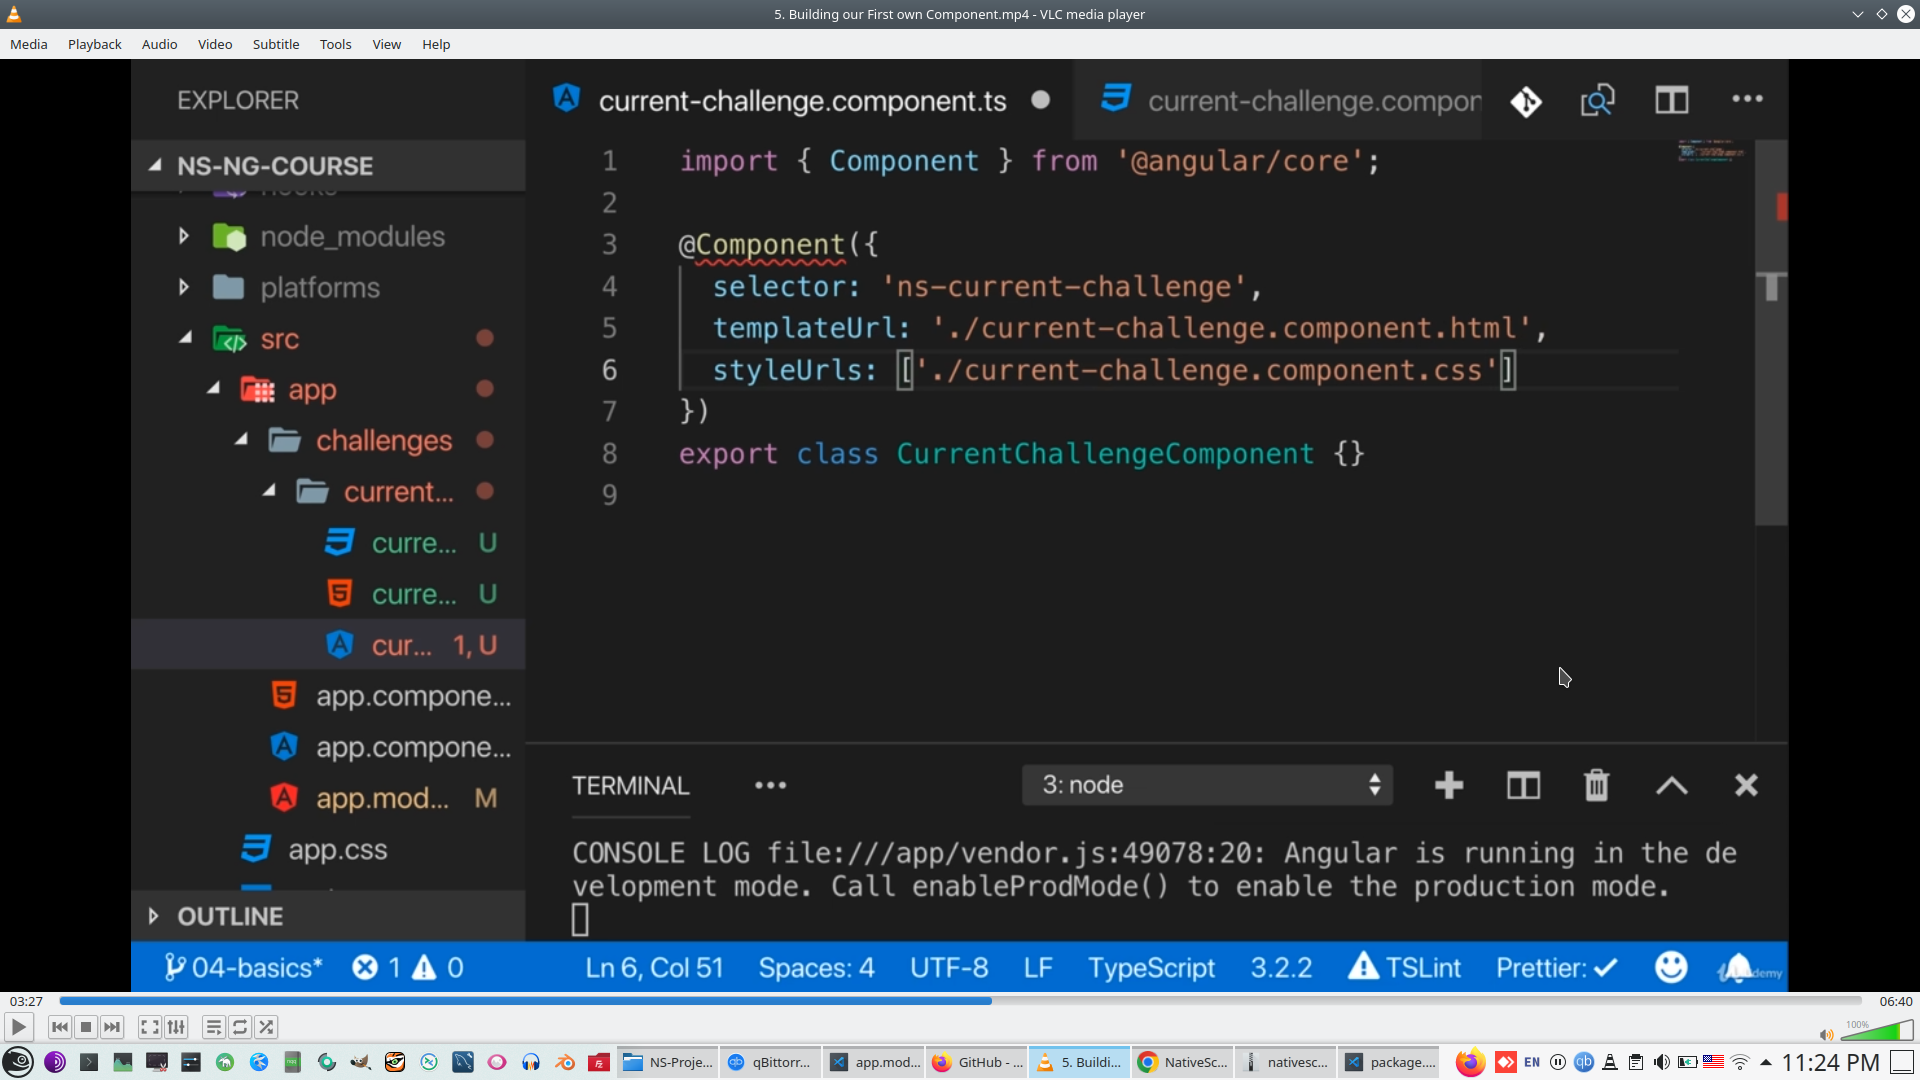
Bind code, template and CSS together
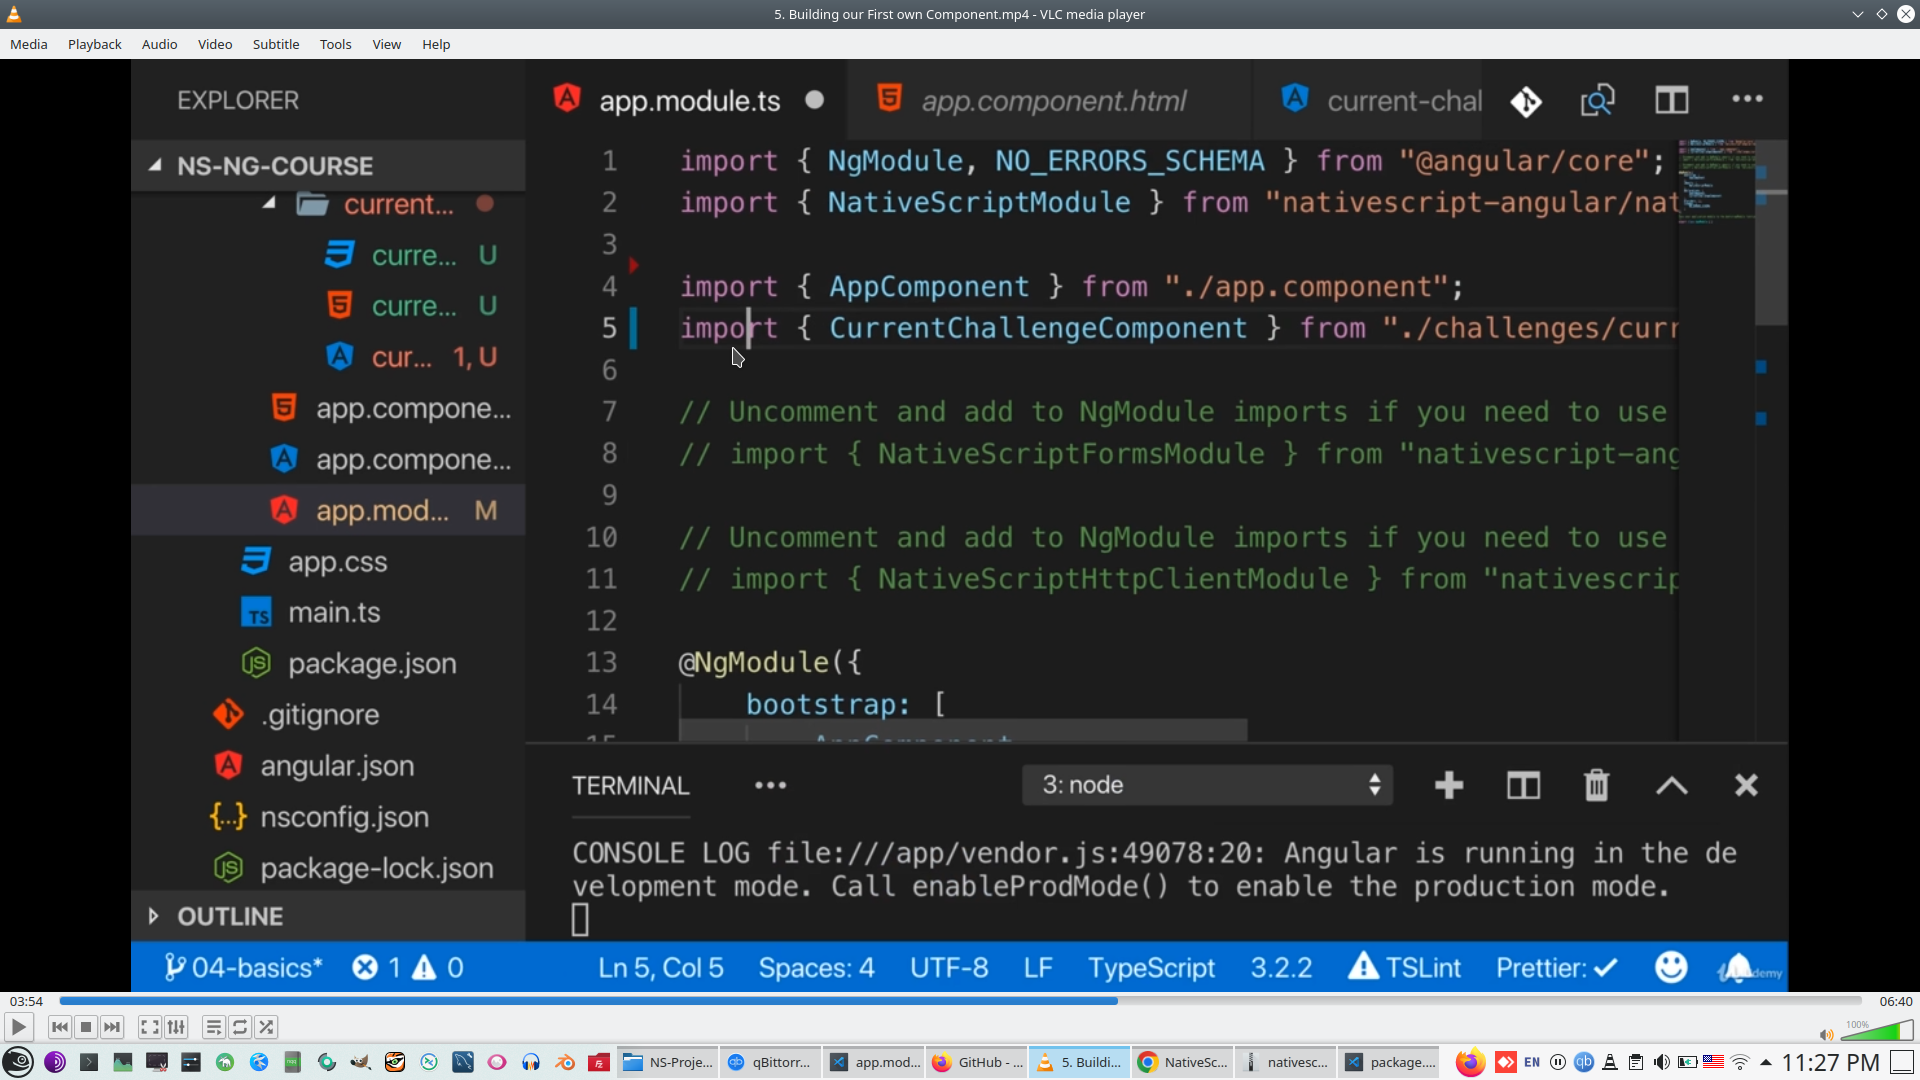
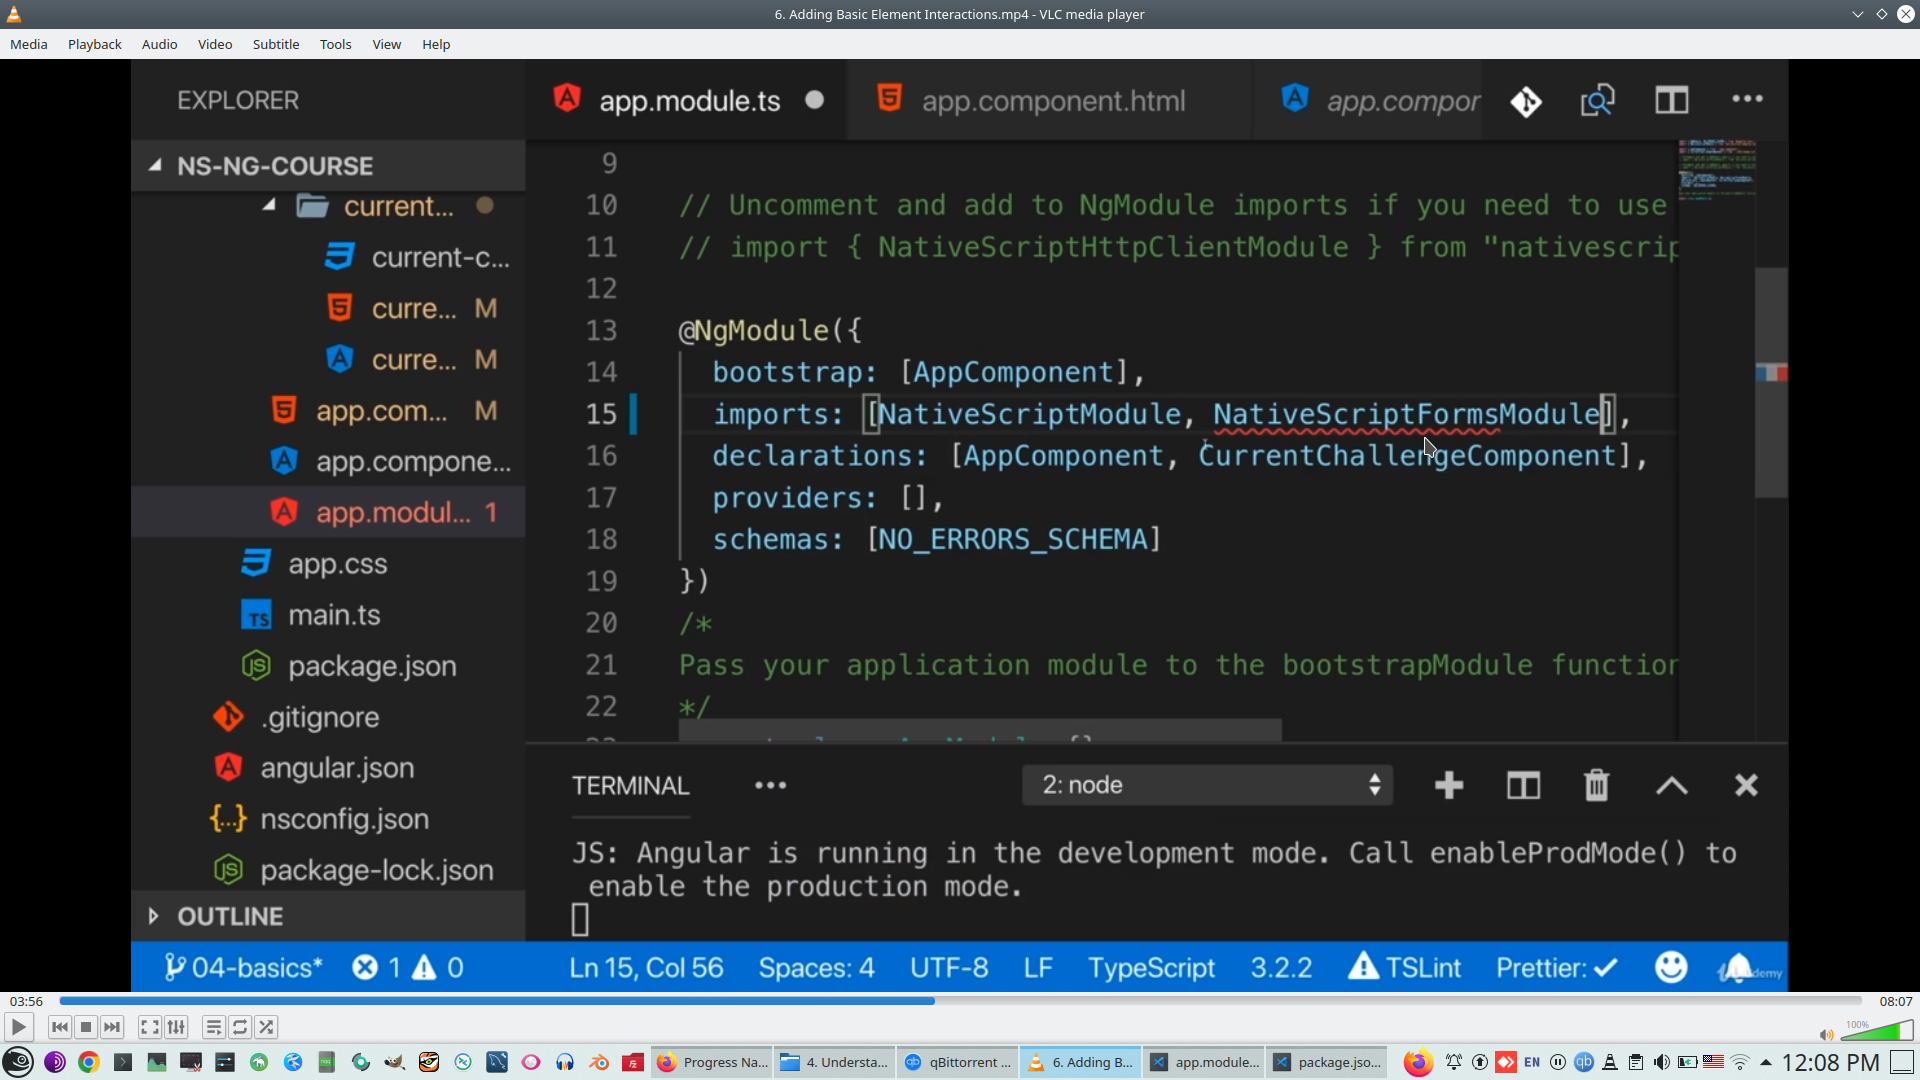
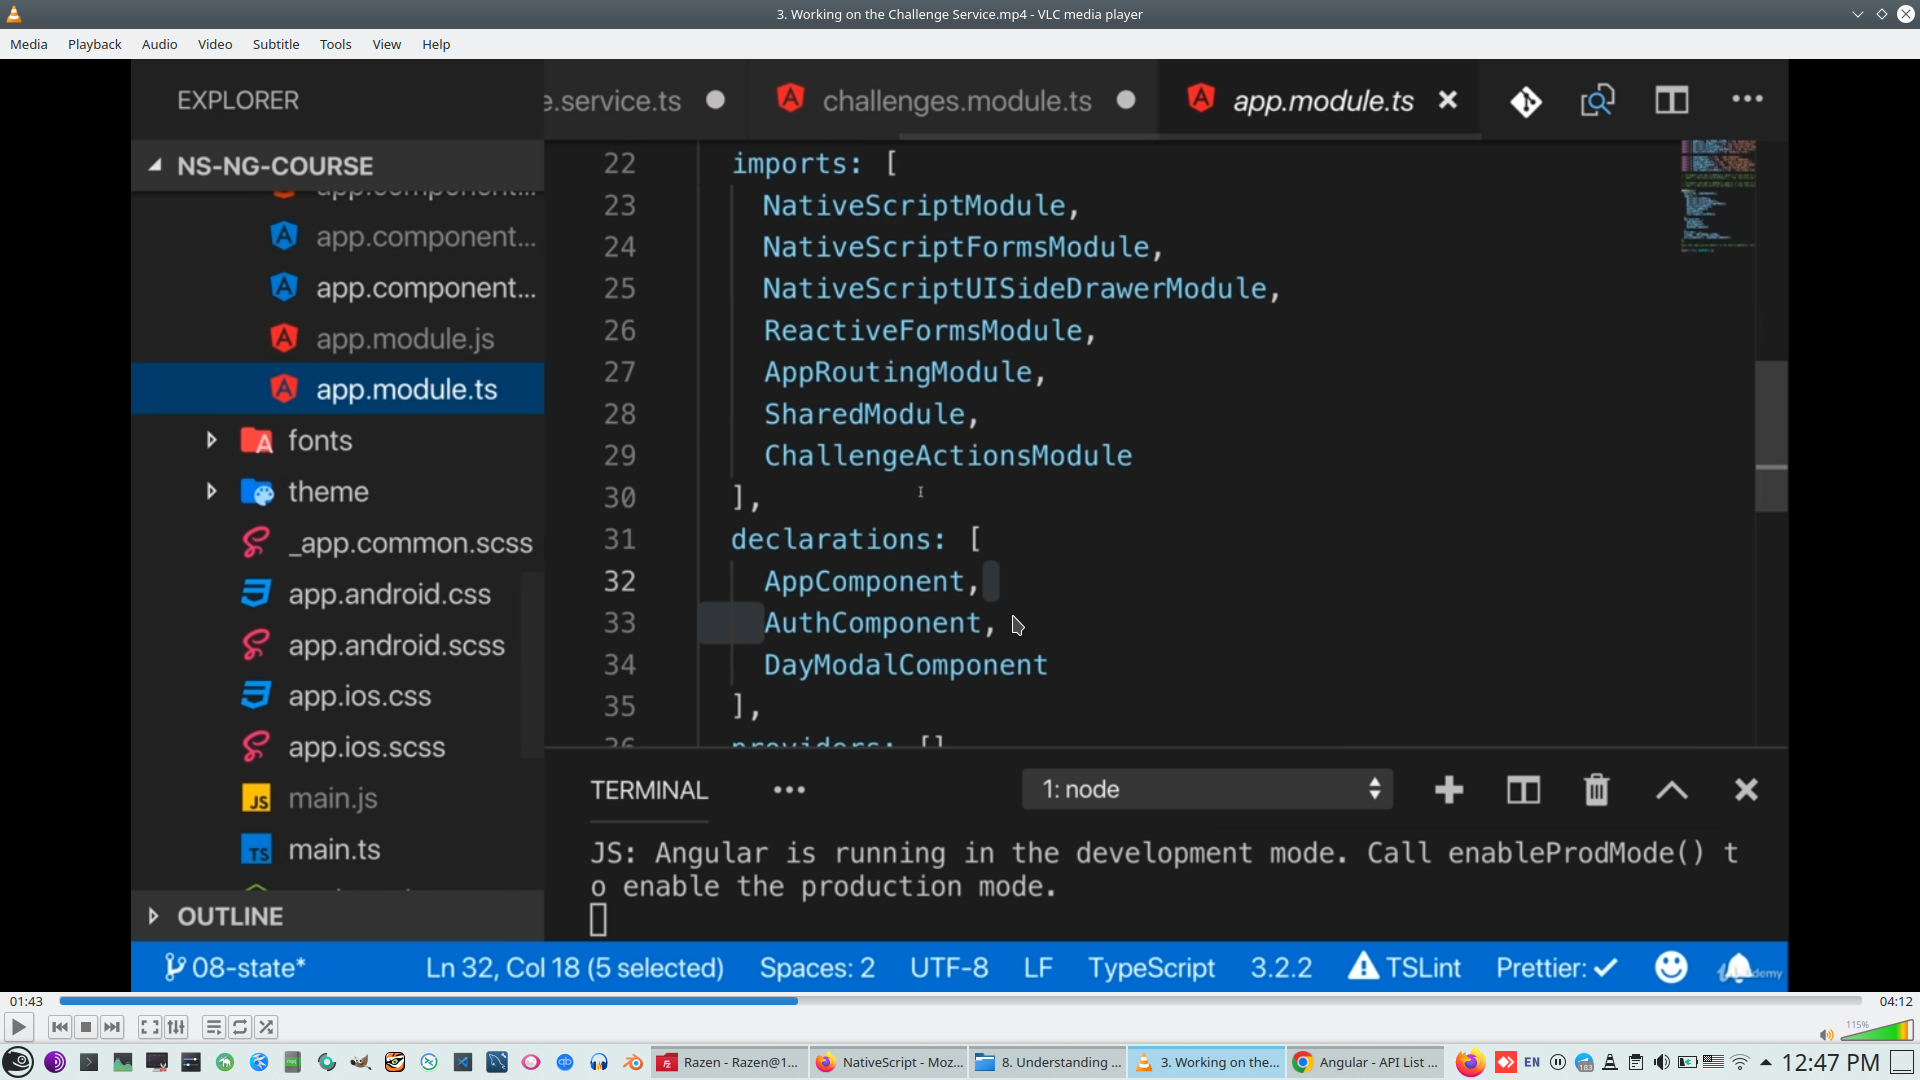
Add component to project module list

Add declaration
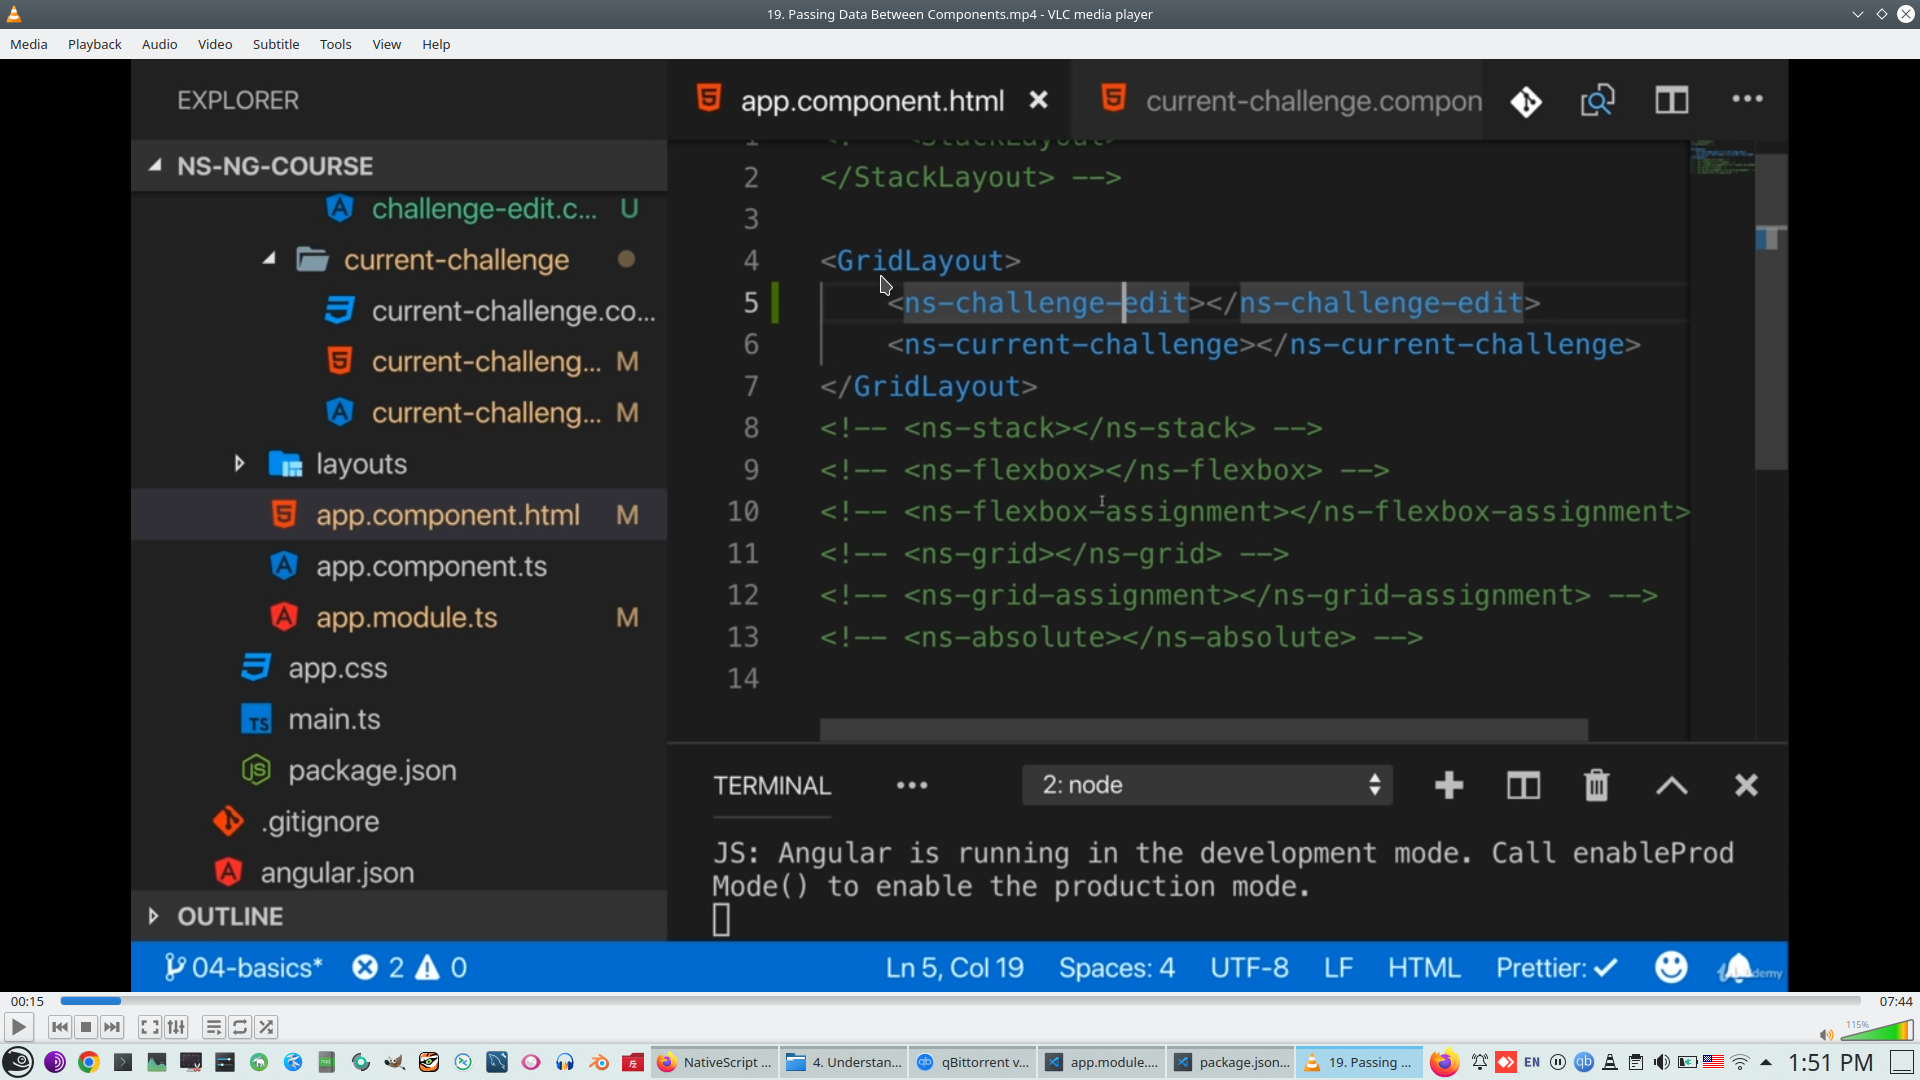
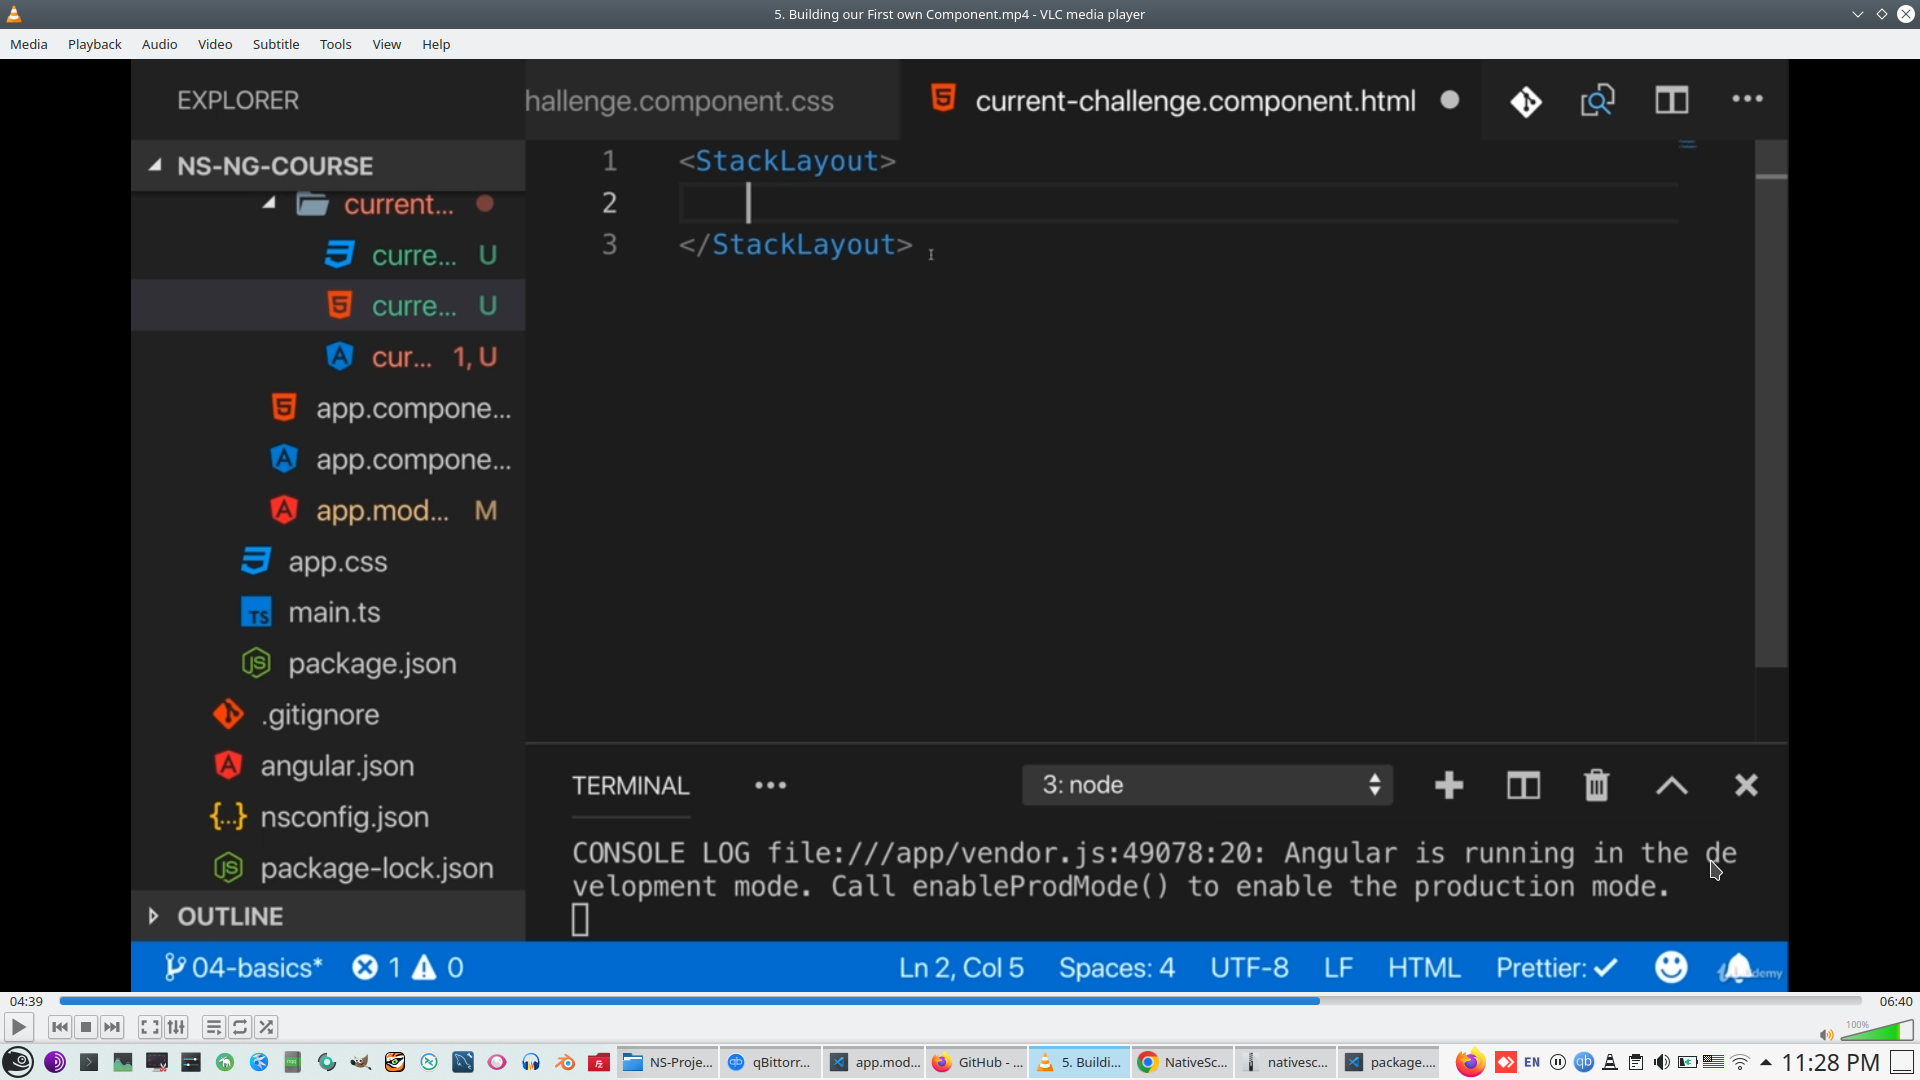
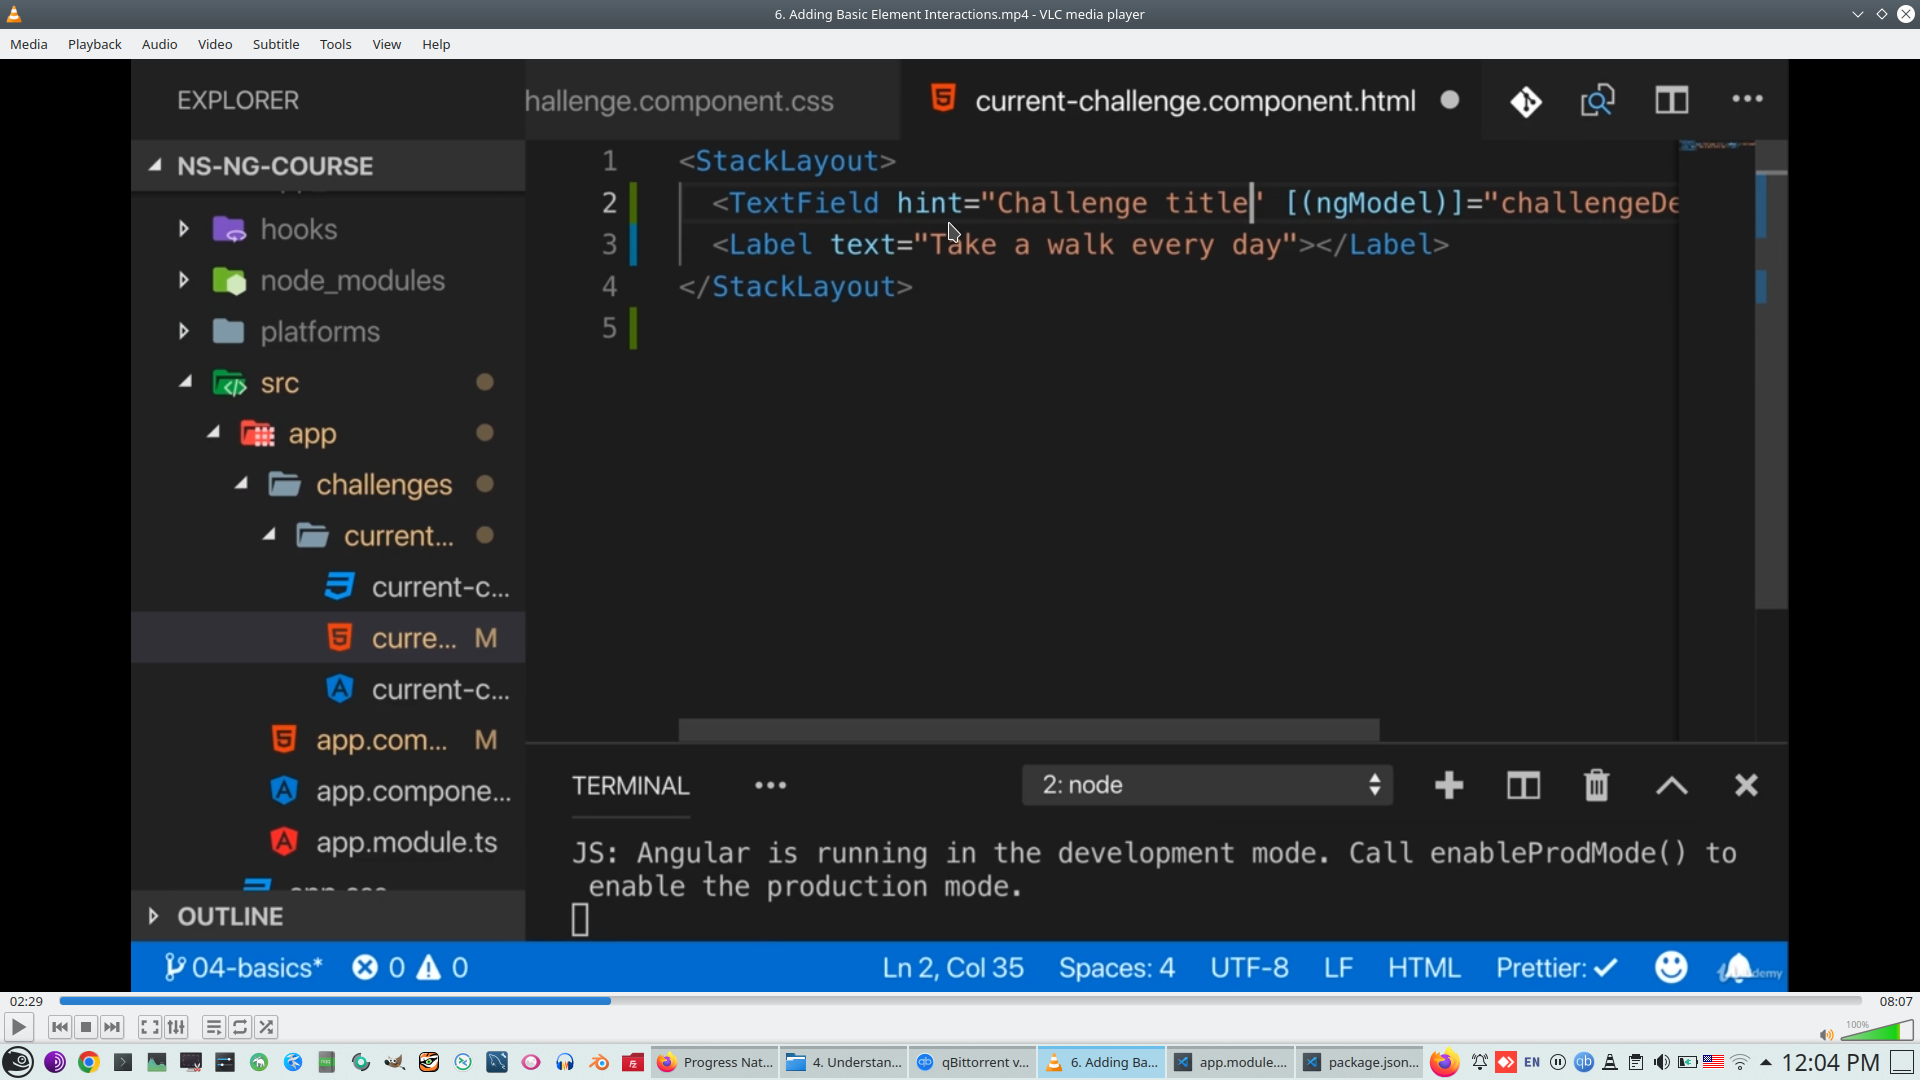
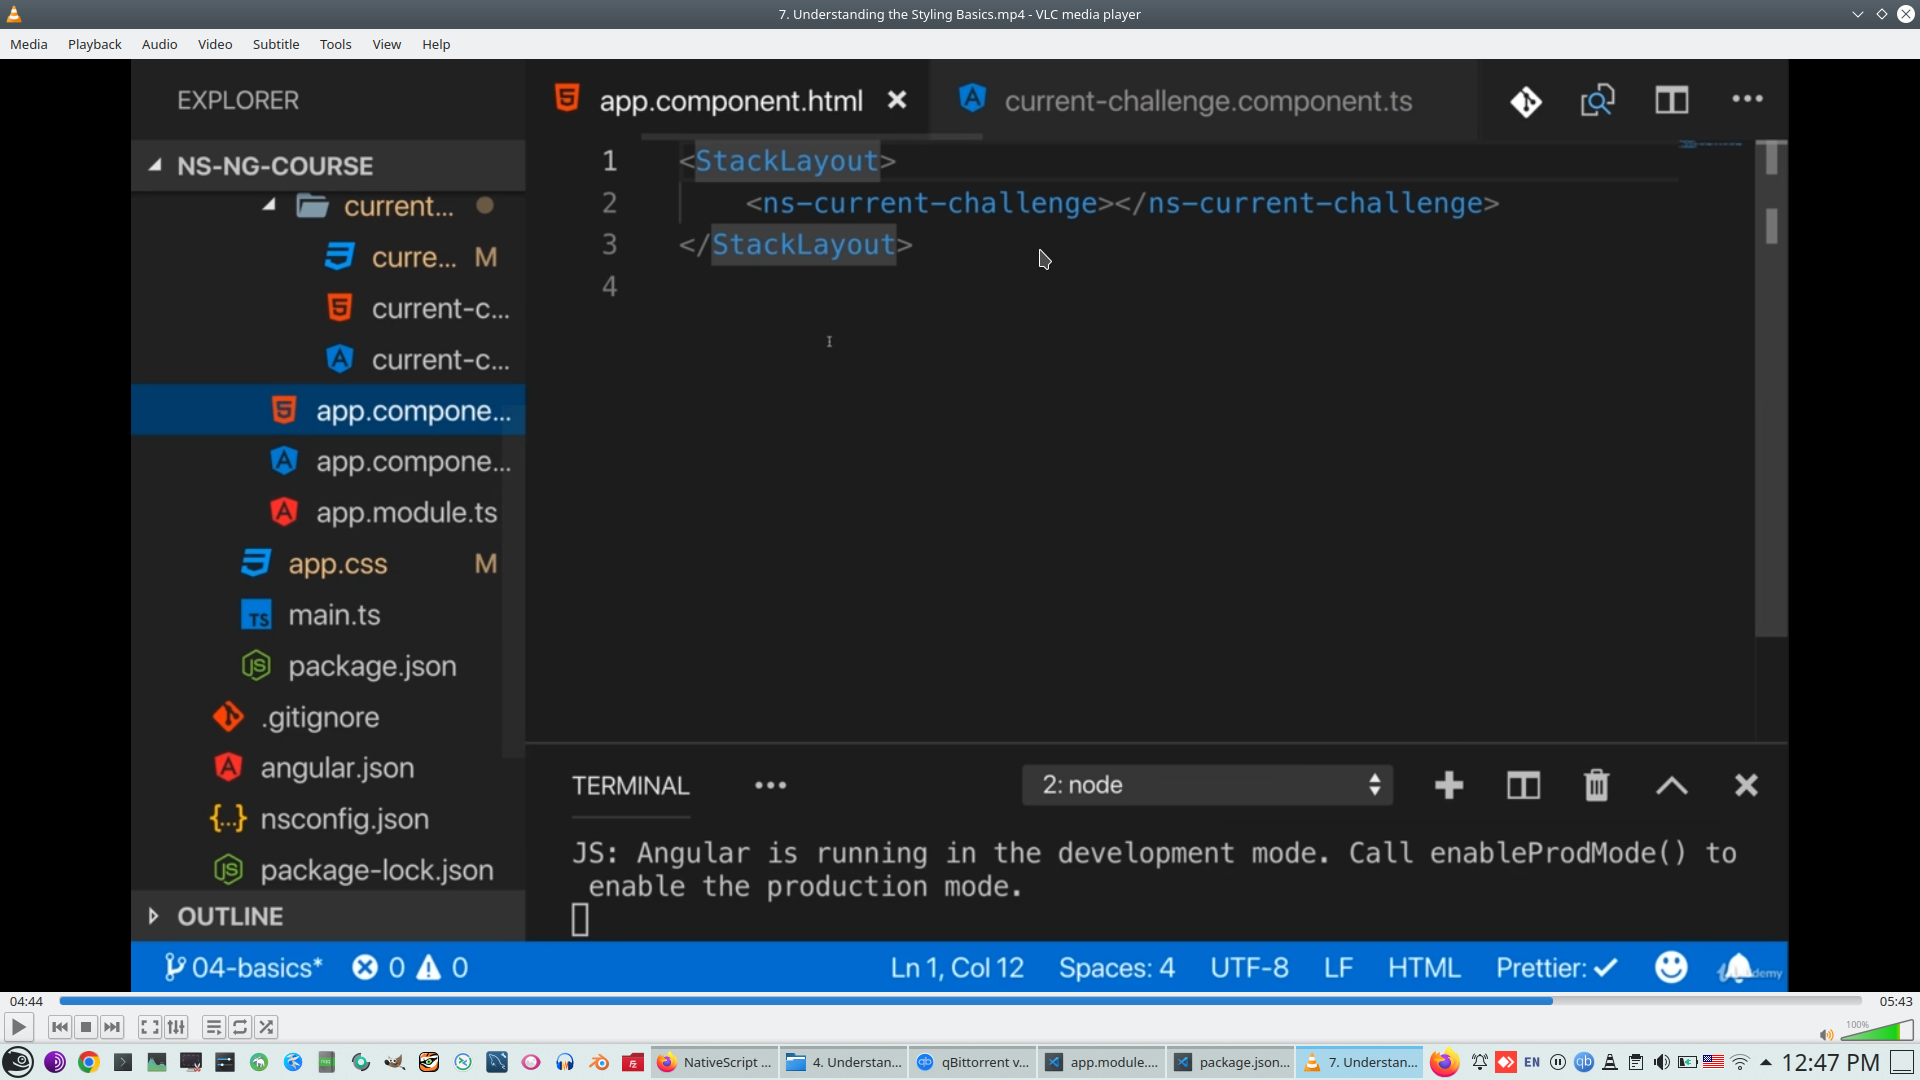
Start building Component from Layout
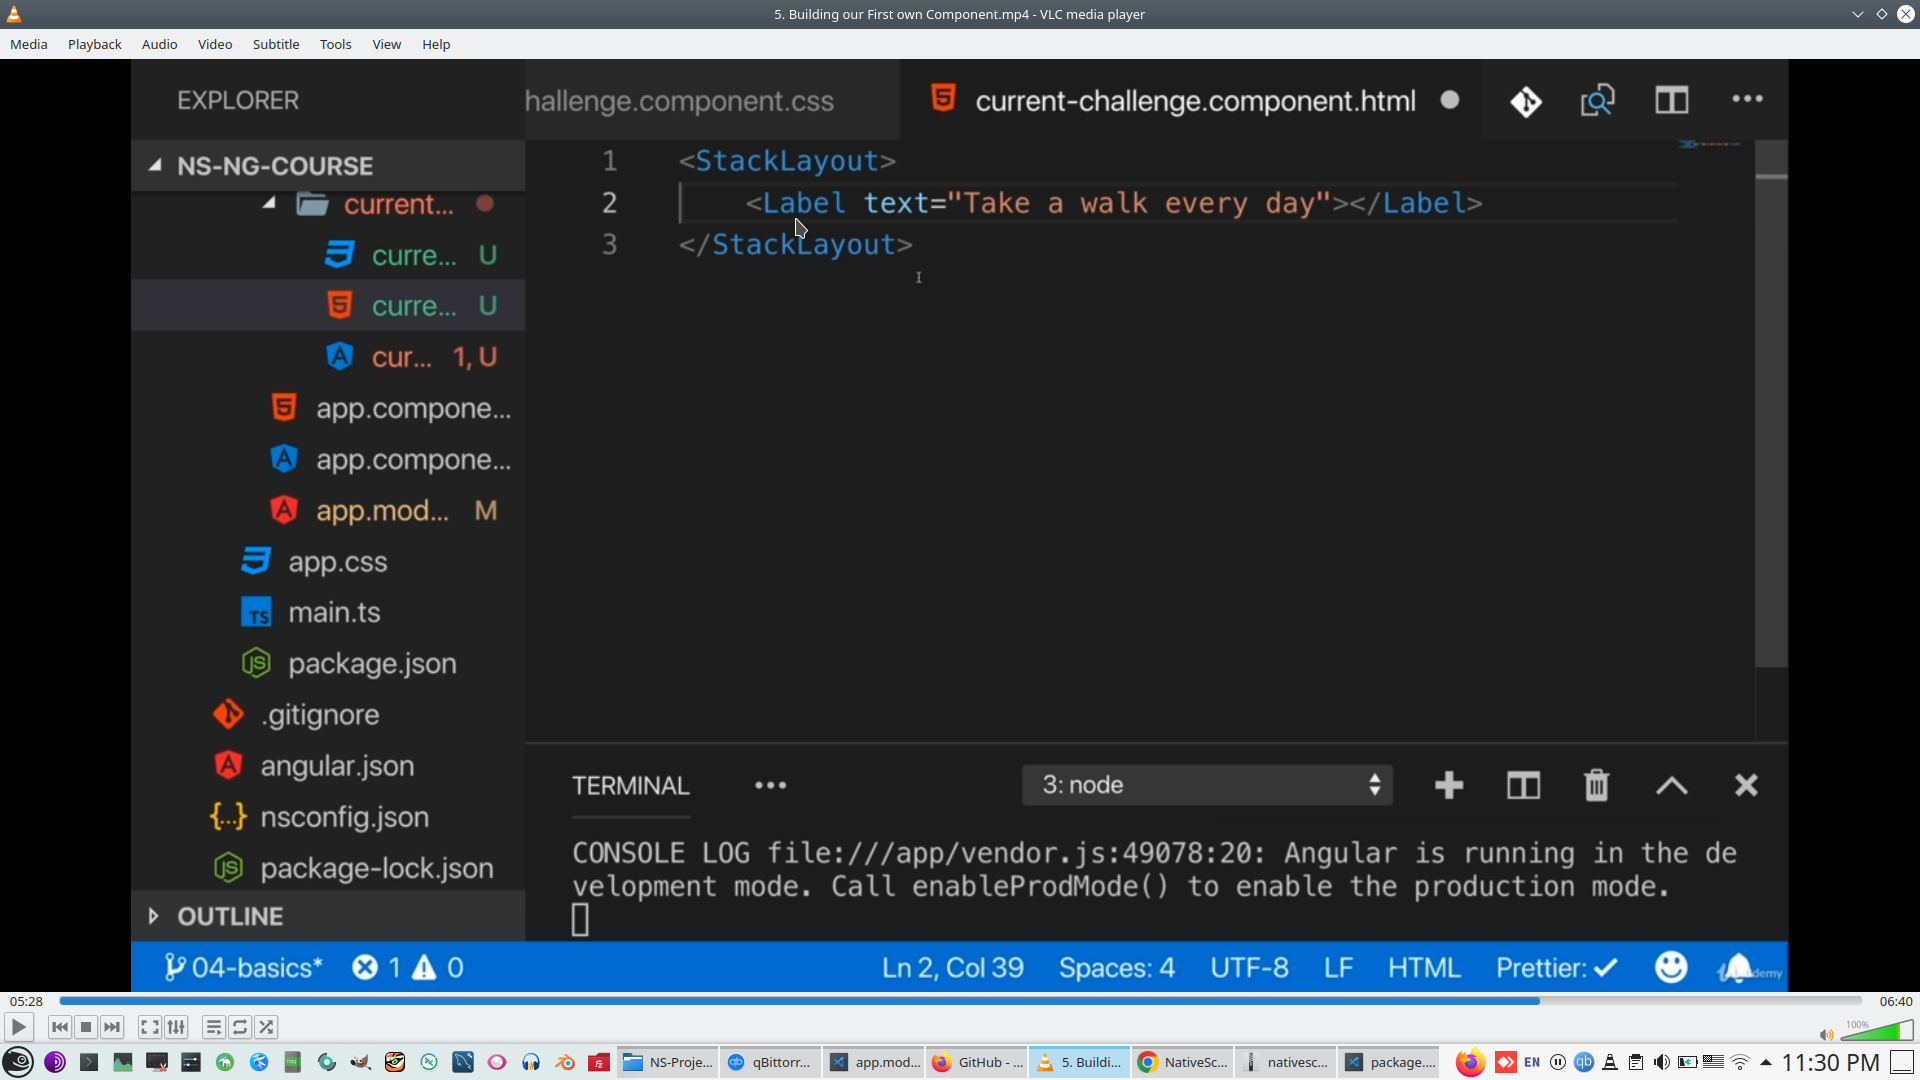
Add content to Layout
Include component to application logic, in this case this is root component
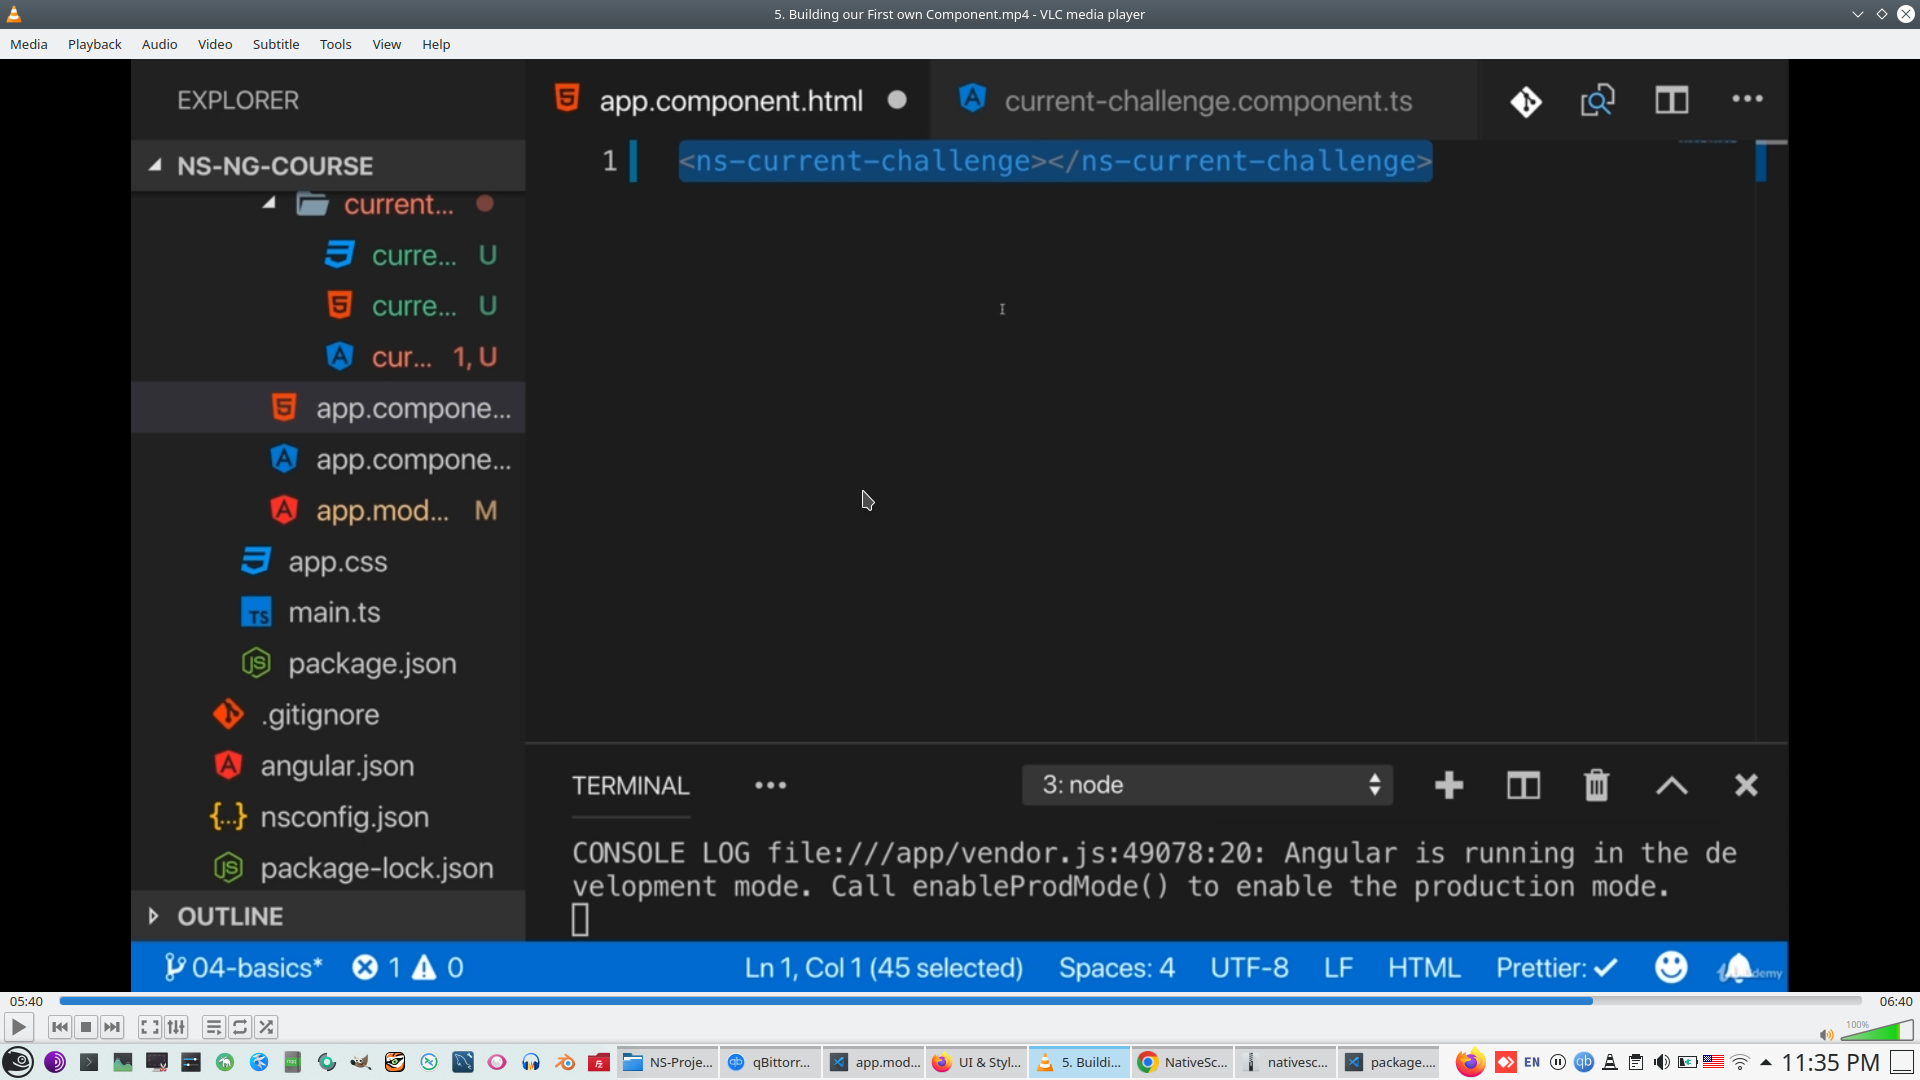
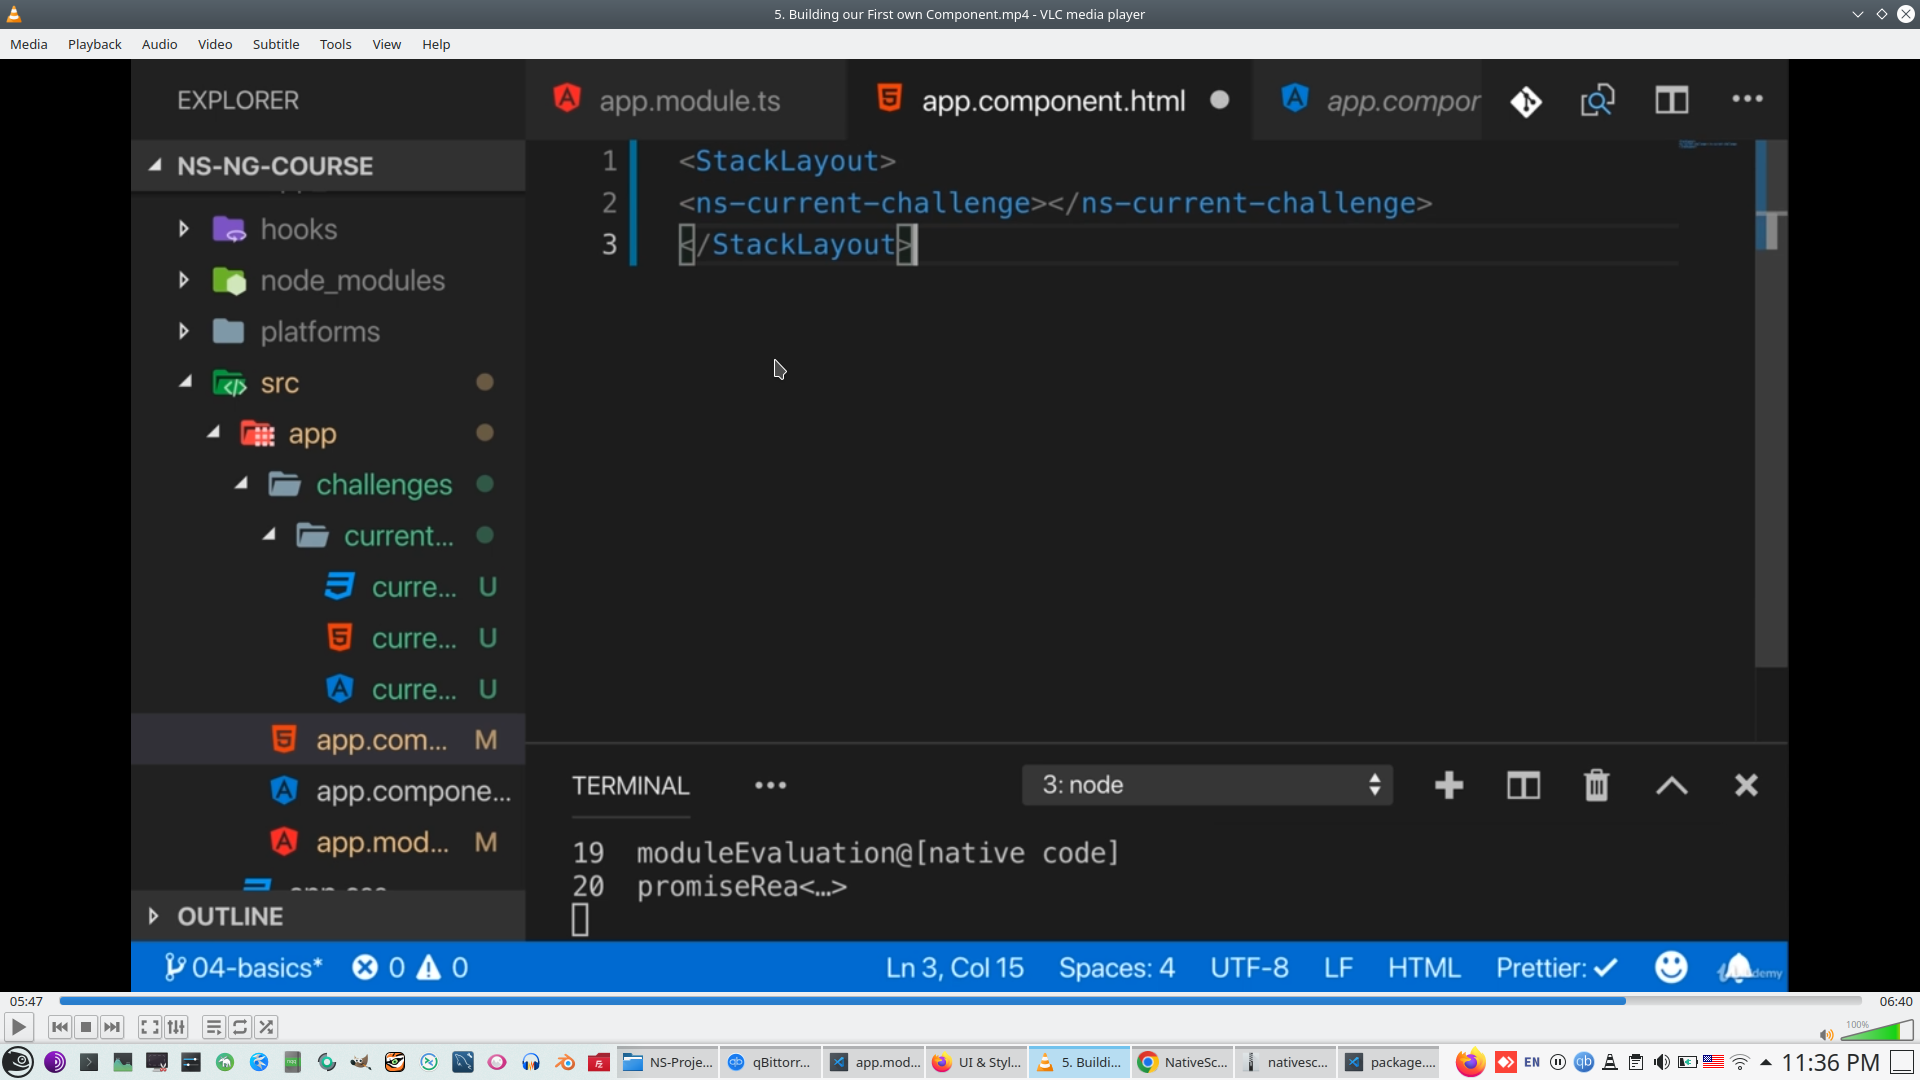
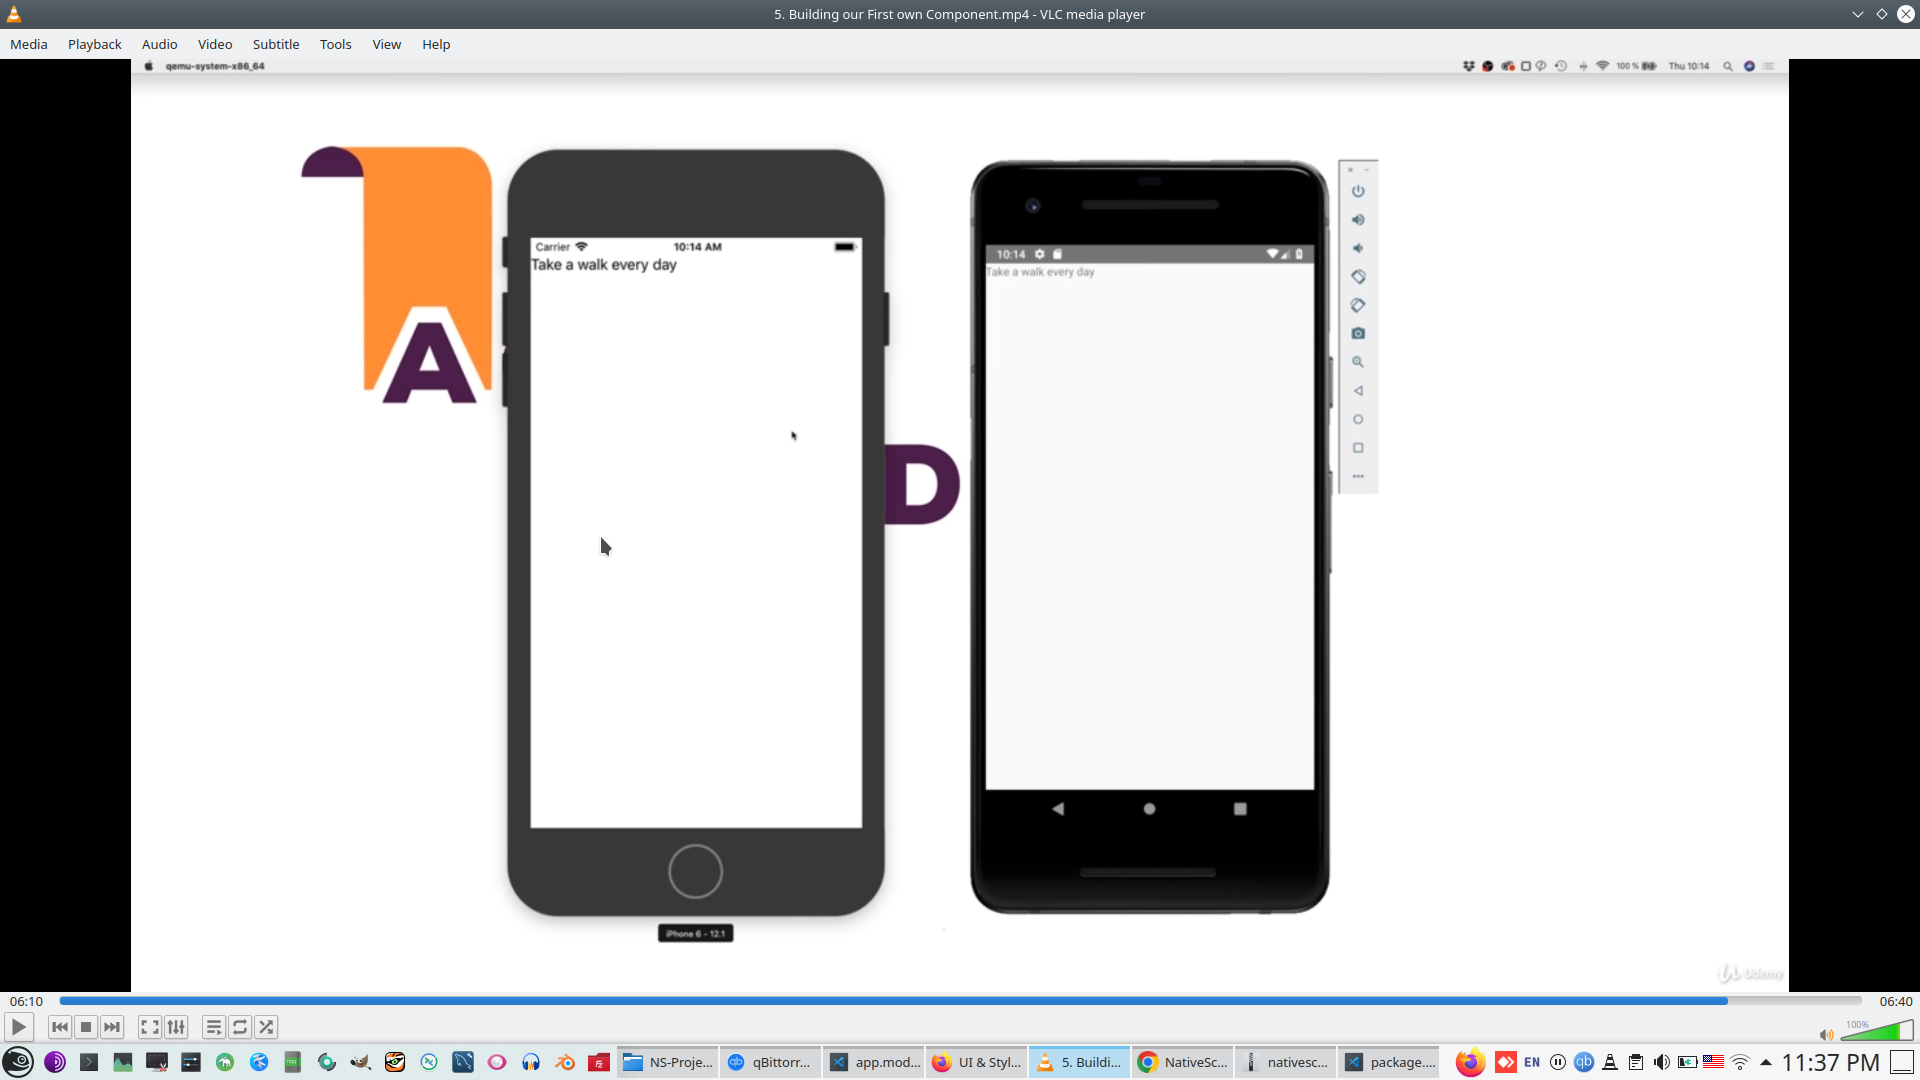
See result
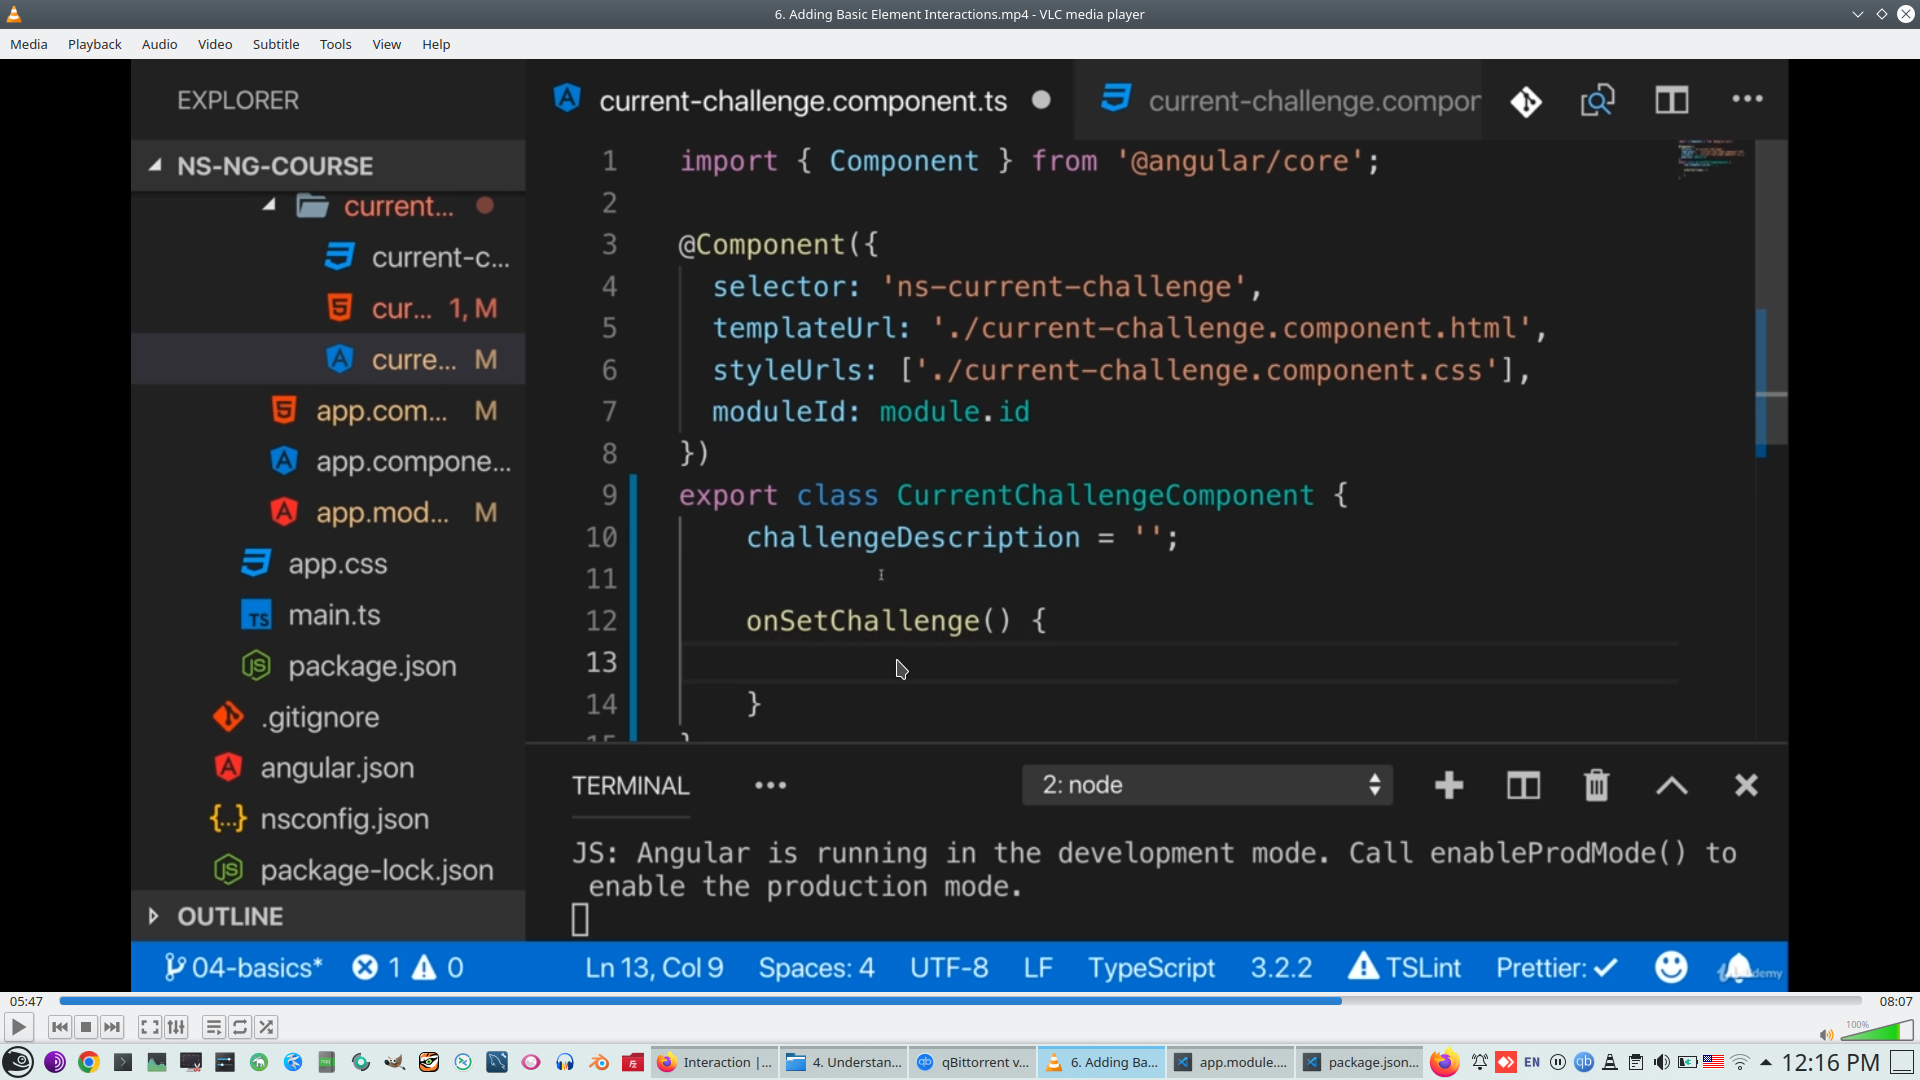
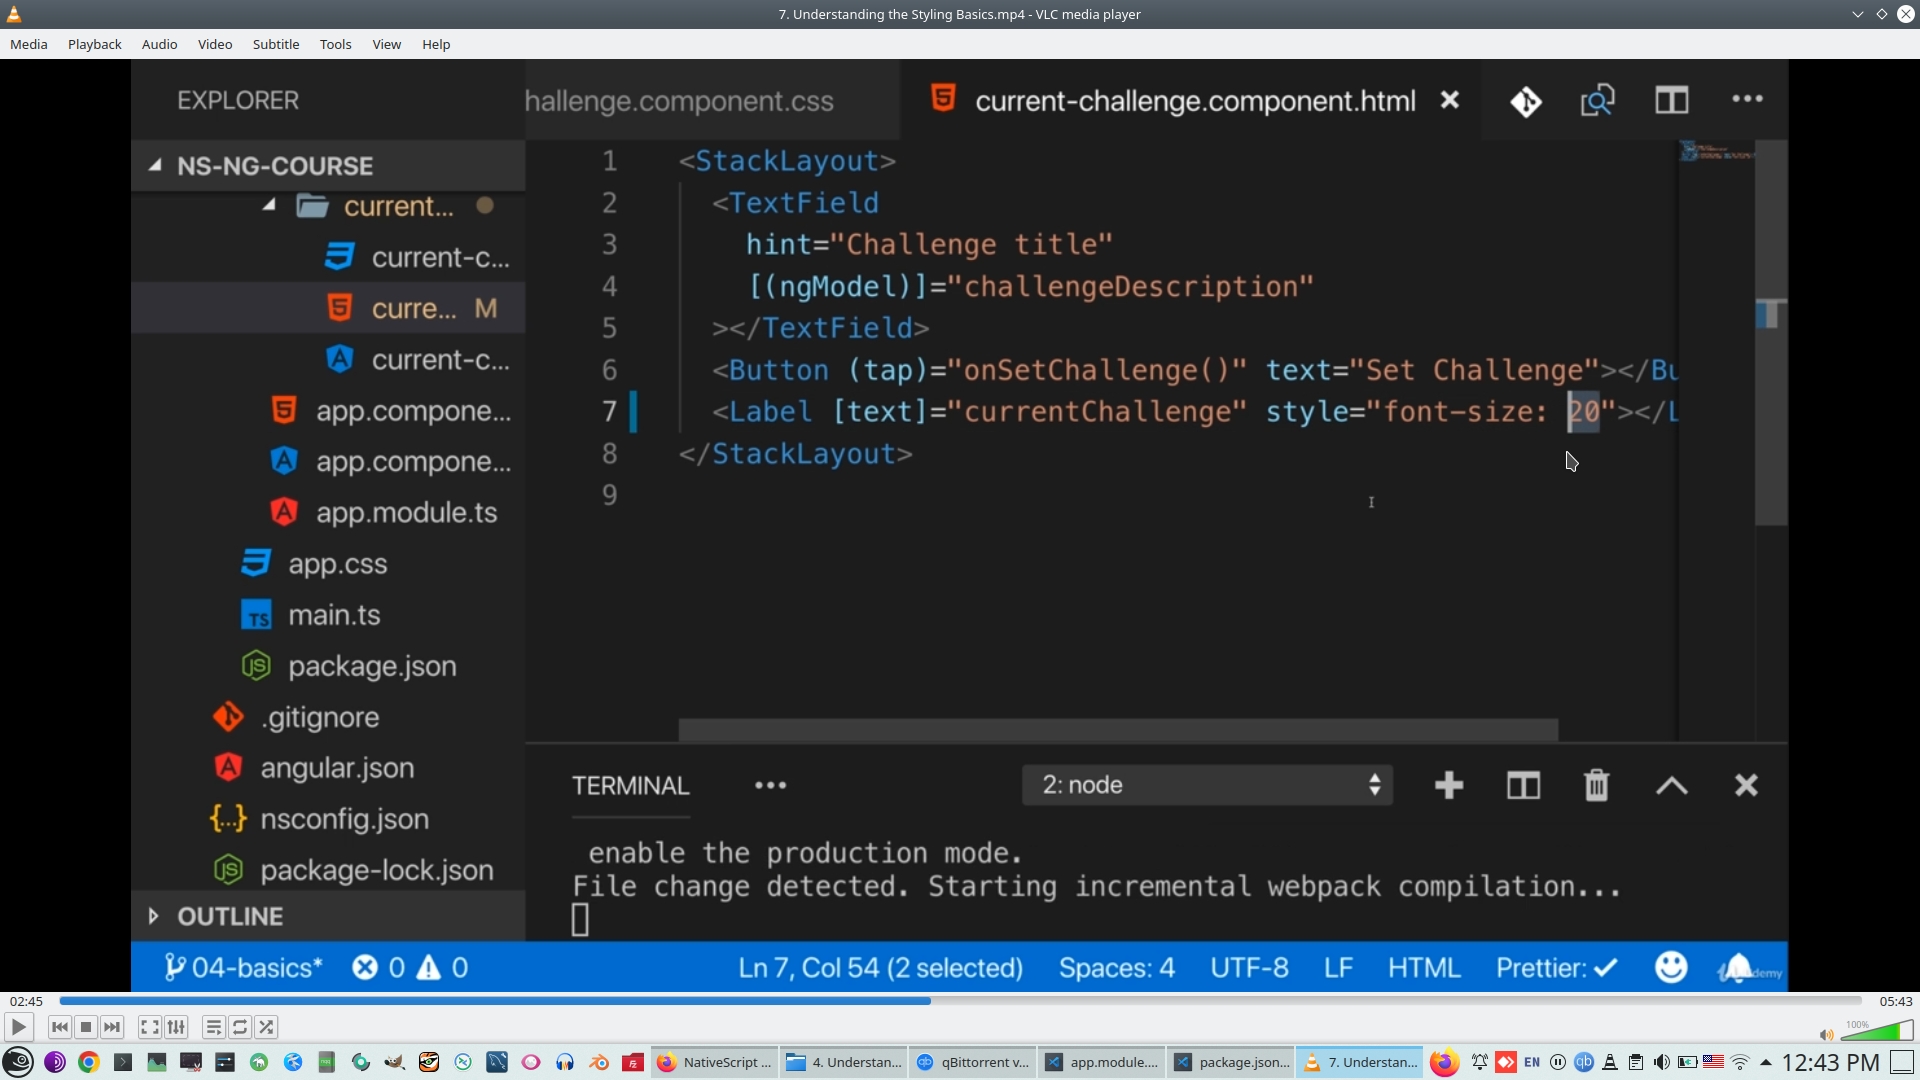
8. Create your first NS component
Creare variable to receive text
NgModel (two way bining - '[()]') allow accept variables from Textbox
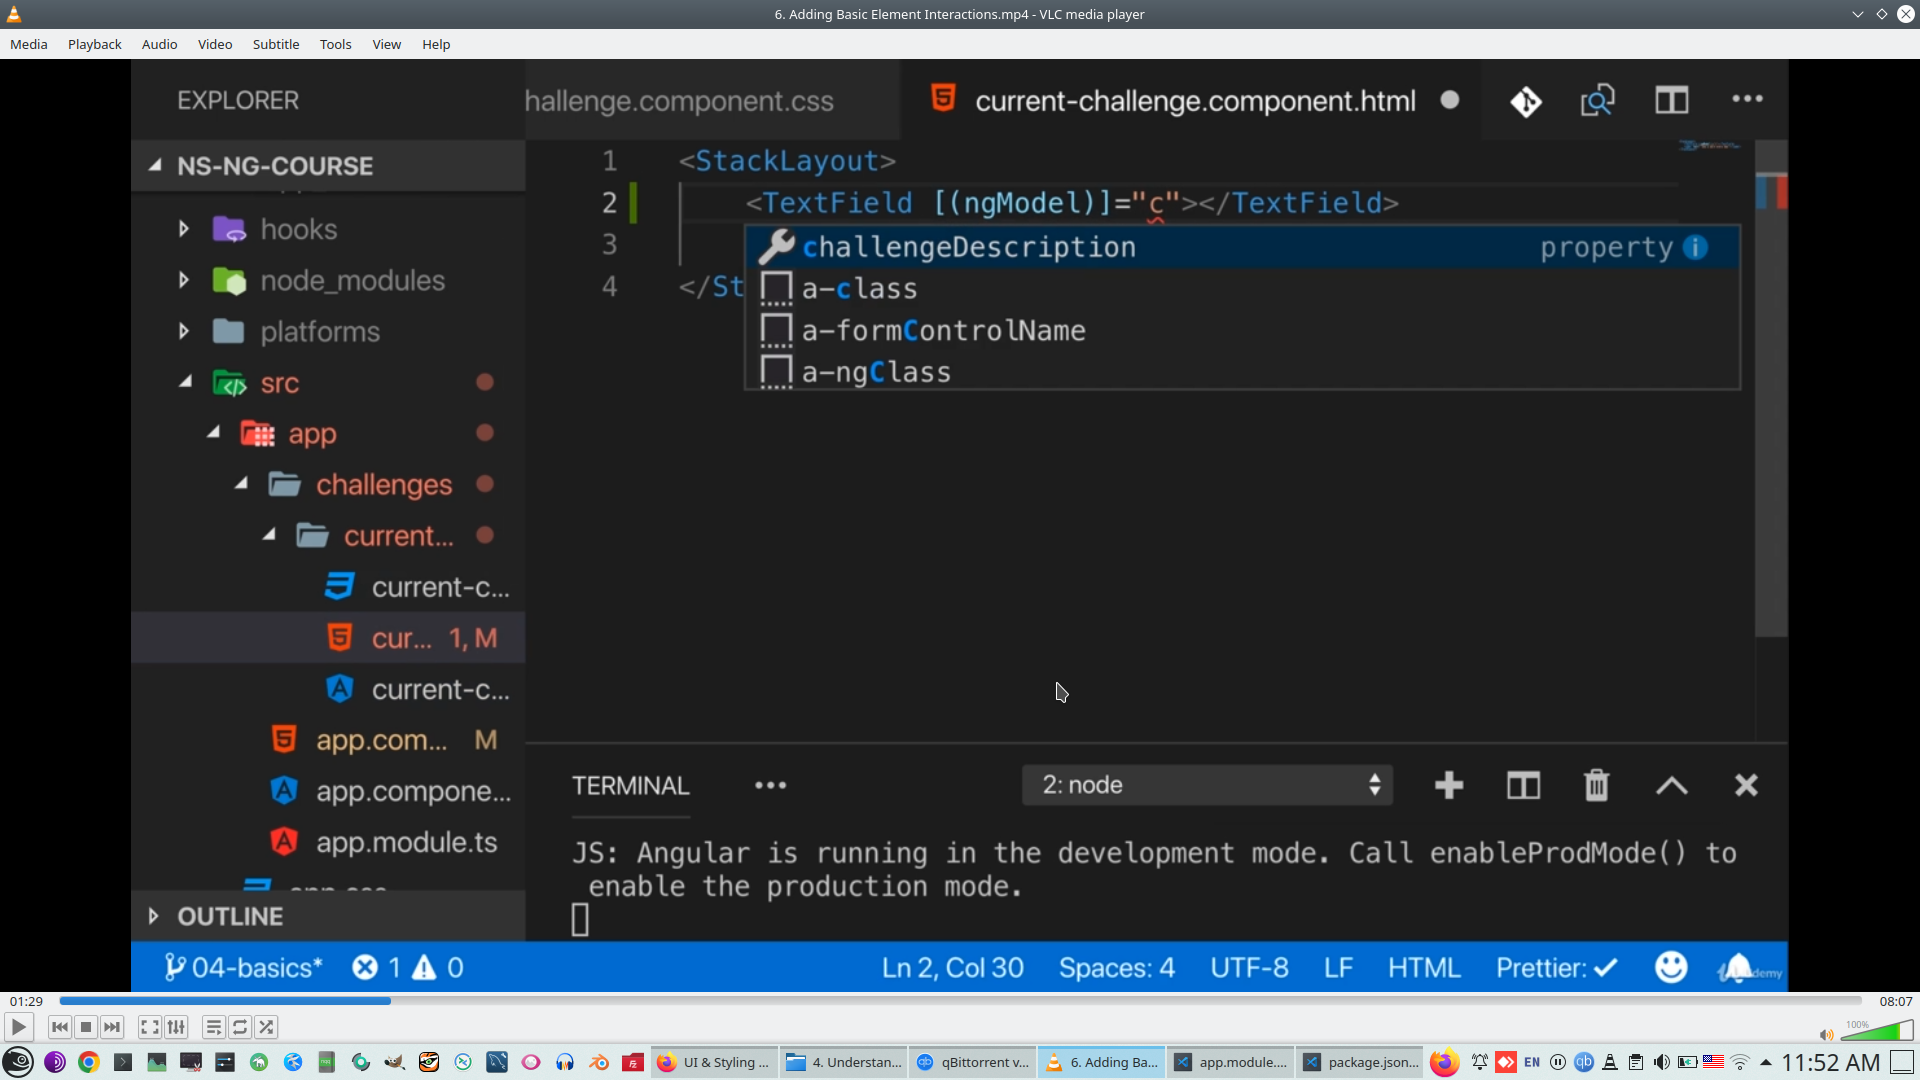
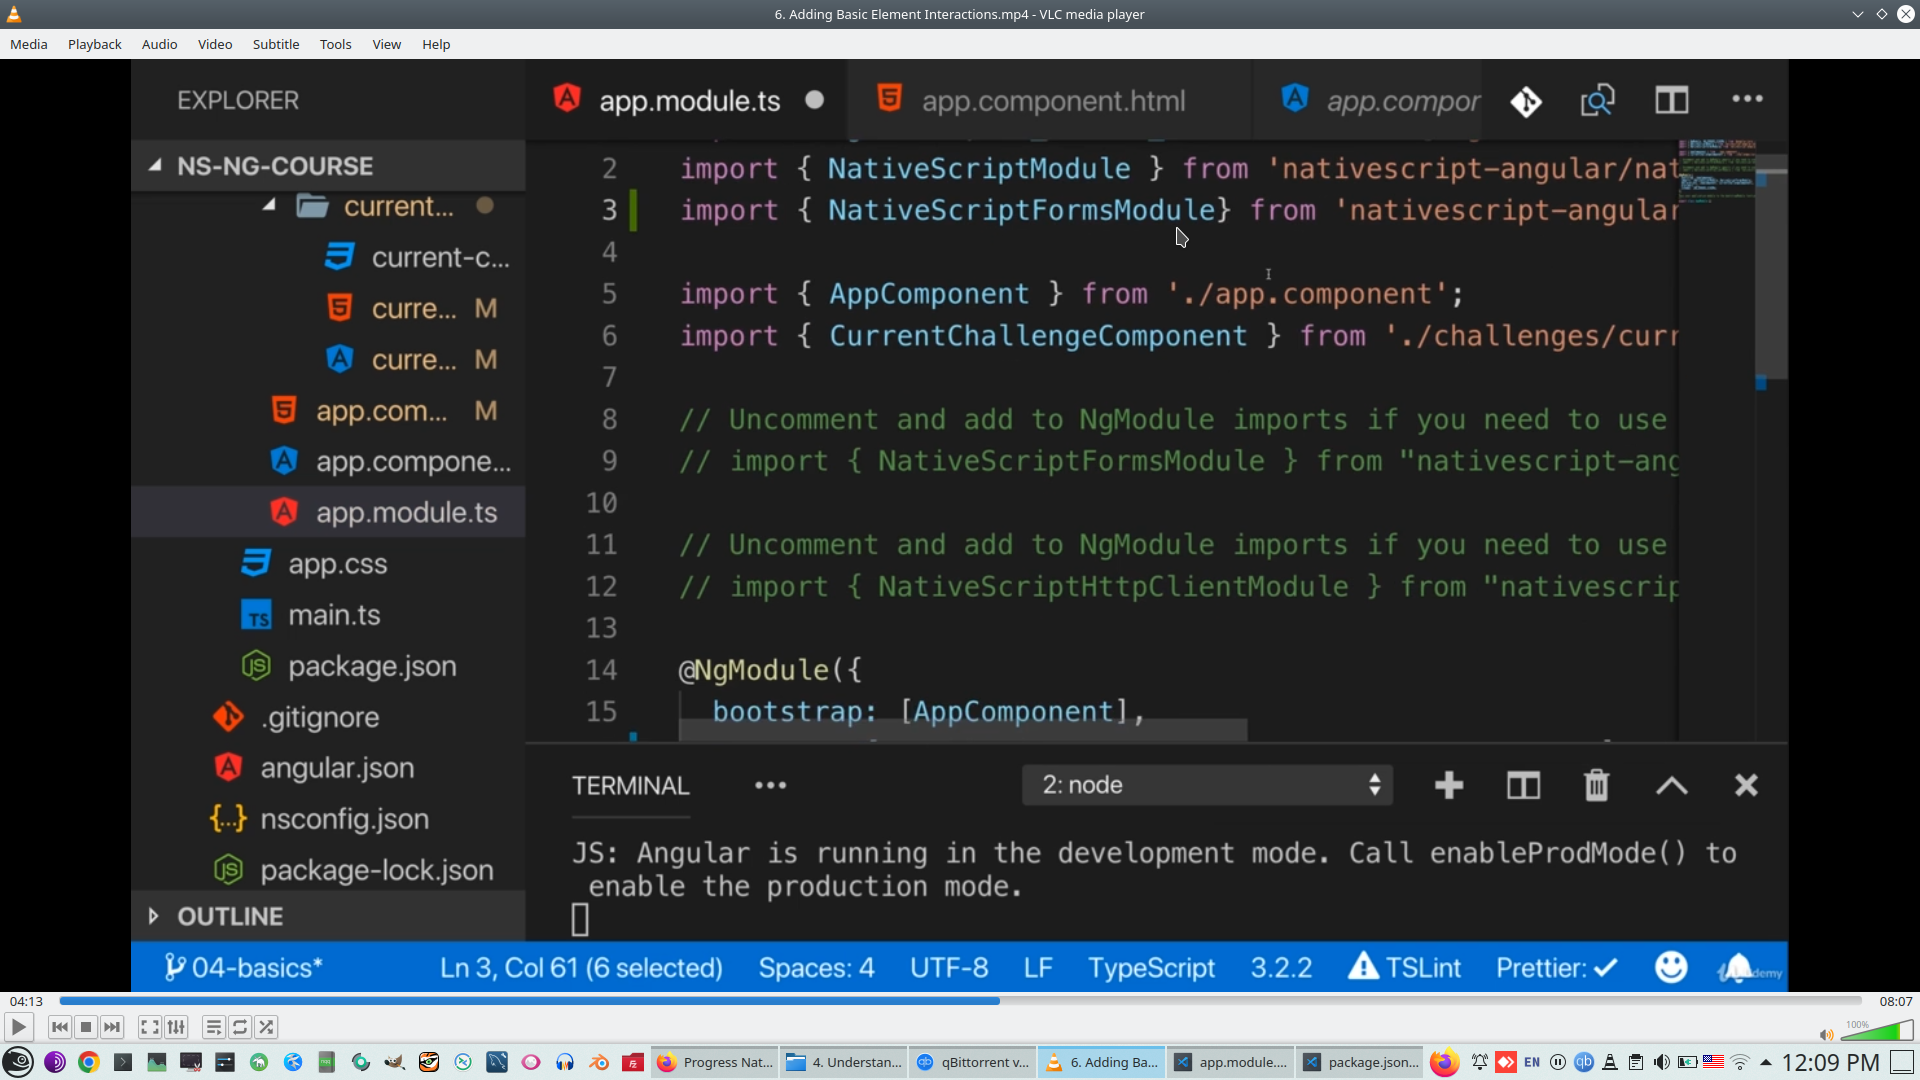
For working with user input and unlock NgModel need to import Forms module
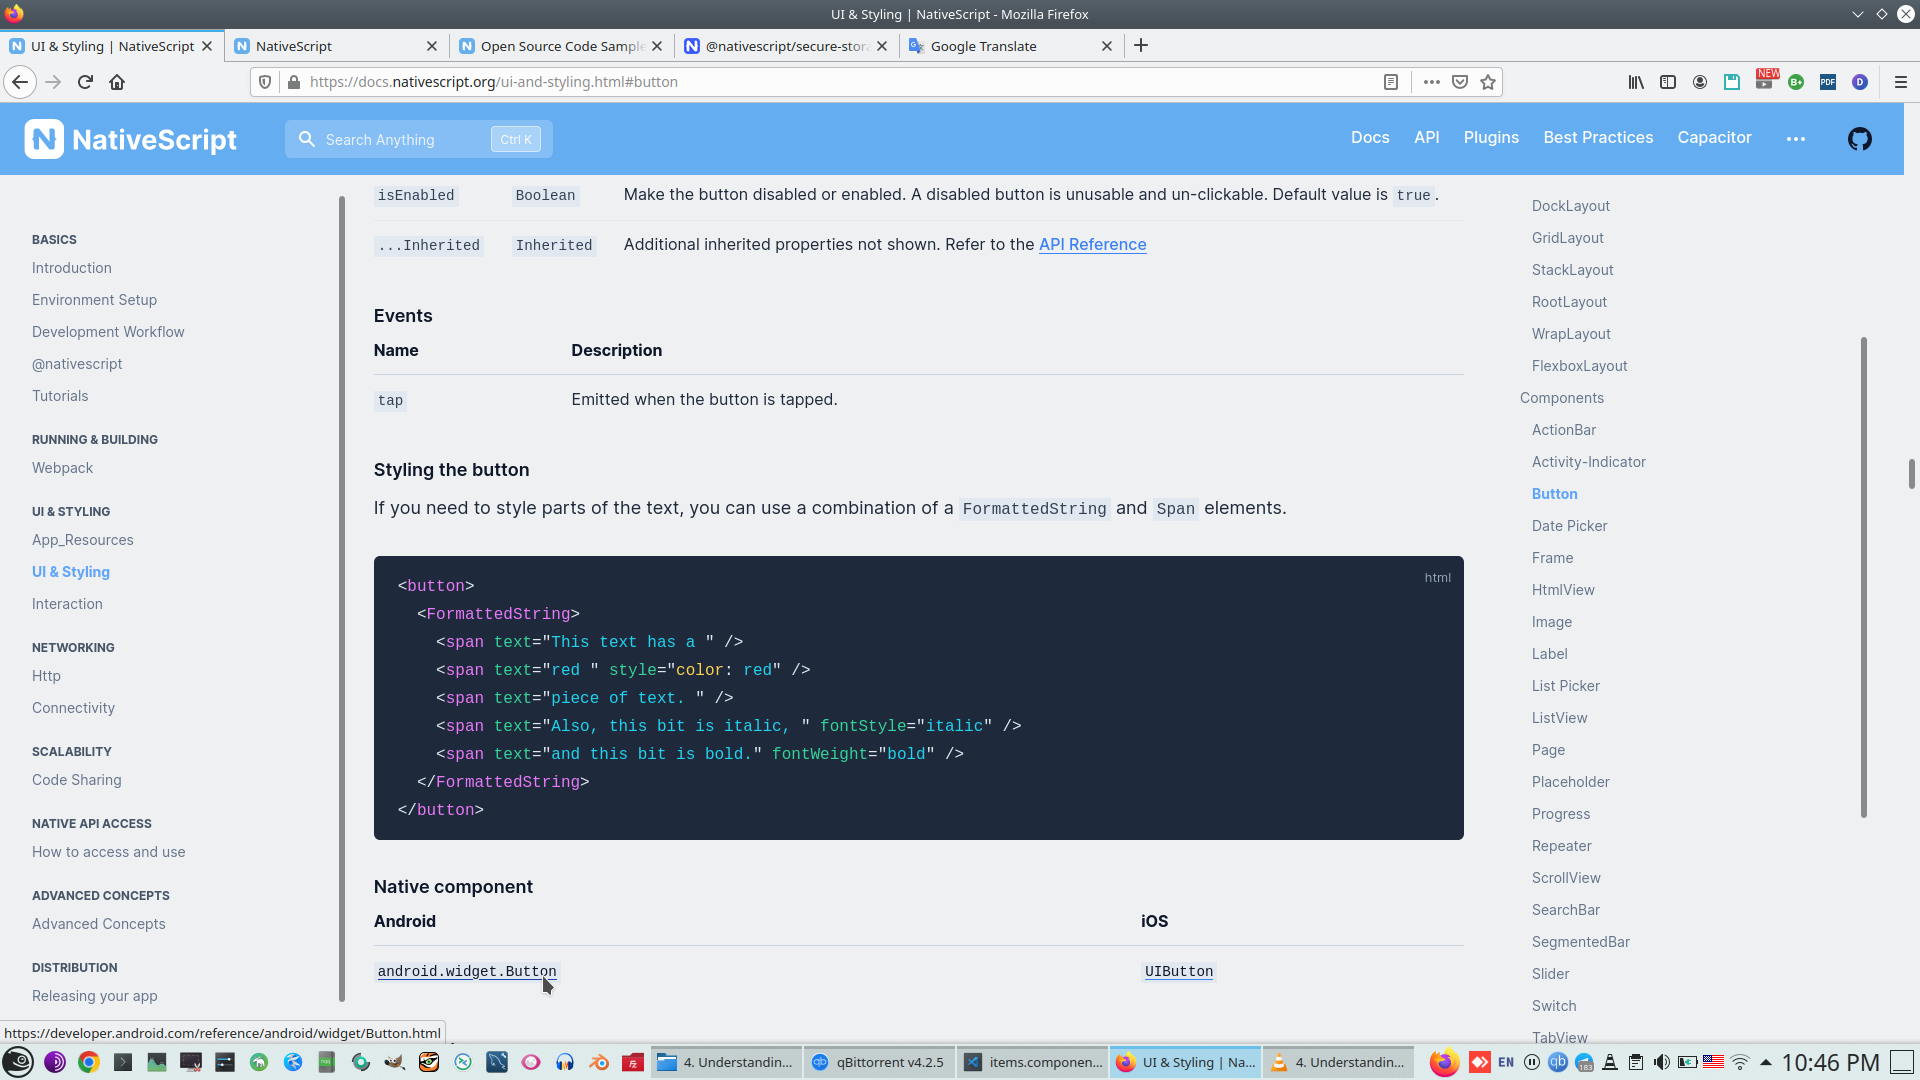
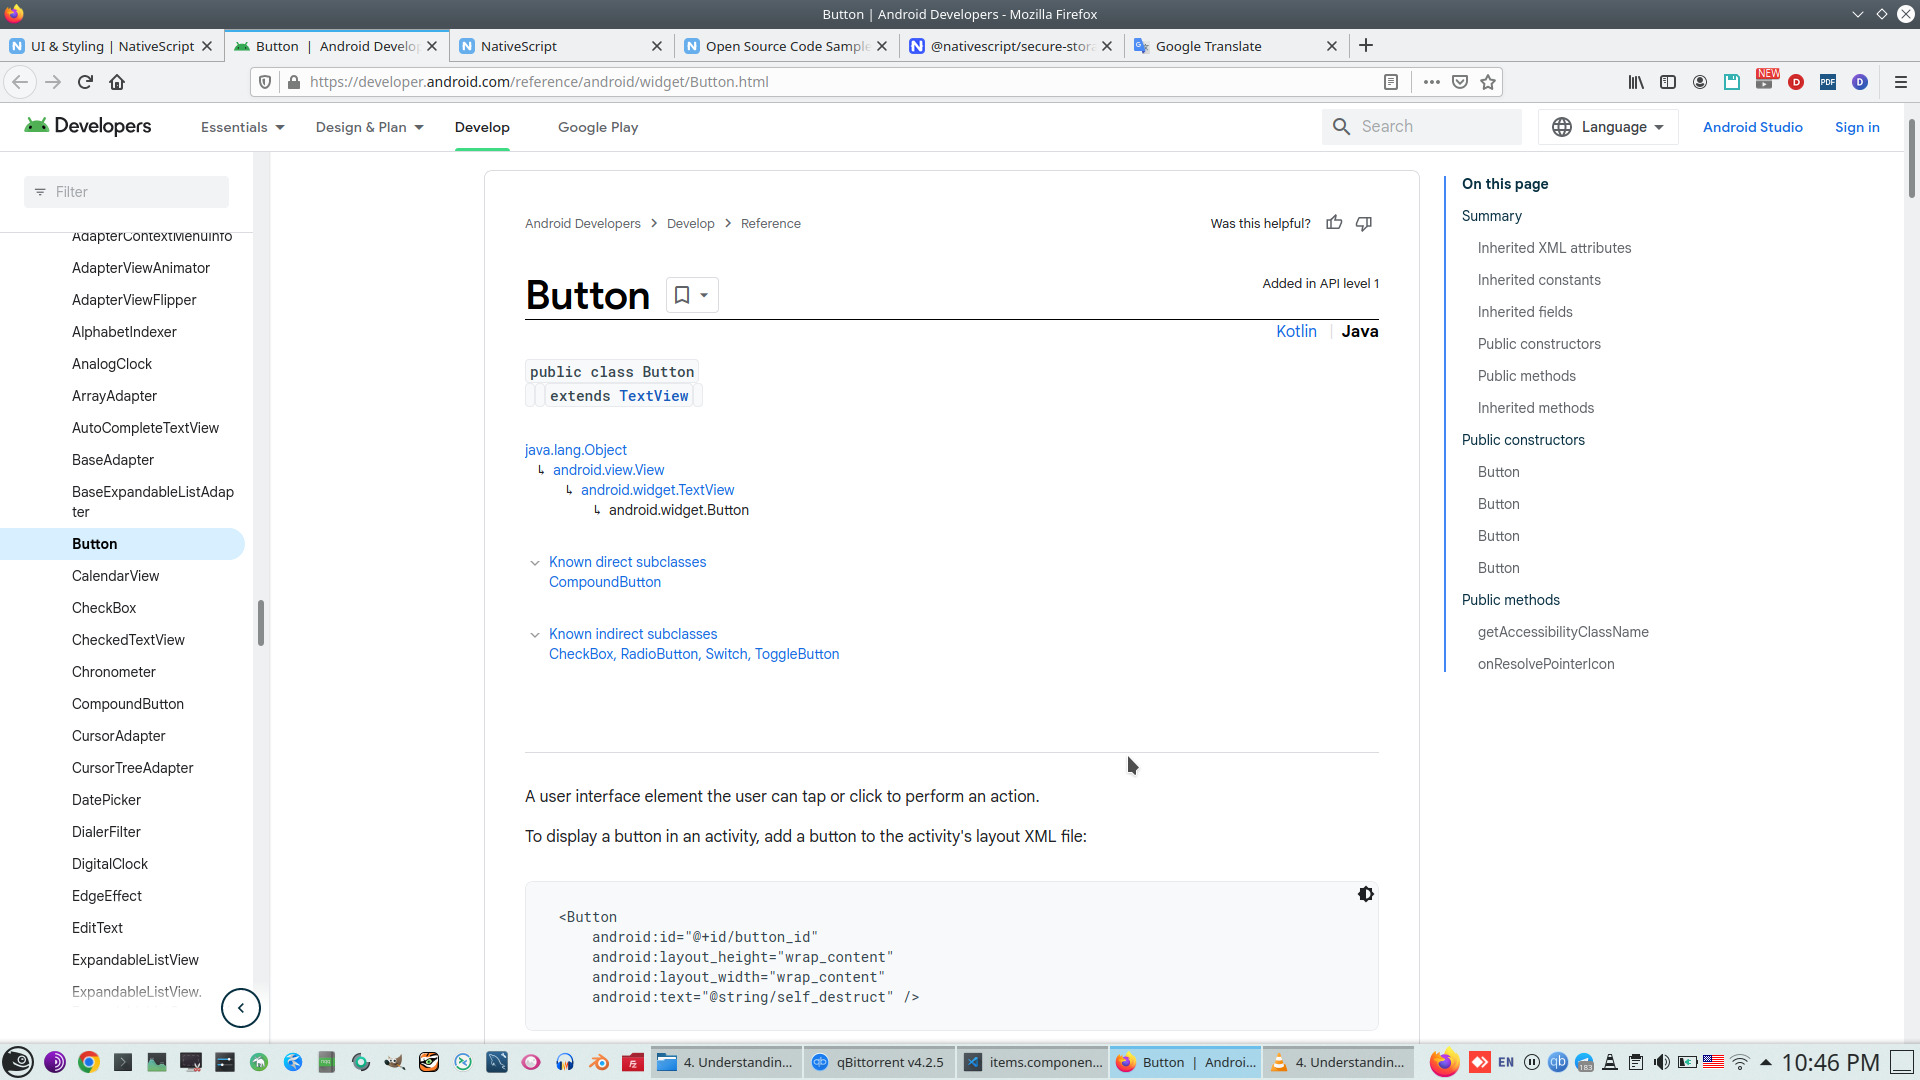
See all attributes and description of UI controls

Also see description of properties of each UI controls
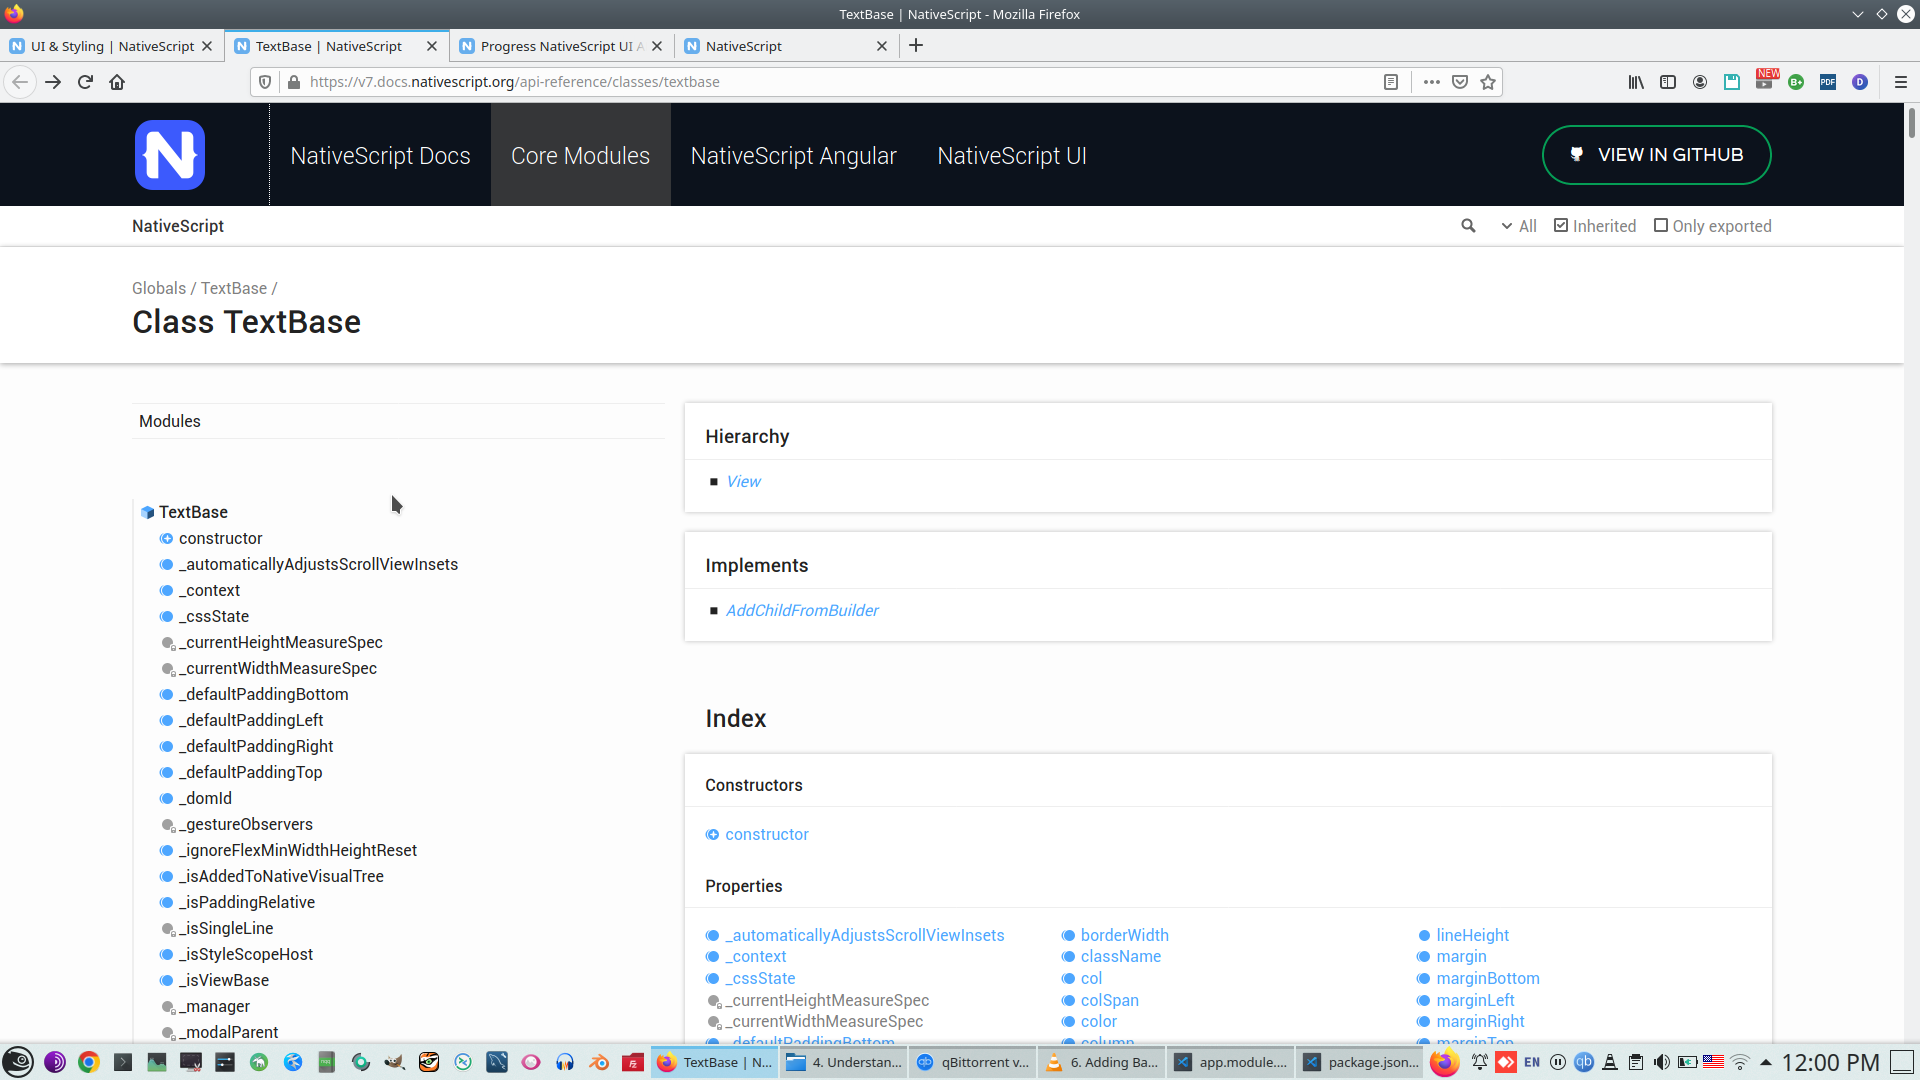
In this case we use Hint attribute
And check how control will working with attributes

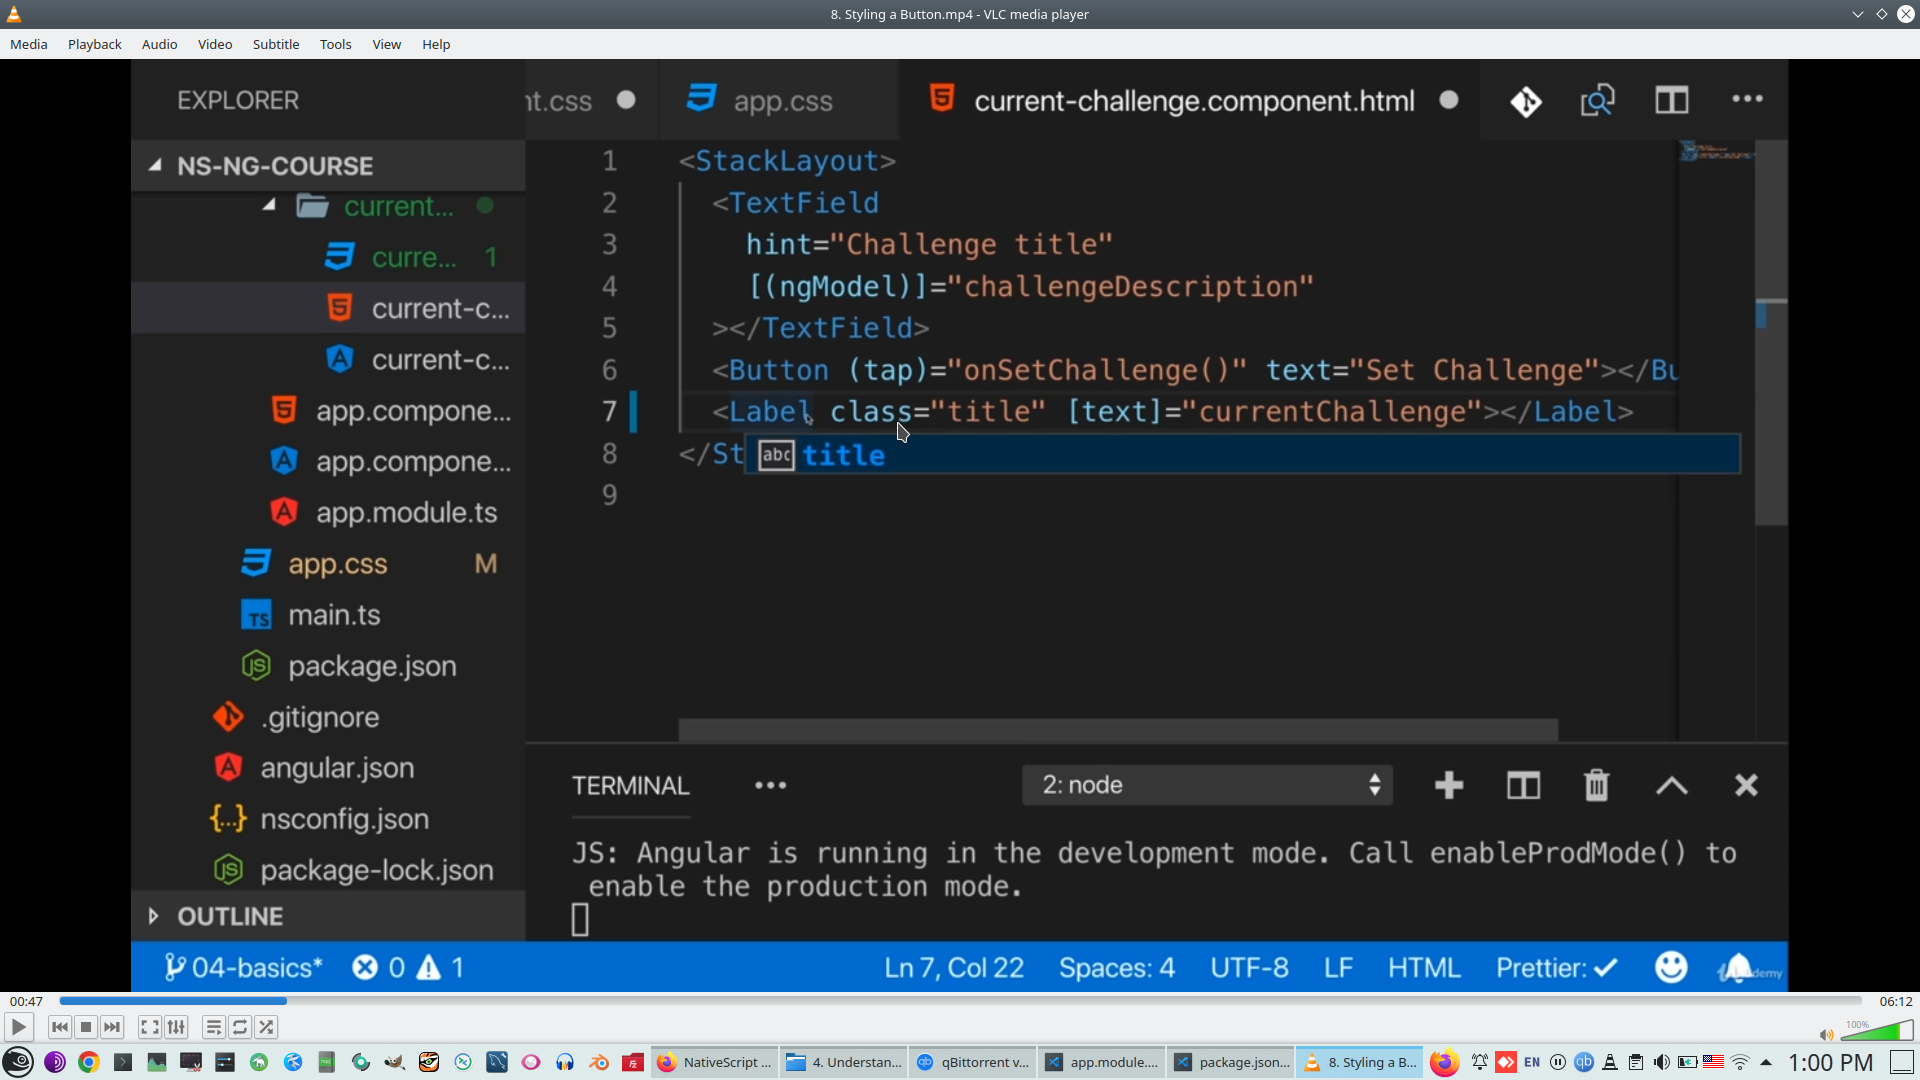
Gestures
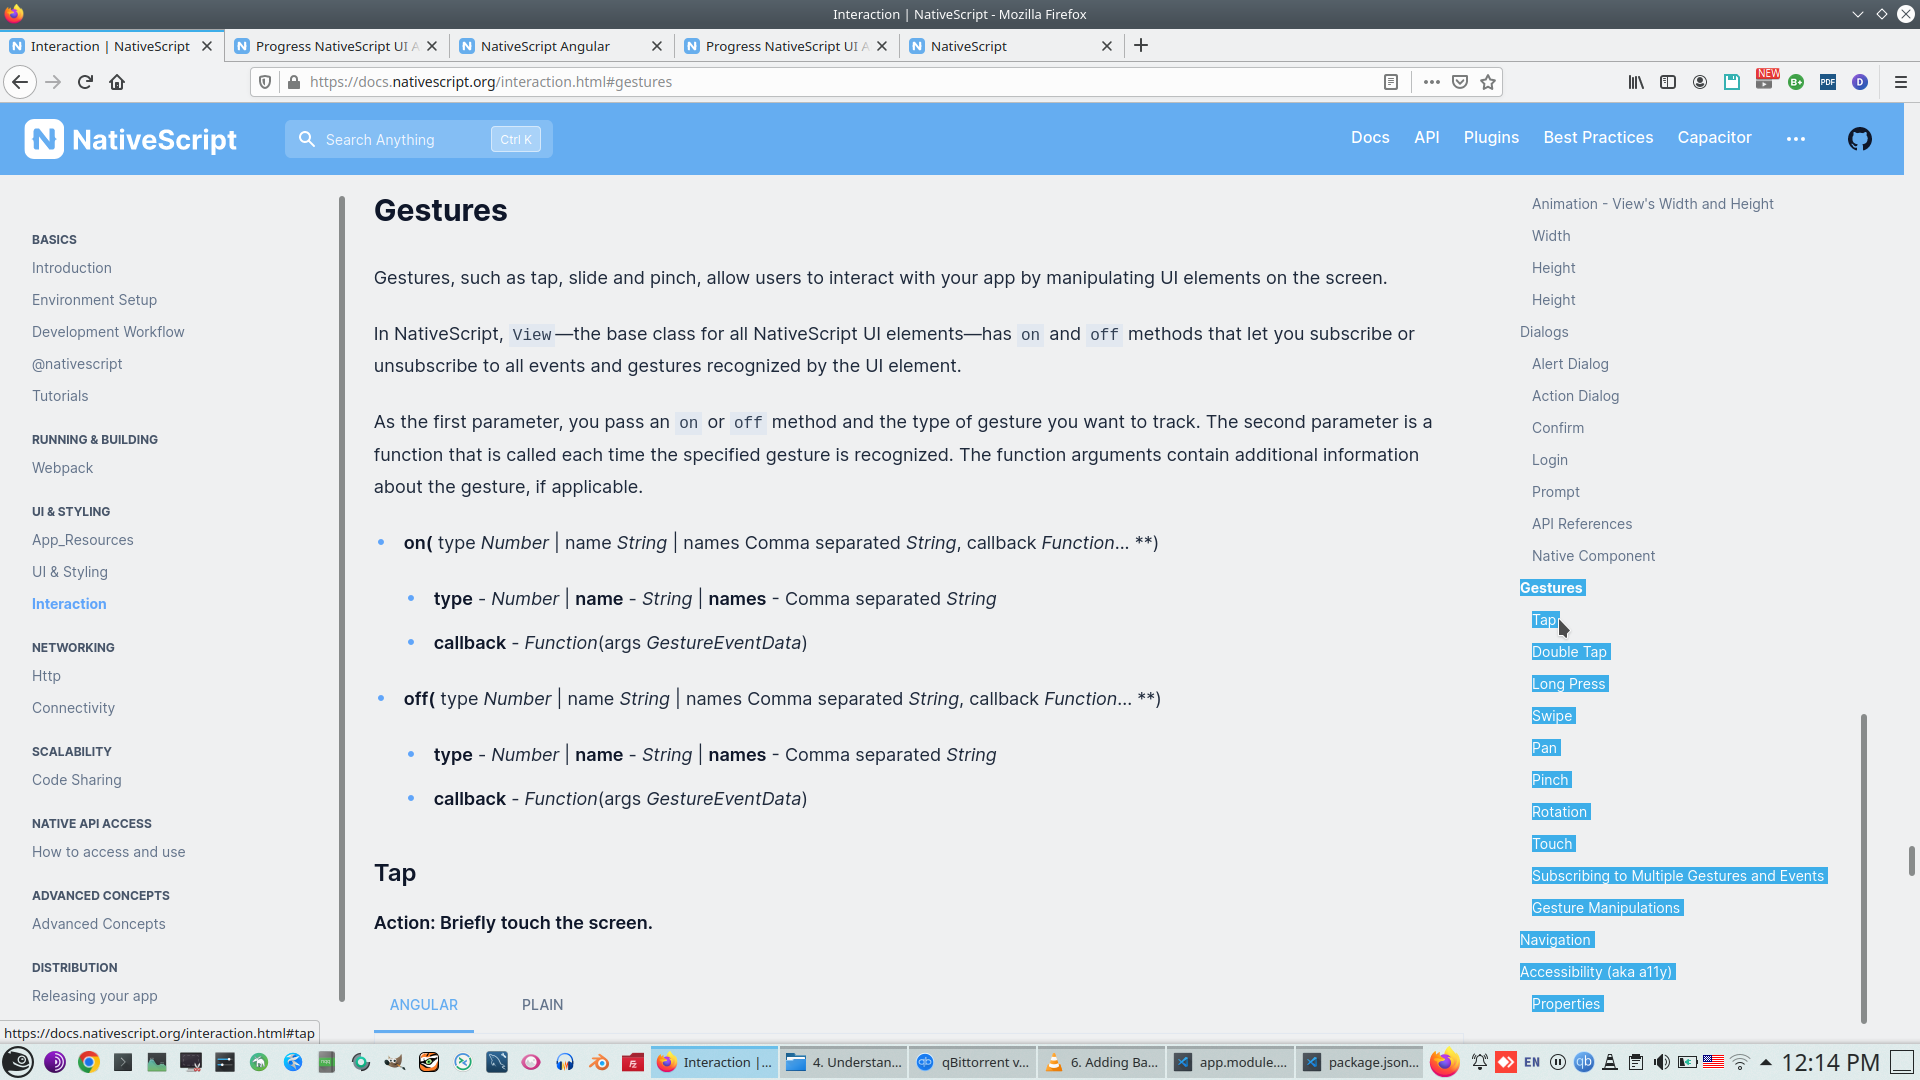
Gestures Tap event, '()' - allow to bind code to event,

'[]' - property binding.
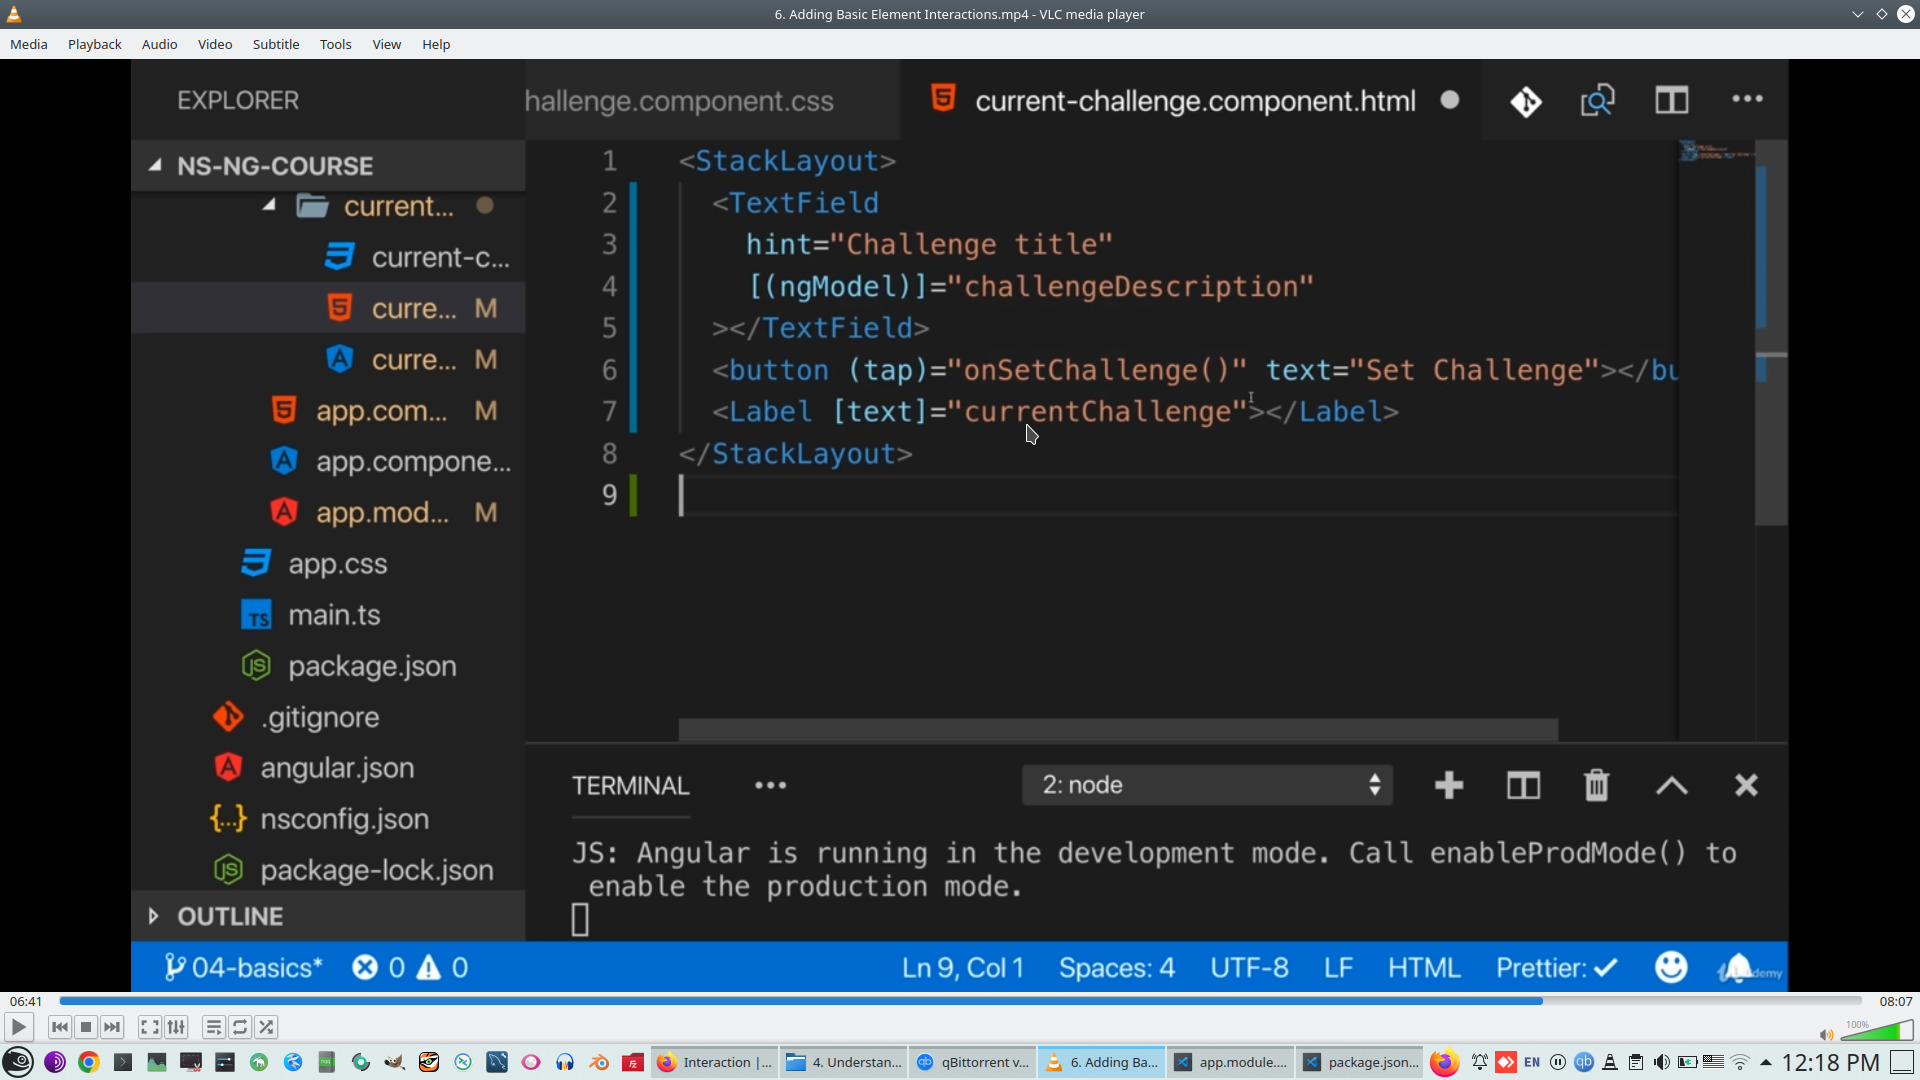
Pass value from Textbox to Label
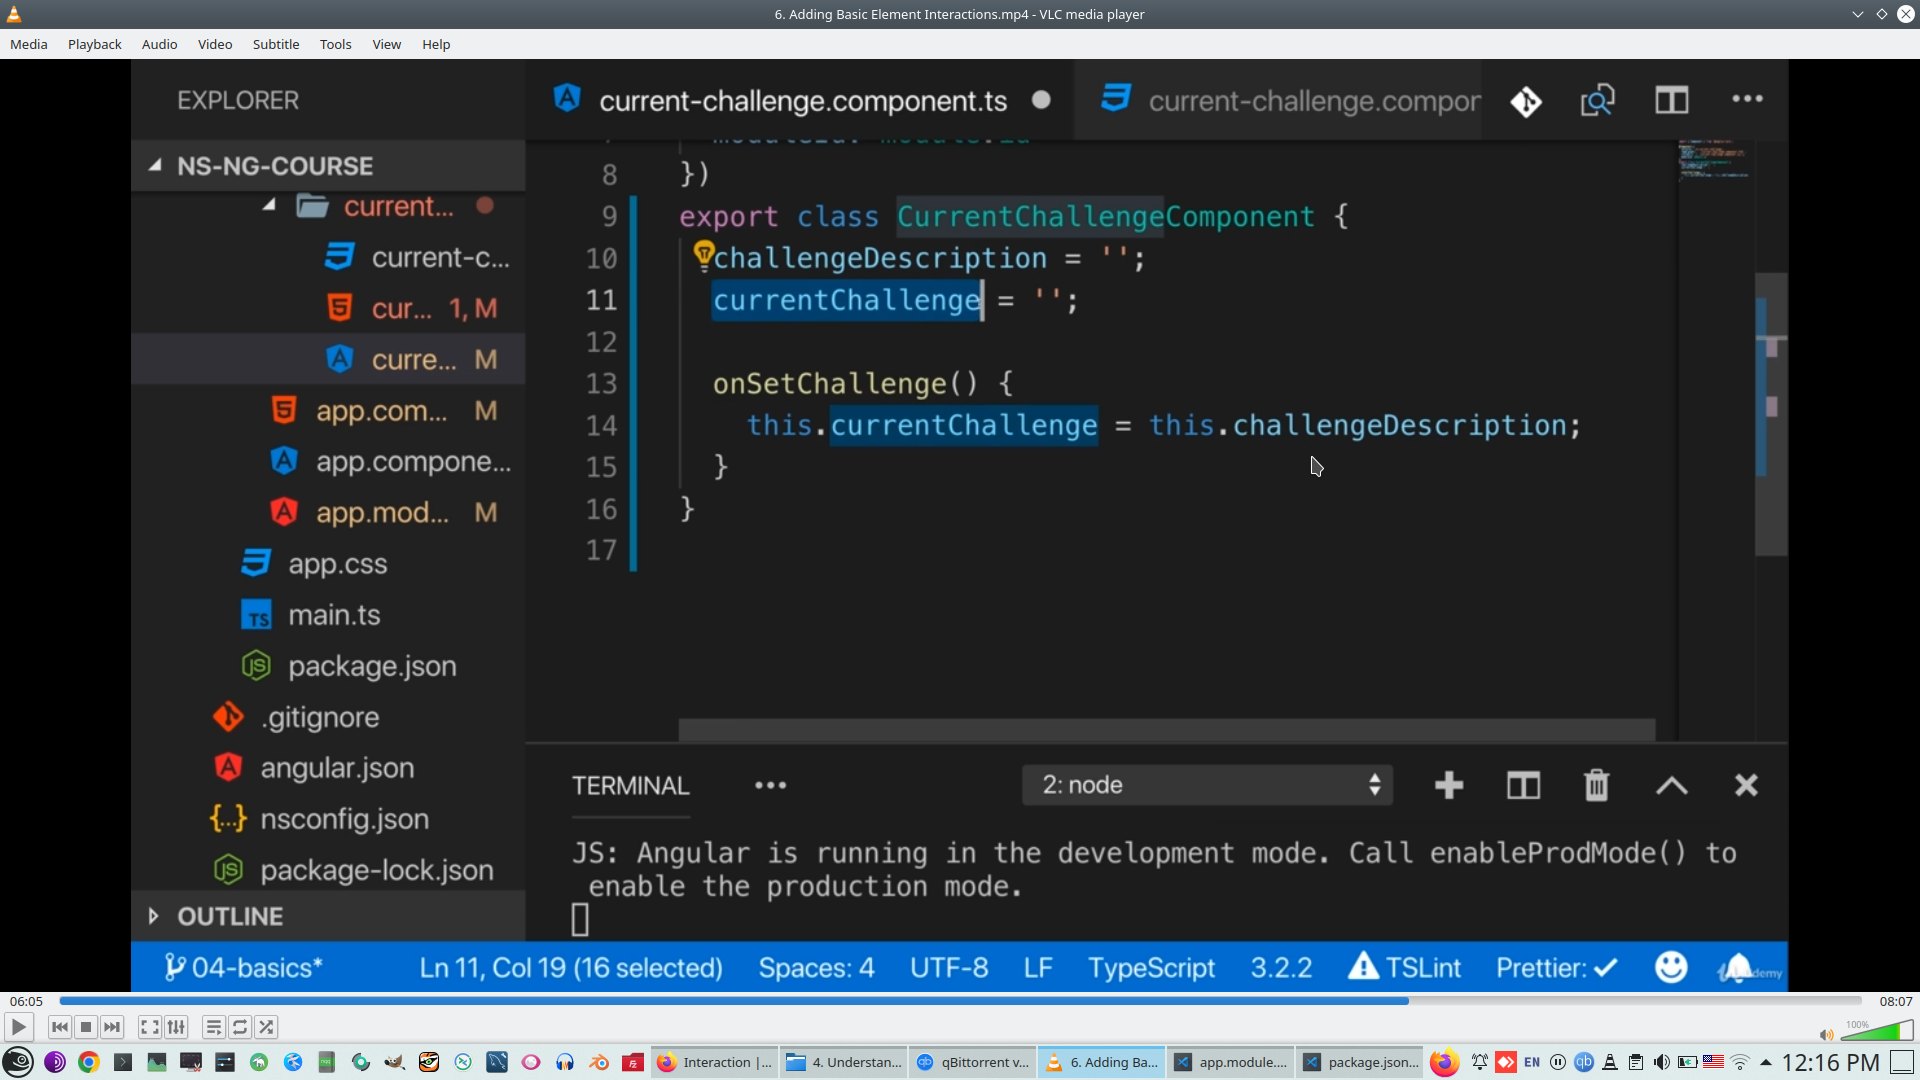
Check result
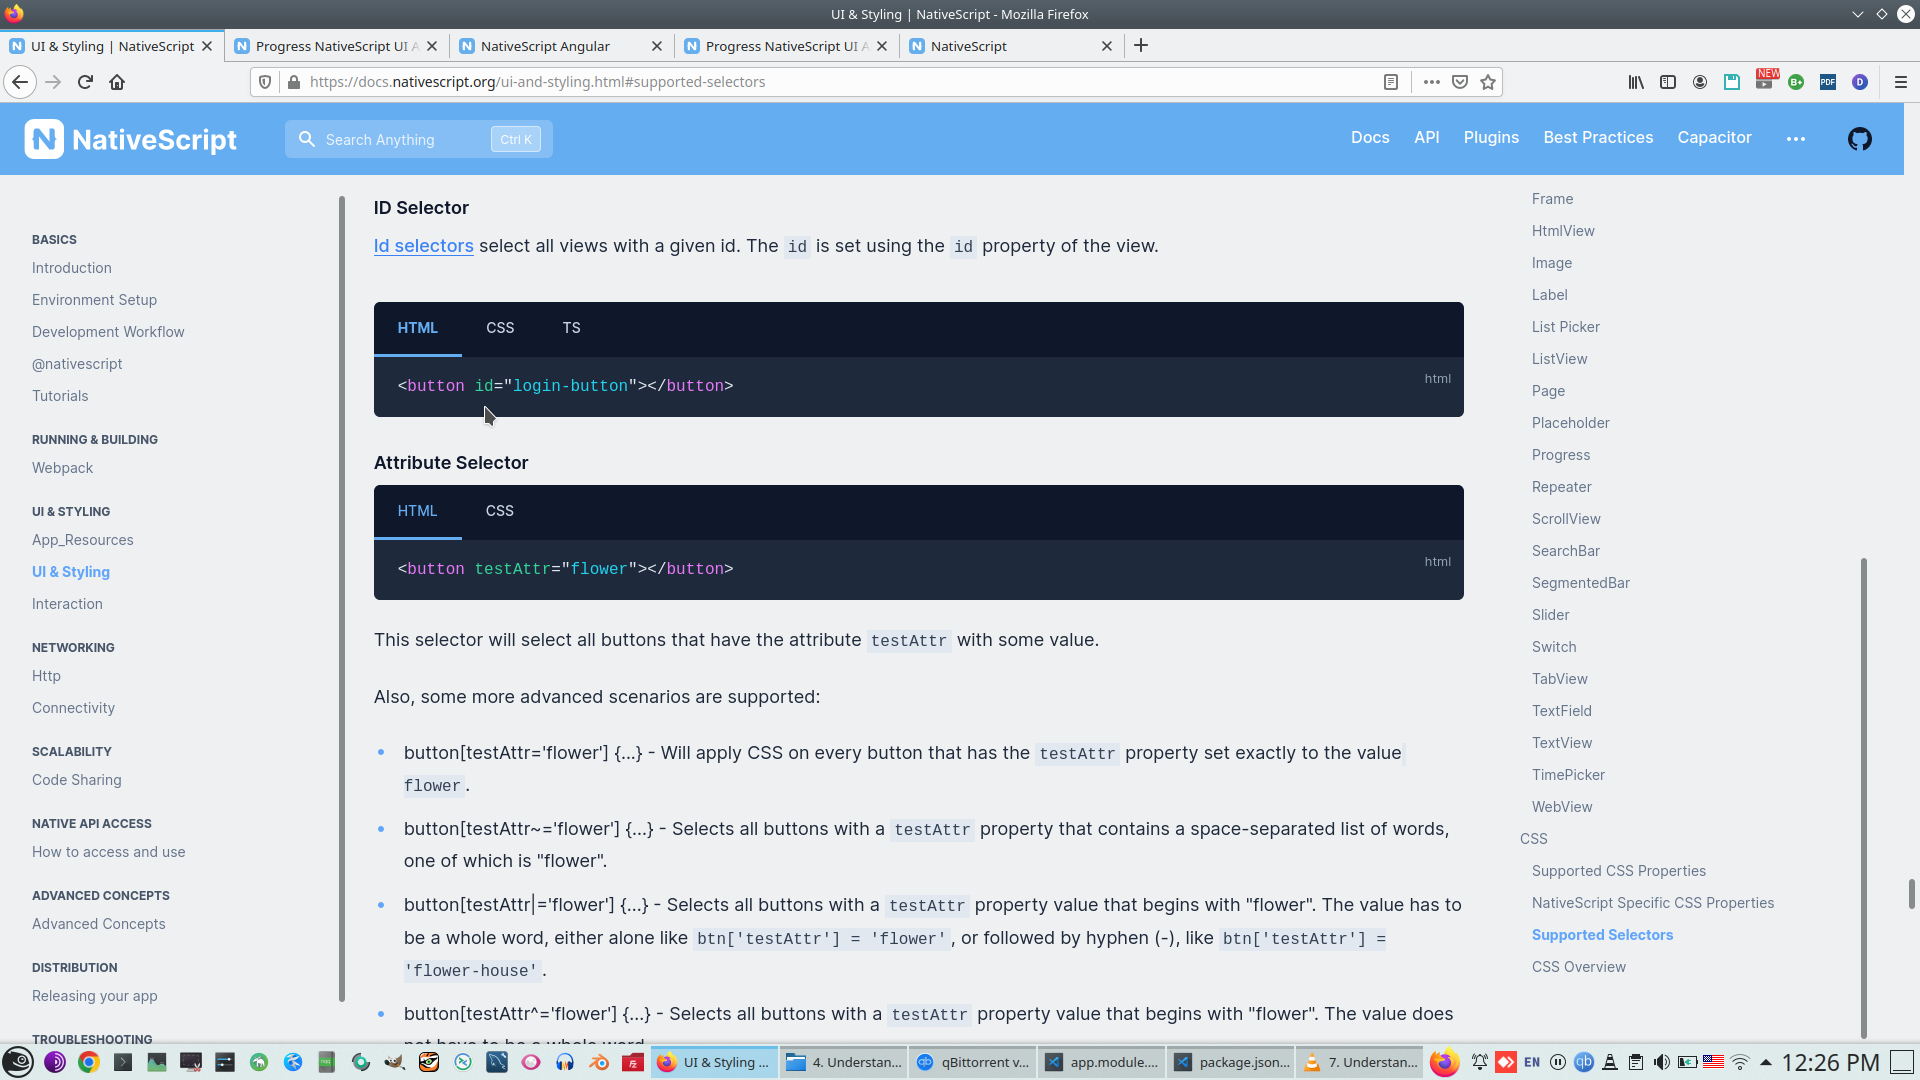
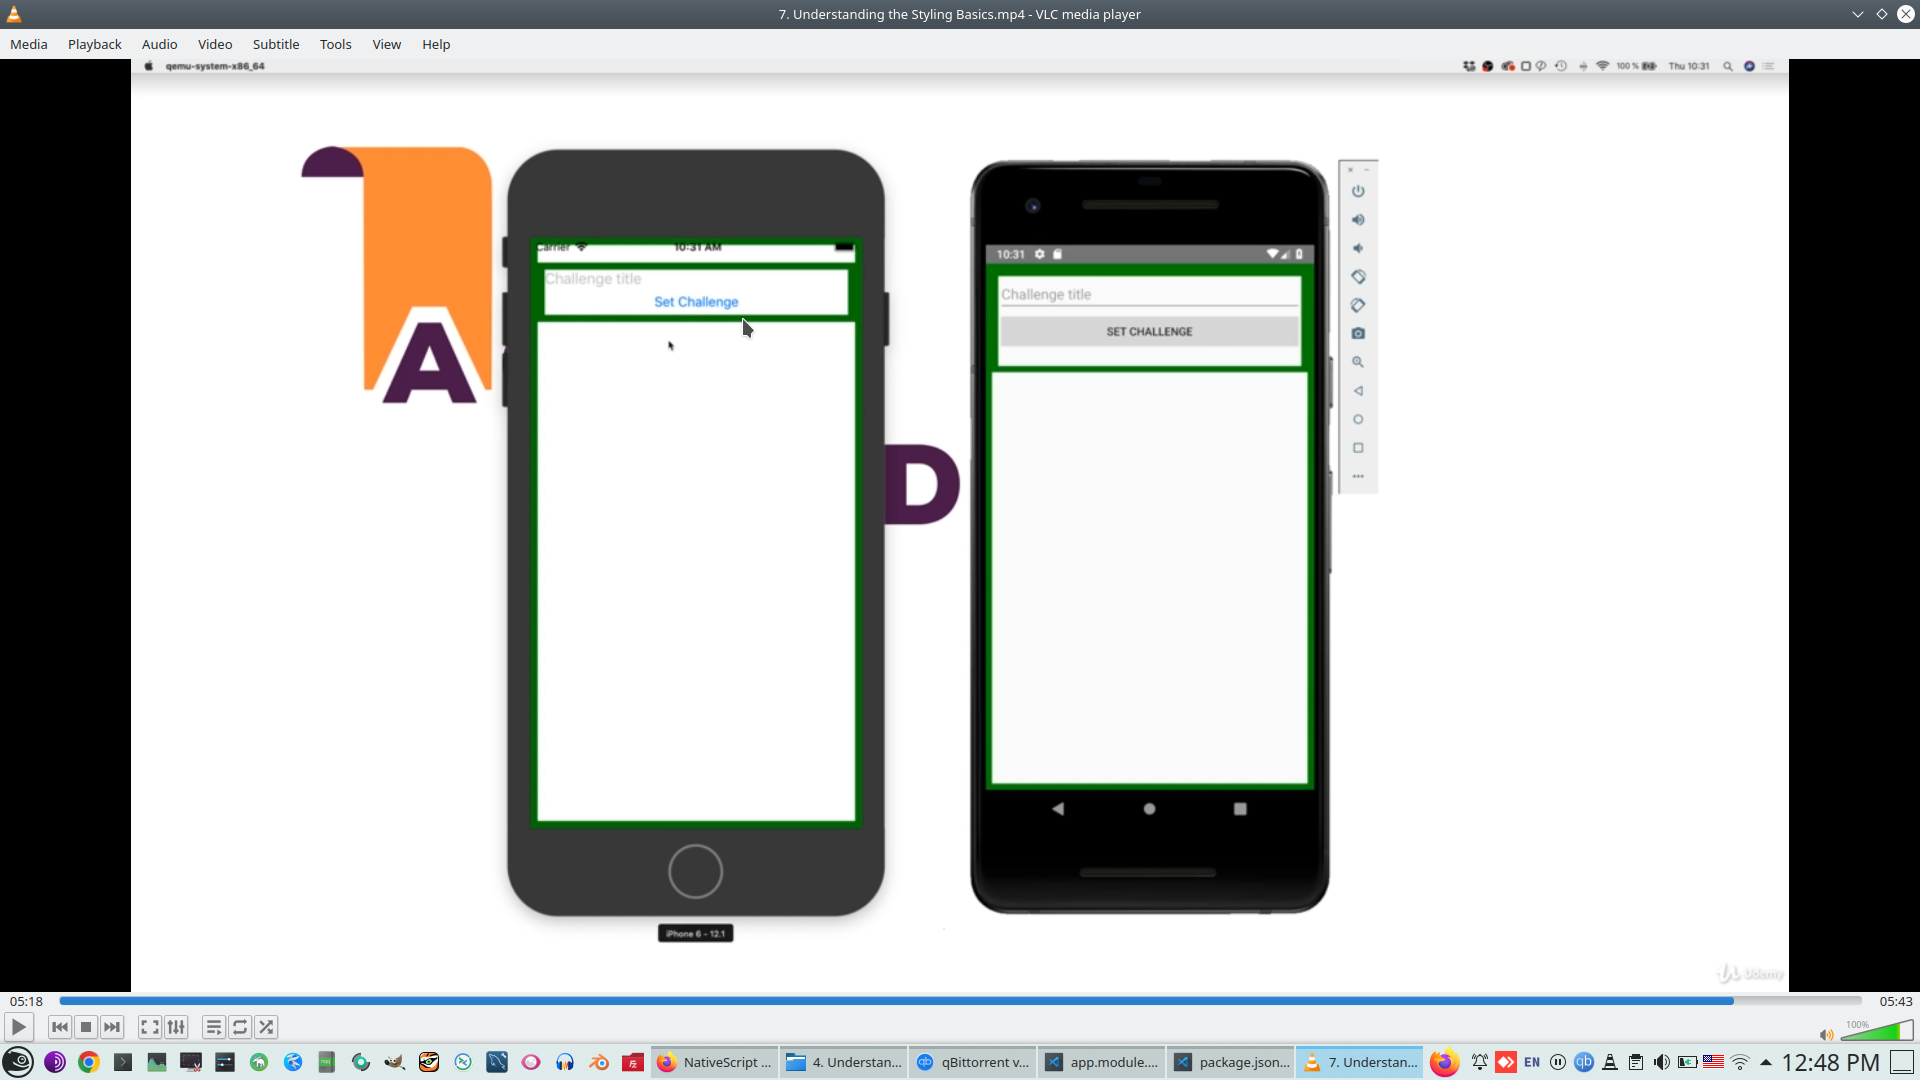
9. Styling app
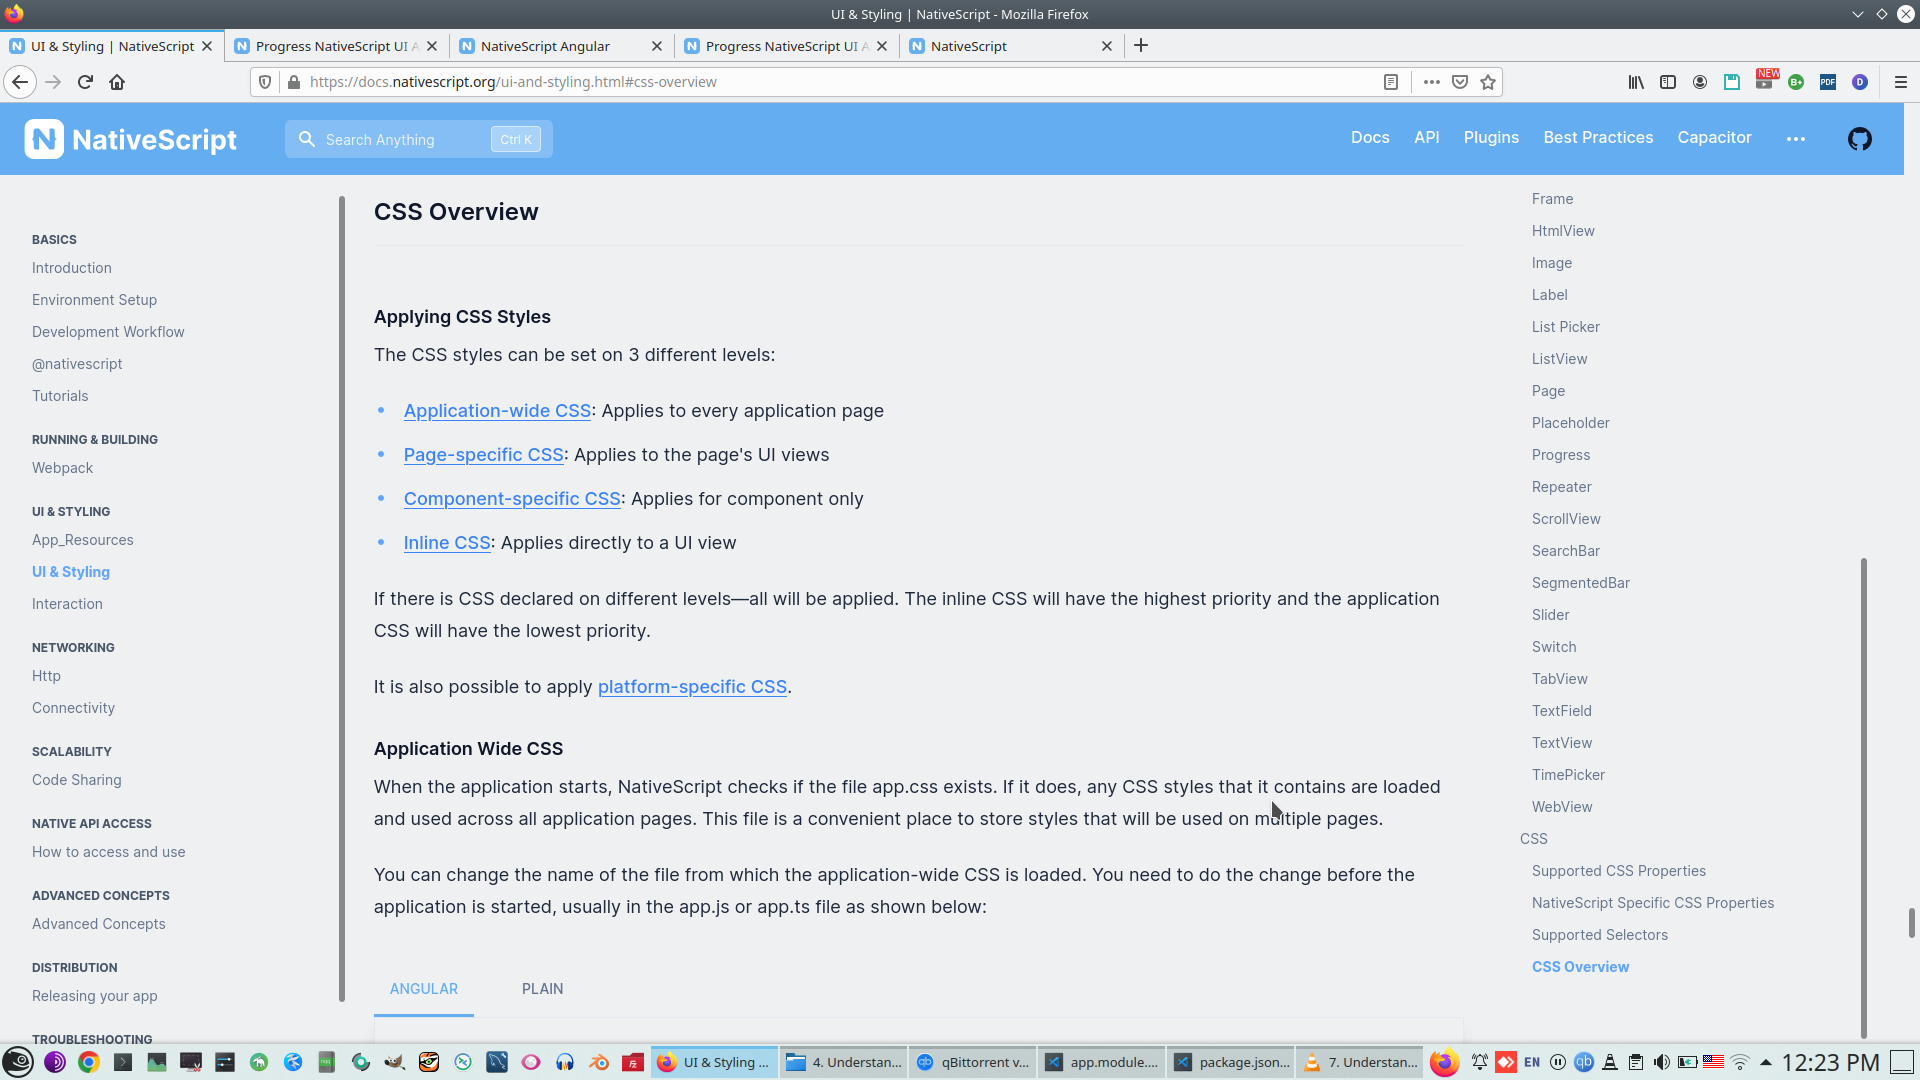
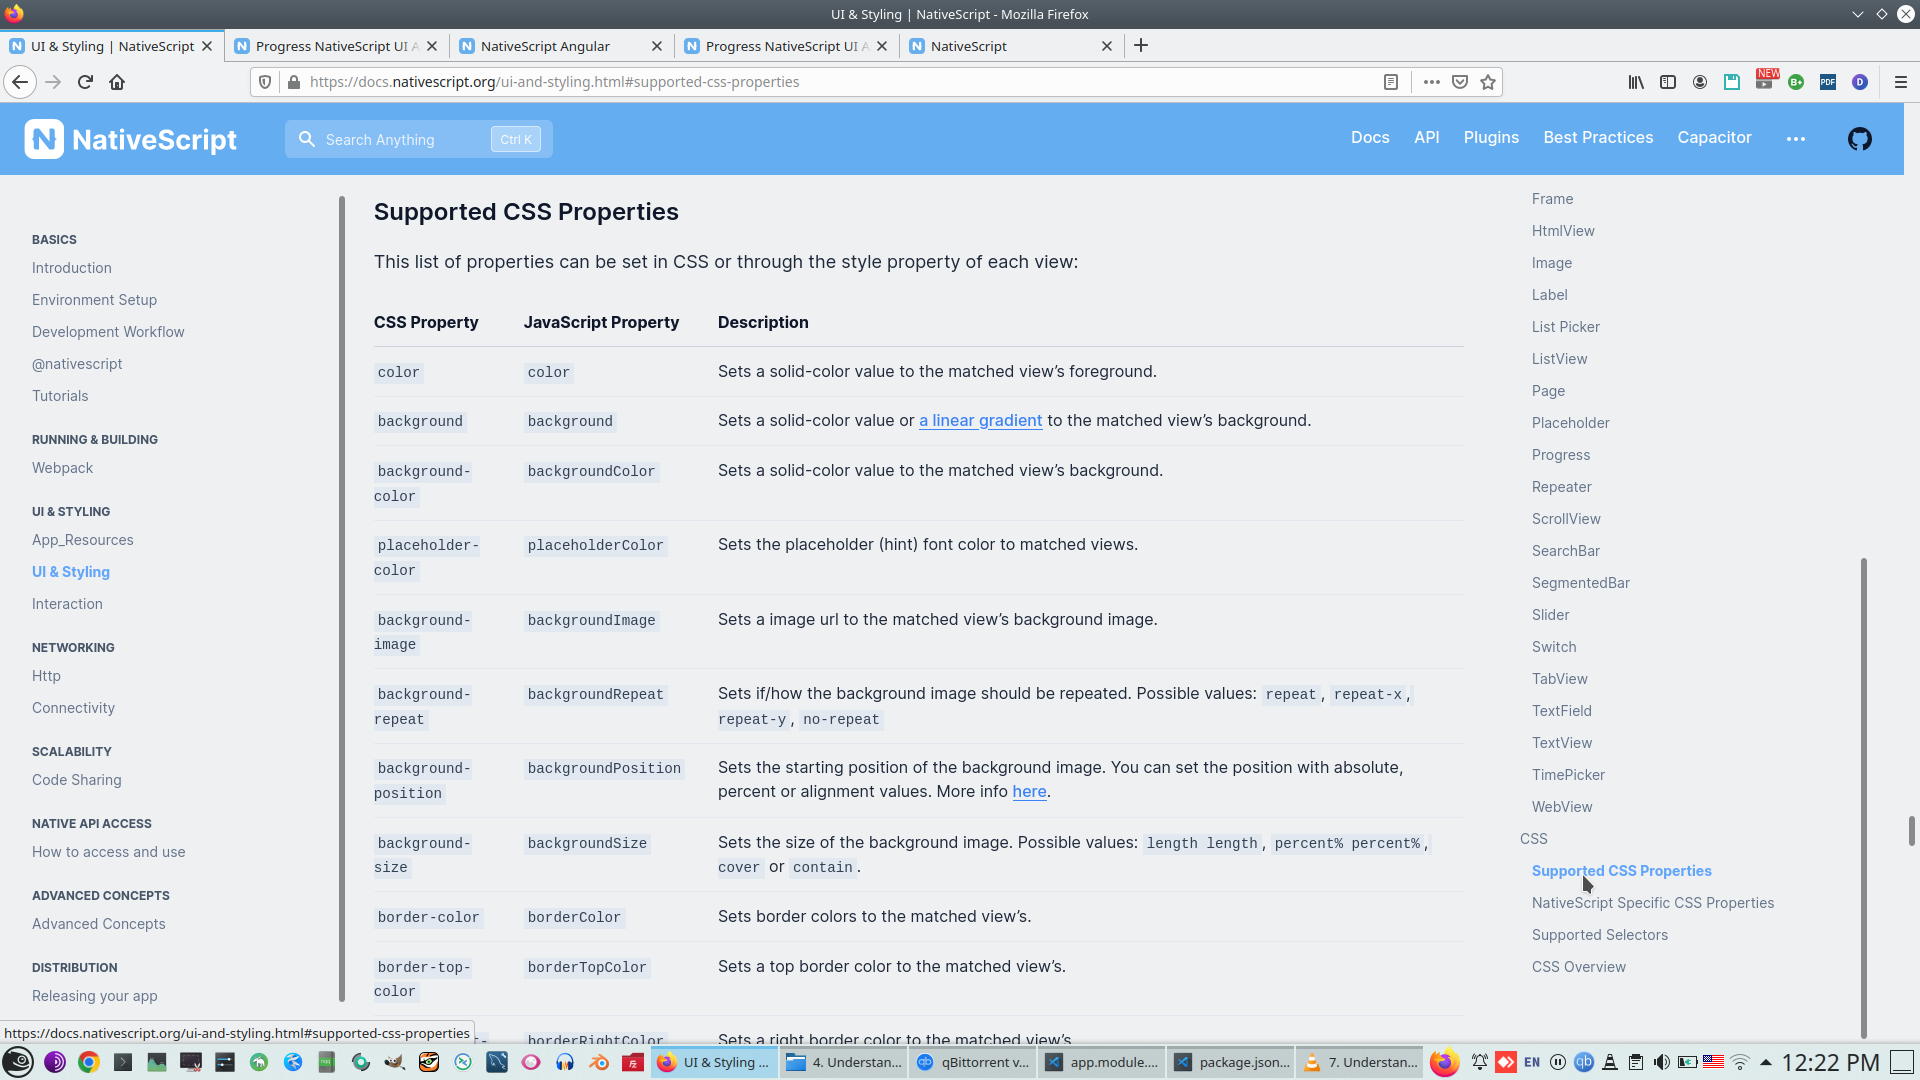
supported CSS properies
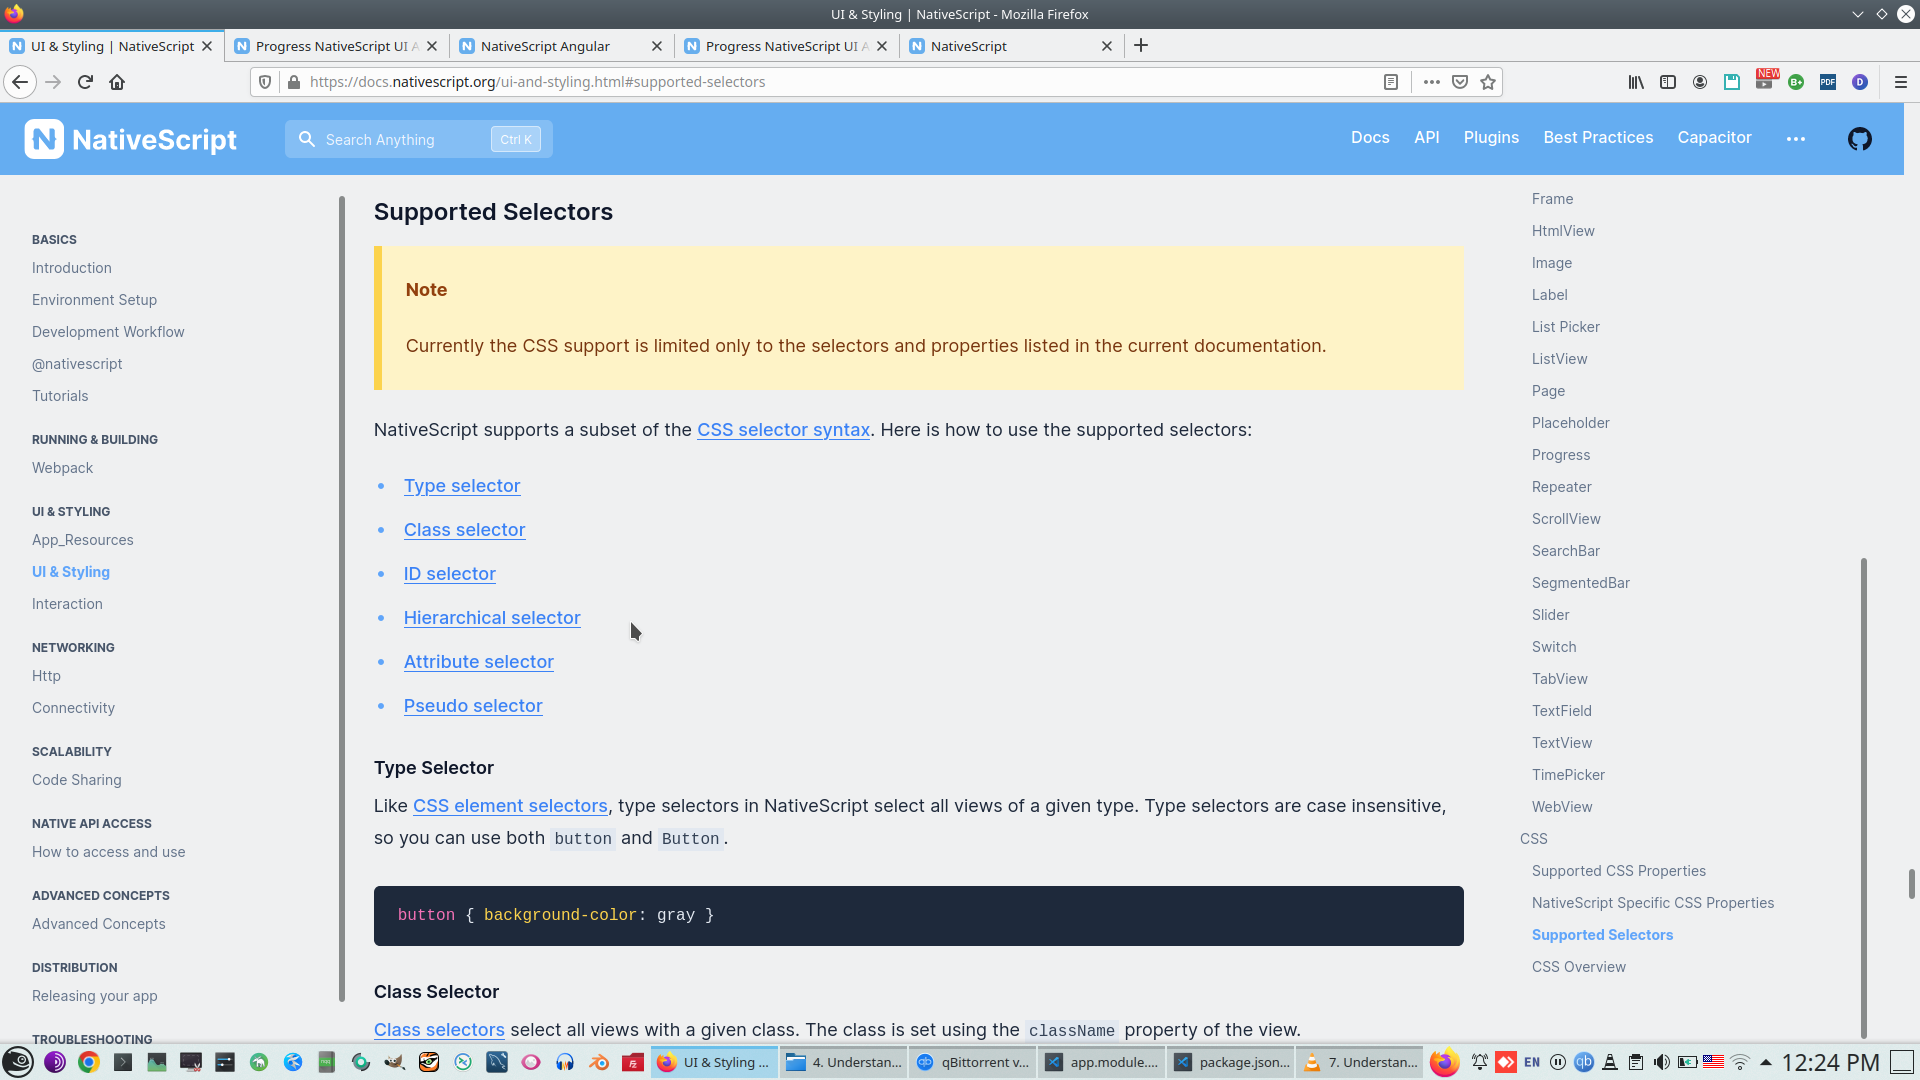
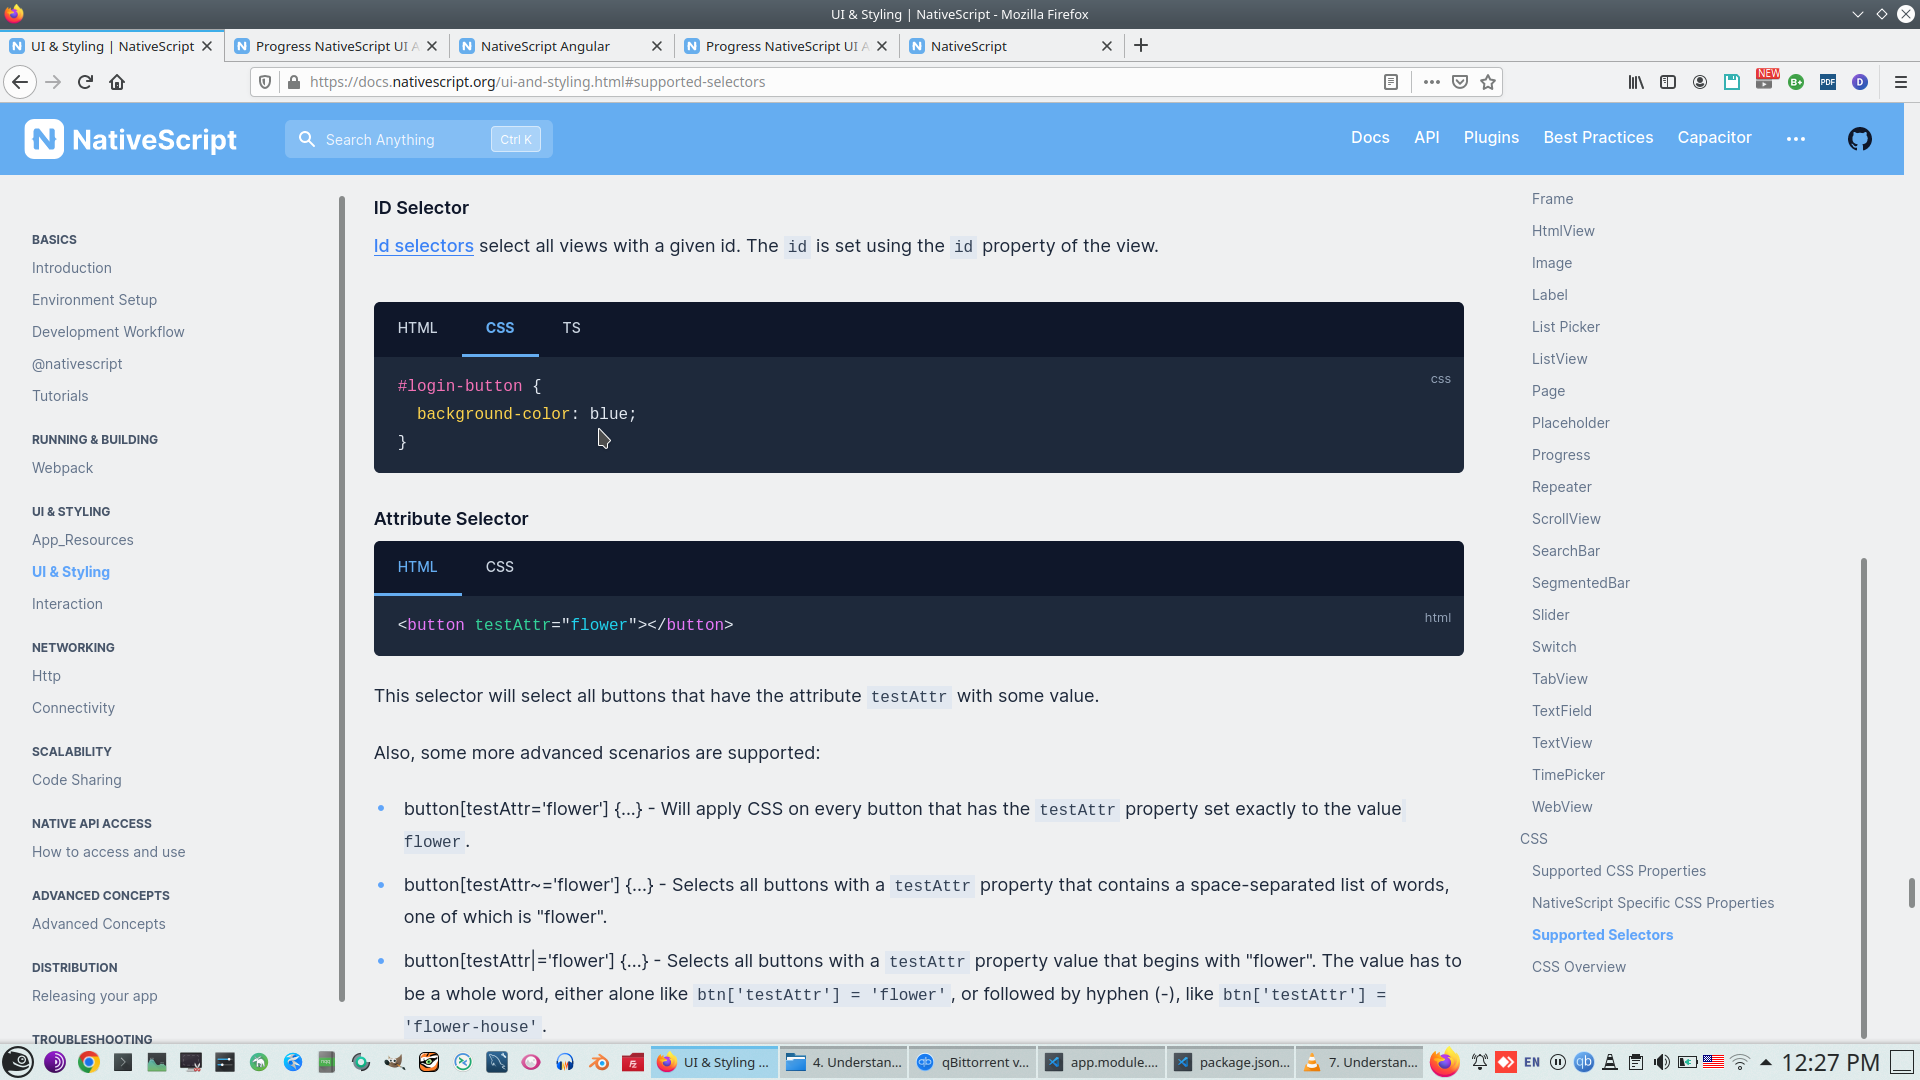
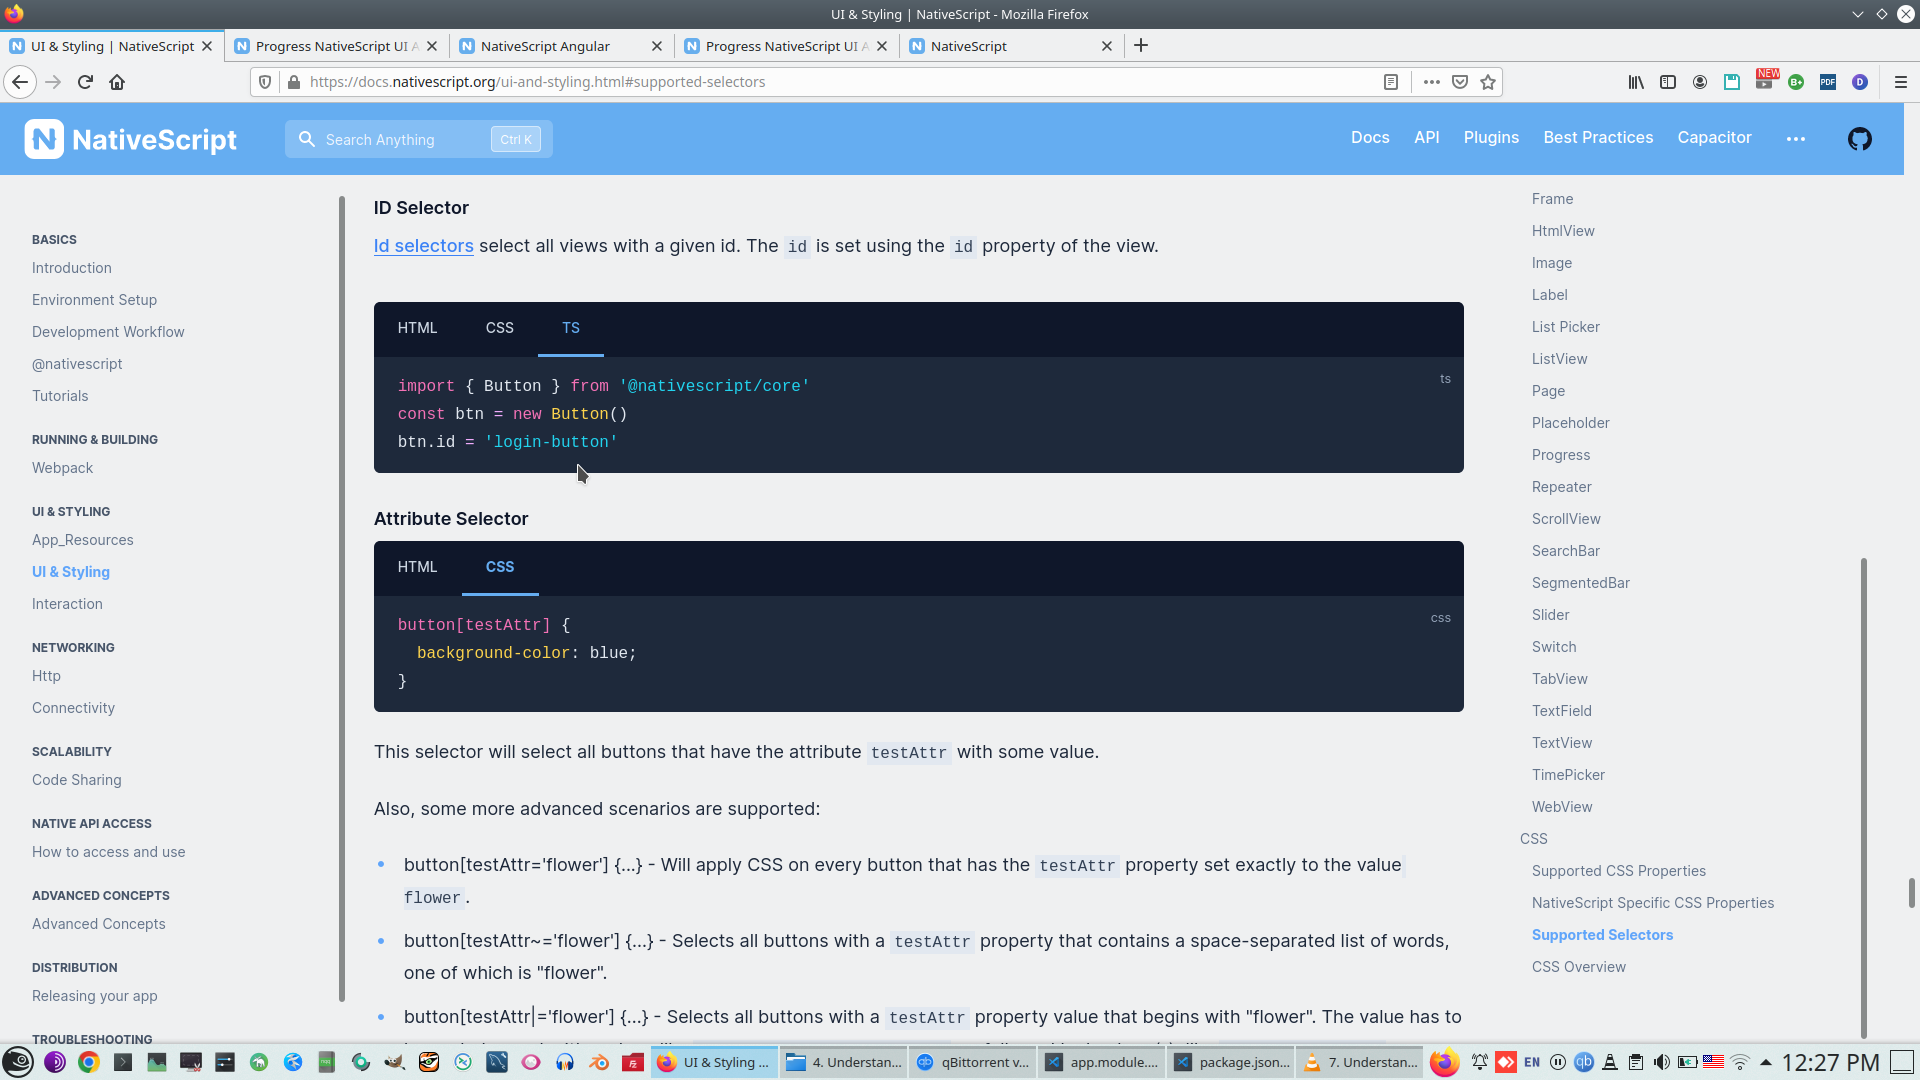
Supported CSS selectors (as static CSS property and dynamically on TS)
Font size use digital value without 'px', device mappping this digital value to pixels.

Style can adding as property and into Style property
Also we can add common UI style of component
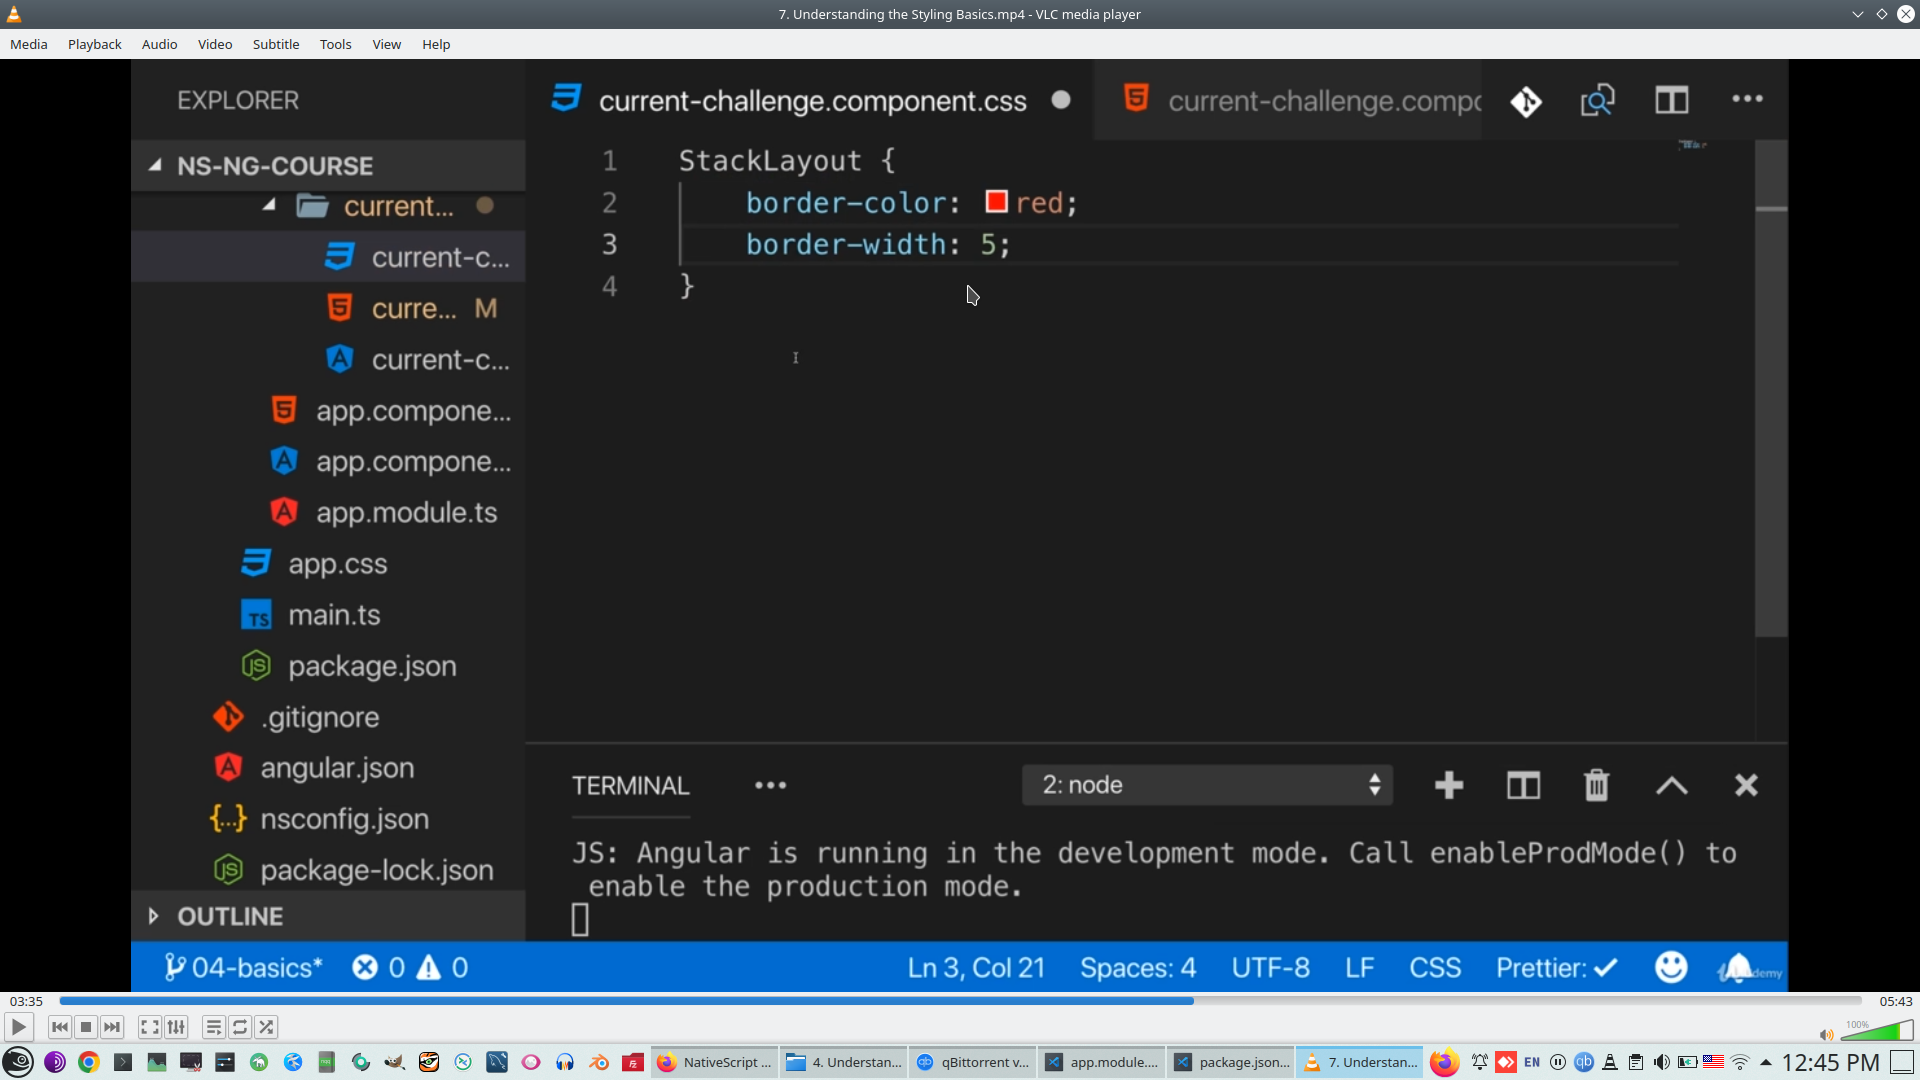
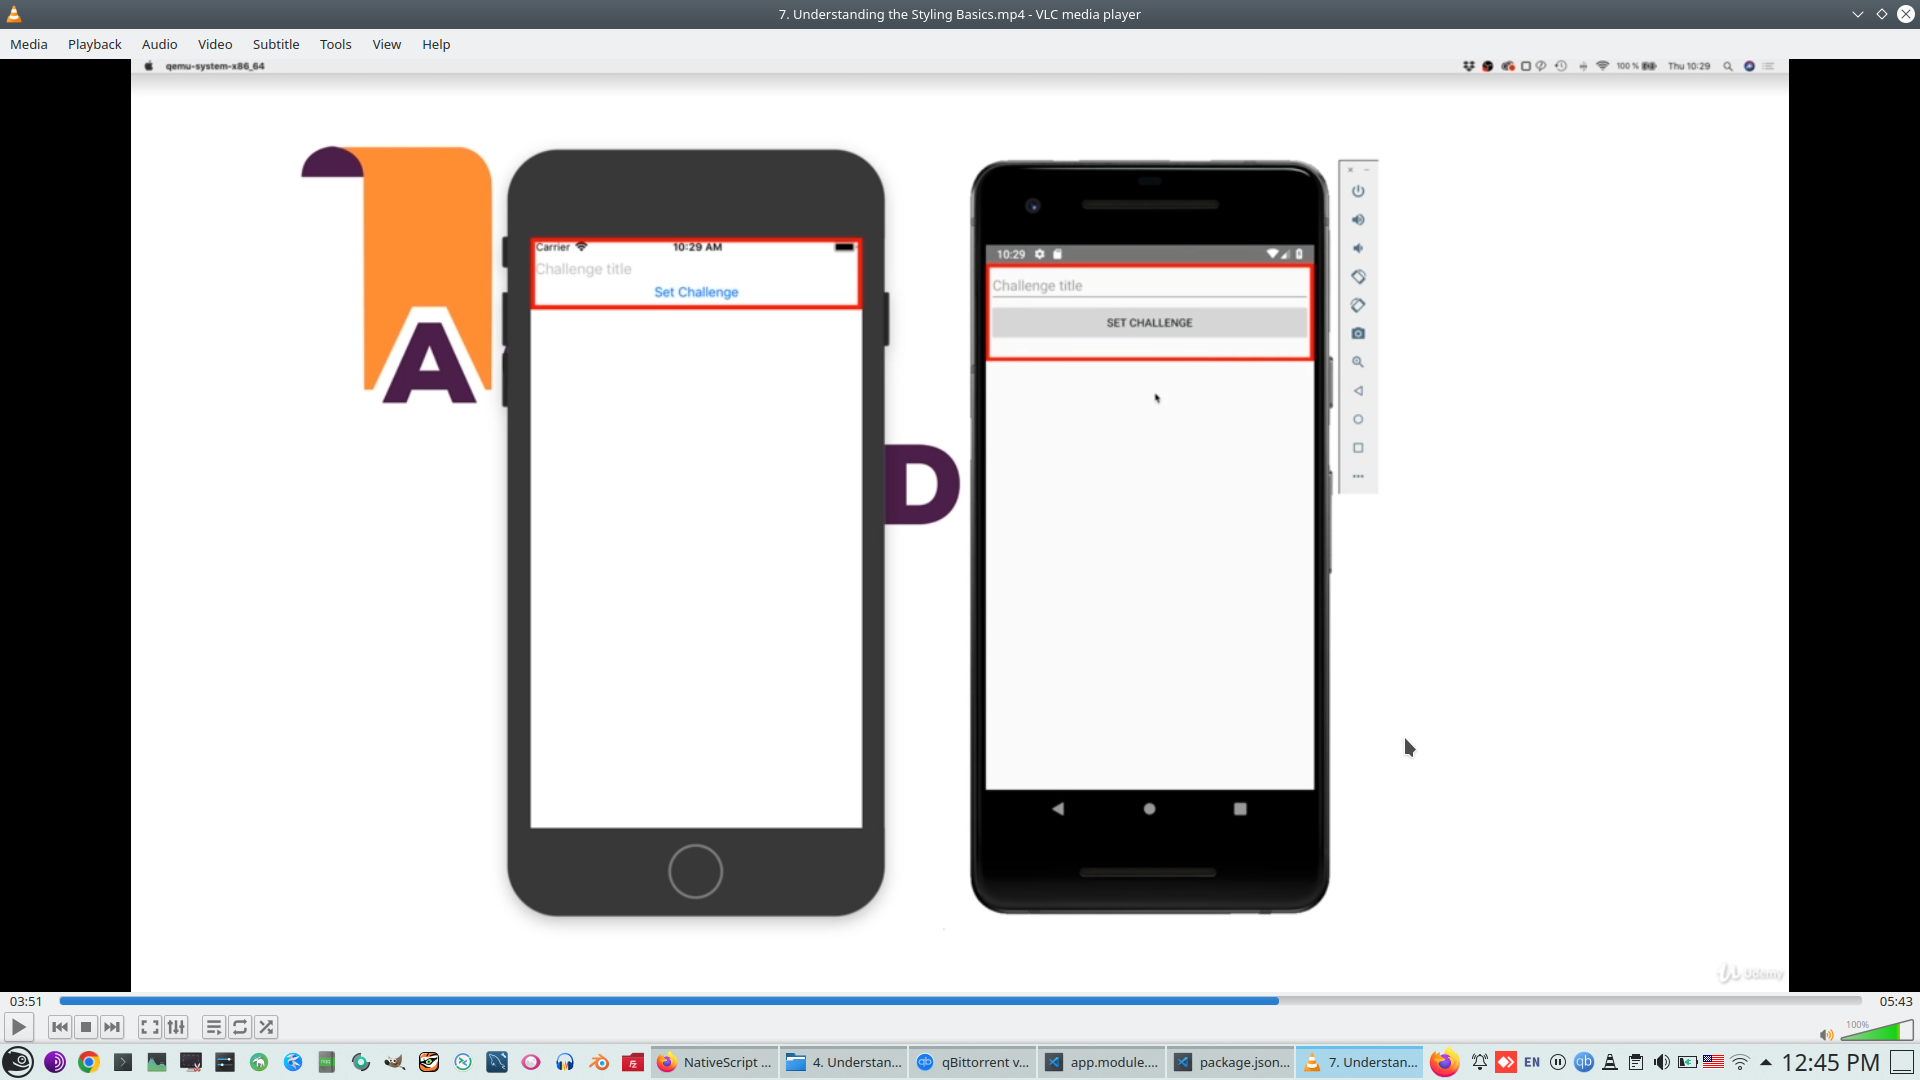
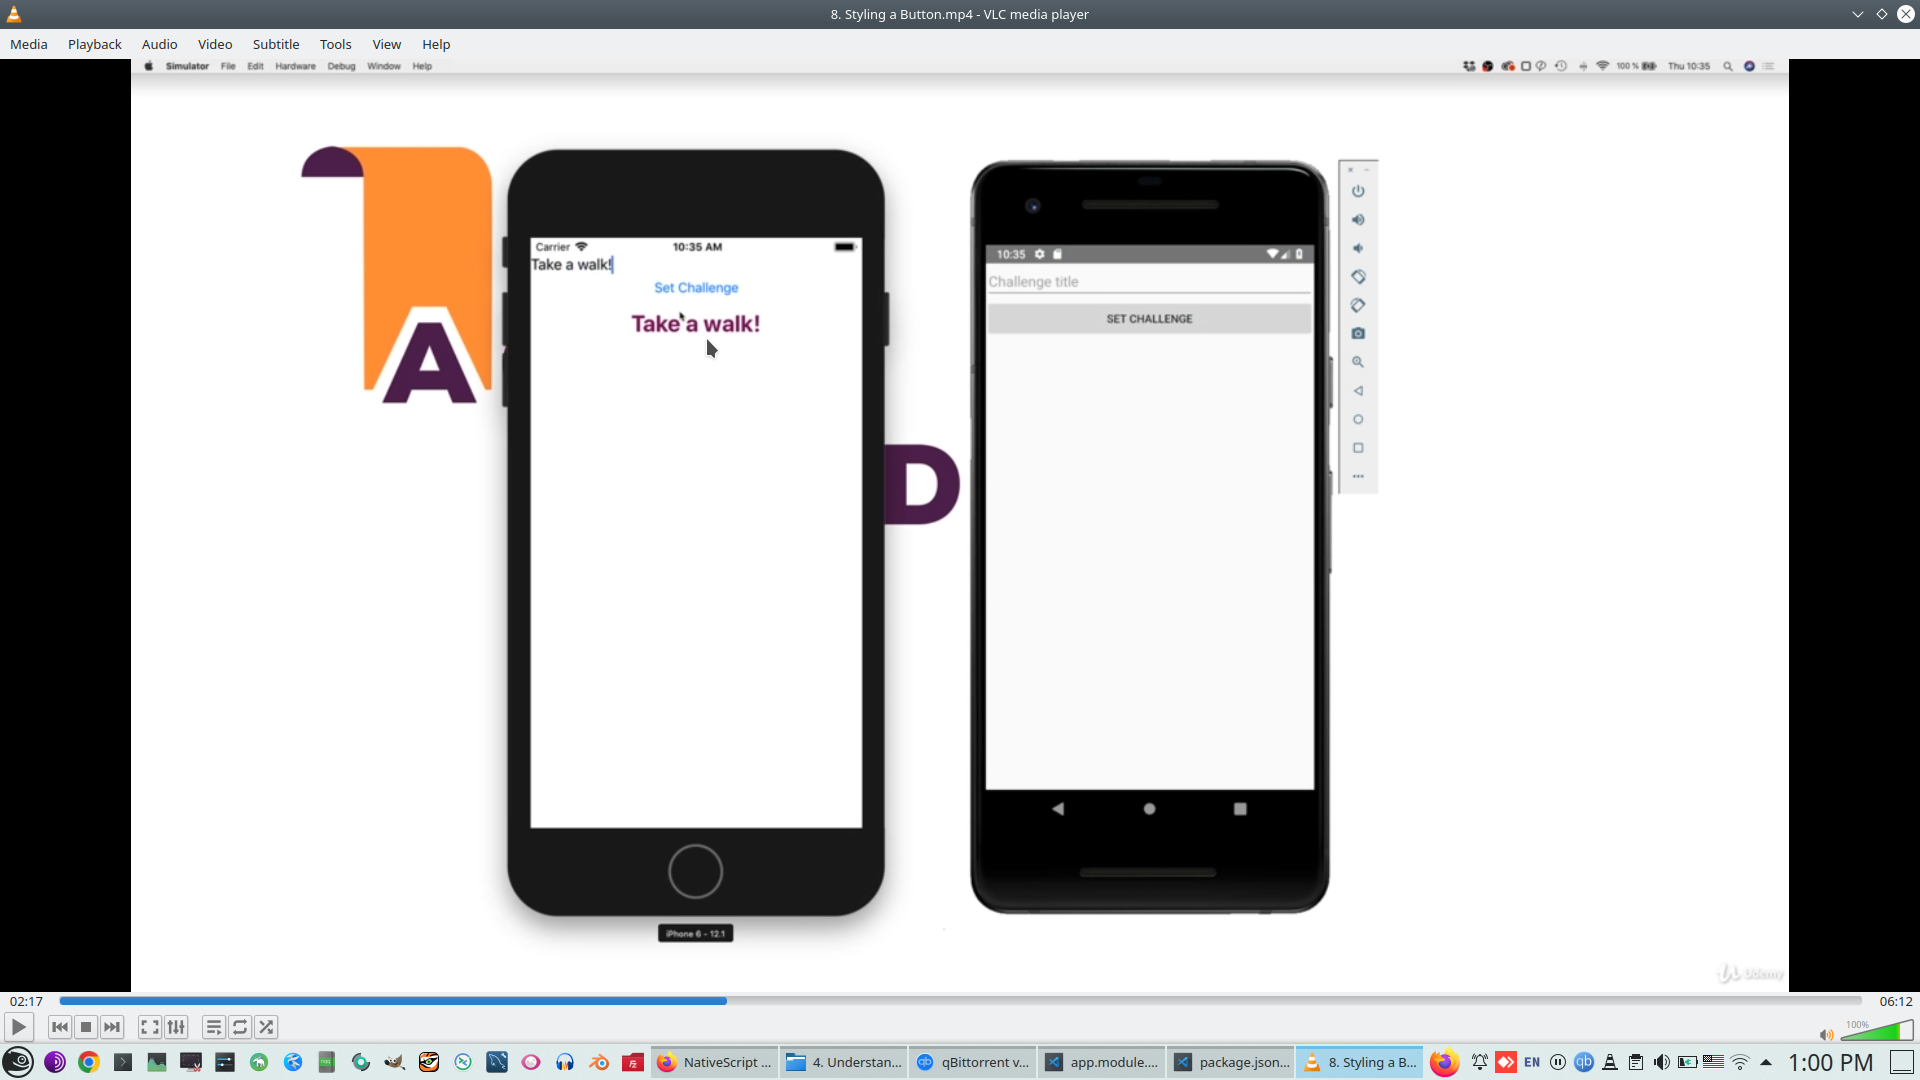
Check style
Style can add globally to whole apps
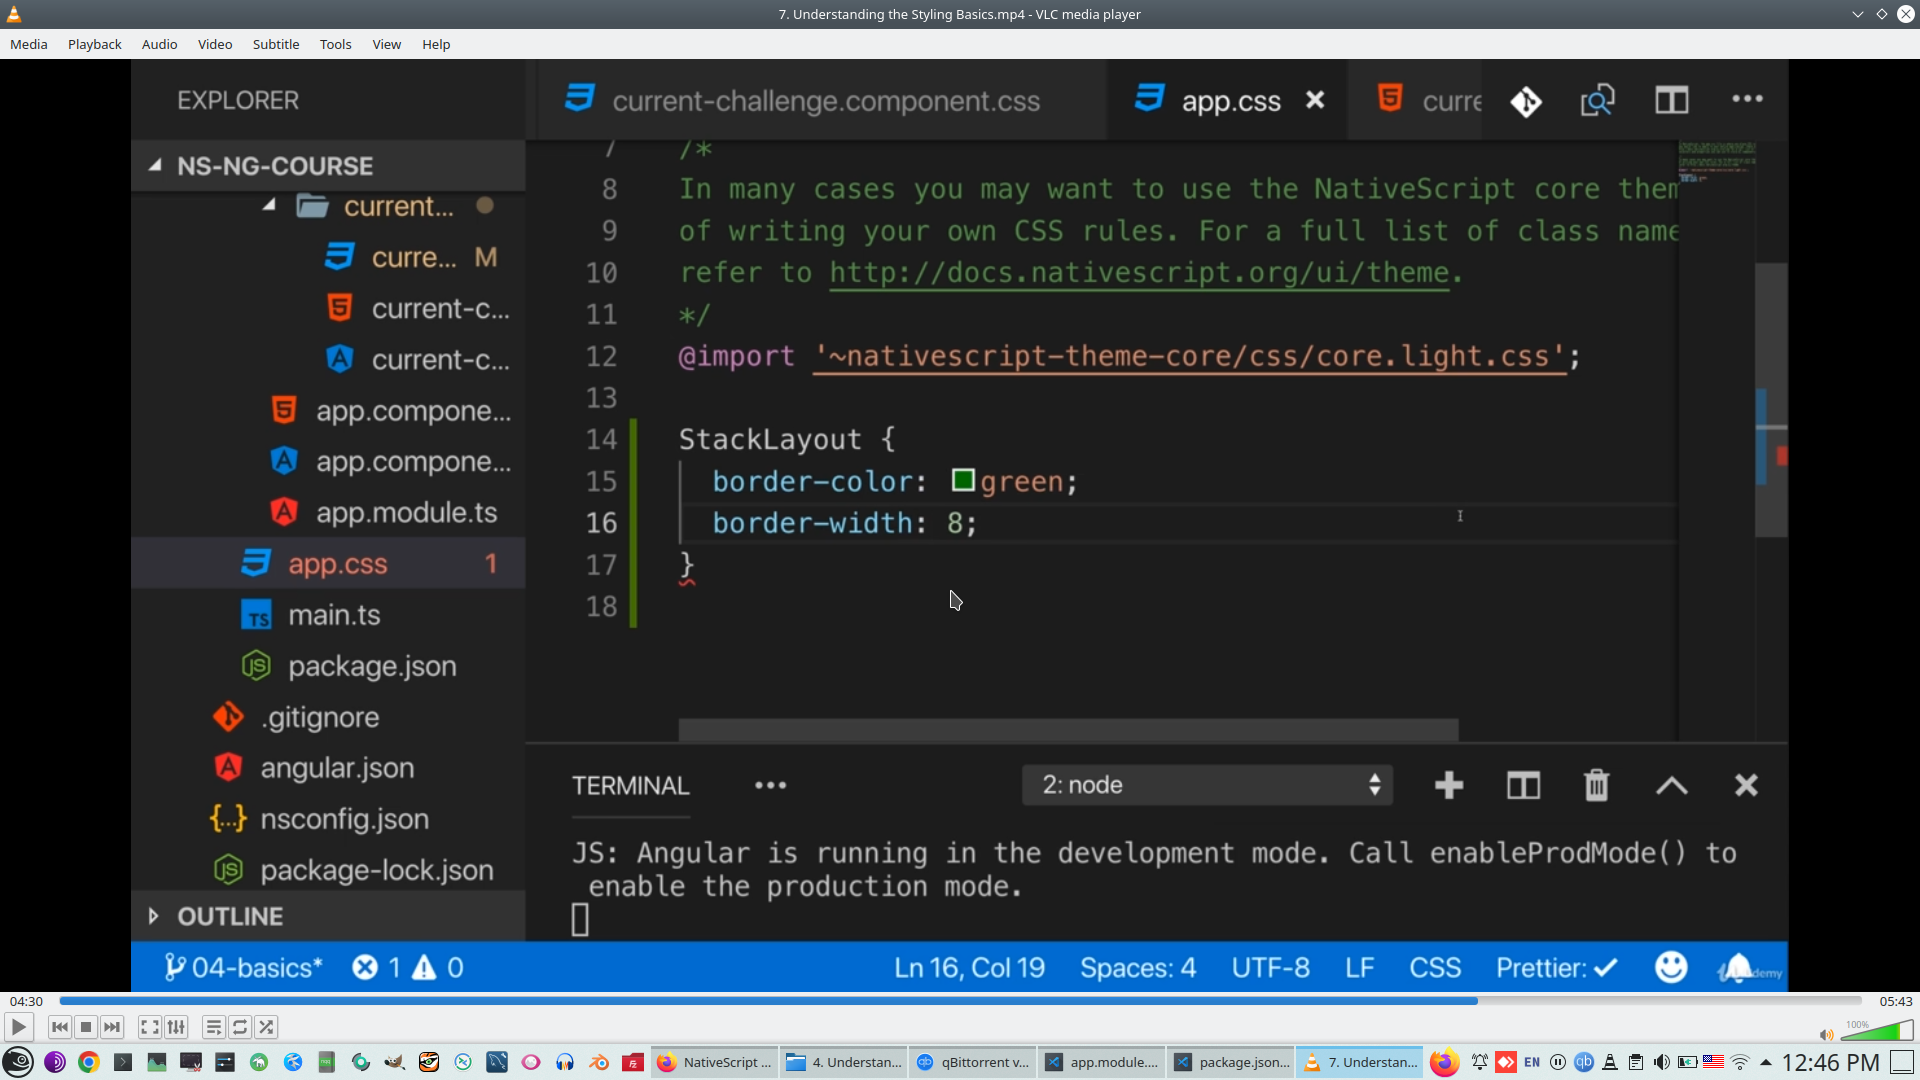

Global styling appplied to global componen
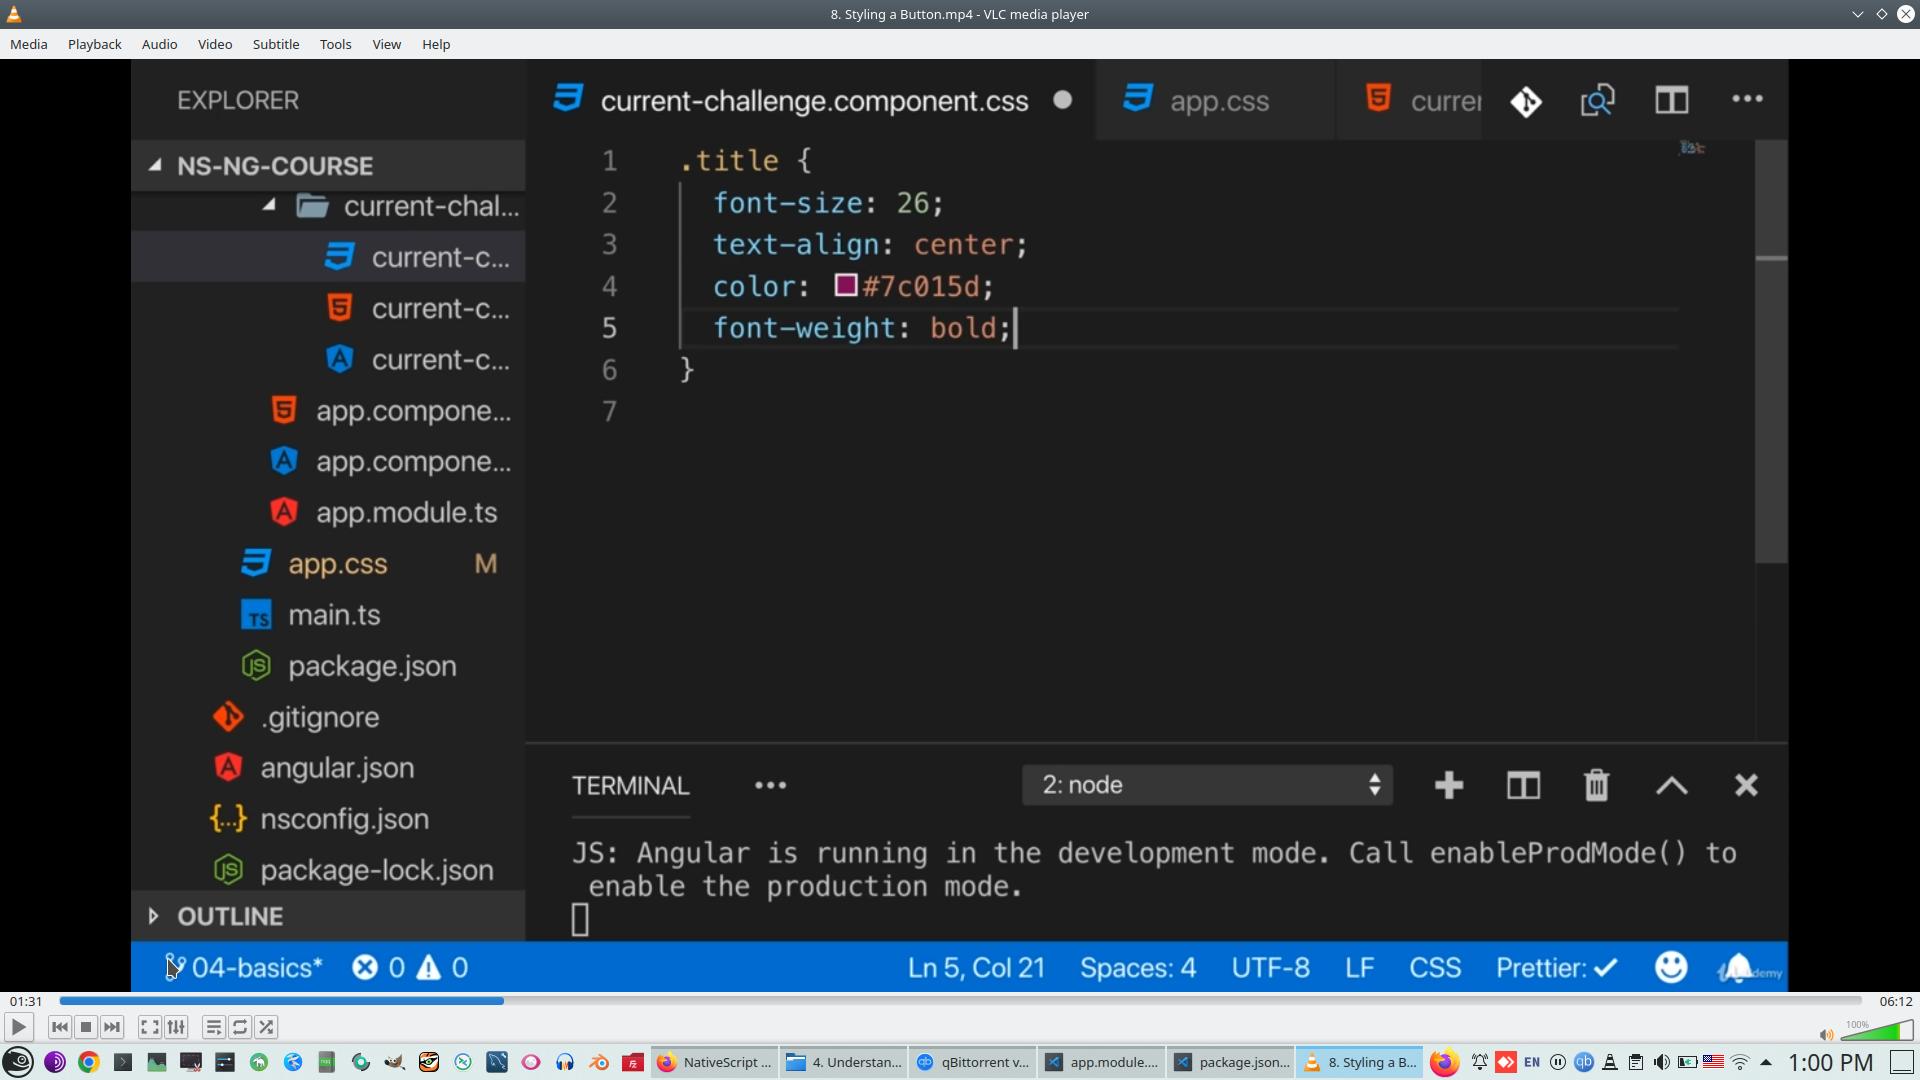
Styling with class description
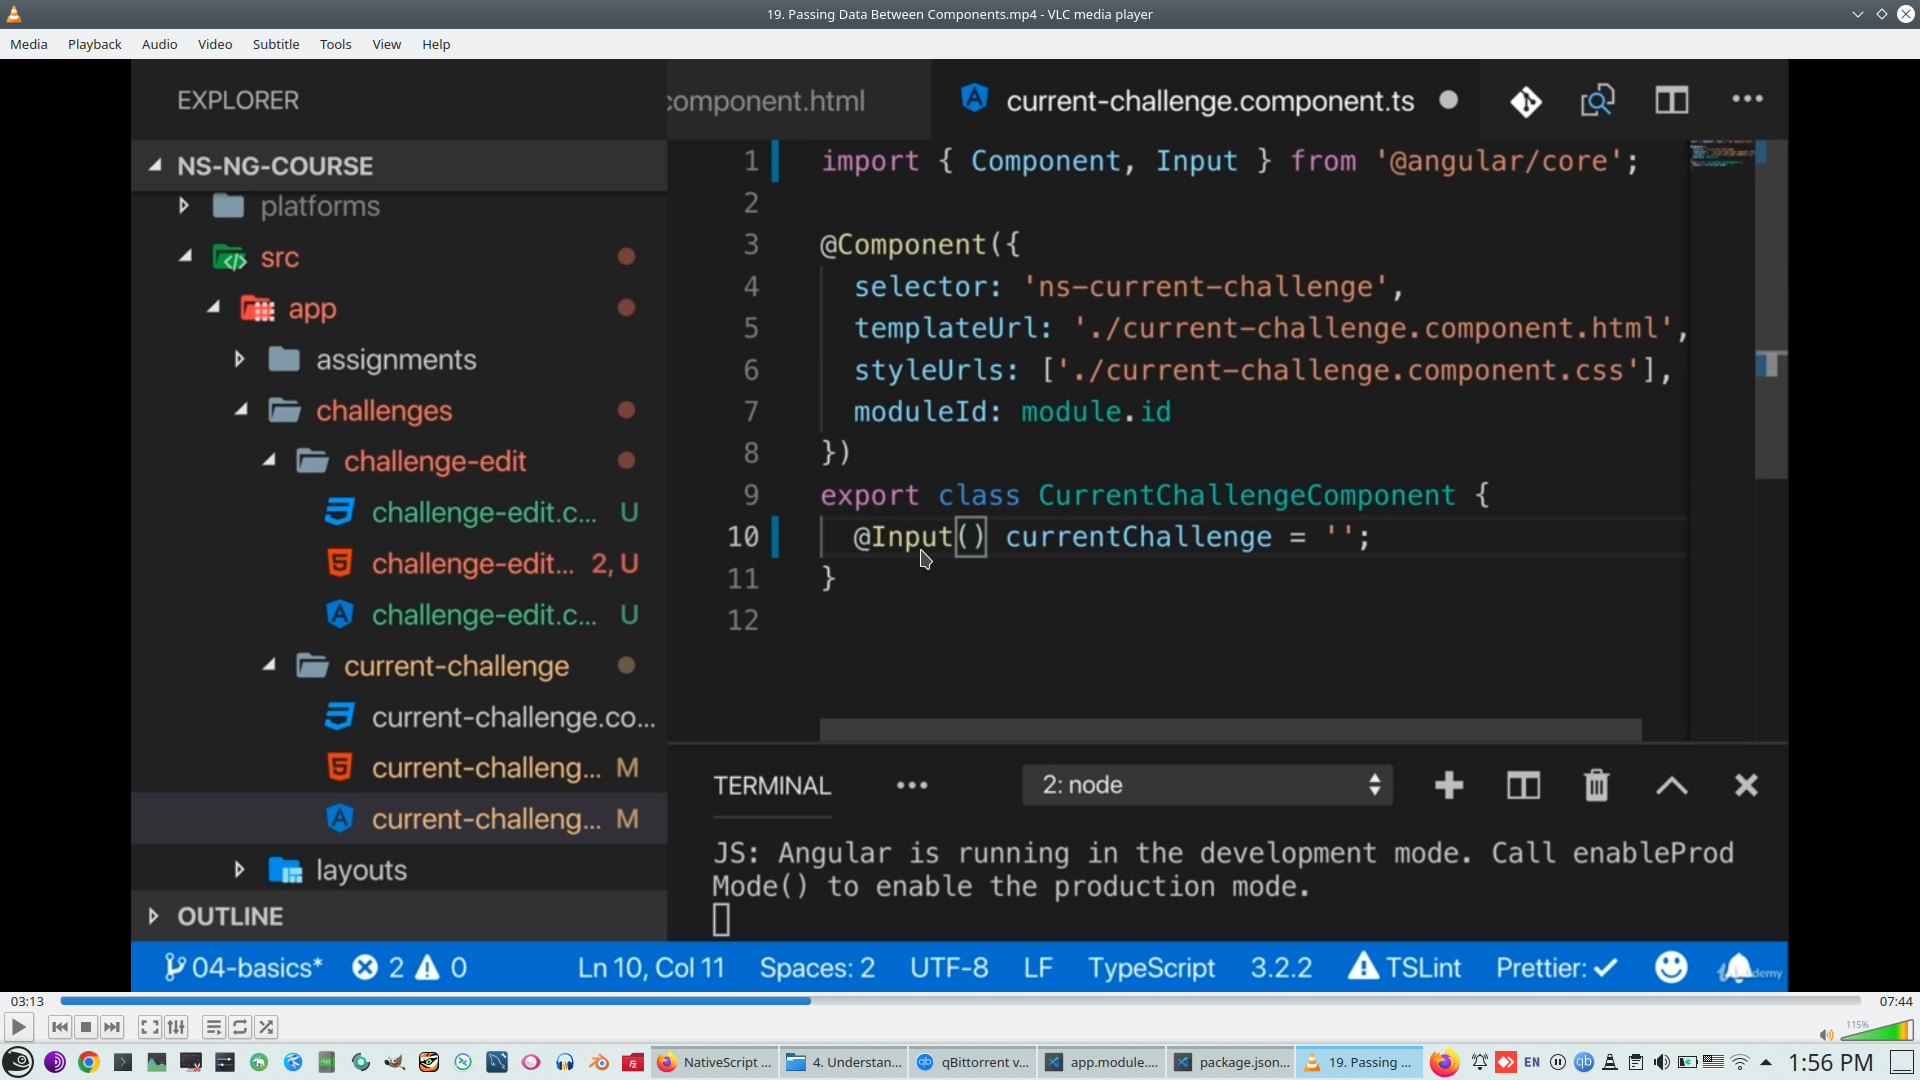
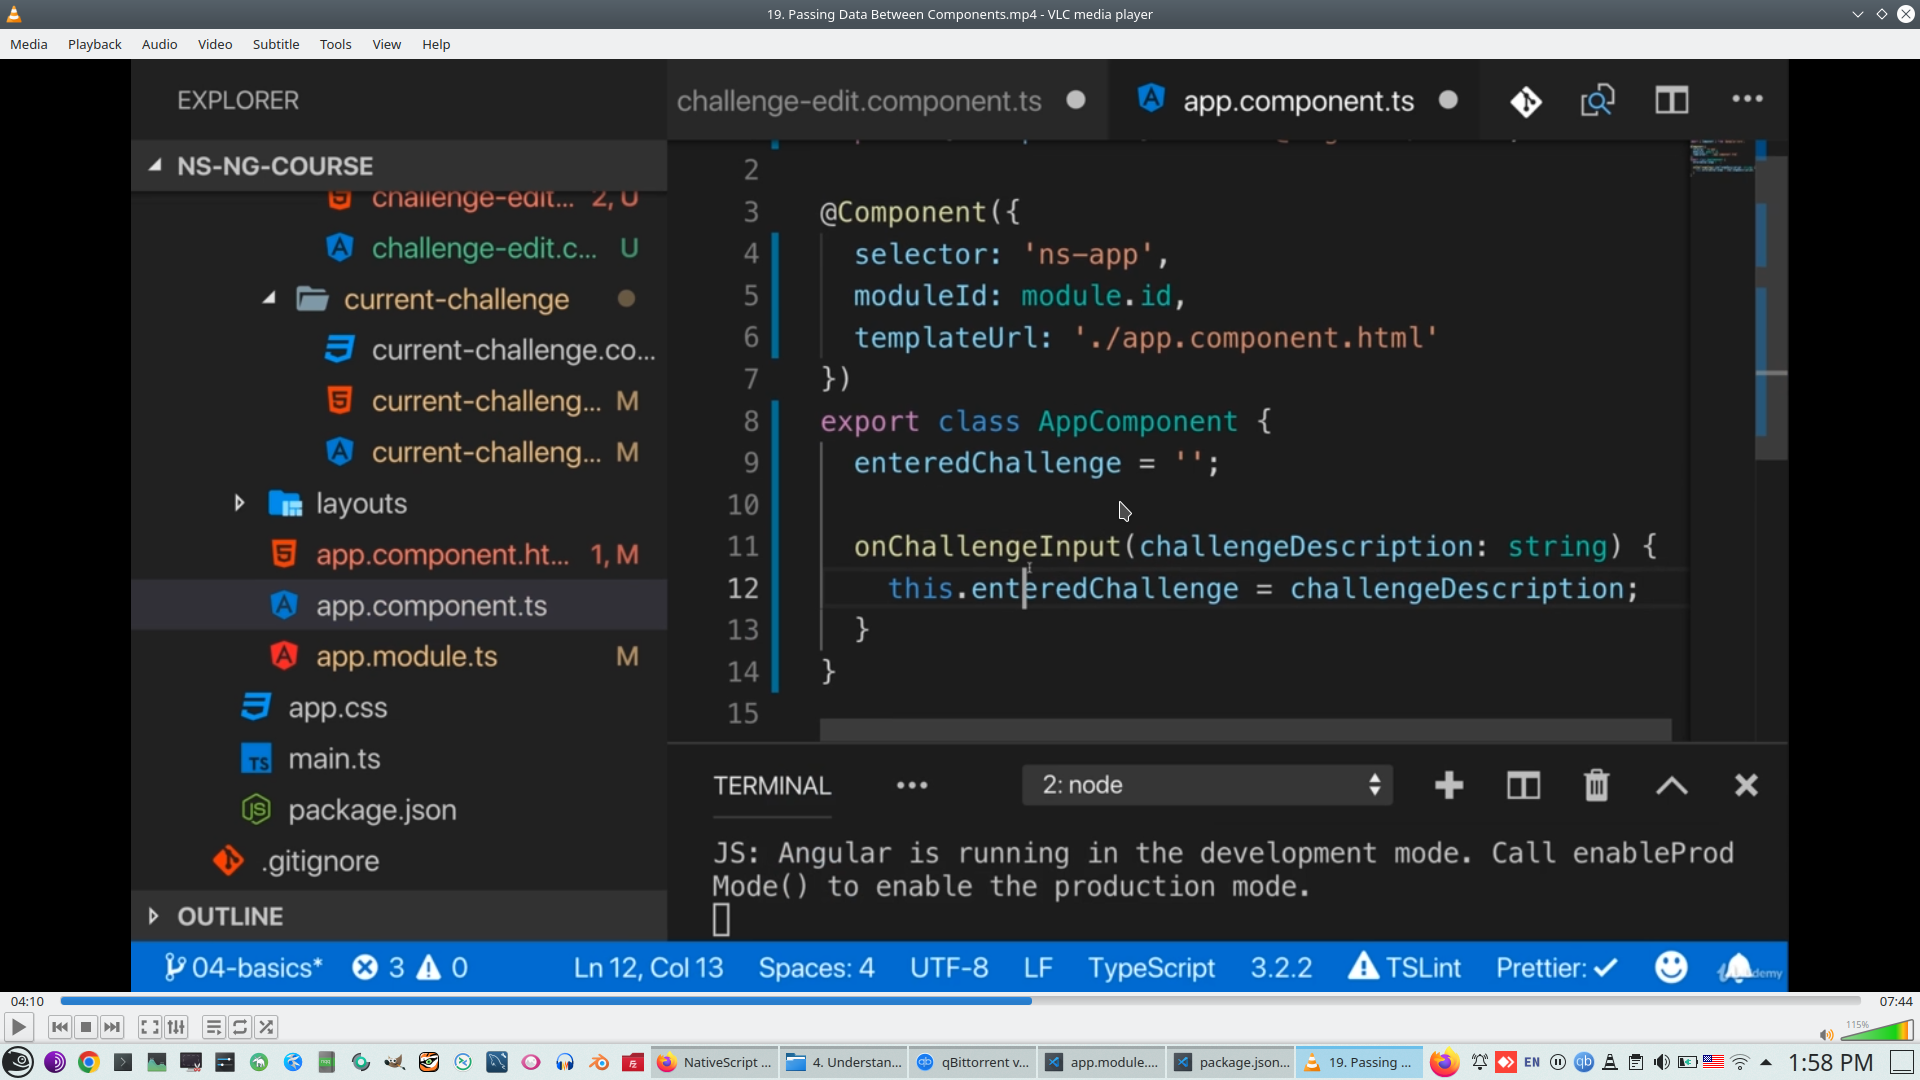
10. Communication between components - Event emitter
RaiseEvent
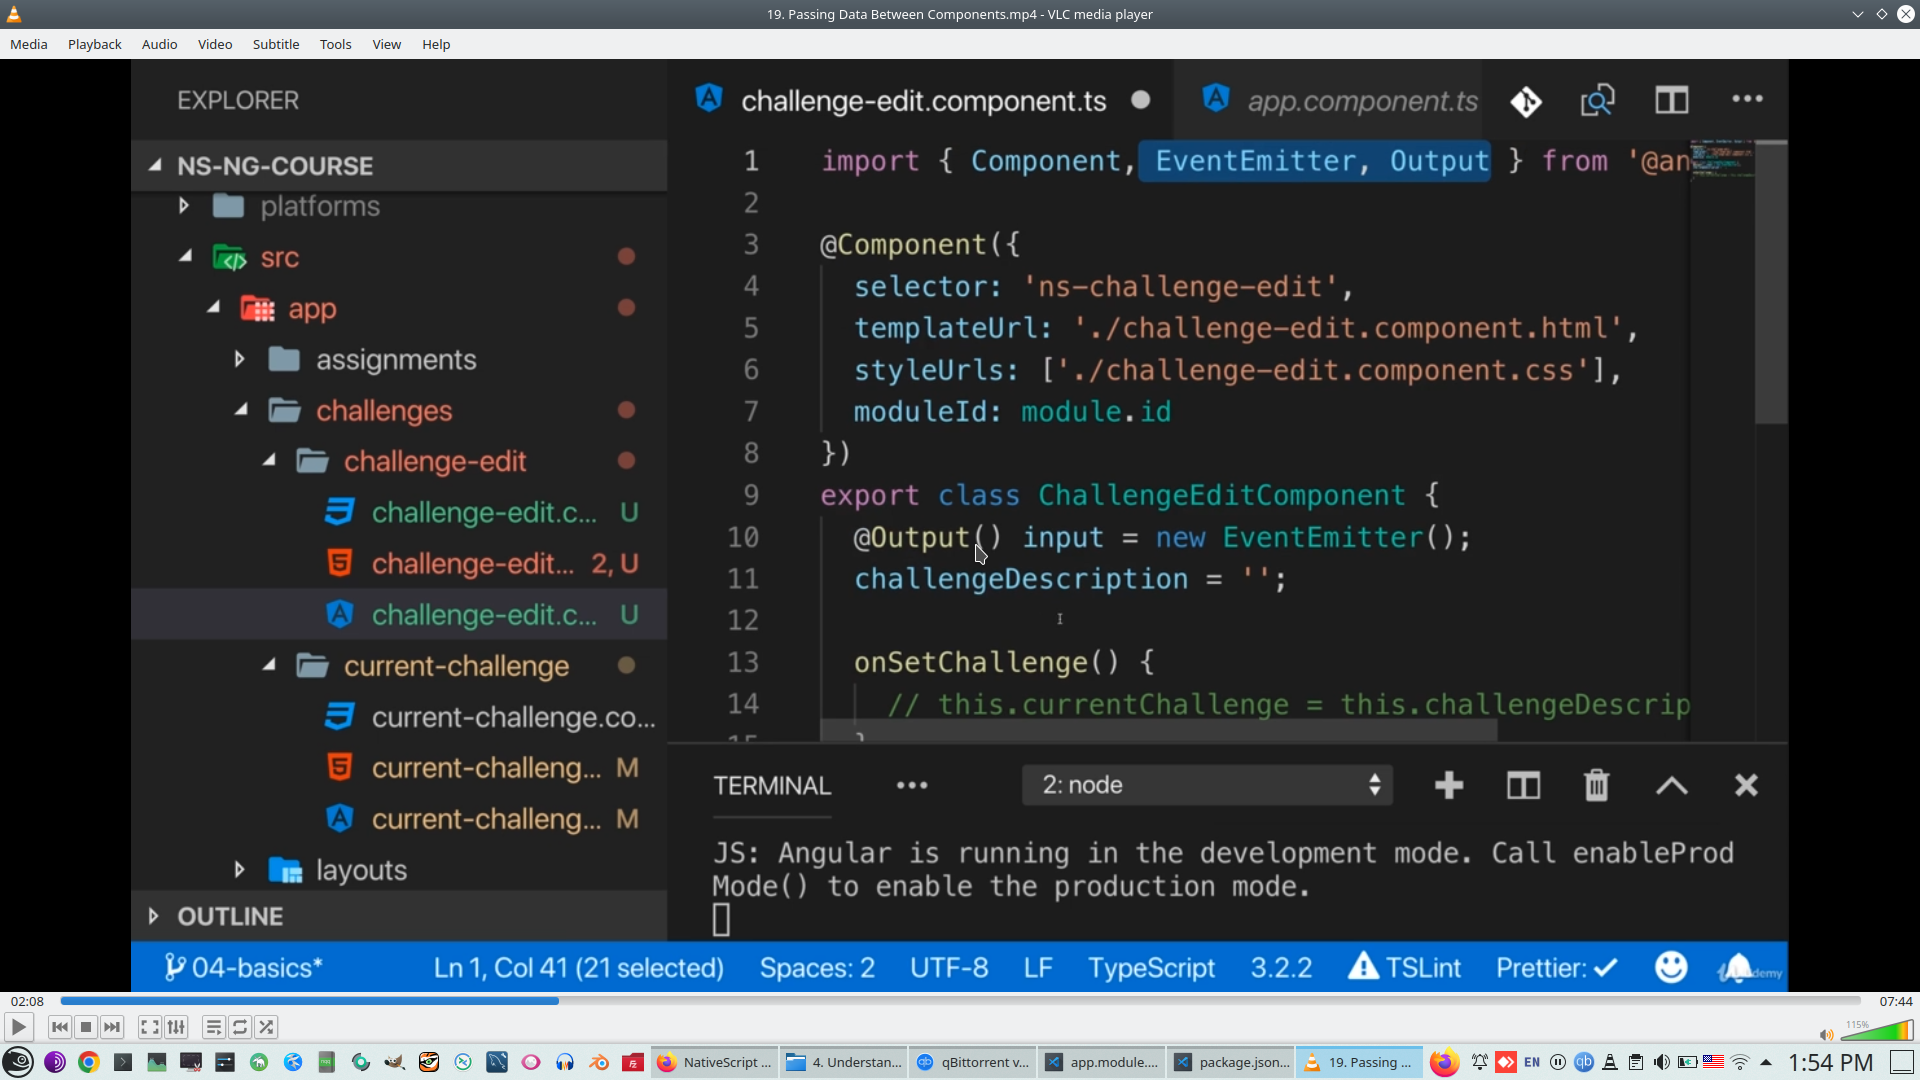

EventSubscriber
$event - automaitc parameters of each events
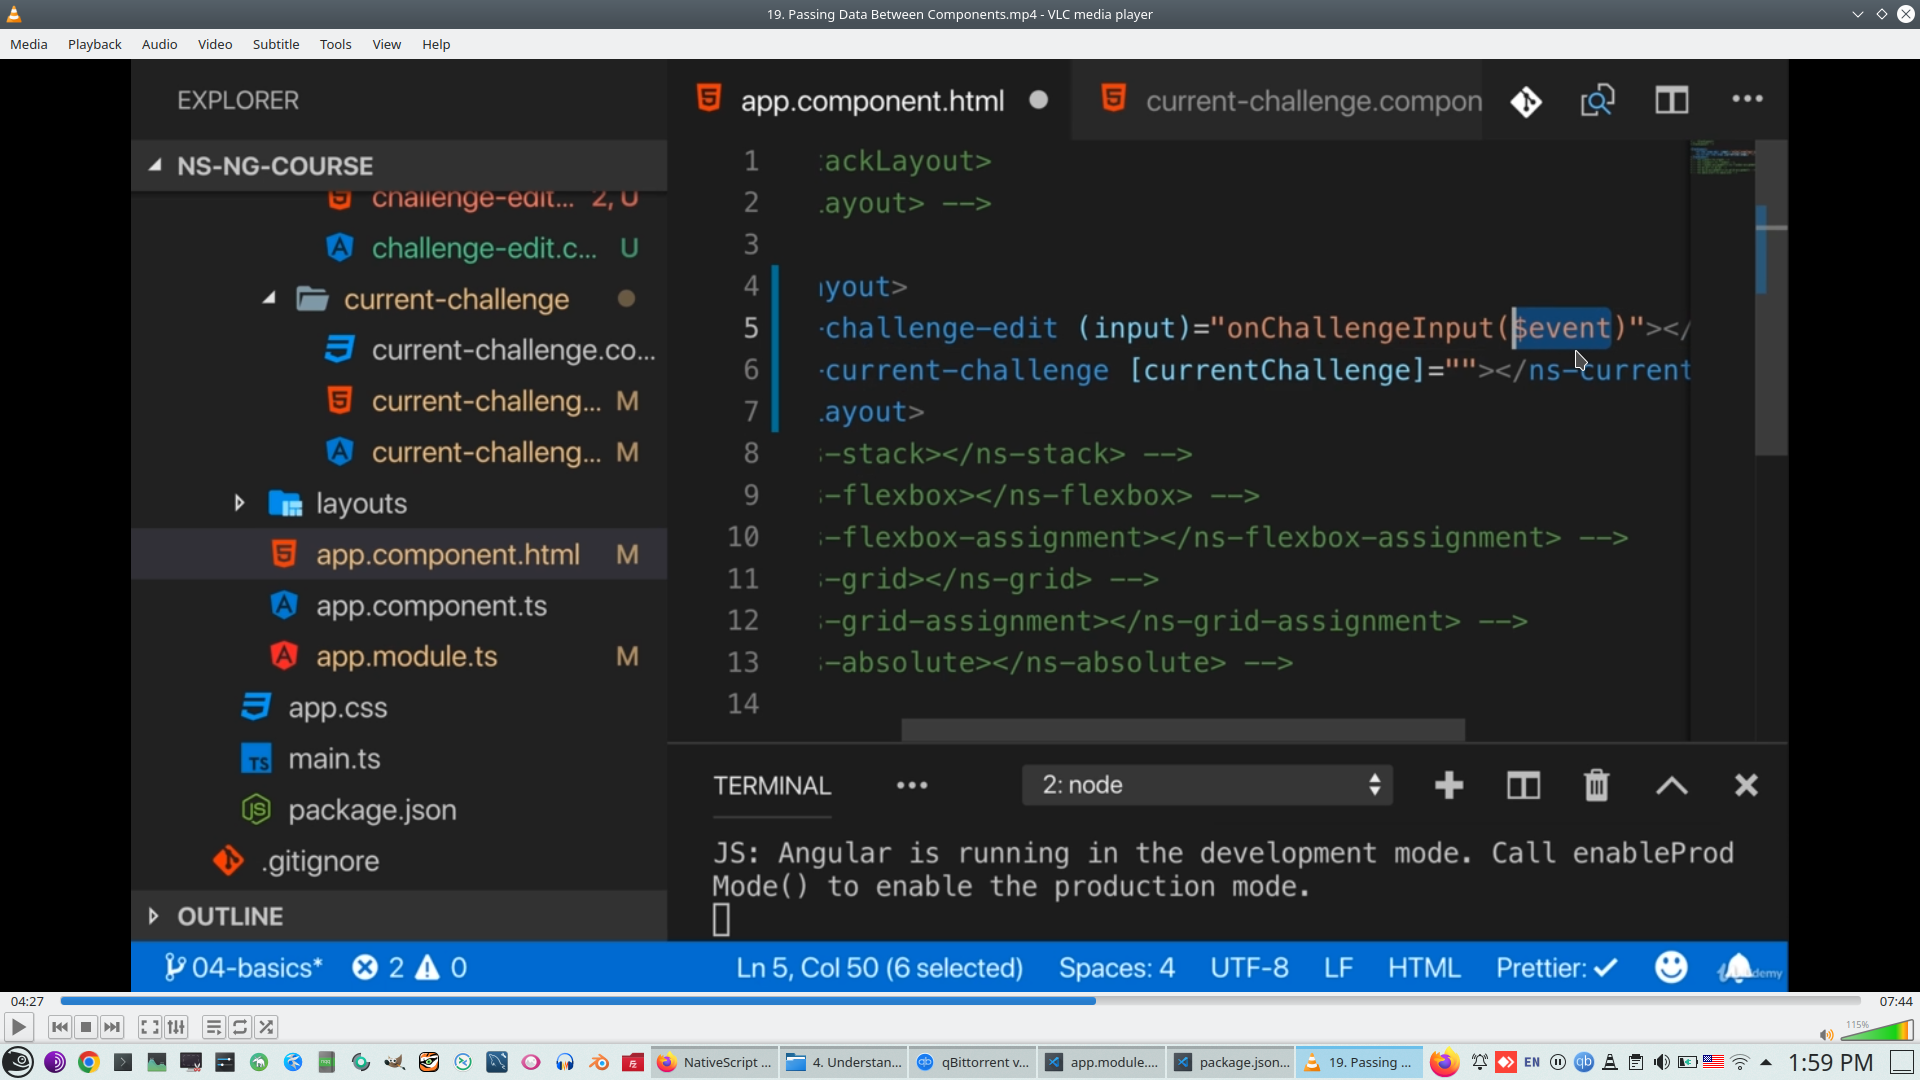
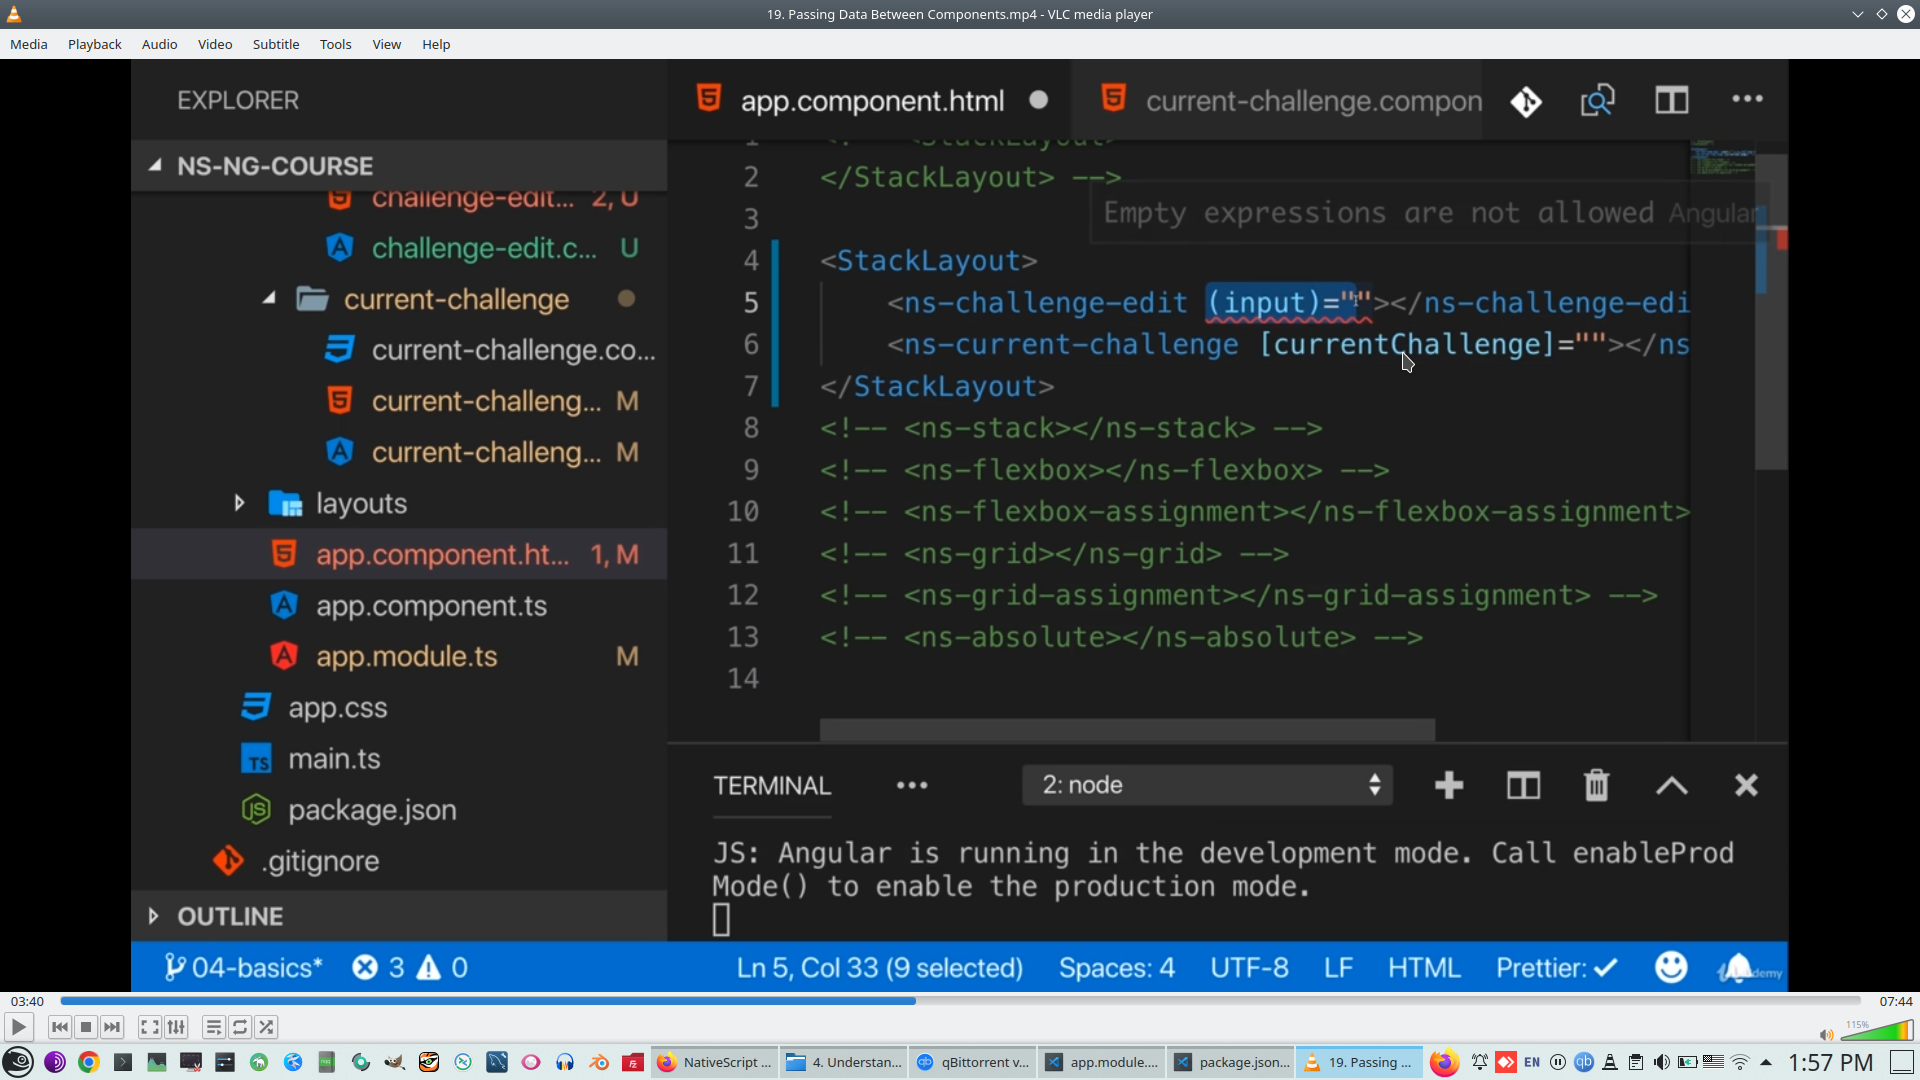
Pass event to property
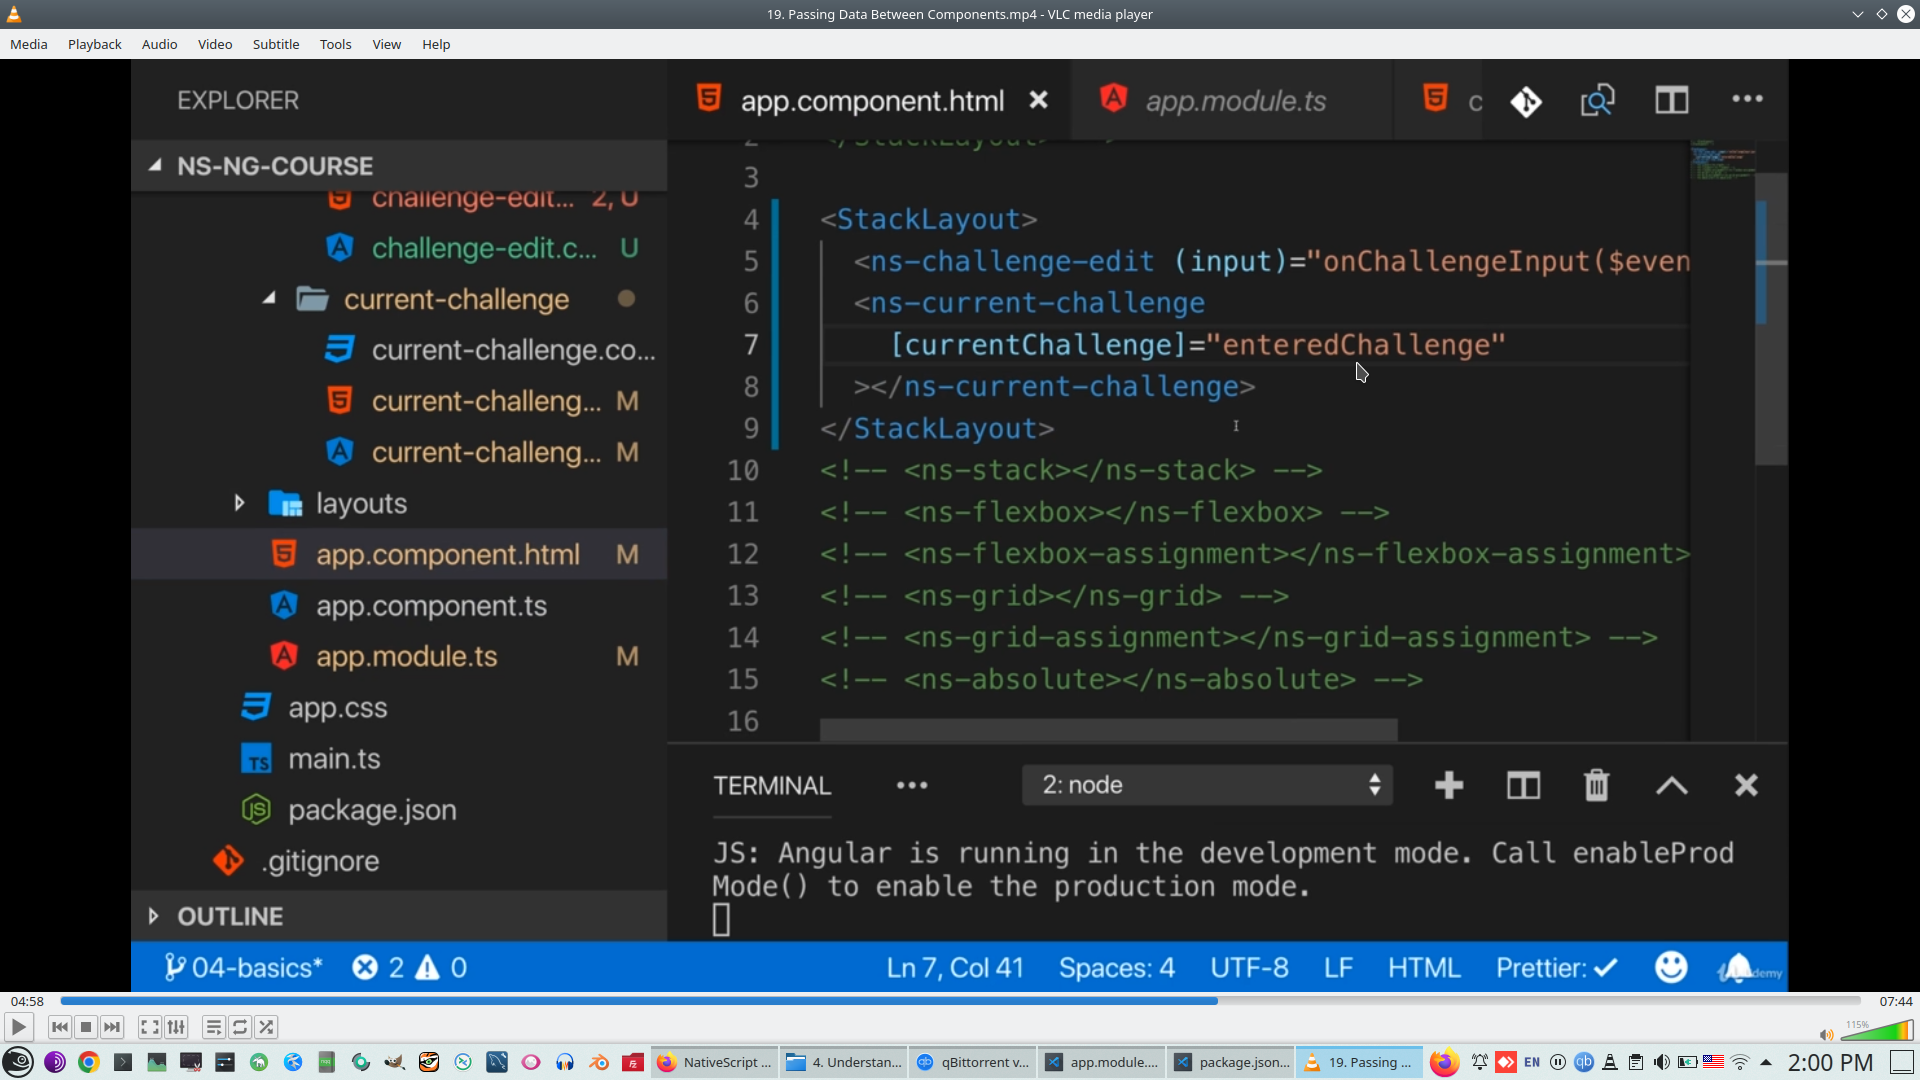
Check
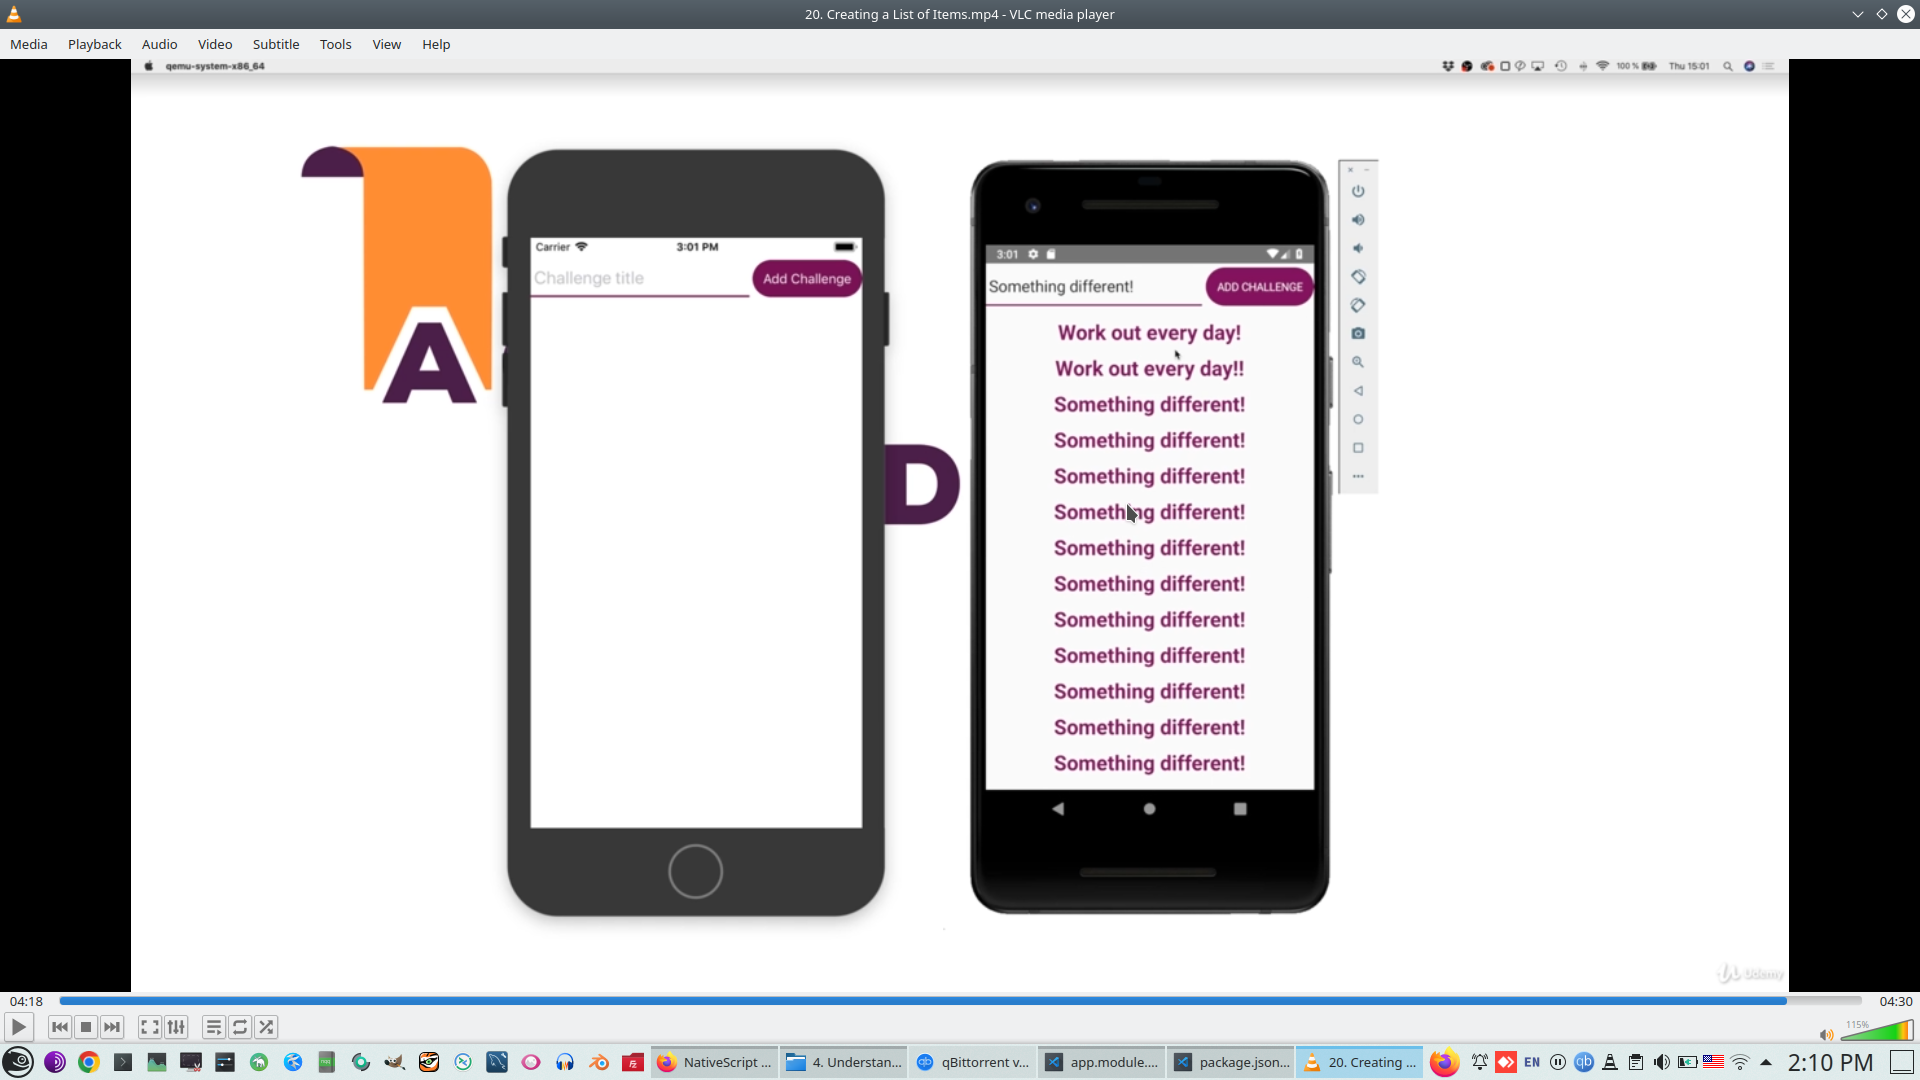
Pass array between components

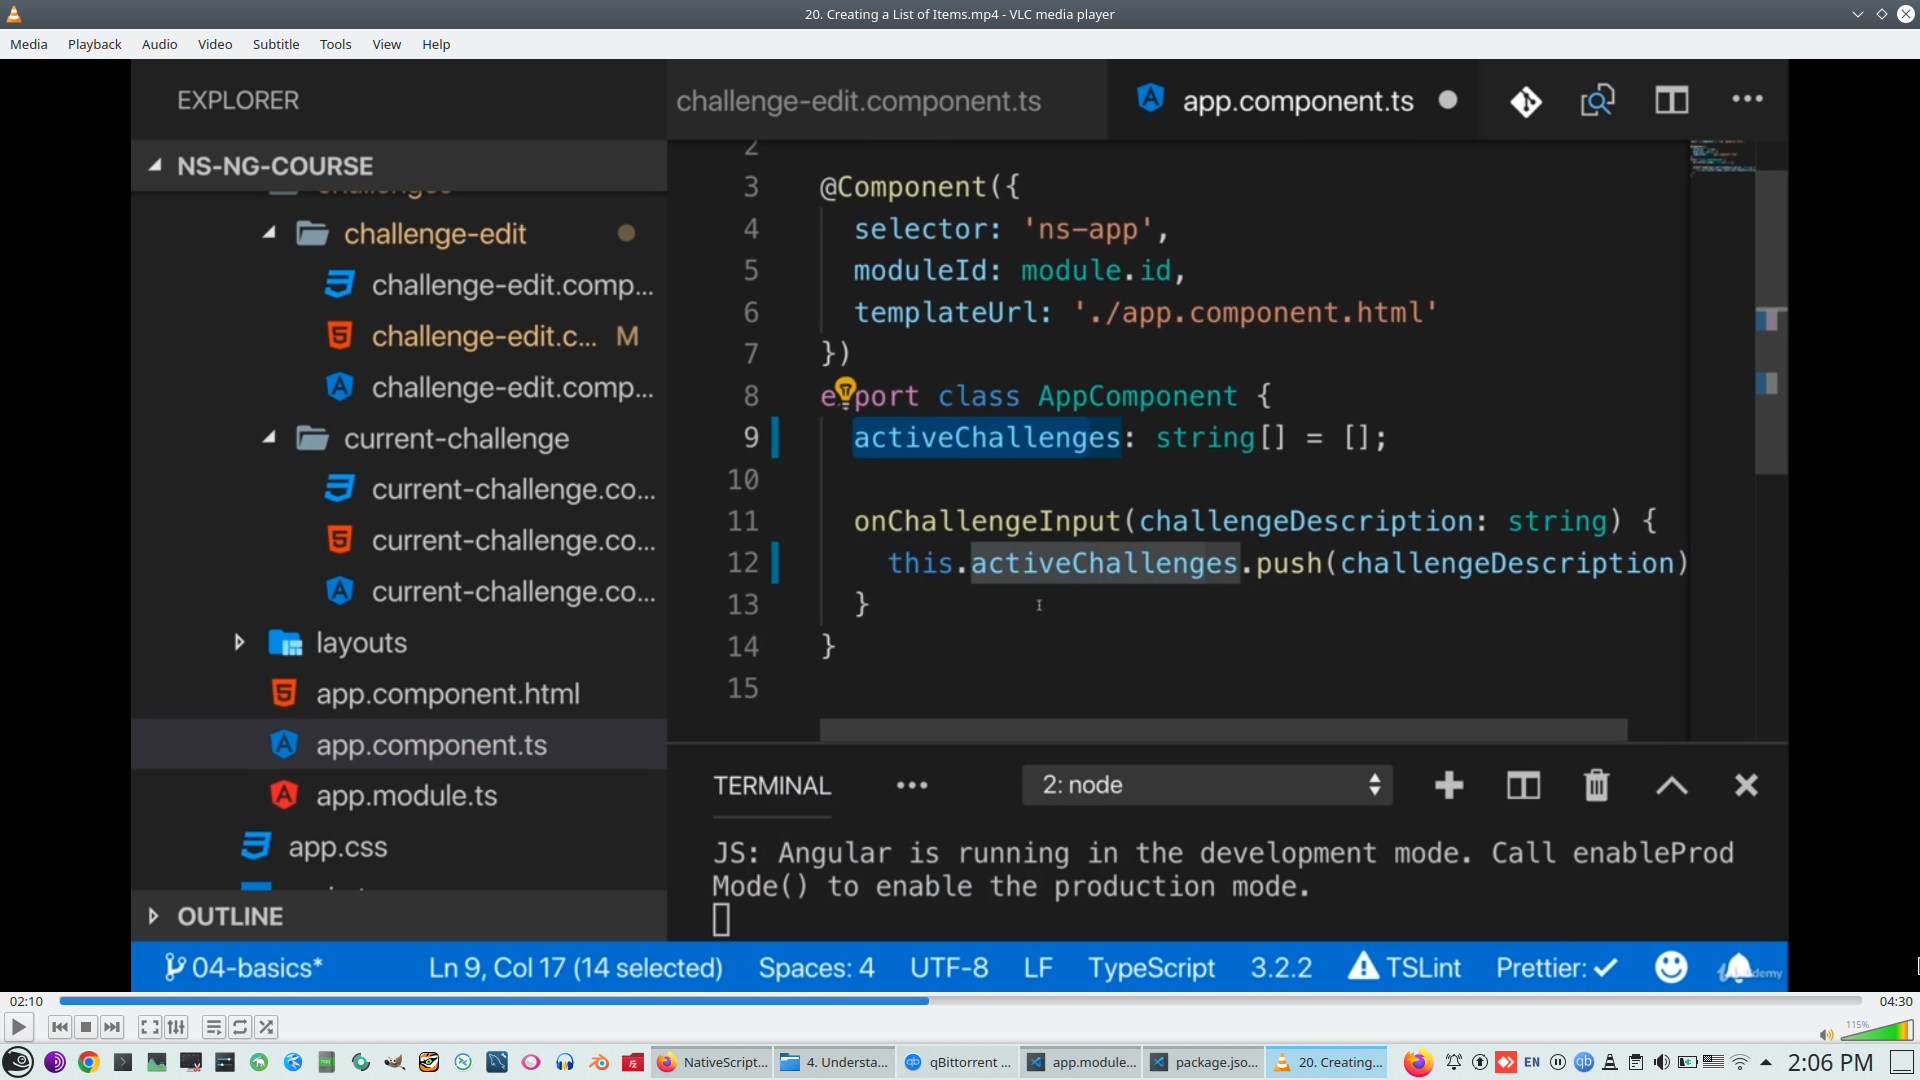
*NgFor repeater is a directive can render array in cyrcle
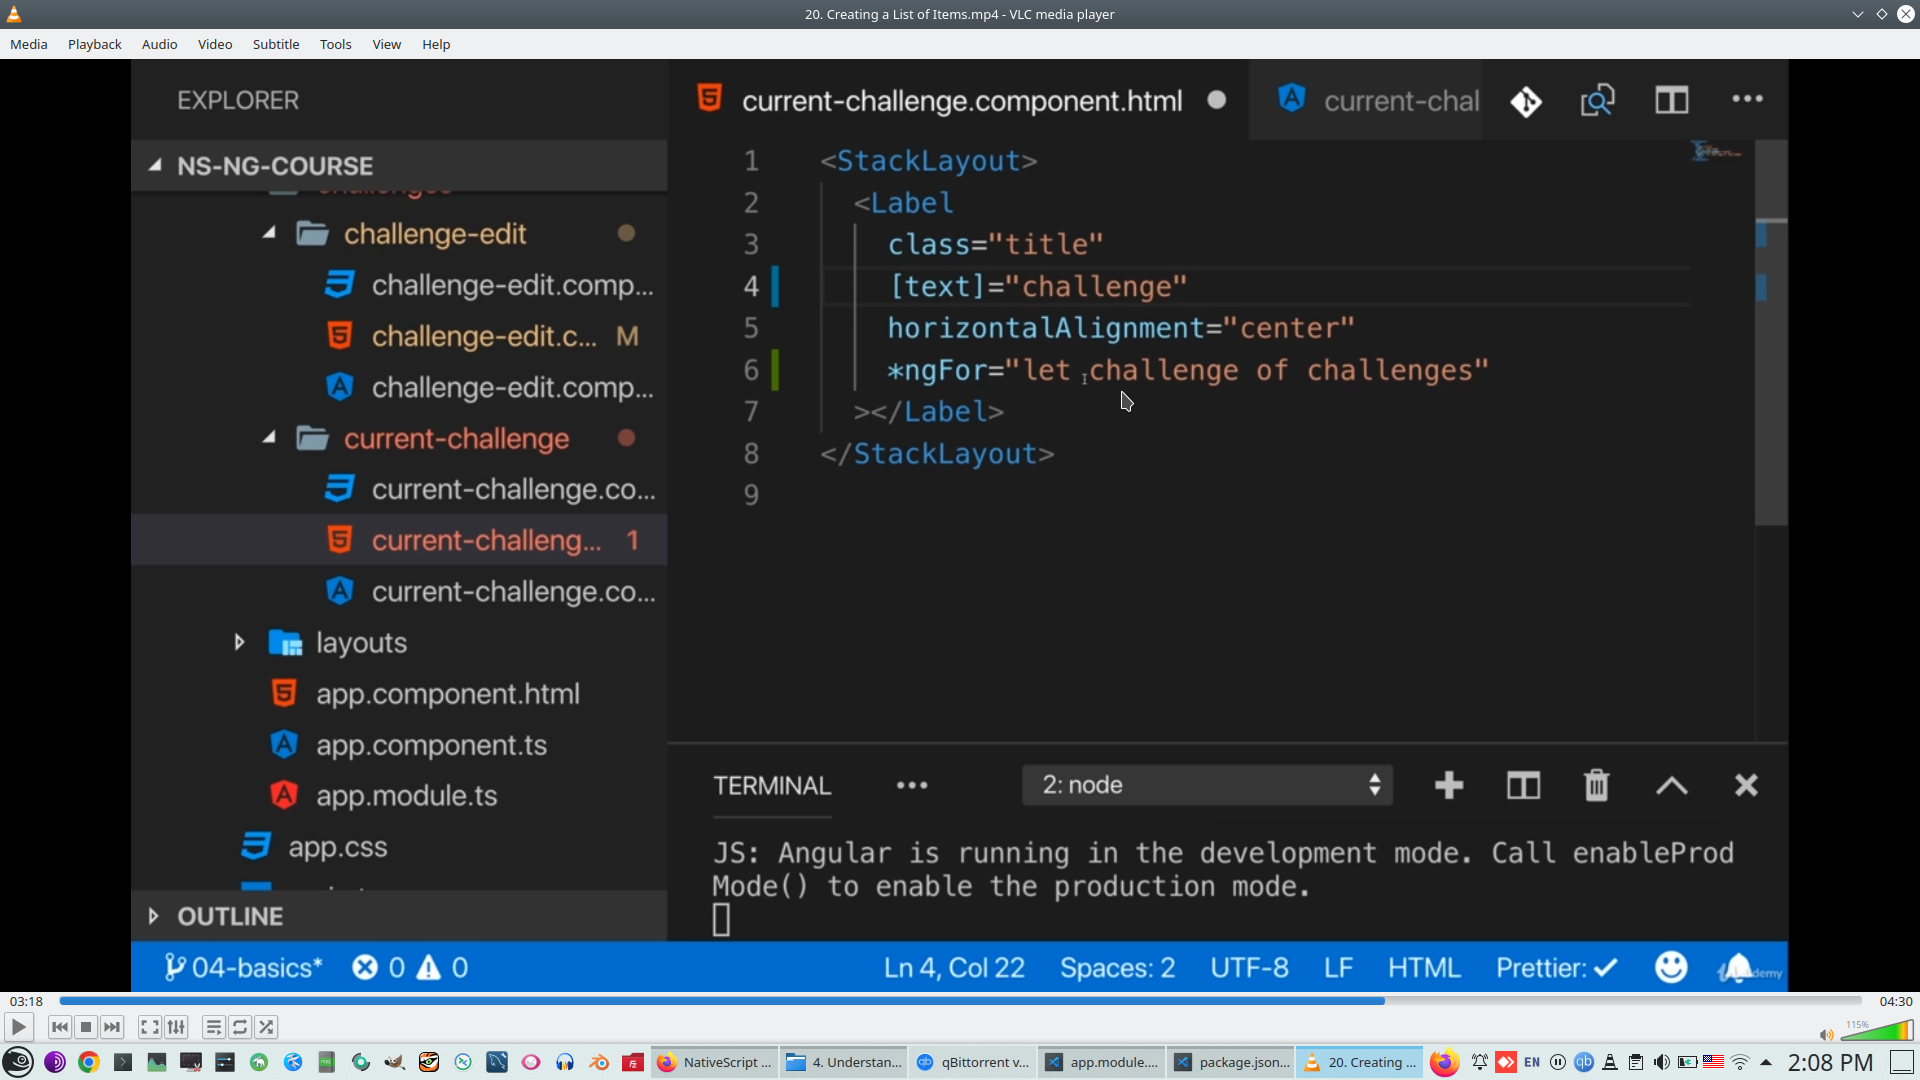
Check
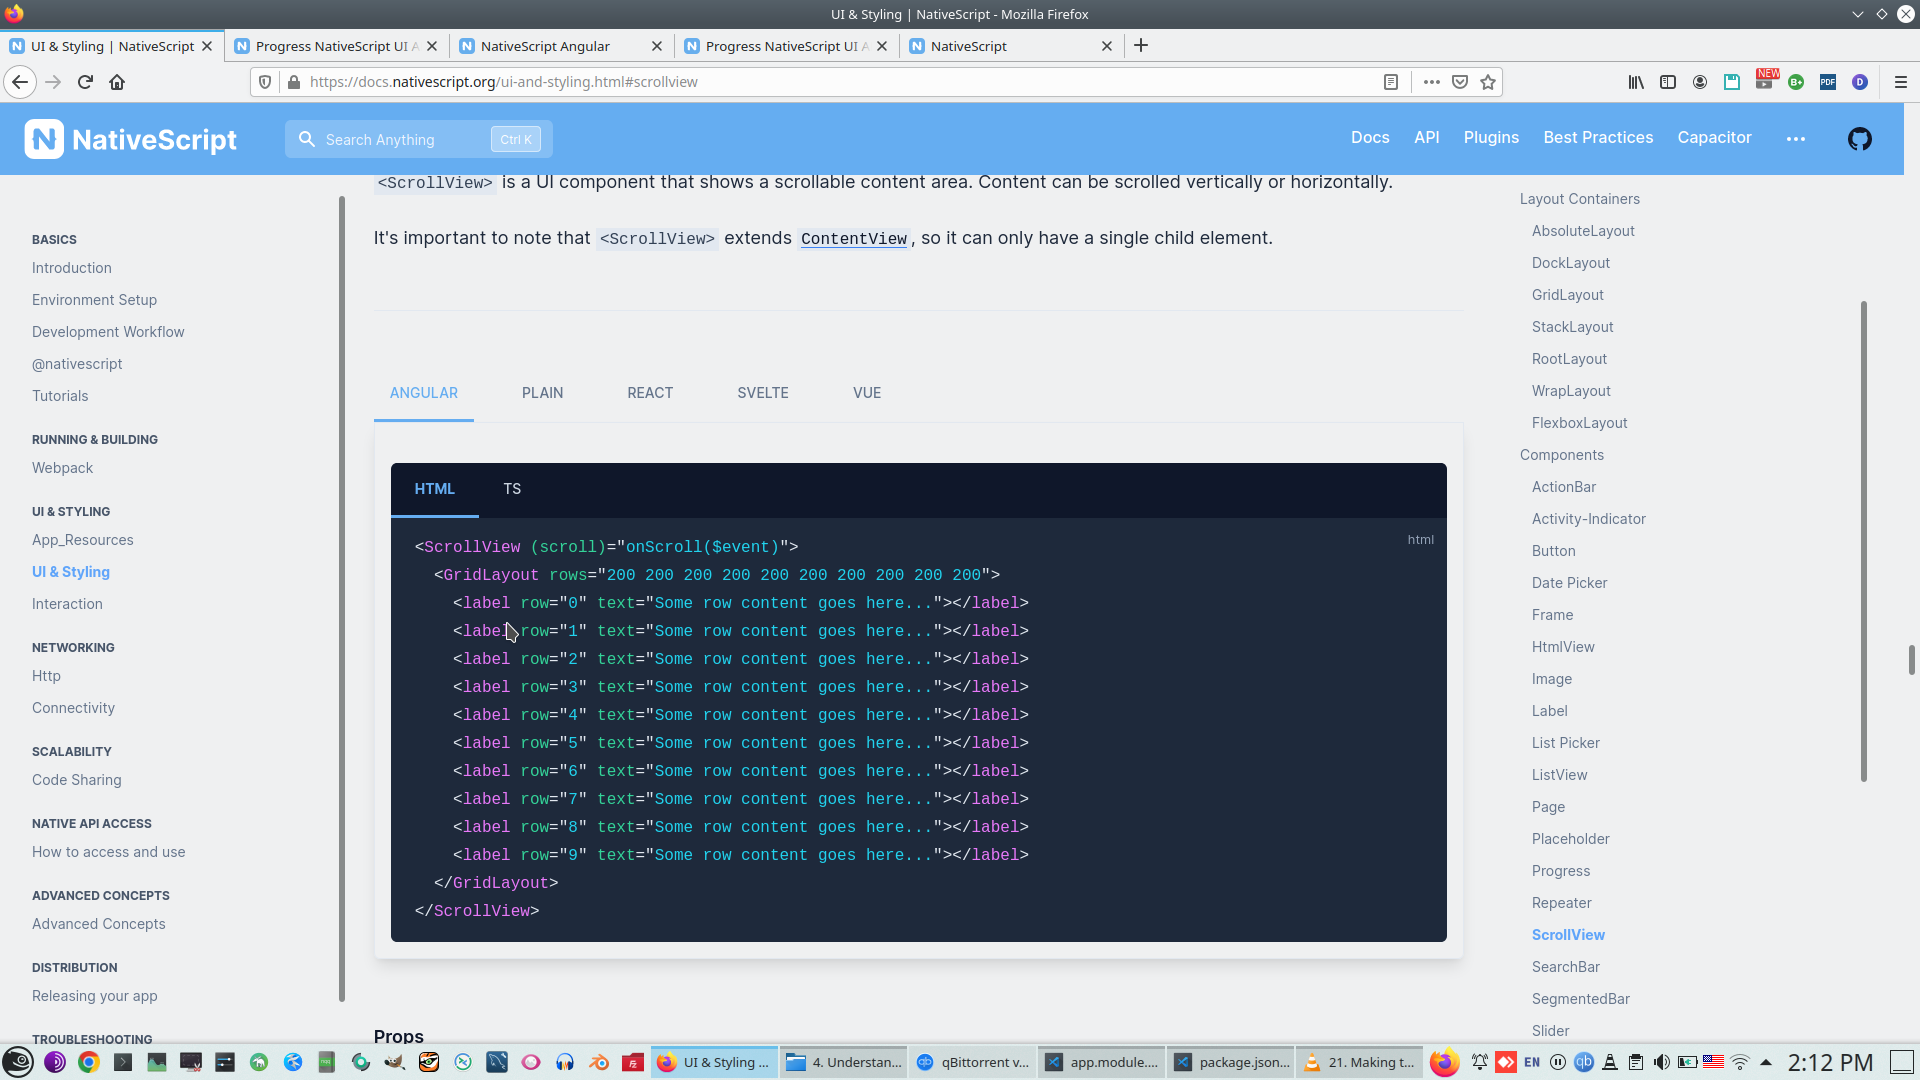
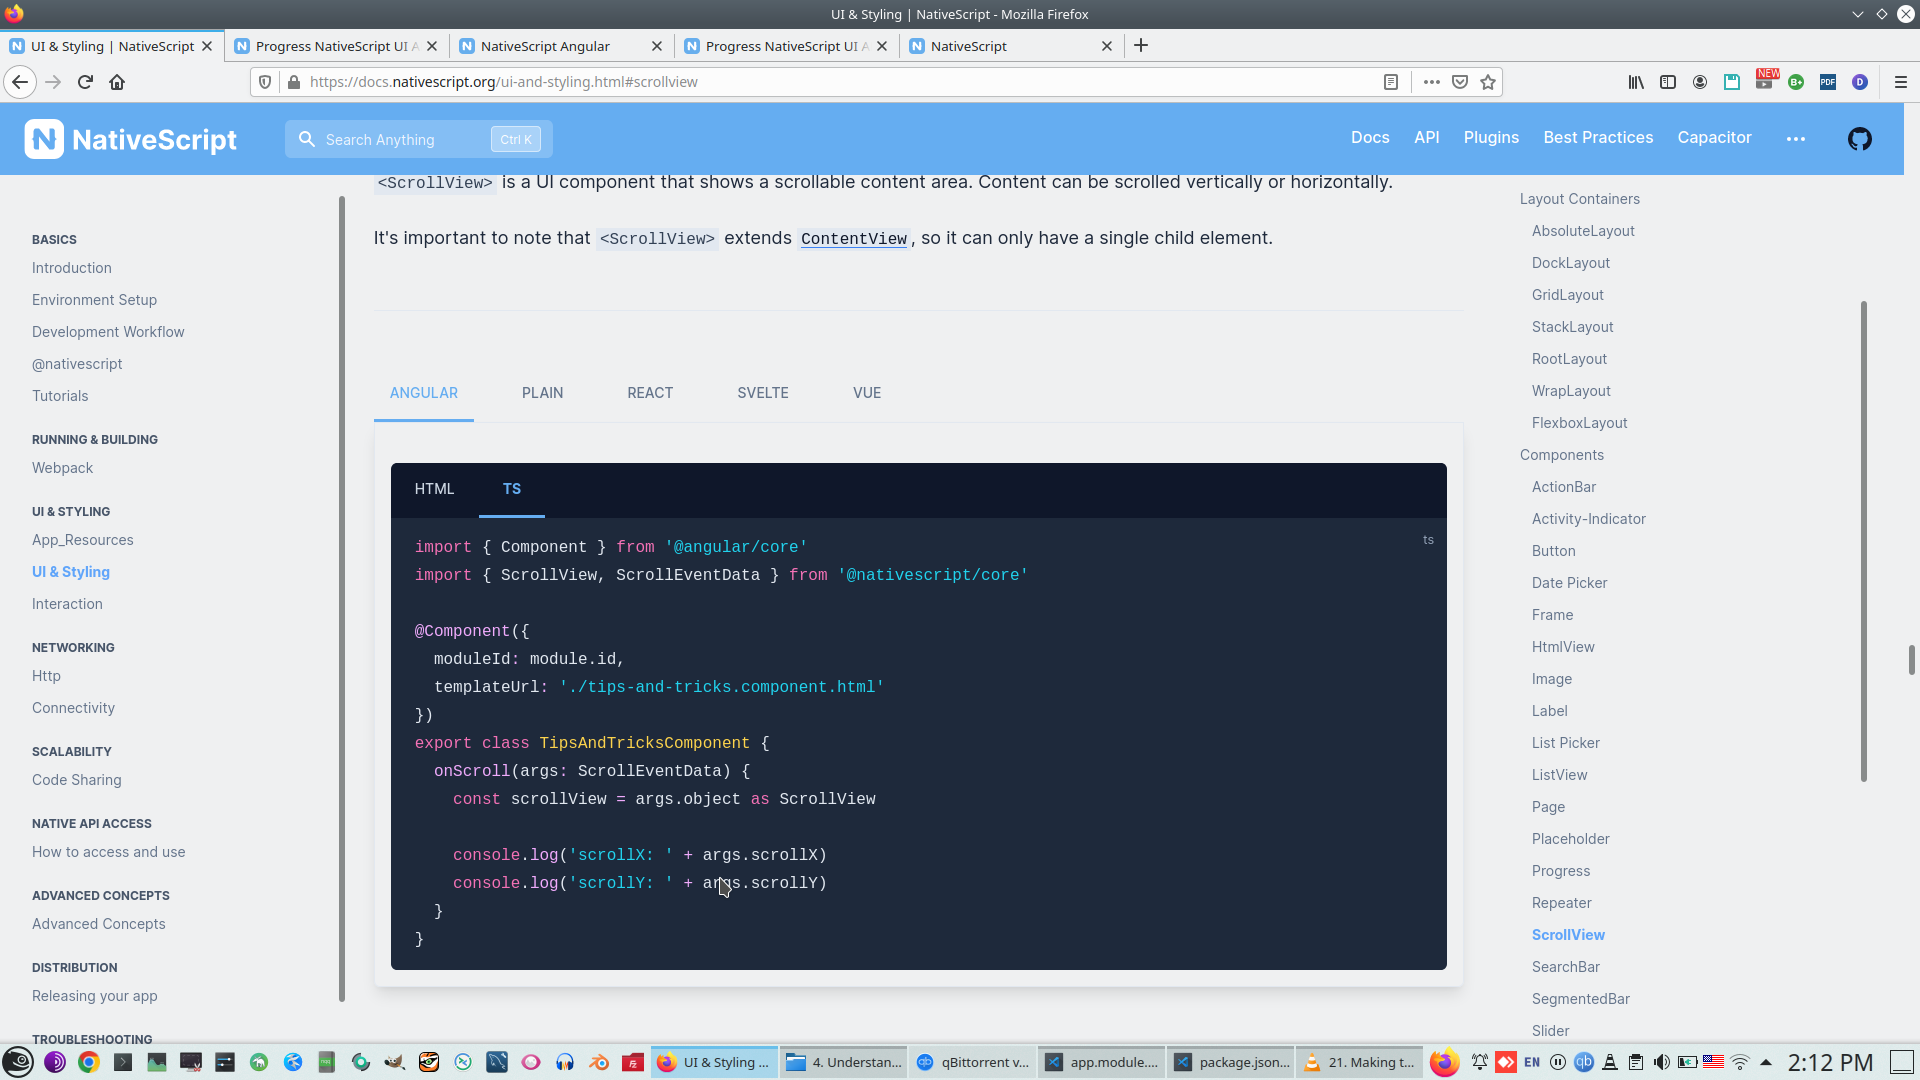
11. ScrollView UI component
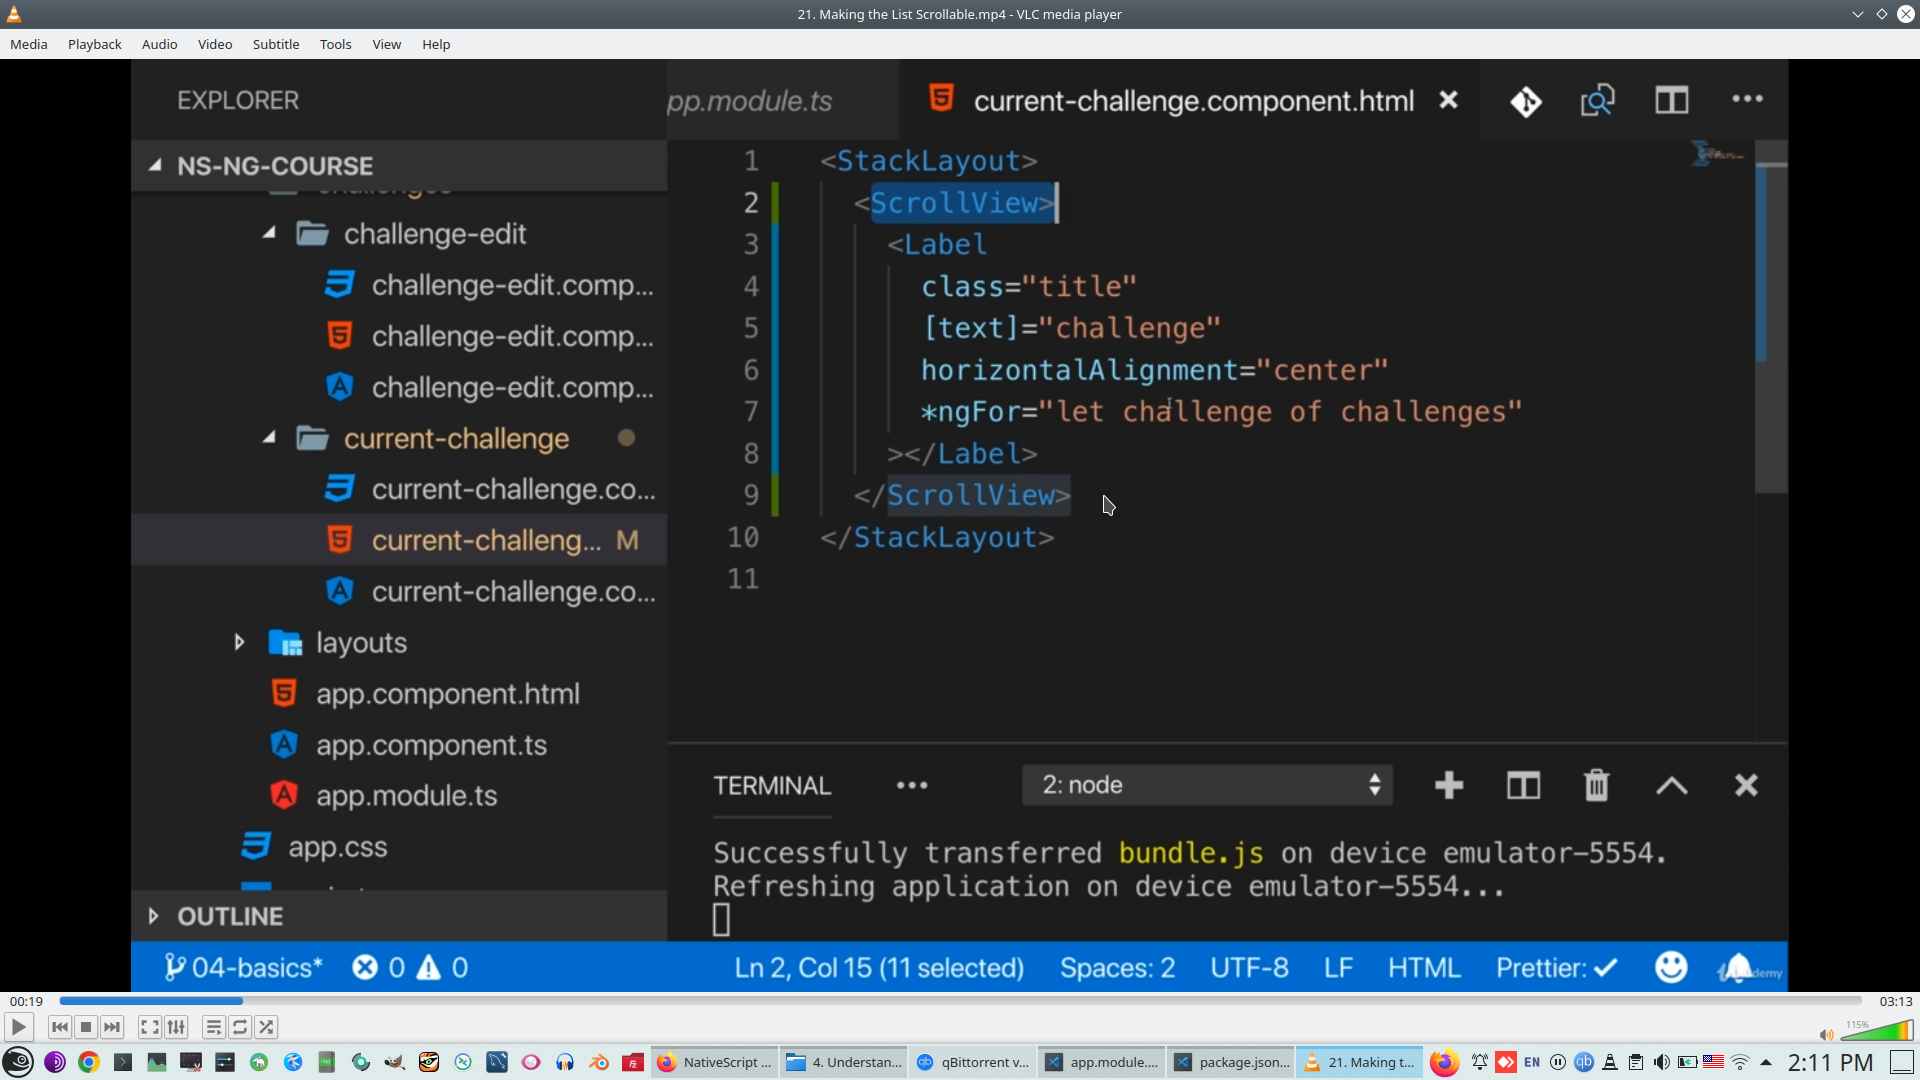
Add component dynamically wit TS
Check
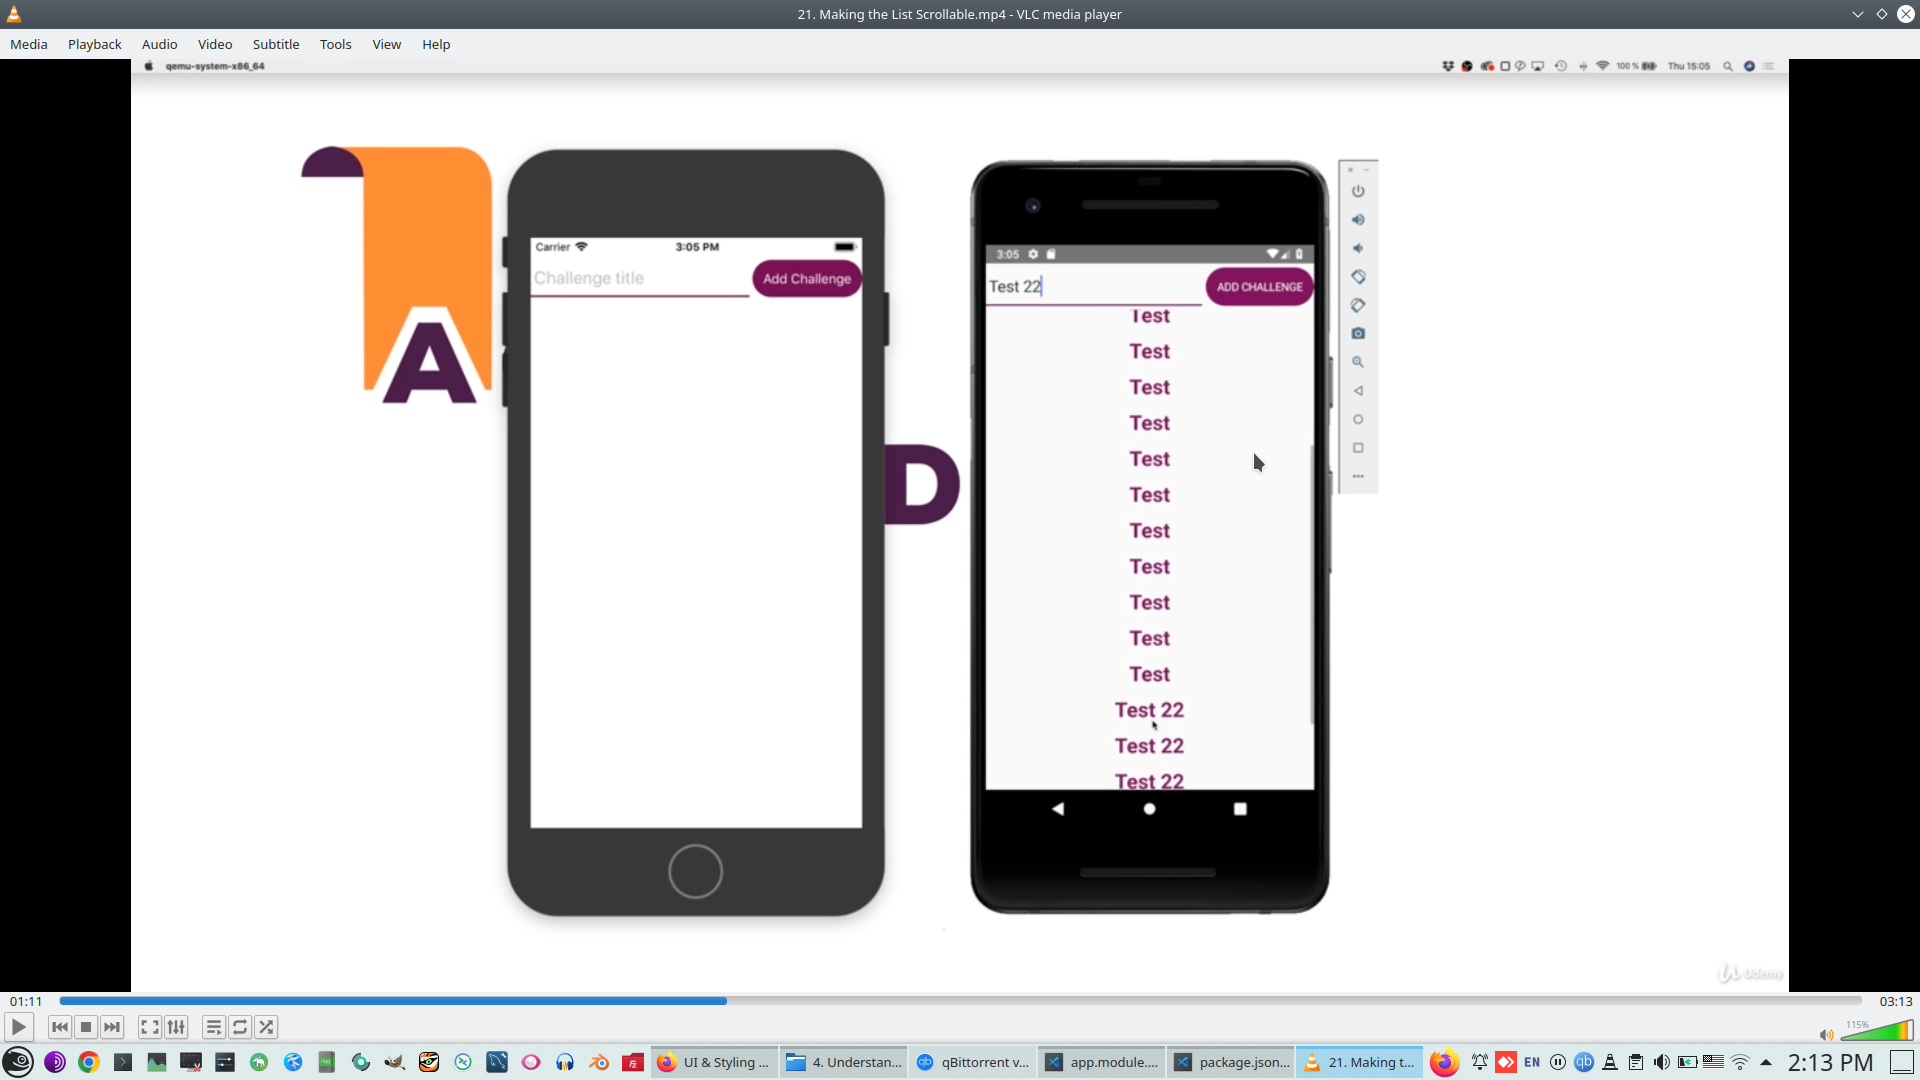
ViewPort
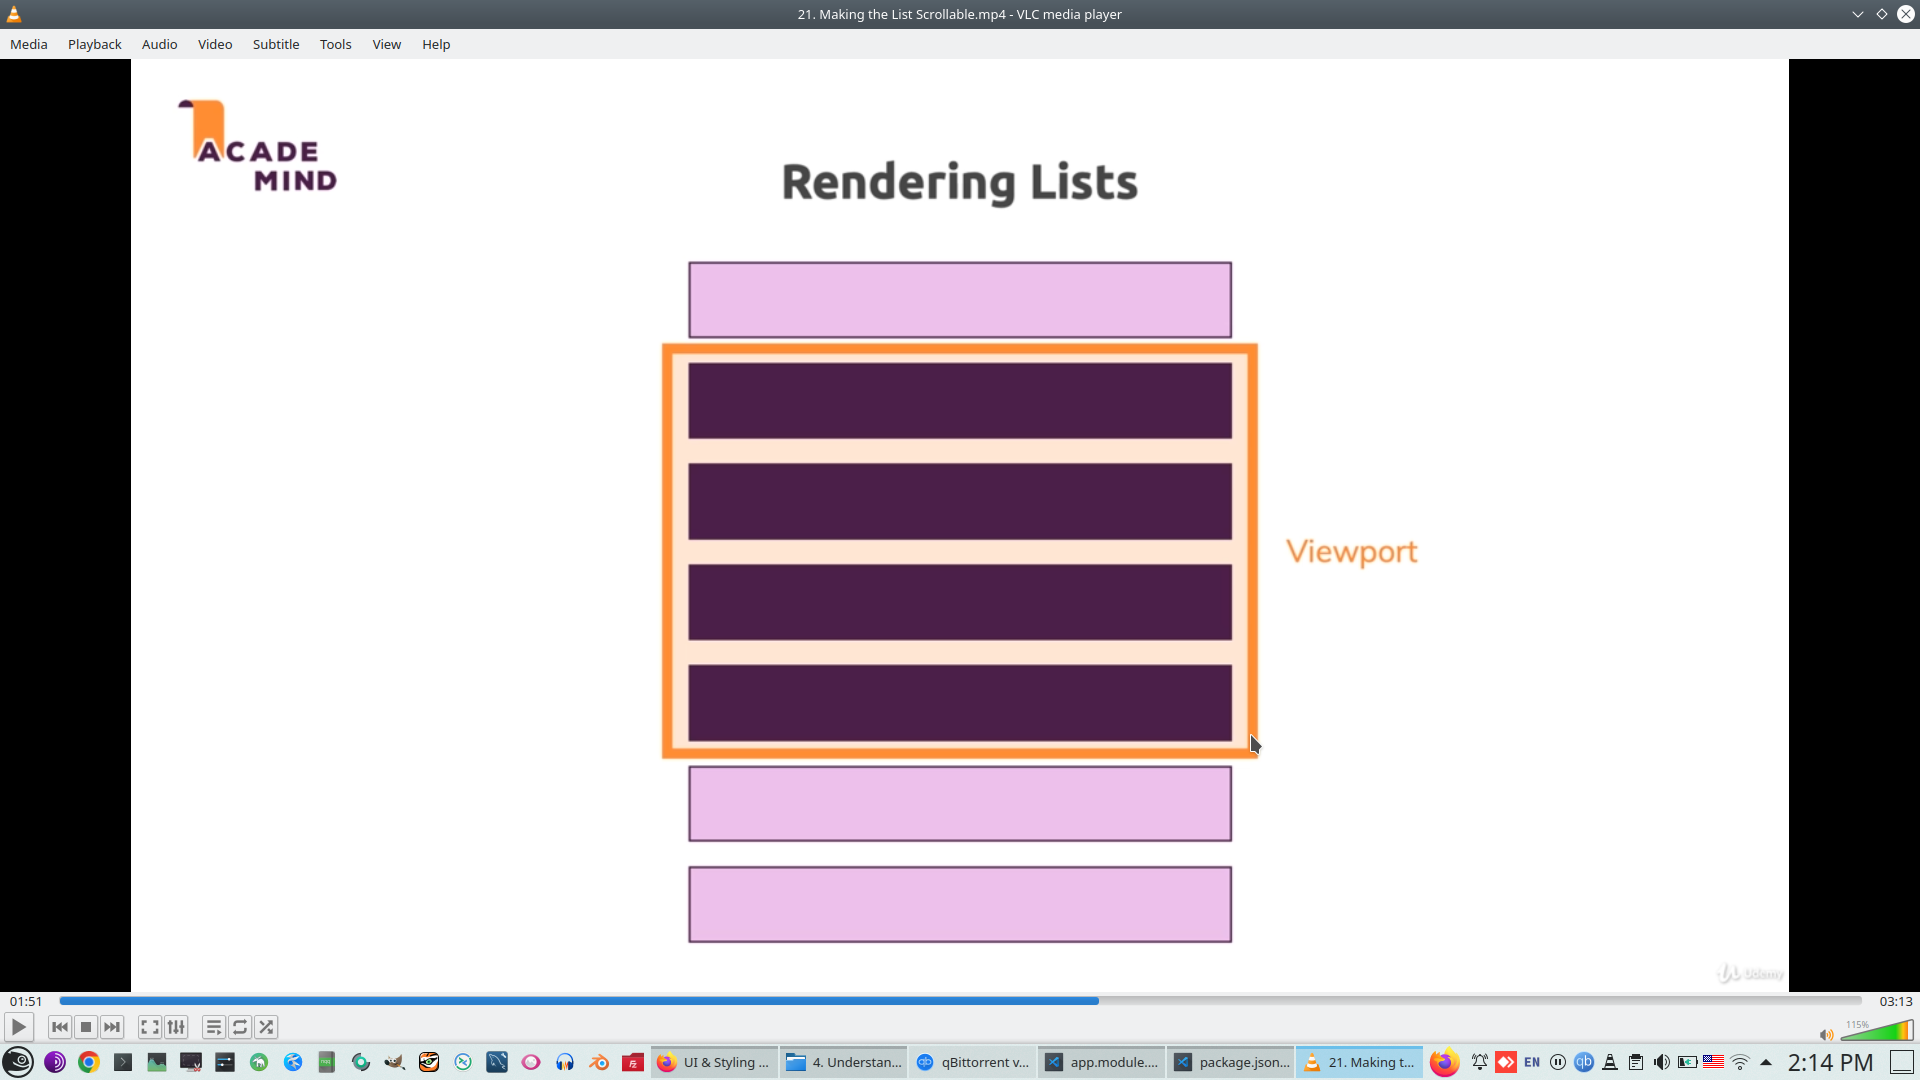
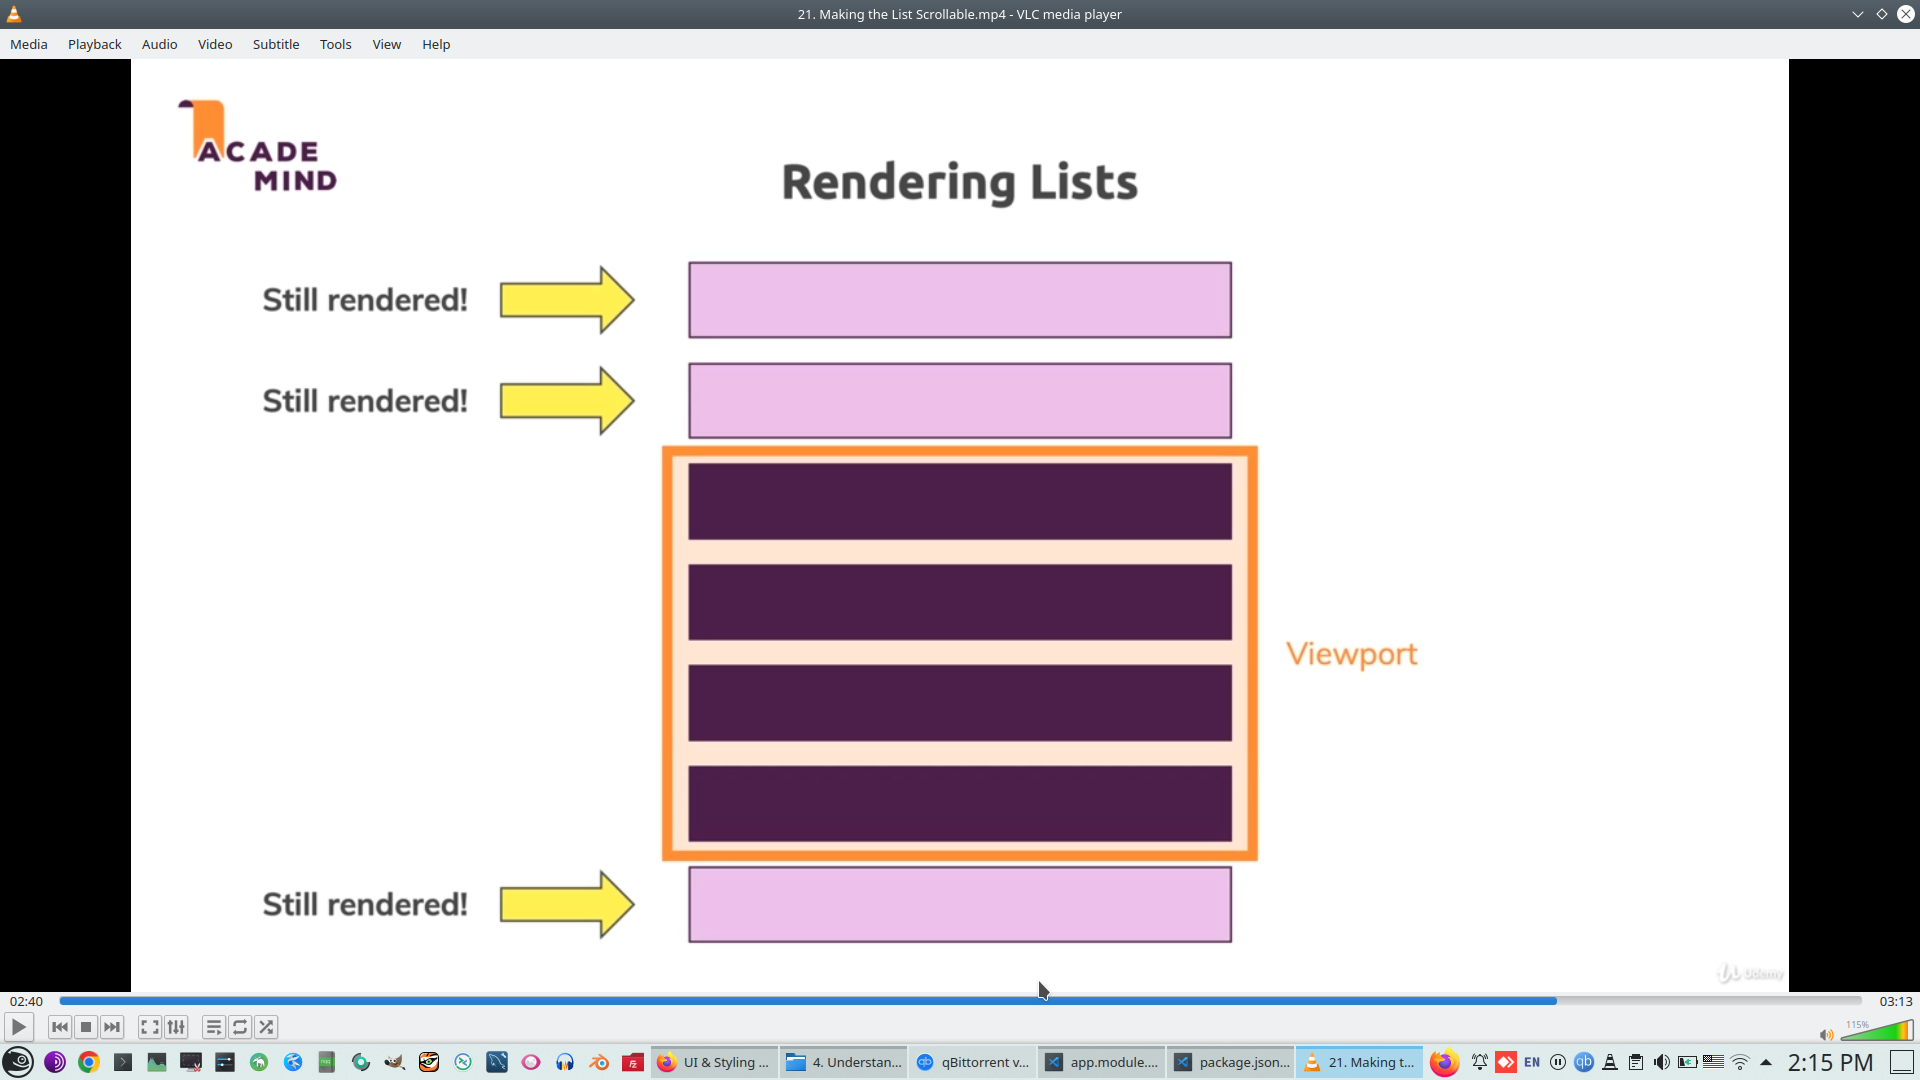
Virtualisation of ScroolView
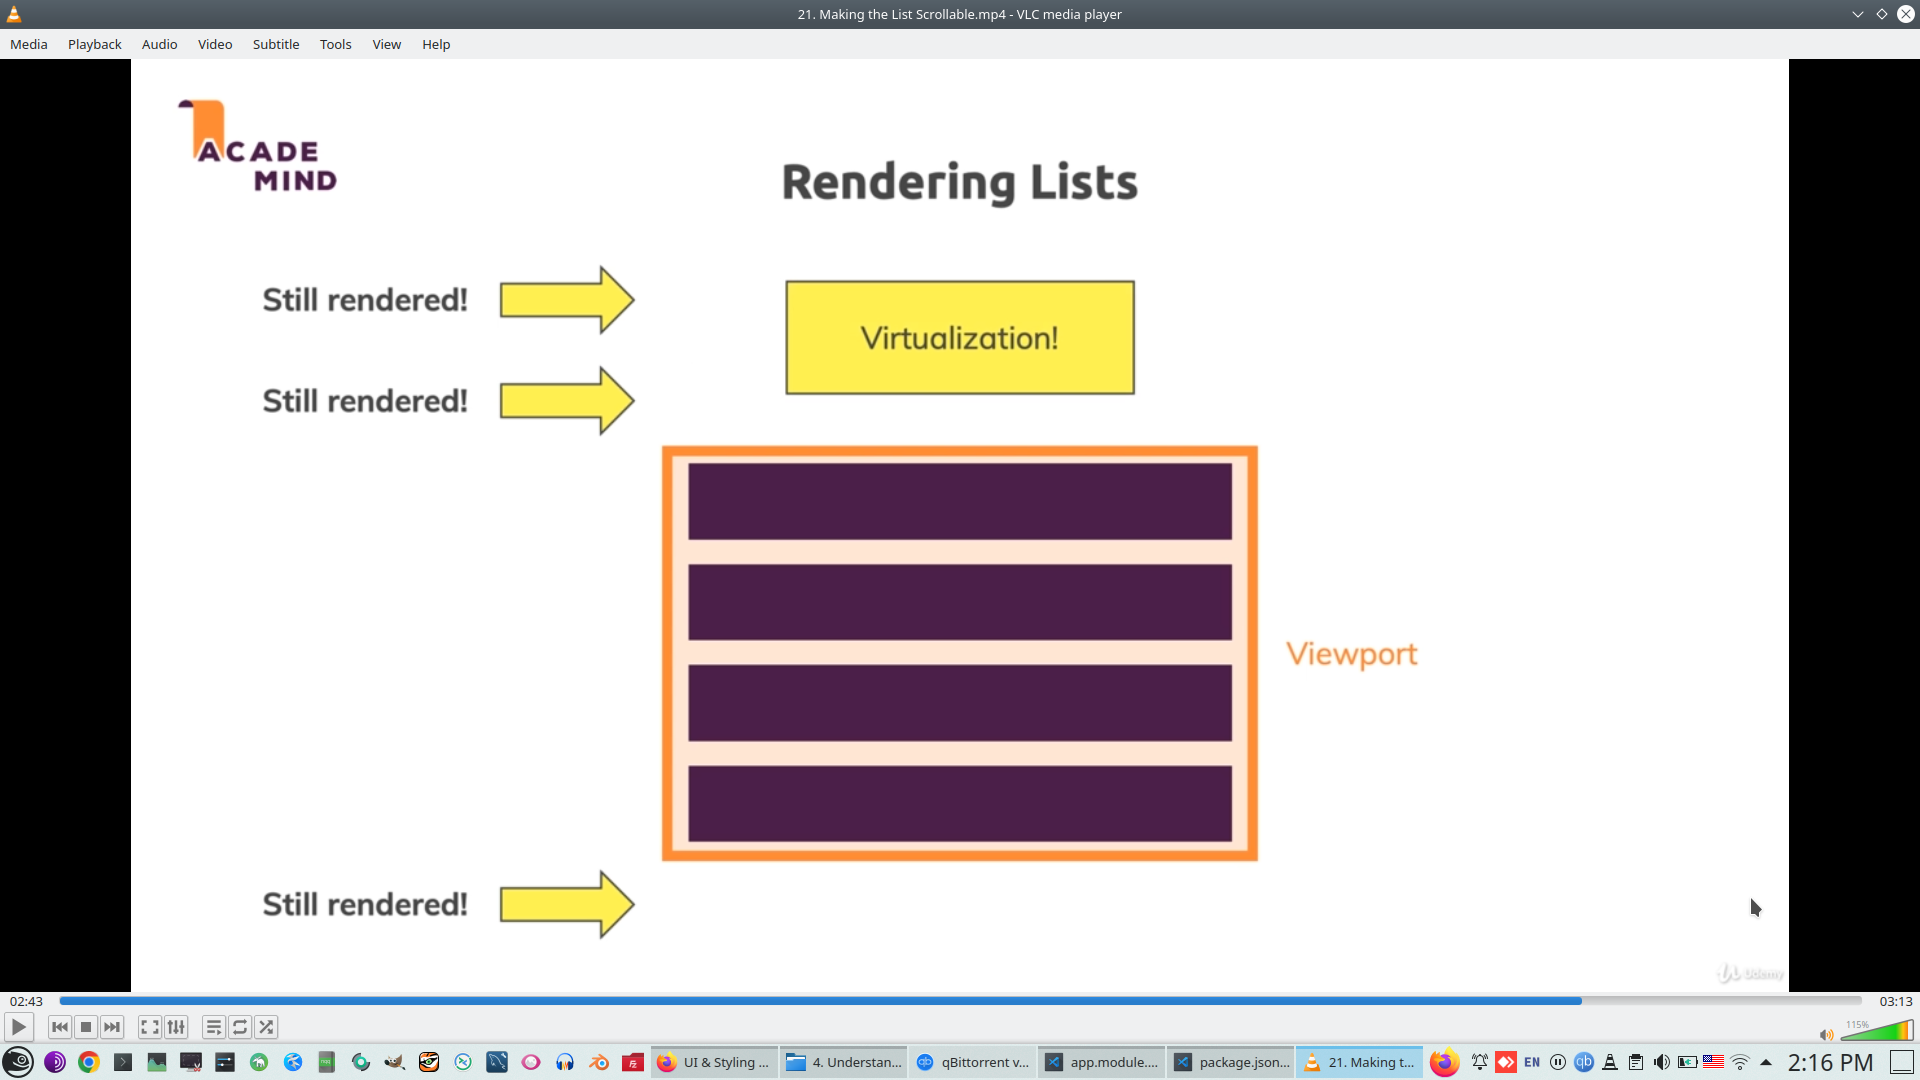
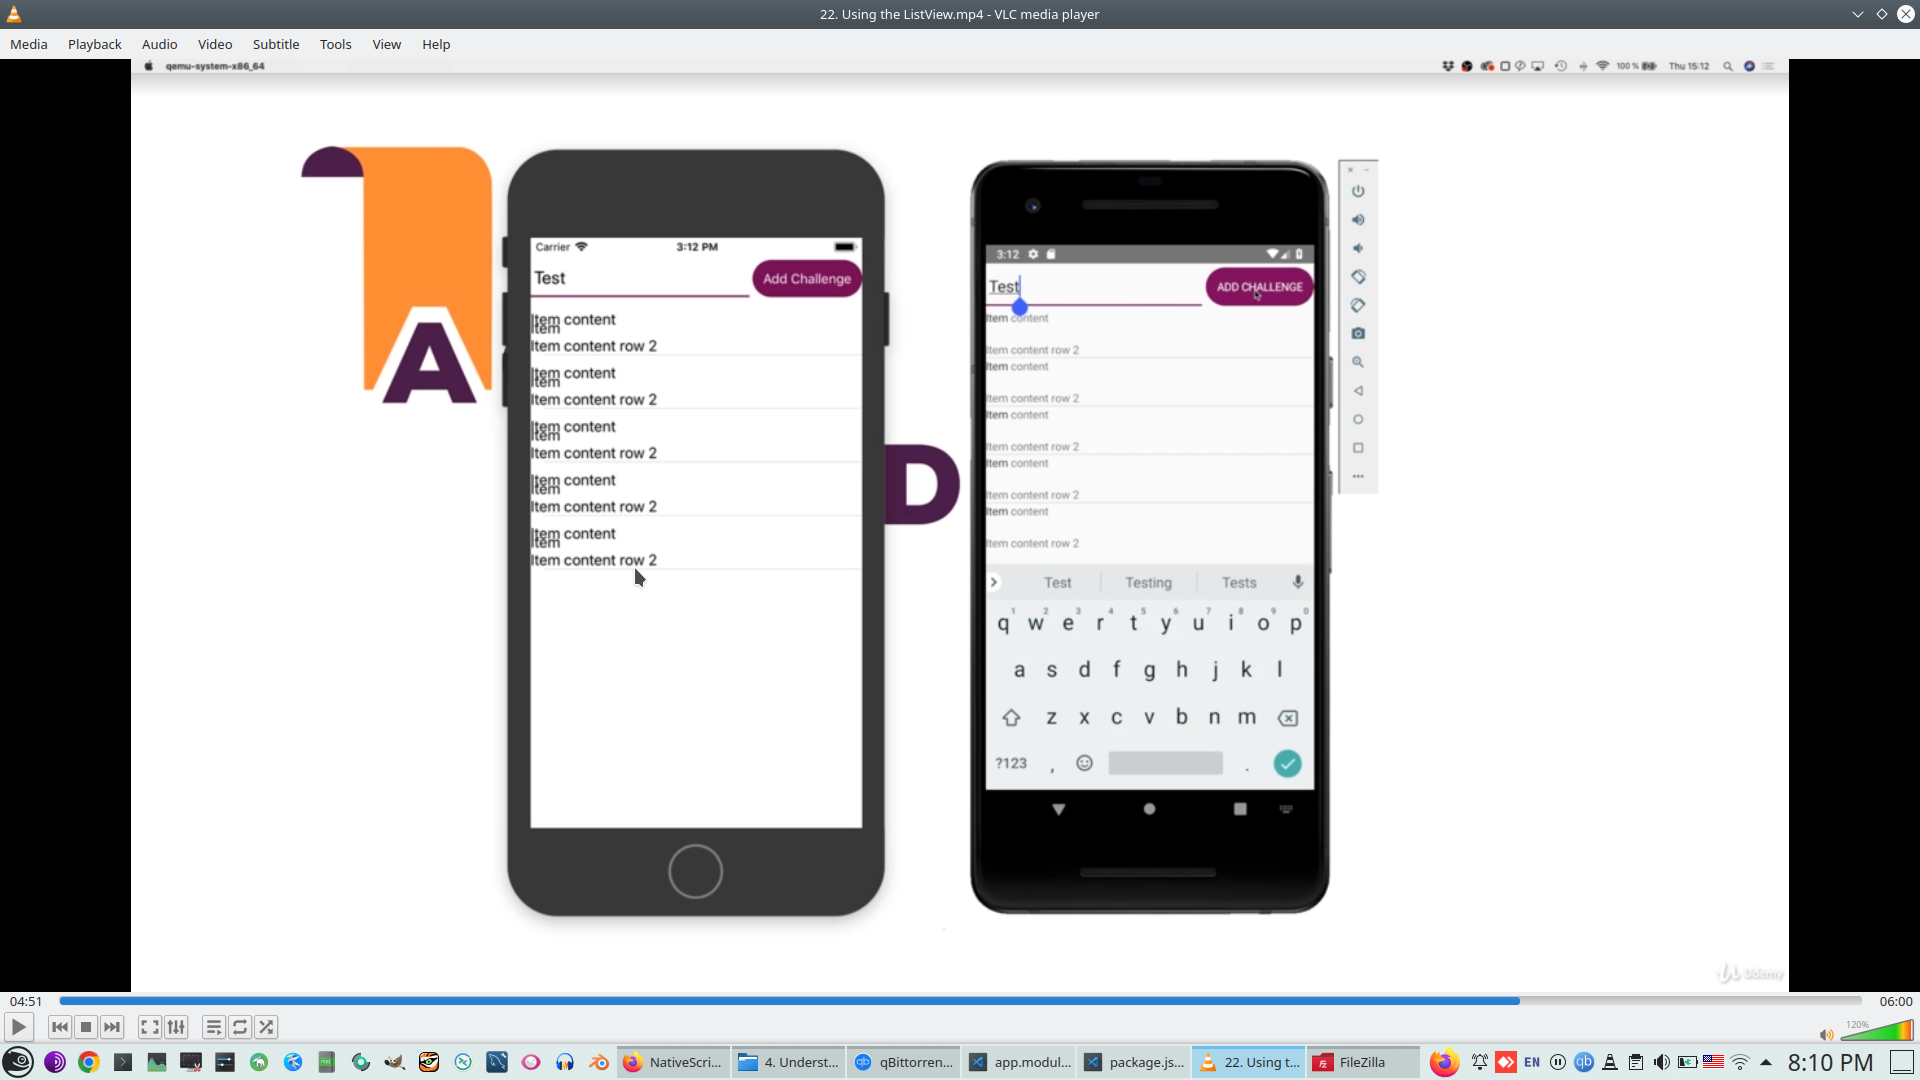
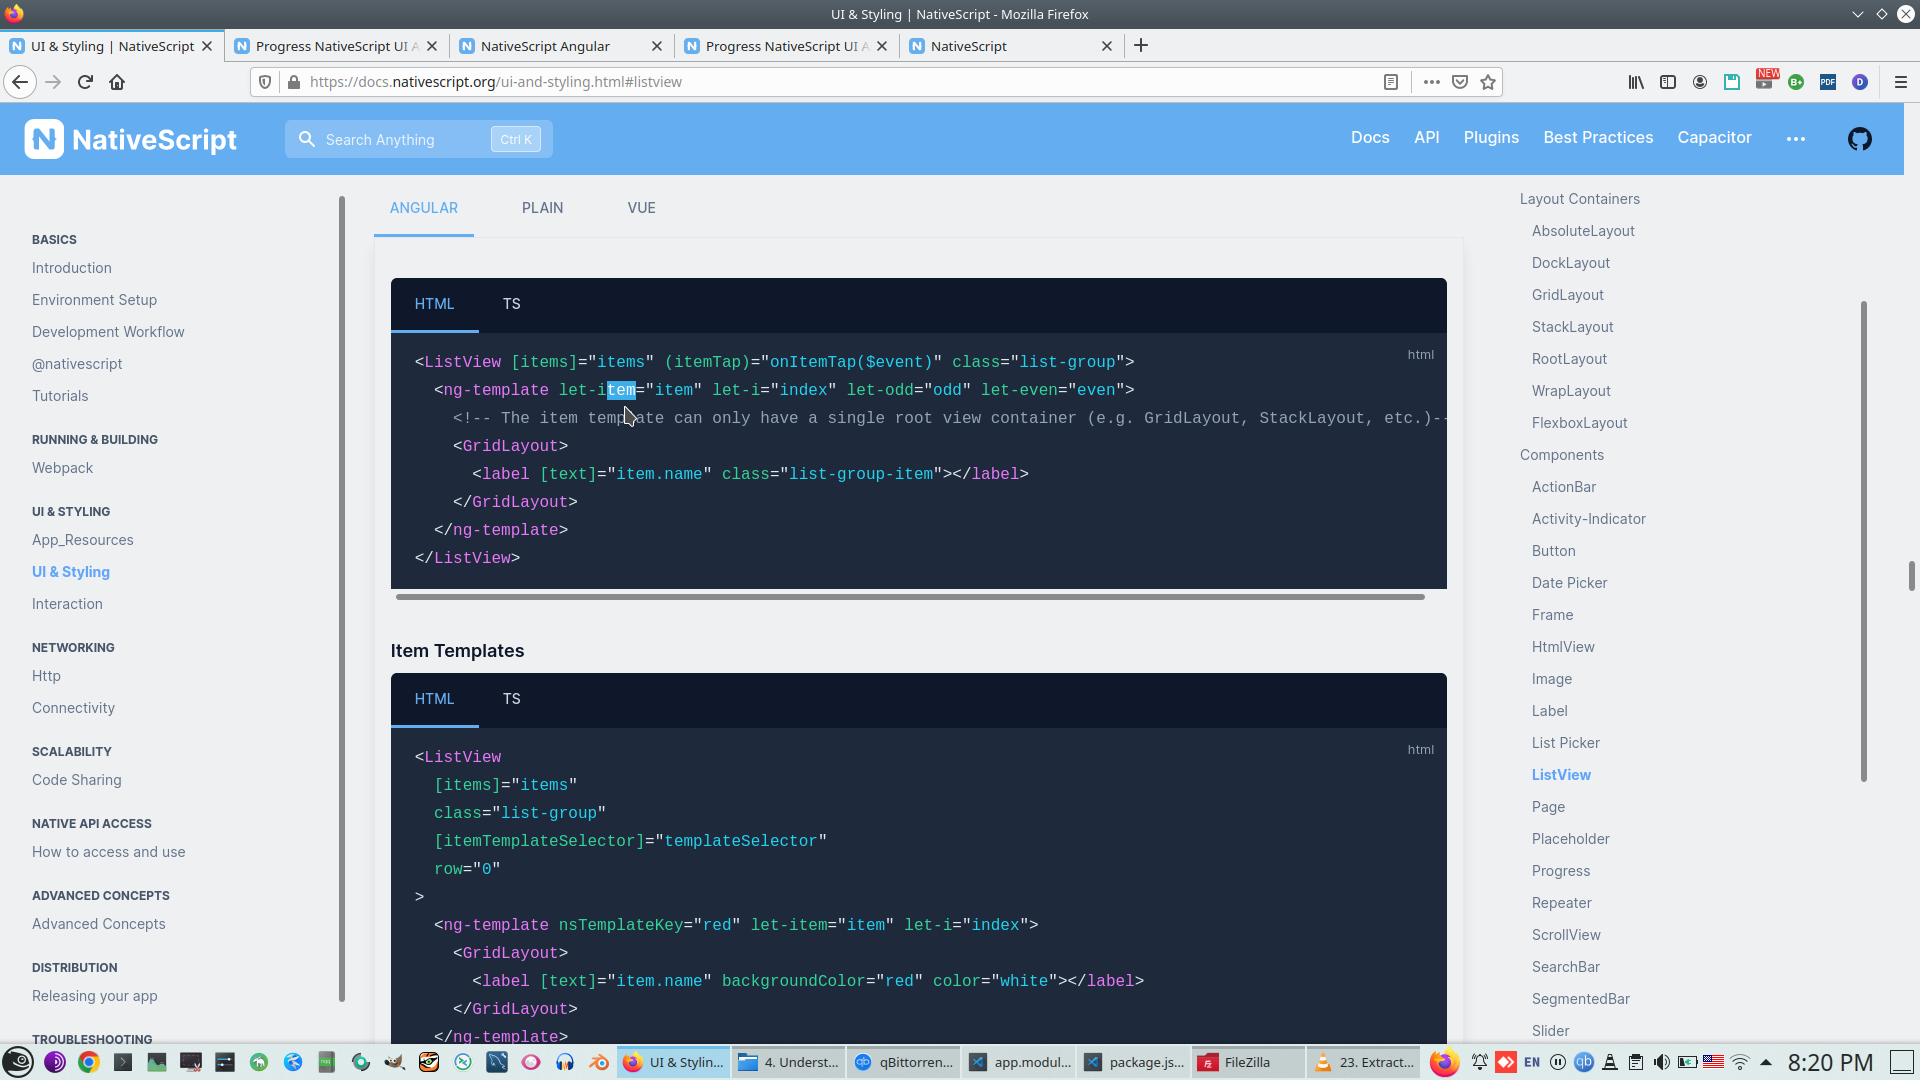
ListView component contains ng-tempate, ng-template provided by Angular, not NS
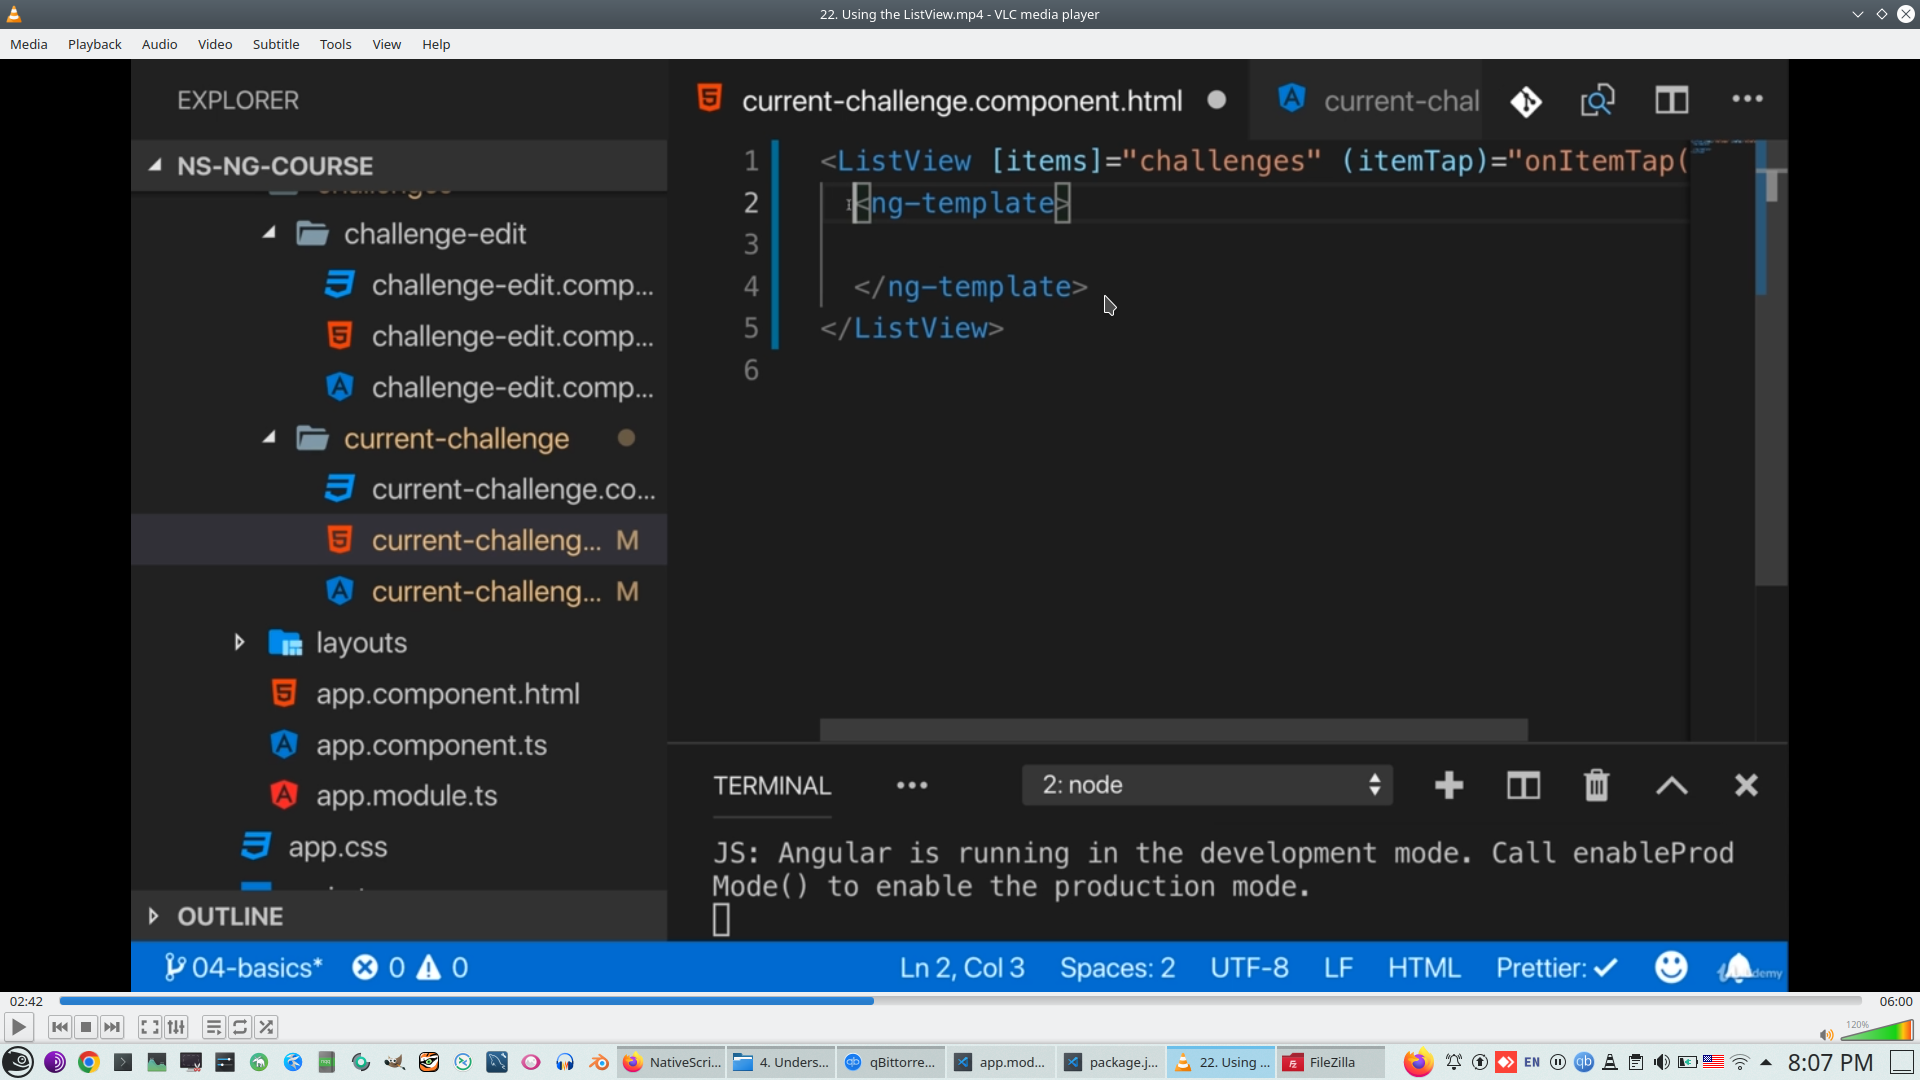
Difference between IOS and Android
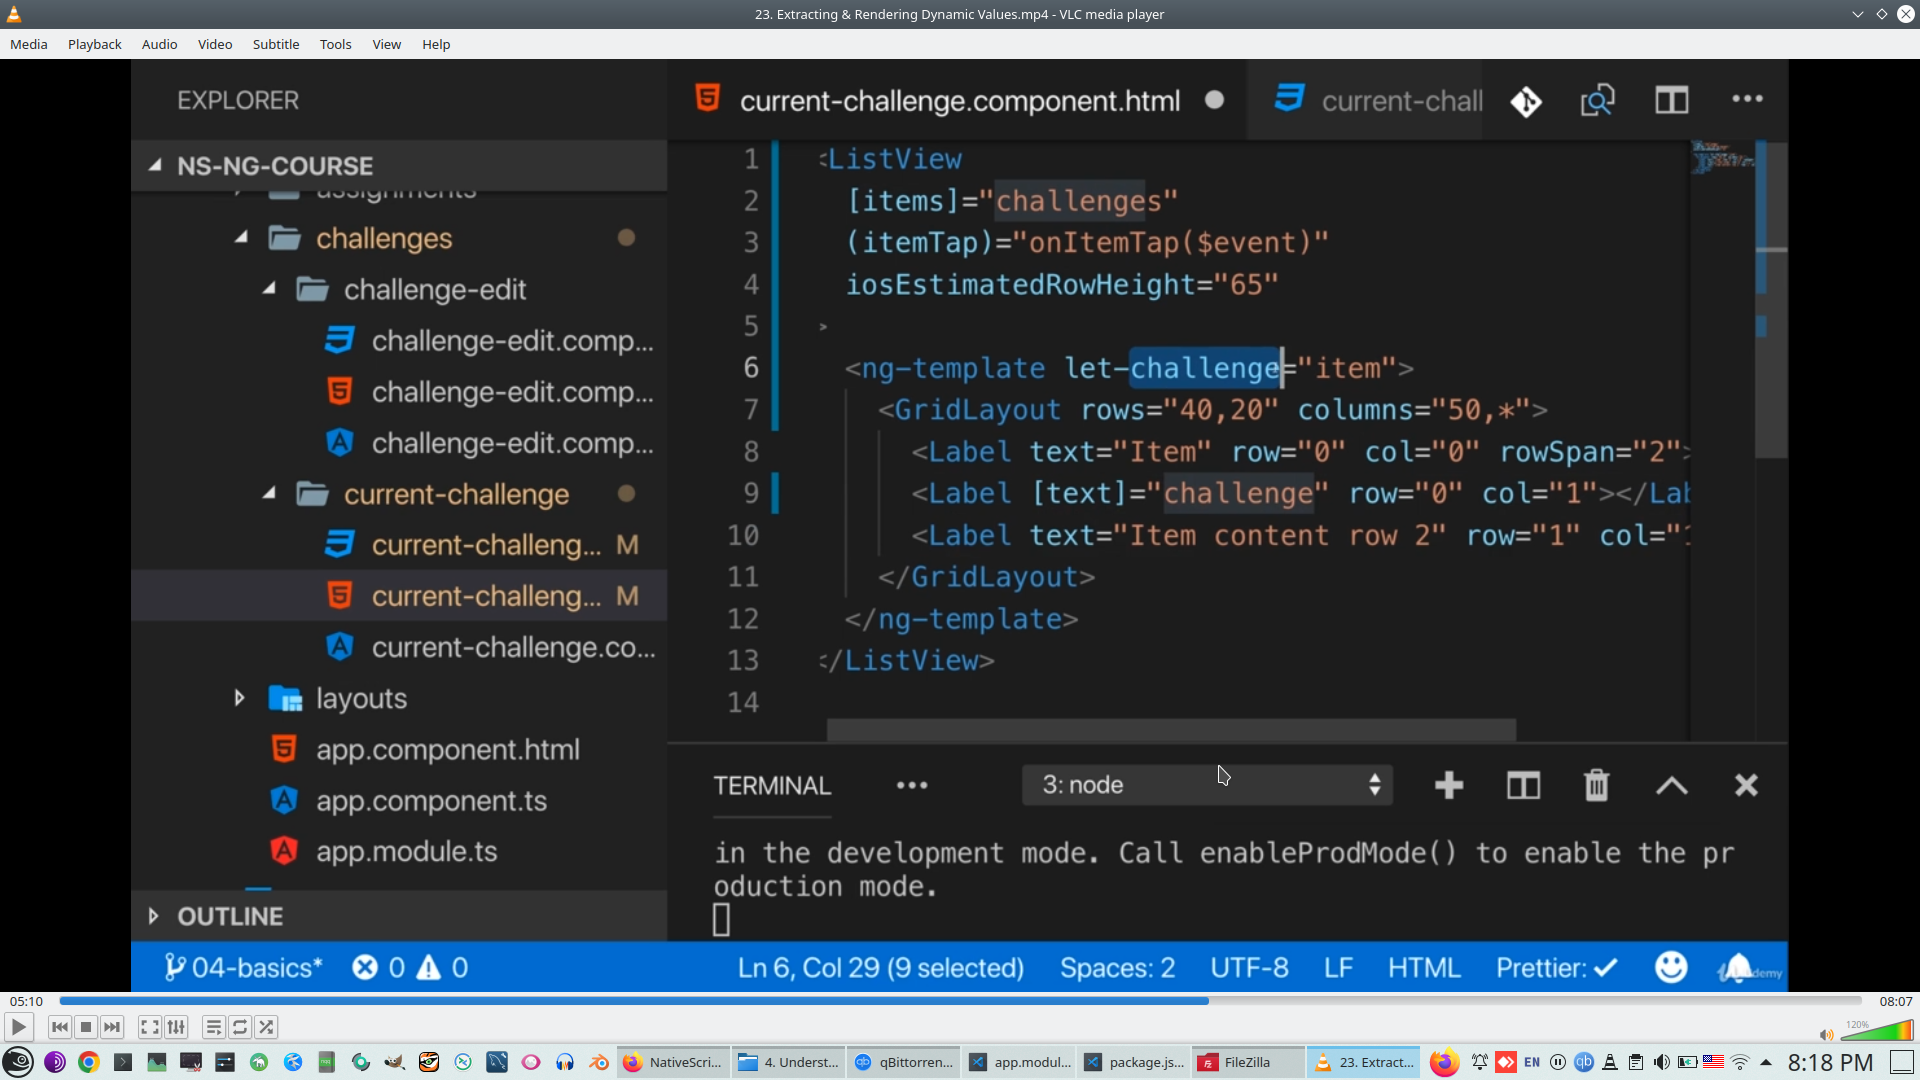
'let-' - special variable for ng-template
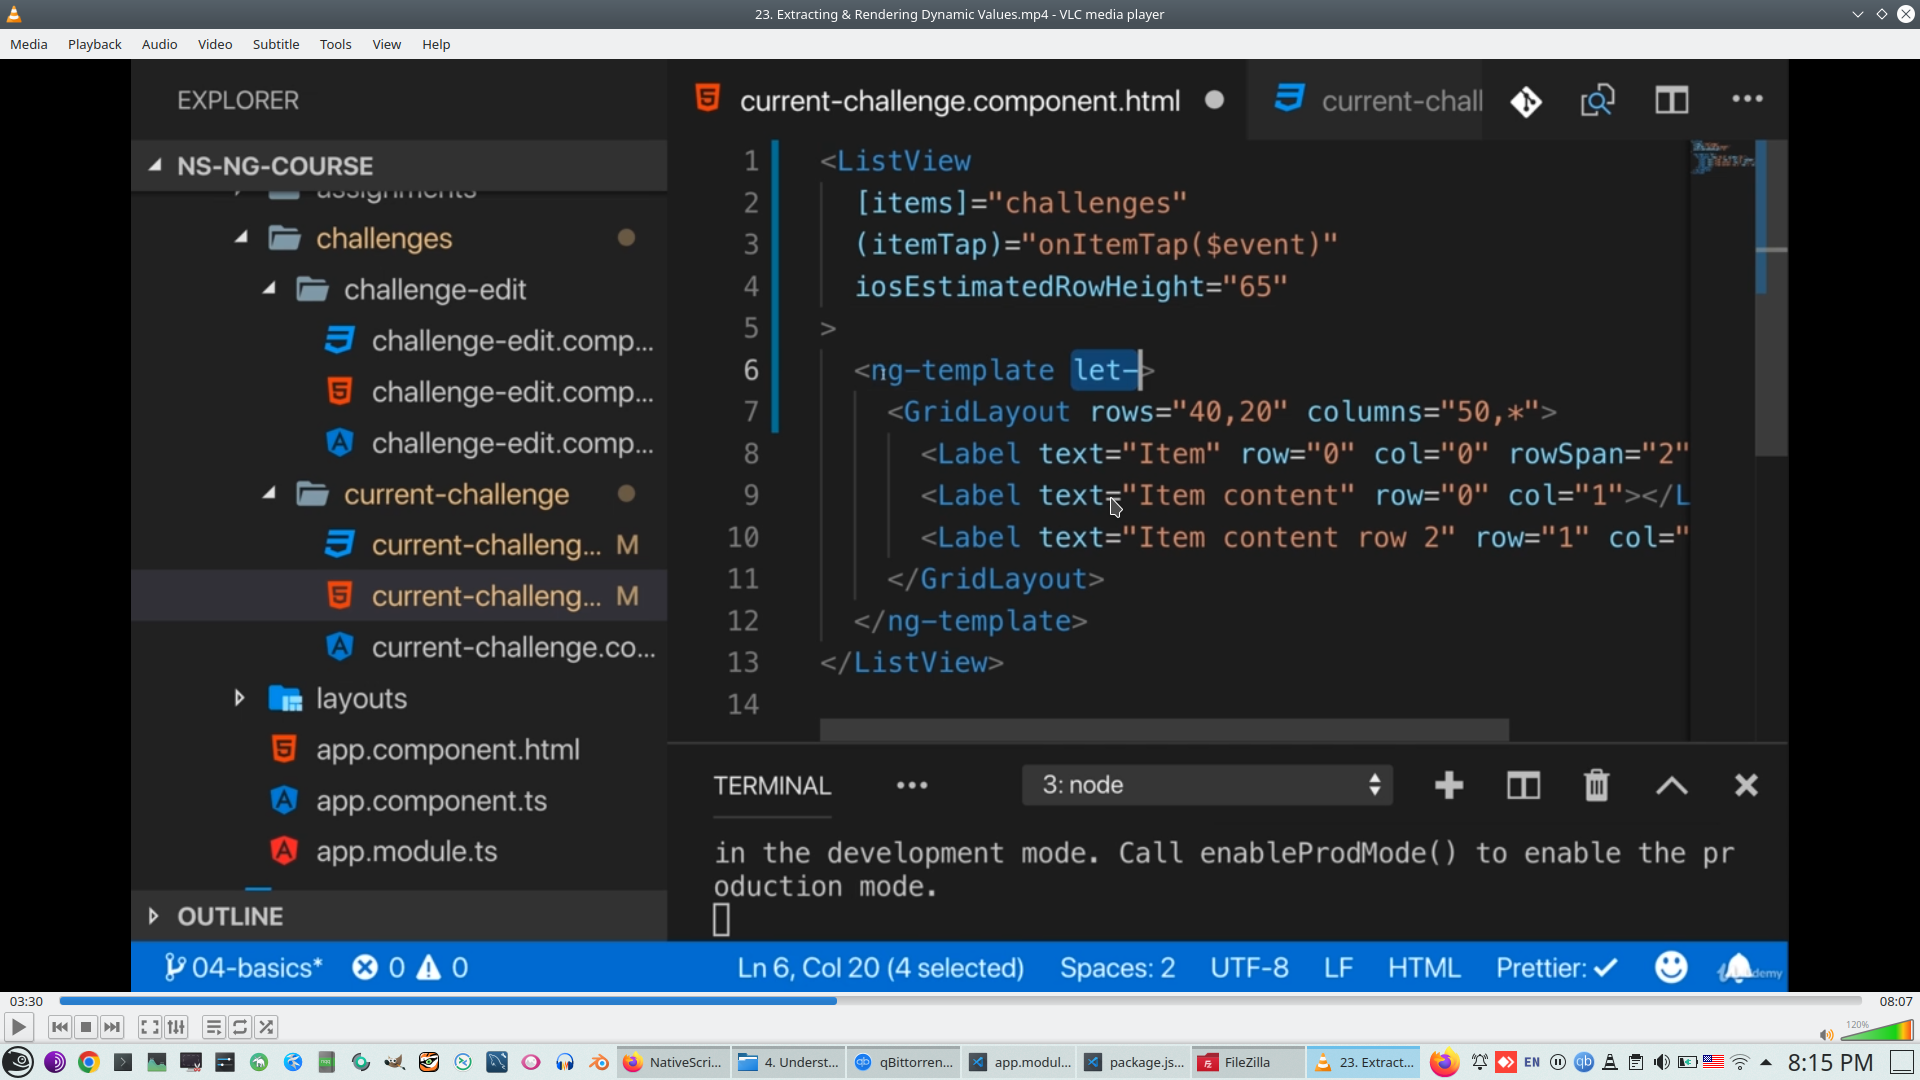
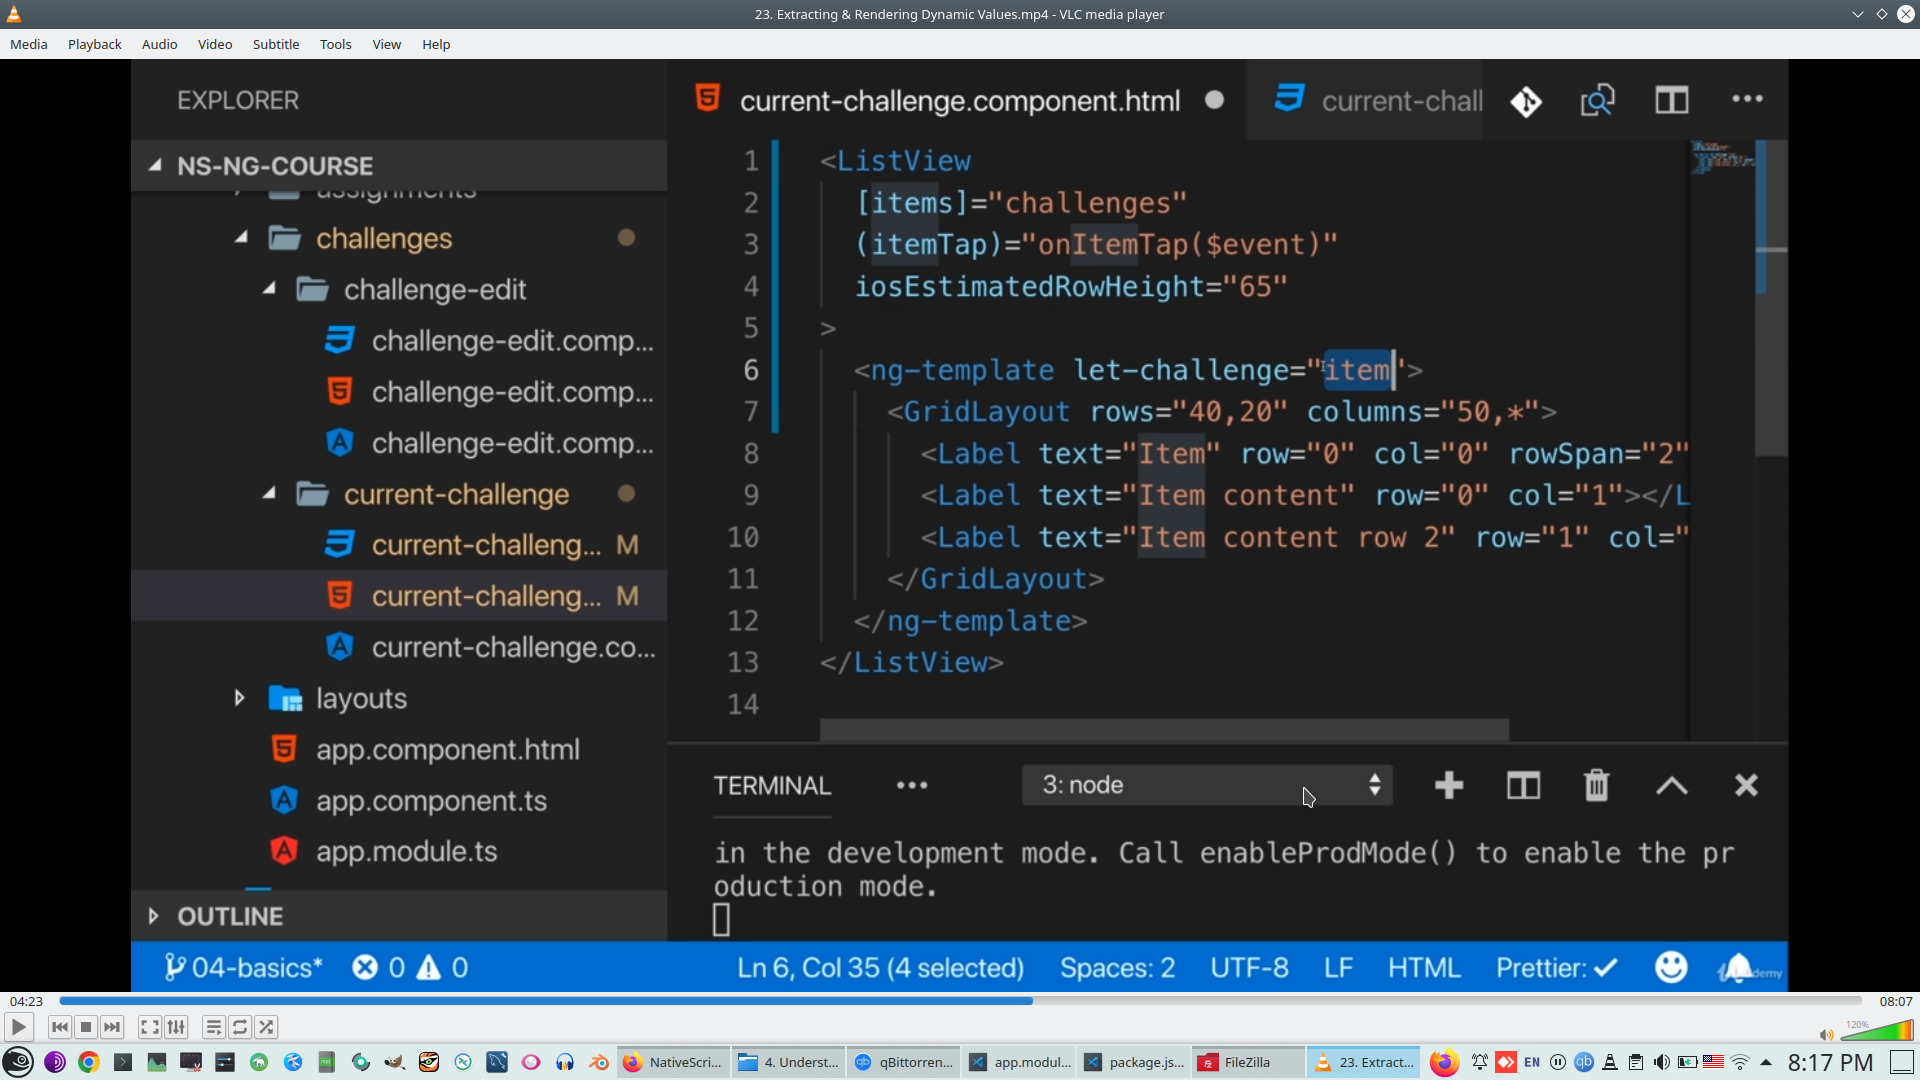
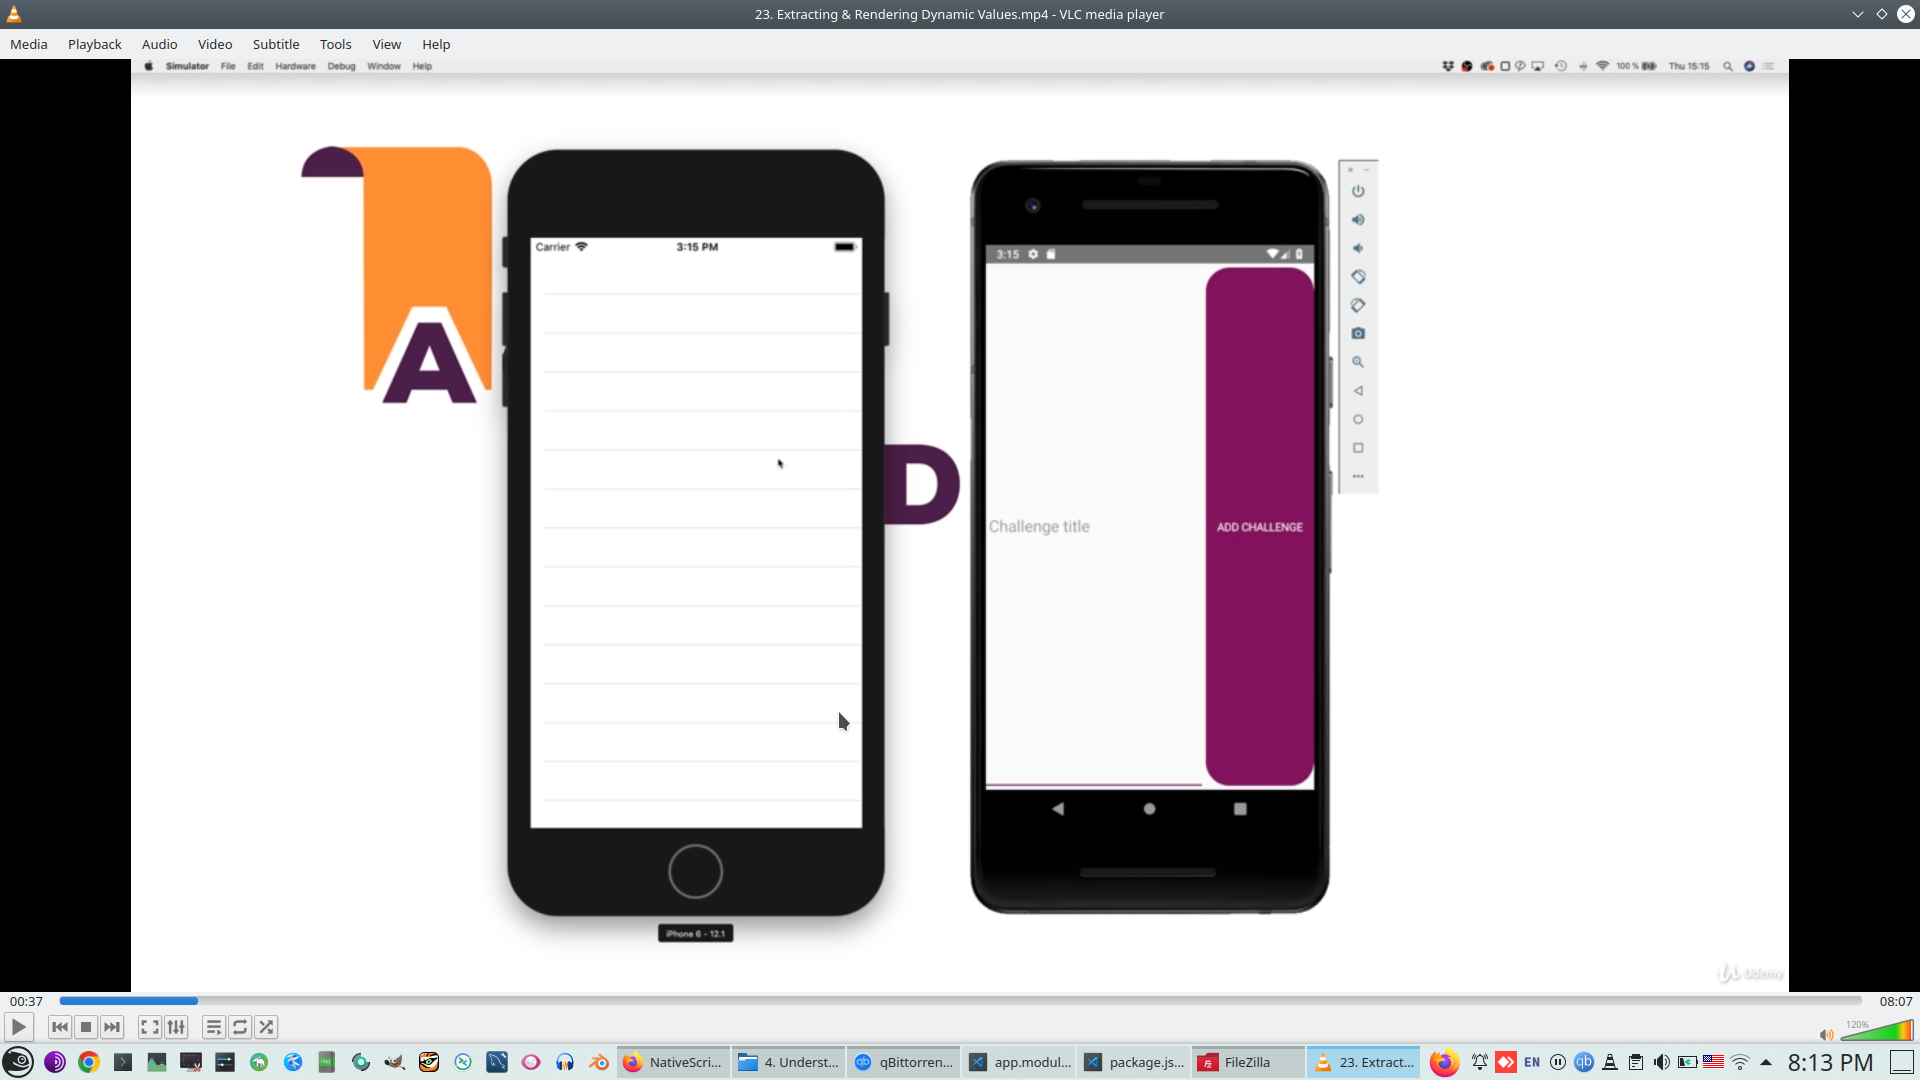
Property binding to specail variable
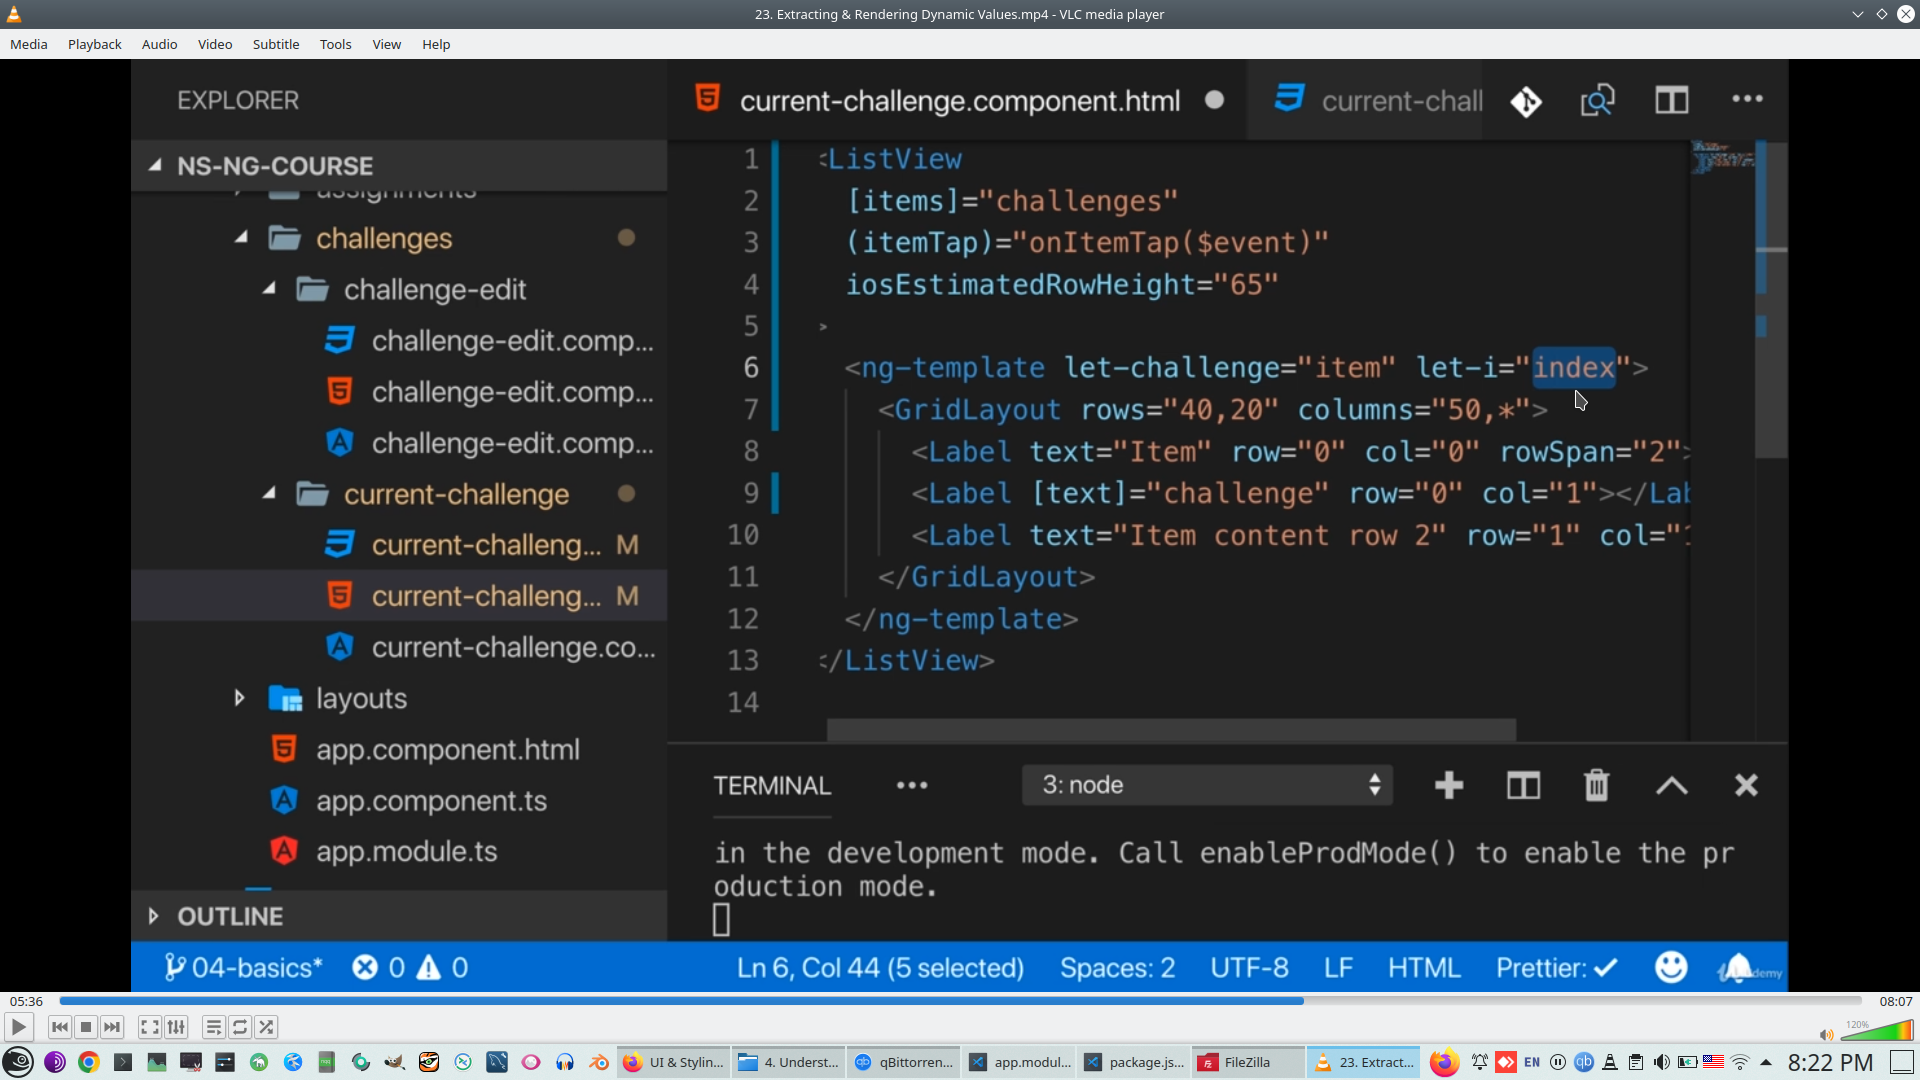
Index of ListItem element
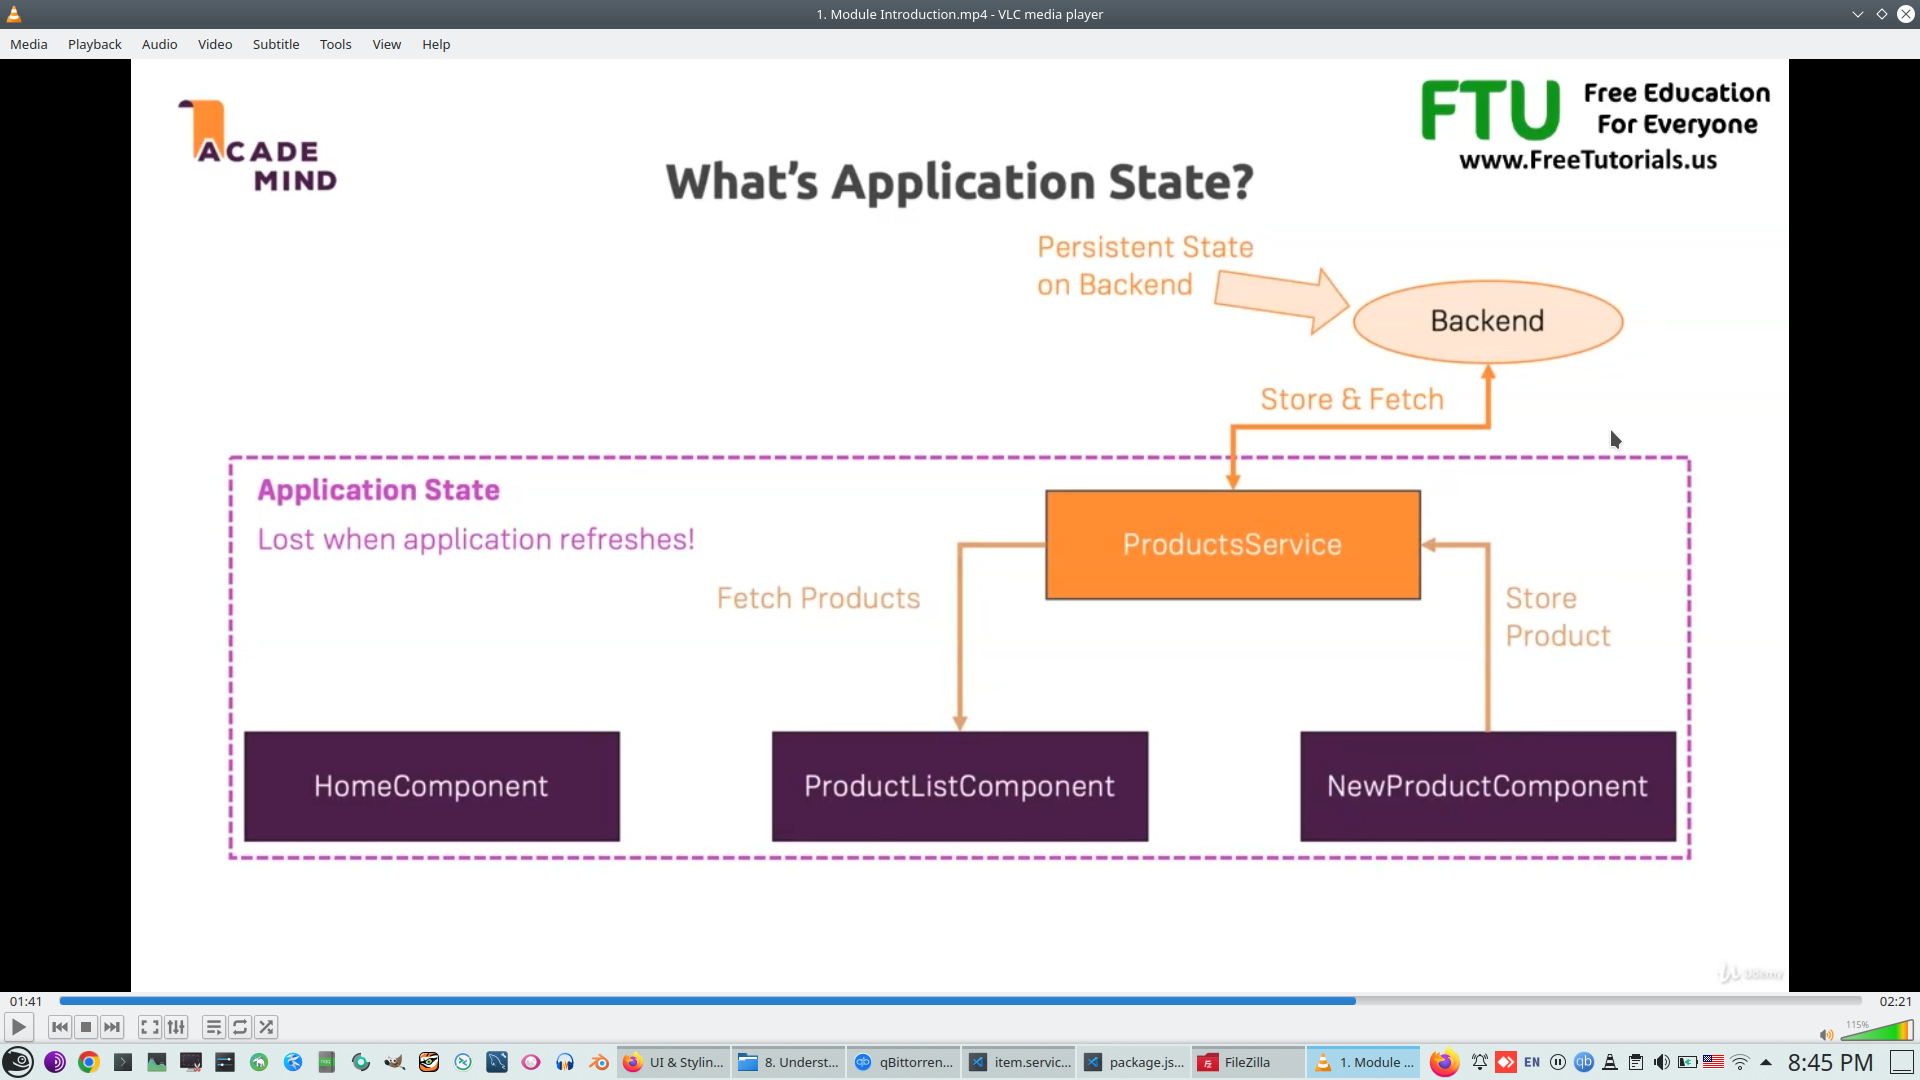
12. Manage state, Services
State lost when application refeshing
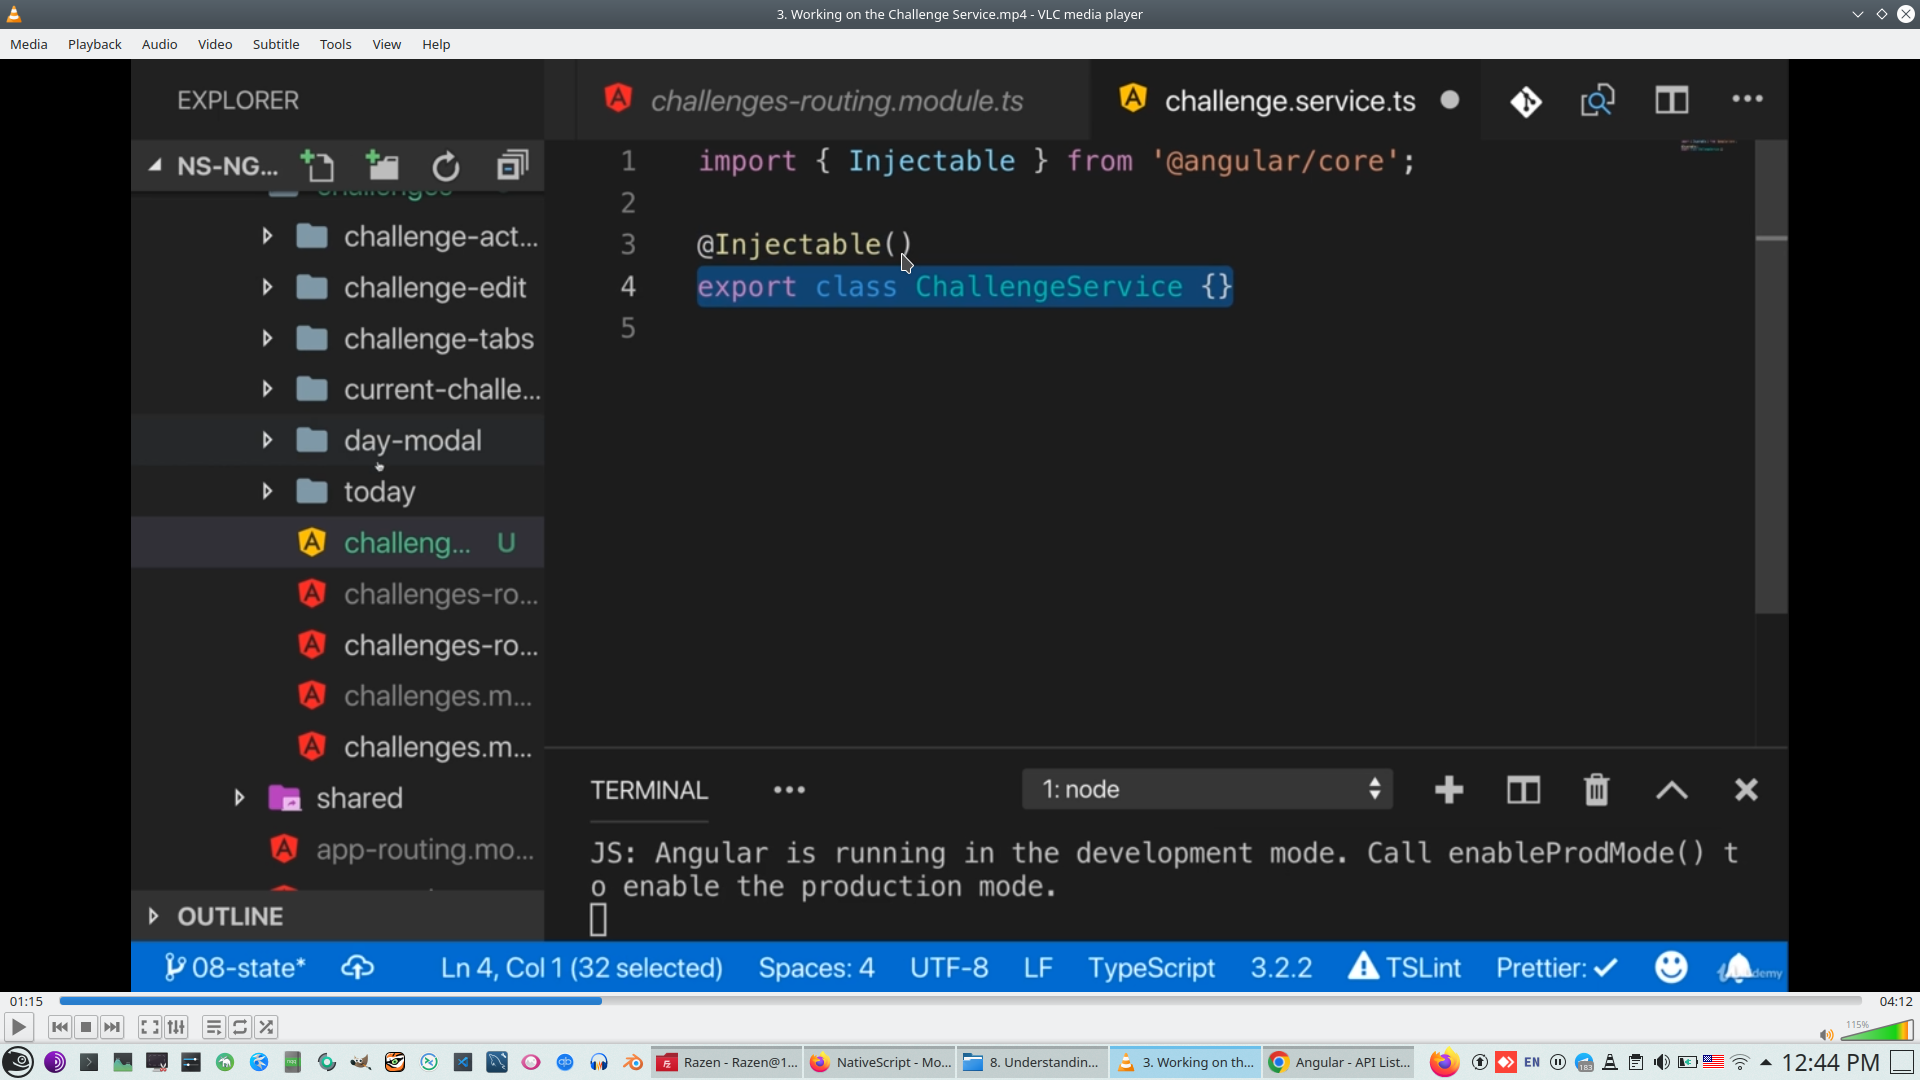
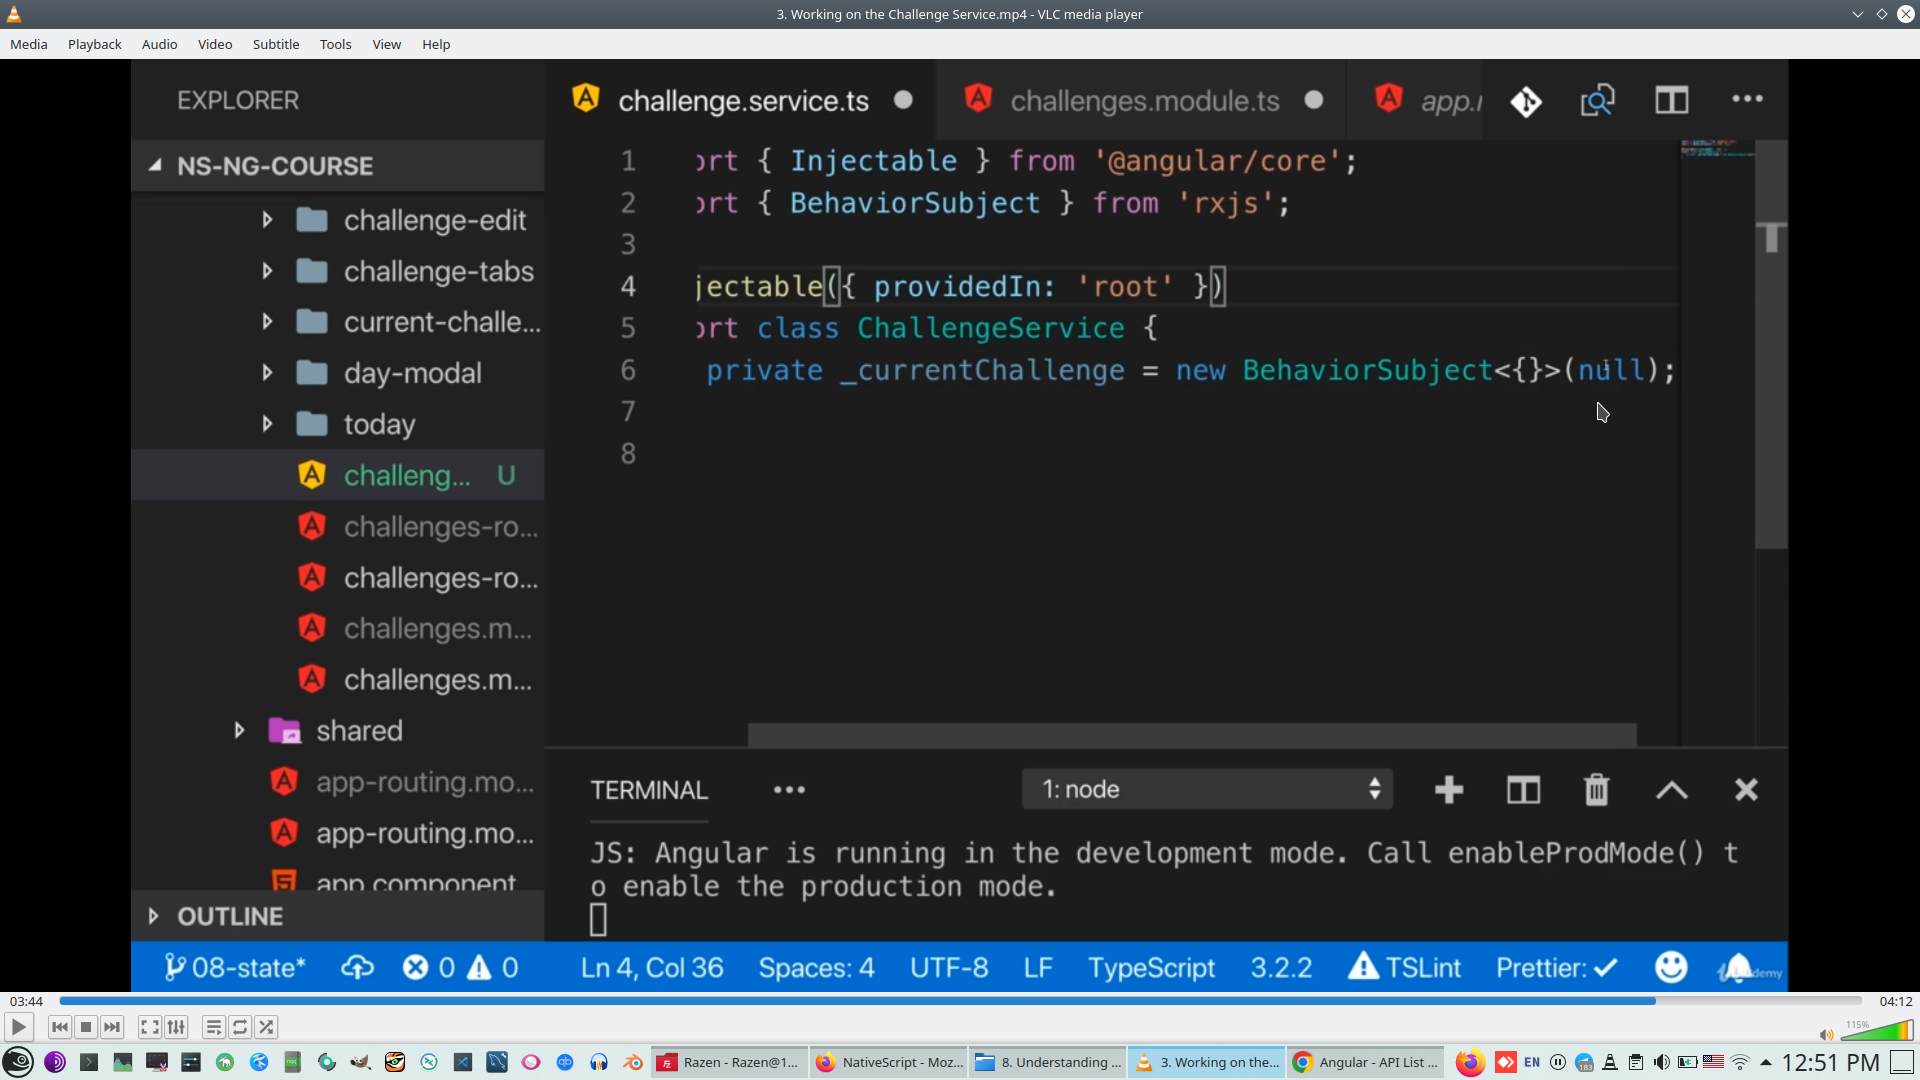
13. Service
Inject service, '{}' - JS object pass as parameter
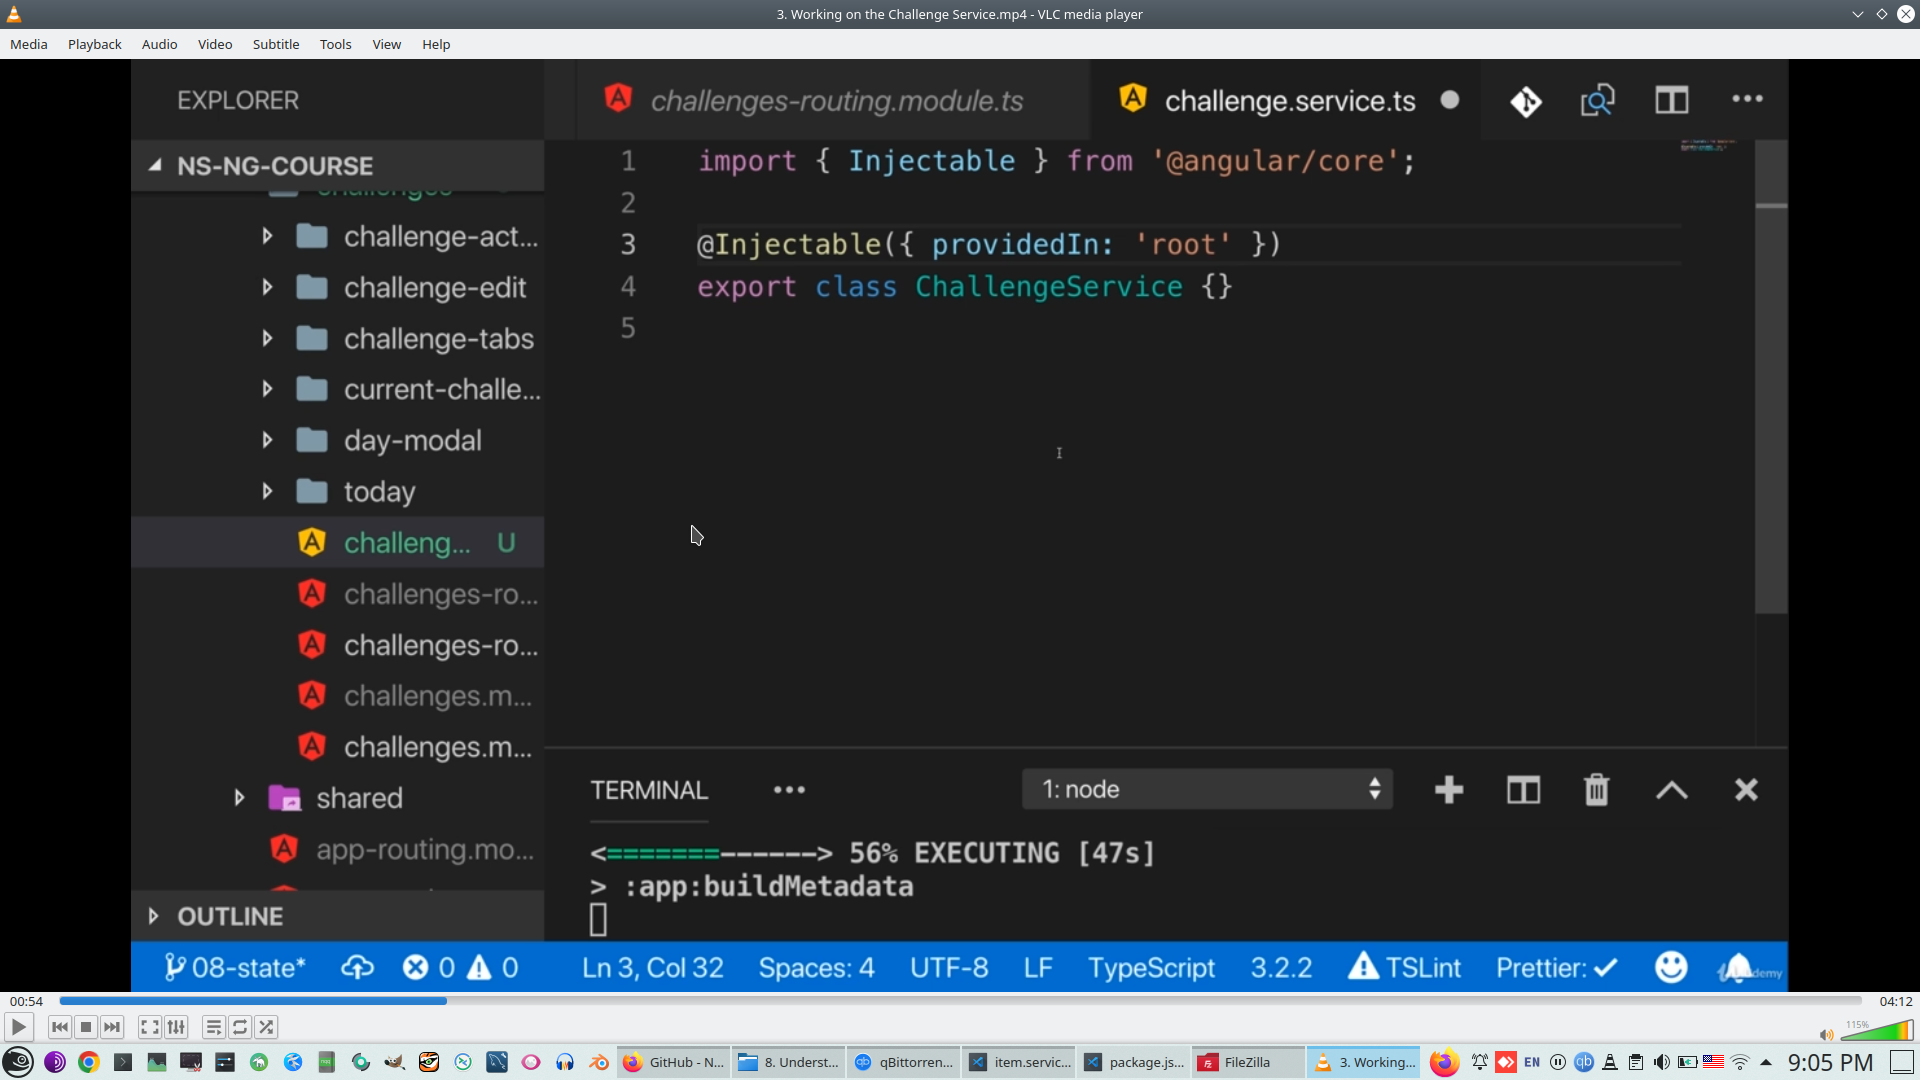
Service start with @Injectable - set\rvice decorator
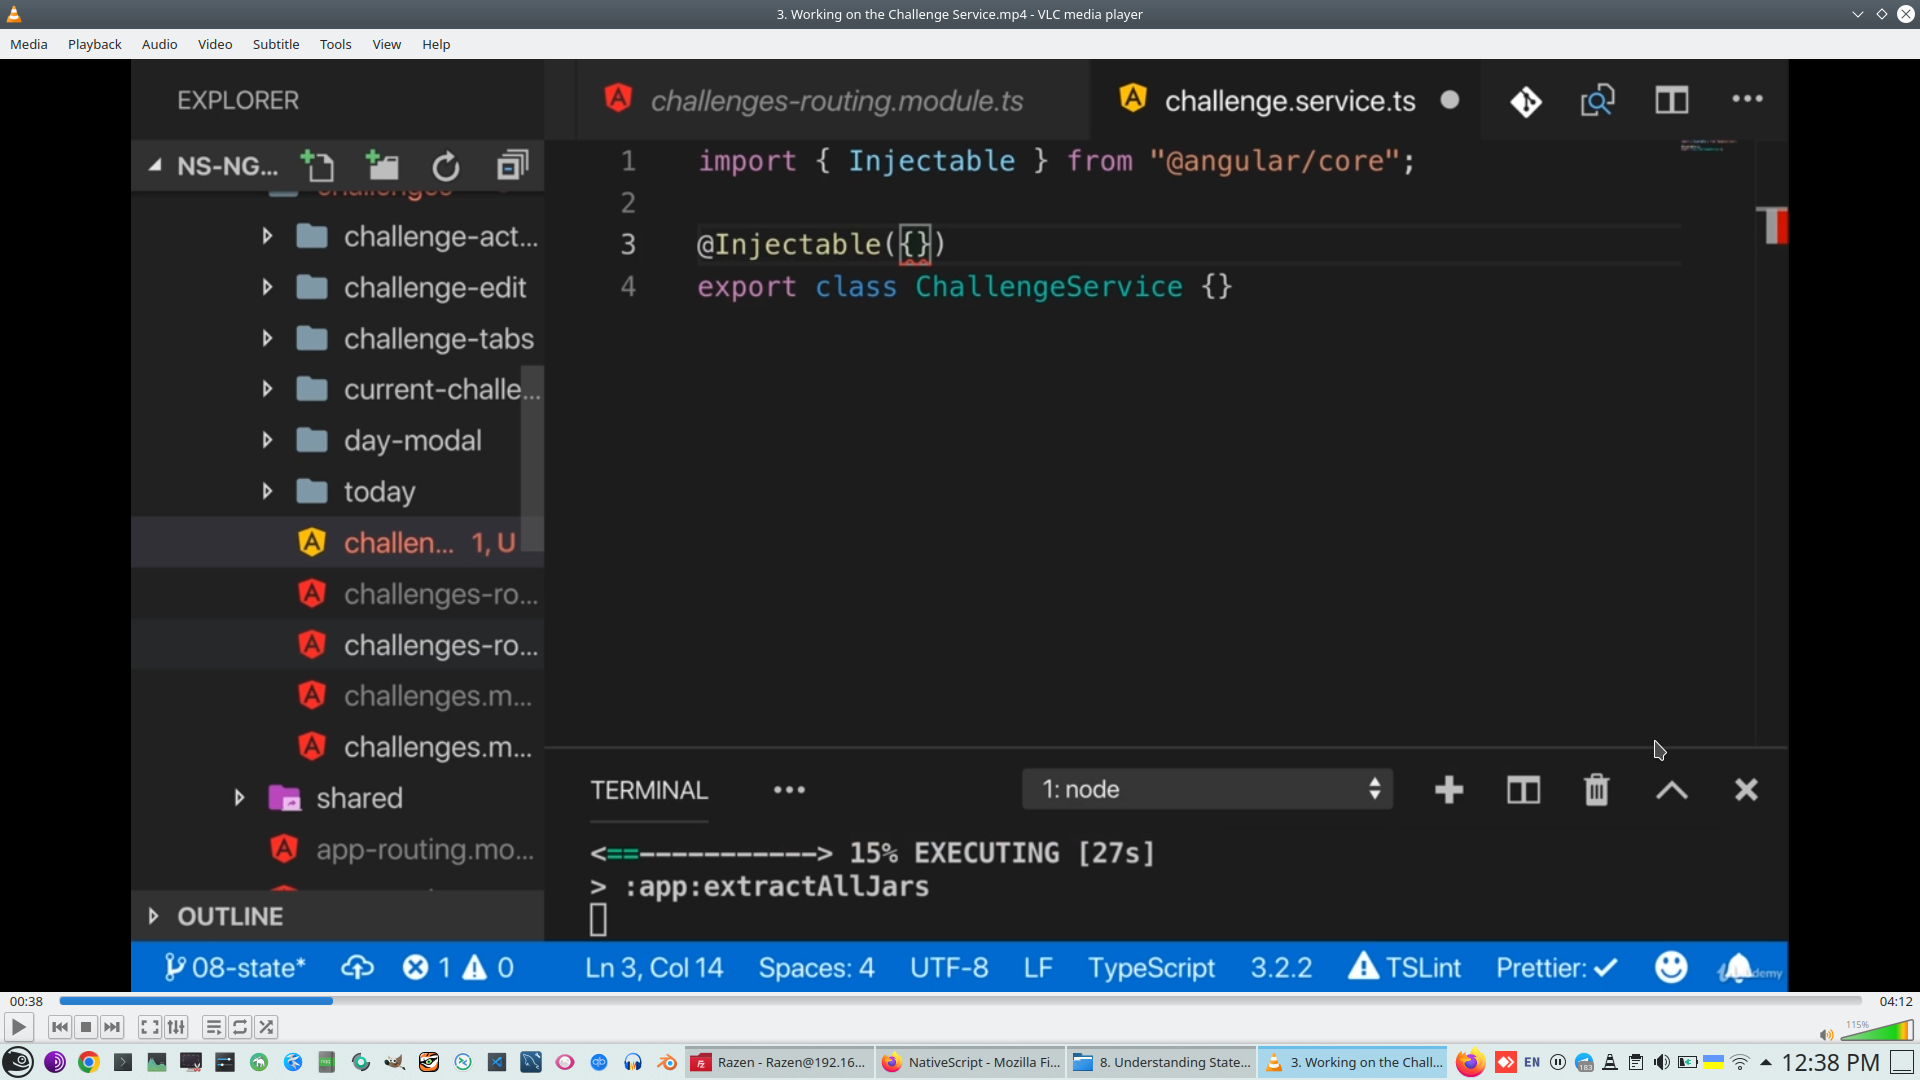

Lazy loading - Provide service on top level of application adn remove 'providedIn:root', than add service only to one component.
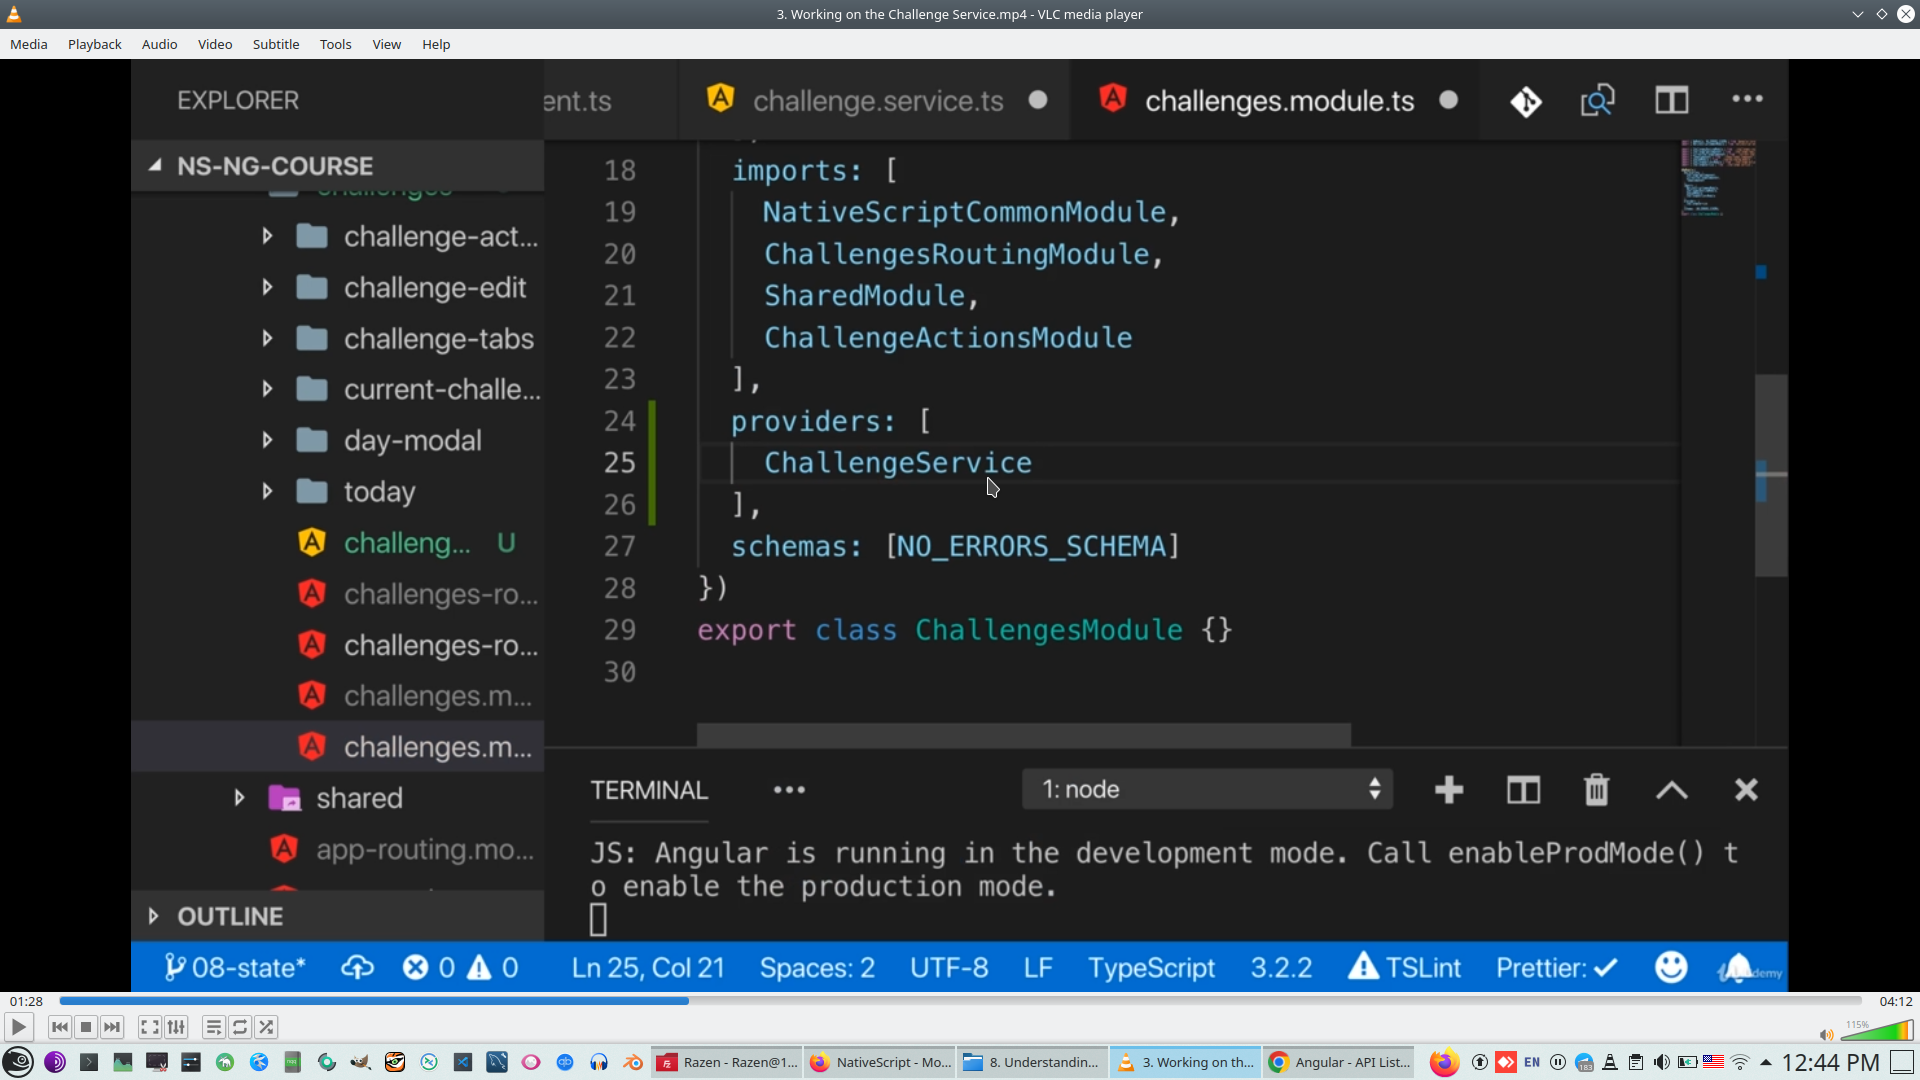
Service can not be added to top level component
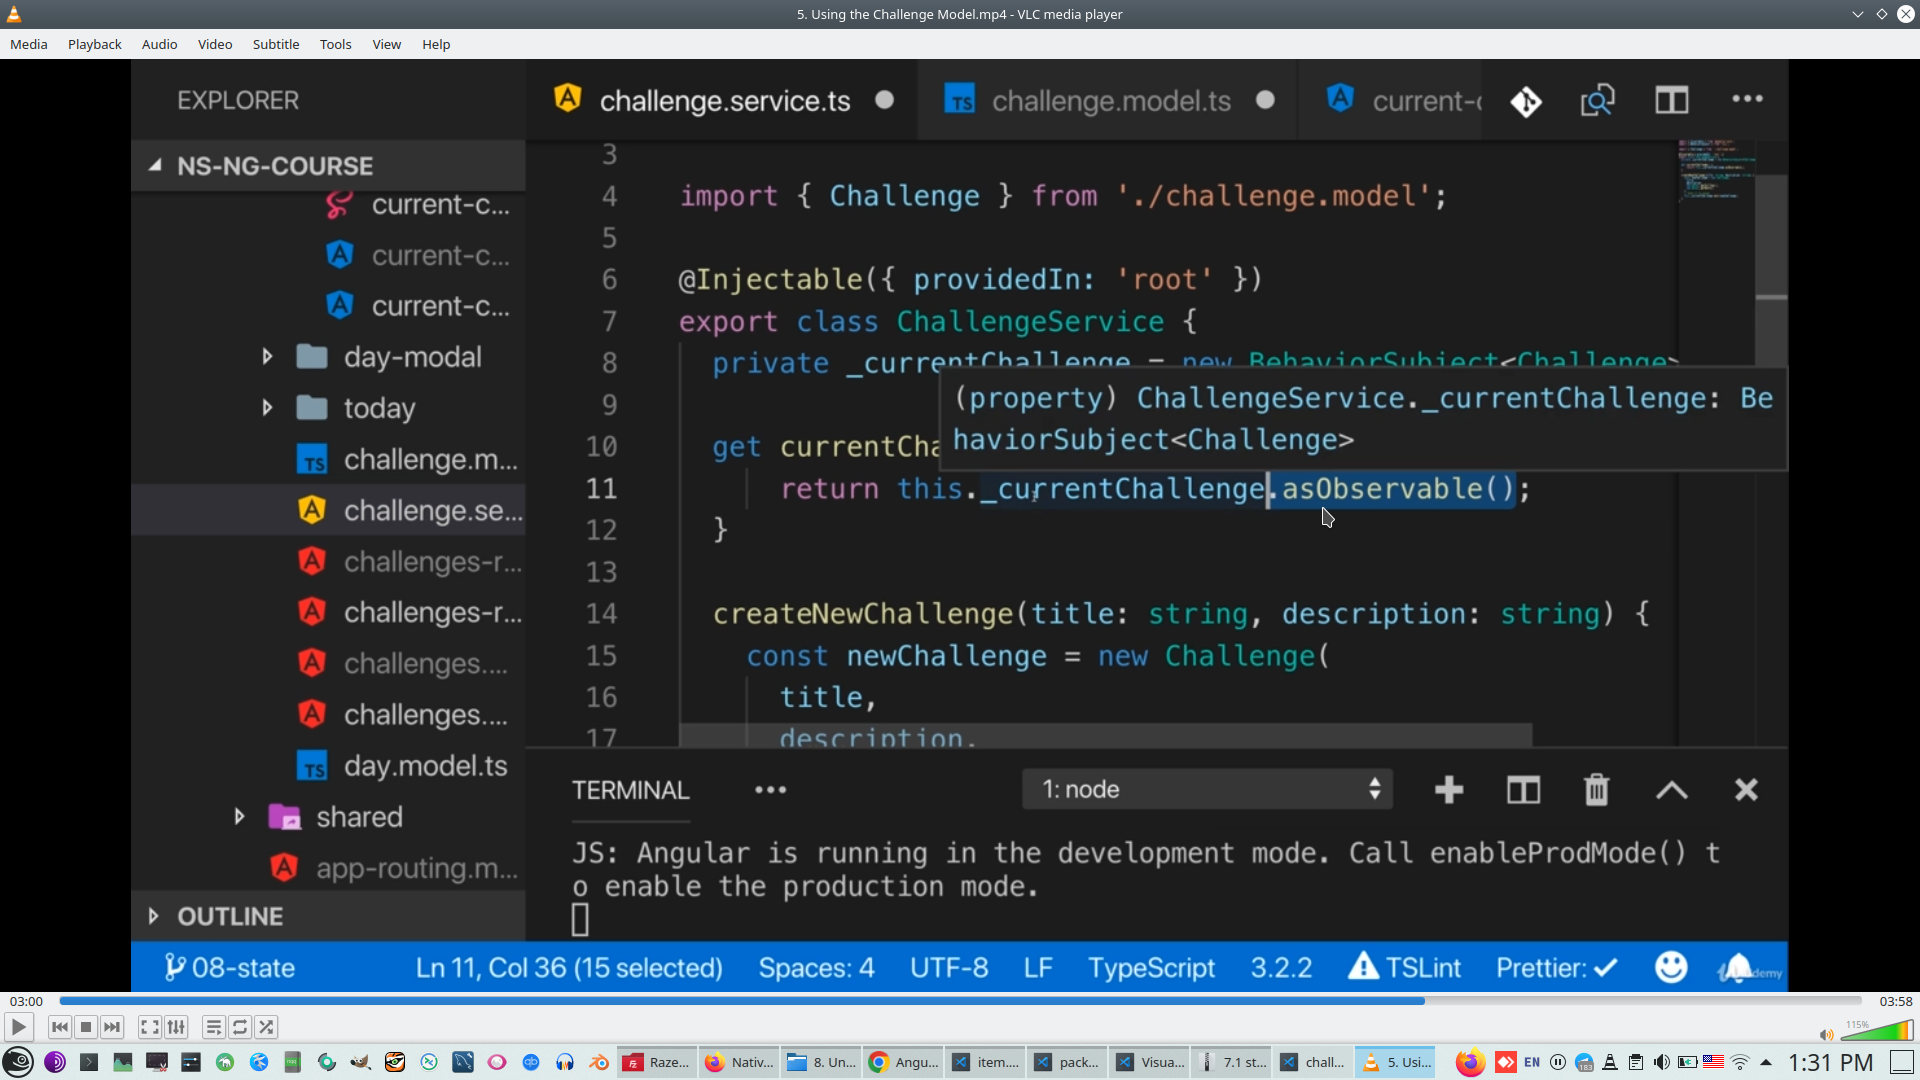
14. RxJs component - BehaviorSubject (asObservable)
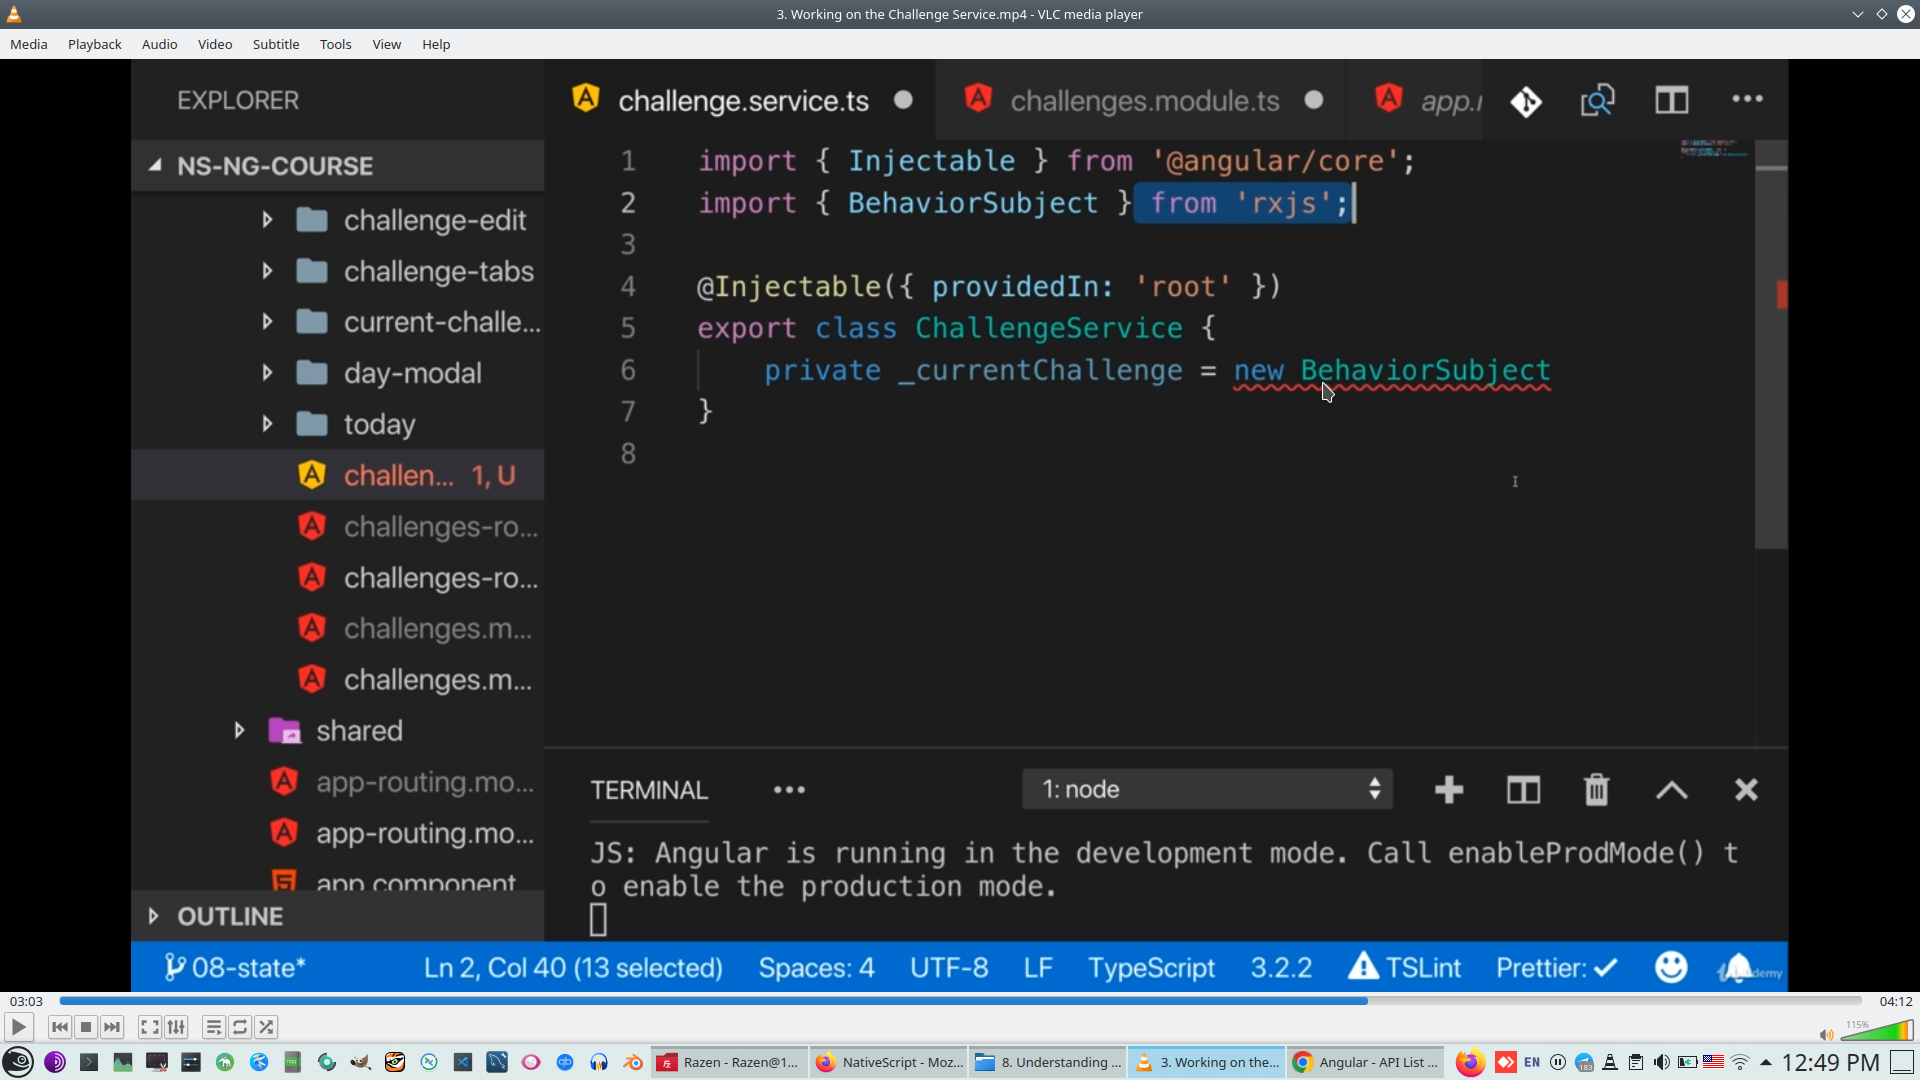
Has Generic future
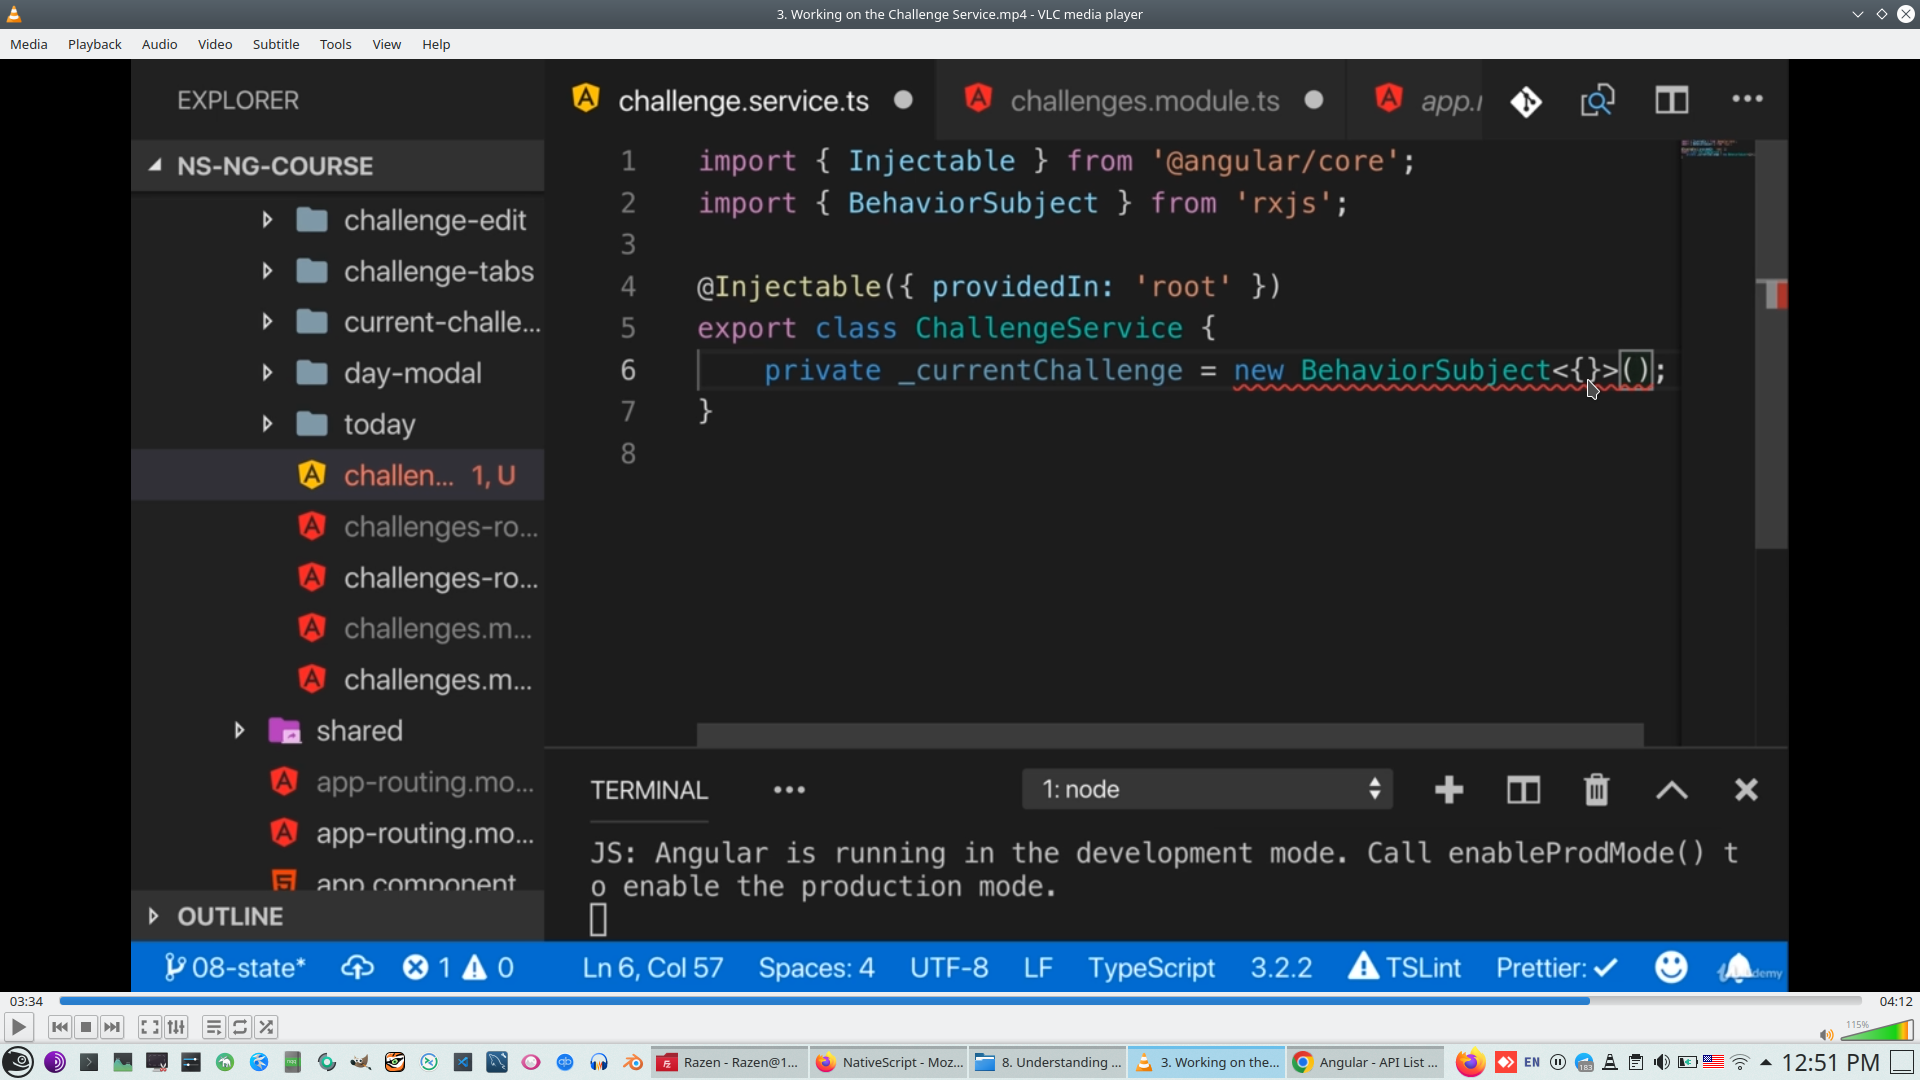
Can raise event with empty object
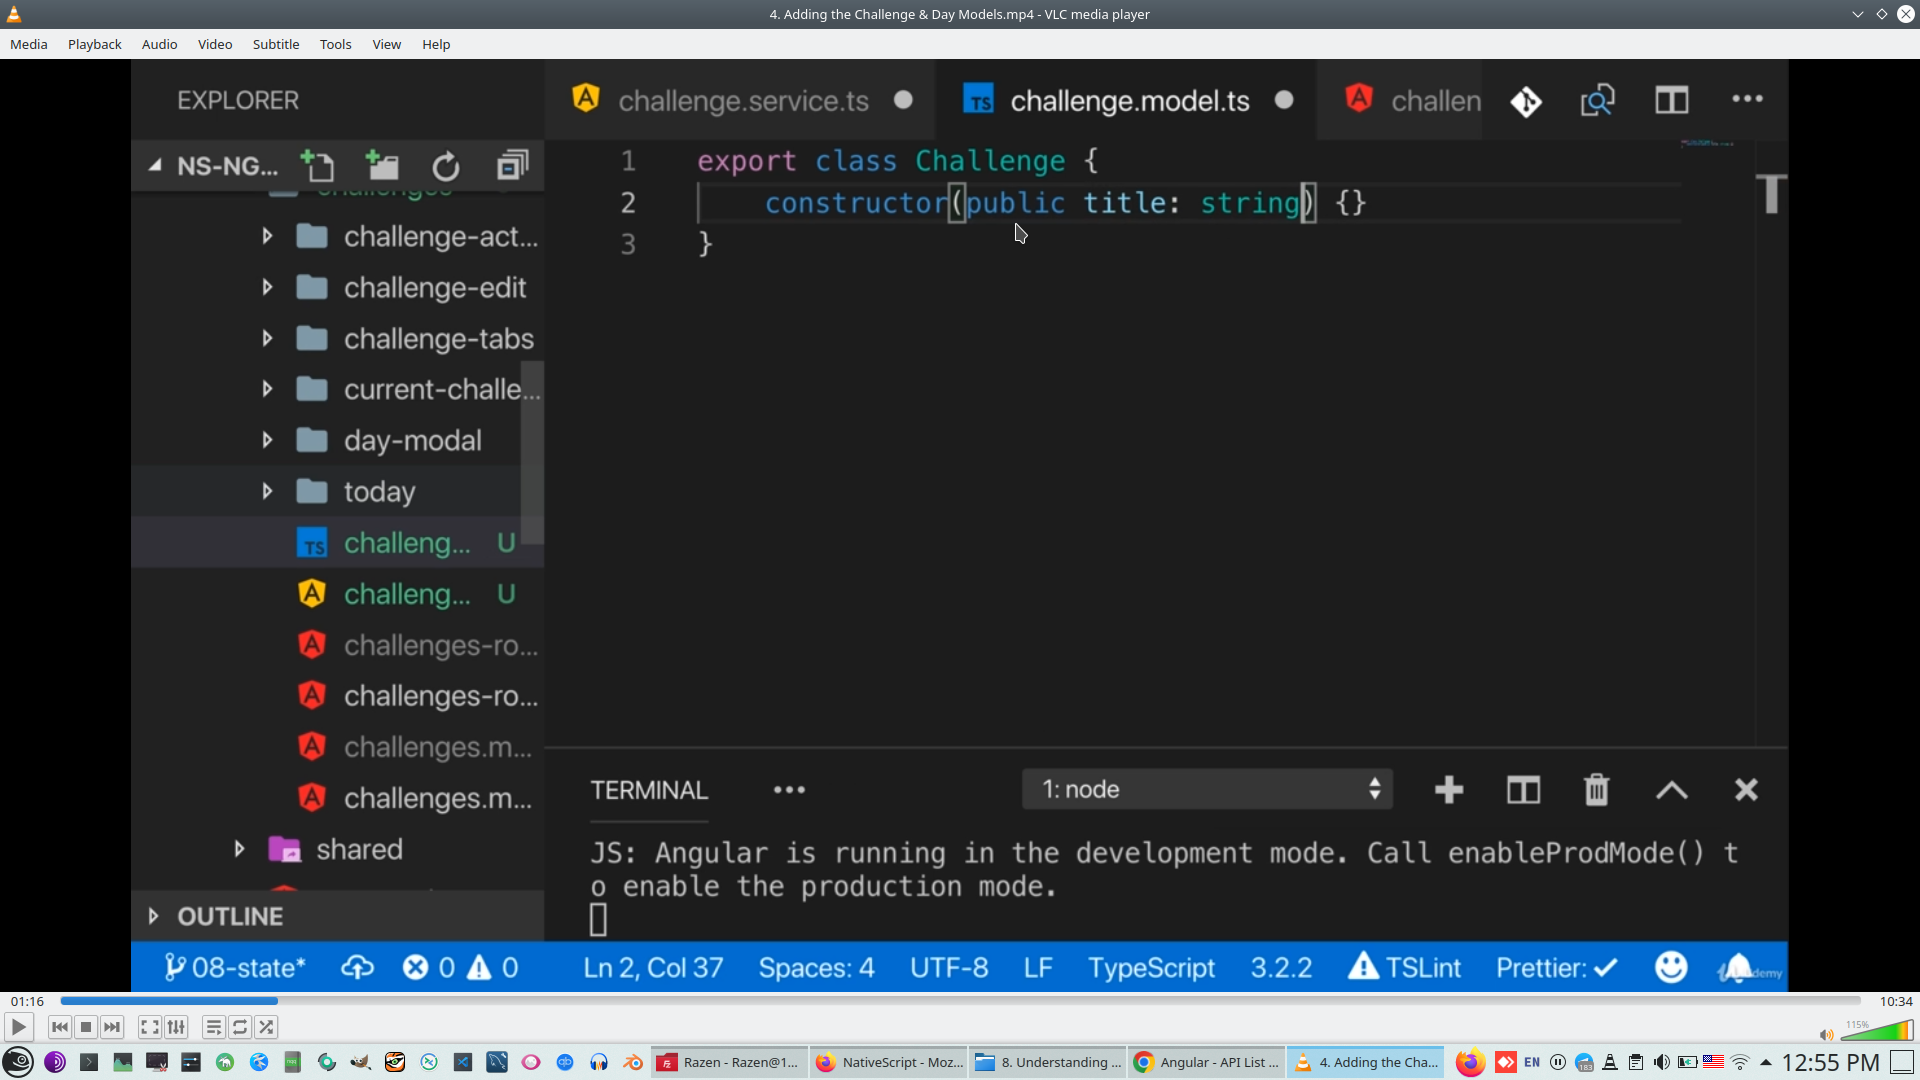
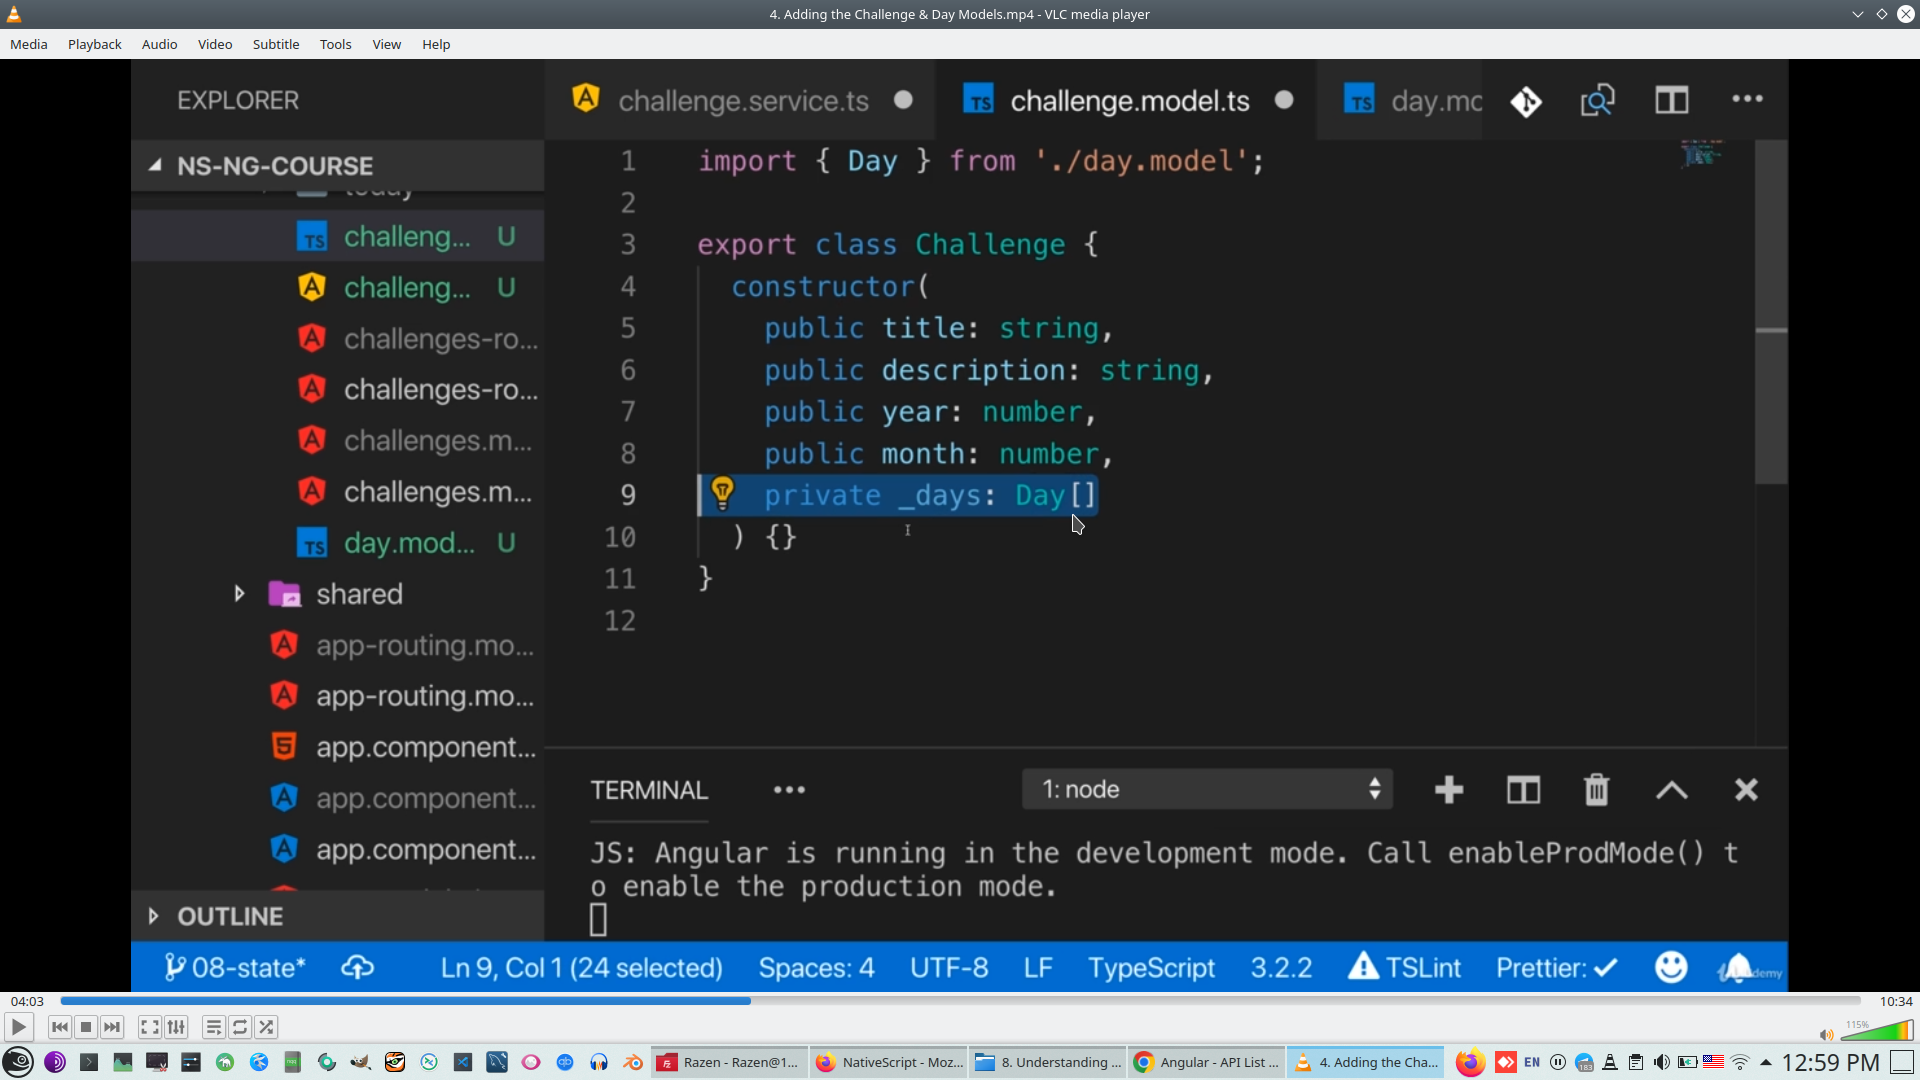
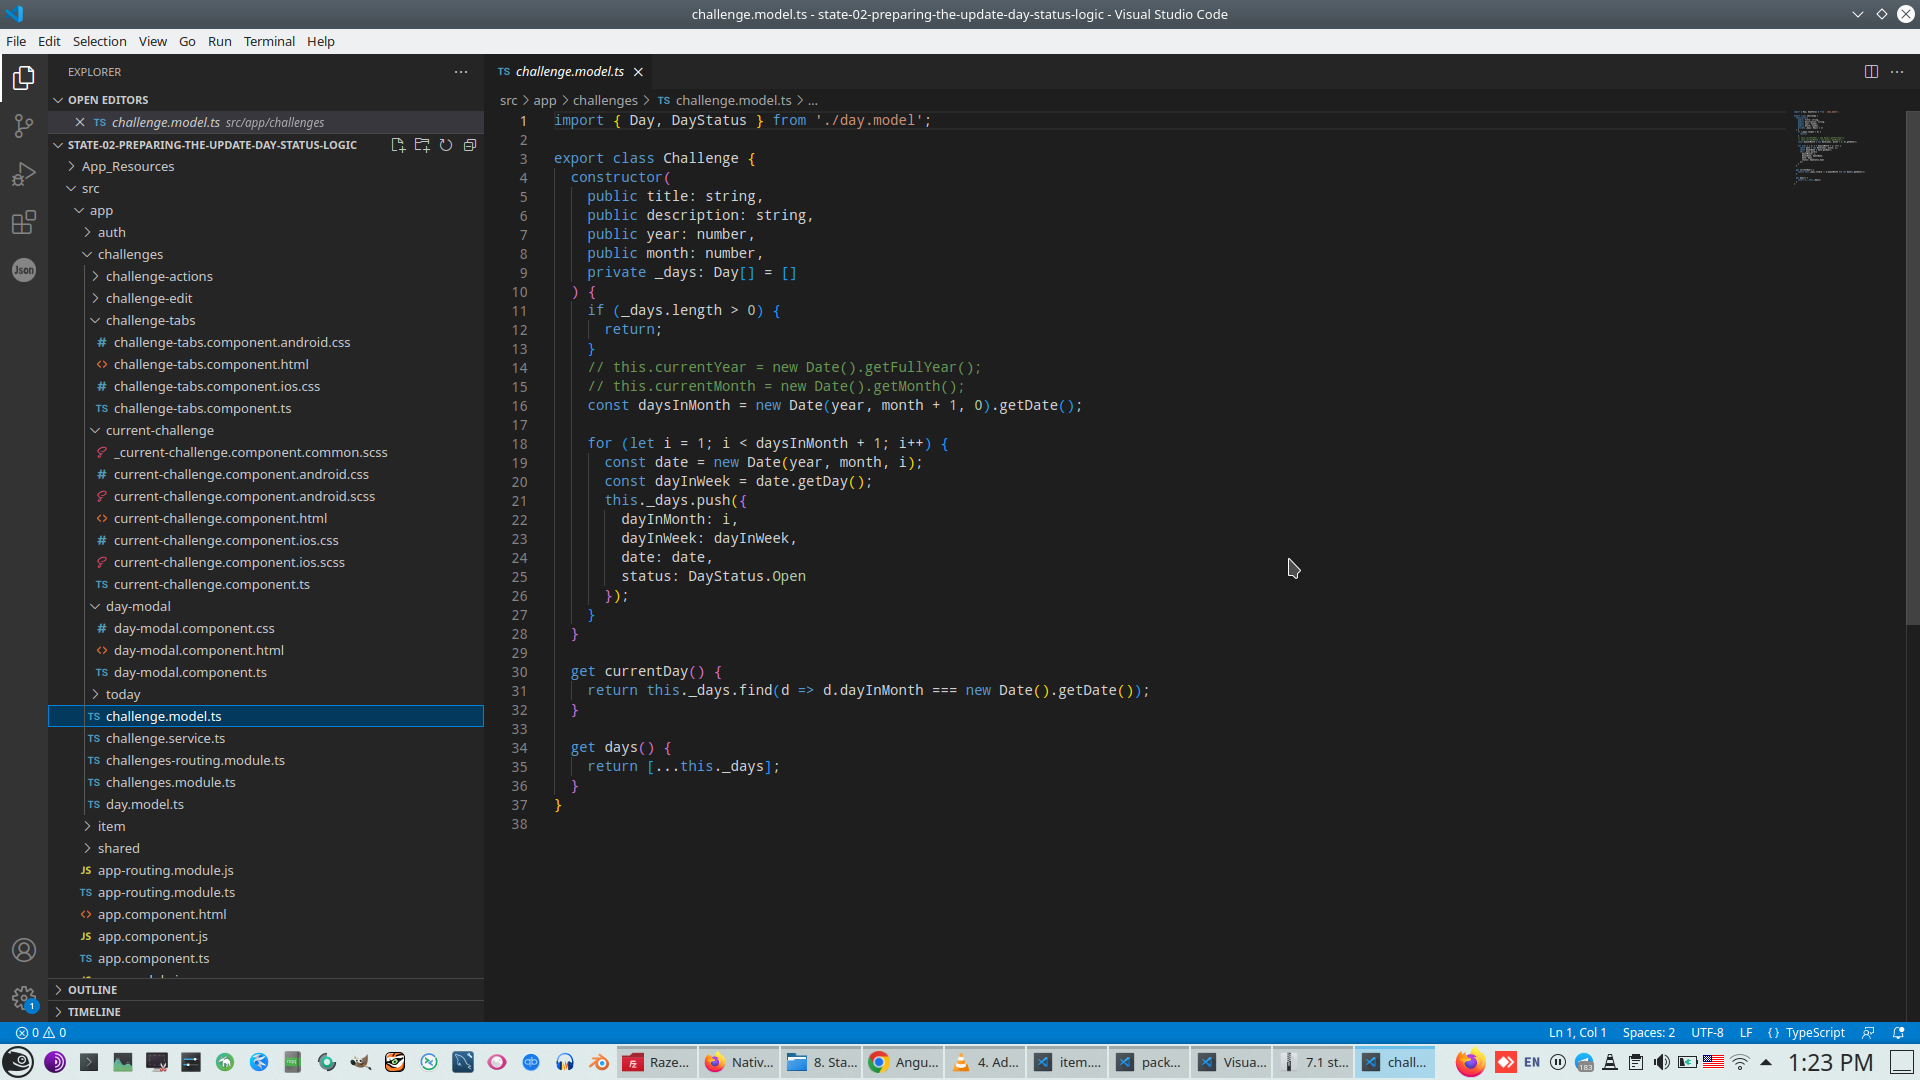
Create class for using as event parameter
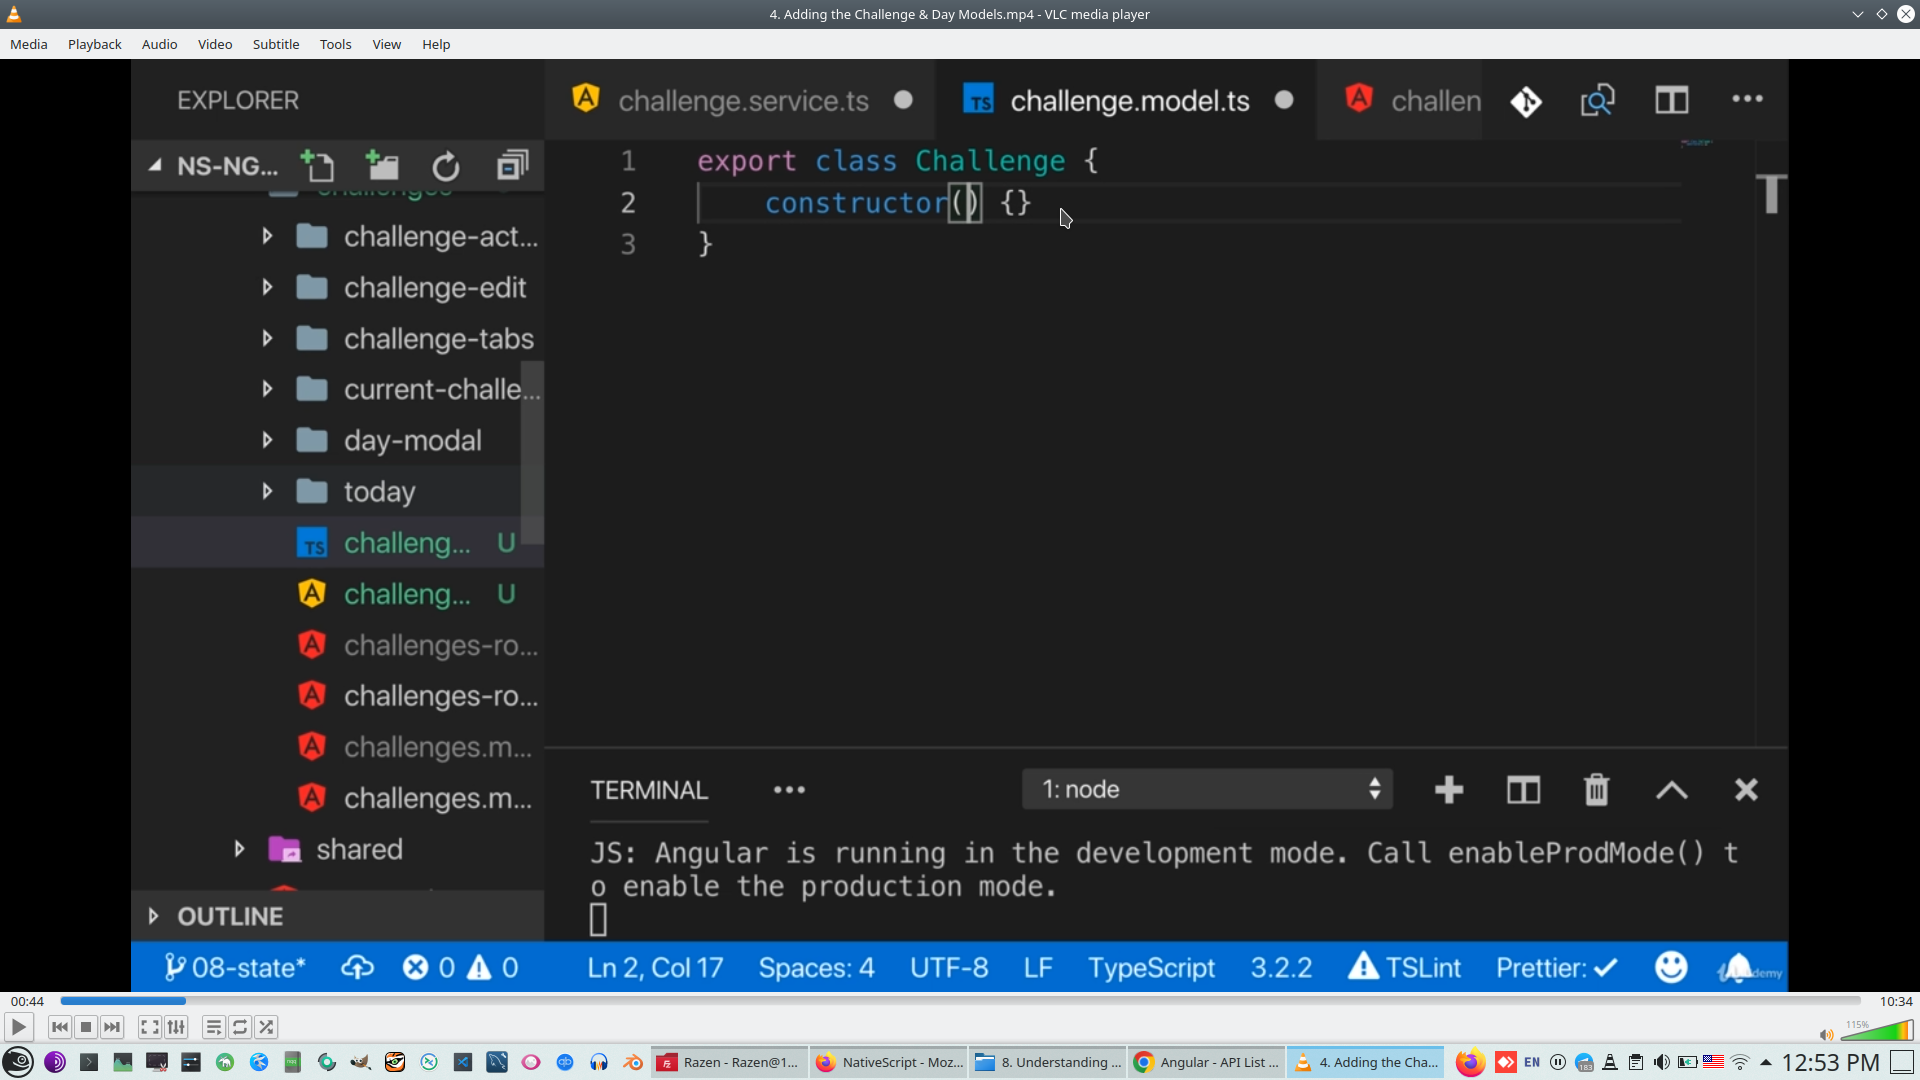
If we add add parameters to constructor it cann see on all class
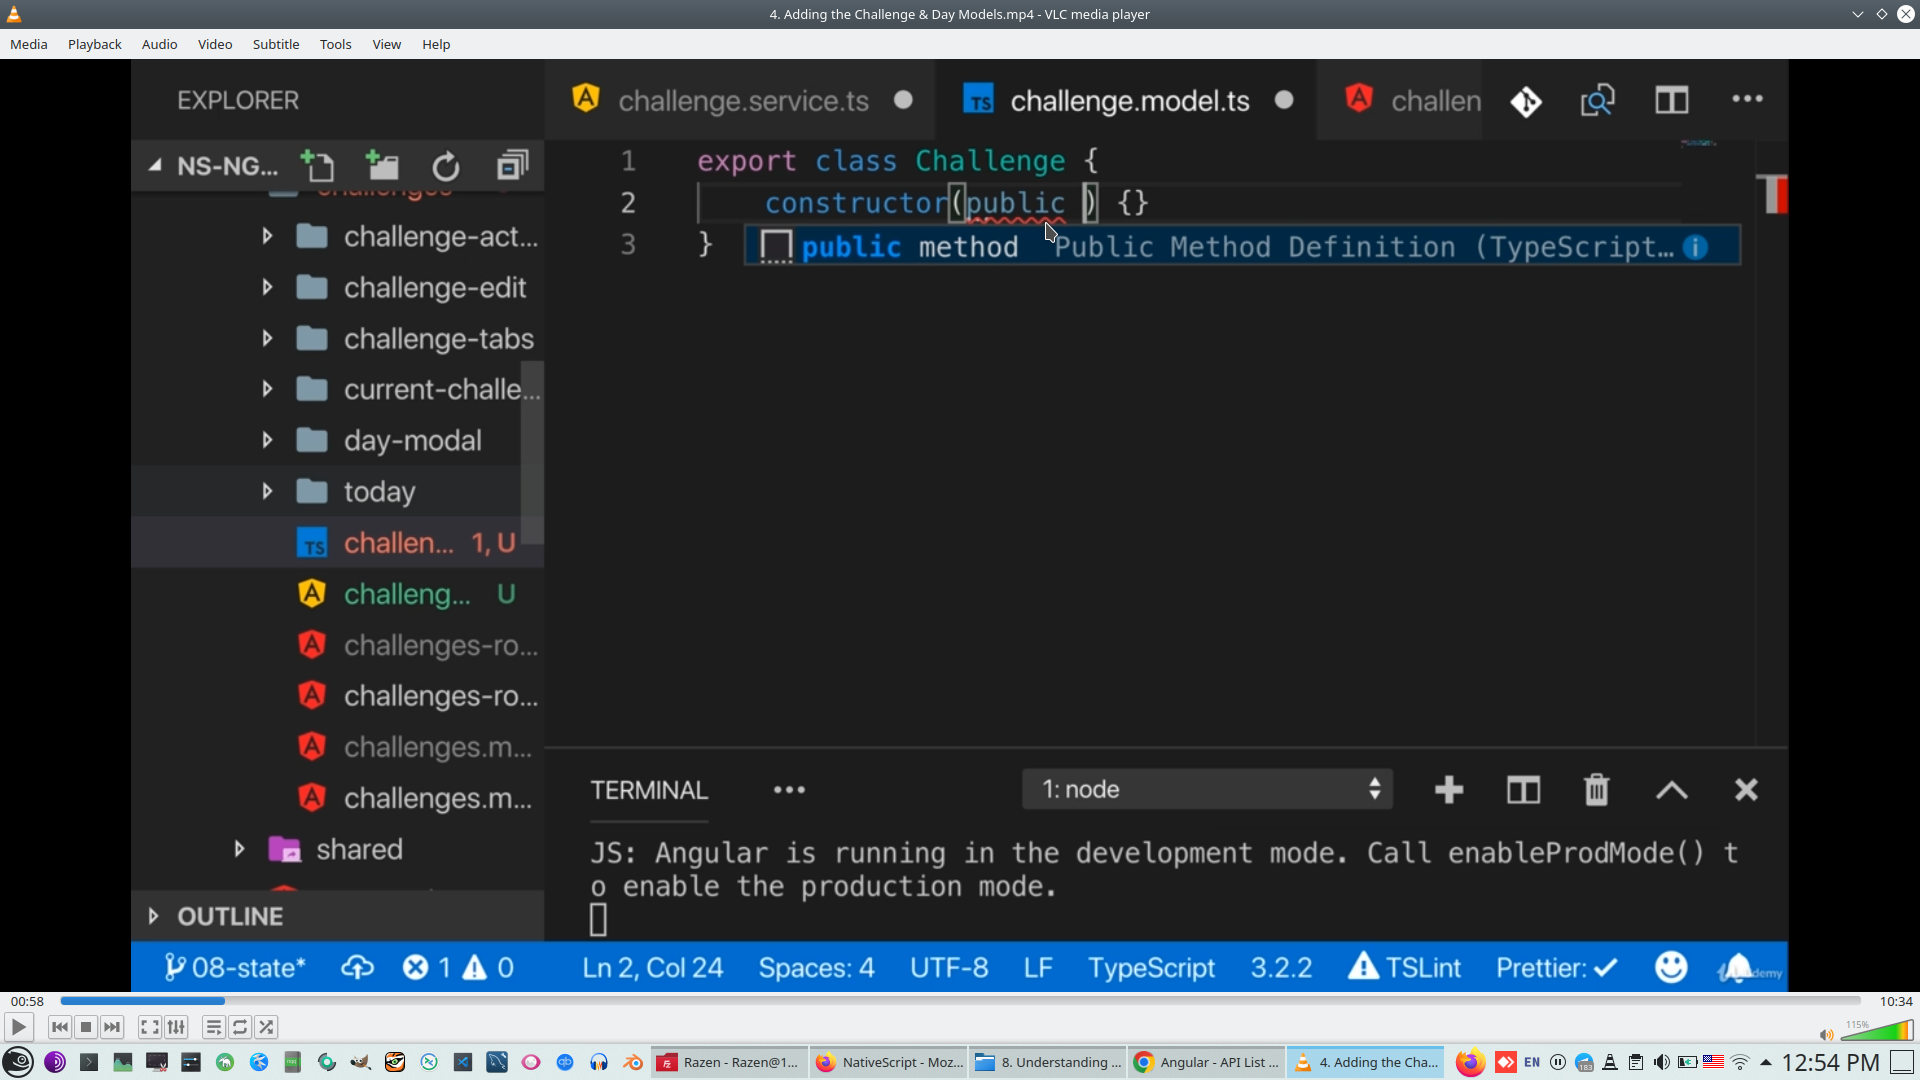
Public parameters can accesible outside module
Interface with Enum

Import interface to Class
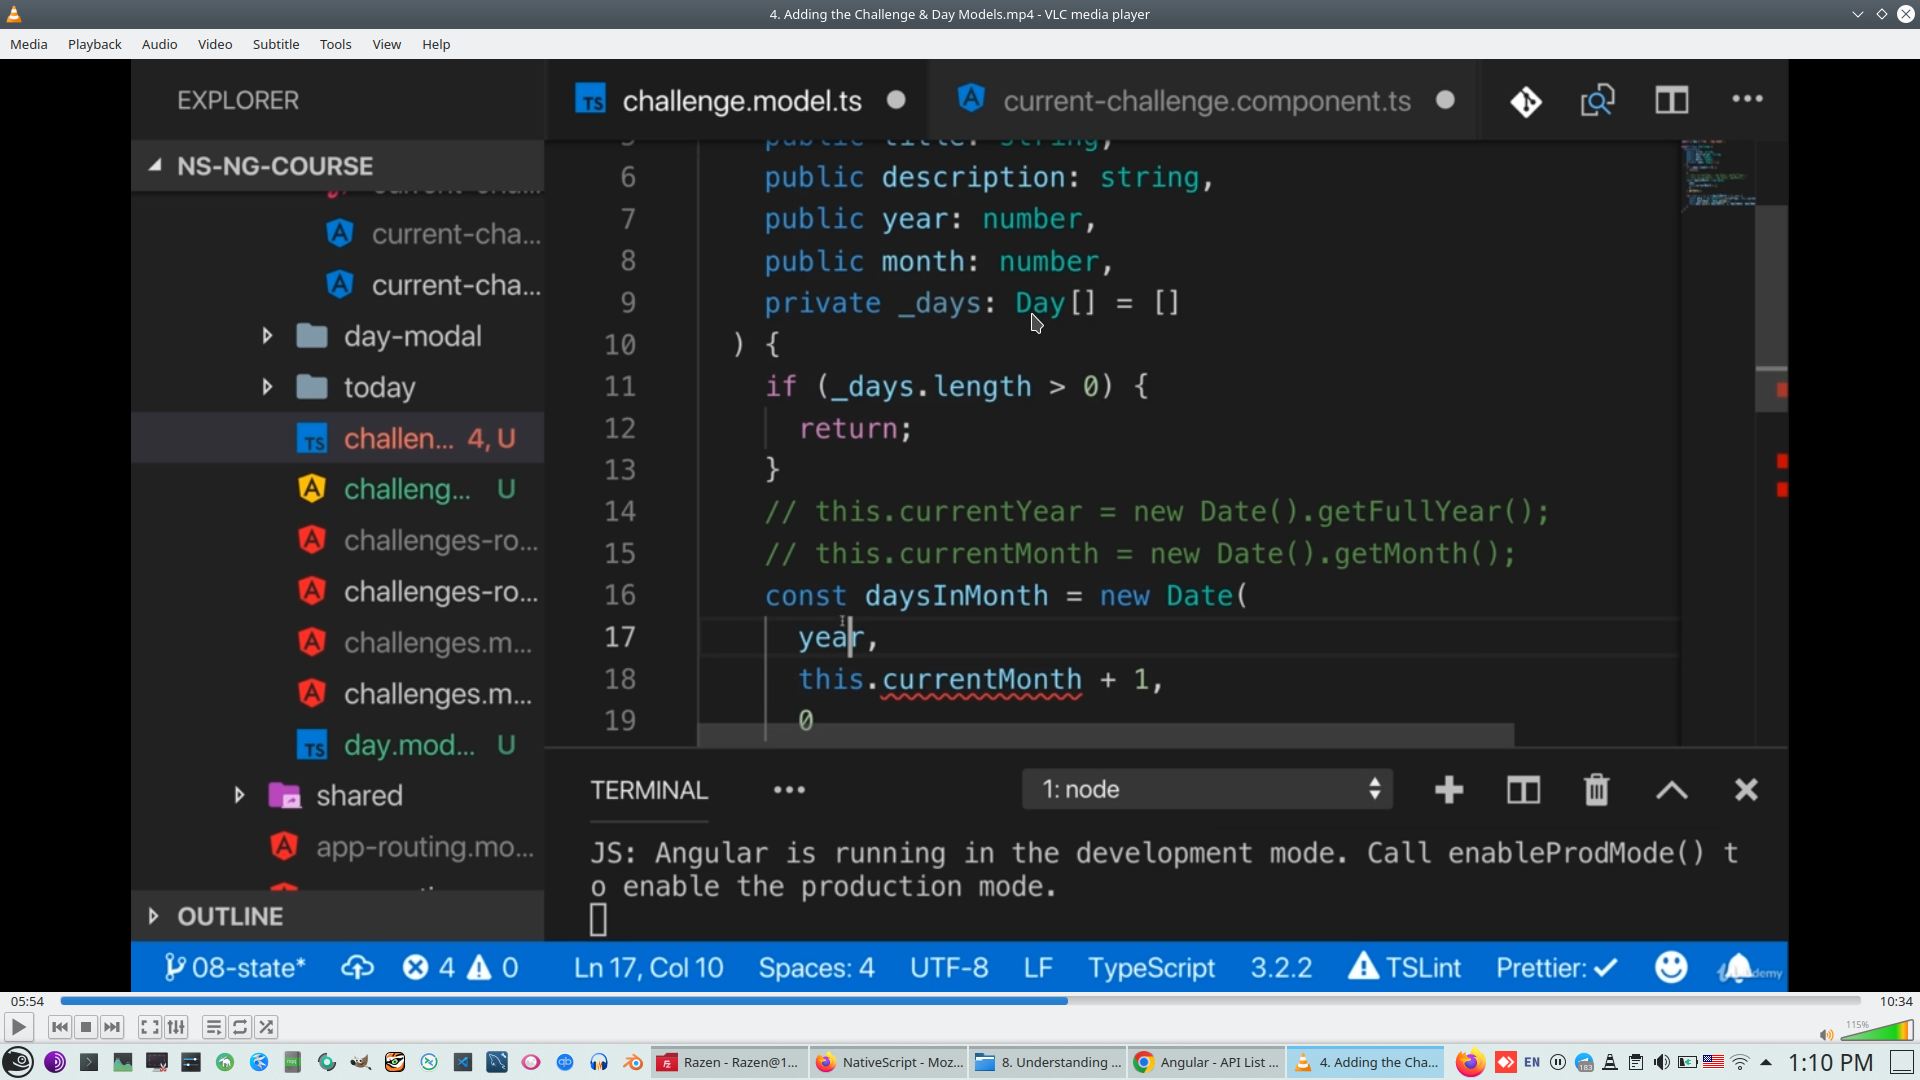
Currently we create a function for each day
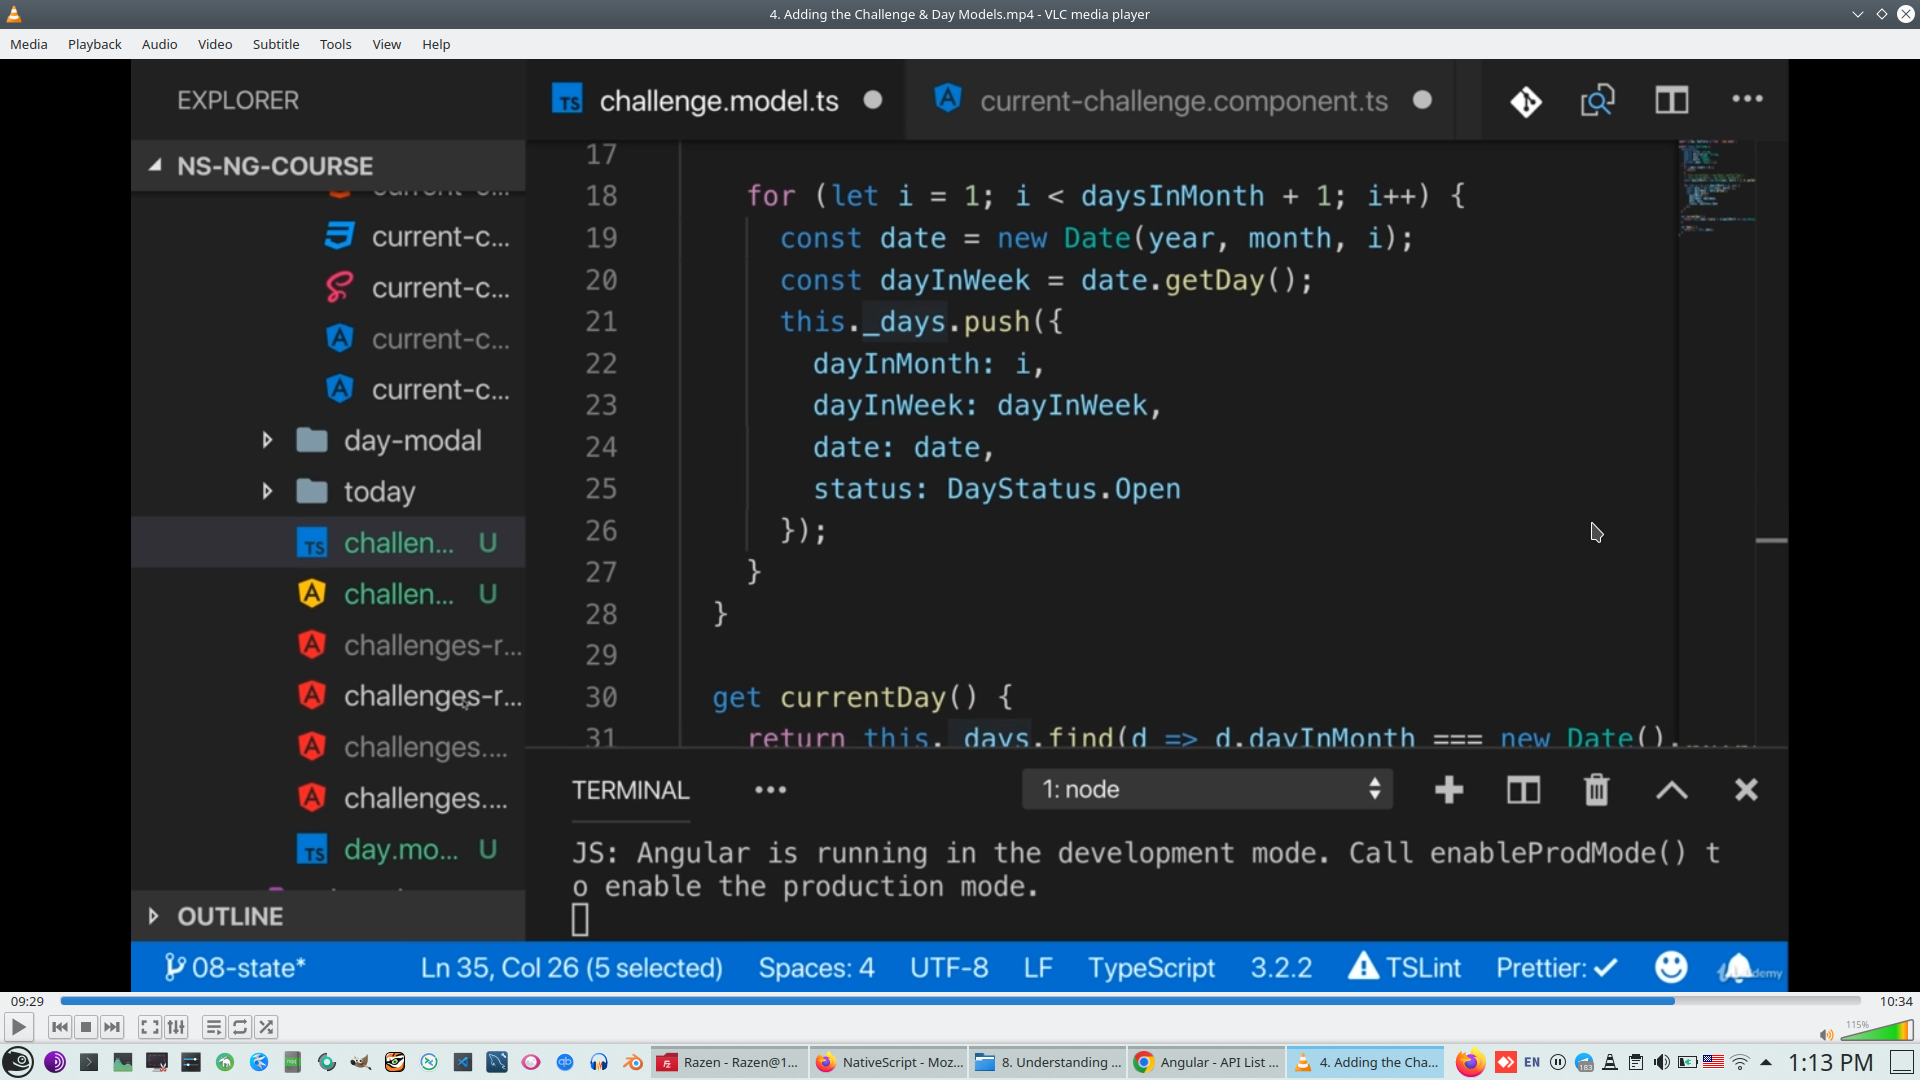
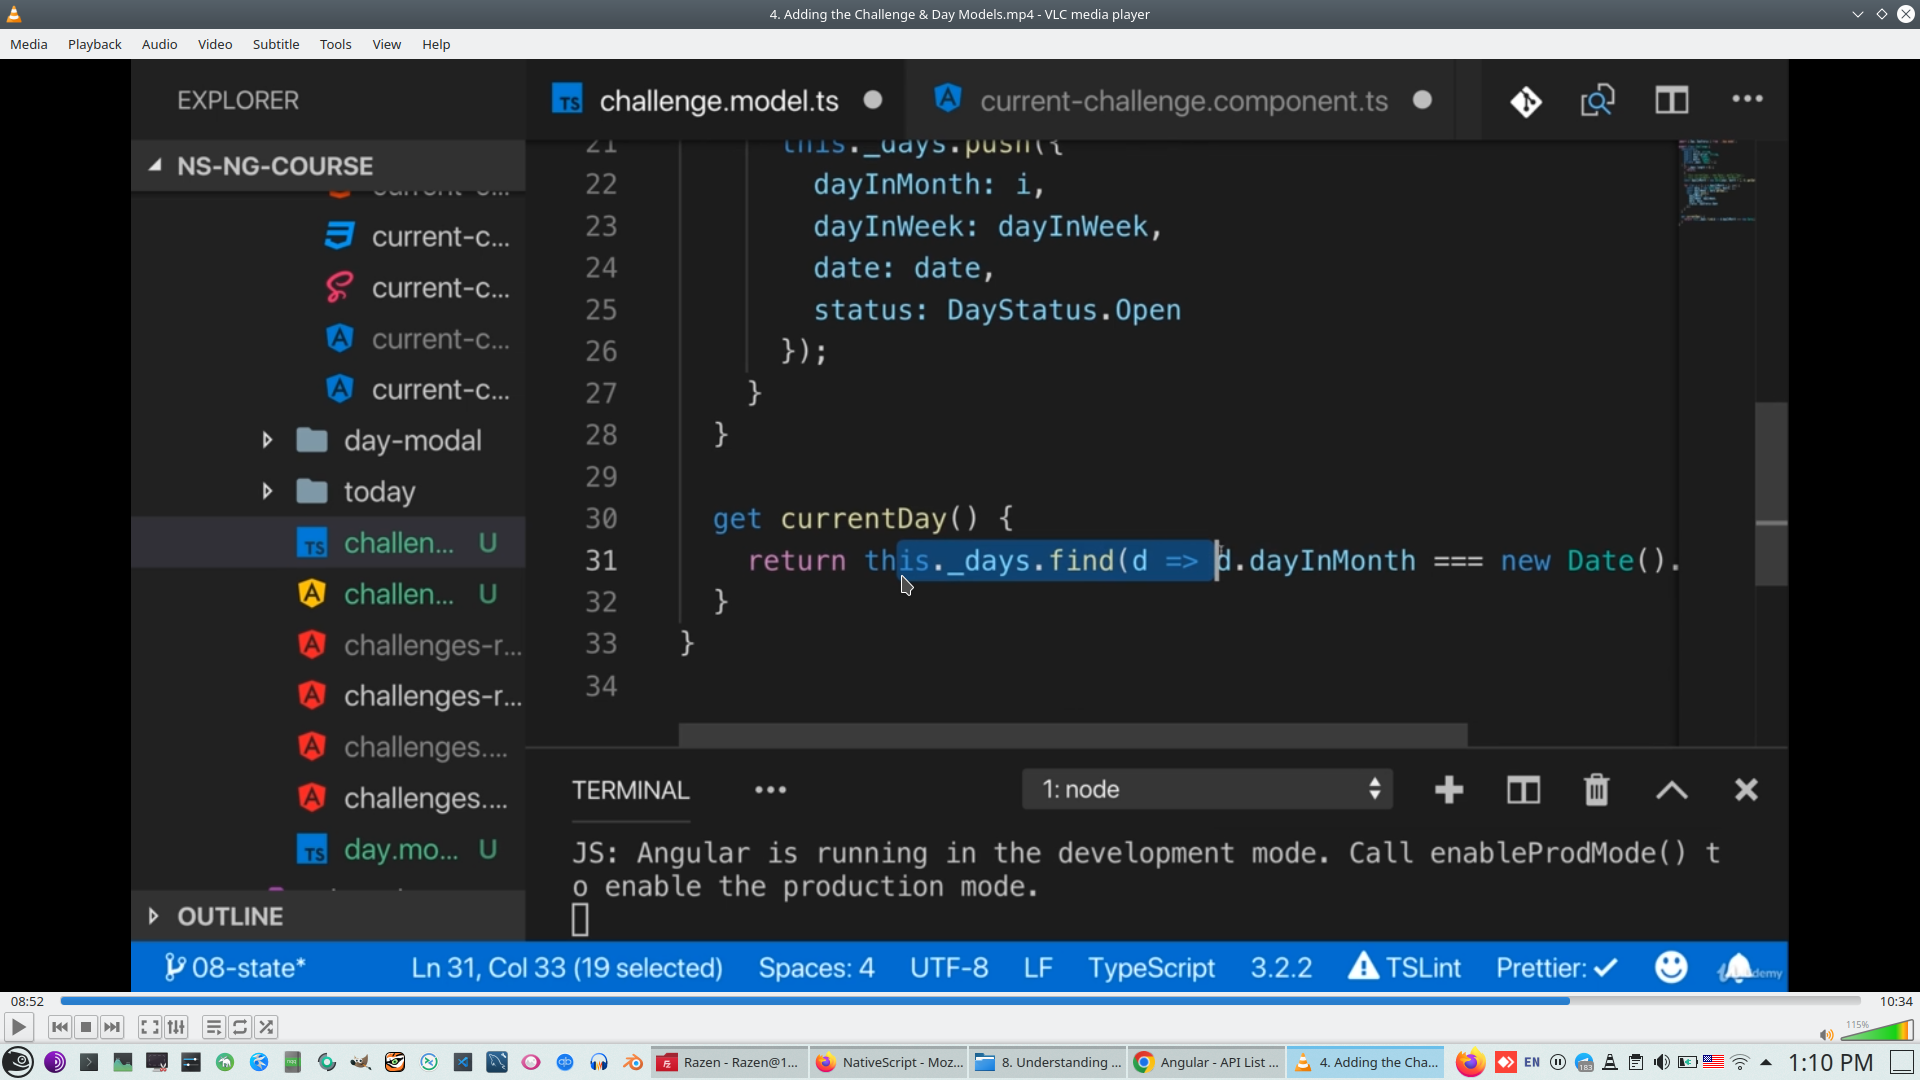
Use Array.Find function for select a day characteristics
Return copy of array with spread syntax '...'
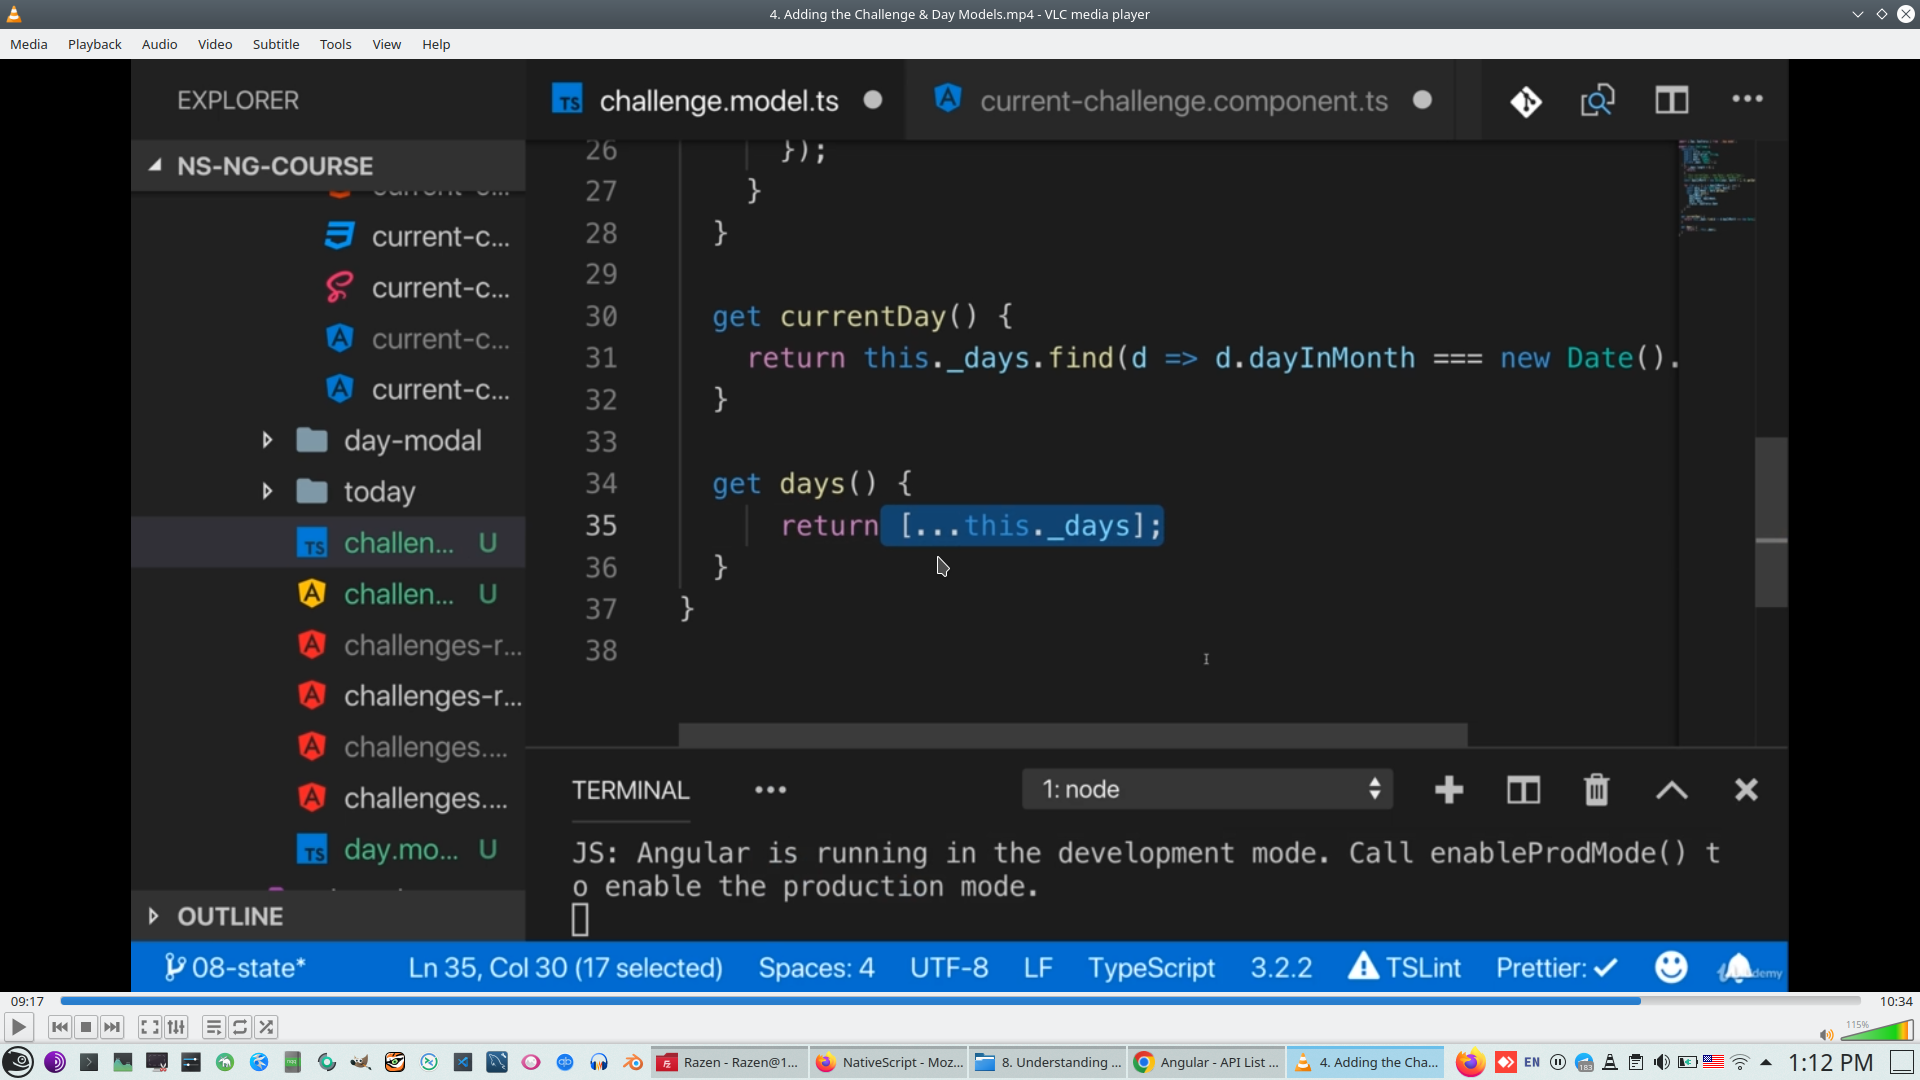
And noew BehaviorObject can emit types events
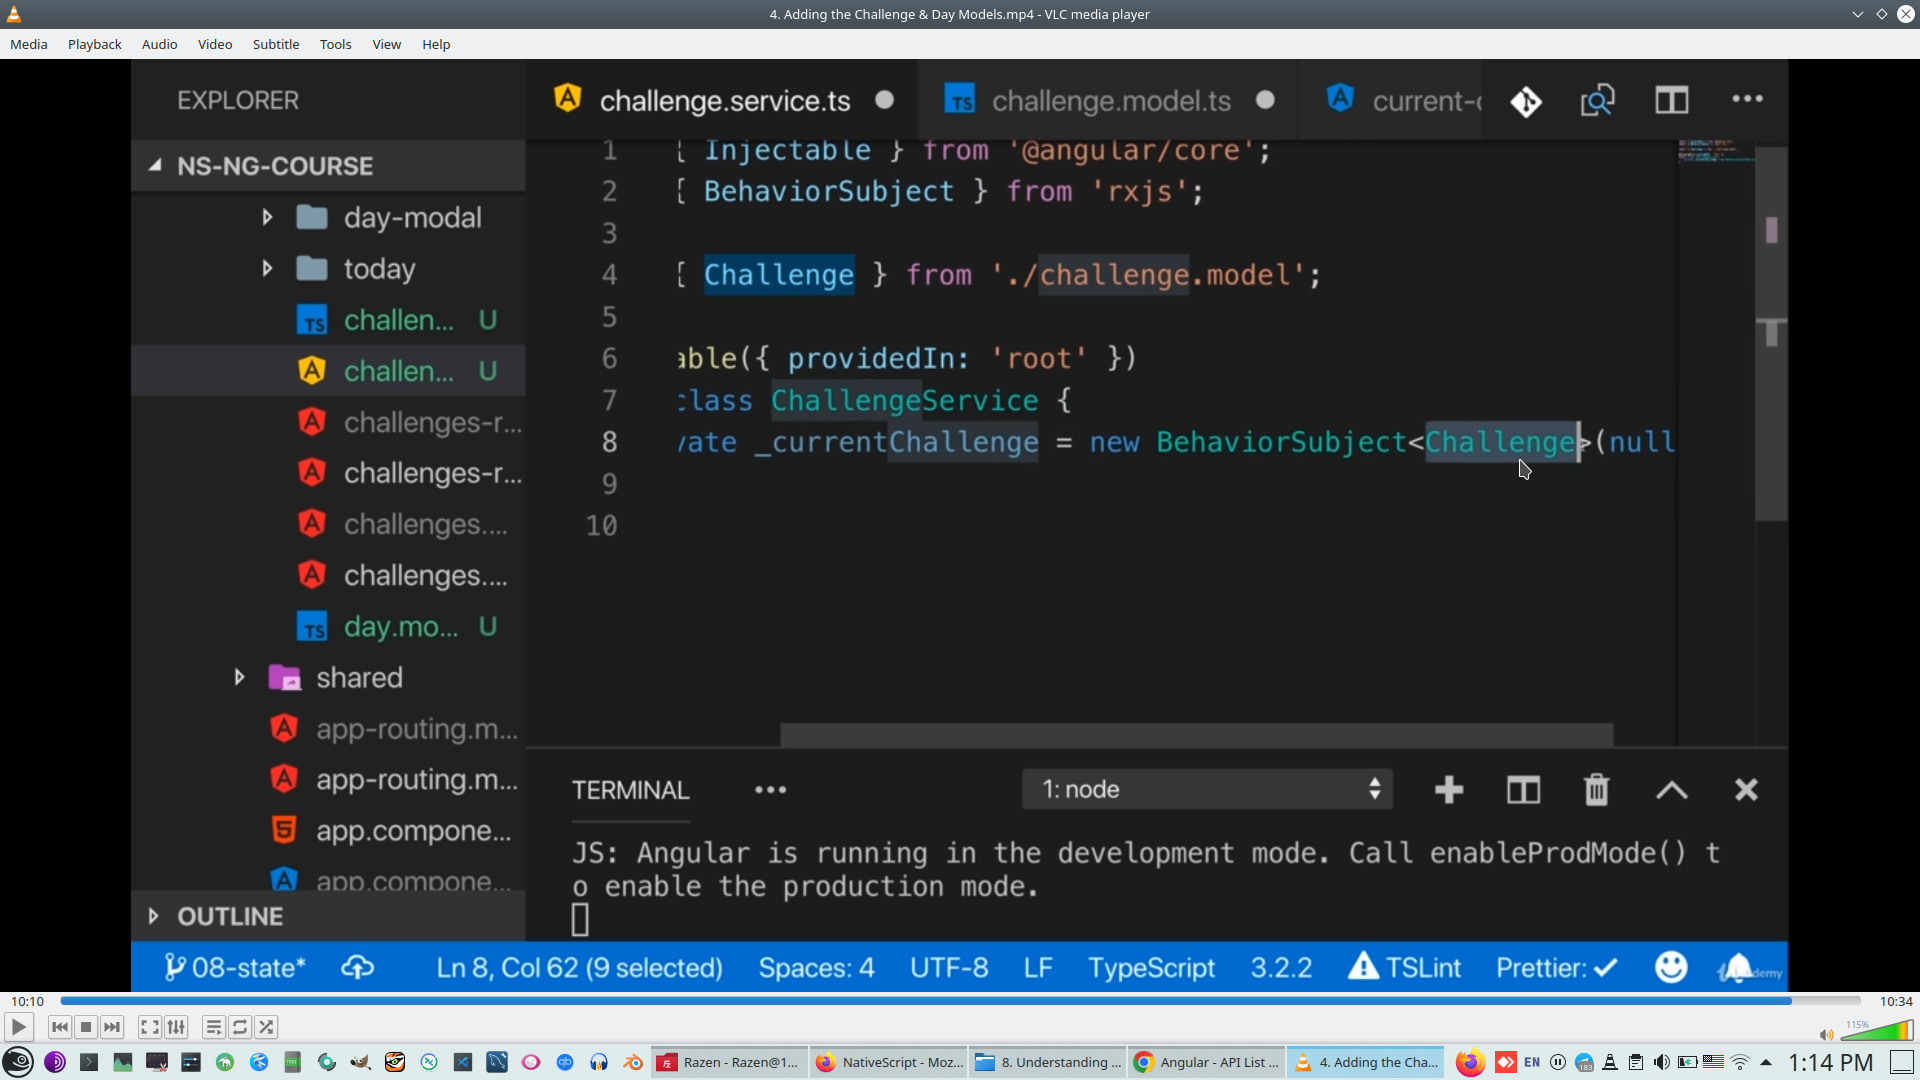
This is current code
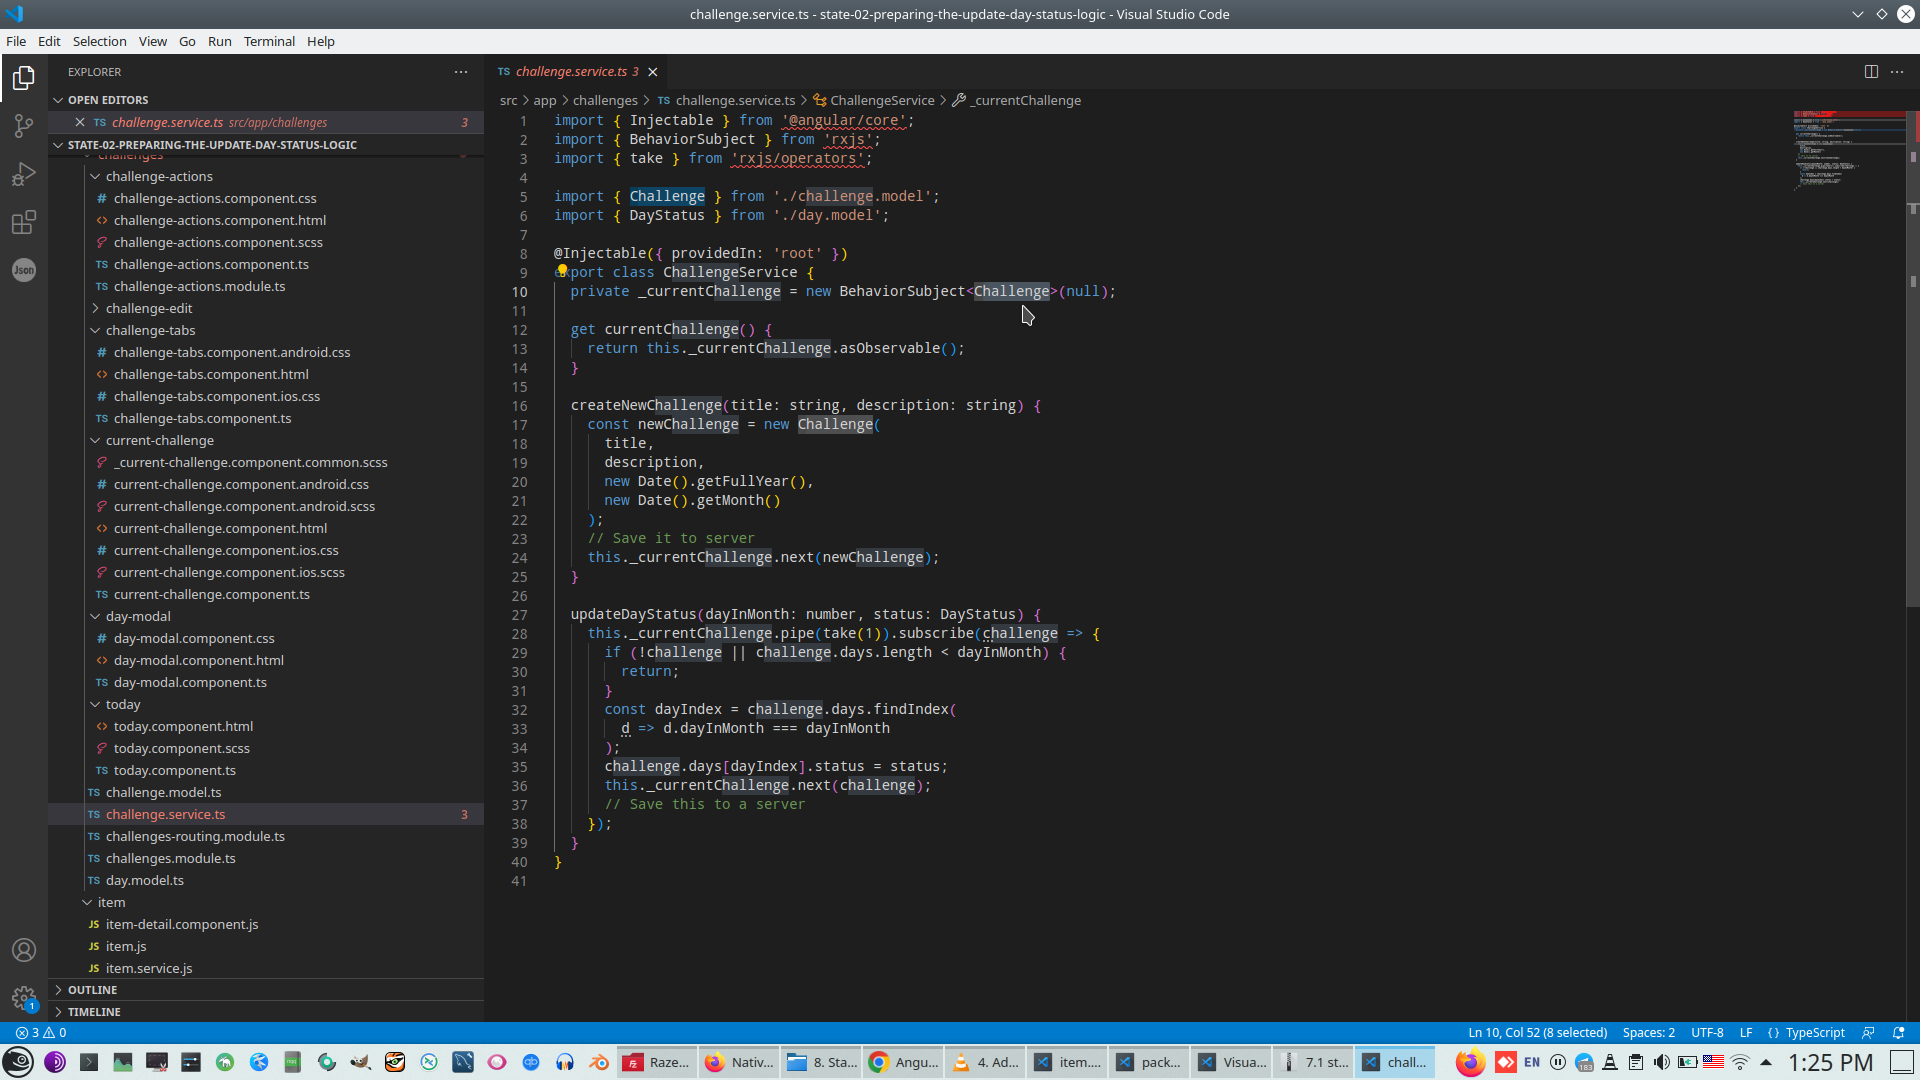
Create external asObservable property
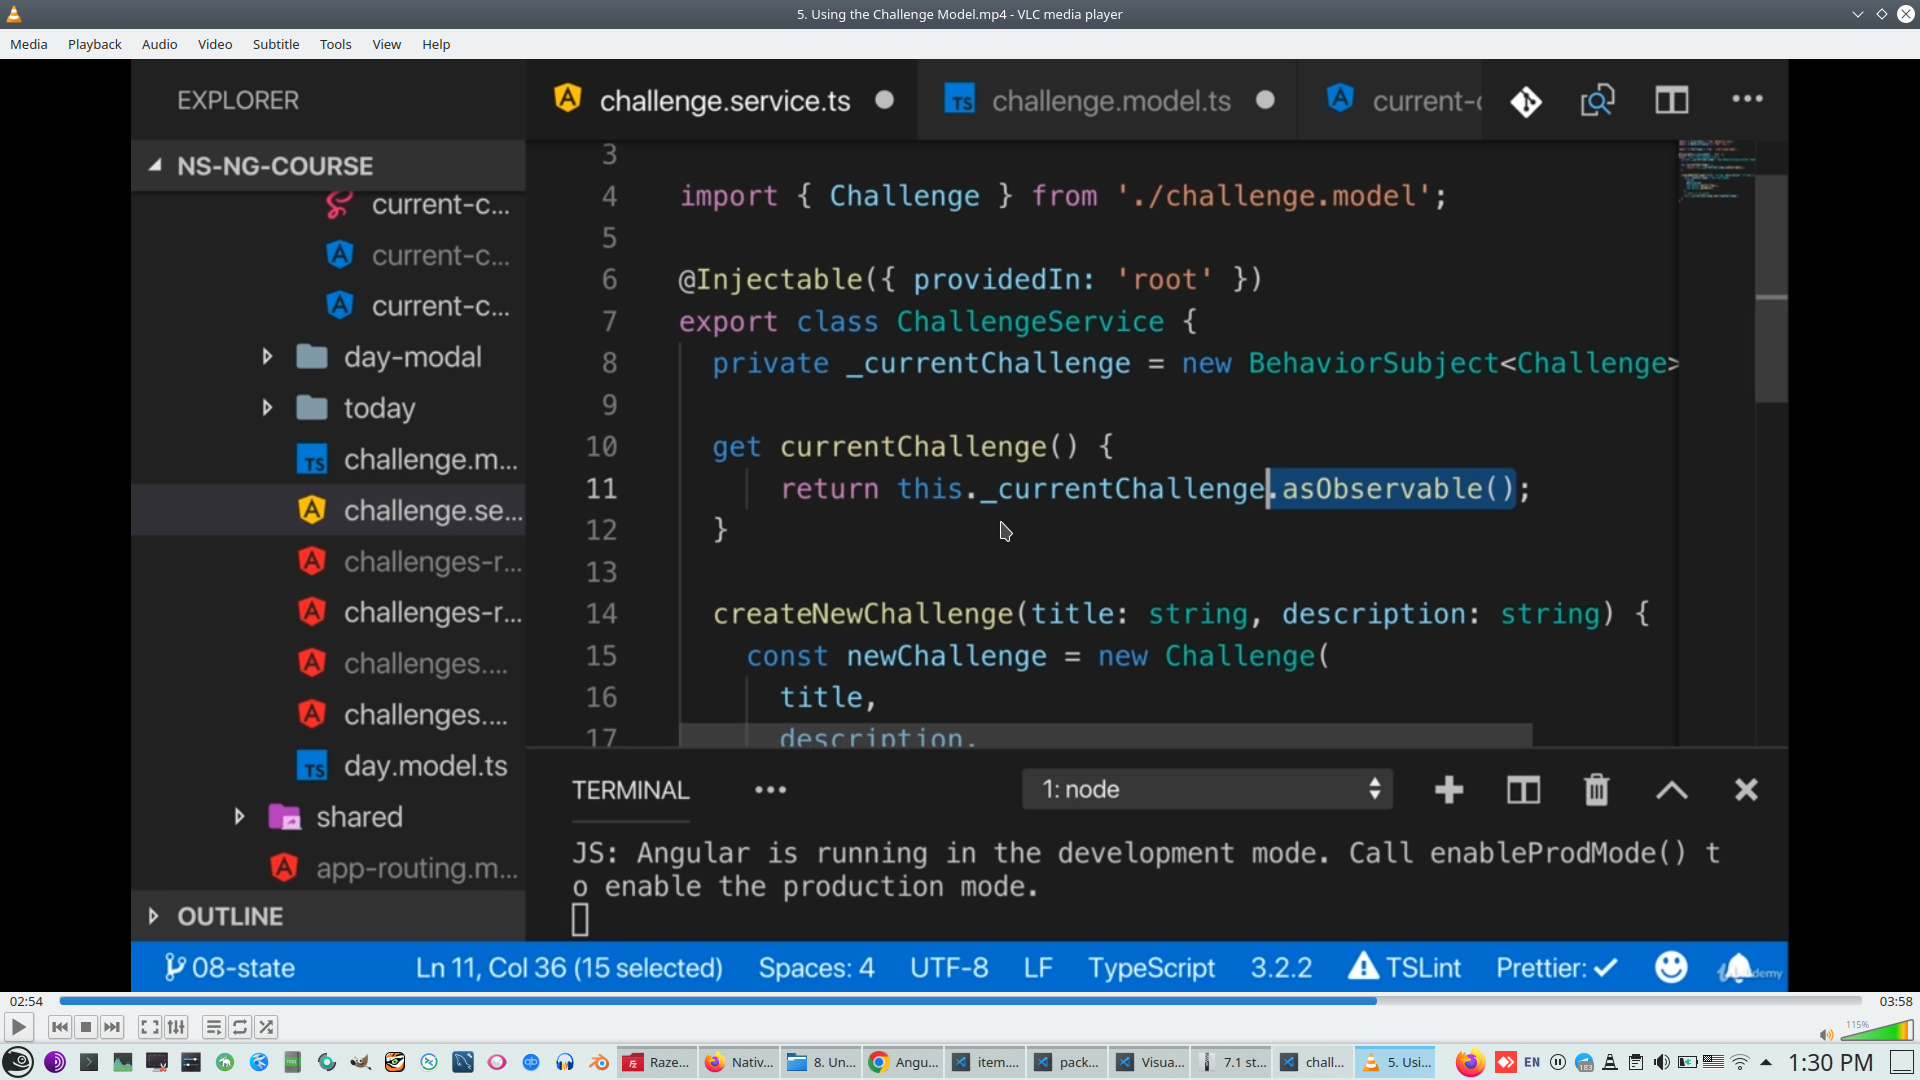
Result of show days characteristics
15. Special Navigation for Mobile Phone - Stack based, Tab based, Drawer based
>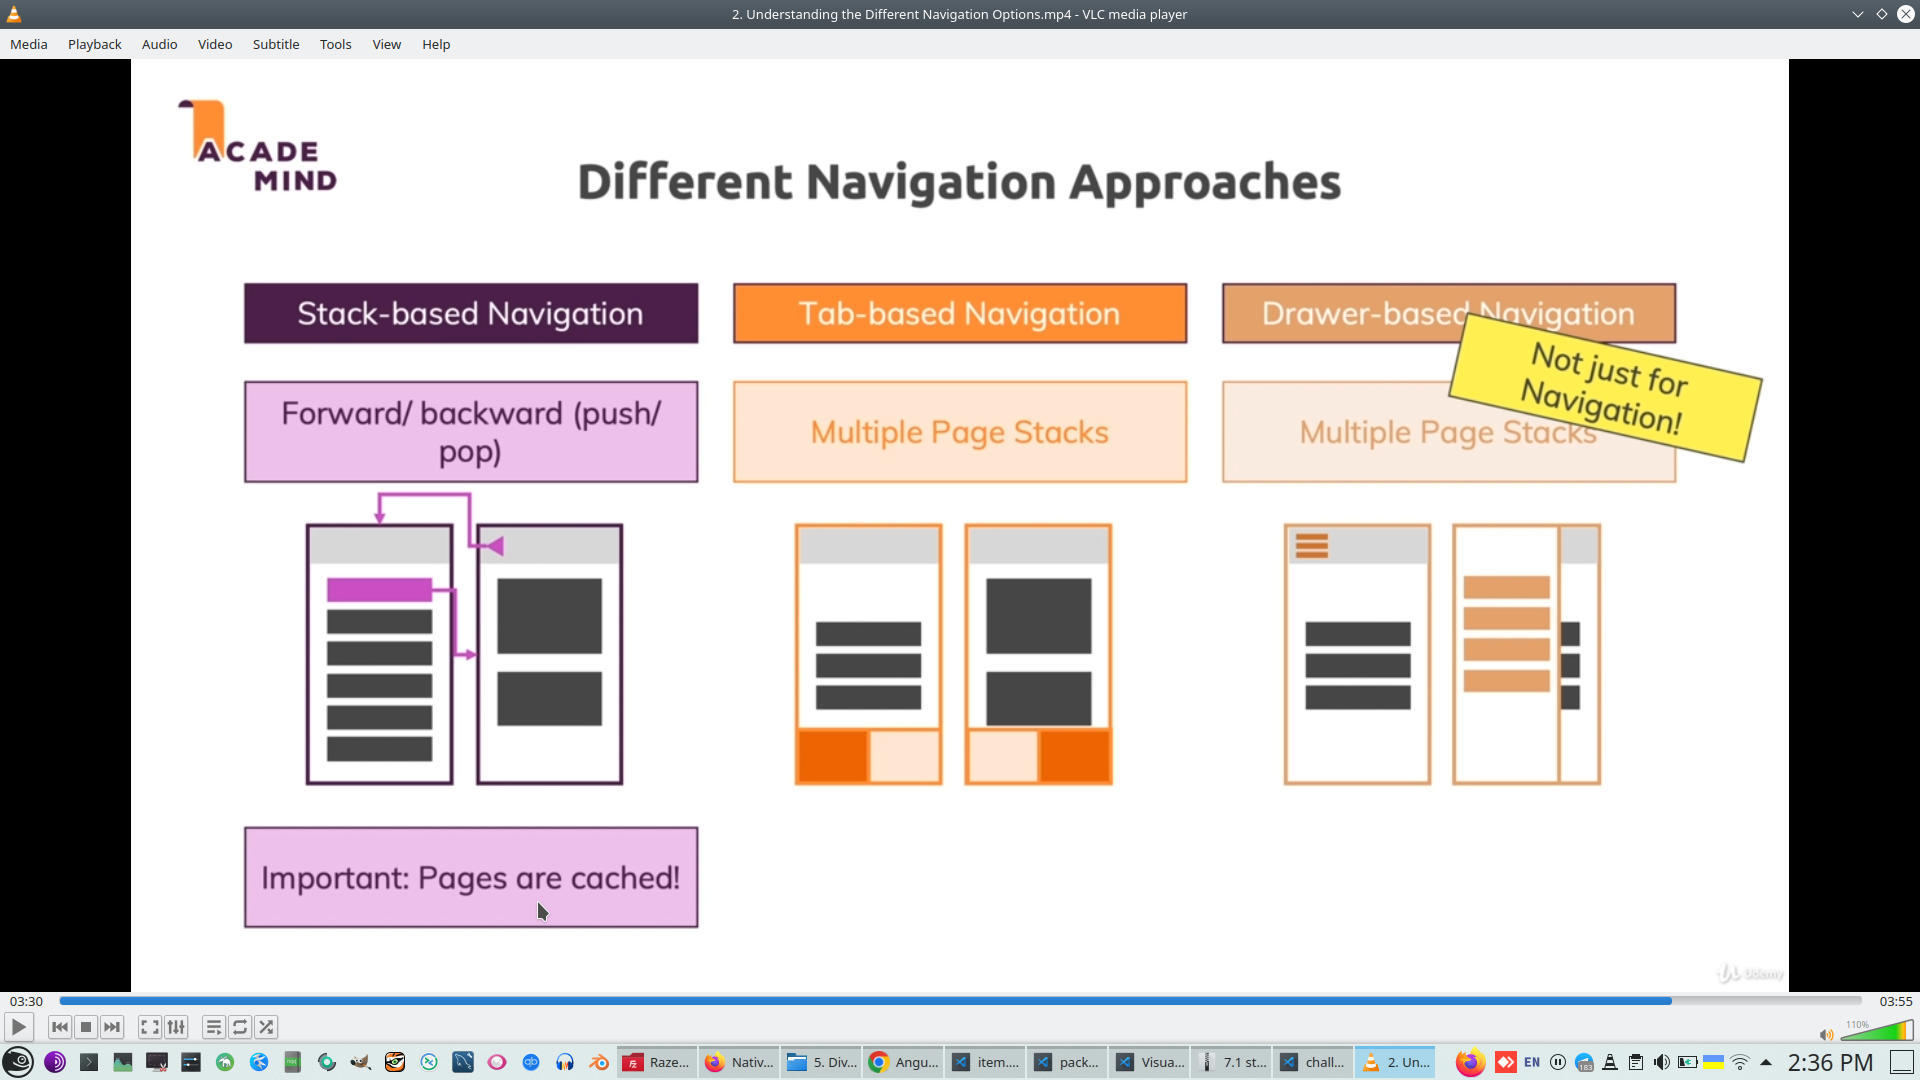
Planning application navigation
Create new components by 'ng g c xxx'
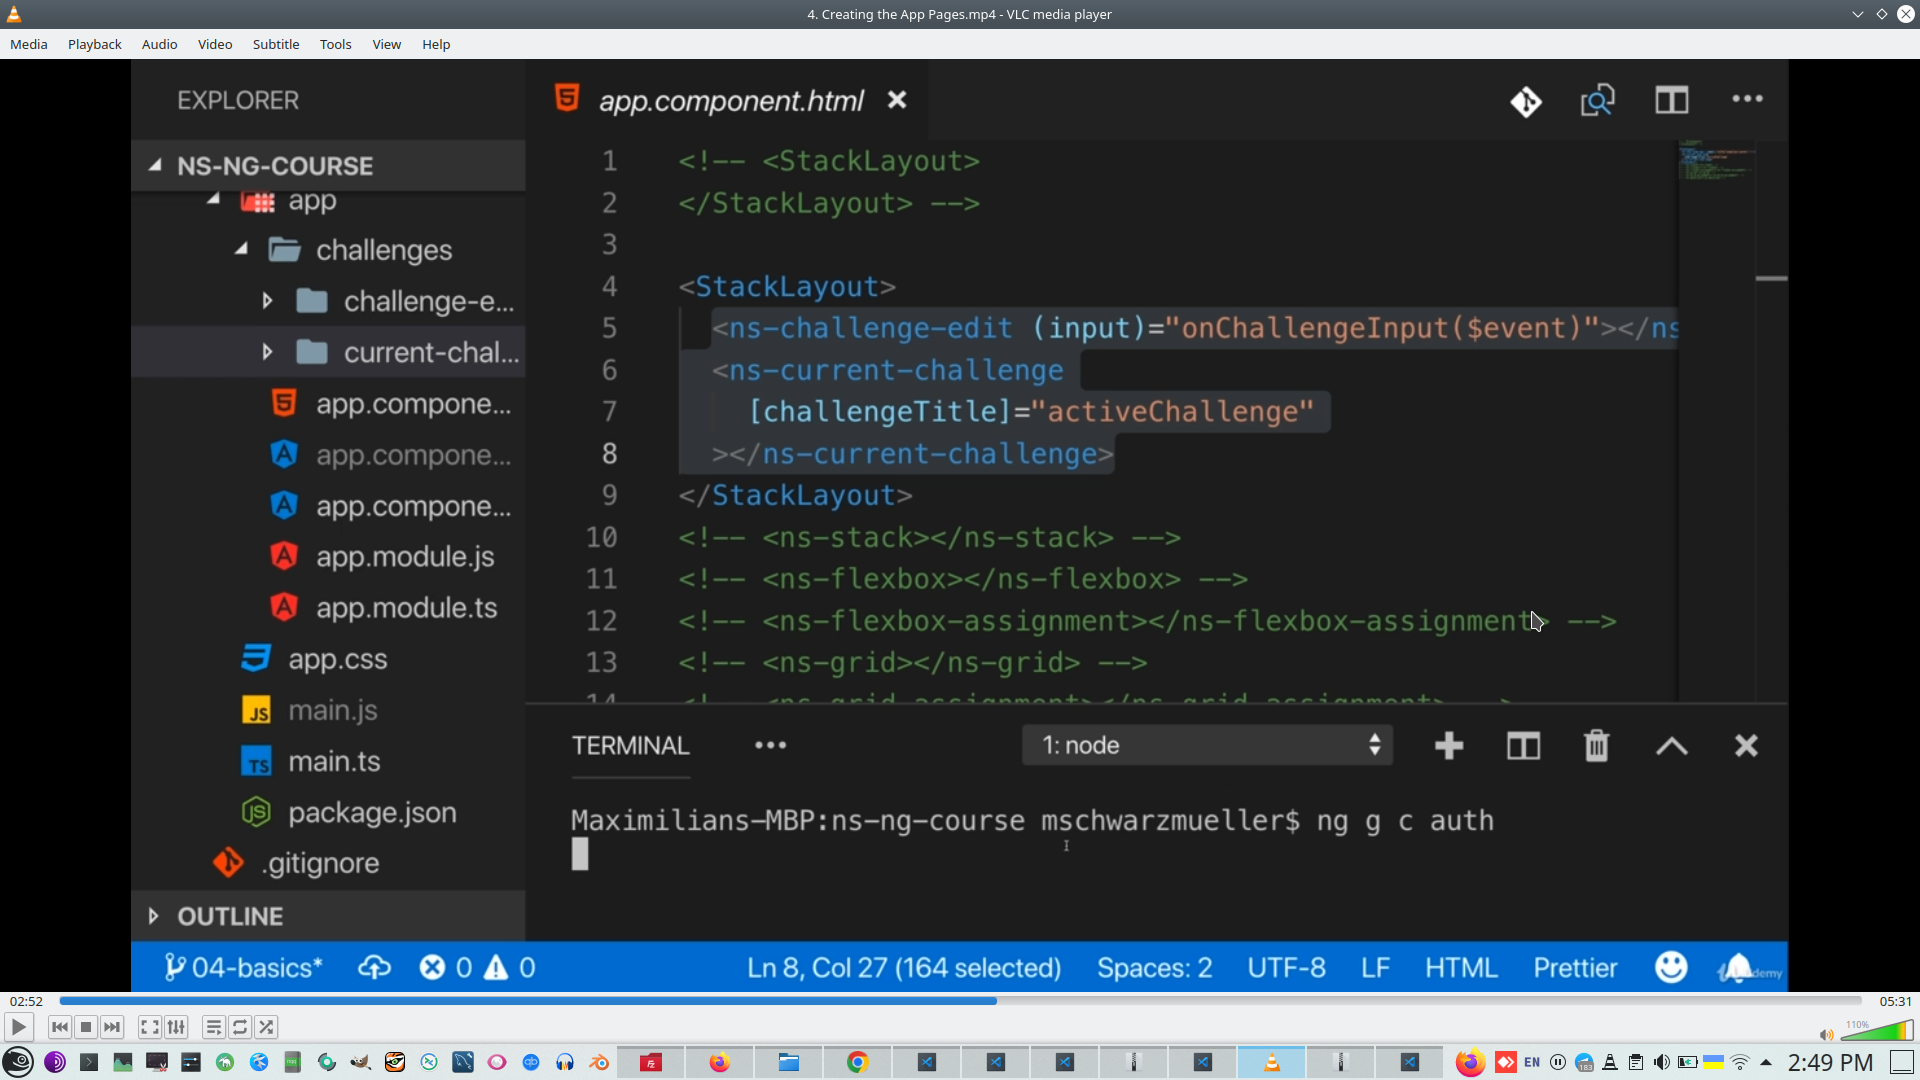
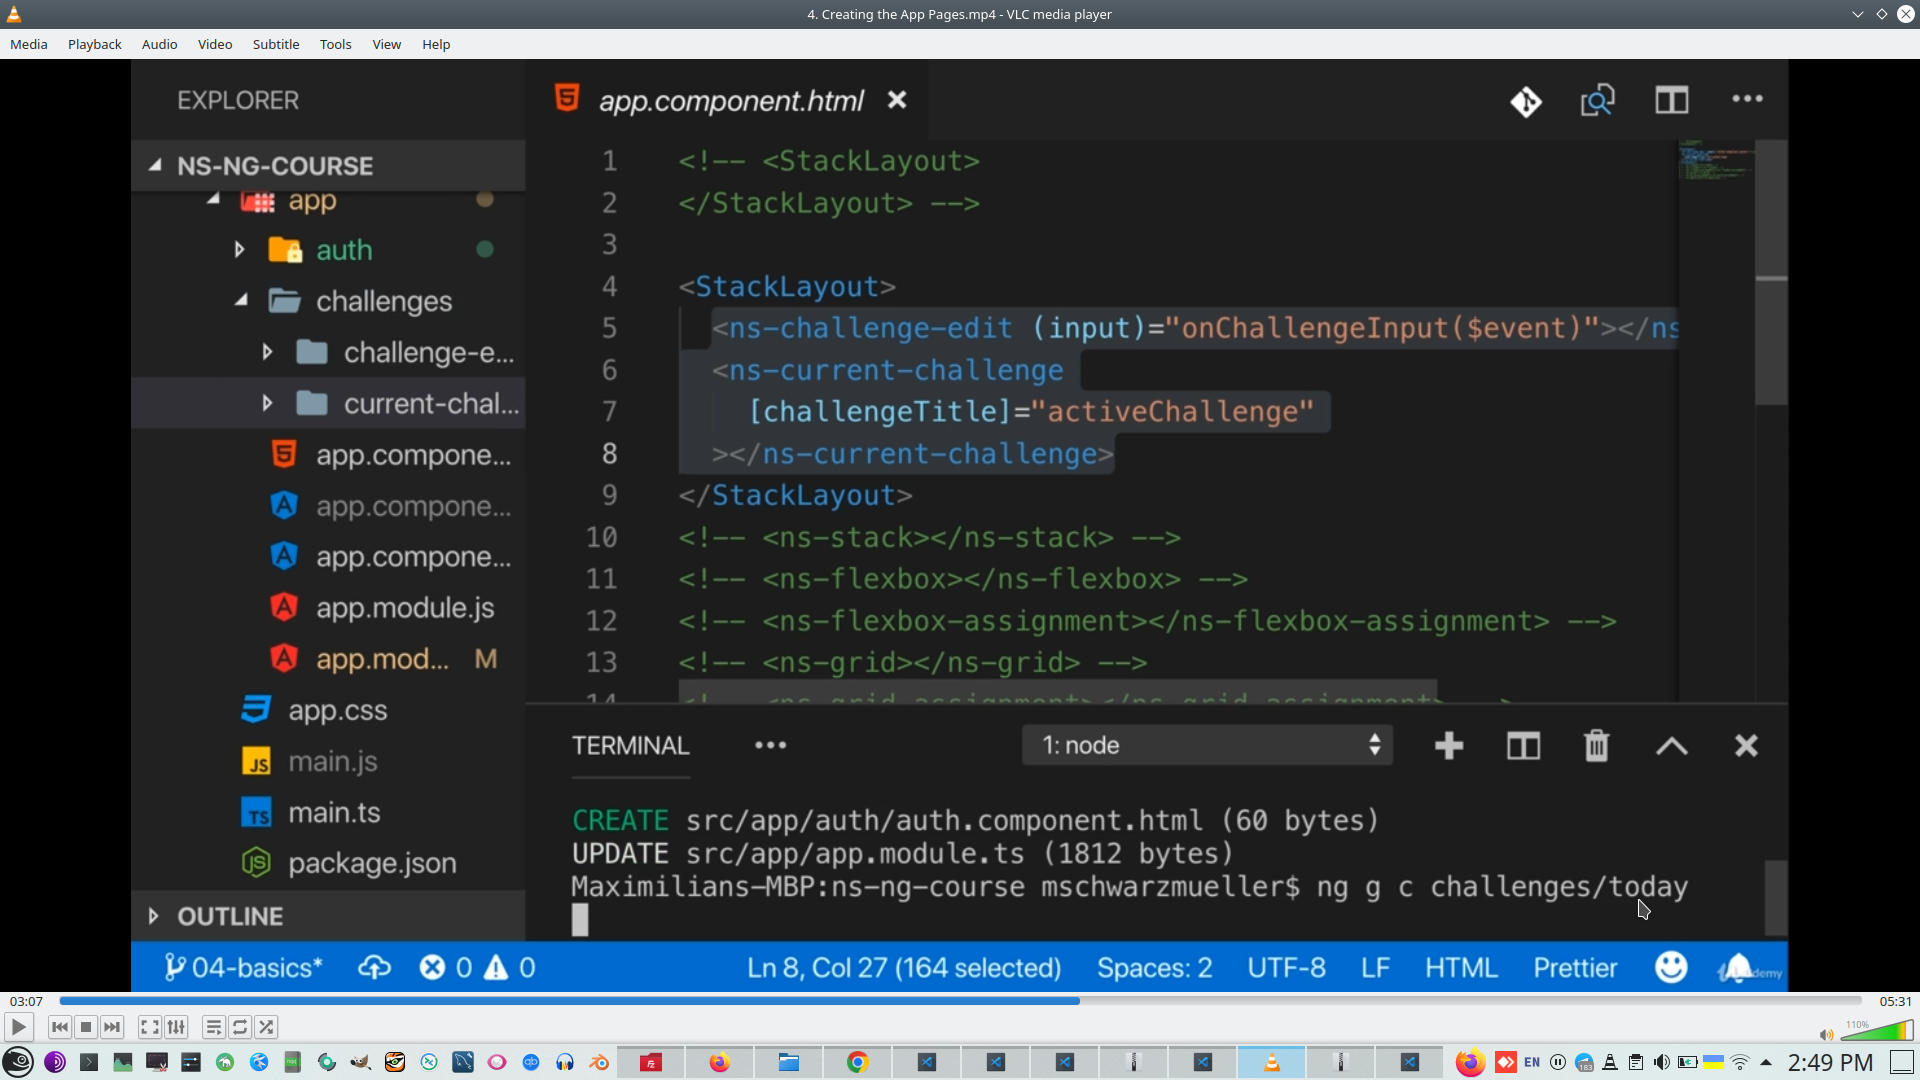
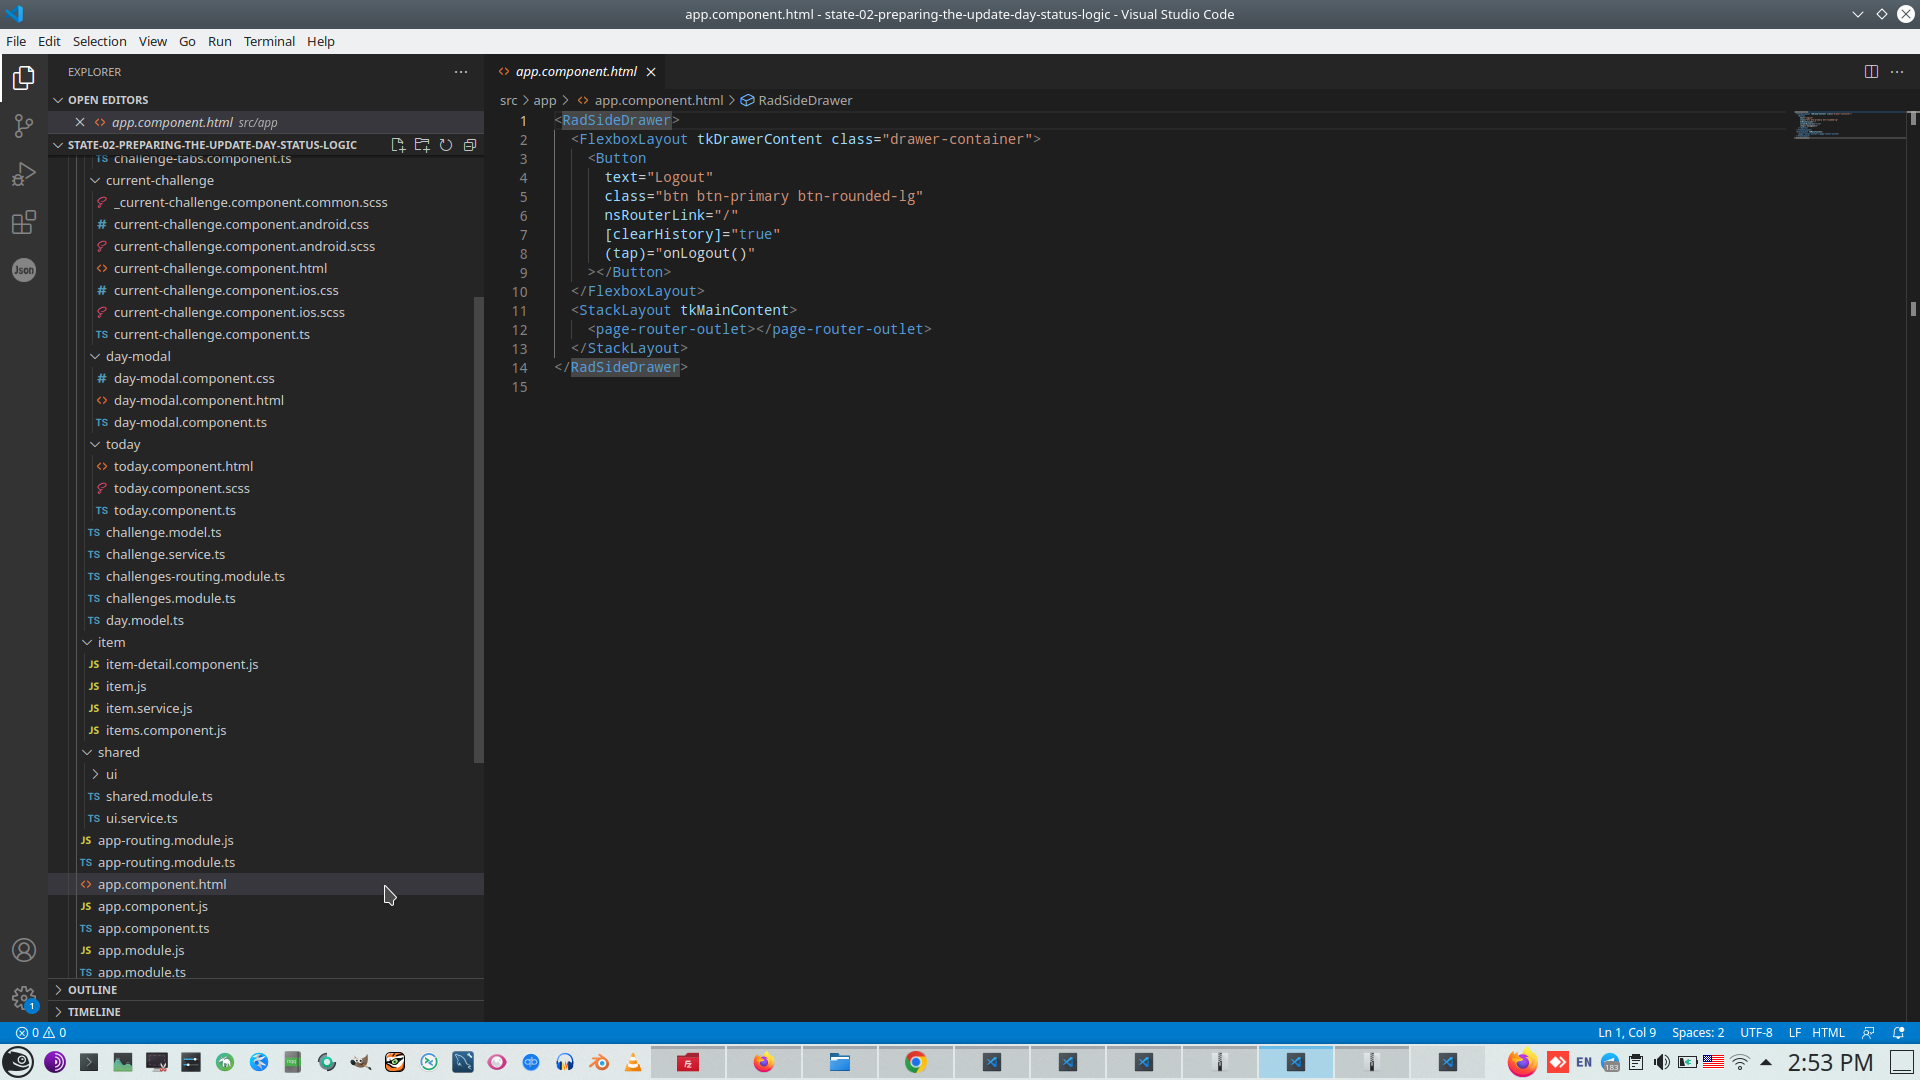
RadSlideDrawler contains only Logout function
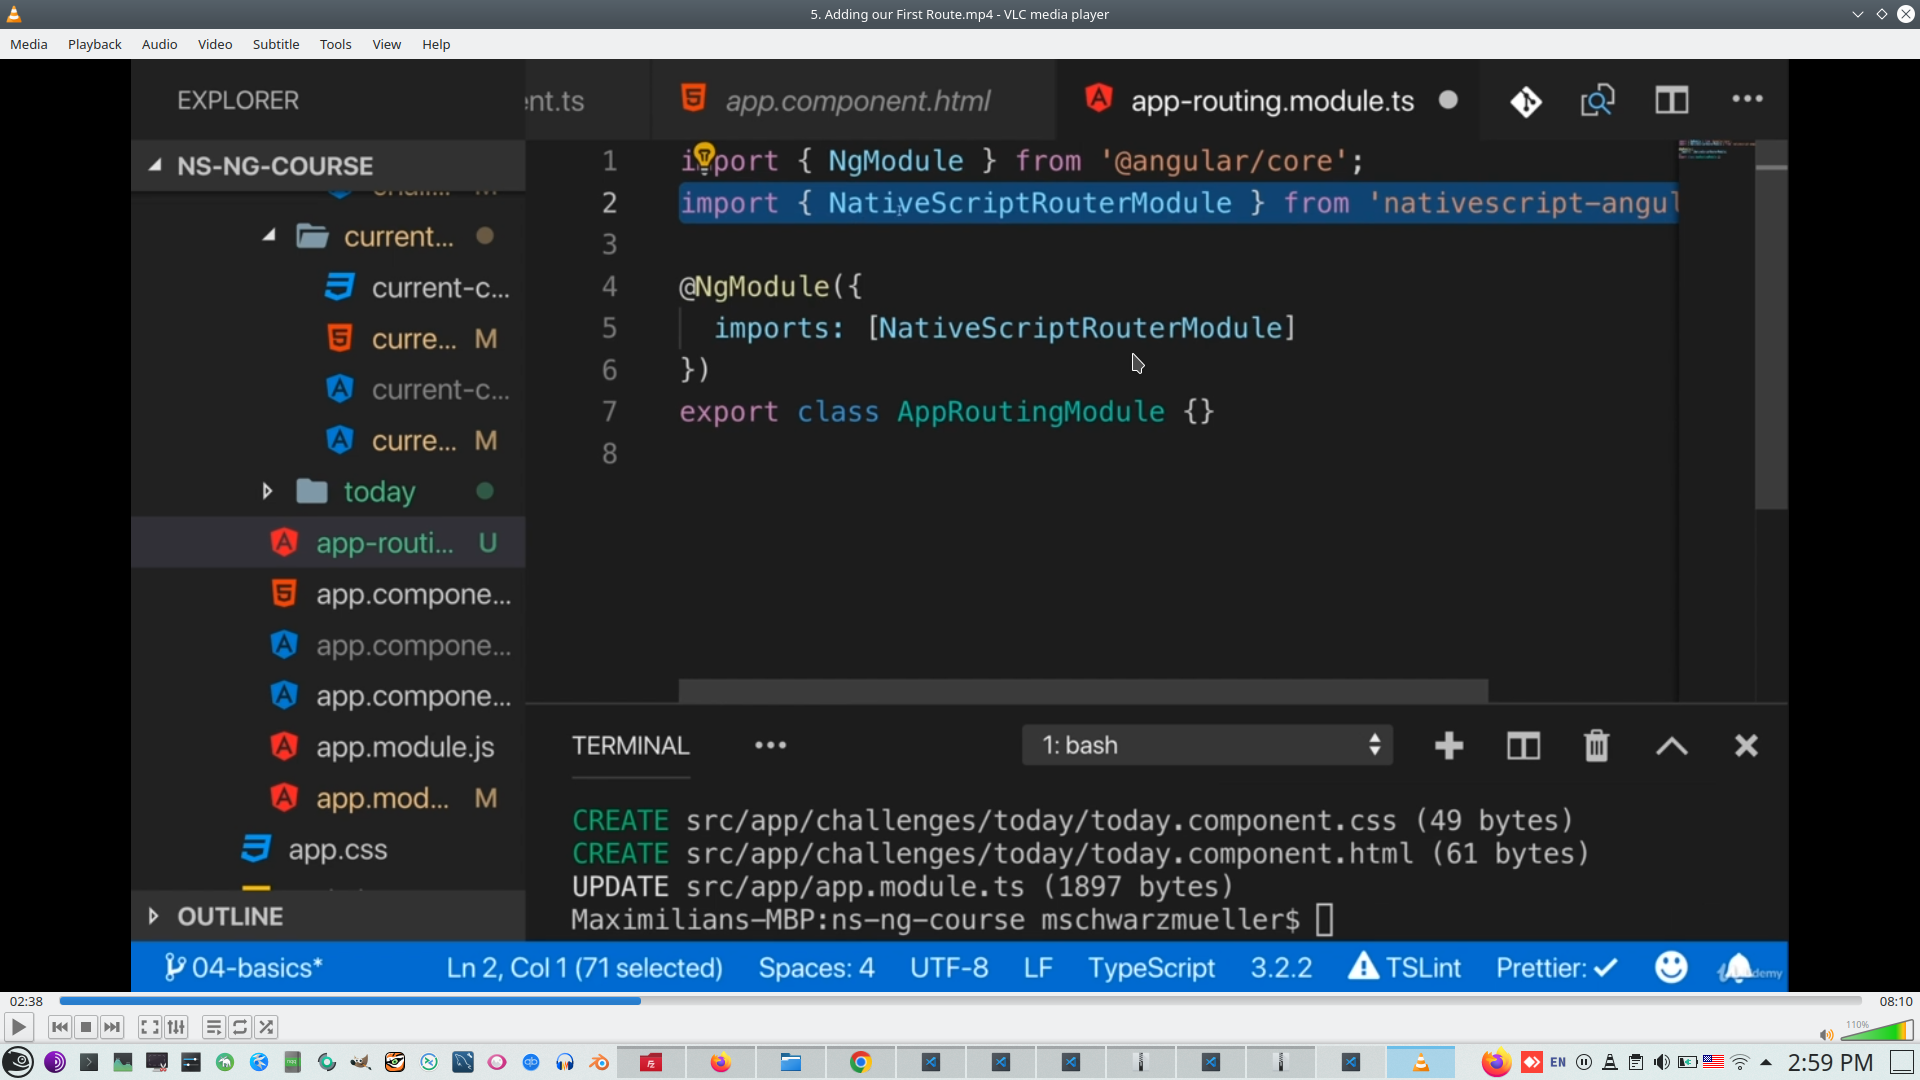
Add routing module manually
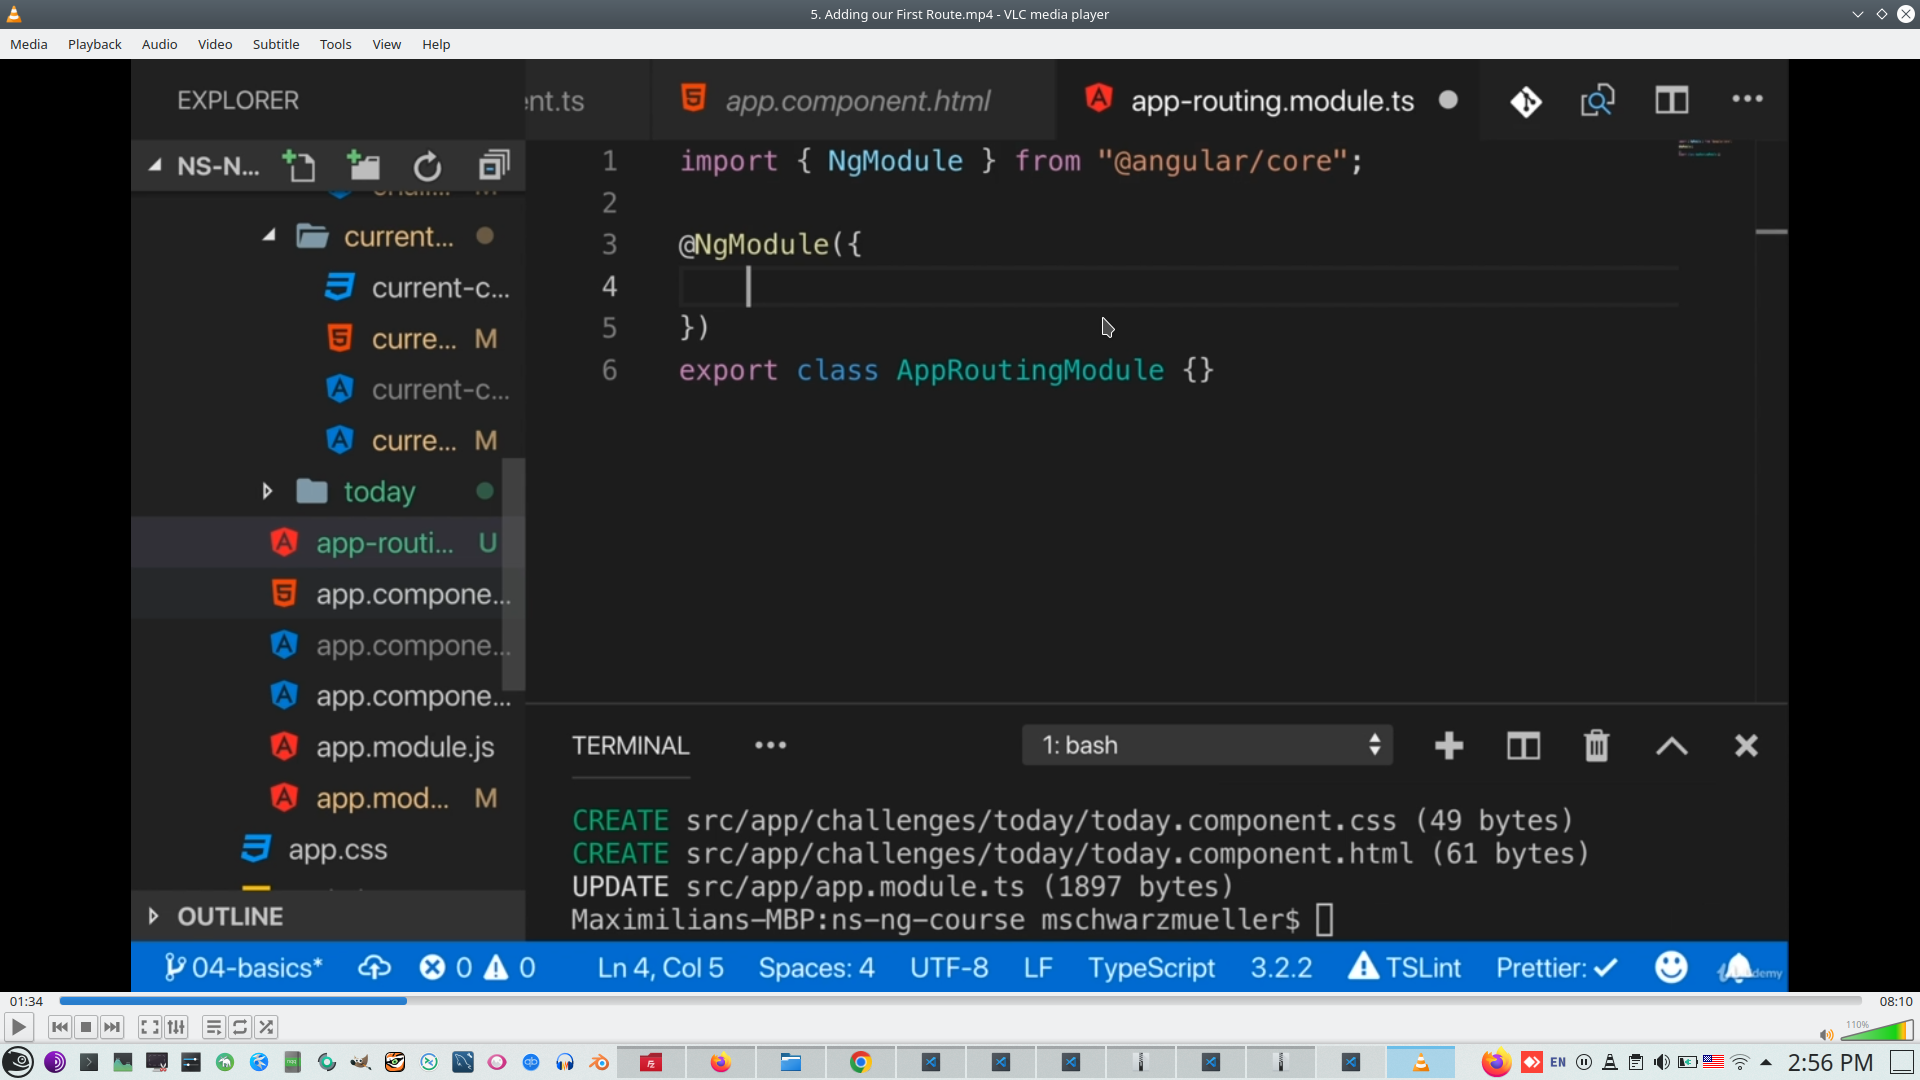
Import NS routing instead Angular Routing
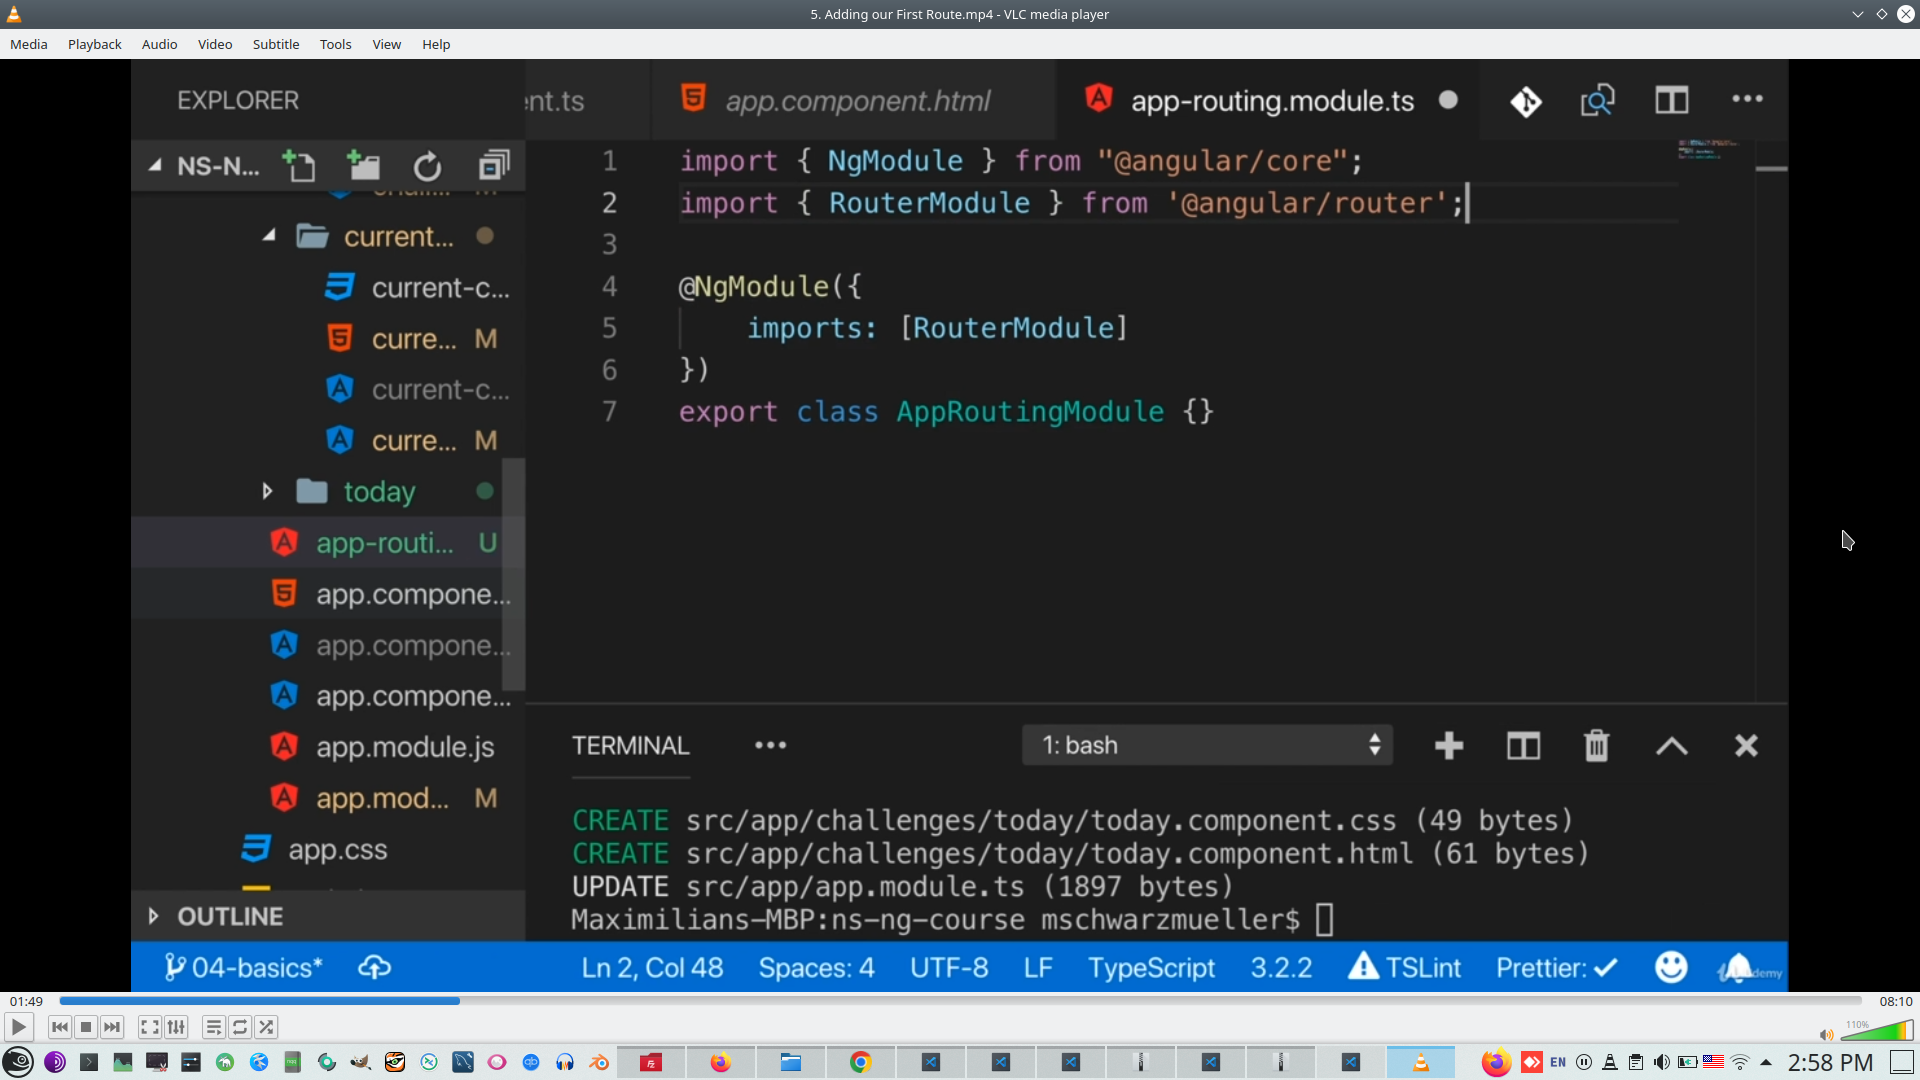
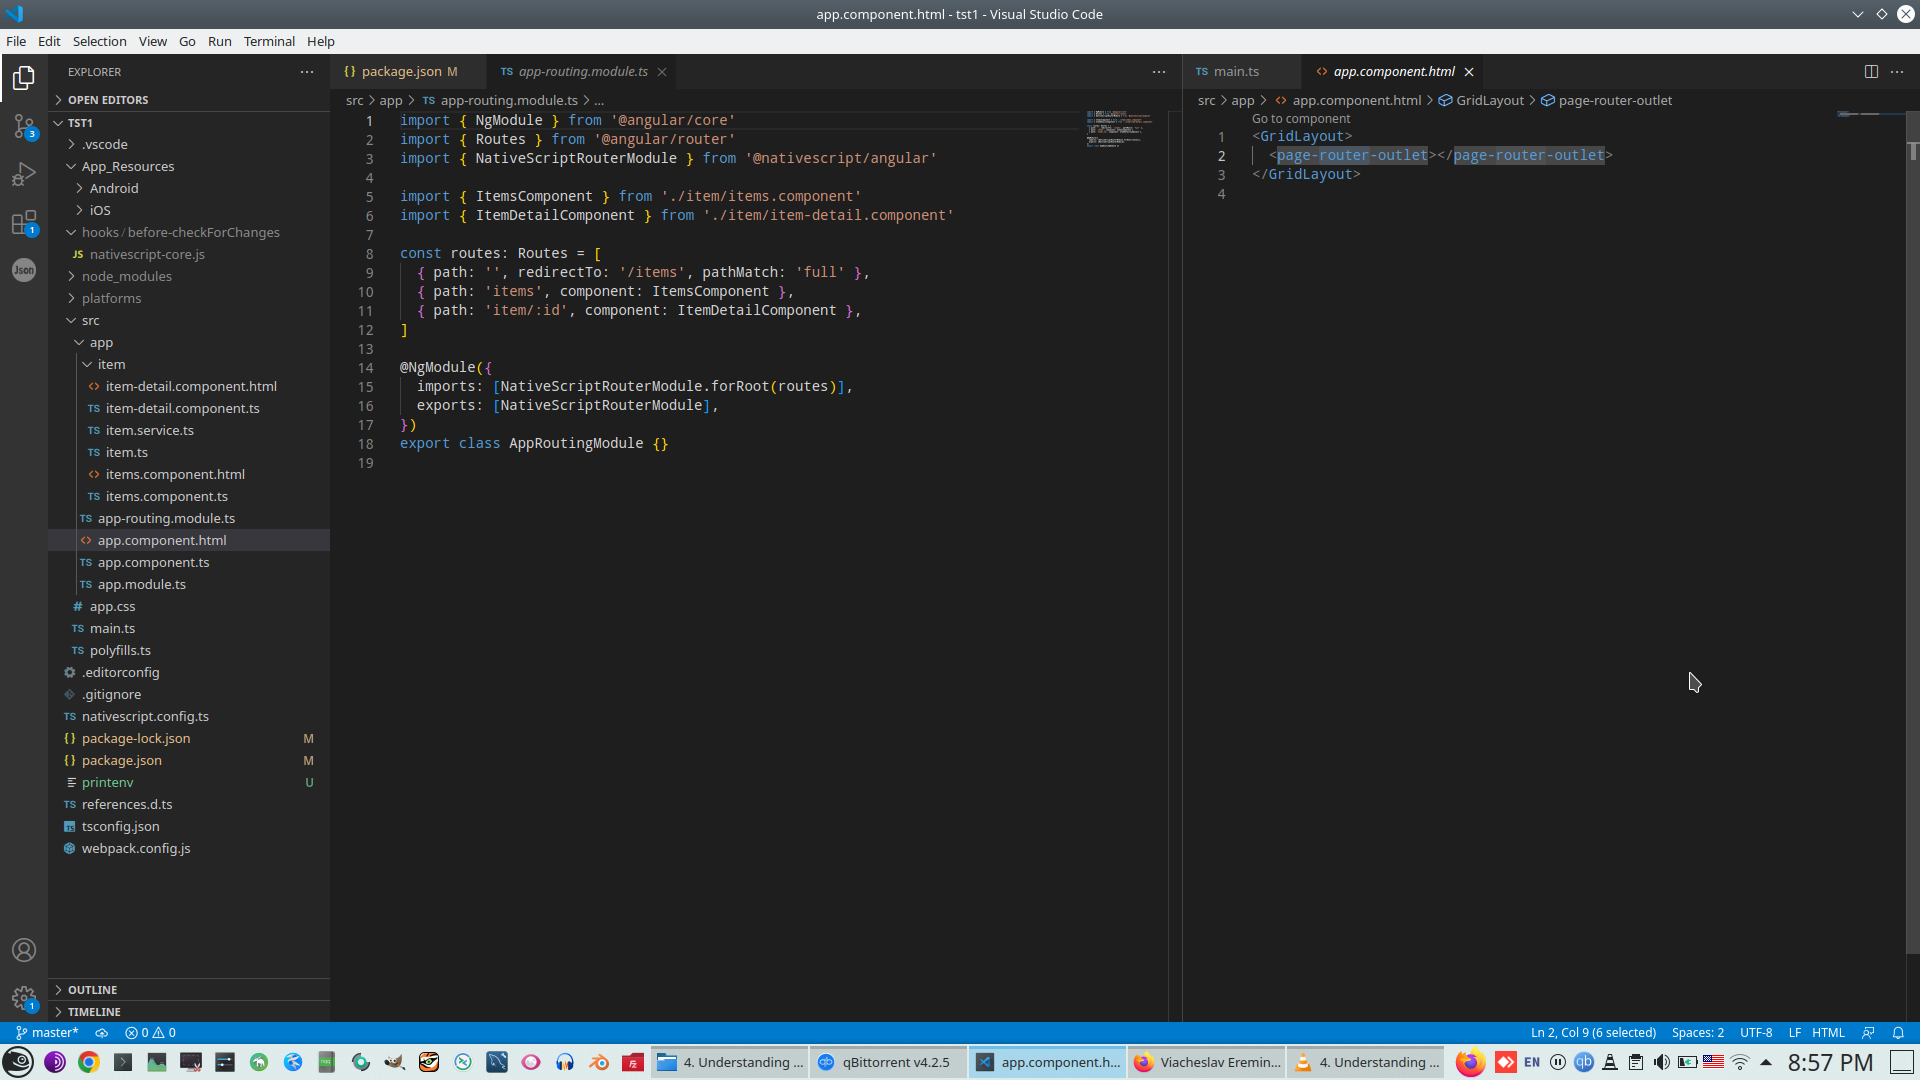
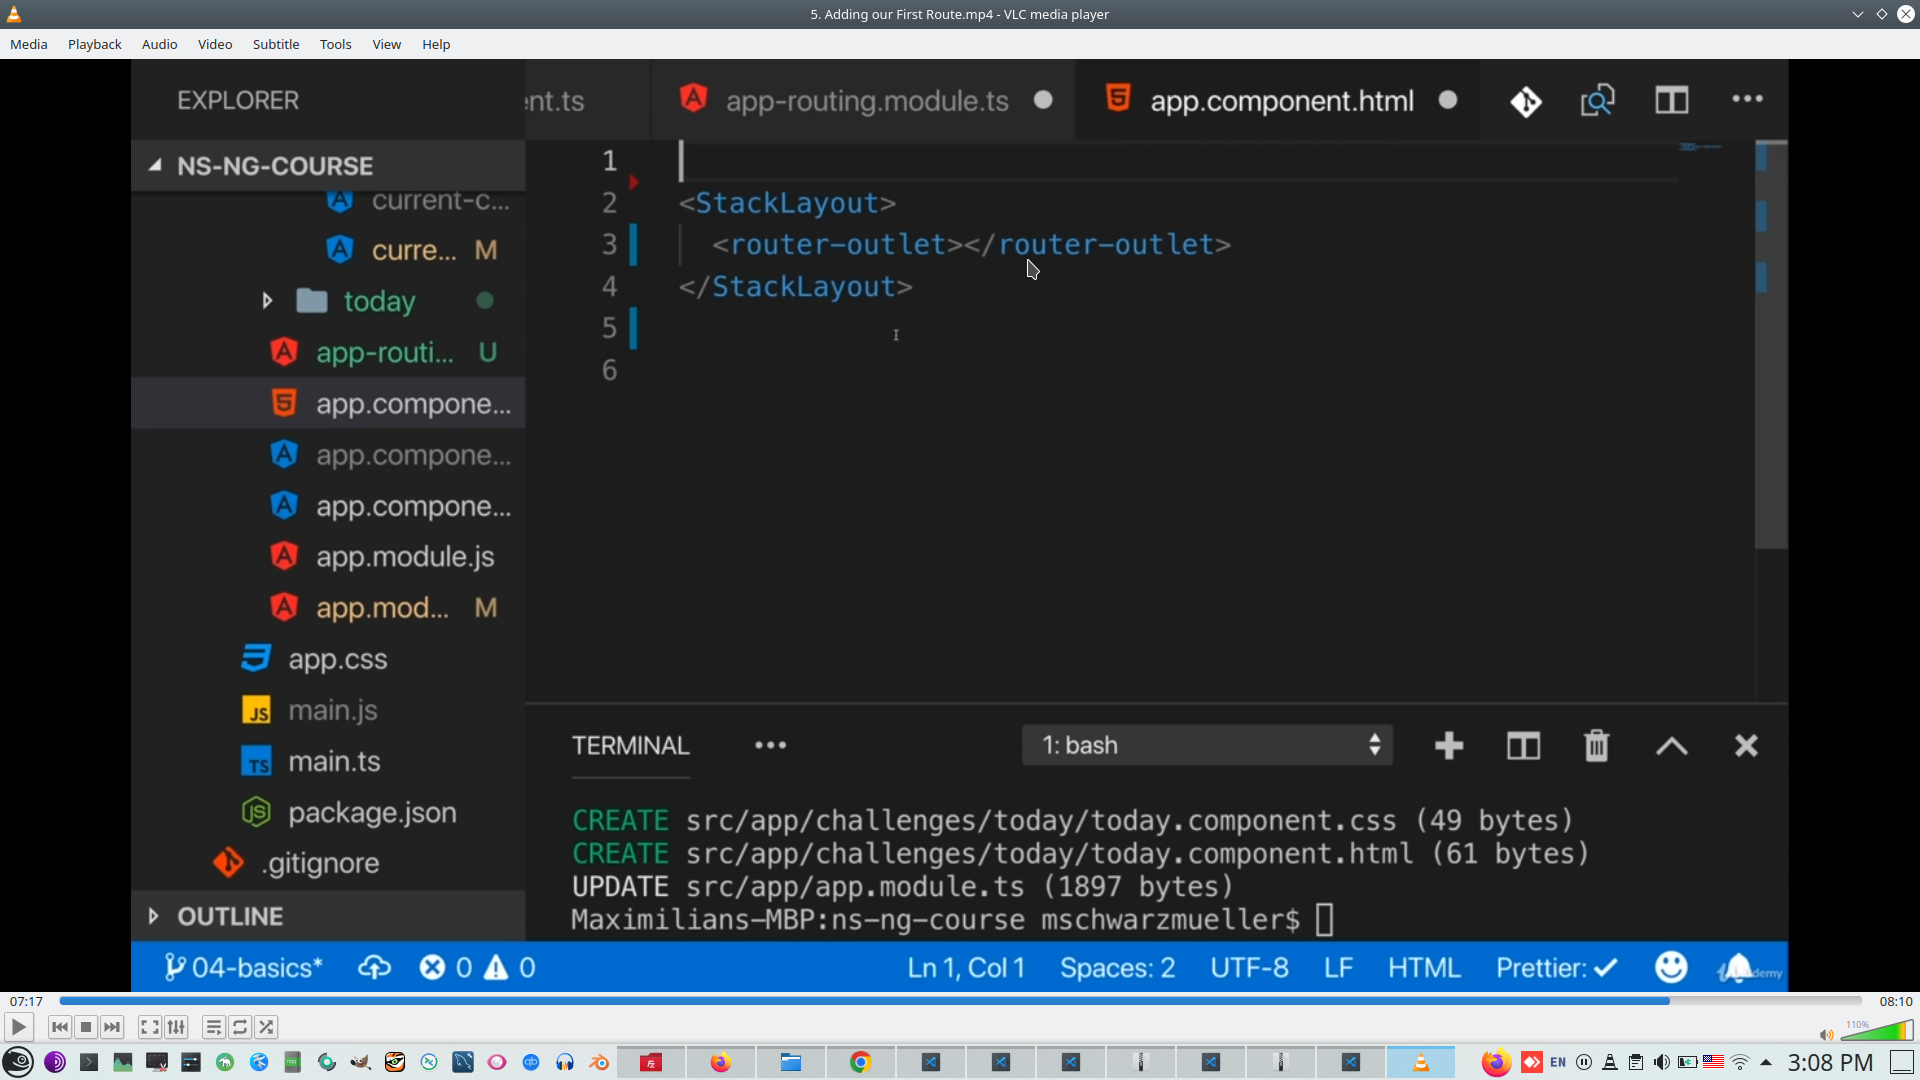
Router-outlet can start app with empty path ''
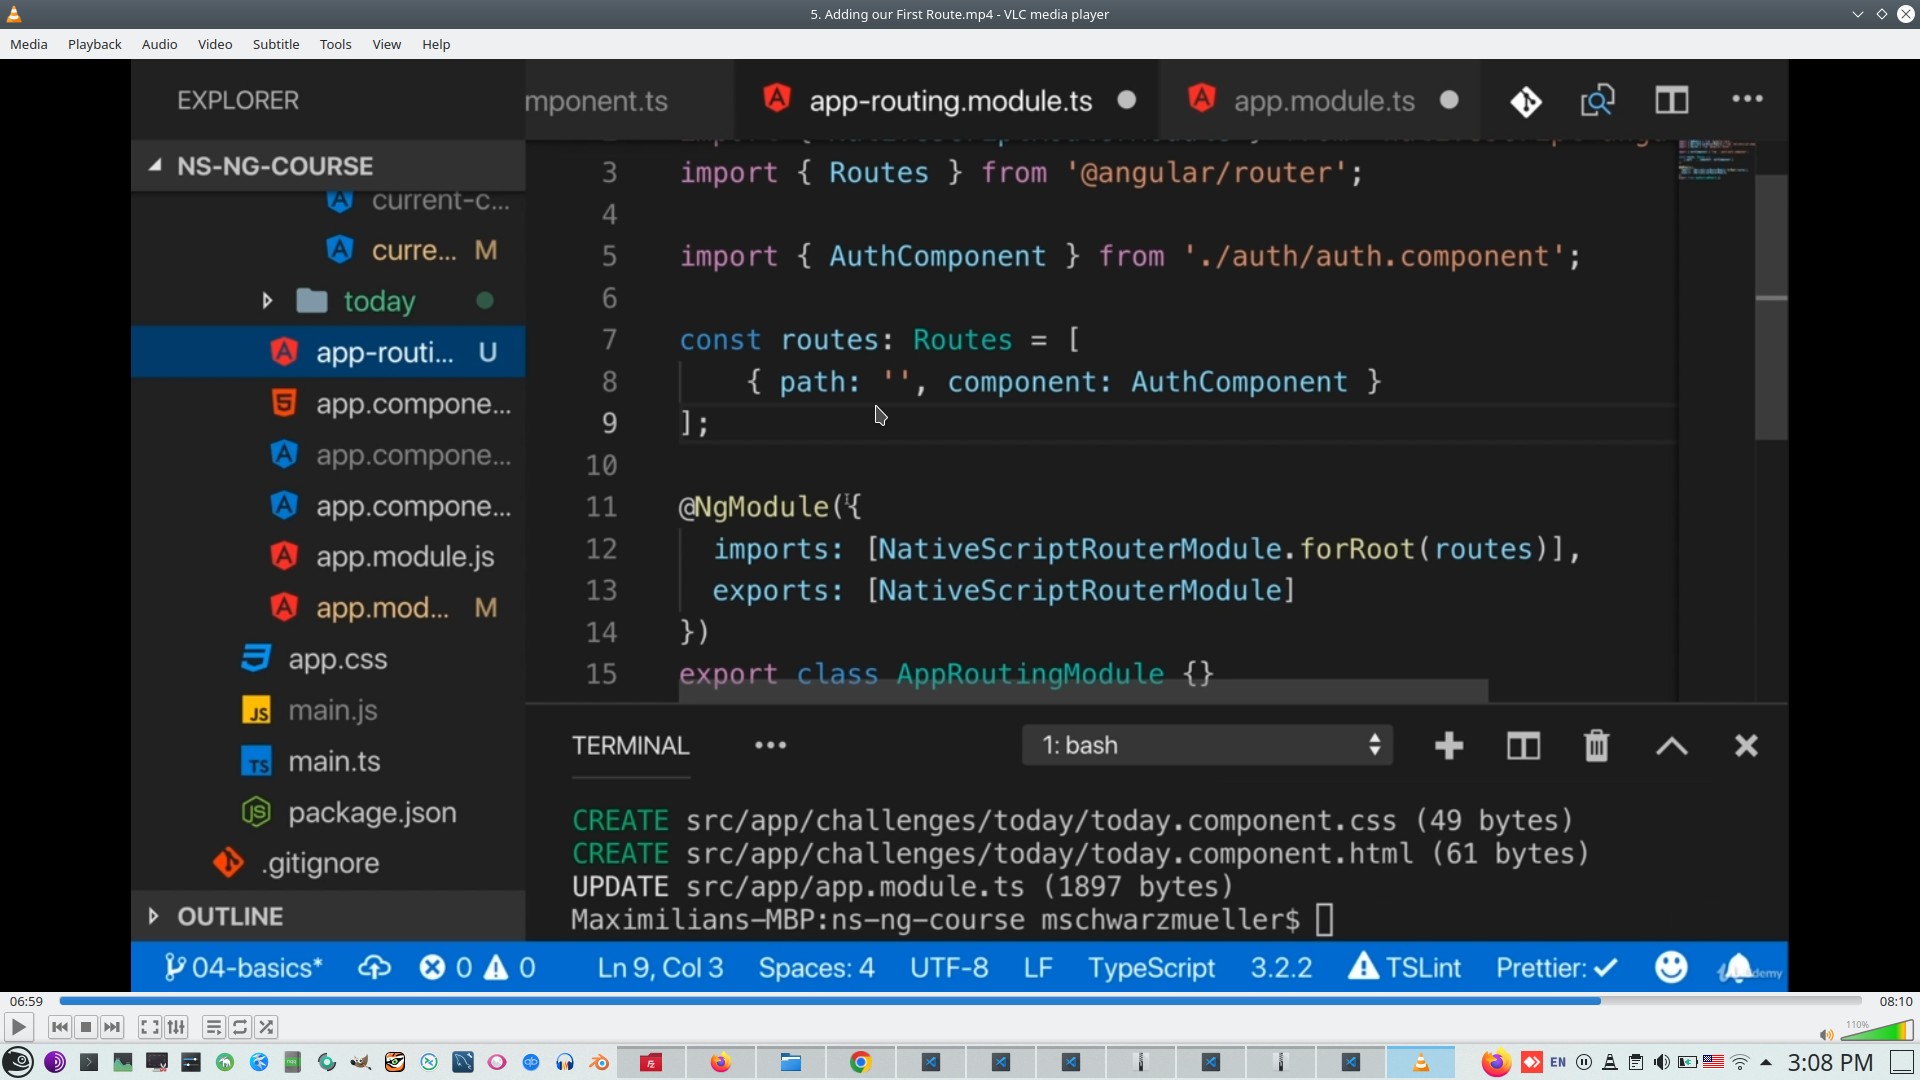
'router-outlet' include SPA-page navigation to start component
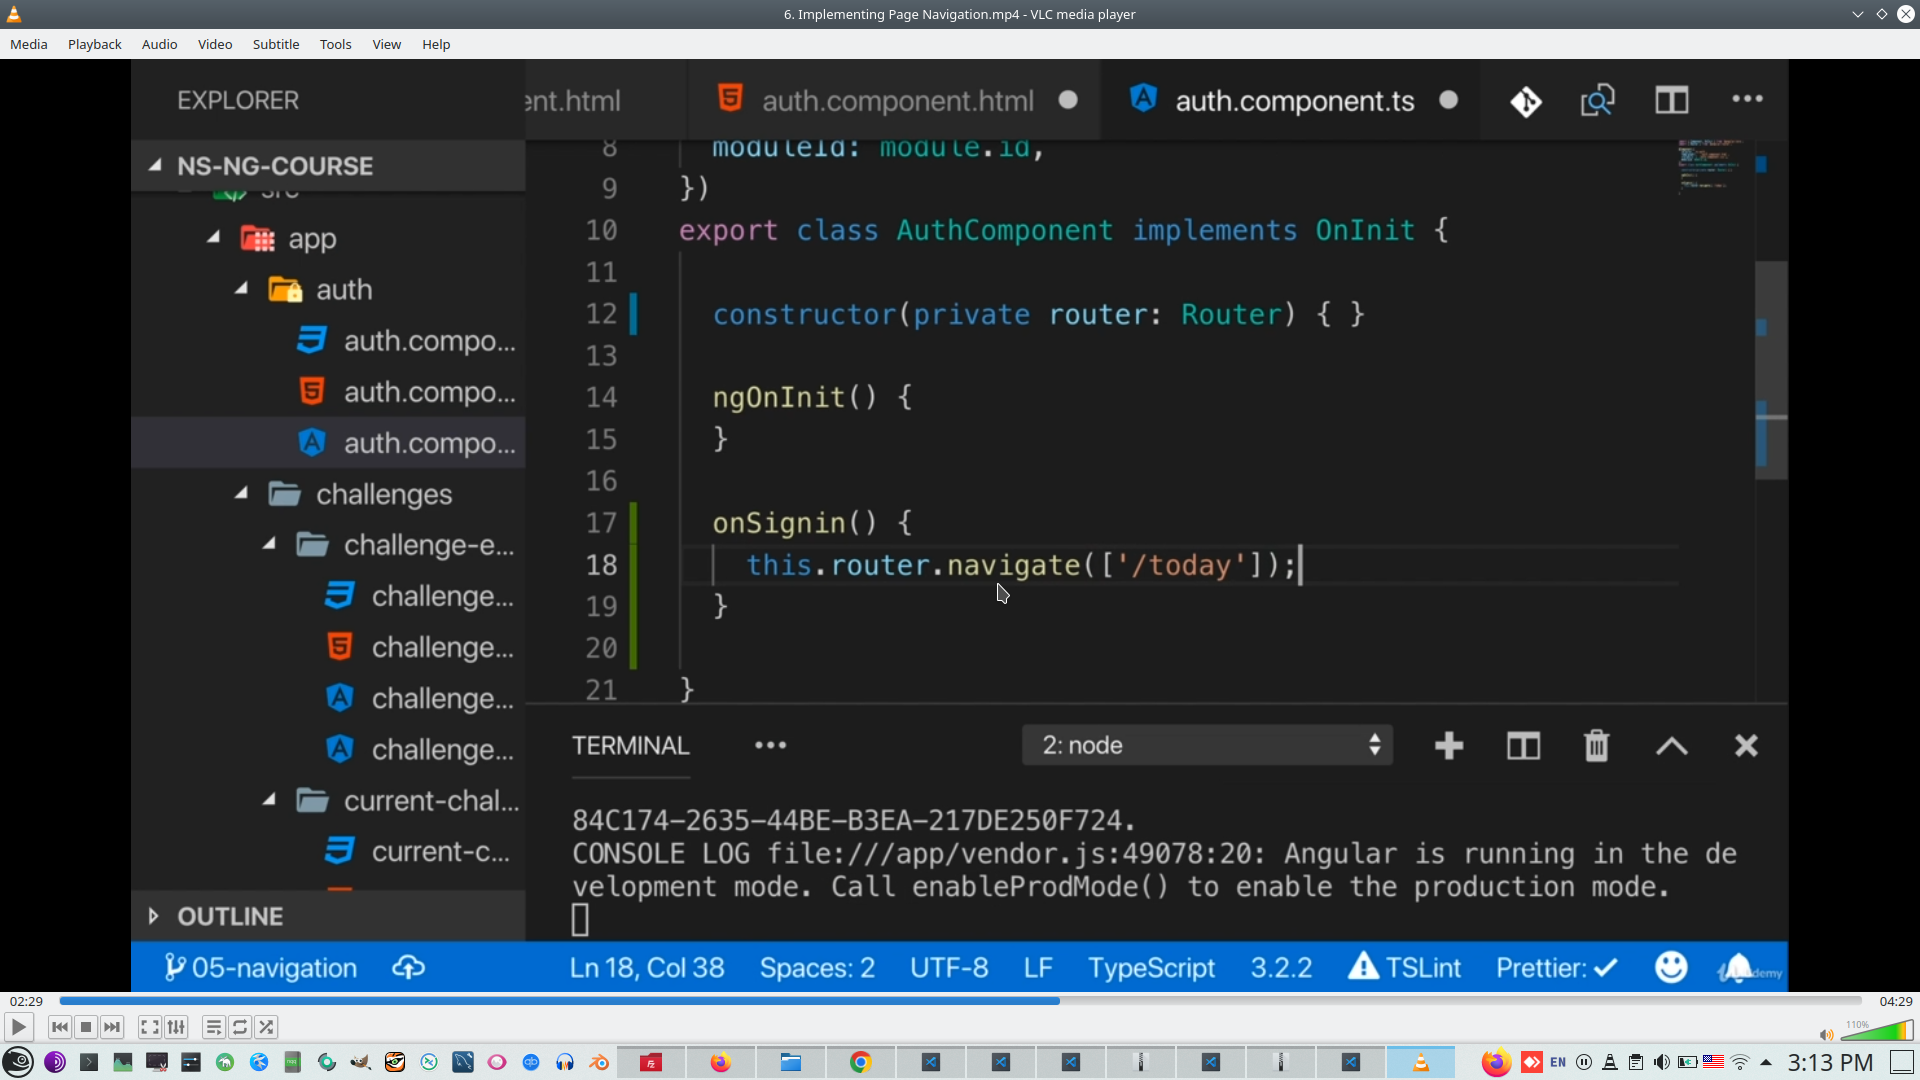
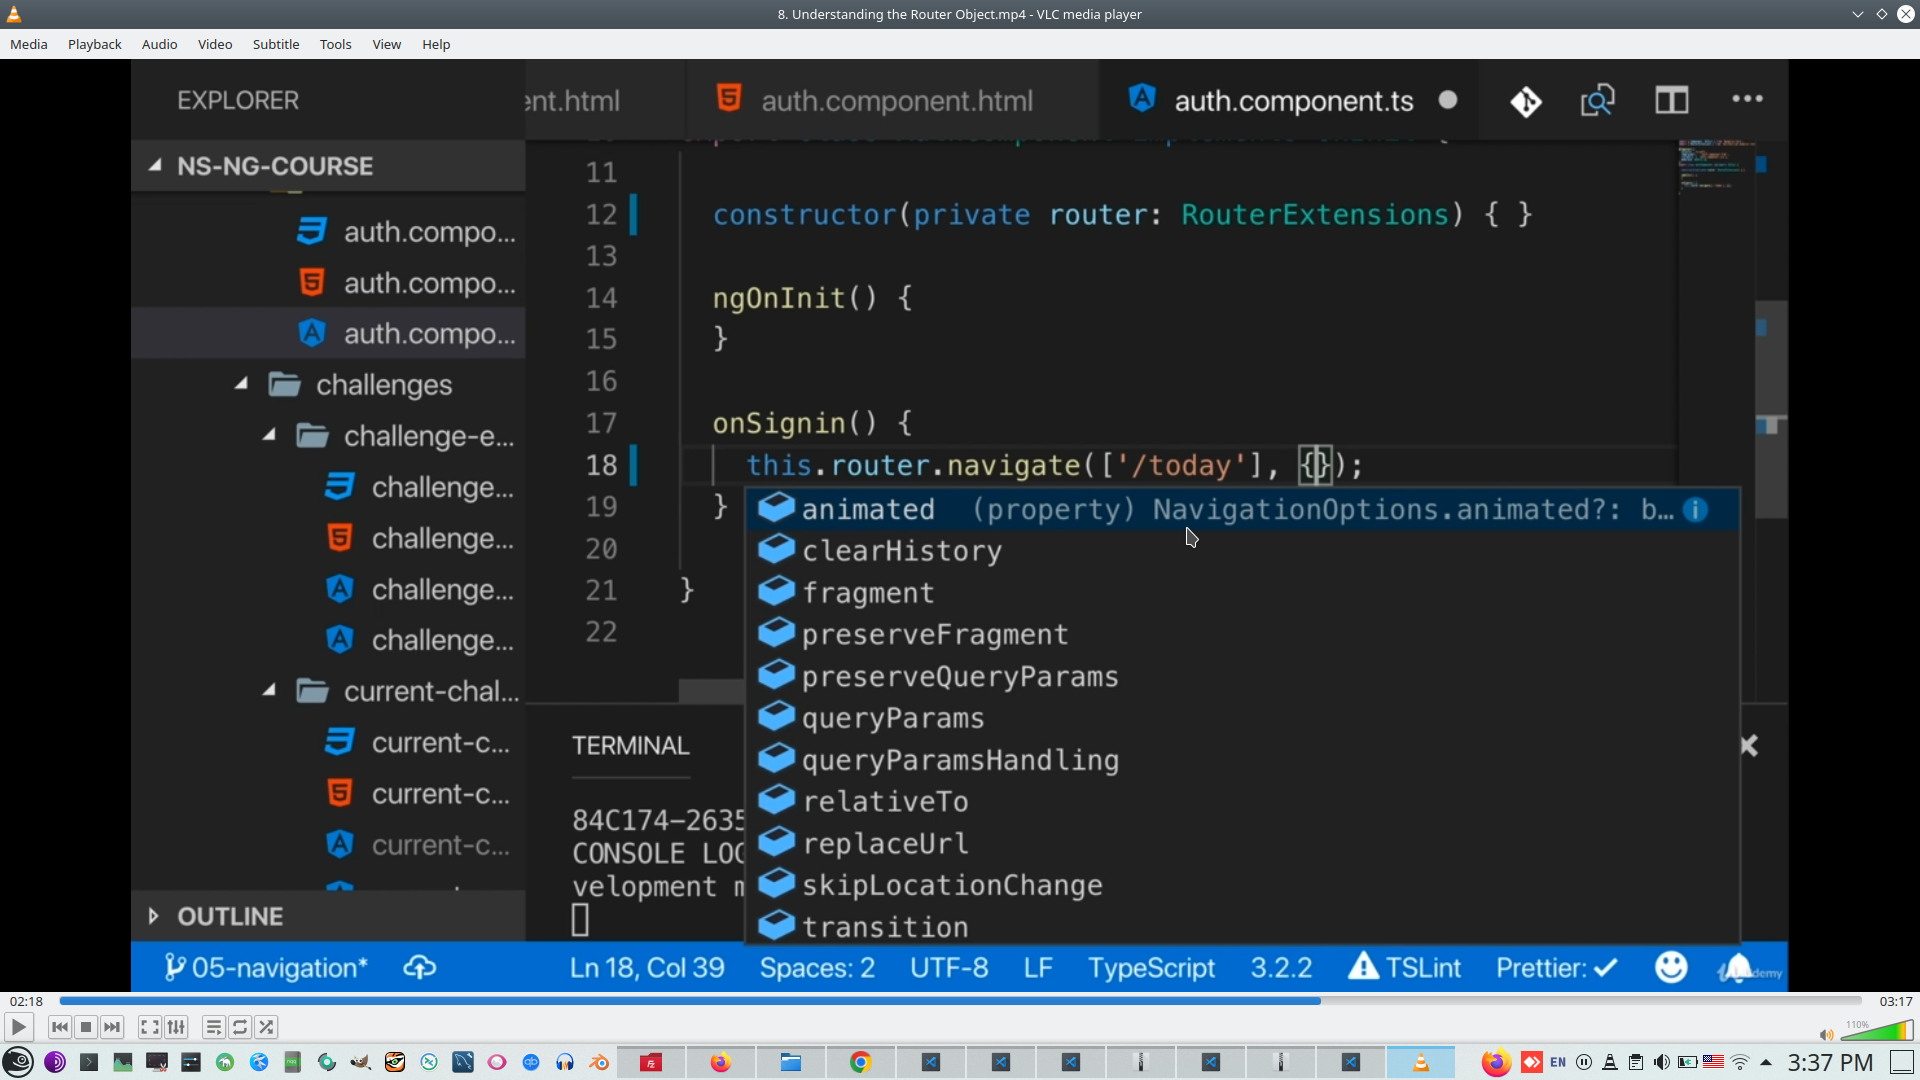
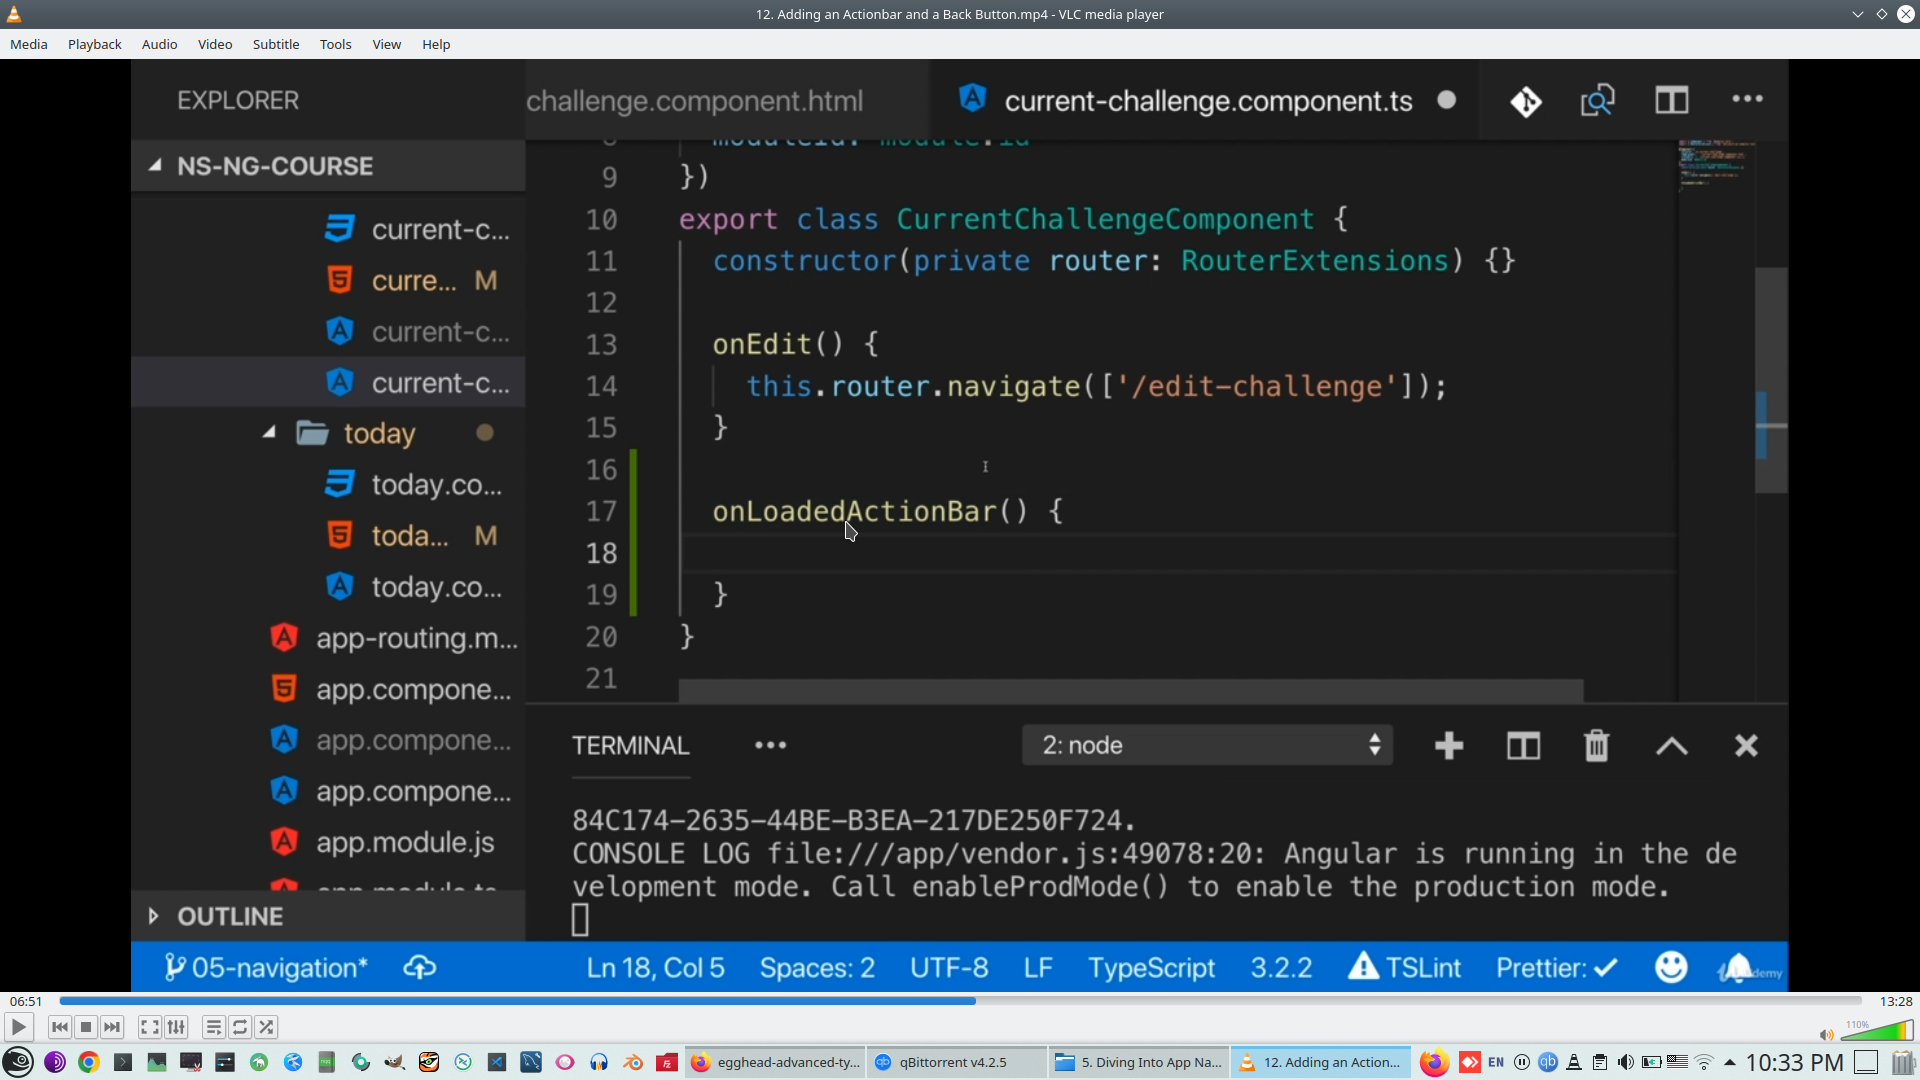
We can inject router module to any component
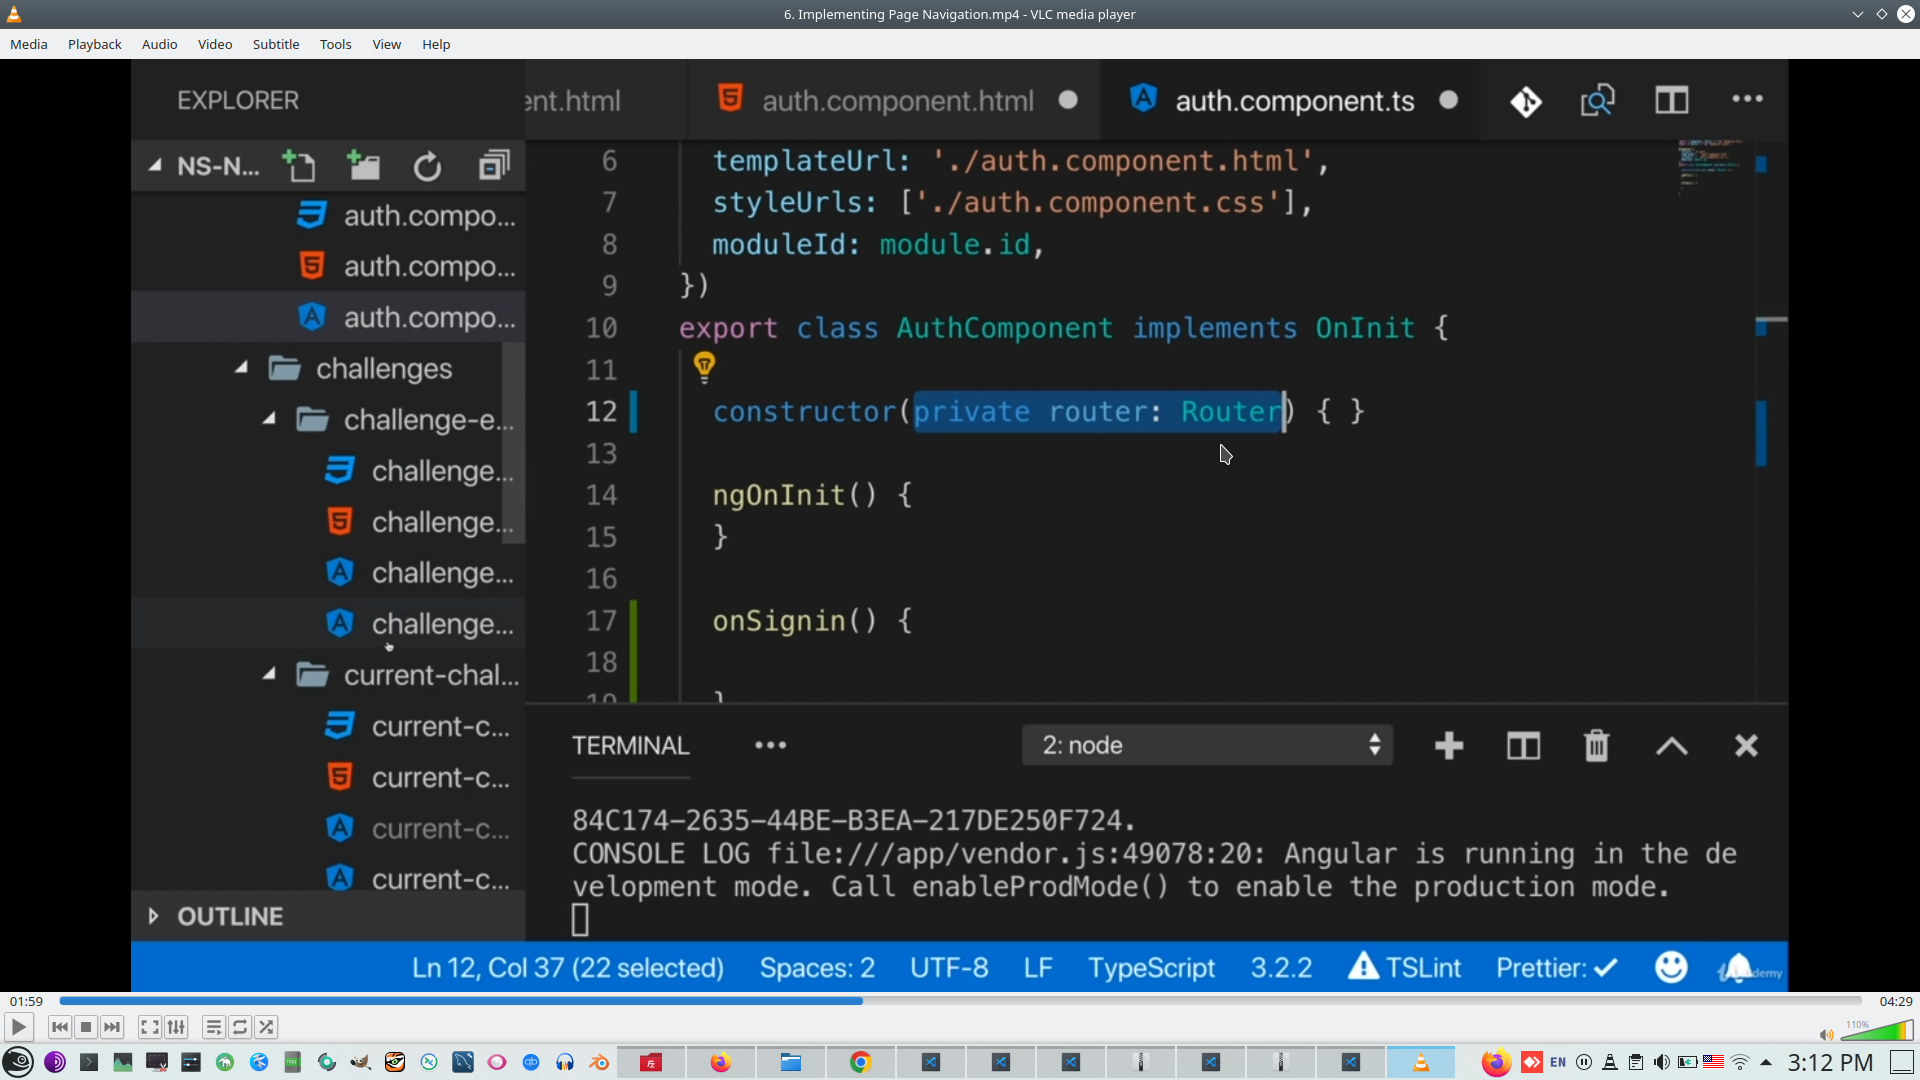
And use Router.Navigate for go to needed page
Mobile phone app is not a SPA page, therefore we need replace normal Angular router to NS page wrapper to components 'page-router-outlet'
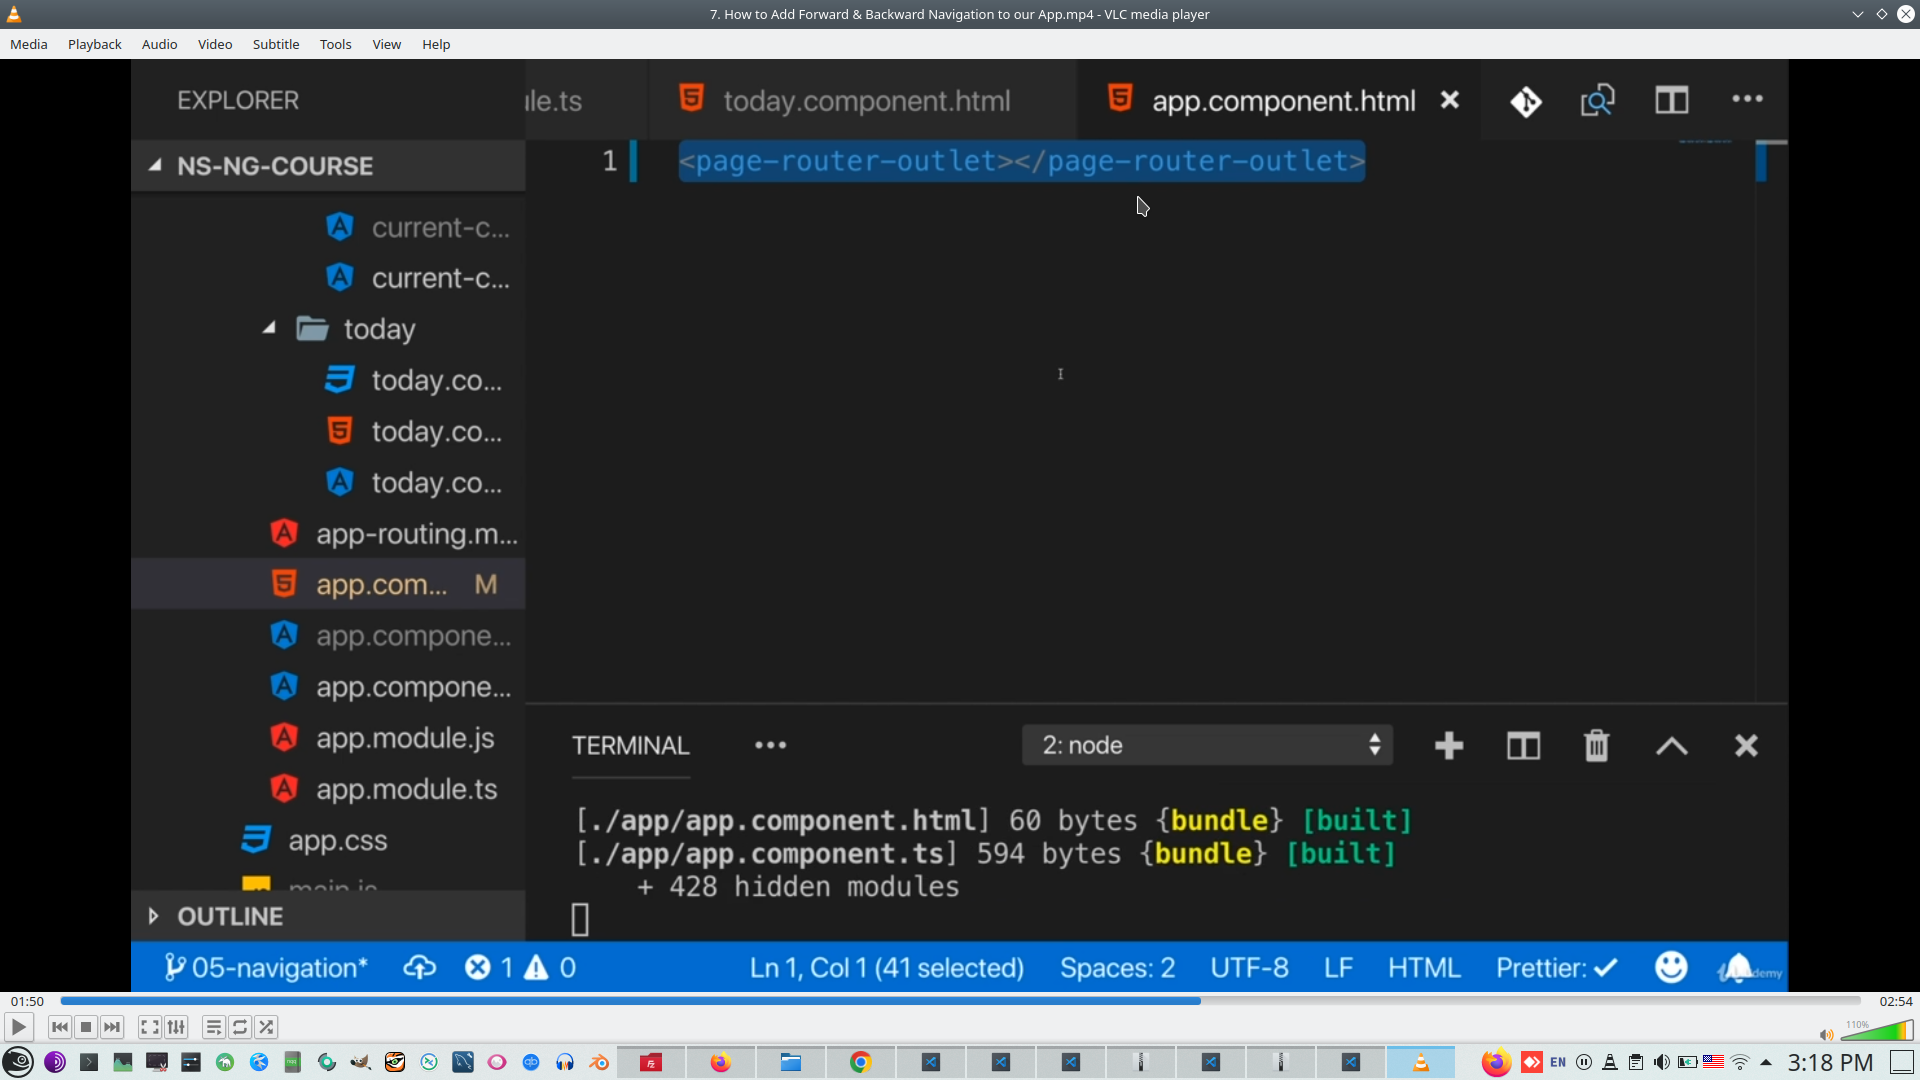
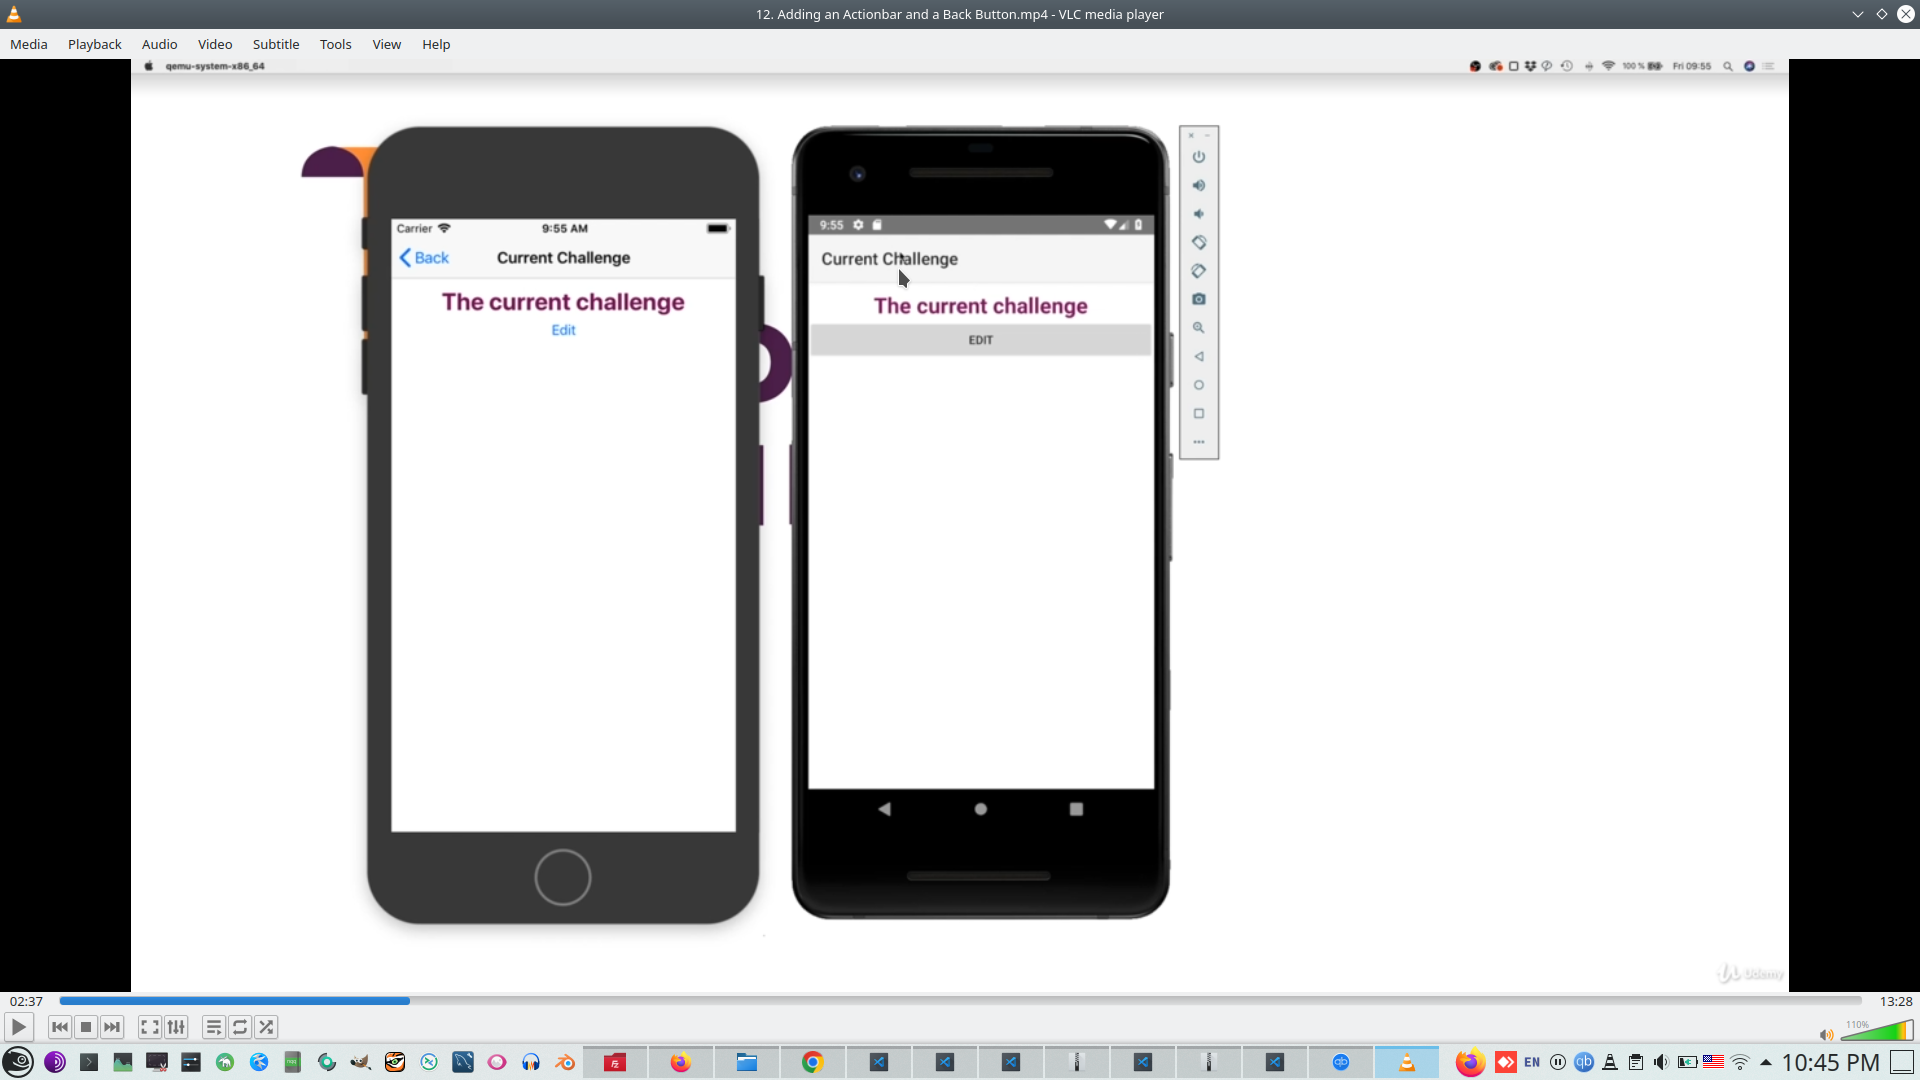
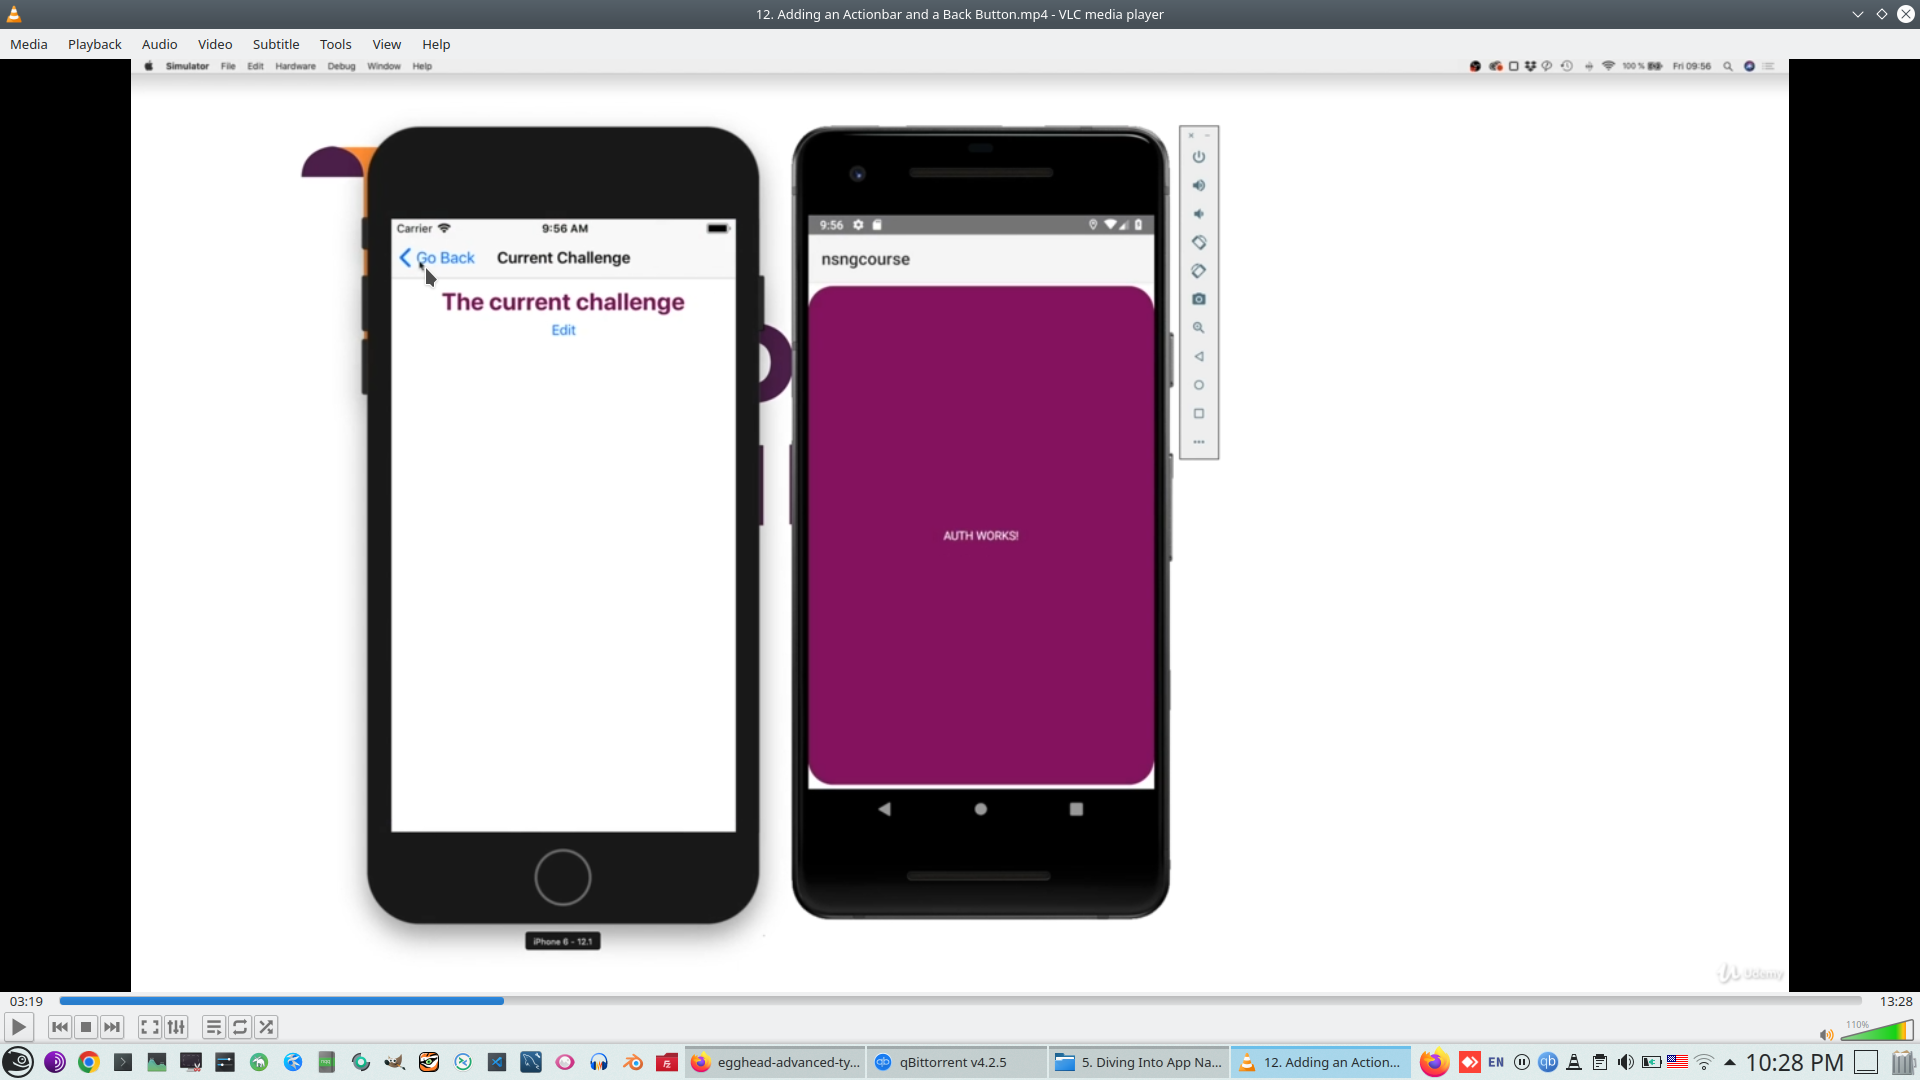
Nornally 'page-router-outlet' show '<back' button on IOS and nothing on Android
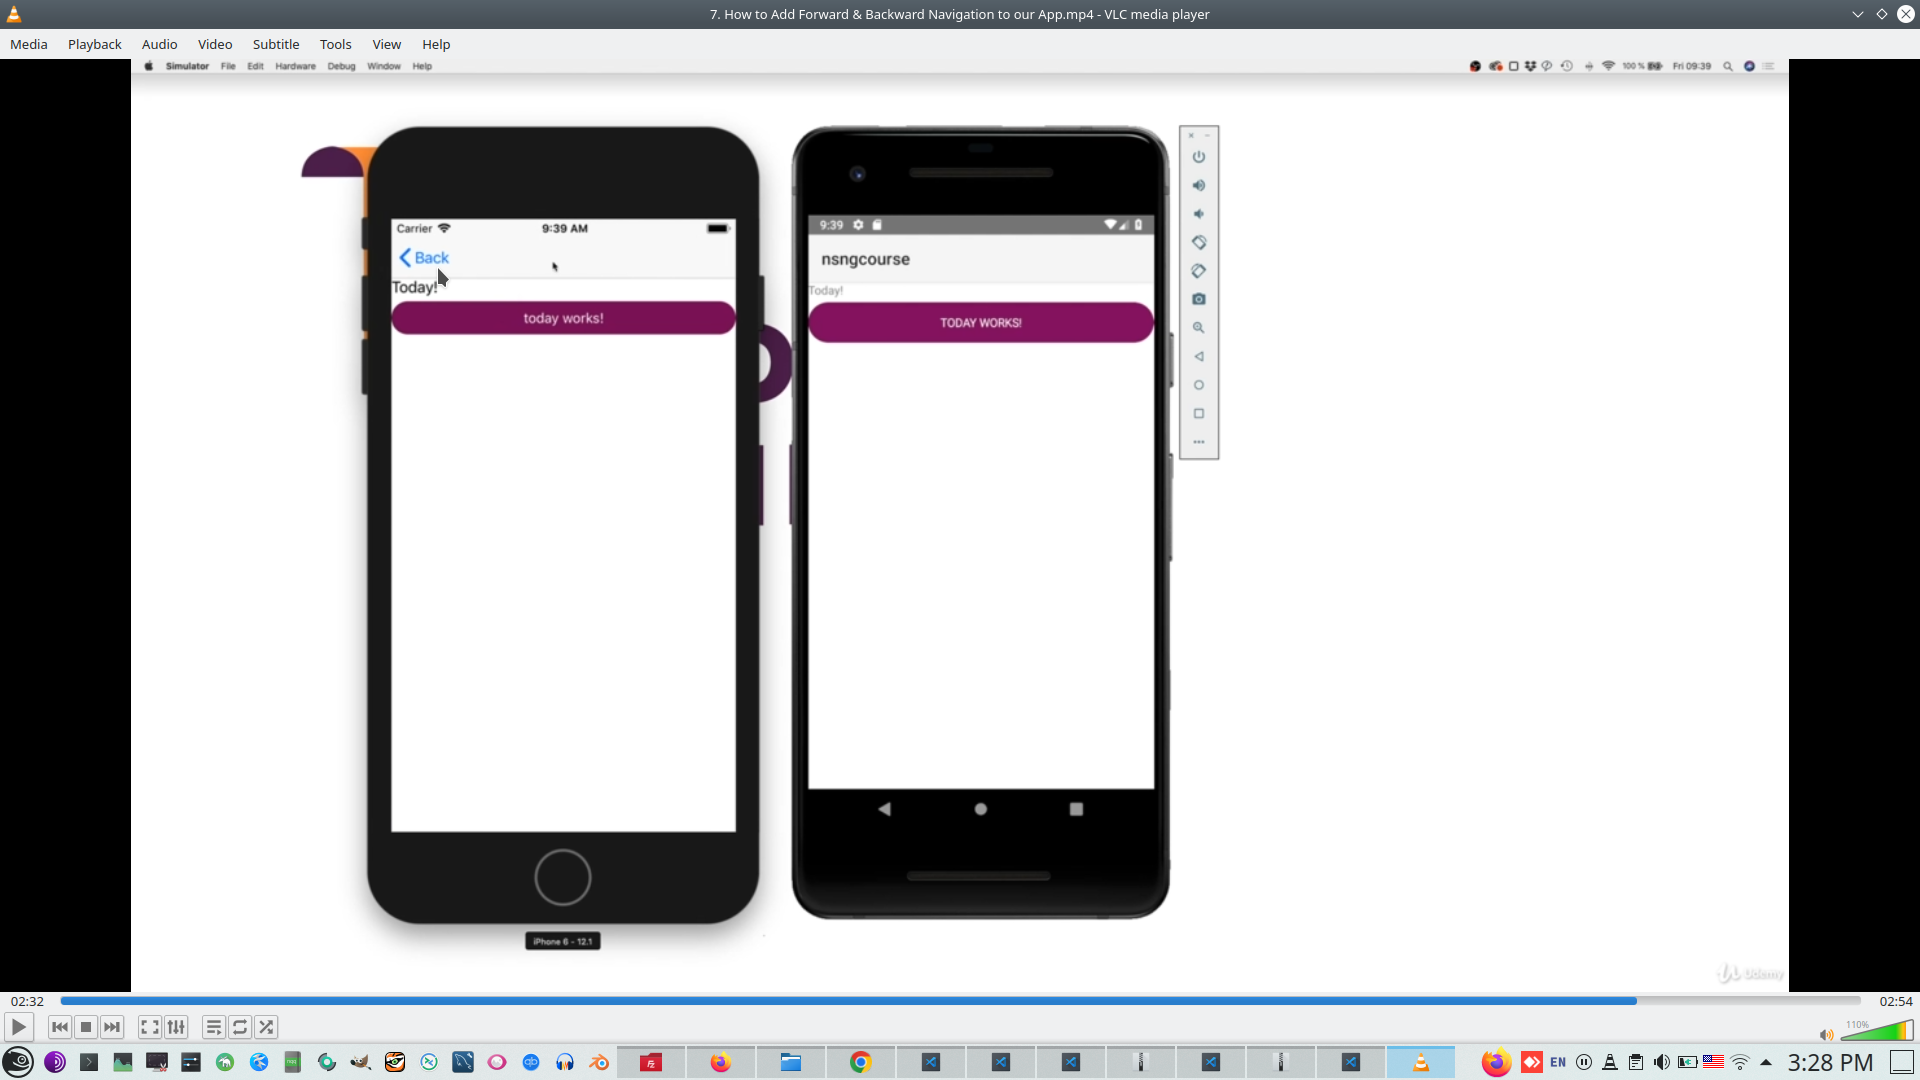
We can inject Routing as NS RouterExtension module, this module has mo method, for example - can we go back? (to prevent exit)

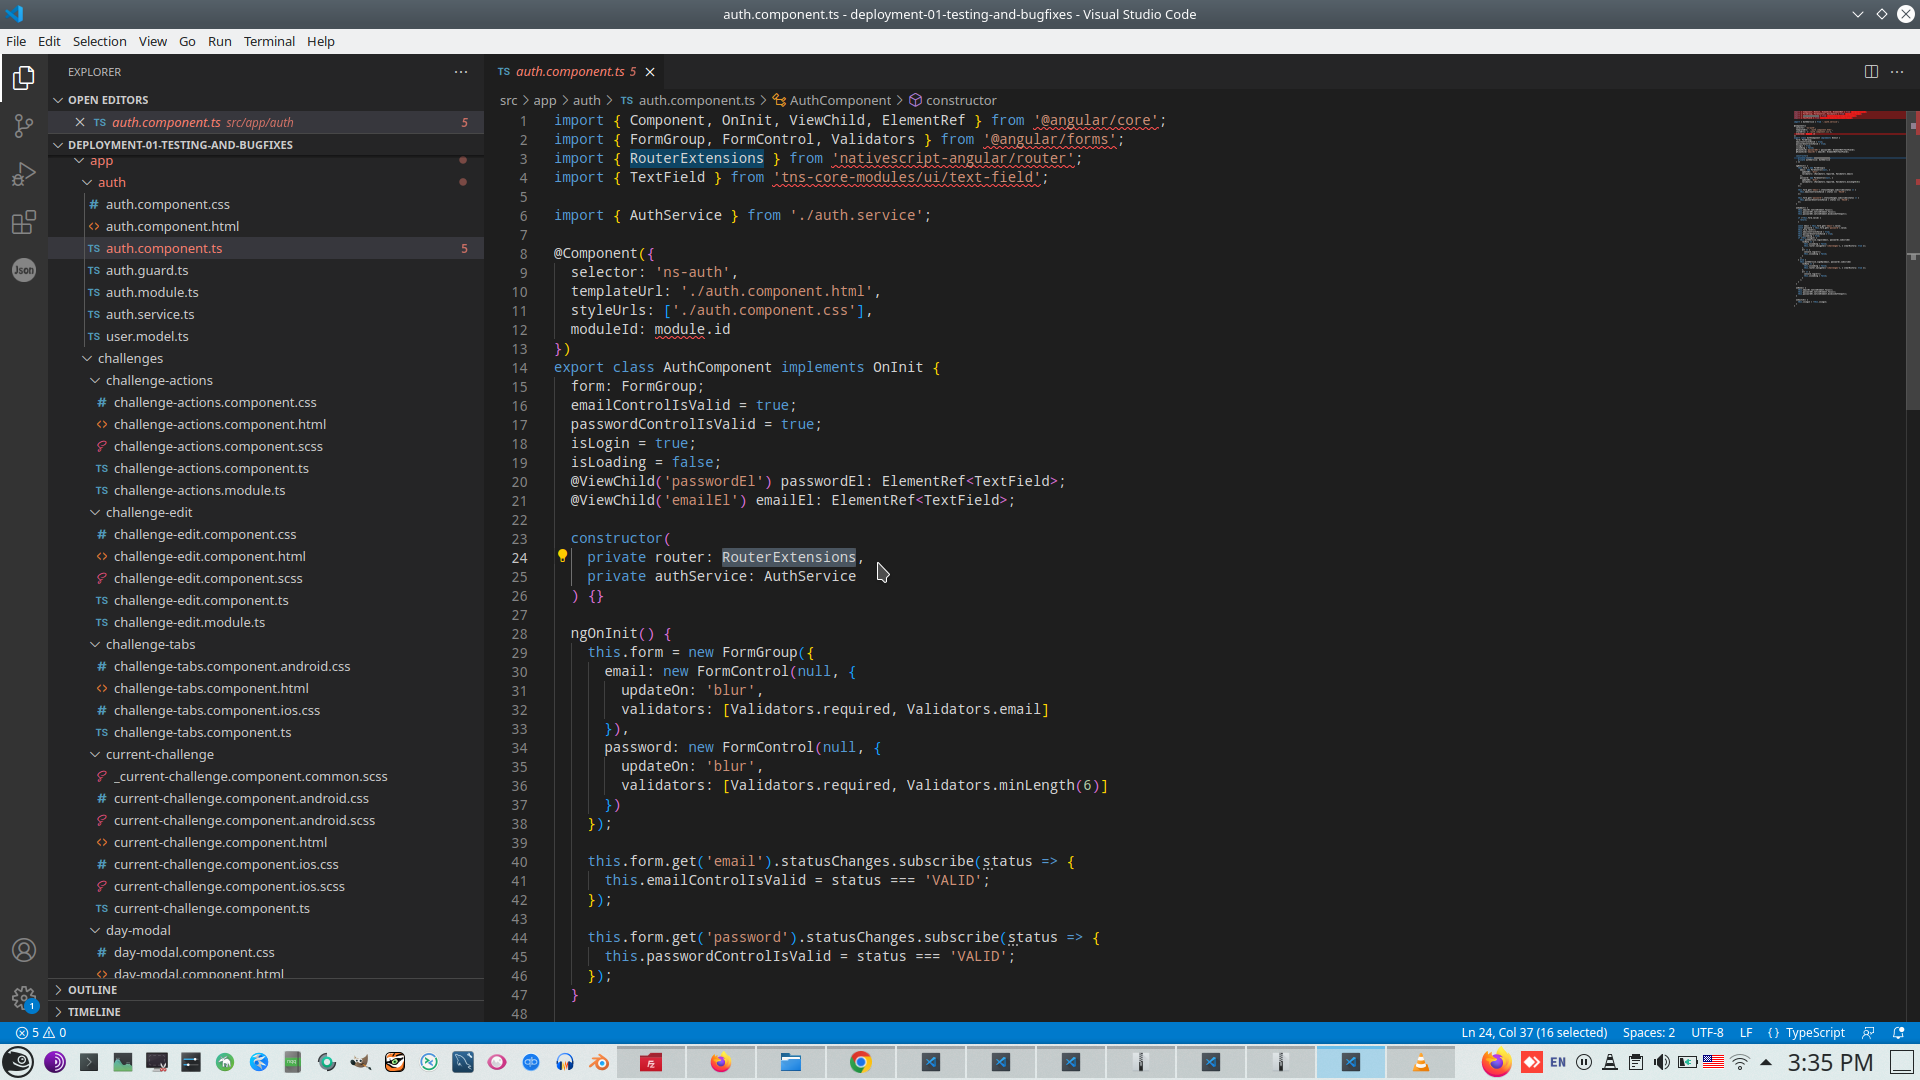
Also extension has animation property for navigation between page
Check routing
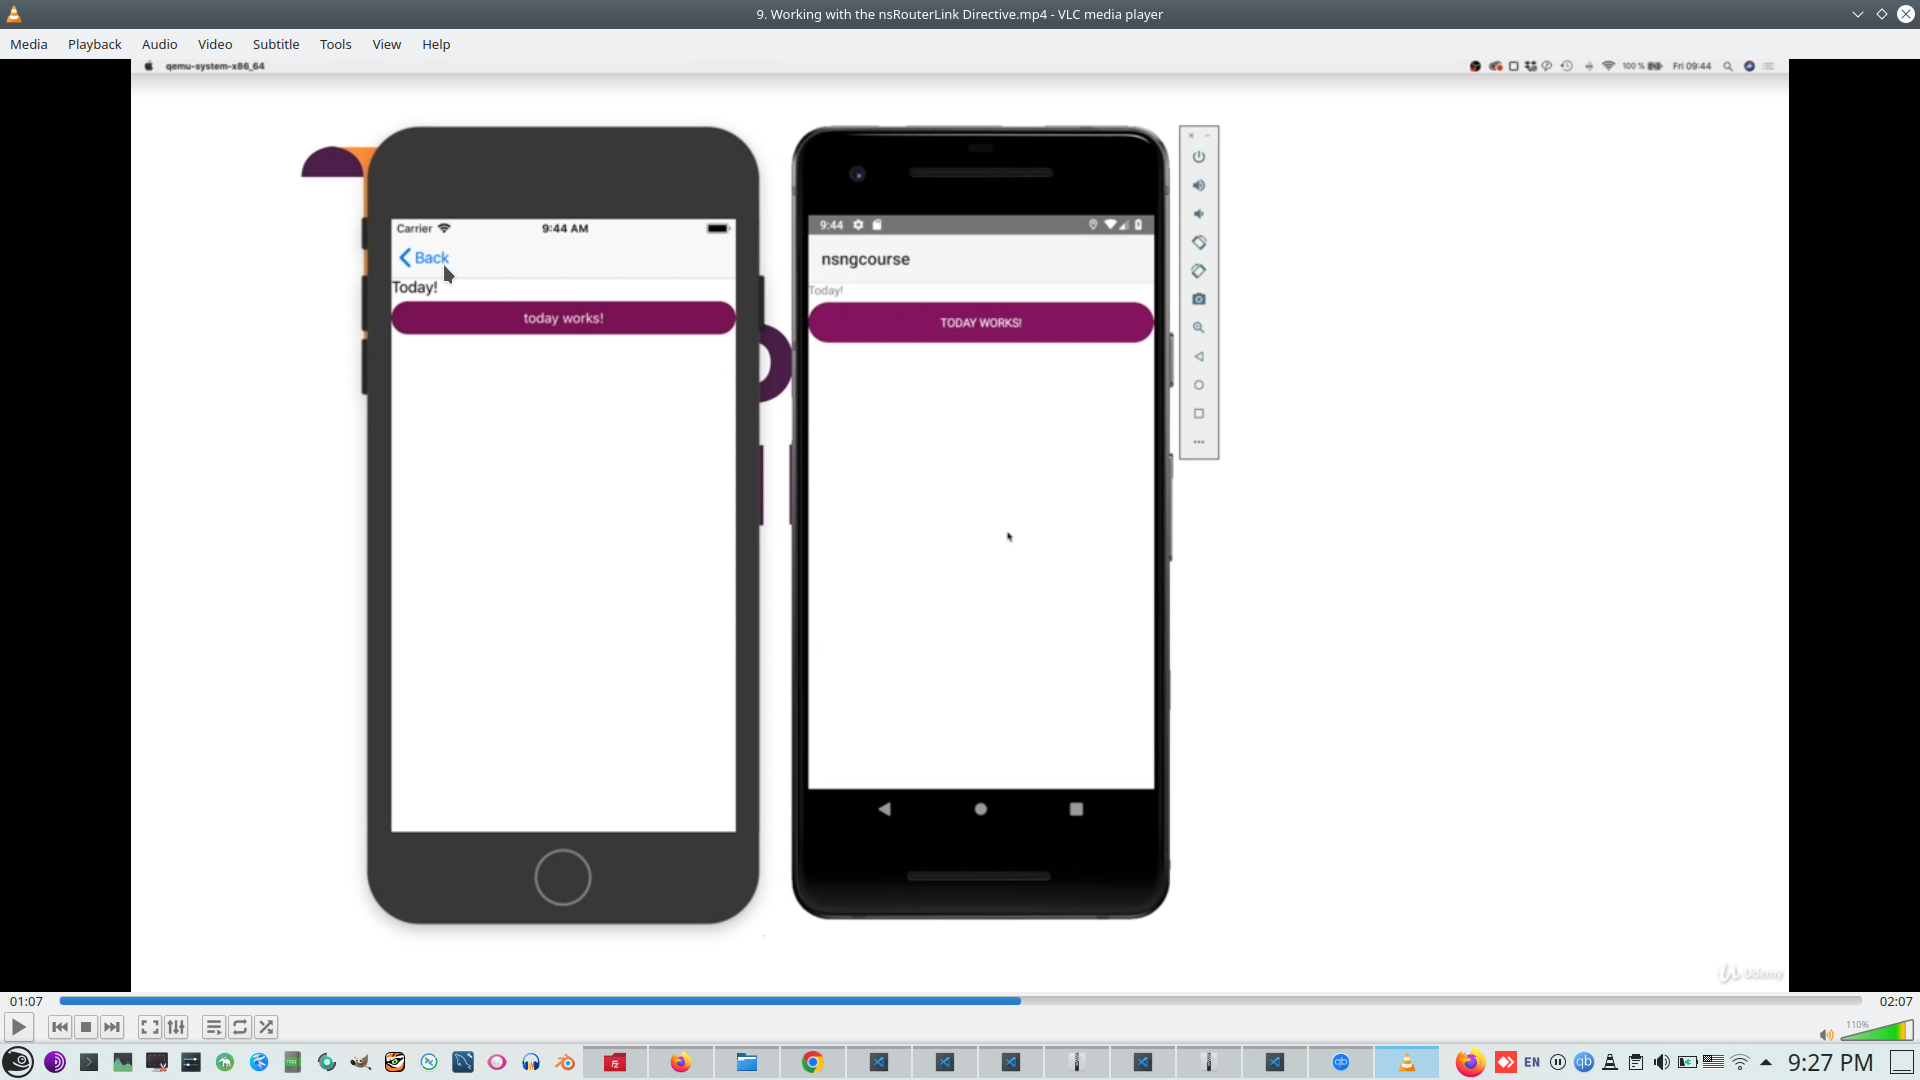
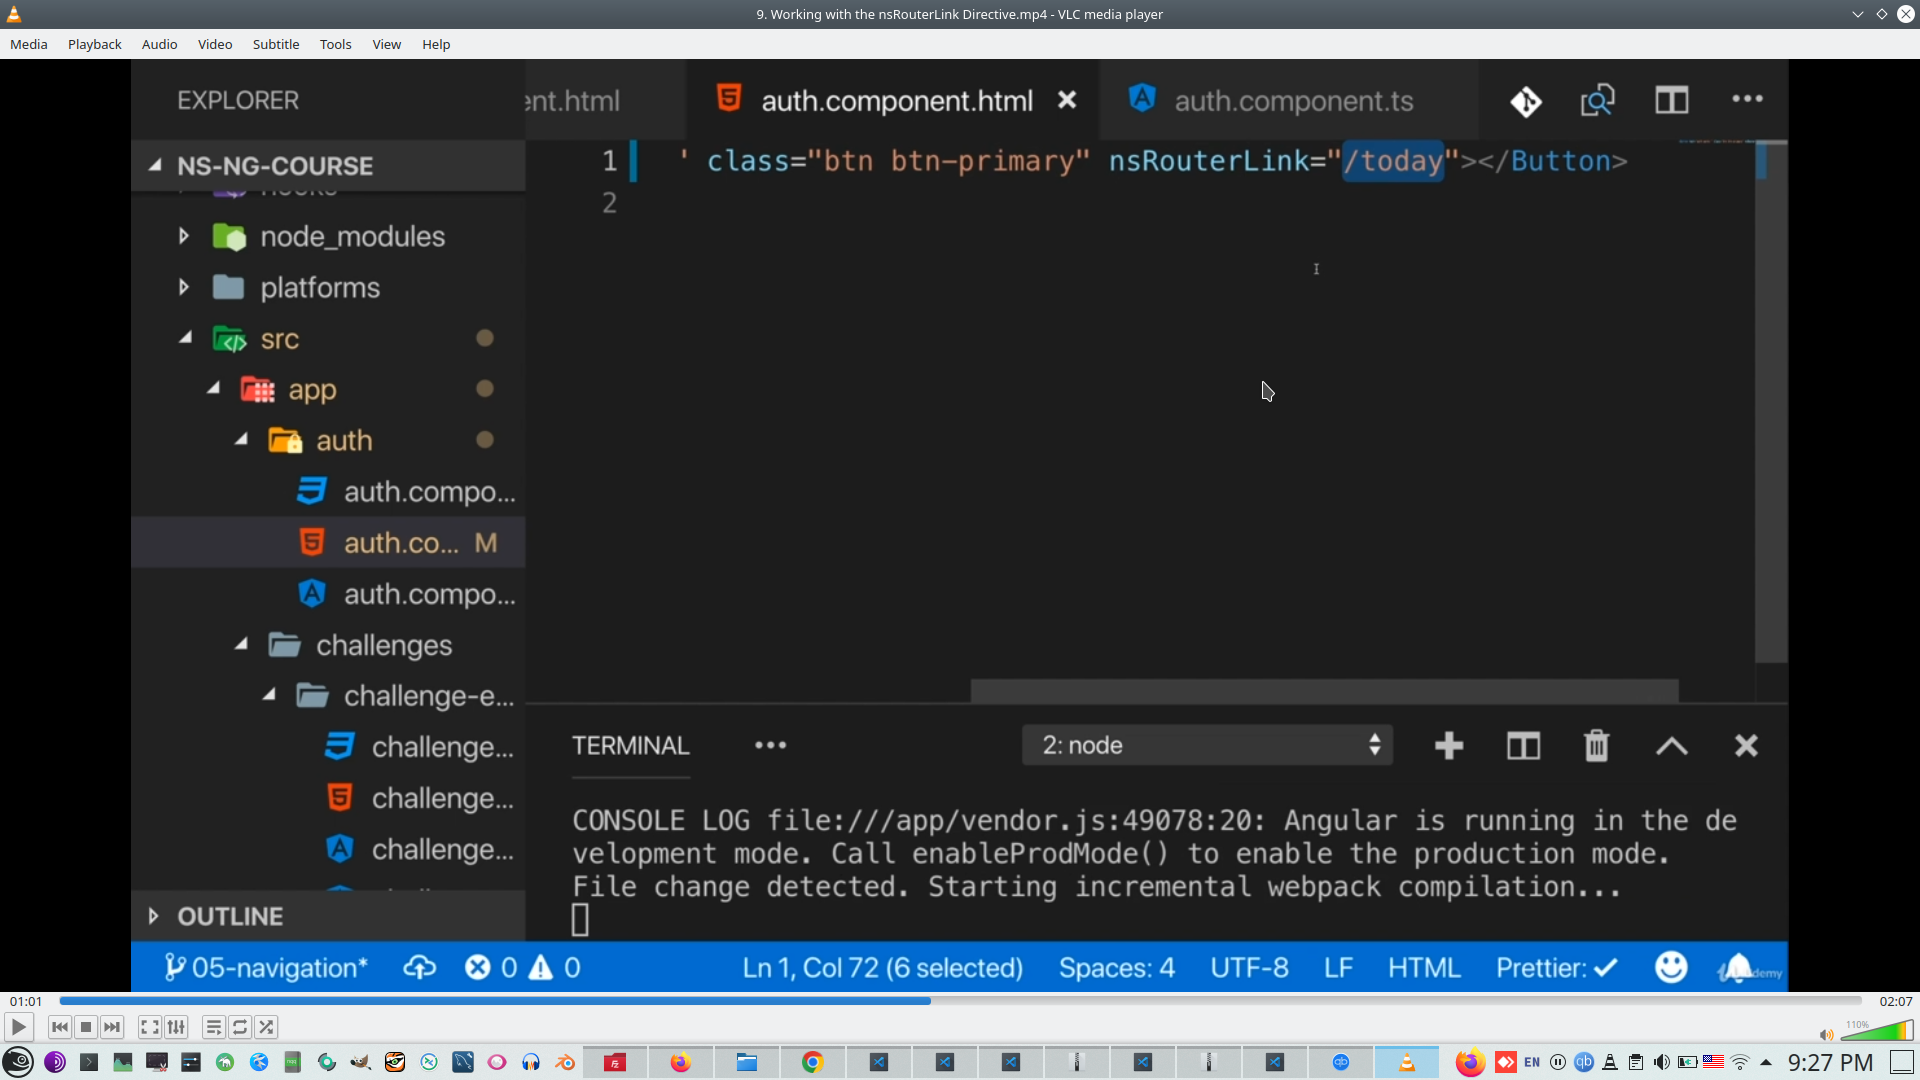
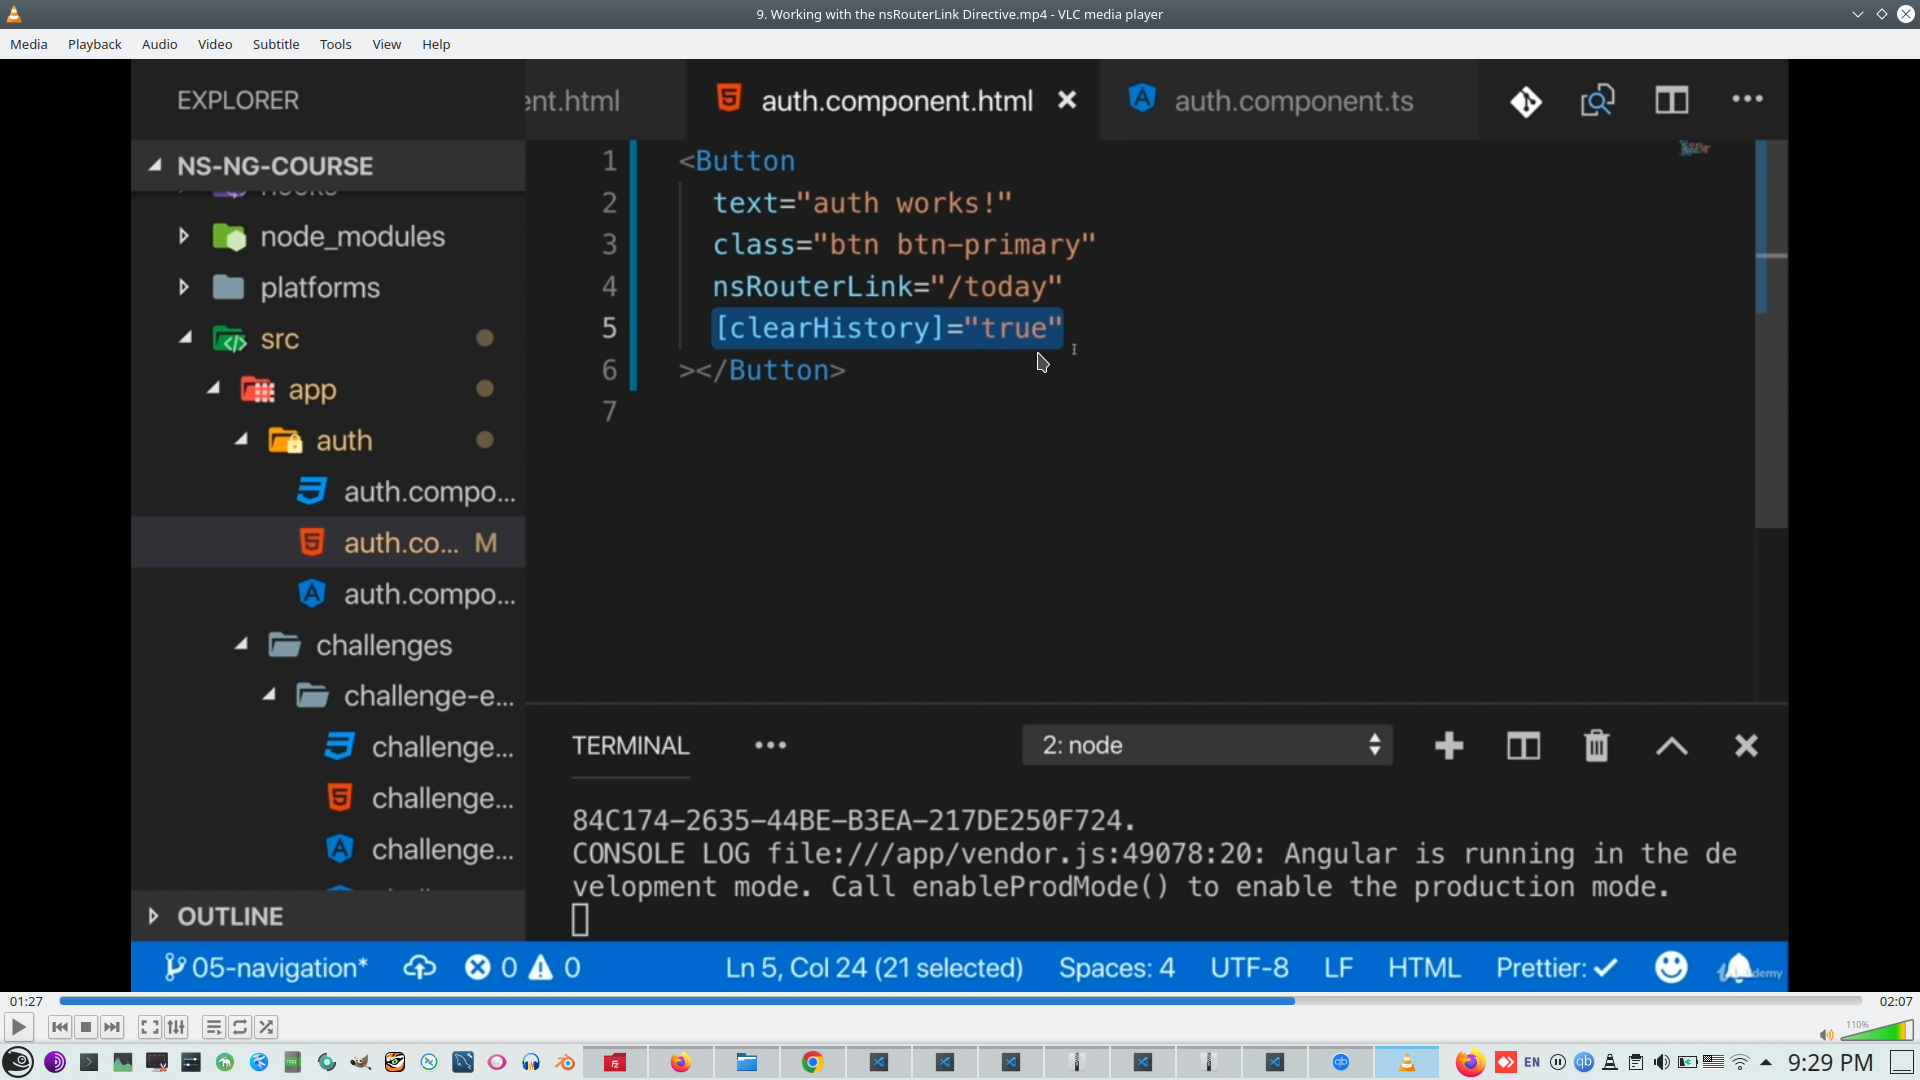
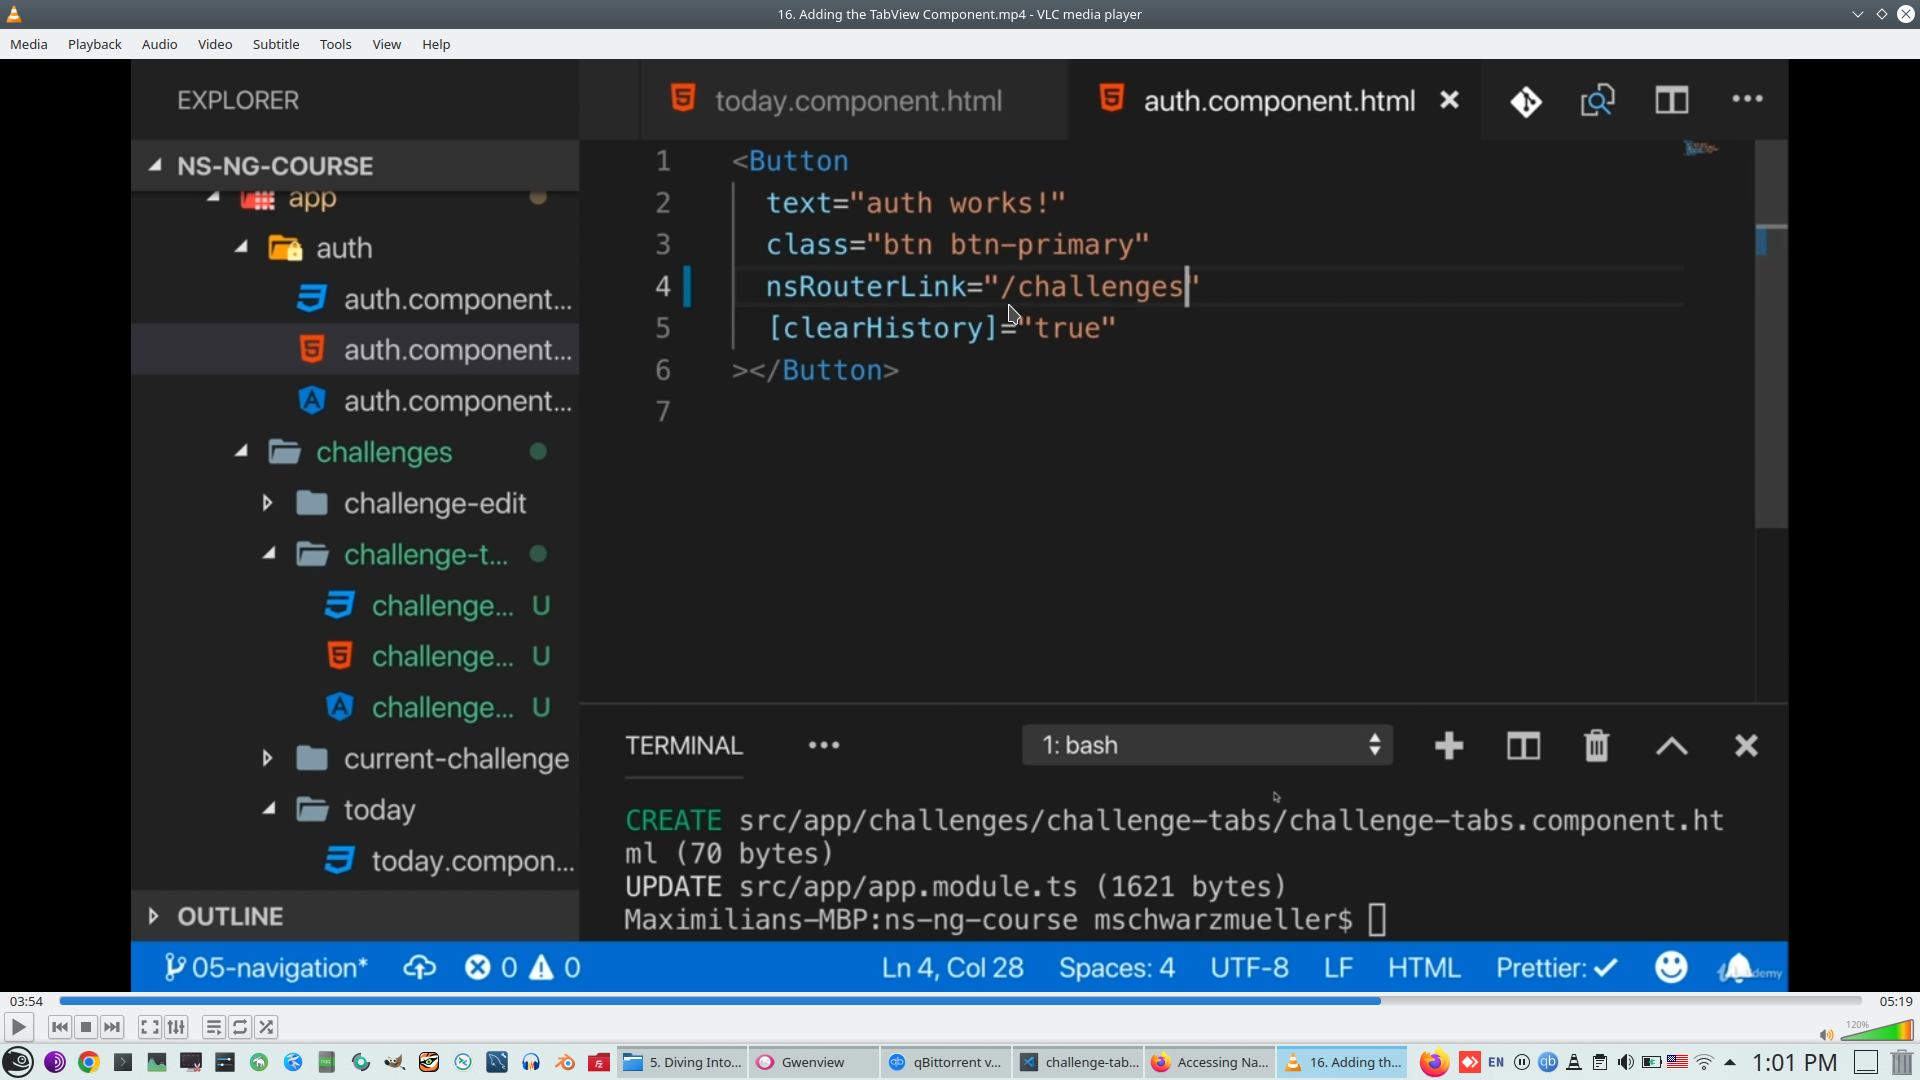
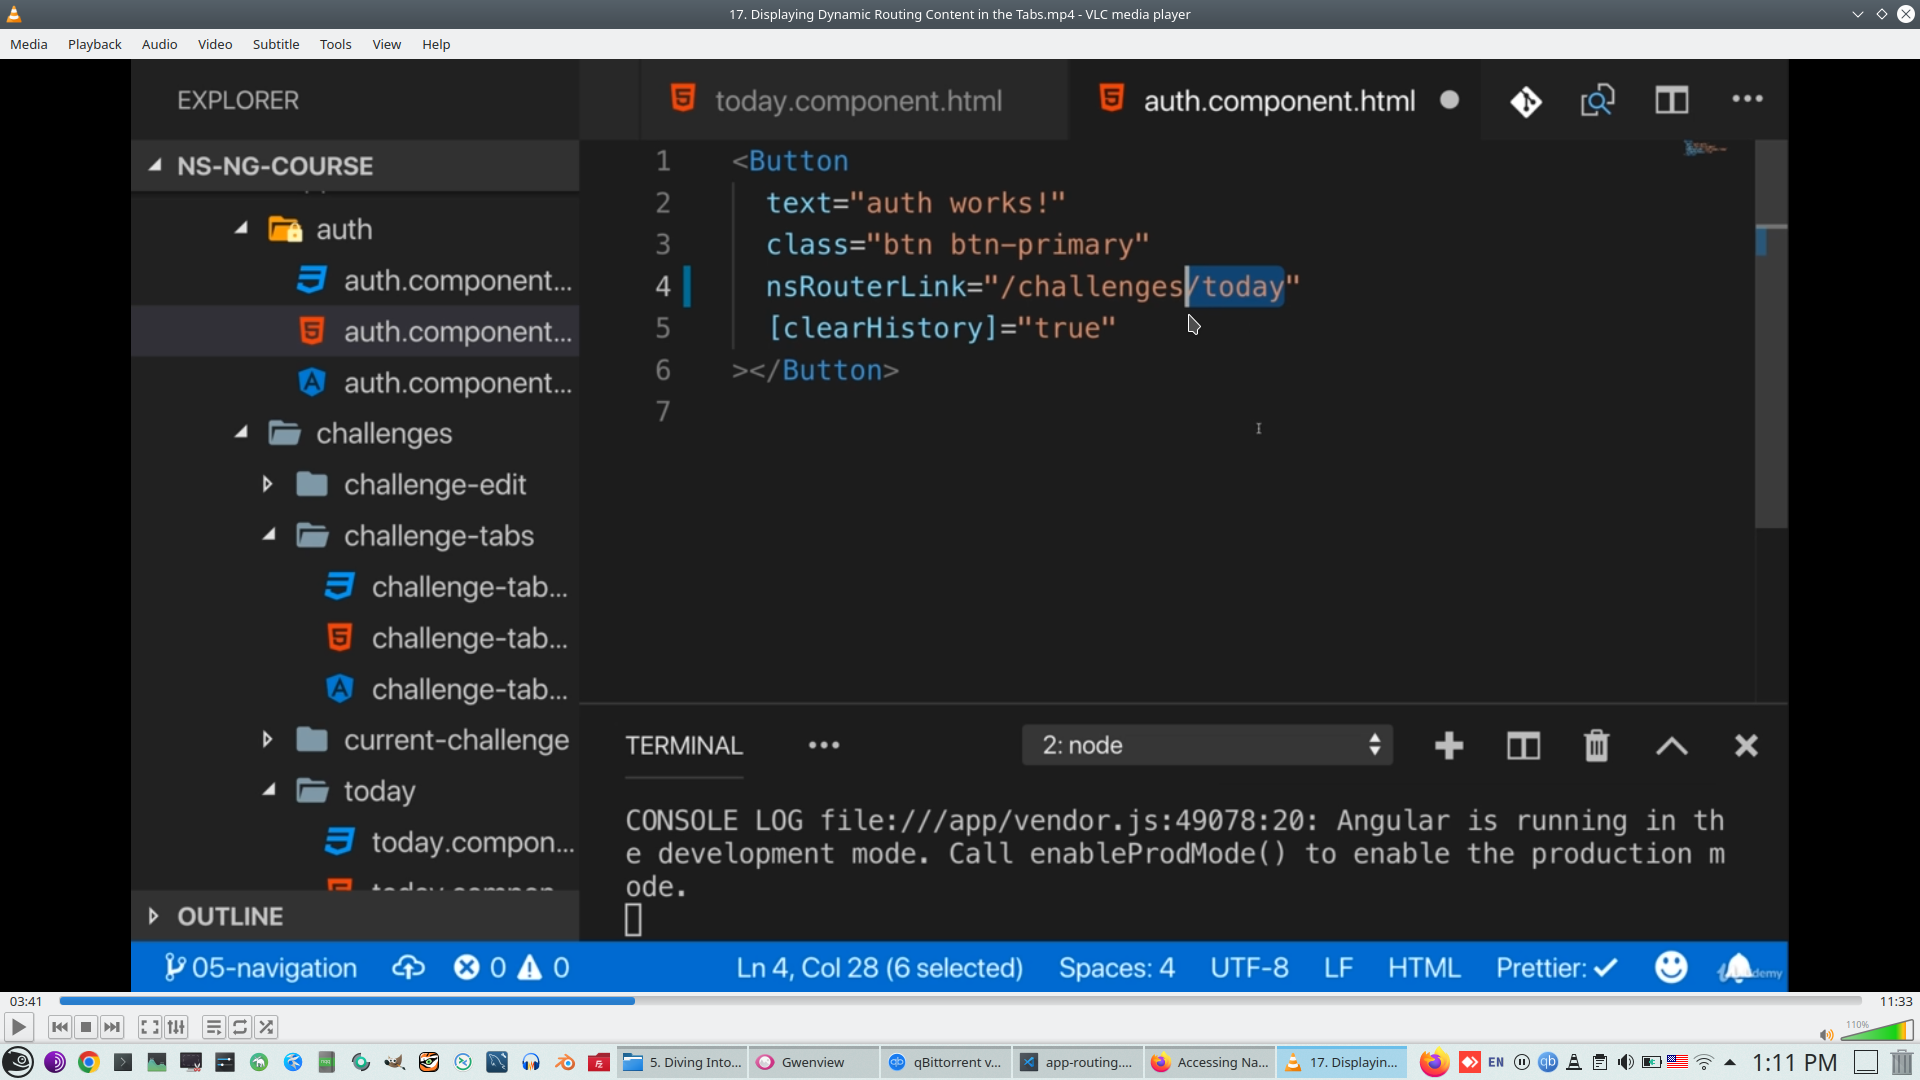
We can use in button nsRouterLink property
And ClearHistory property to prevent application exit
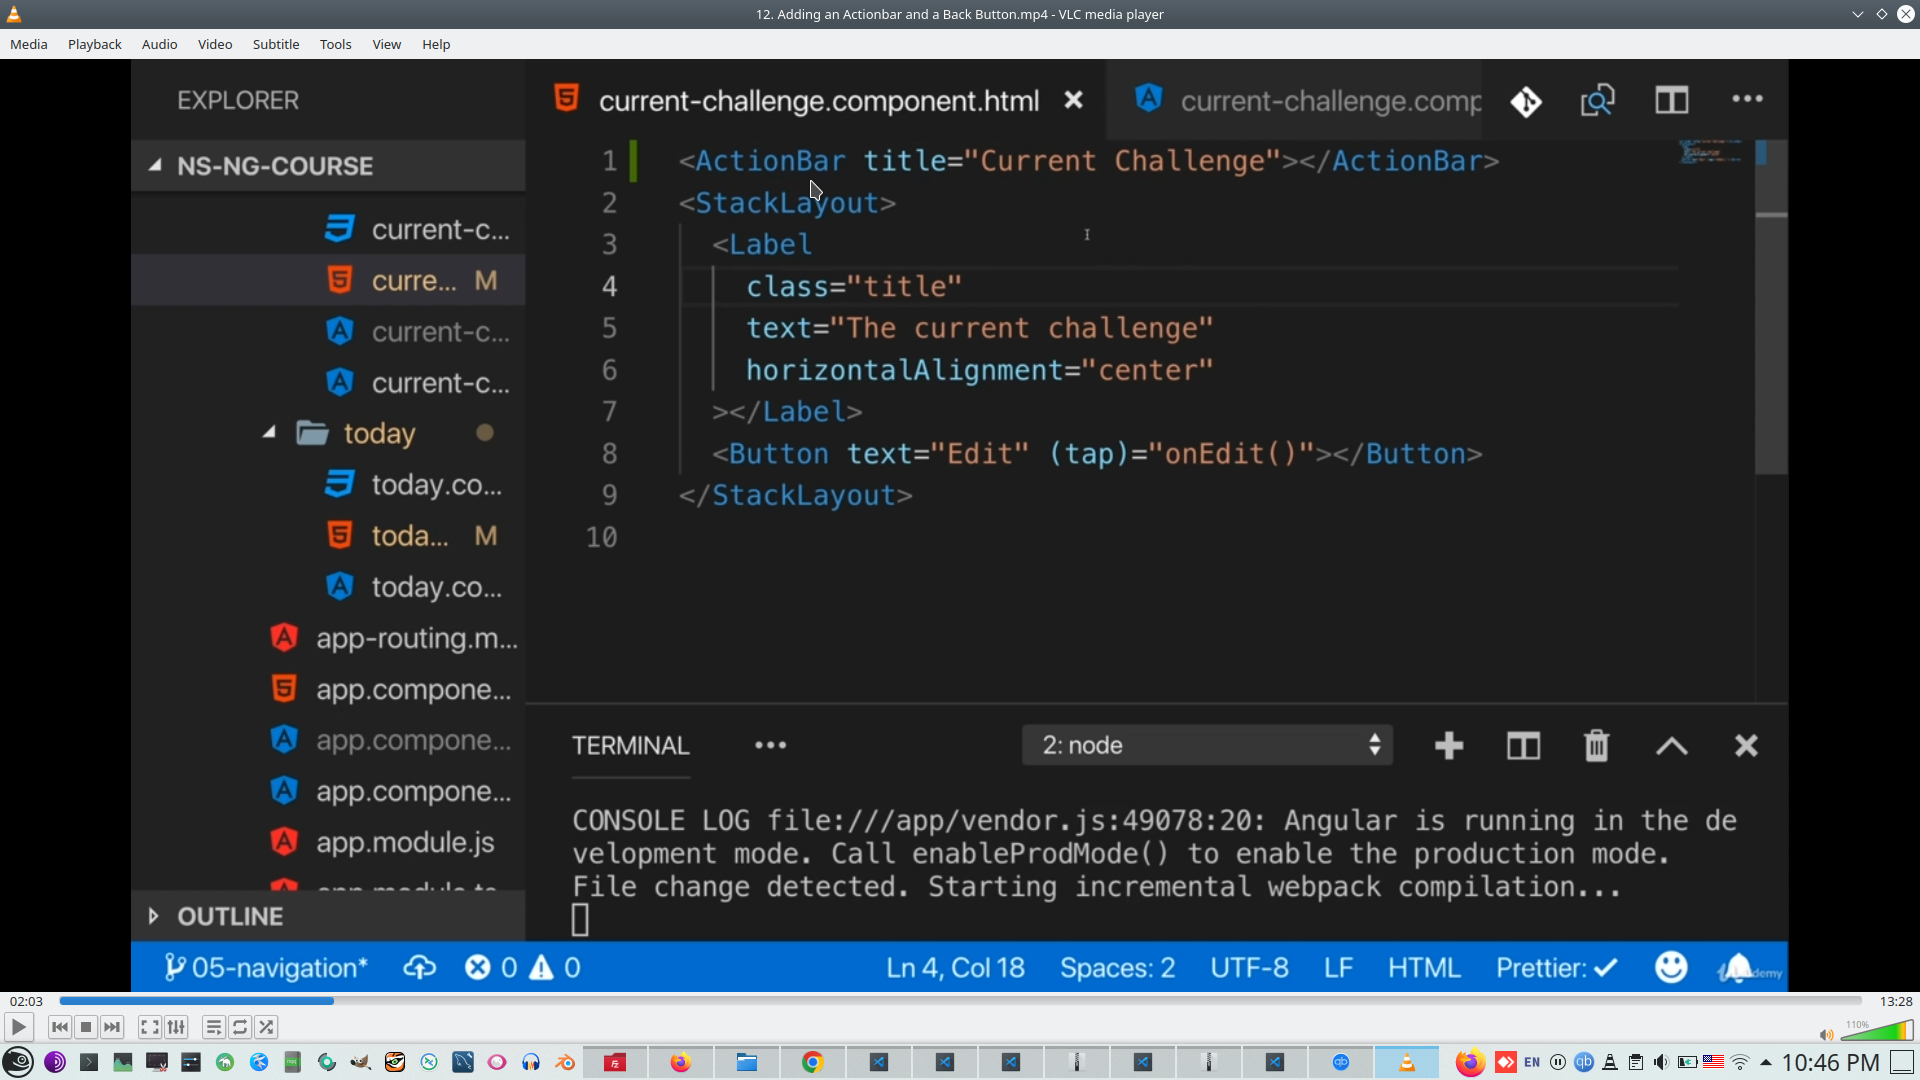
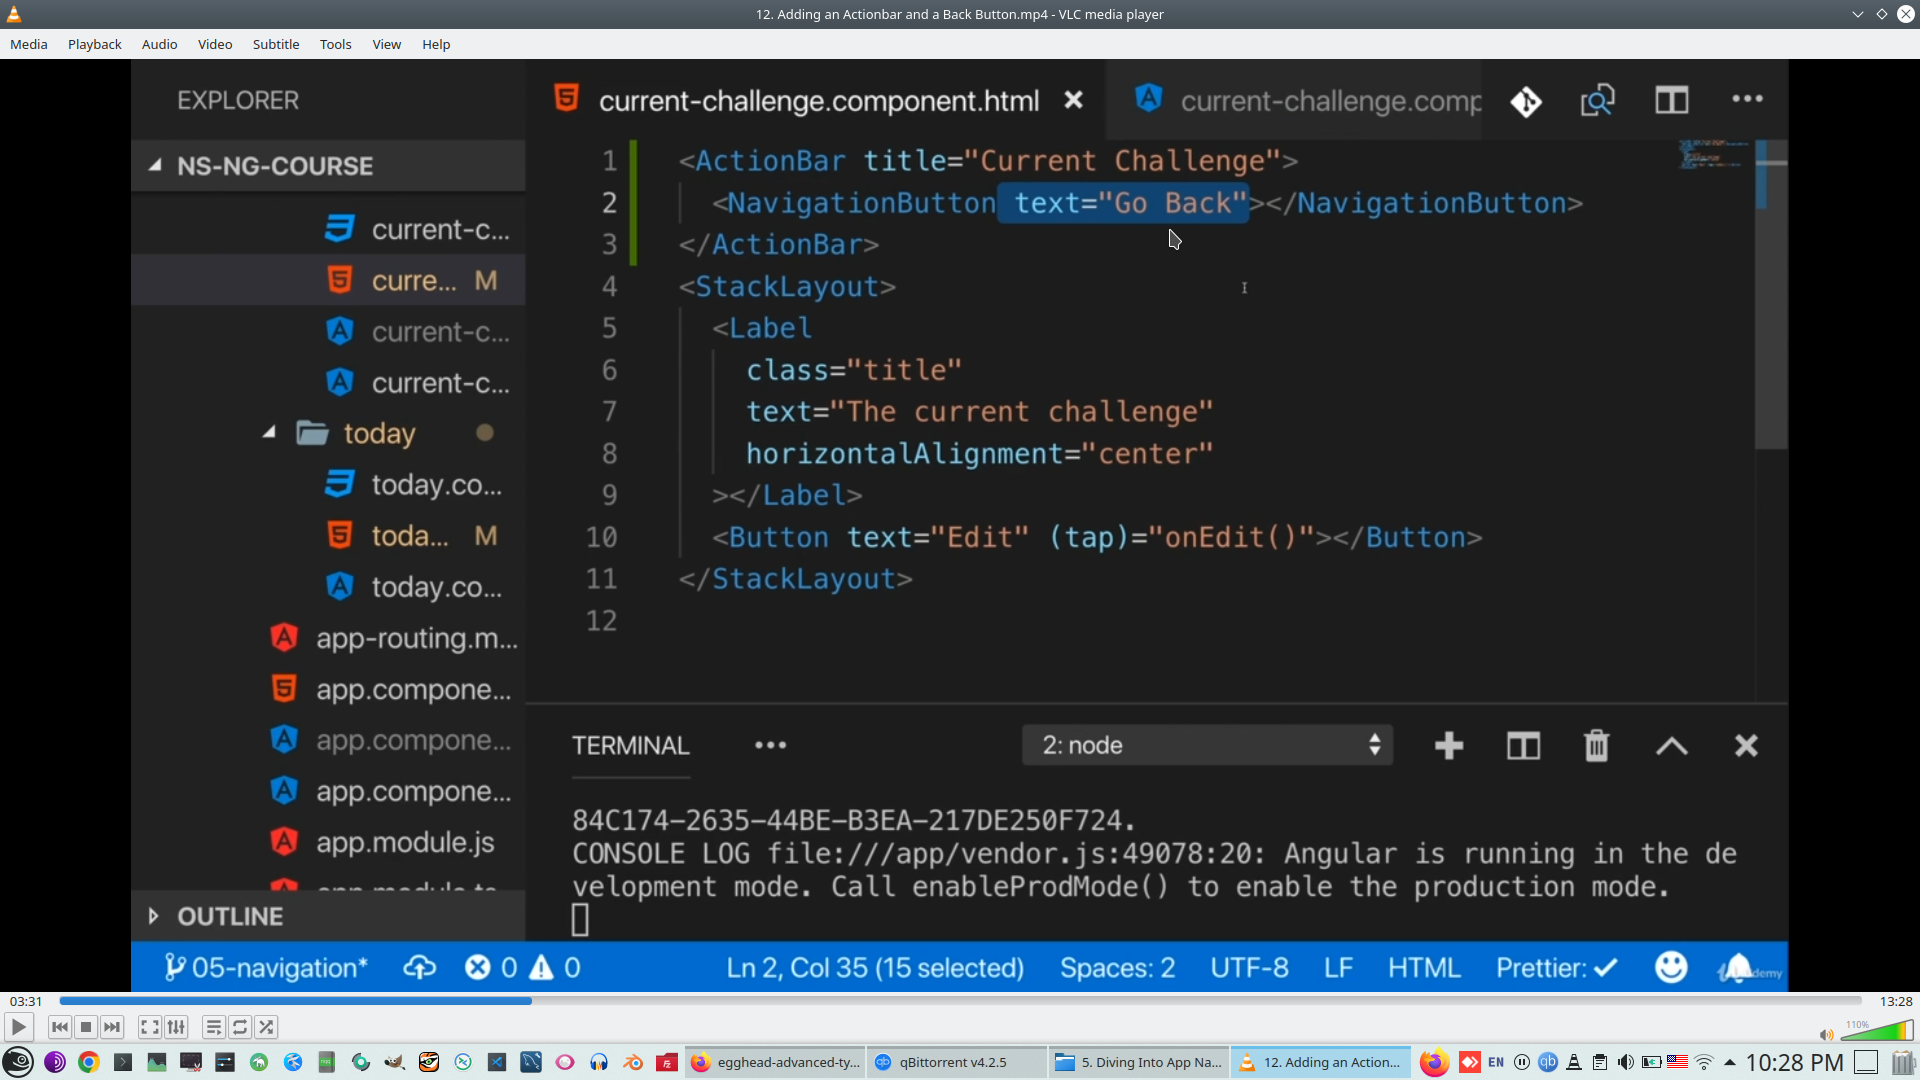
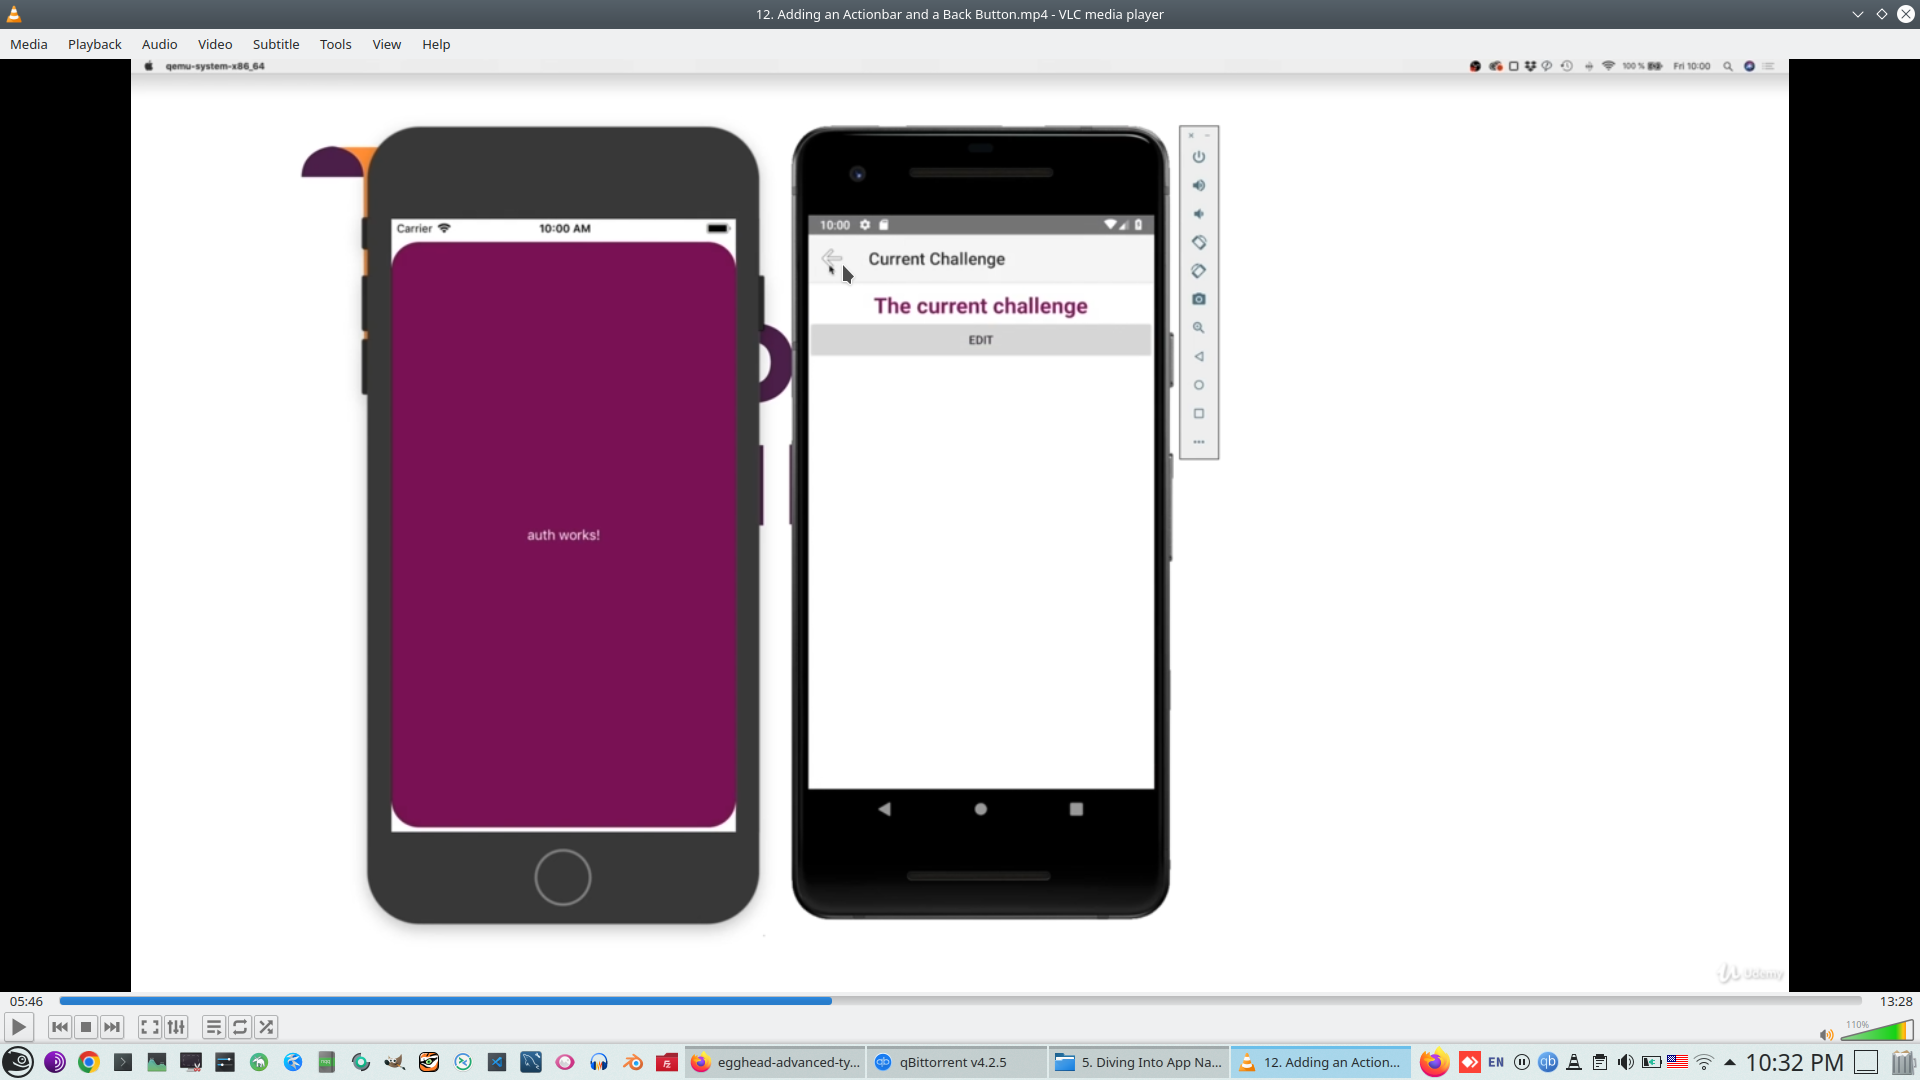
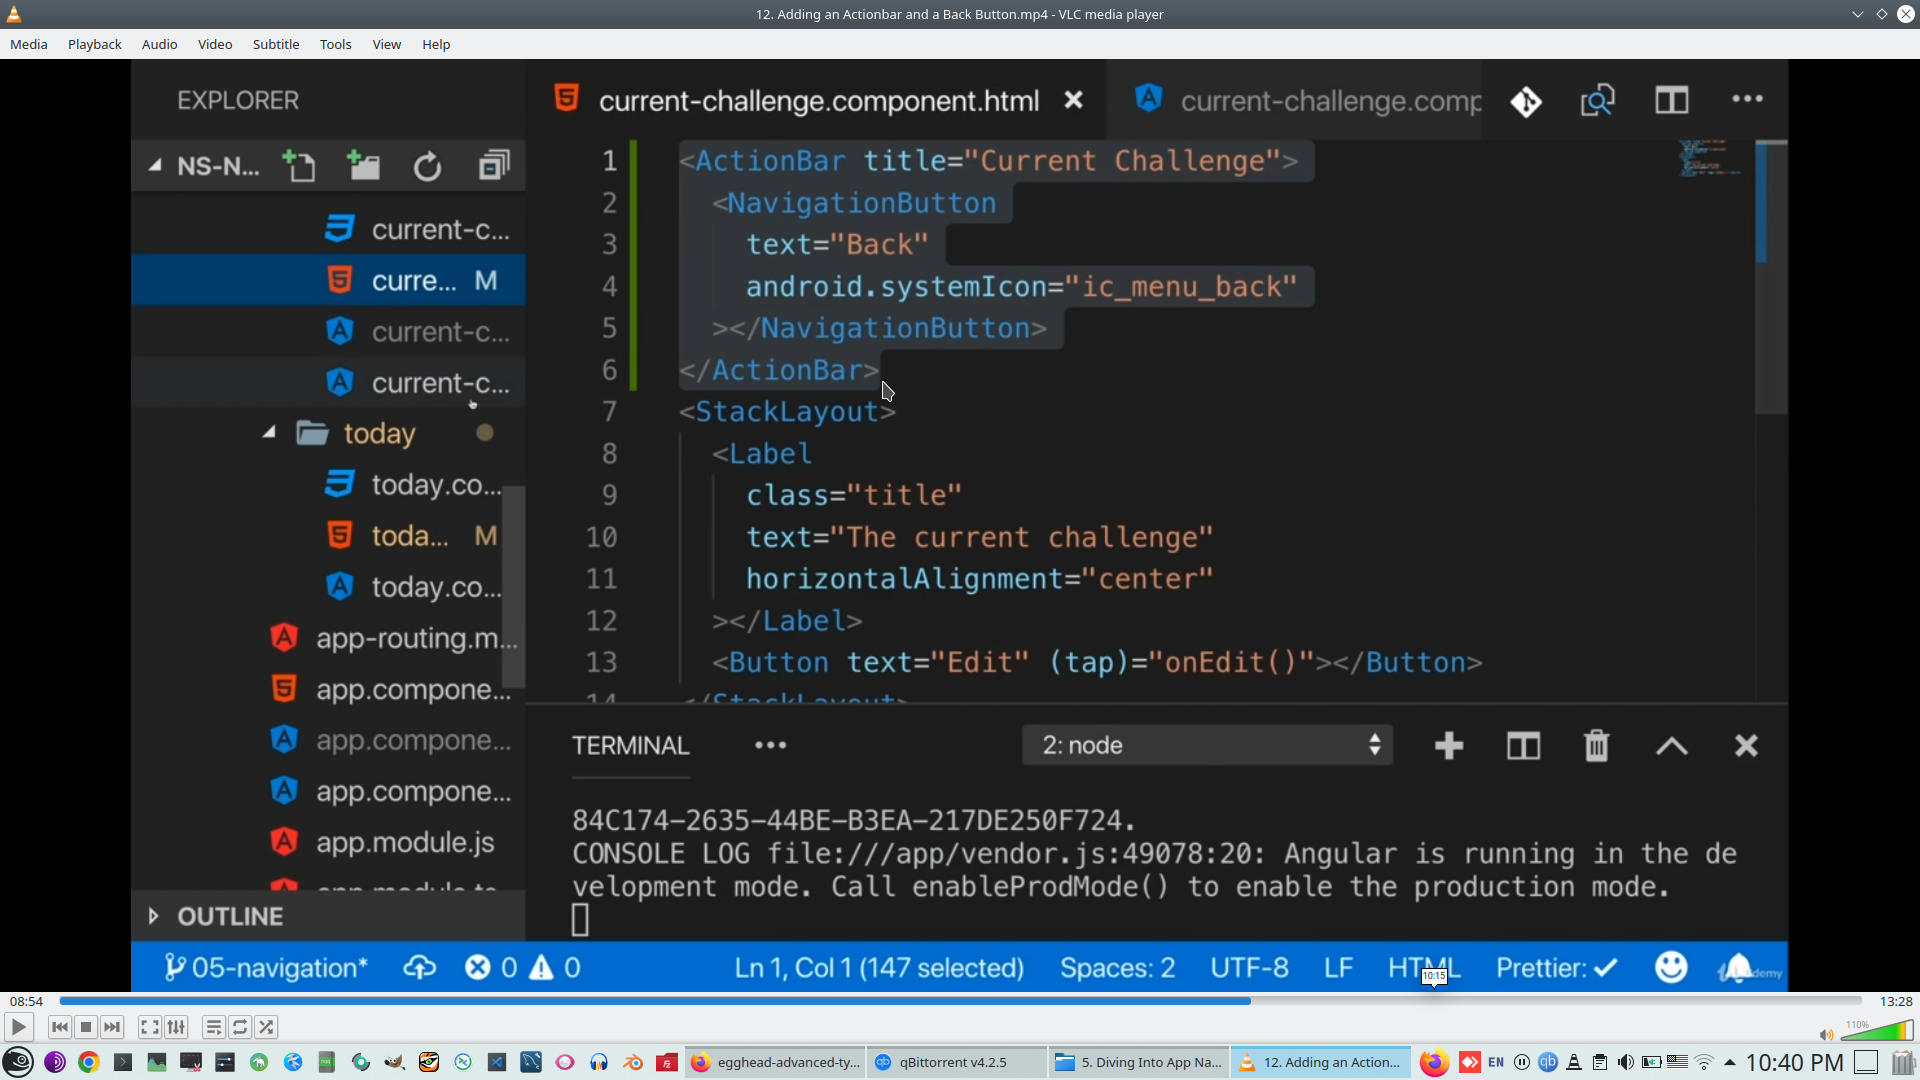
Currently we will use ActionBar UI component for top on all pages with page title
We can add custom navigation button on IOS
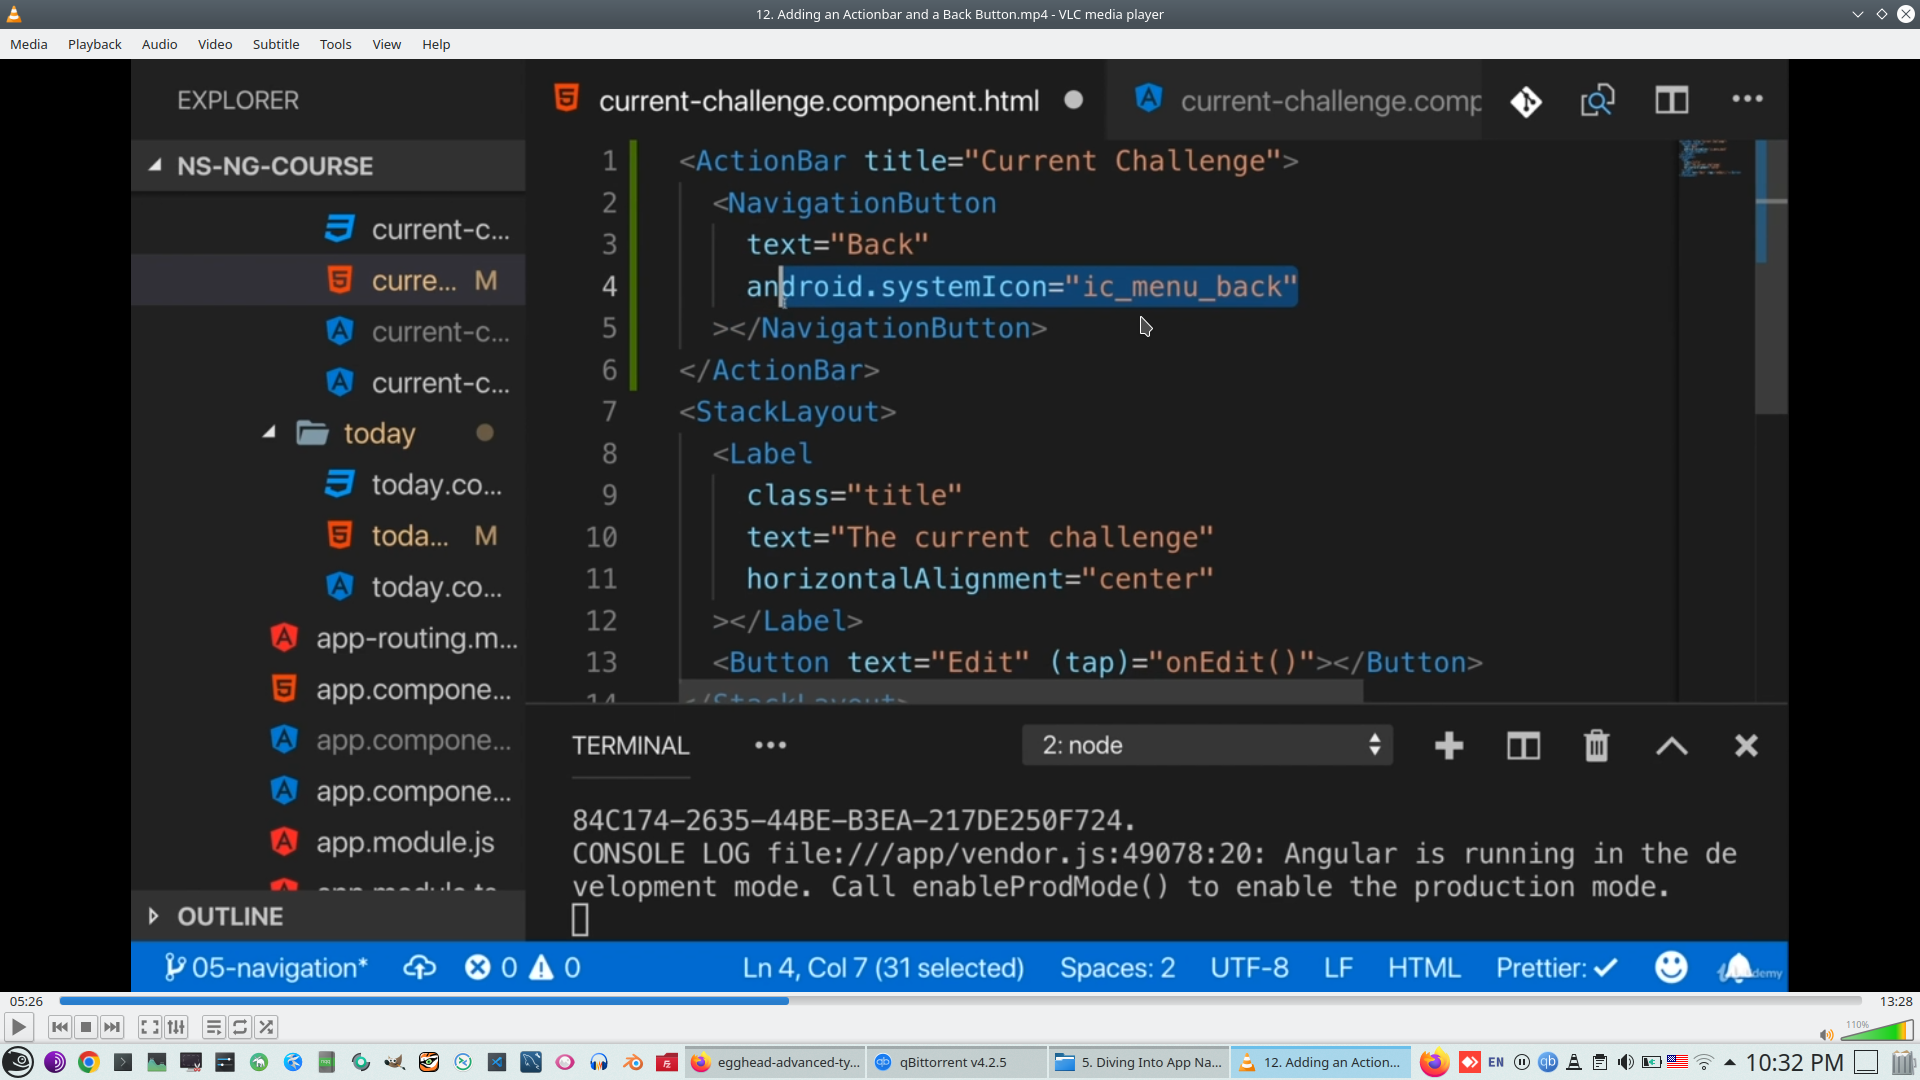
For Android we need to use special Android Icon
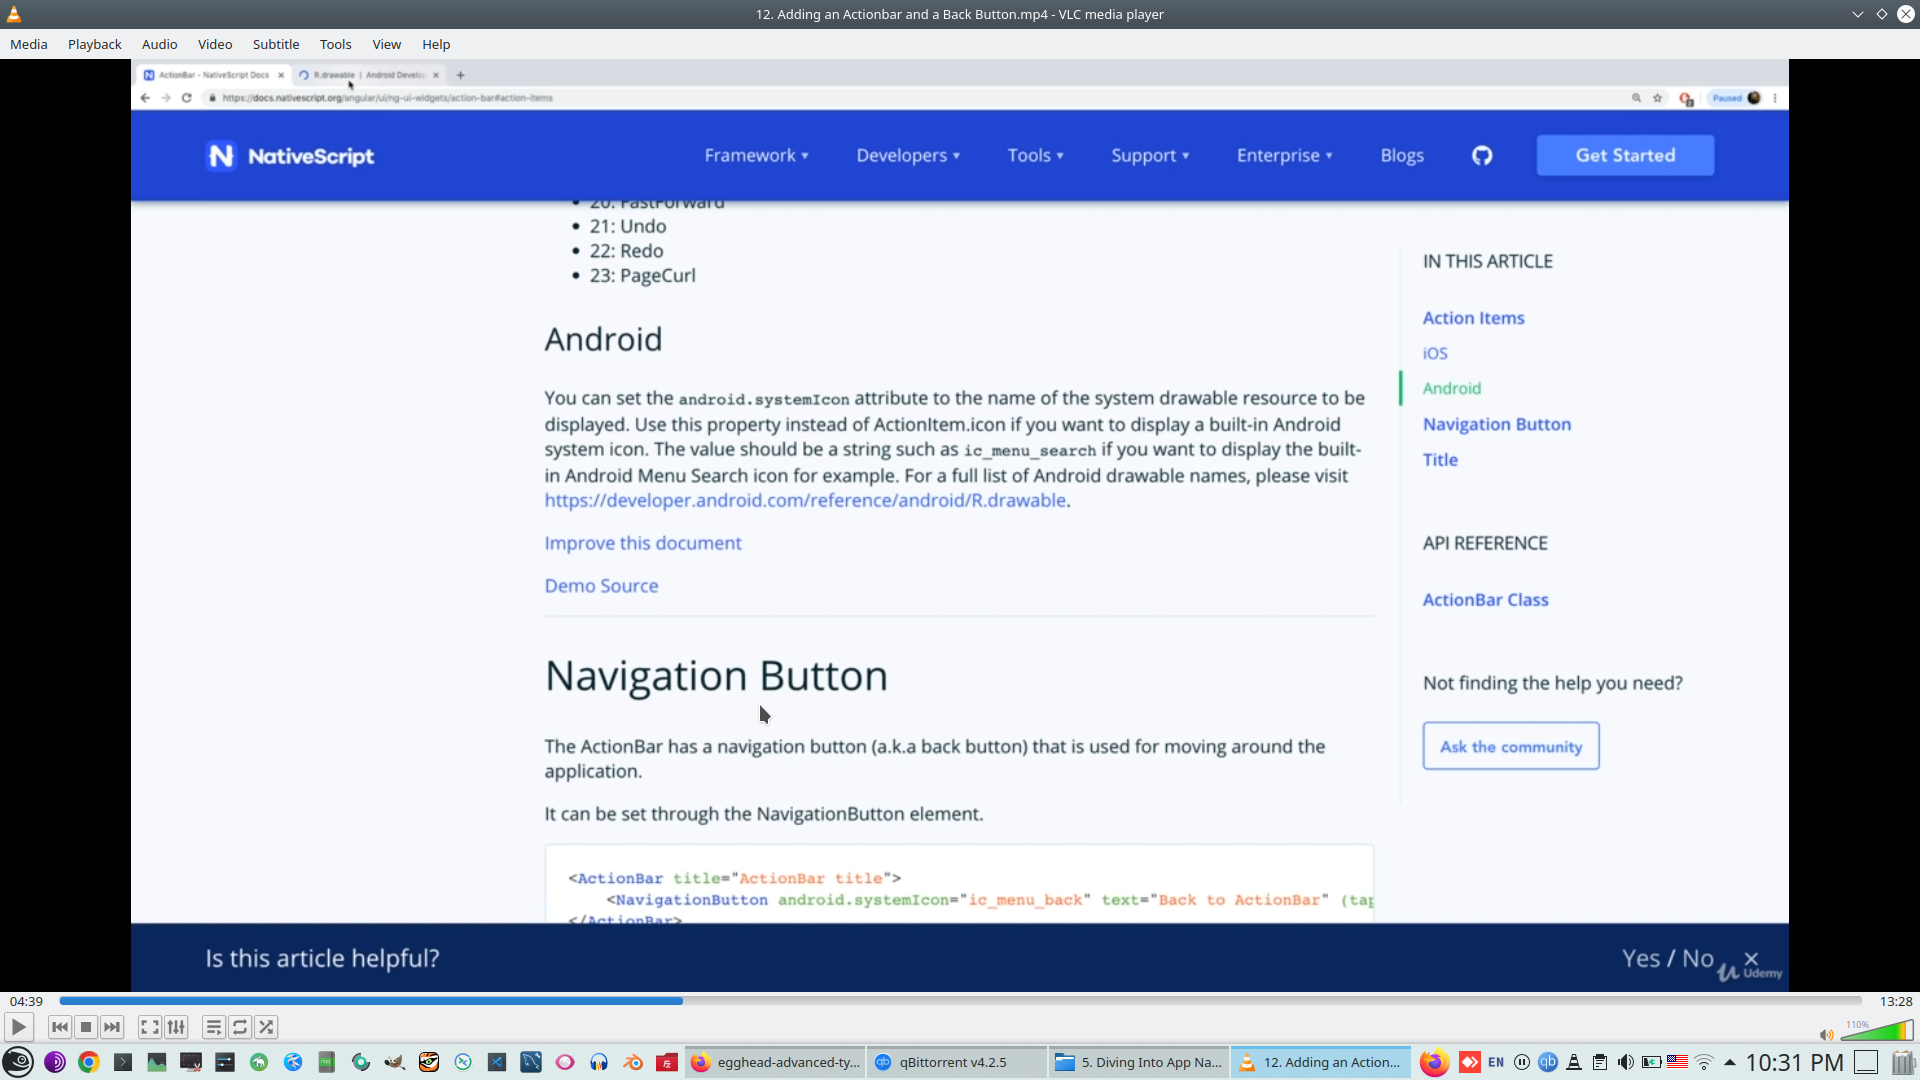
16. Platform depended future - we will create special navigation icon for Androis only and tune it style
Firstly need to import platform
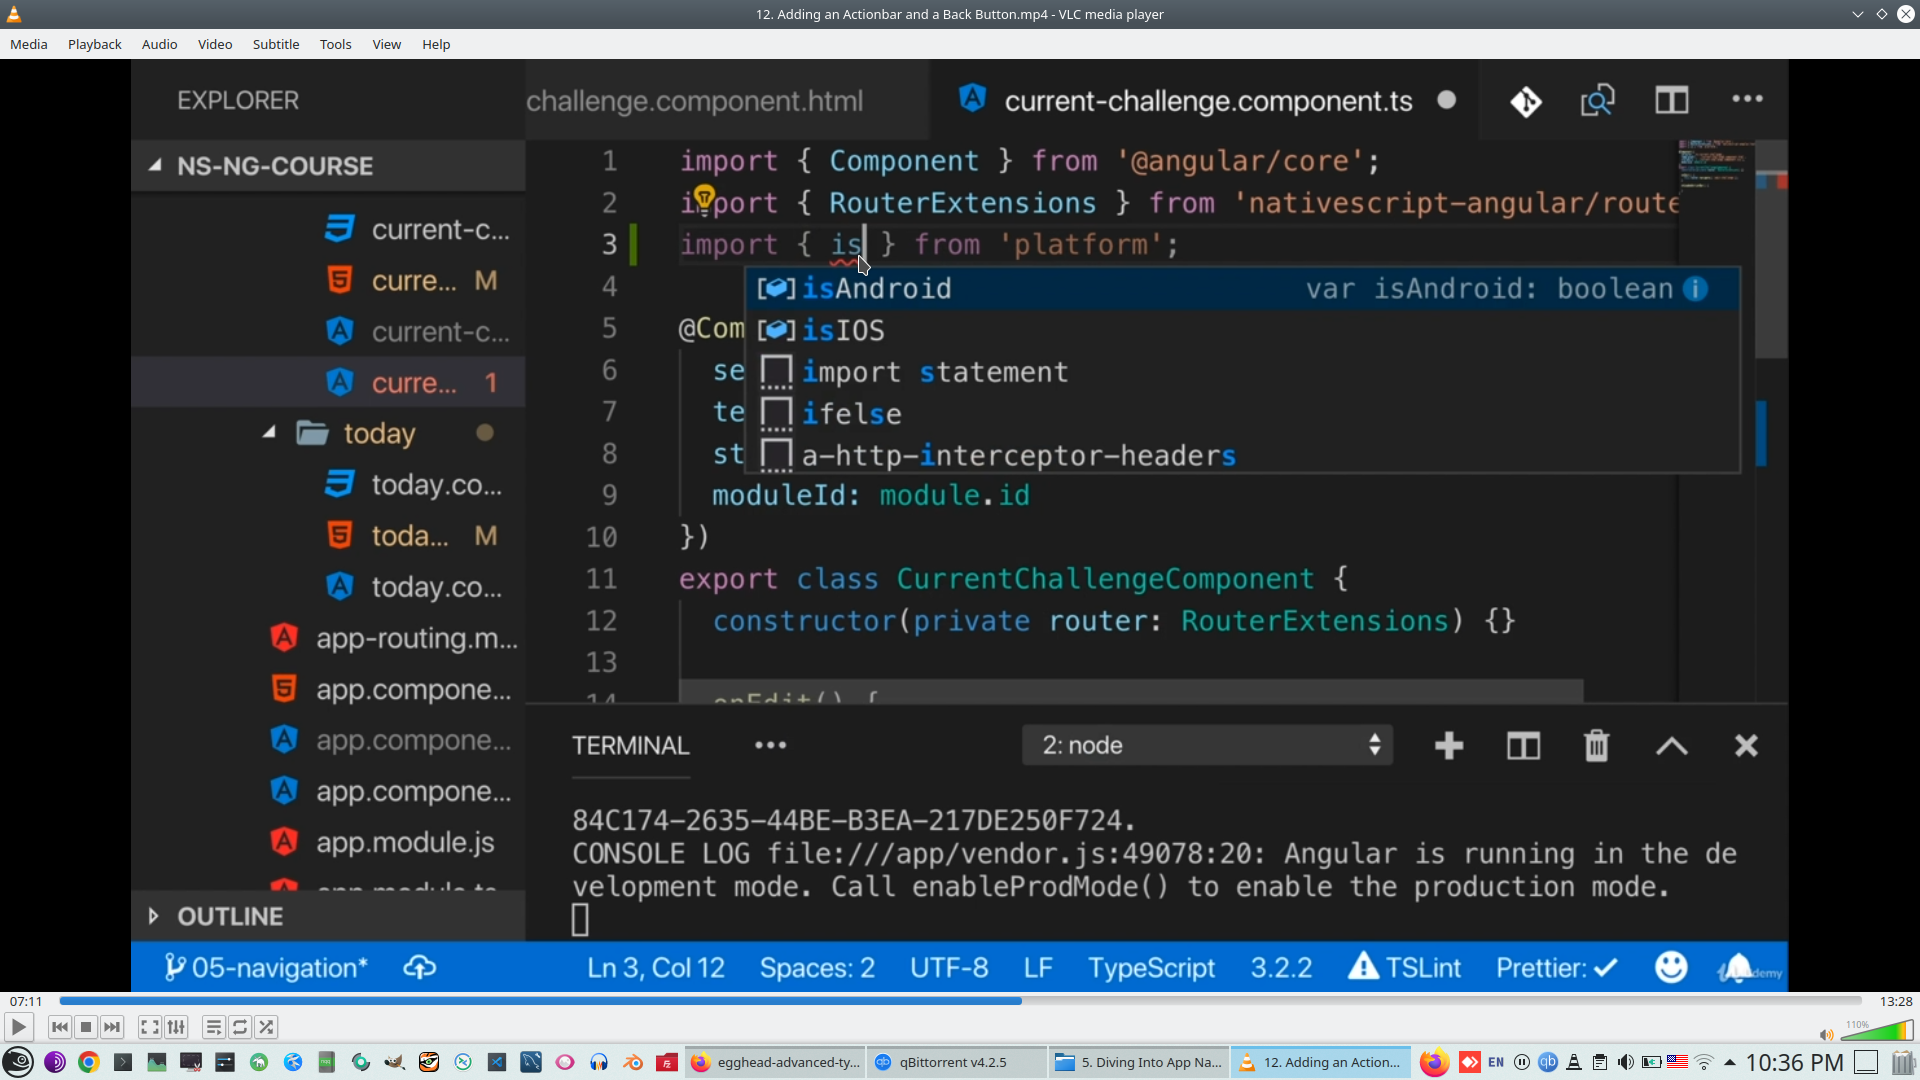
Than use platform specific code

For receive access to any UI item we need to import page component
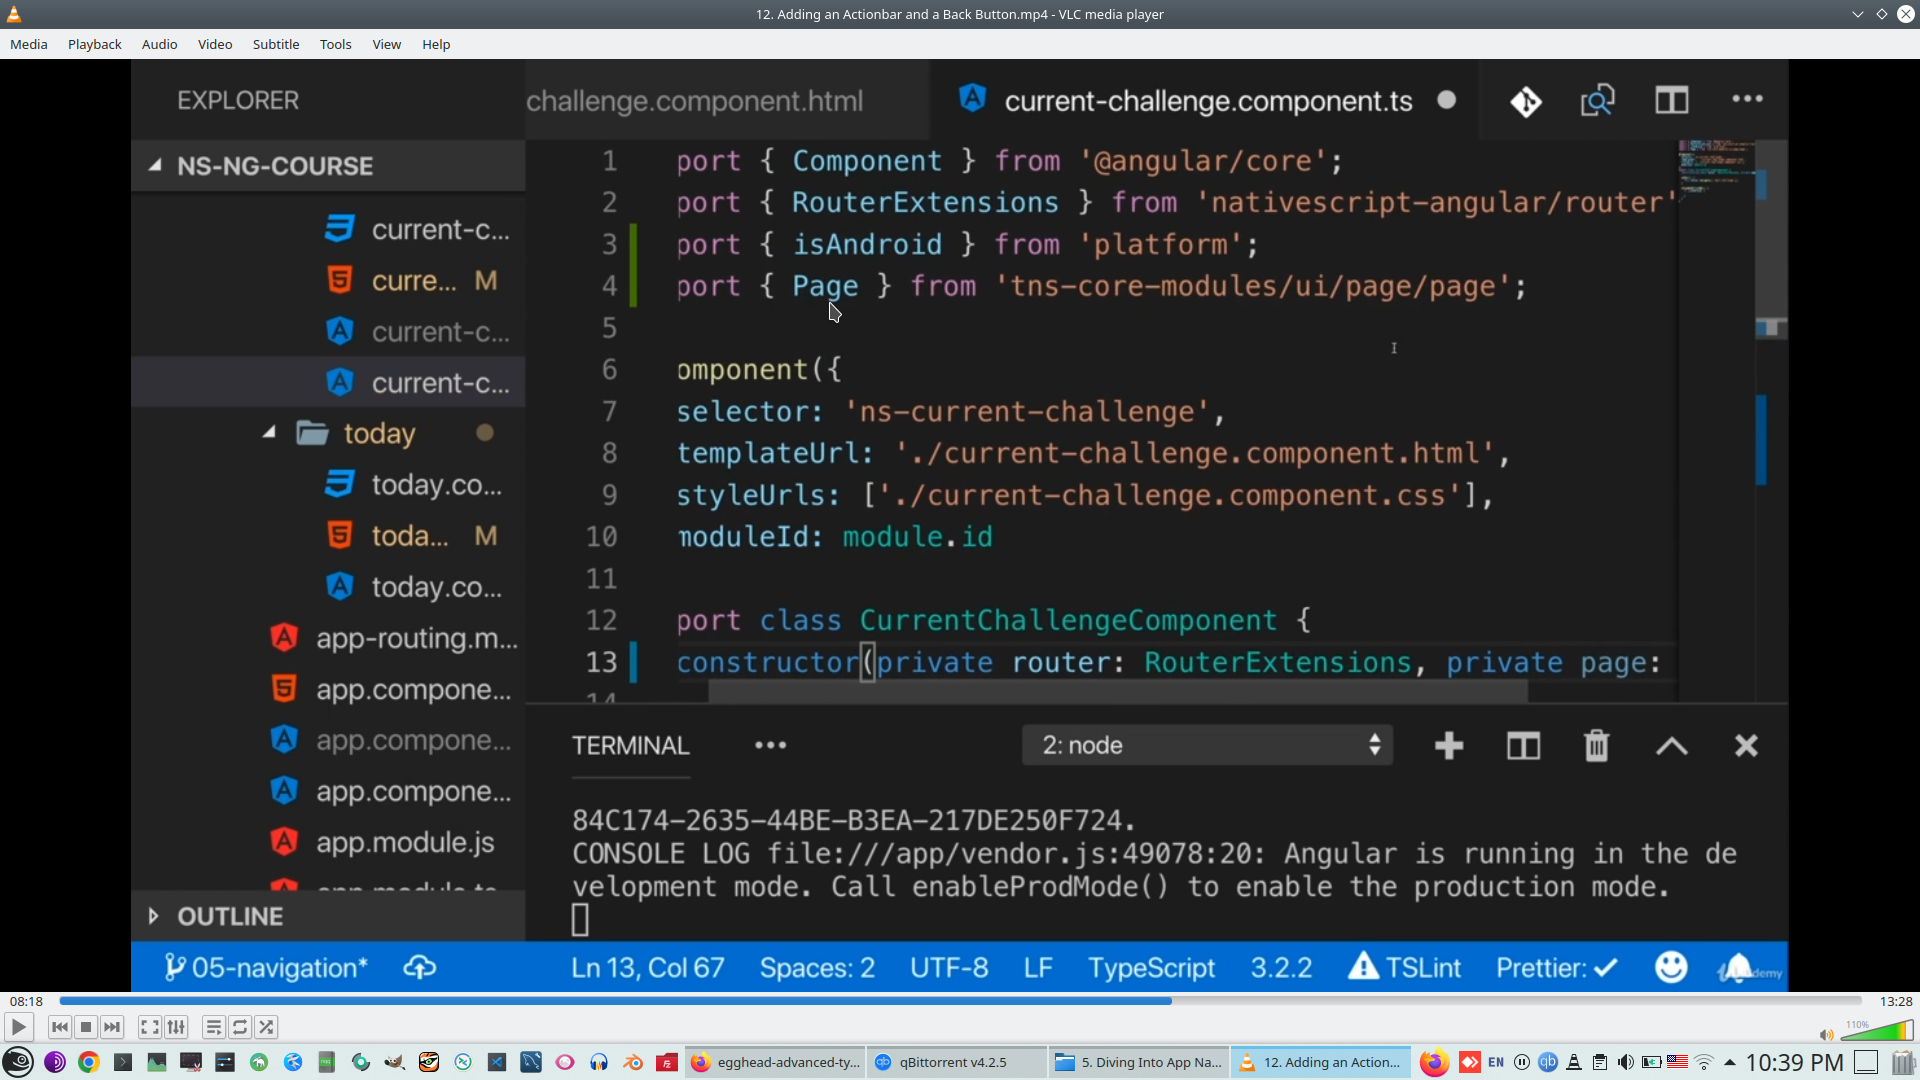
Now we have access to ActionBar
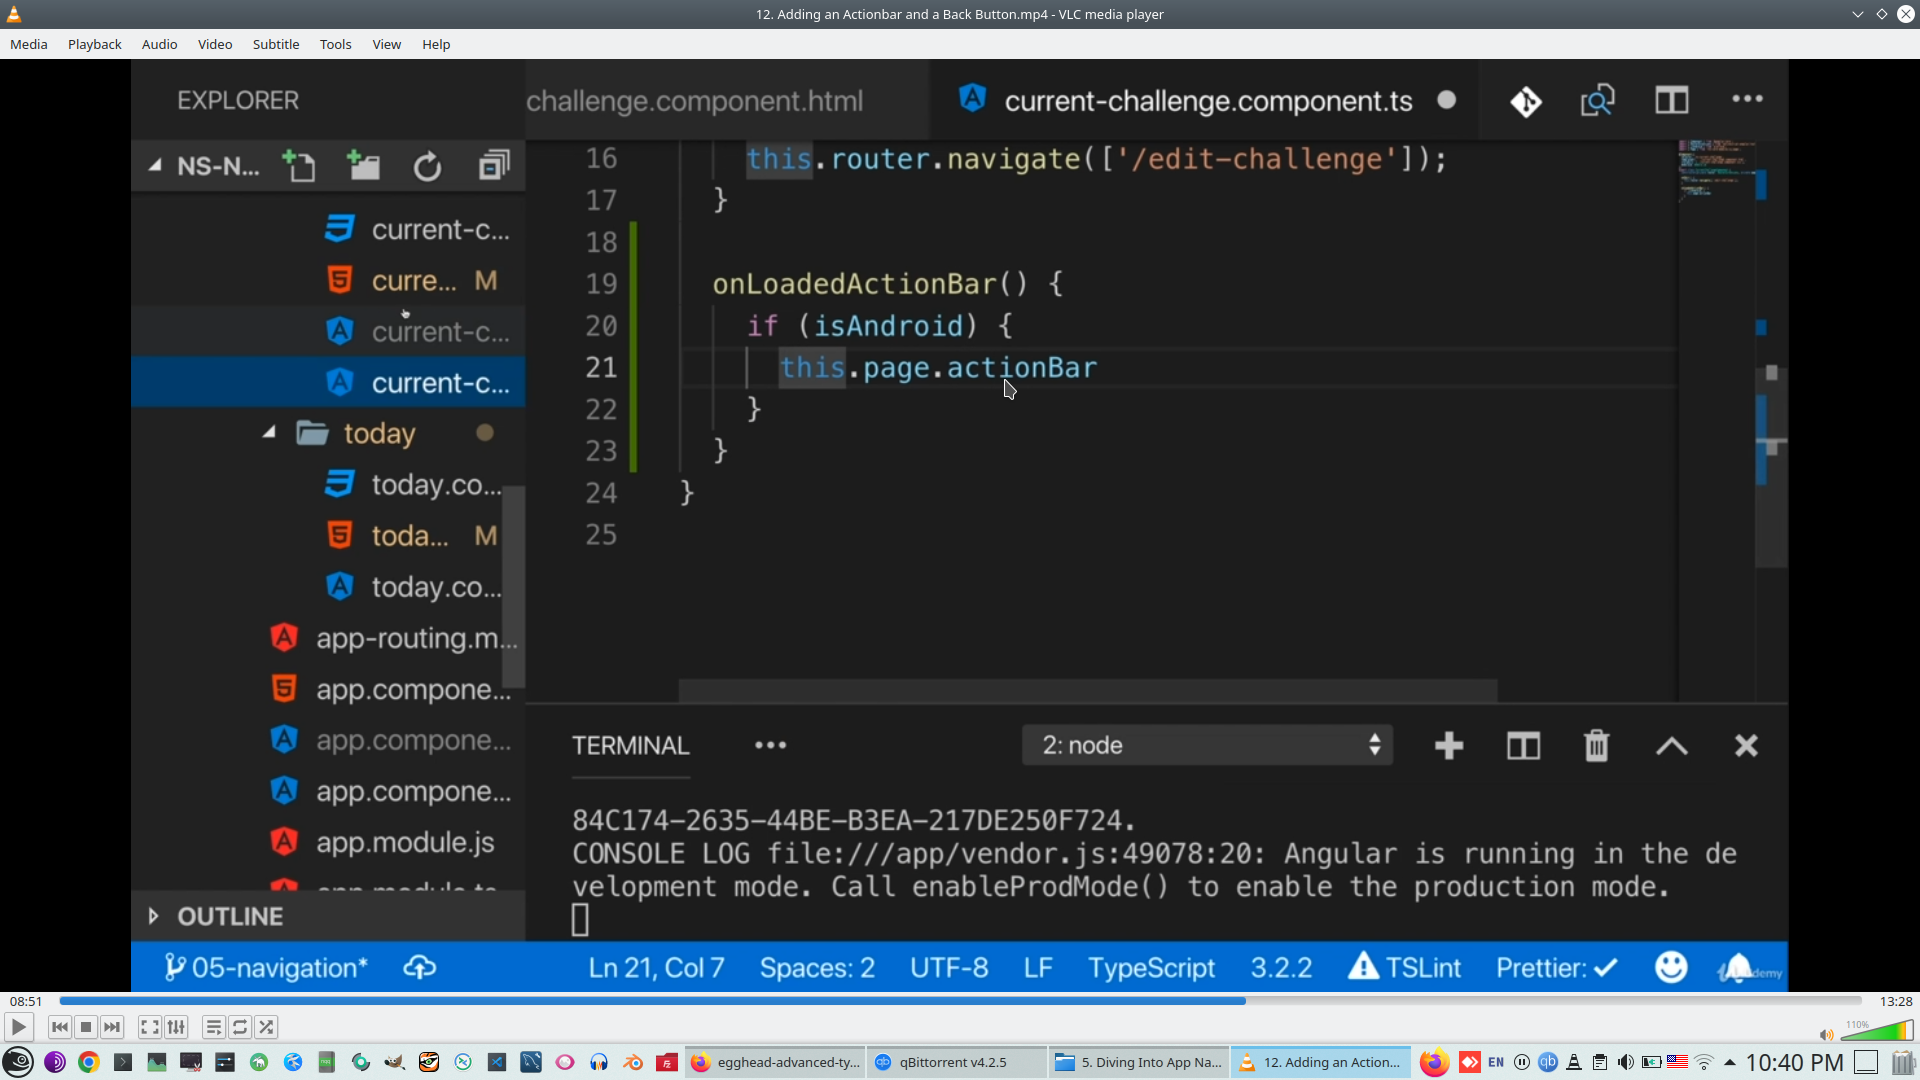
And access to NativeView
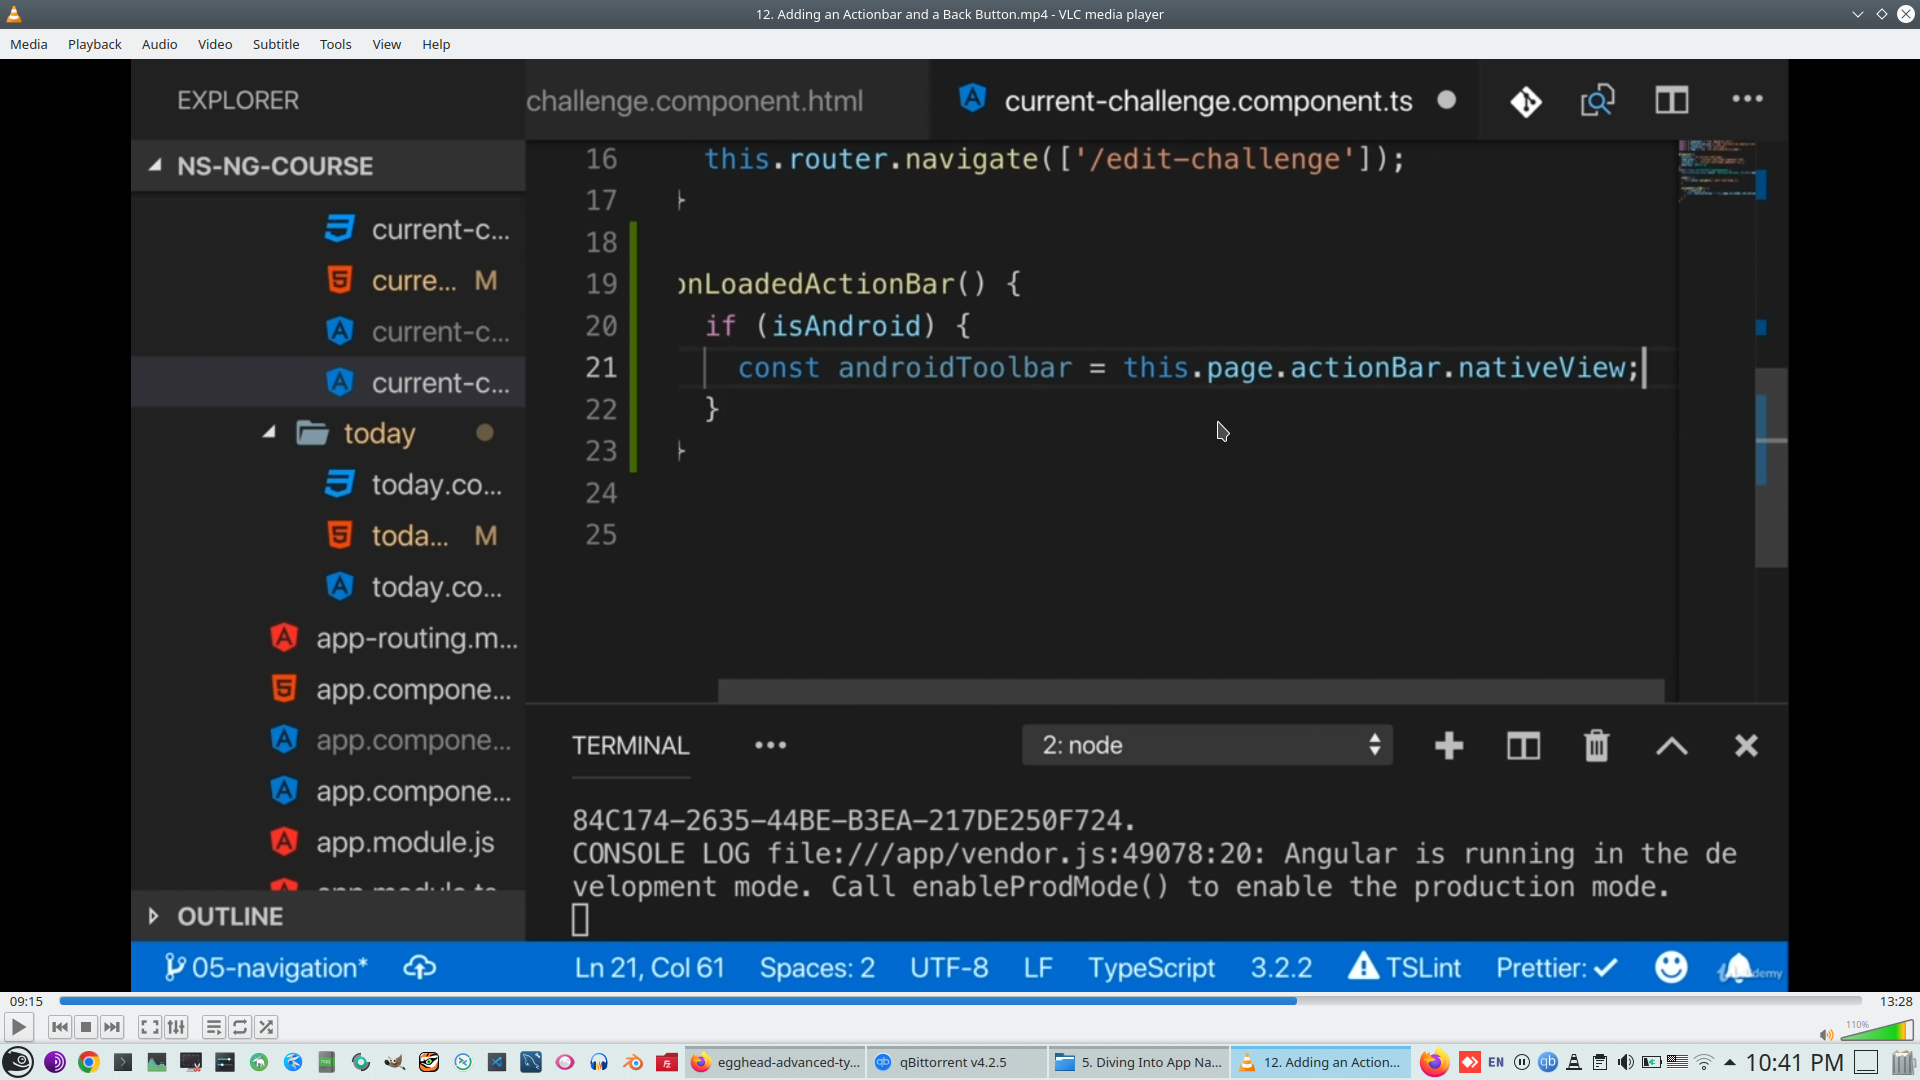
Import all Android variable
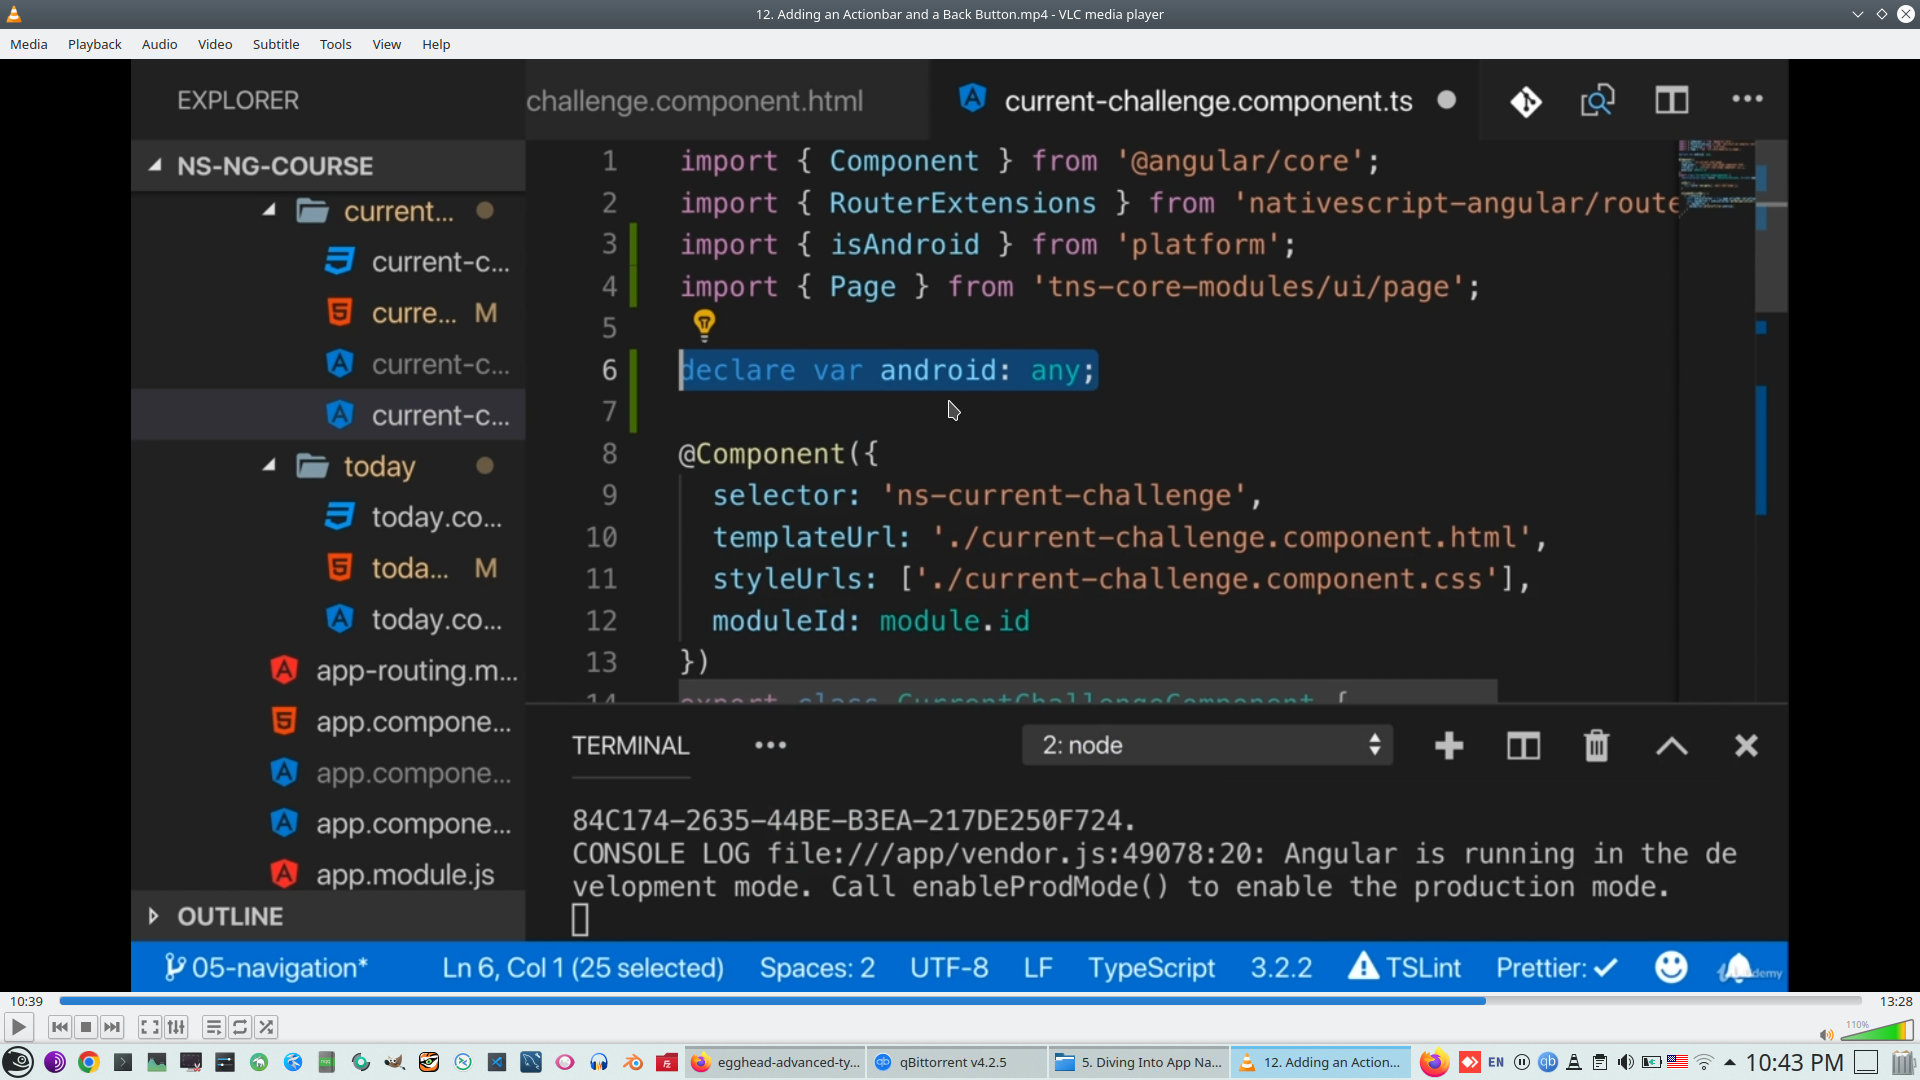
And Finally we can change style of Android Back button, (need add 'any' for android type)
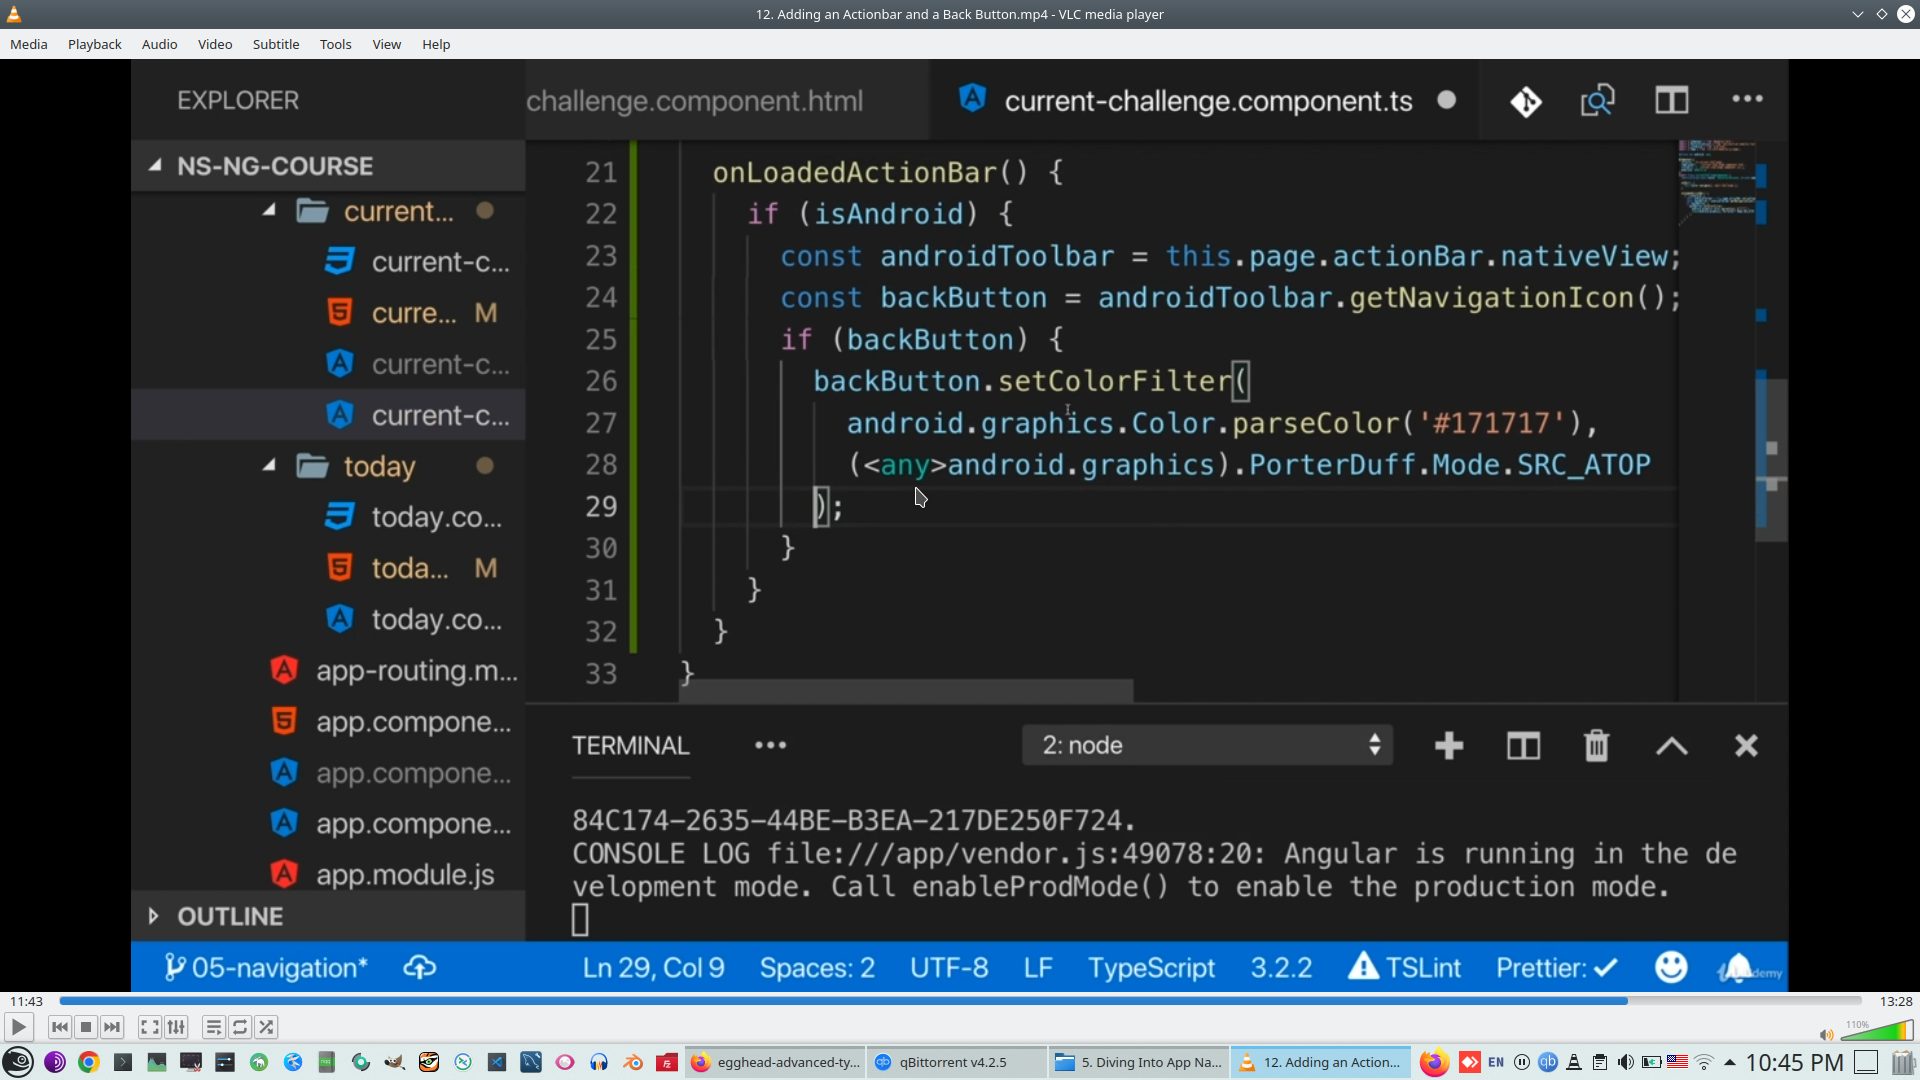
And bind this code to 'loaded' event of ActionBar

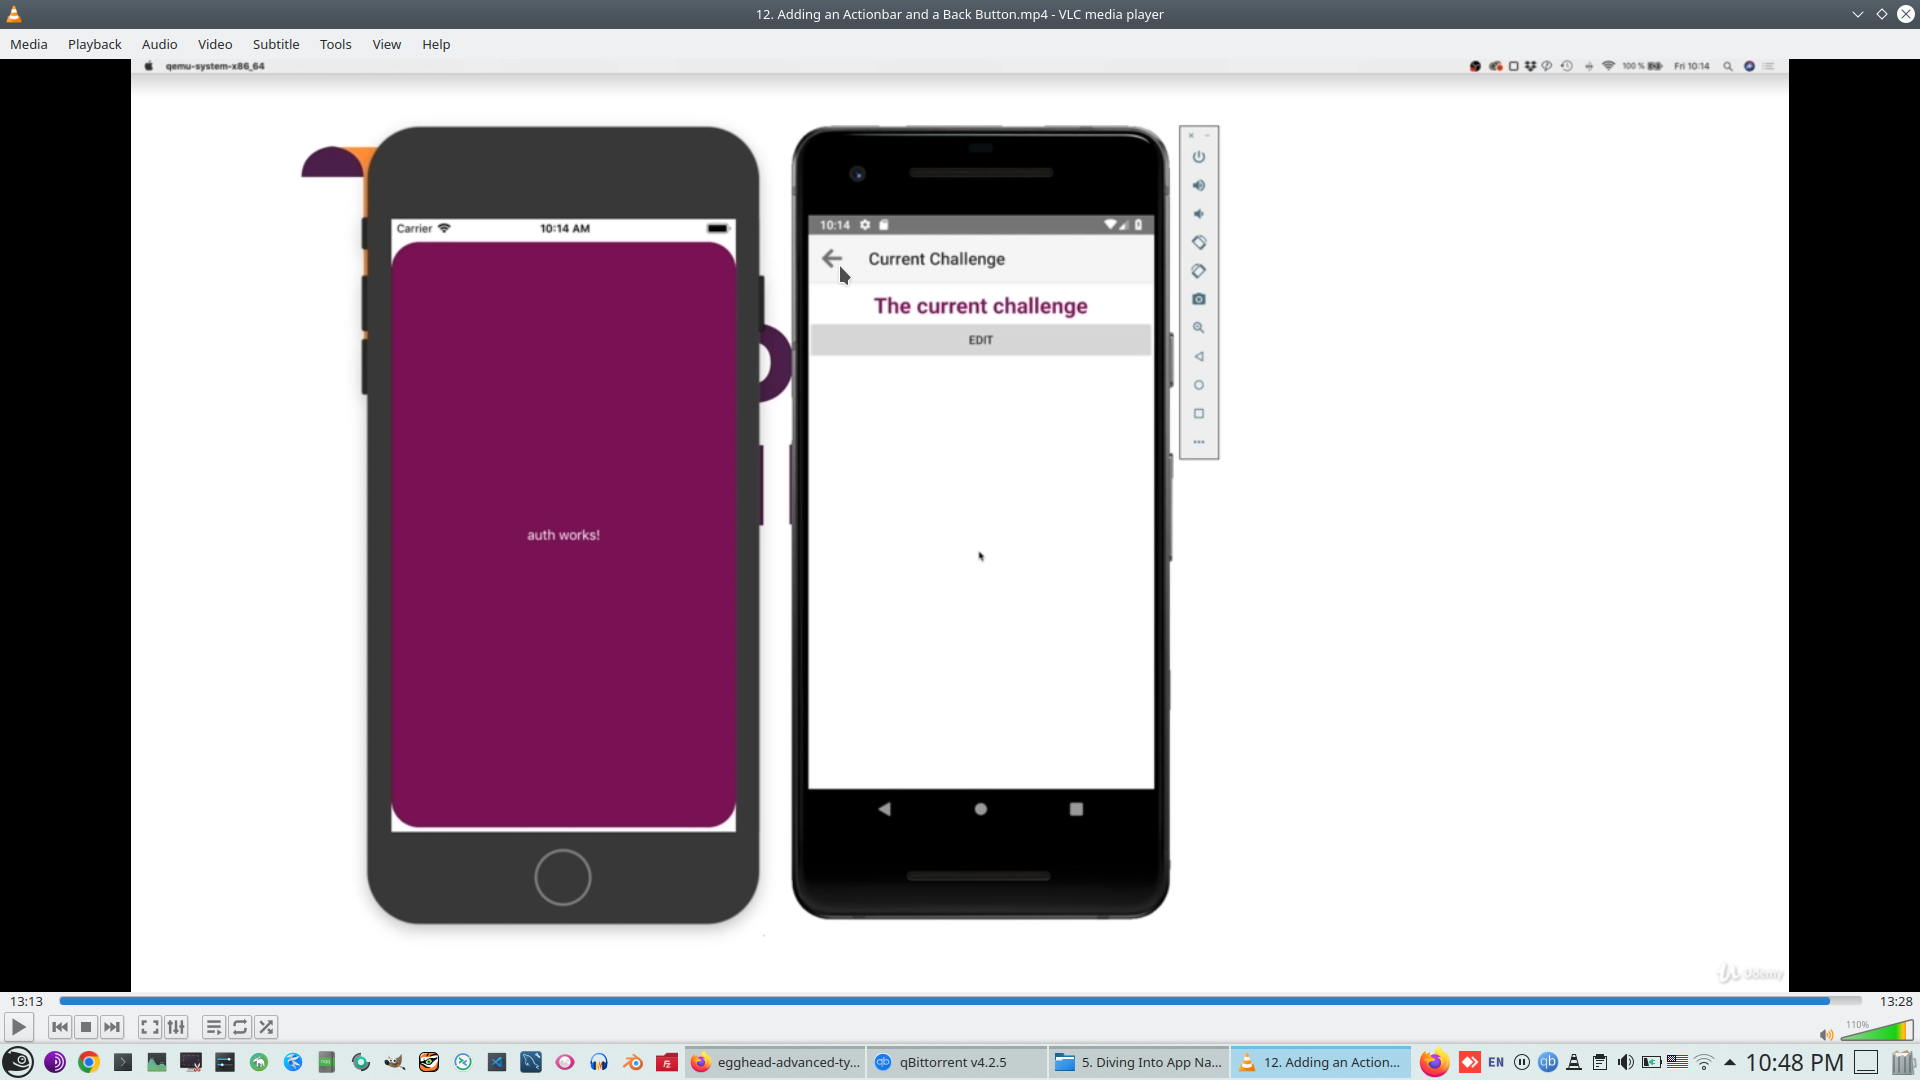
Check it, button 'Back' has our custom color
17. Continue improve app navigation
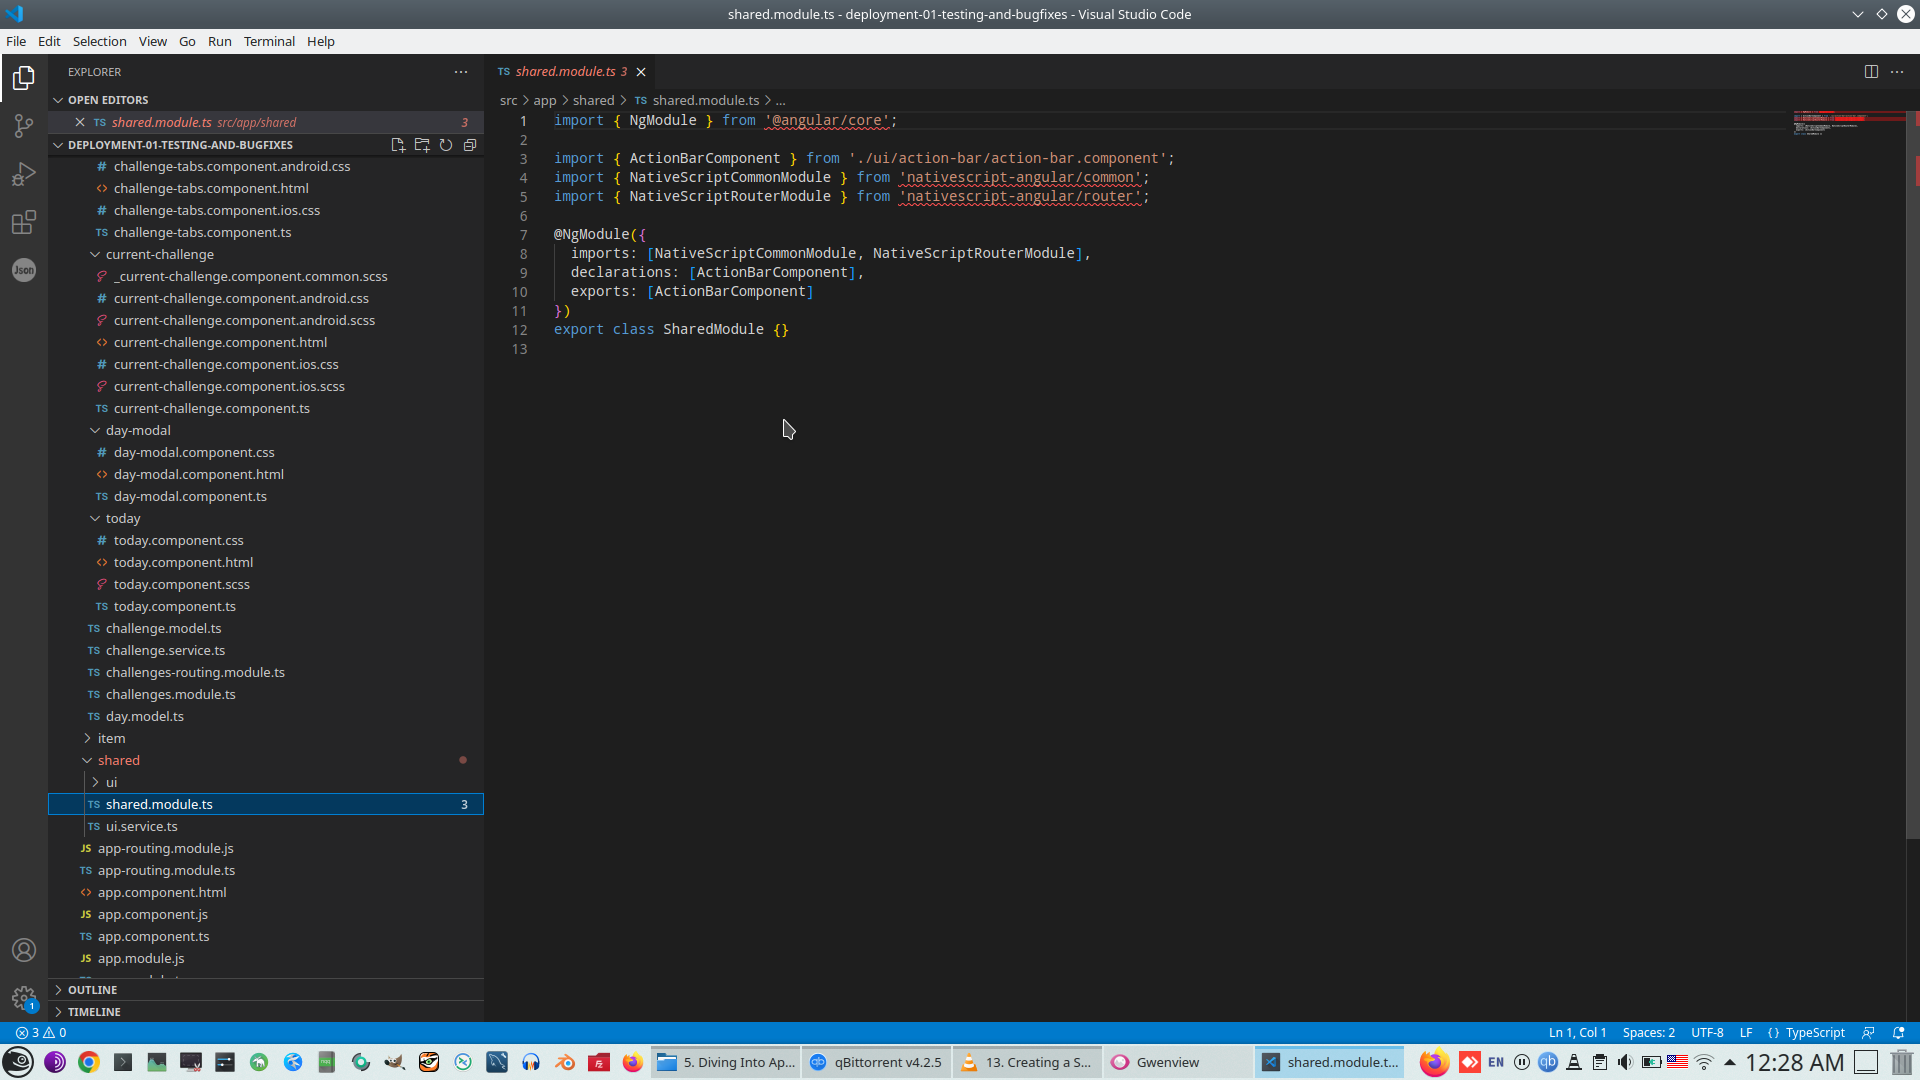
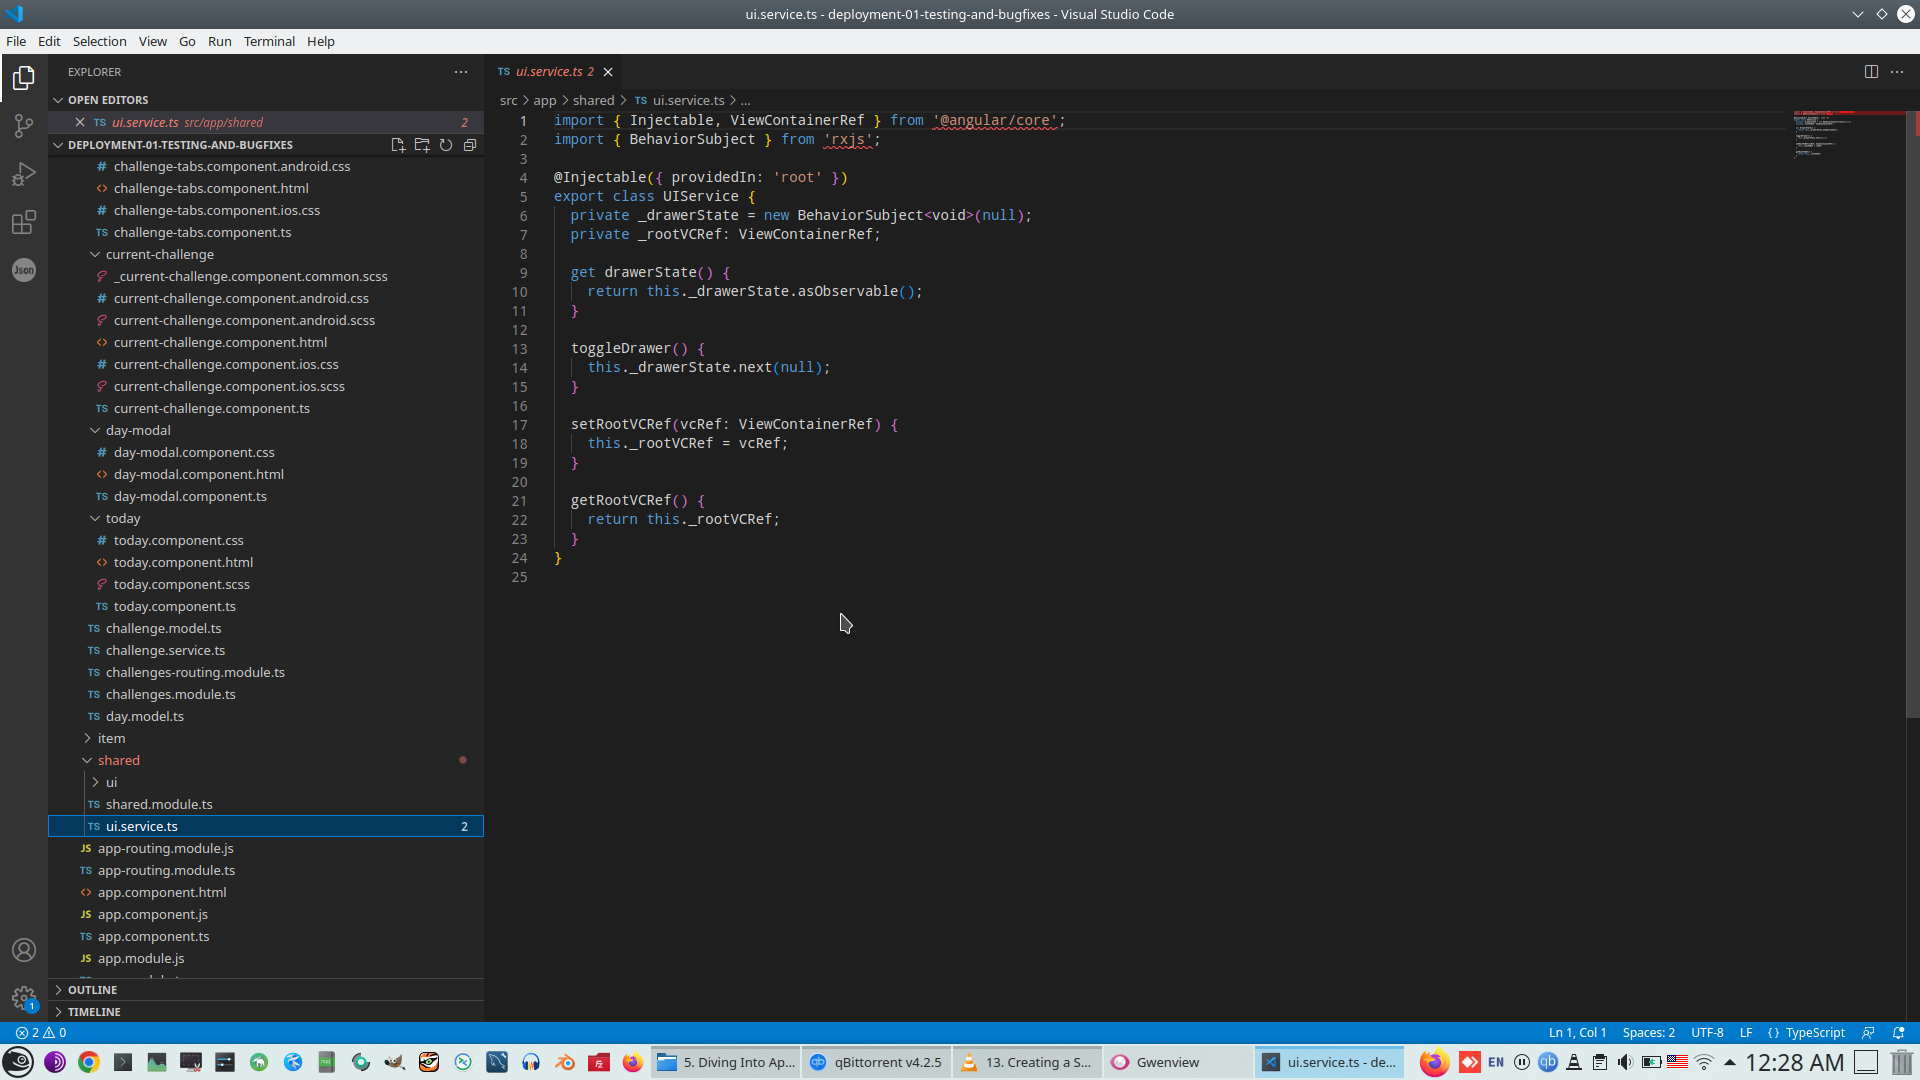
Now we move platform depended ActionBar from page to separate component
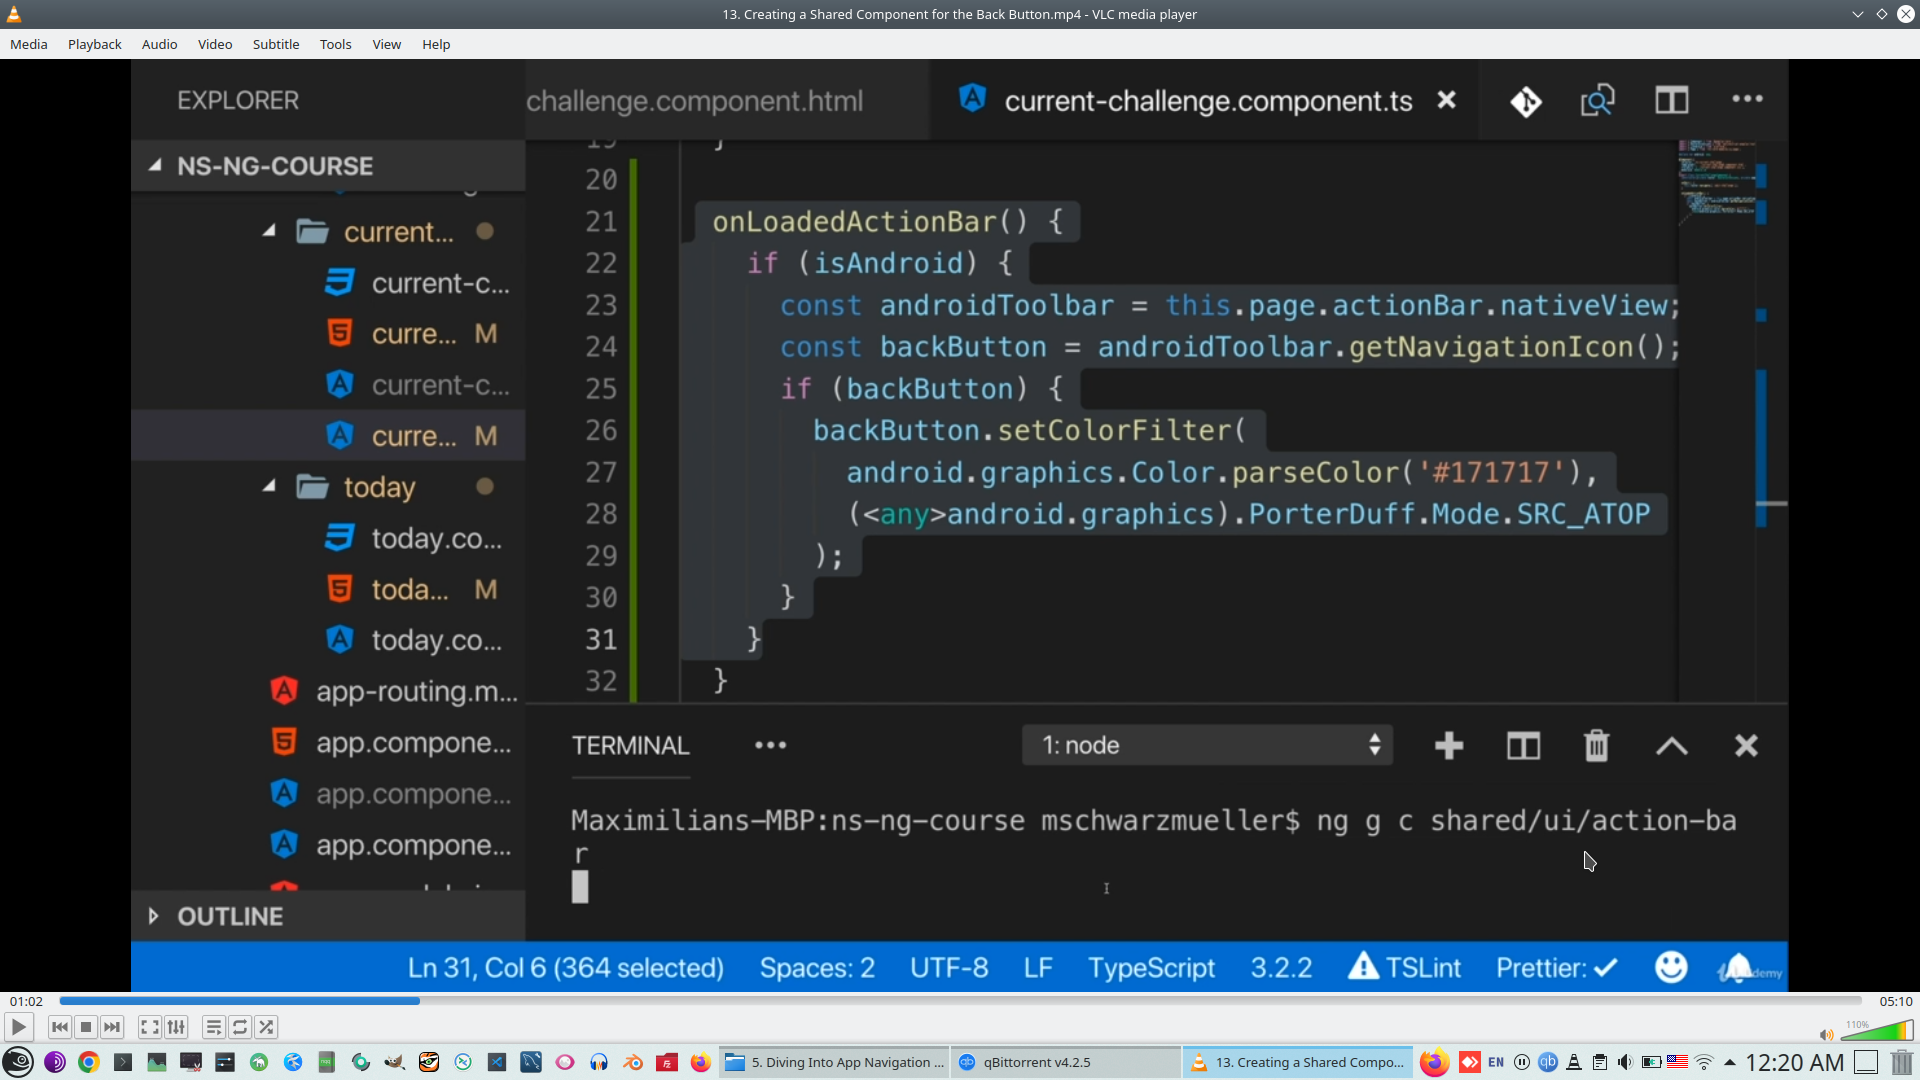
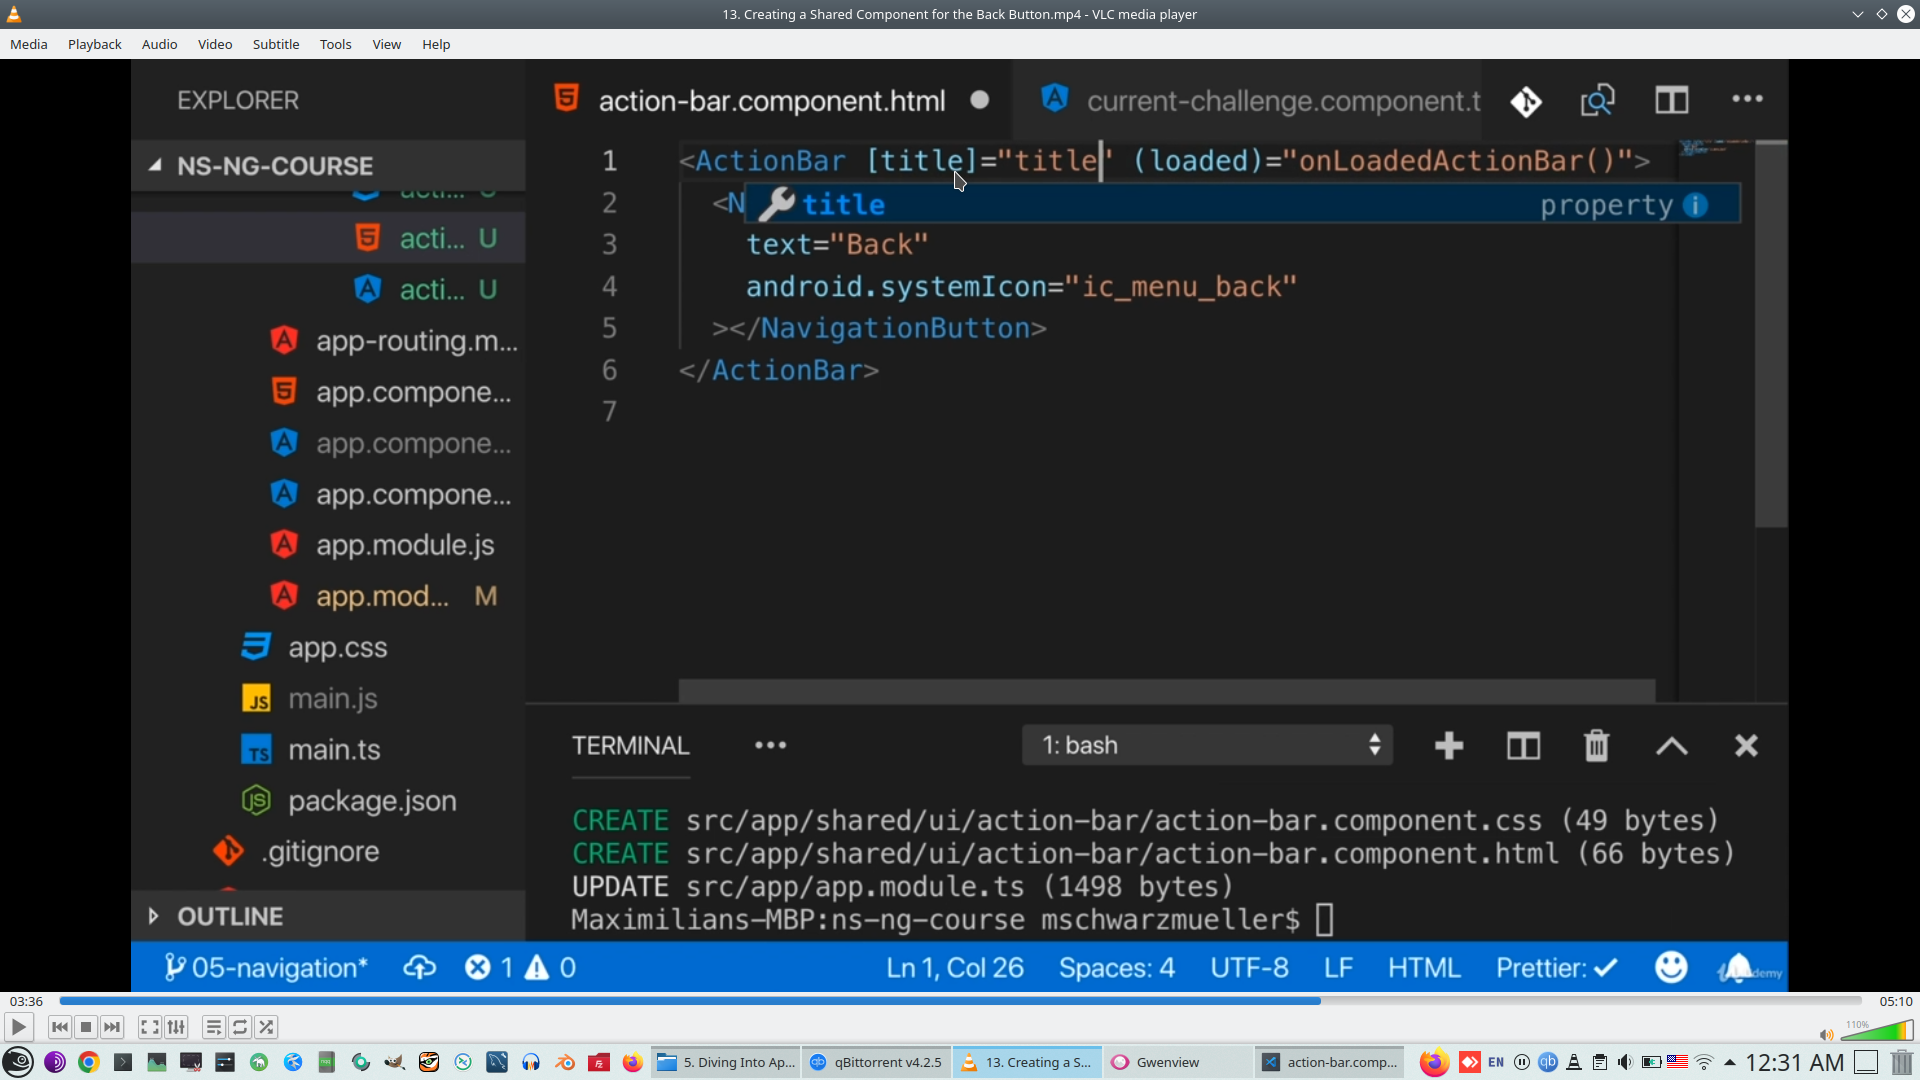
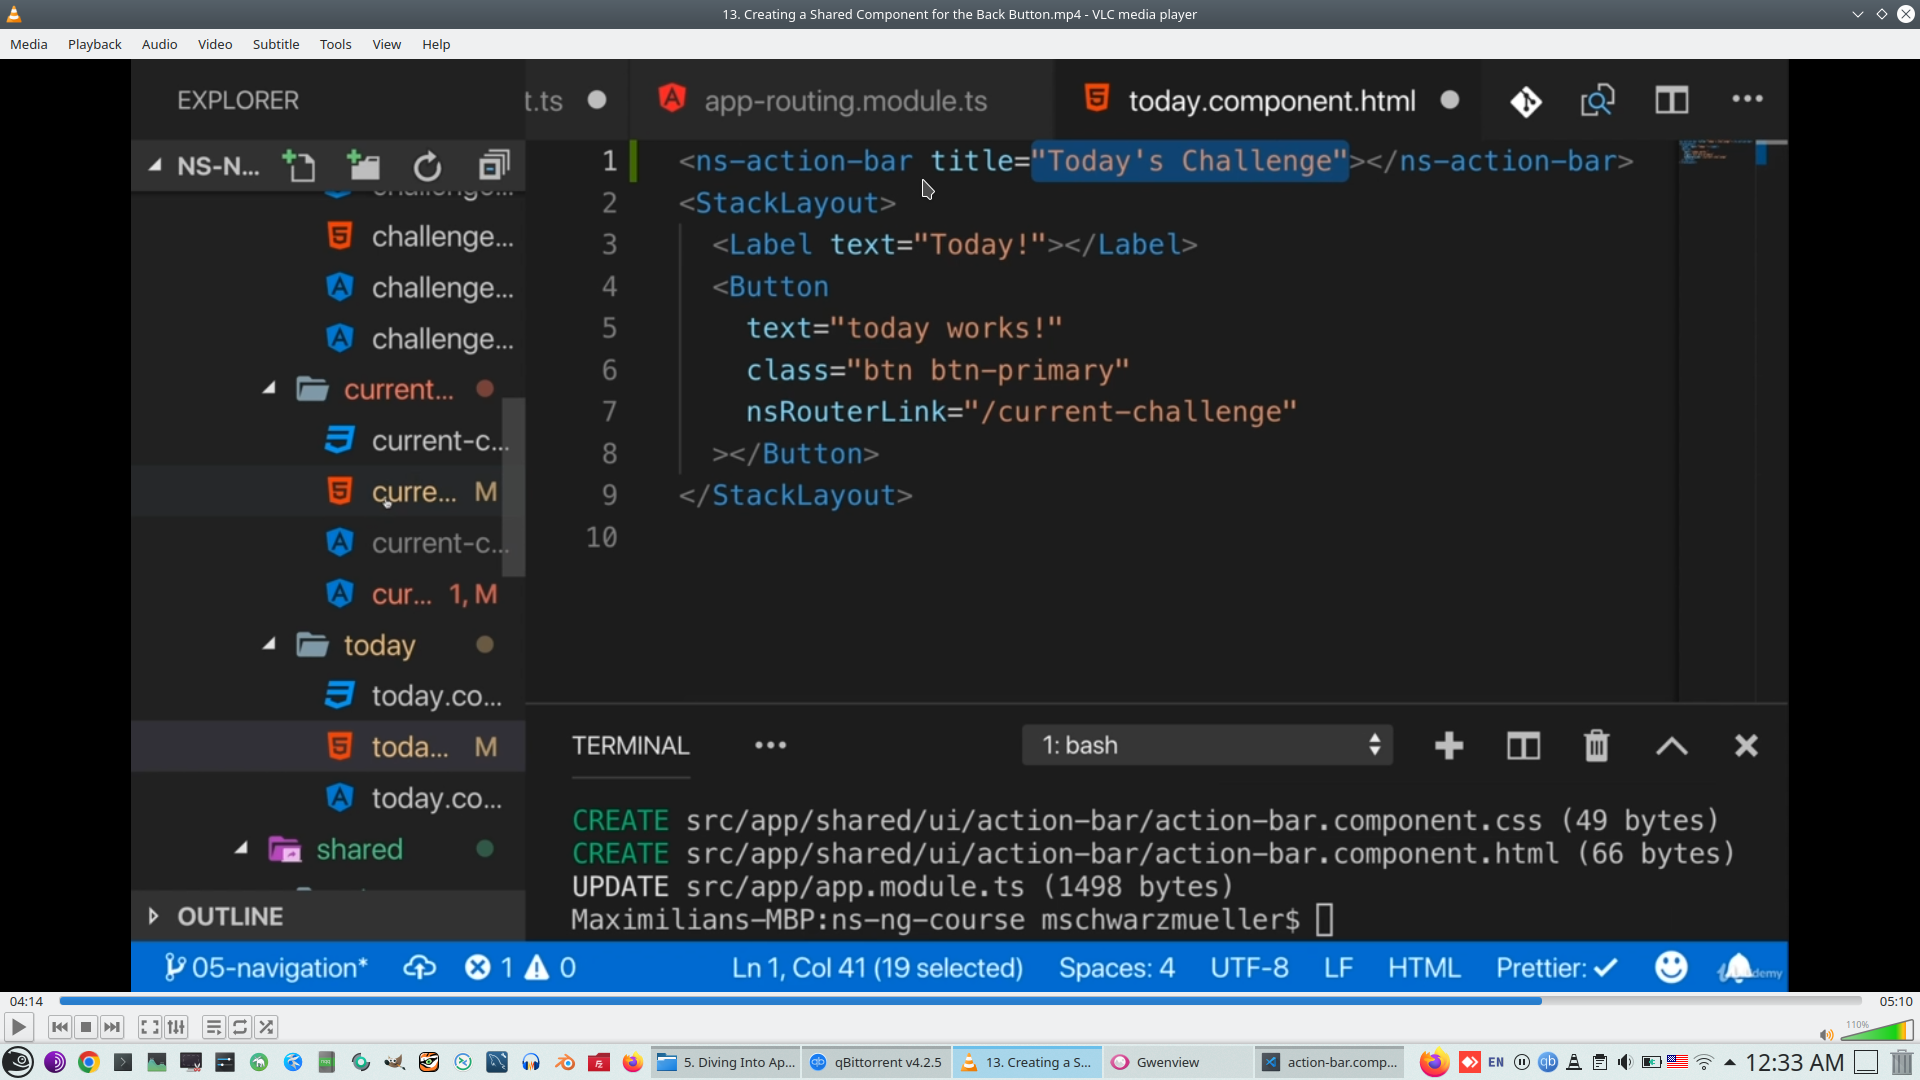
Make input parameter 'title' to ActionBar component
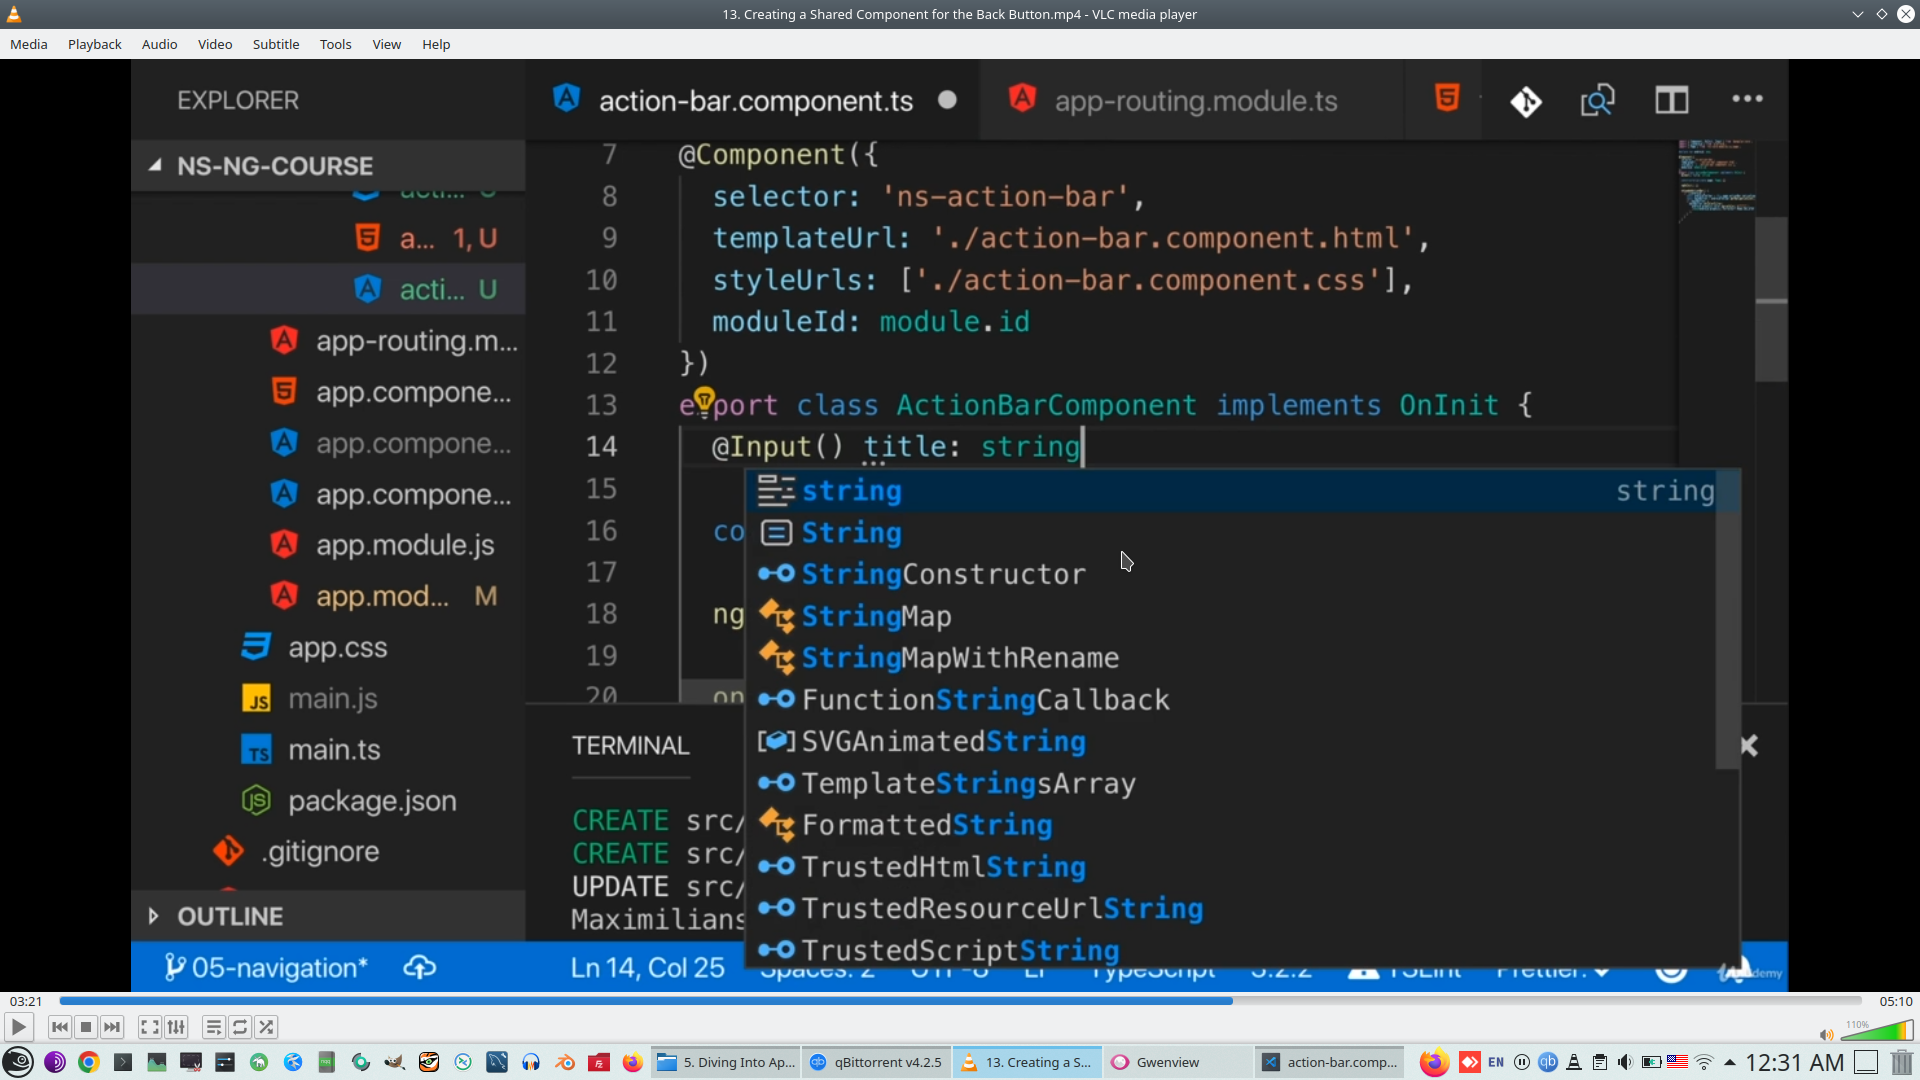
And setup it for each page
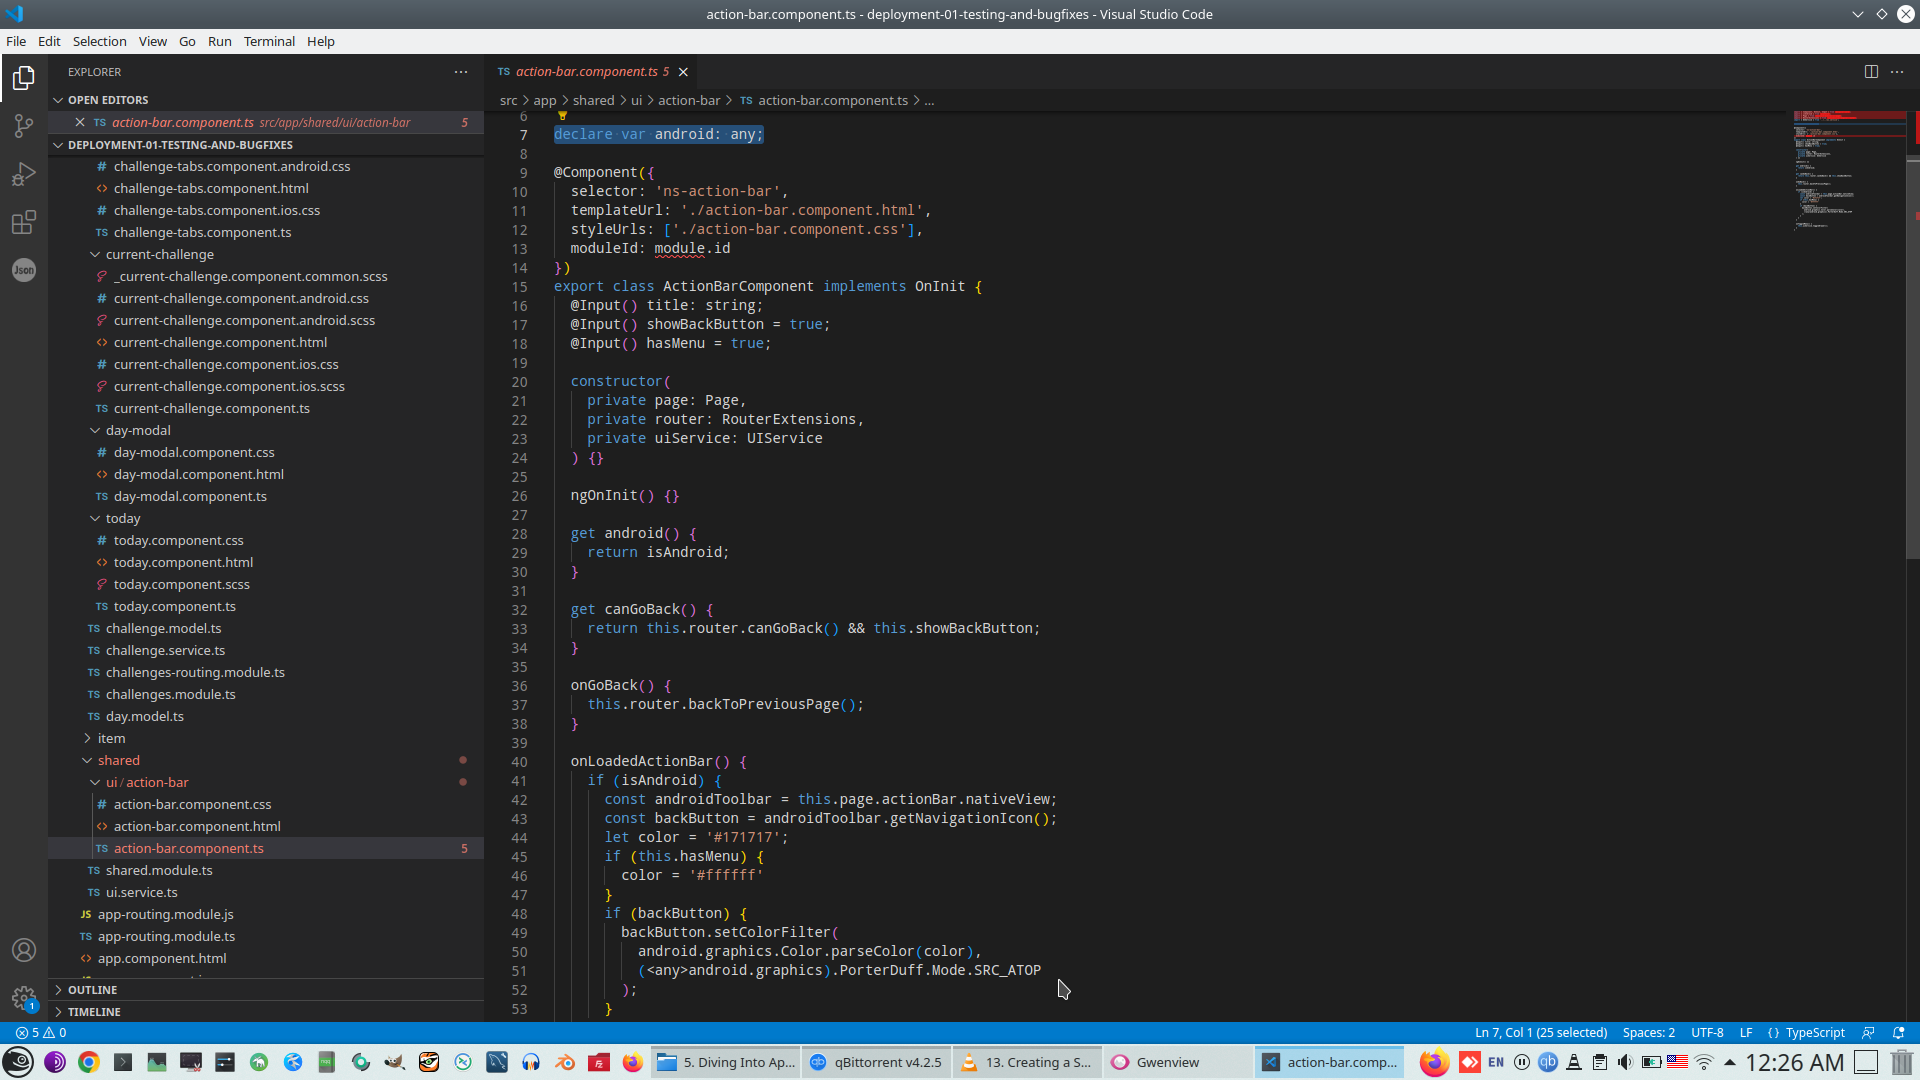
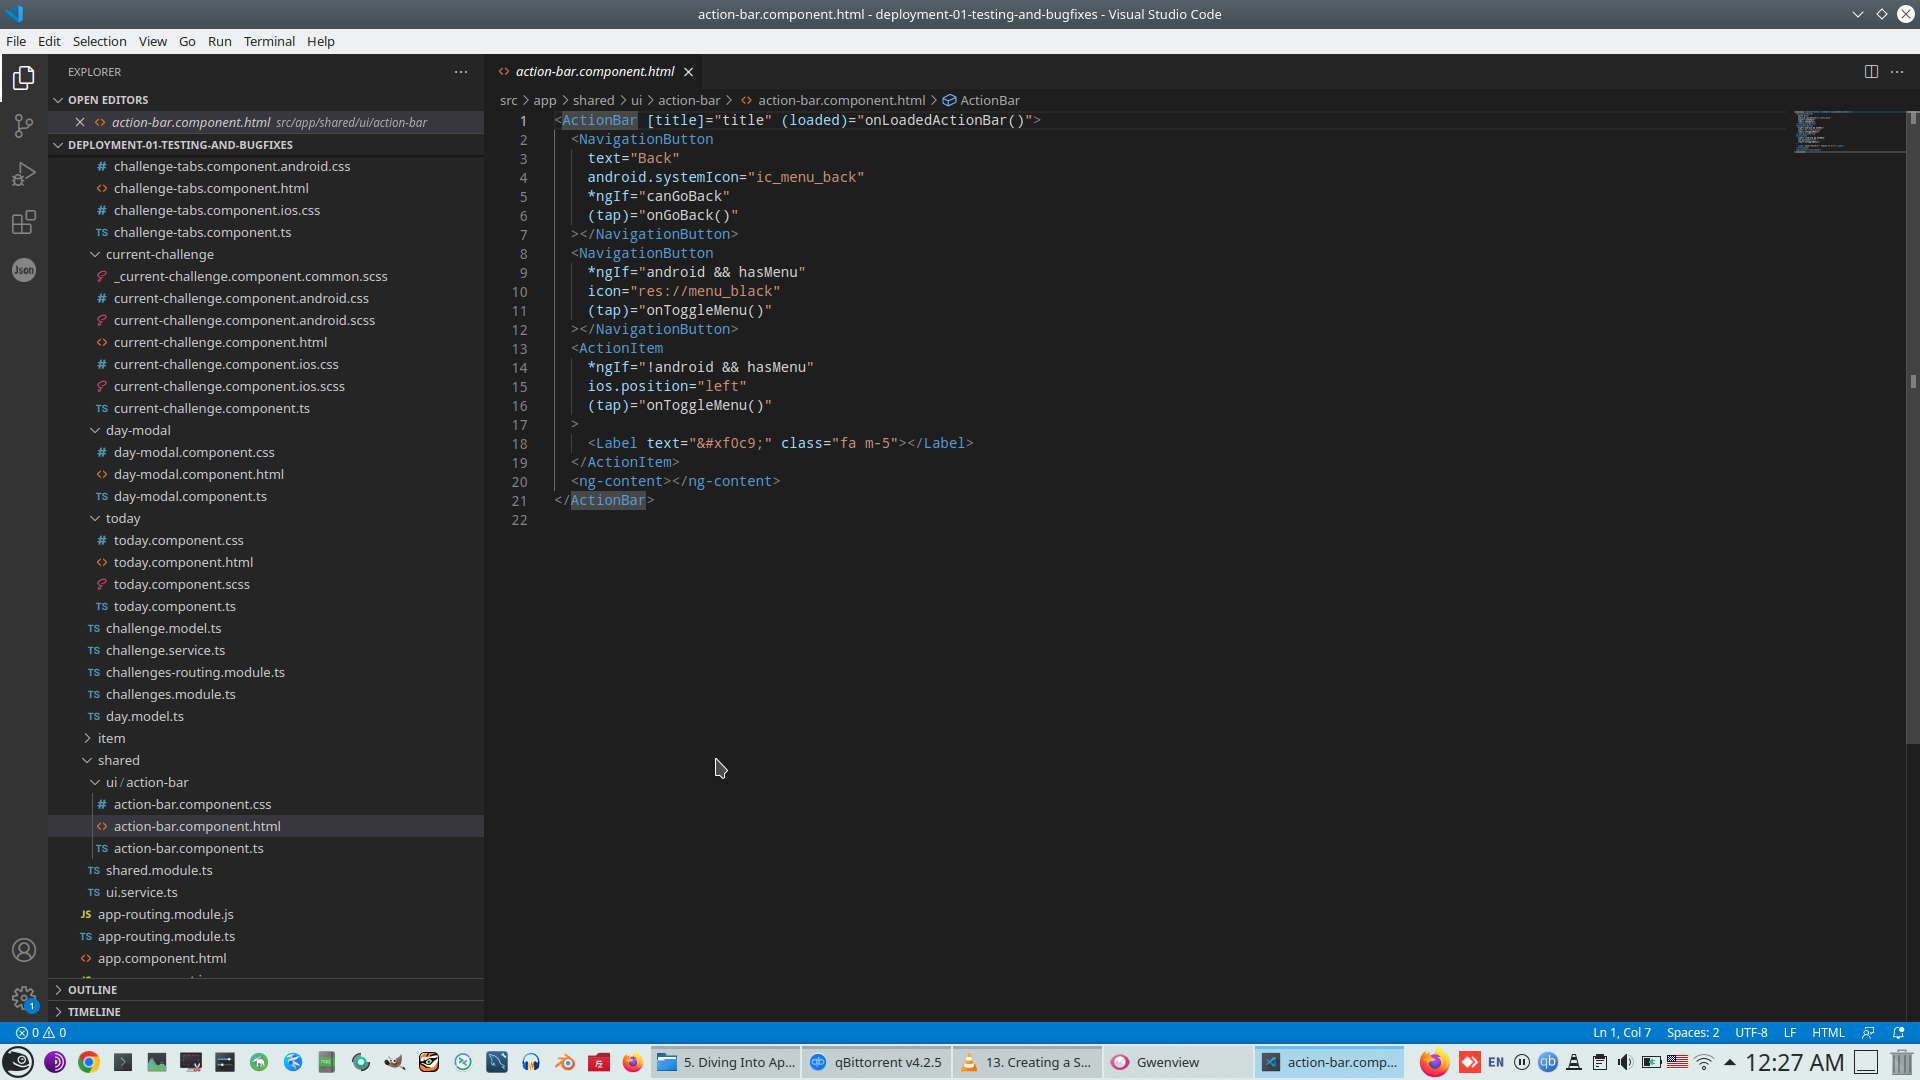
This is final code for shared component
And with Drawler
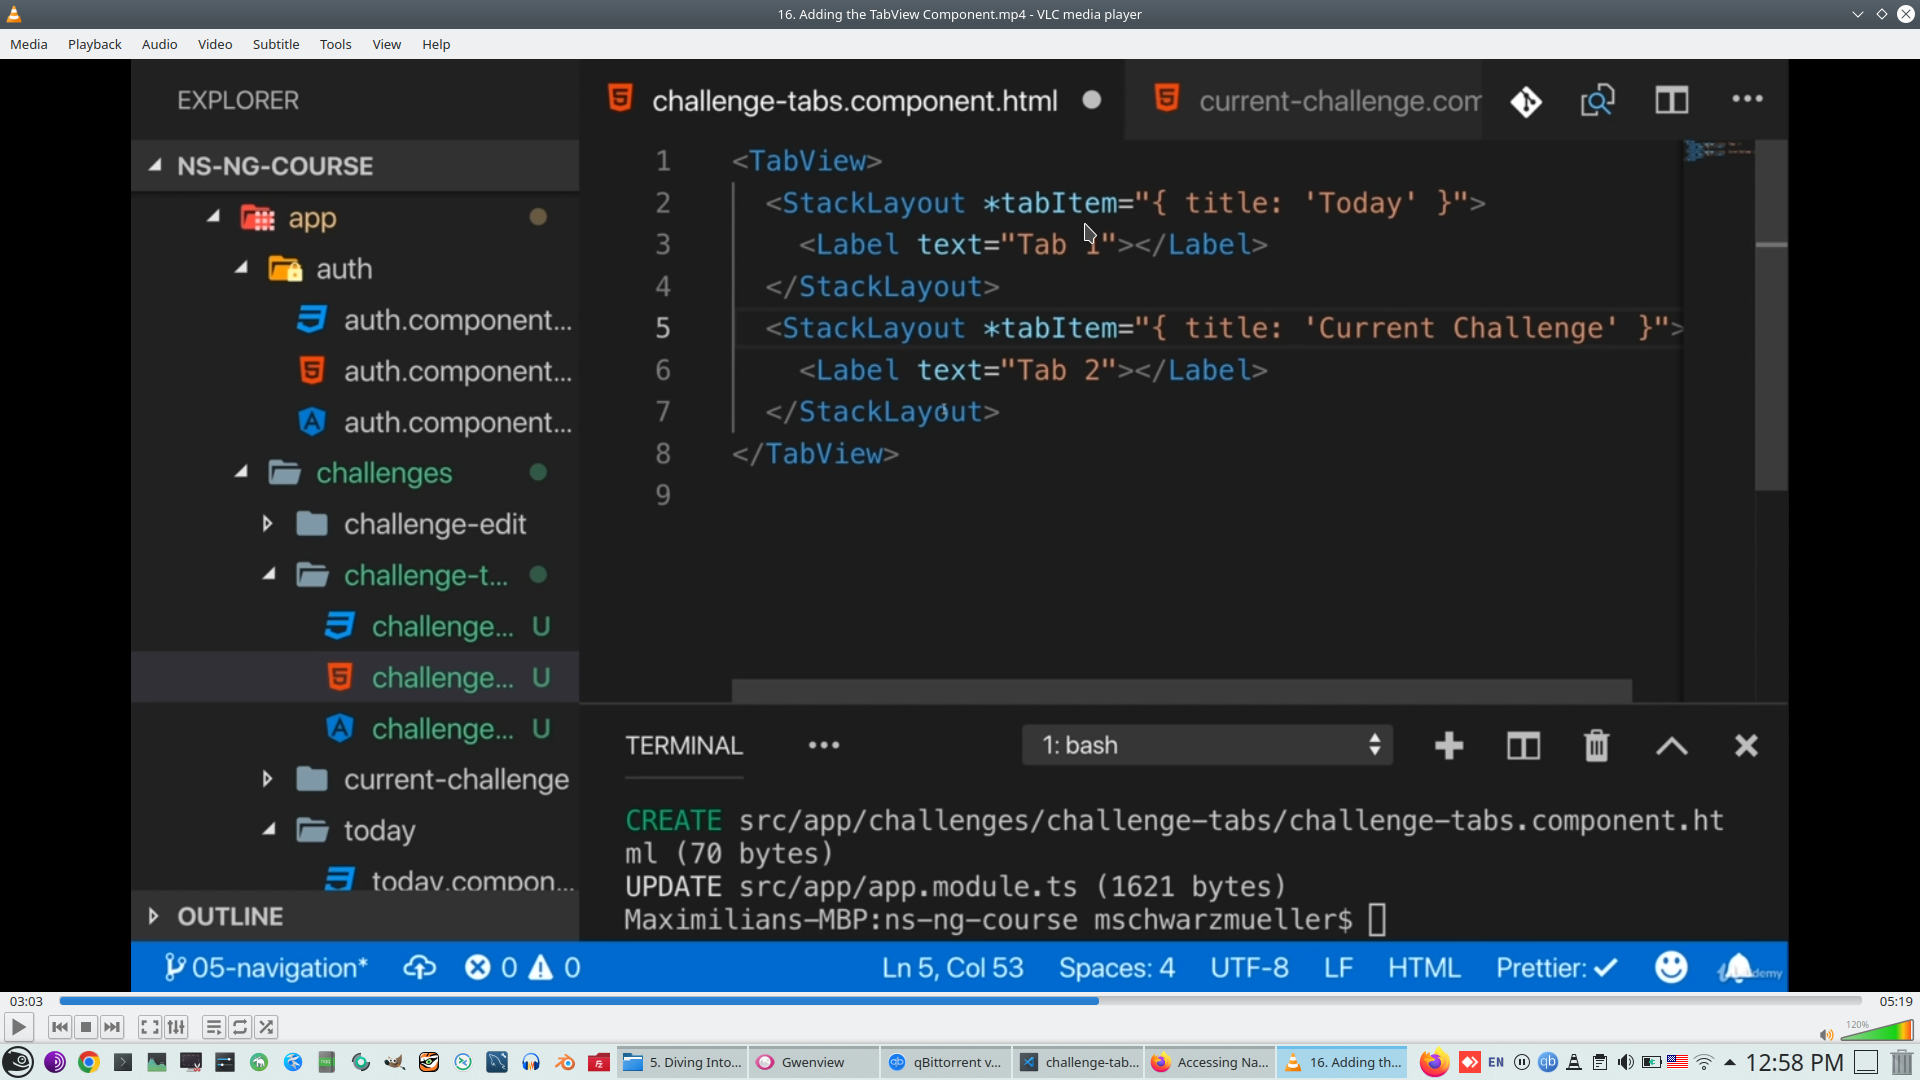
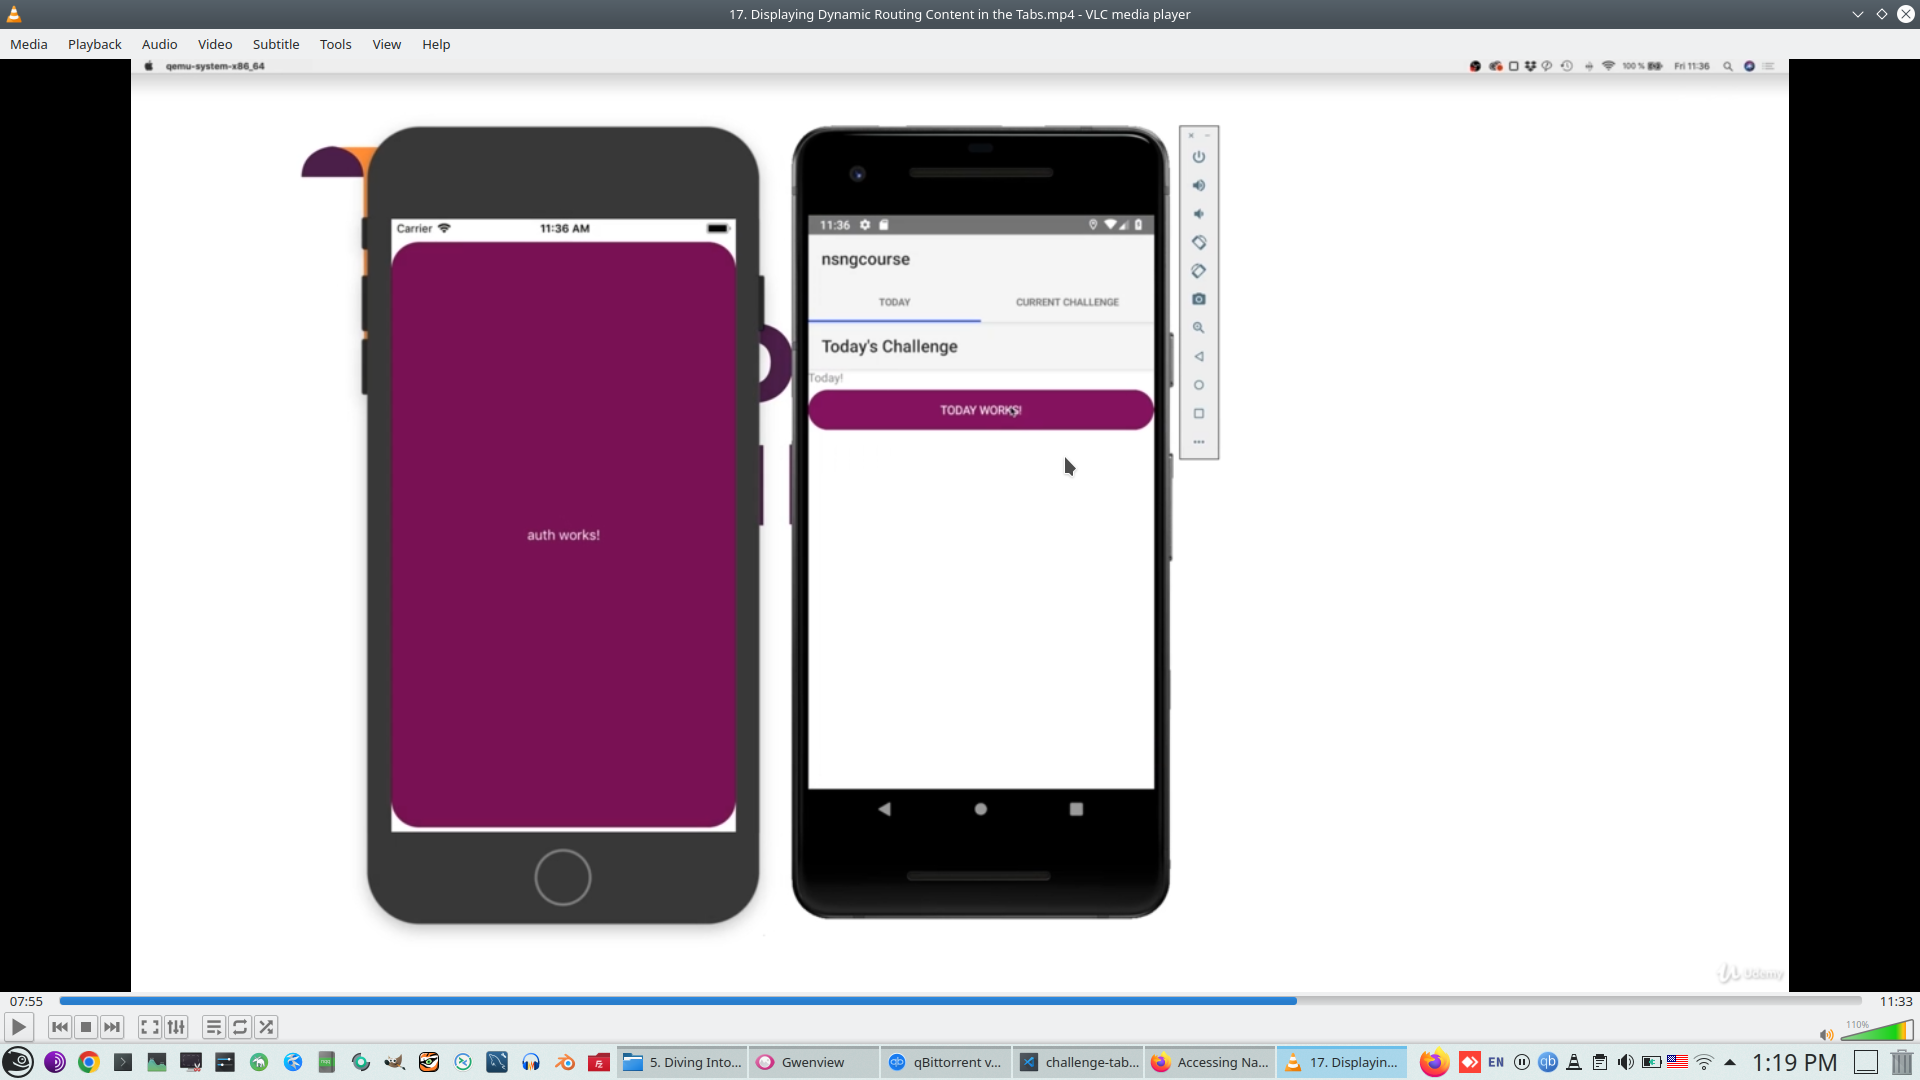
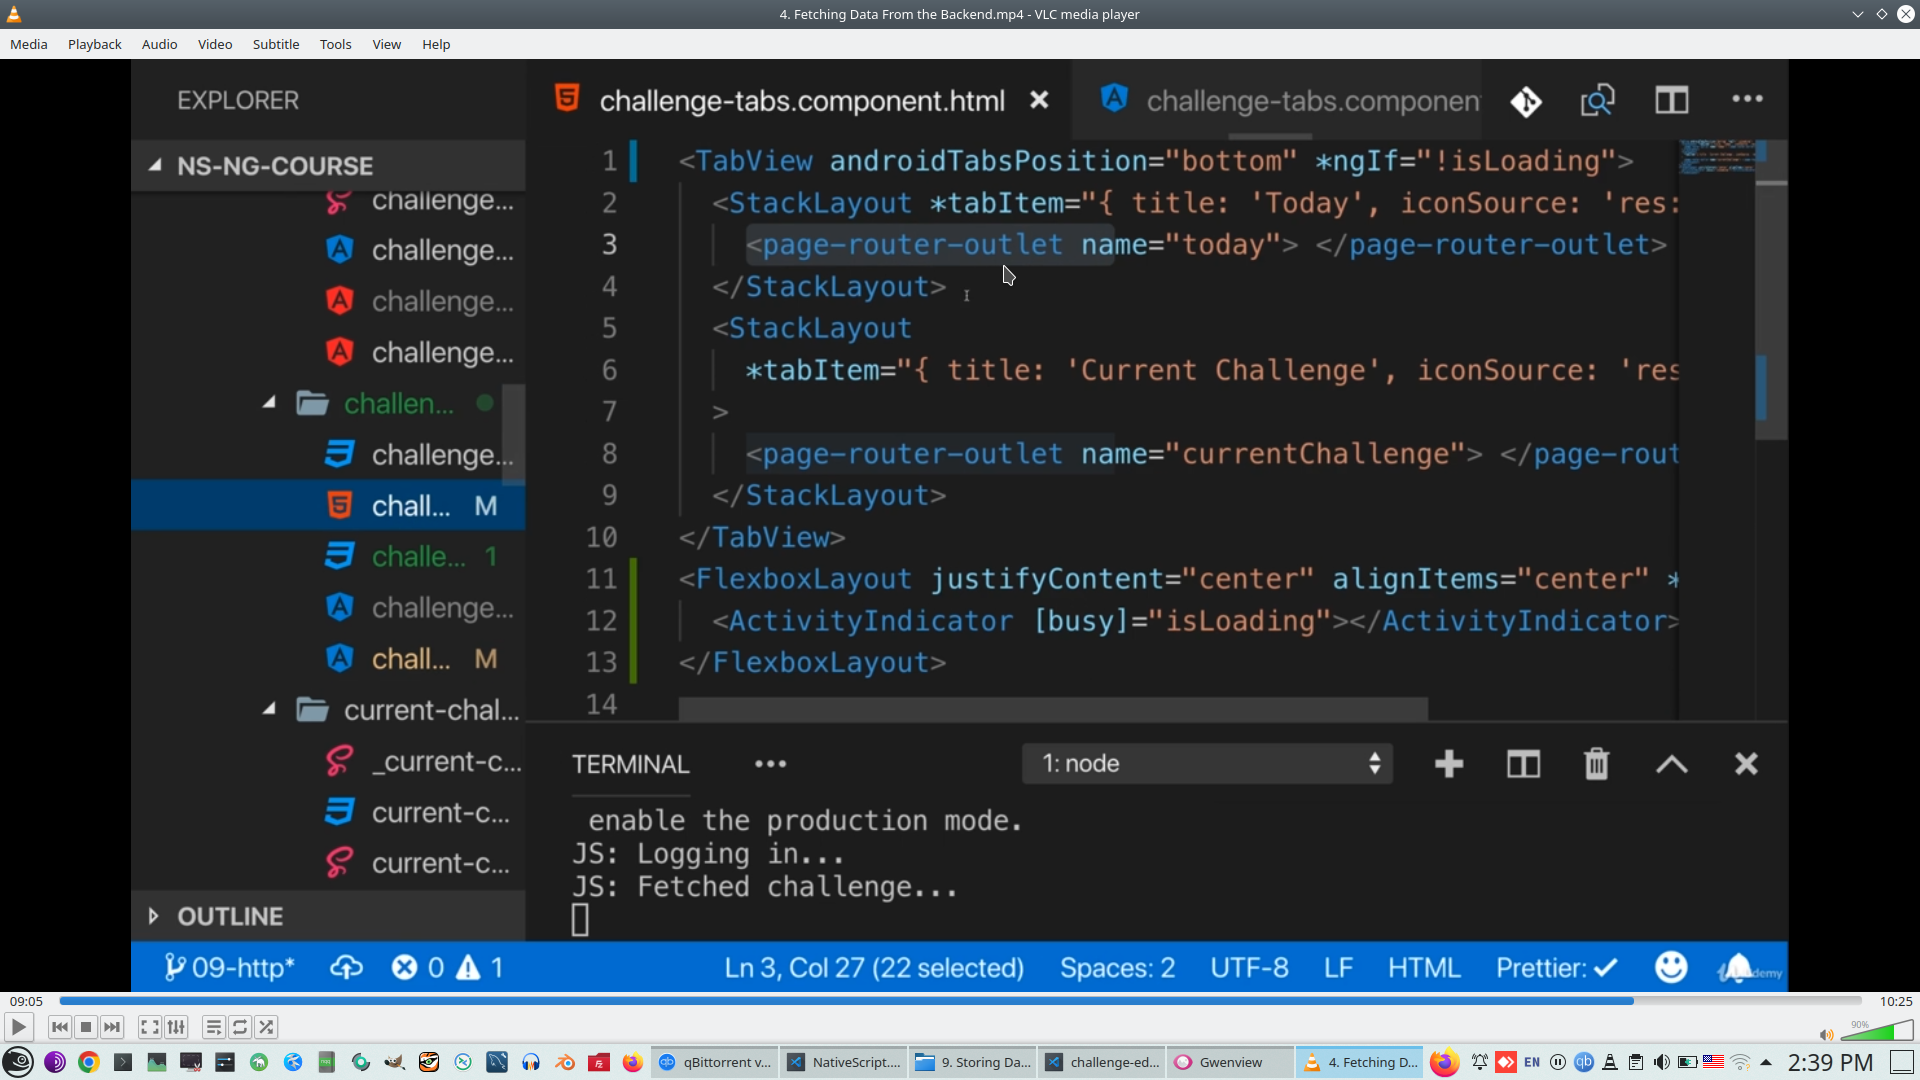
18. TabView navigation

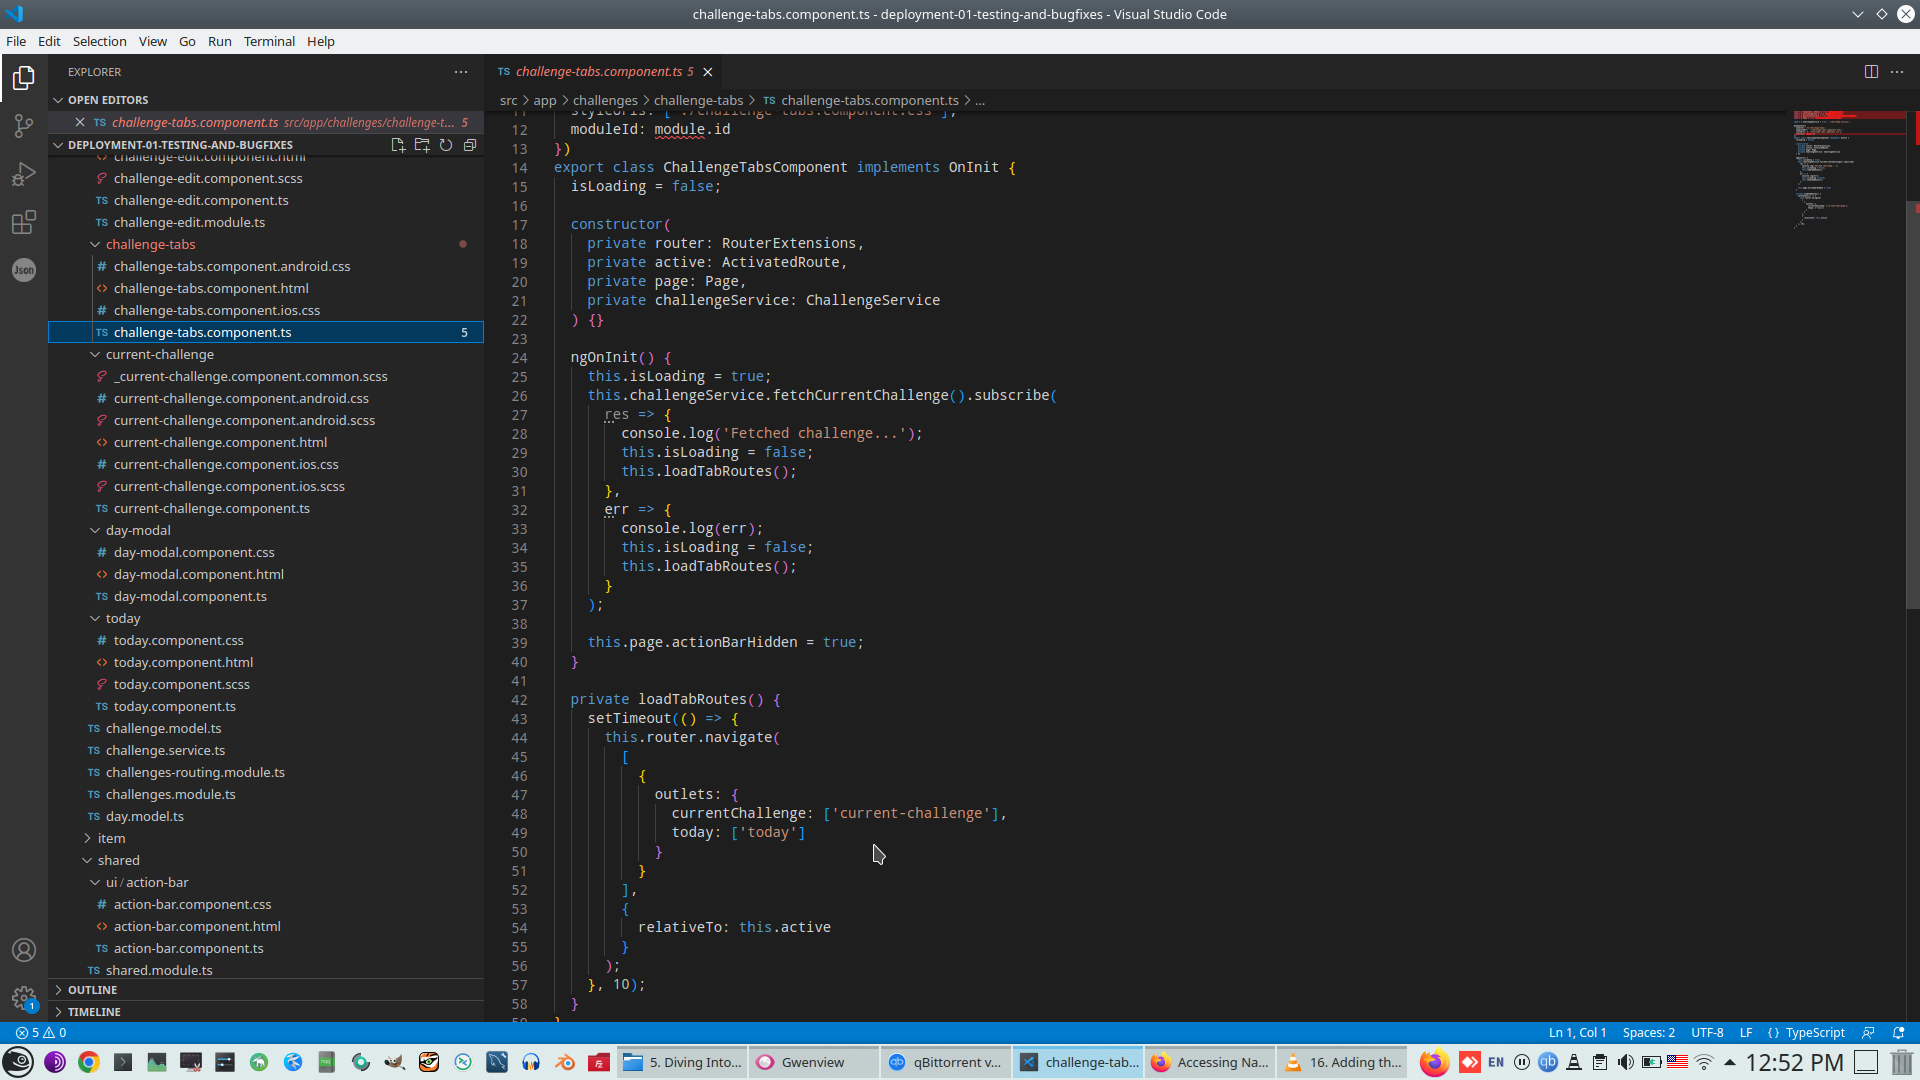
Access for routing parameters
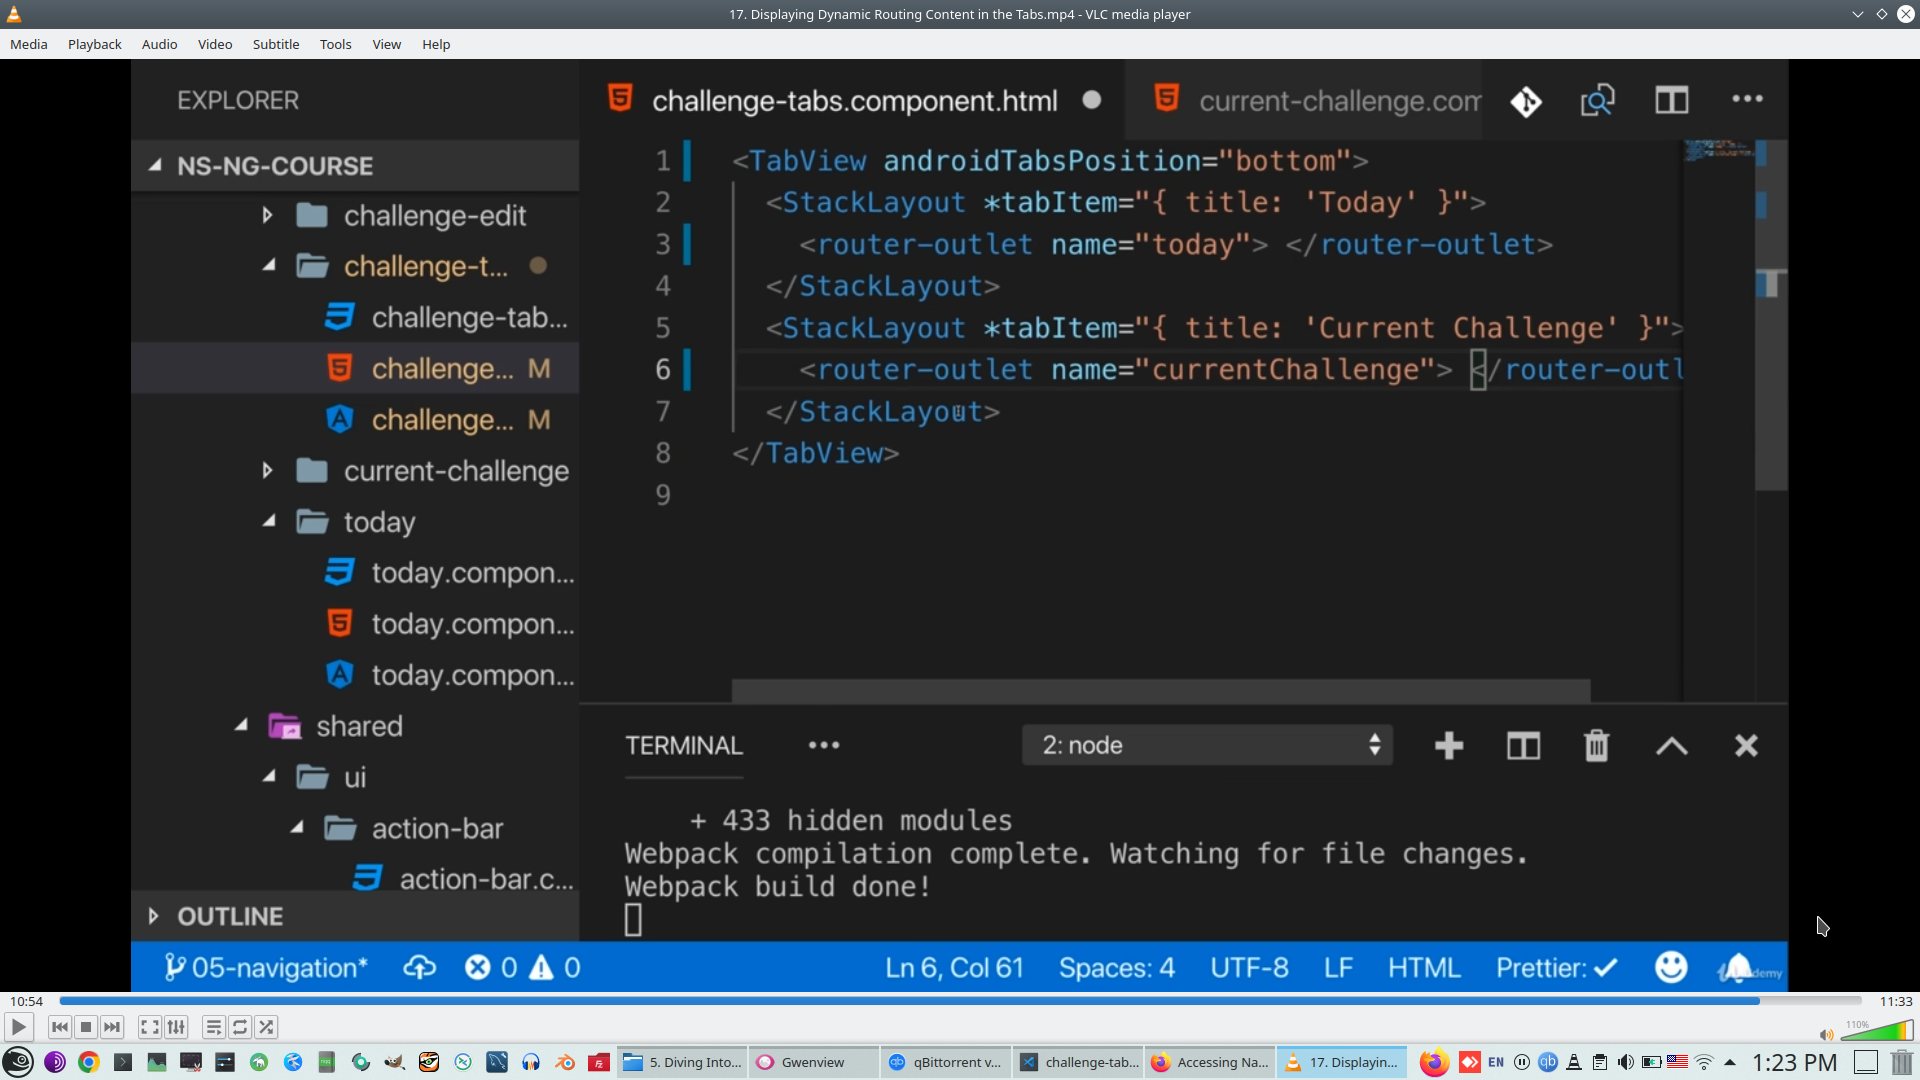
*TabViewItem
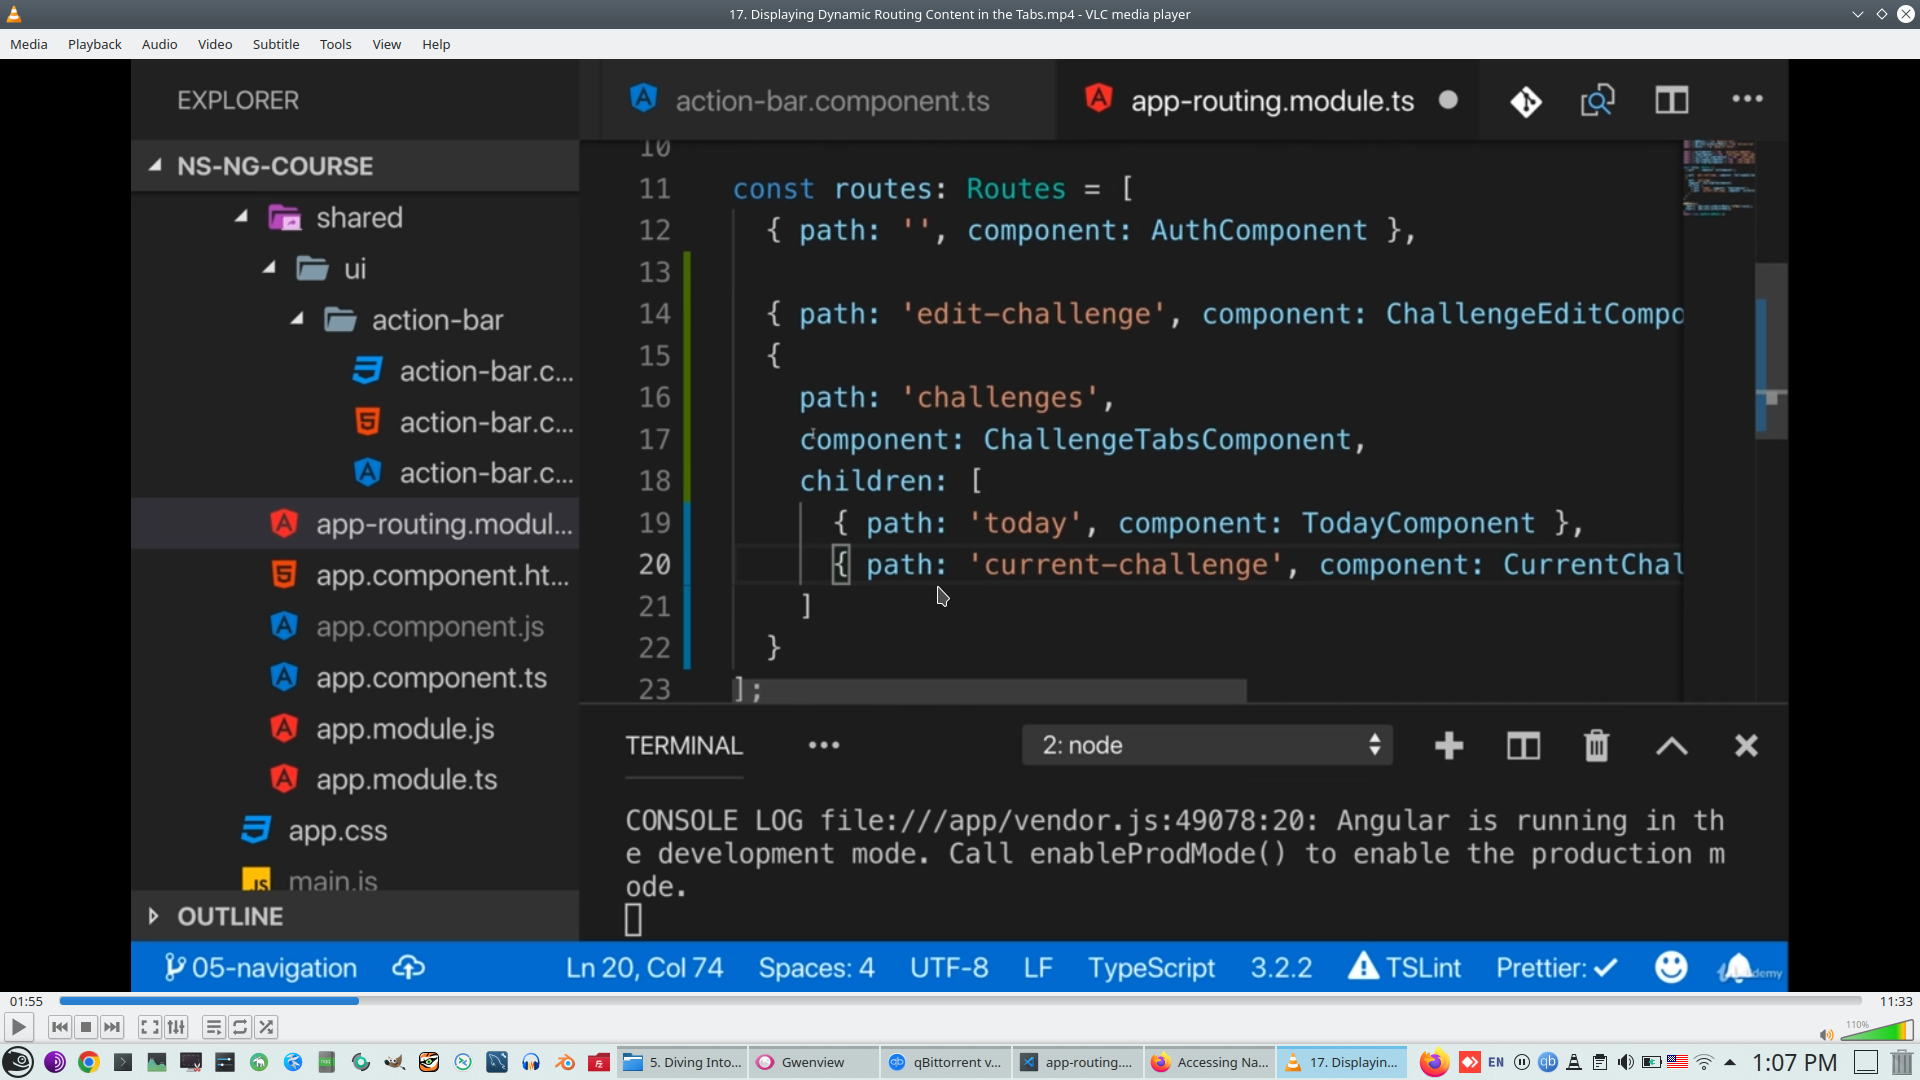
This is Router array
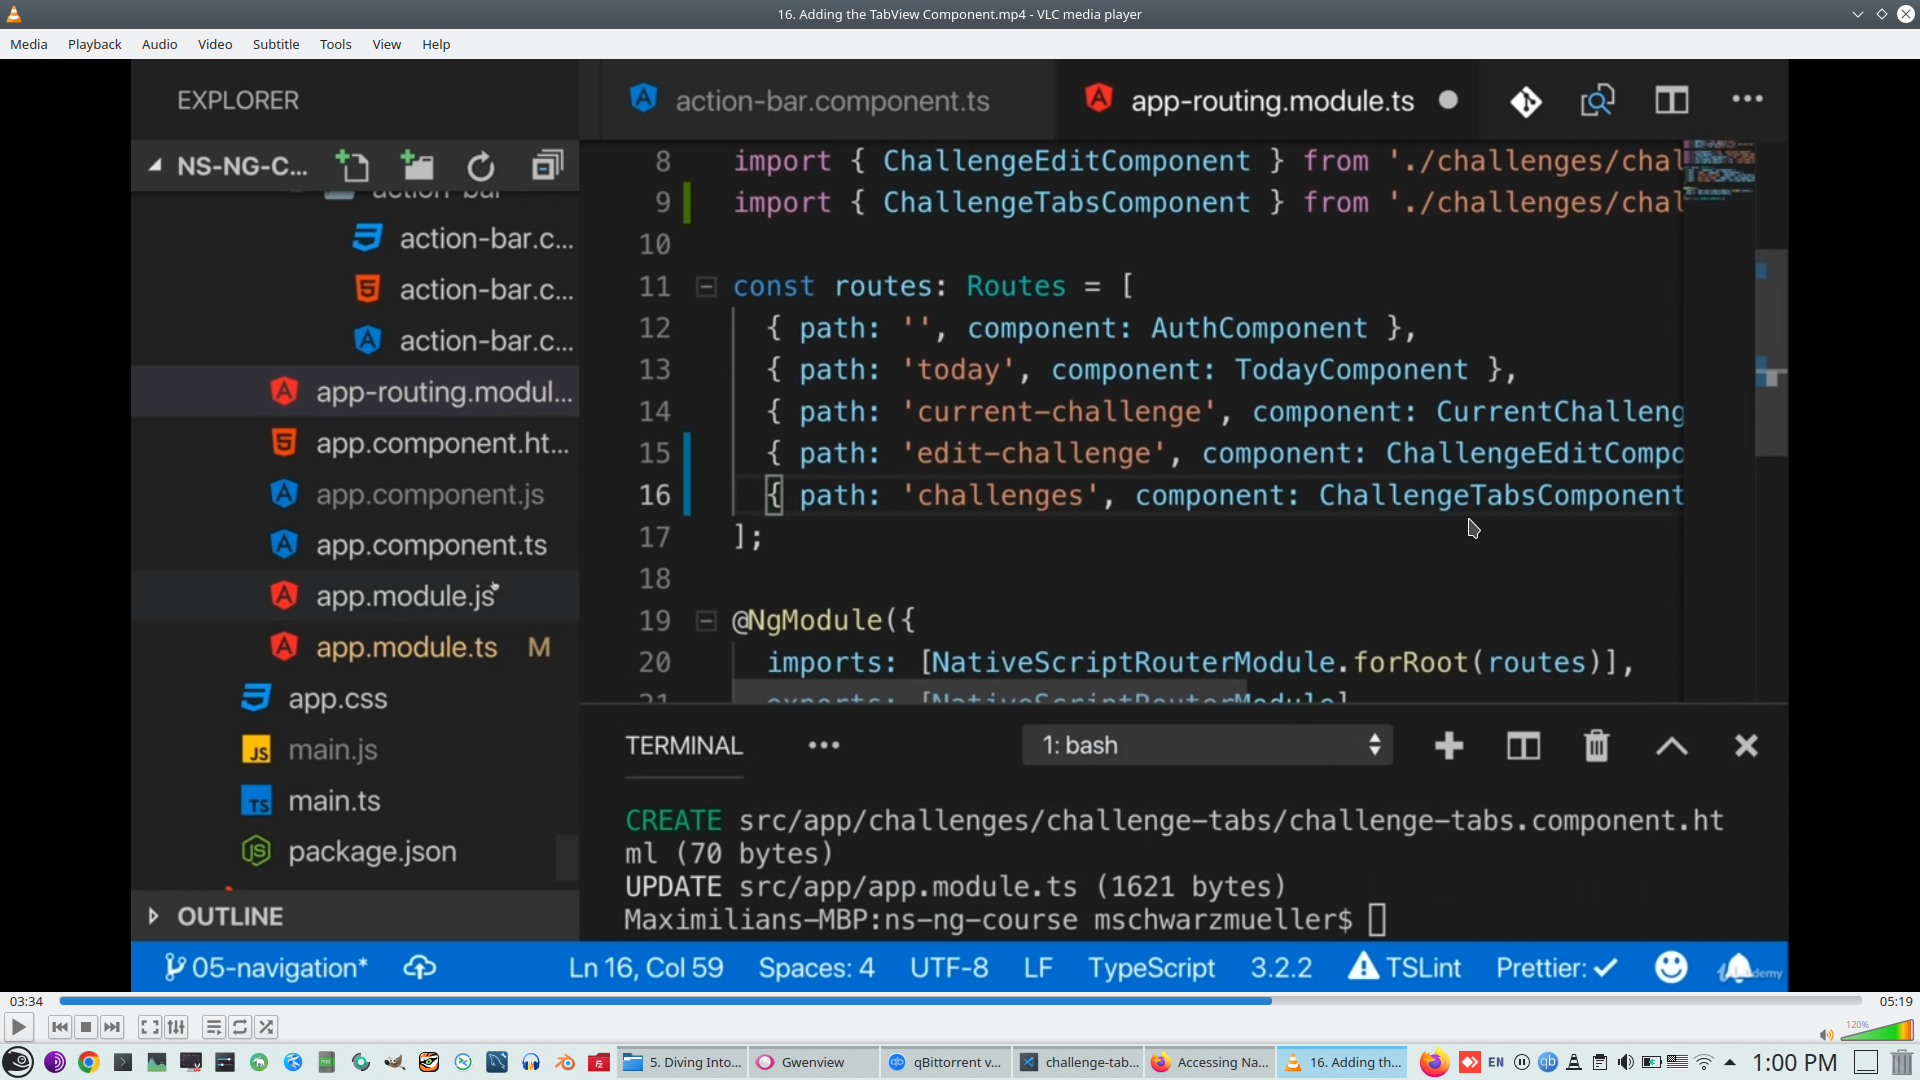
And routing path on Button
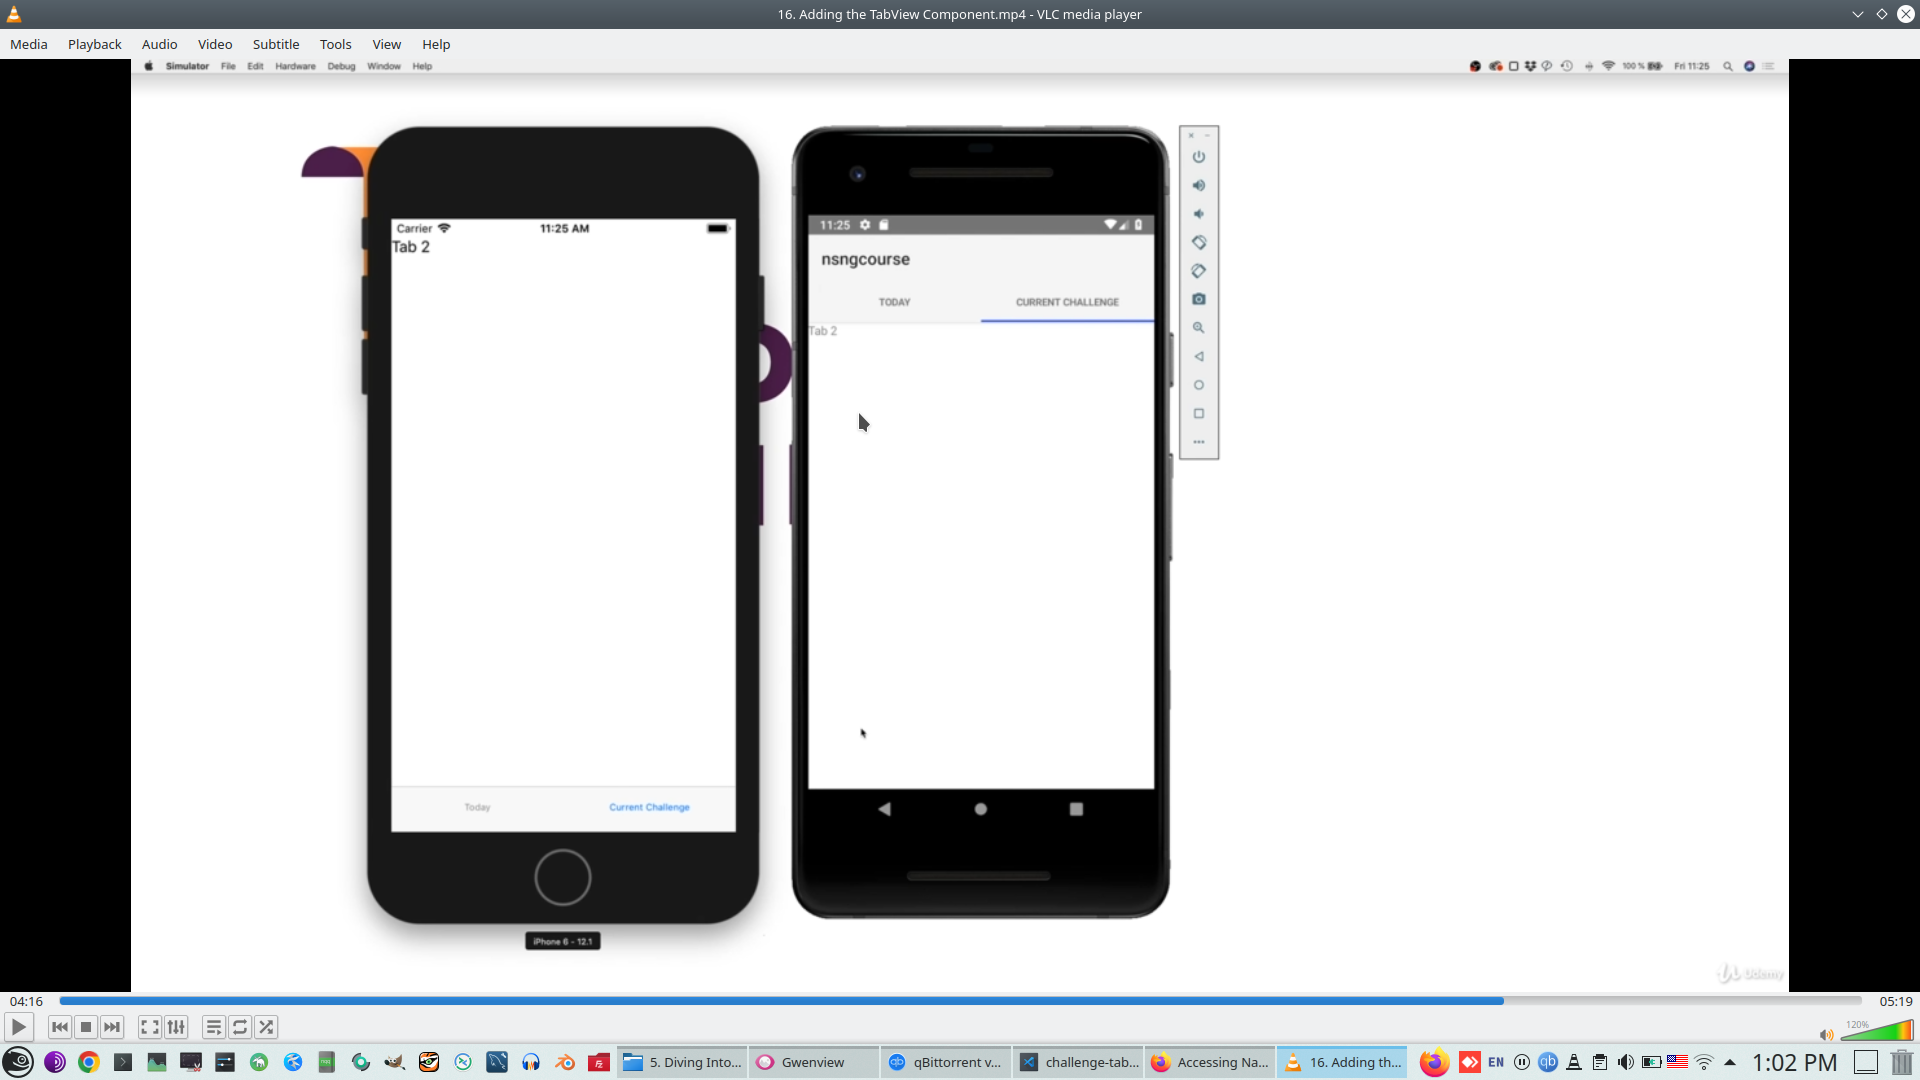
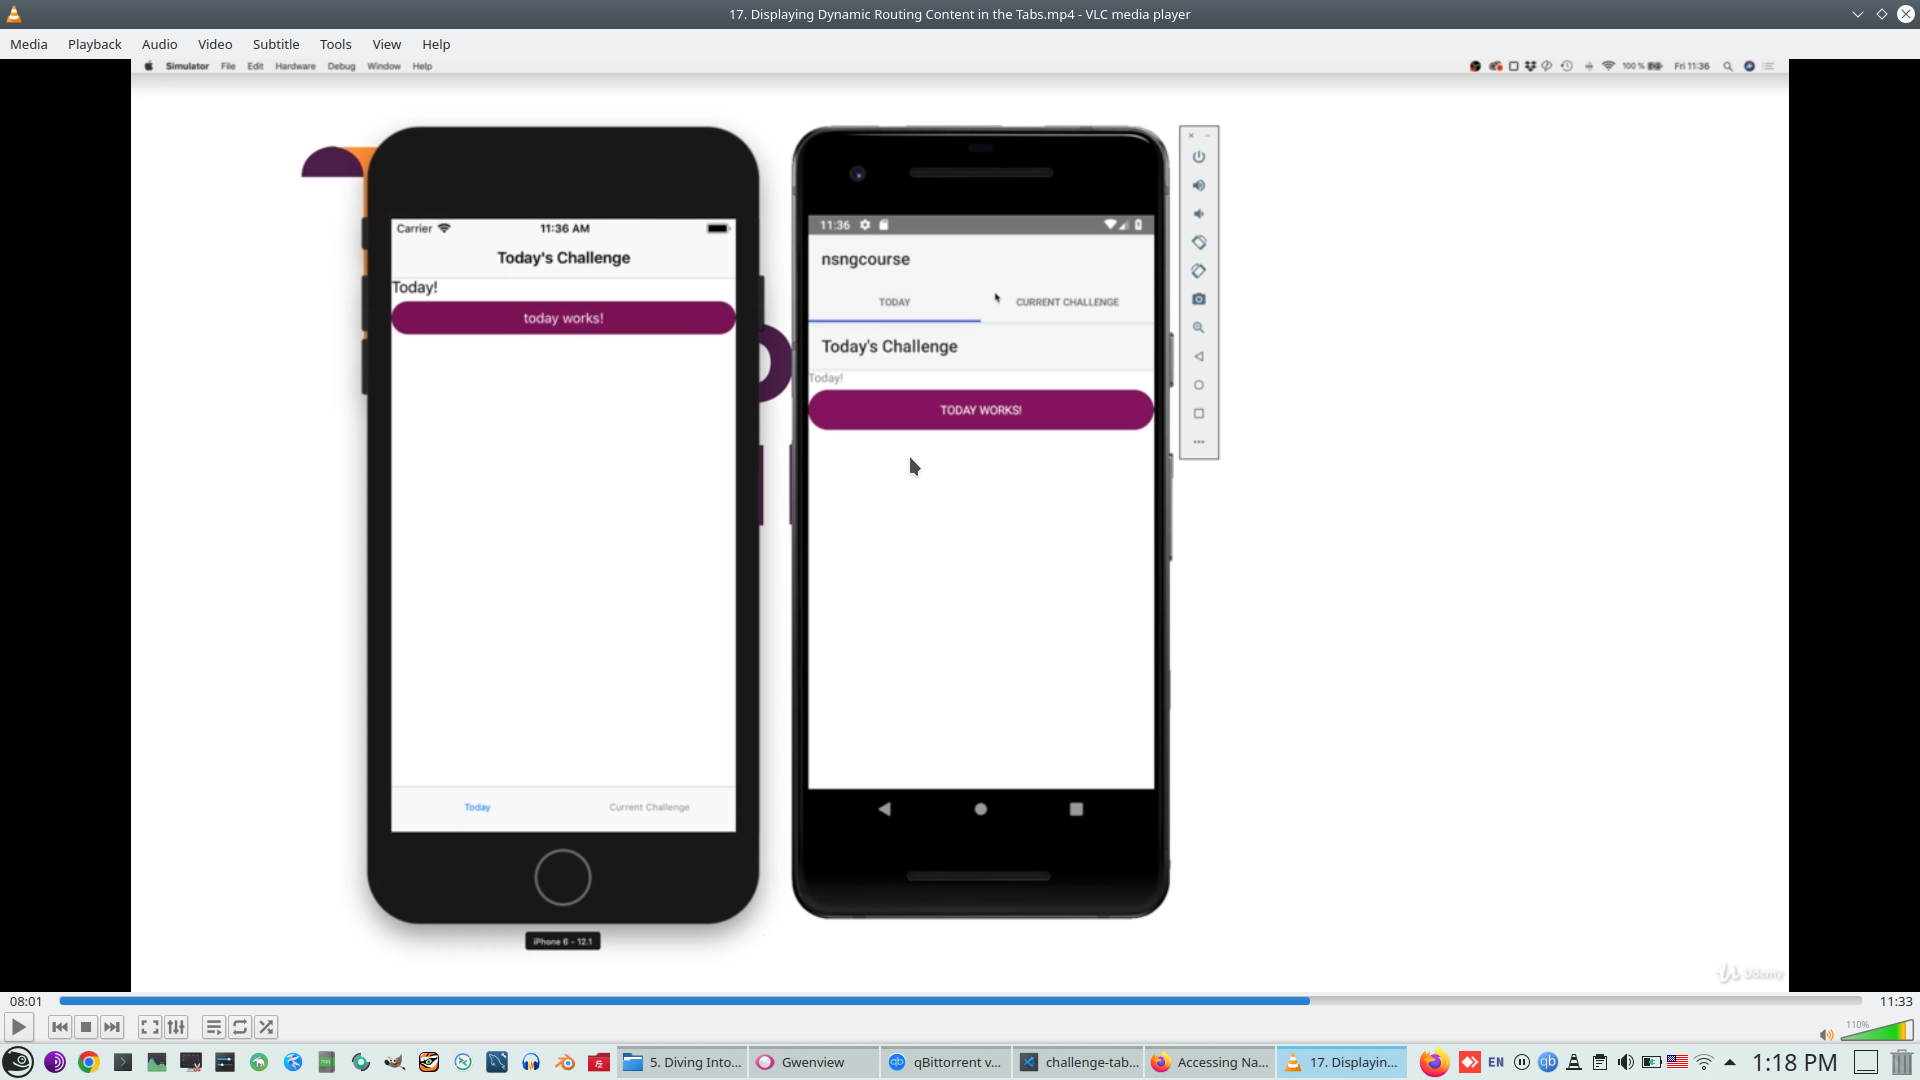
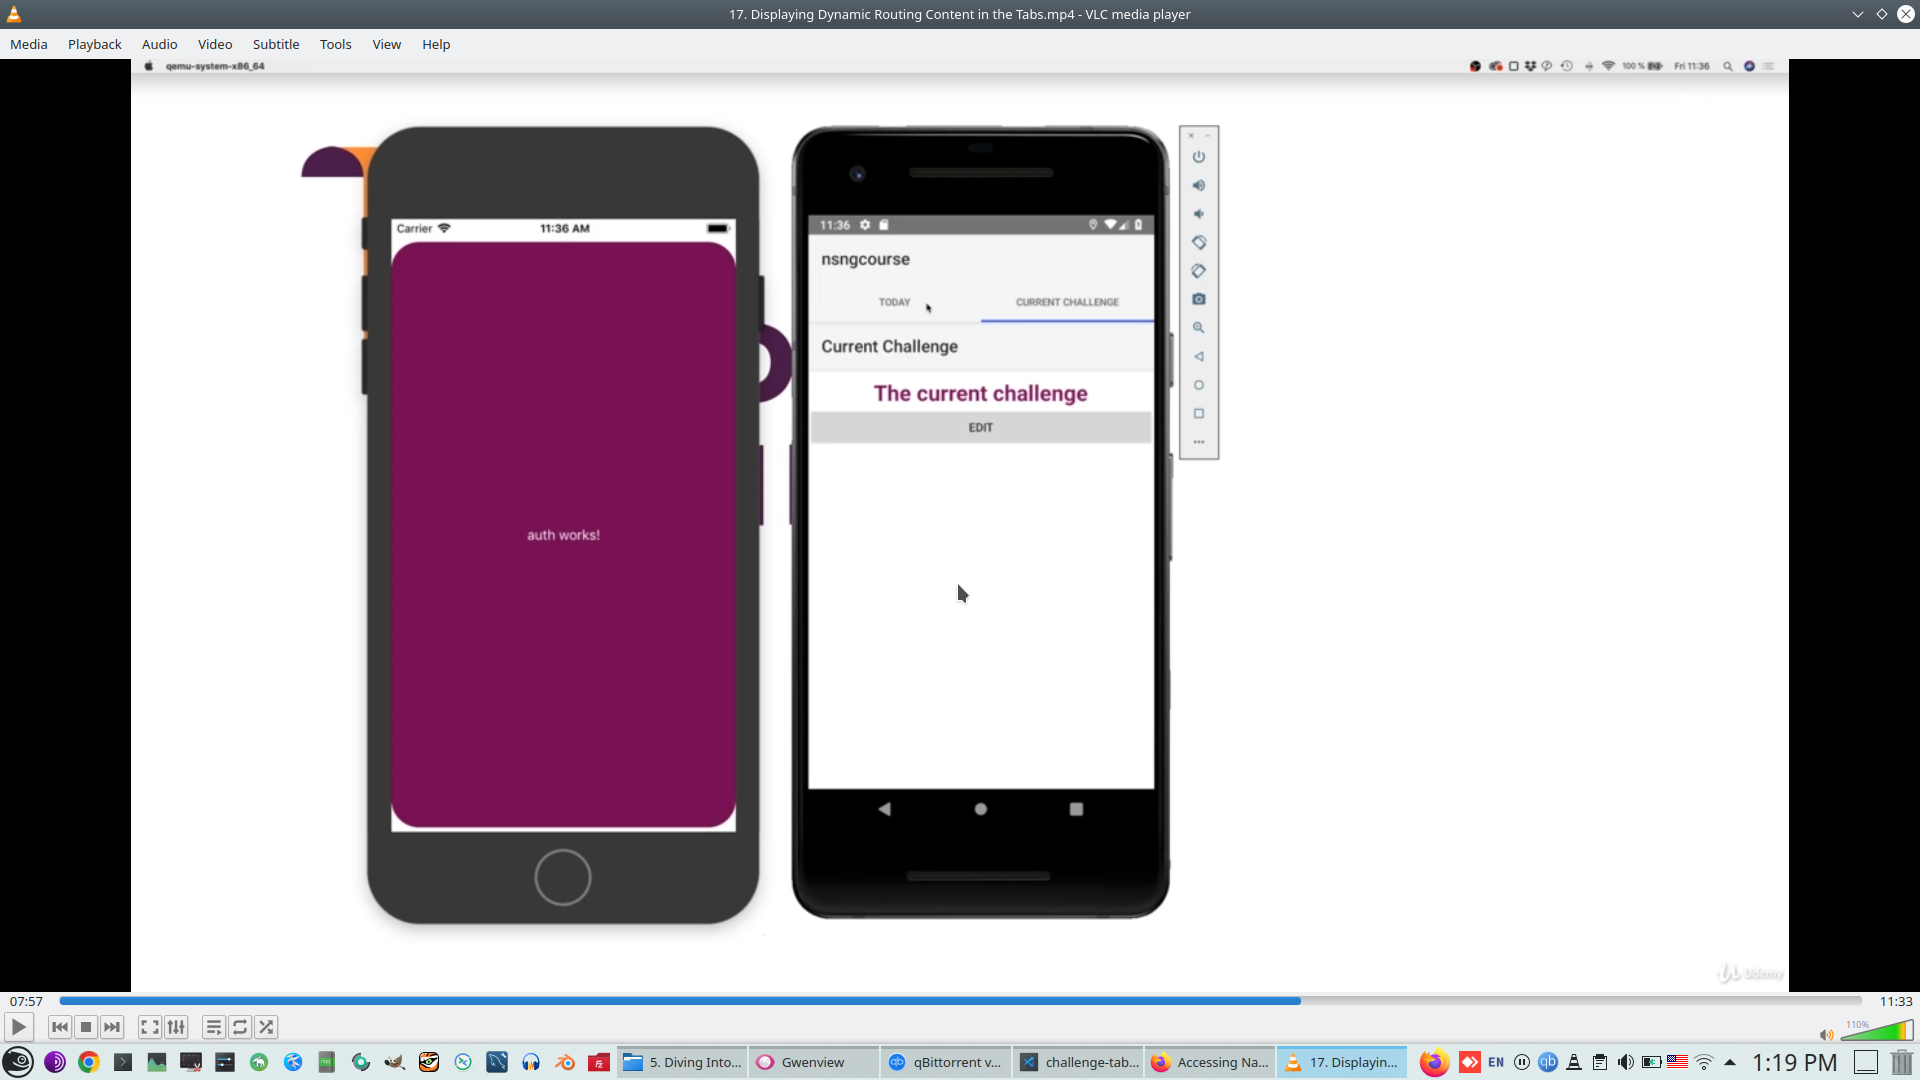
Check Tb navigation
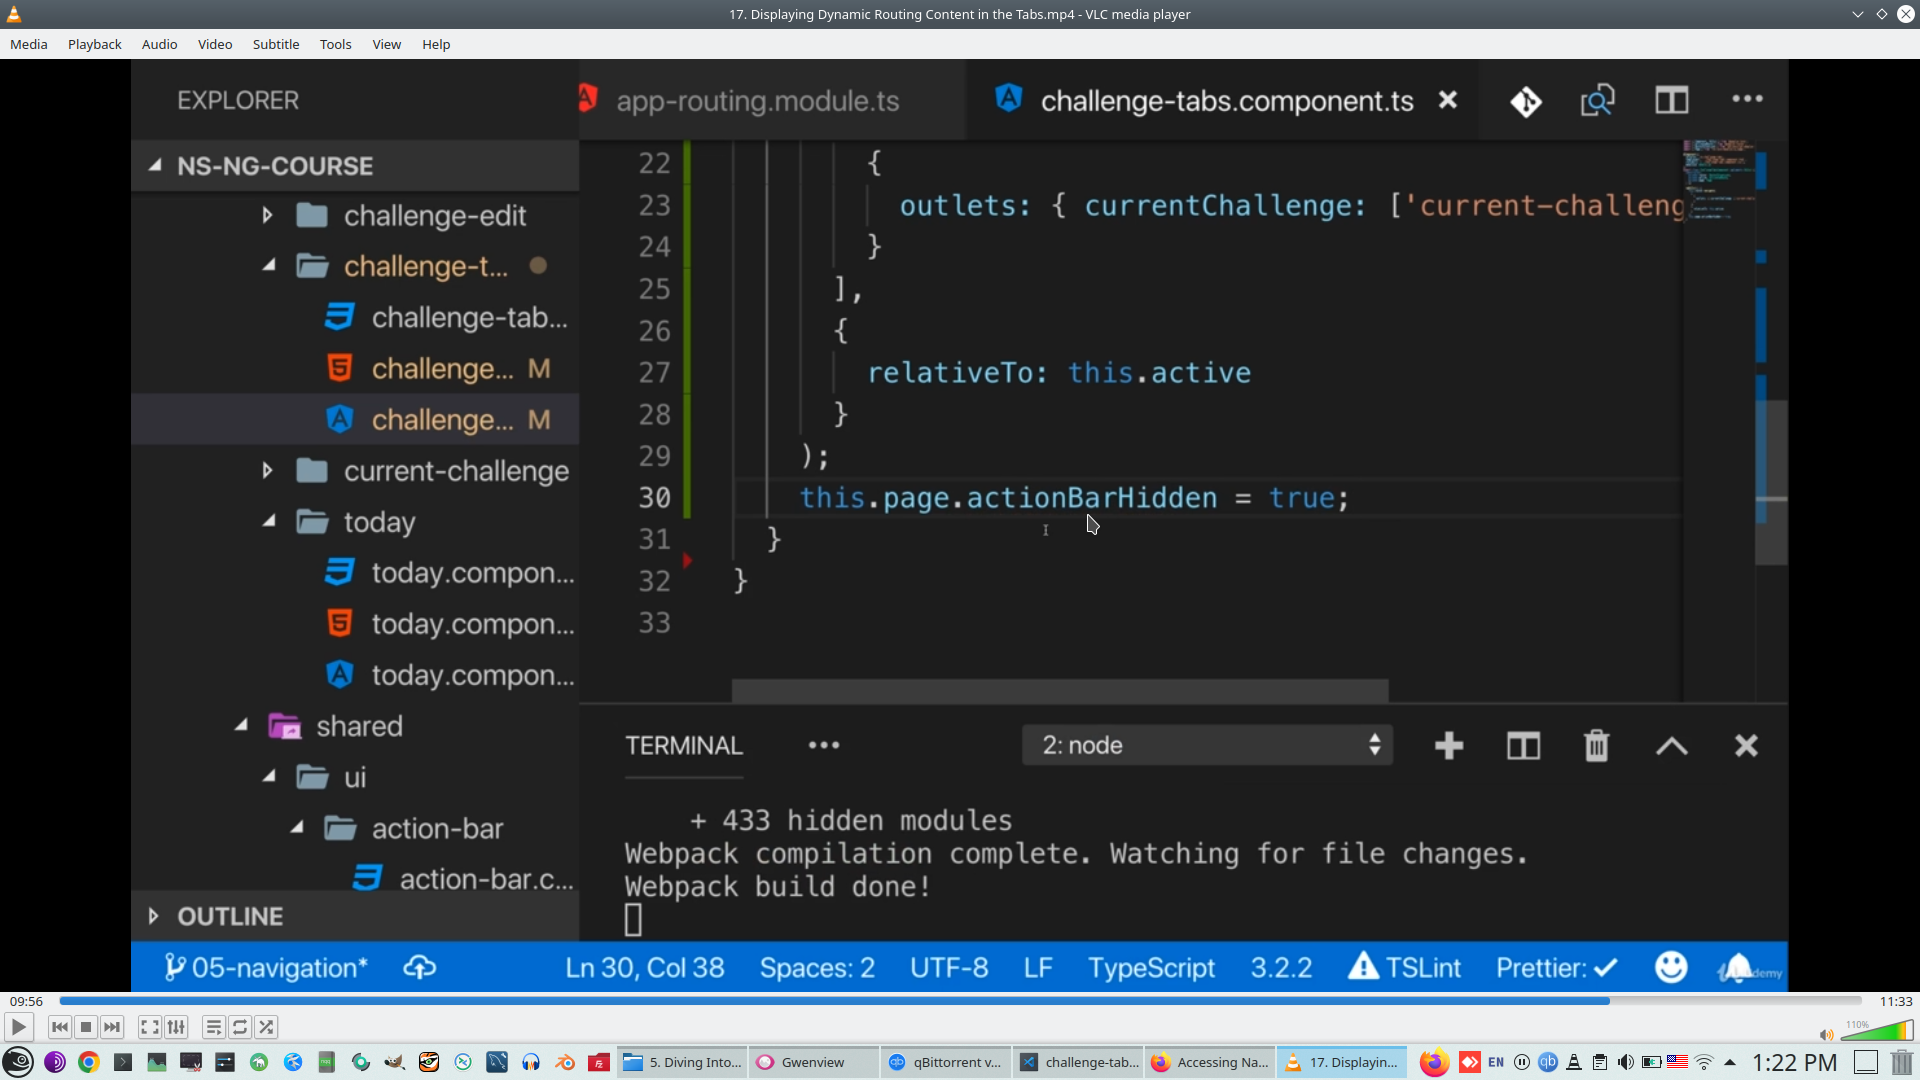
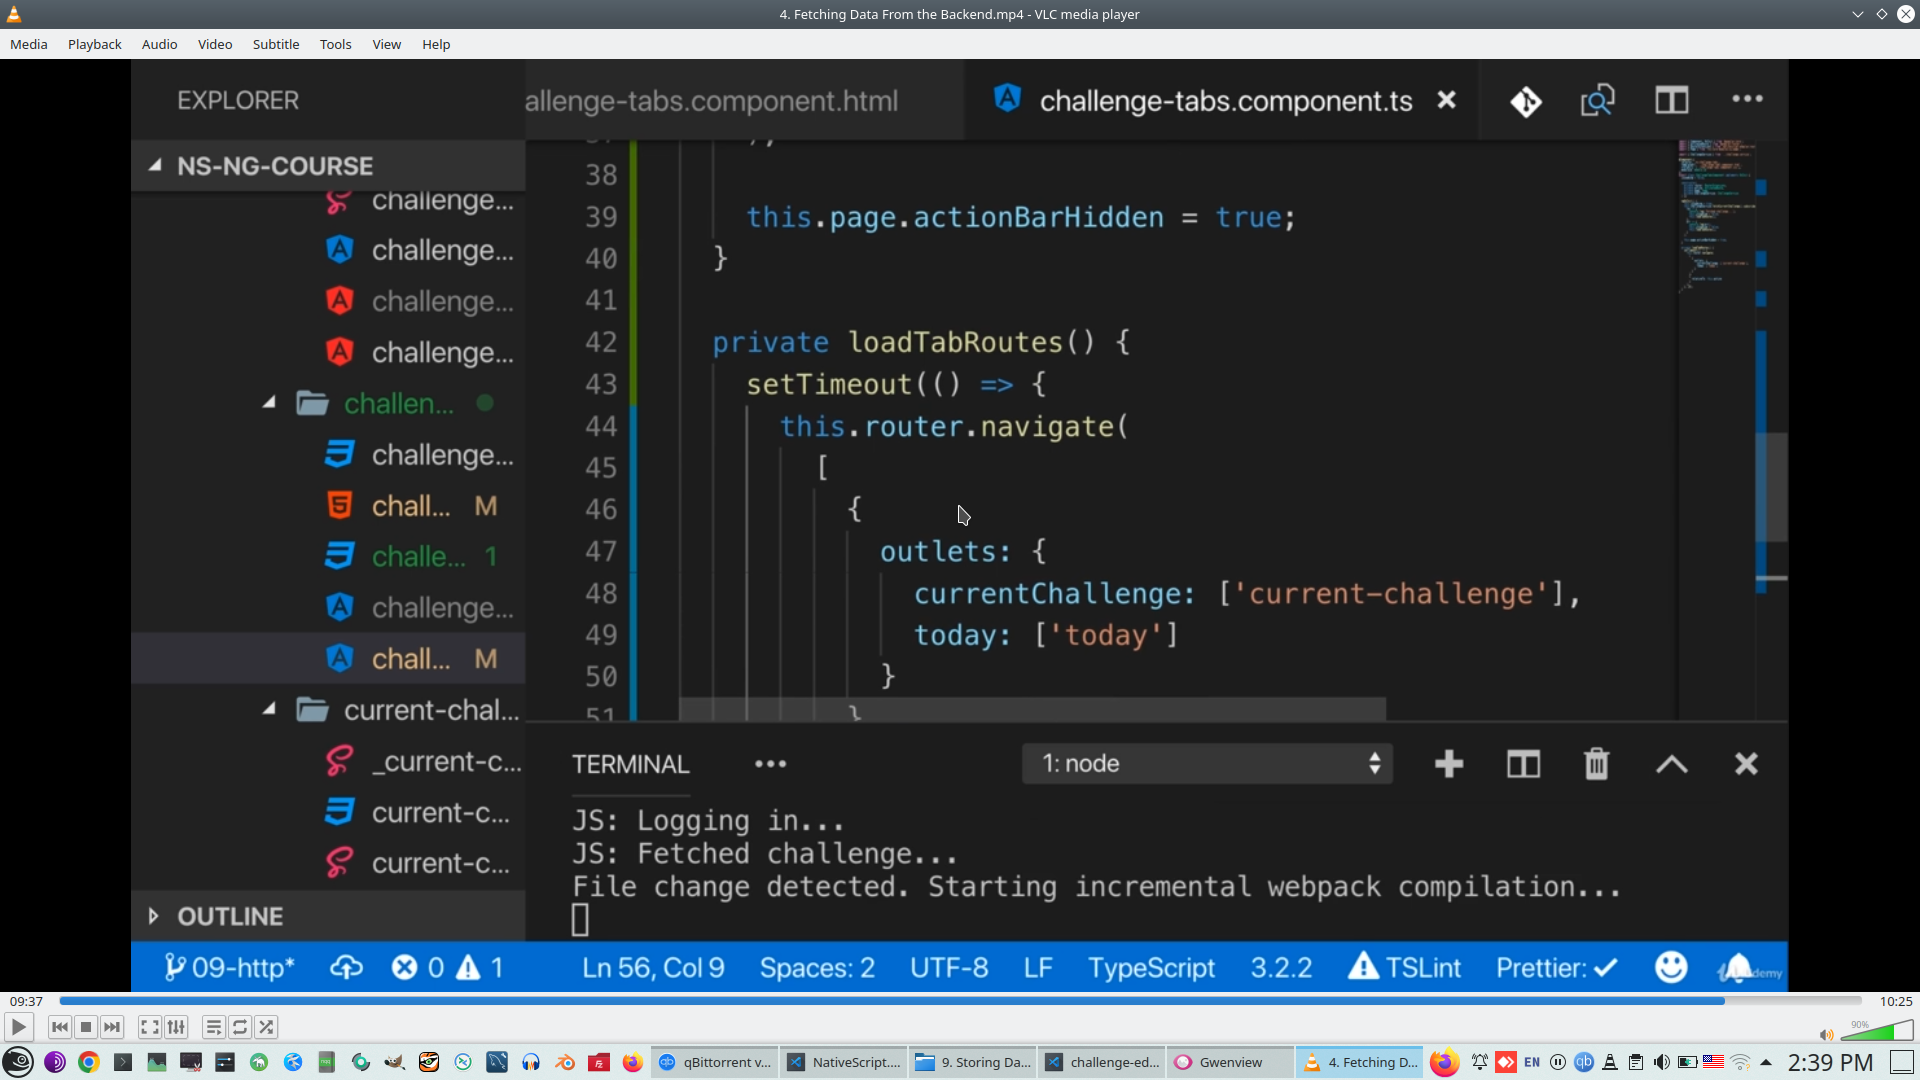
Add nested navigation inside tab
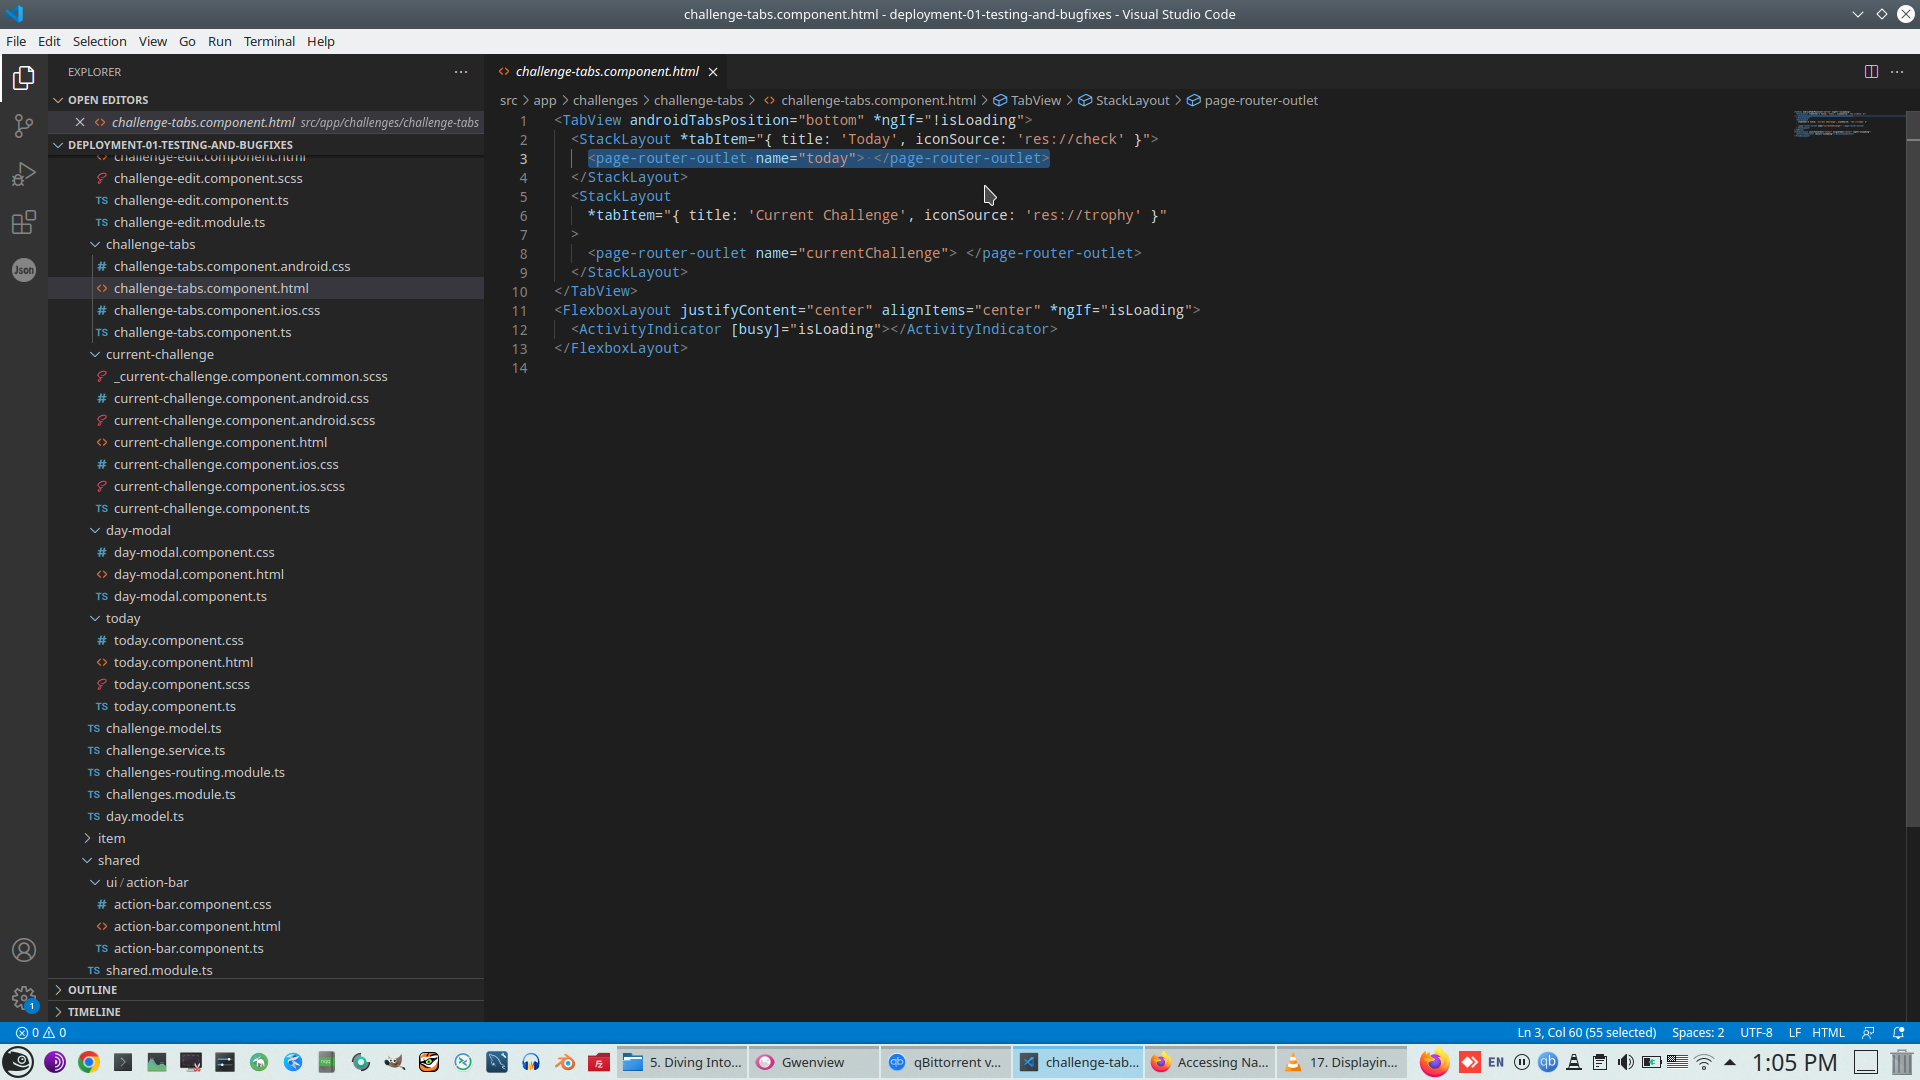
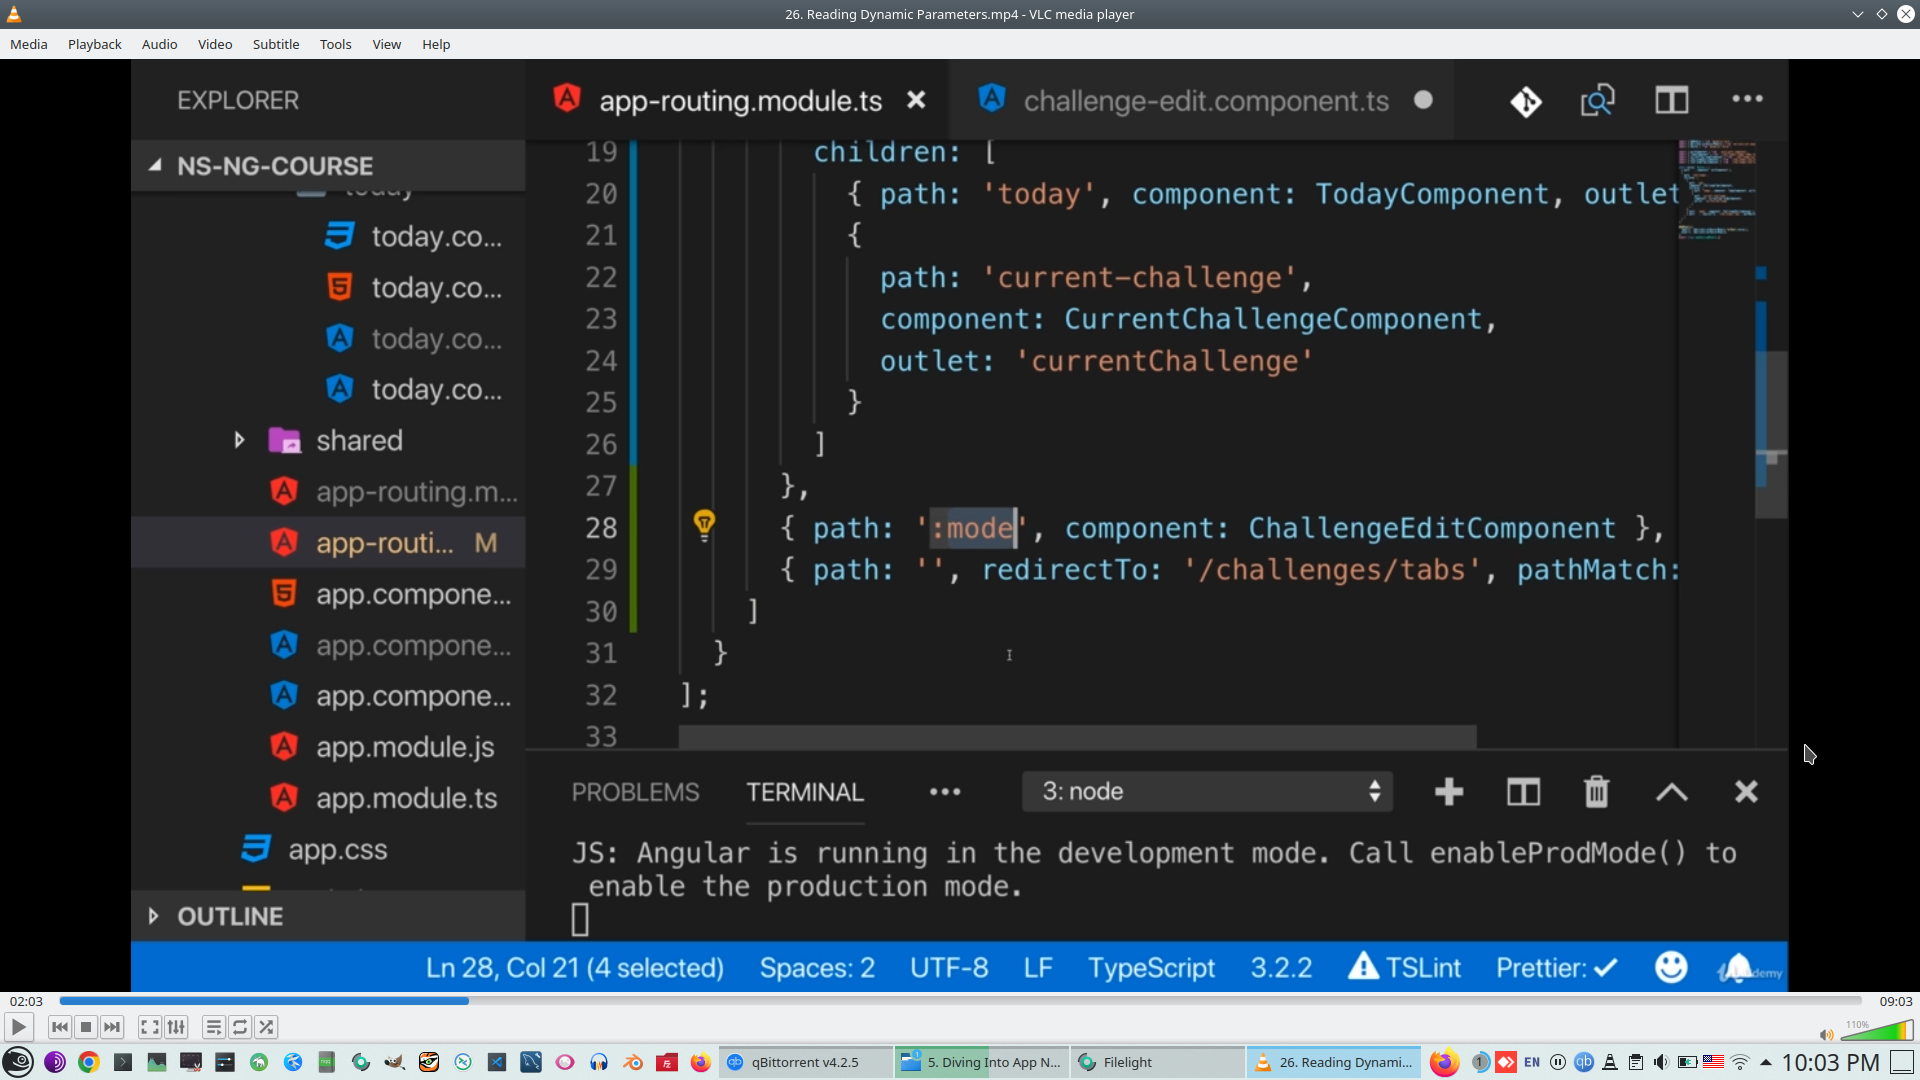
Add children navigation to Router array
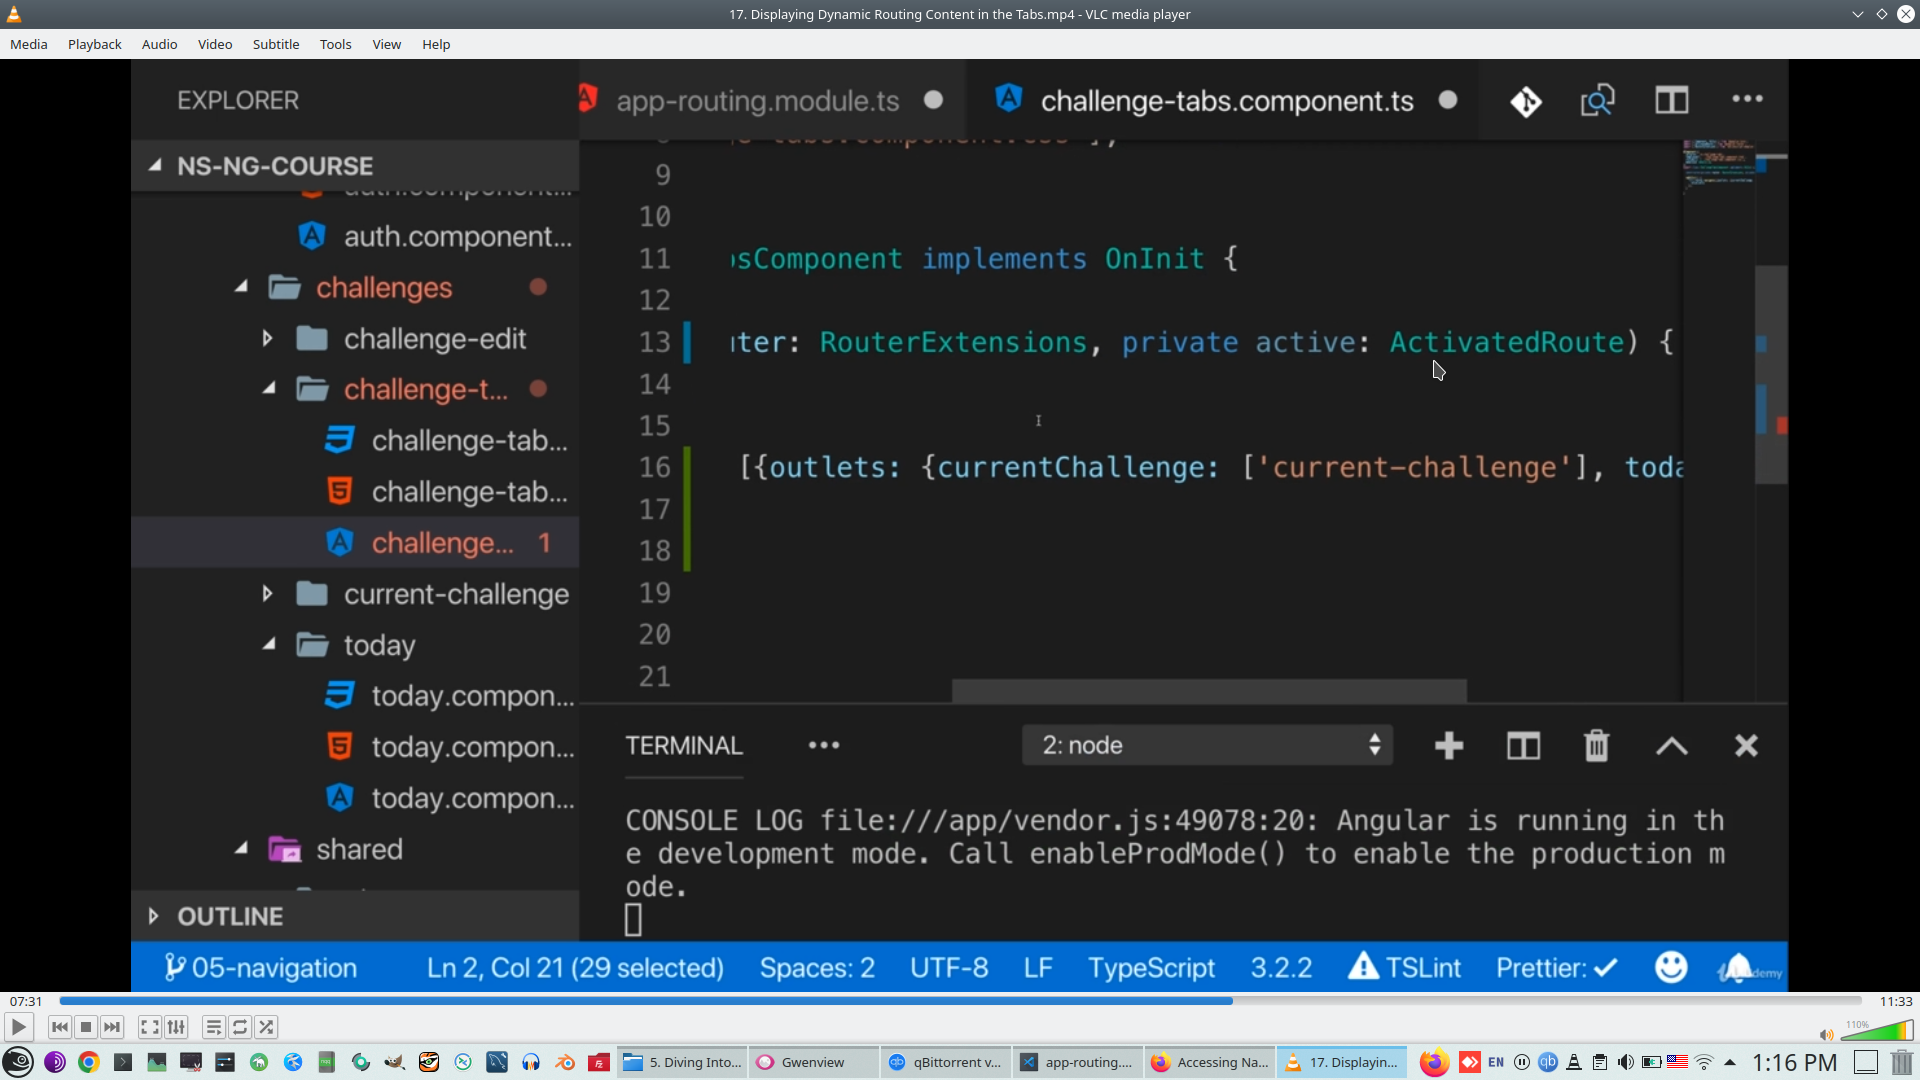
With parameter Outlet, this is Angular Future
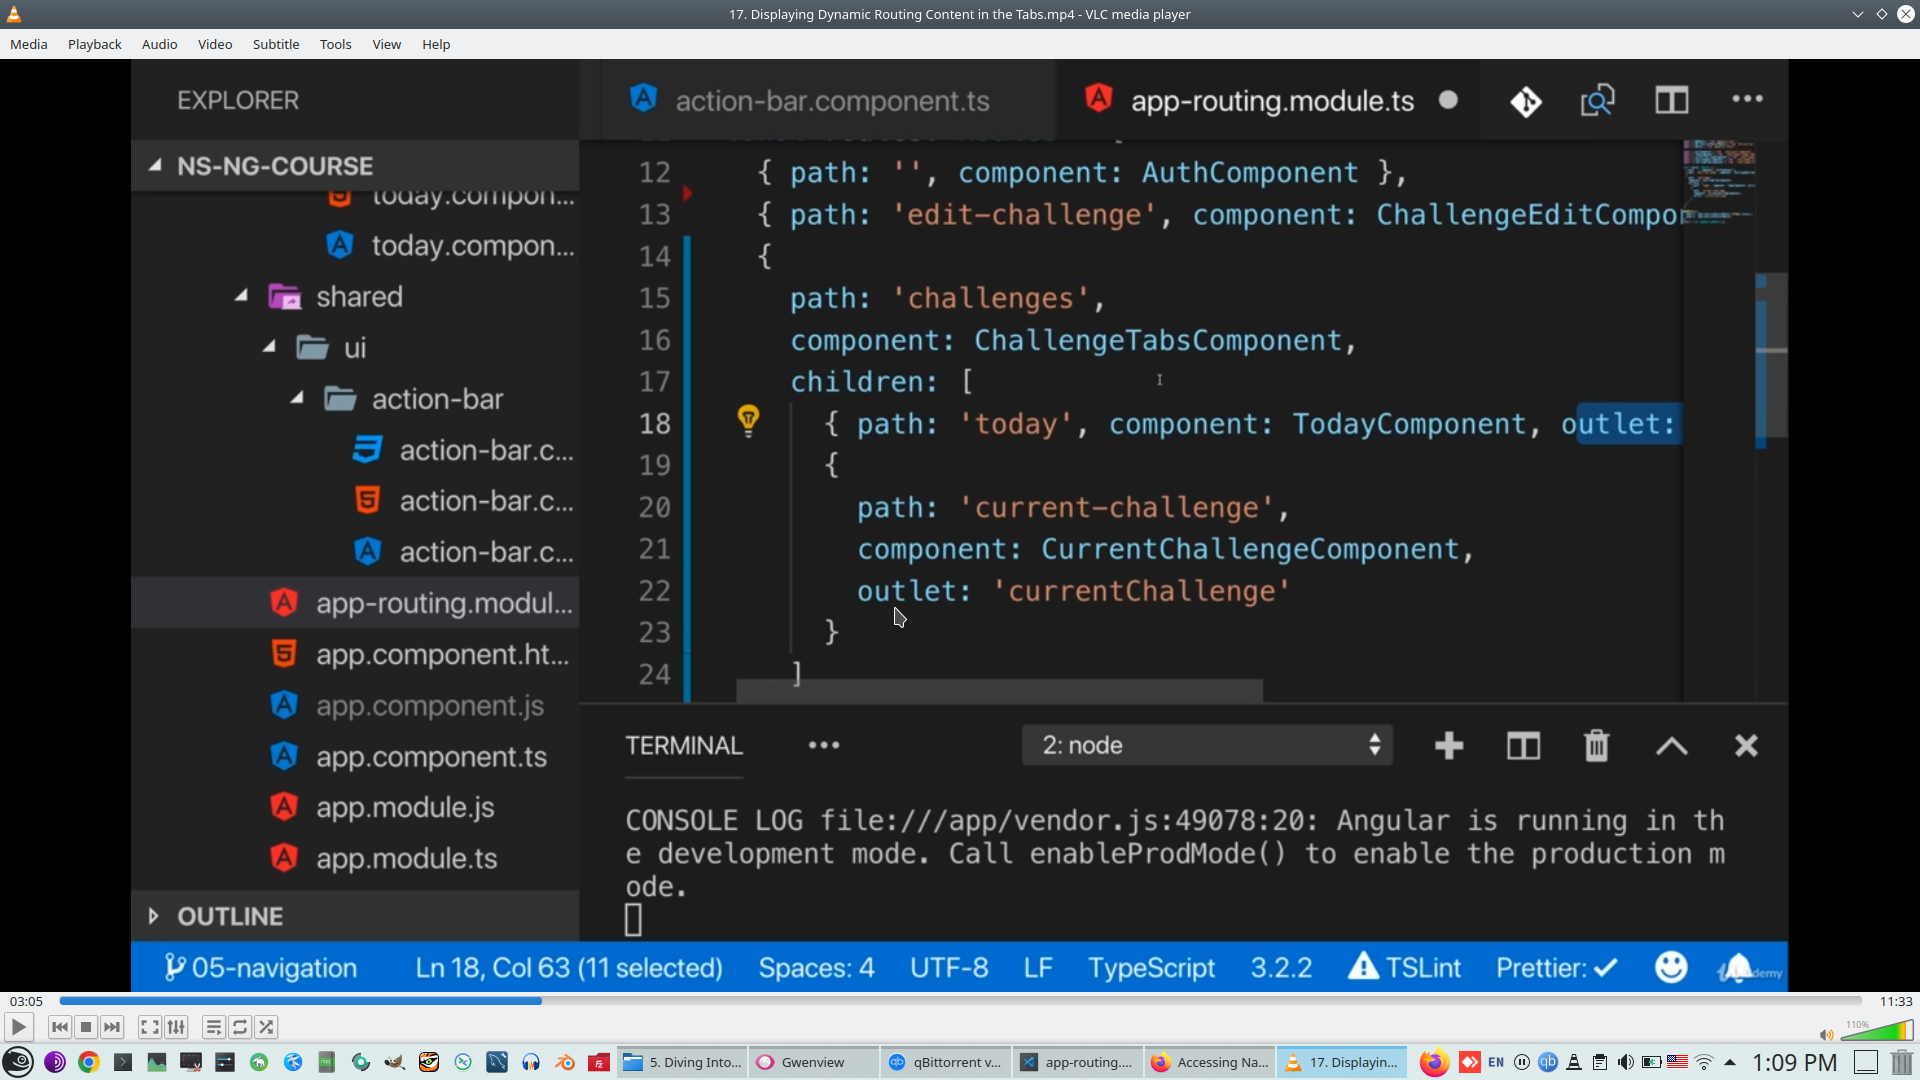
We can add Outlet parameters dymamically

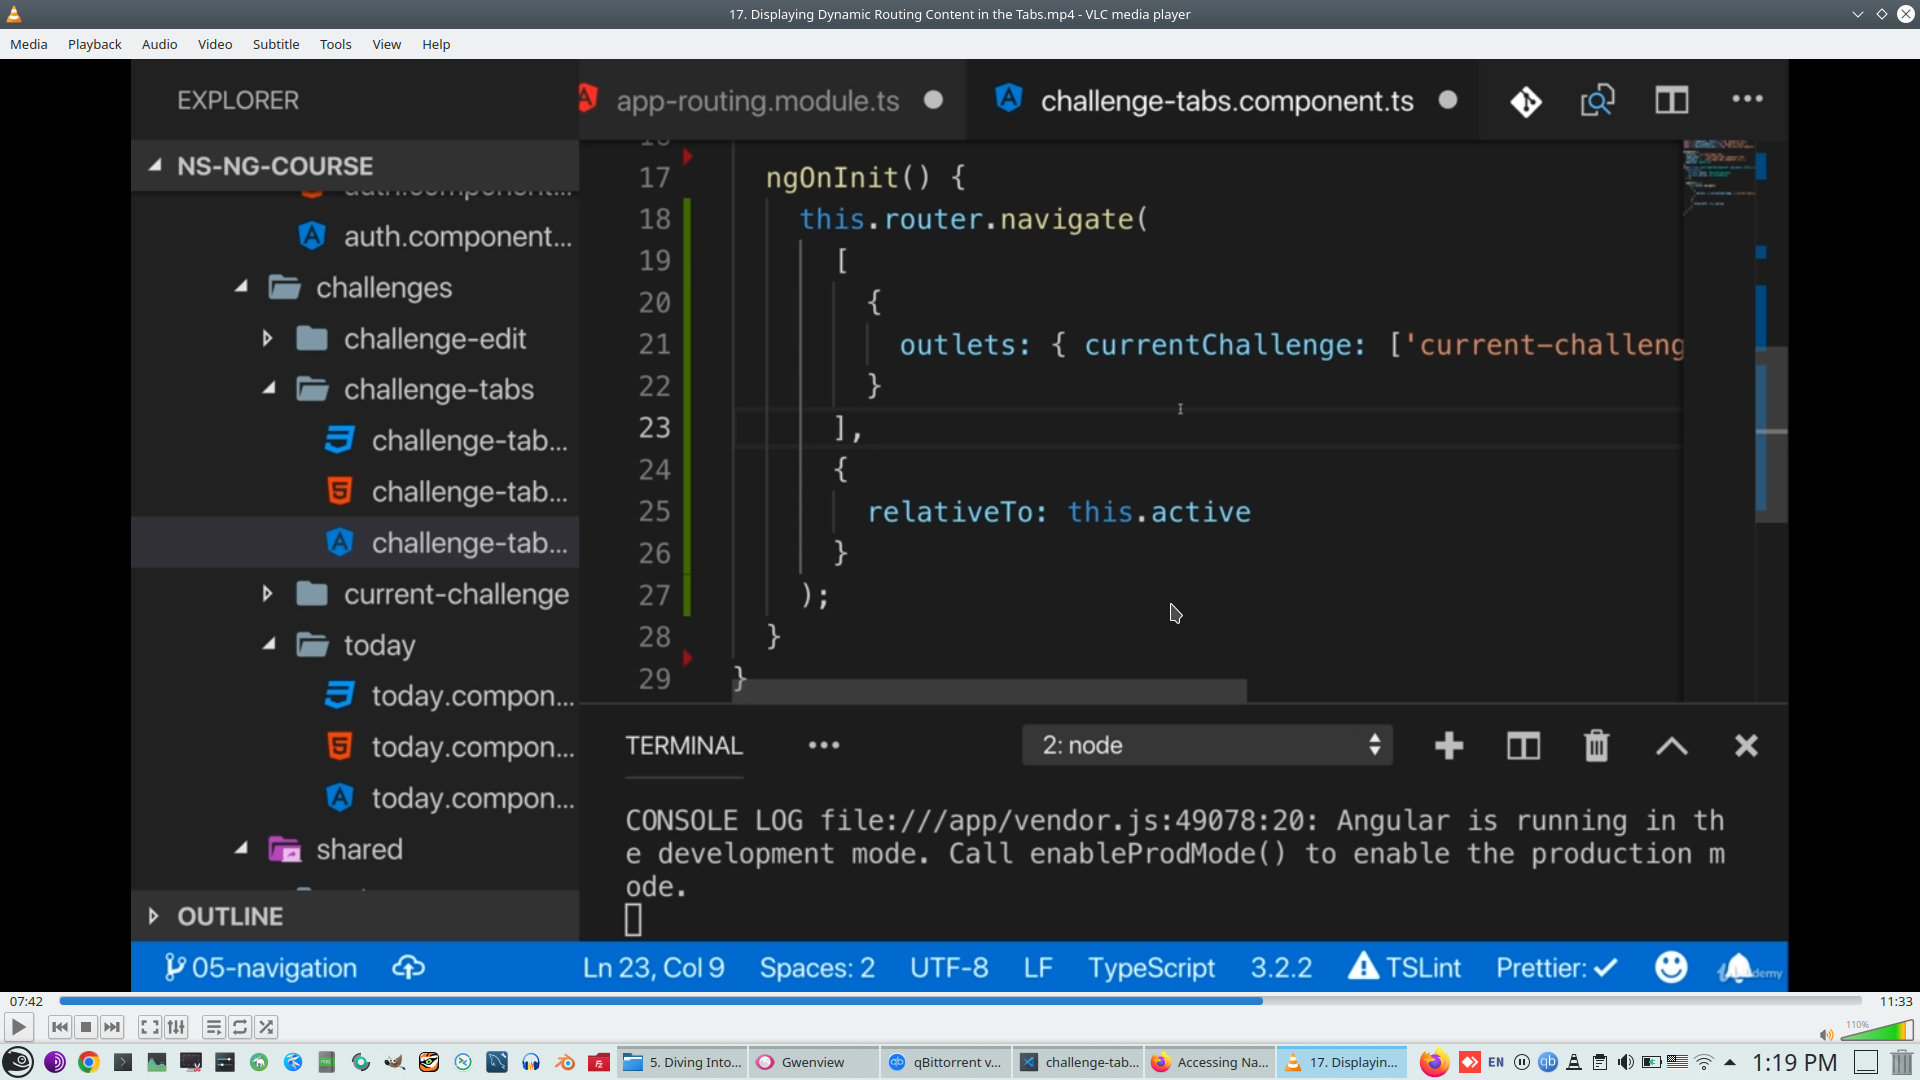
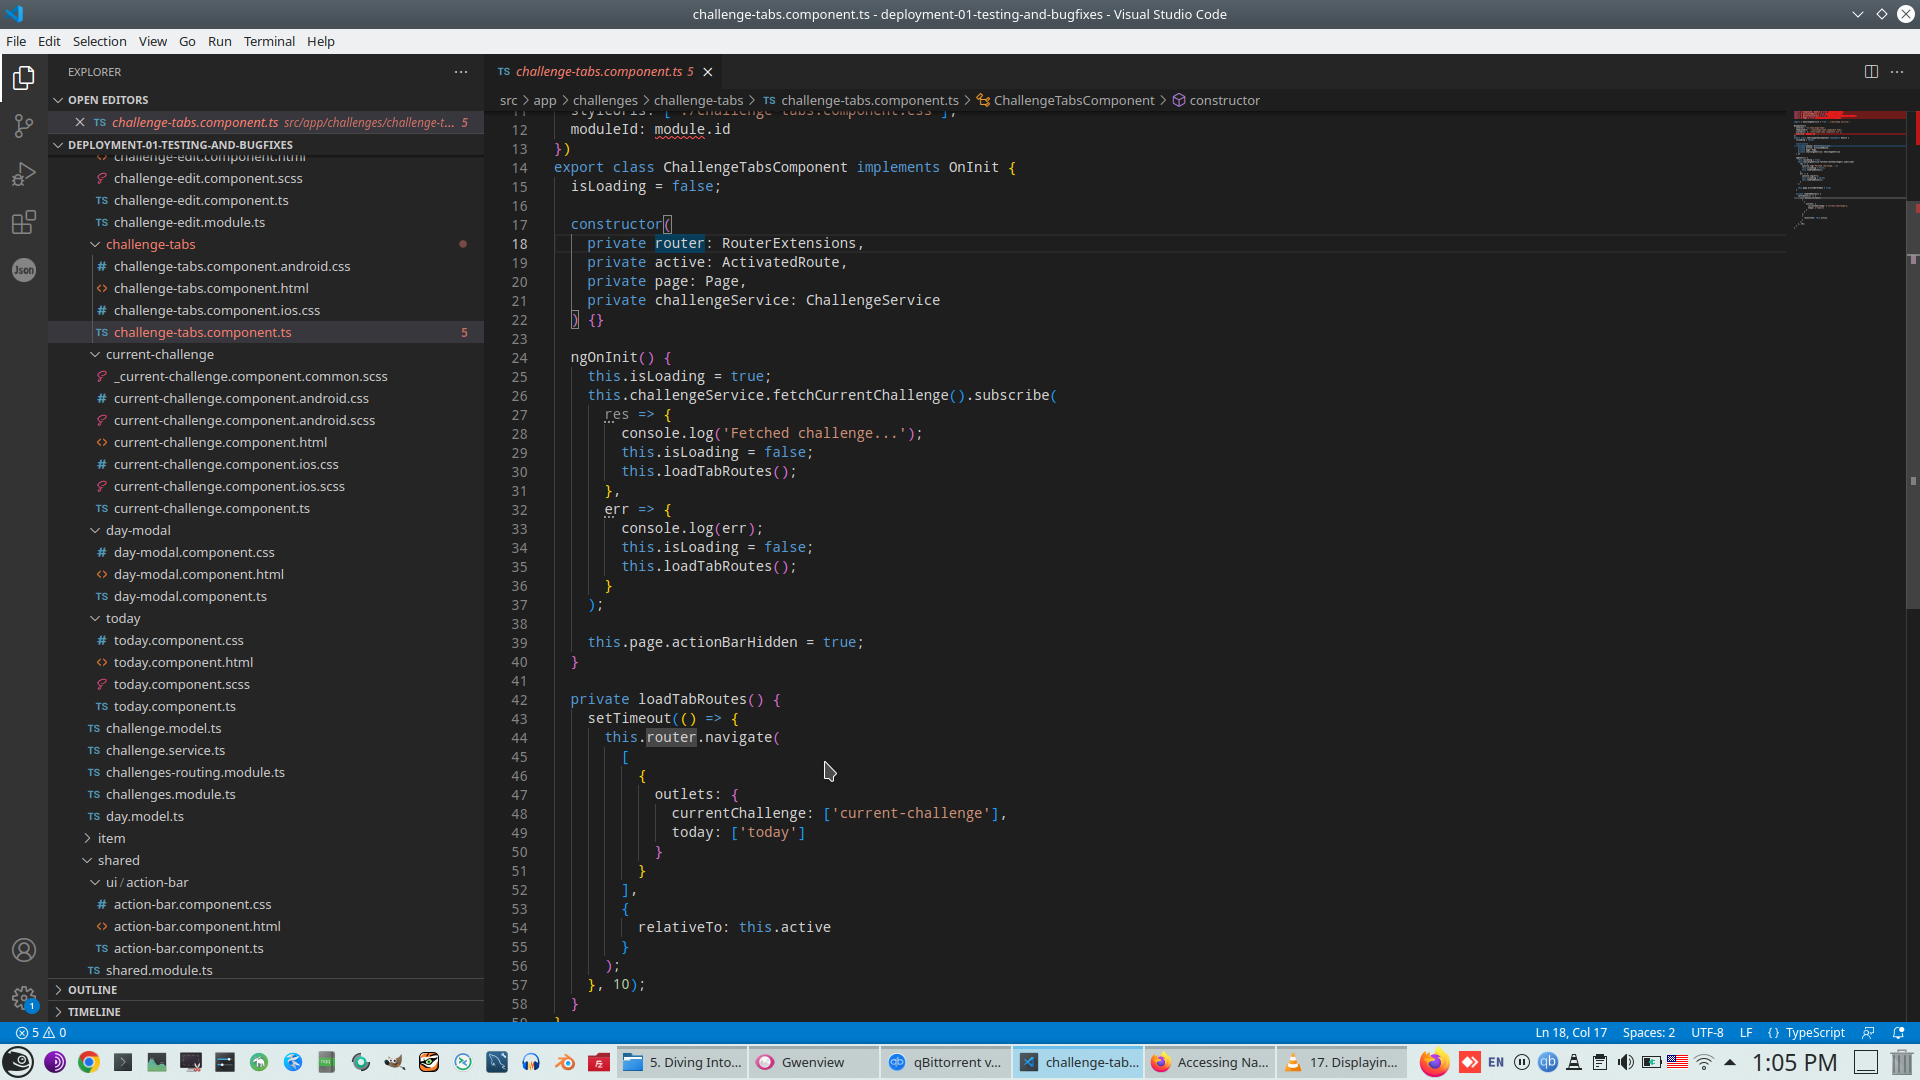
And we need to inject ActivatedRoute class for access to router additional metadata
Check how navigation inside Tab working
Inject Page ooject and hide some UI component on page

Altarnate way - move tabItem to StackLayout
Read metadata from ActivateRoure
19. Styling
- 1. Module Introduction
- 2. CSS in NativeScript - An Overview
- 3. Understanding Platform Specific Inline Styles
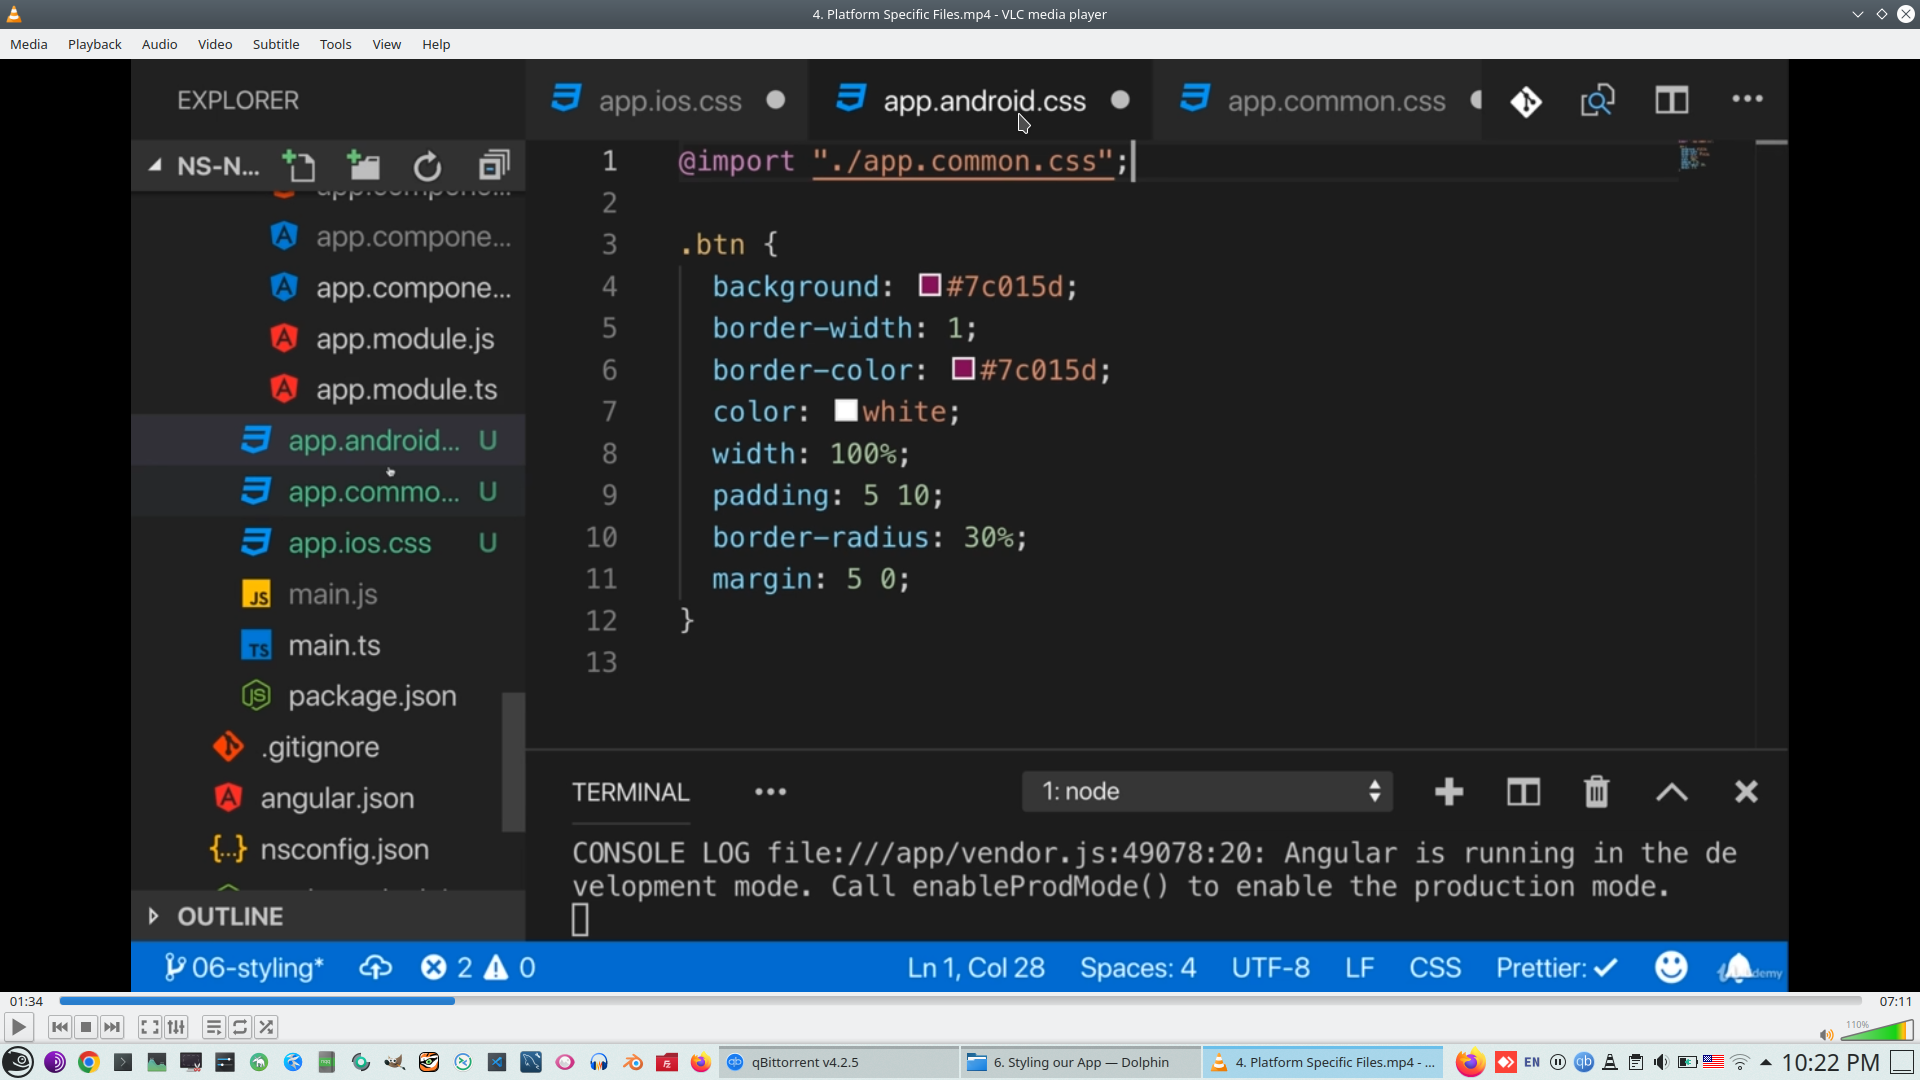
- 4. Platform Specific Files
- 5. Setting Properties Via CSS
- 6. How CSS Works Behind the Scenes
- 7. Using a Theme
- 8. Working with SASS Variables
- 9. Styling the Action Bar10. Preparing the Form Styling
- 11. Centralizing Common Styles
- 12. Styling Today's Challenge
- 13. Working on the Current Challenge
- 14. Adding the Grid to the Current Challenge
- 15. Populating the Grid
- 16. Styling the Grid
- 17. Opening the Modal when Tapping a Day
- 18. Fixing the Sidedrawer Button & Adding Icons
- 19. Adding Text Fonts
- 20. Integrating Images
- 21. Adding Icon Images
- 22. Improving the Logout Button Look
- 23. Wrap Up
Various selectors
Global styling>
We can pass parameter to another global styleing
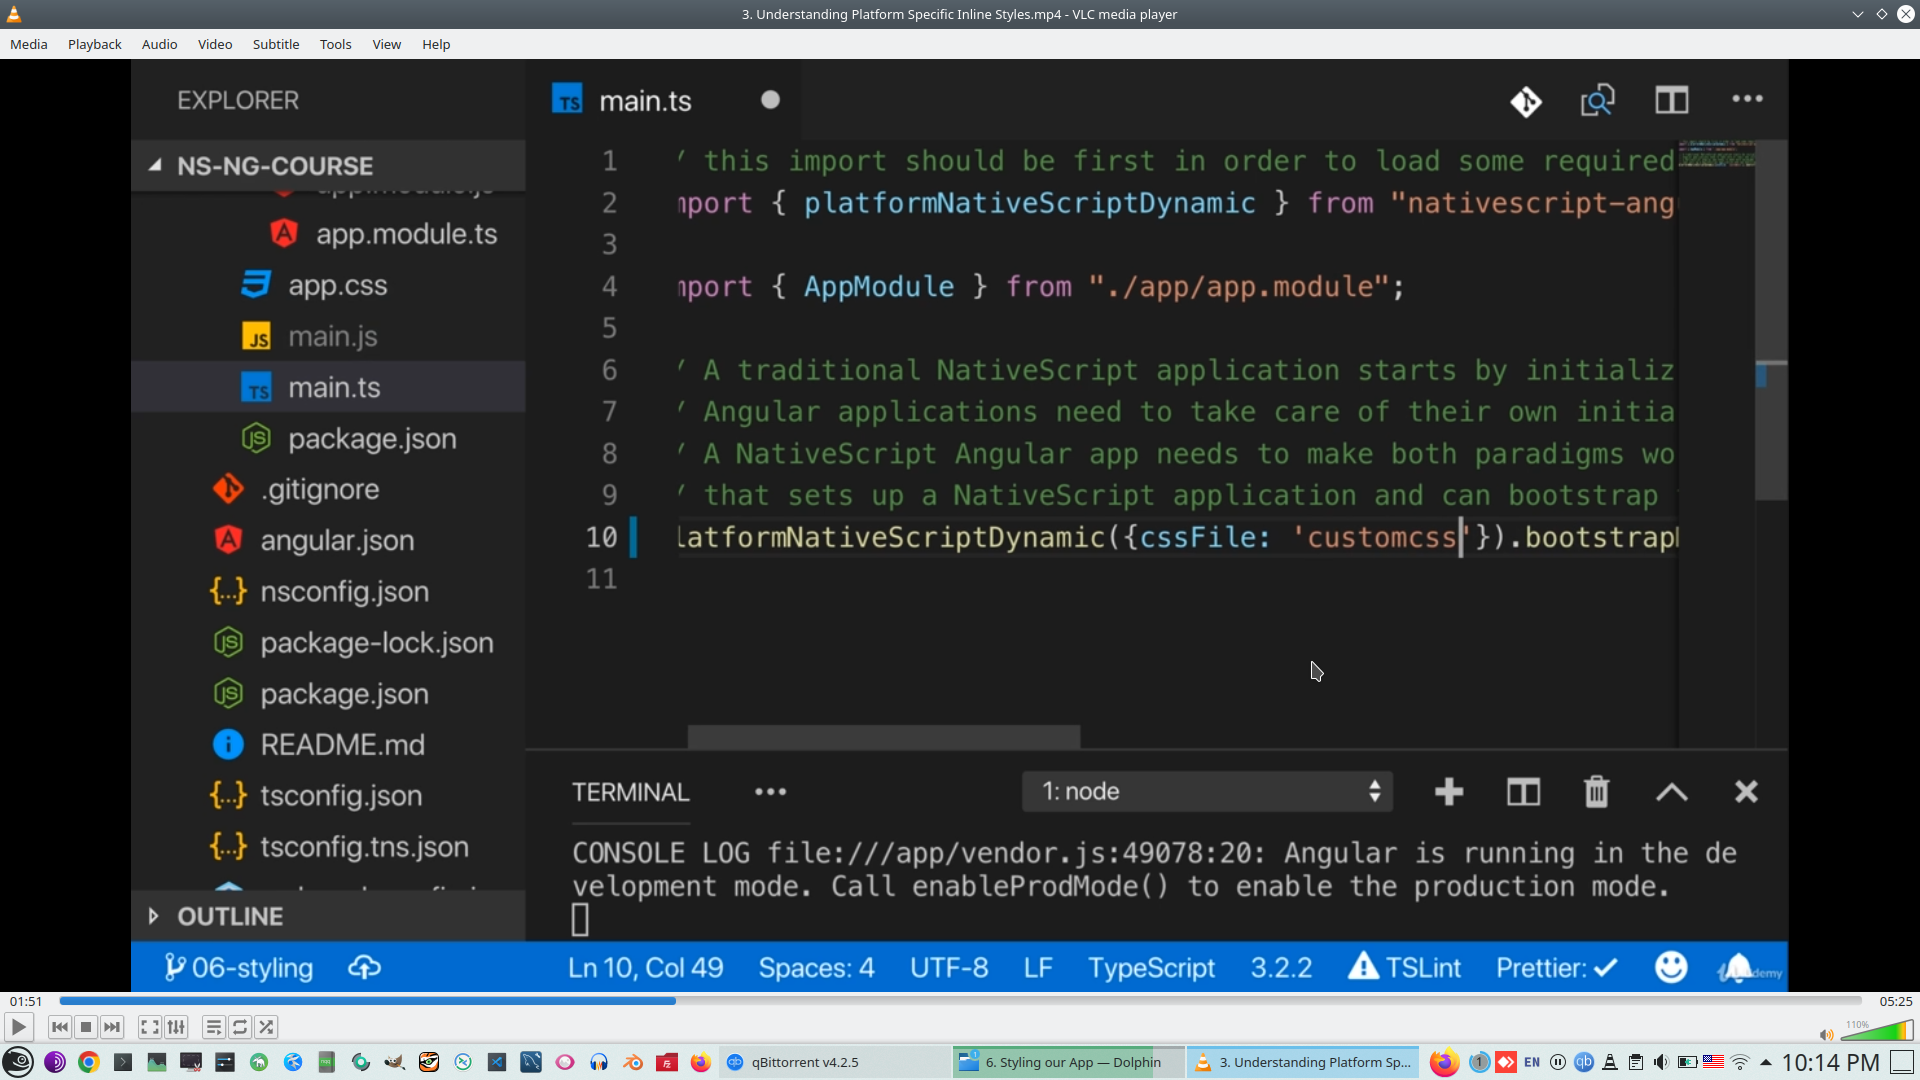
Platform specific CSS
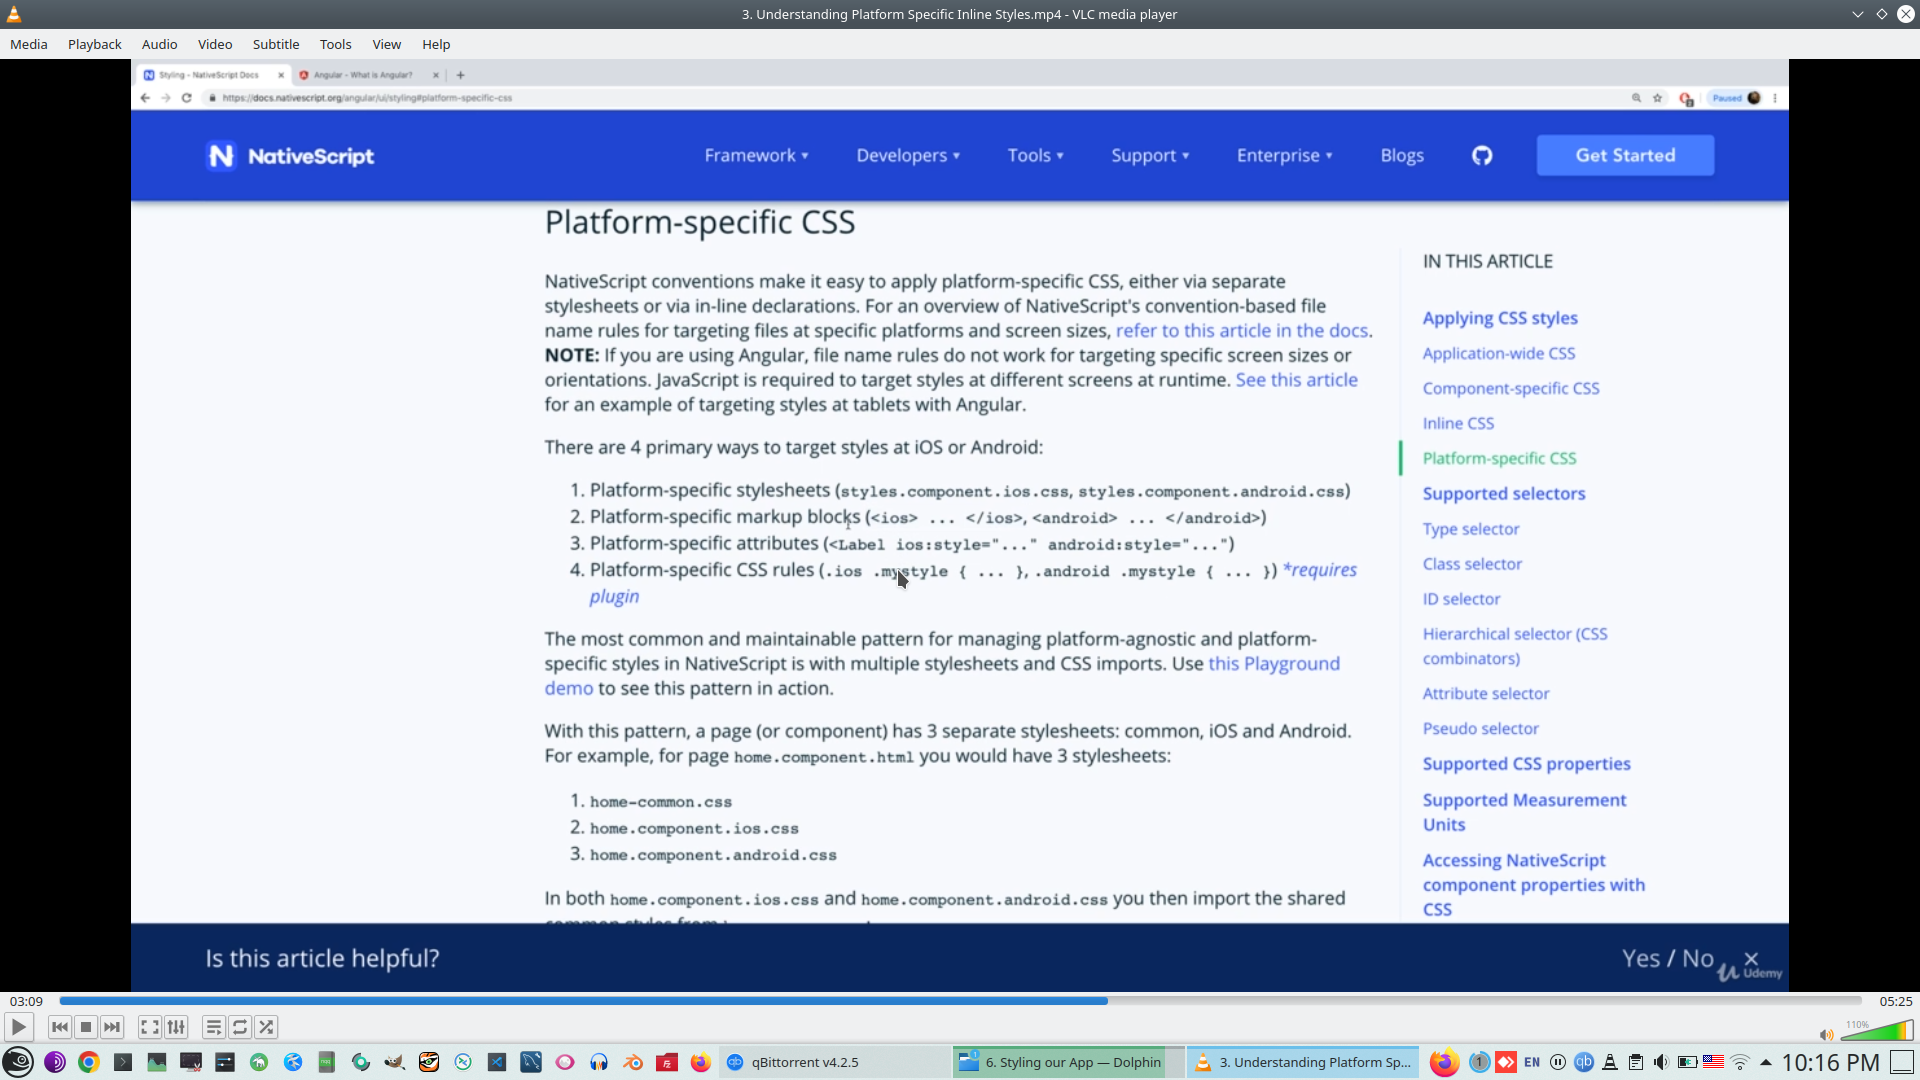
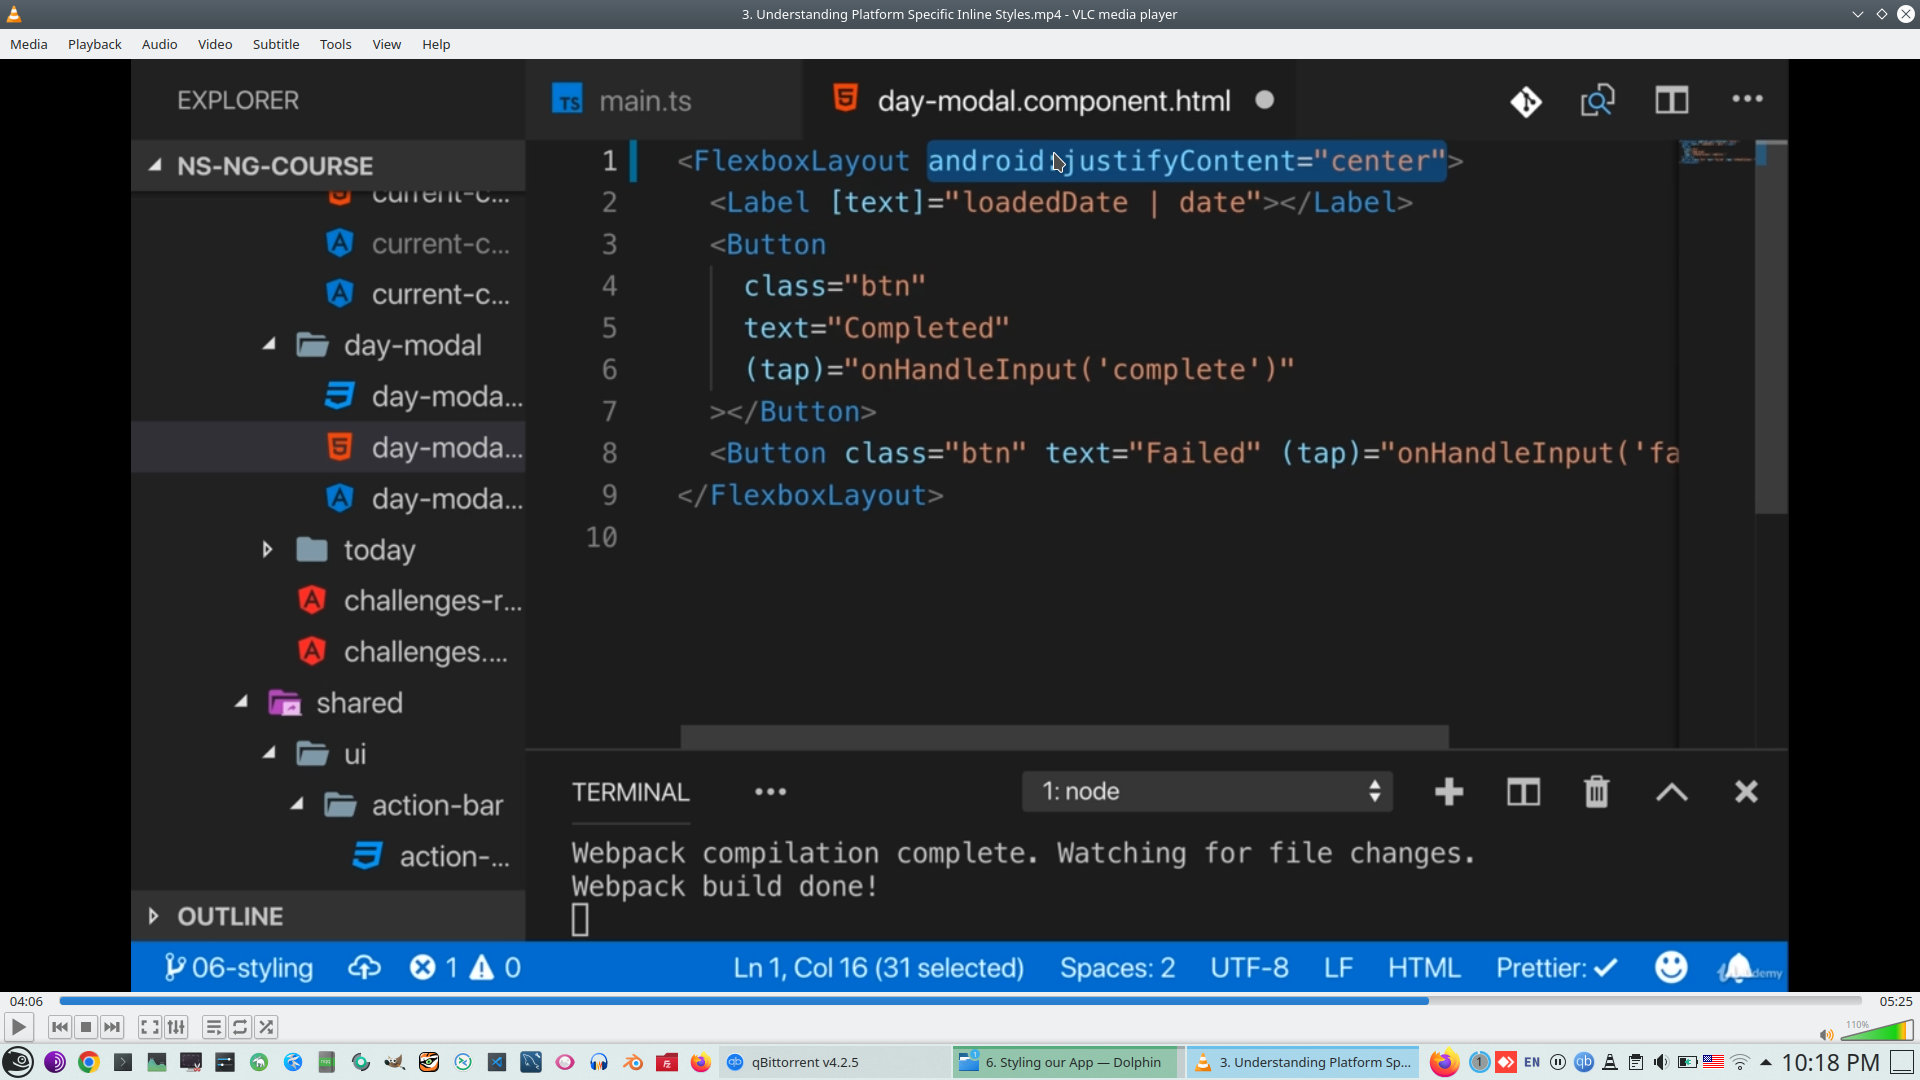
Prefix supported in styling on CSS, event, text
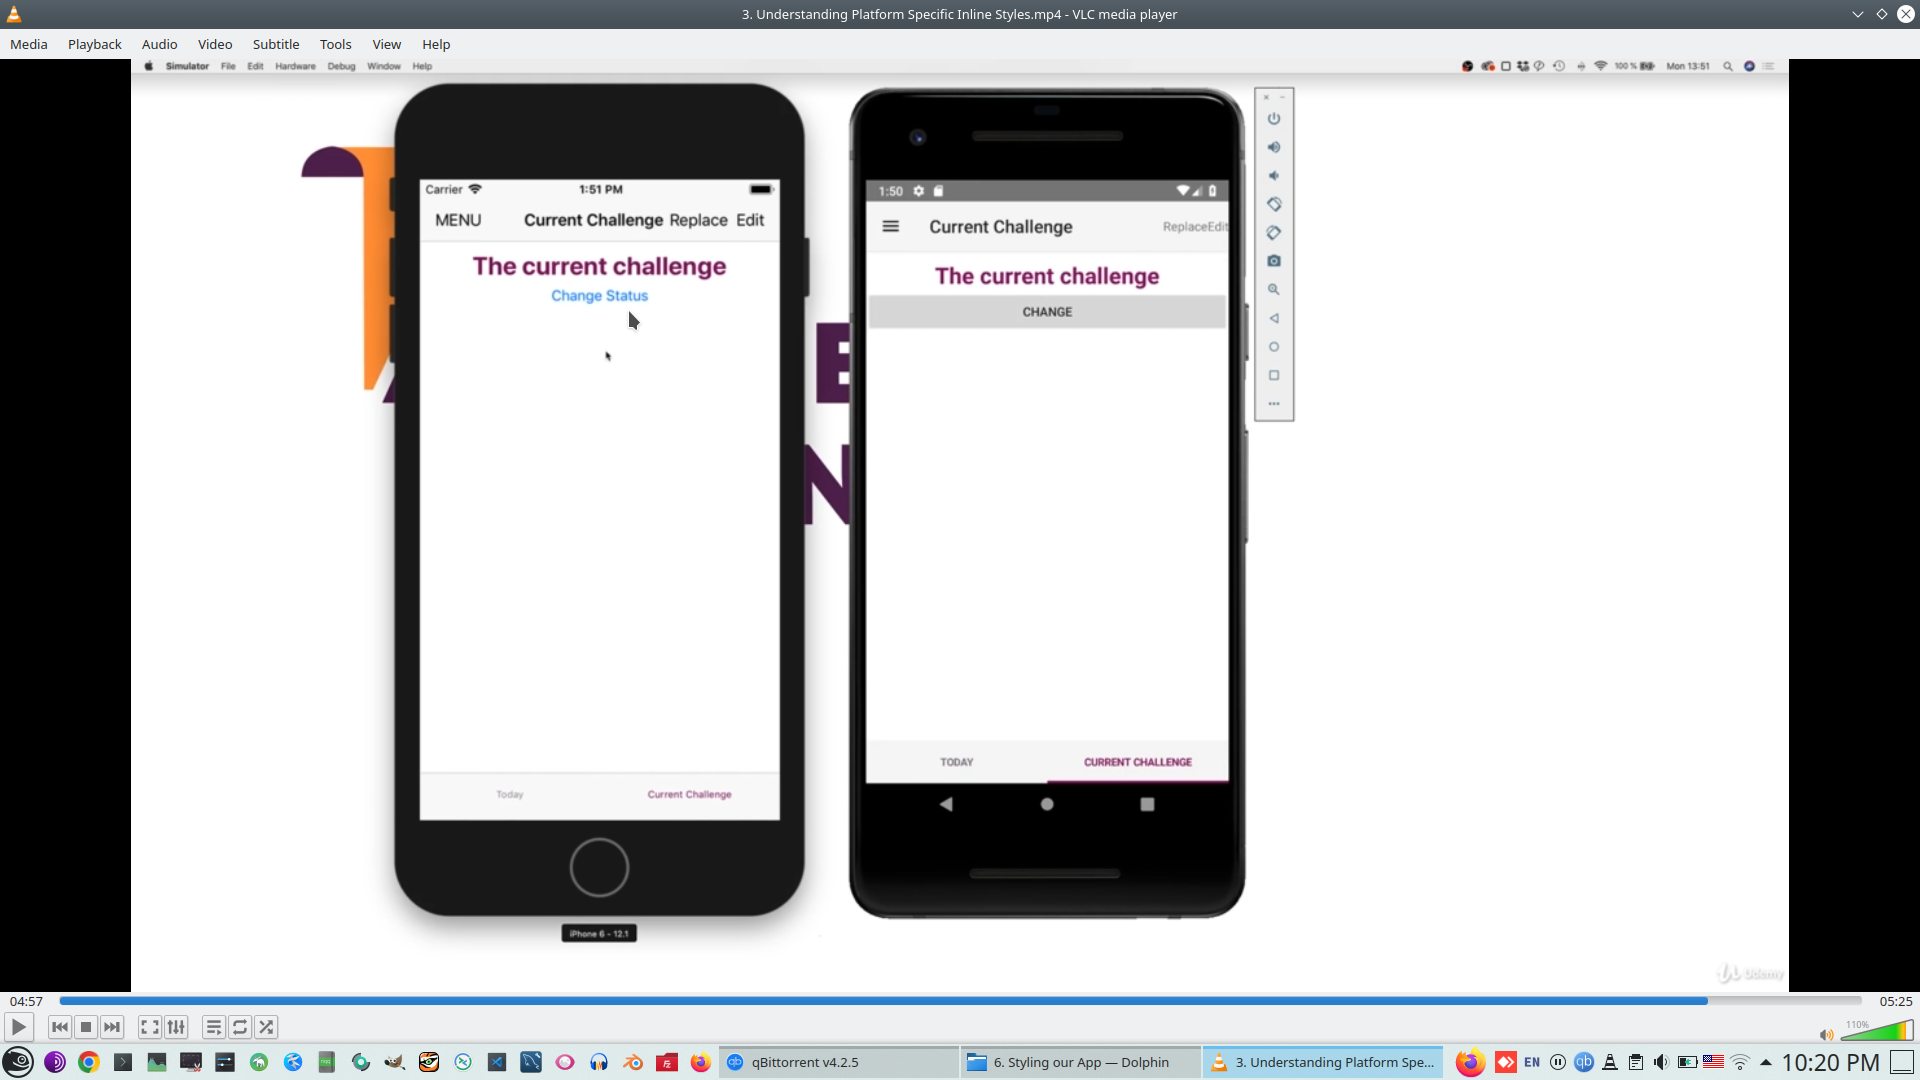
Check IOS only style
20. Animation
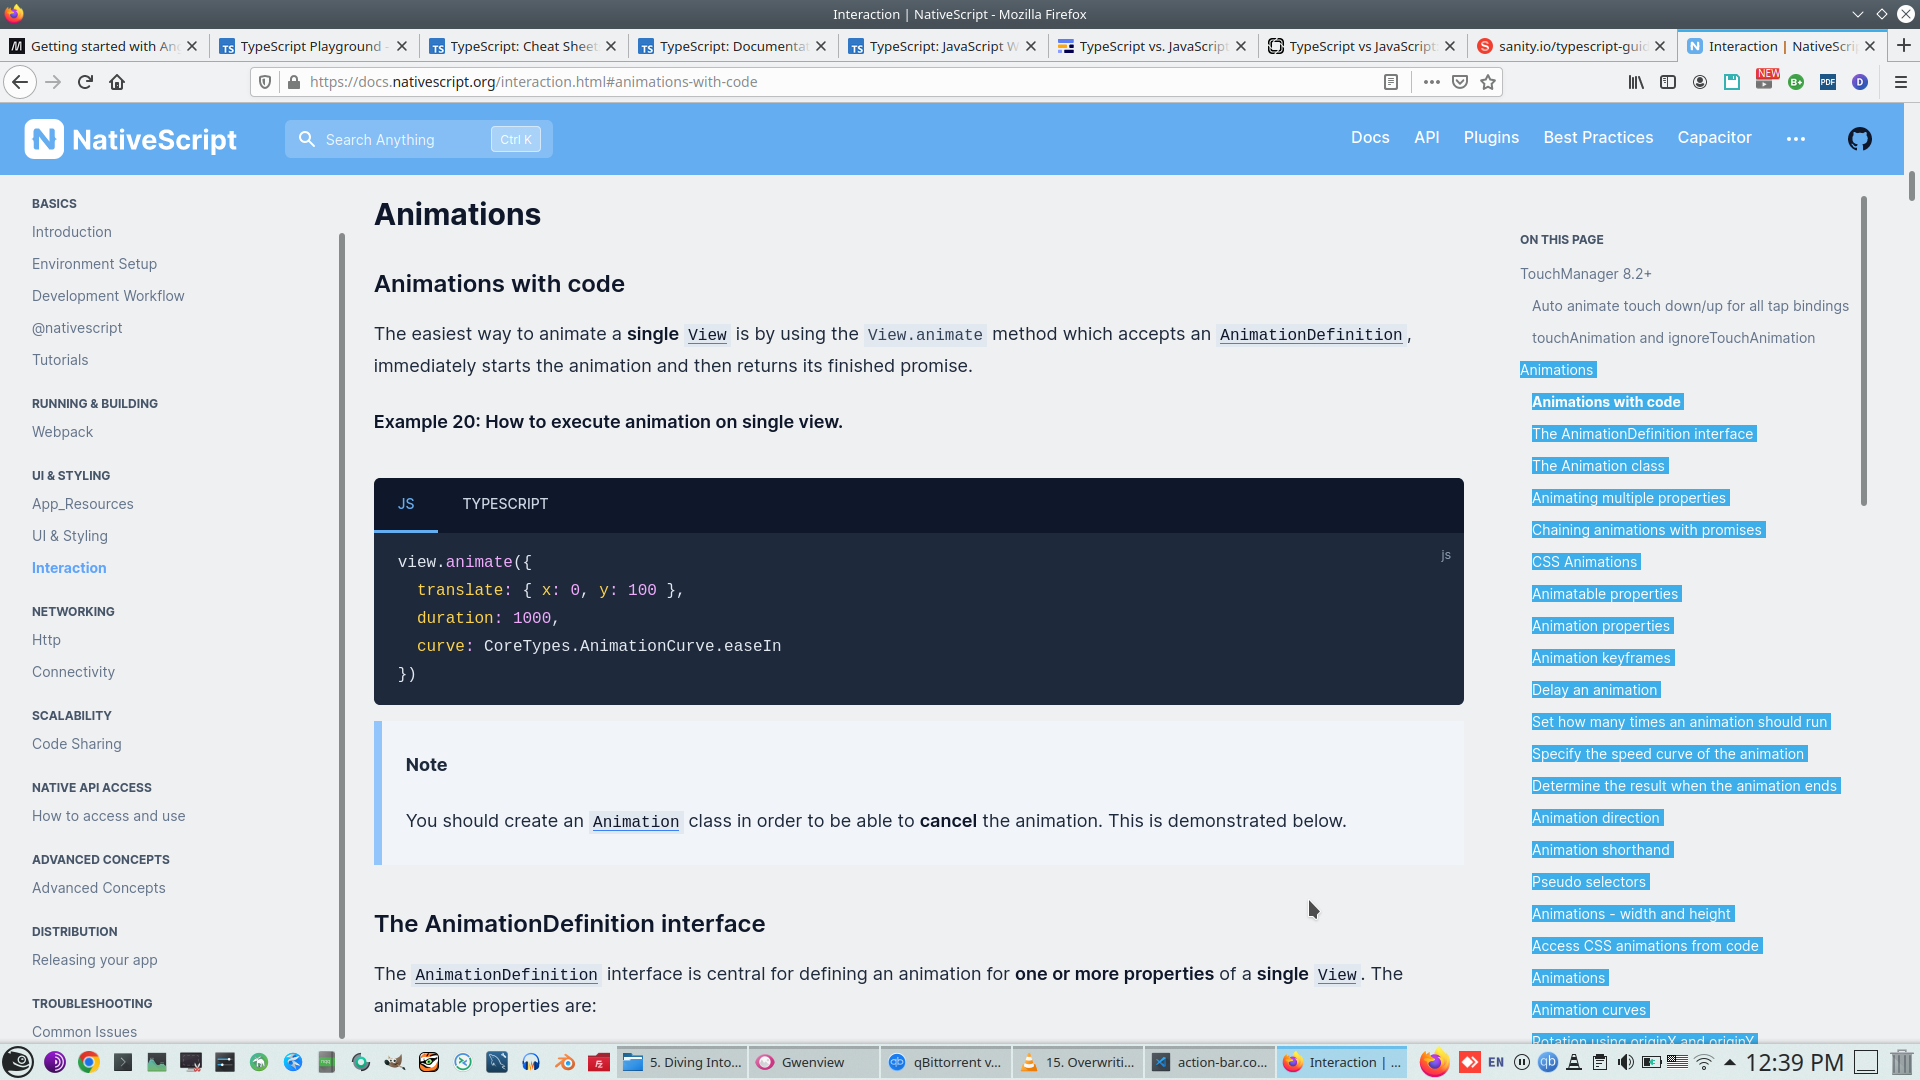
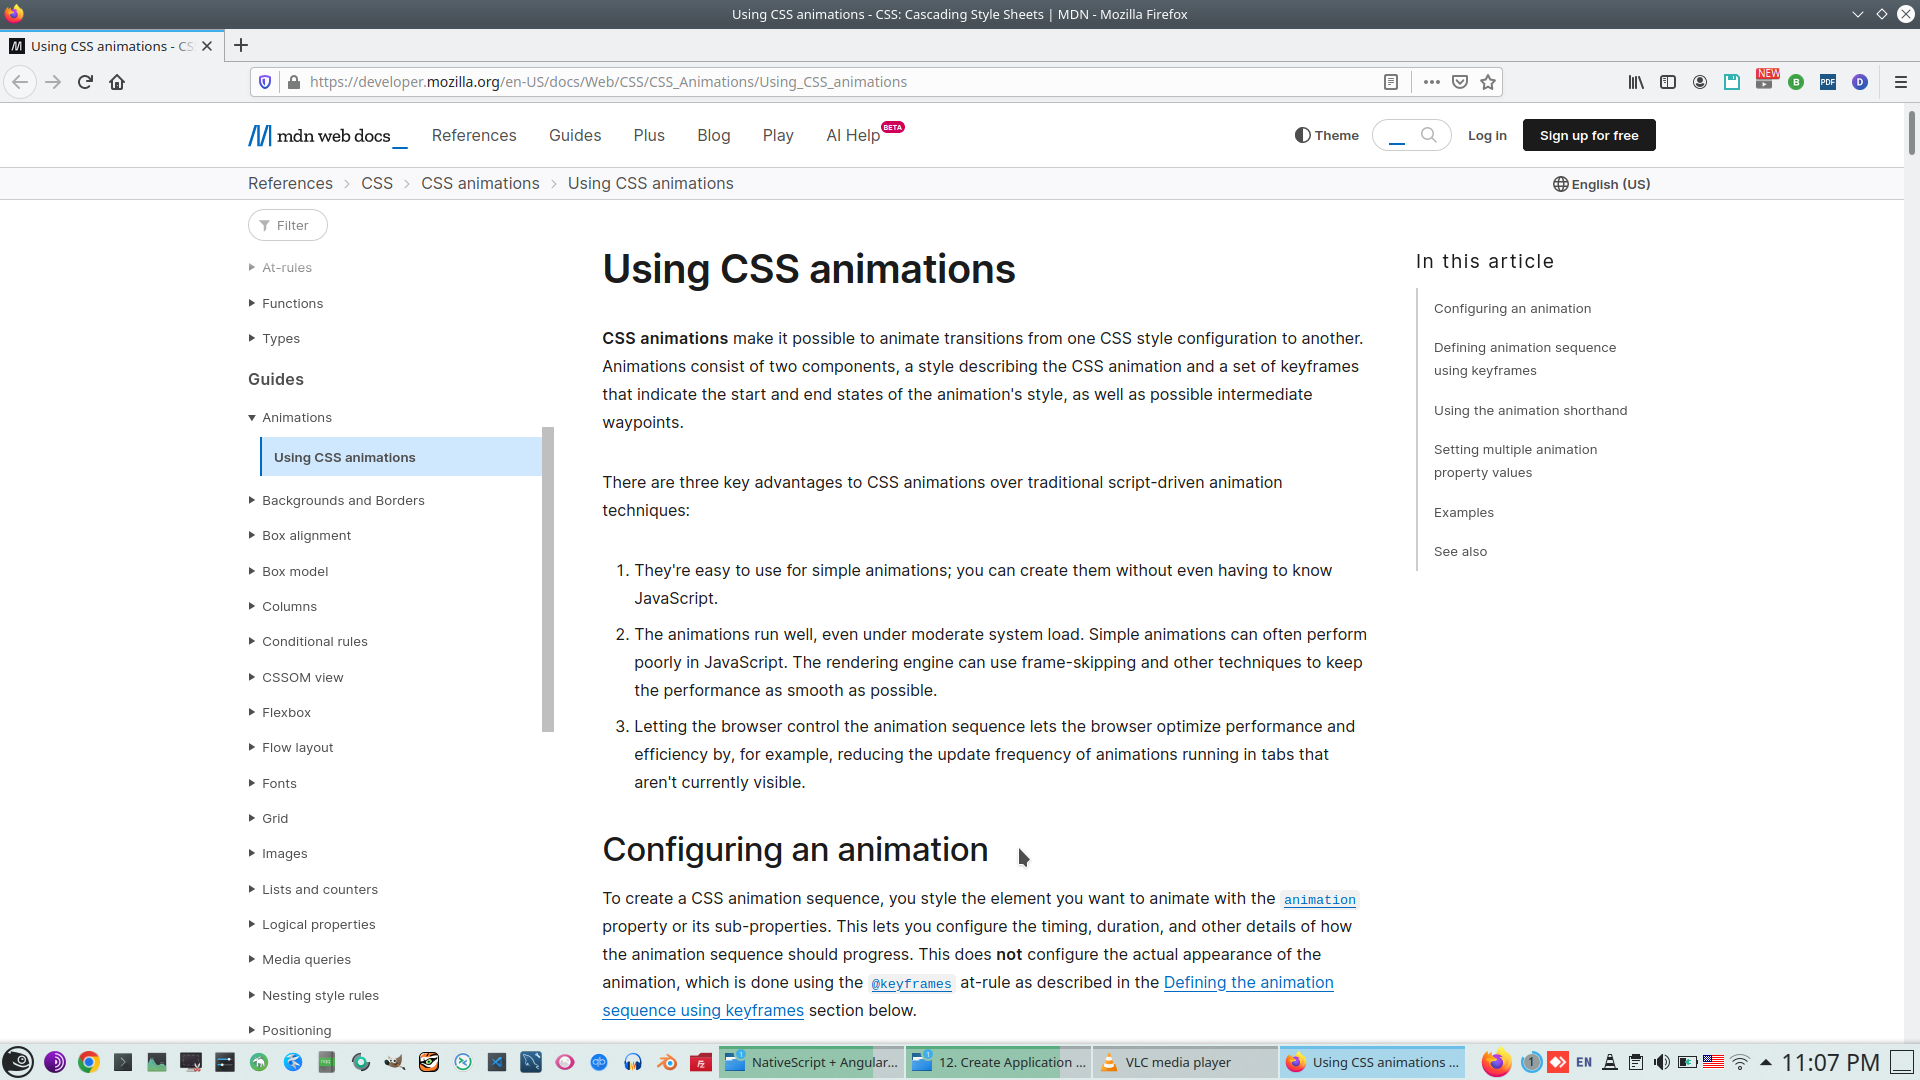
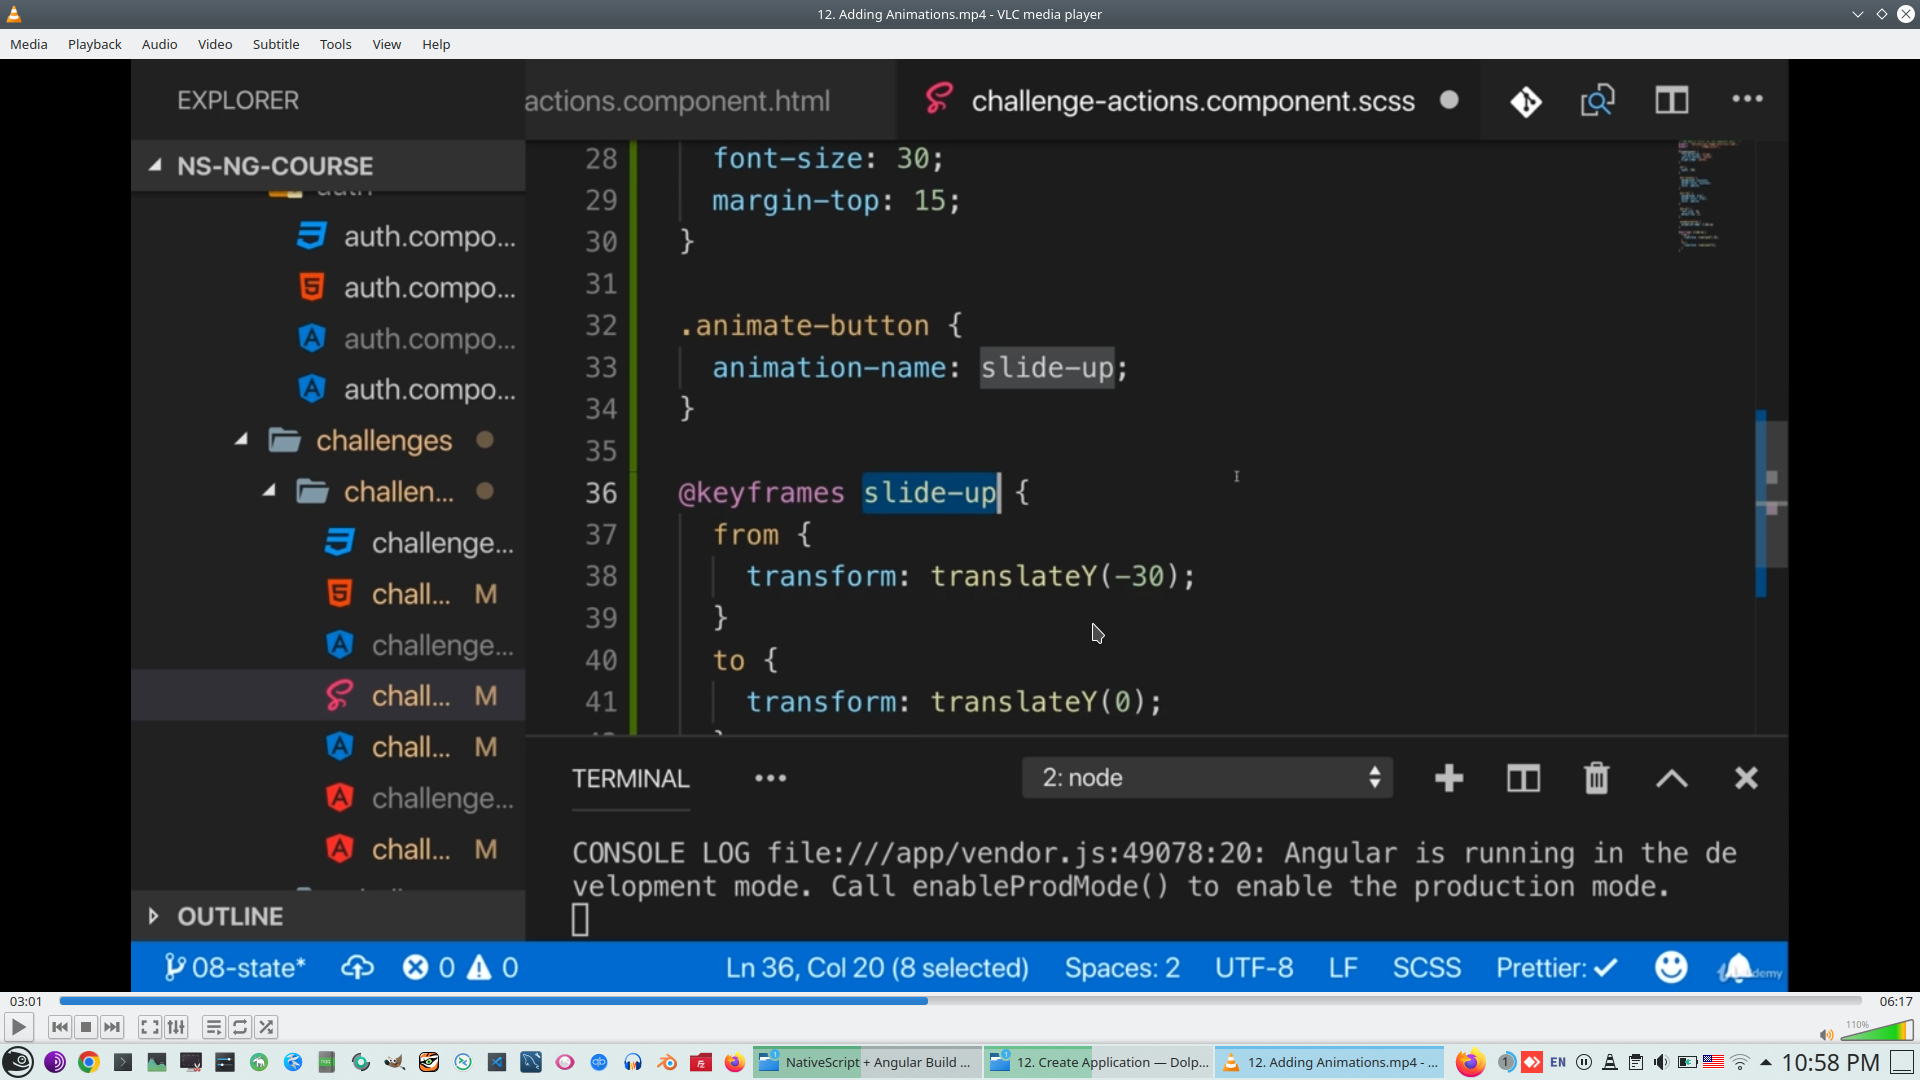
Step one, define KeyFrames with tramsformation: from - to
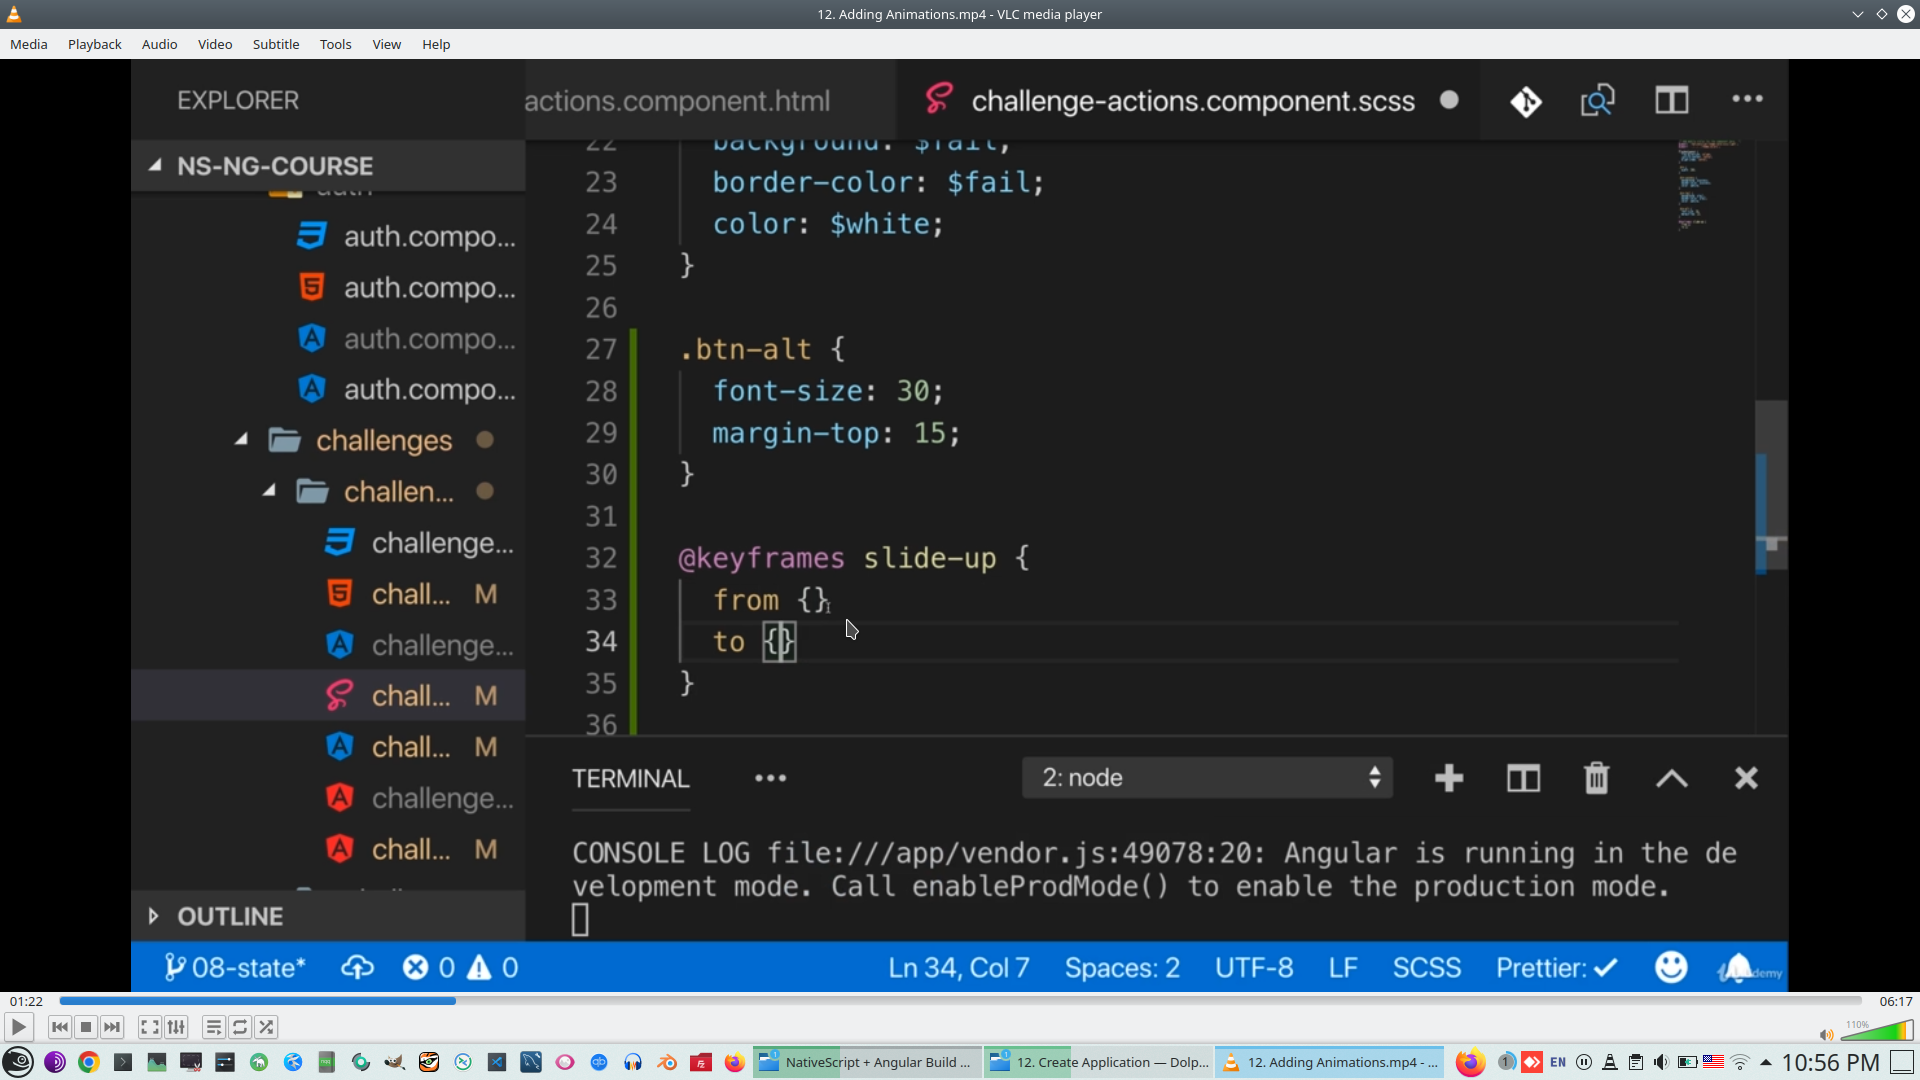
Than define class referred to KeyFrames with other animation parametres - iteration count, duration, direction
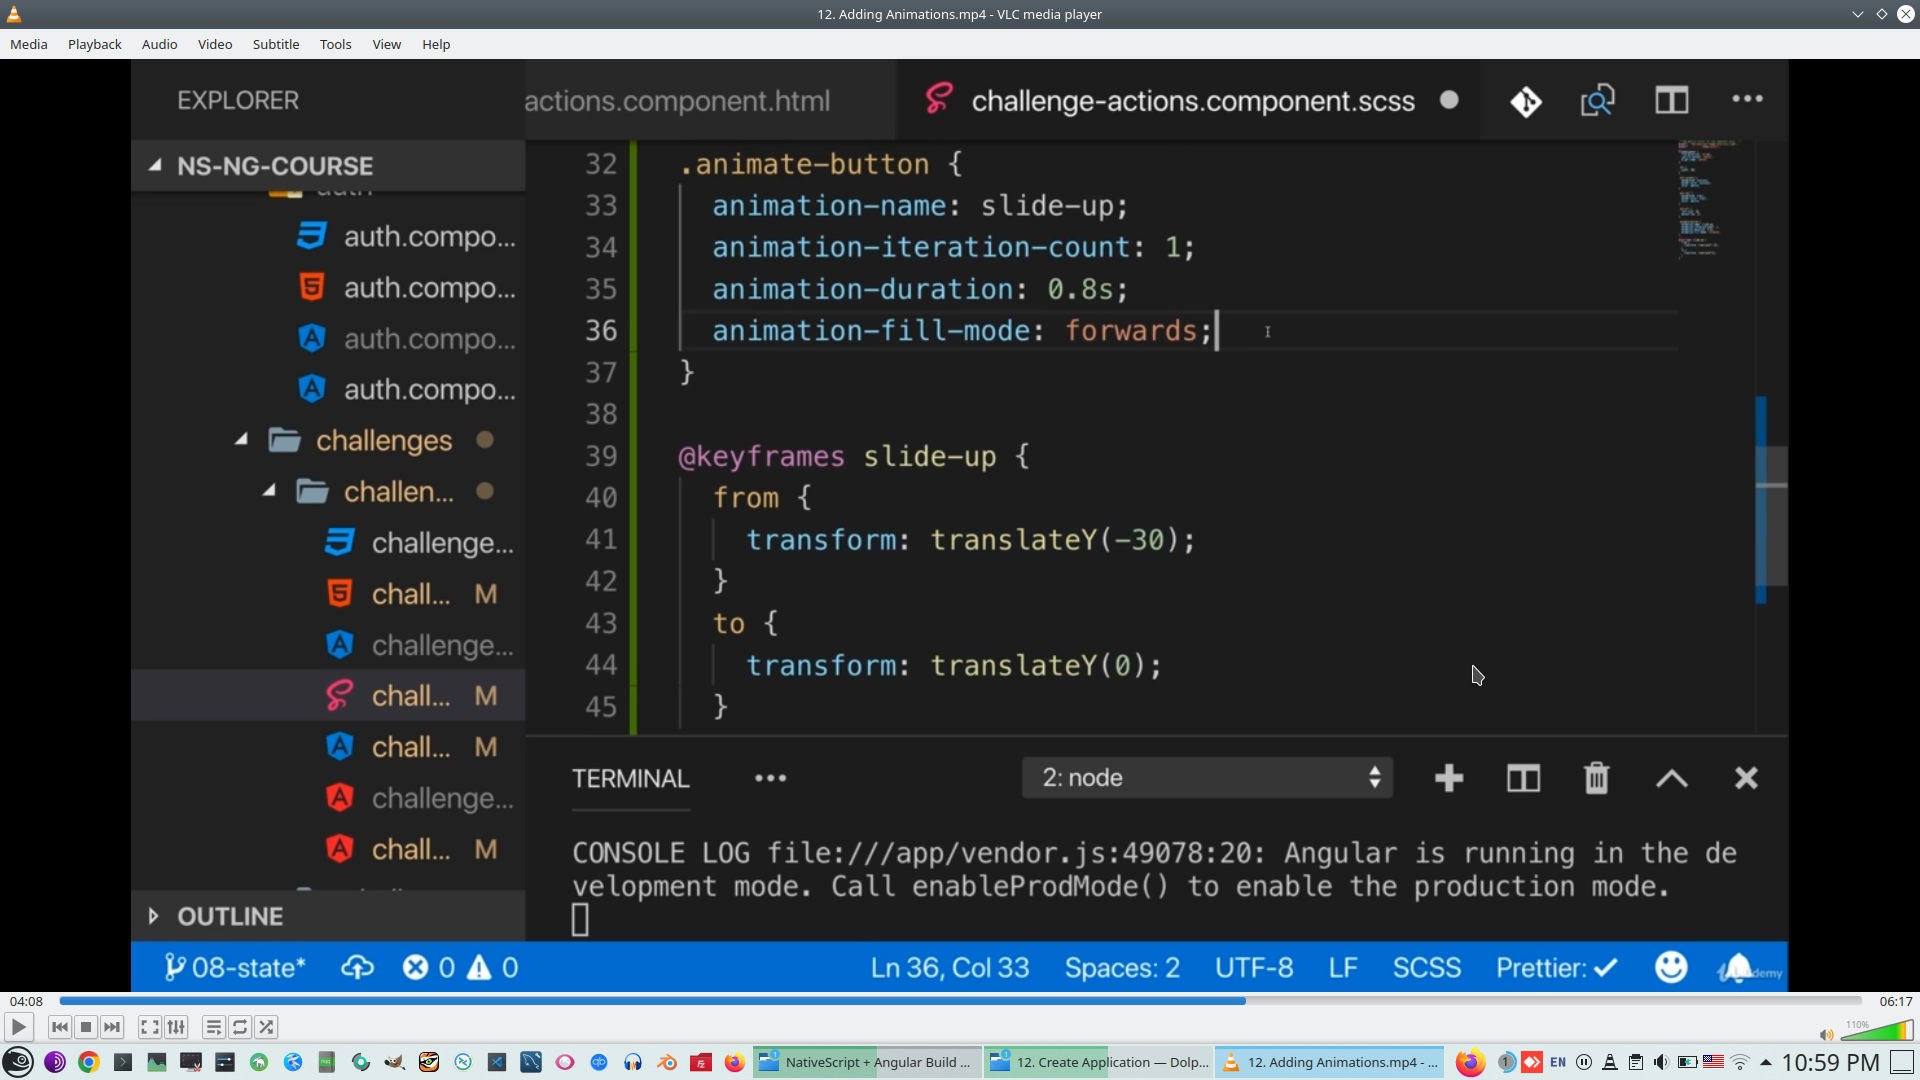
Check
21. Forms
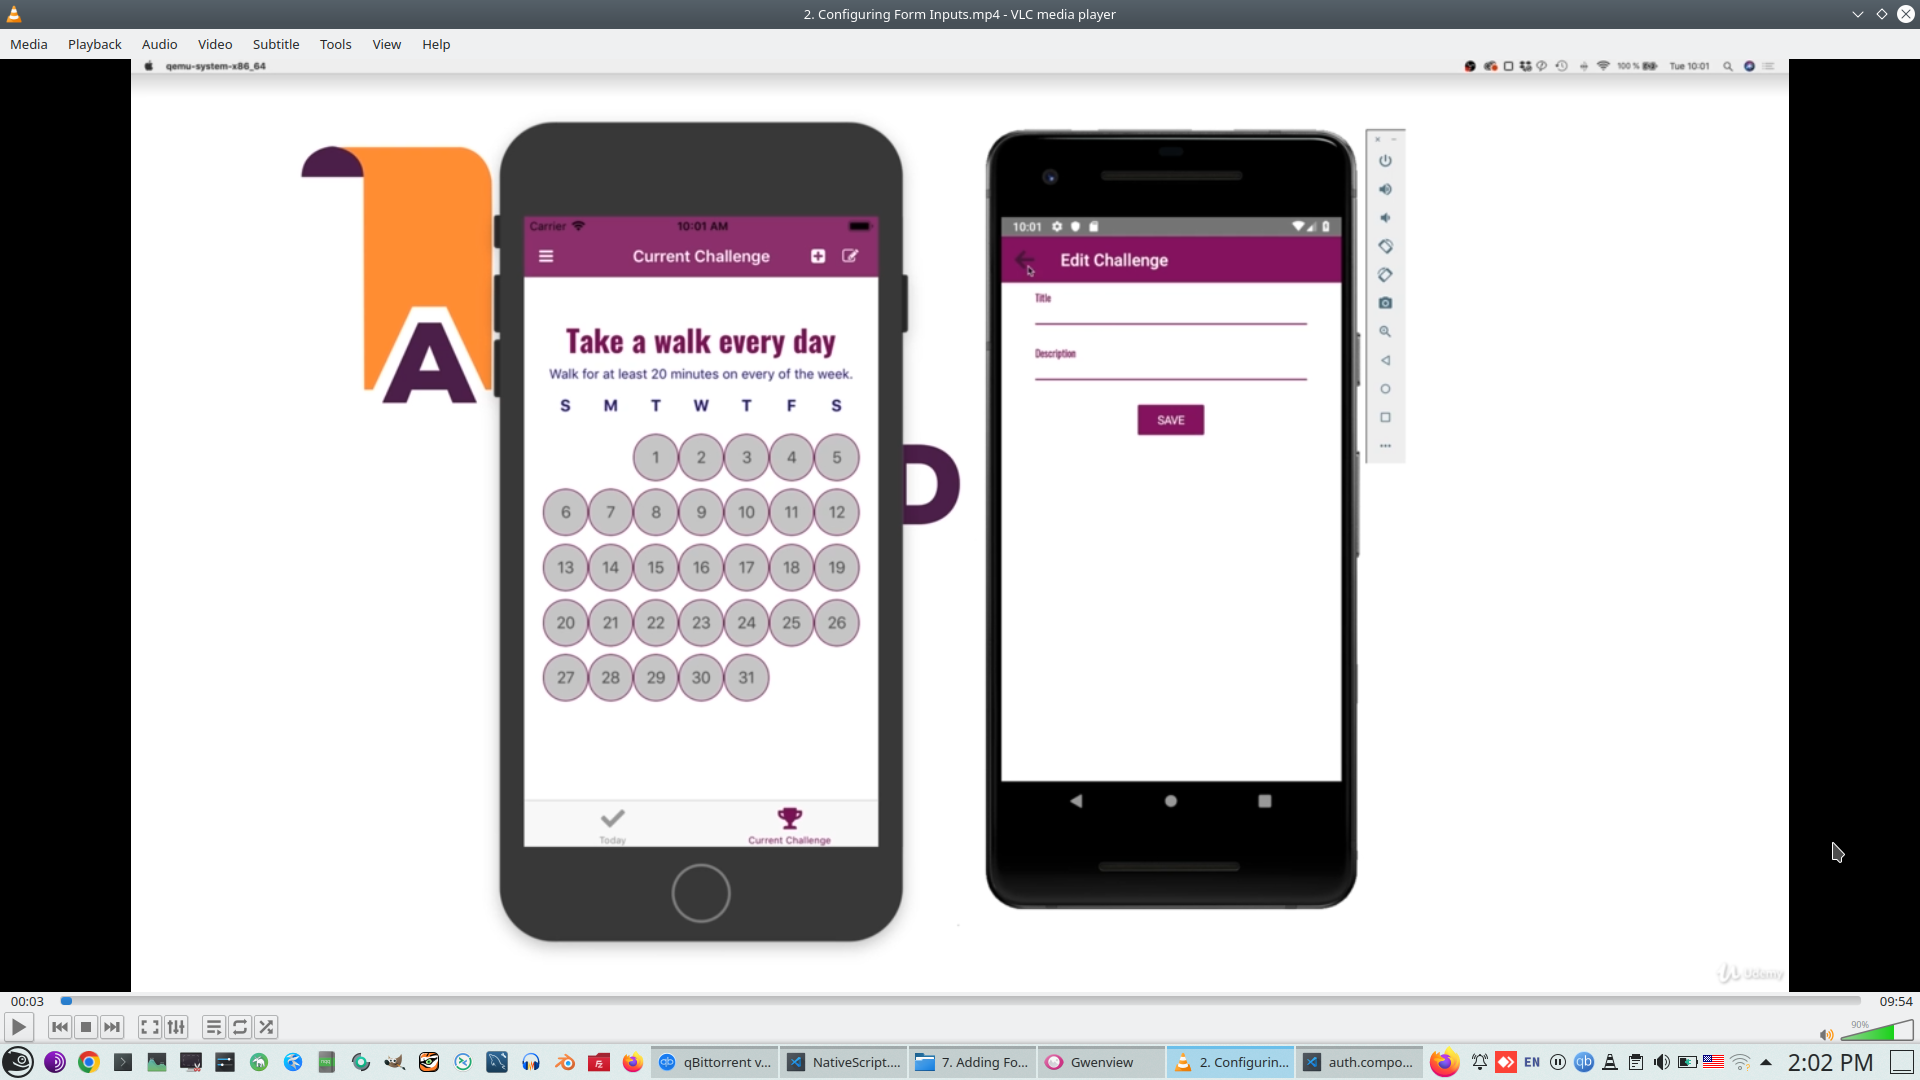
Template-driven and Reactive forms, reactive means all configured in TS code. Template based not full supported on NS, because tag FORMS missing in NS.
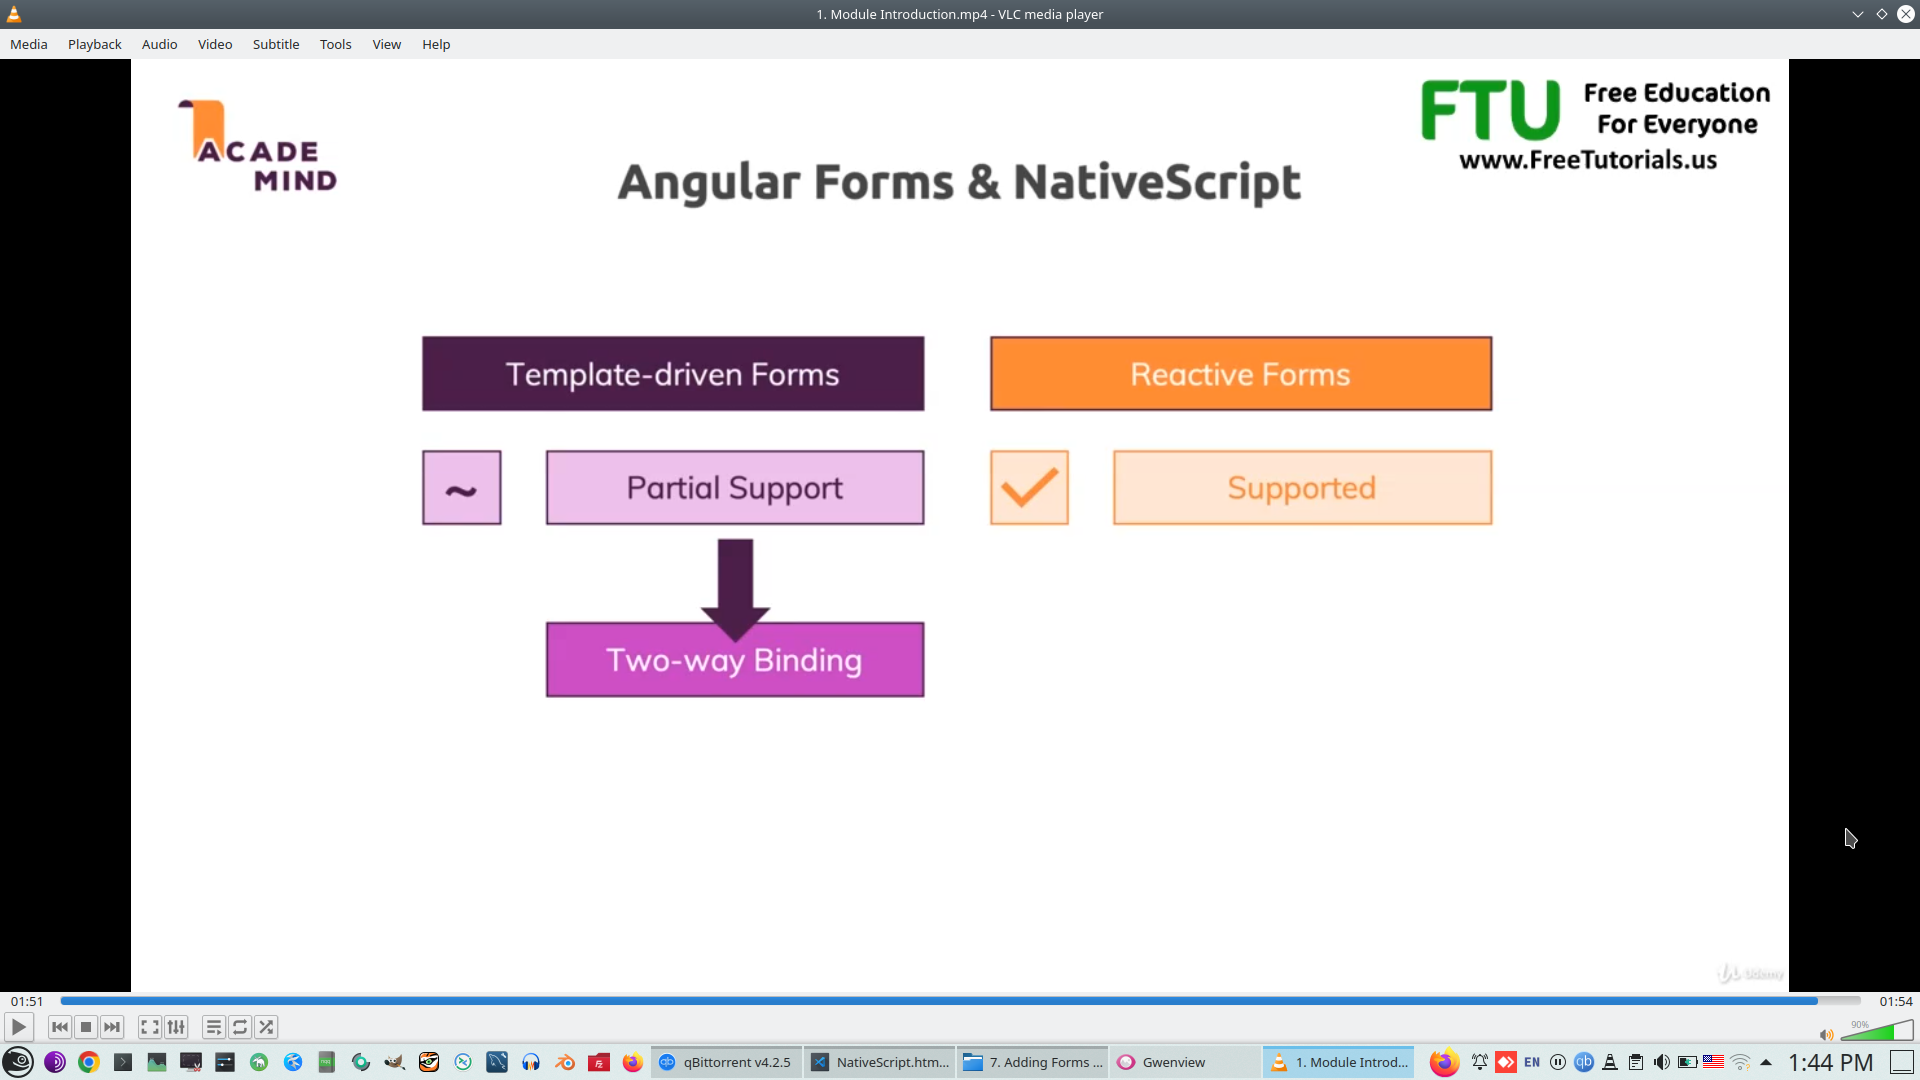
In this project ChalengeEdit id Template-Driven form
Reacrive forms used in this project in Auth module


More details ...
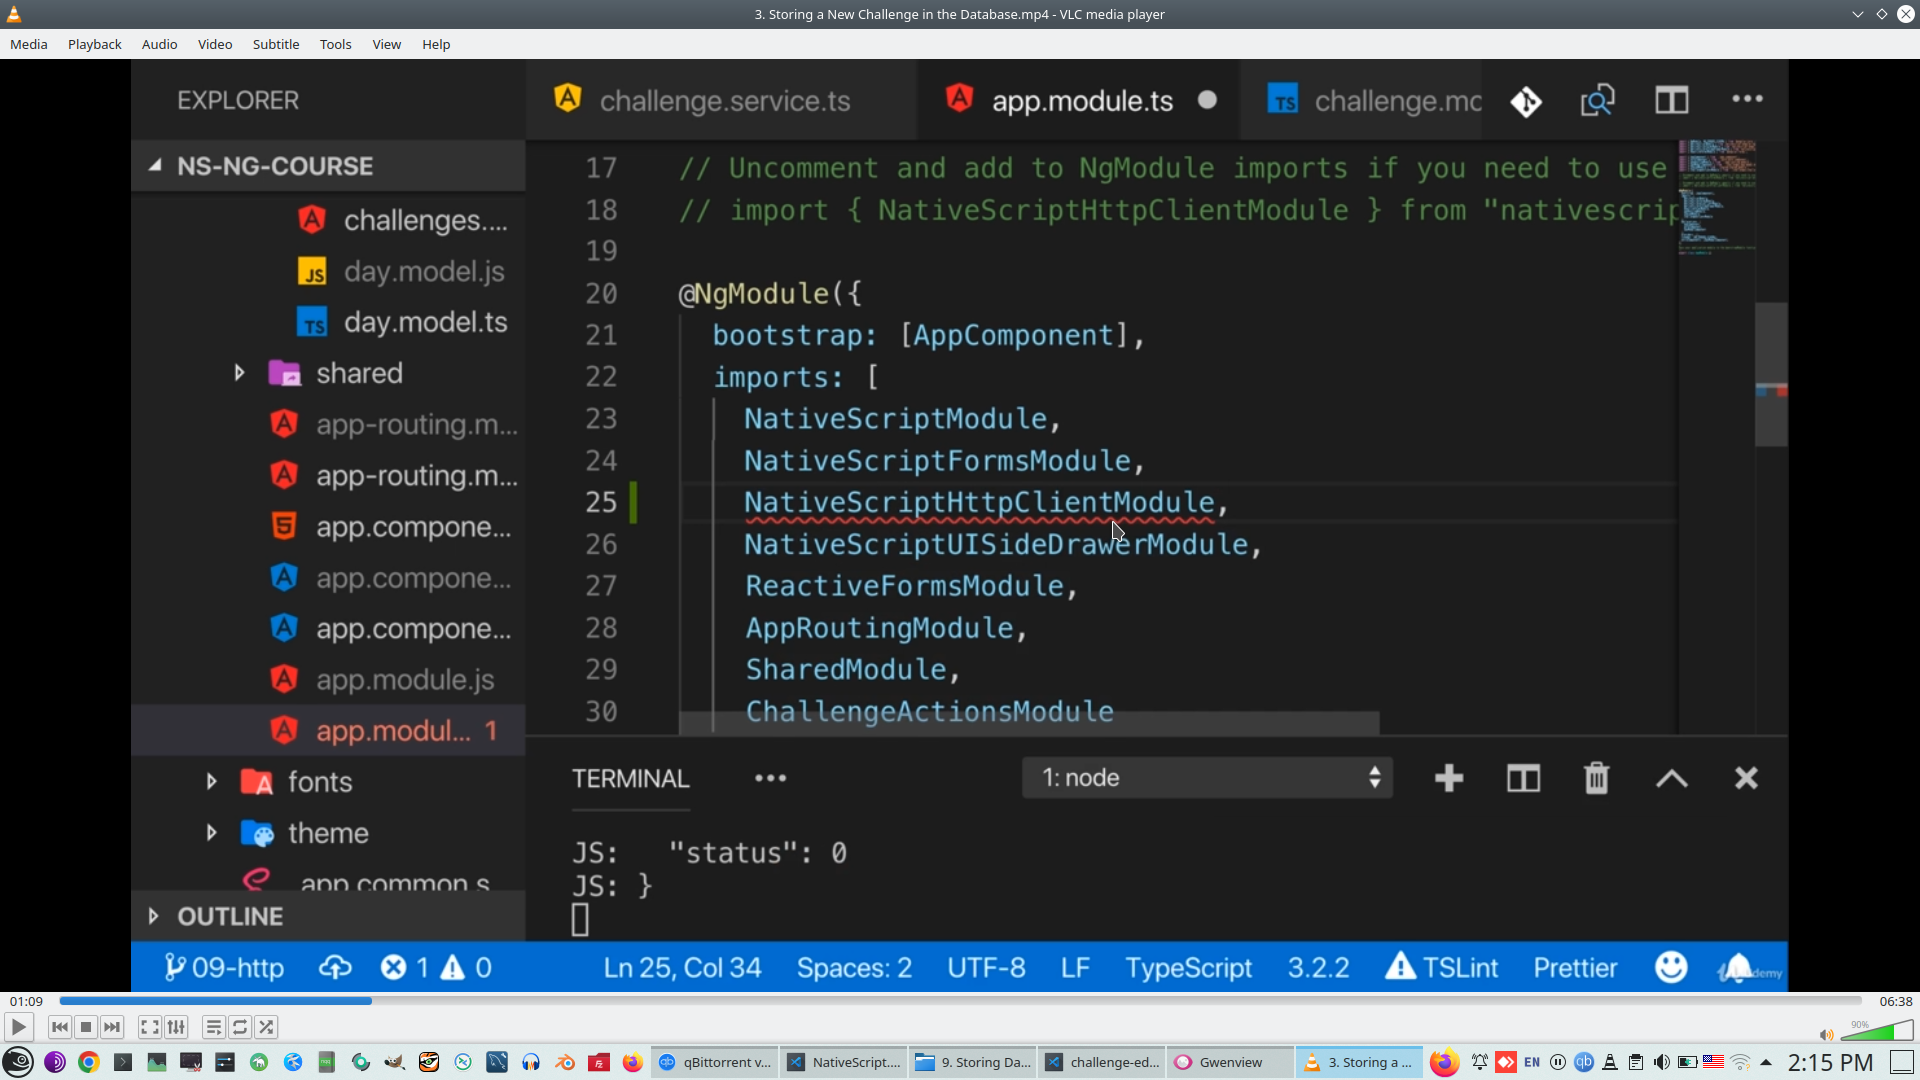
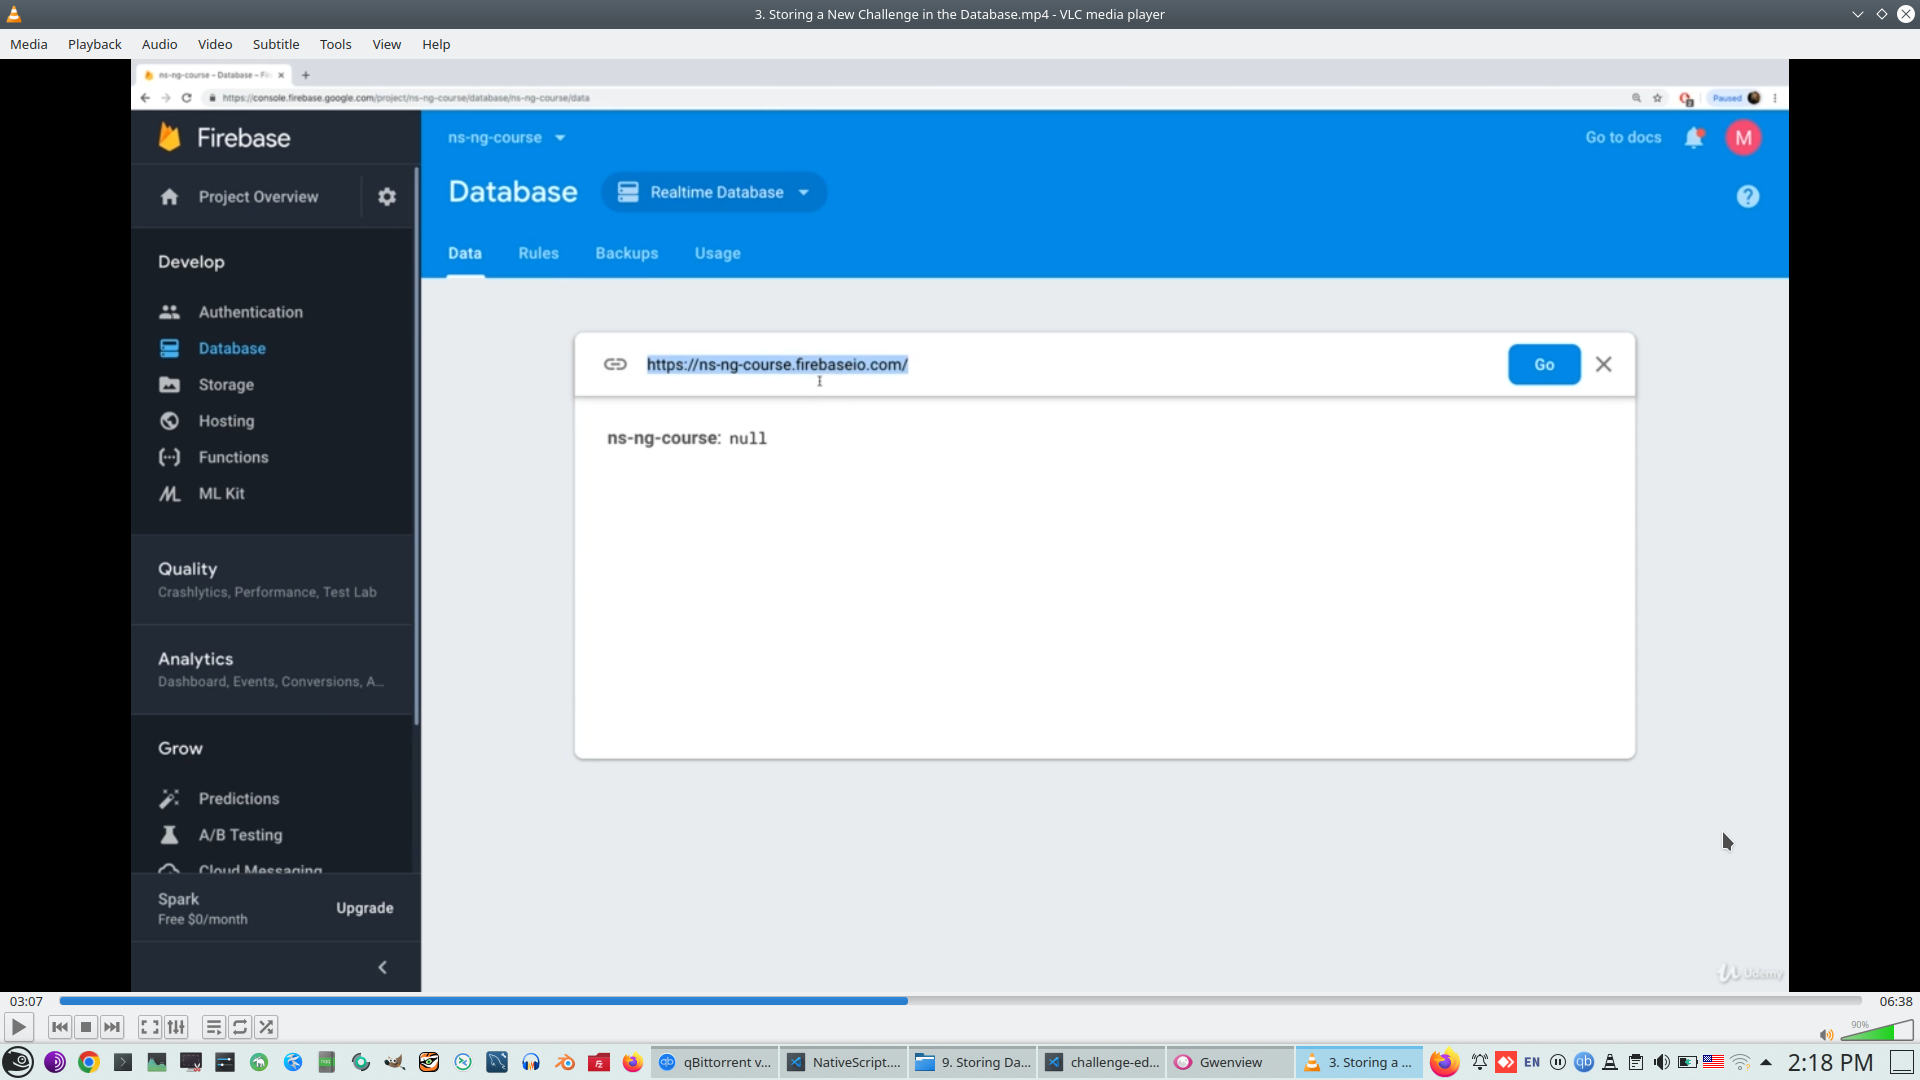
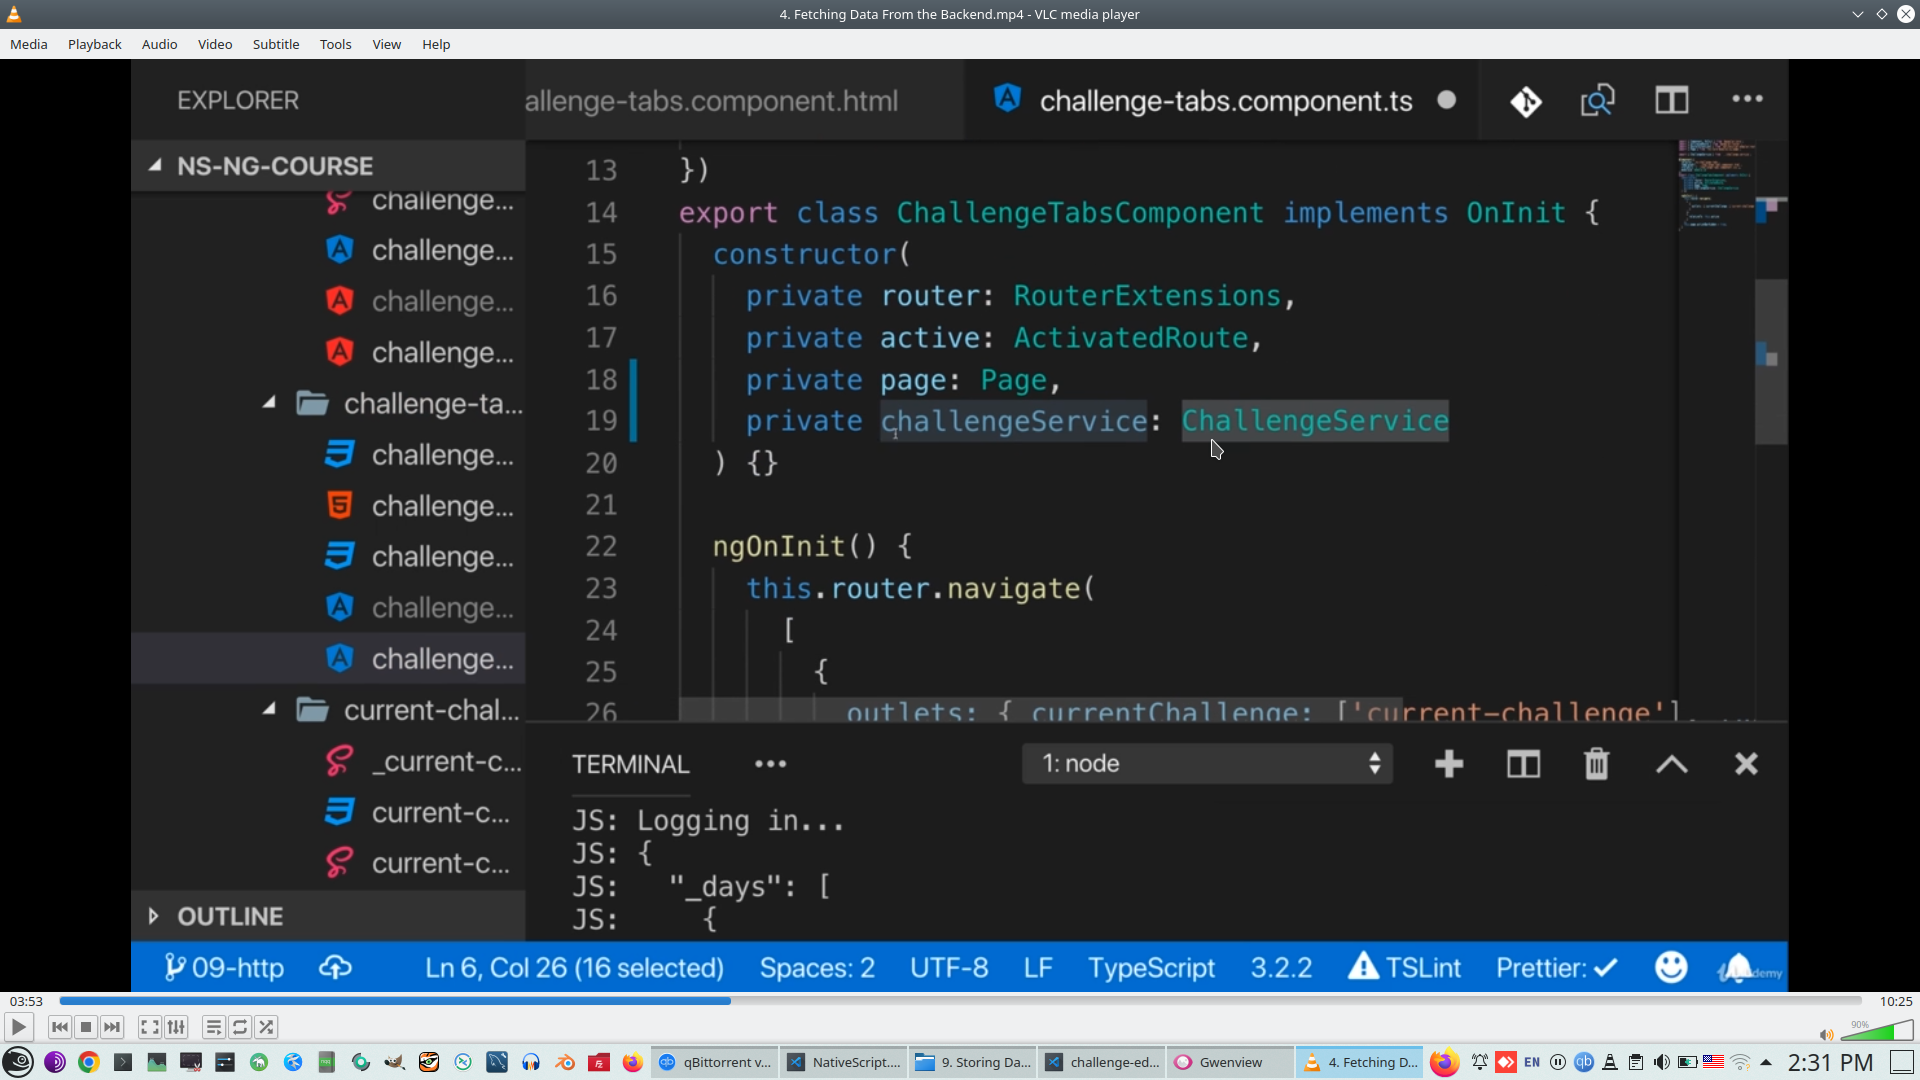
22. Working with backend, This project use Firebase
Place to insert code
>
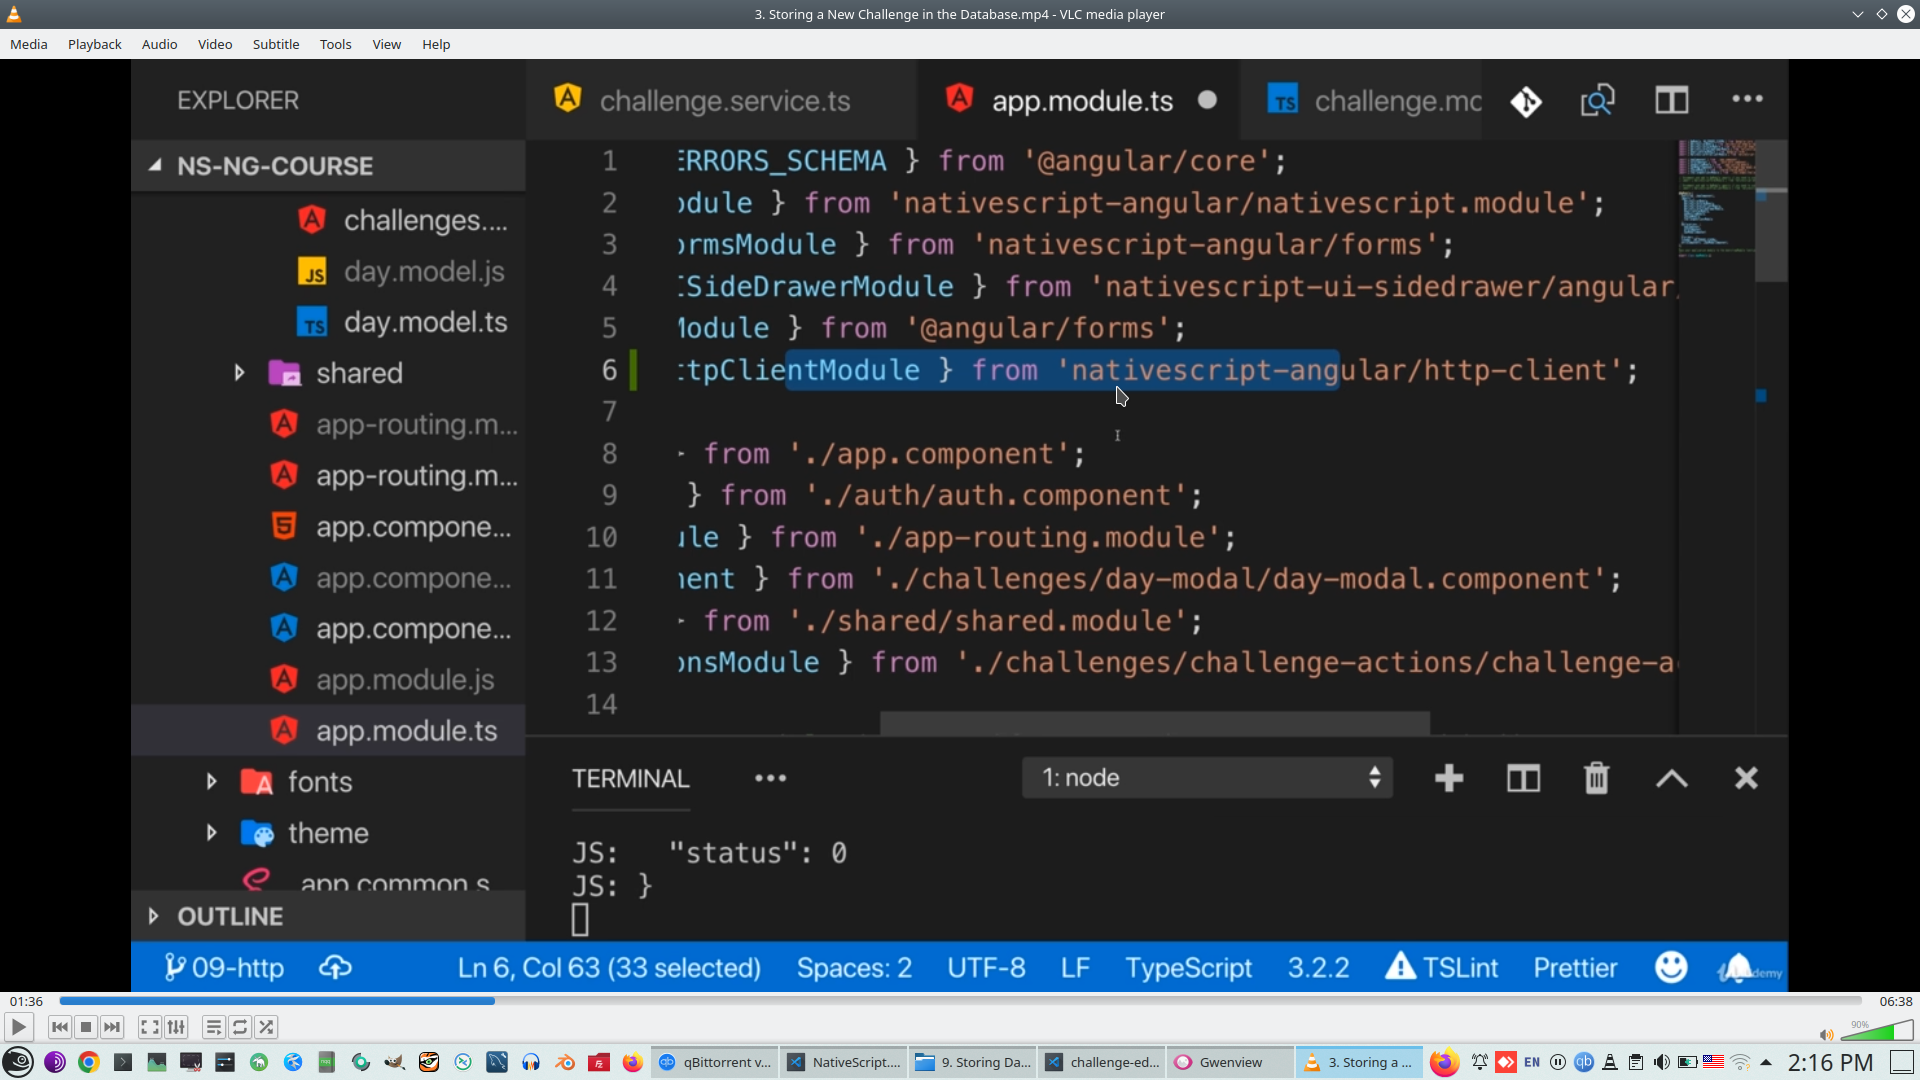
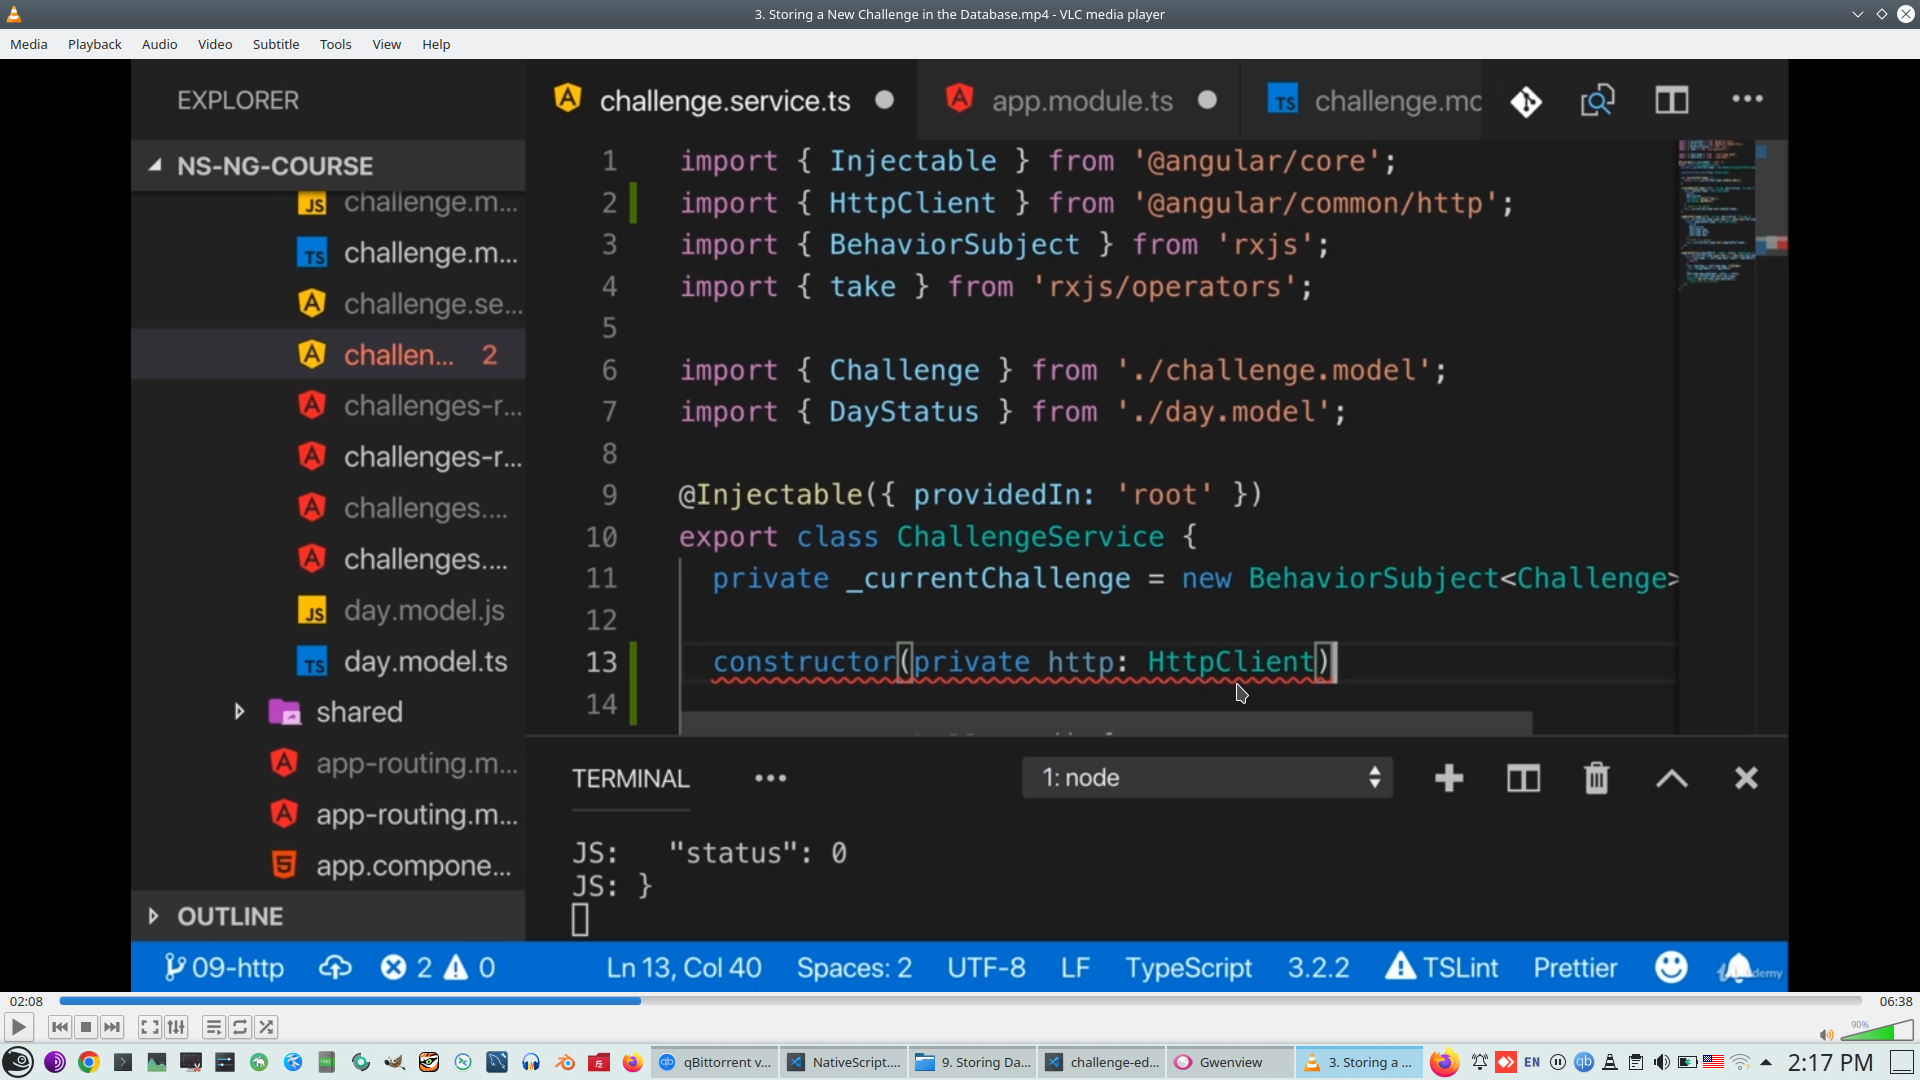
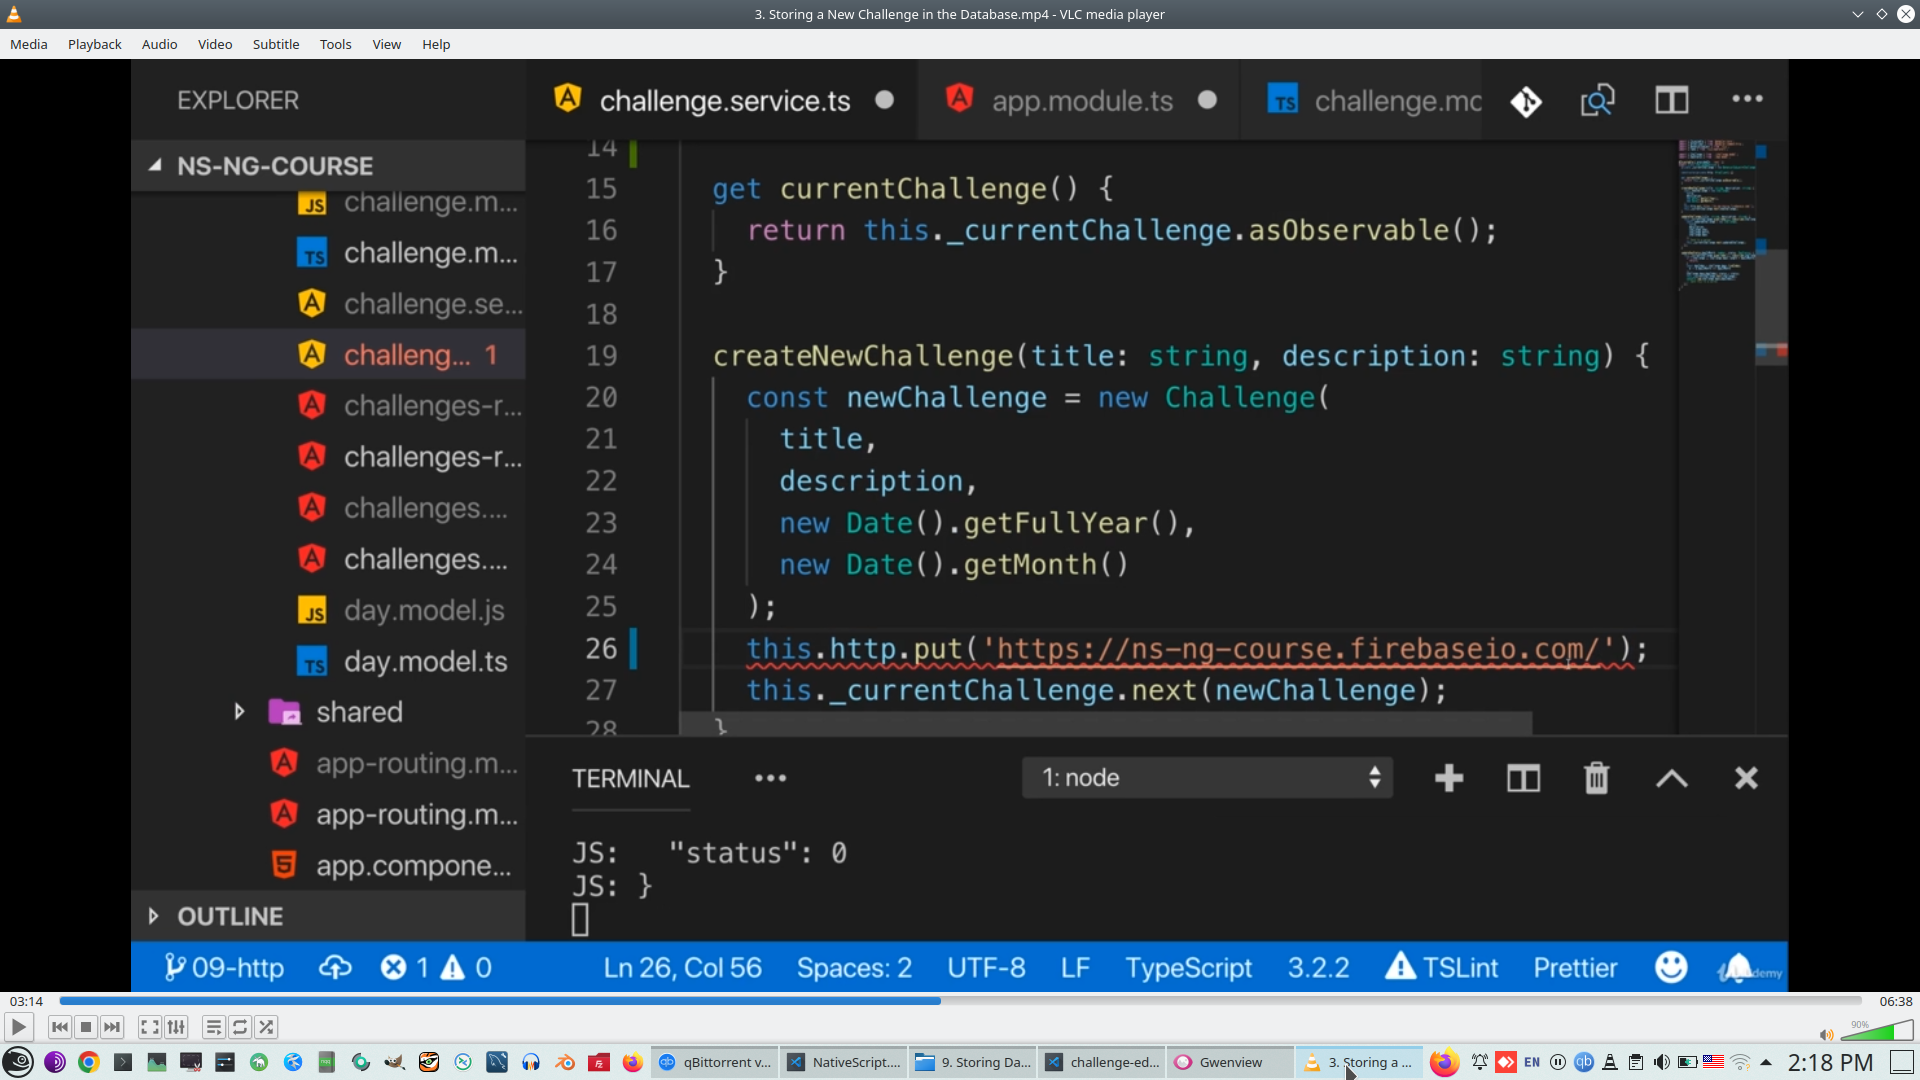
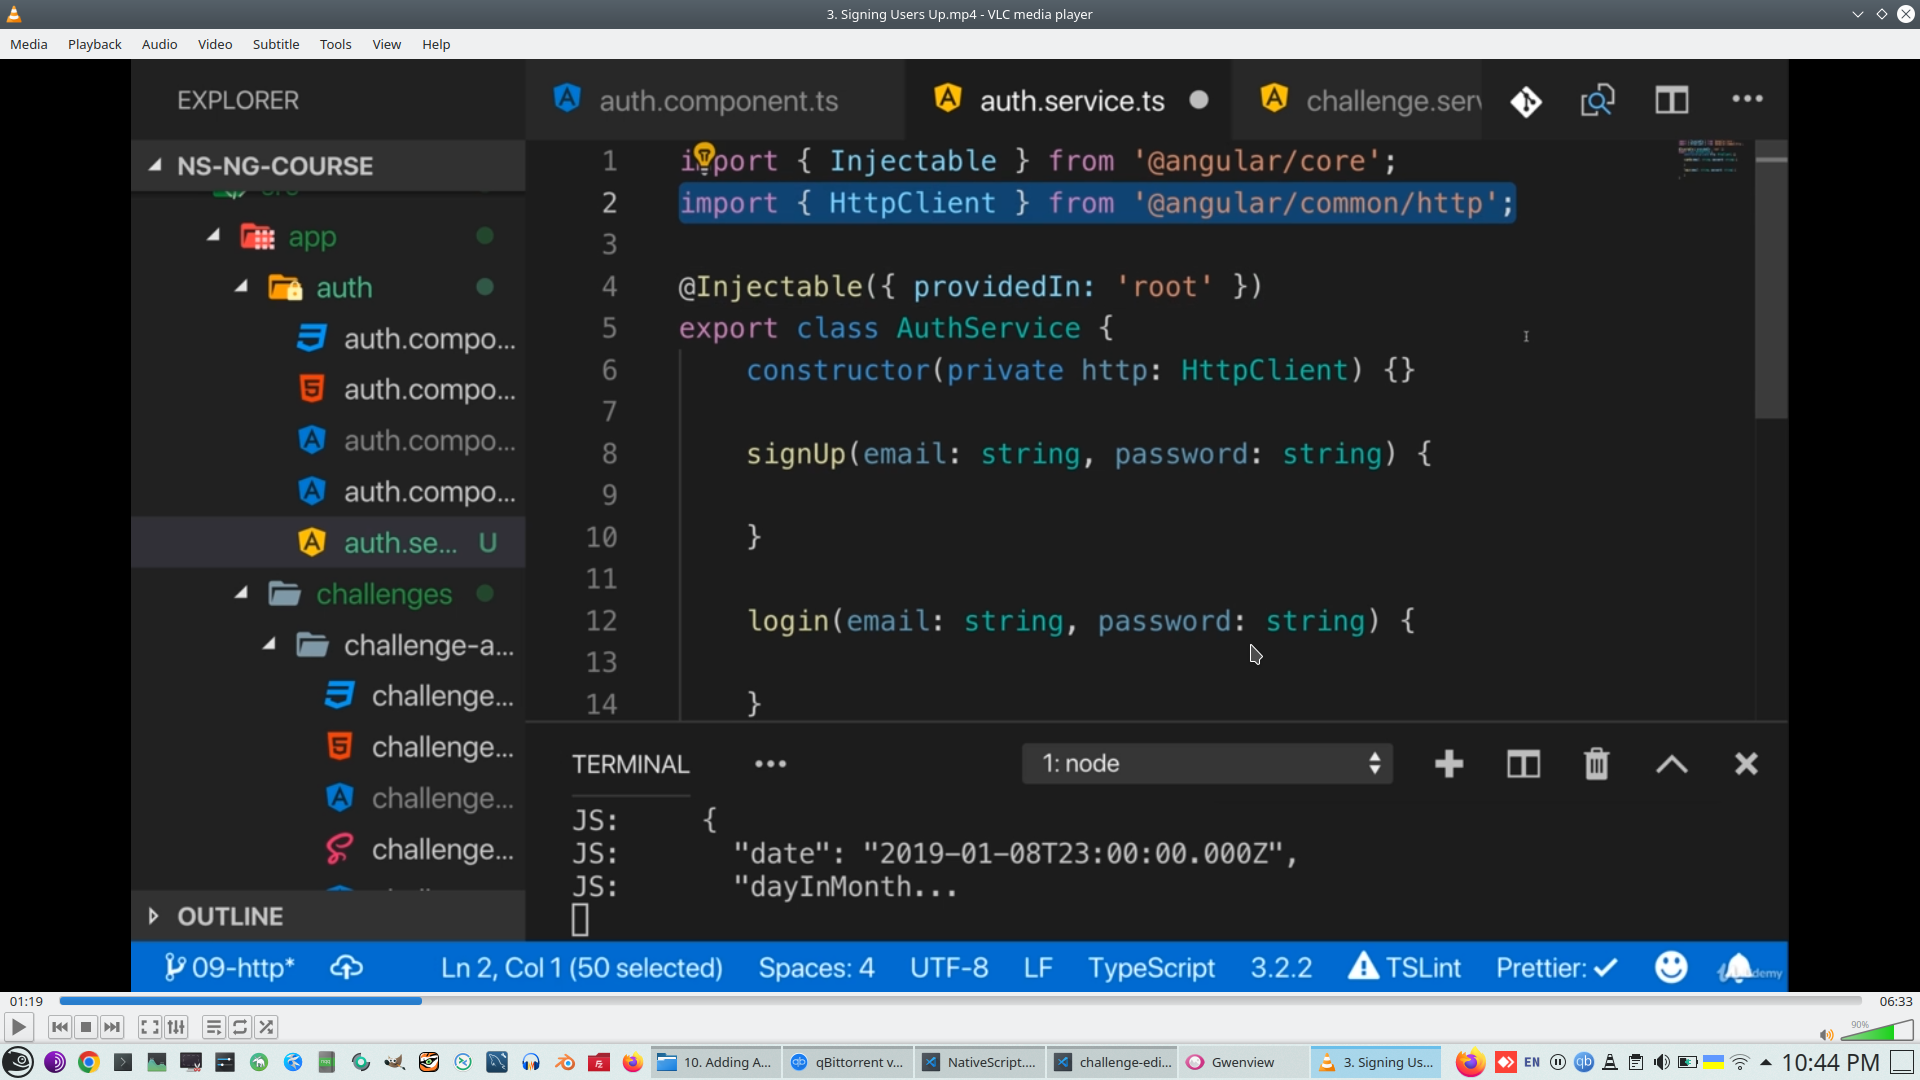
Firtly need import HttpClient from NS and Inject it
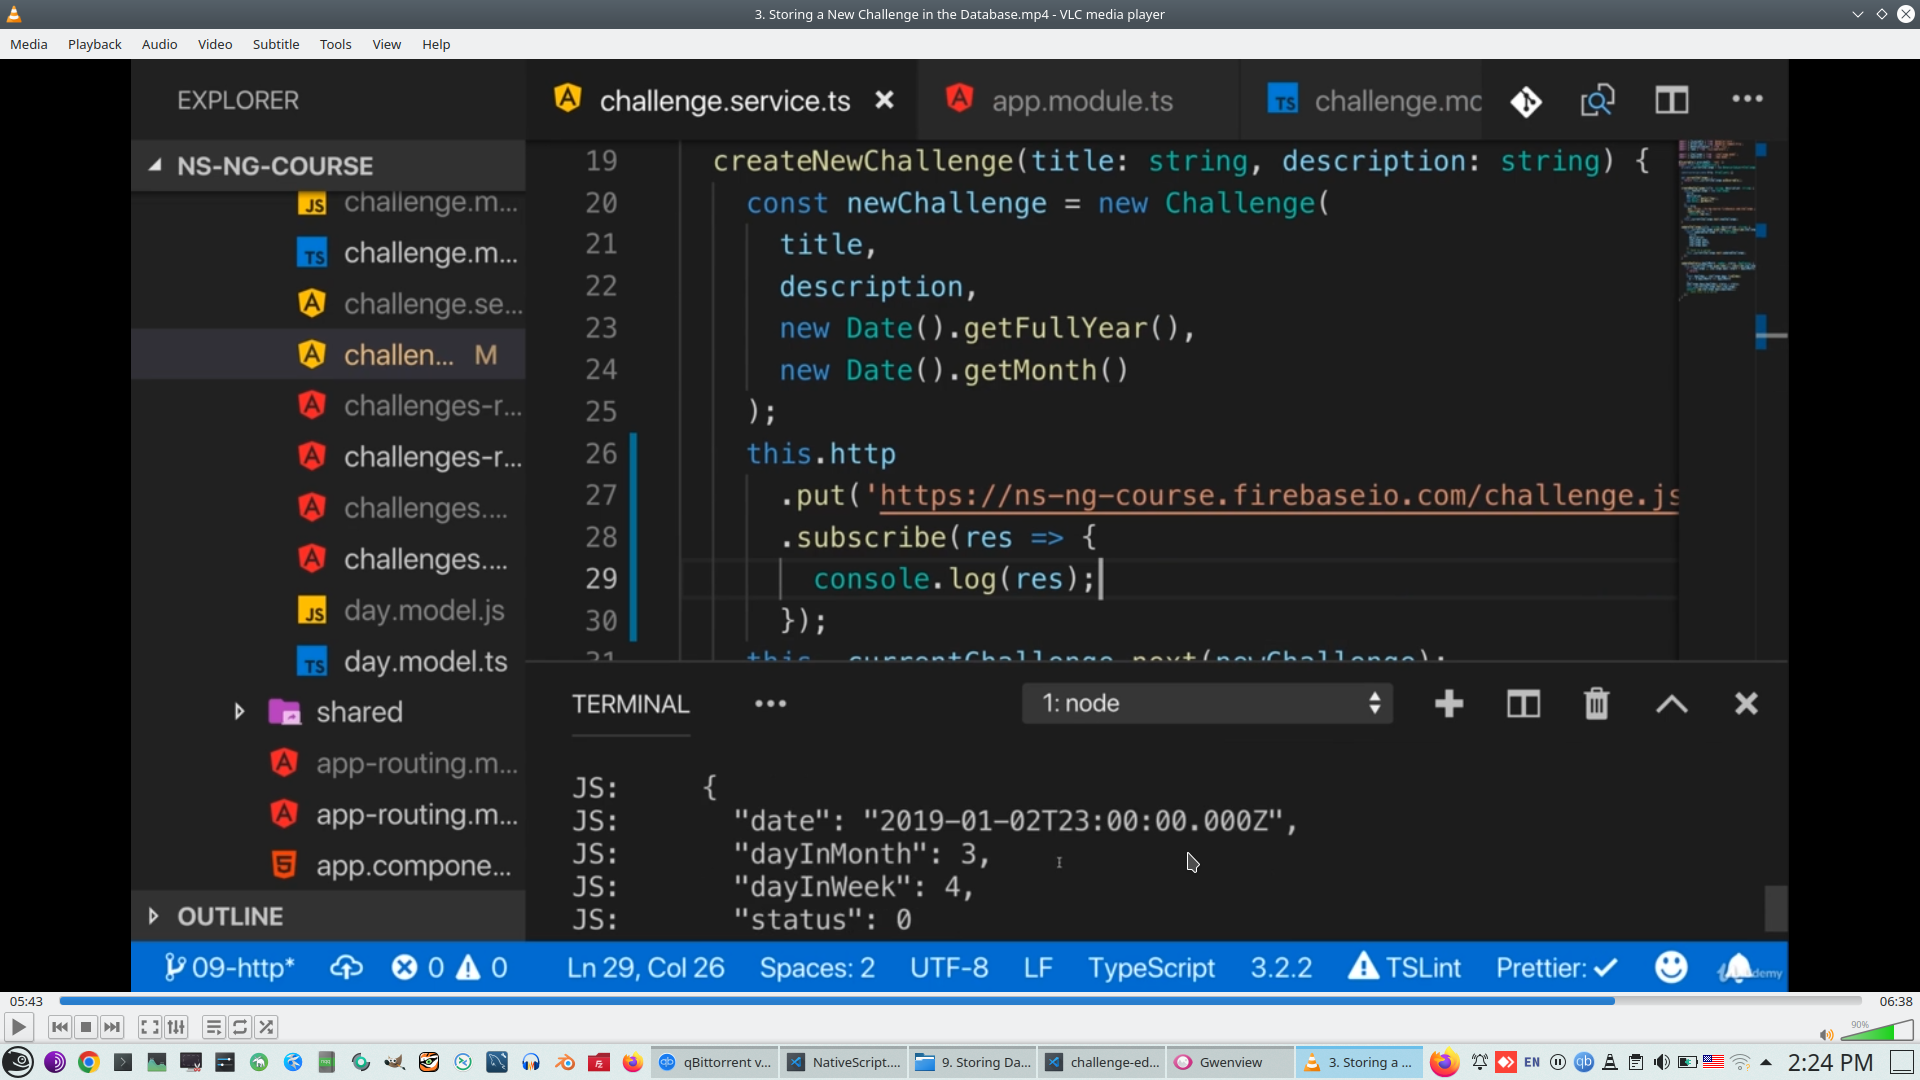
For writing to server we will use PUT method
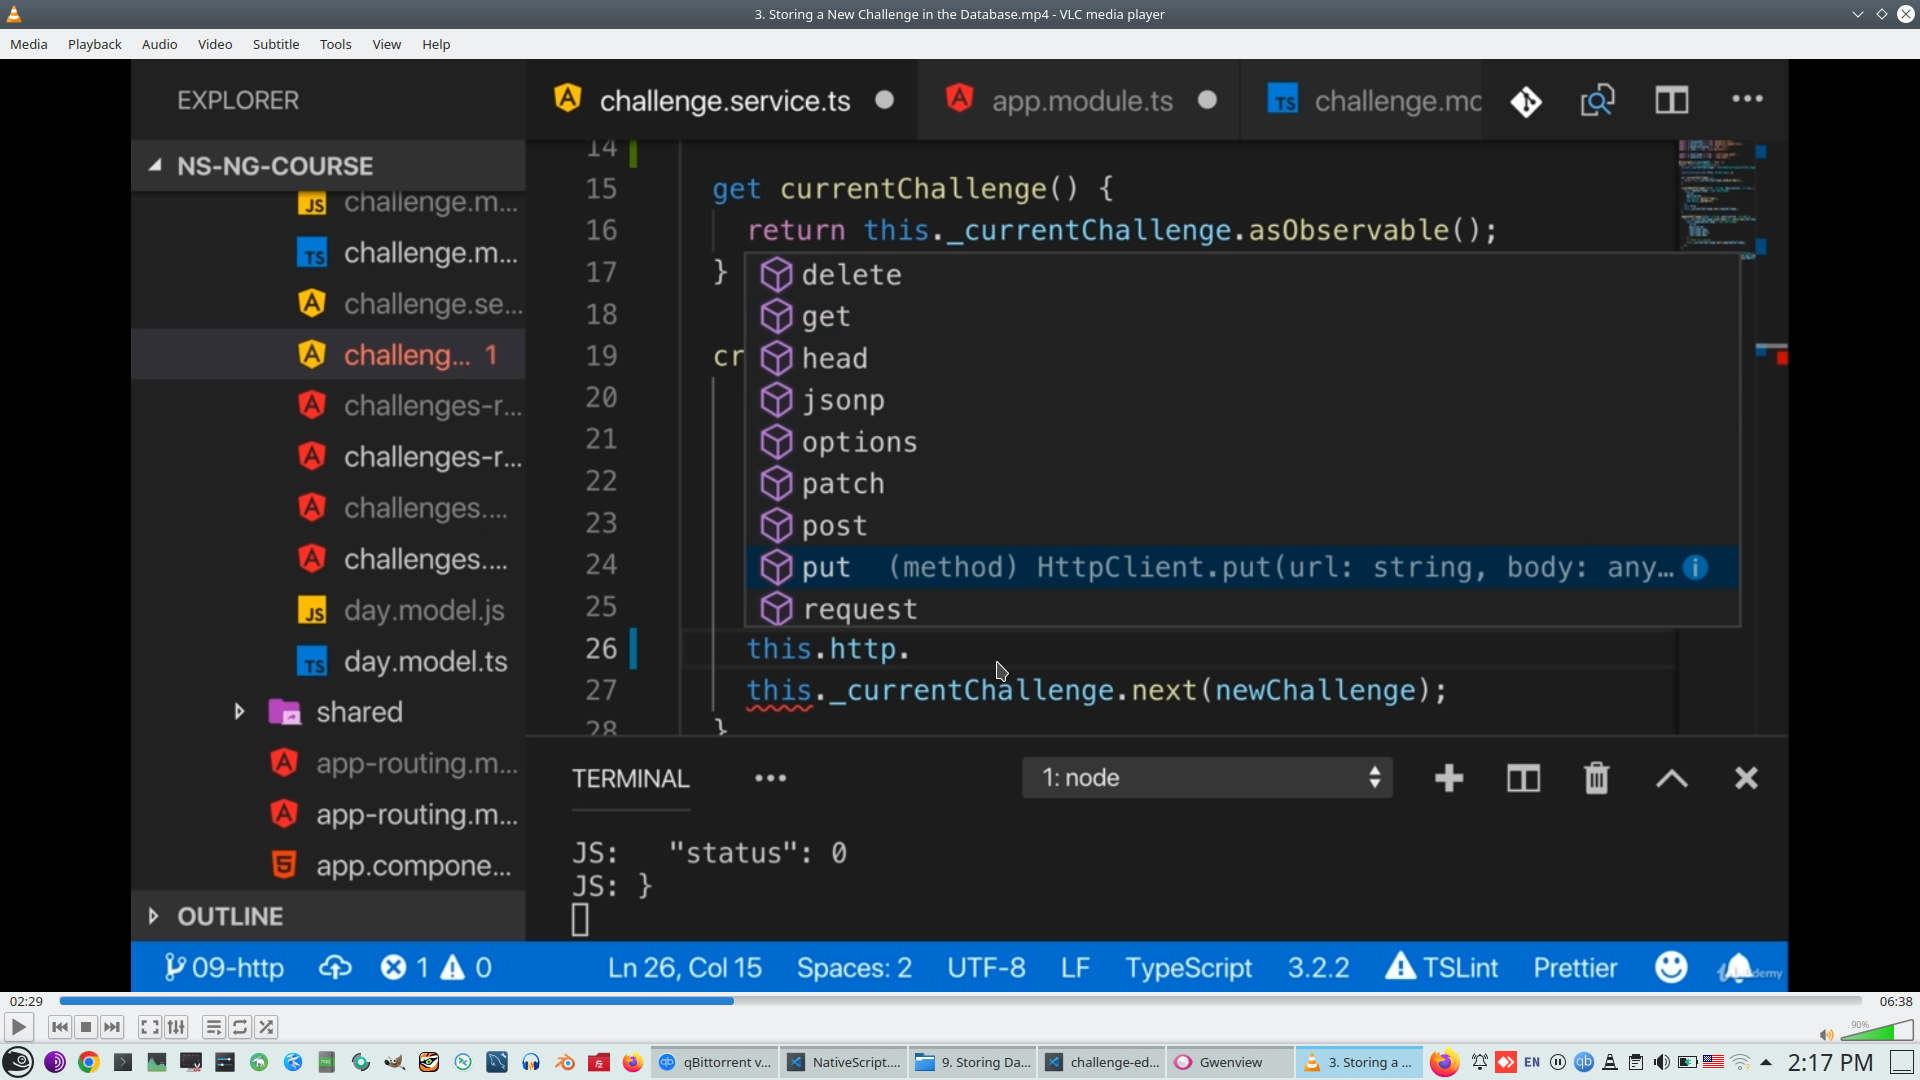
Copy Firebase URL
For Firebase we always need to add JSON on the end
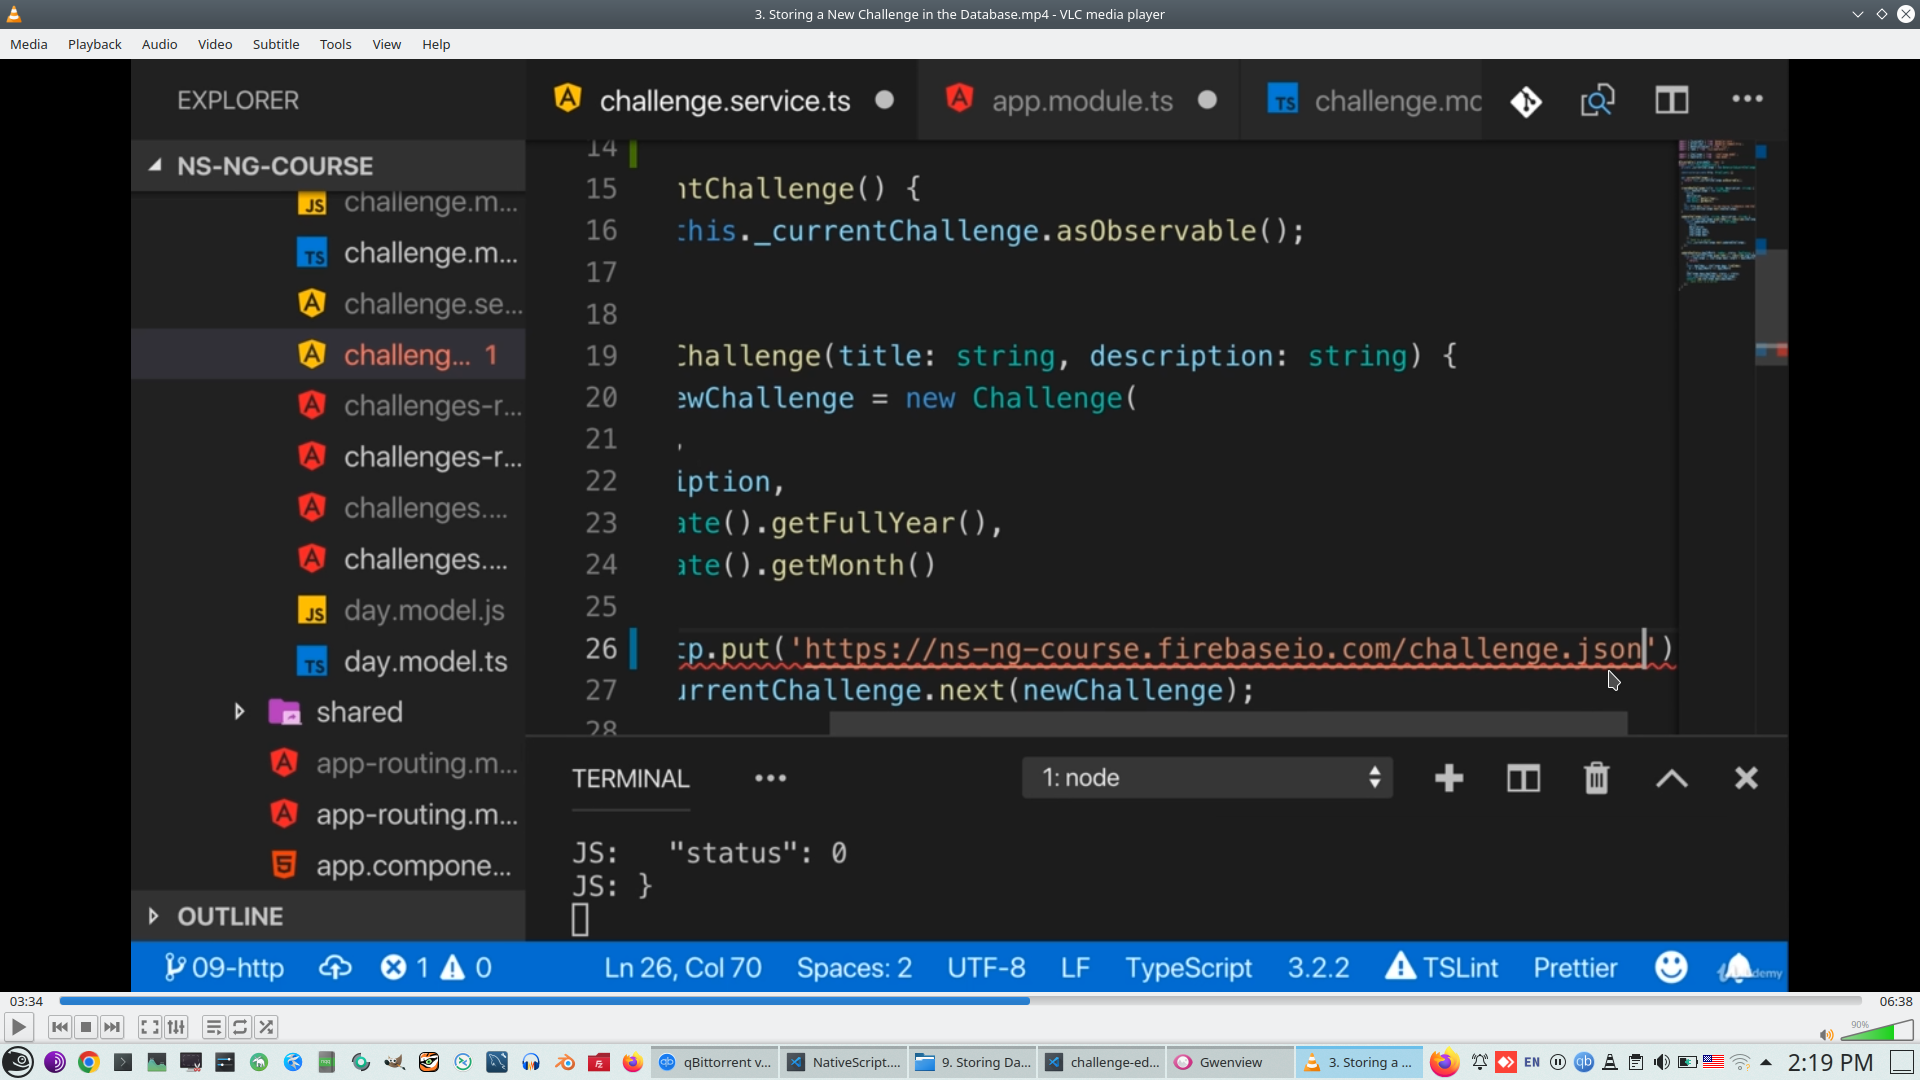
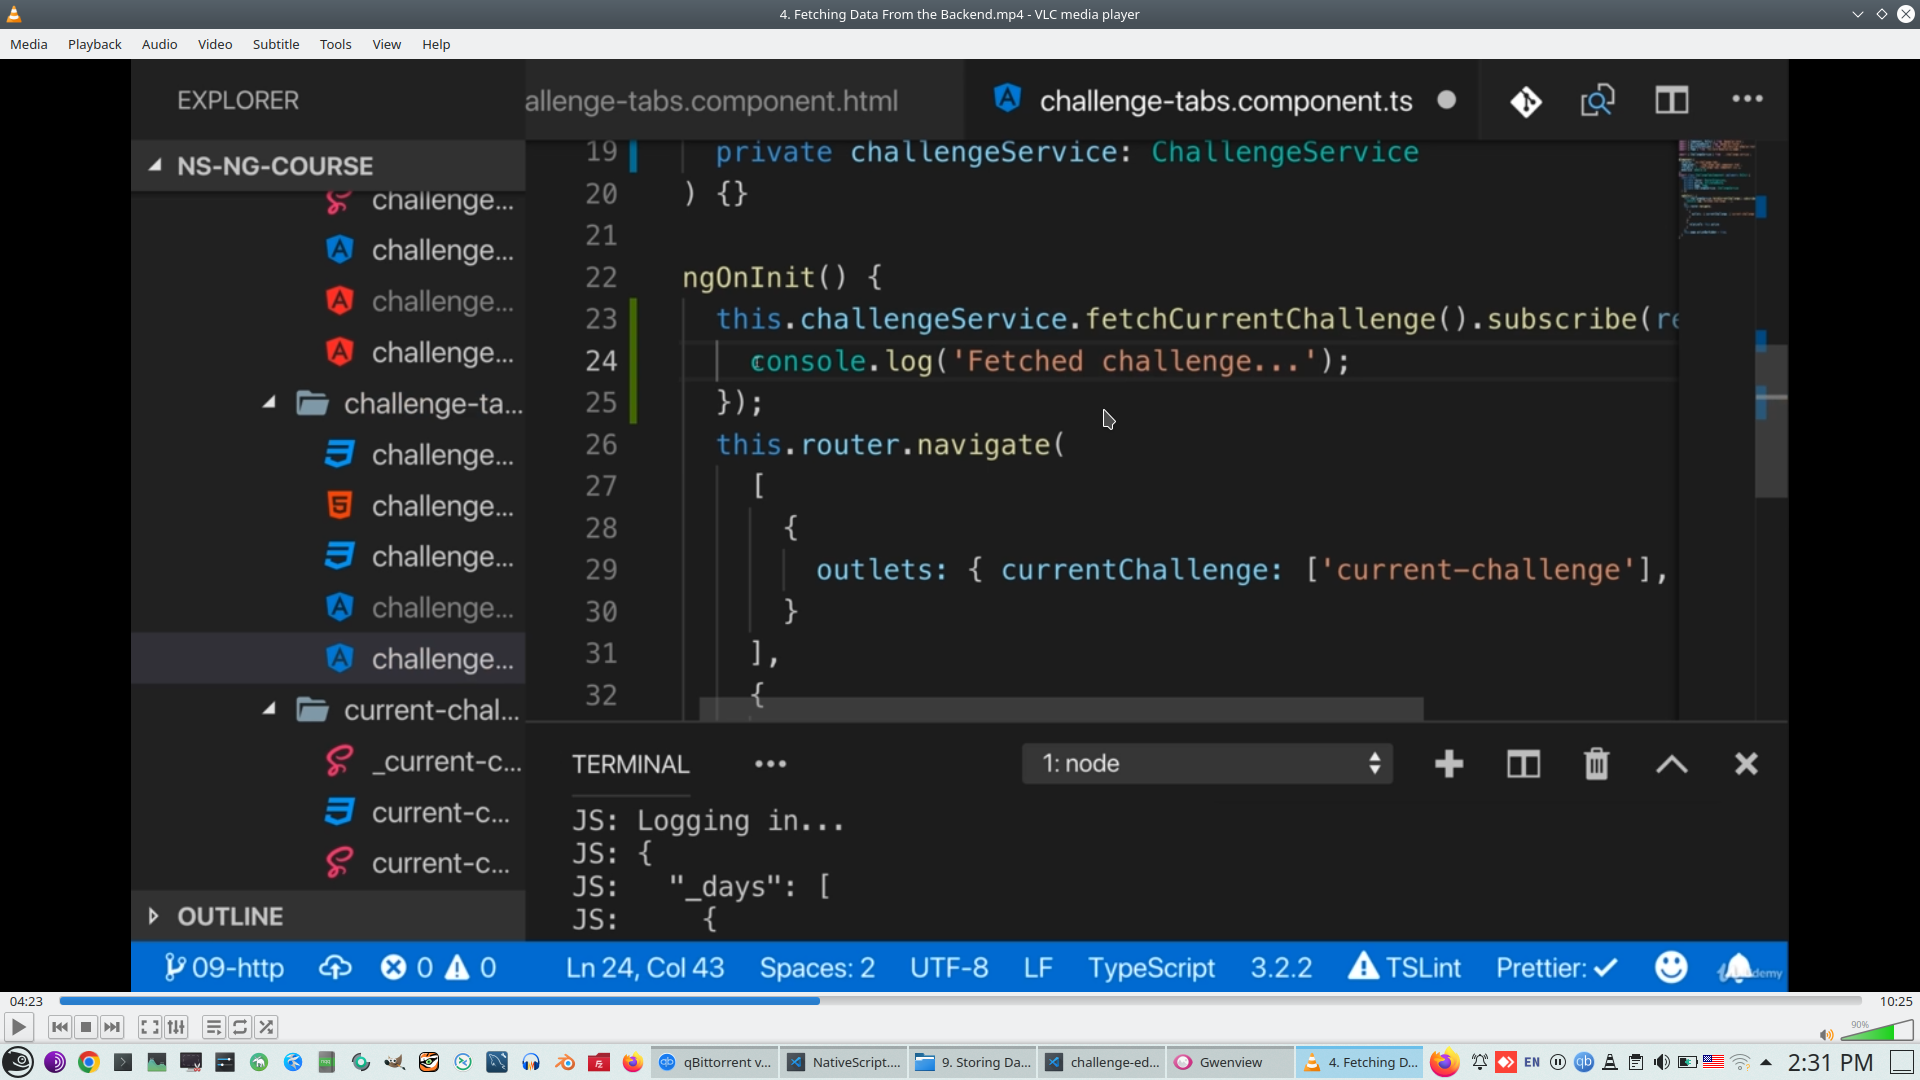
Second parameter Data, and we need to Subsribe in order to receive result
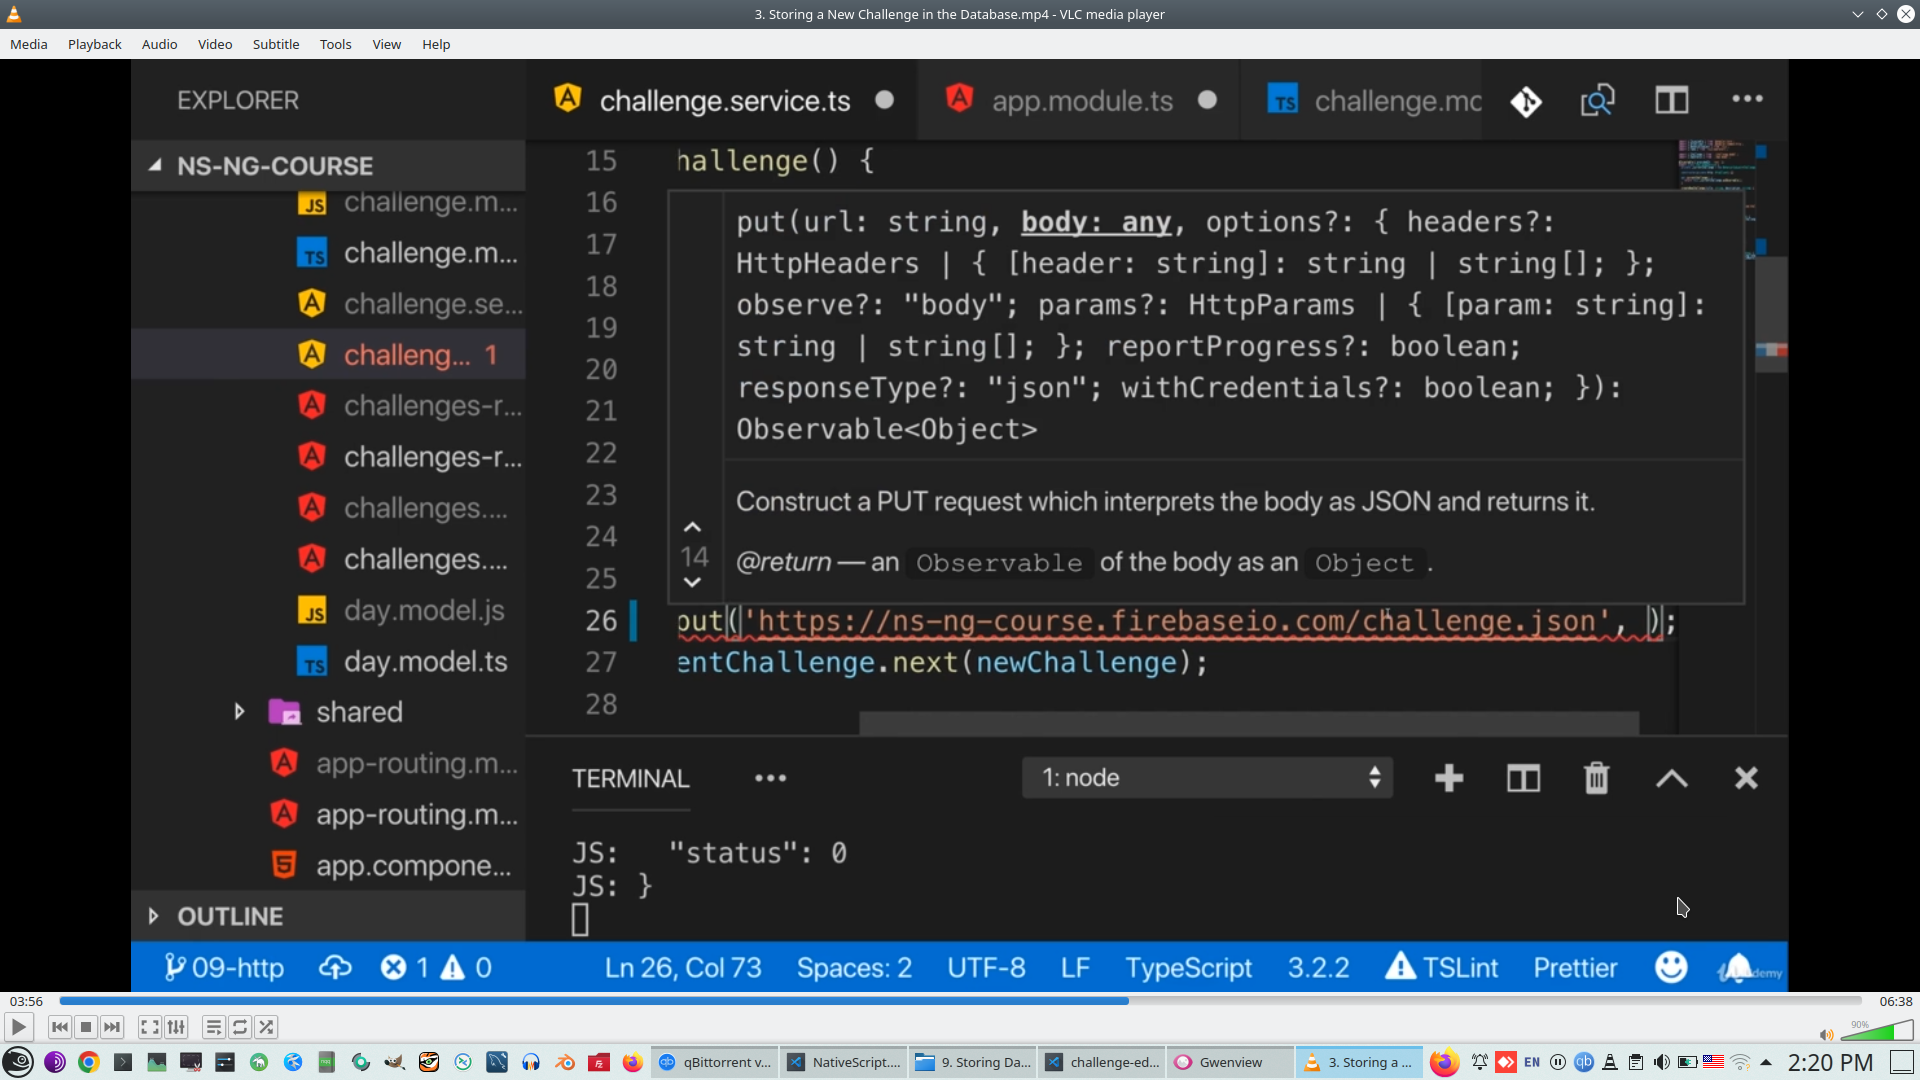
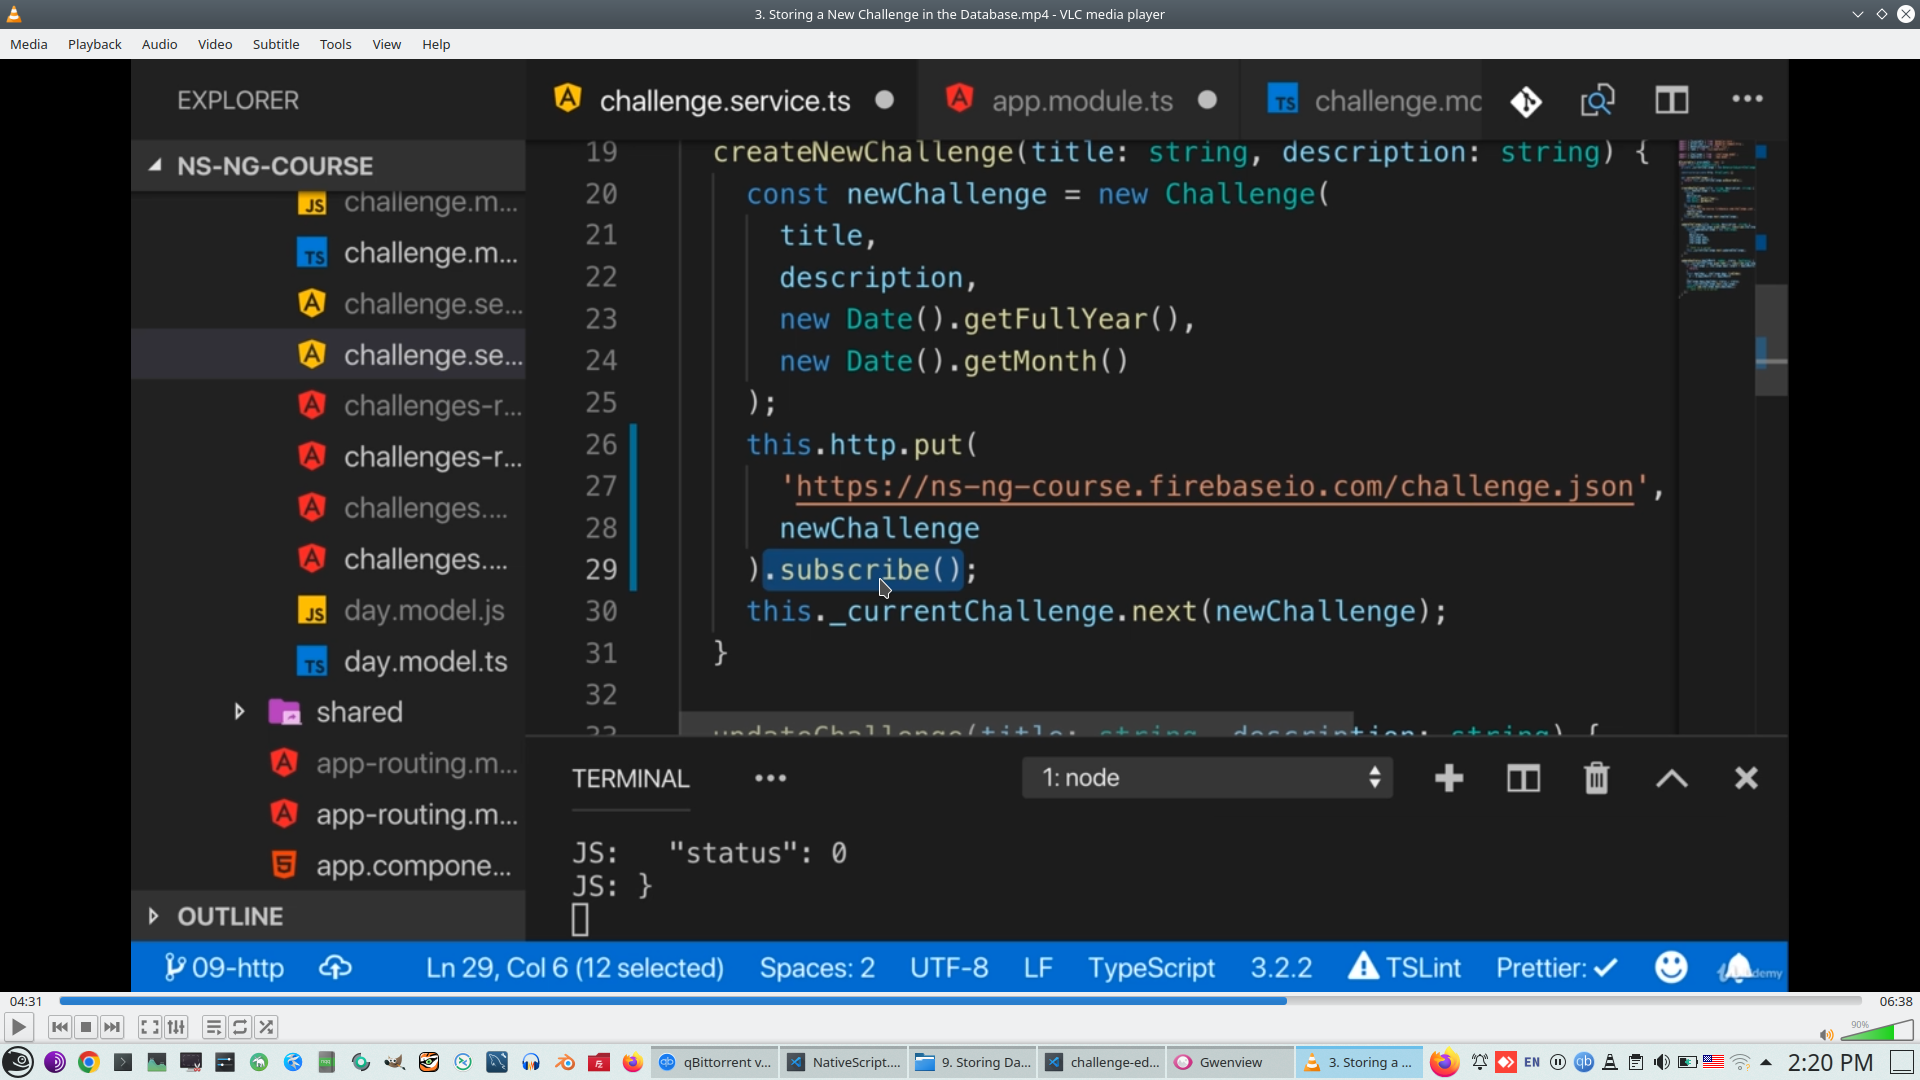
Or return Obsevable from this method
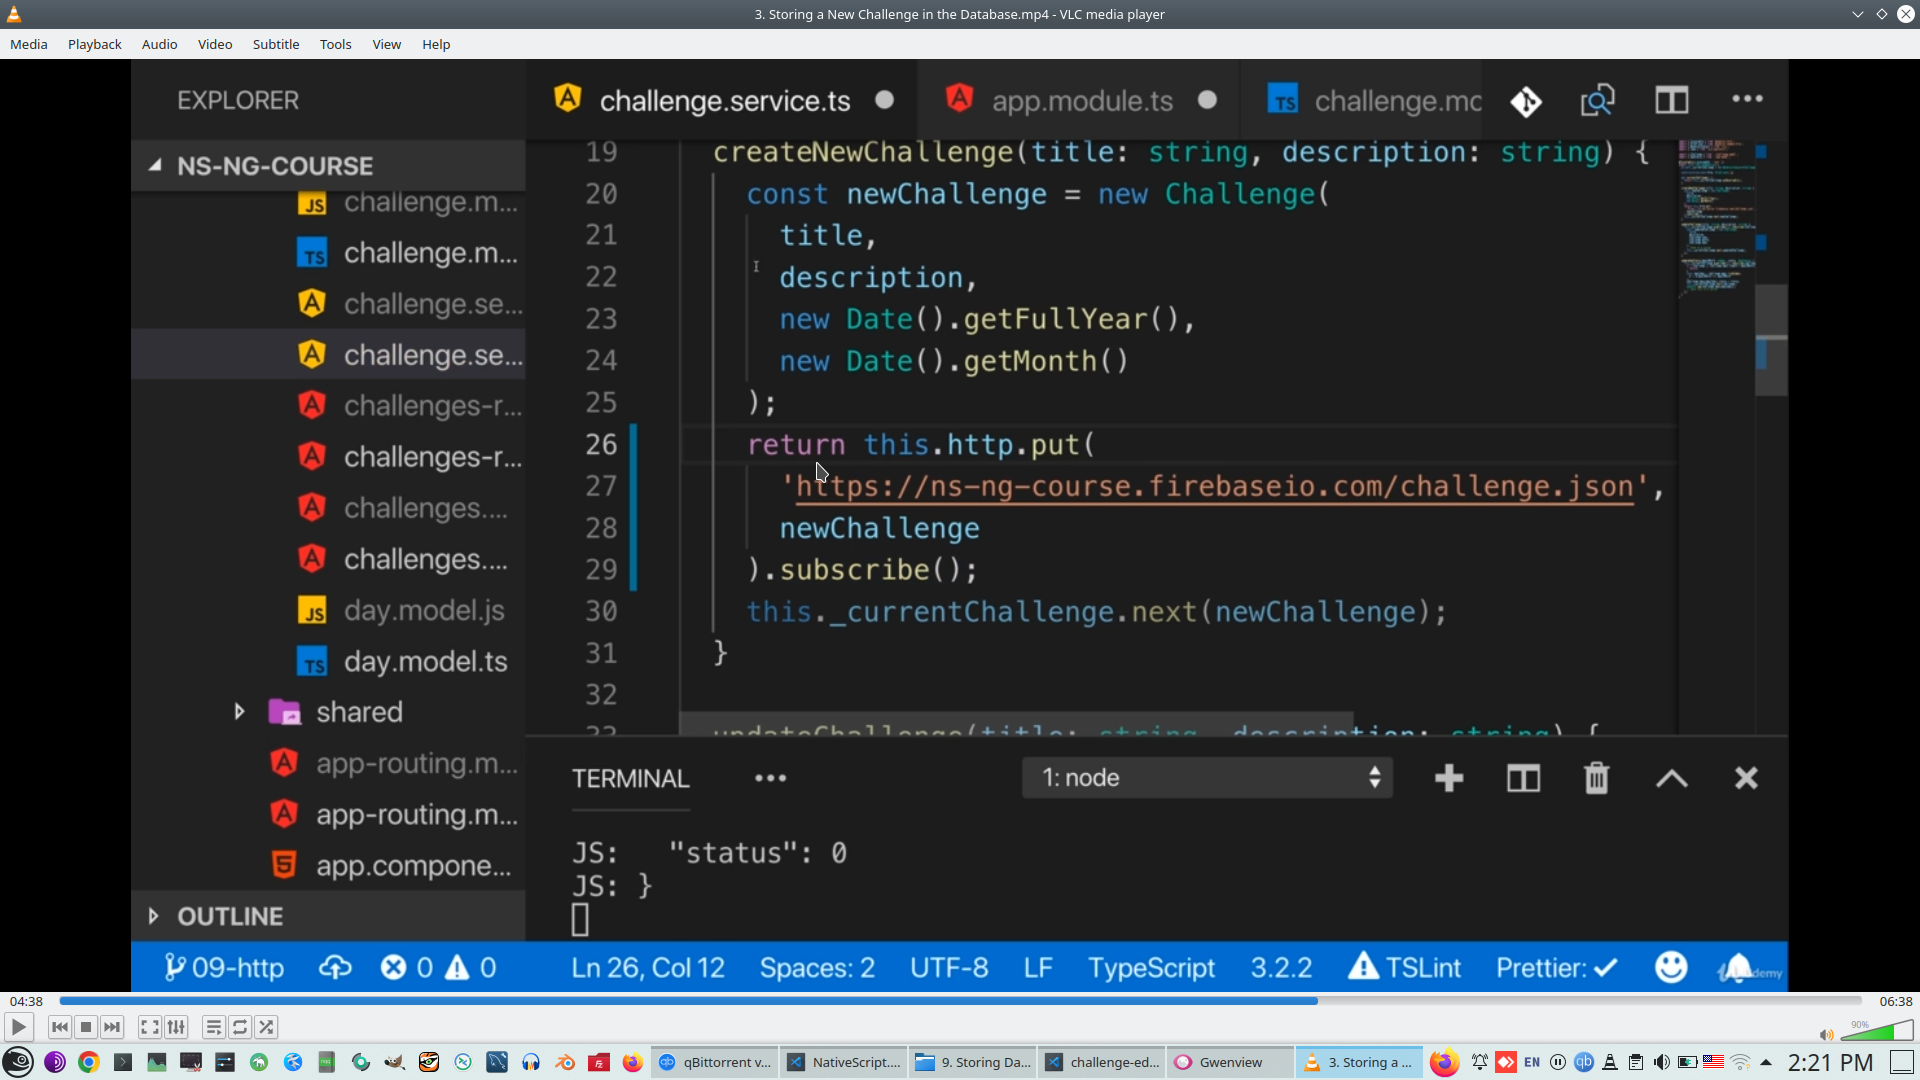
But currently we only see result on console
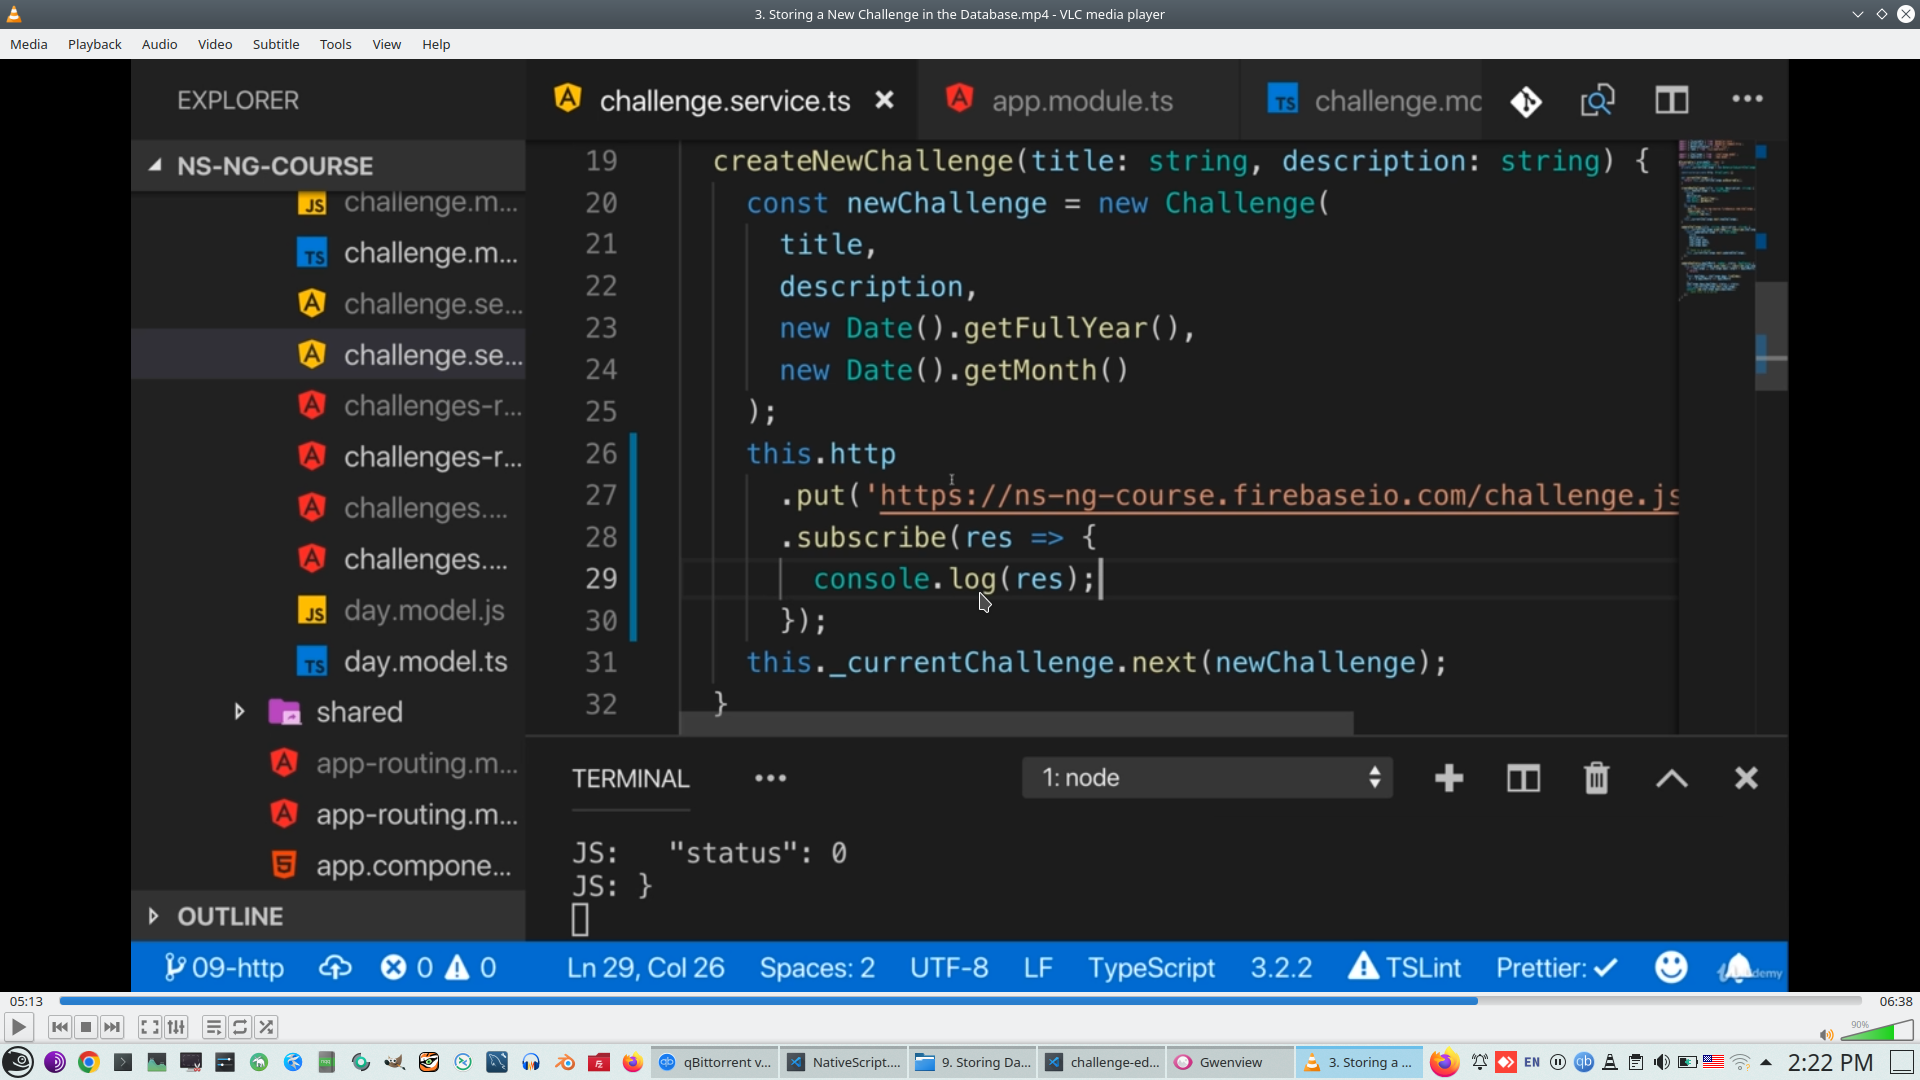
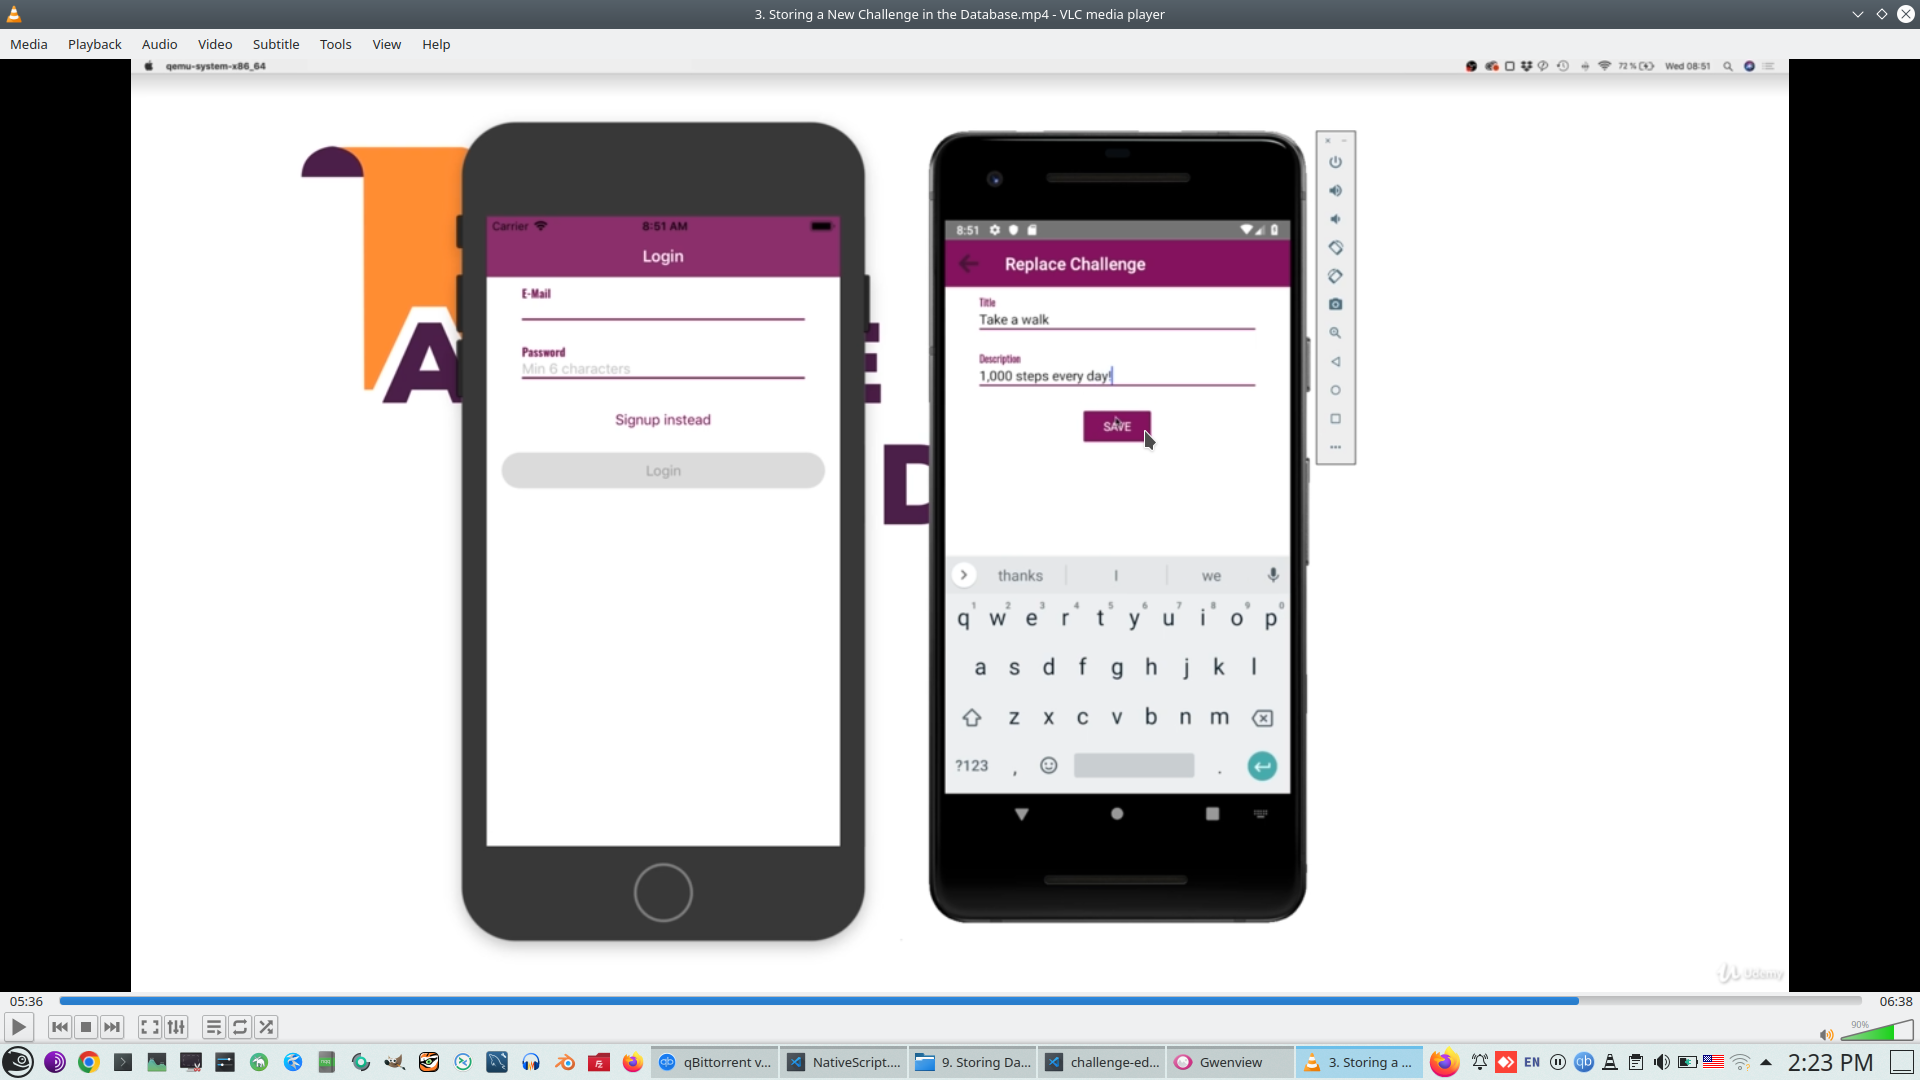
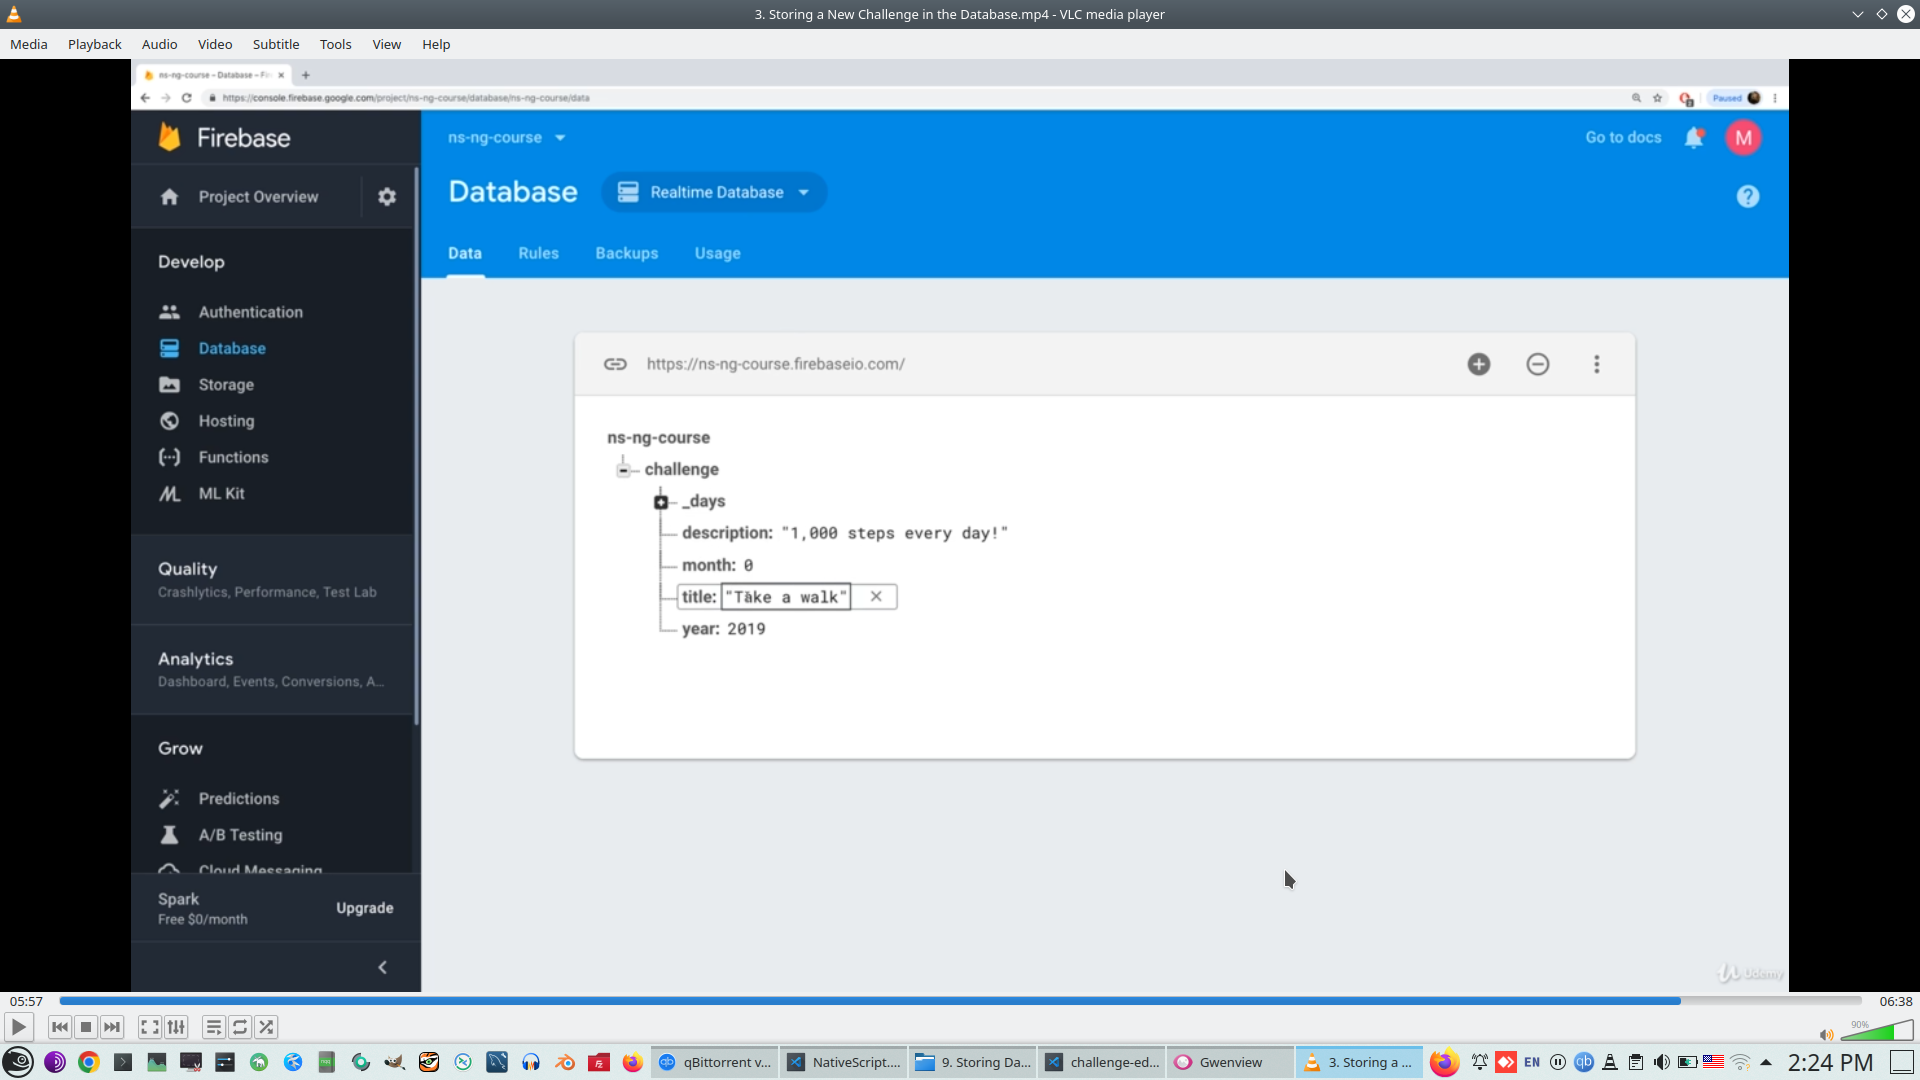
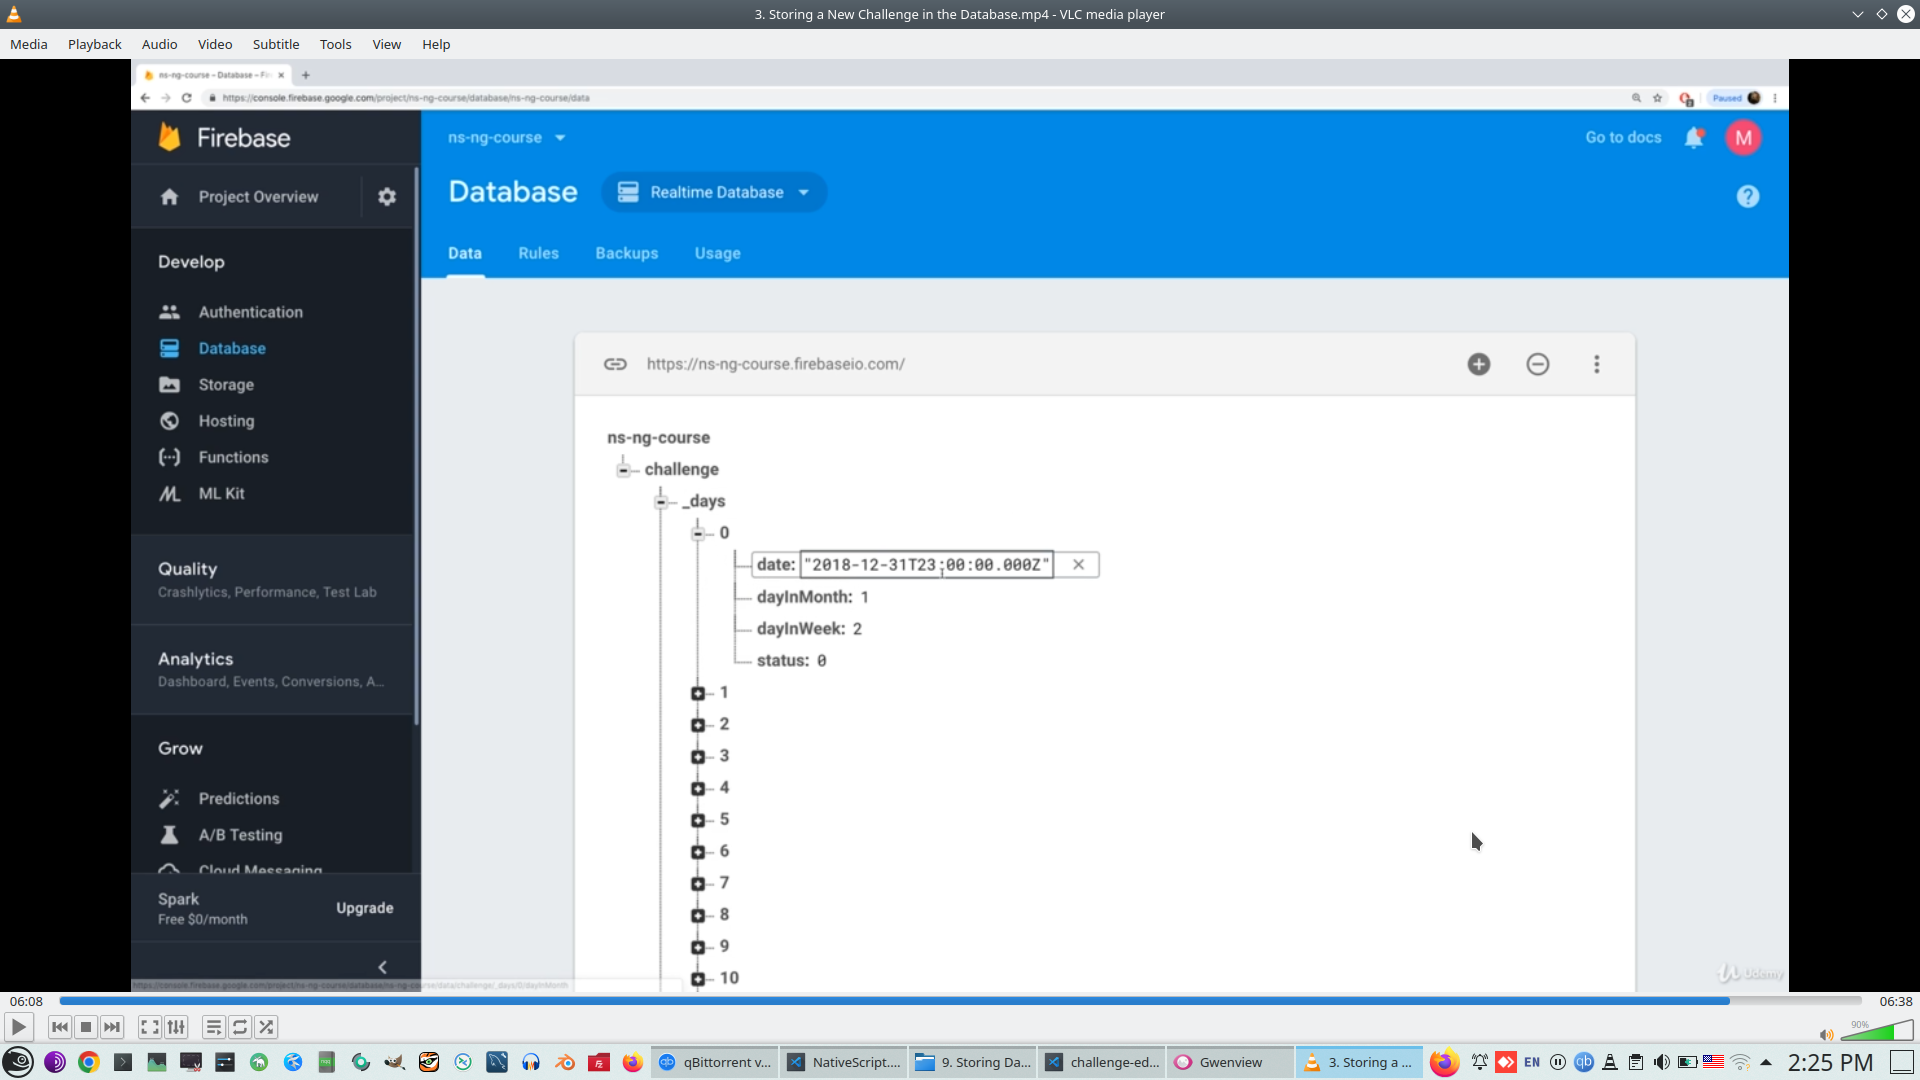
Try to see result of first test writing to Firebase
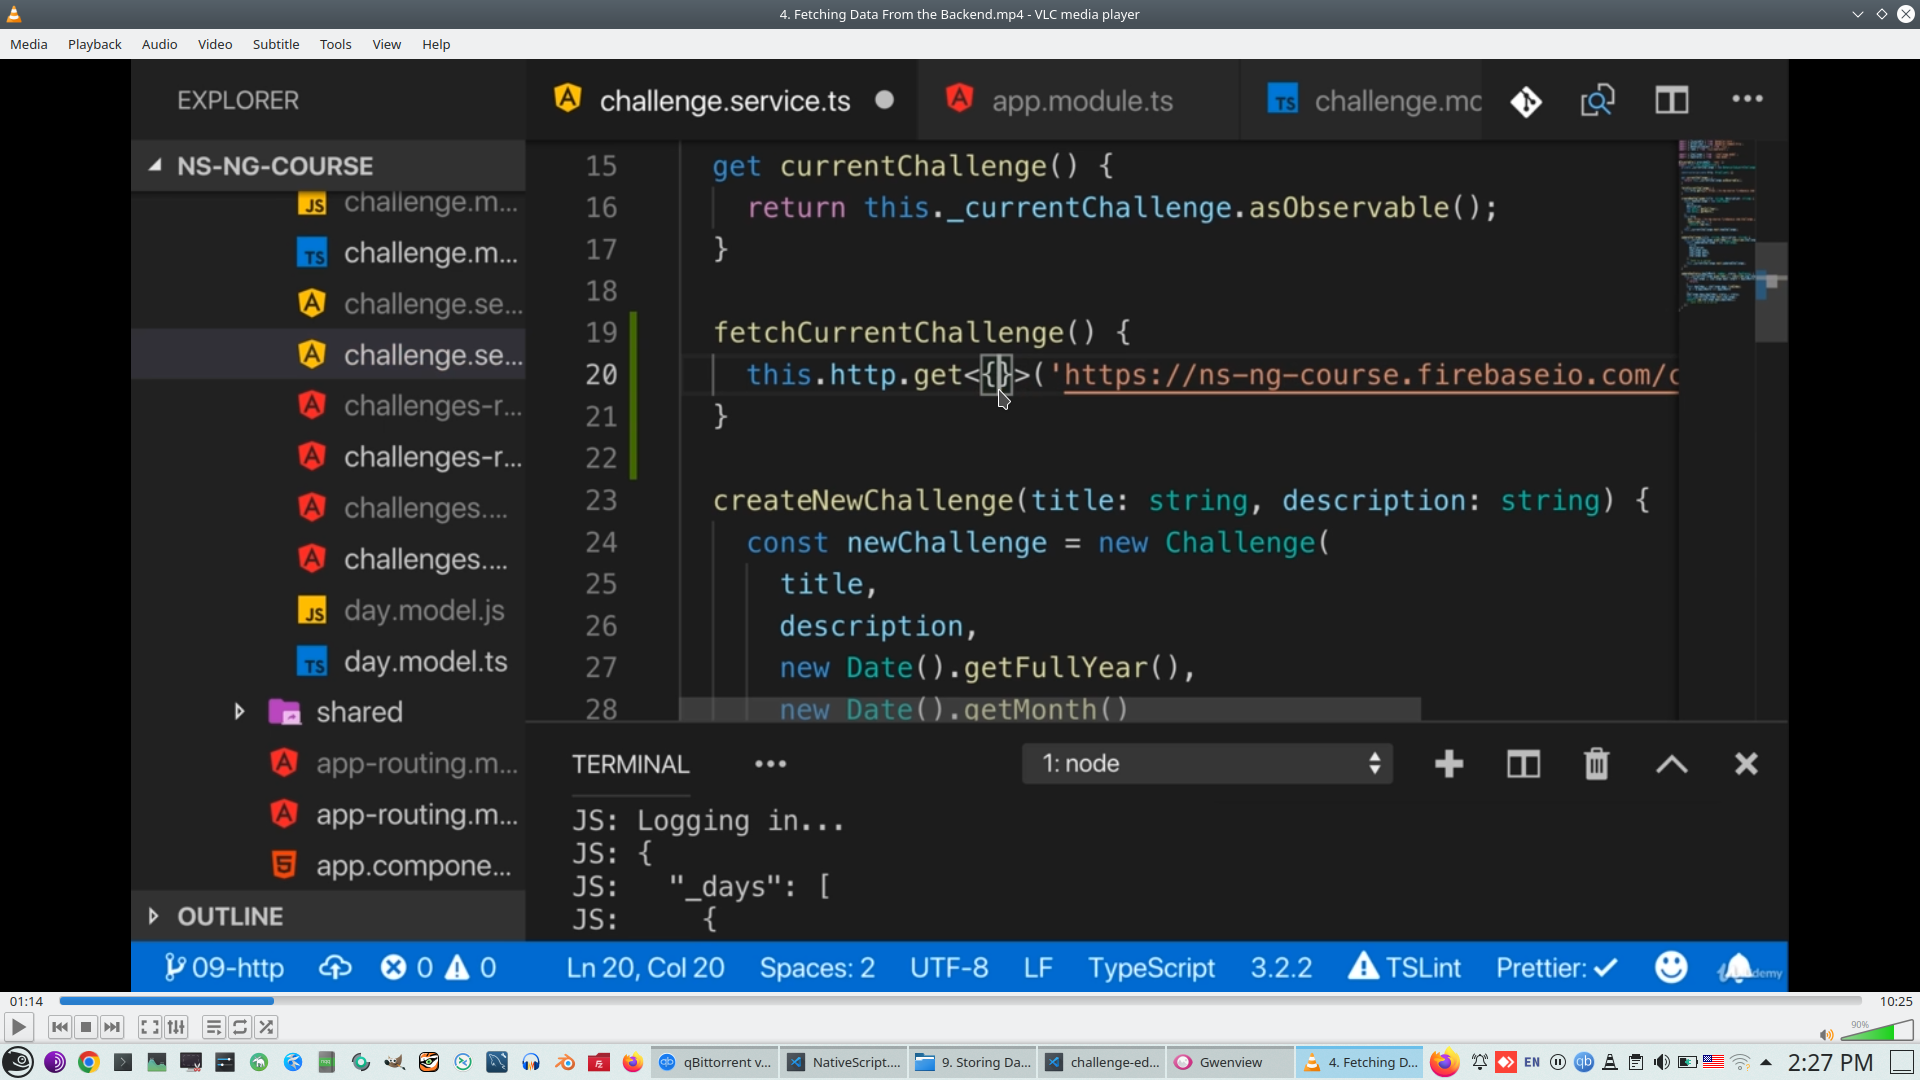
Try to first read
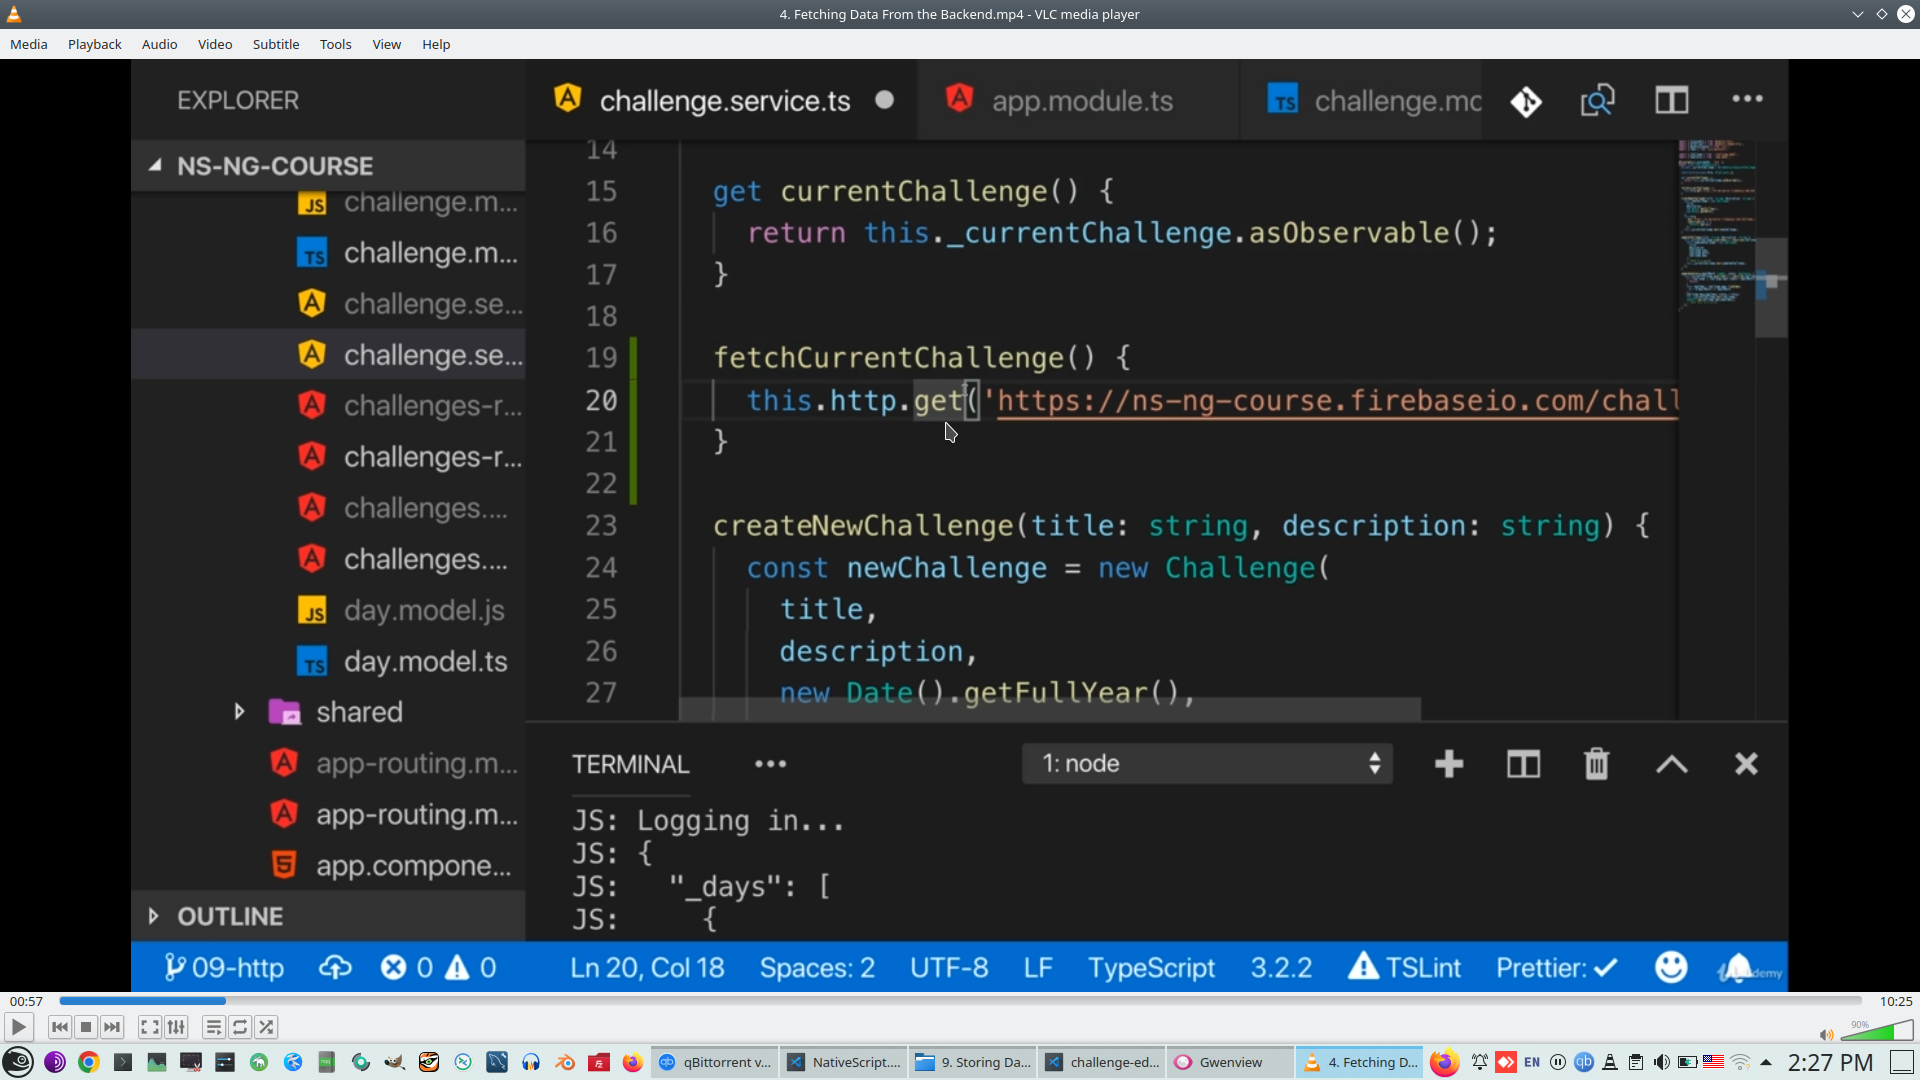
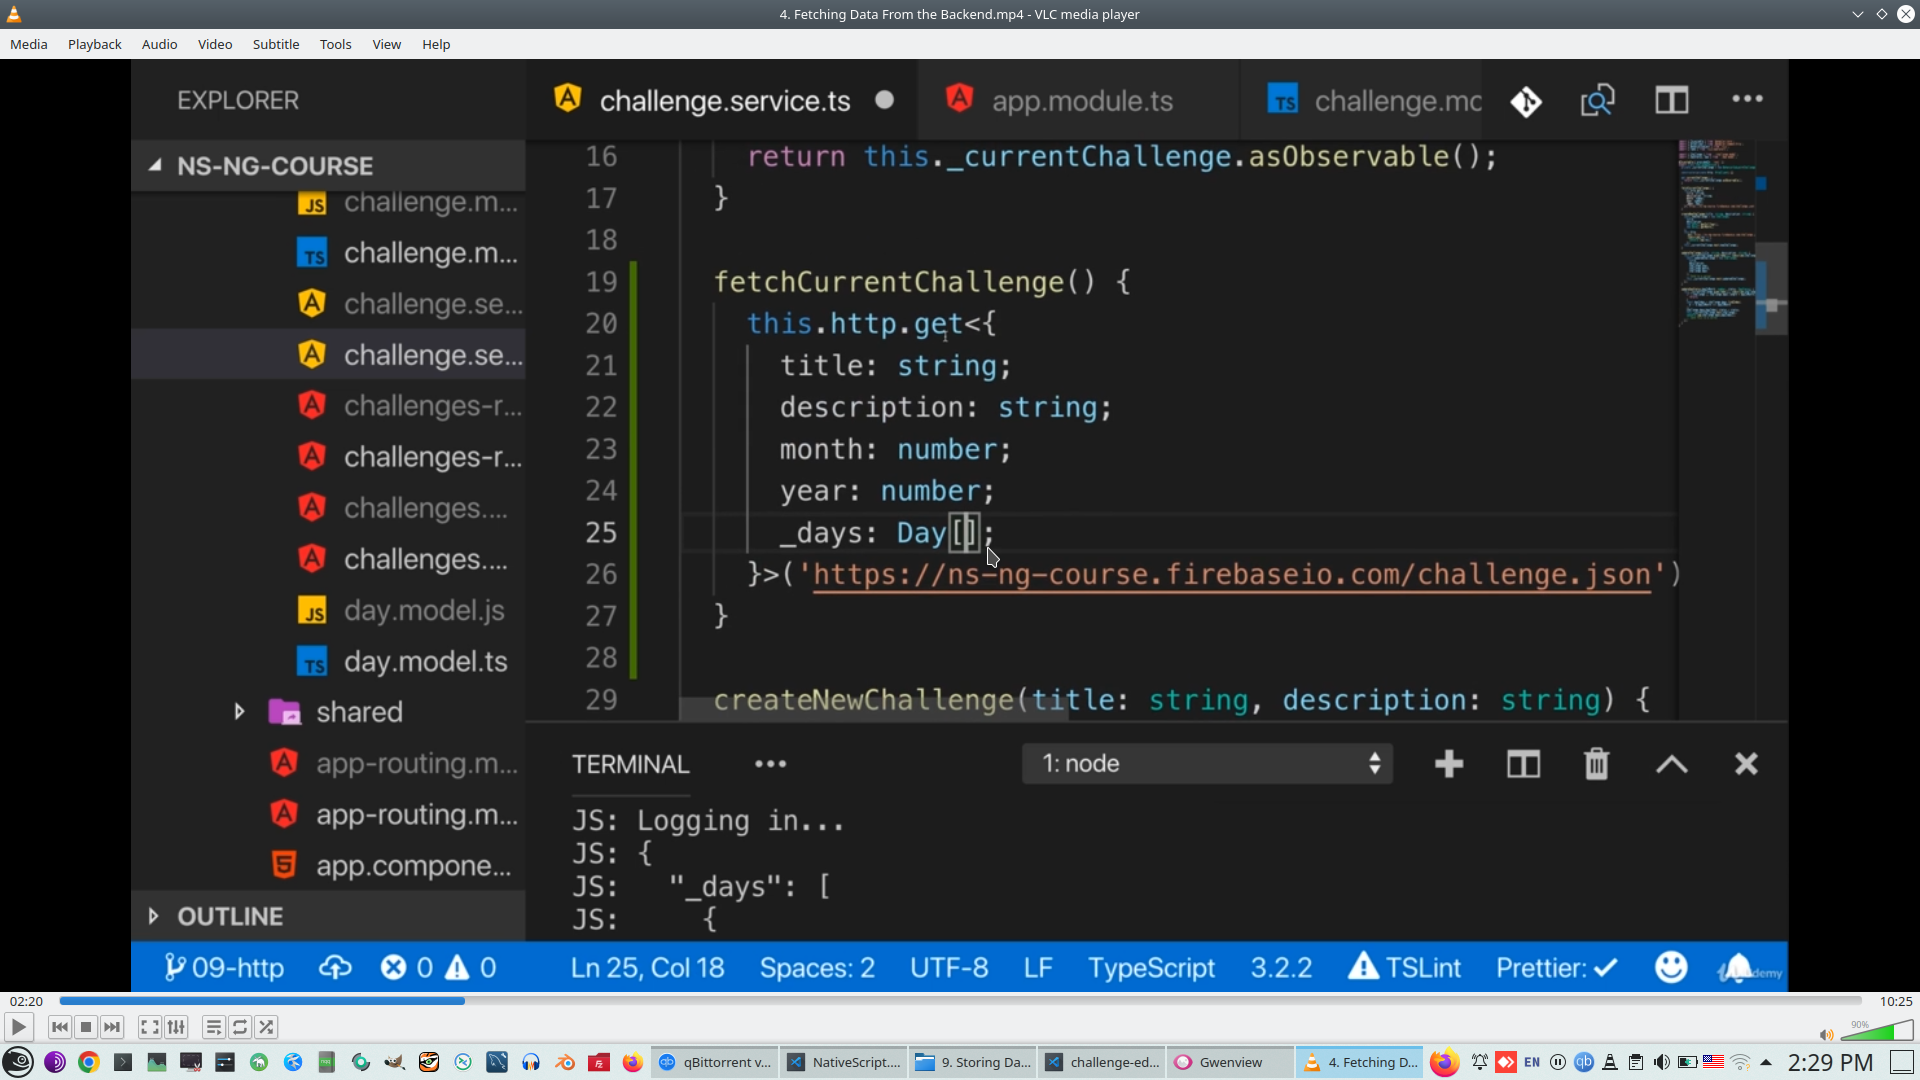
Read can be typed
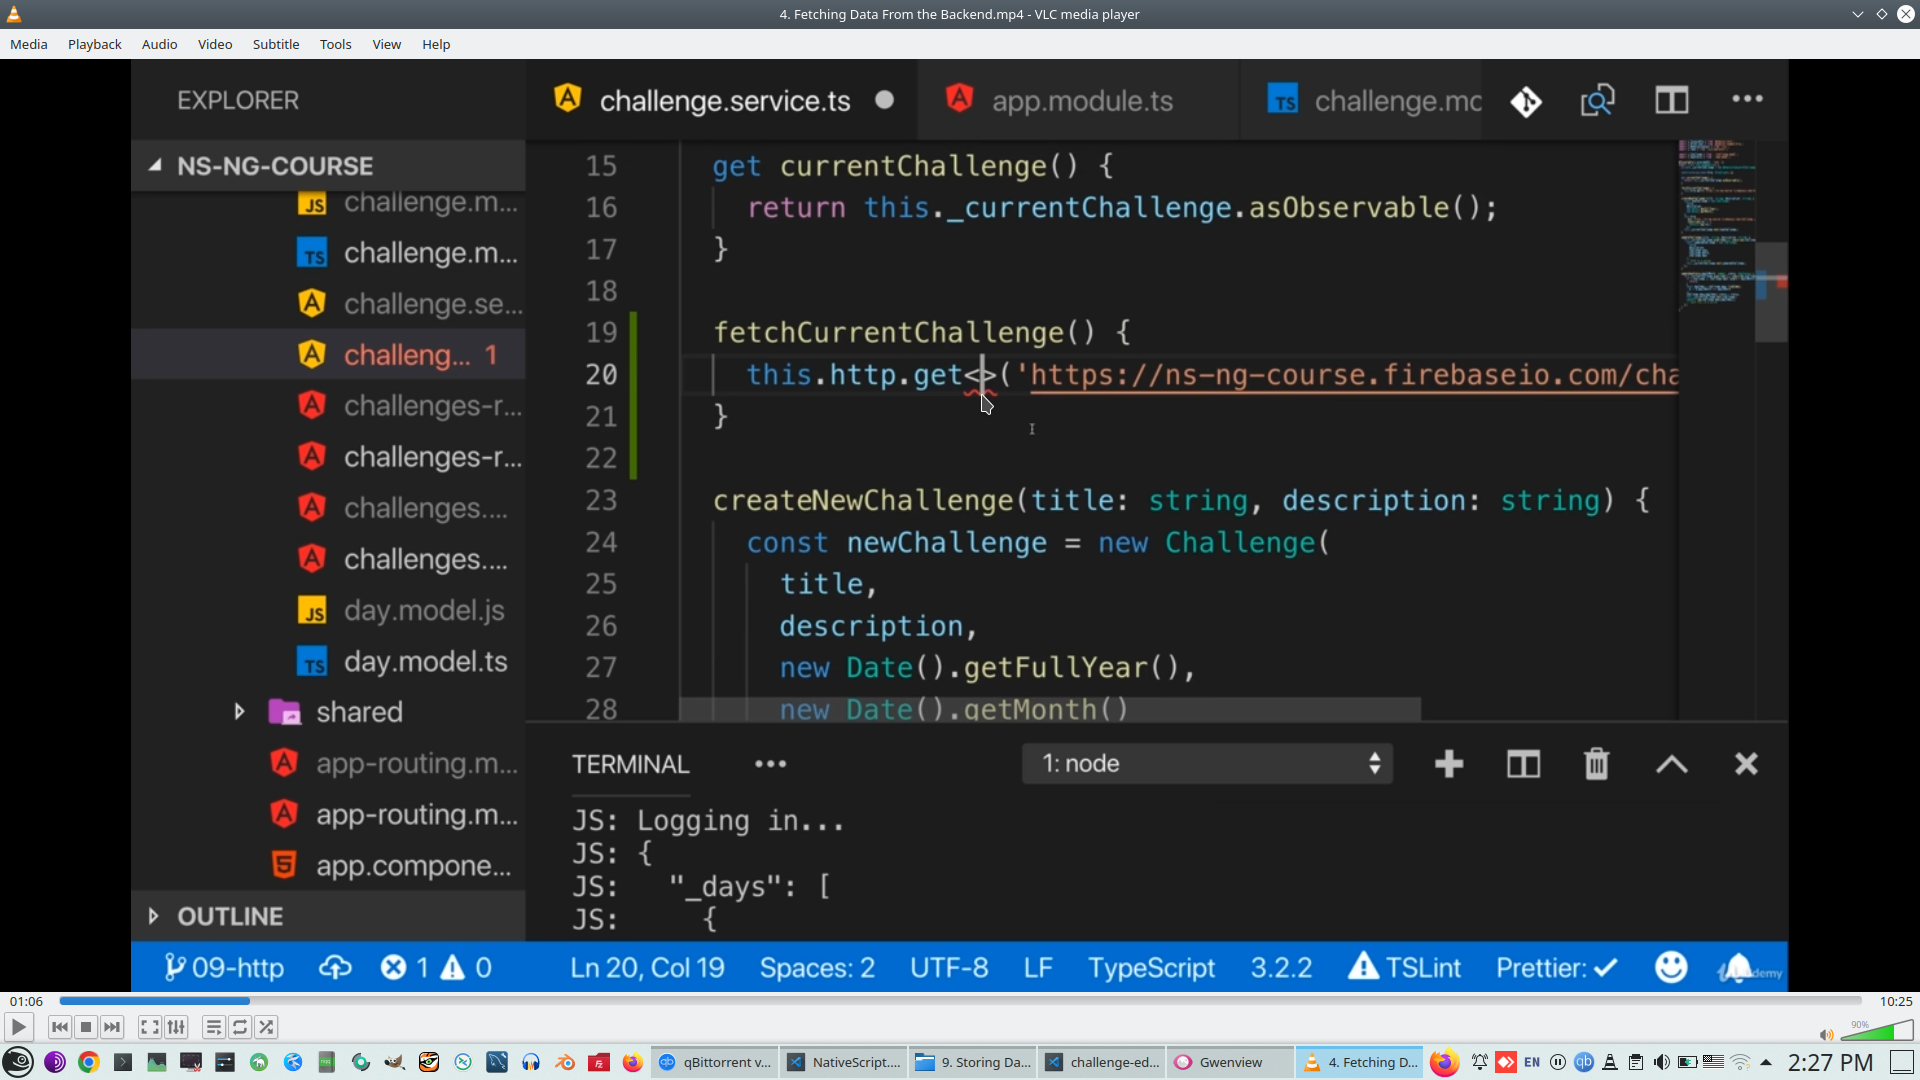
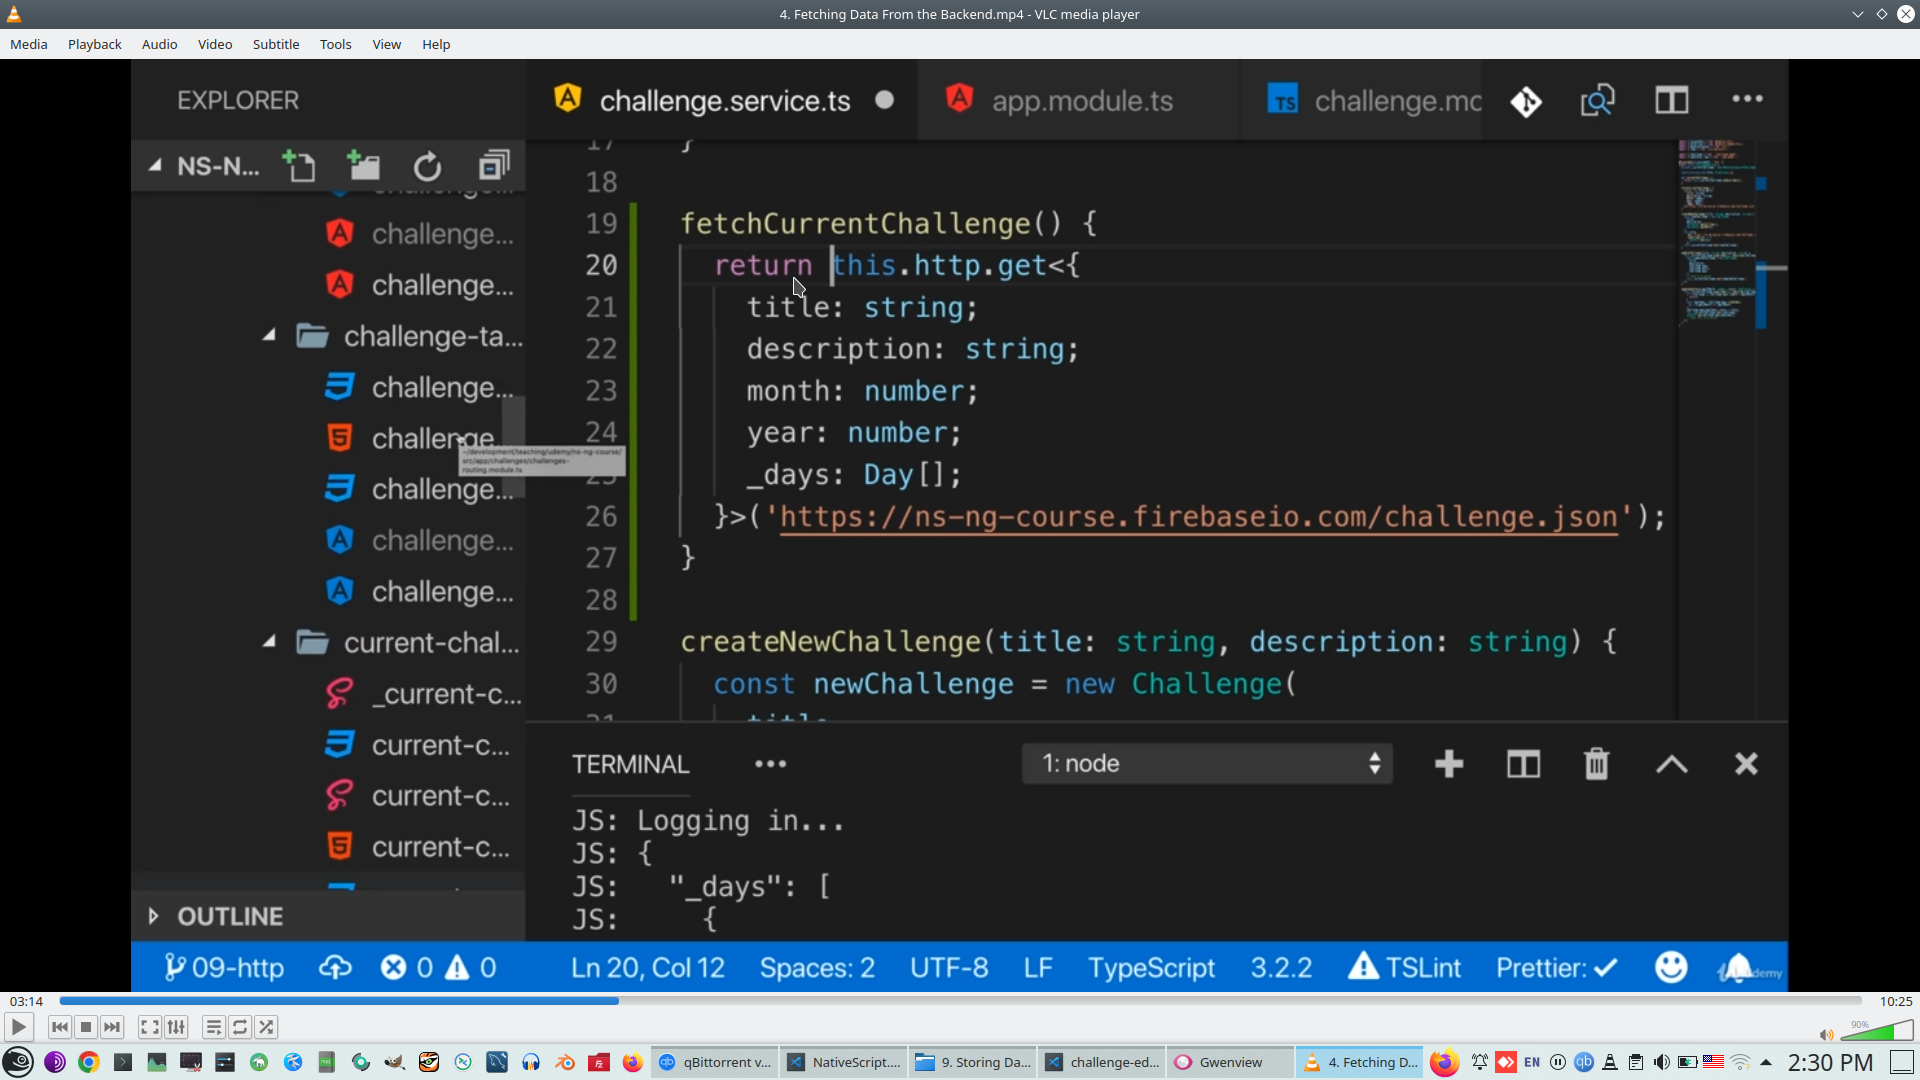
We can pass JS object directly to this place to receive typed result
We can return result as Observable
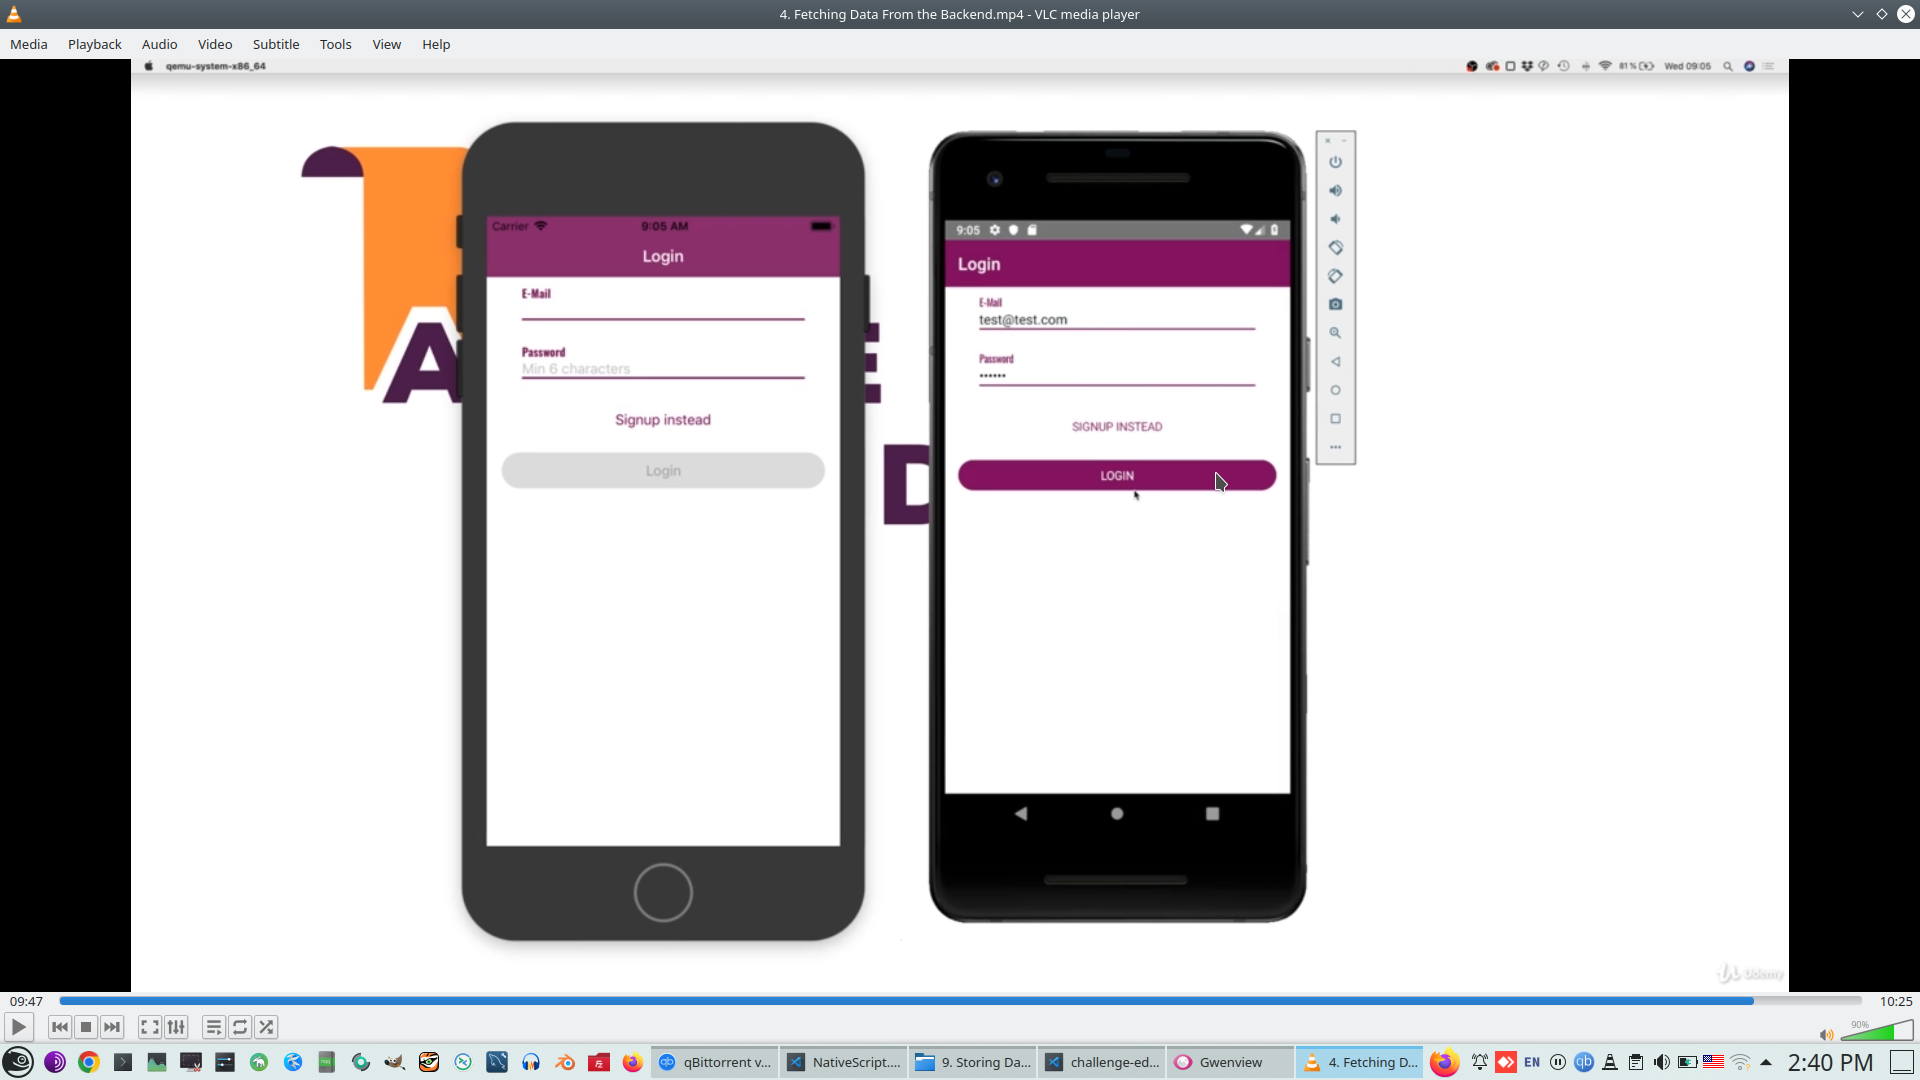
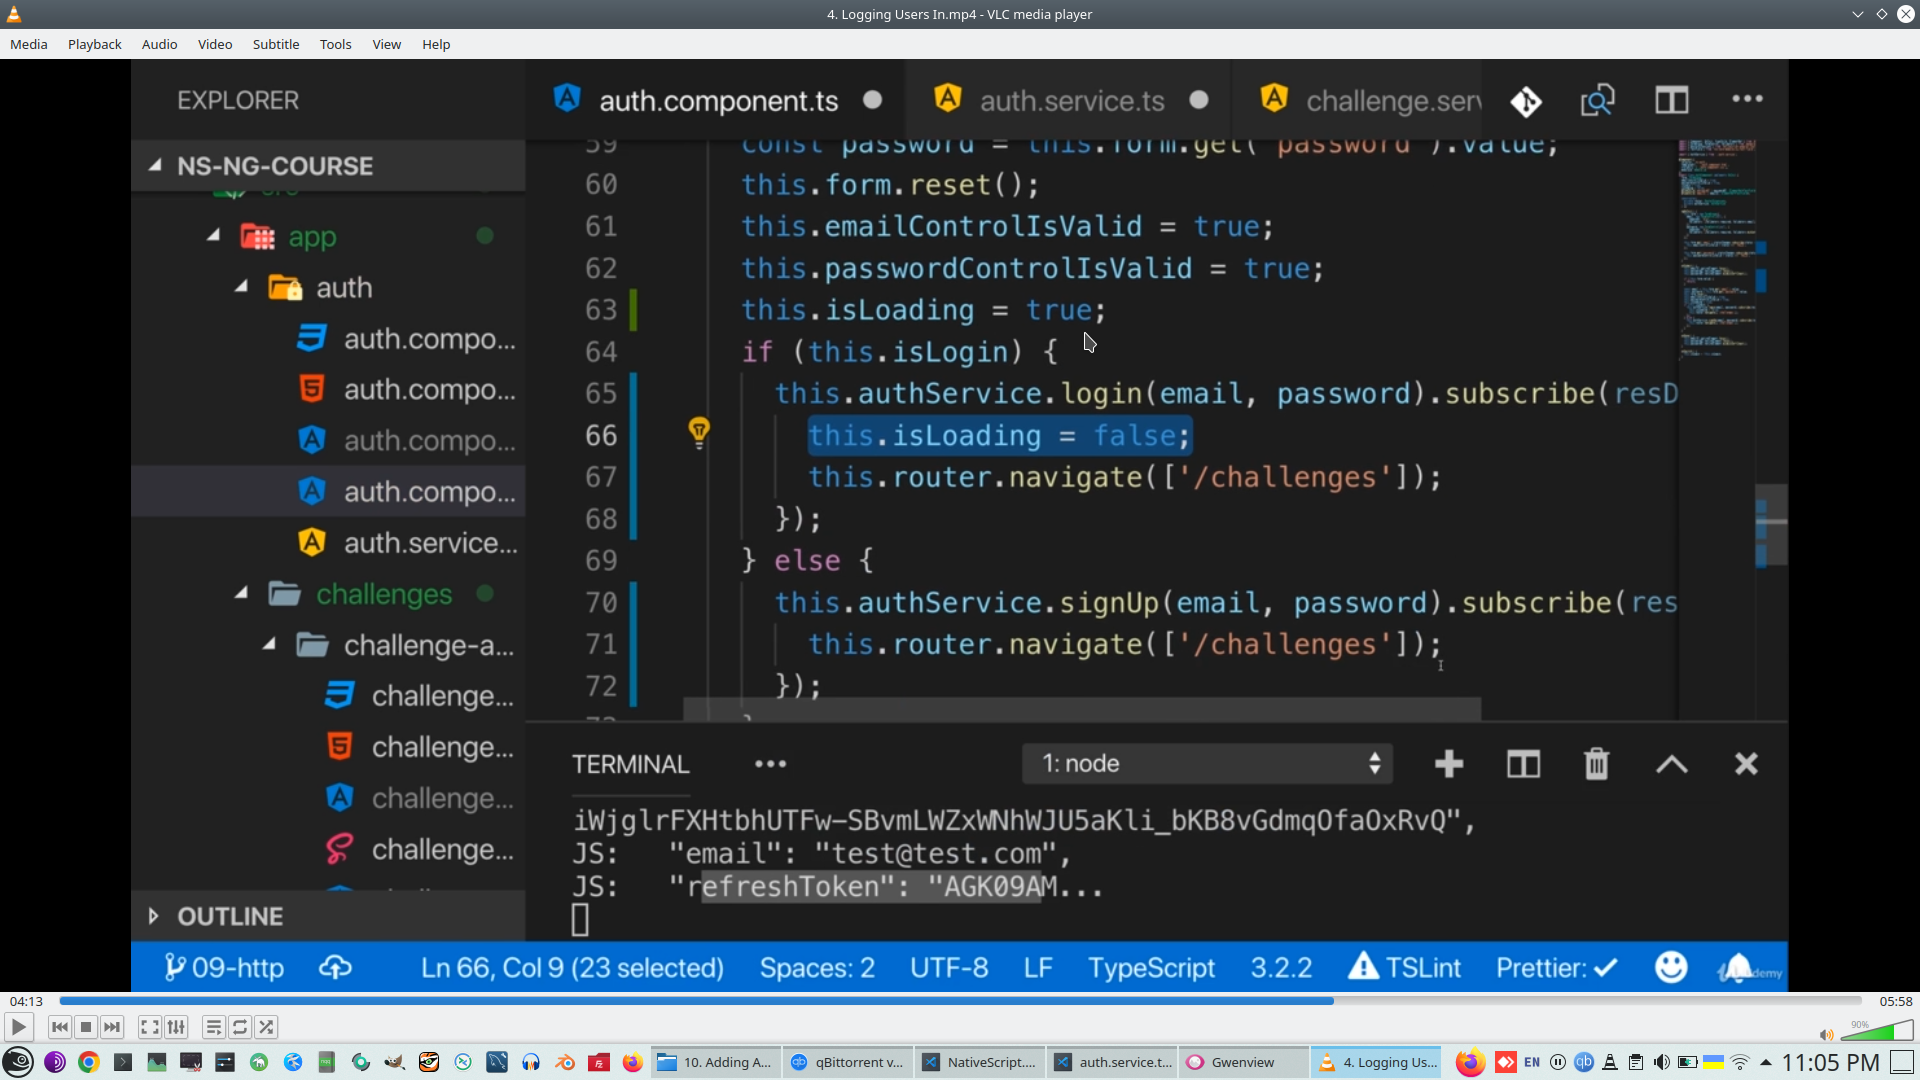
23. Spiner
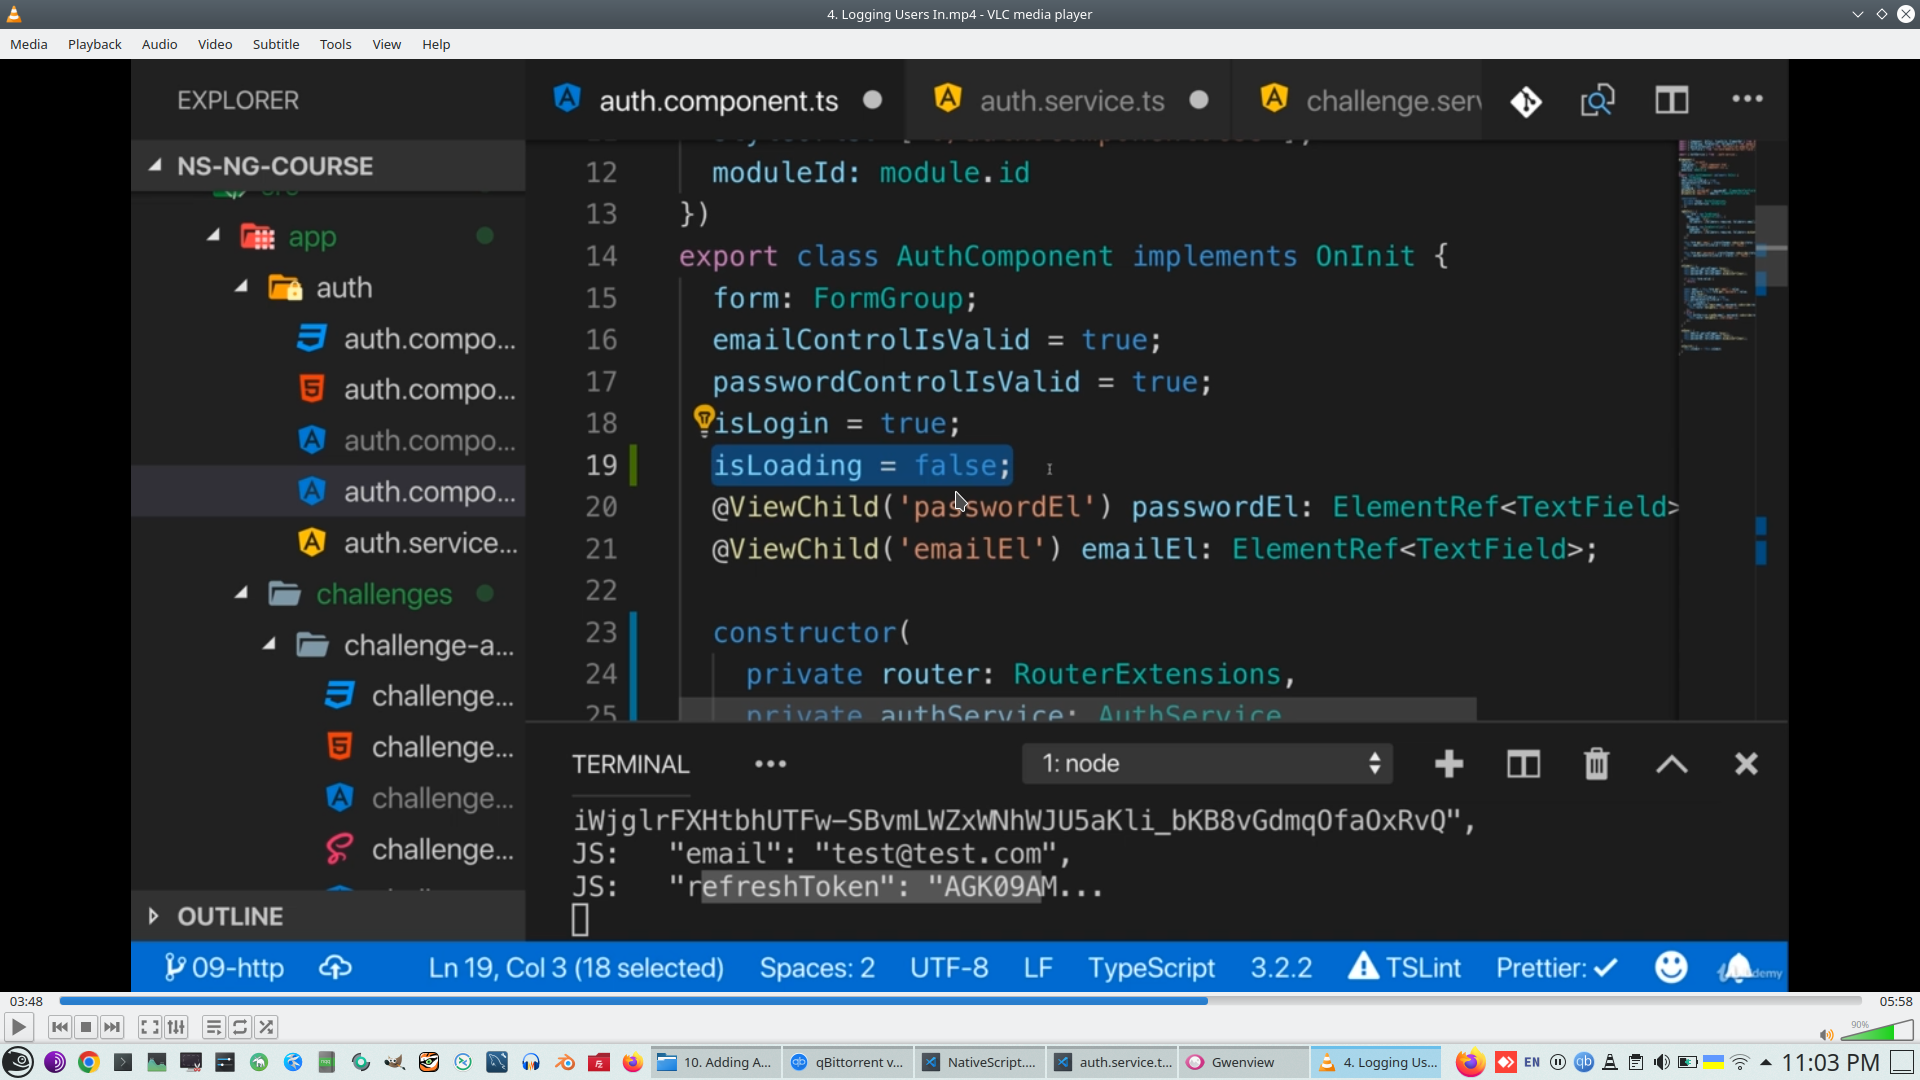
Inject service in right place and understand routing
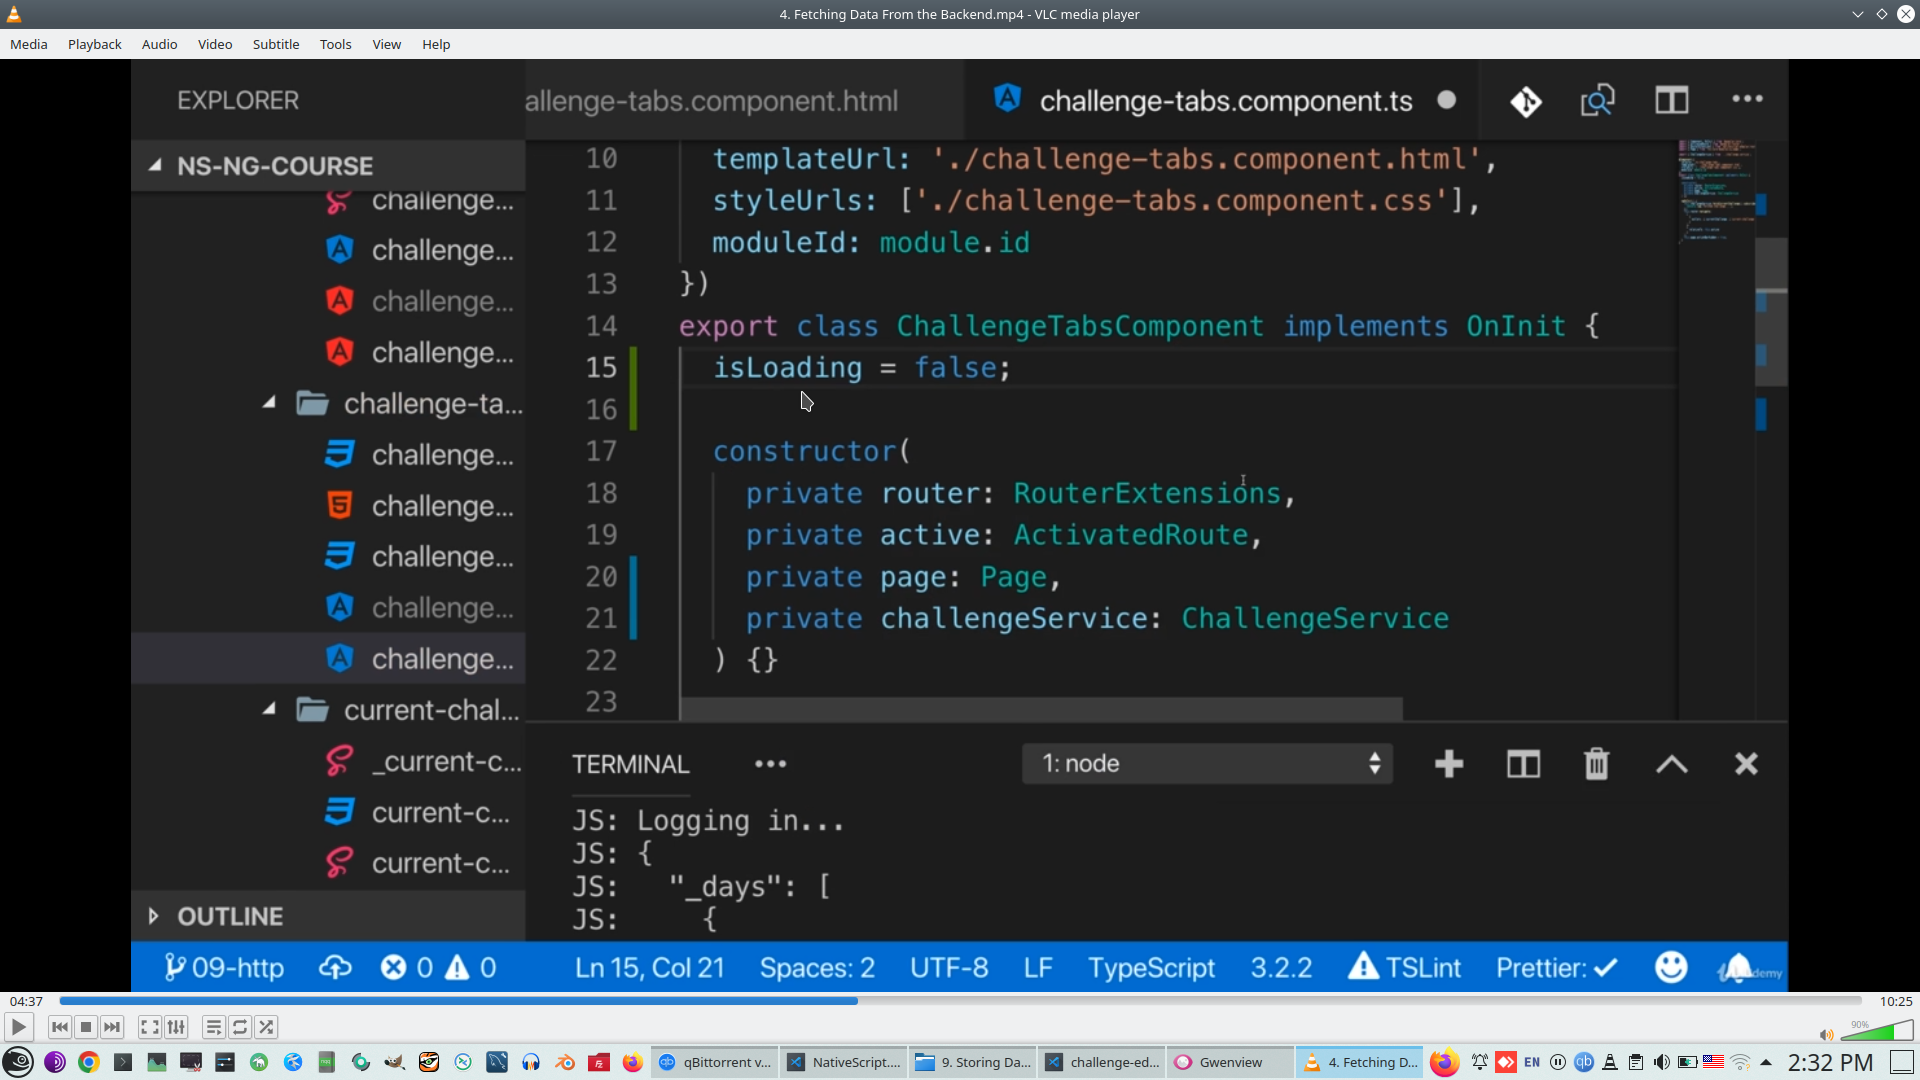
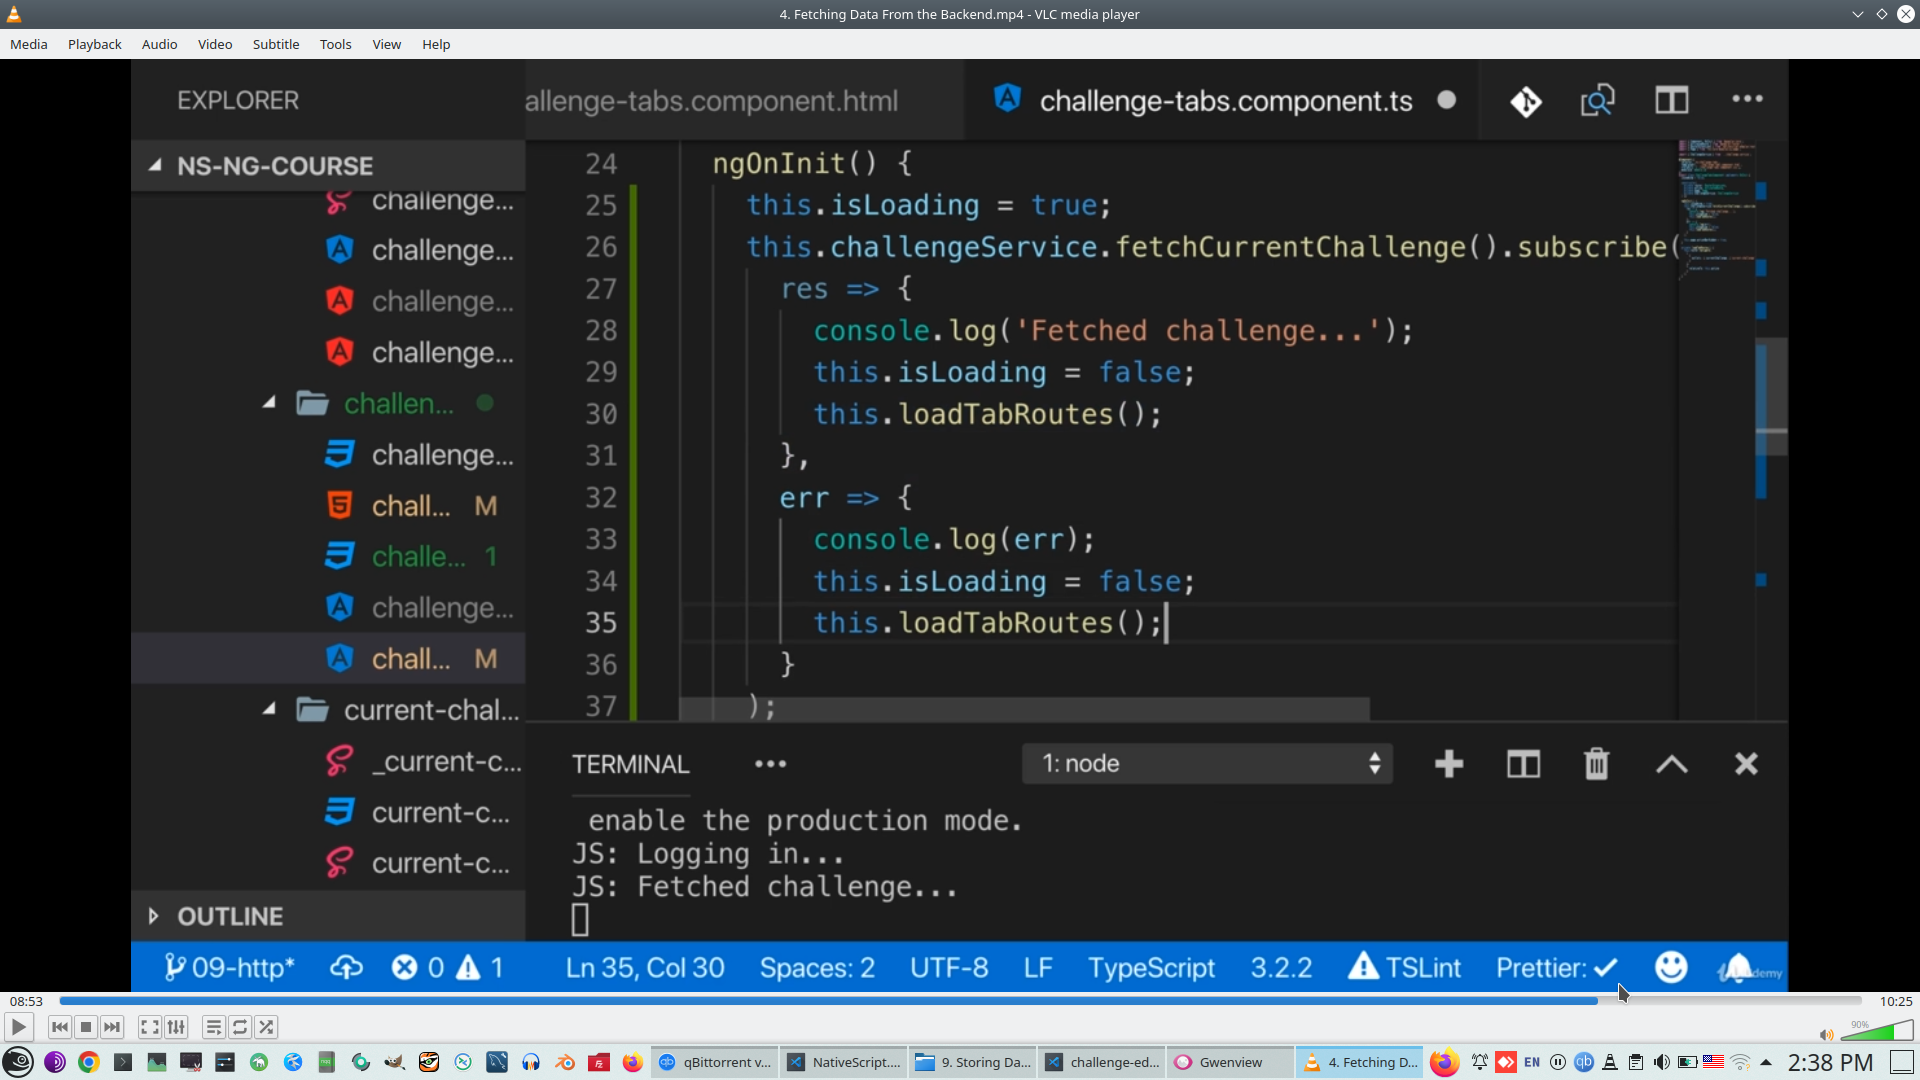
Create IsLoading flag
Try Fitch result and check corret place to receive result
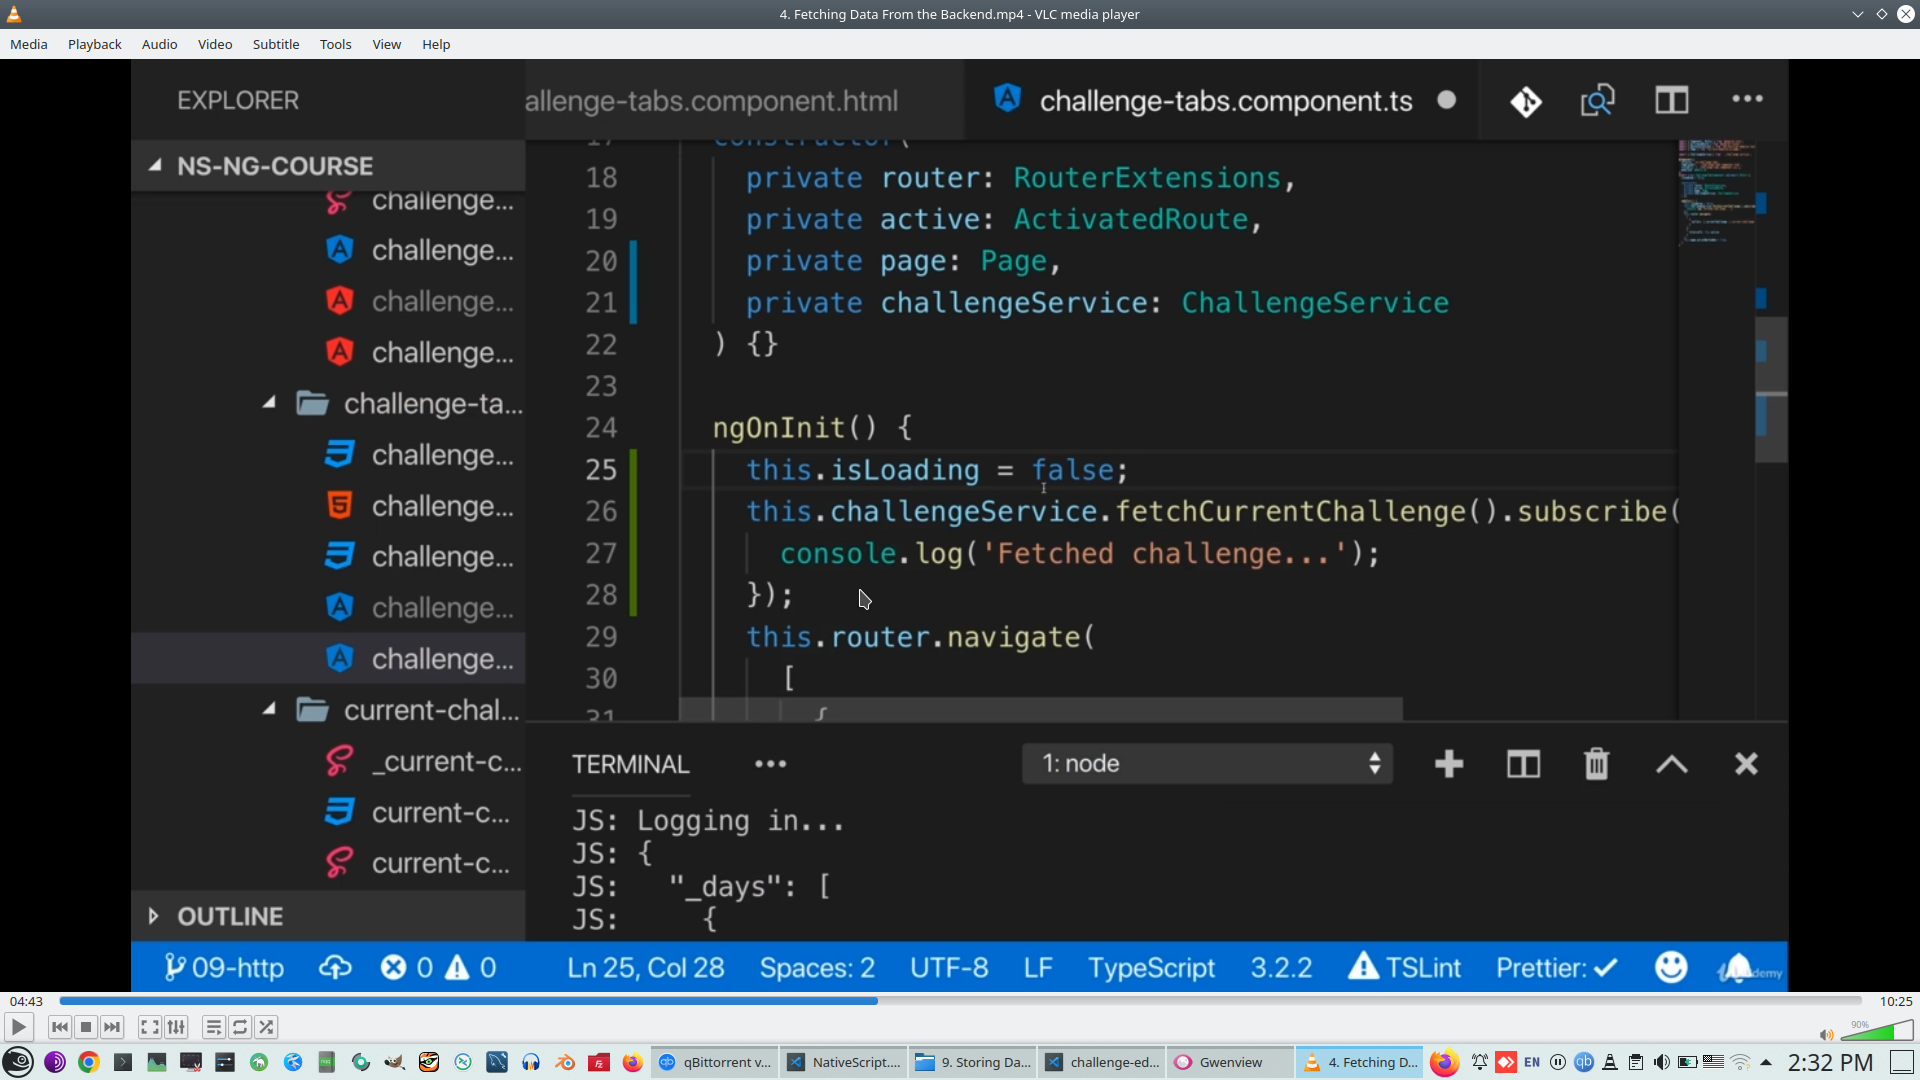
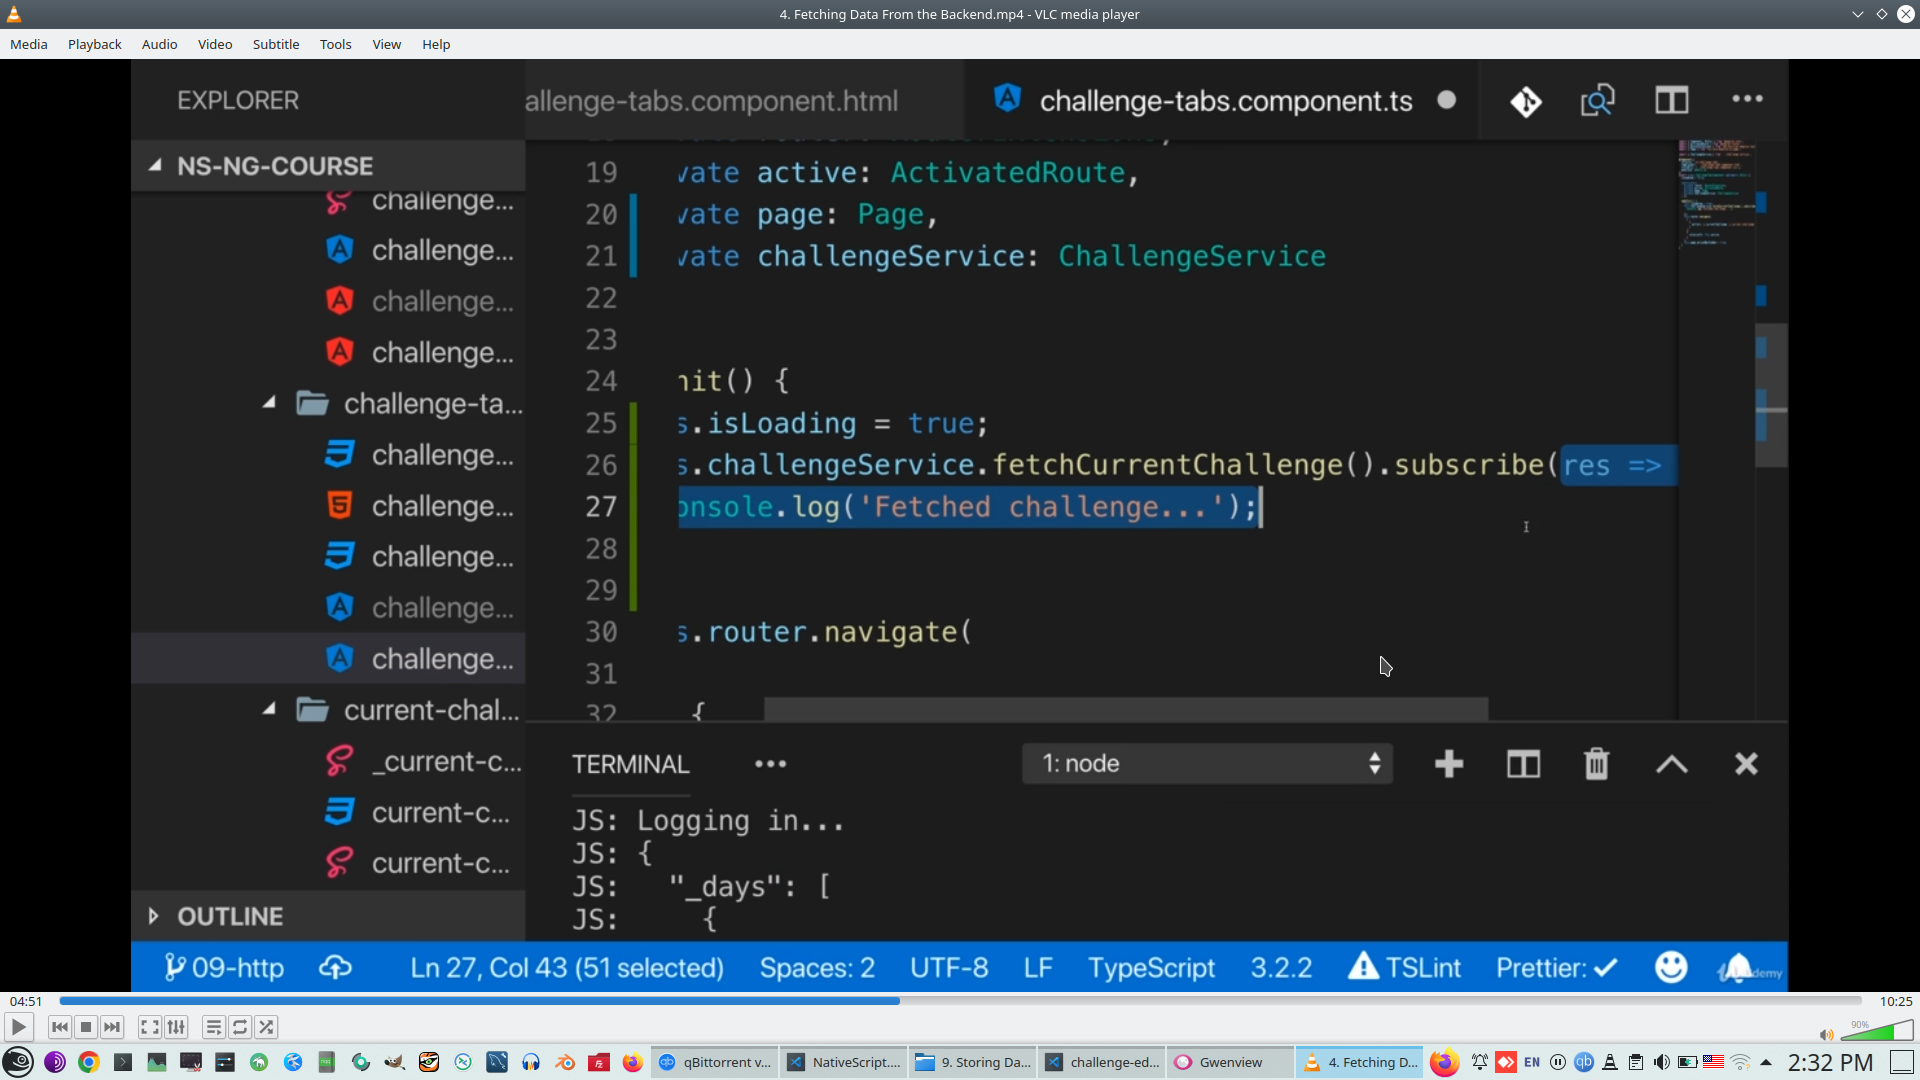
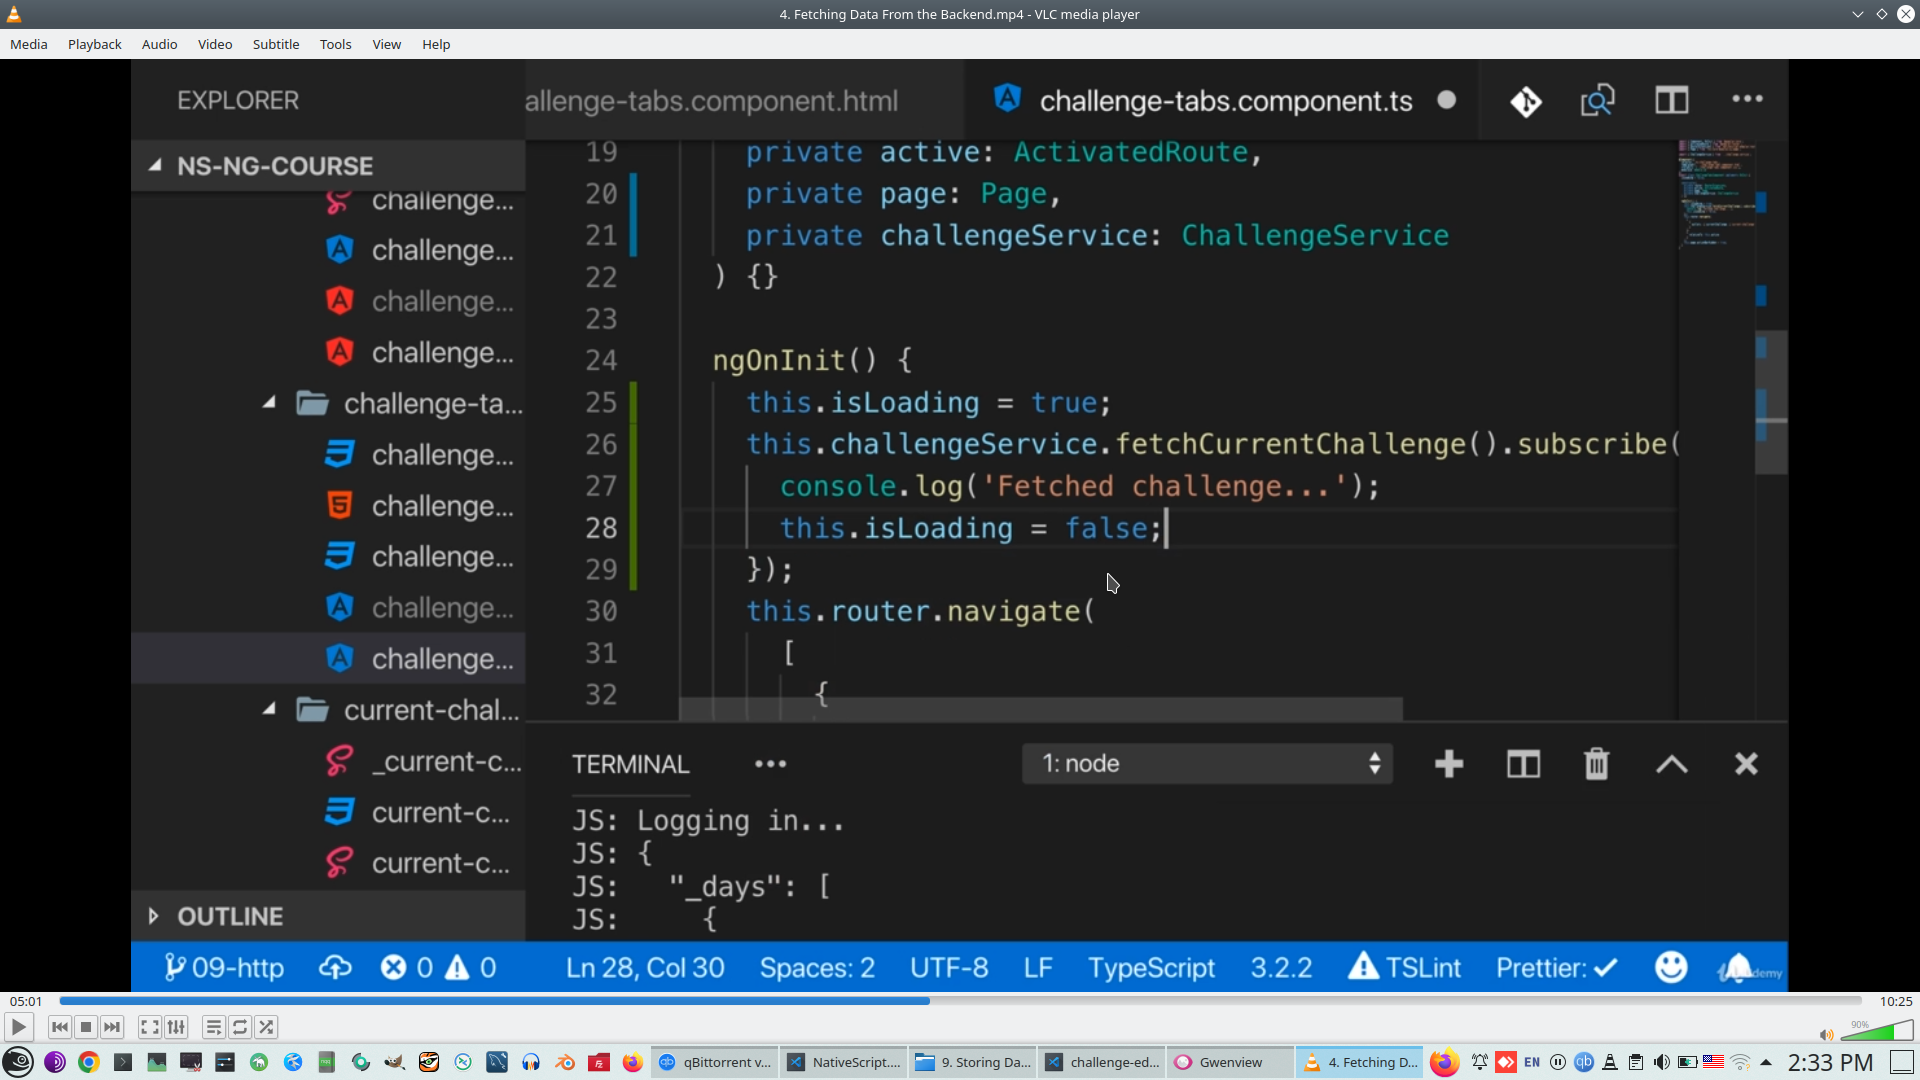
Change flag true/false before and after result received
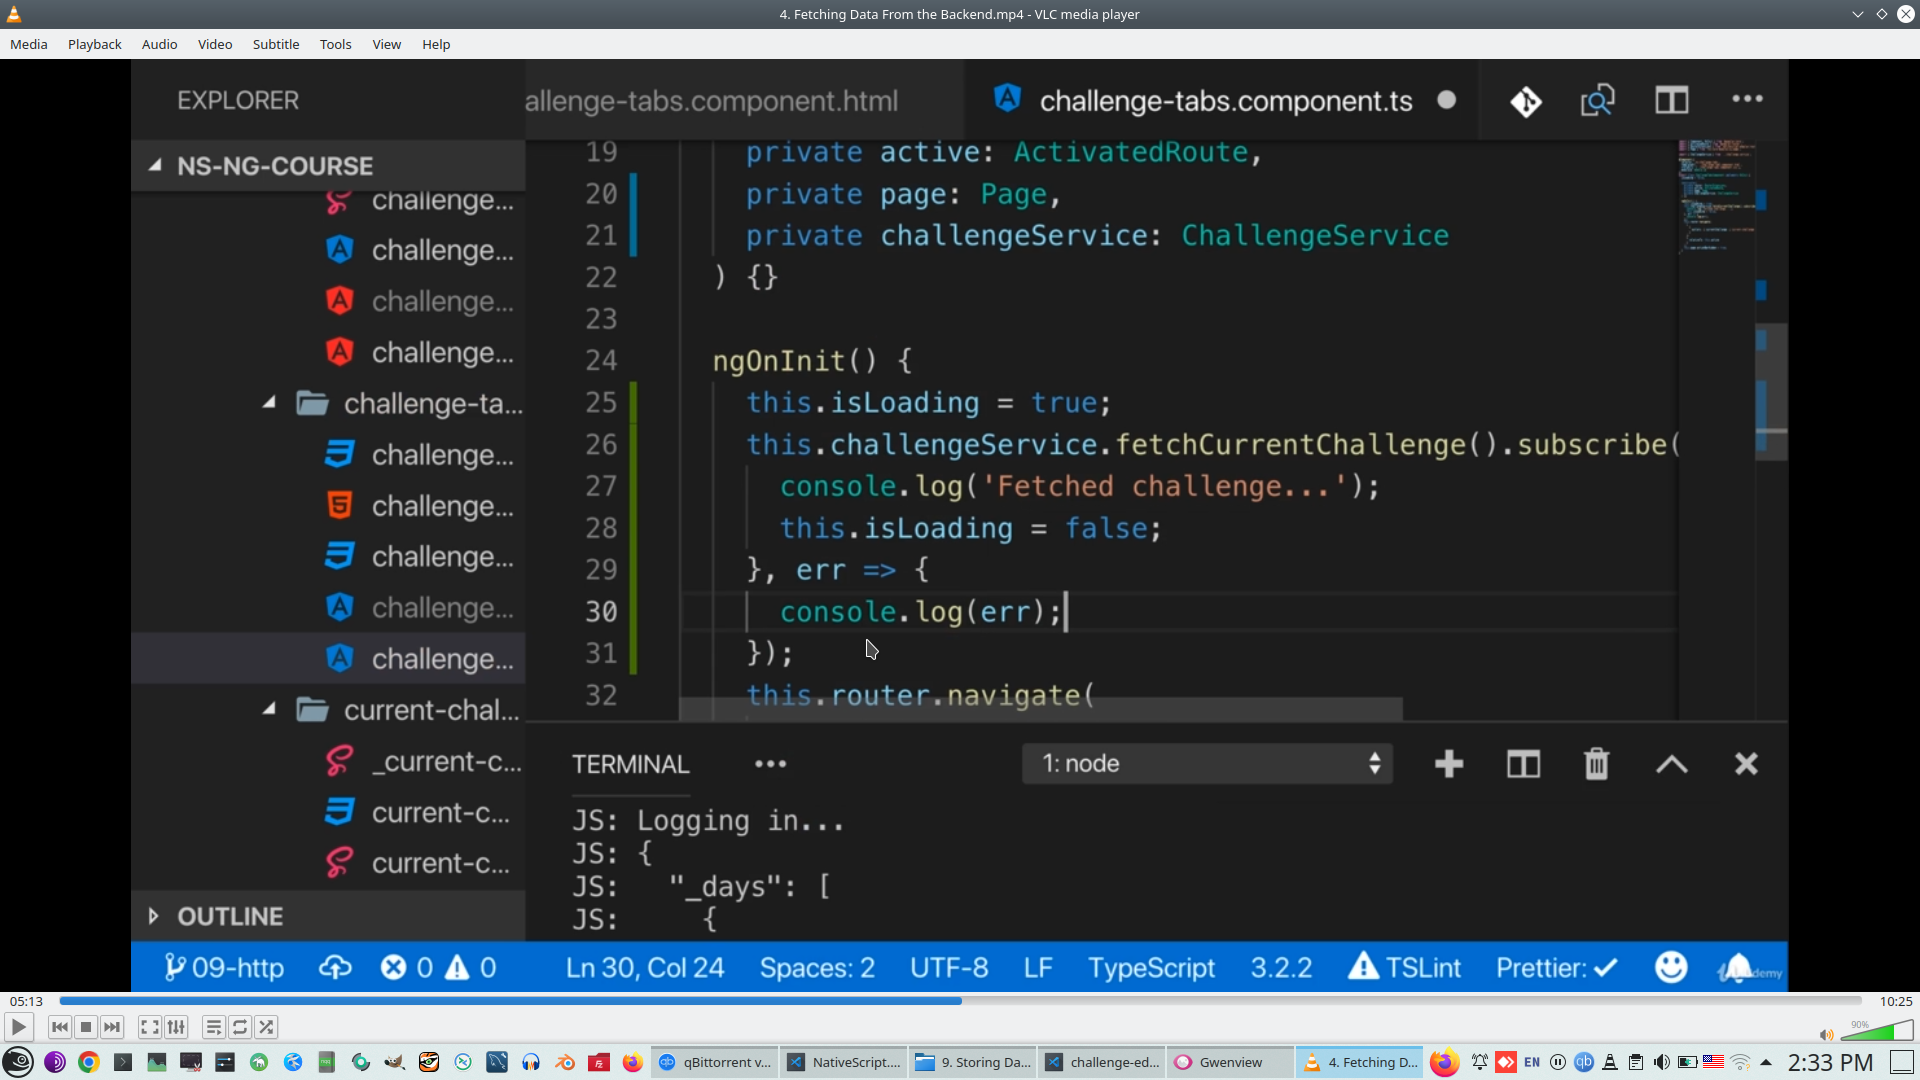
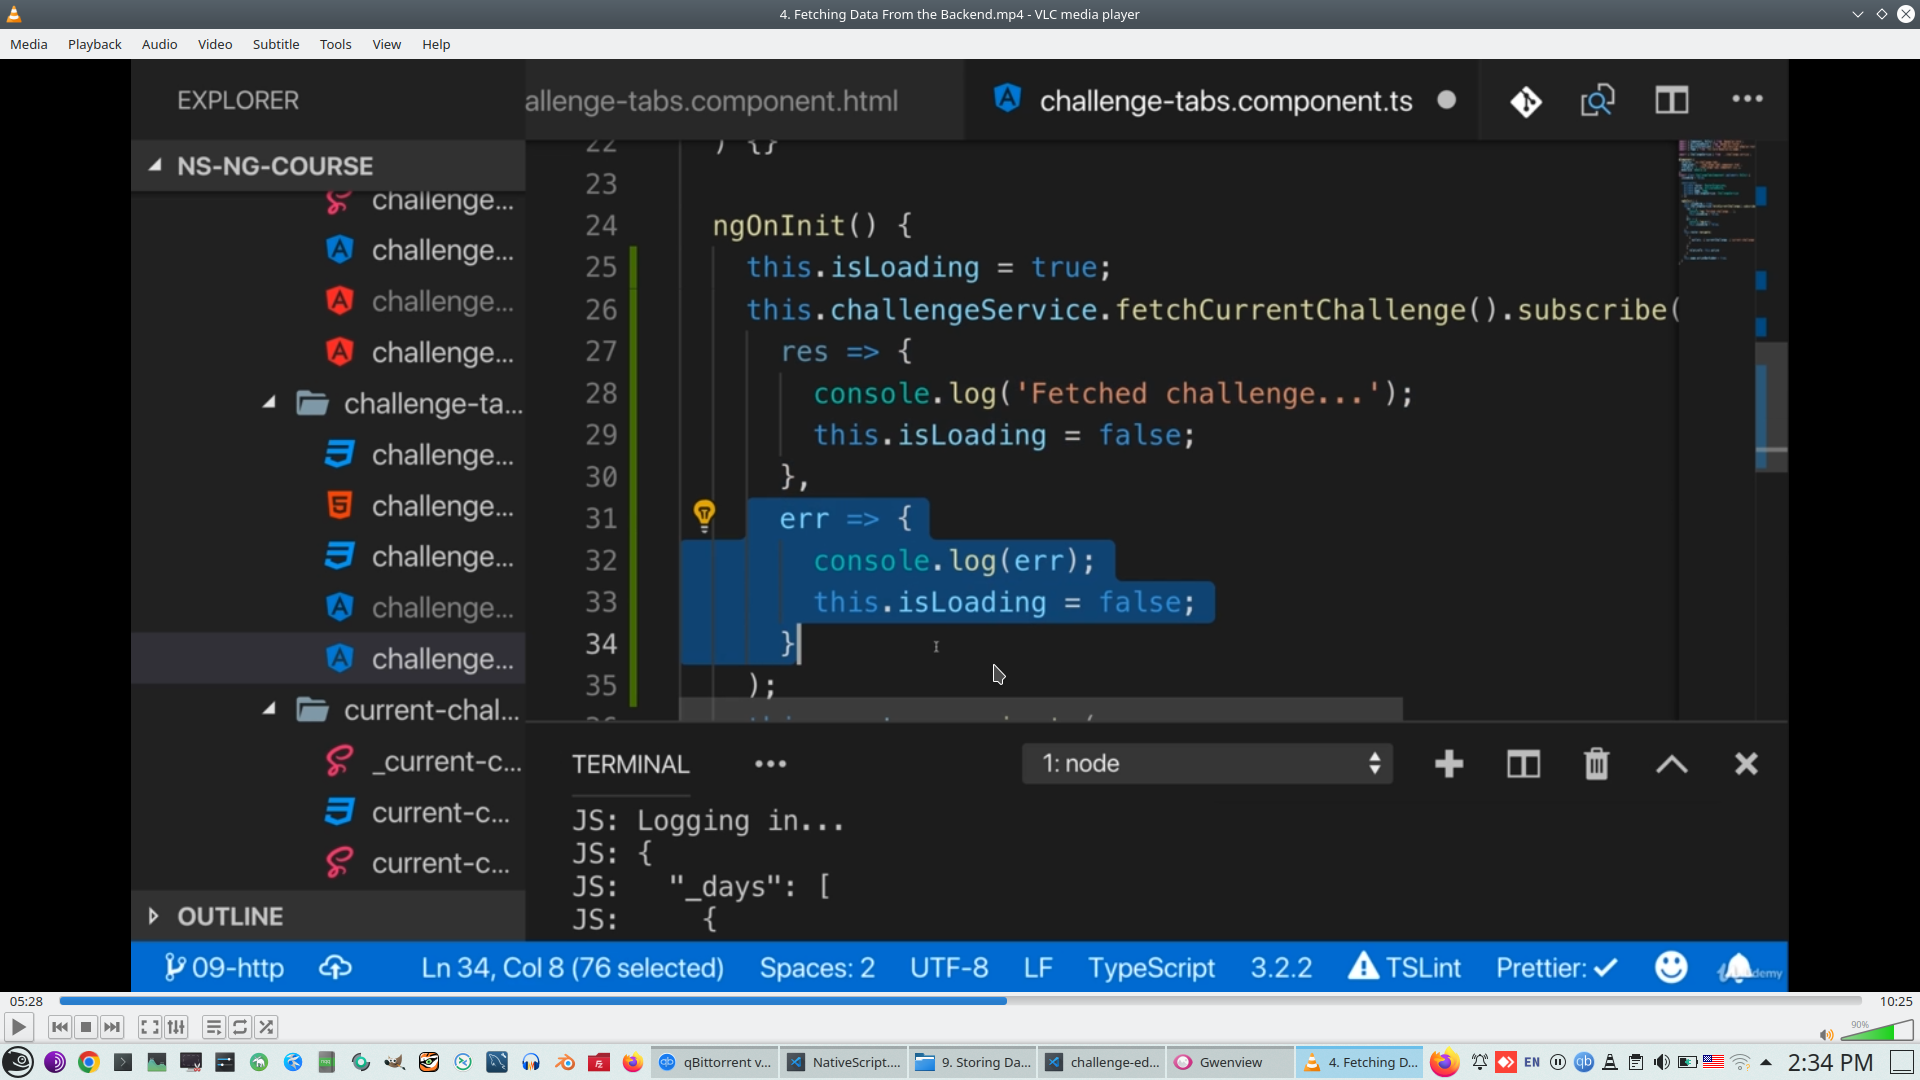
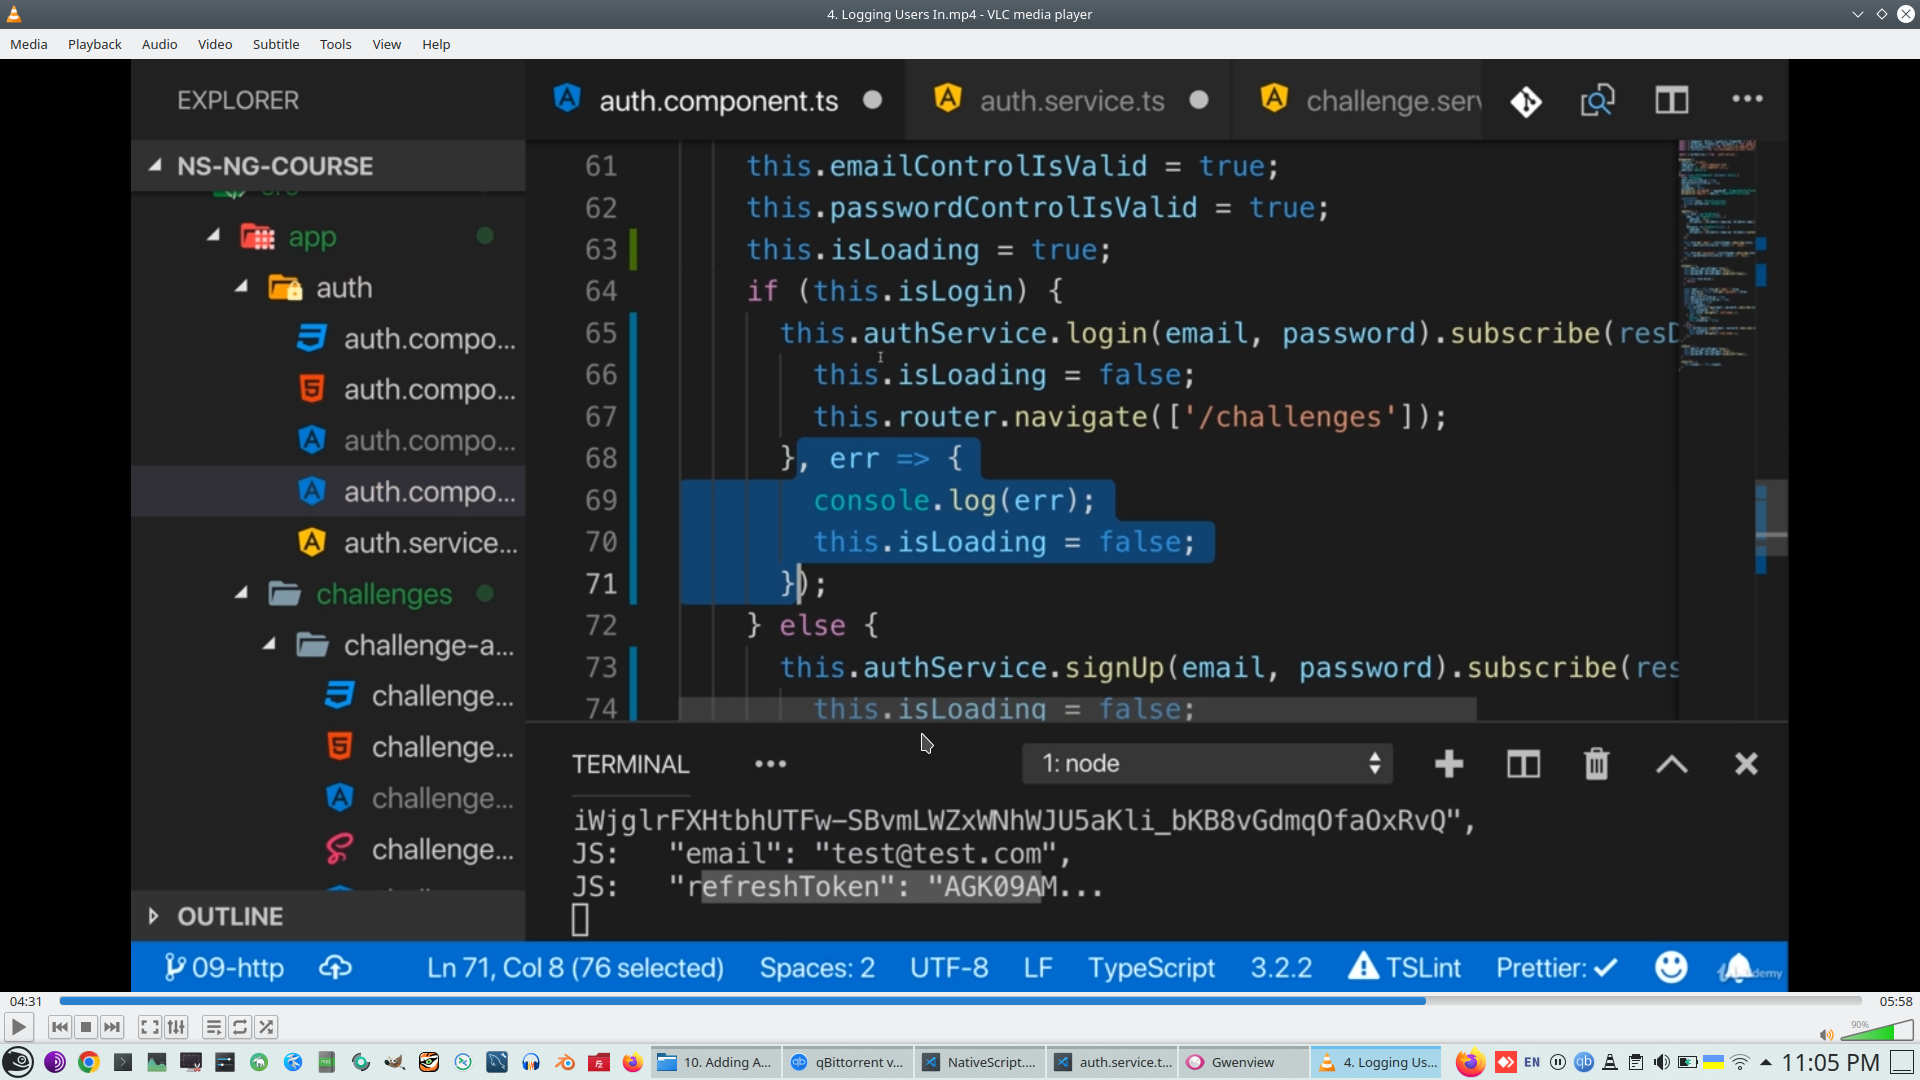
Handle not answered server
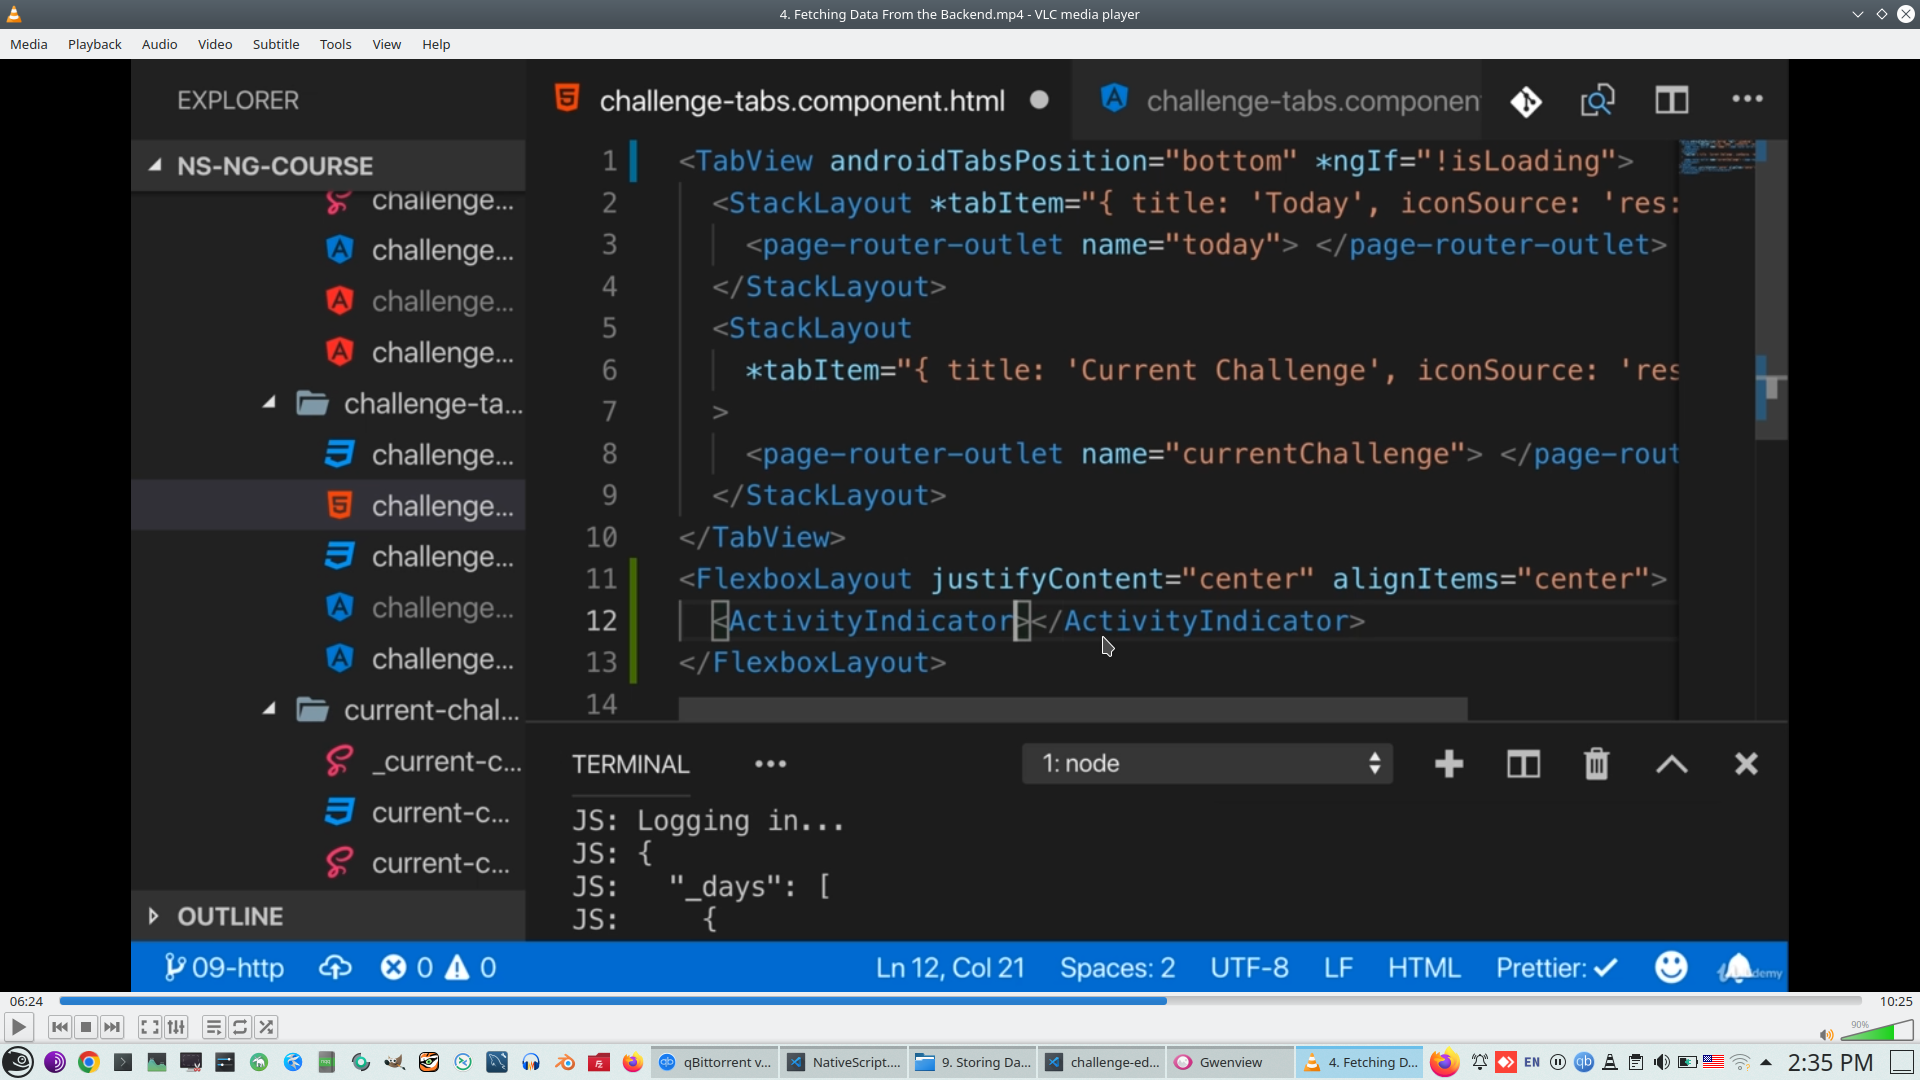
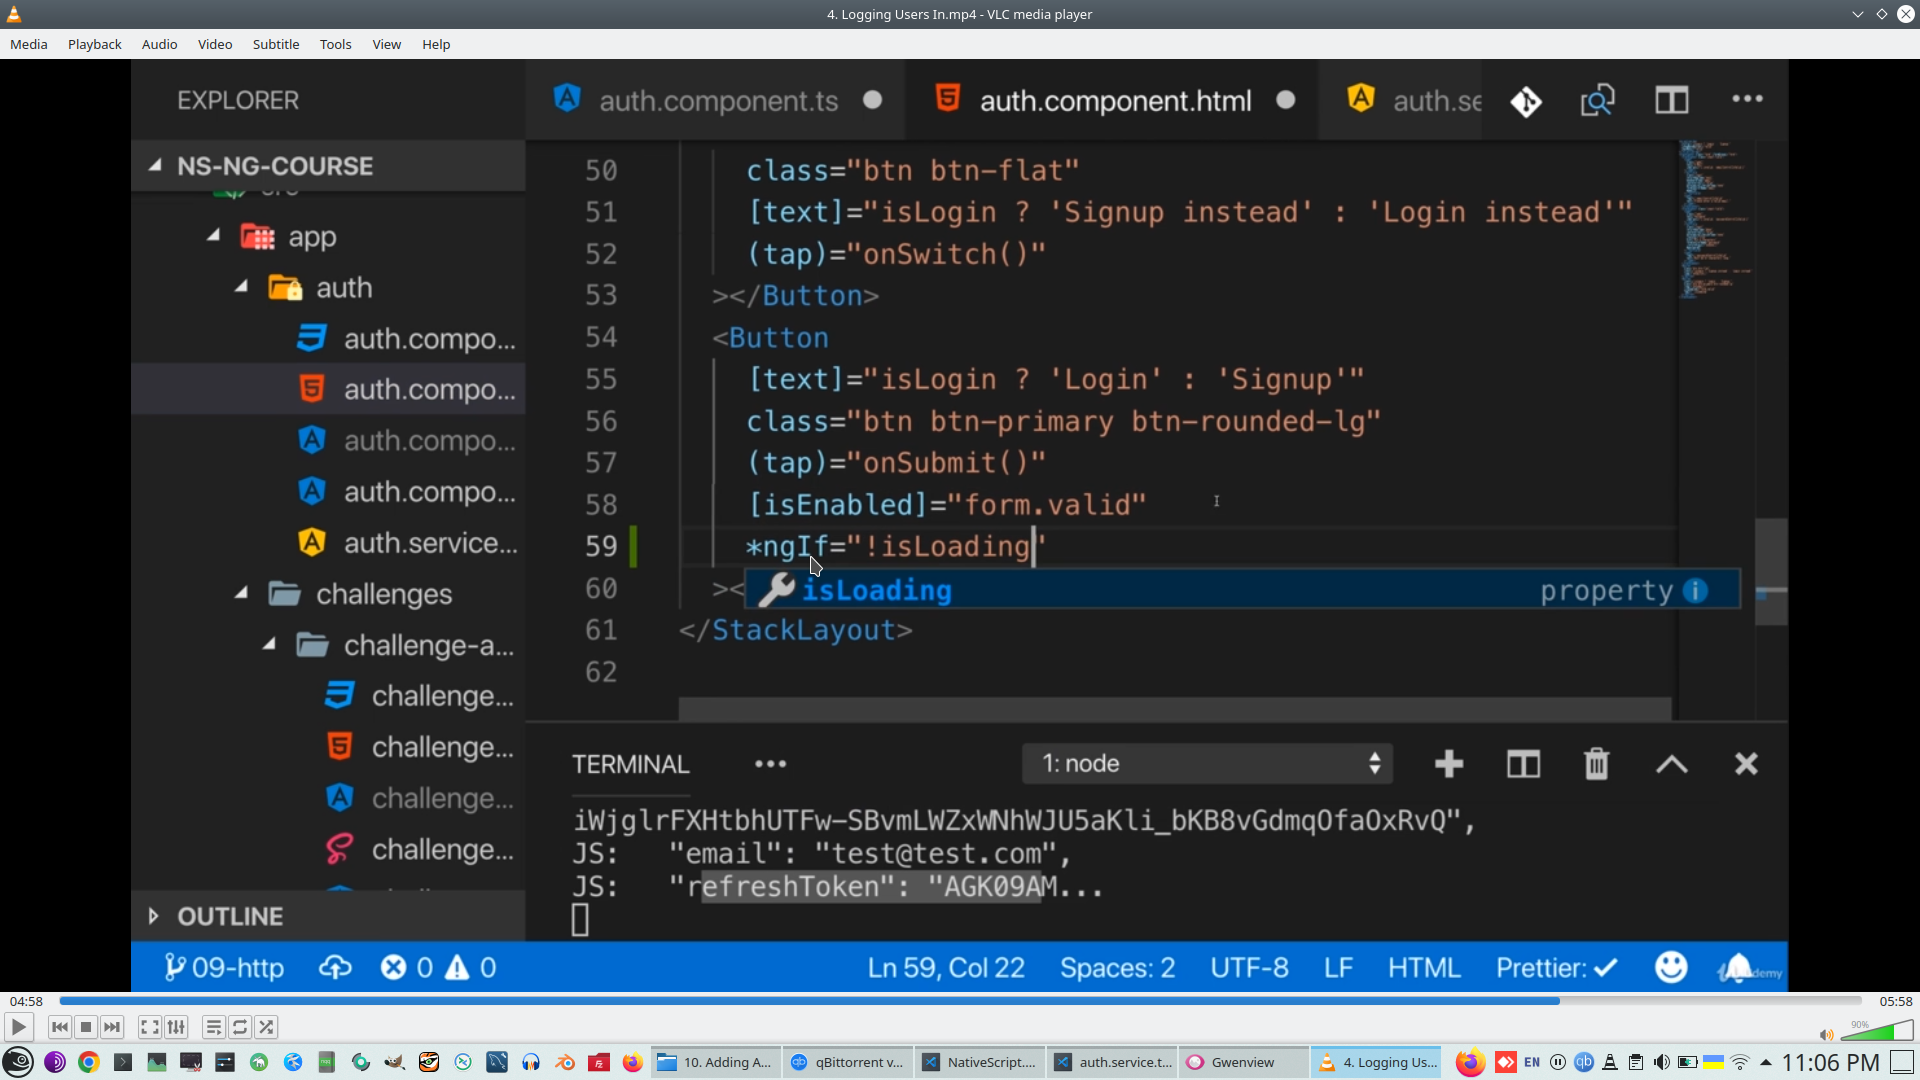
Add Spiner on the form *ngIf
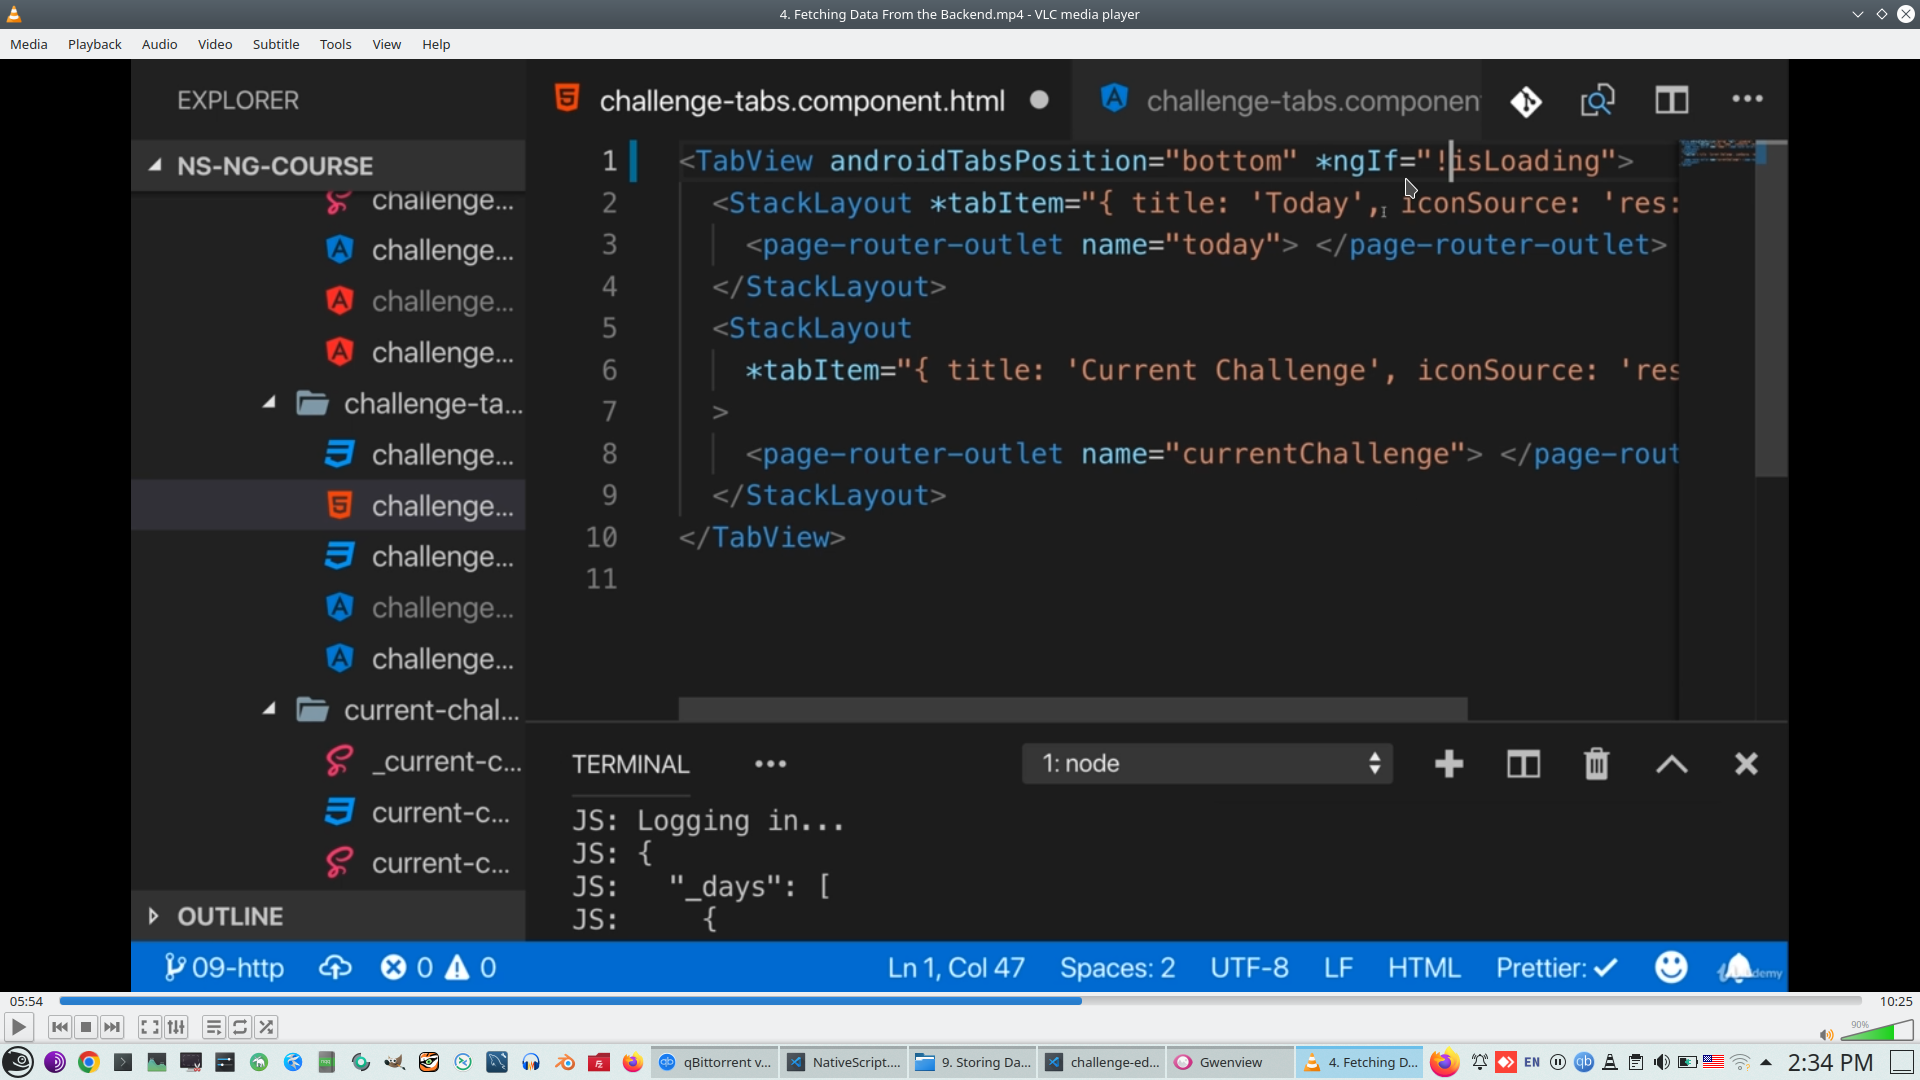
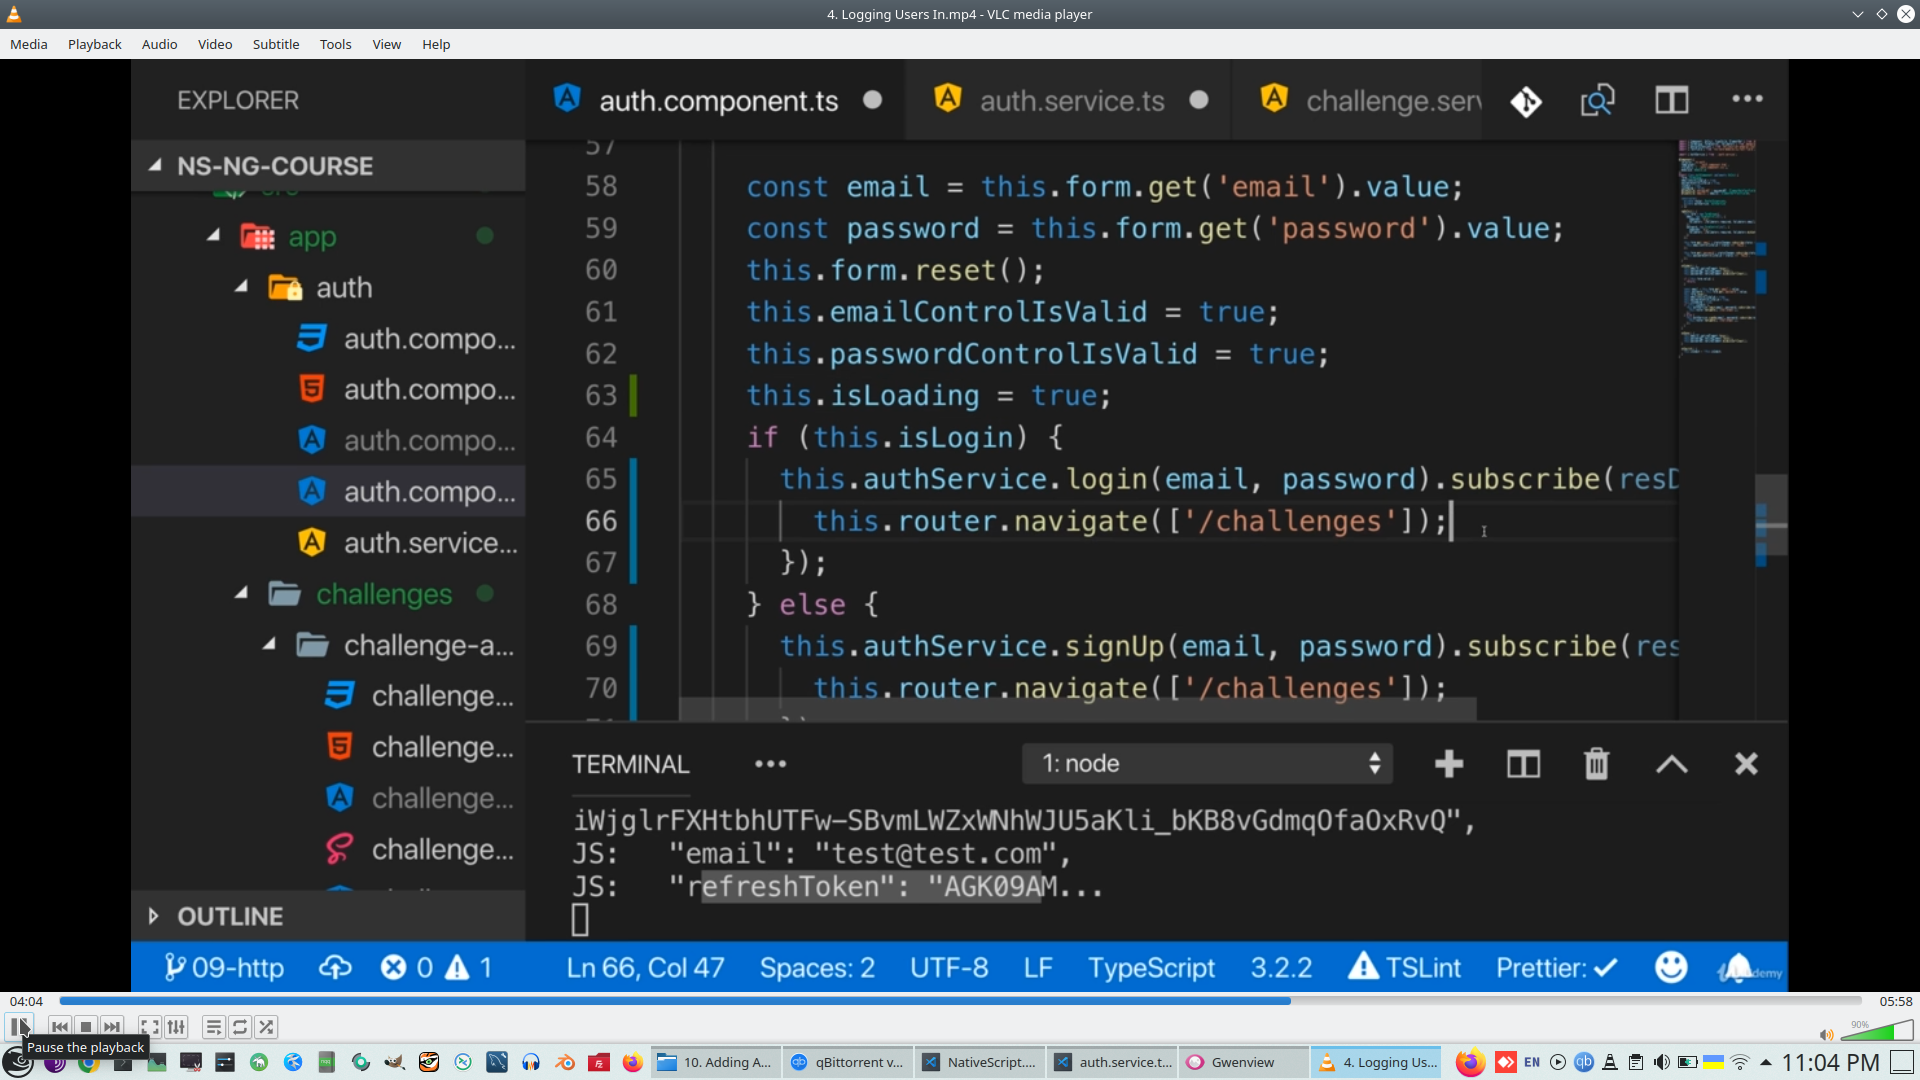
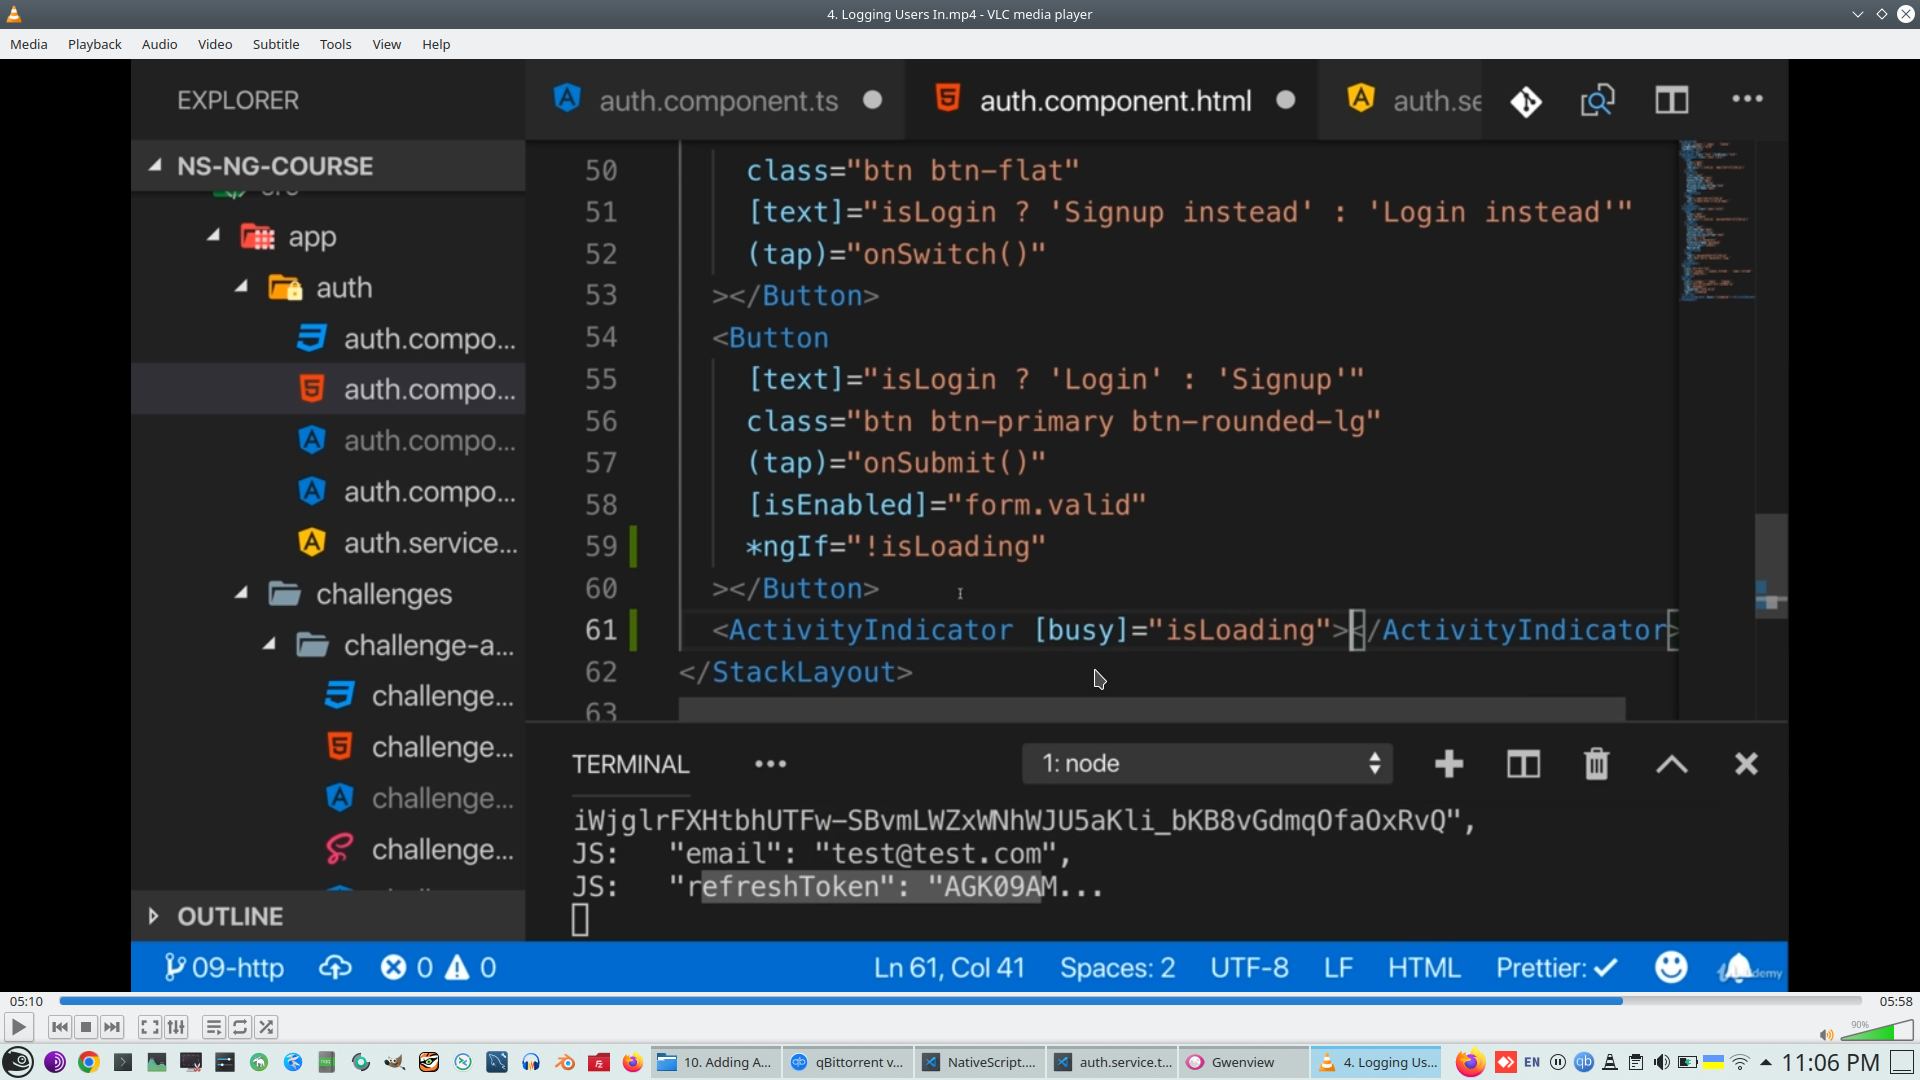
Add ActivityIndicator and tune it

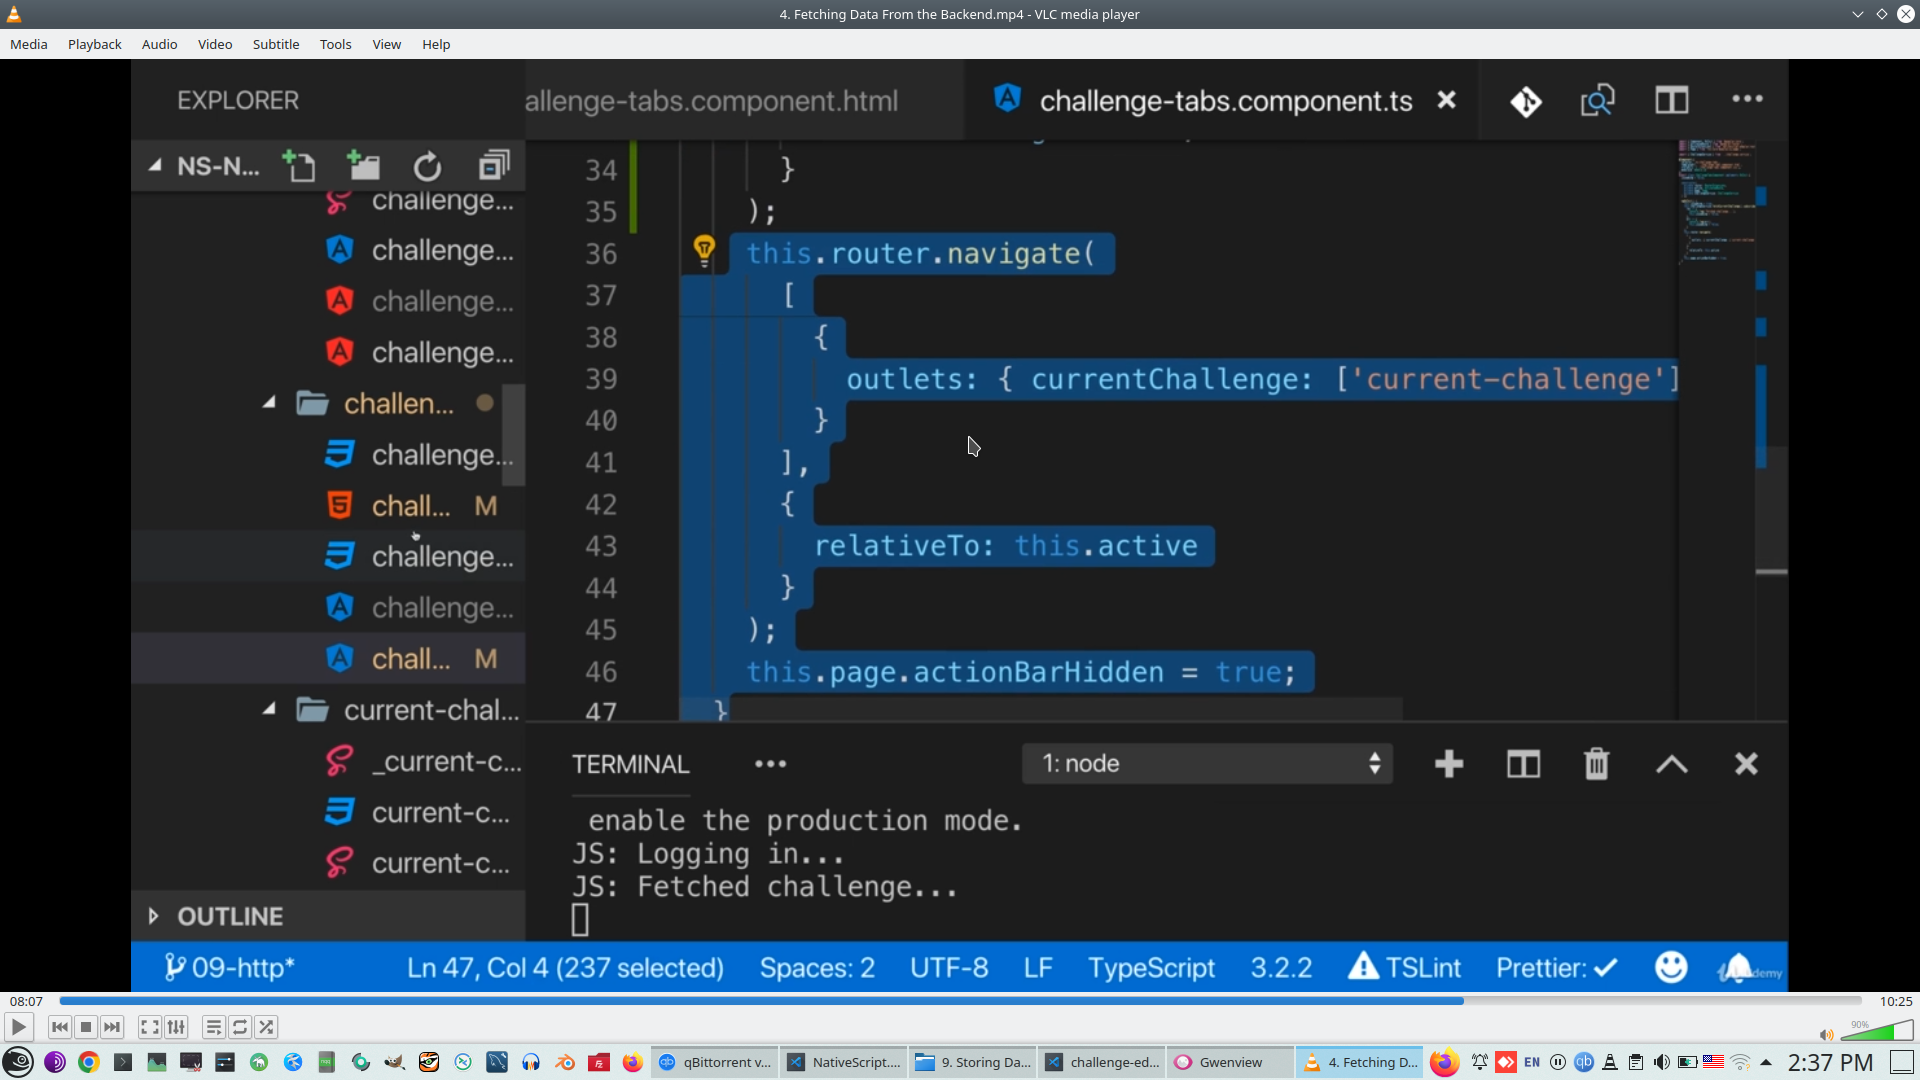
Change place to going to needed URL after Fitch result, move code to subsribe branch, if server serpond correctly
Look to Spiner
24. Authentication
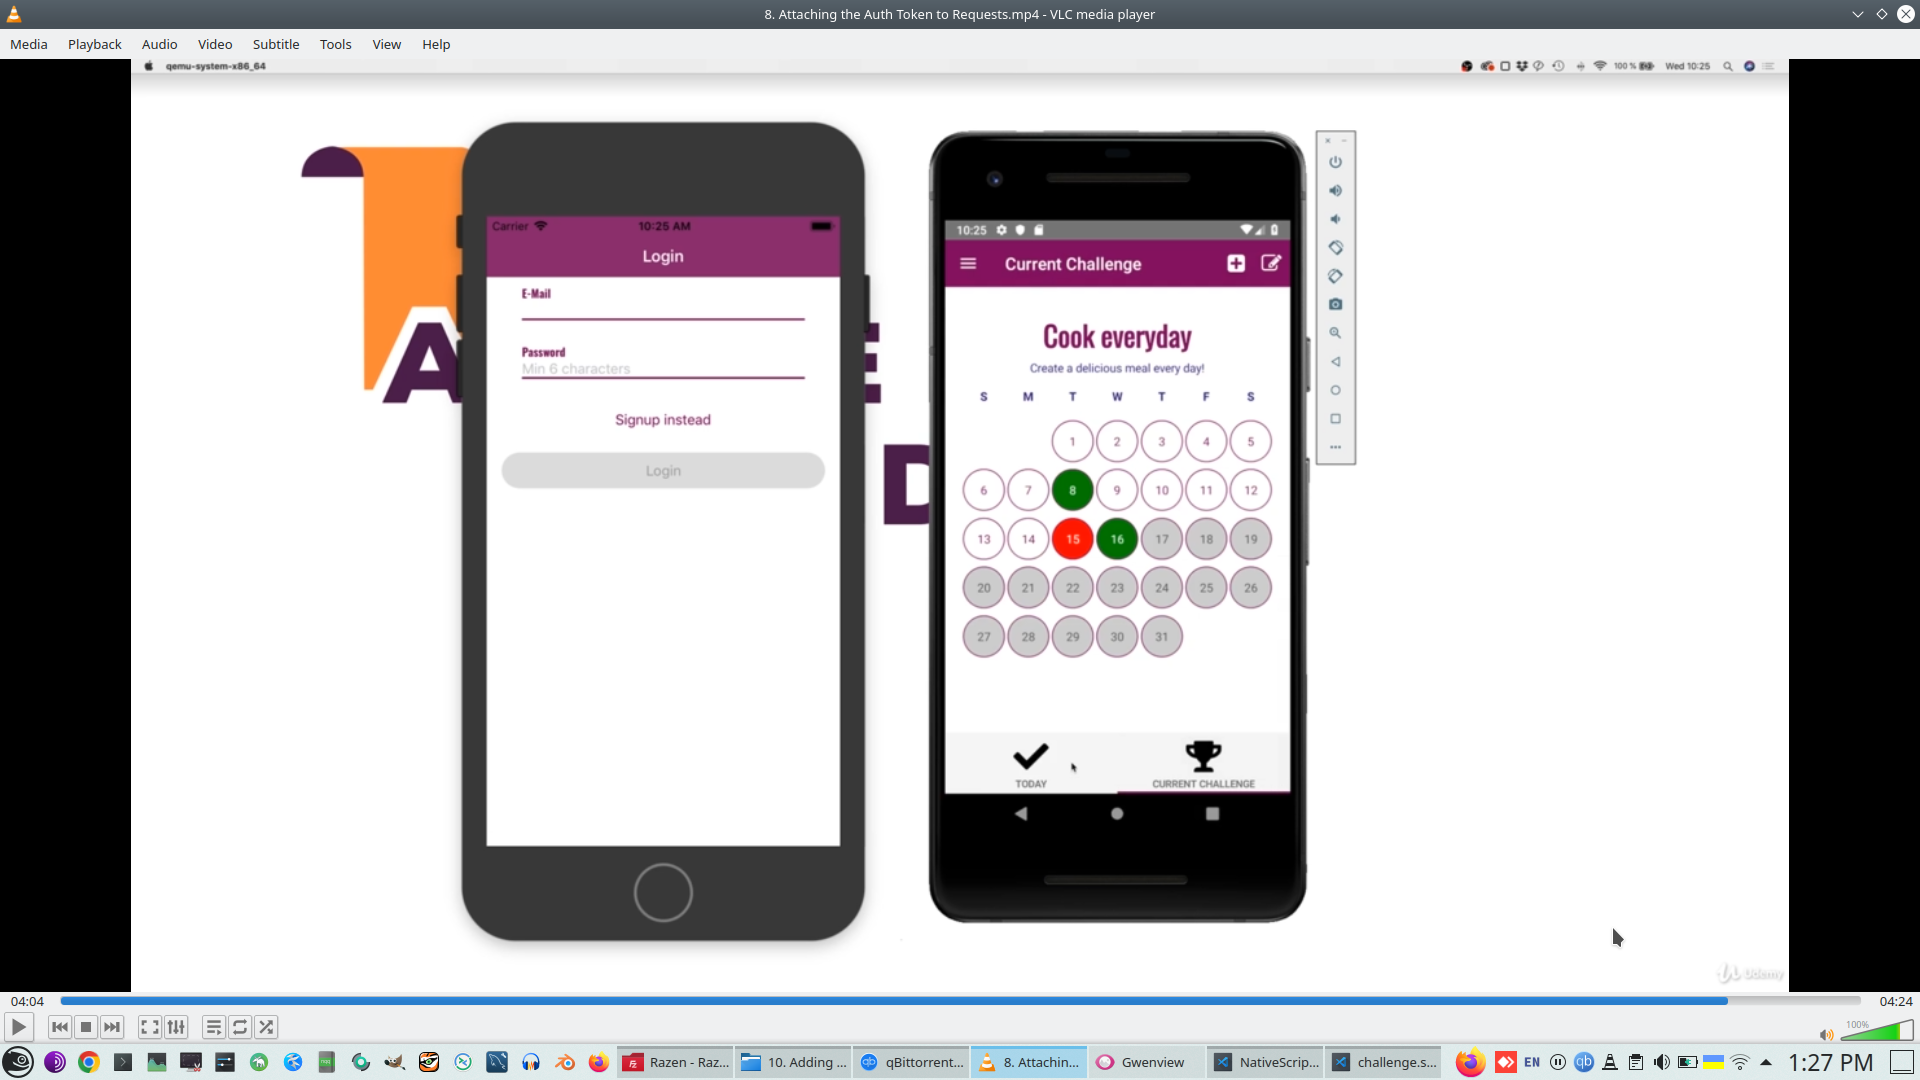
Firebase check login/pass and if it valid Firebase return JWT and we need append thaty JWT as header to each request.
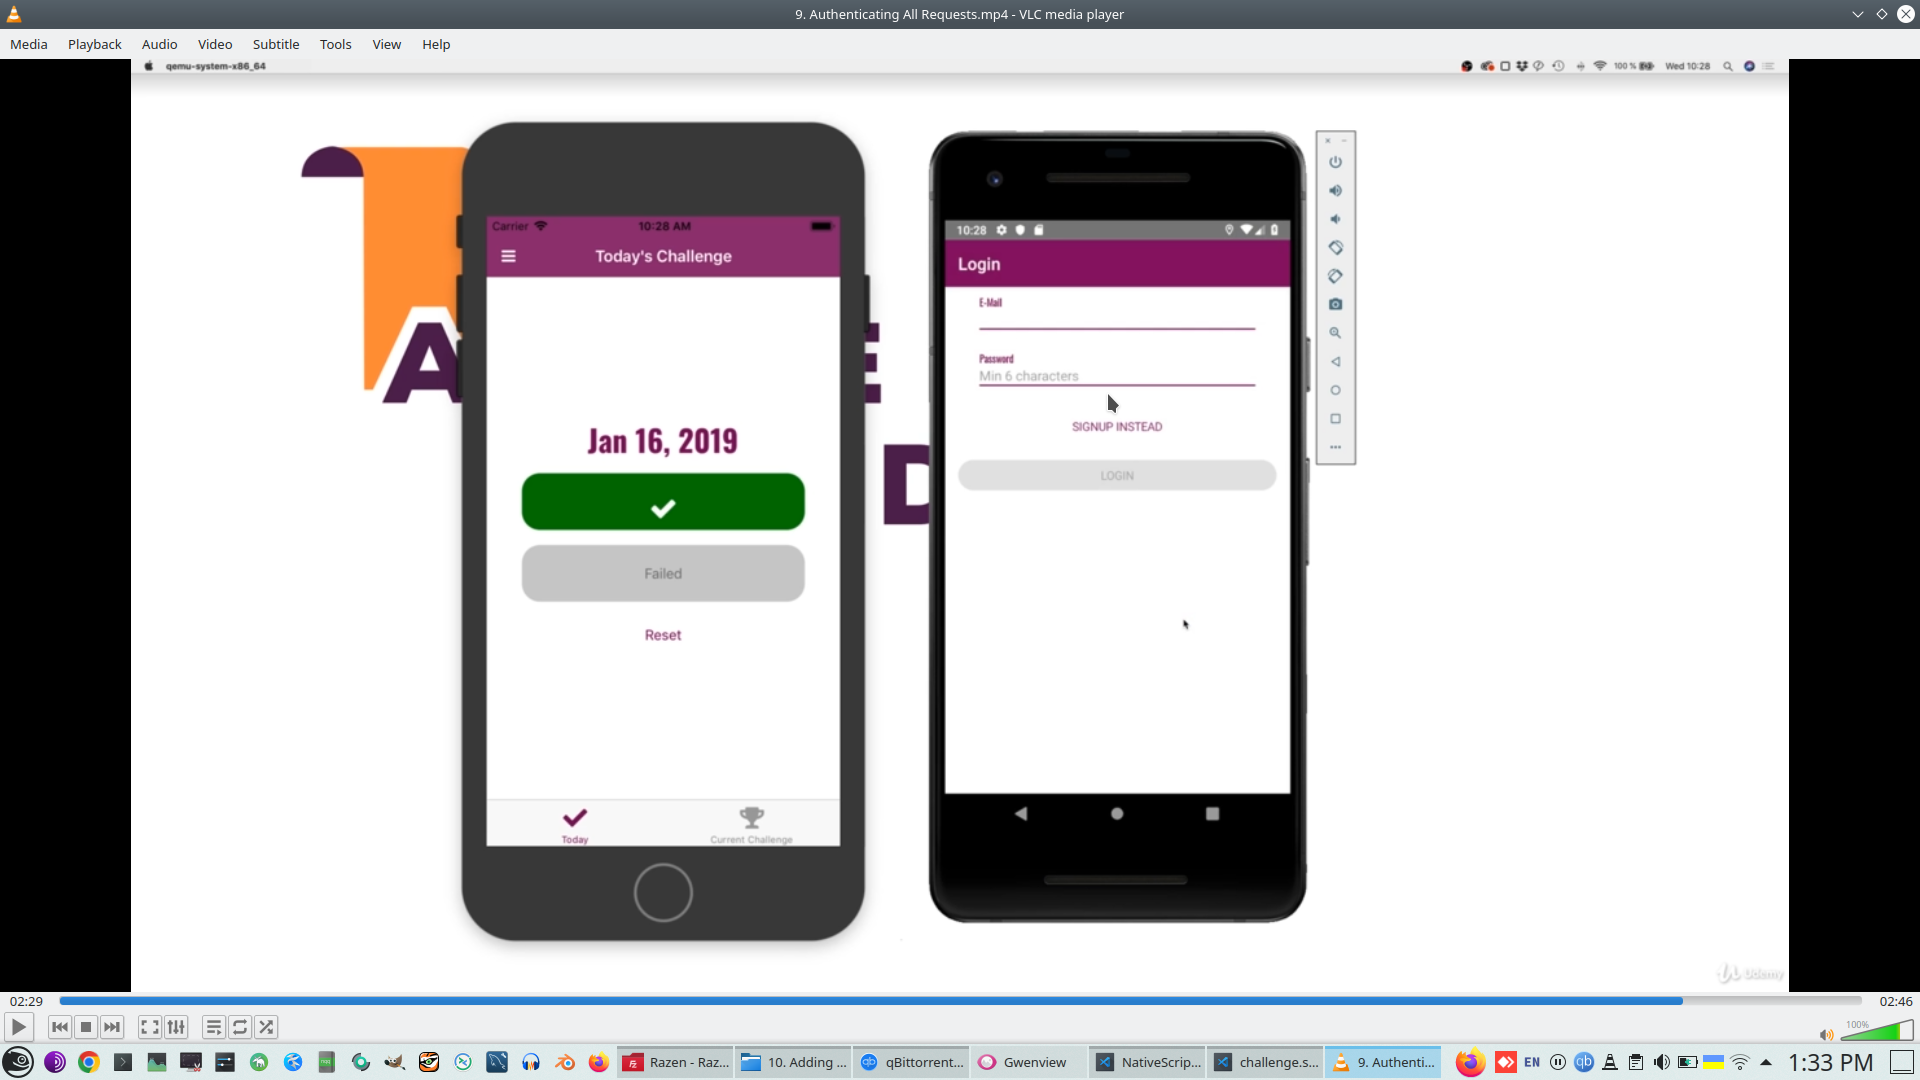
Cuprently project has empty authentication
>
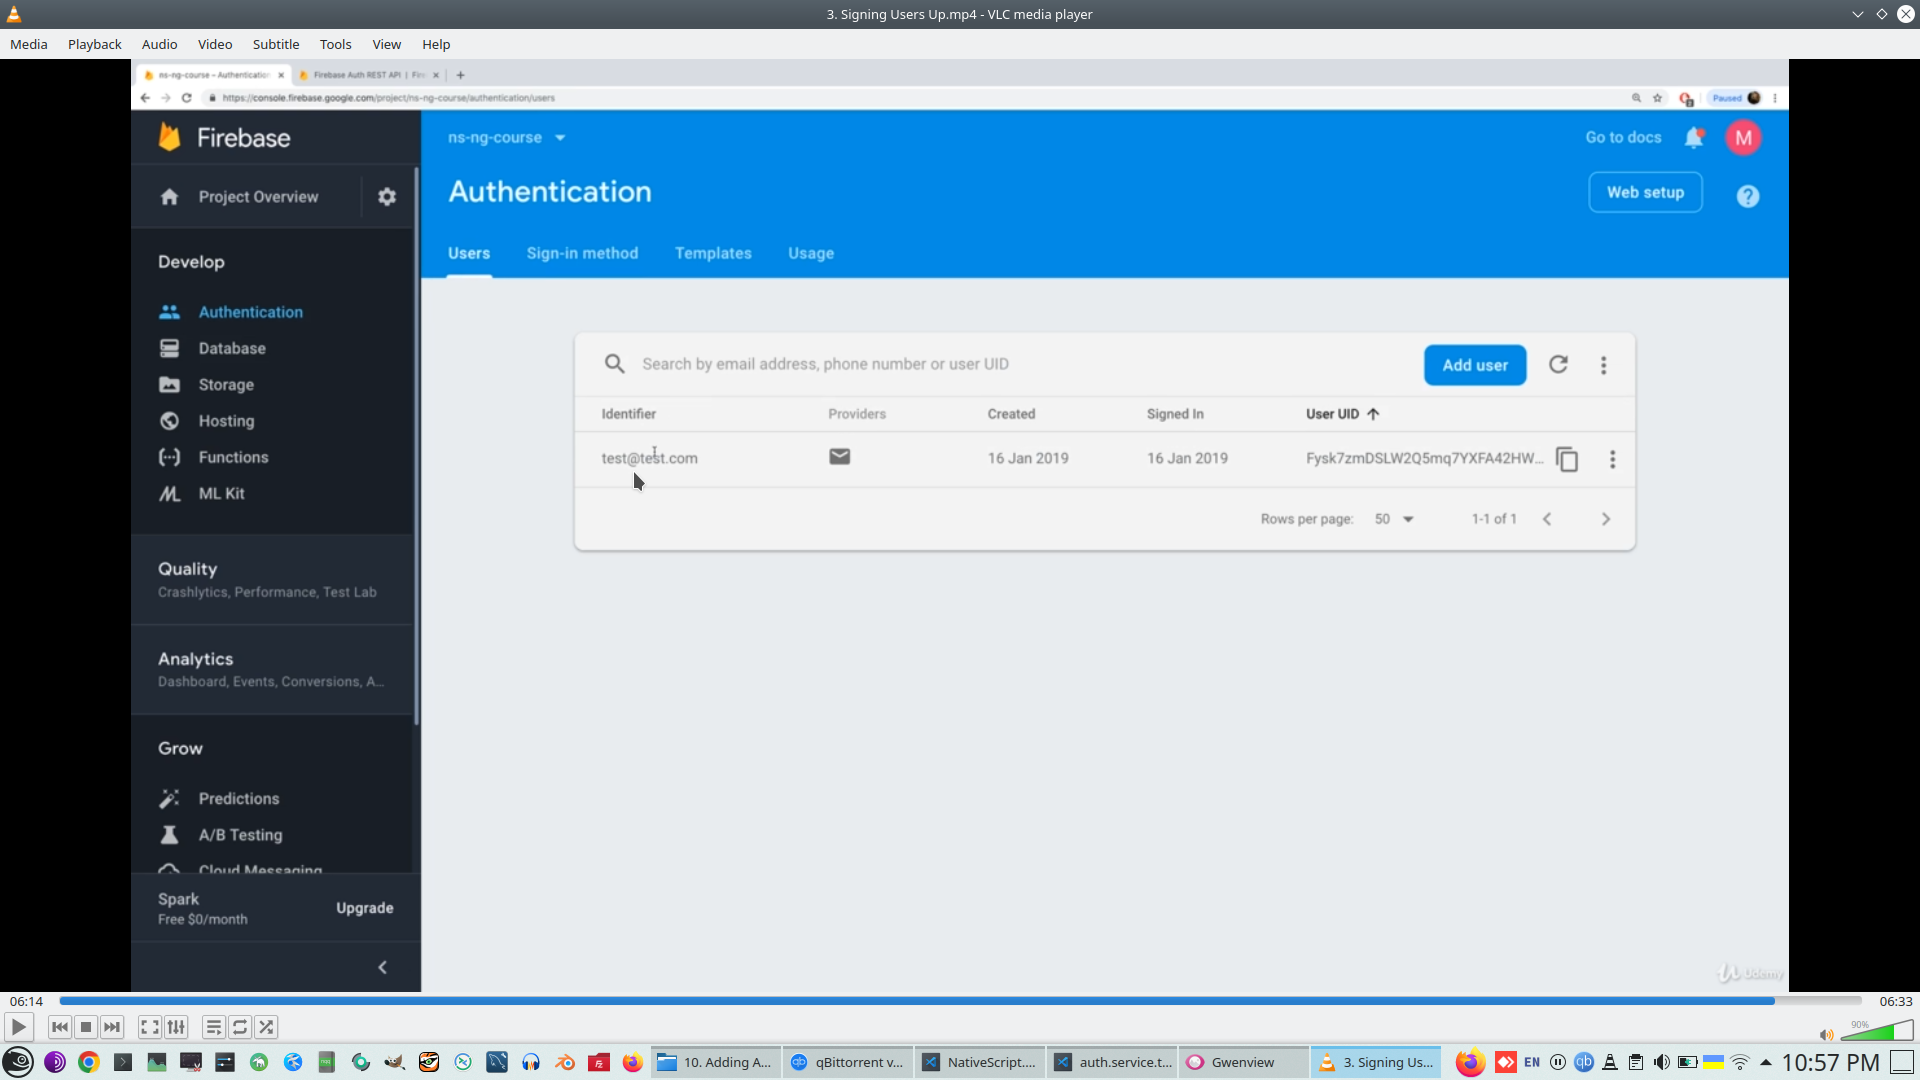
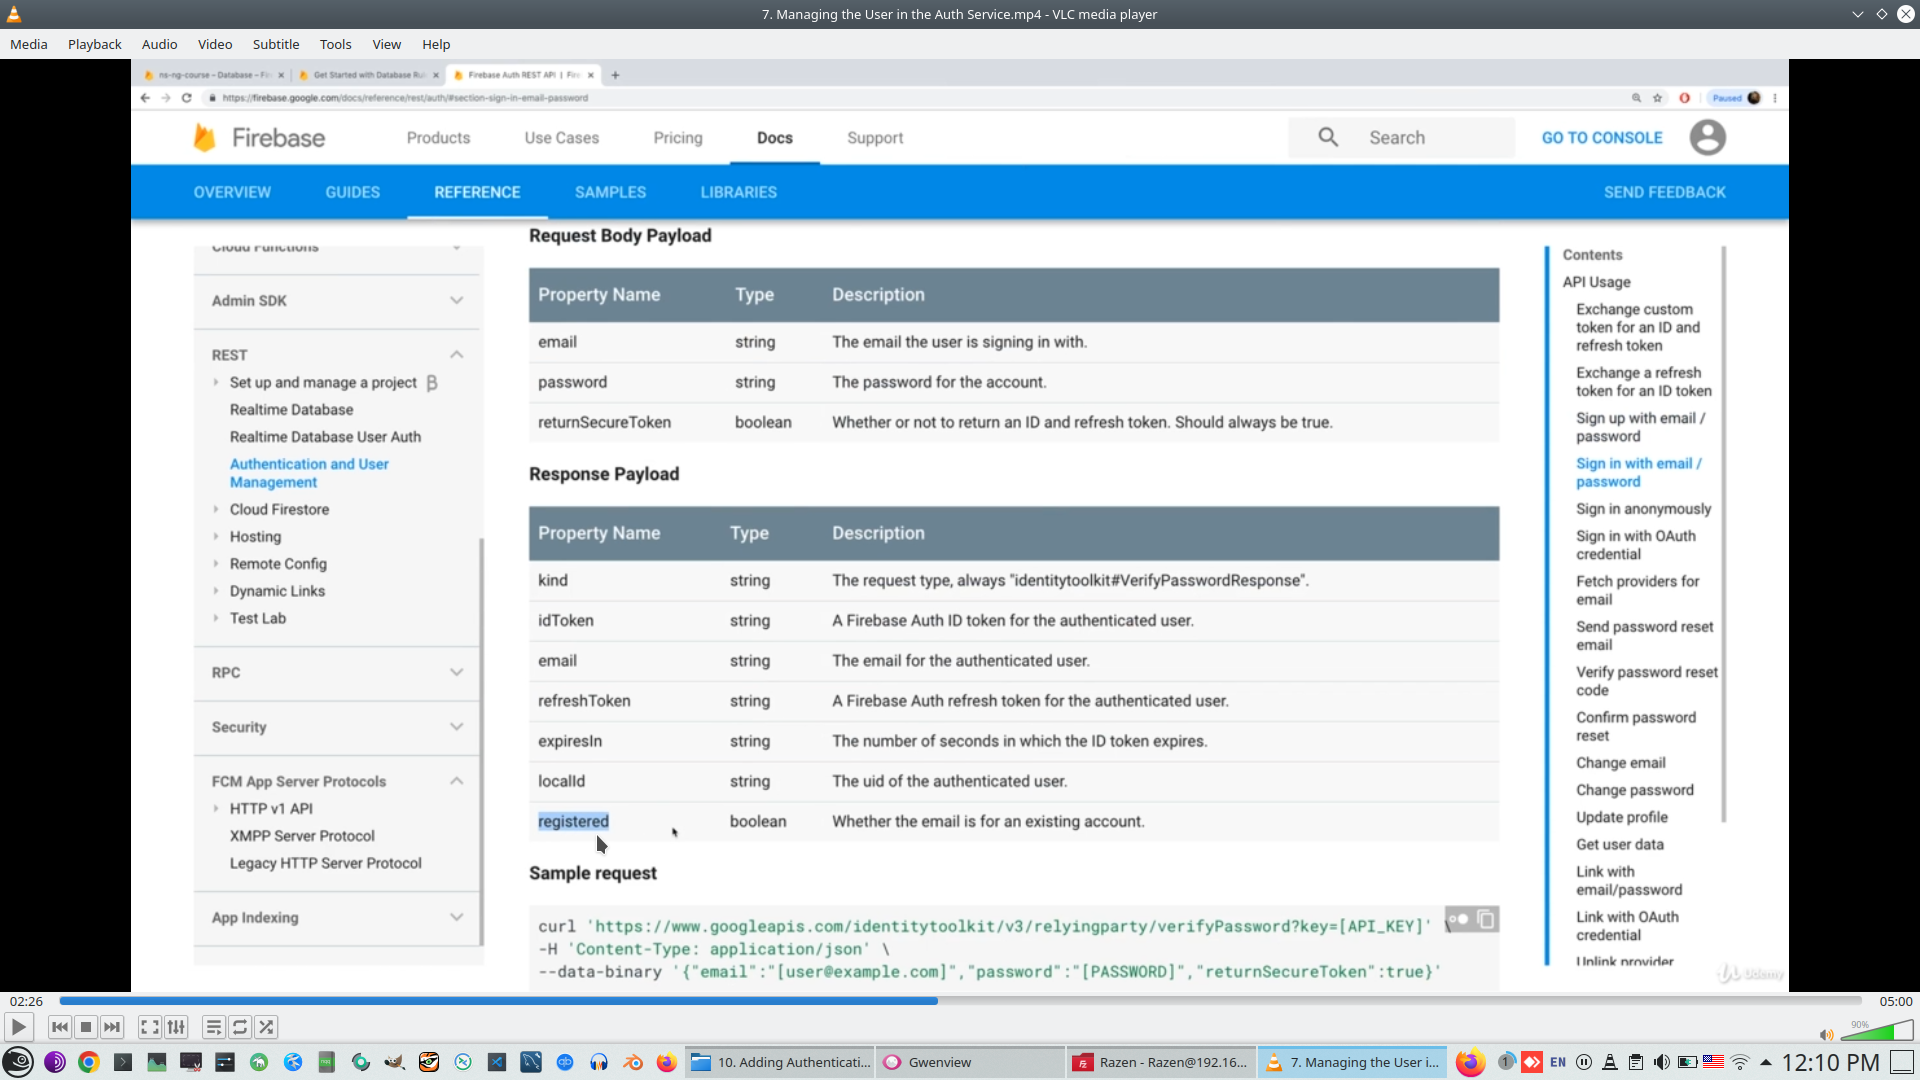
We will add FireBase AU
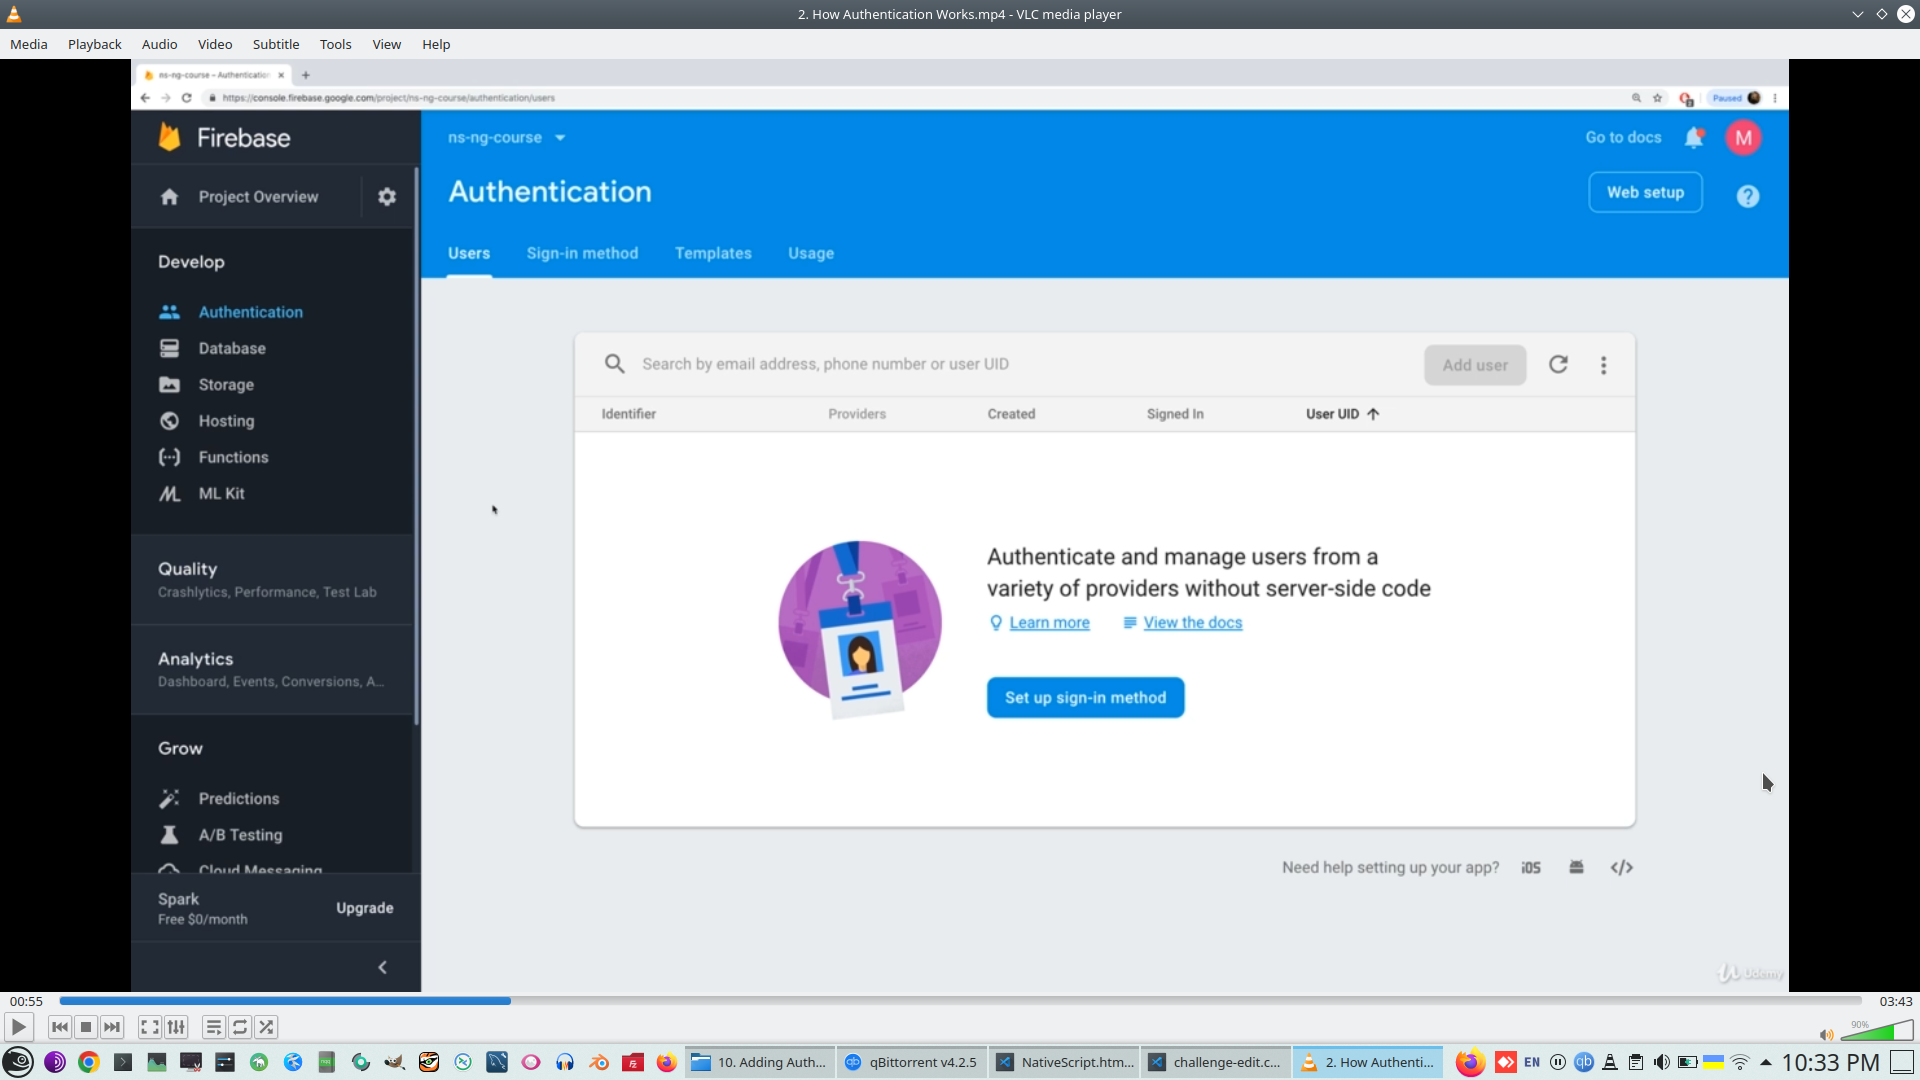
Various type of Firebase AU

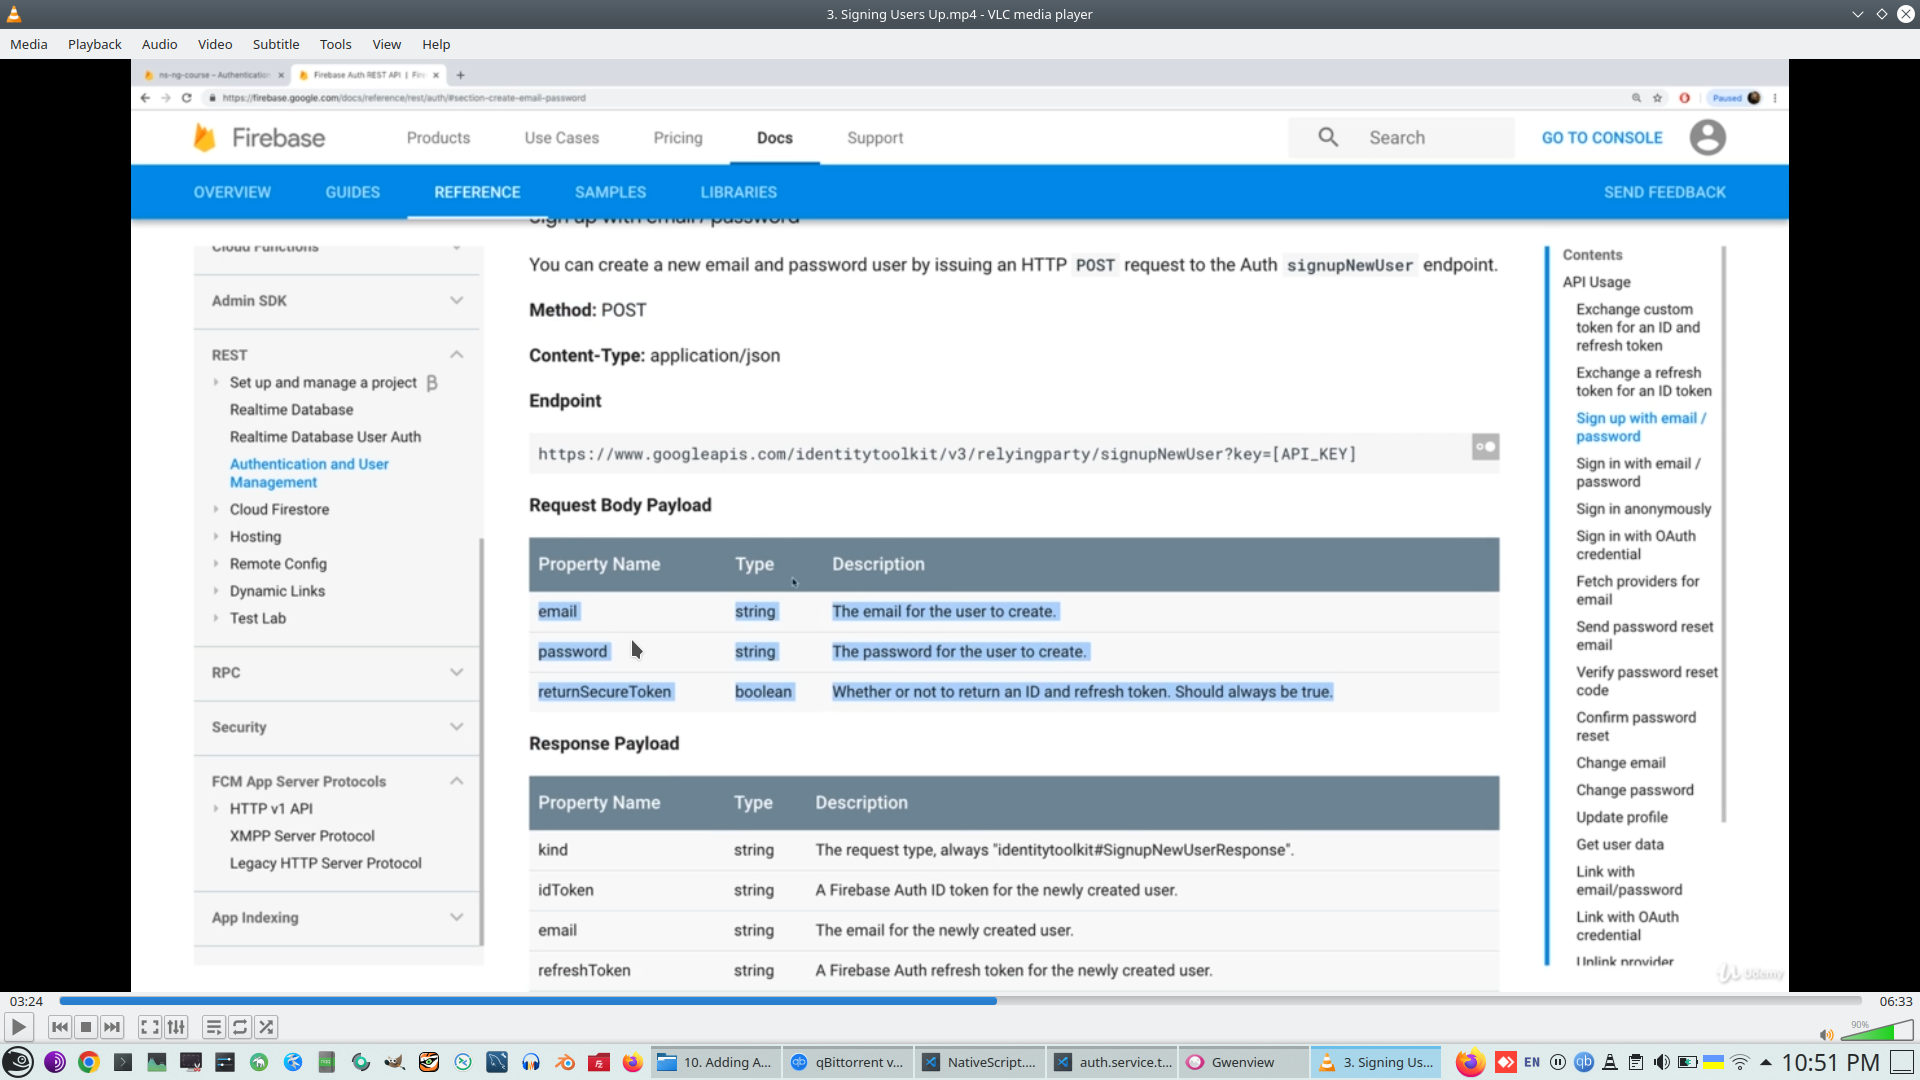
We select simple eMail/Pass AU
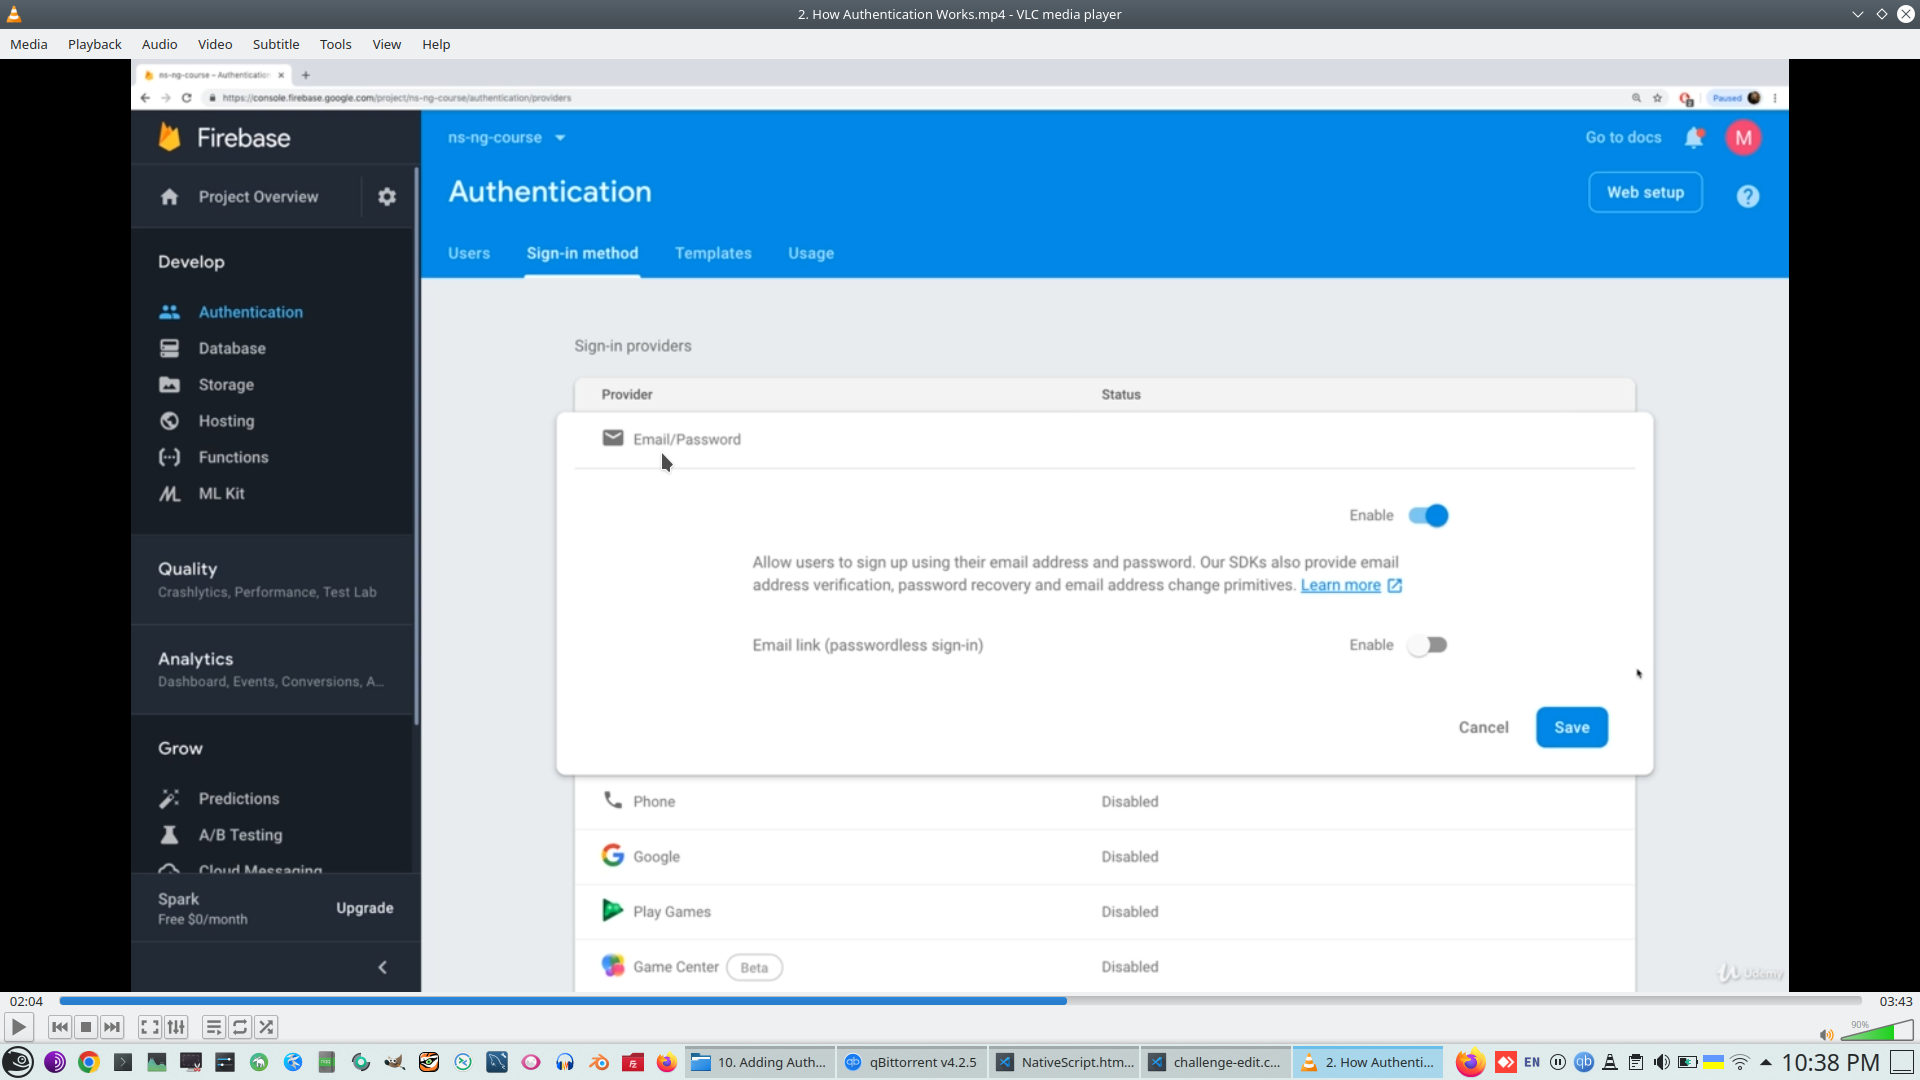
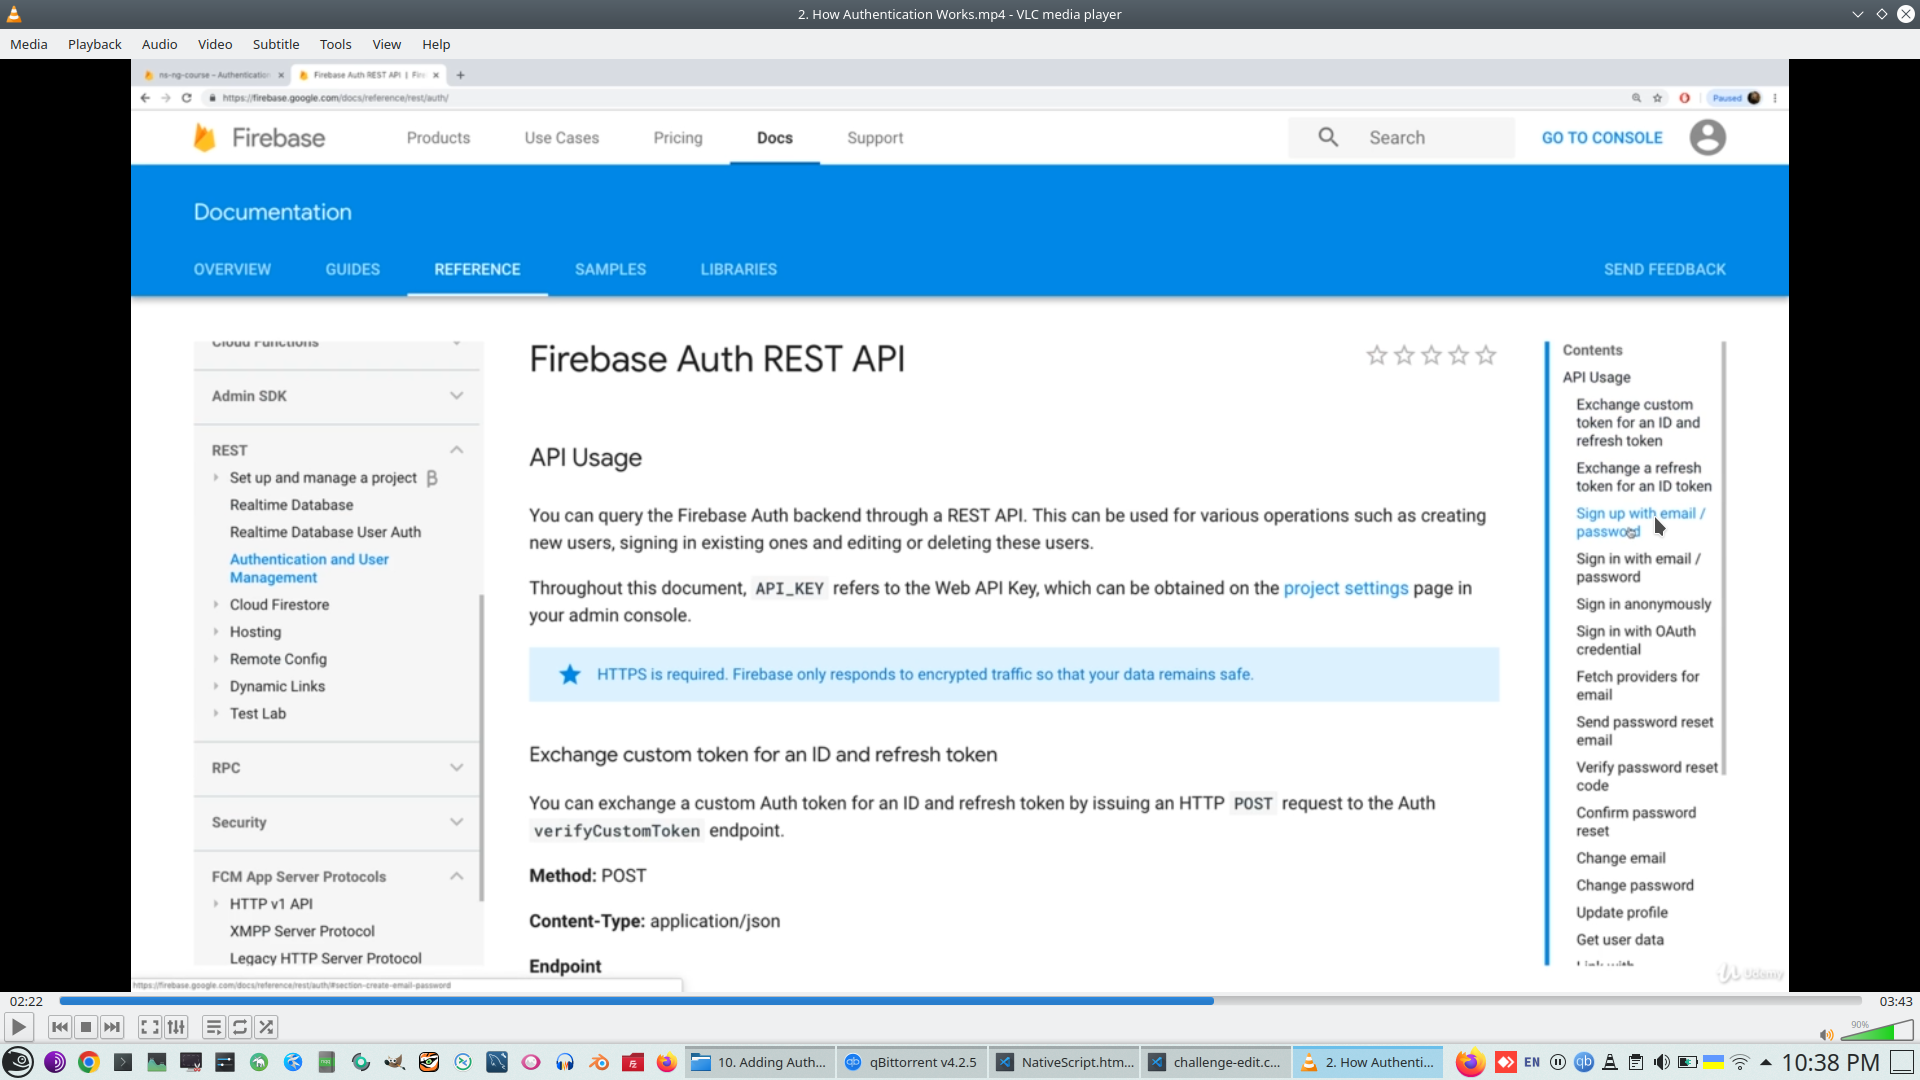
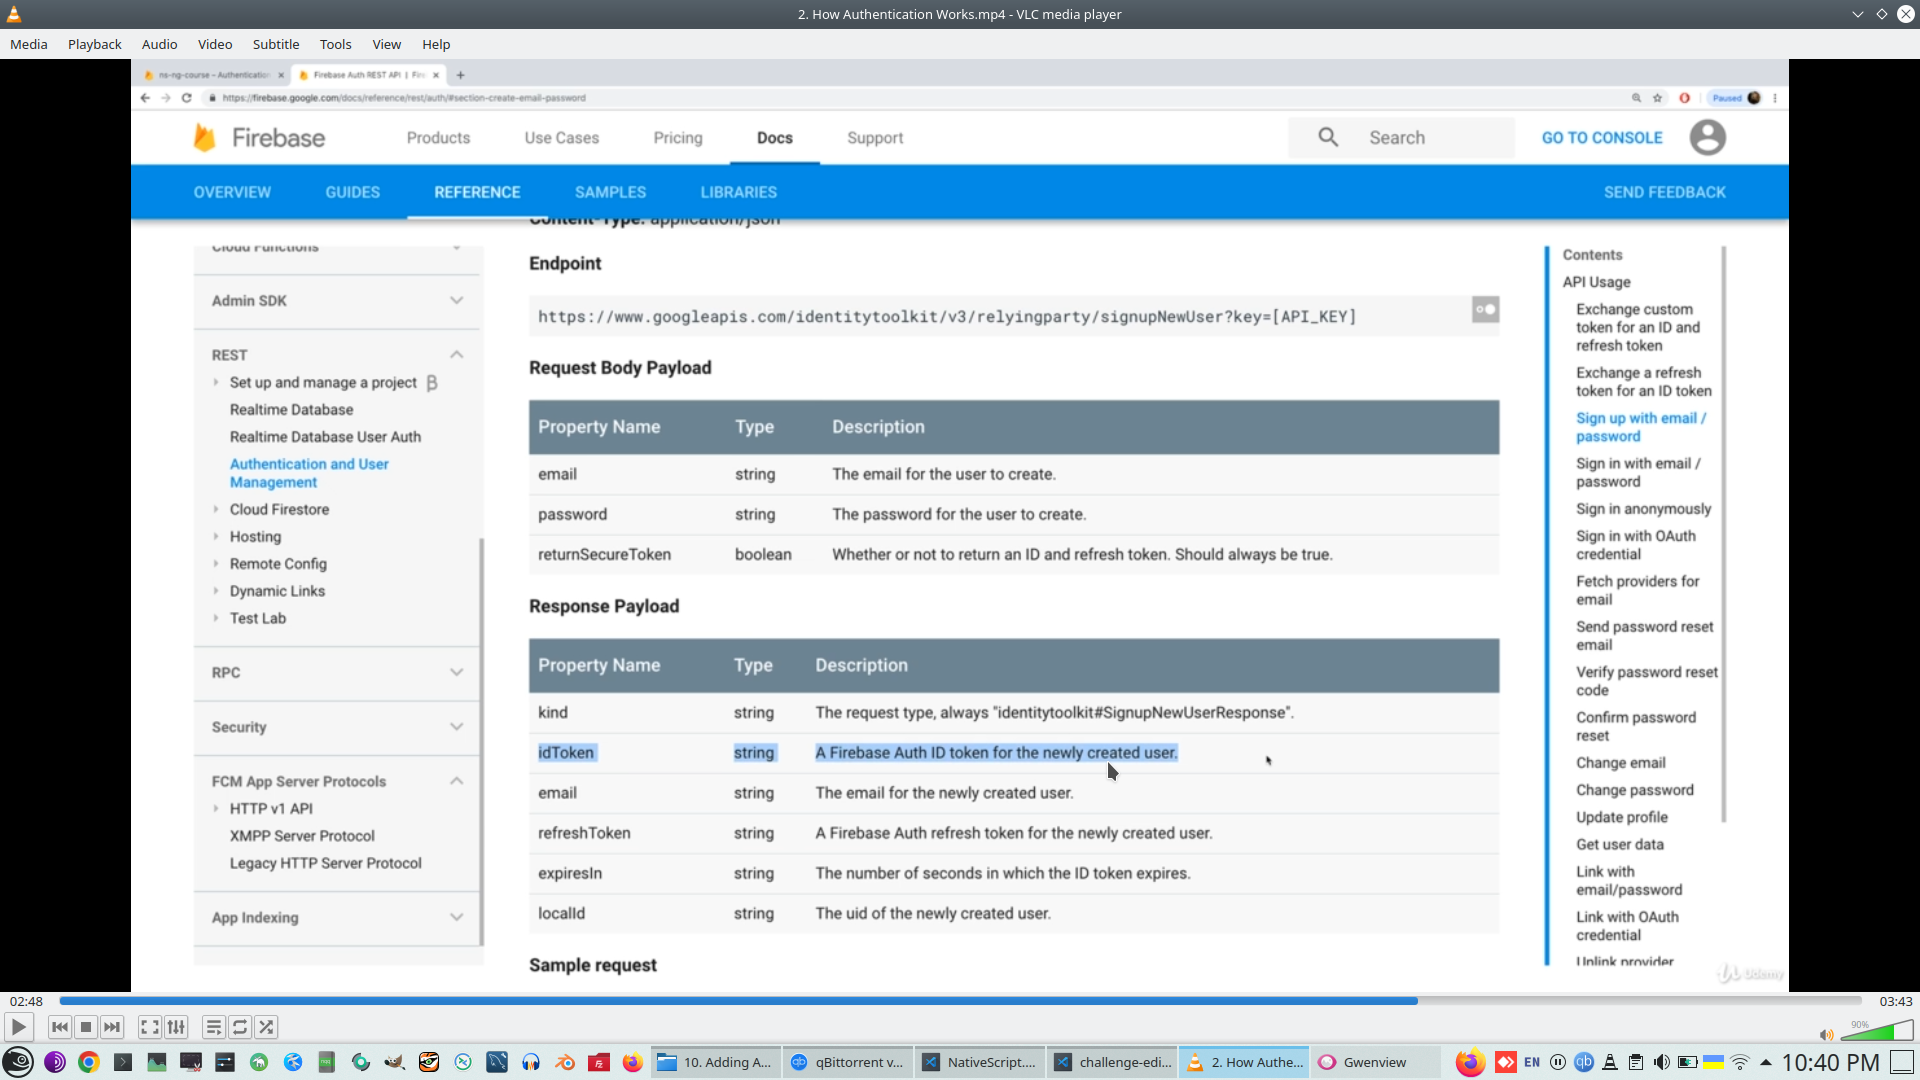
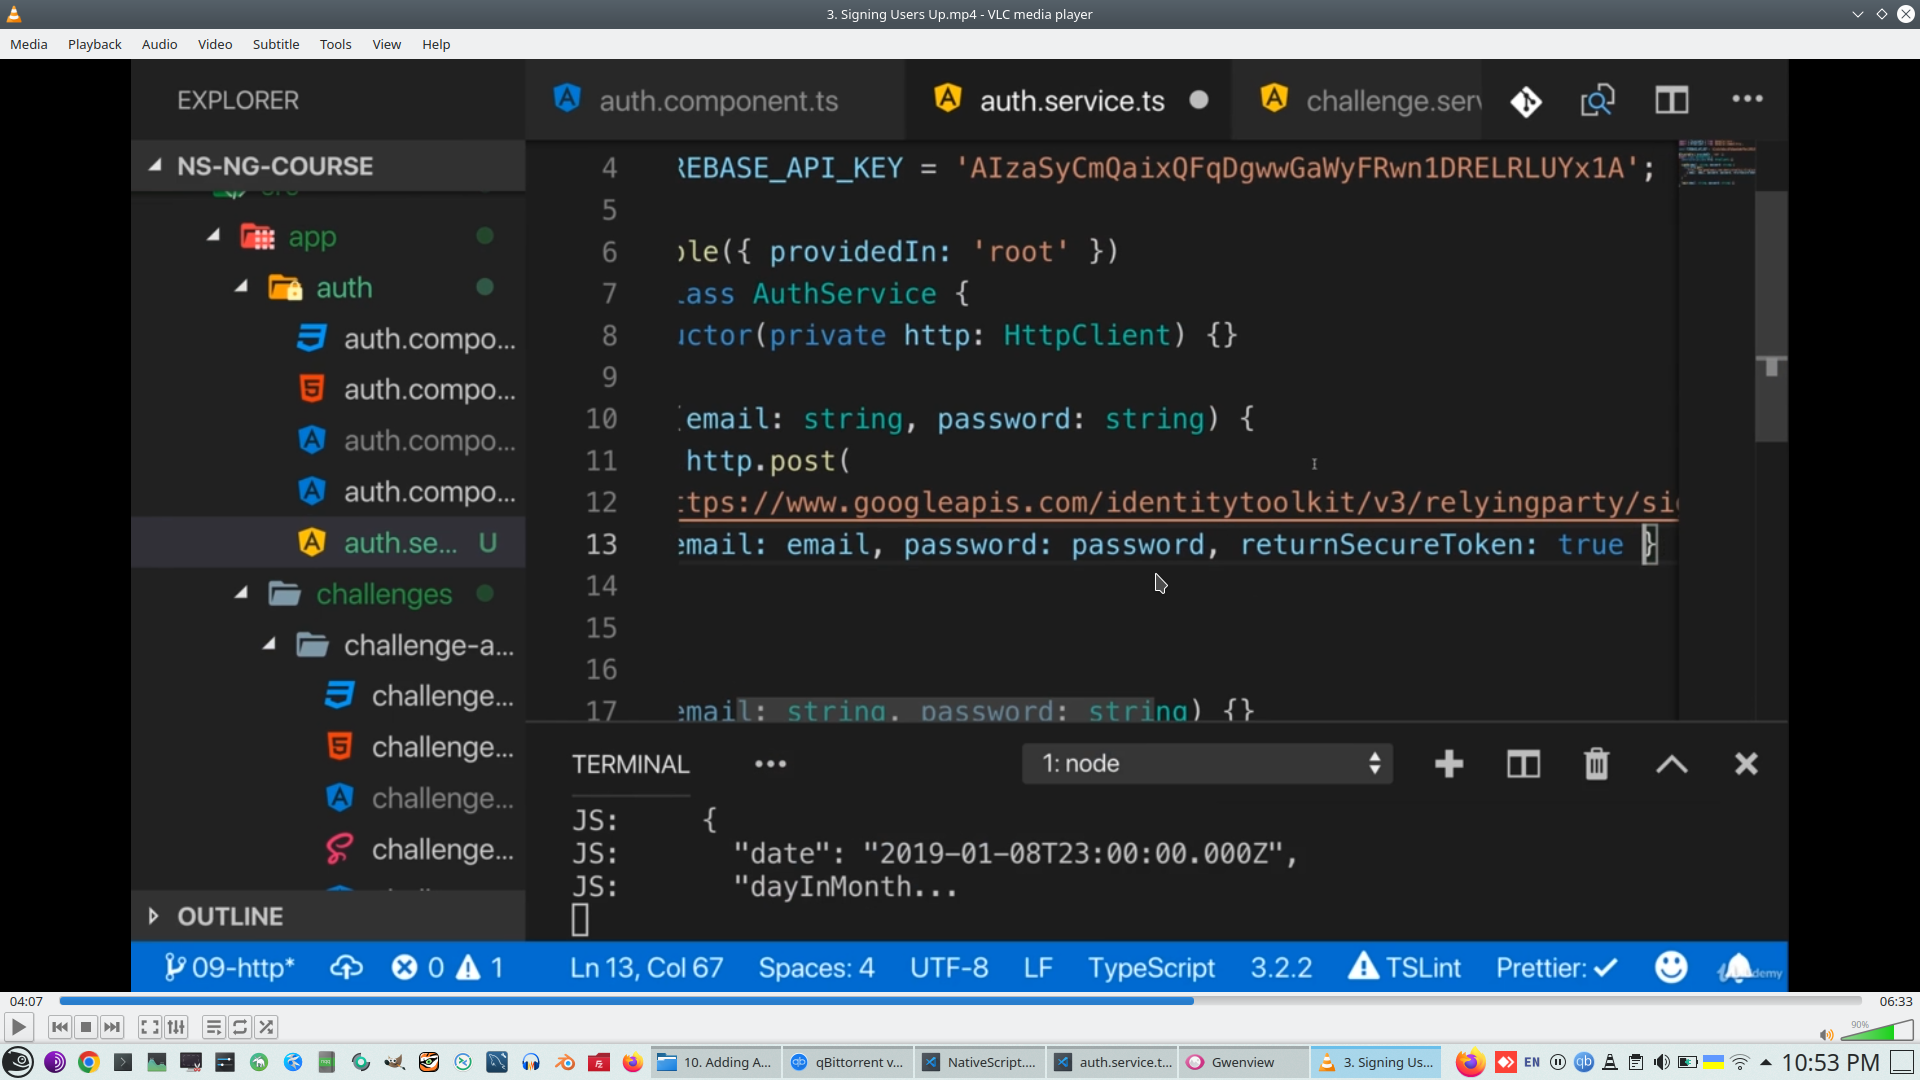
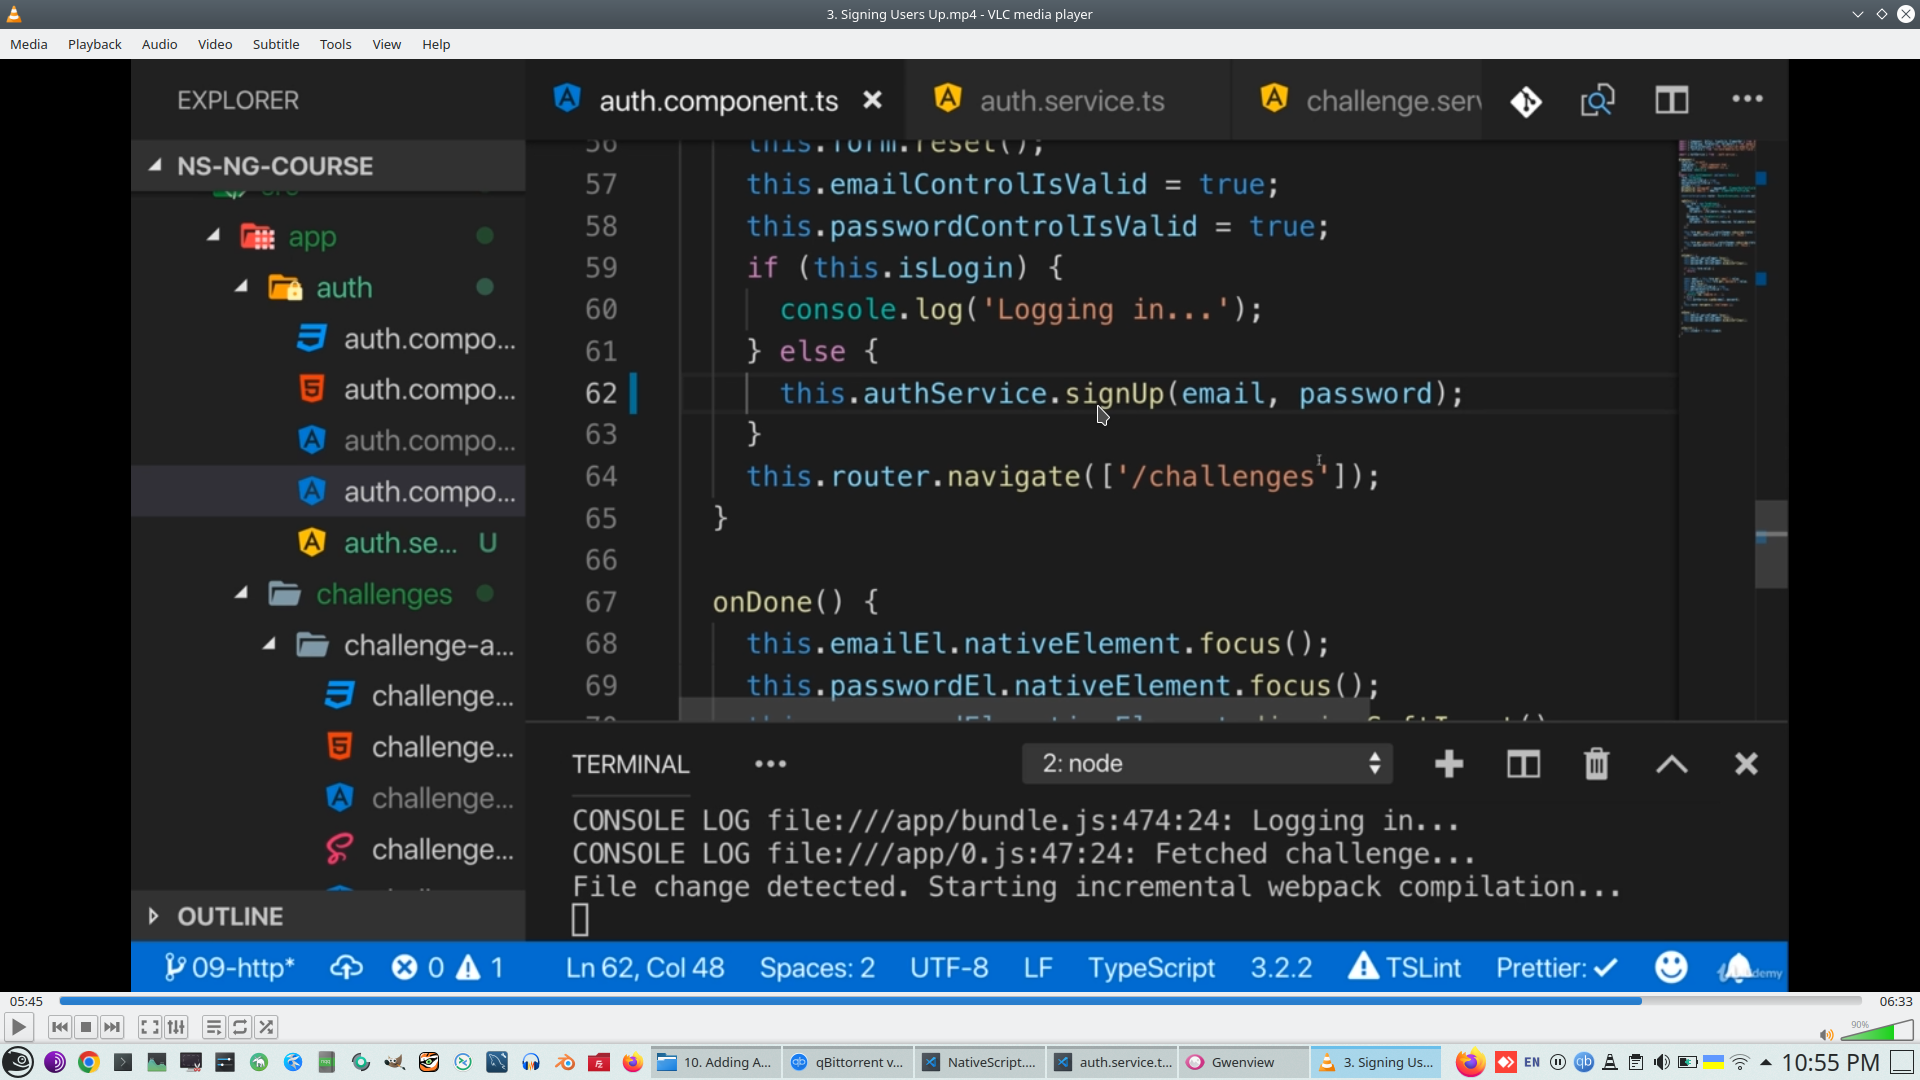
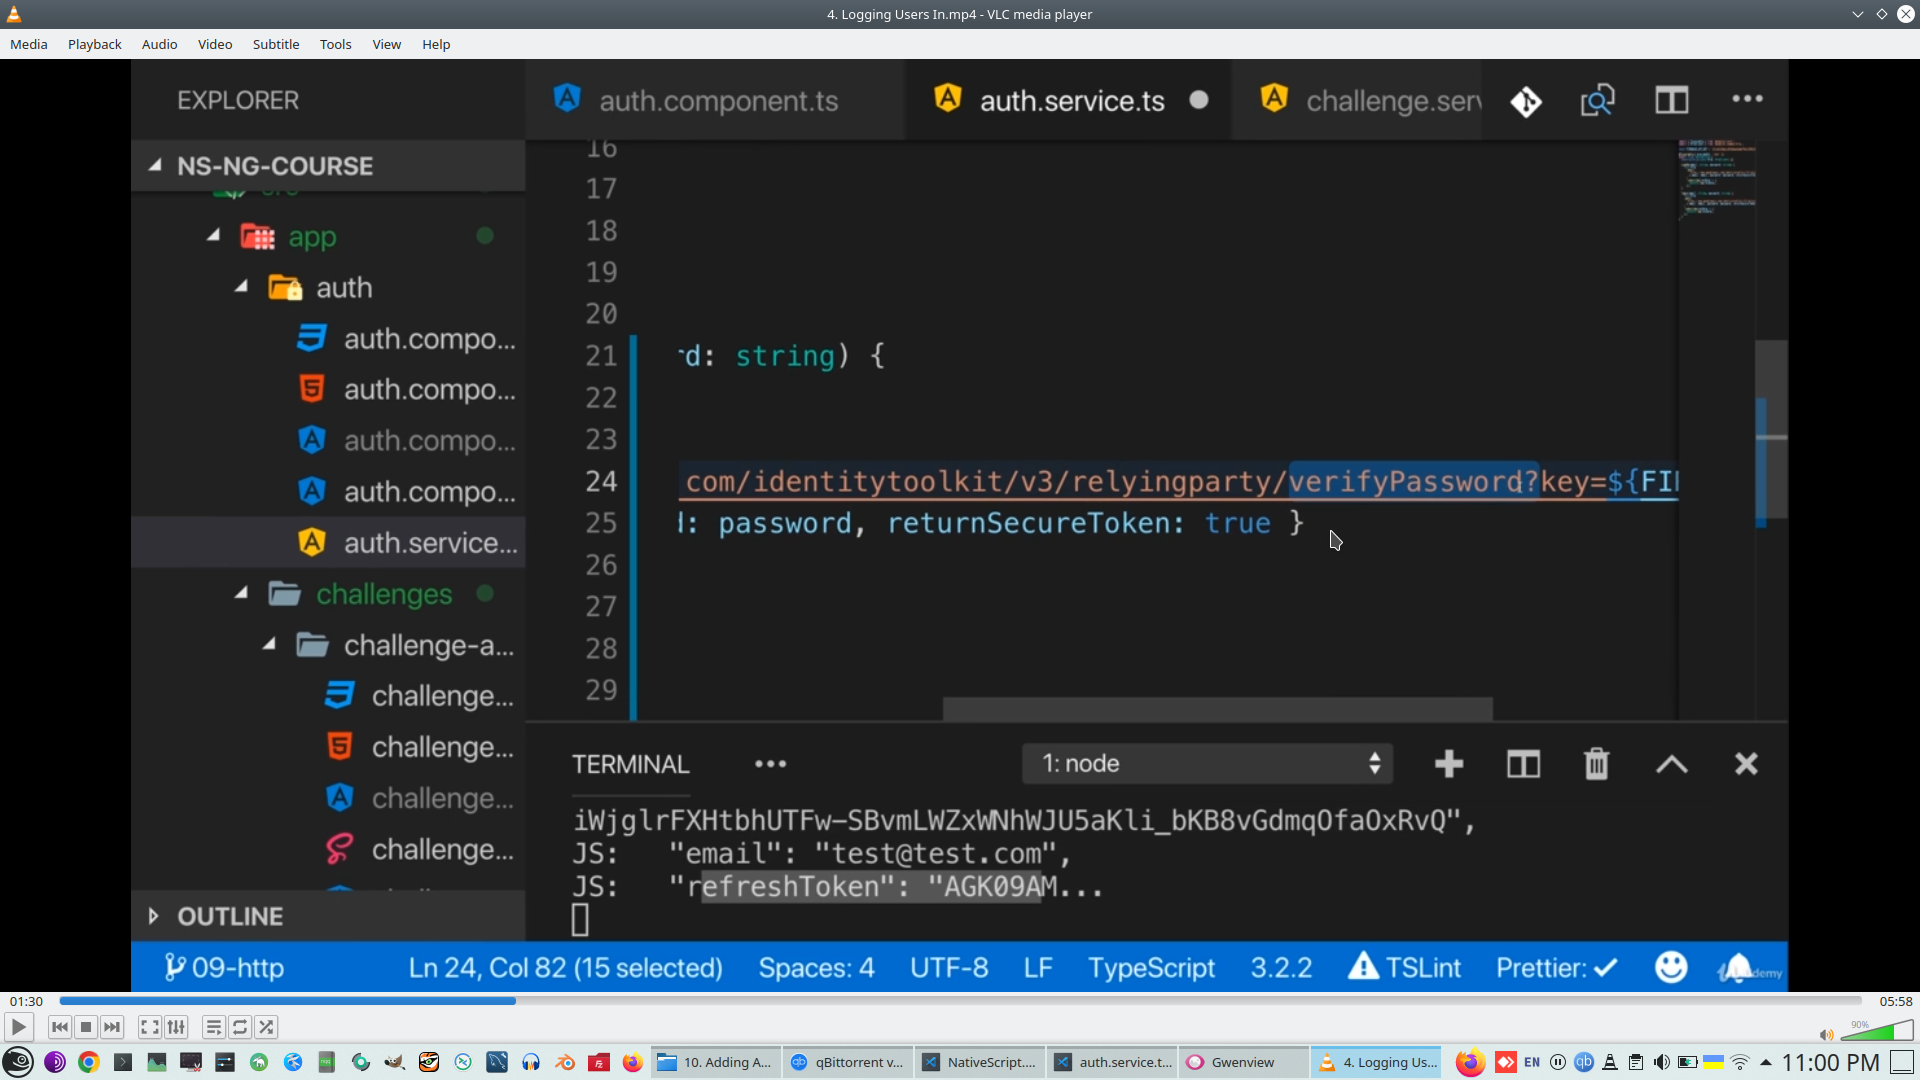
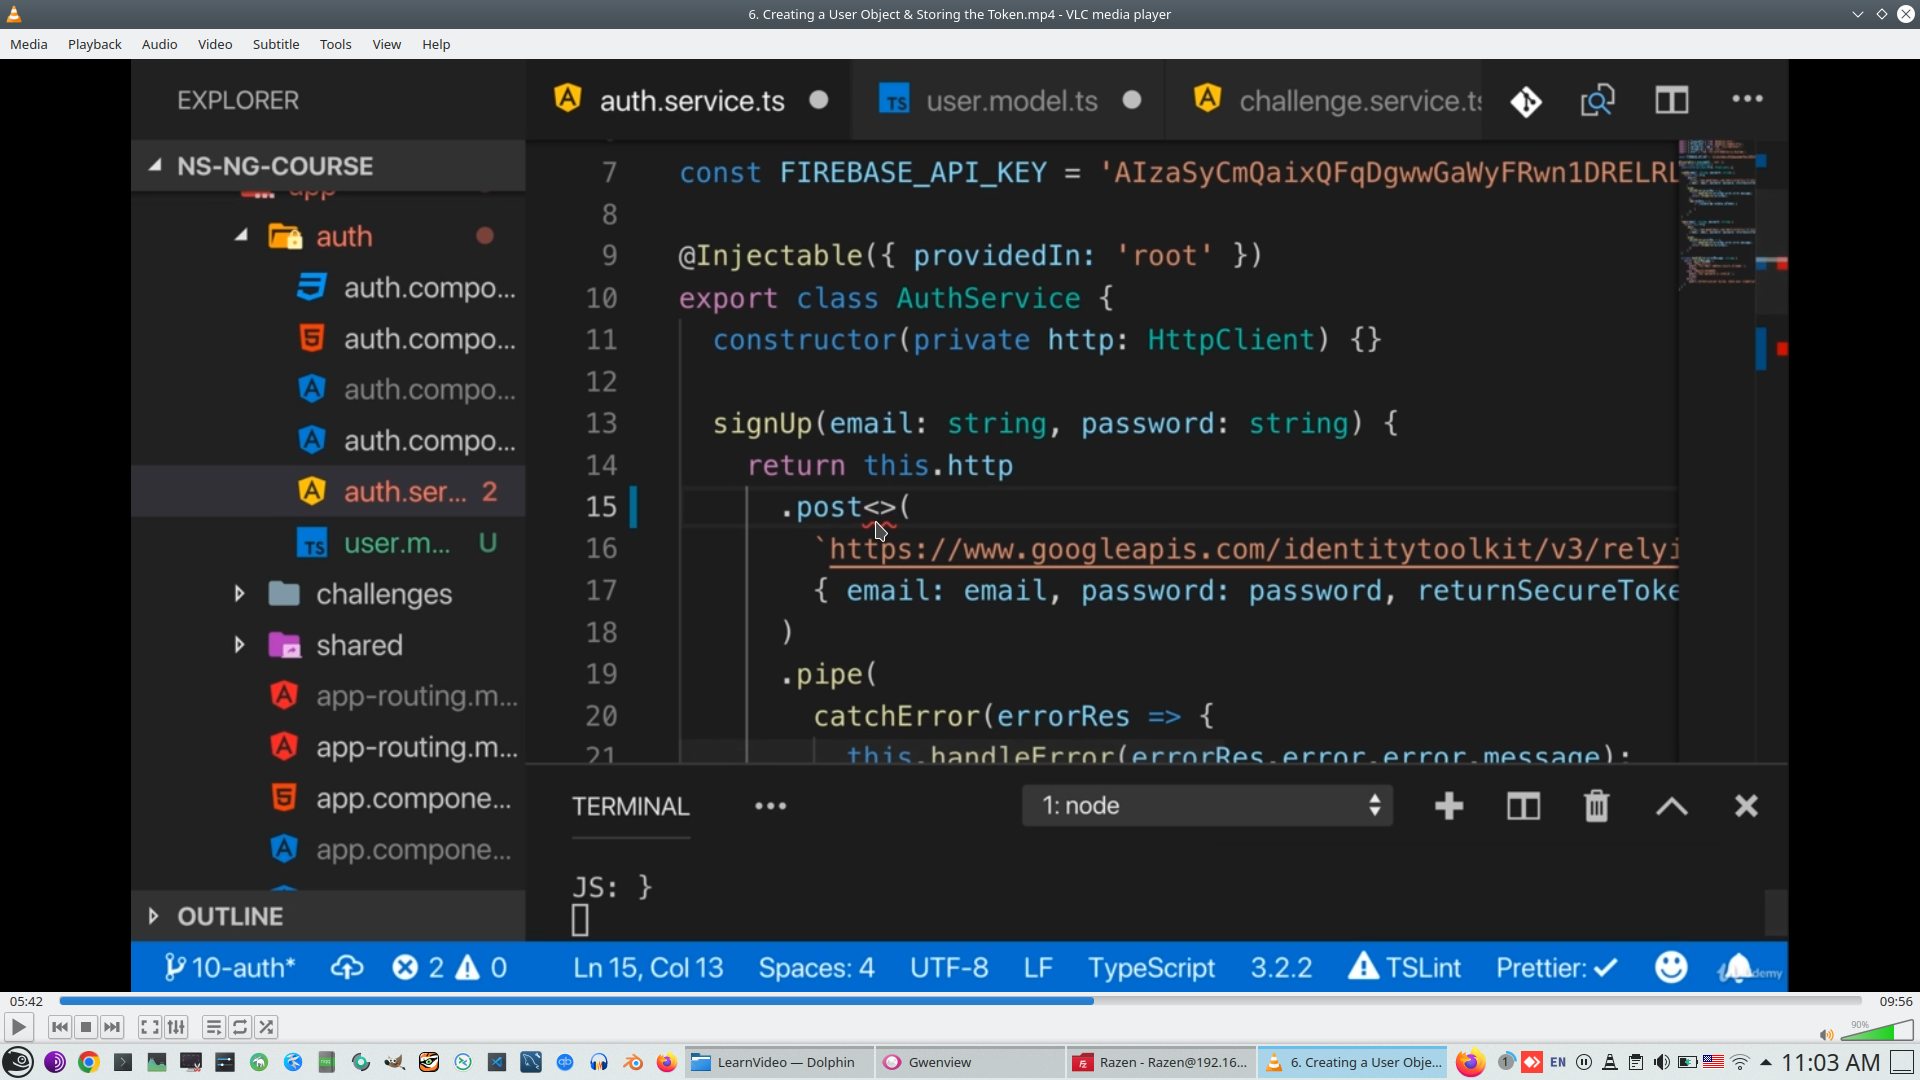
We need create POST request with parameters

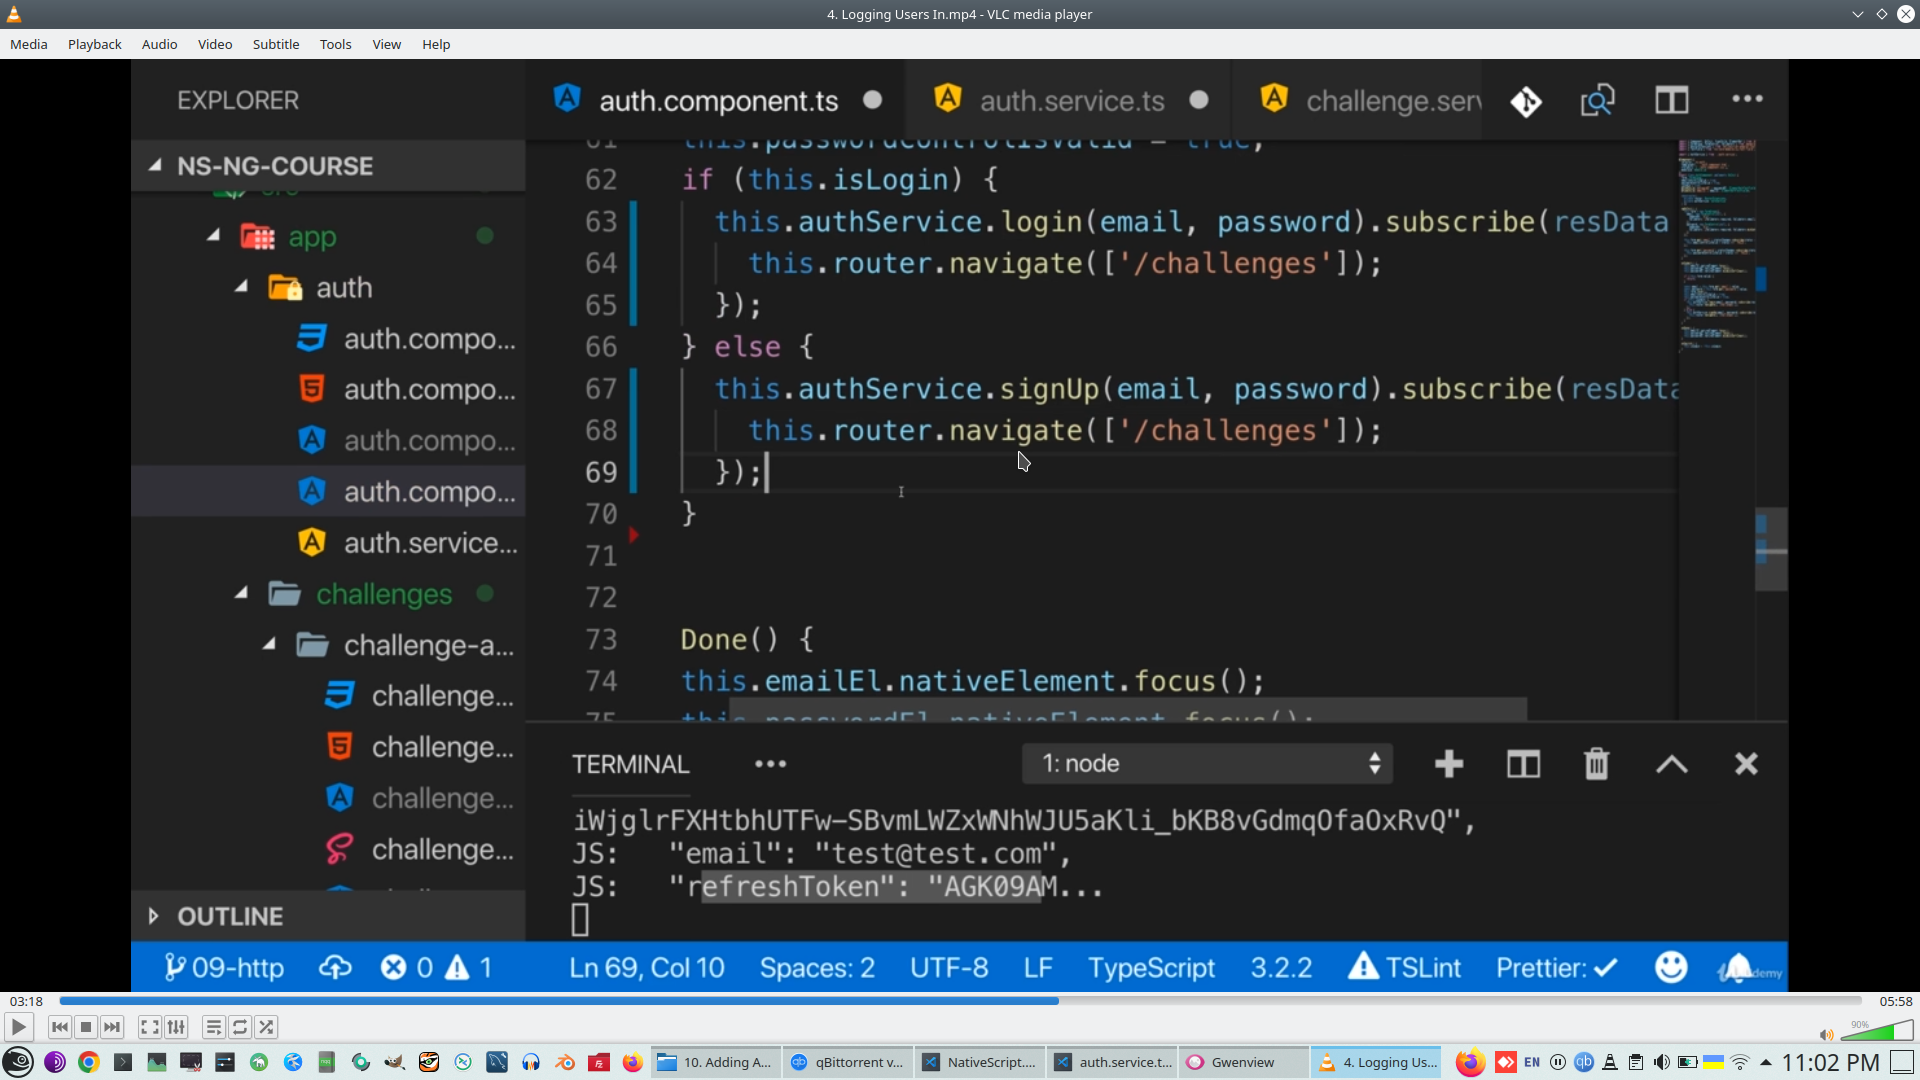
Currently we instantly after login redirect to /chalenge
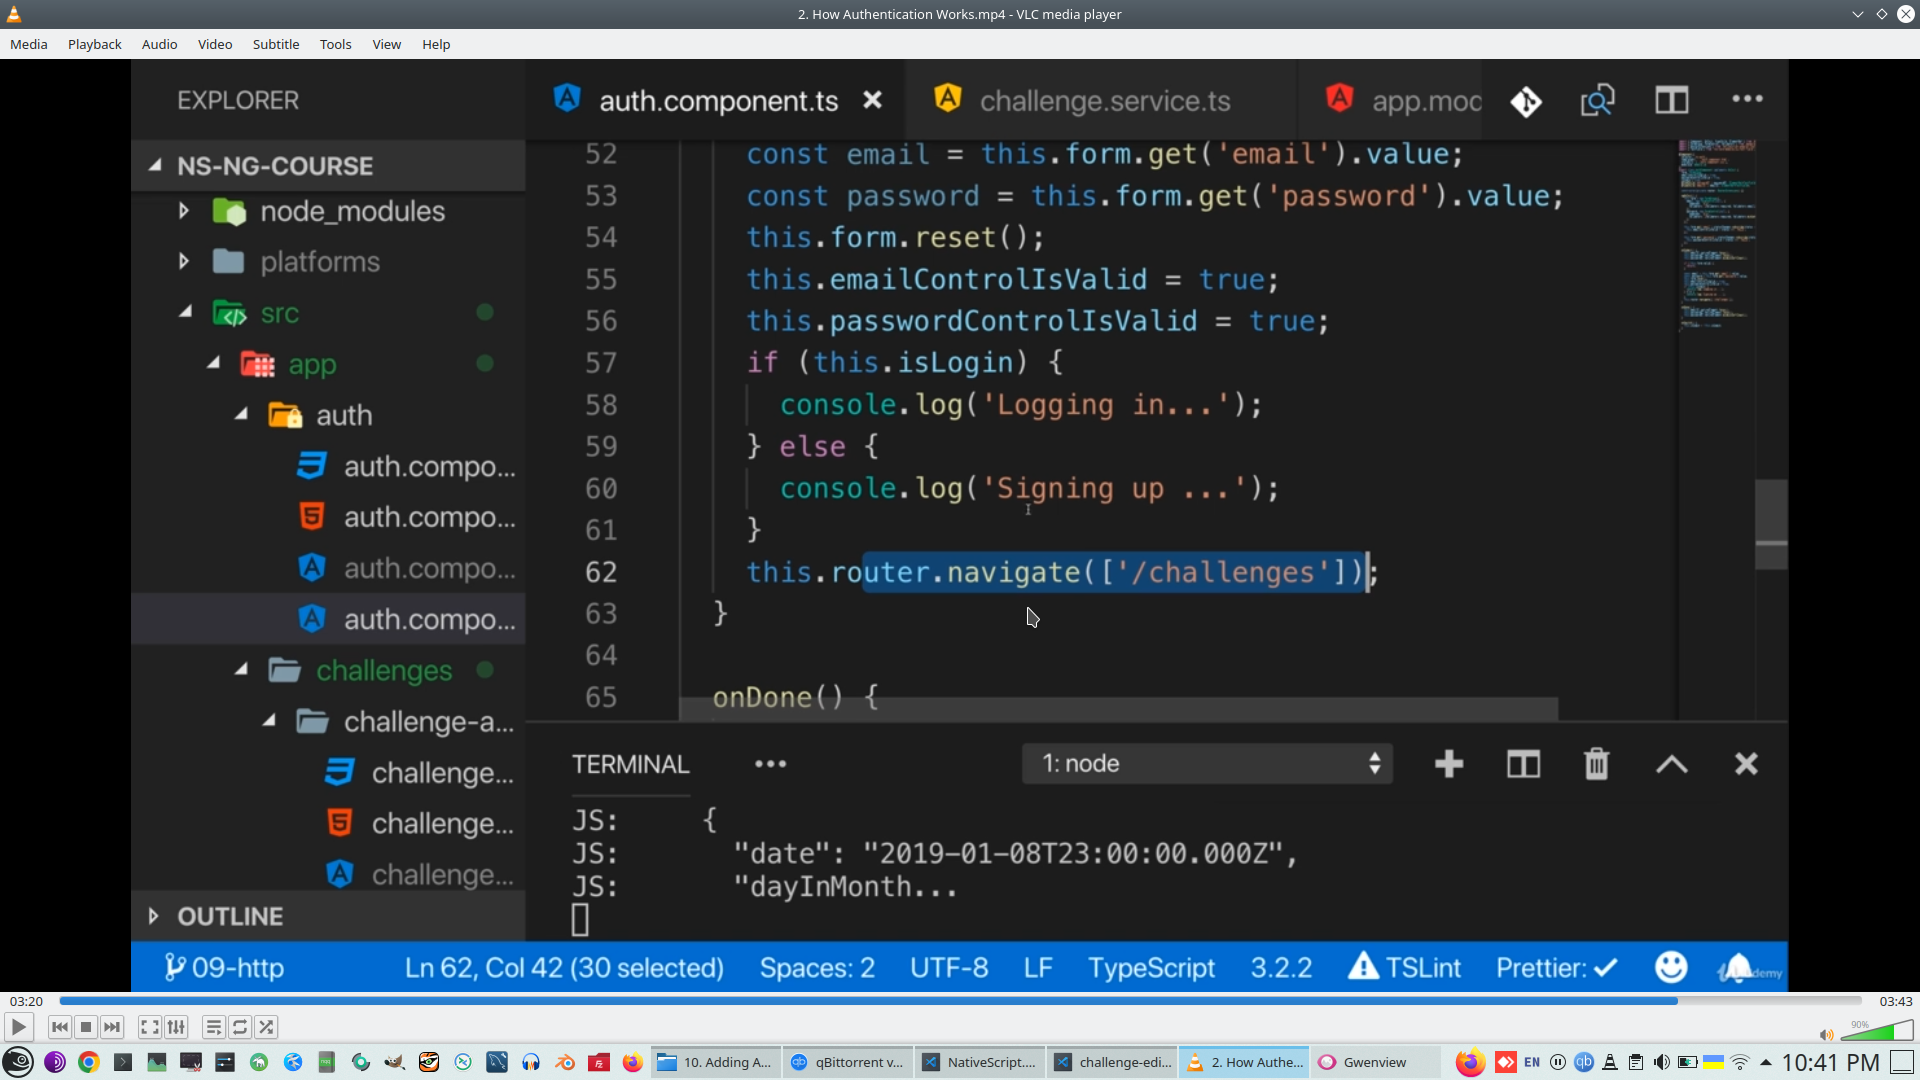
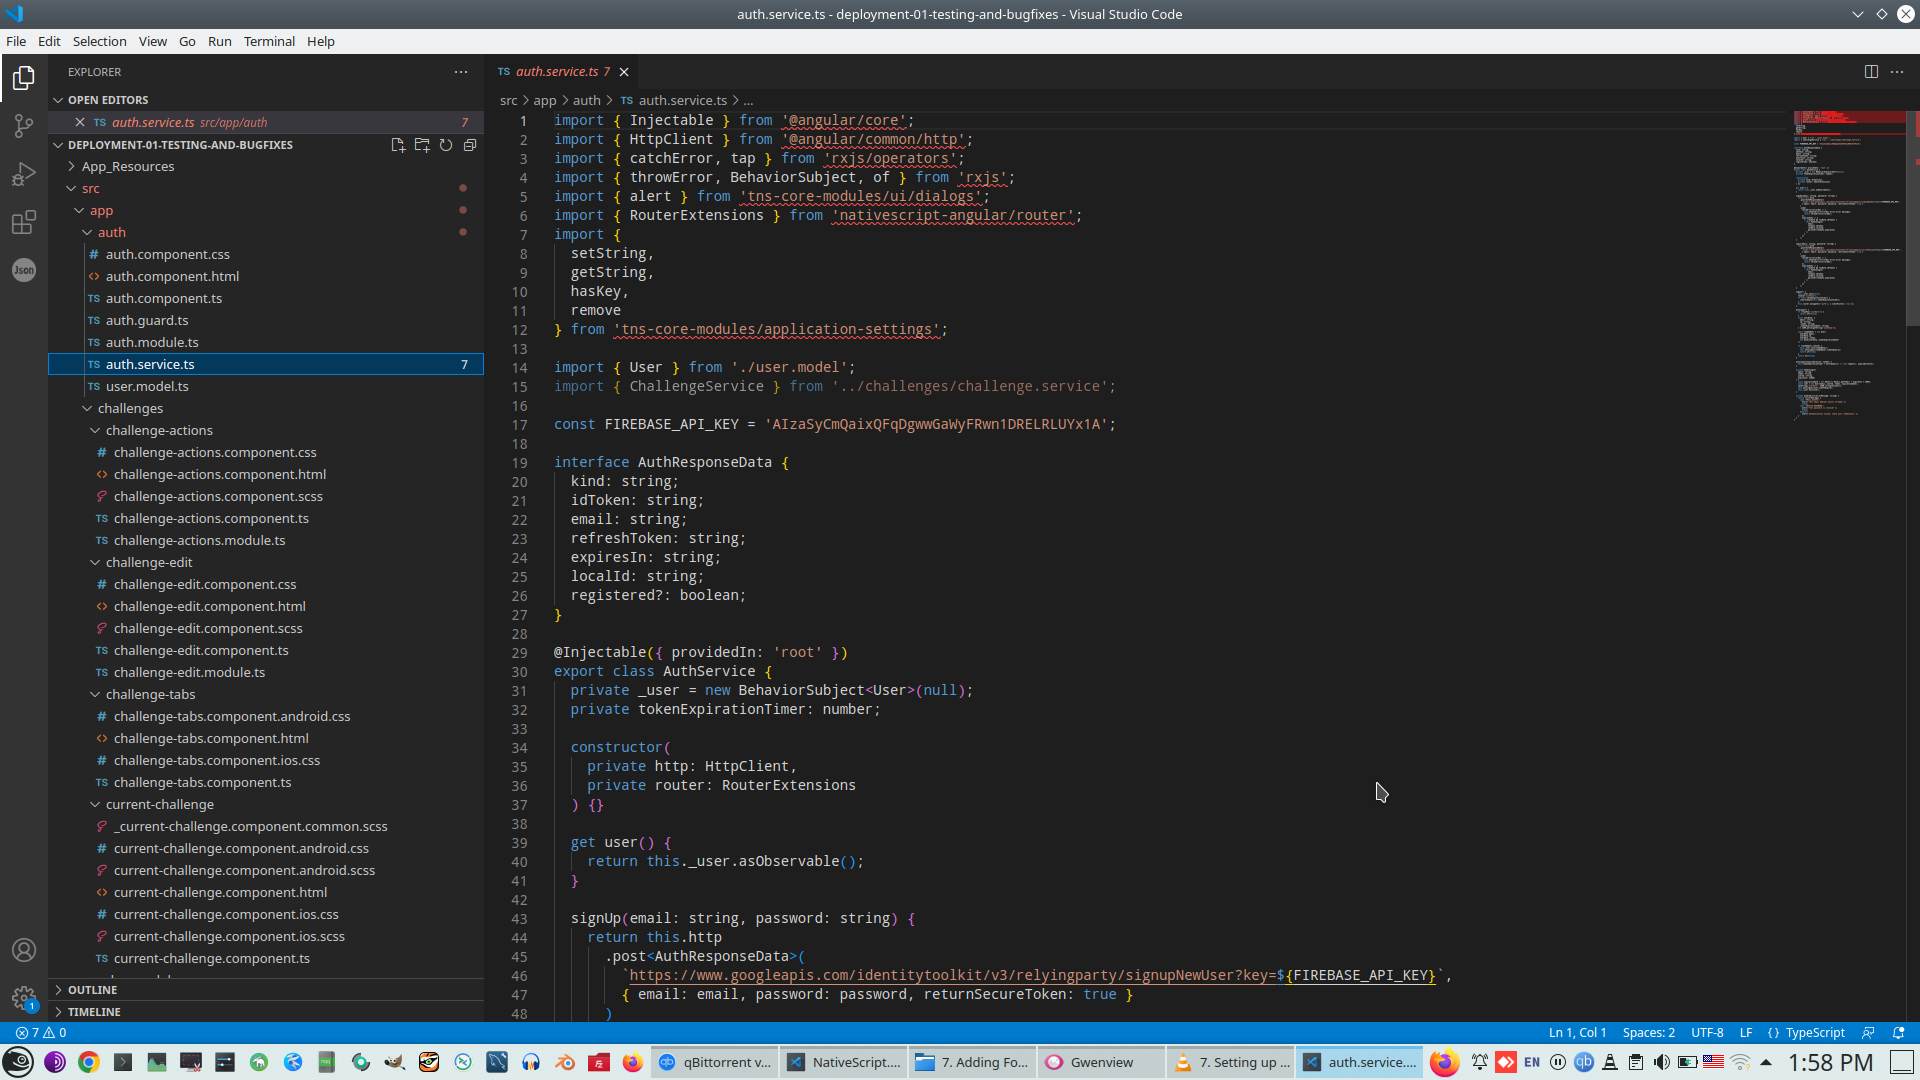
We start to add AU from servie AuthService
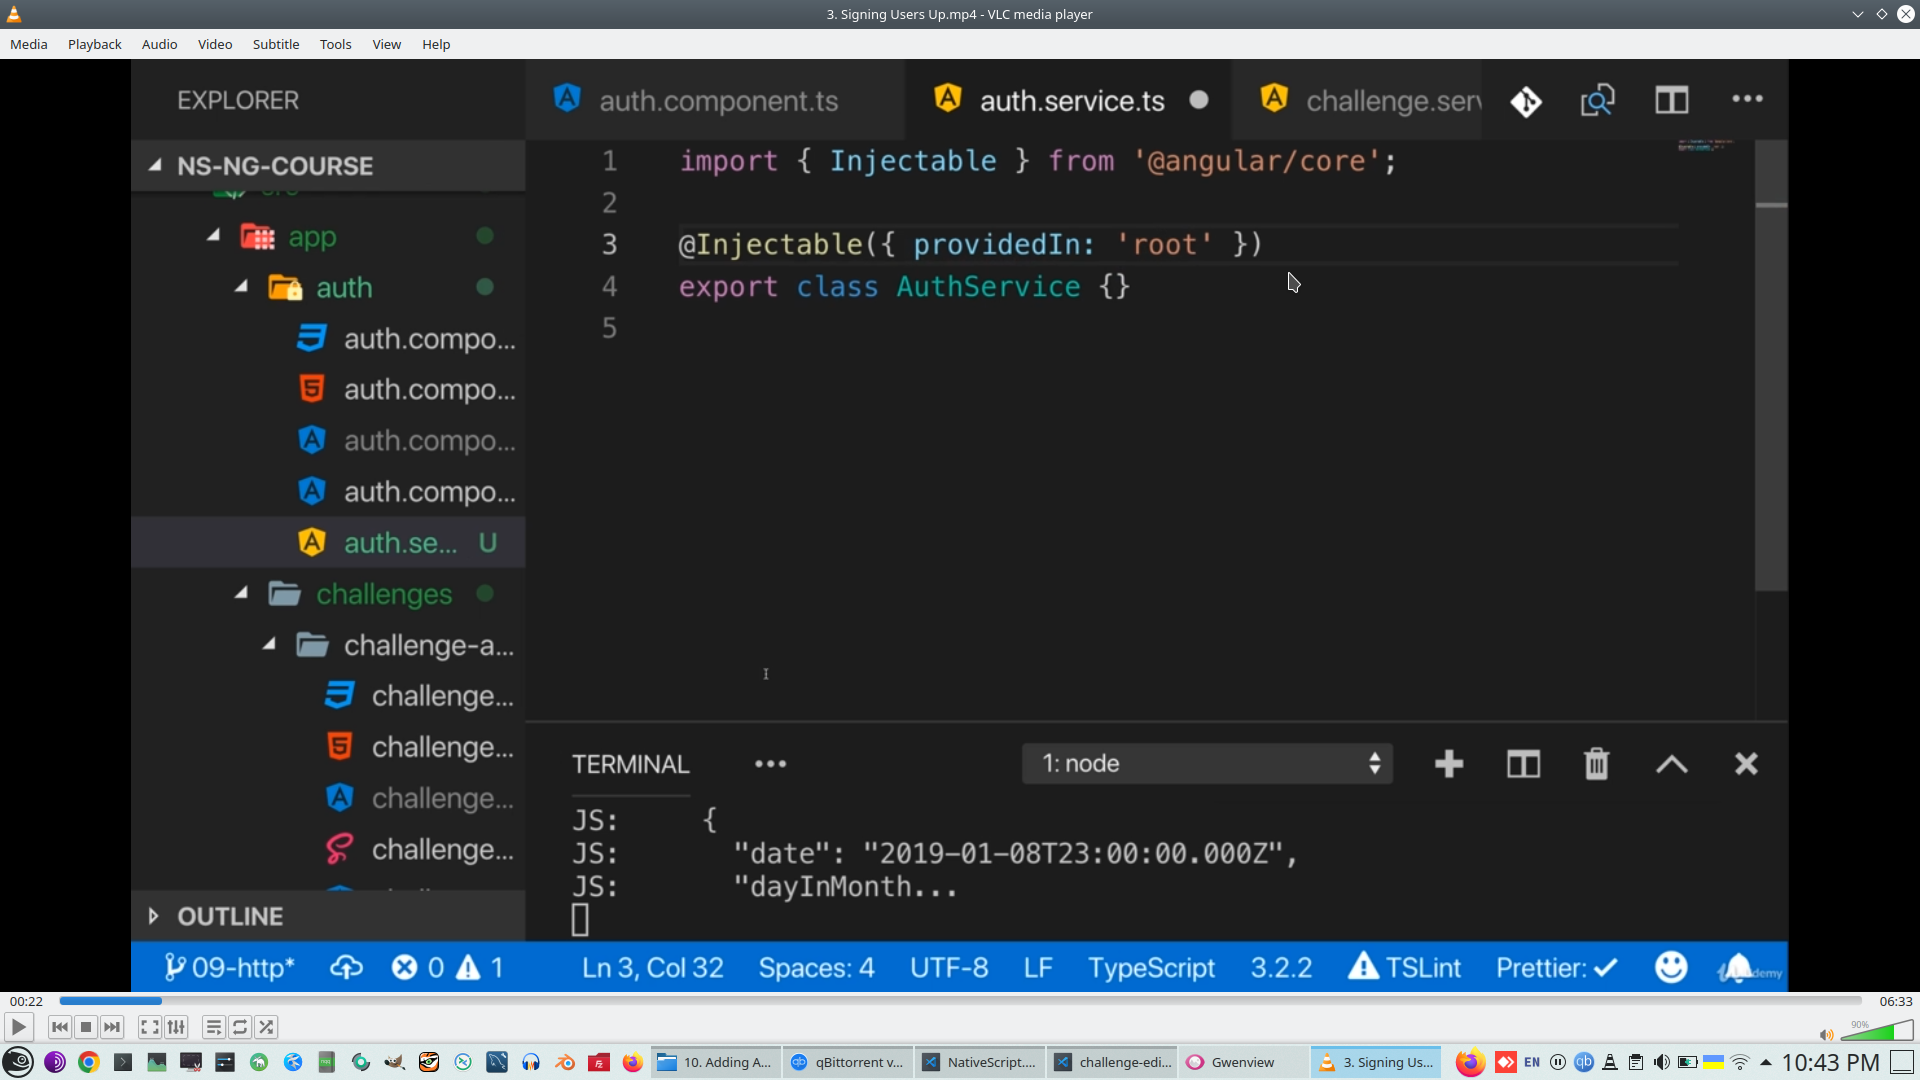
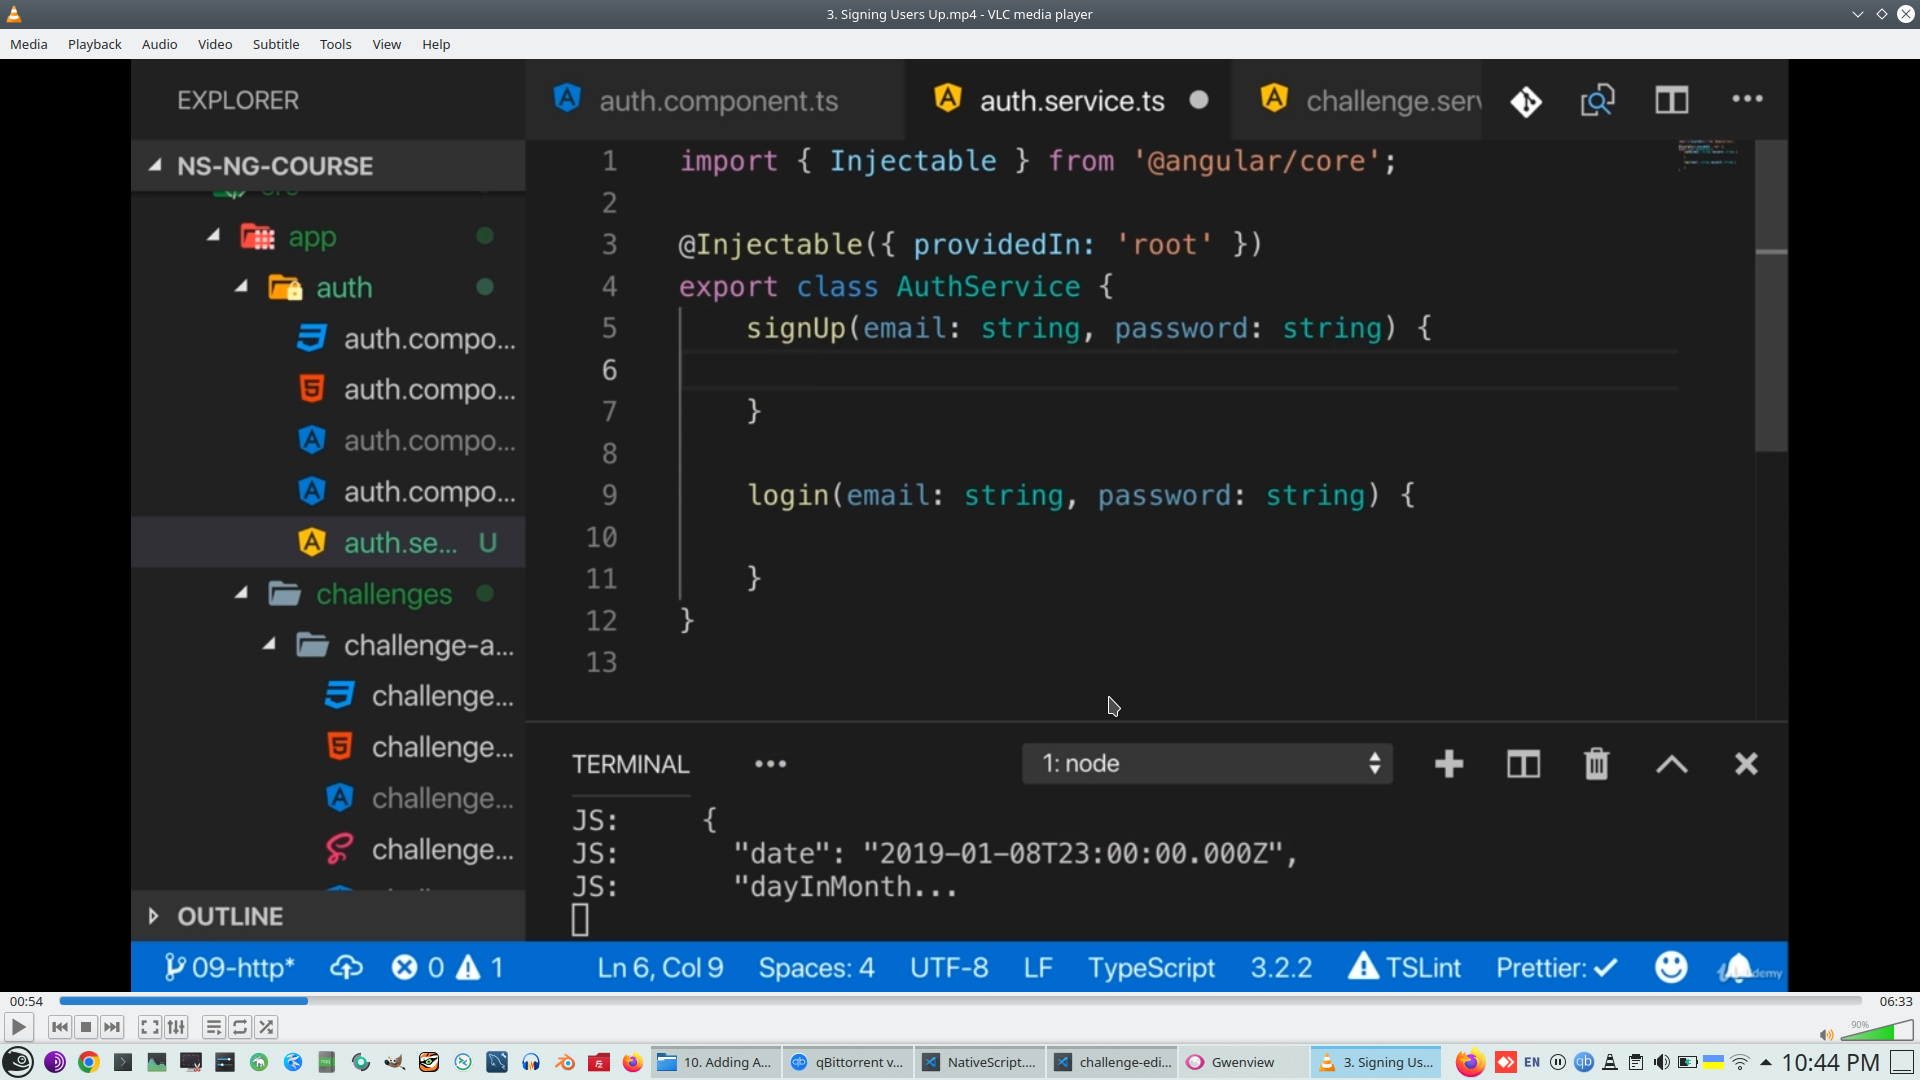
Service need 2 base method - login and Signup
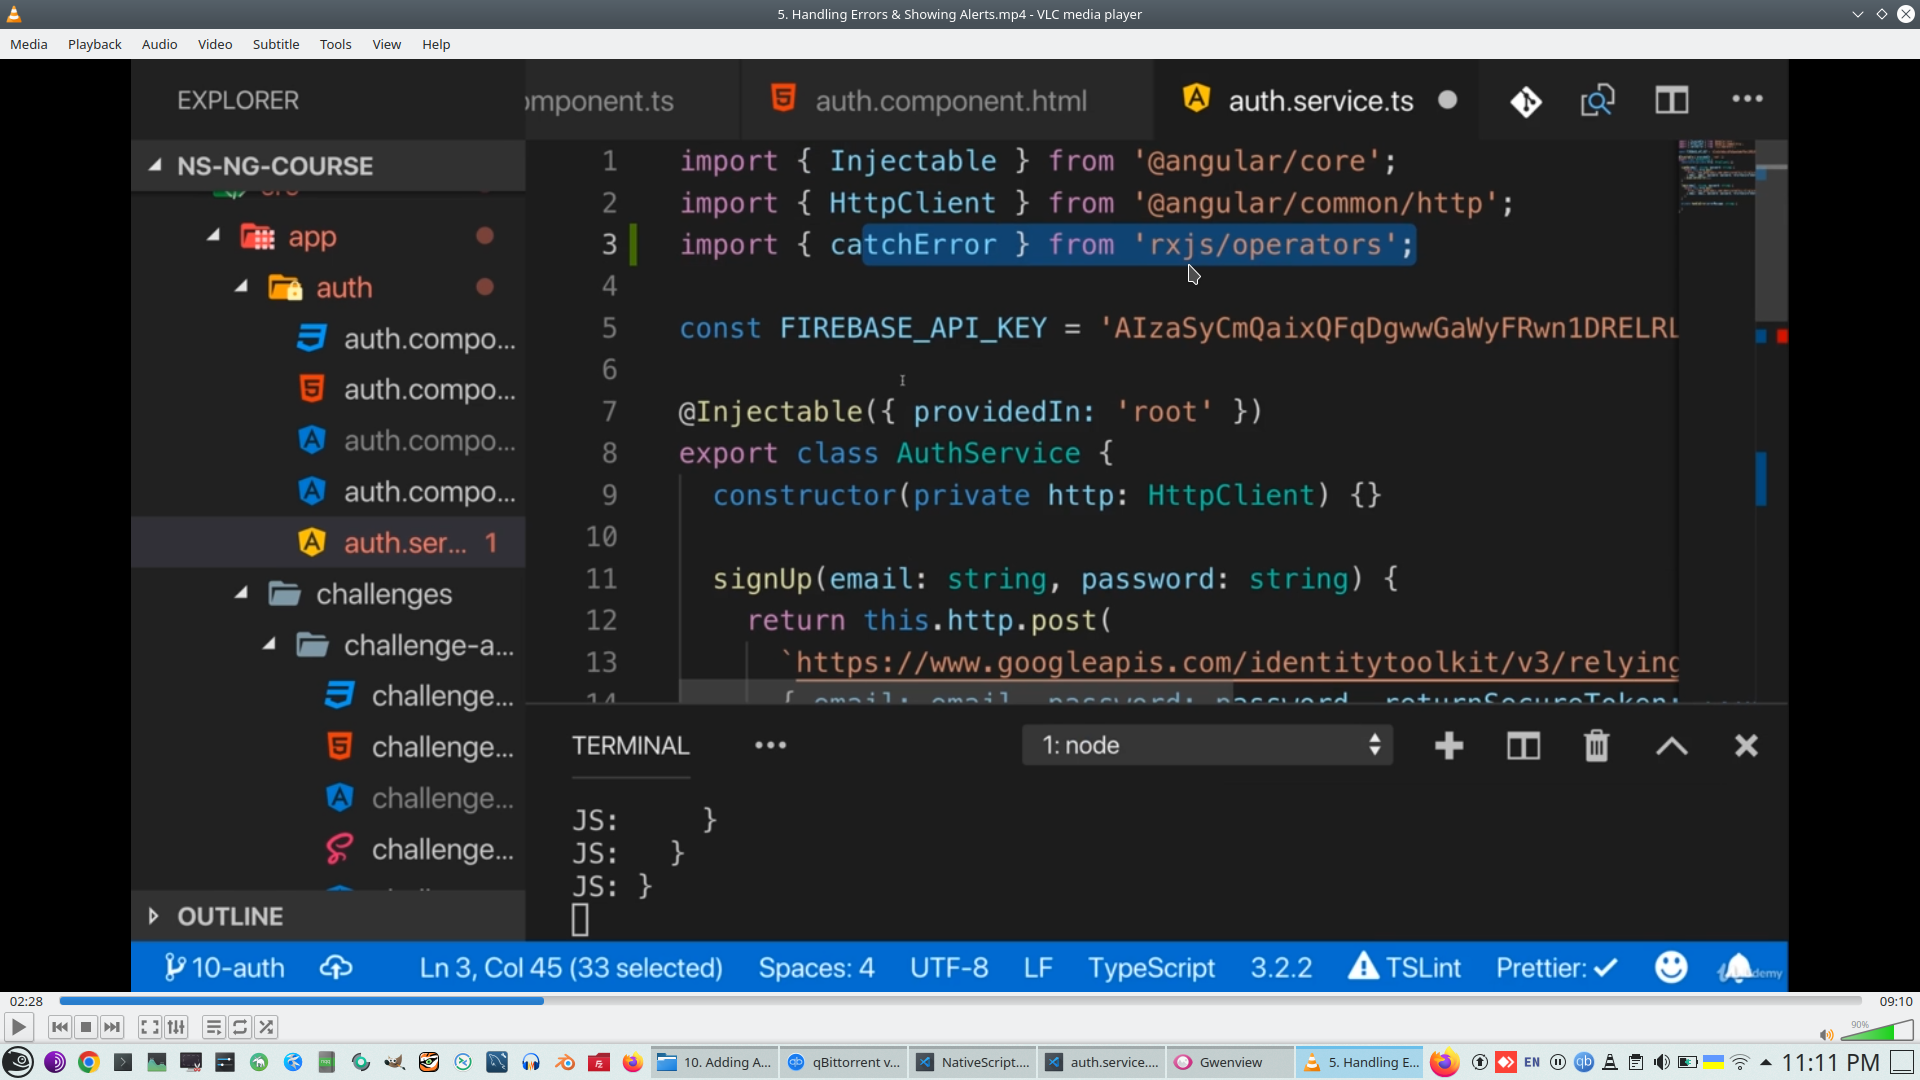
Service will based on standard Angular http client
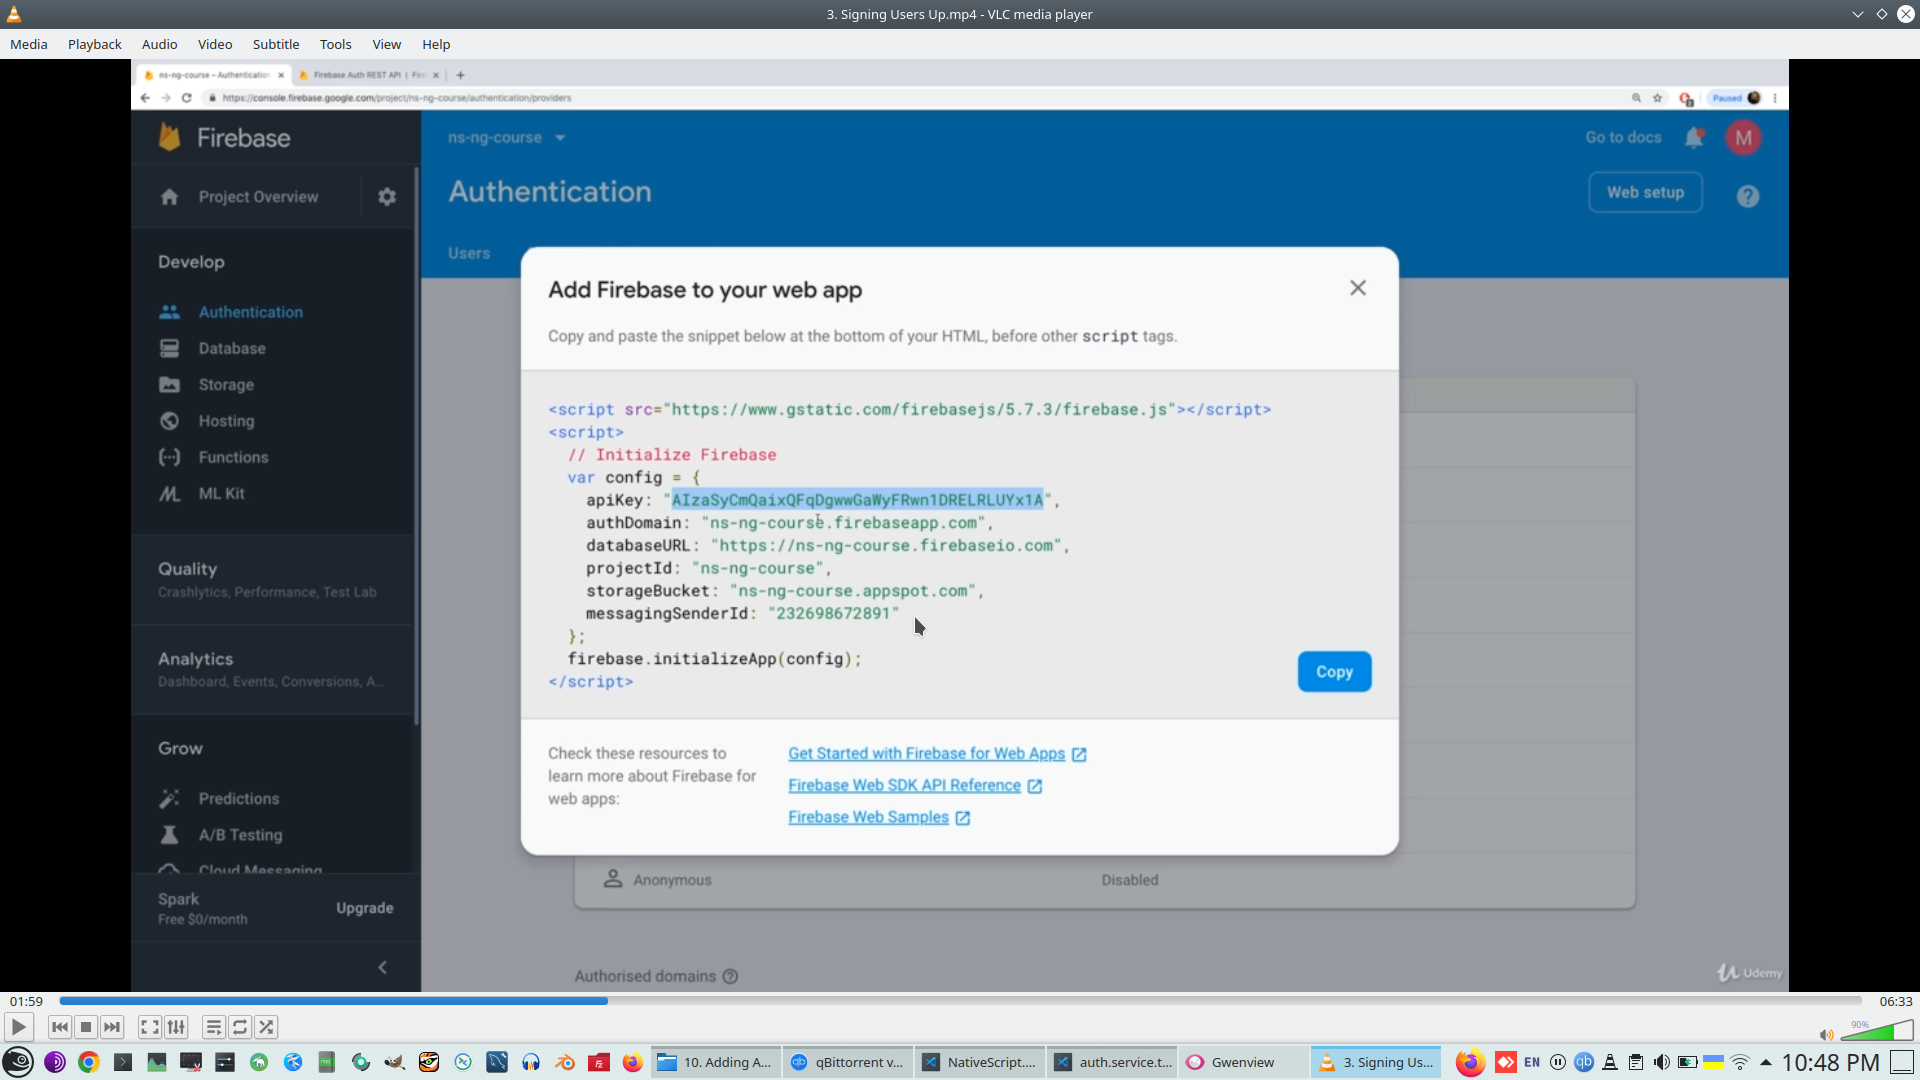
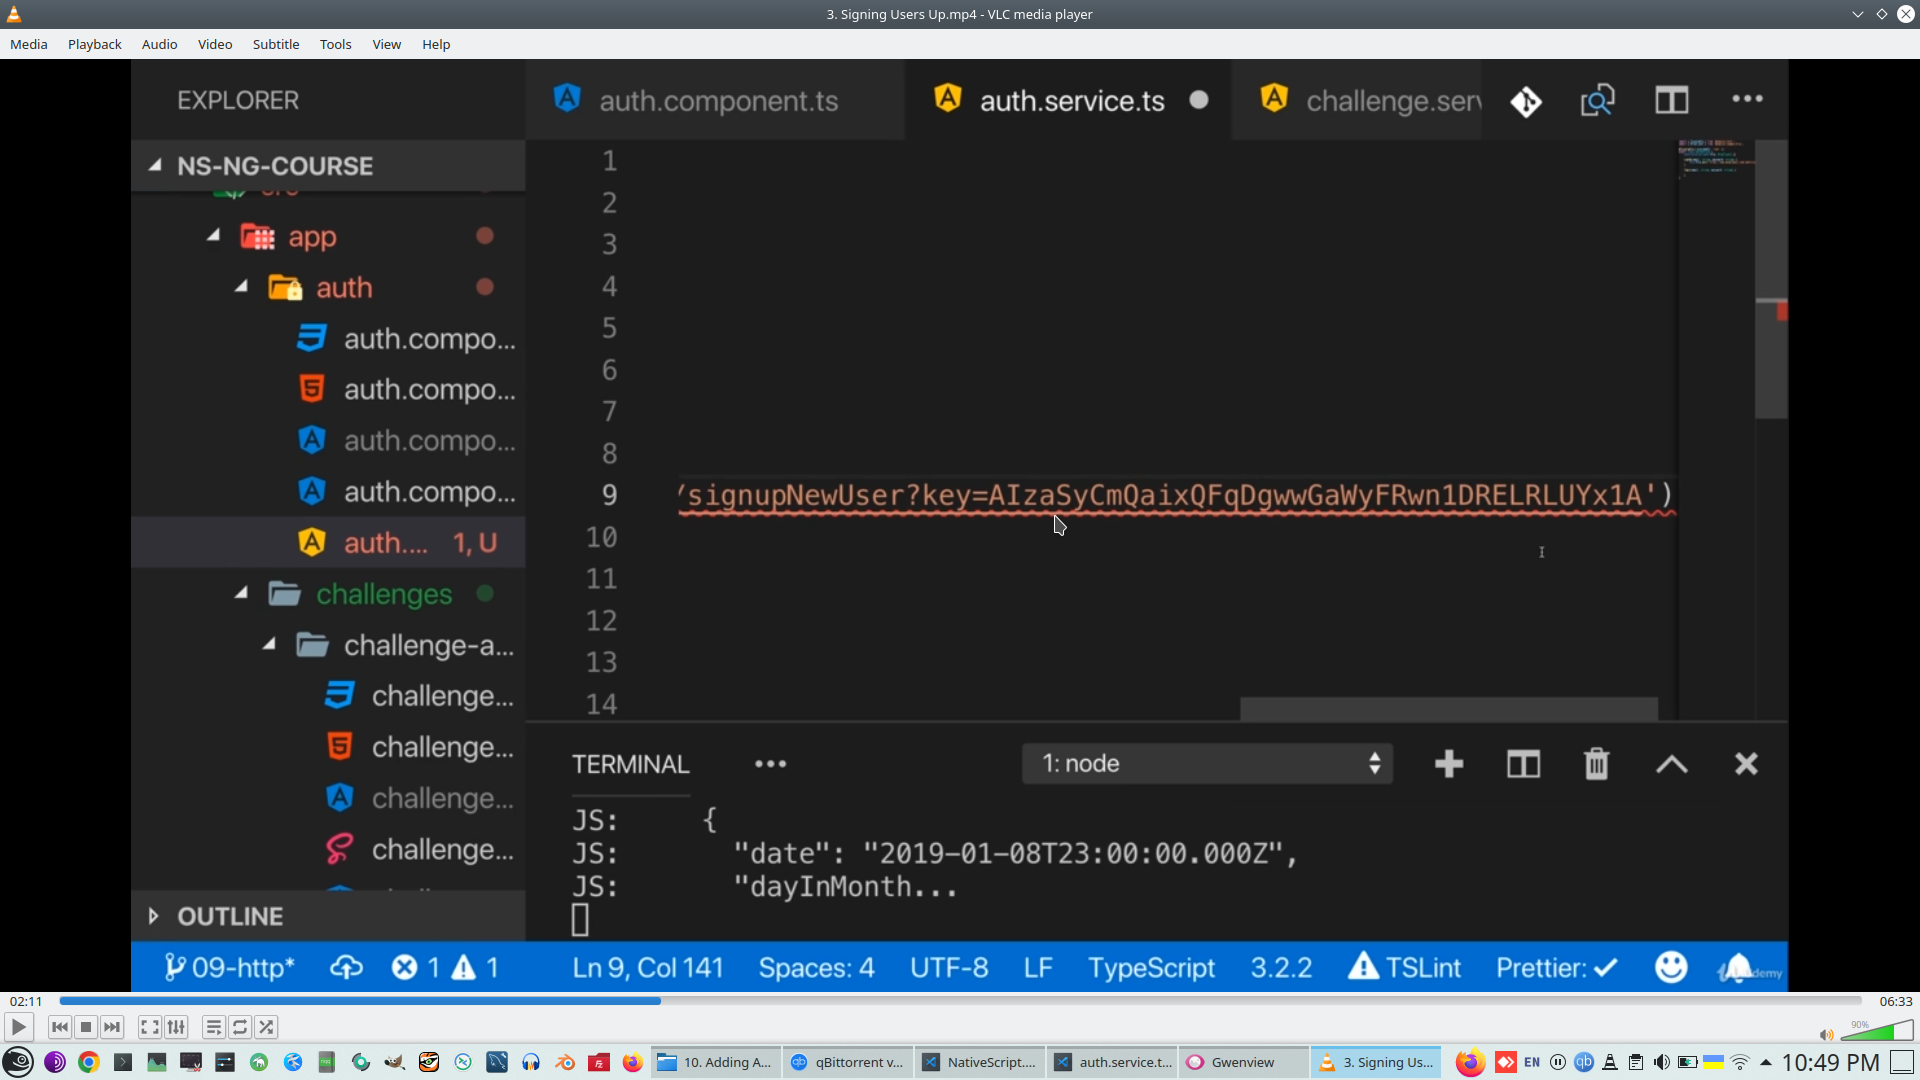
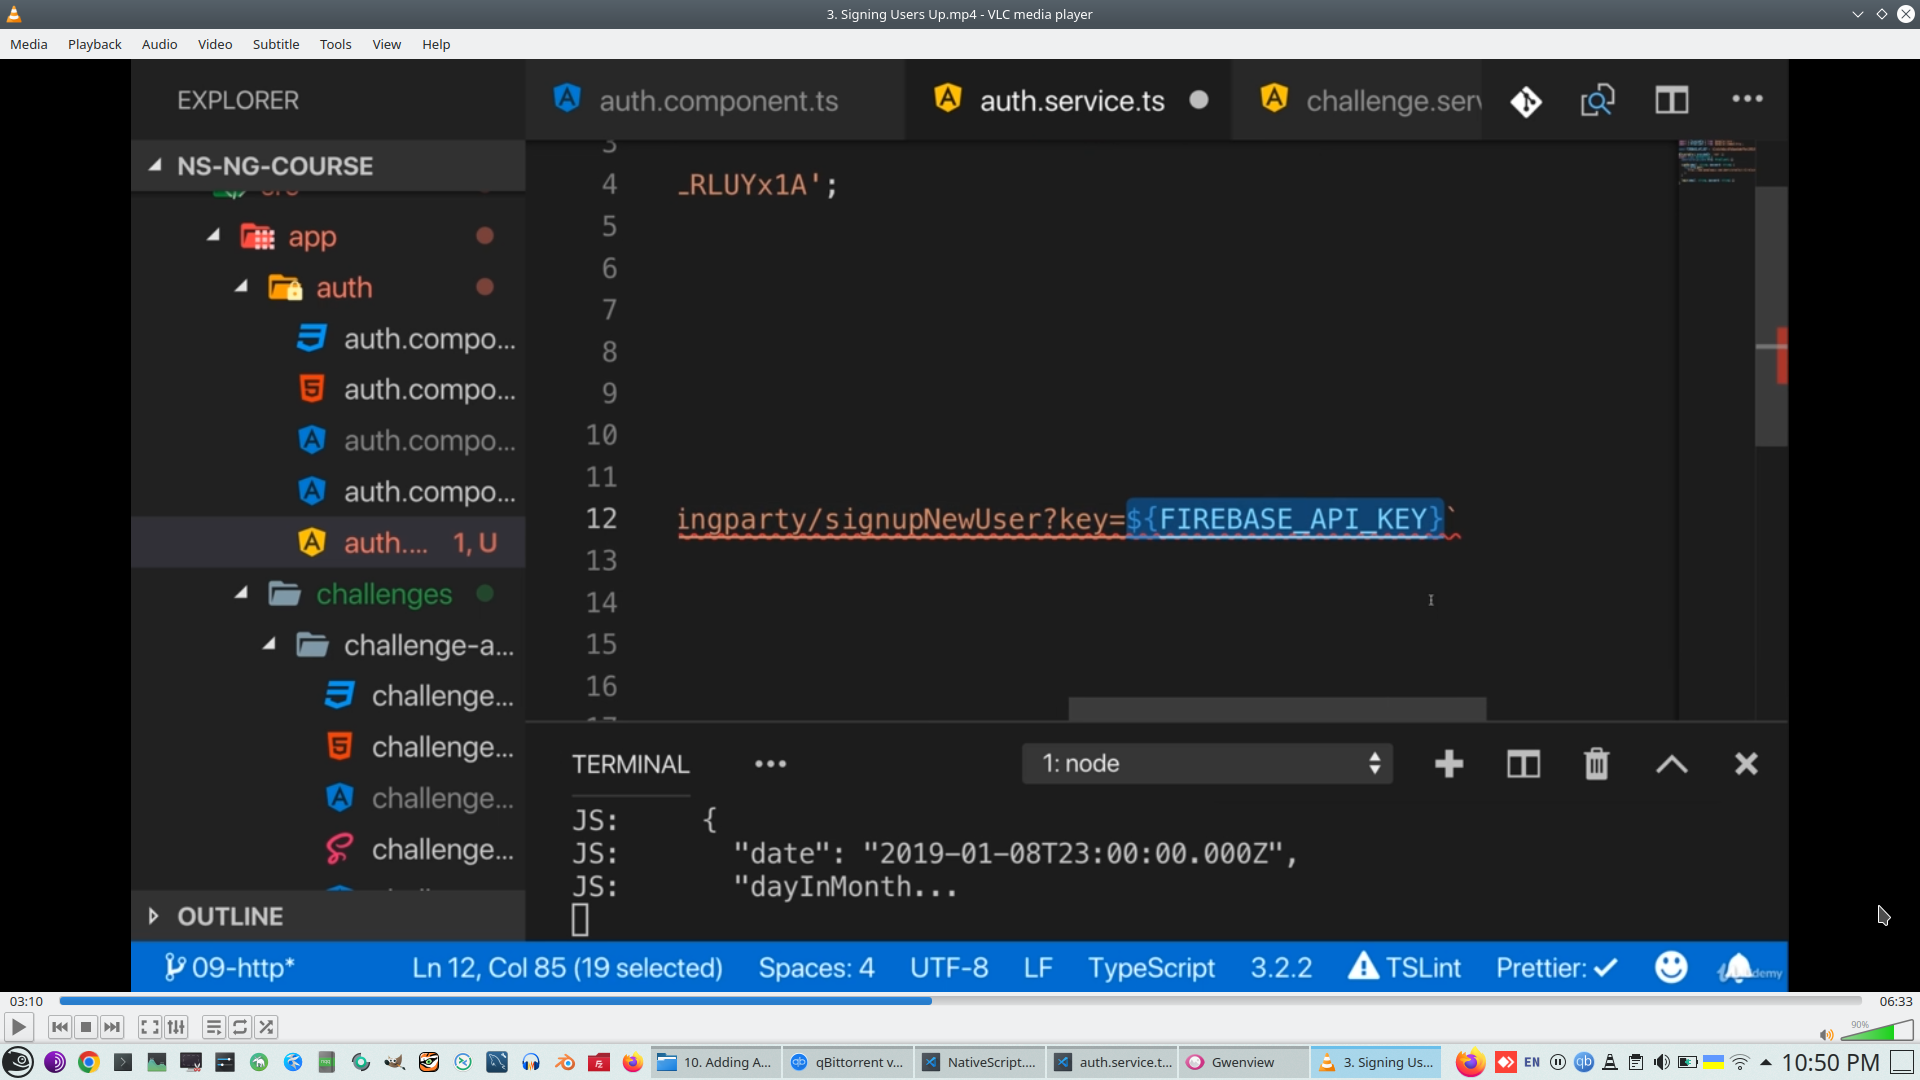
Firstly copy ApiKey from FireBase
Second parameter of POST request is data
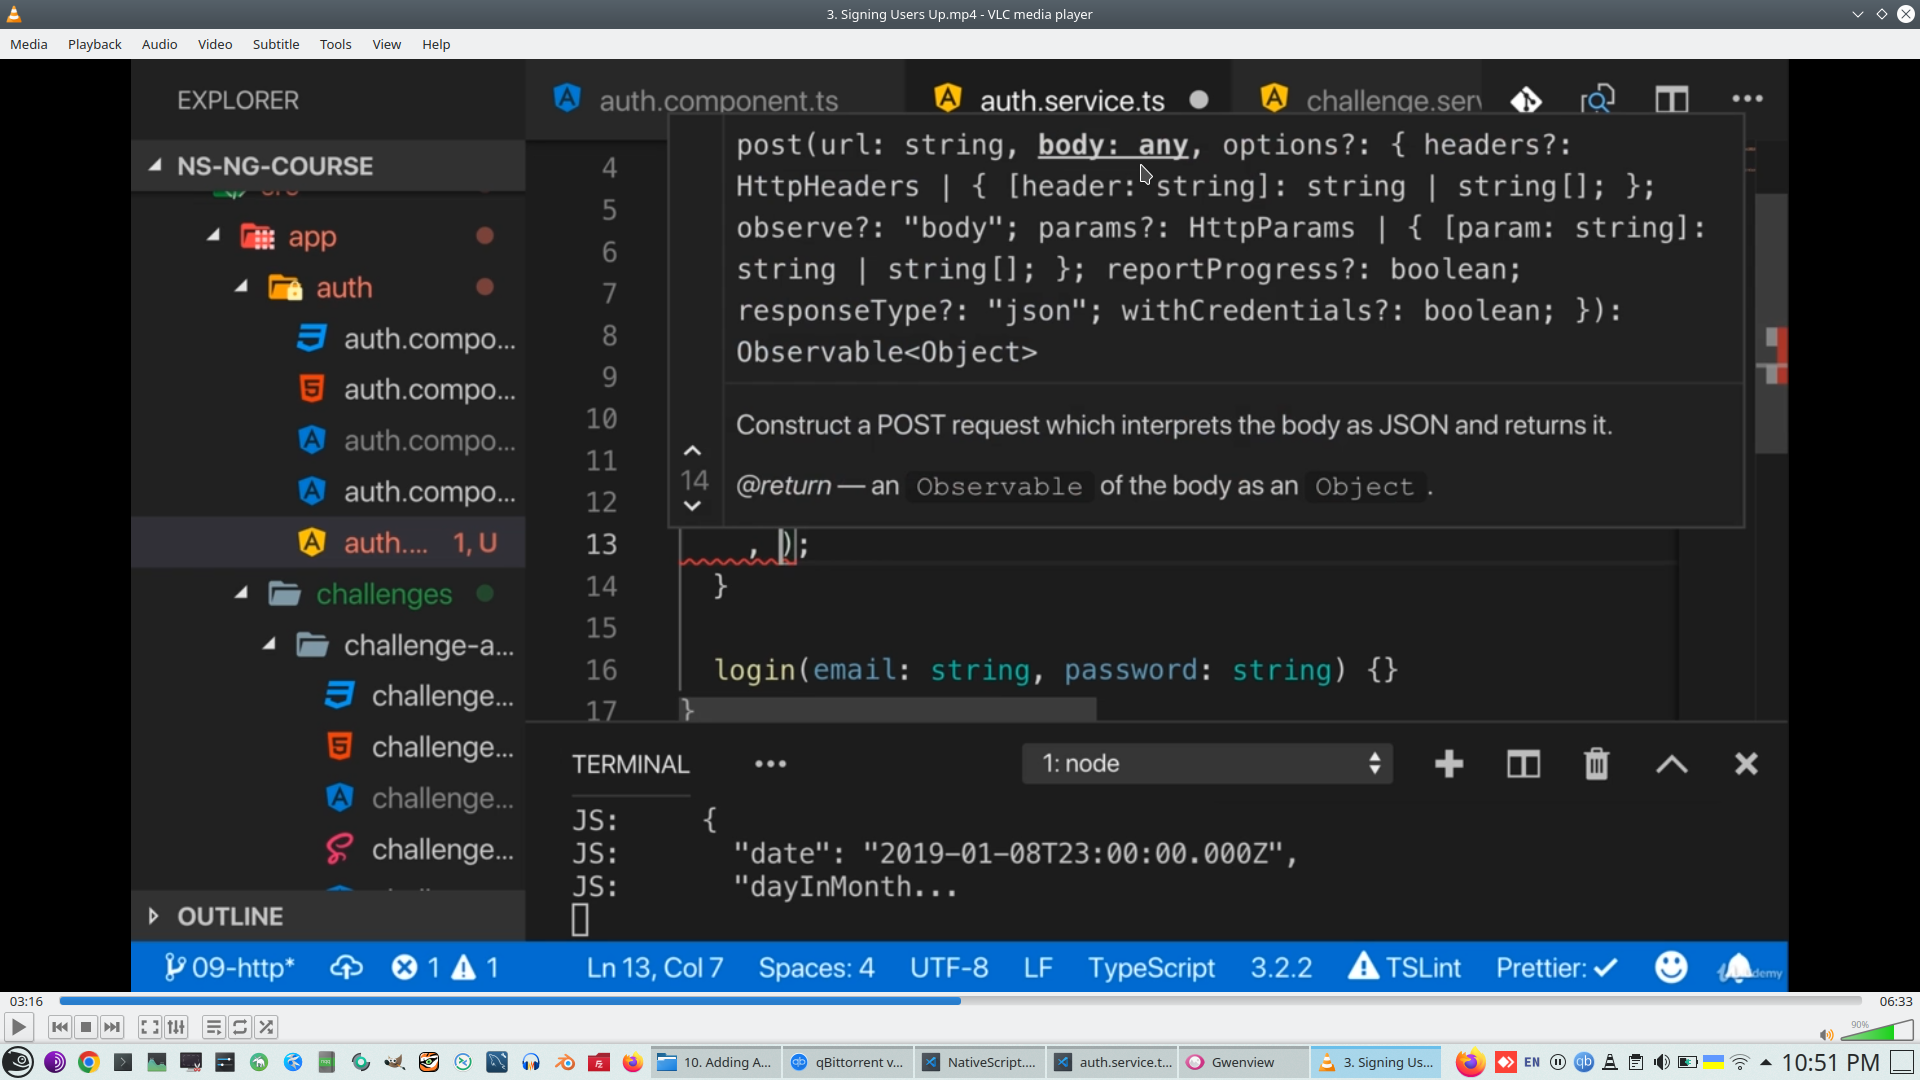
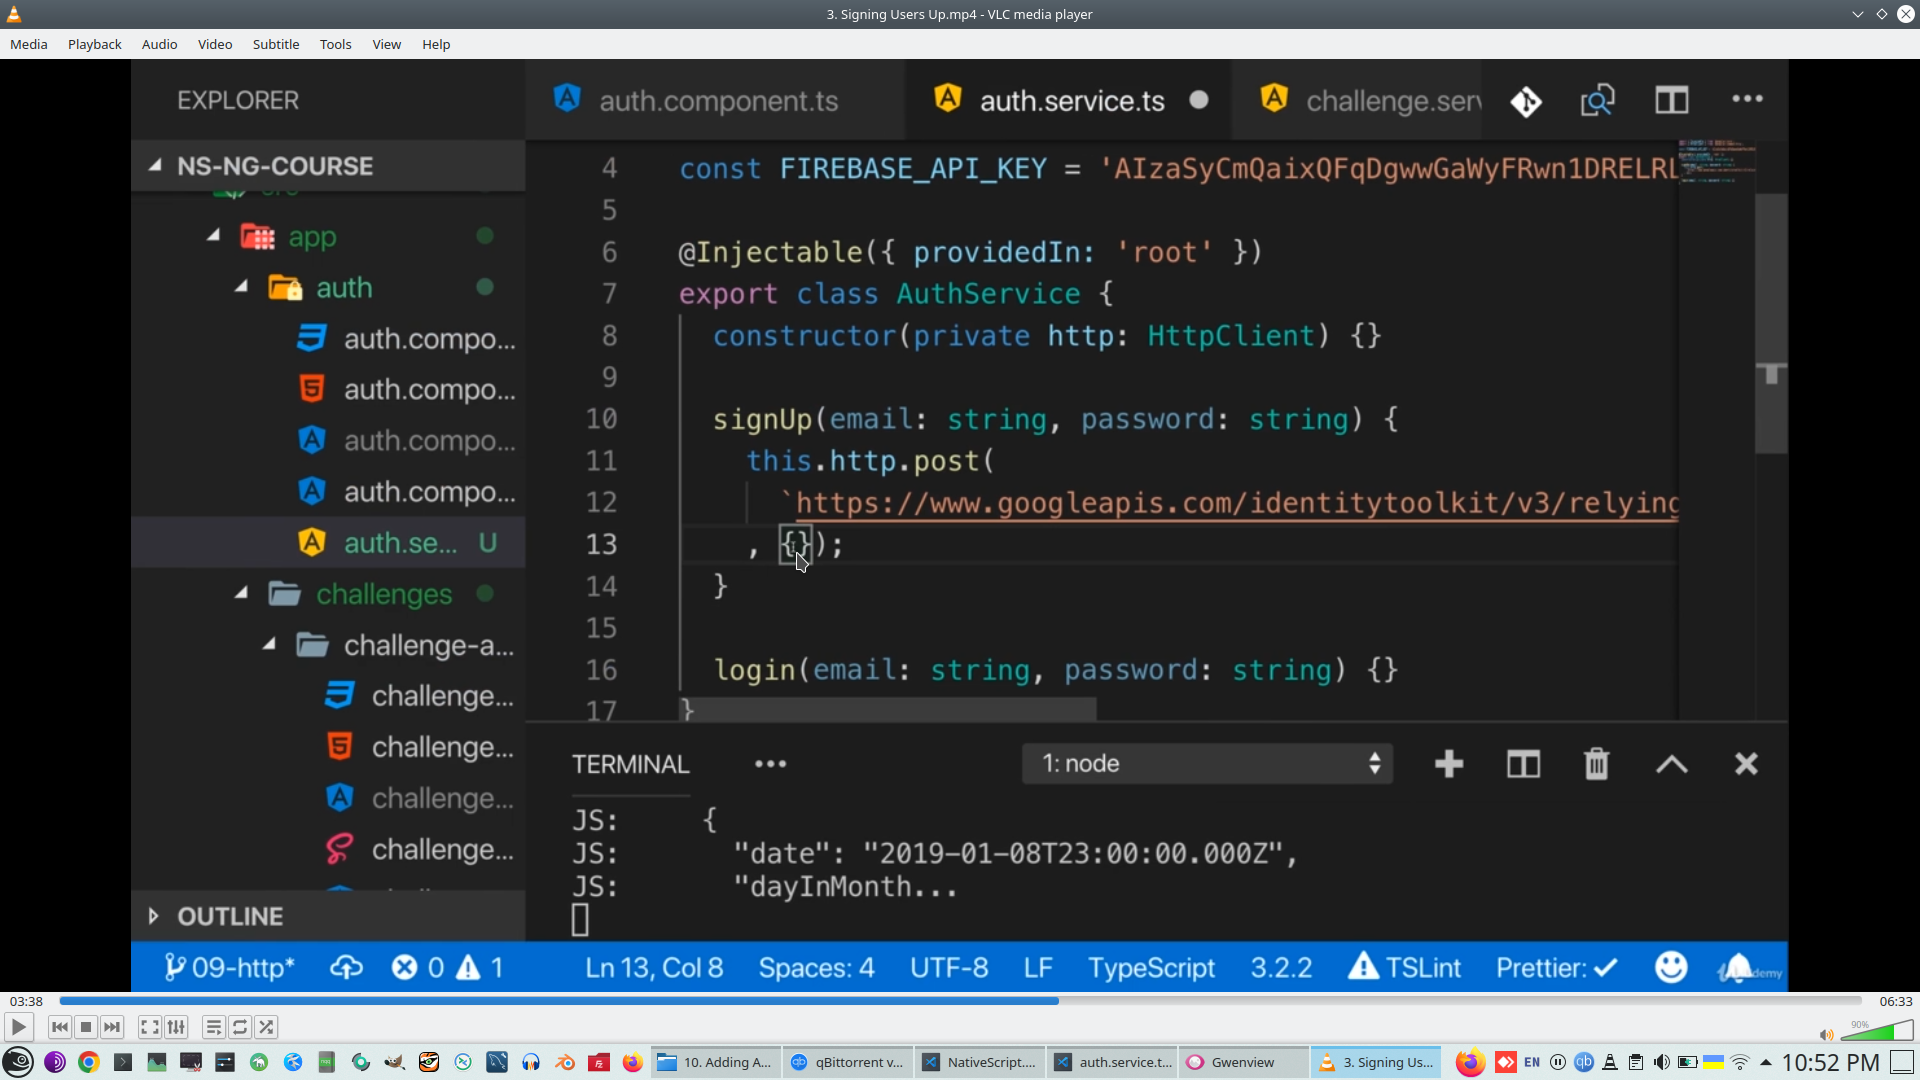
Pass JS object as parameters
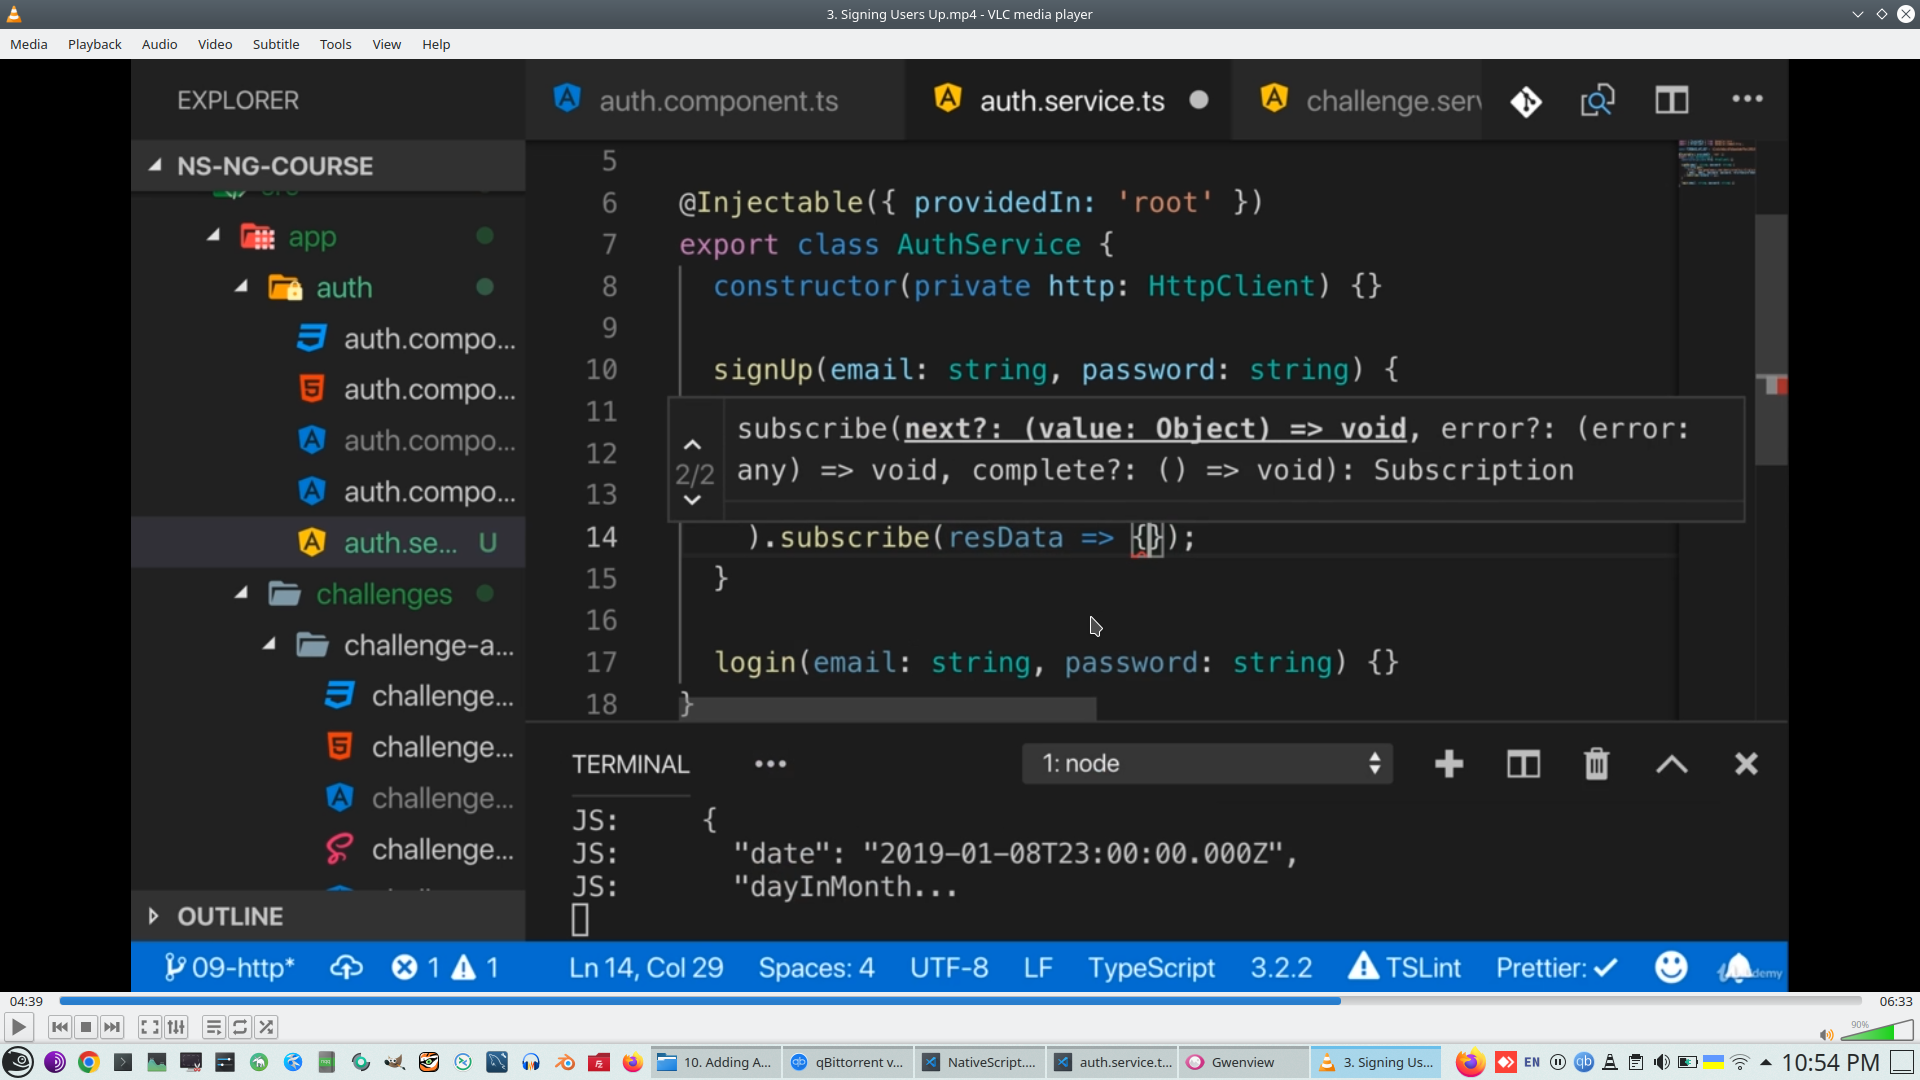
Subscribe handles when POST request will finish, Farebase return JWT
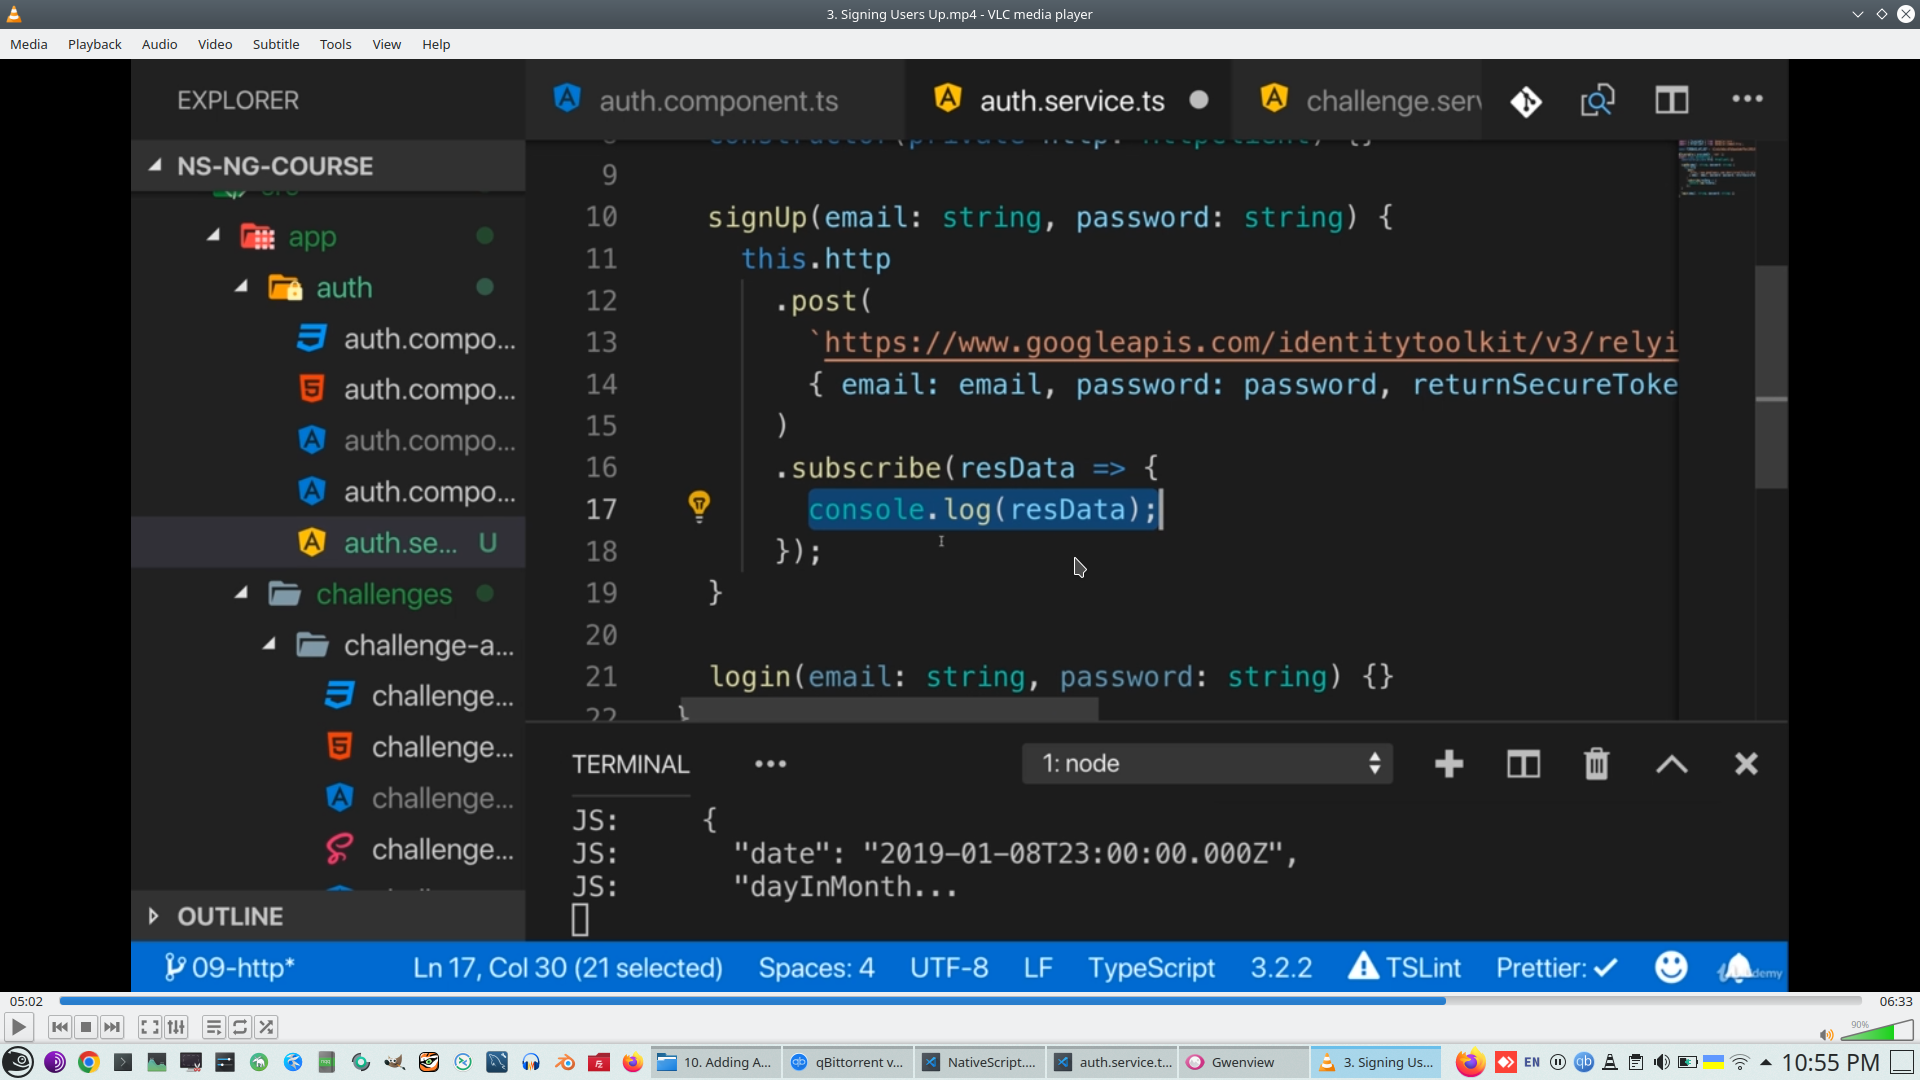
First attempt to signUp, Firebase create new user and we receive JWT
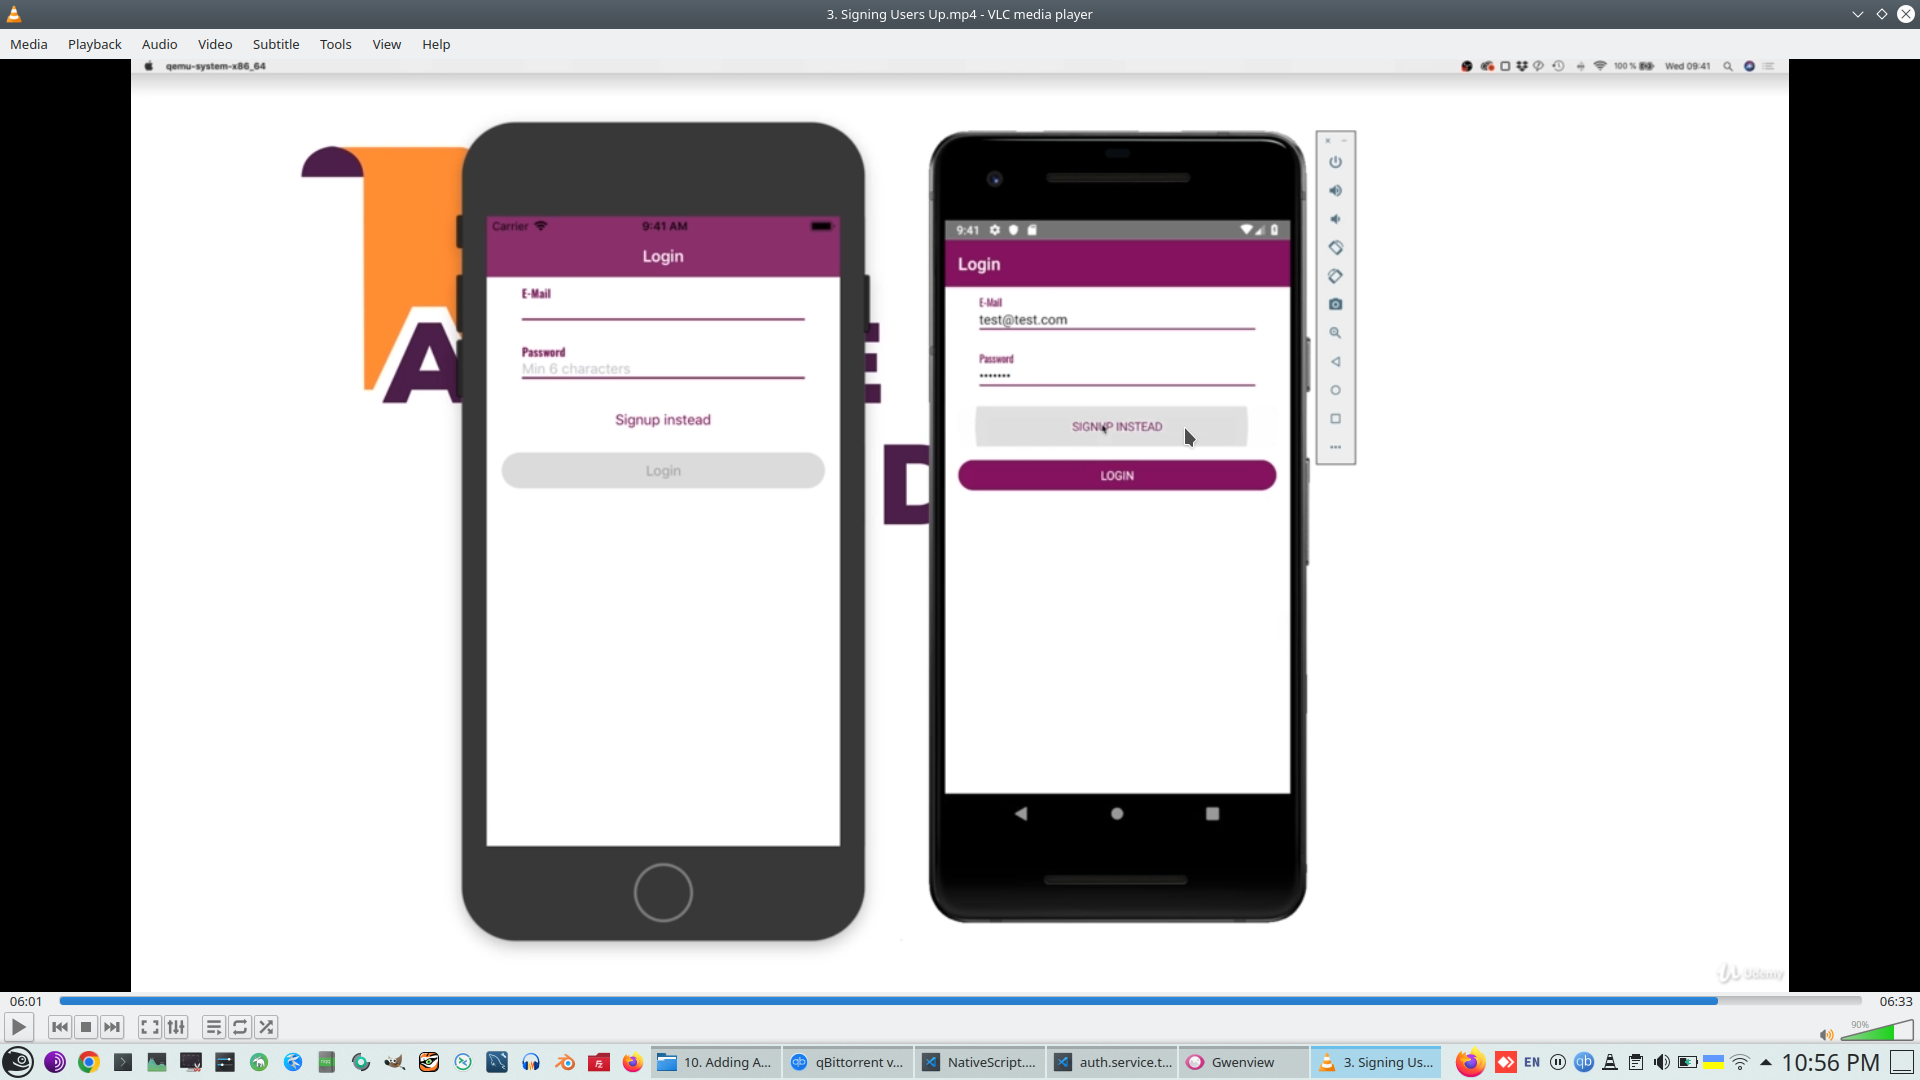
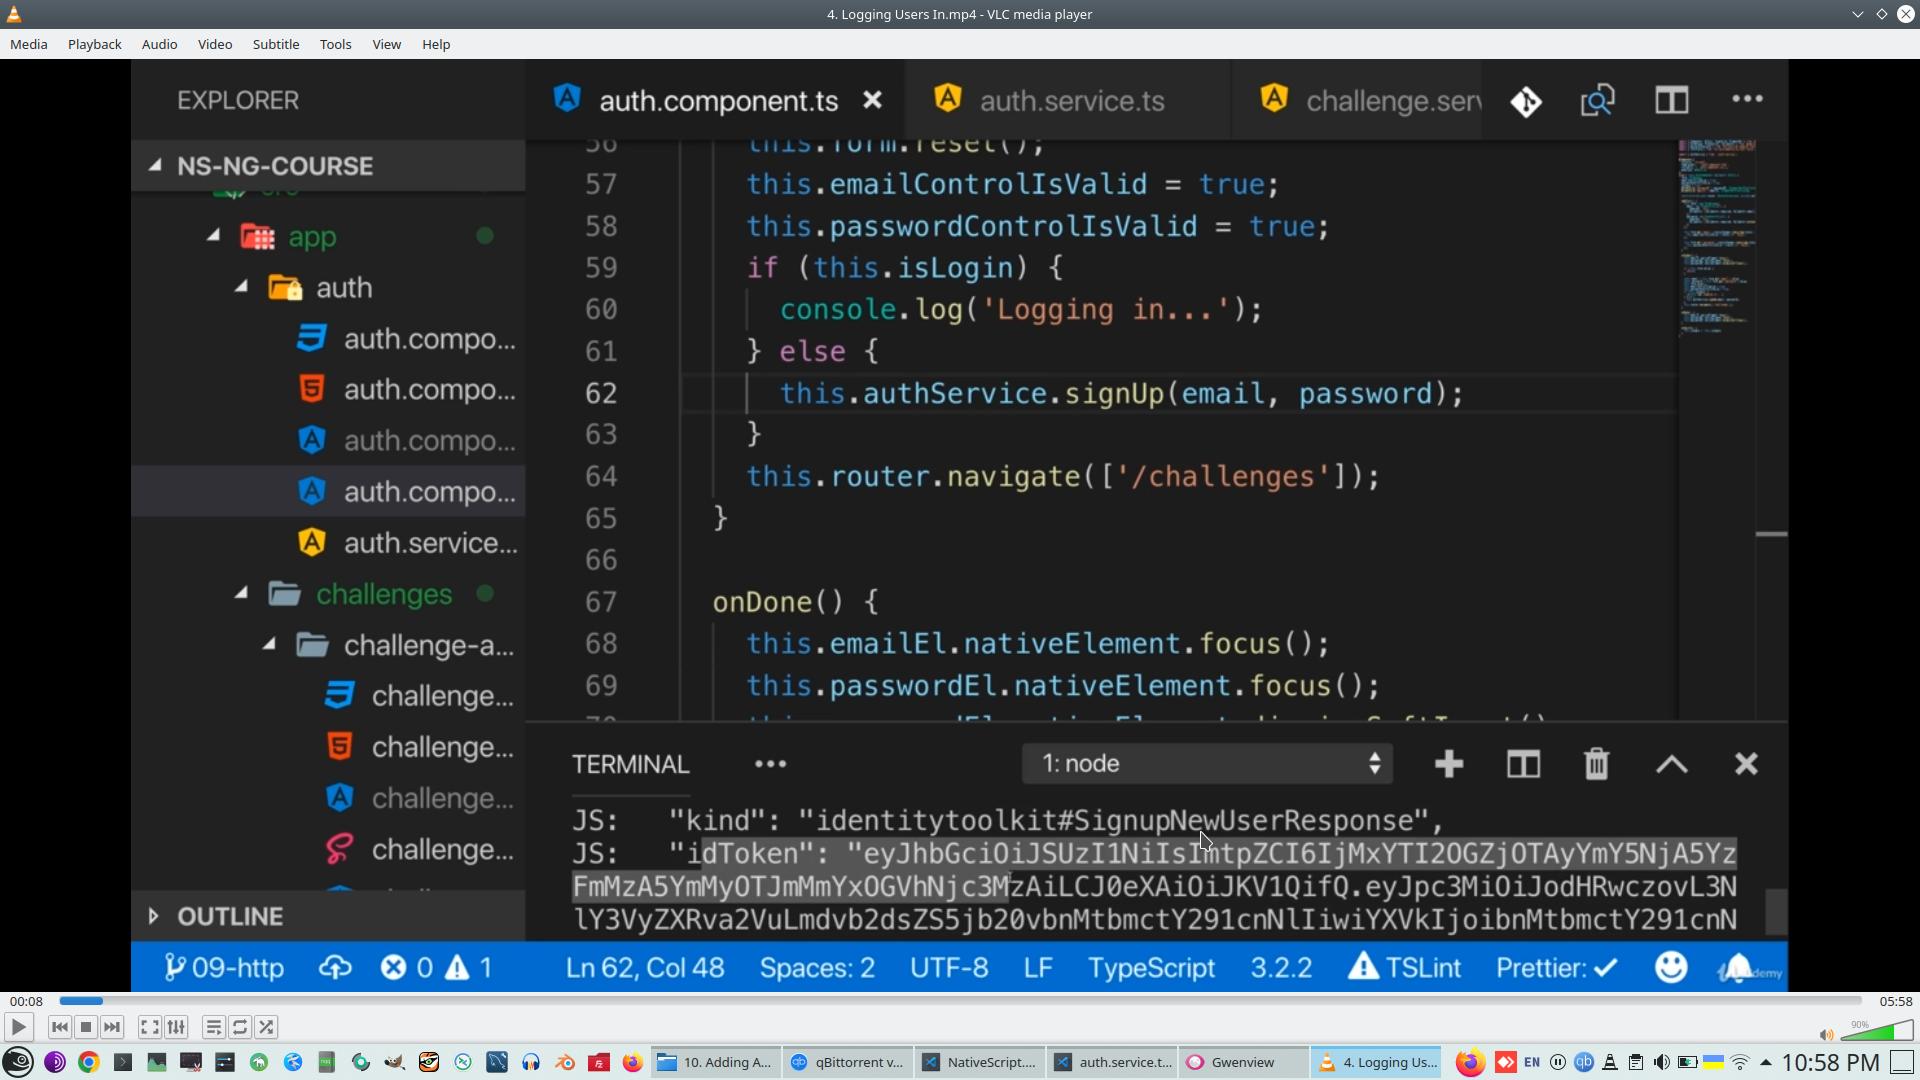
Verify pass
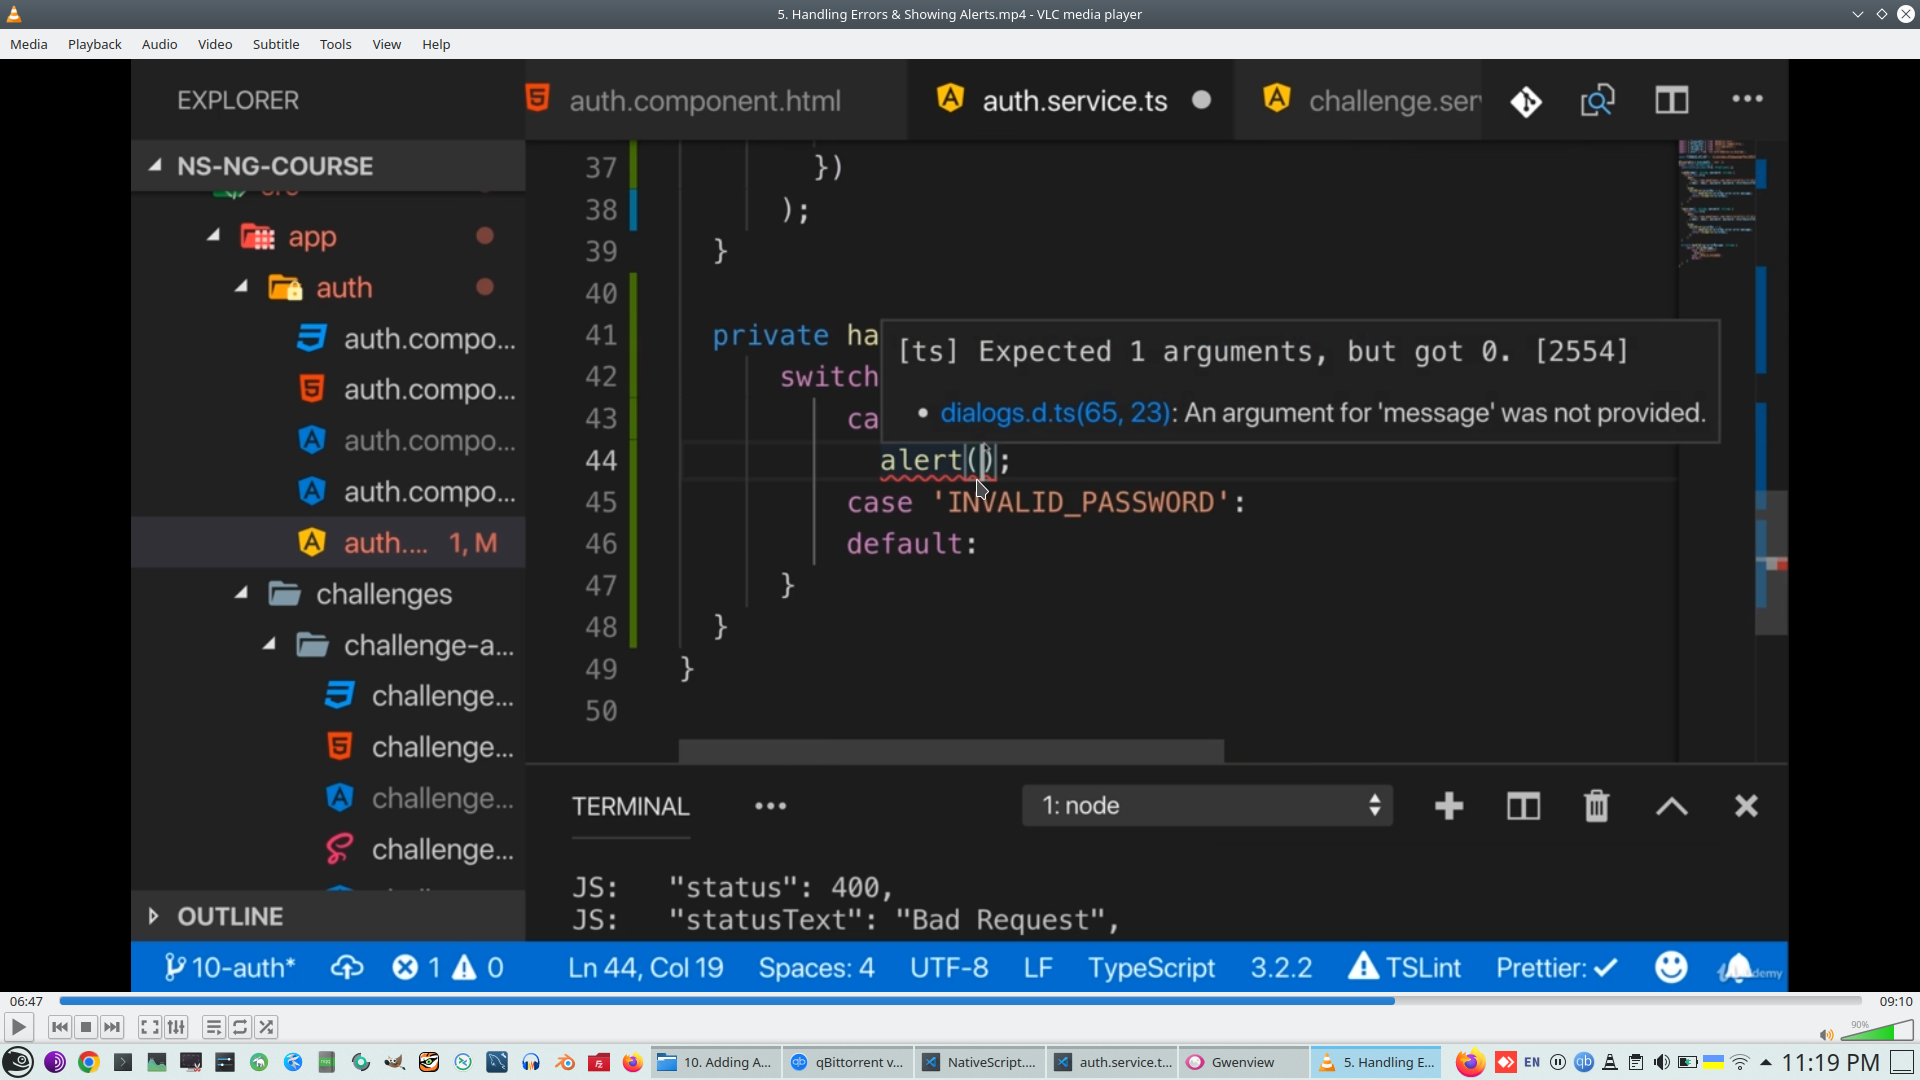
Add application logic if AU service return correct token and processing error if no
Add spinner
Check spinner
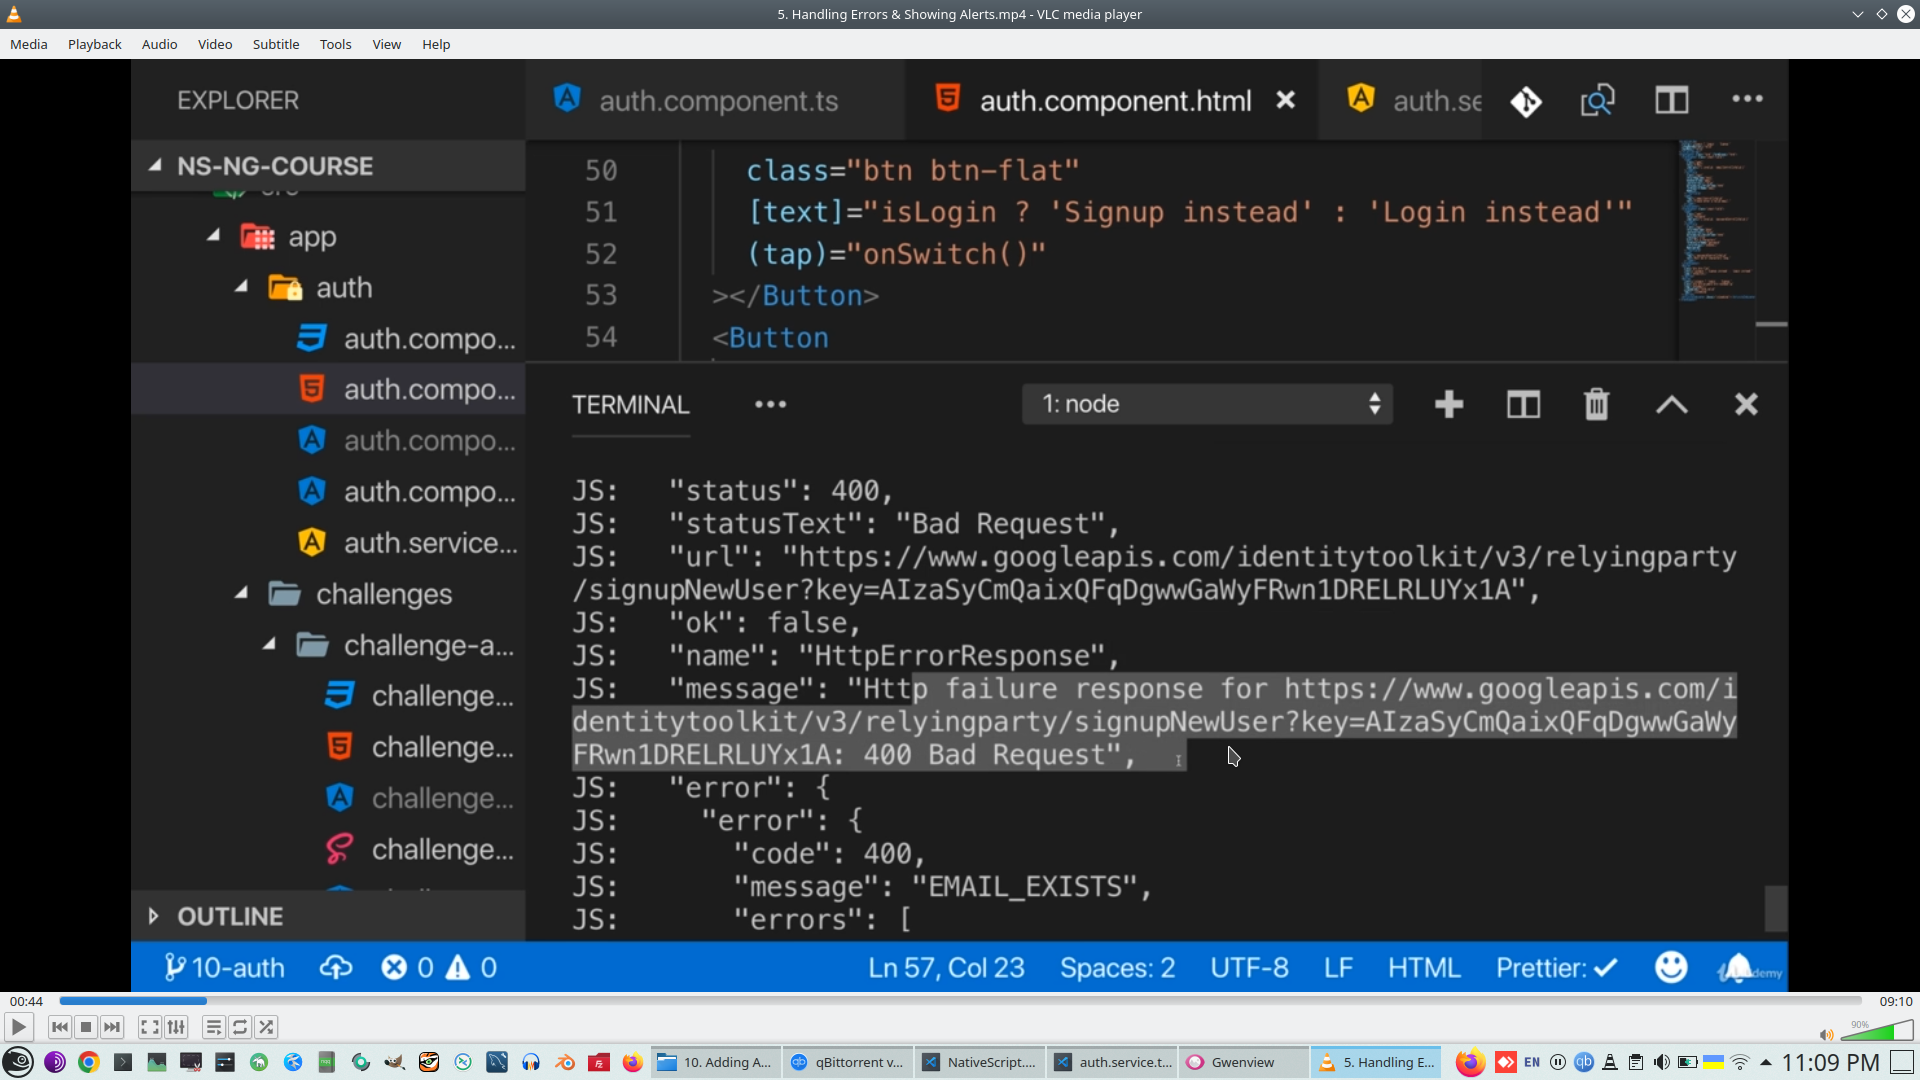
Check bad SignUp branch
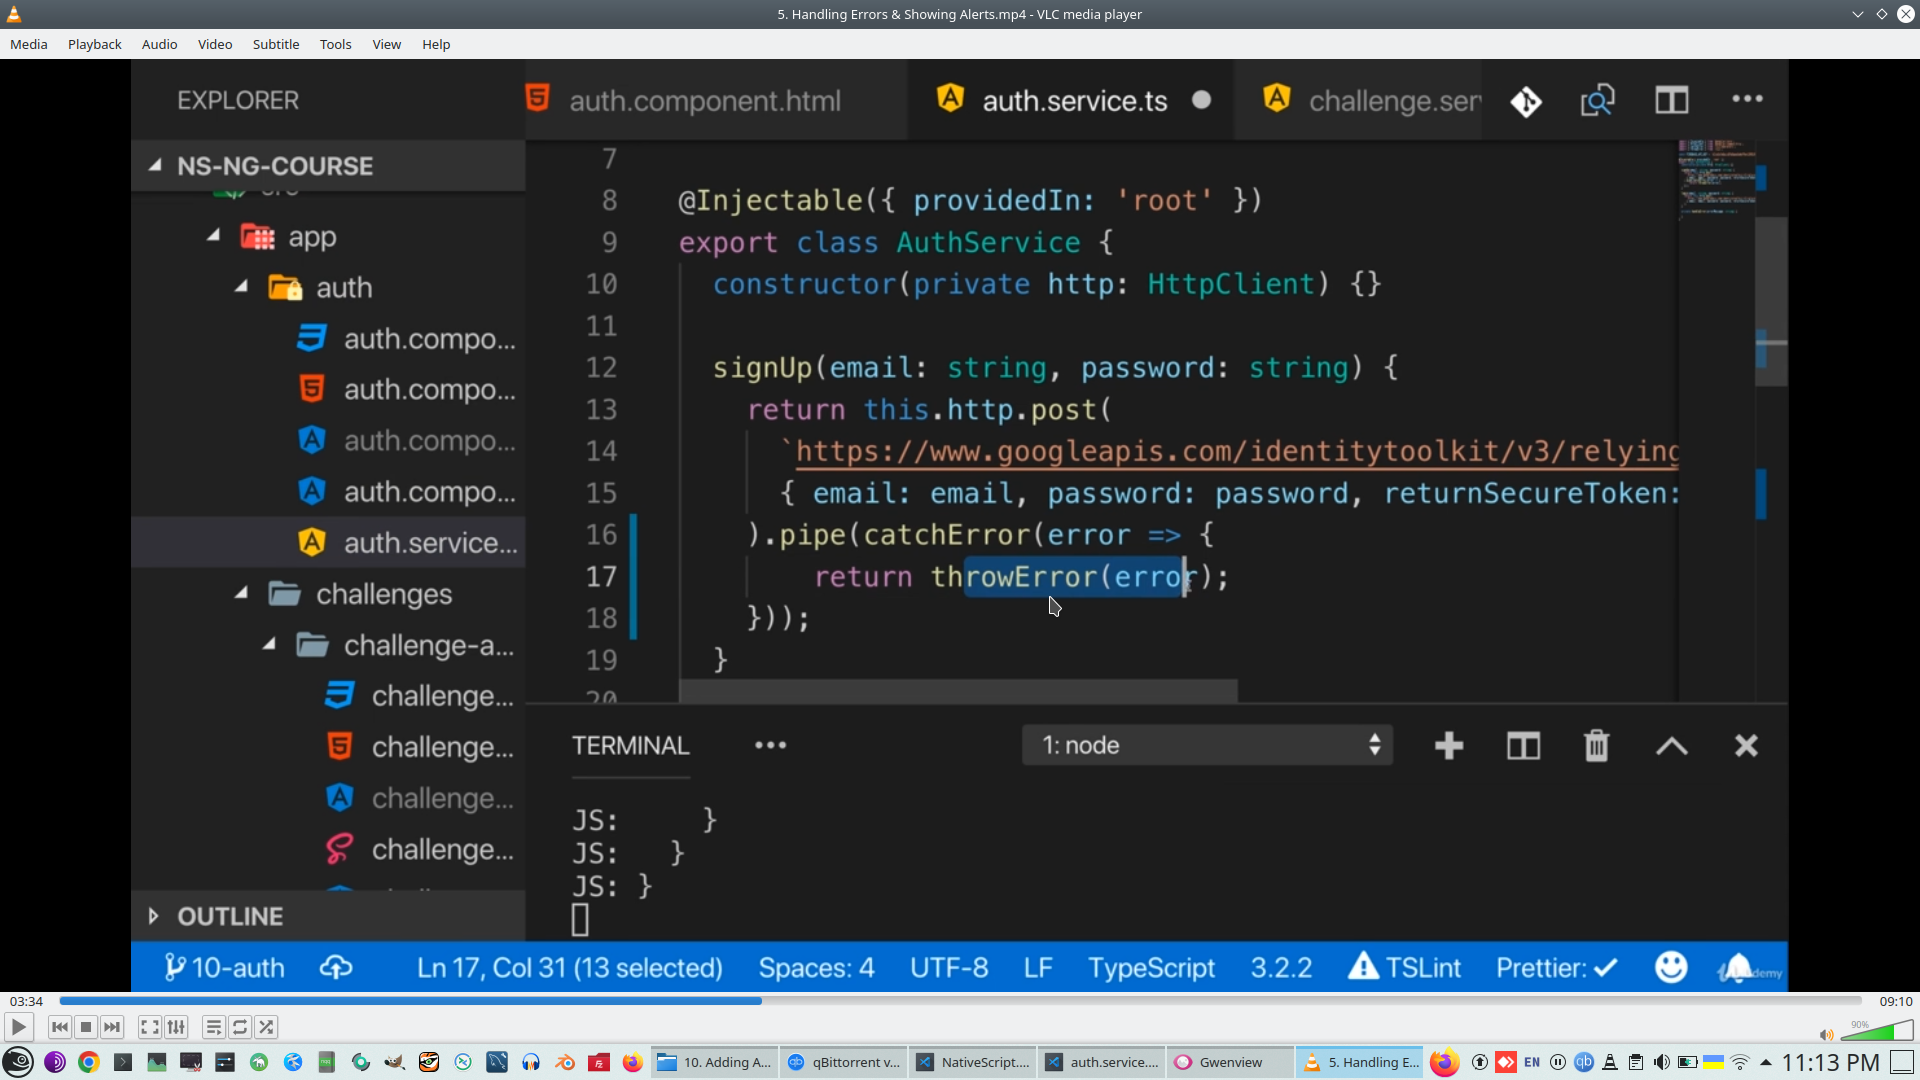
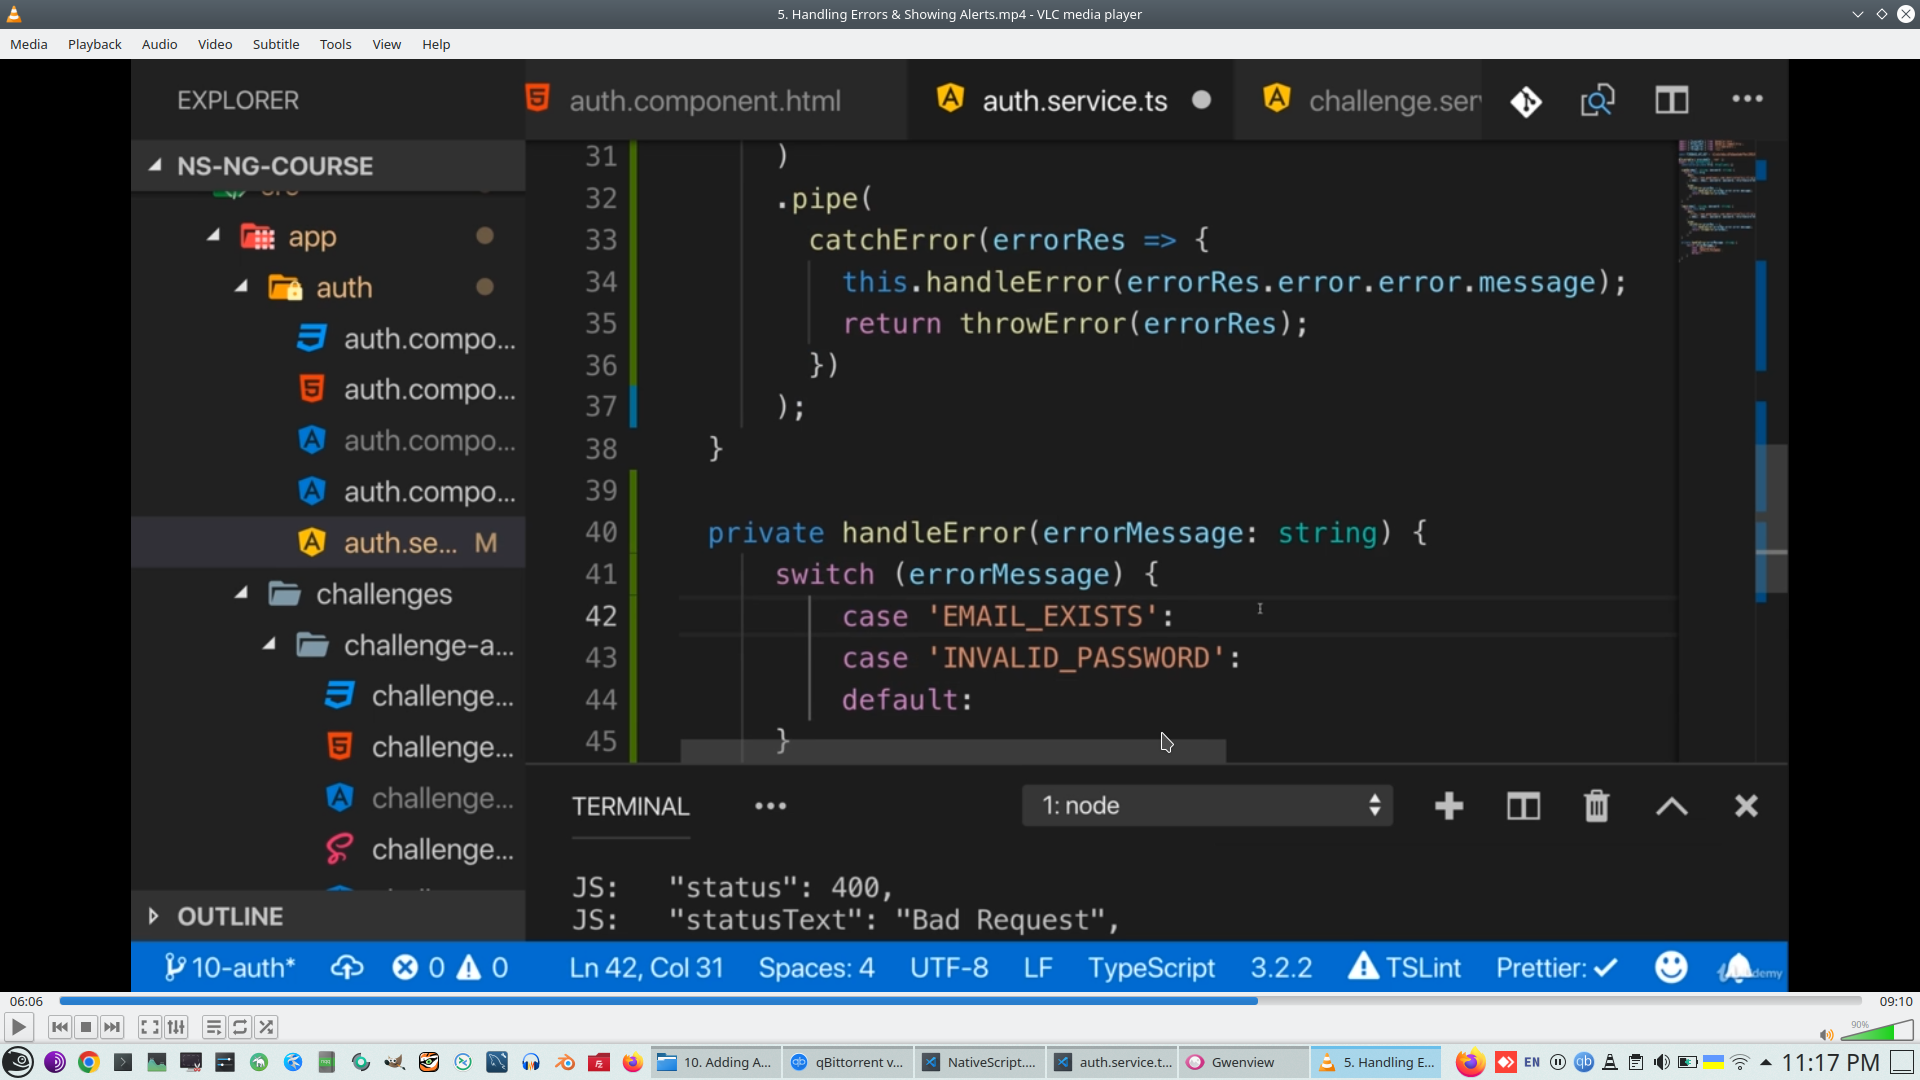
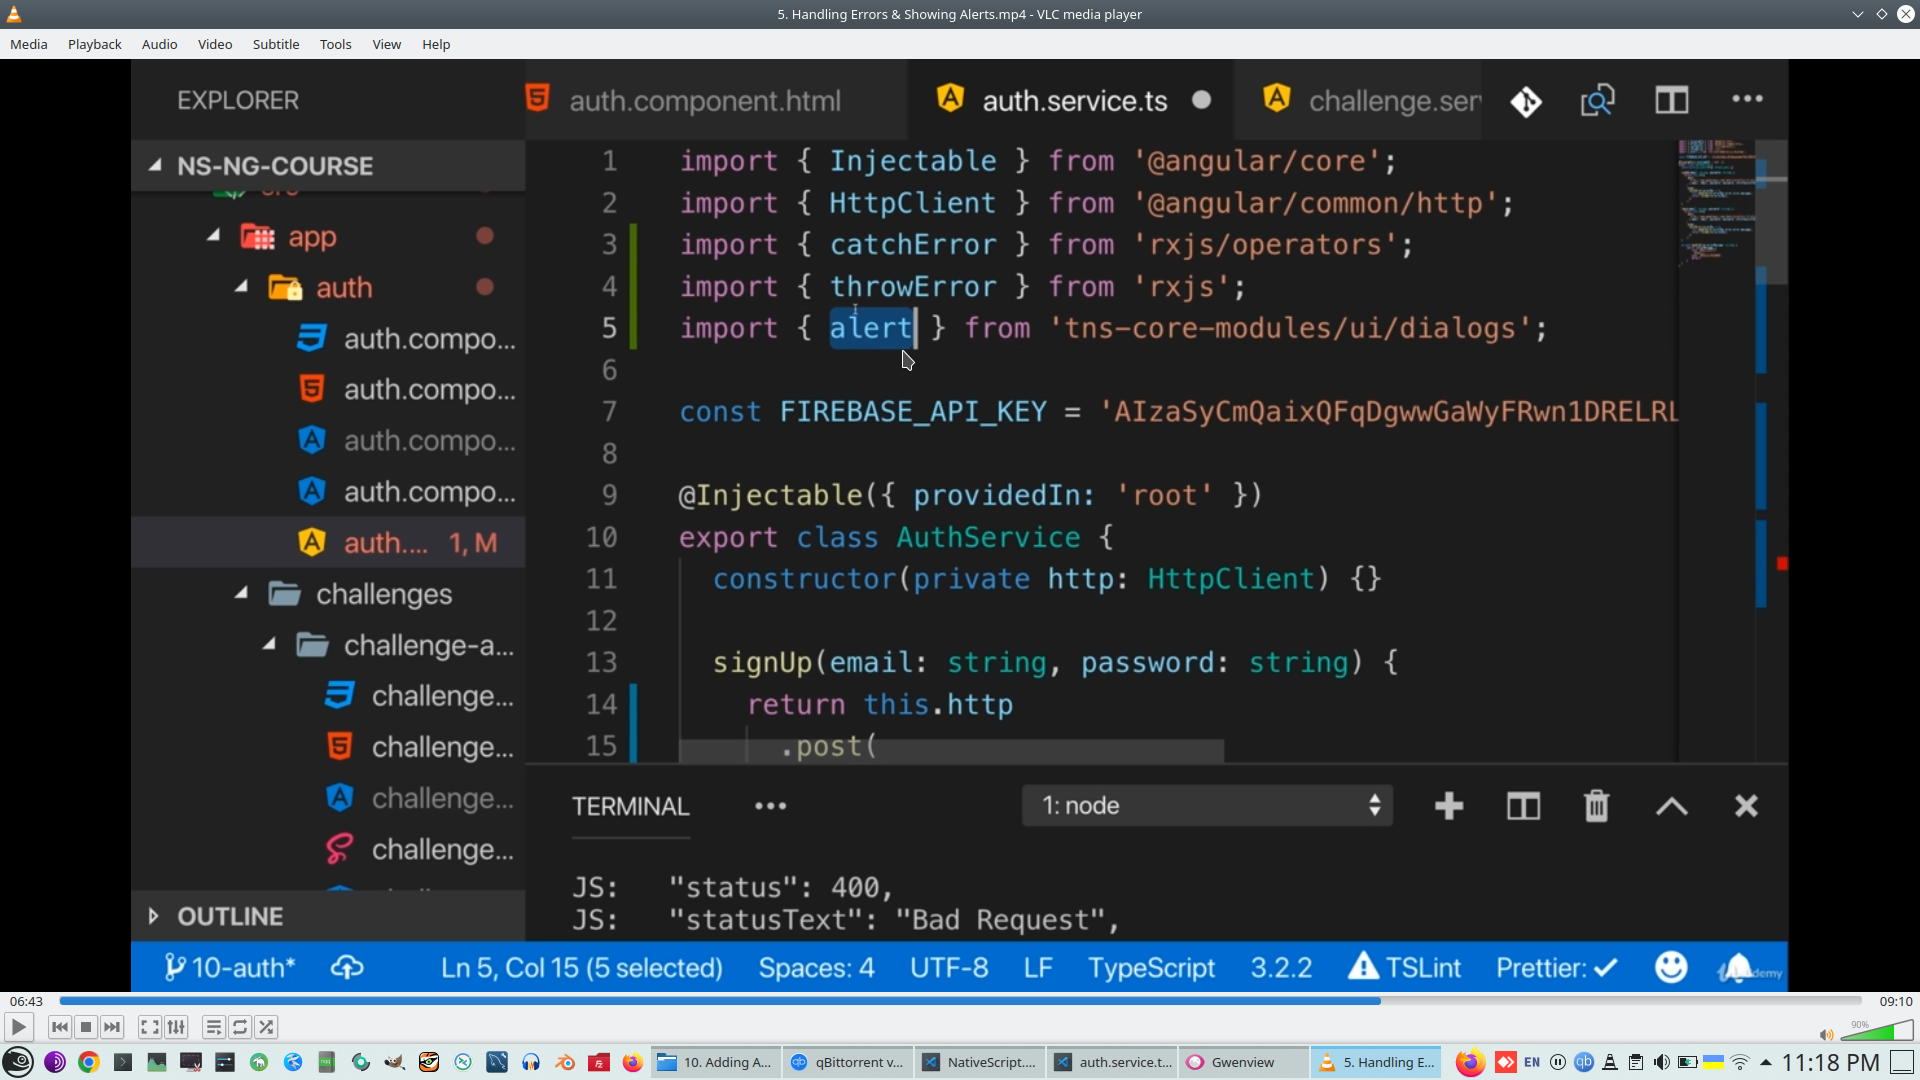
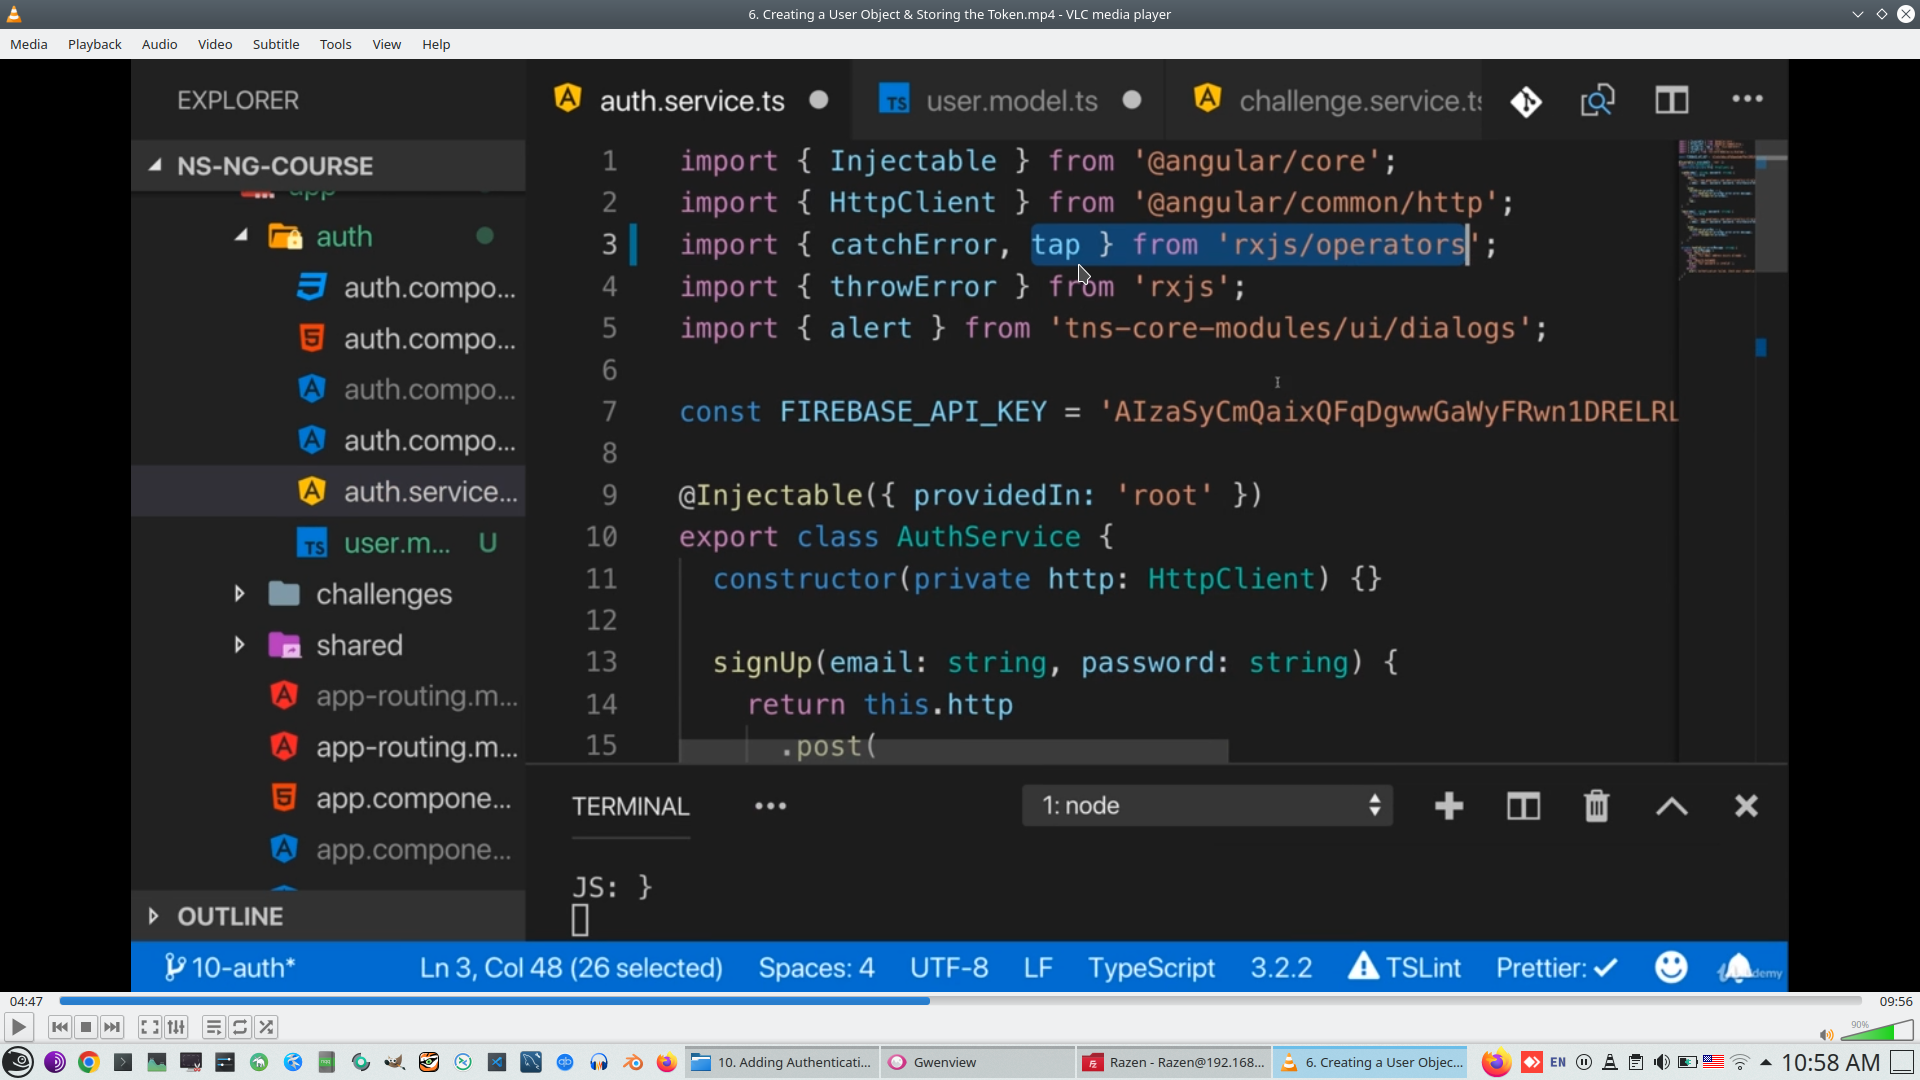
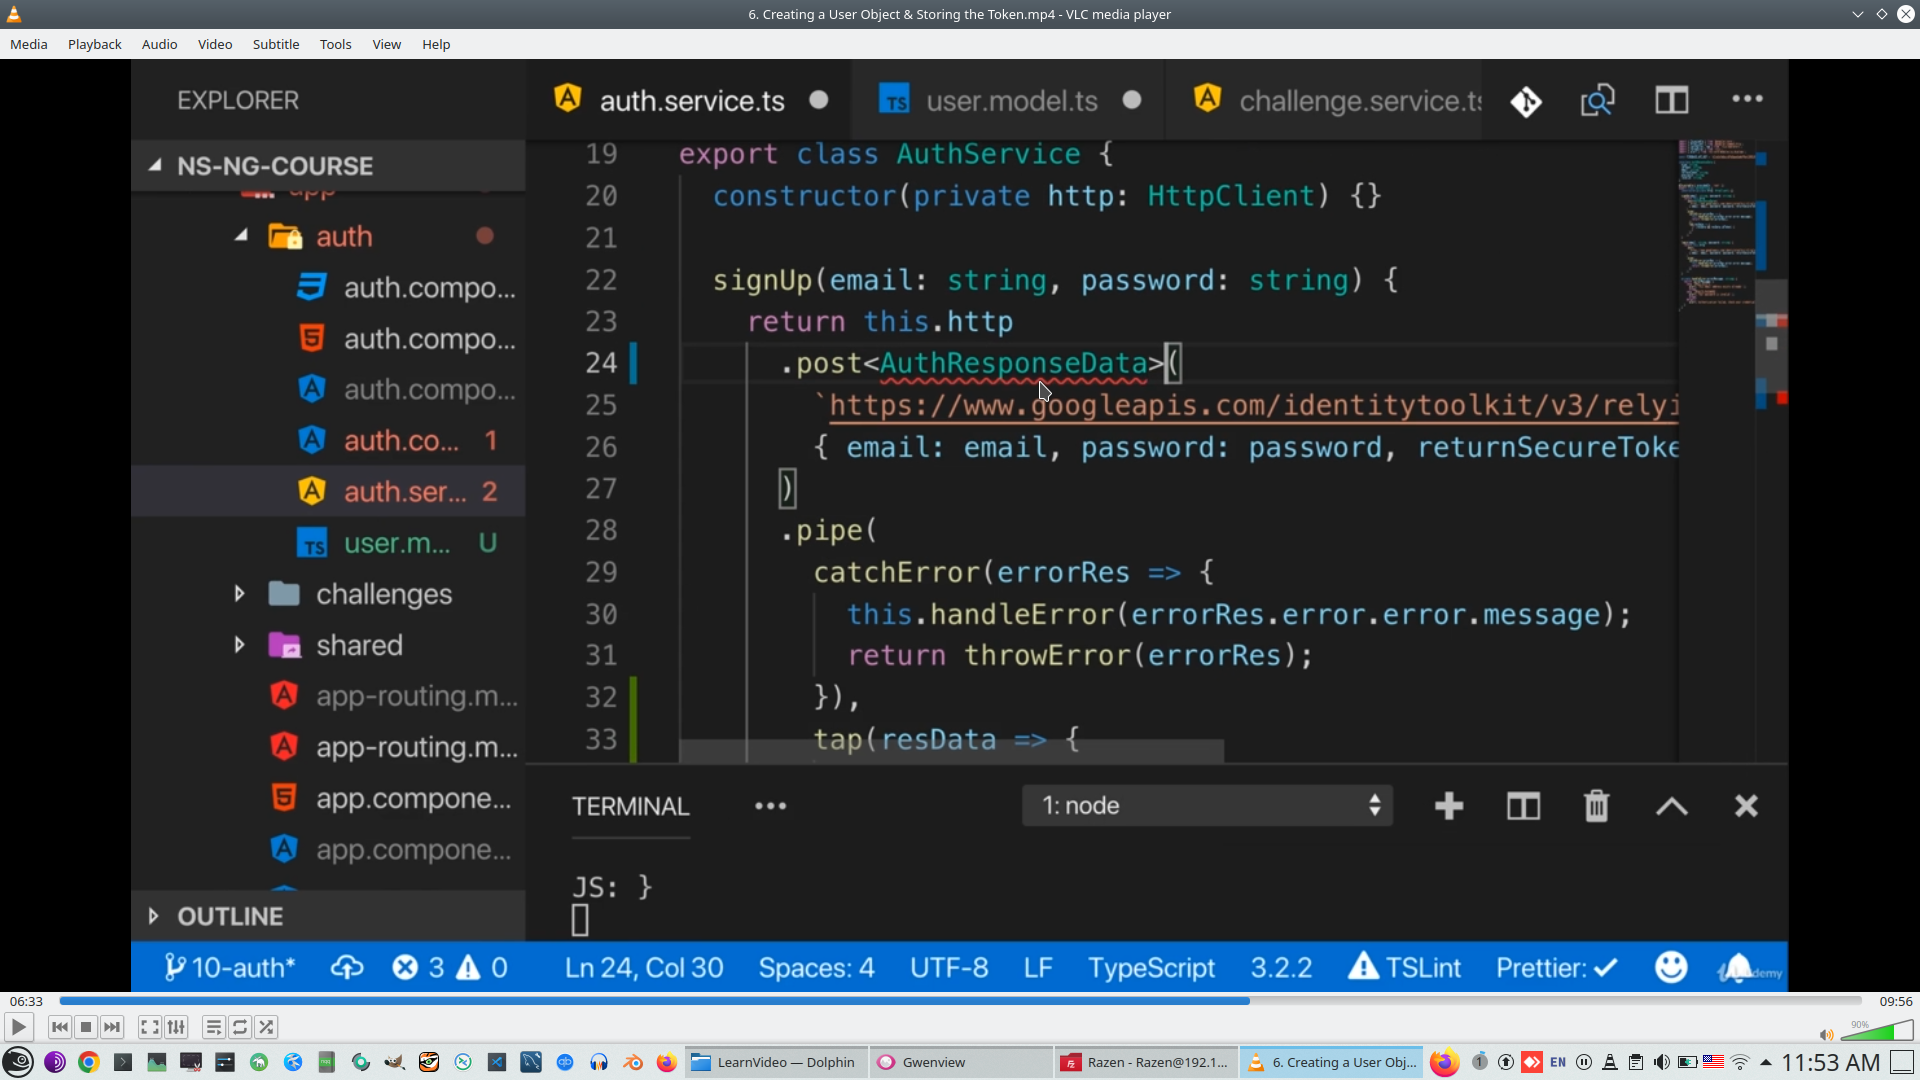
Import ThrowError and CatchError from RxJs

Import RxJs Pipe and CatchError, Pipe function let's you chain RxJS operators, Pipe function returns a new Observable each time https://rxjs.dev/guide/operators, https://thinkrx.io/rxjs/pipe/, interesting that Angular also has Pipe operator - https://angular.io/guide/pipes
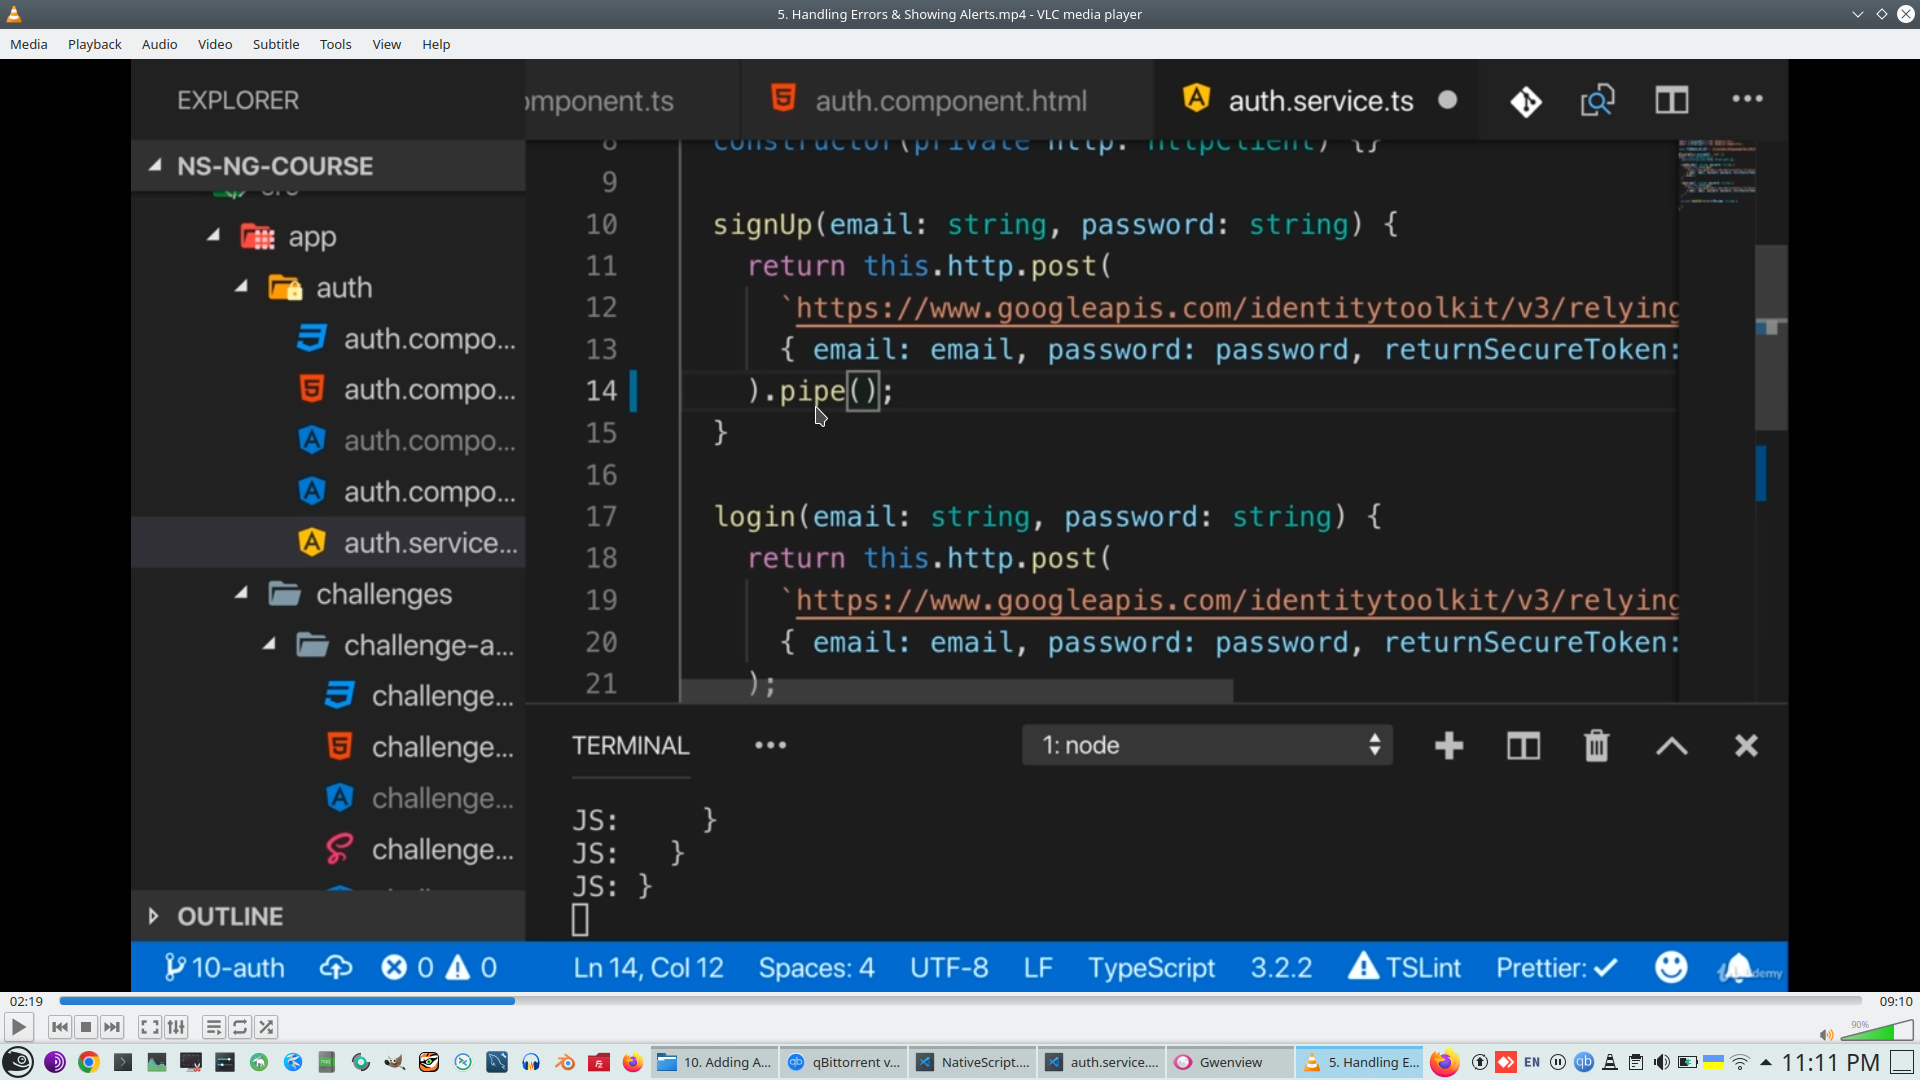
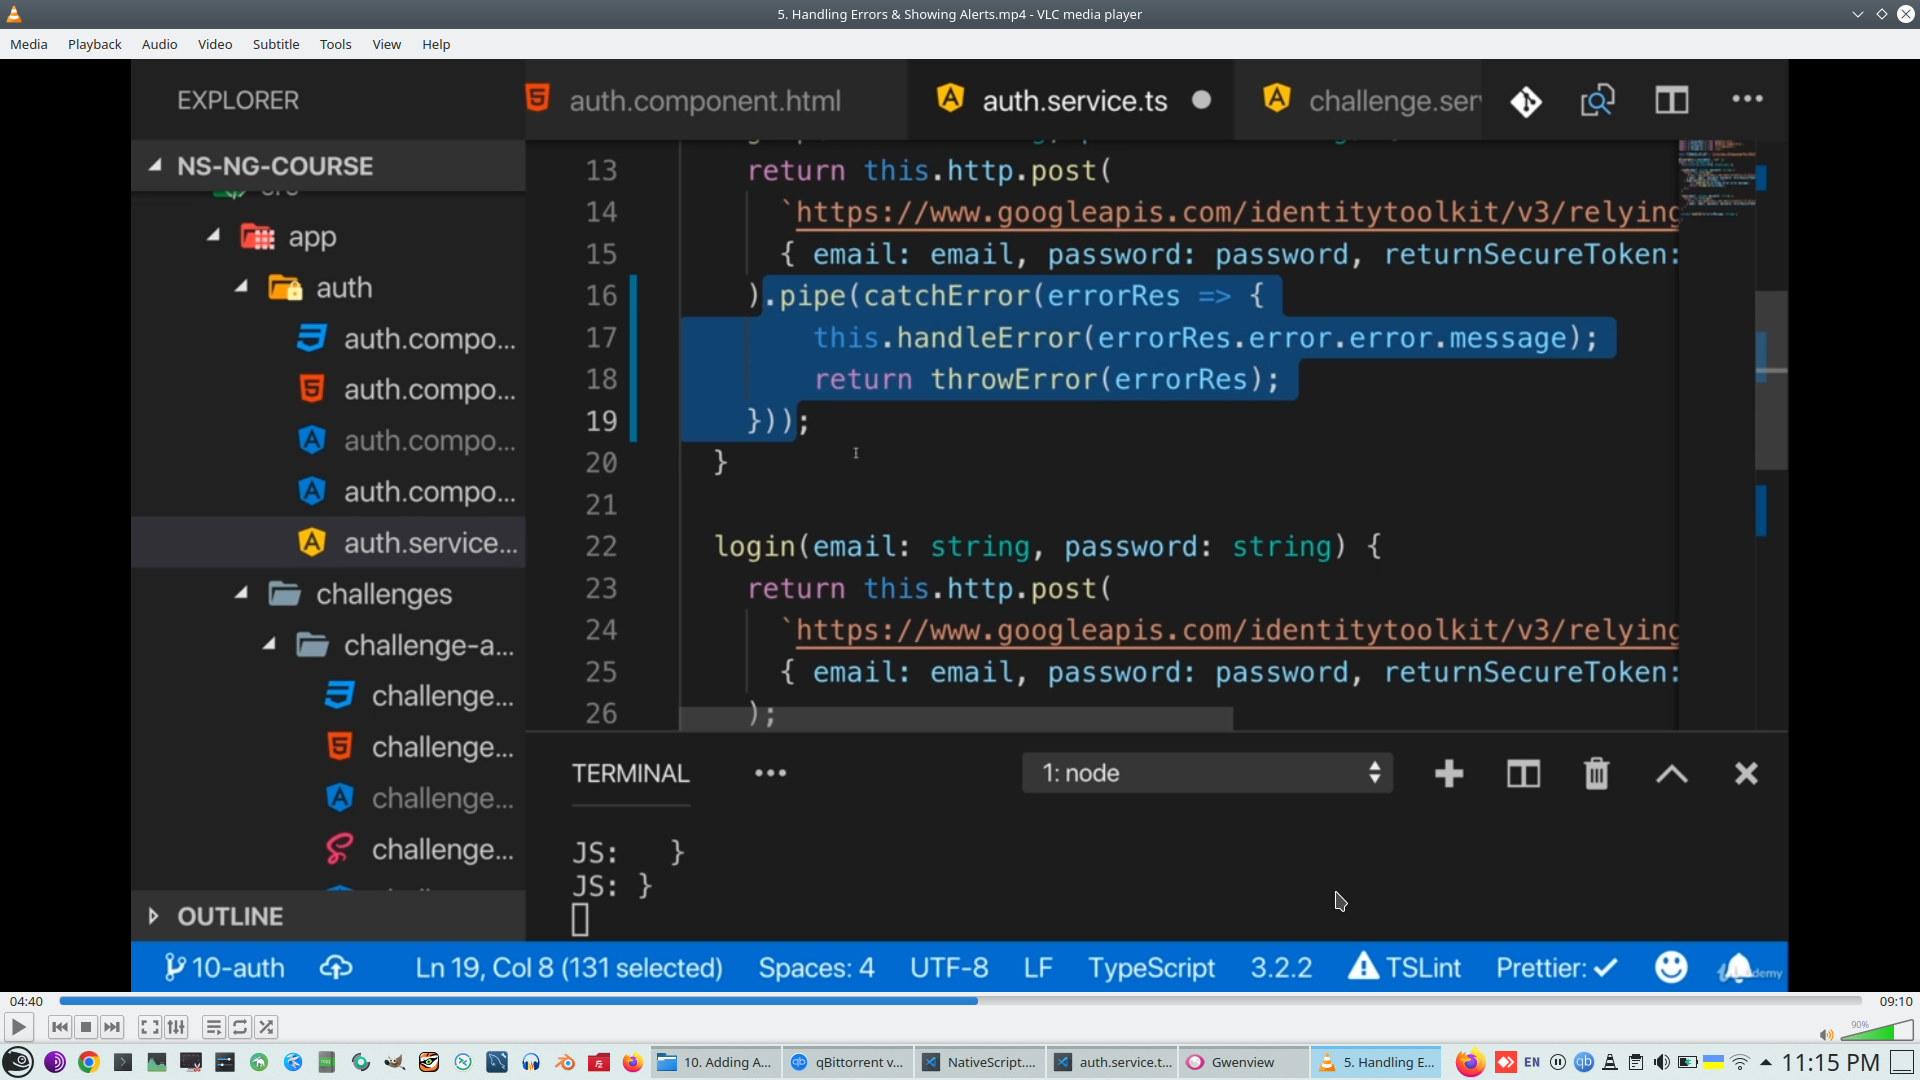
And insert ThrowError and CatchError into Pipe
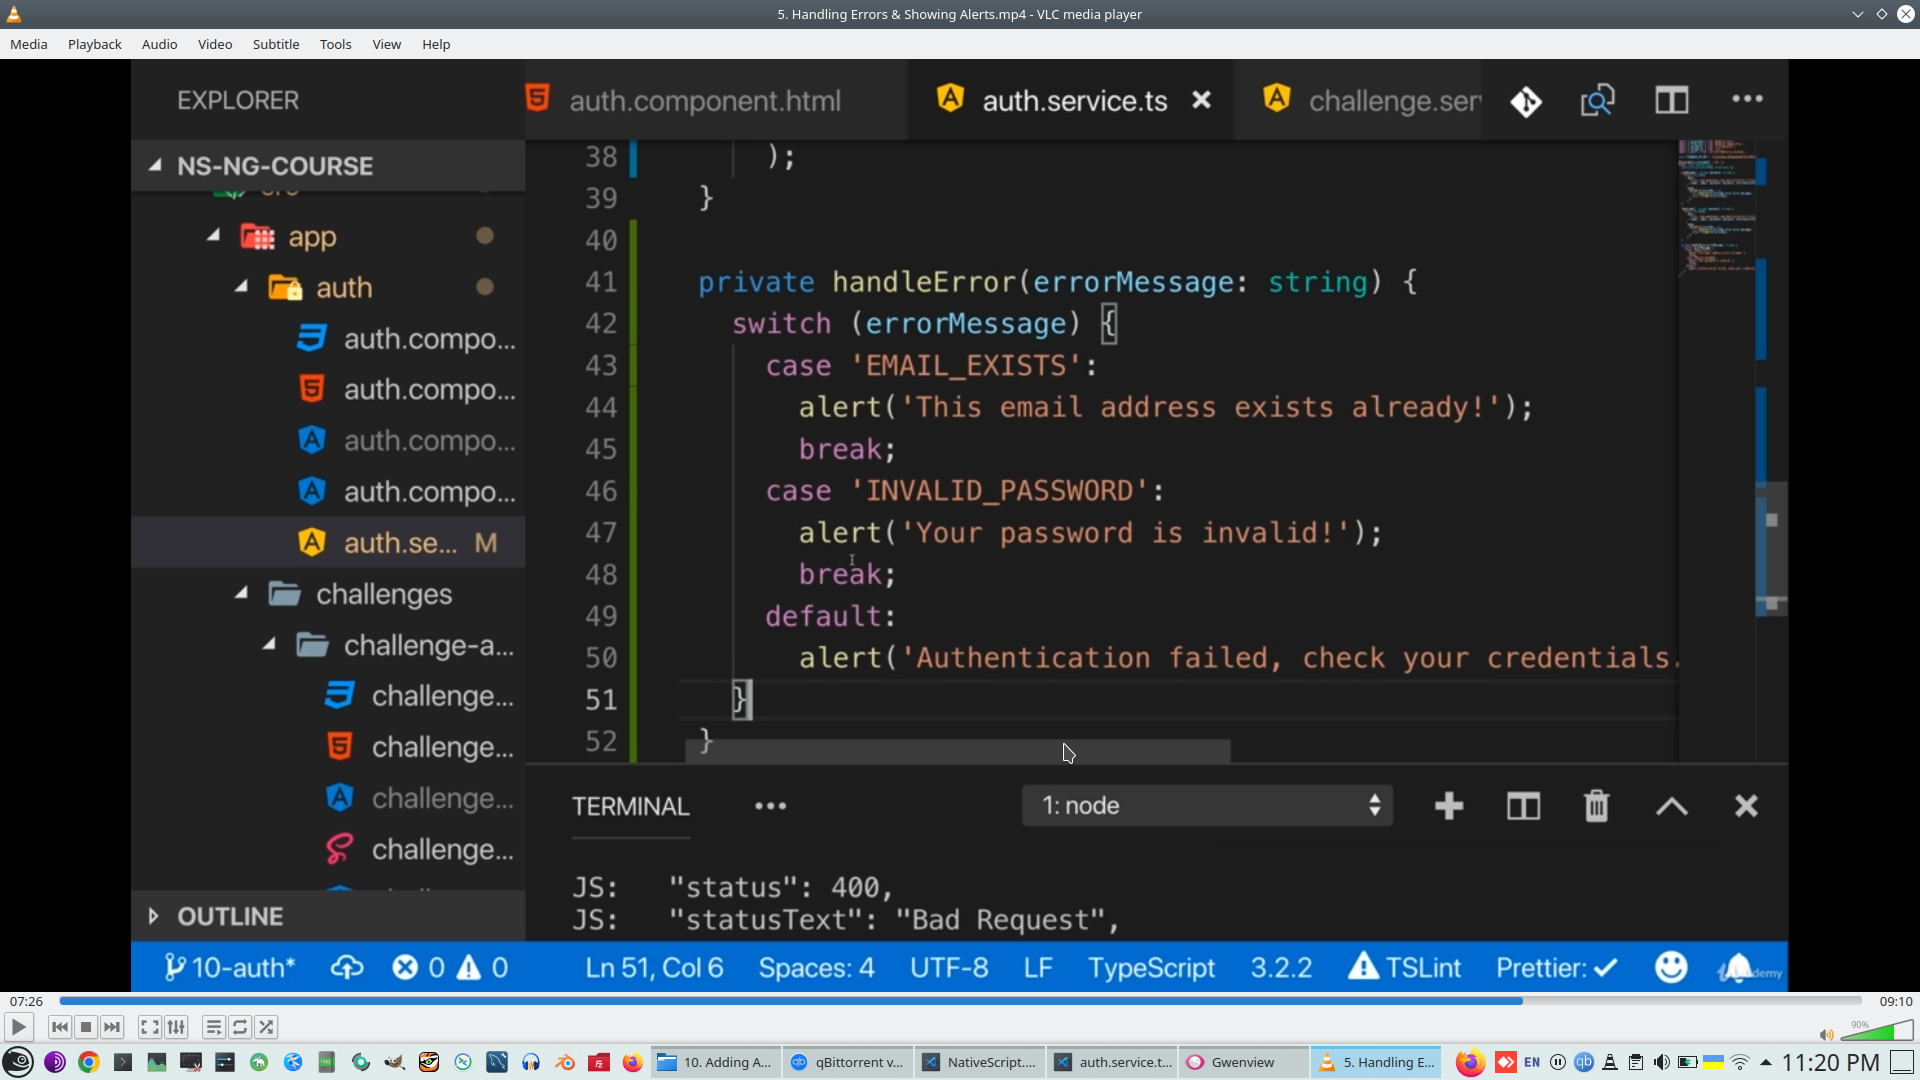
Handle error in separate function
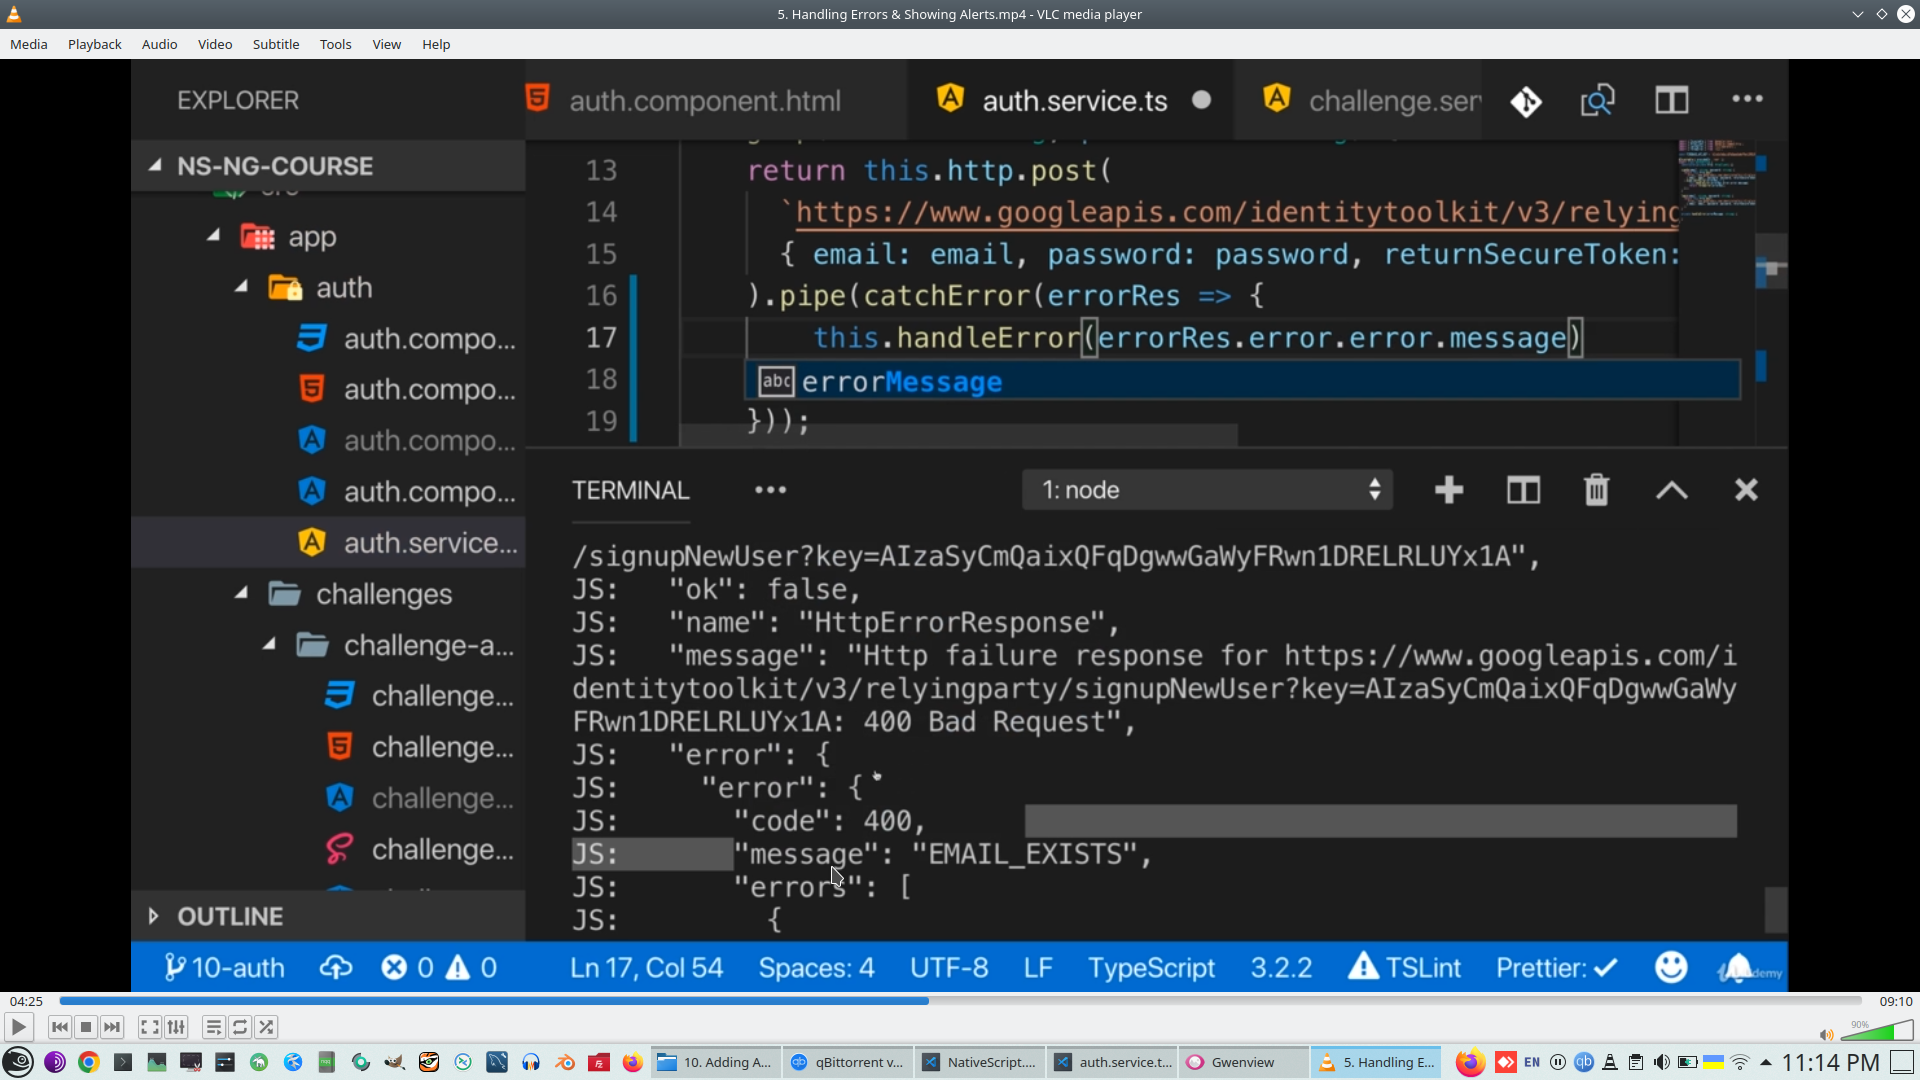
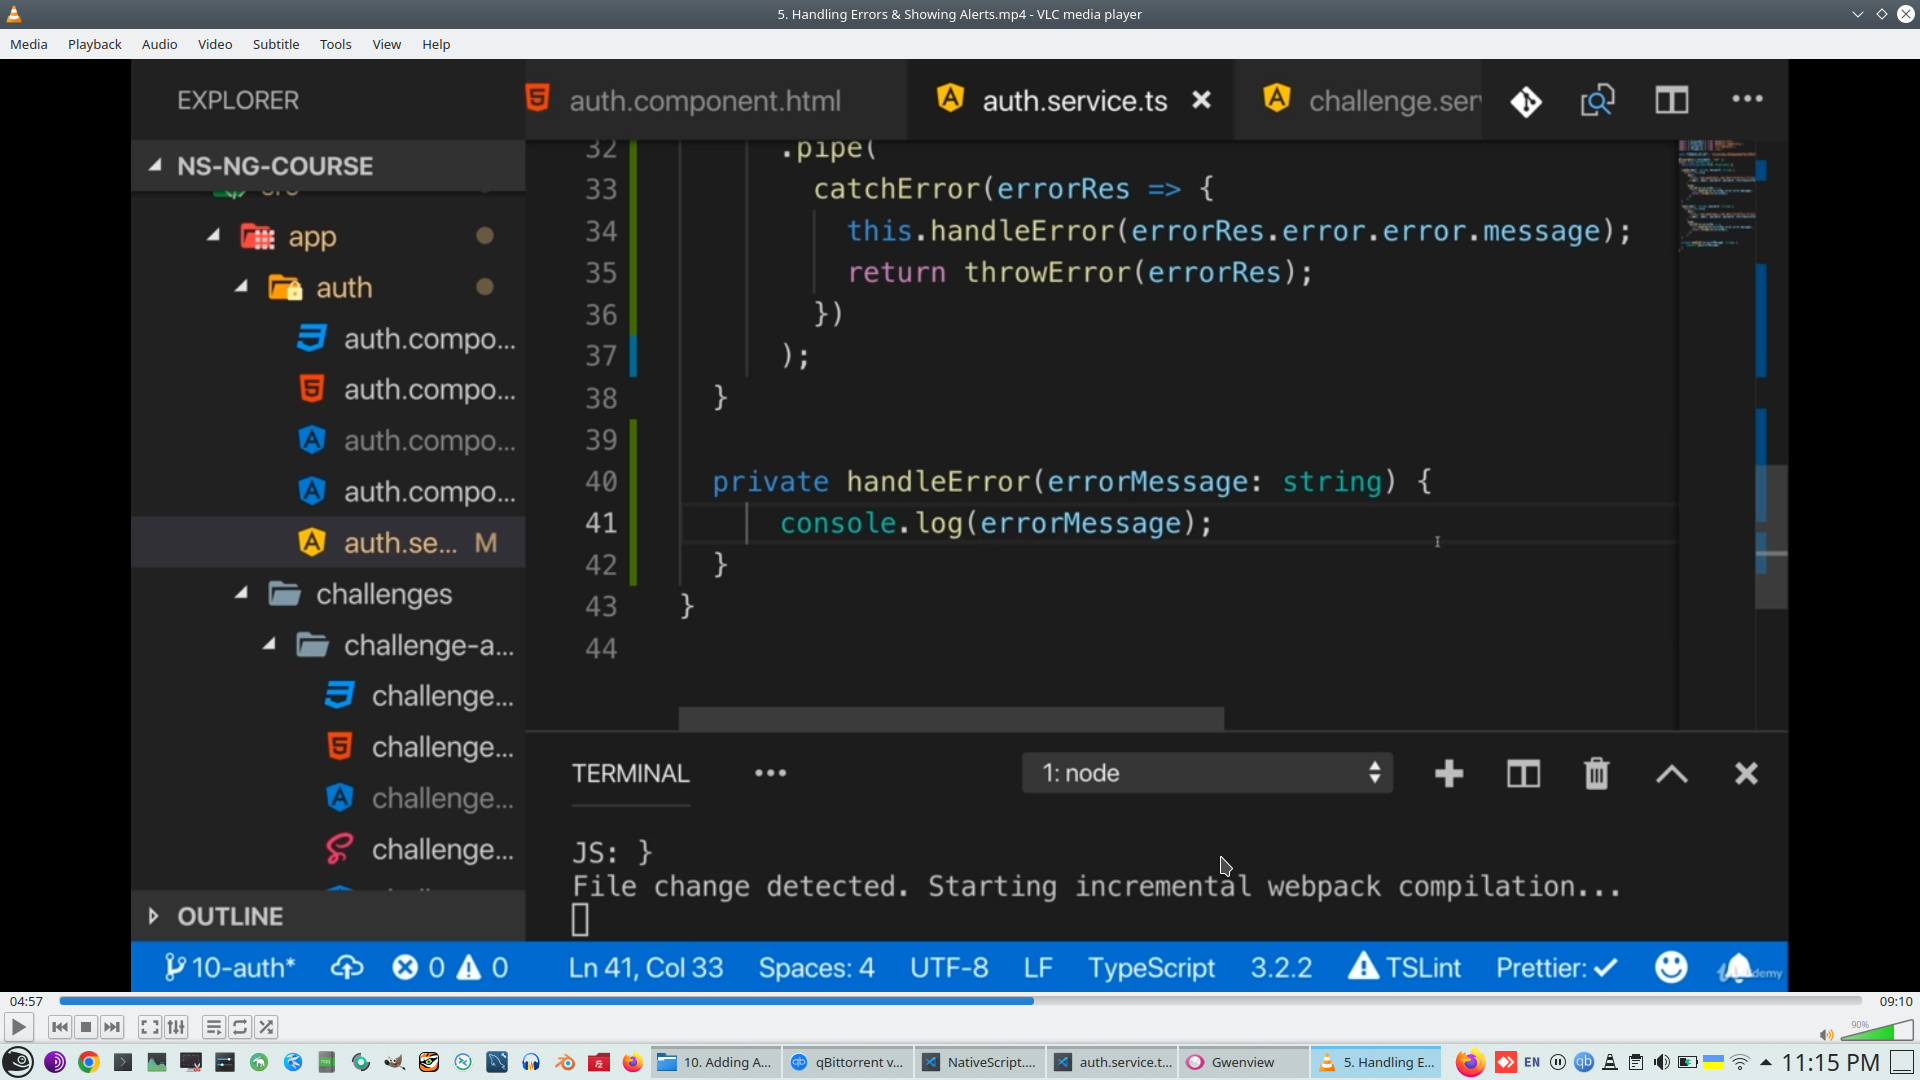
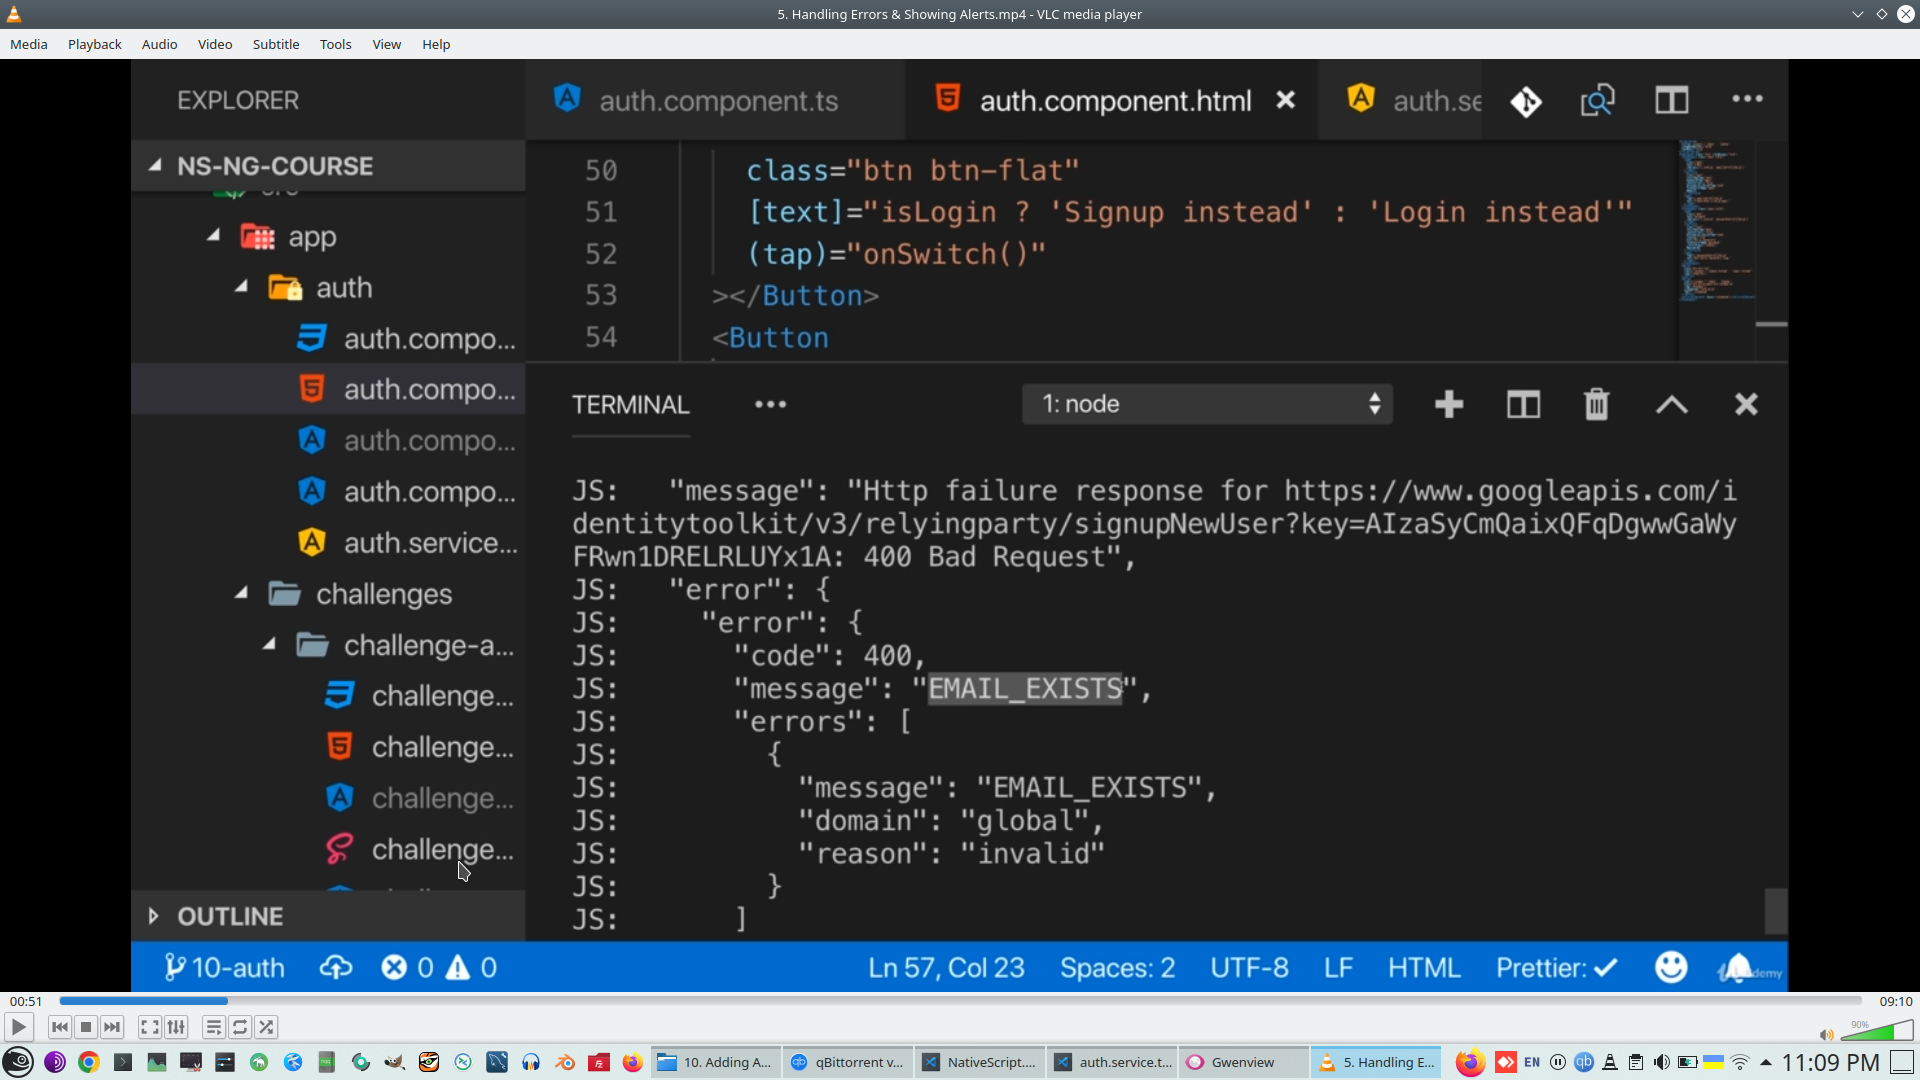
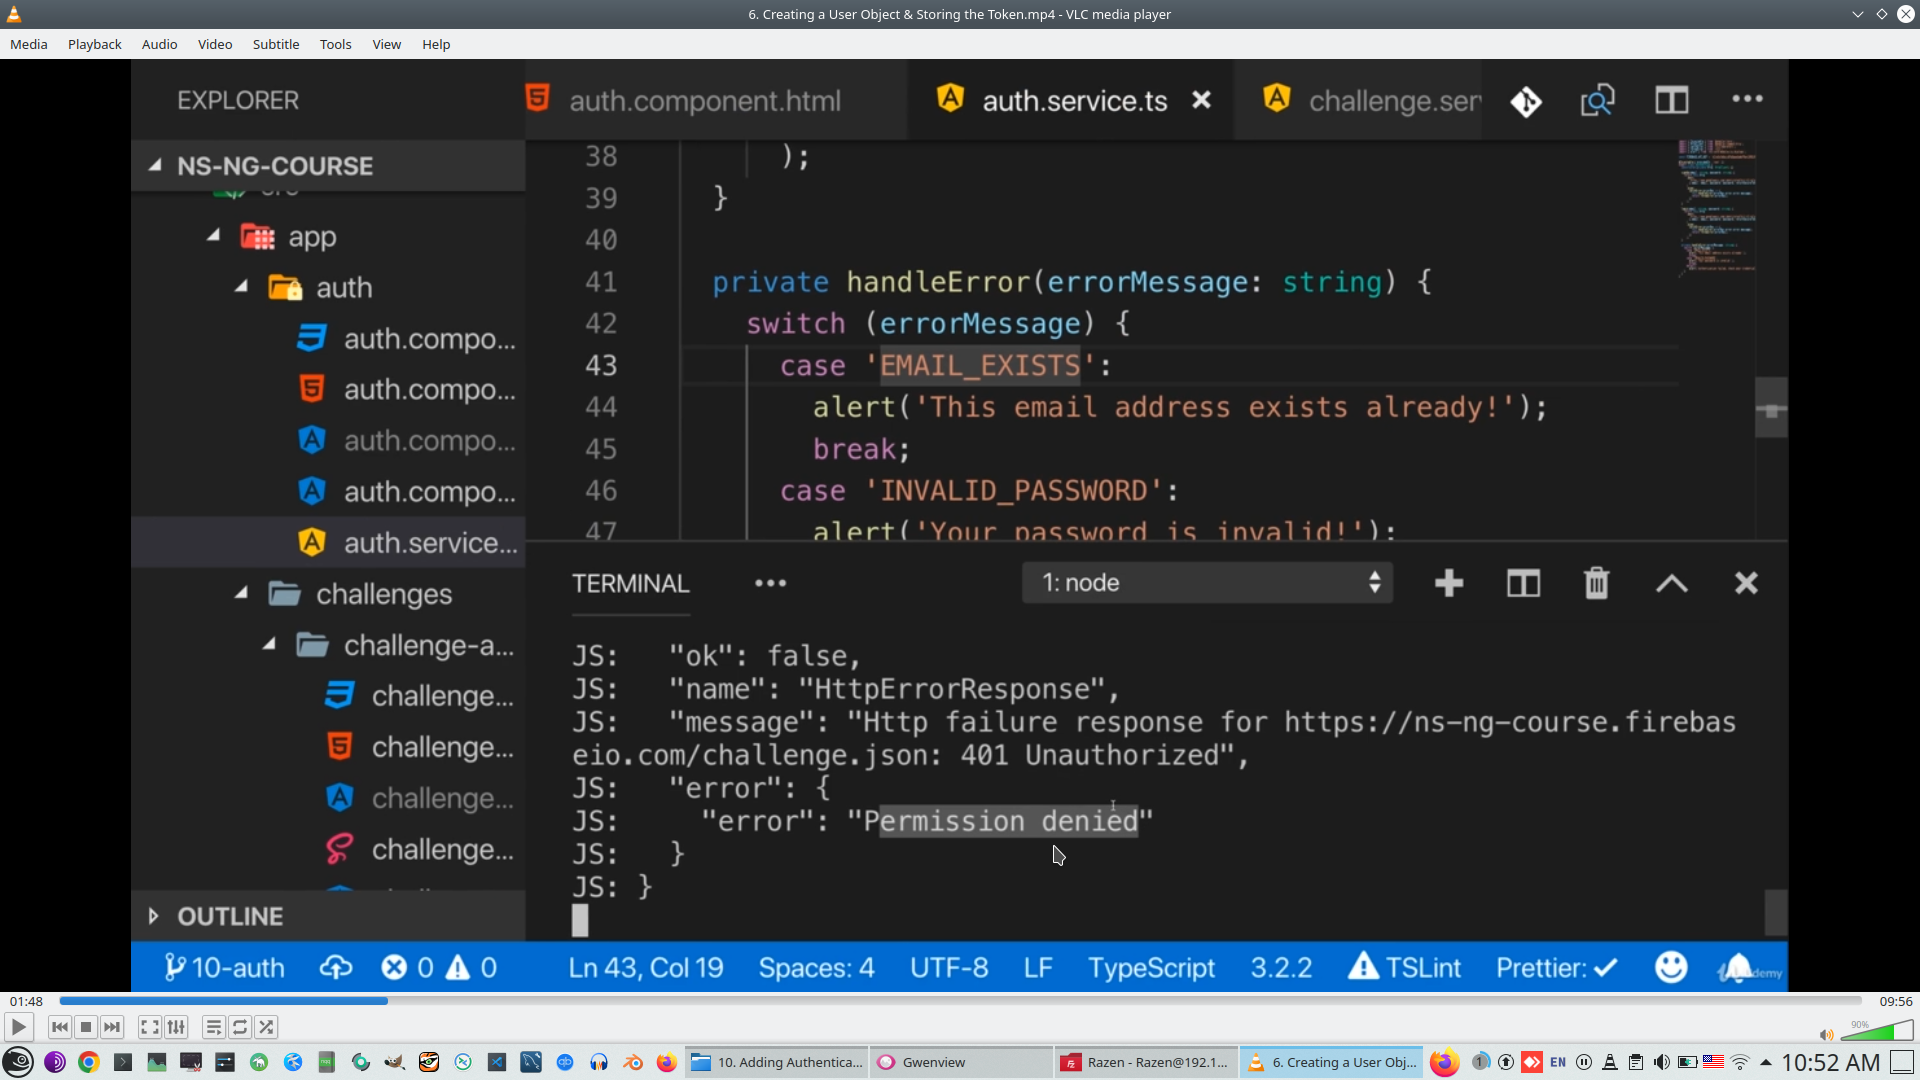
Common Firebase error on Login and Signup
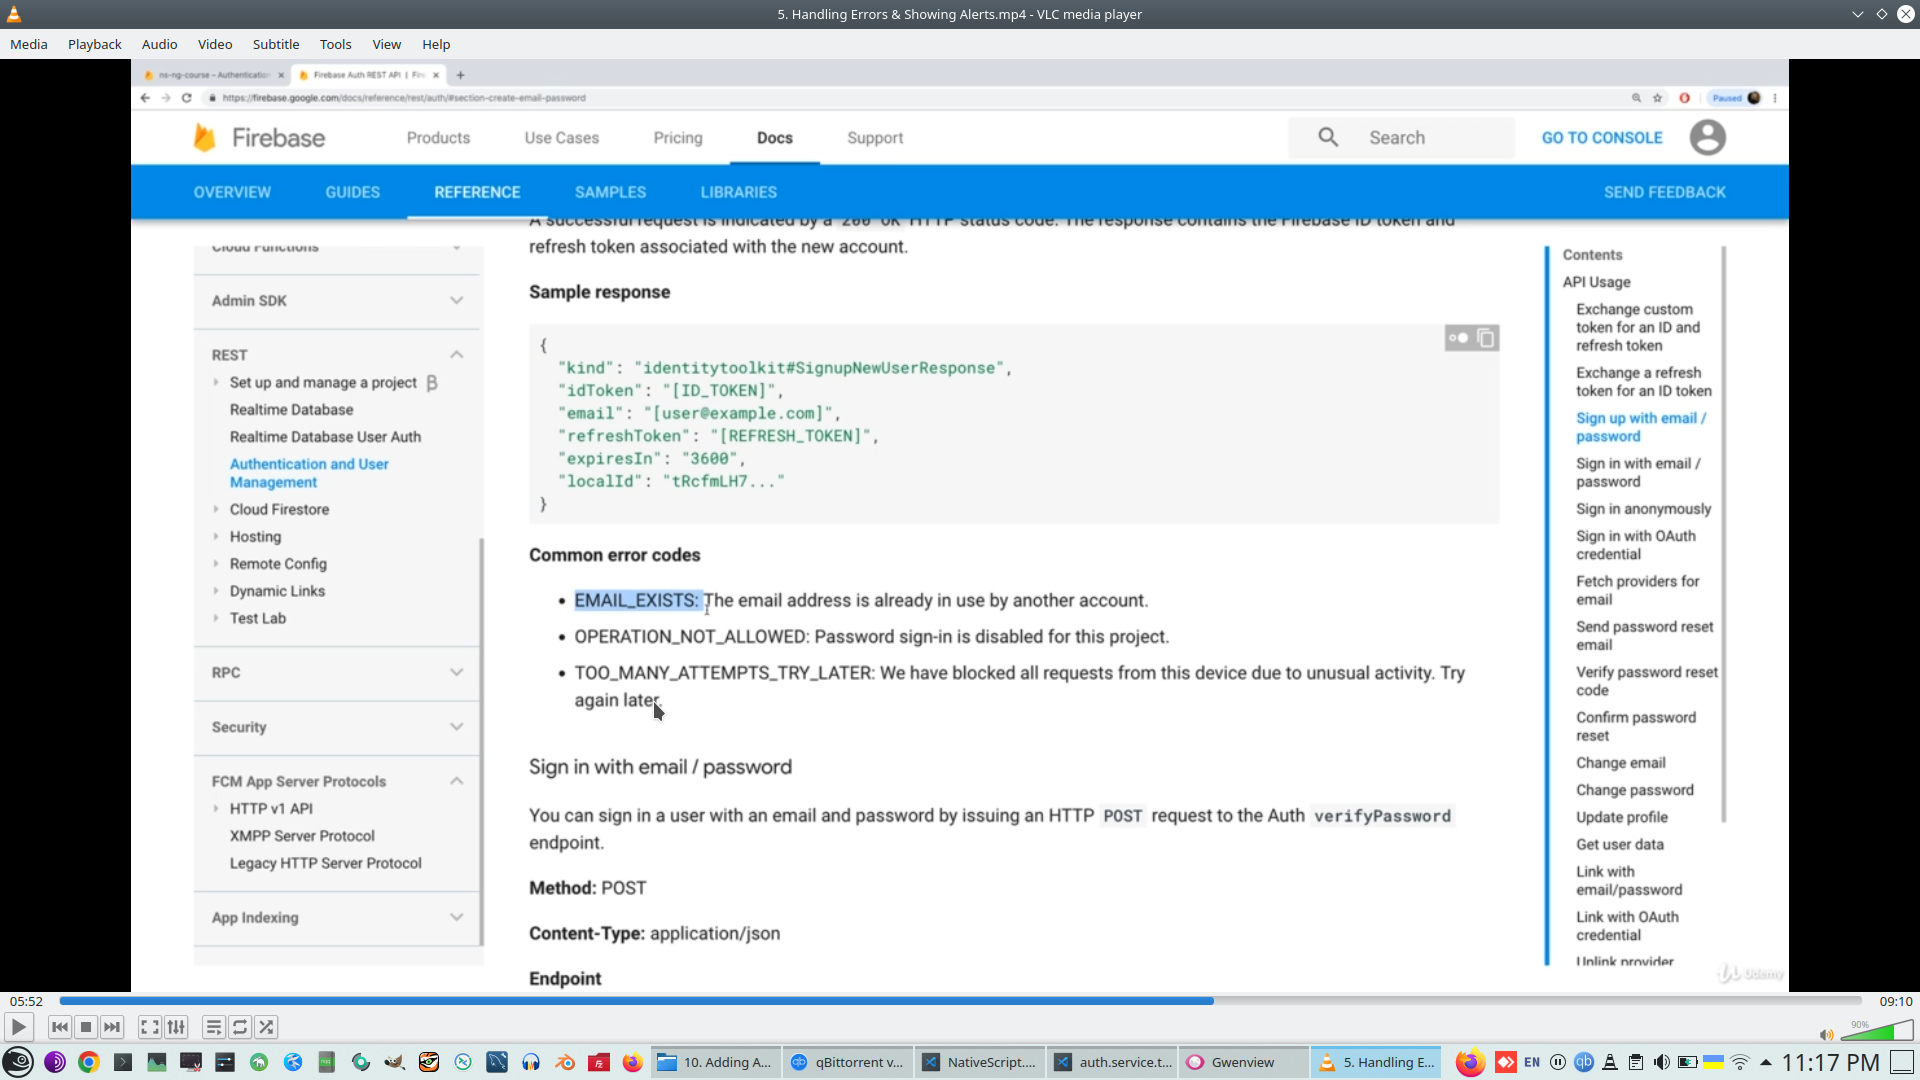
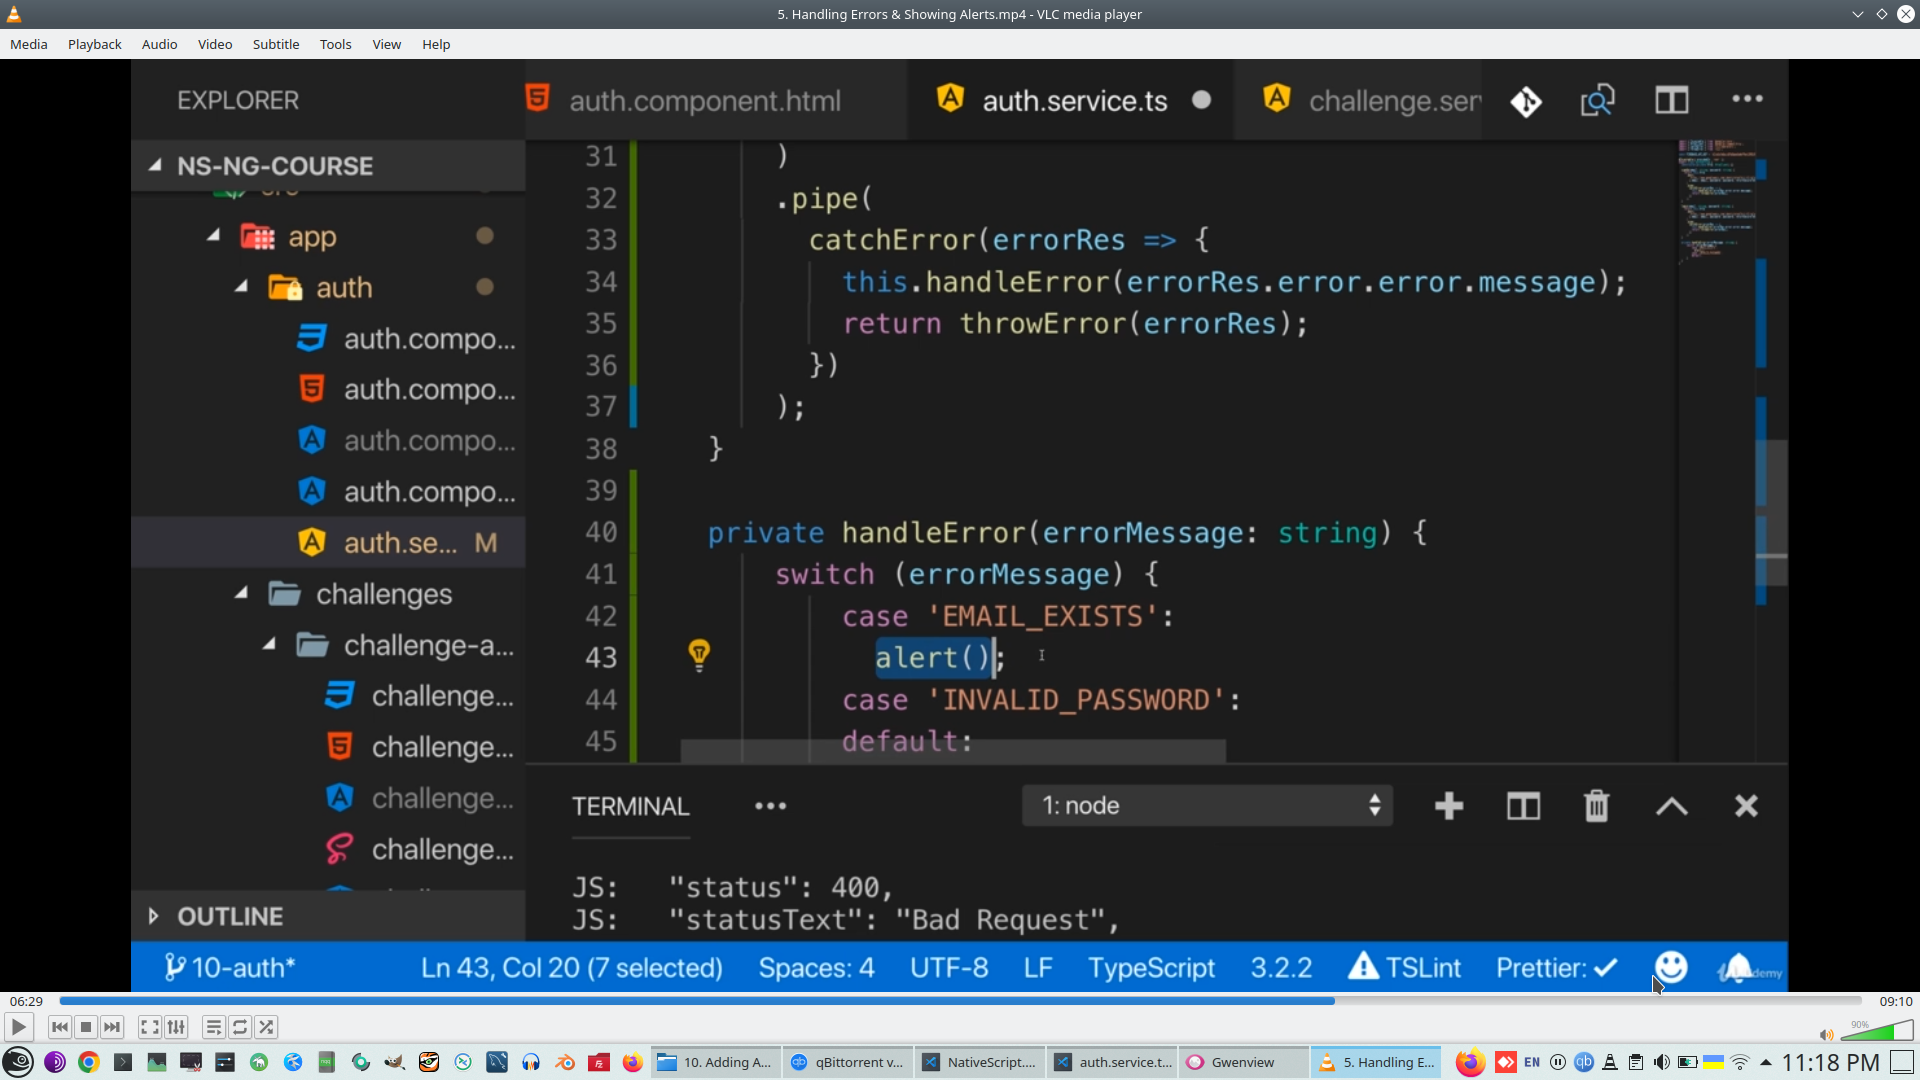
Handle that errors
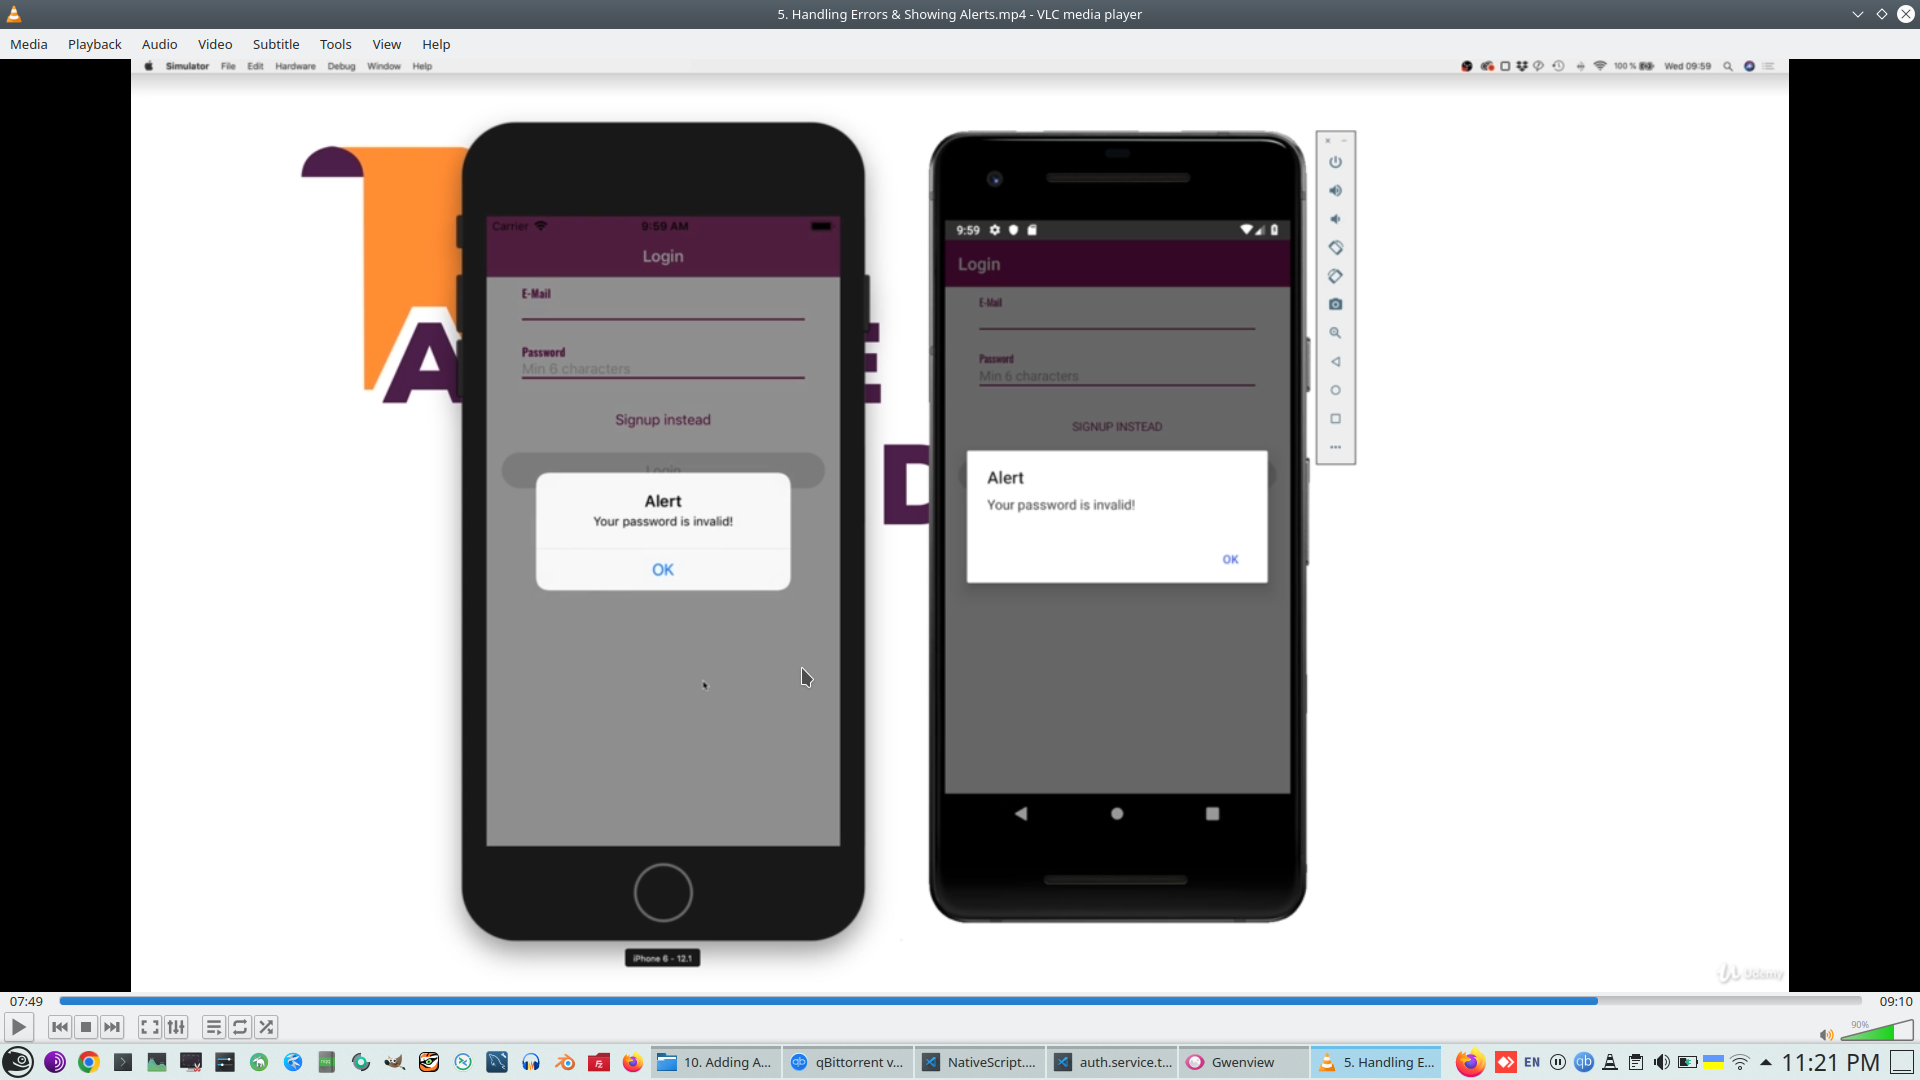
25. NativeScrip Alert finction is working!
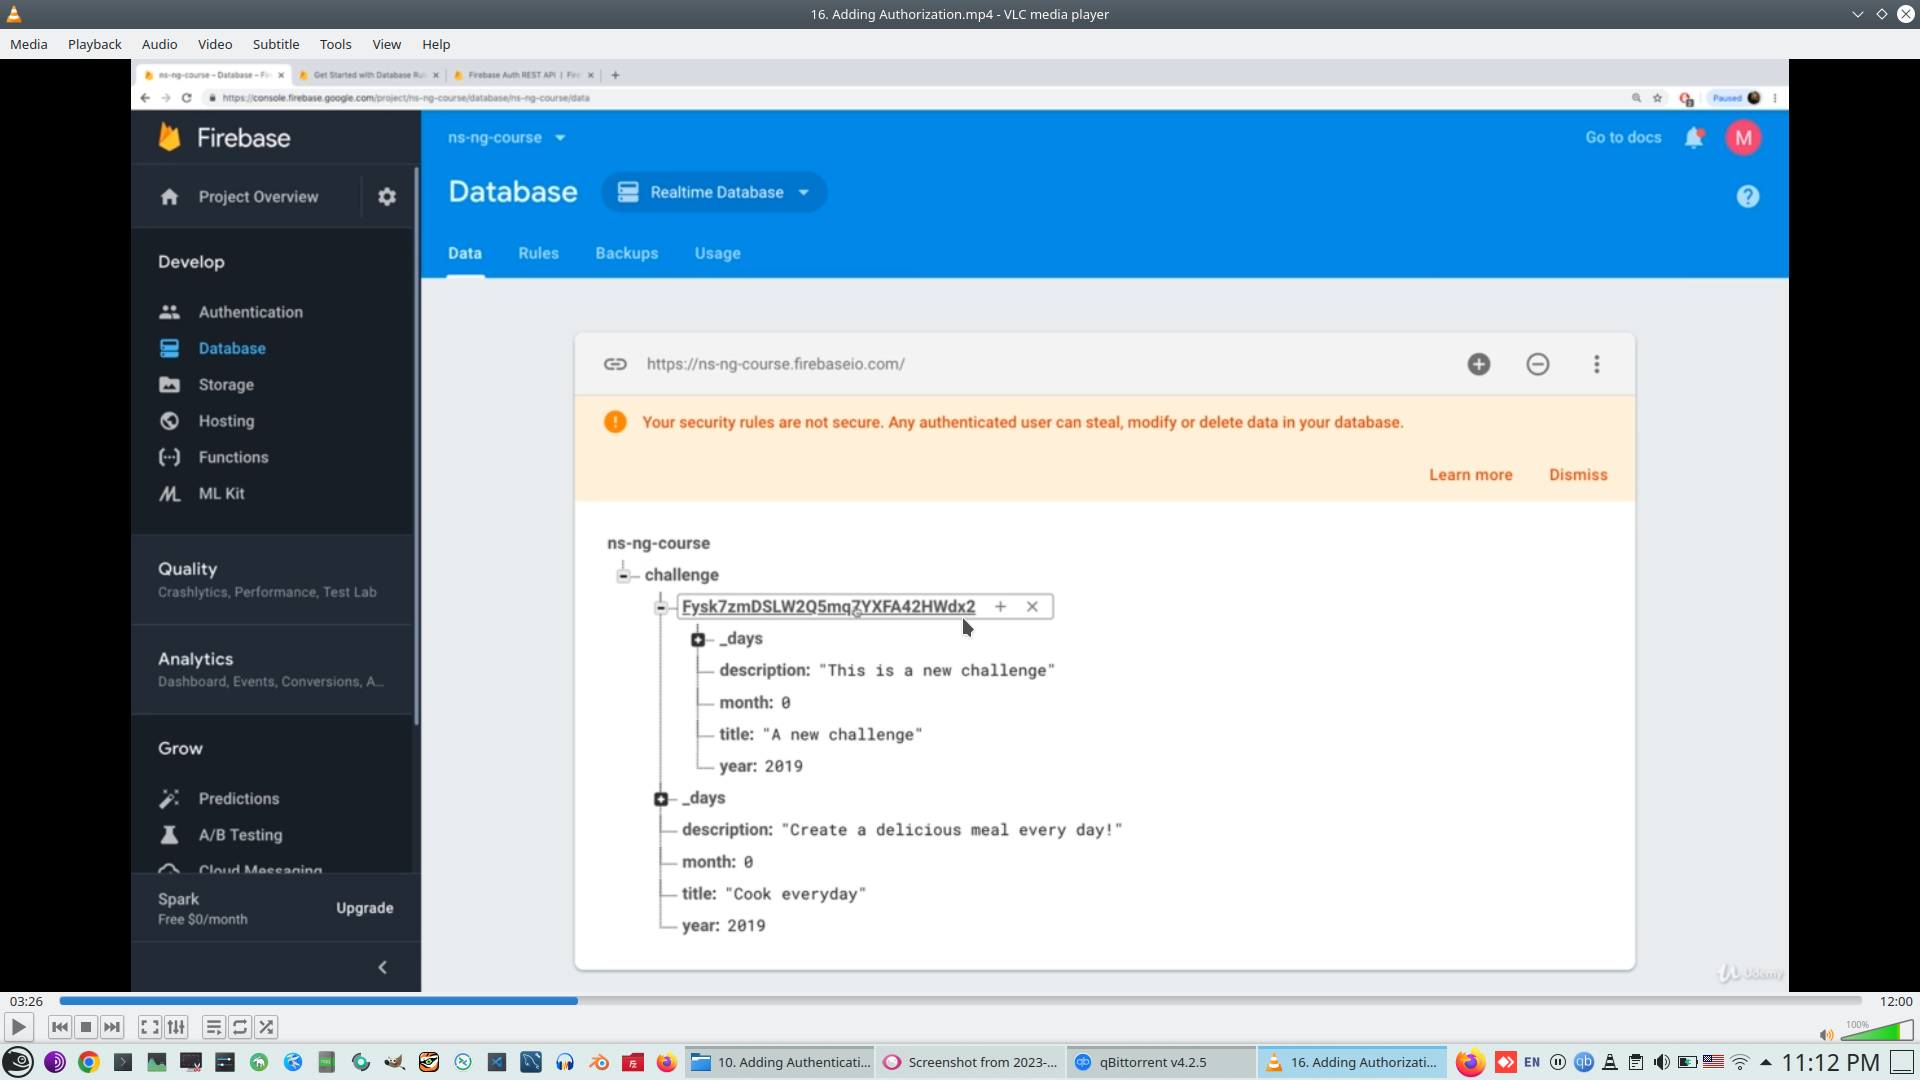
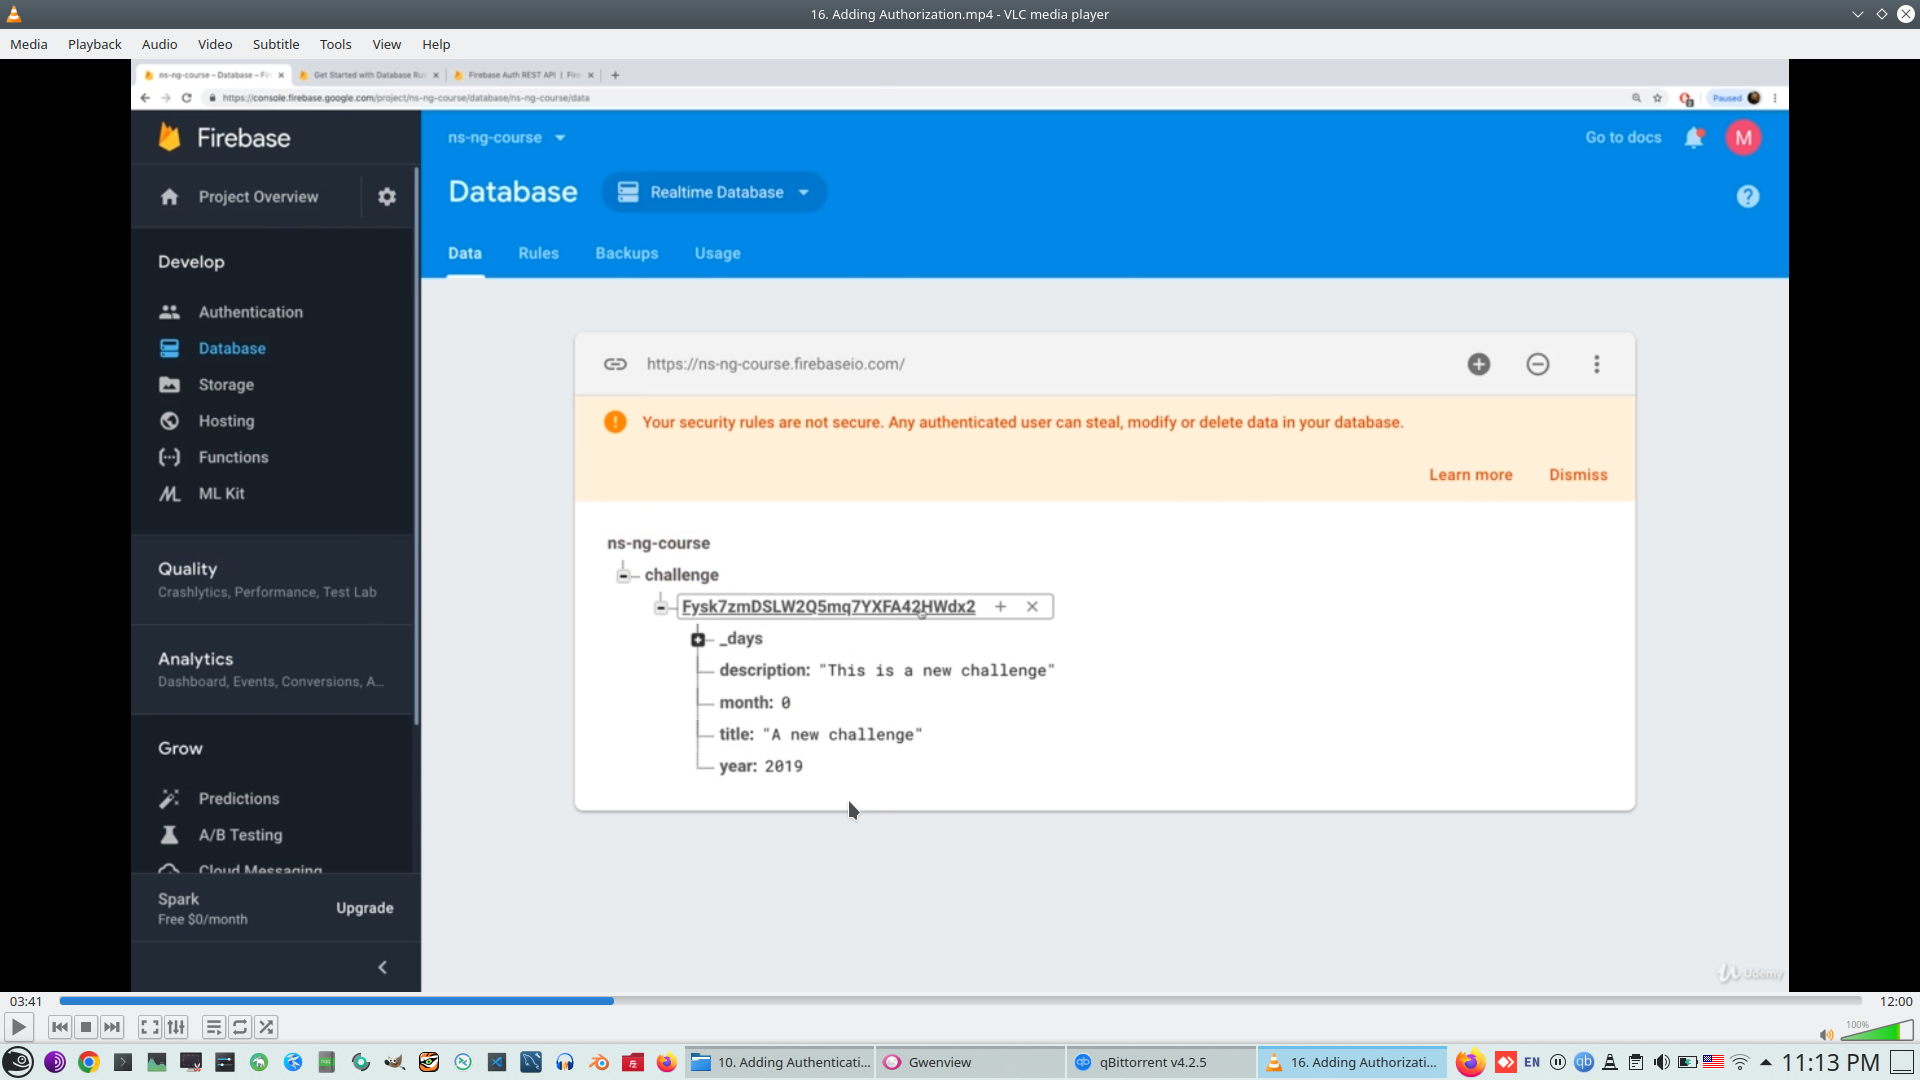
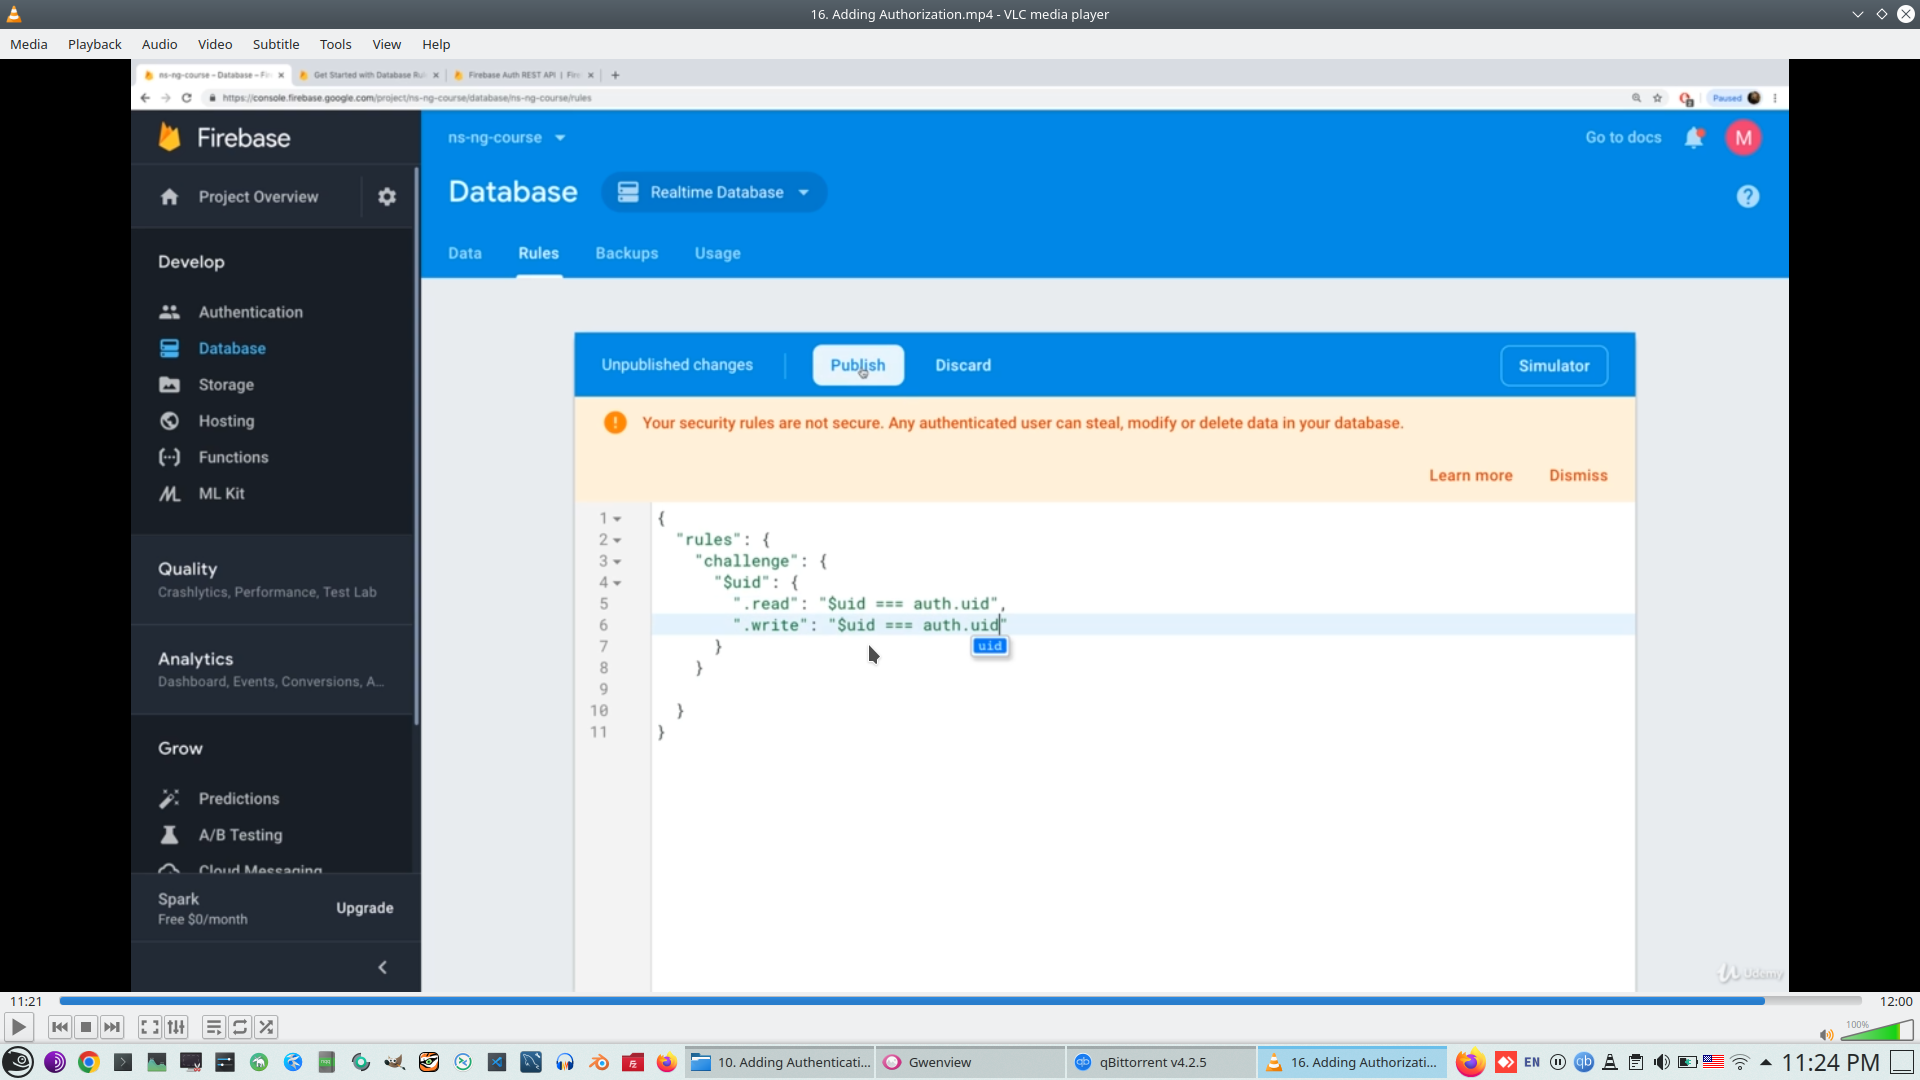
26. Start Authorization on Firebase, unlock databases for Users
Changing default databse rules to access databse only for Authenticated users

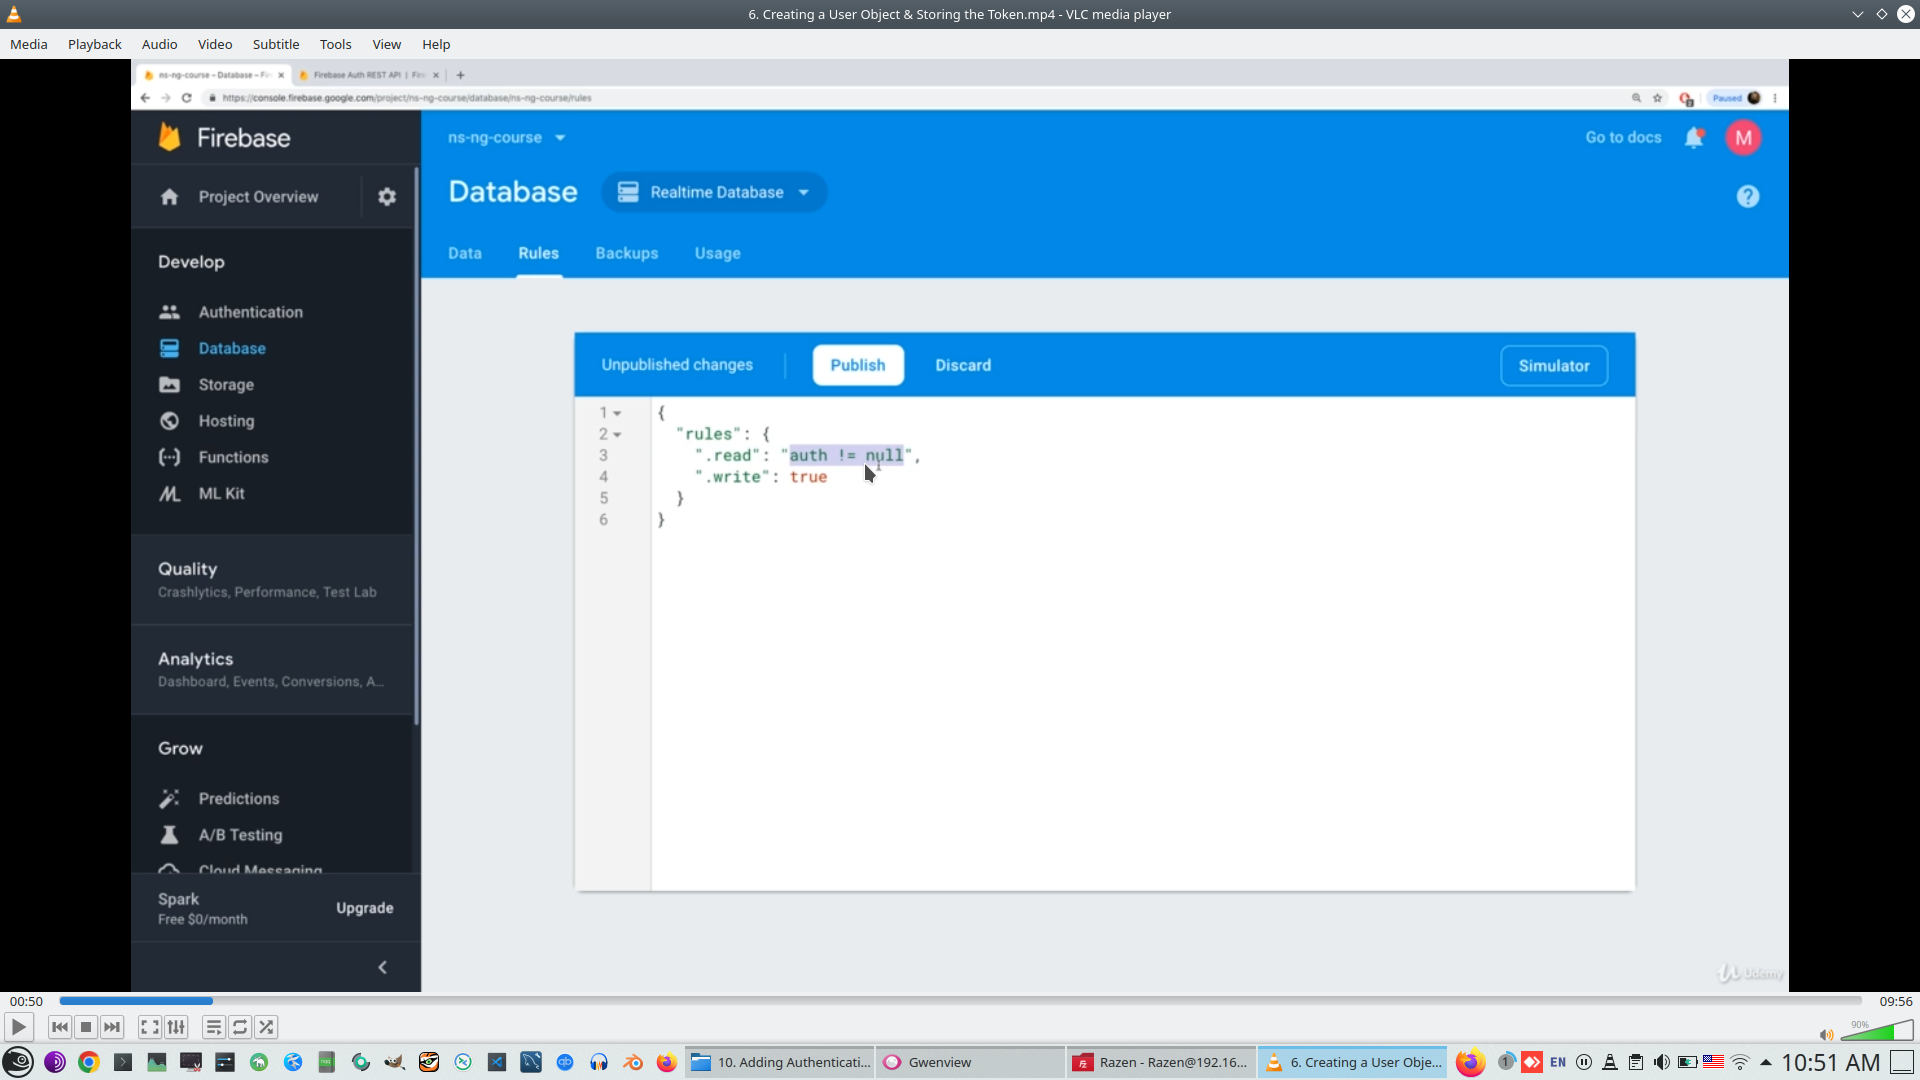
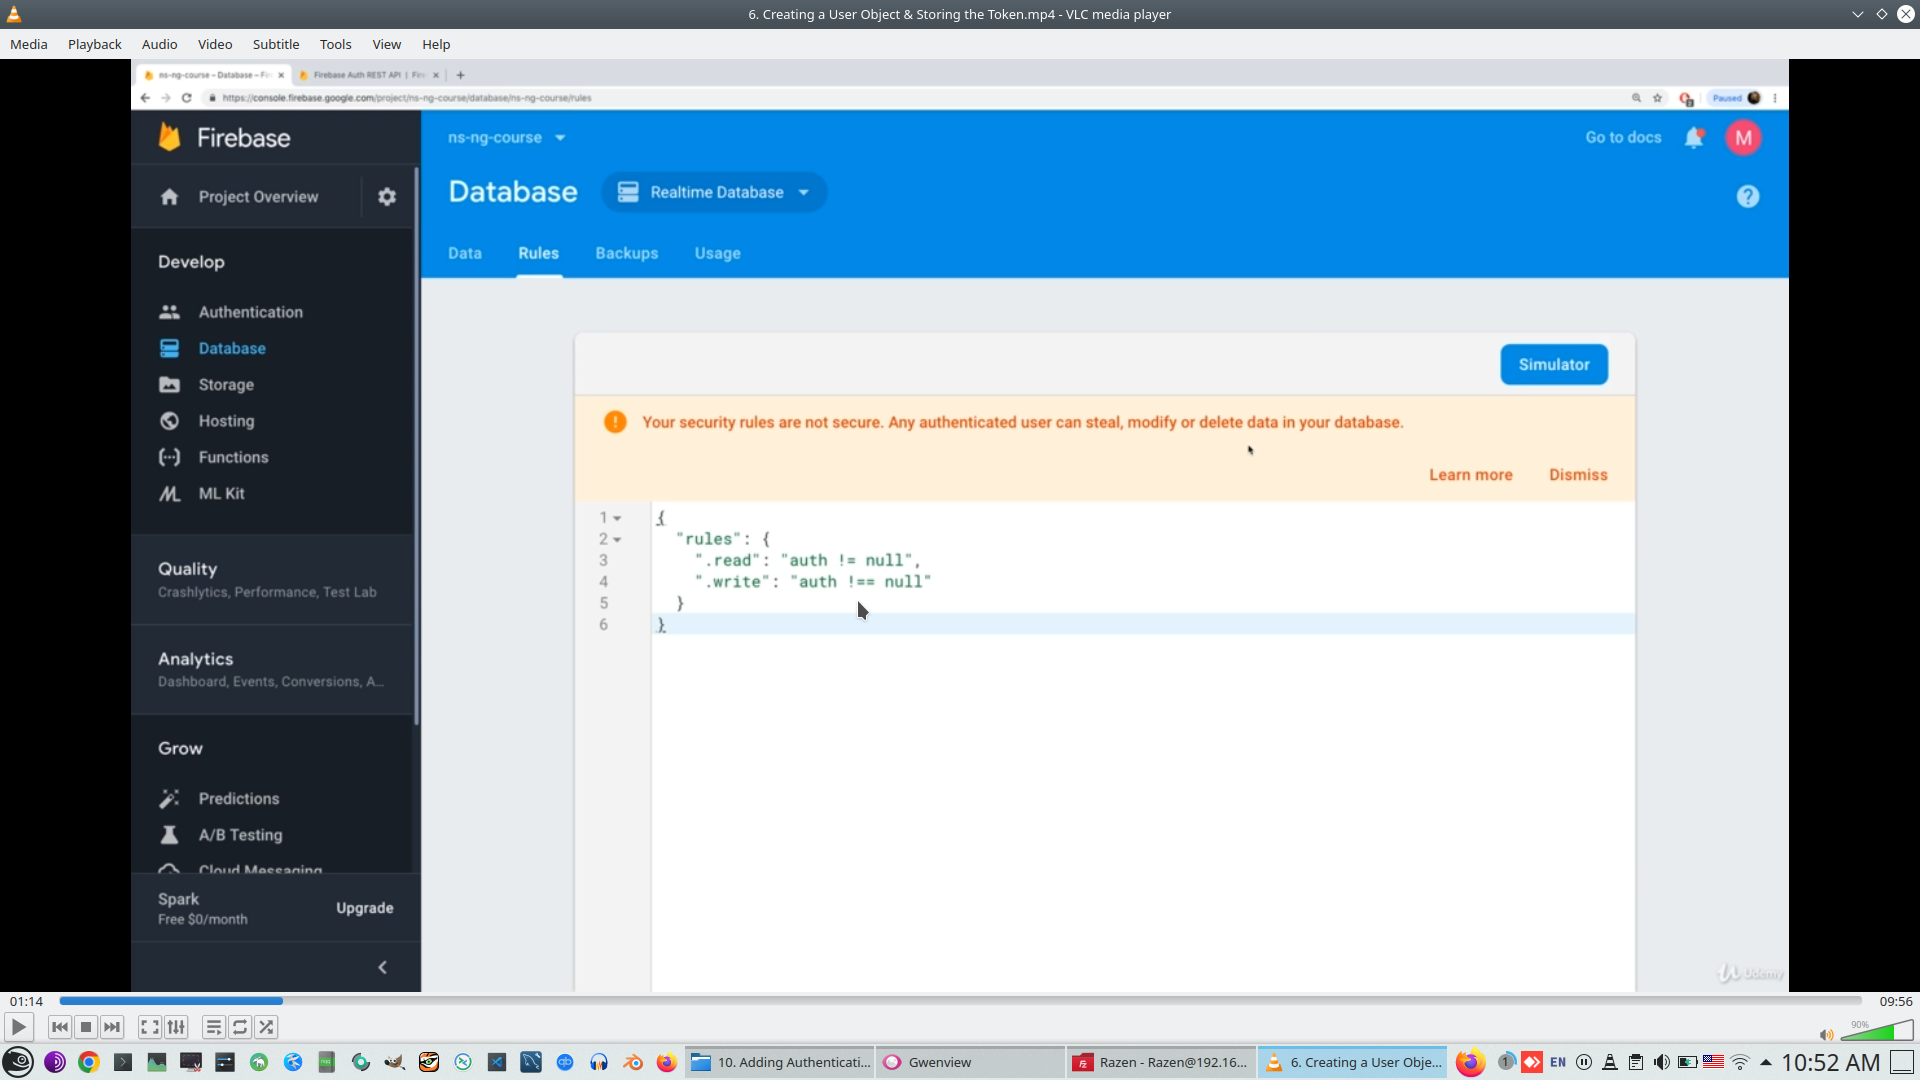
And check rules
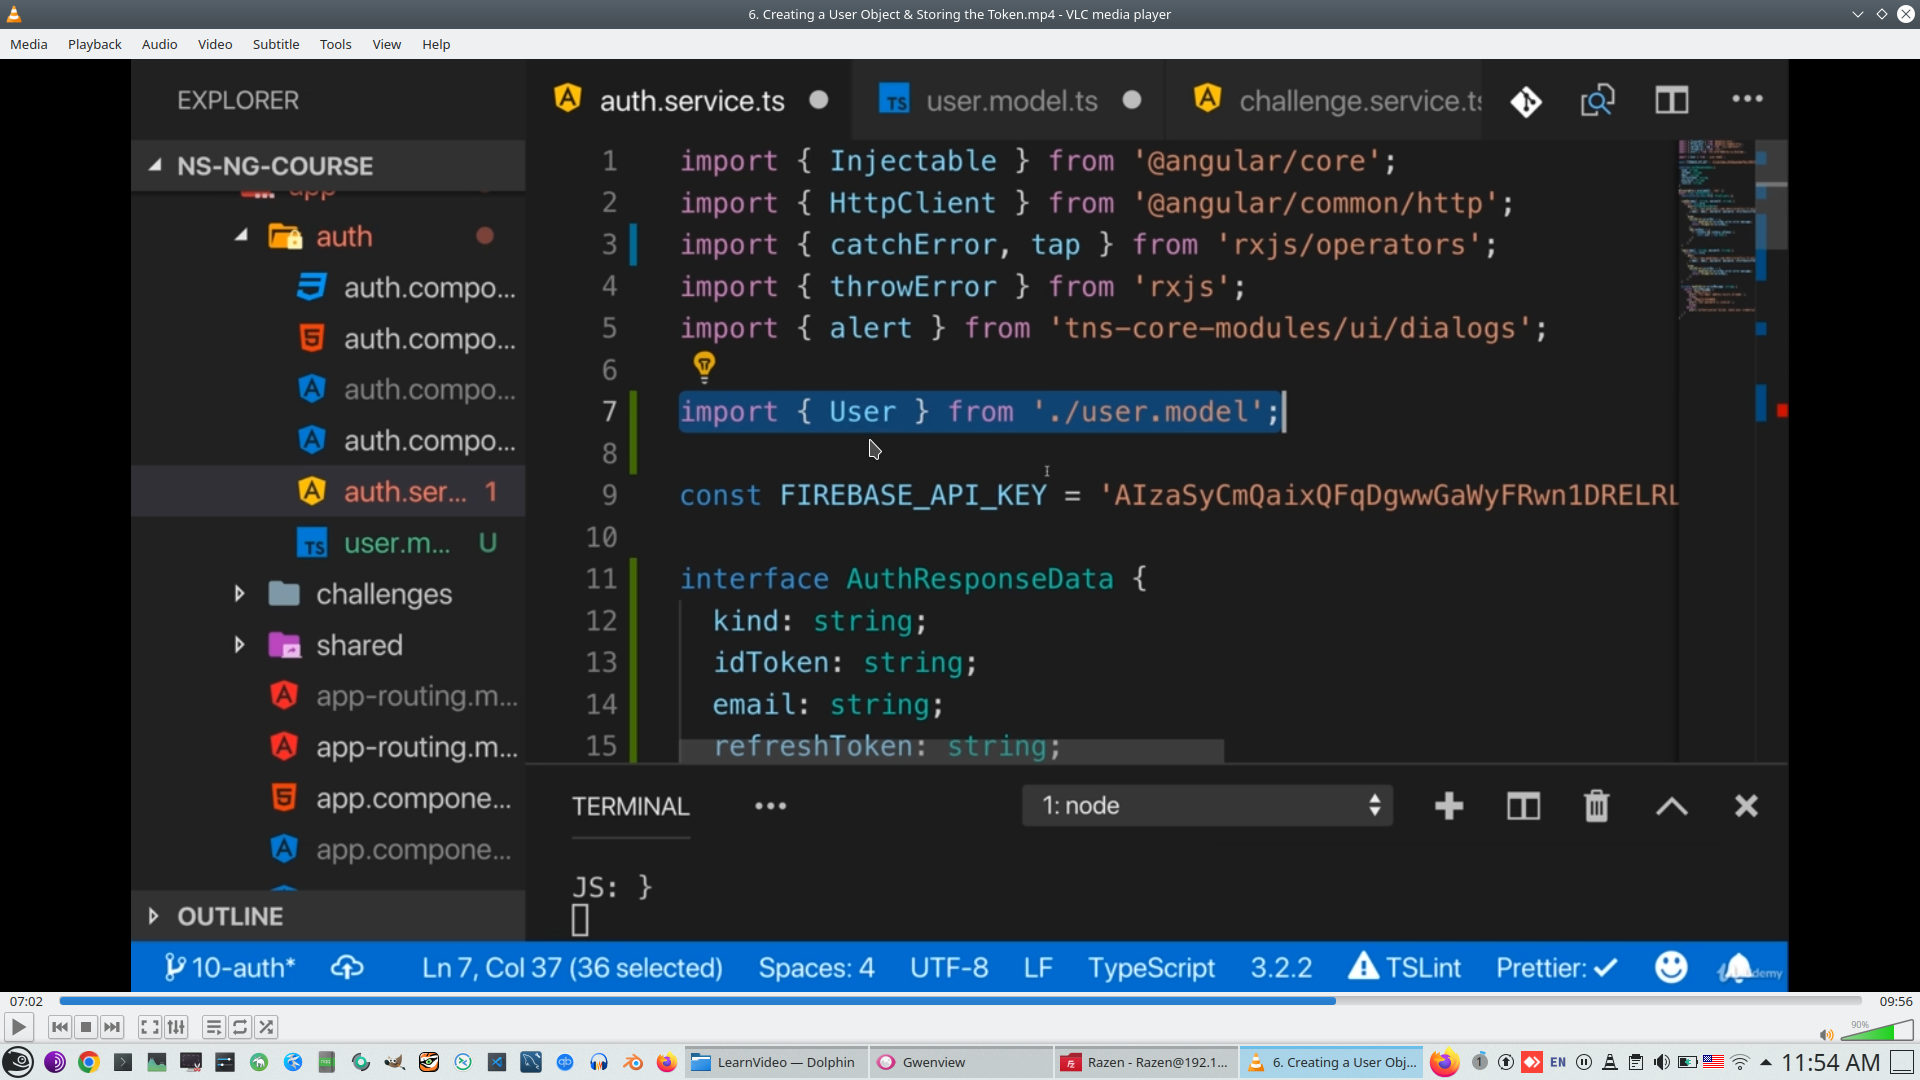
Currently all users store own data only one place - one for all users

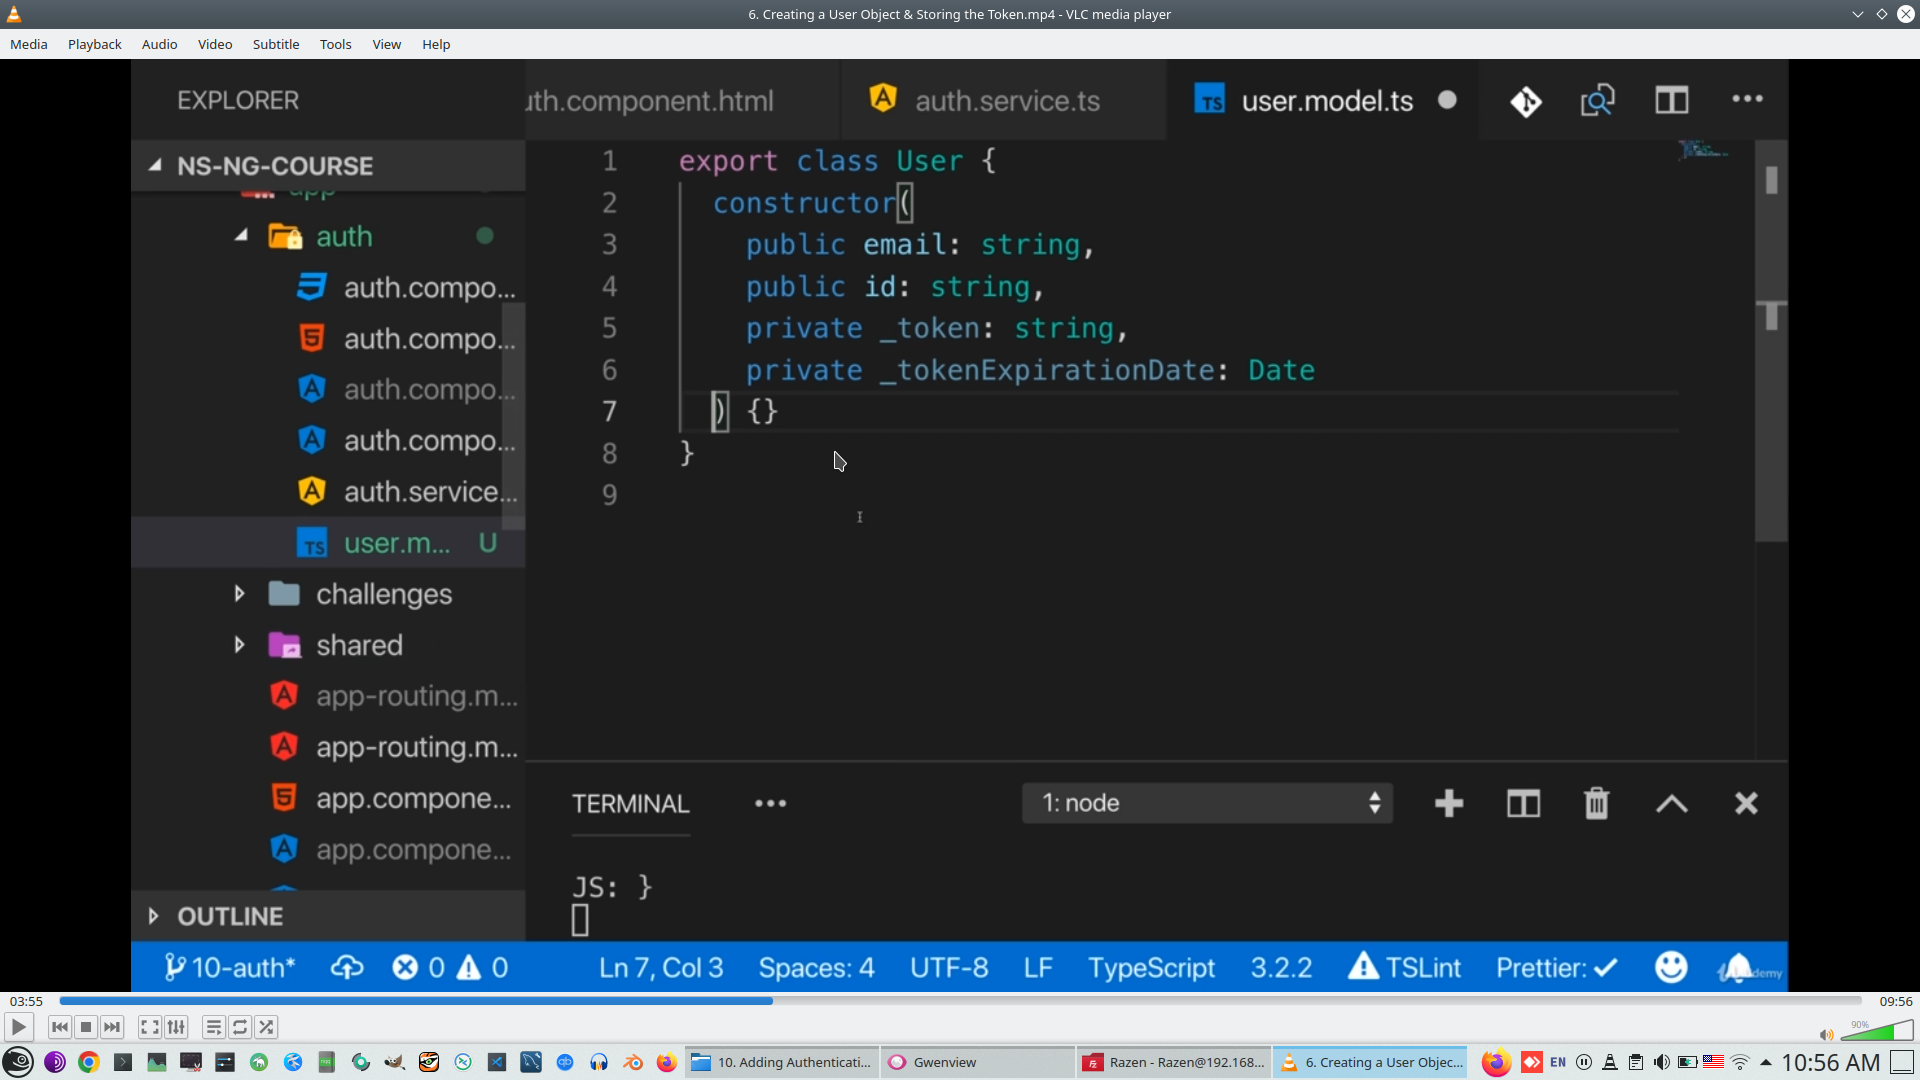
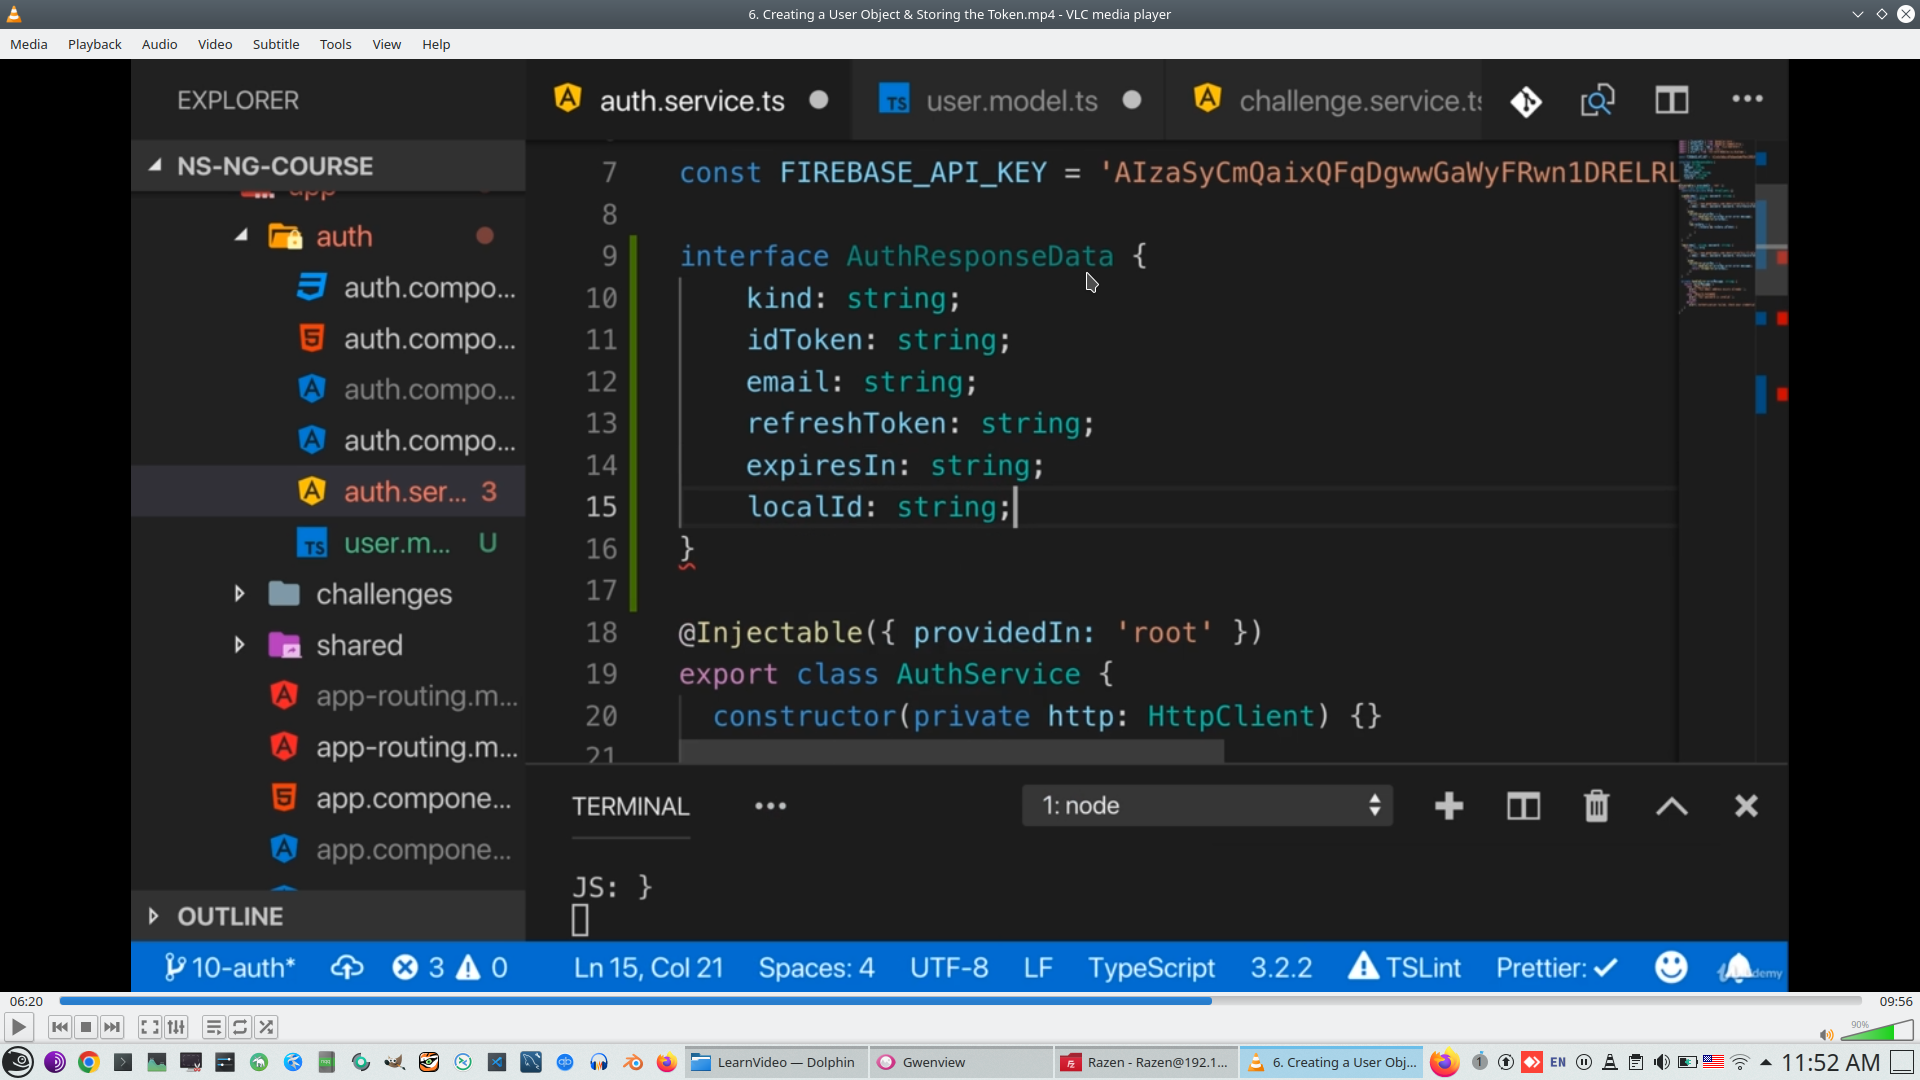
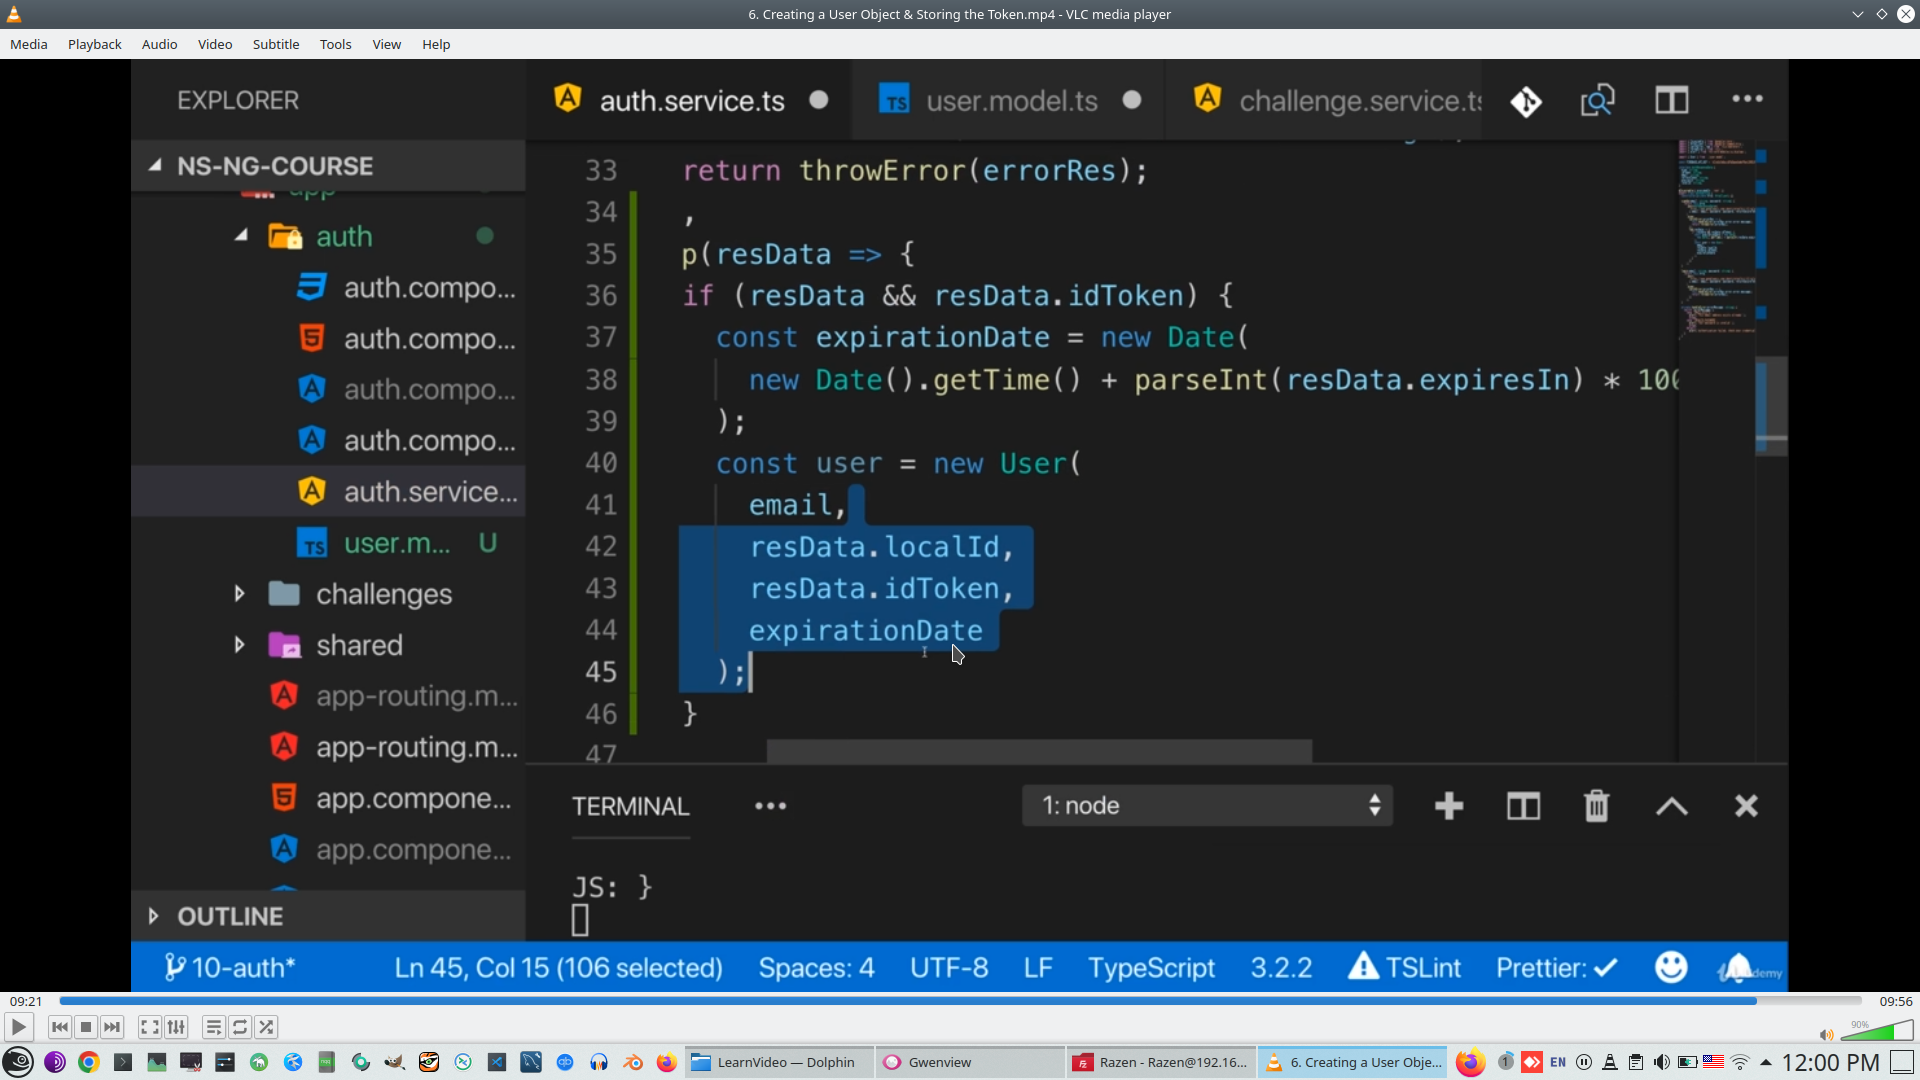
Create class to store User information
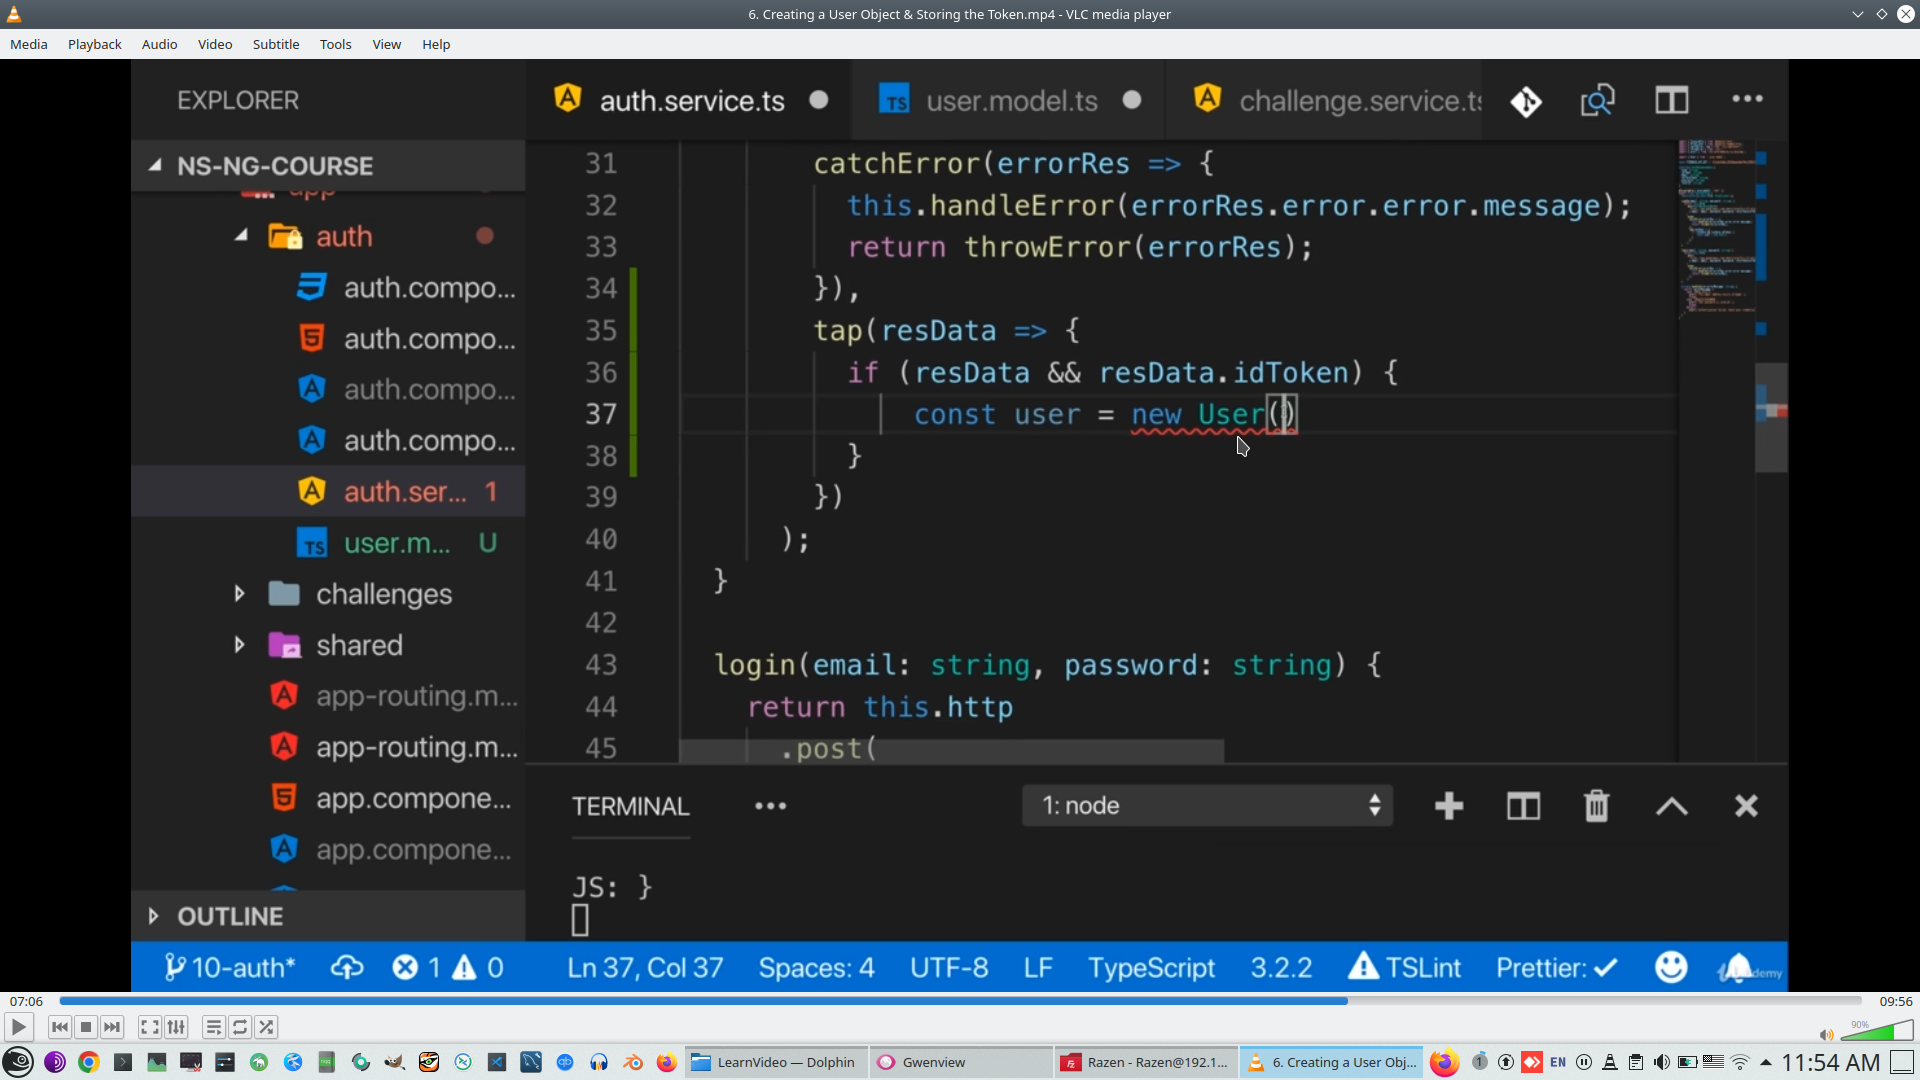
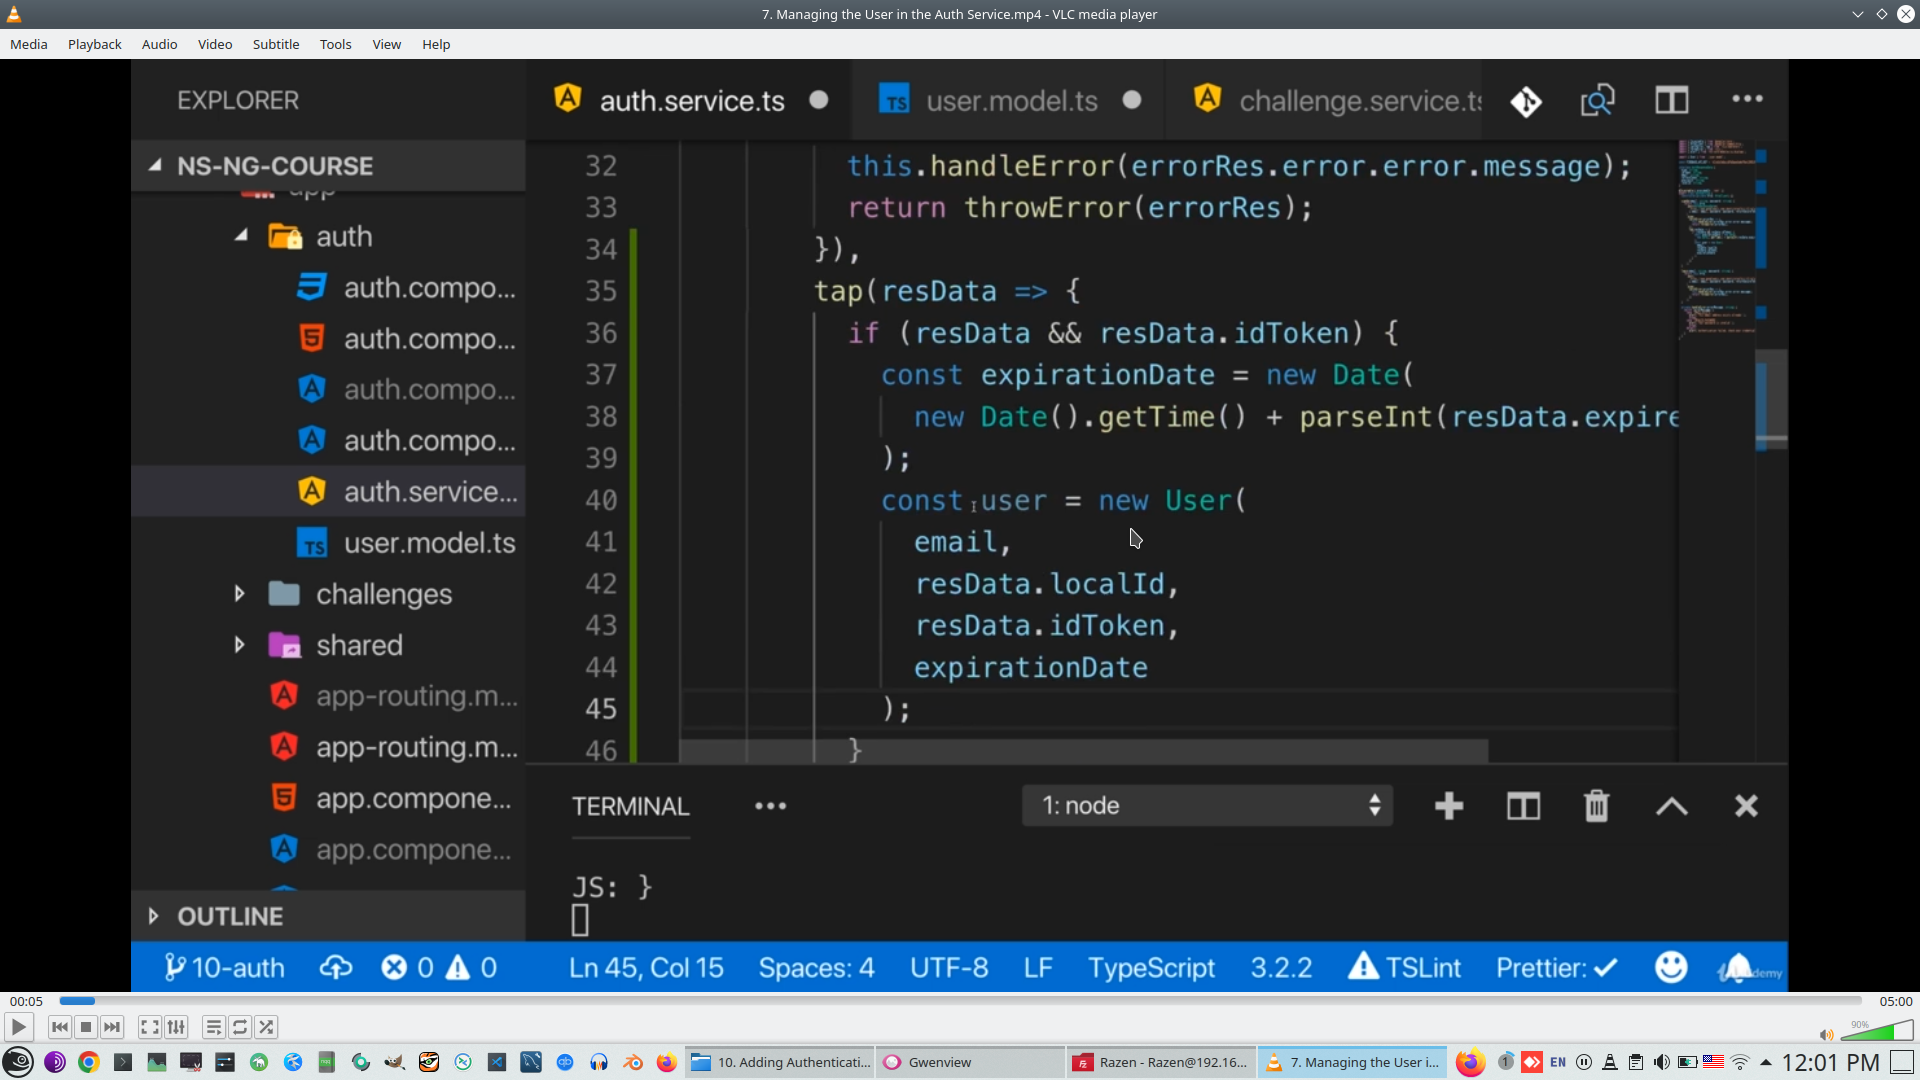
Import Tap from RxJs https://rxjs.dev/api/operators/tap
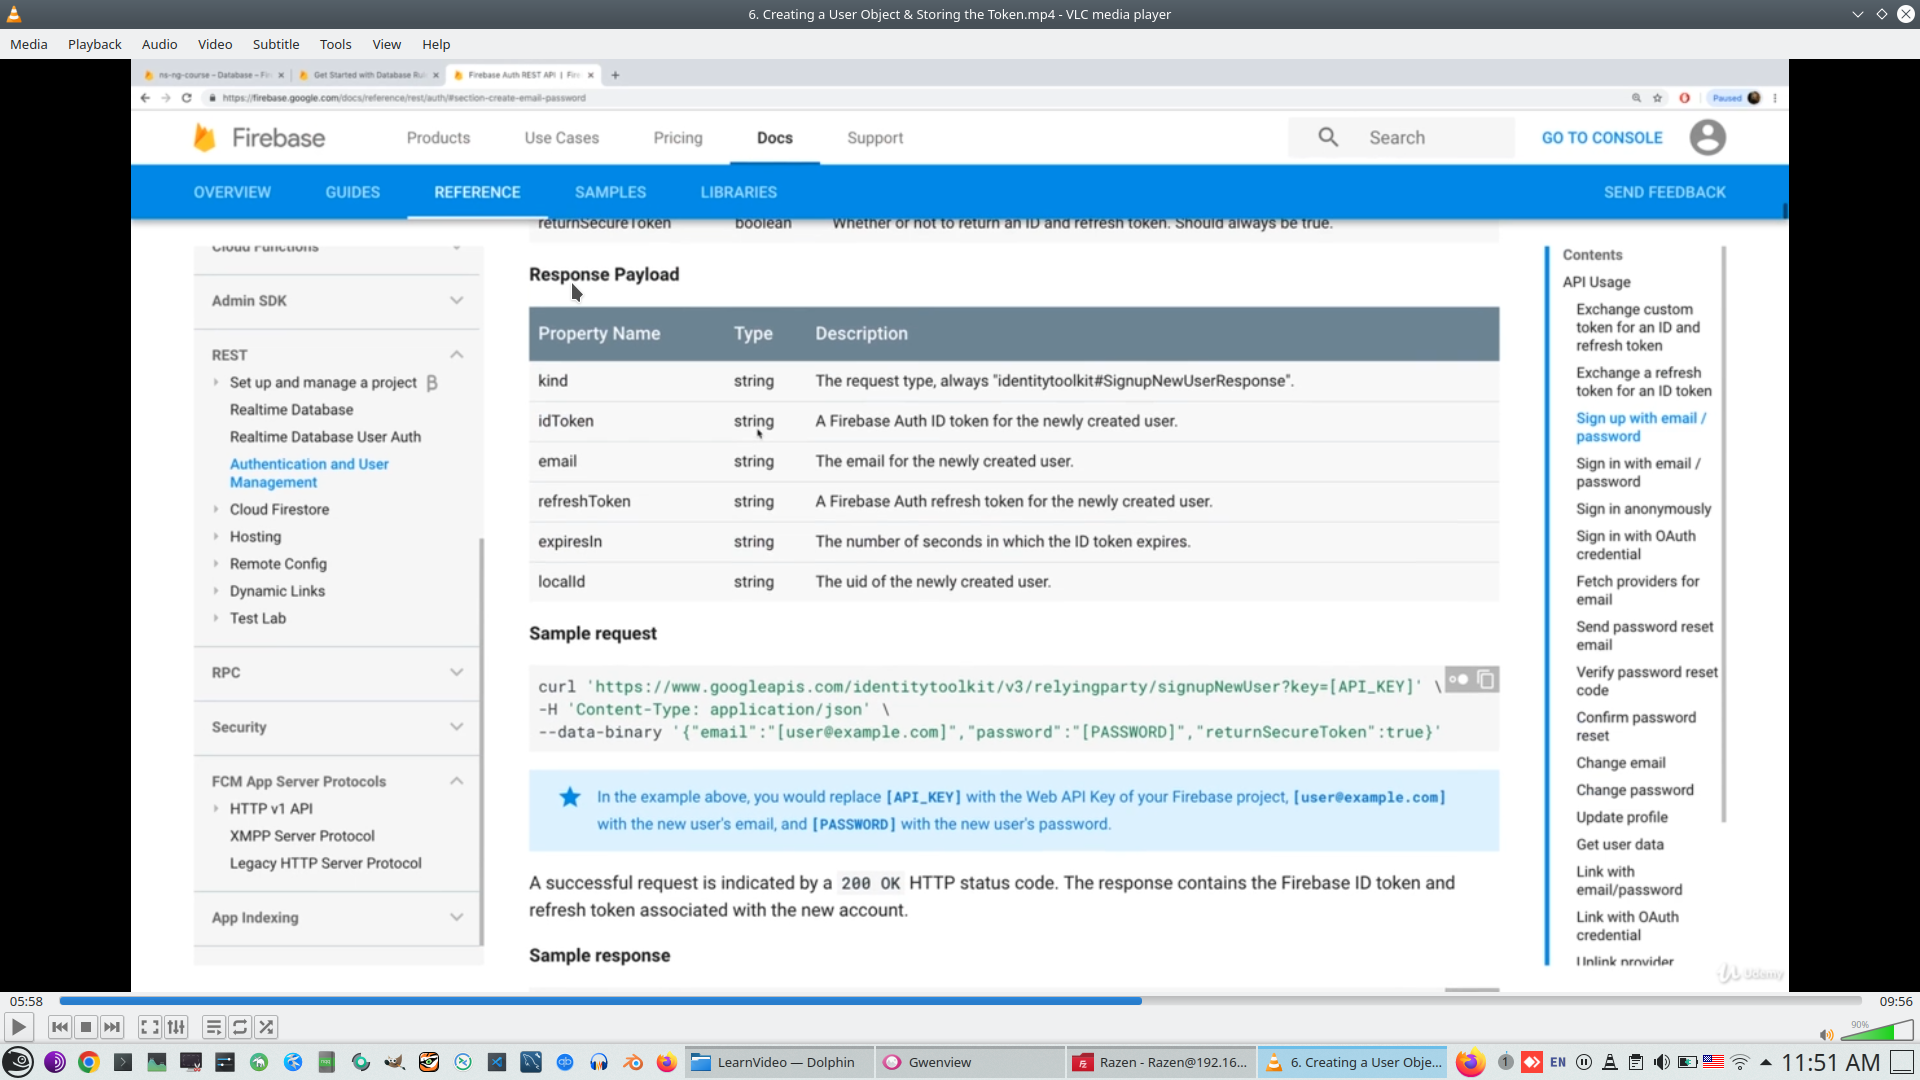
Create types post request
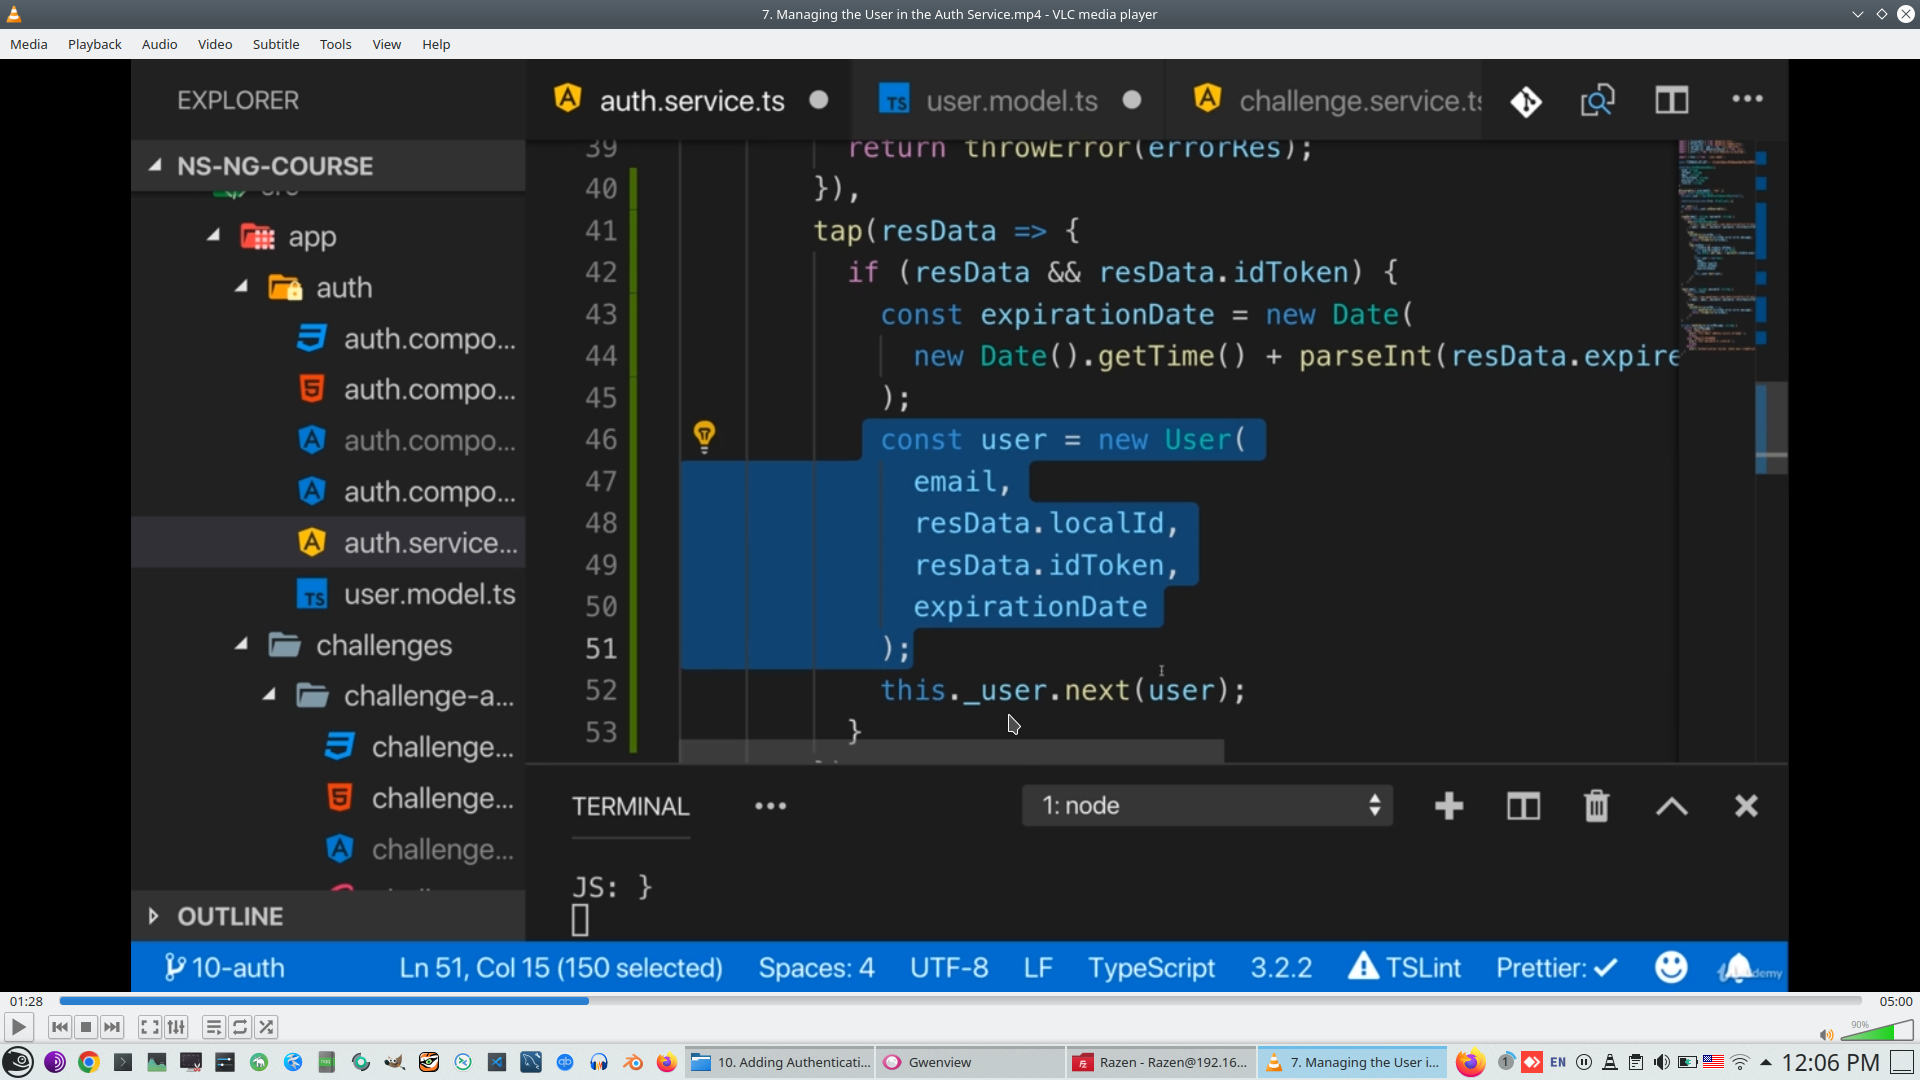
Tap is possible second argument of Post request, we create new User on Tap based on typed response
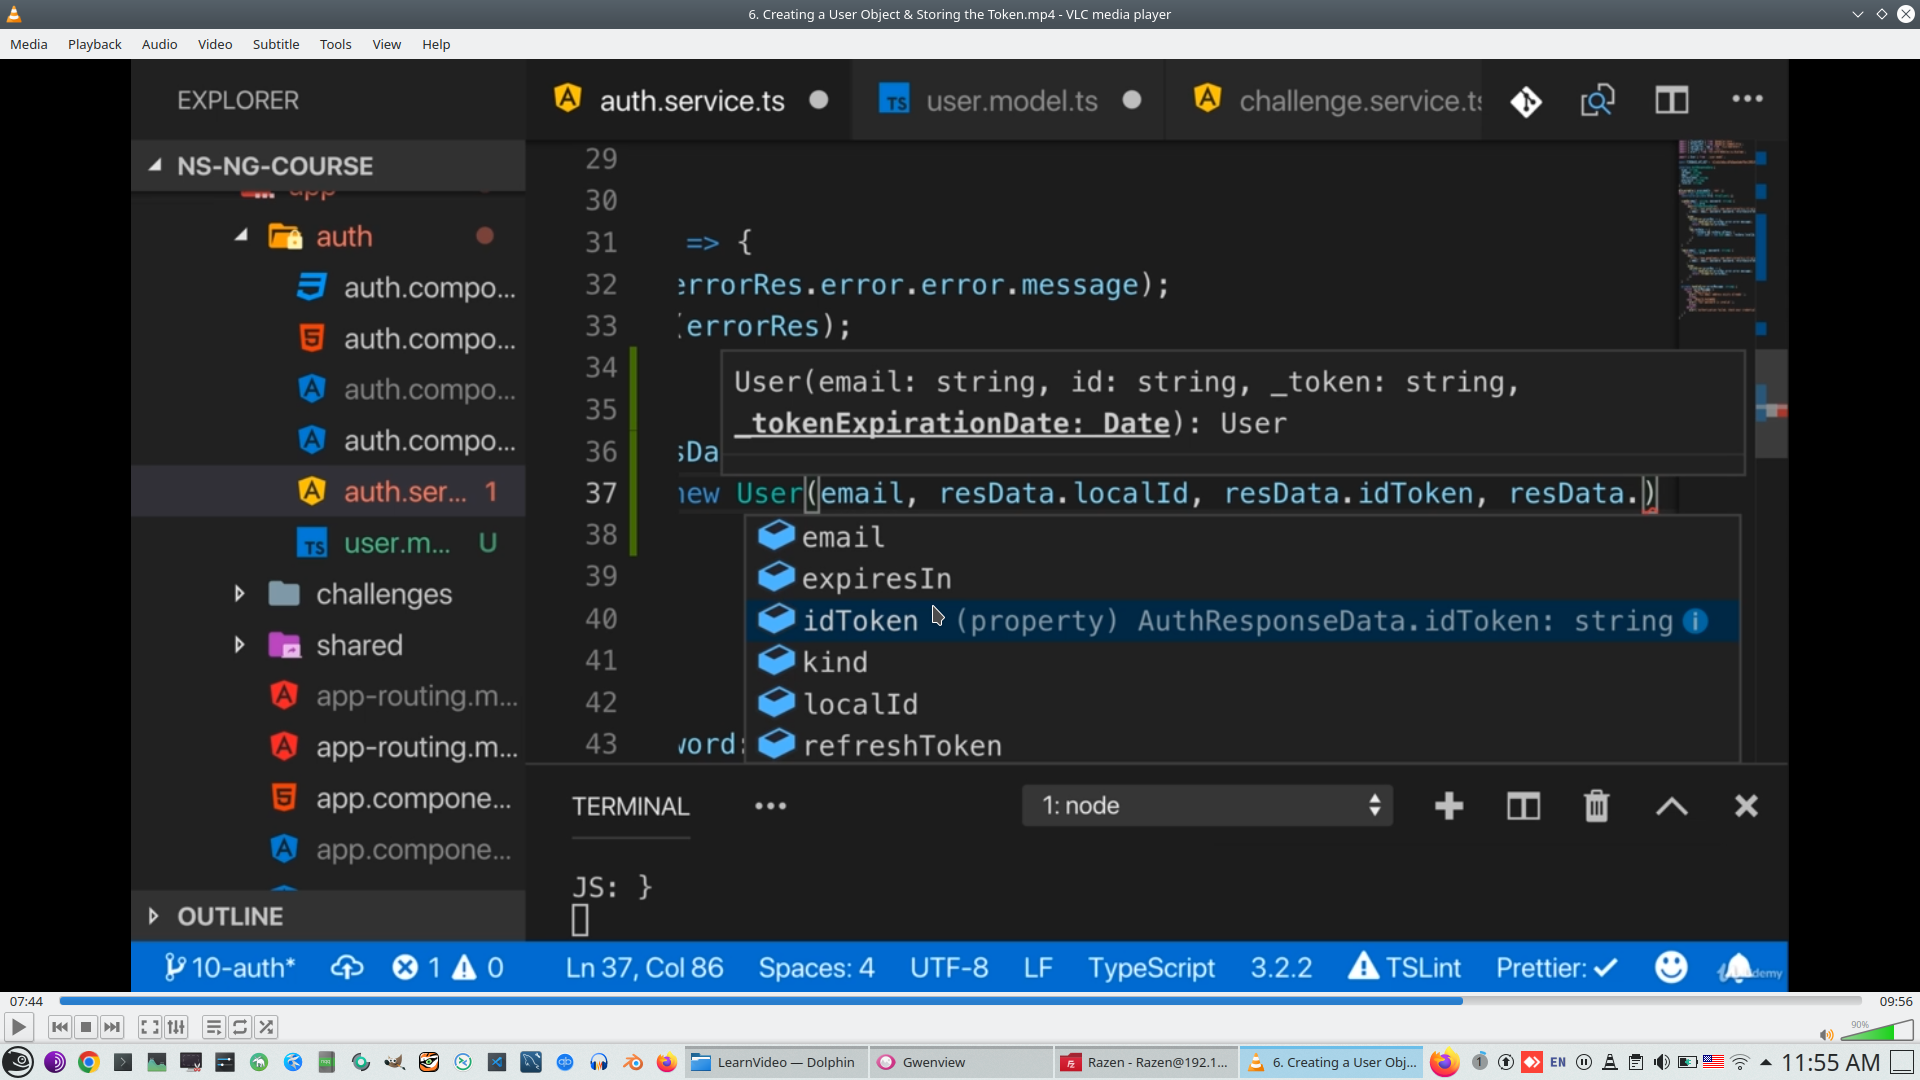
But problem with data, we need convert data to milliseconds and calculate experied date
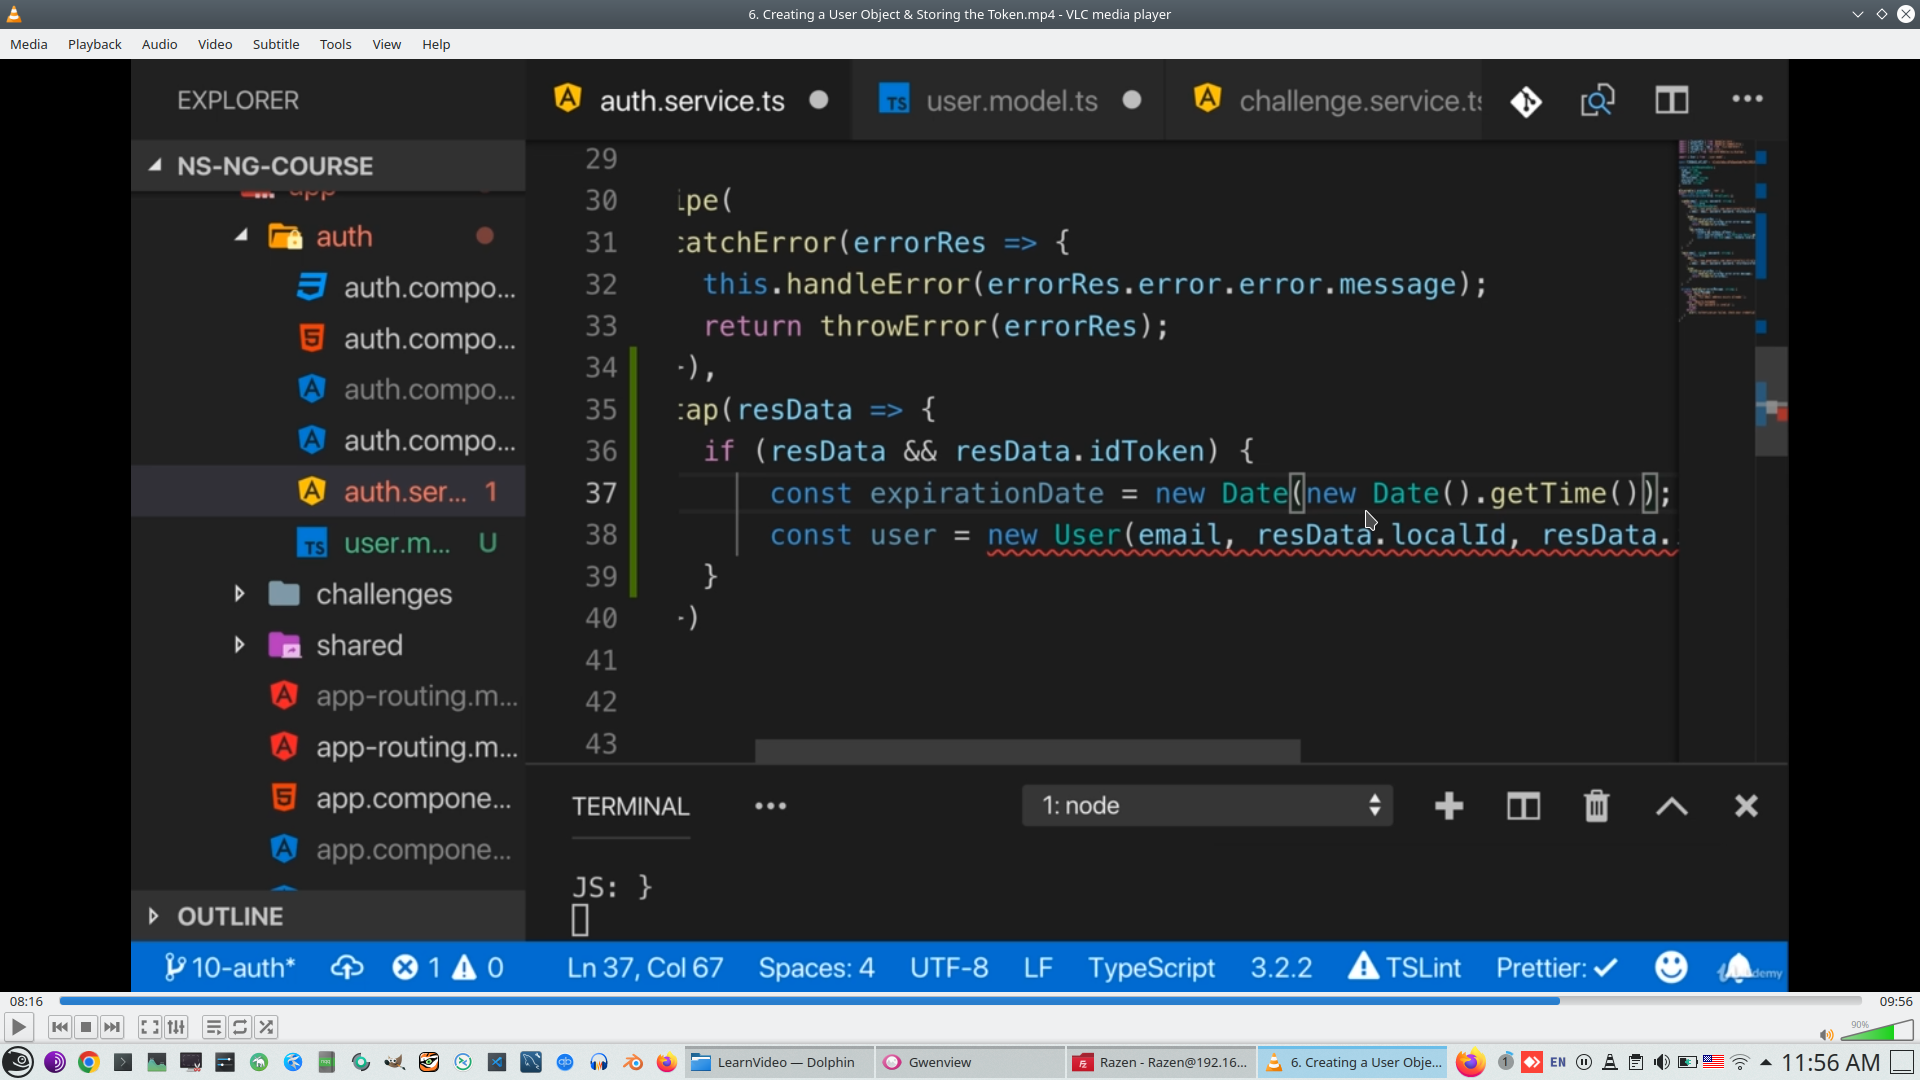
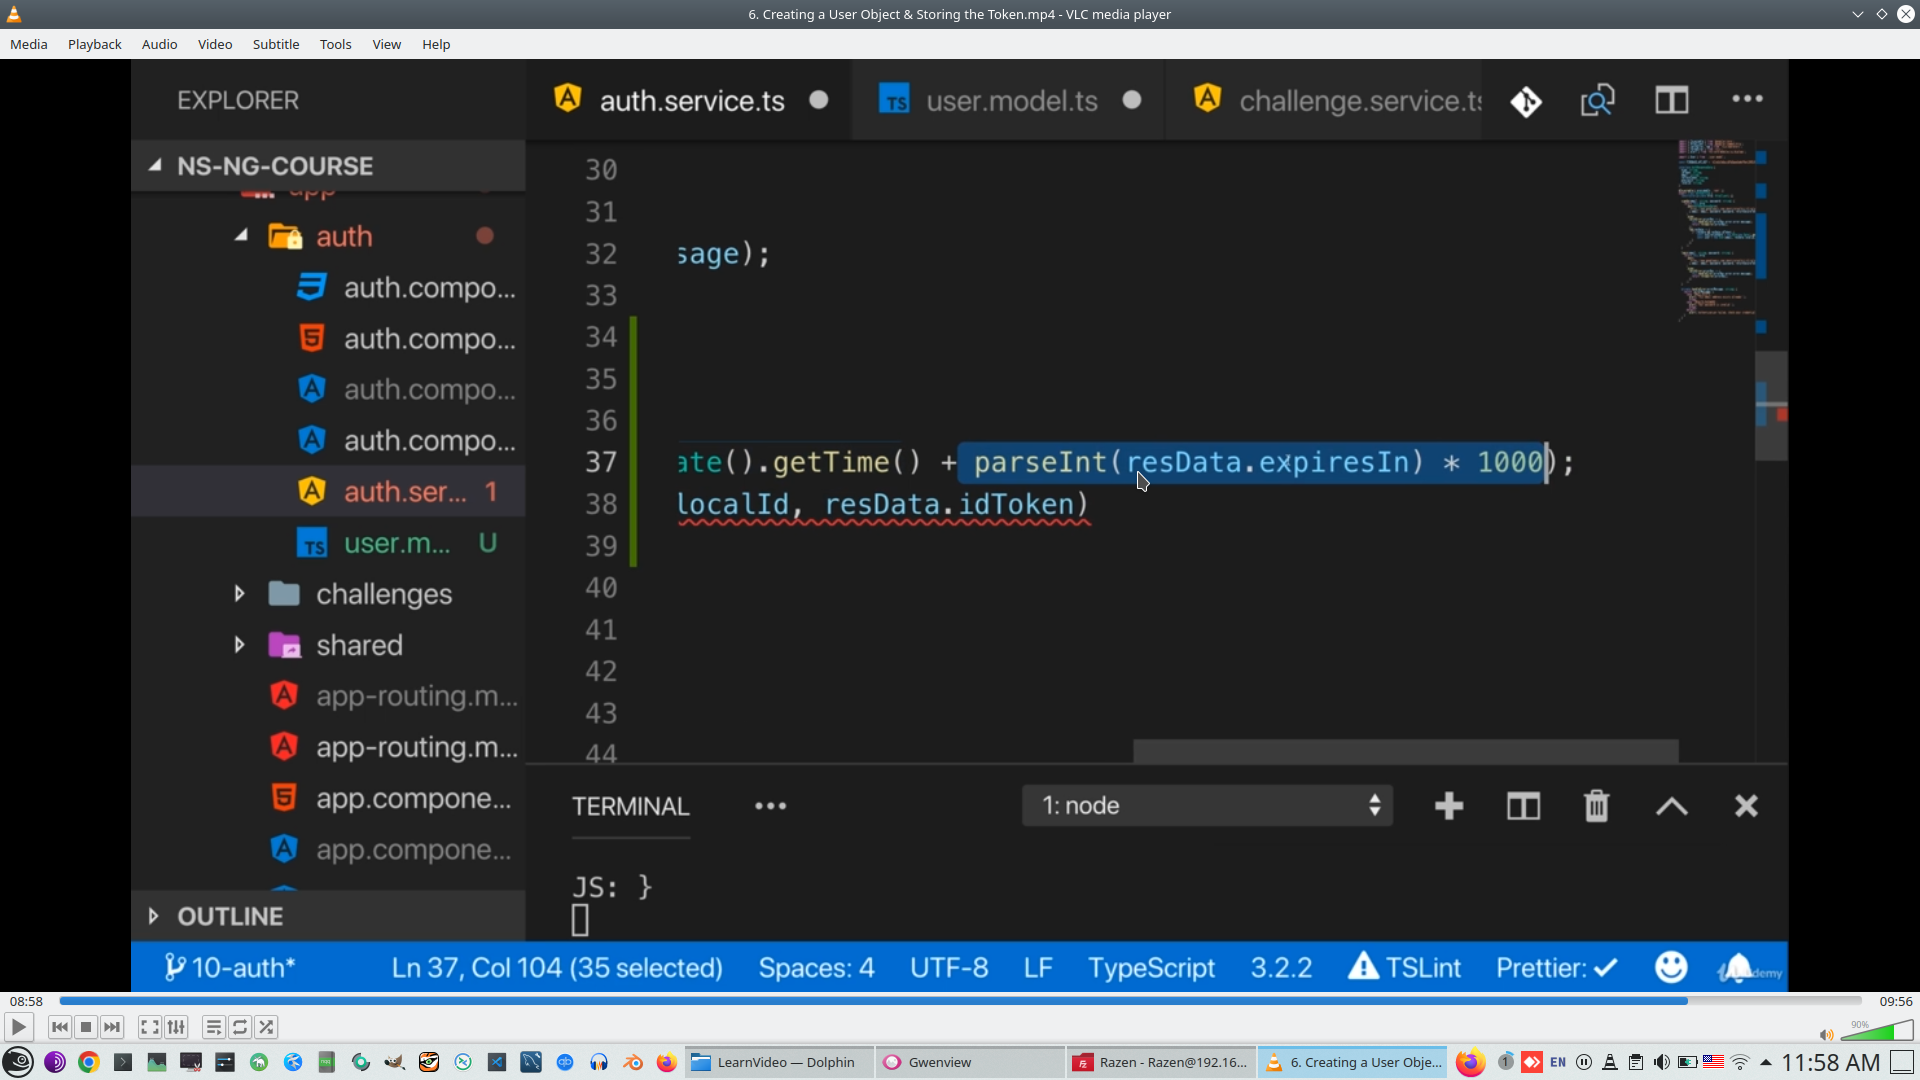
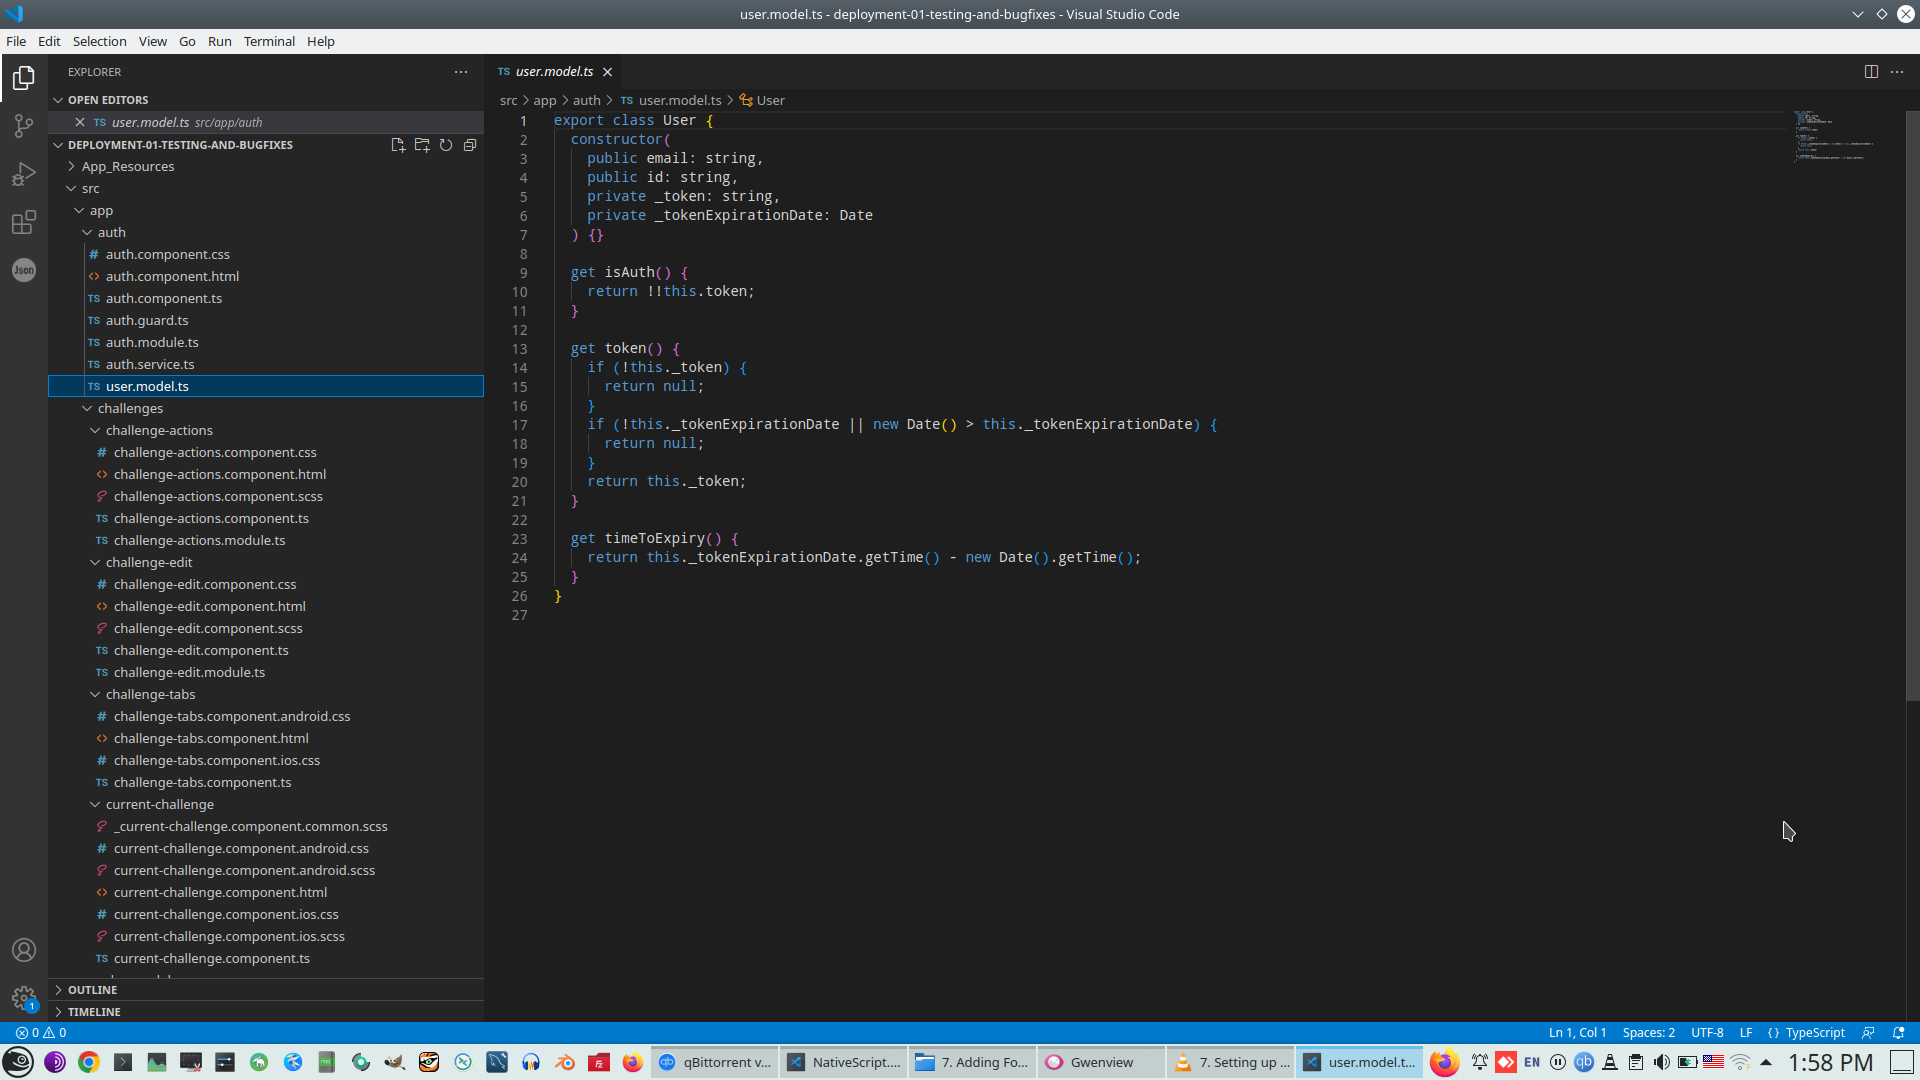
And finally we create new User with correct token experied time
We have new user, but still don't use it, now we create BehaviorObject from RxJs allow to subscribe https://rxjs.dev/api/index/class/BehaviorSubject
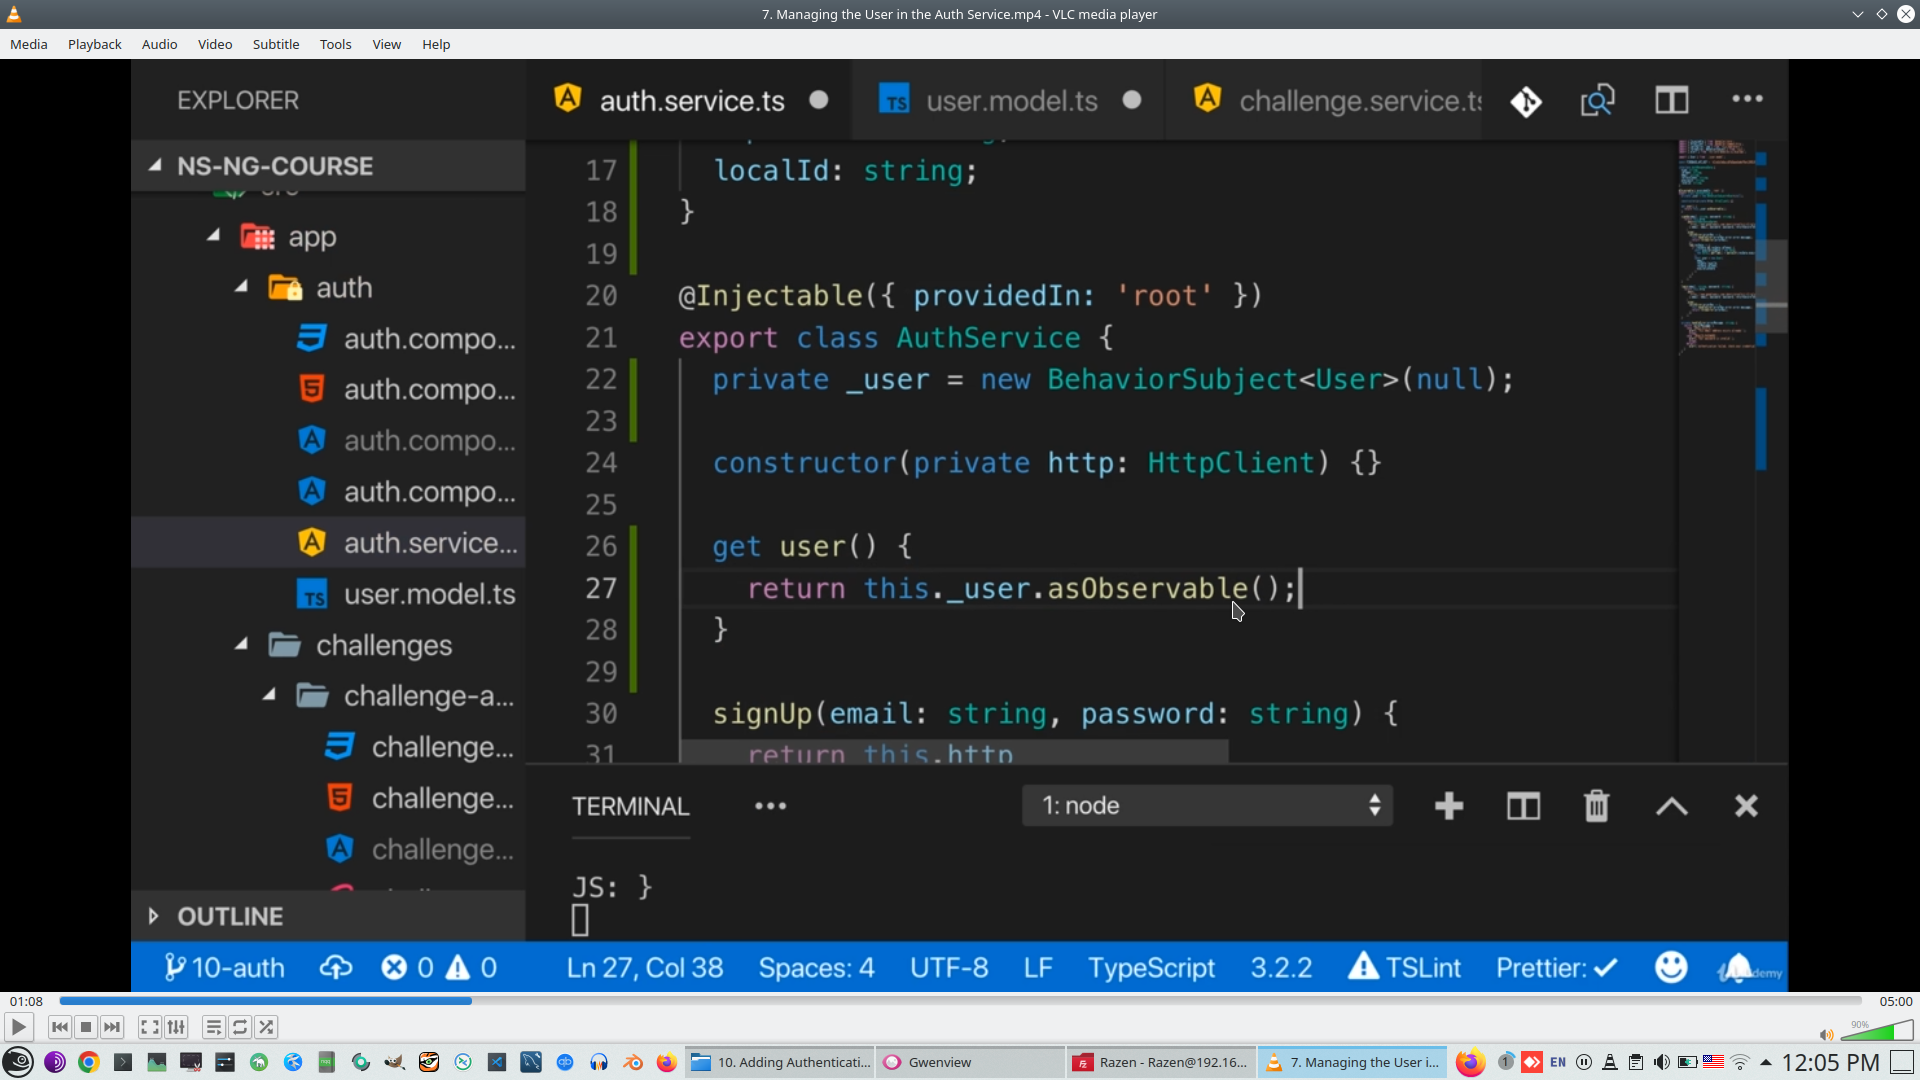
Now User will return asObservable
Next method emit User event https://www.learnrxjs.io/learn-rxjs/subjects/behaviorsubject
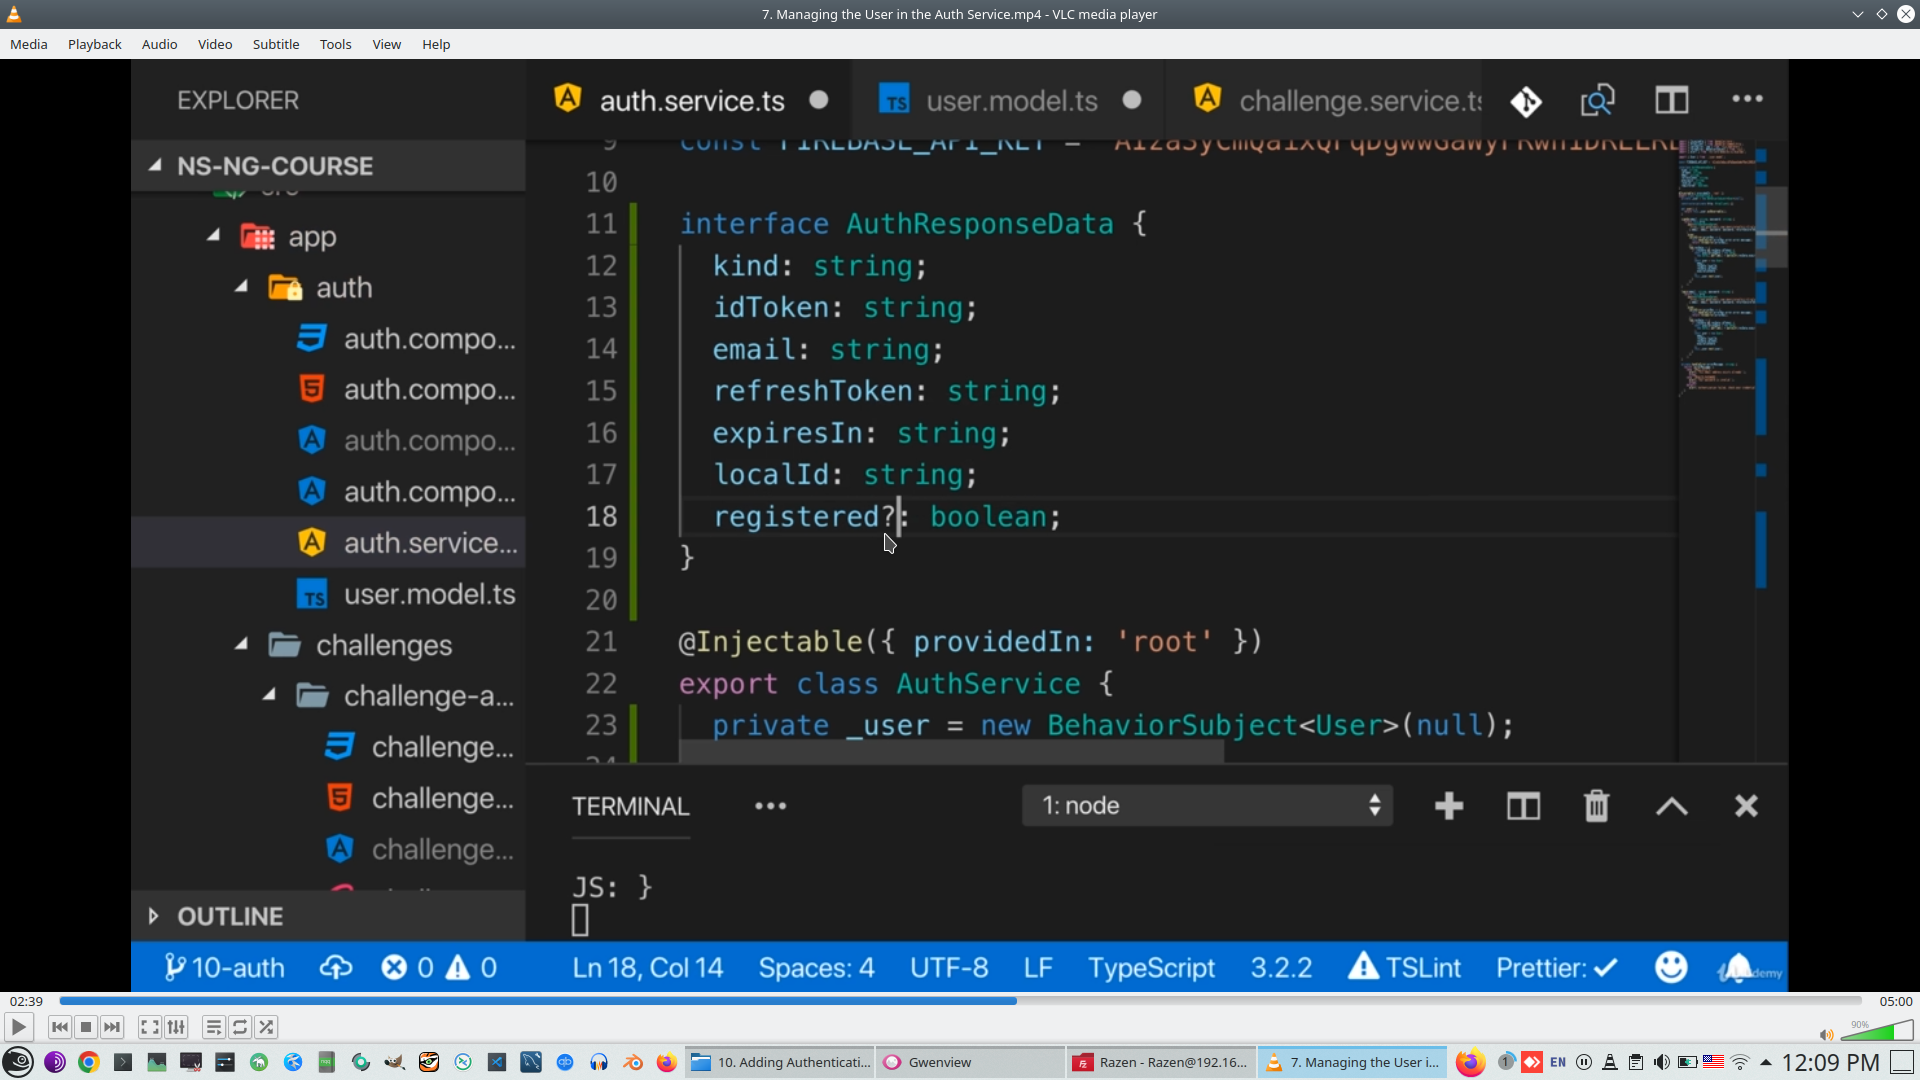
Firebase response can emit additional extra field, we set up response with optional parameter
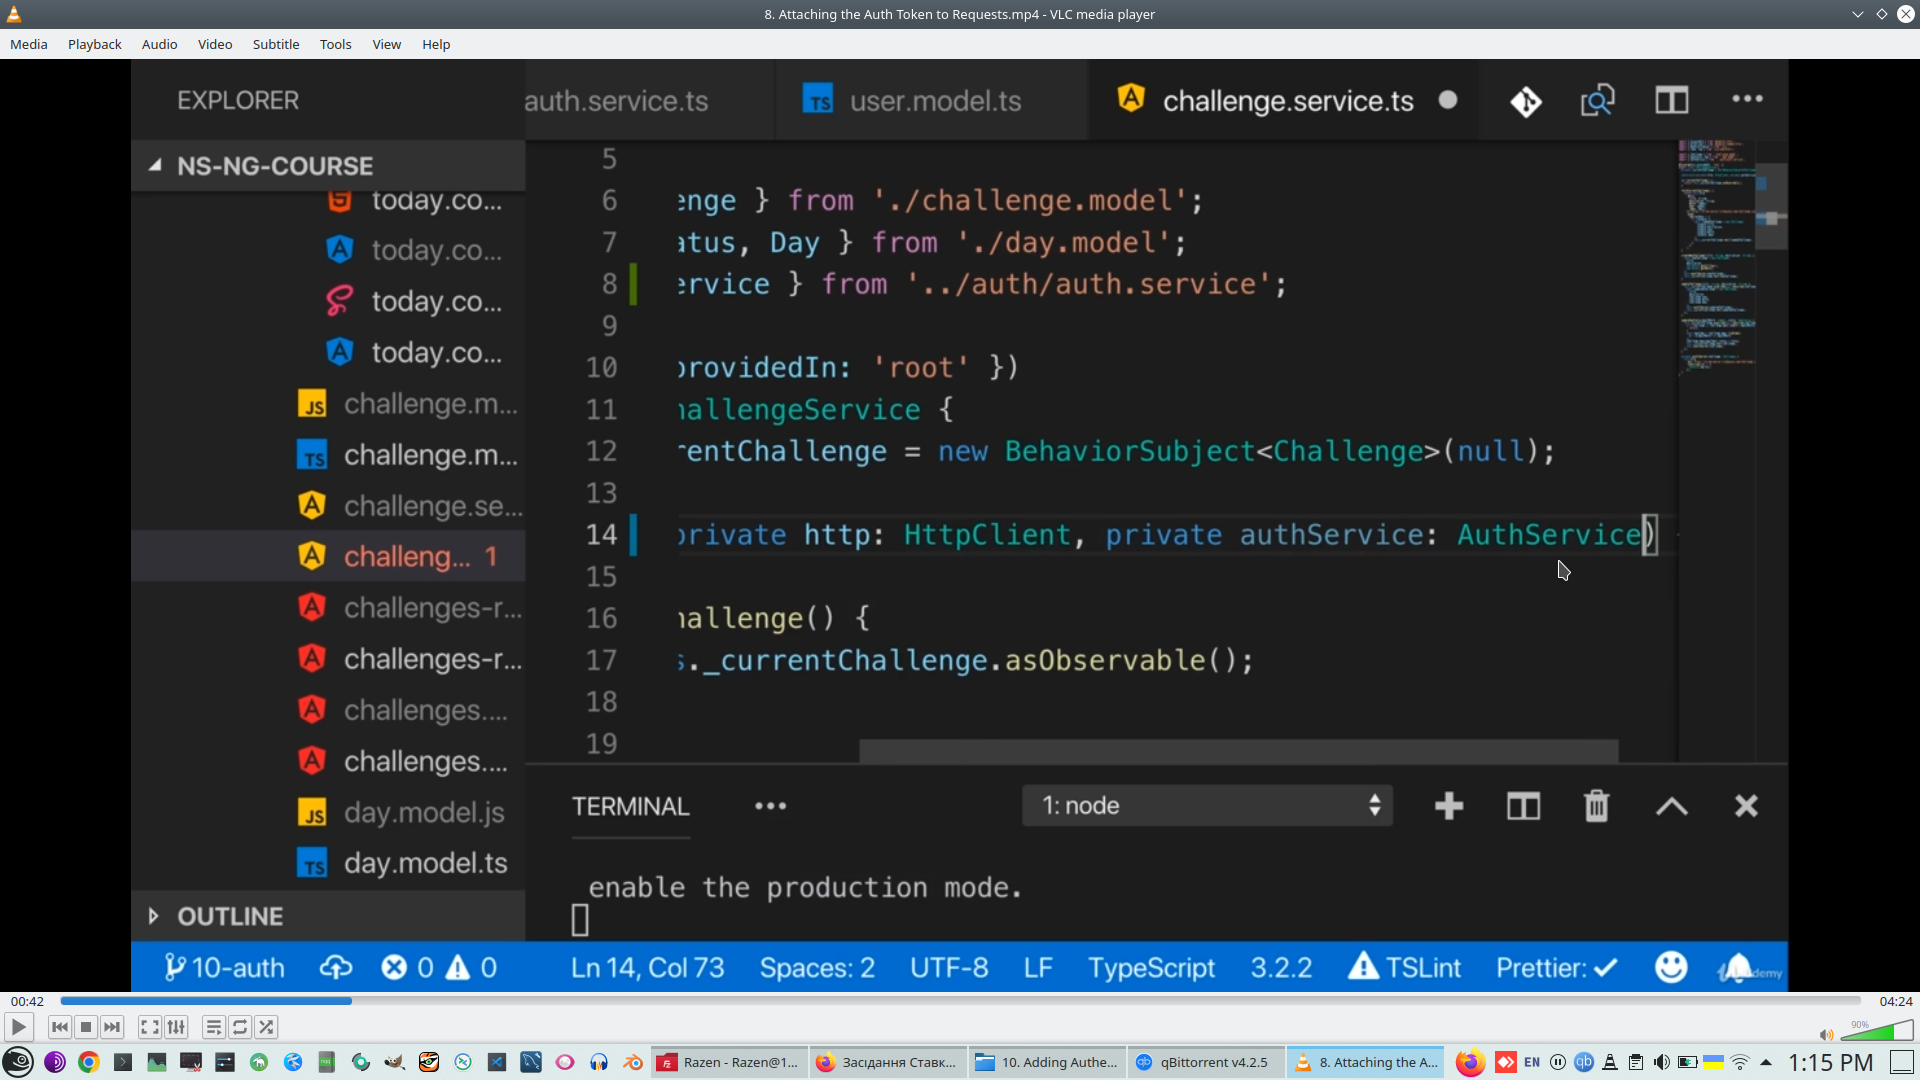
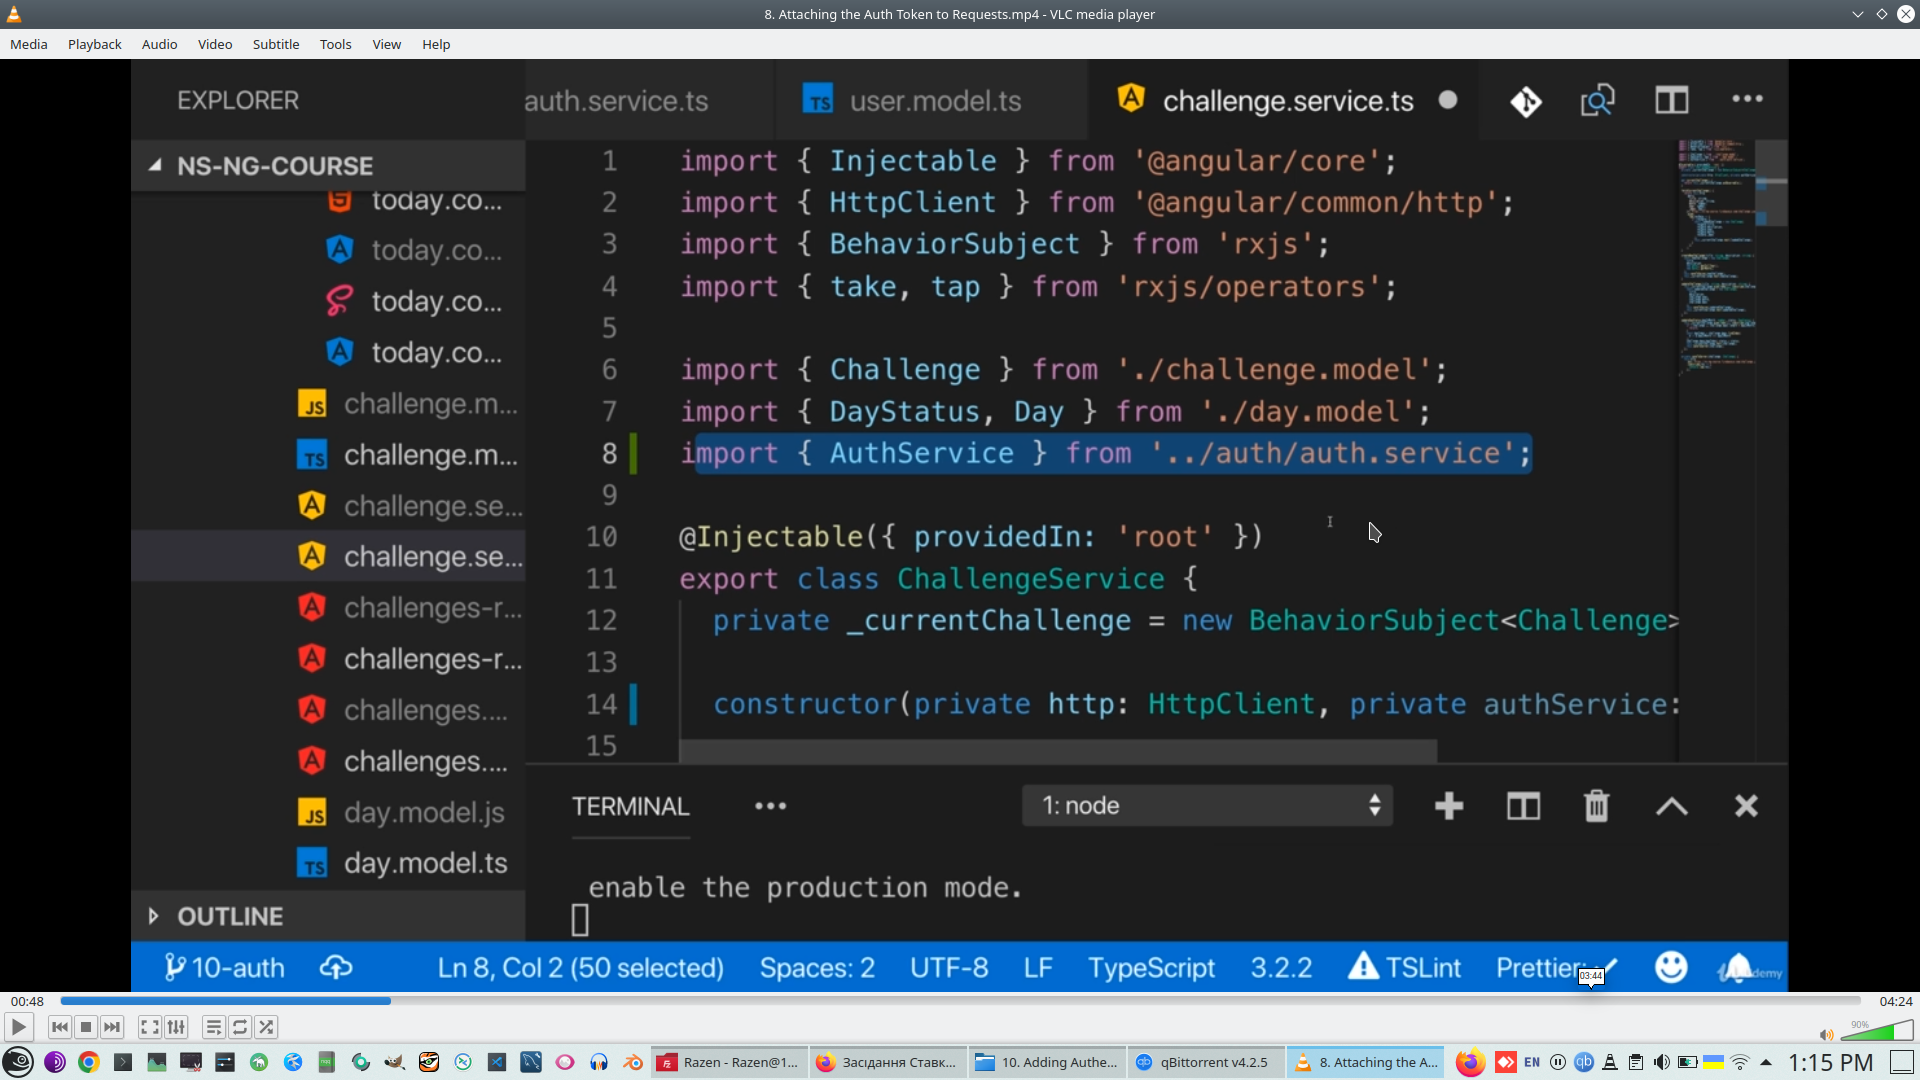
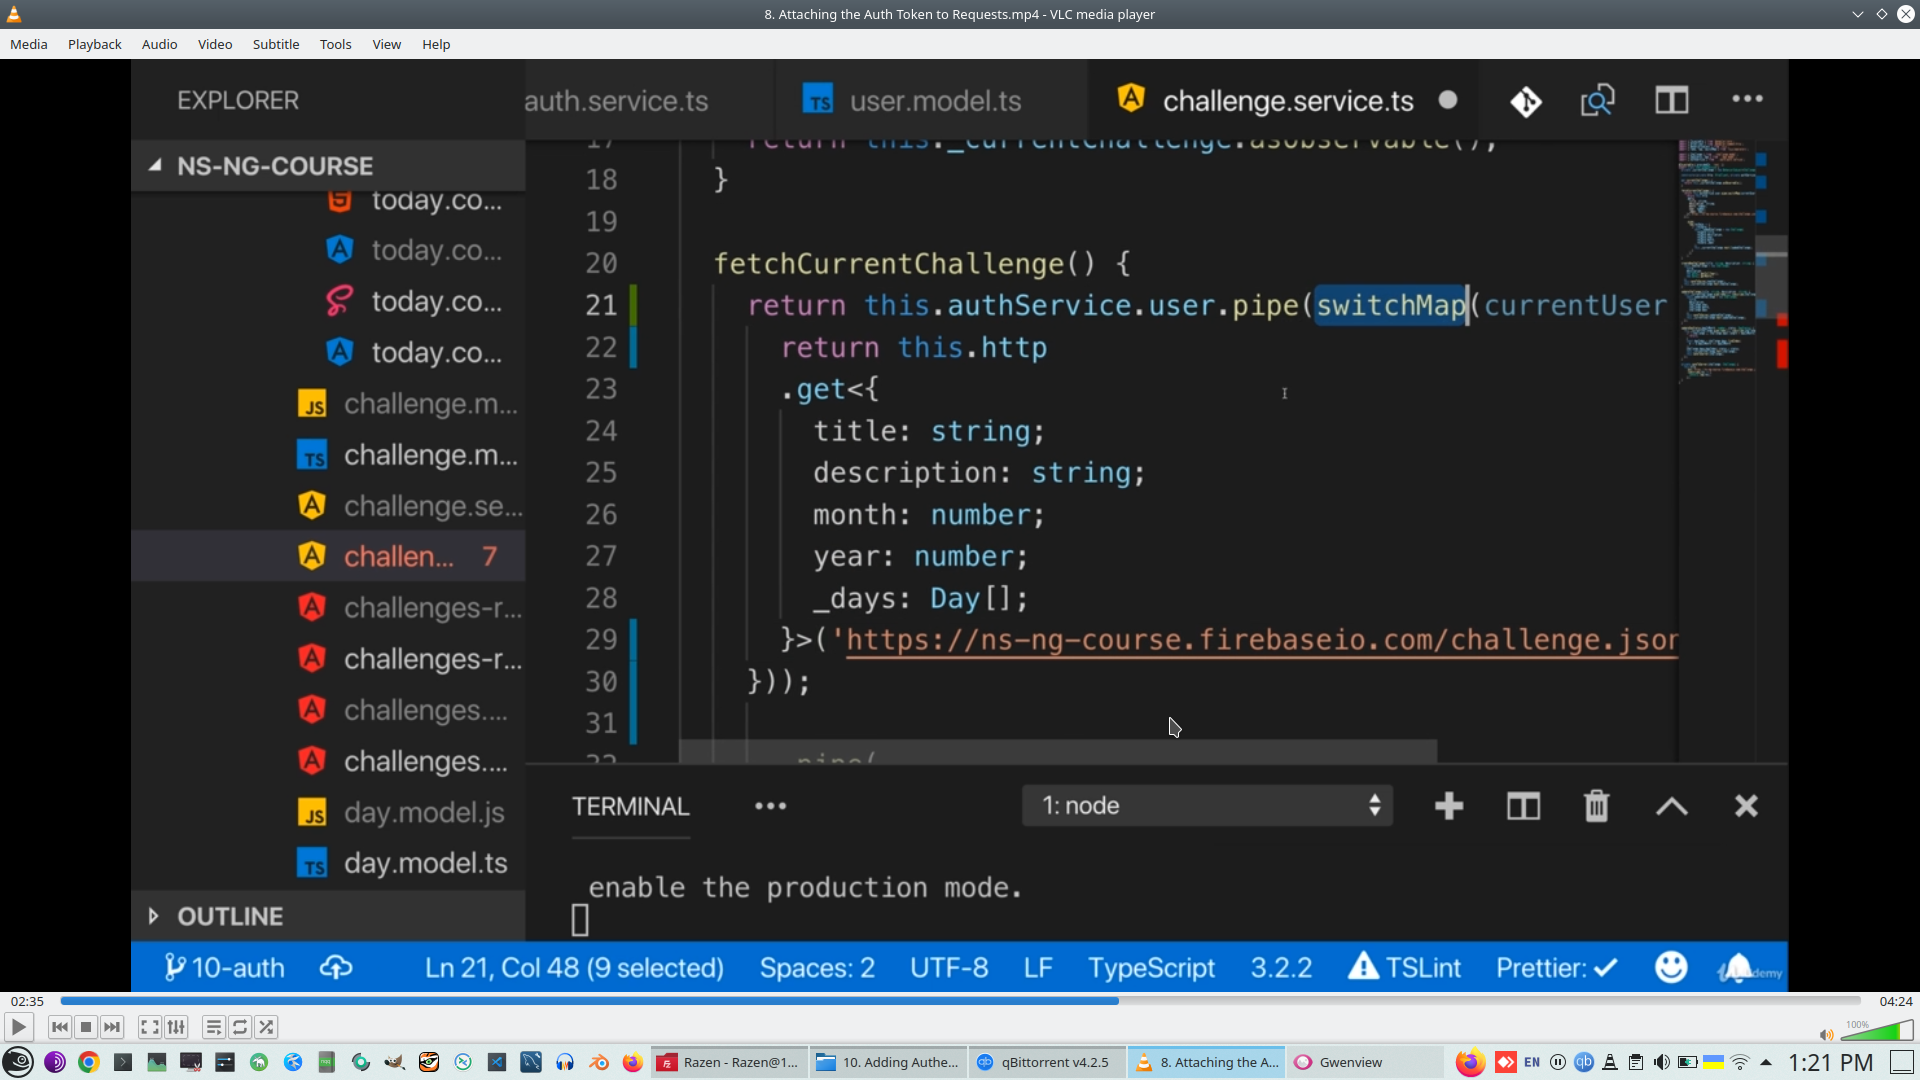
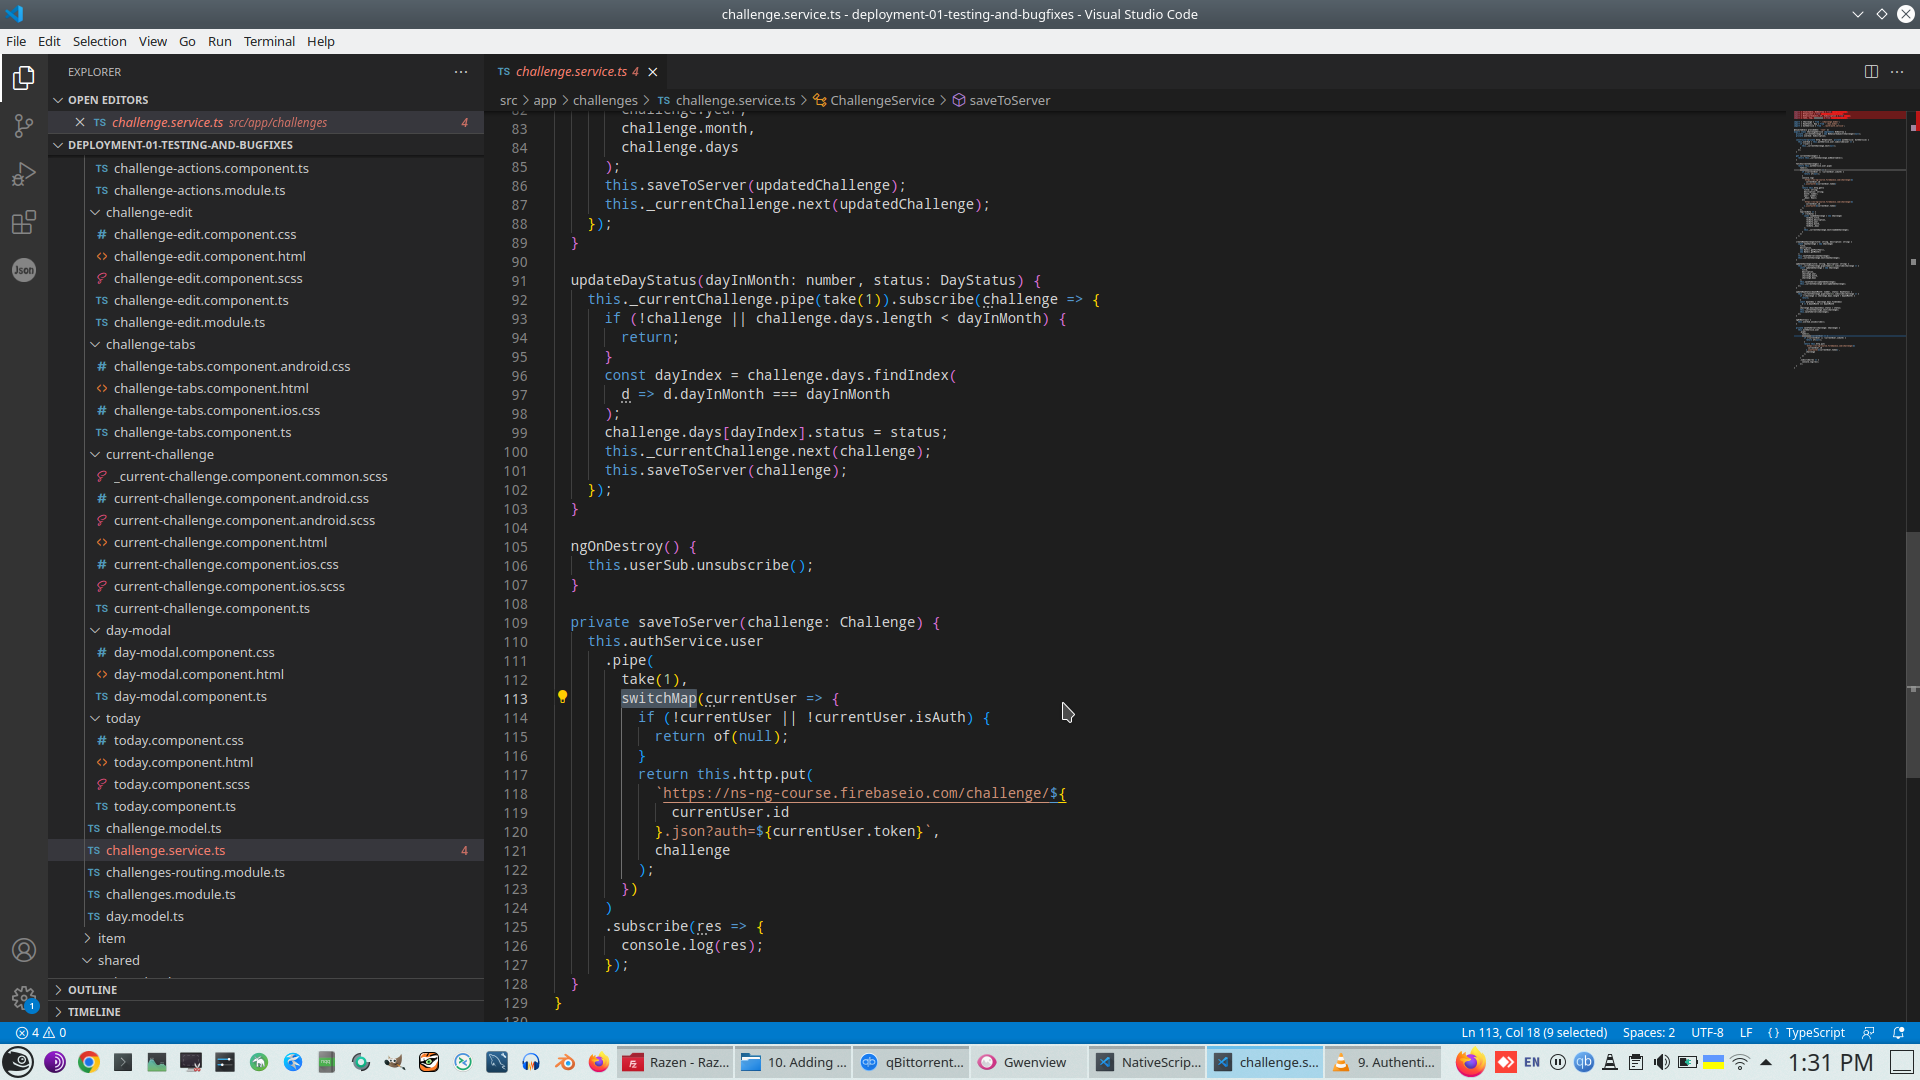
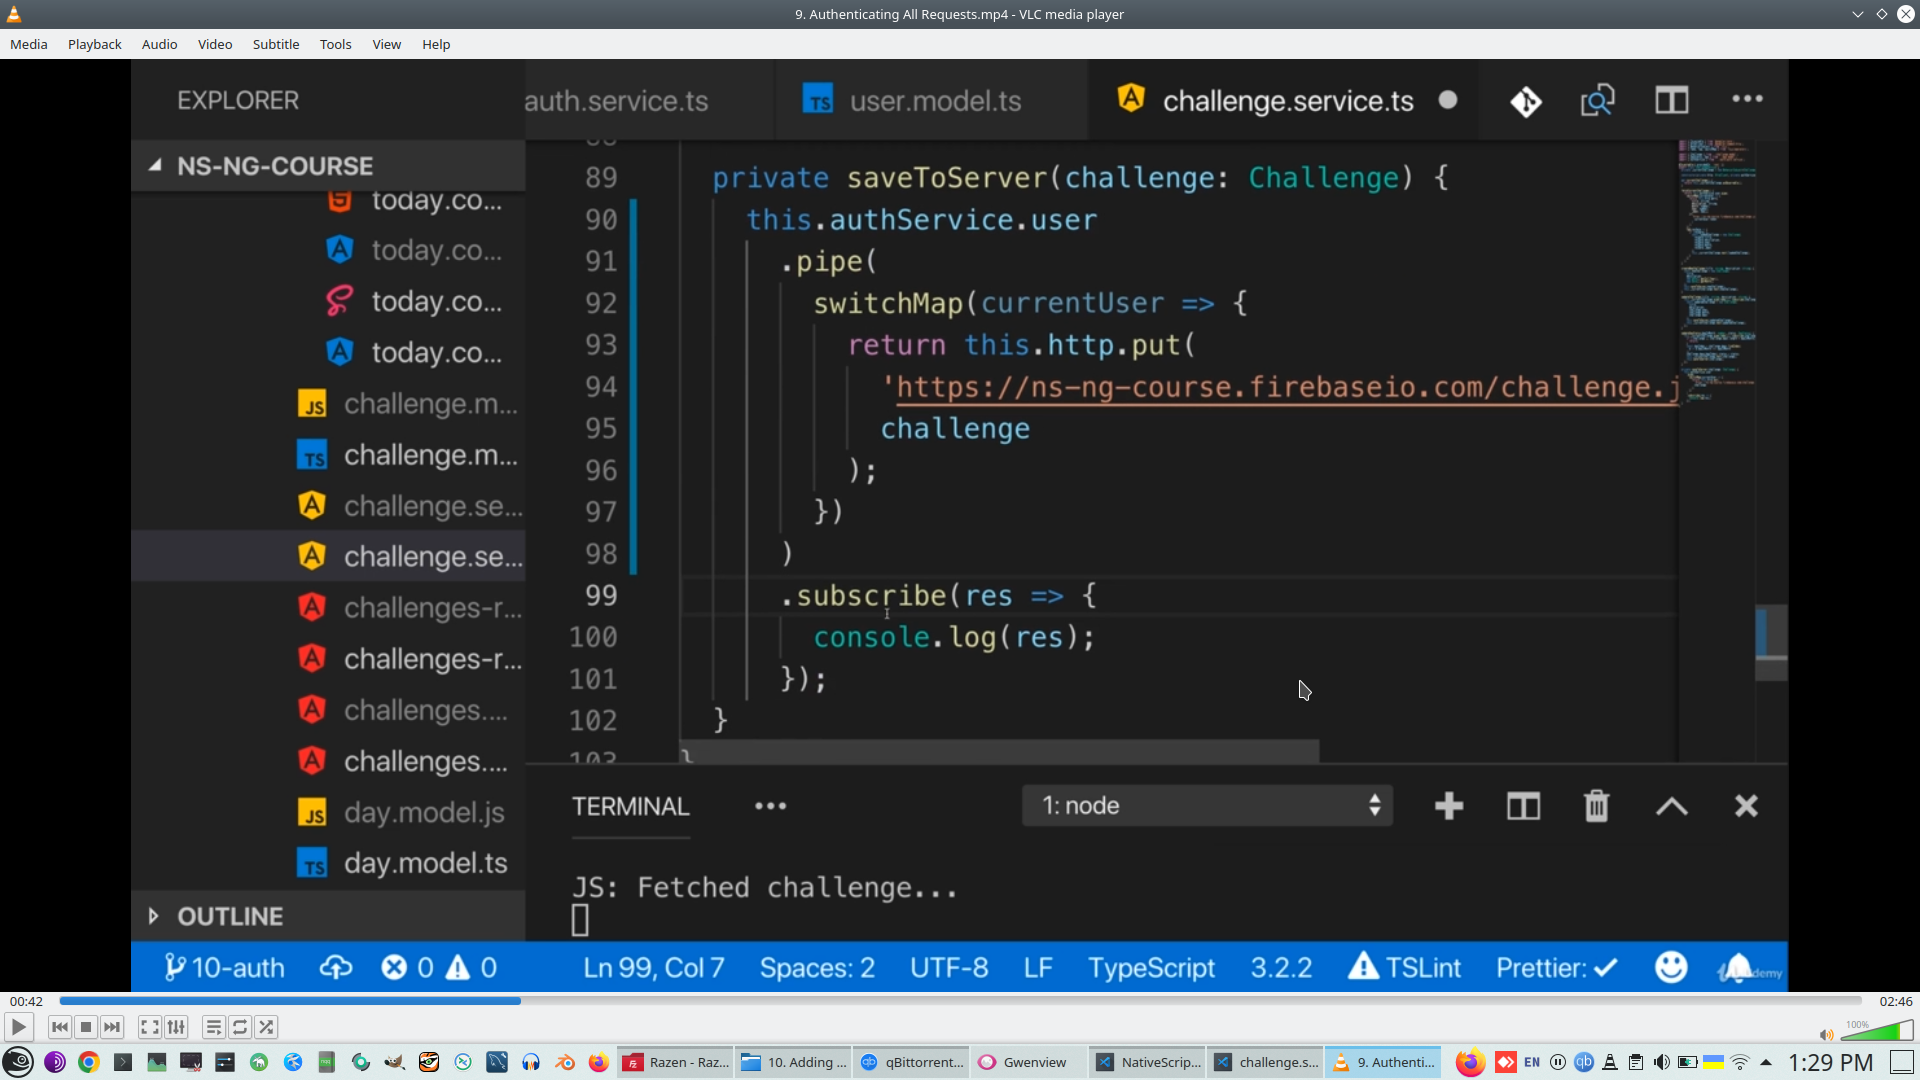
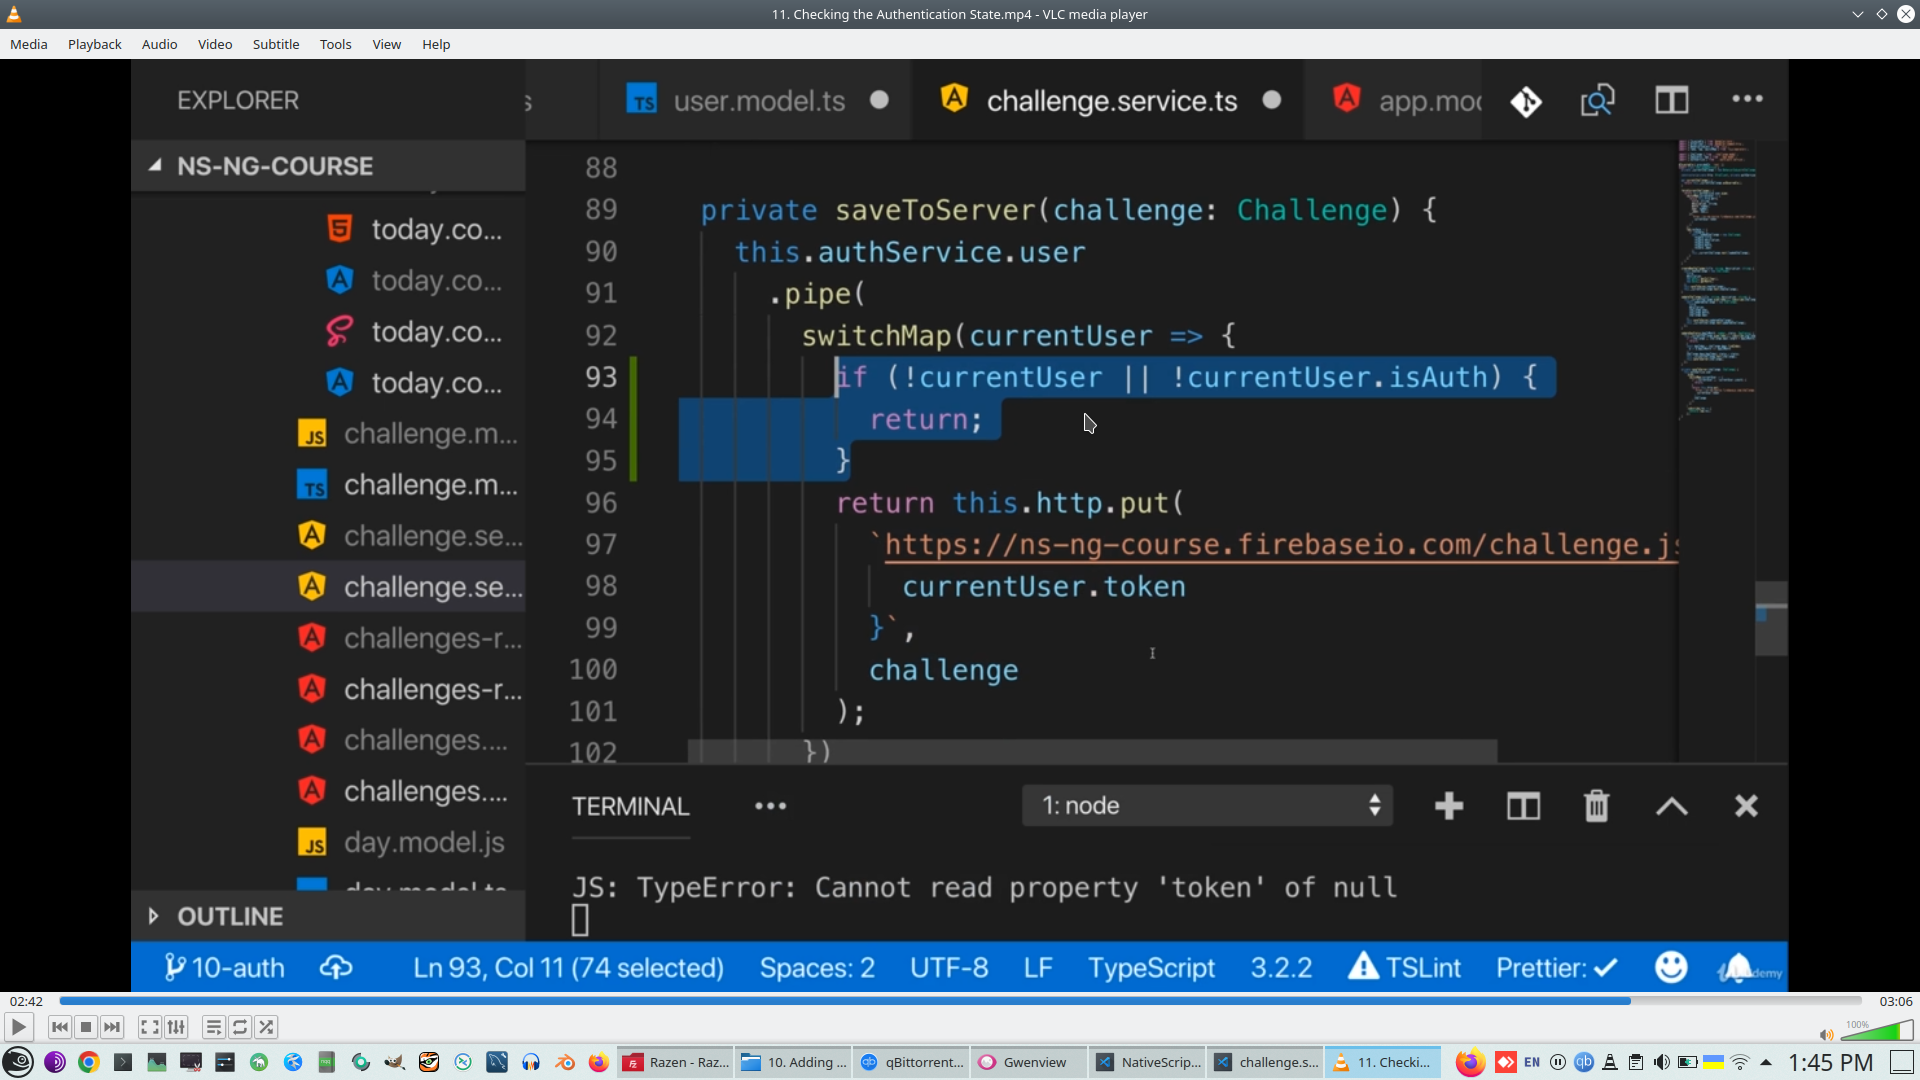
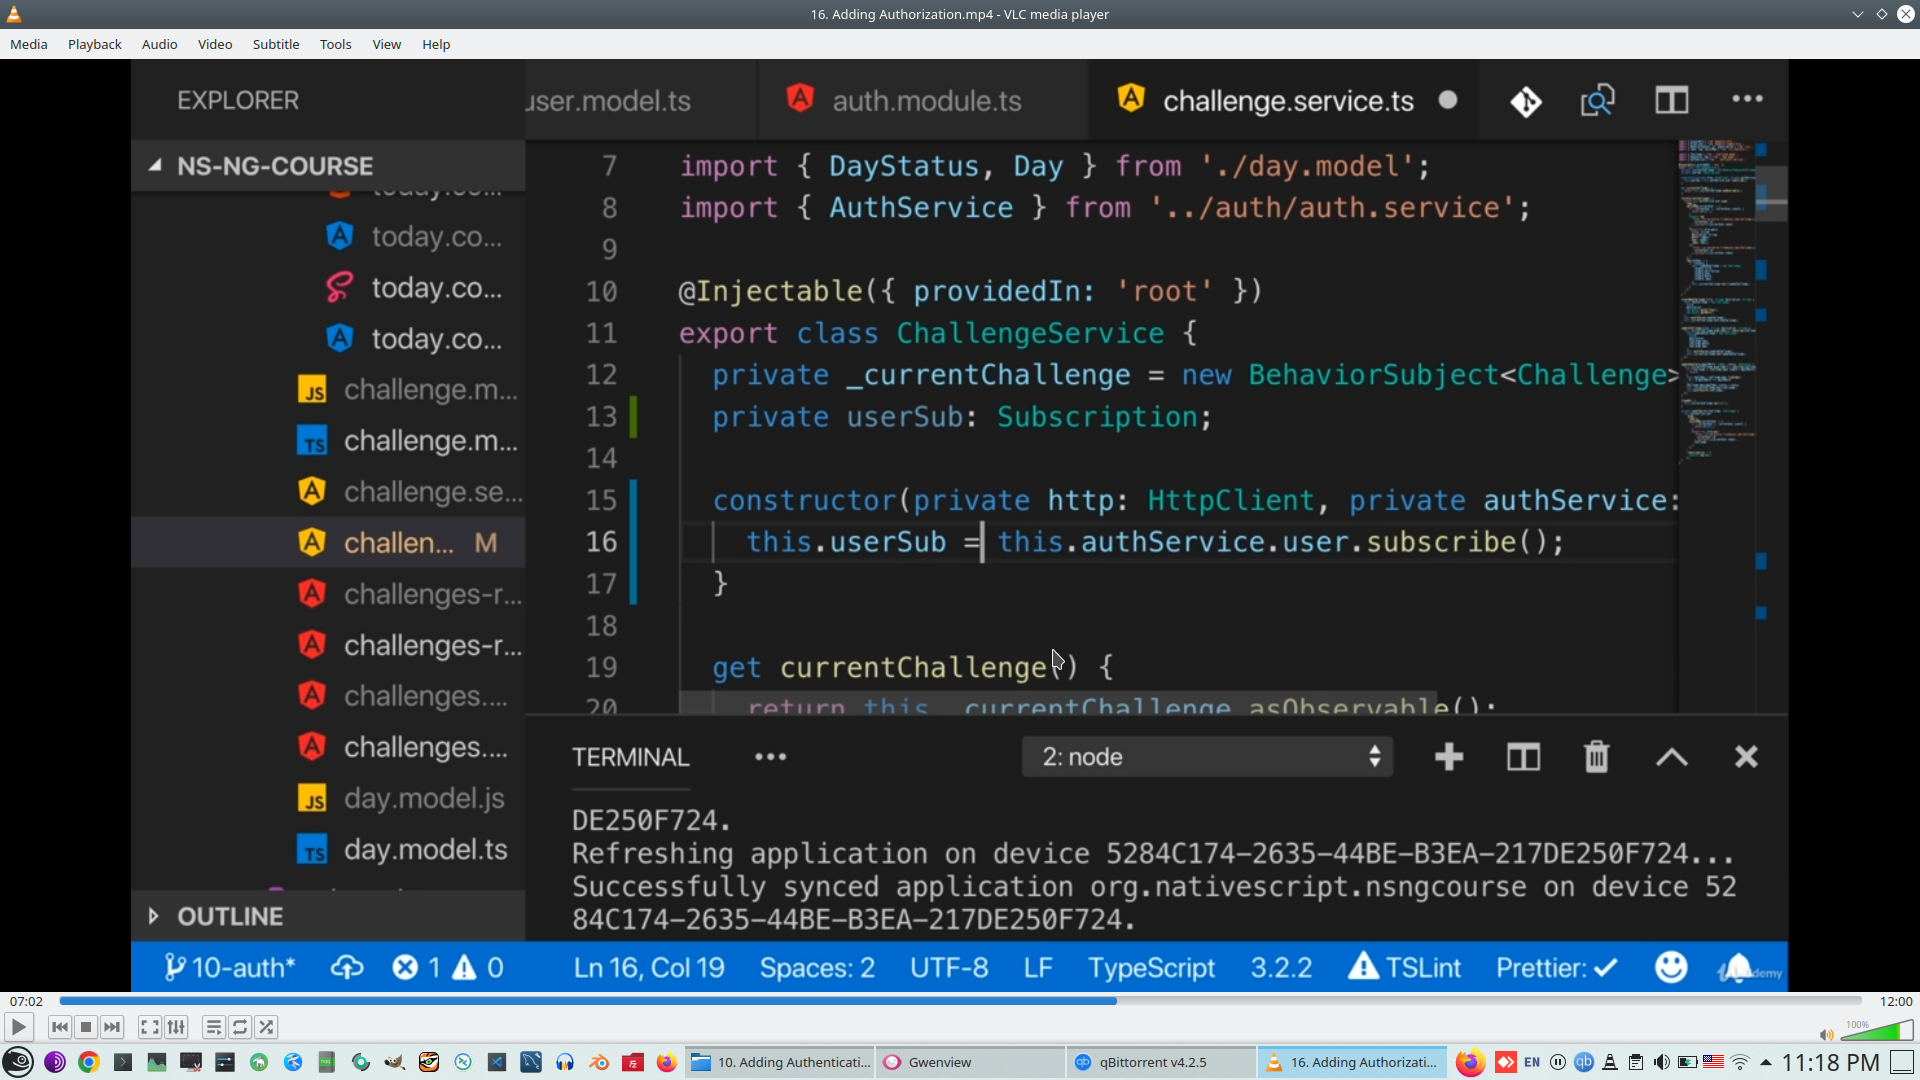
For add AU Header to any request we need to Inject Auth service to Chalenge service
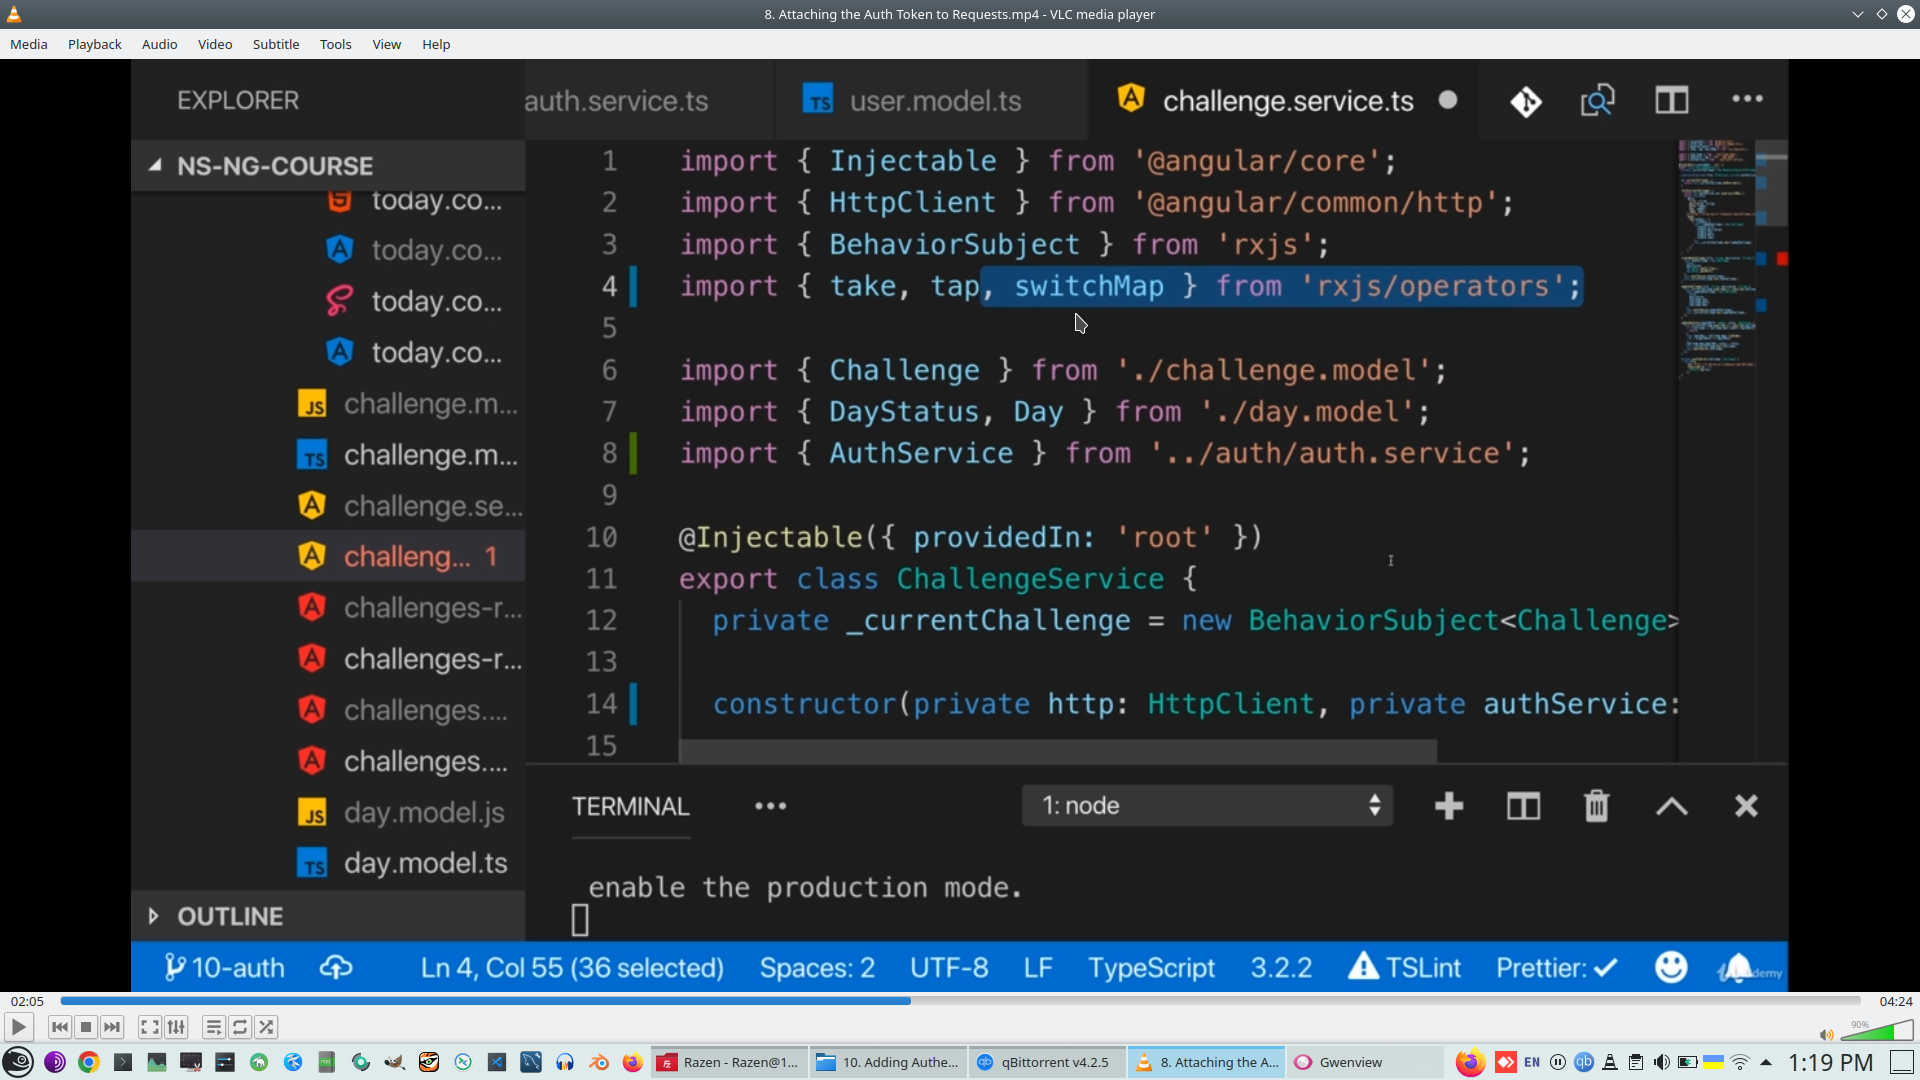
But we need inject on observable result to another observable, in order to do this we need to use SwitchMap https://thinkrx.io/rxjs/switchMap/, https://rxjs.dev/api/index/function/switchMap
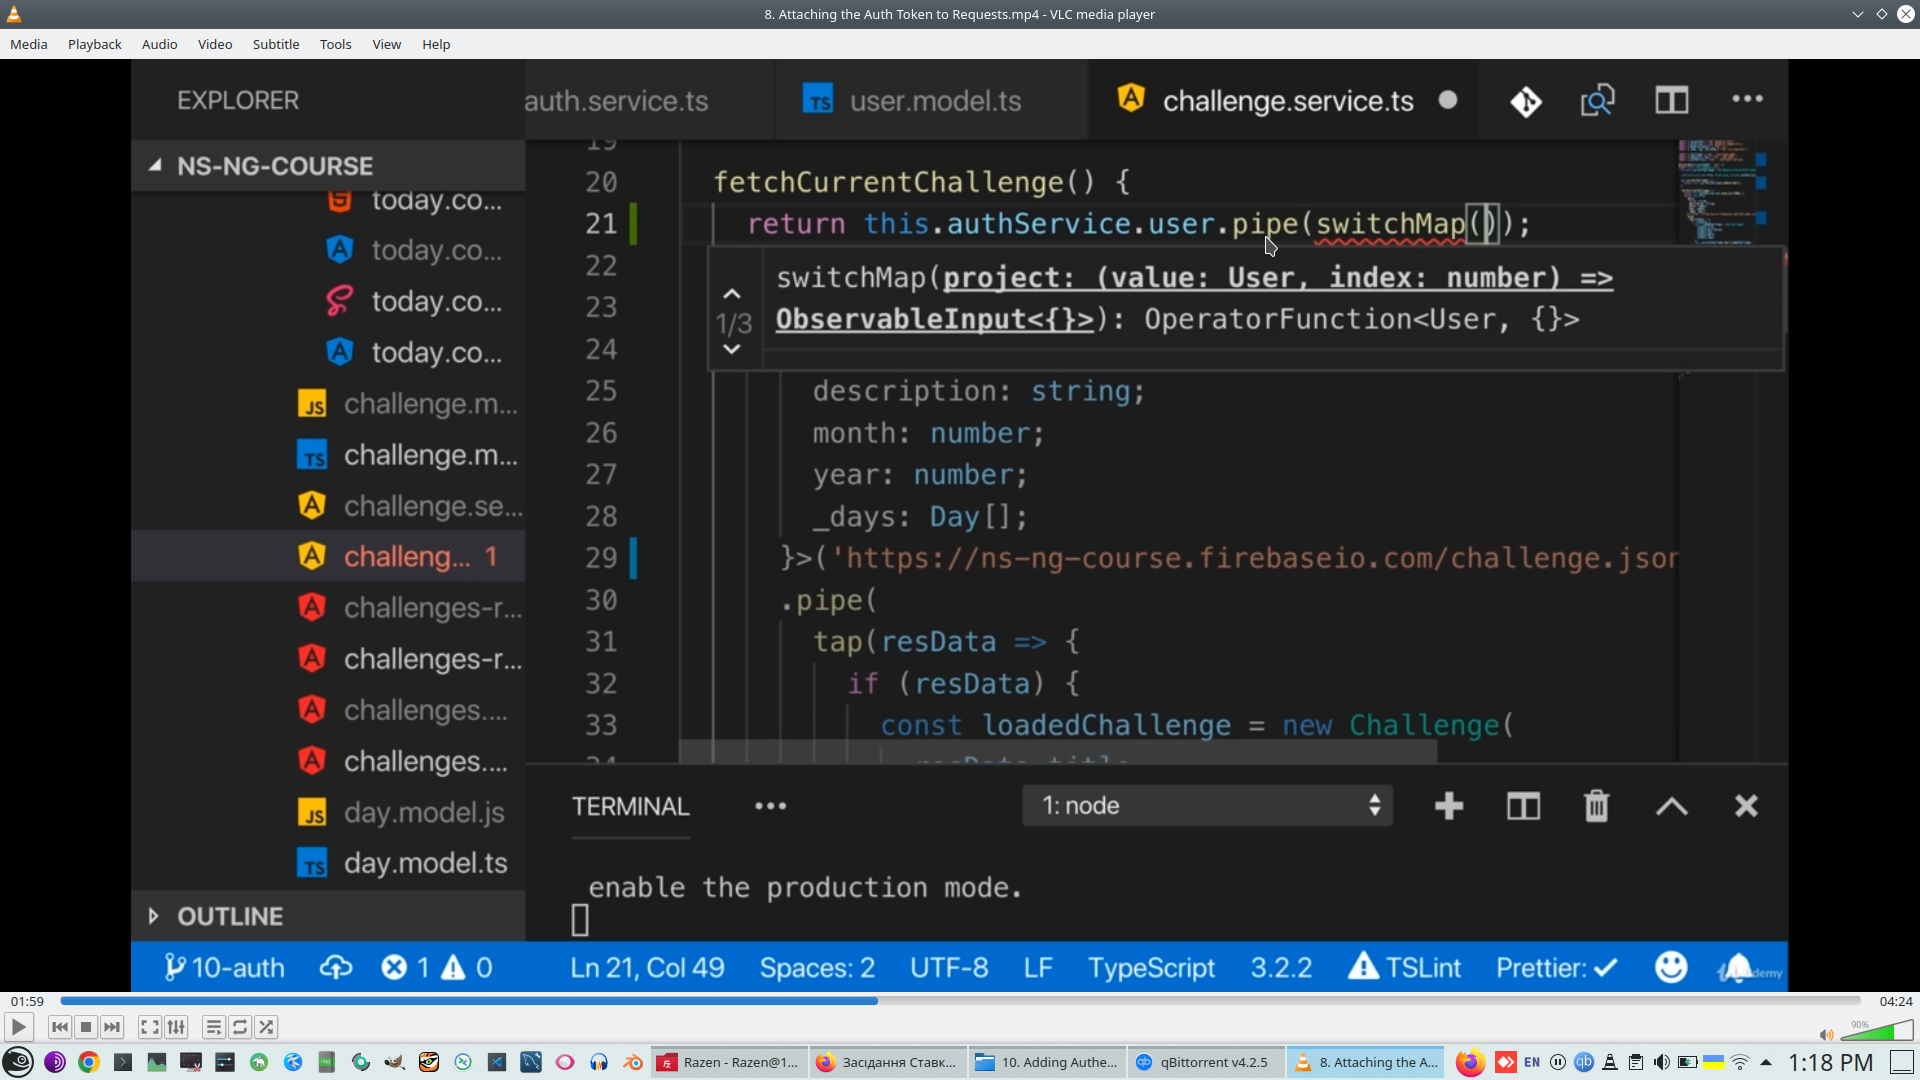
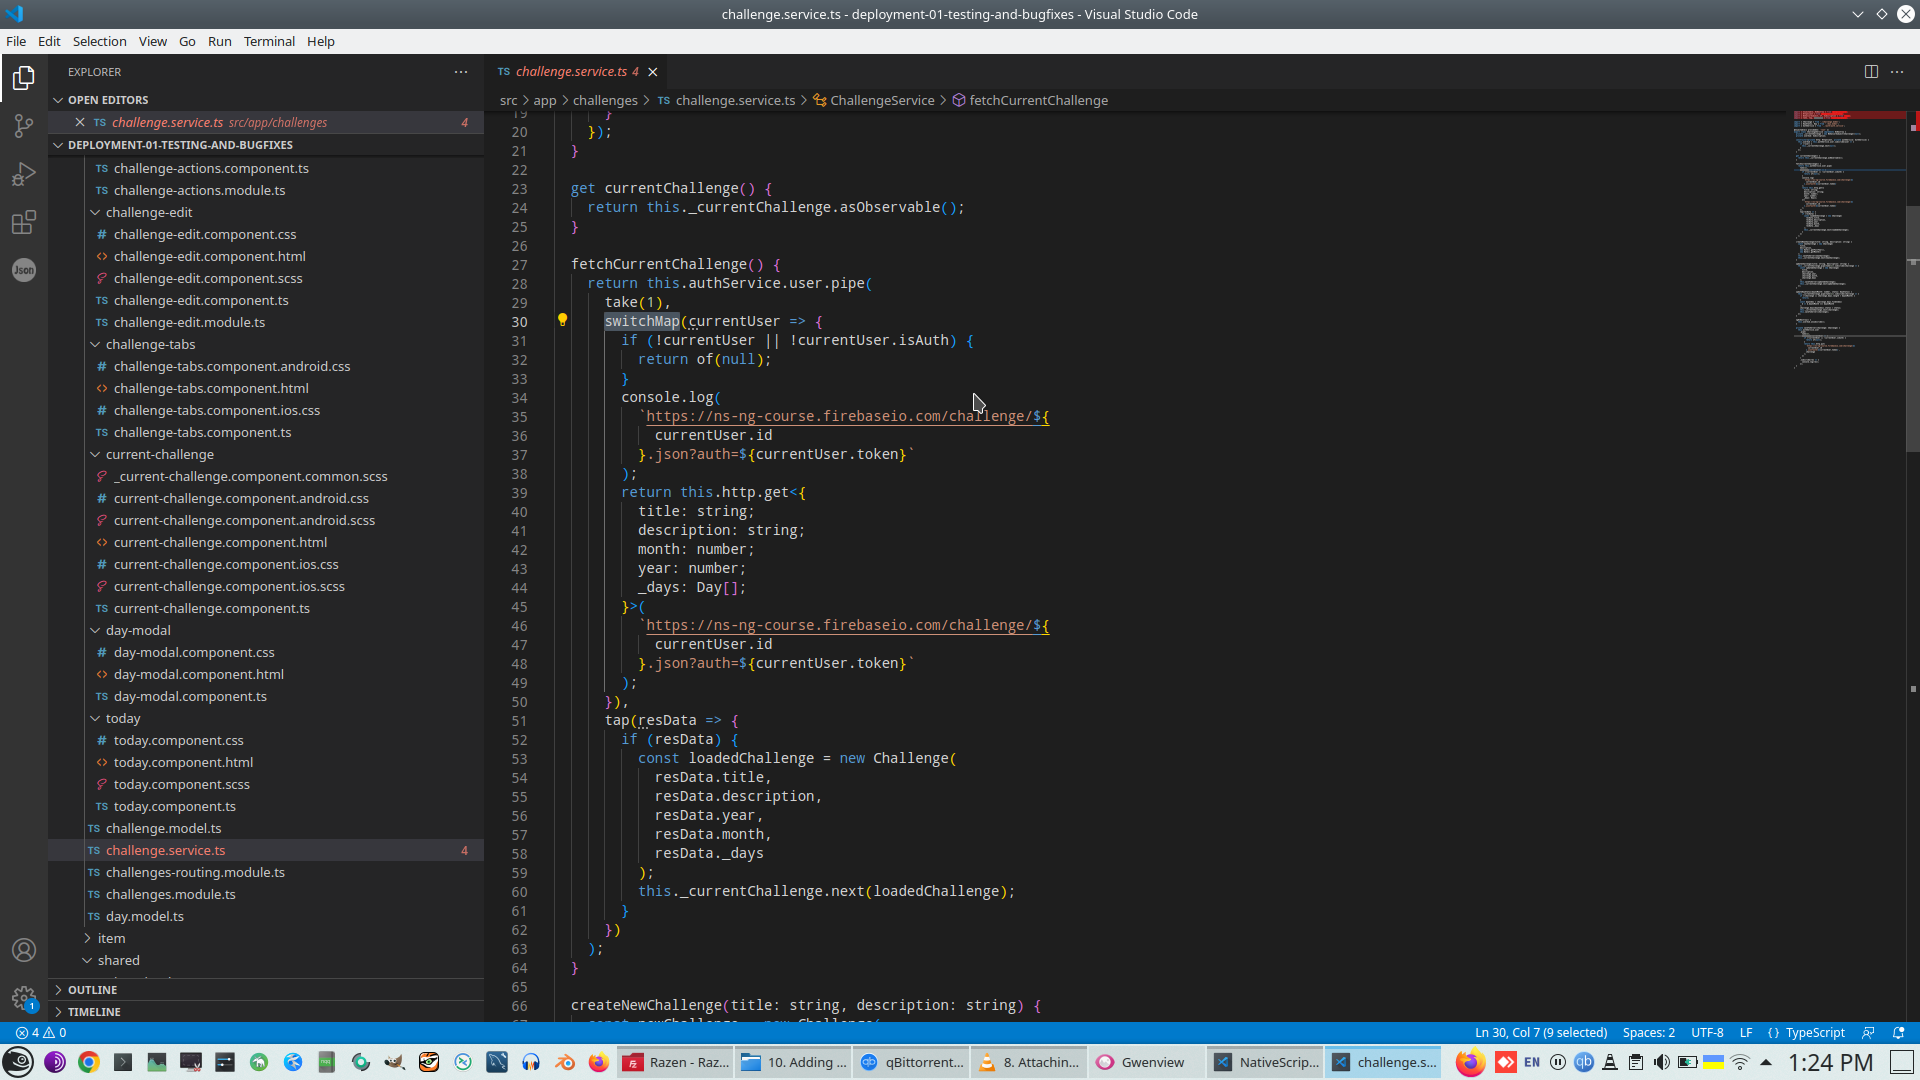
Build correct logic, firstly we receive User than inject User class Header to Autorized request to Firebase
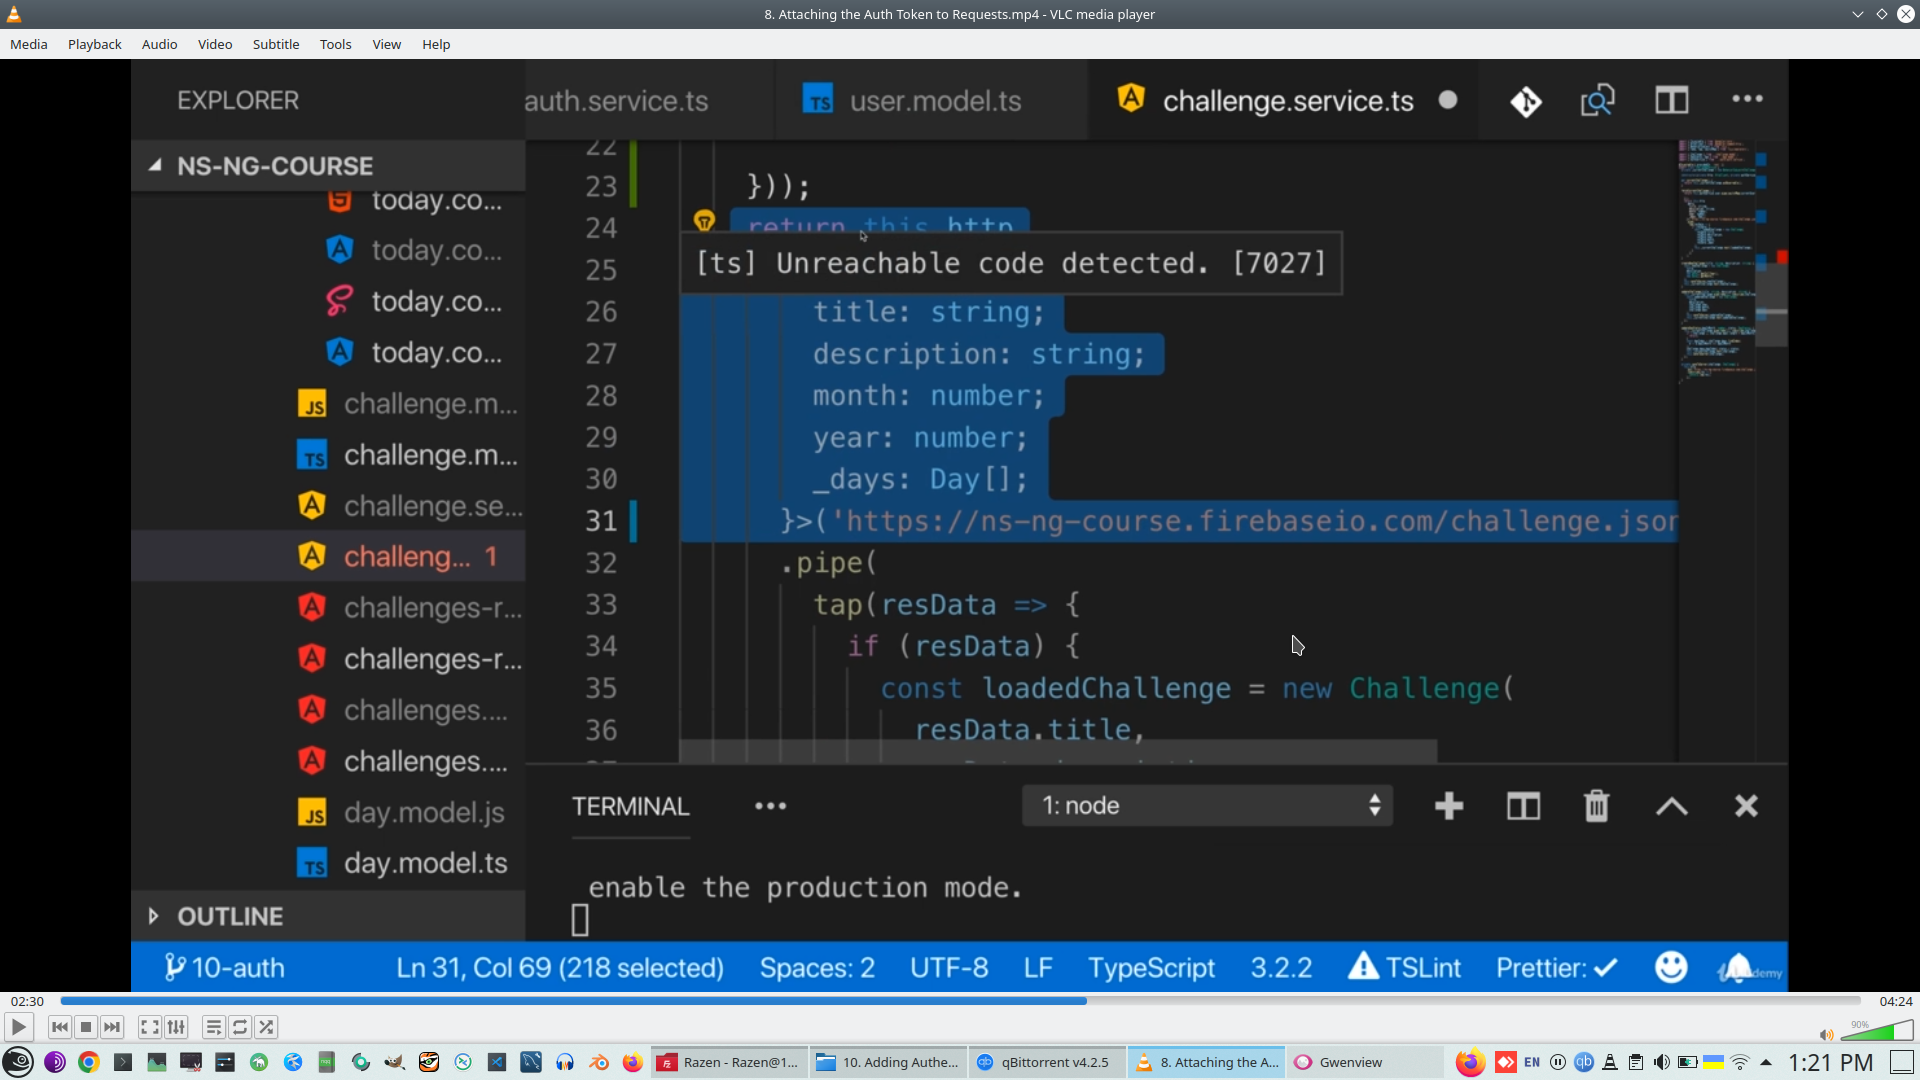
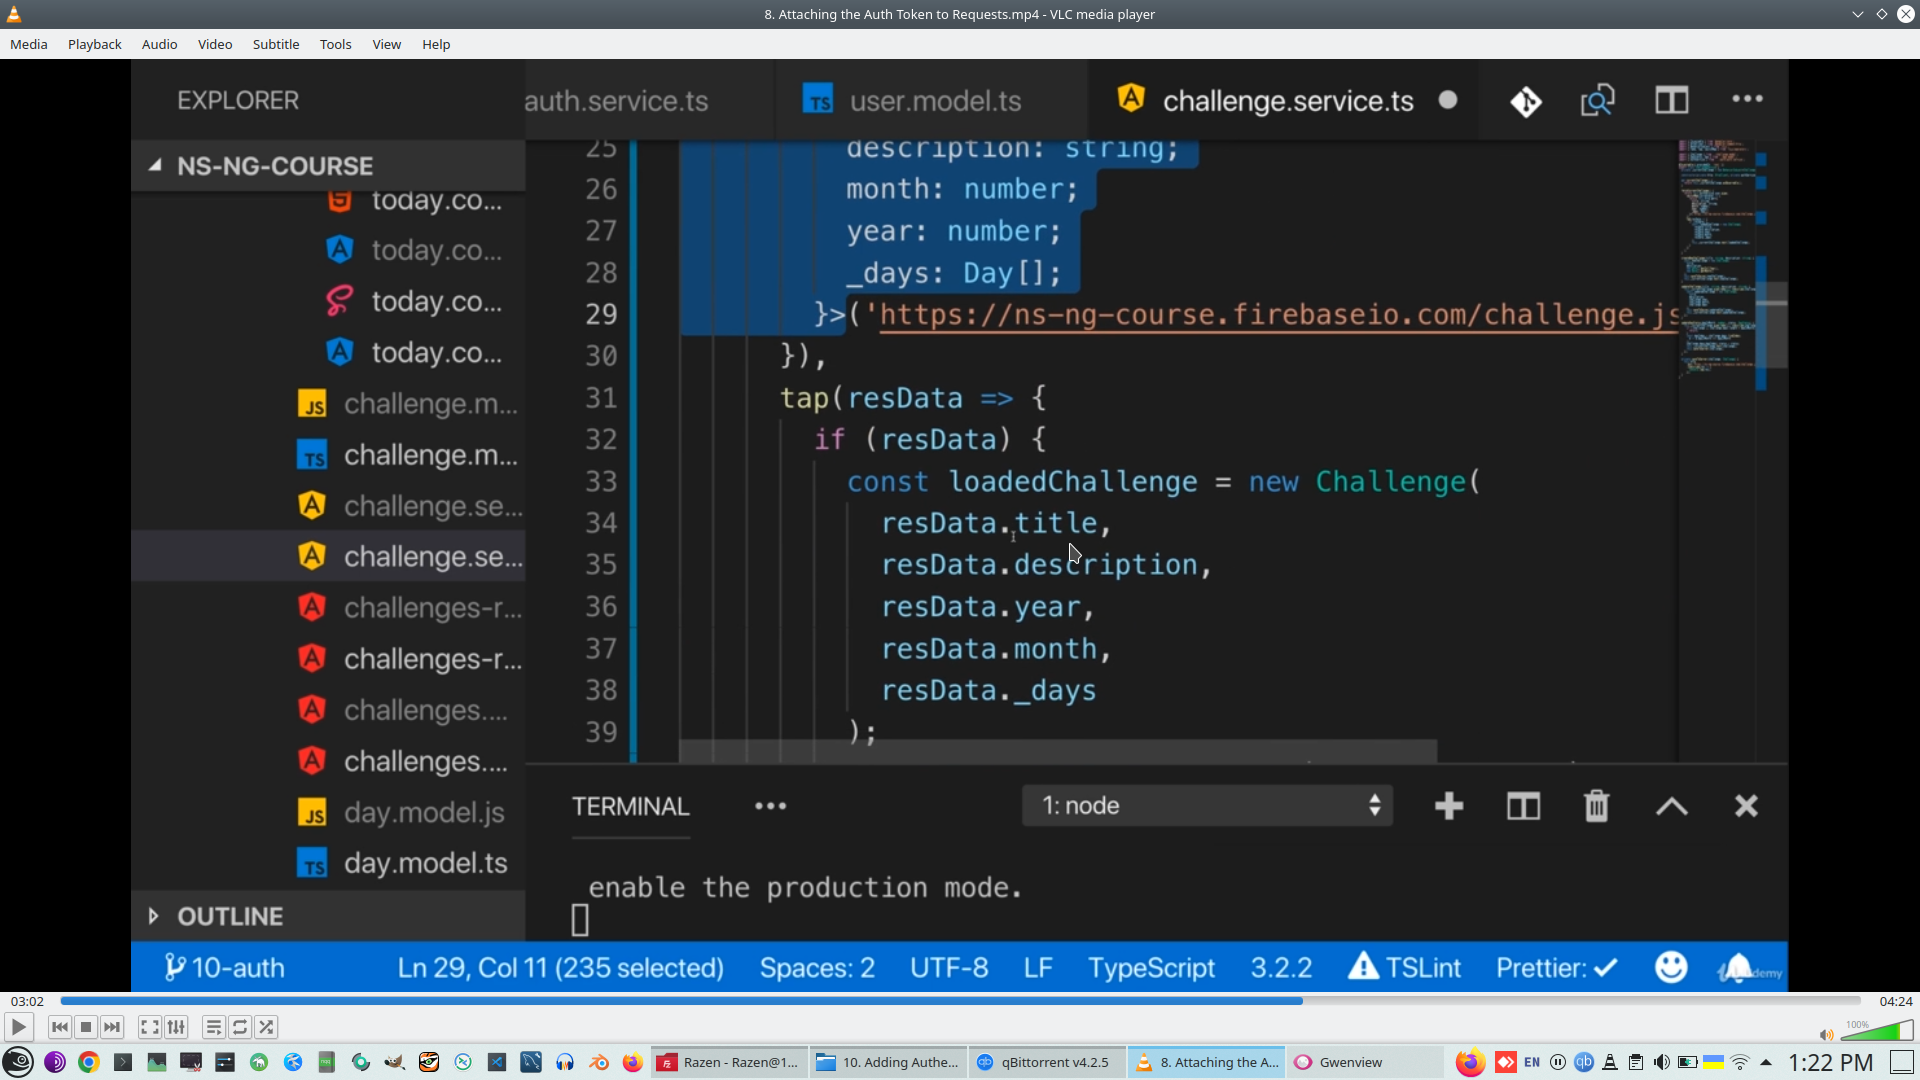
Check how it working
27. Create persistent UserId
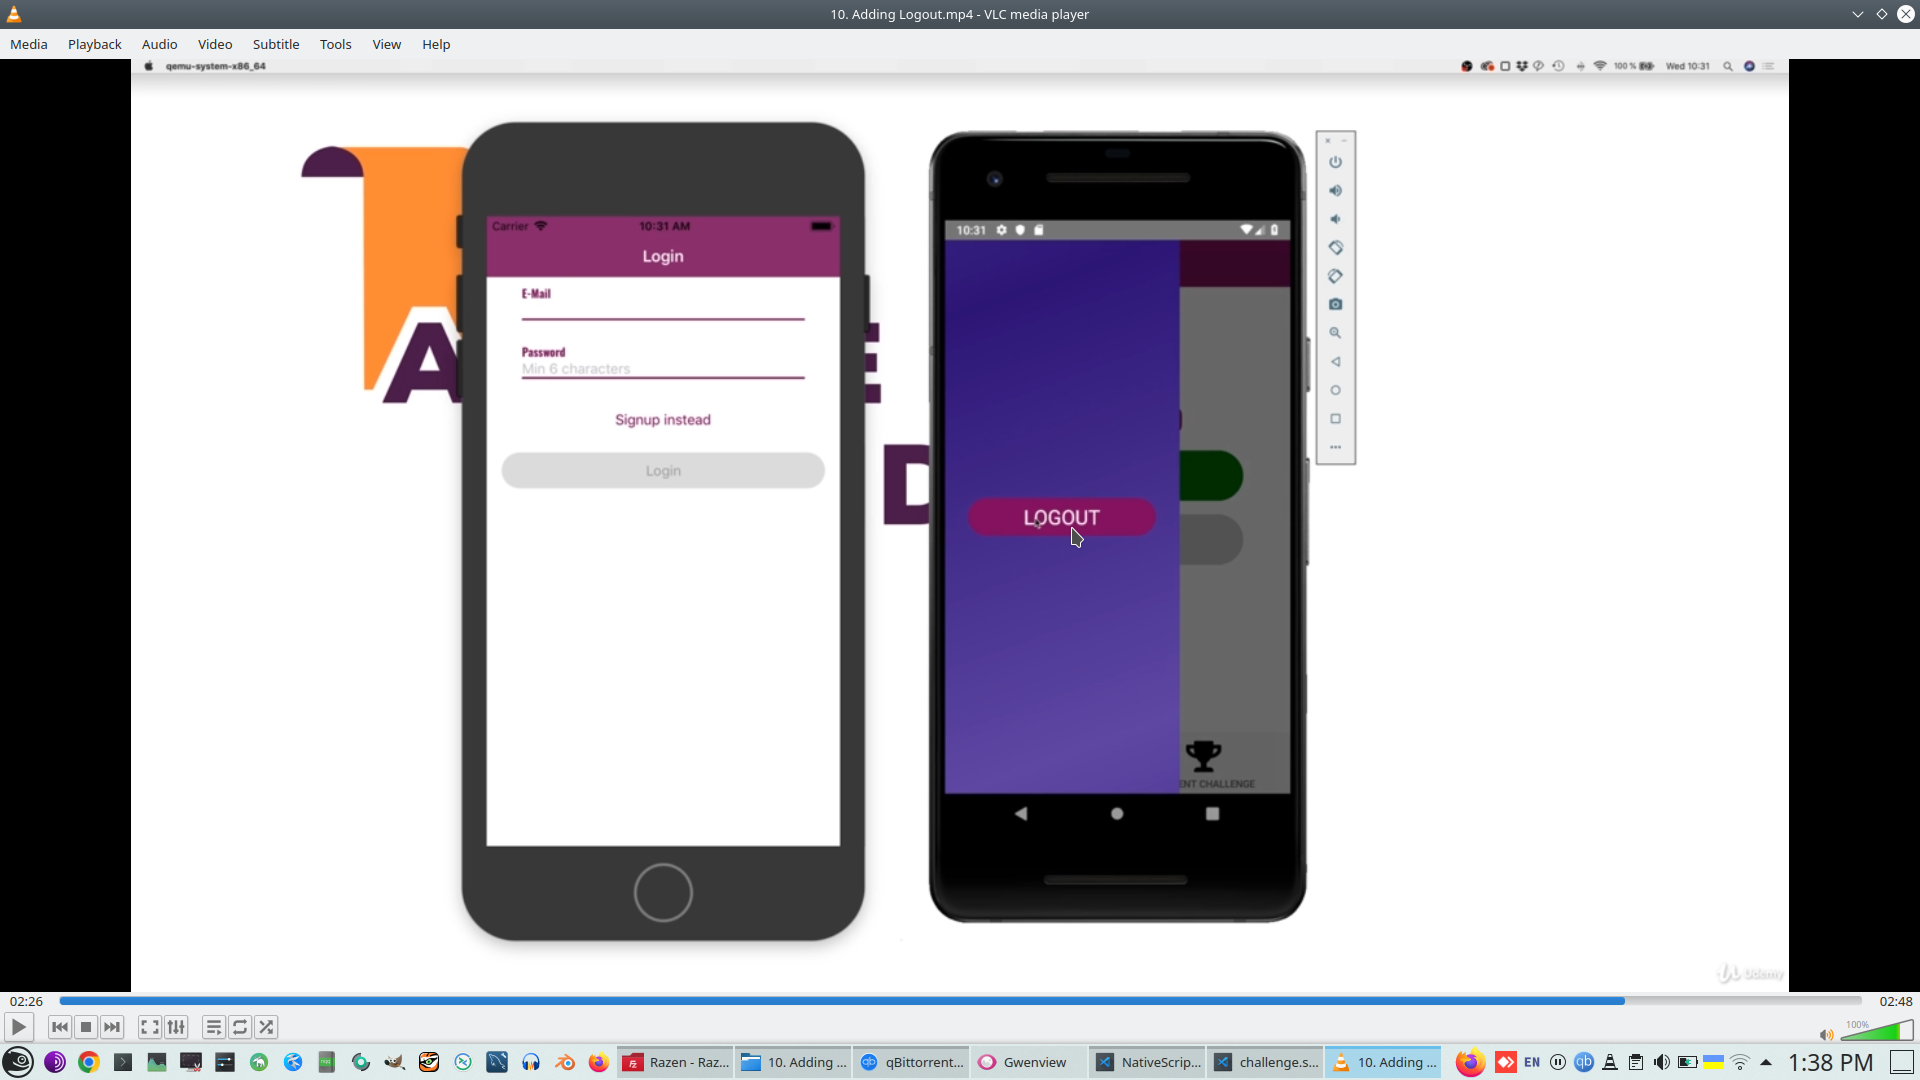
If we close app currnly, we need login again
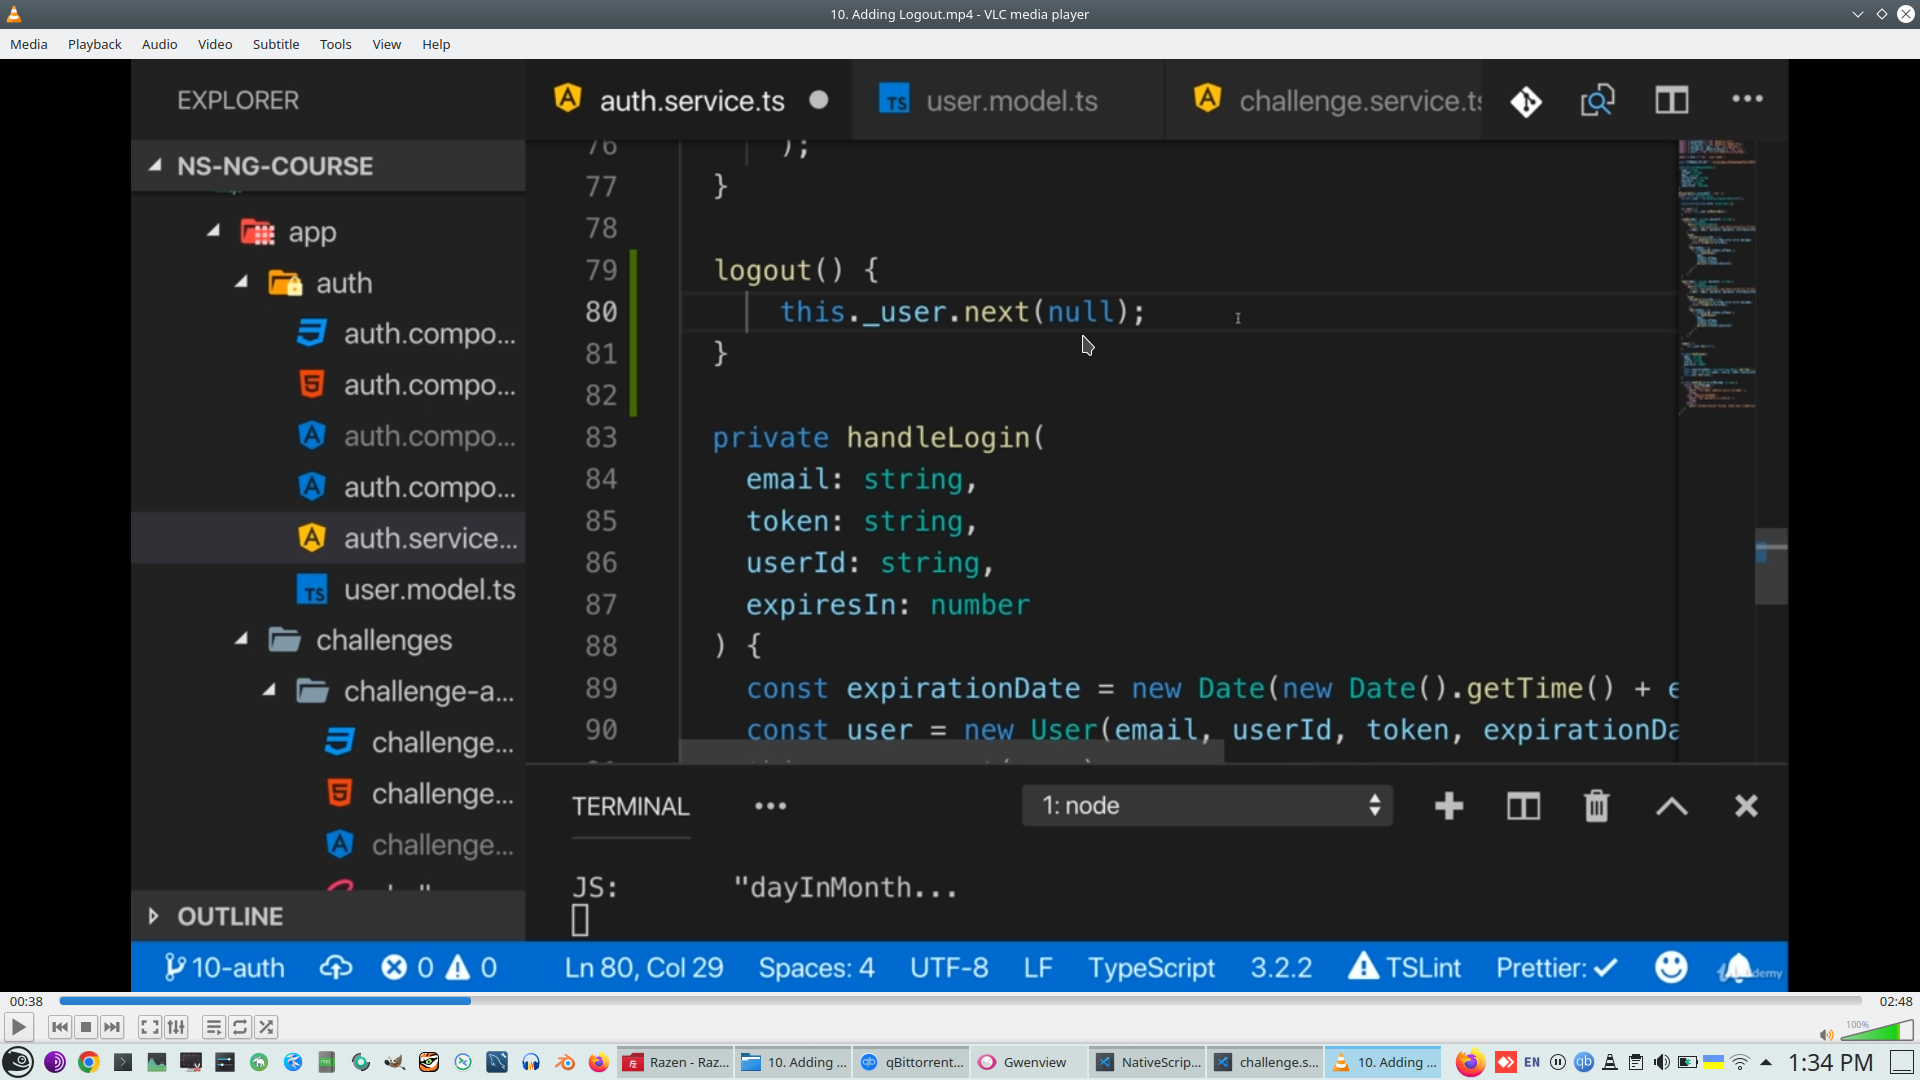
Because logout emit null user
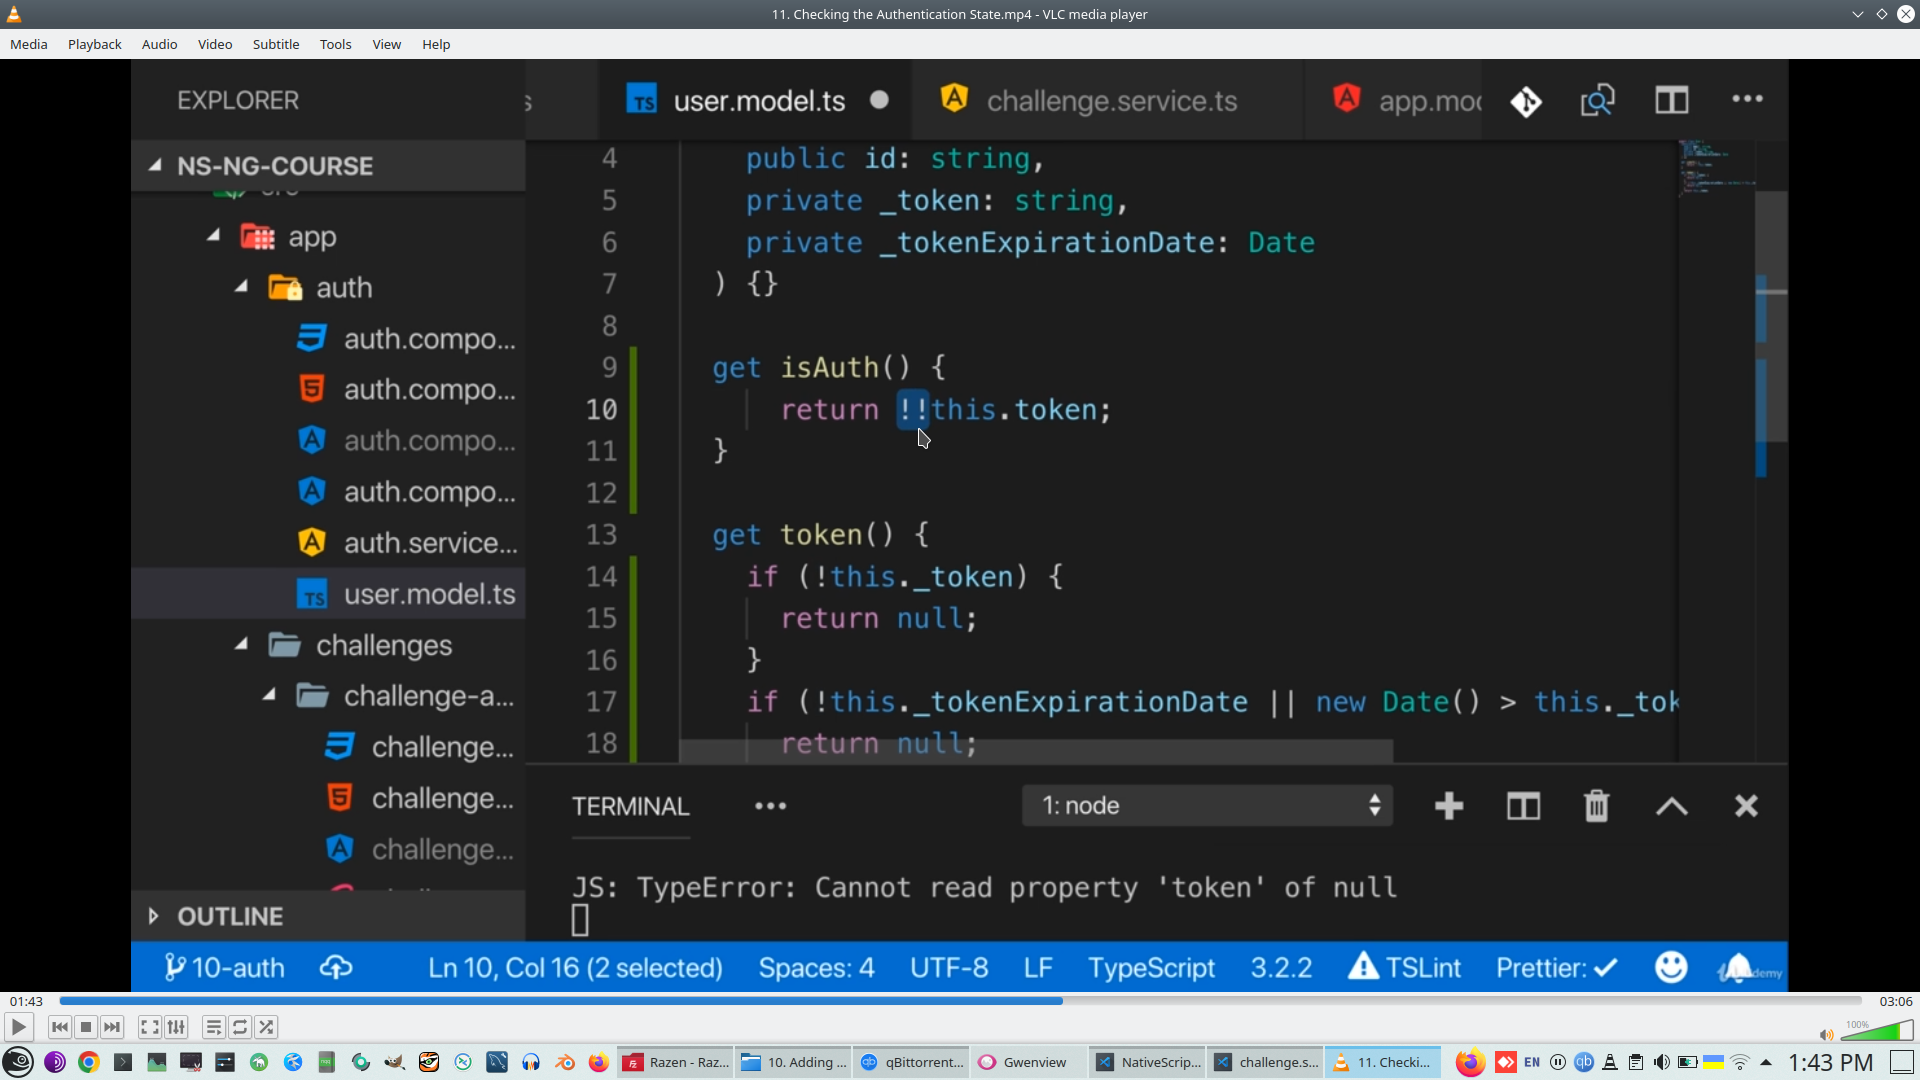
Firstly we need to check token status, is it experied?
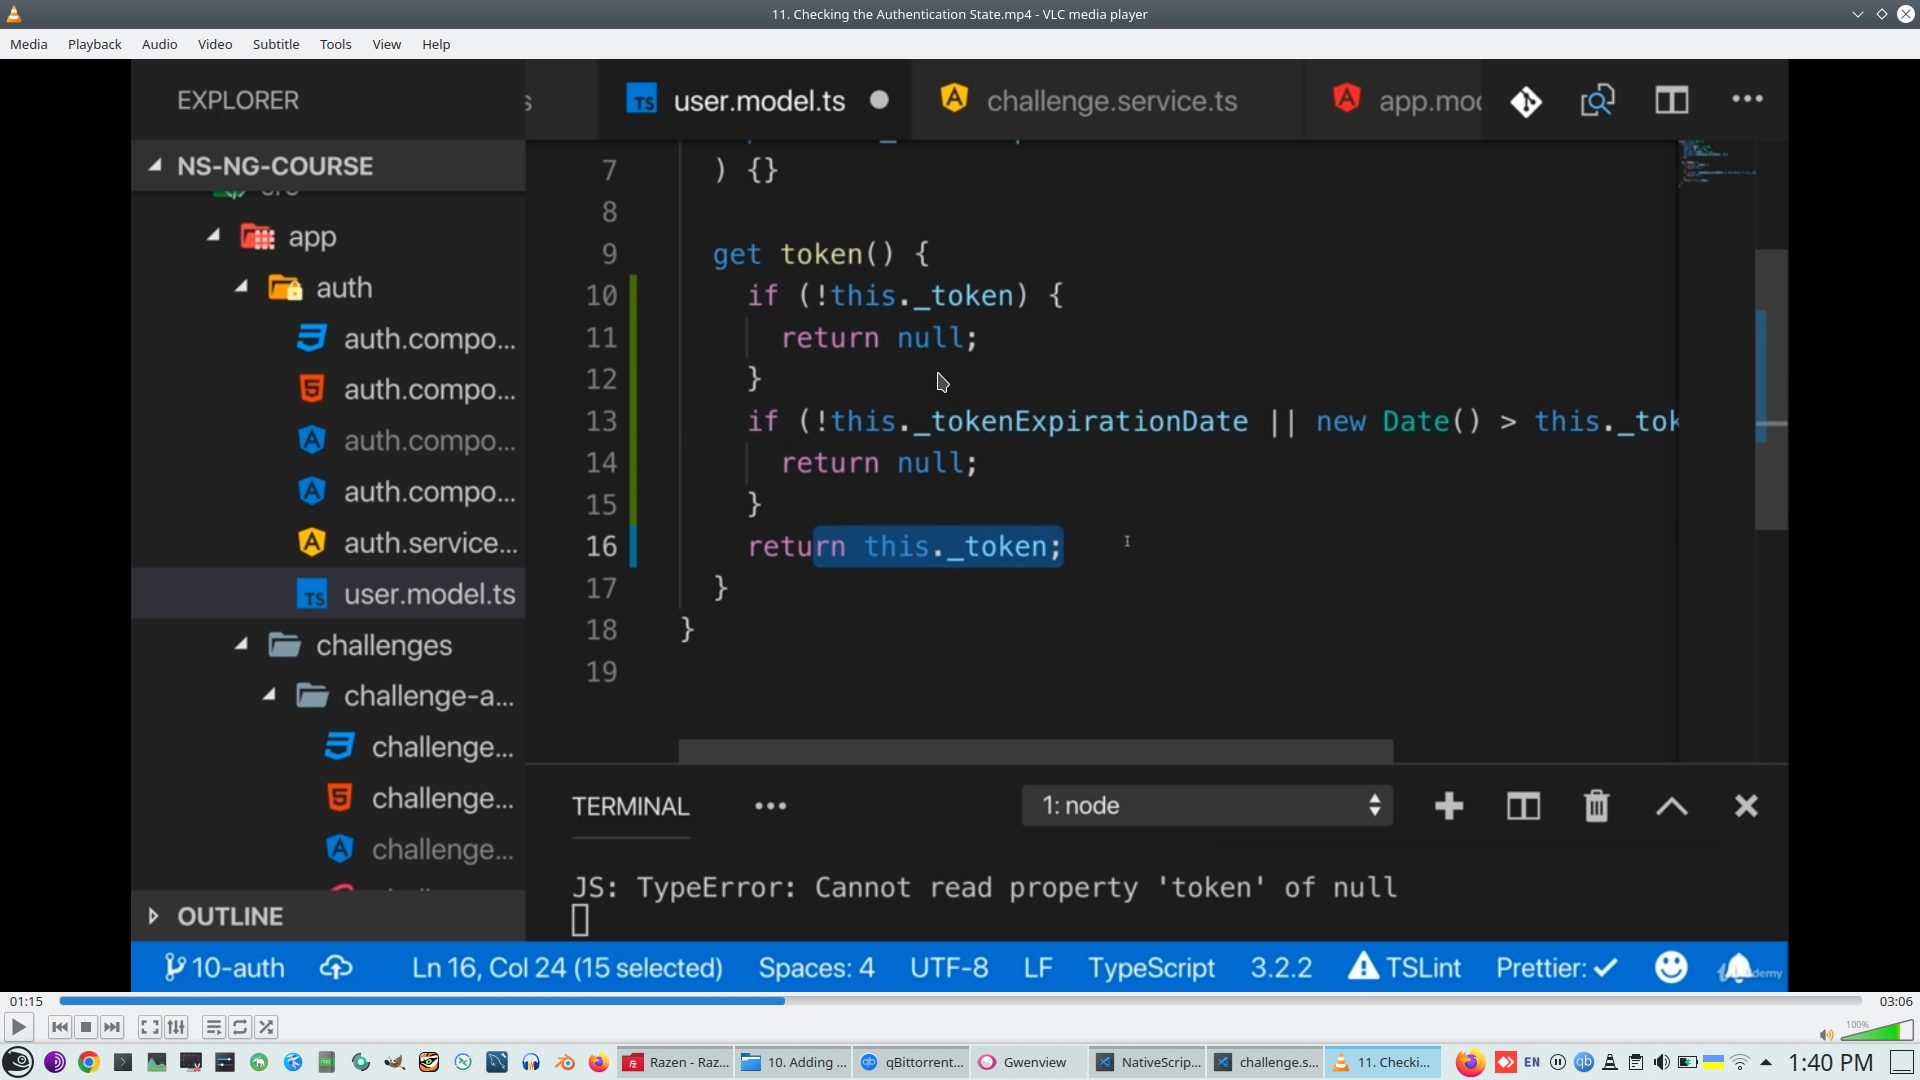
!! = double exclamation convert token to boolean (novalue converted to false)
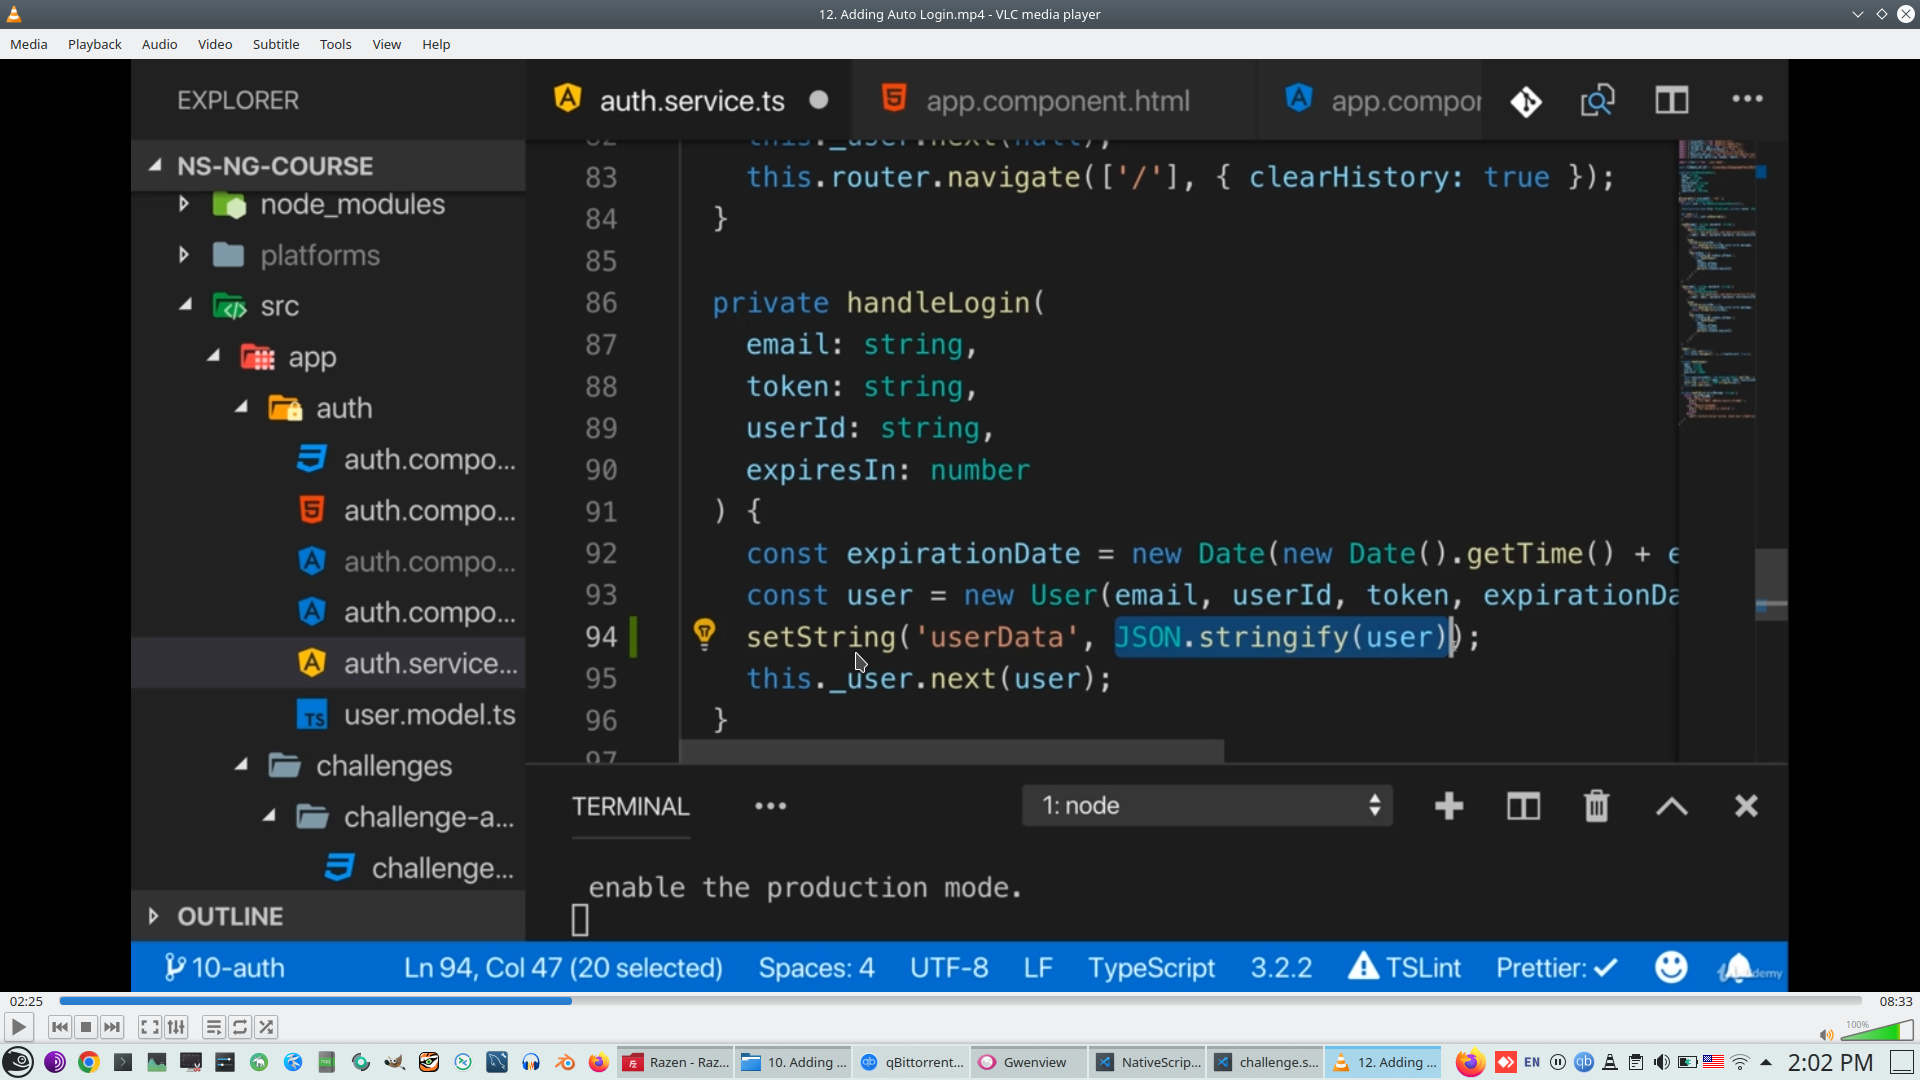
We will store to server only correct User Token
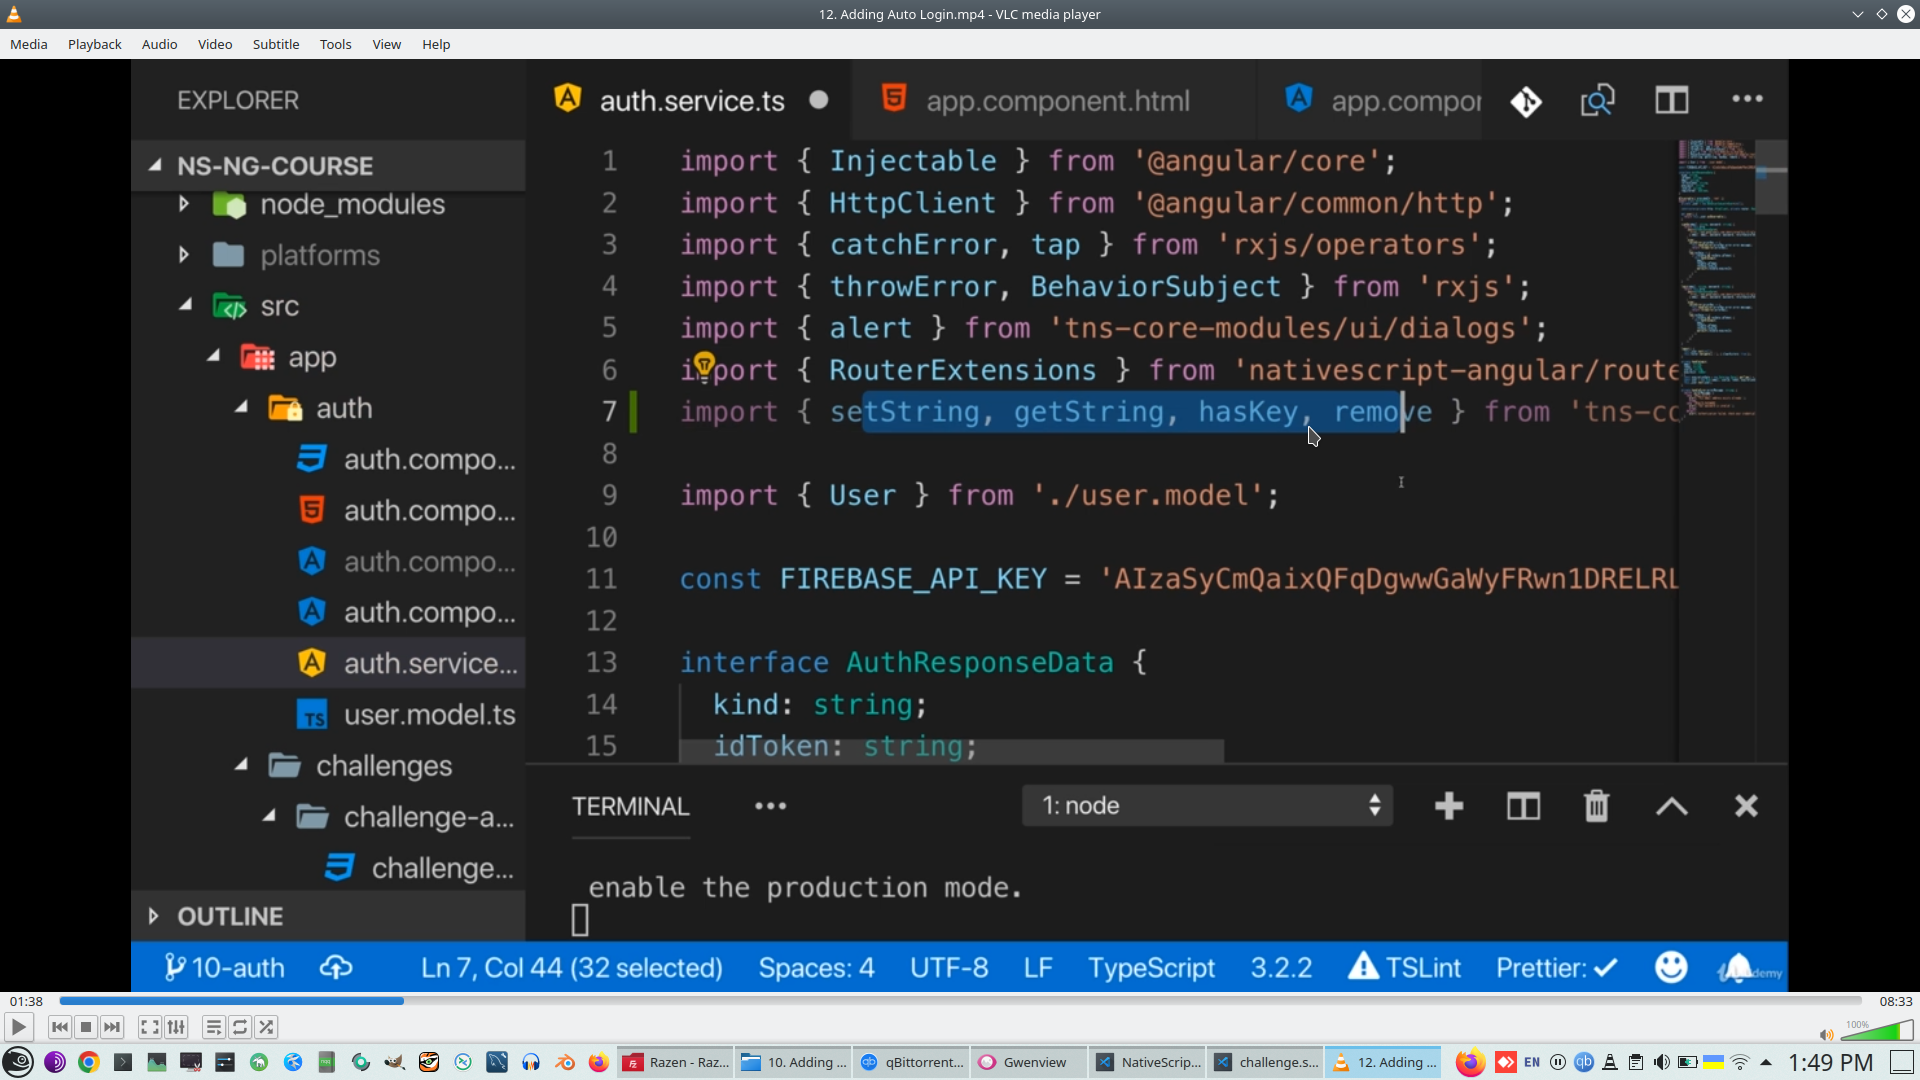
ApplicationSetting allow store simple KeyValue data to Application Setting storage
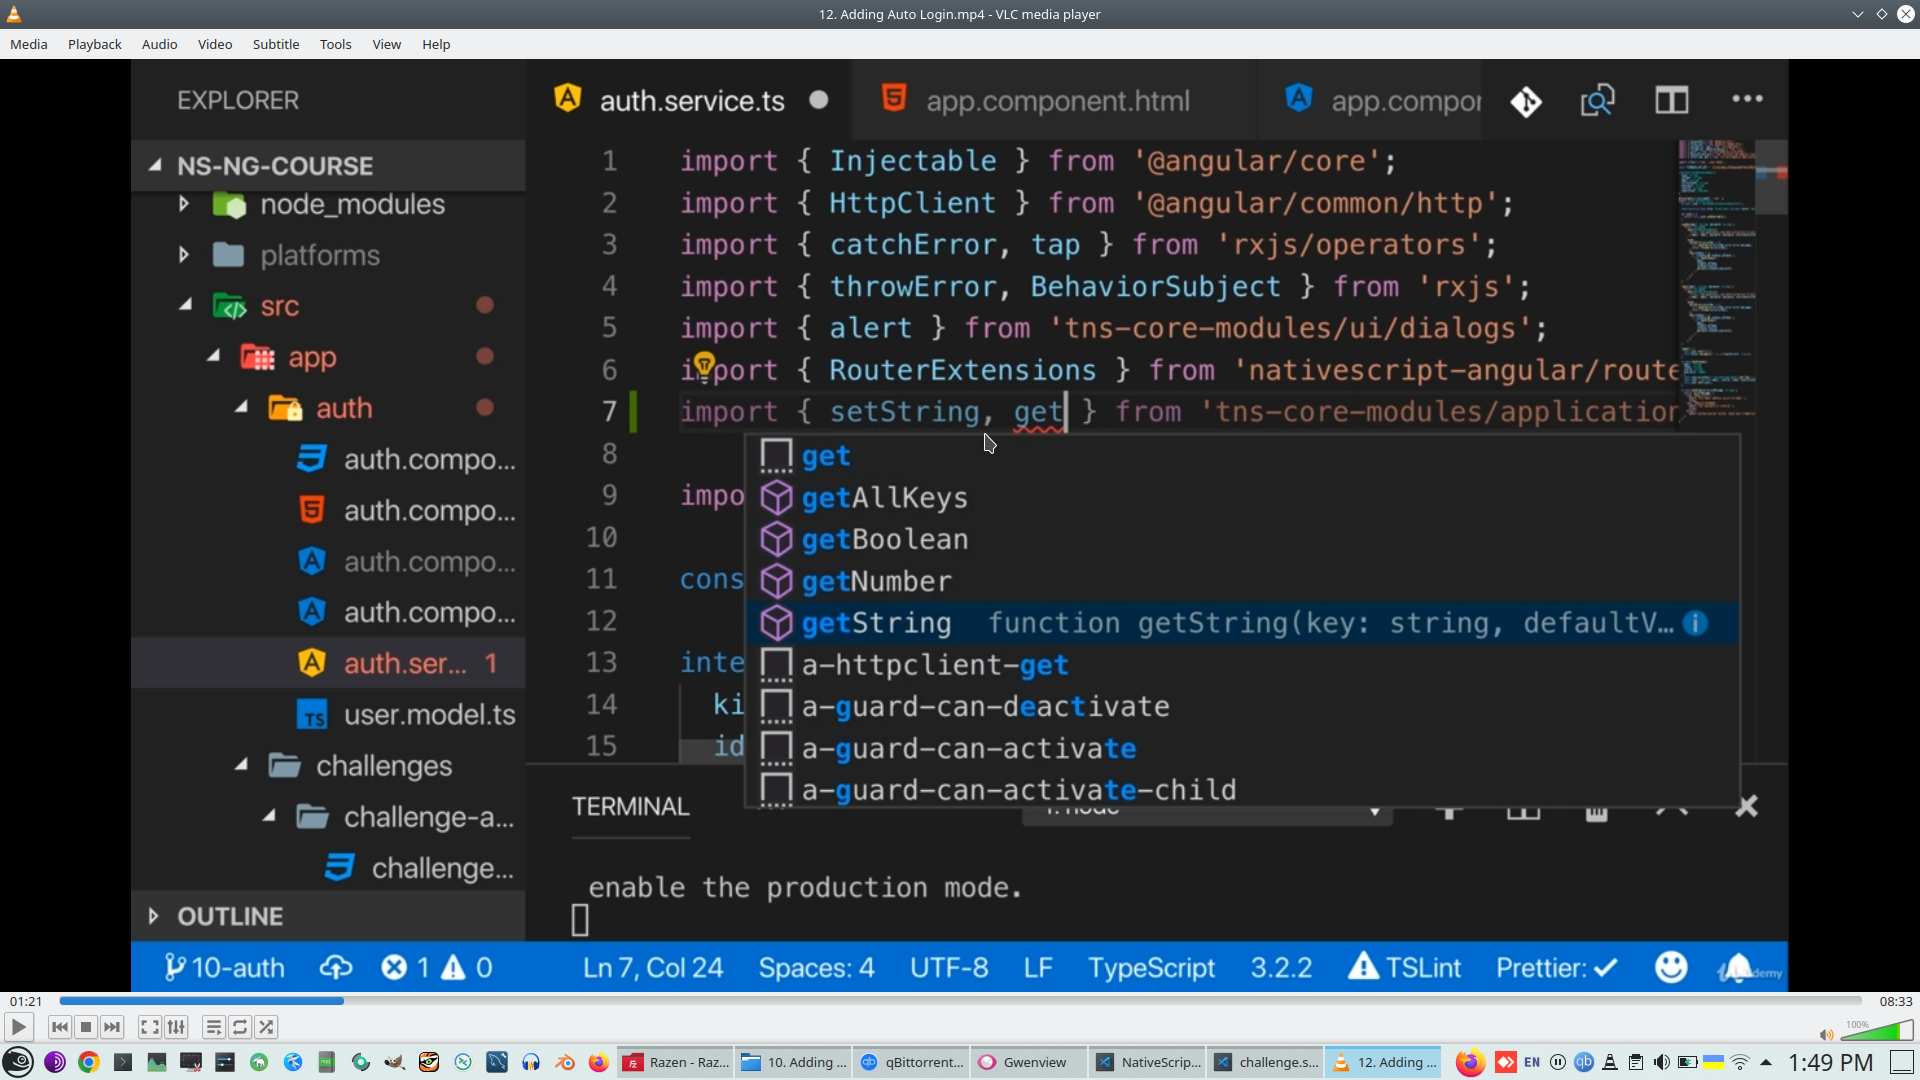
This four methods allow store, retrieve and delete string Key
We strinfy User object to Json string
Import OF from RxJs https://thinkrx.io/rxjs/of/

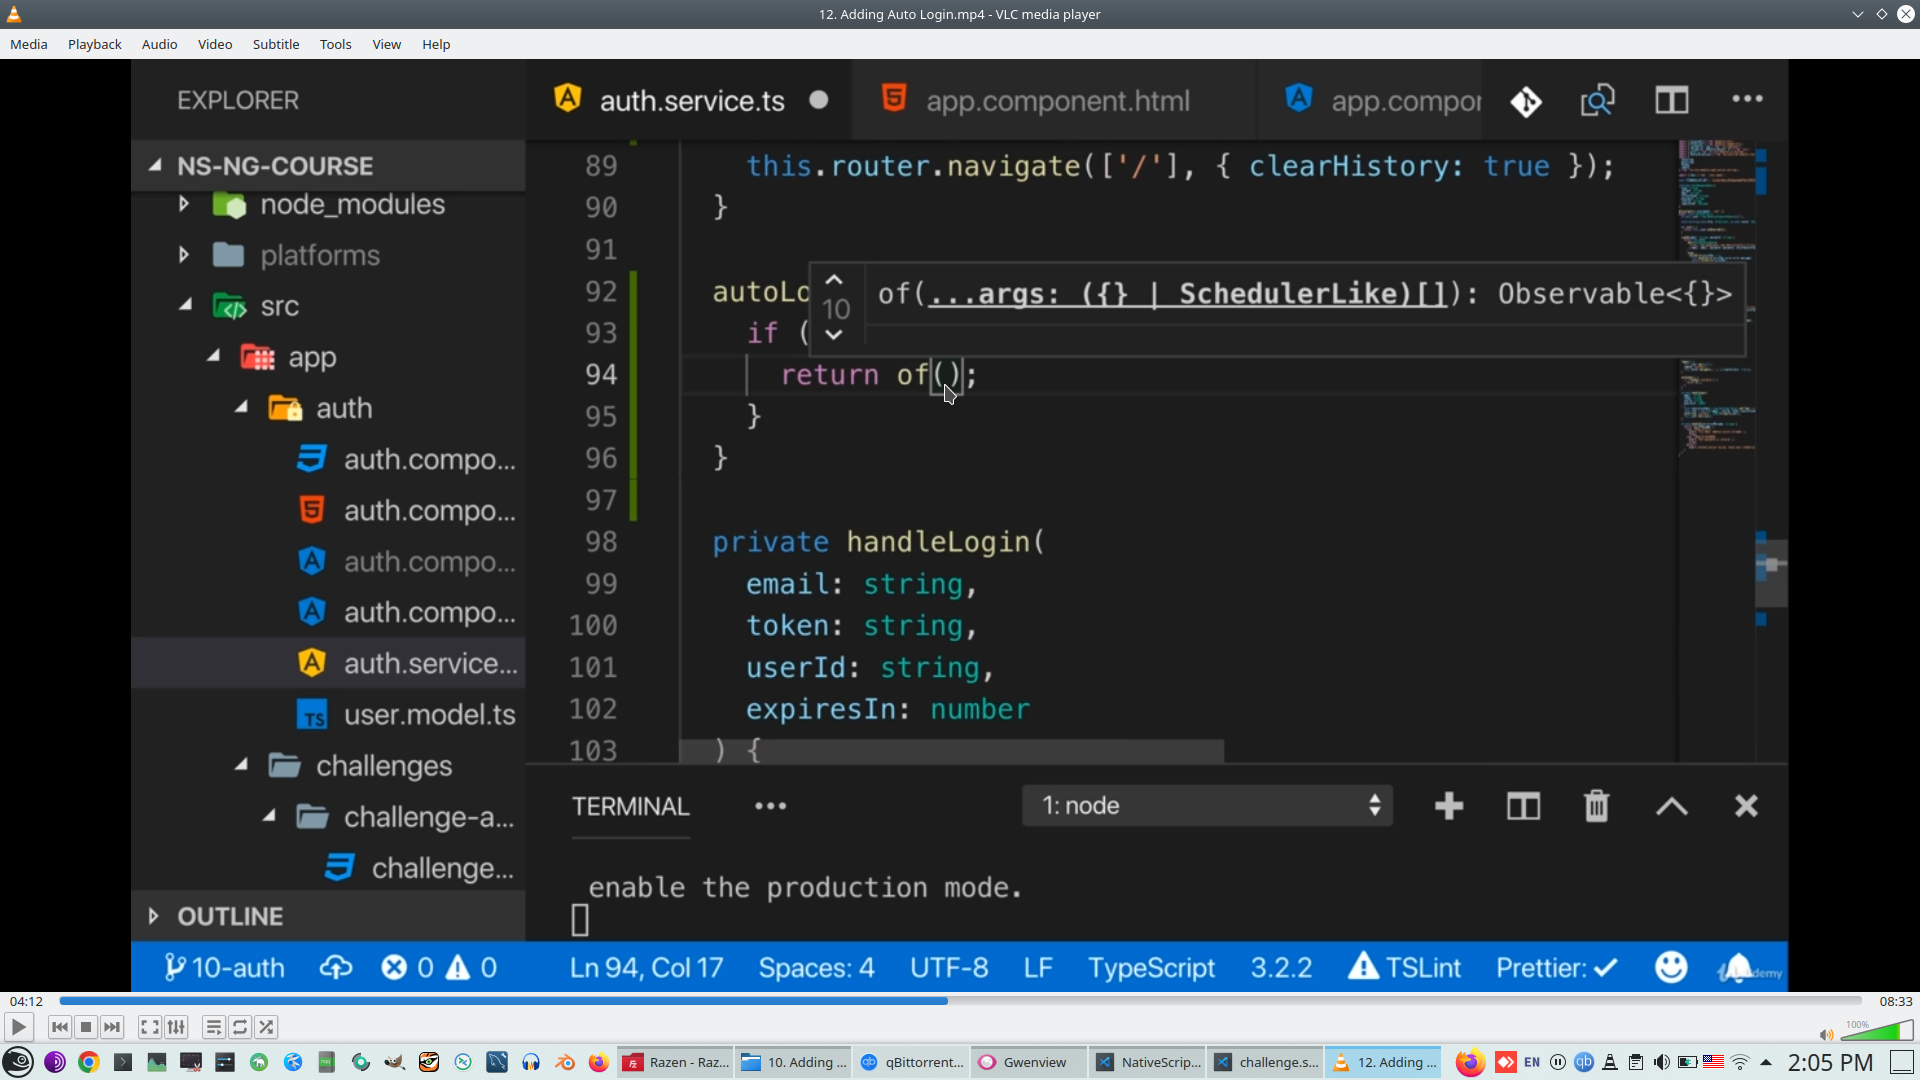
Create Observable from simple boolean value
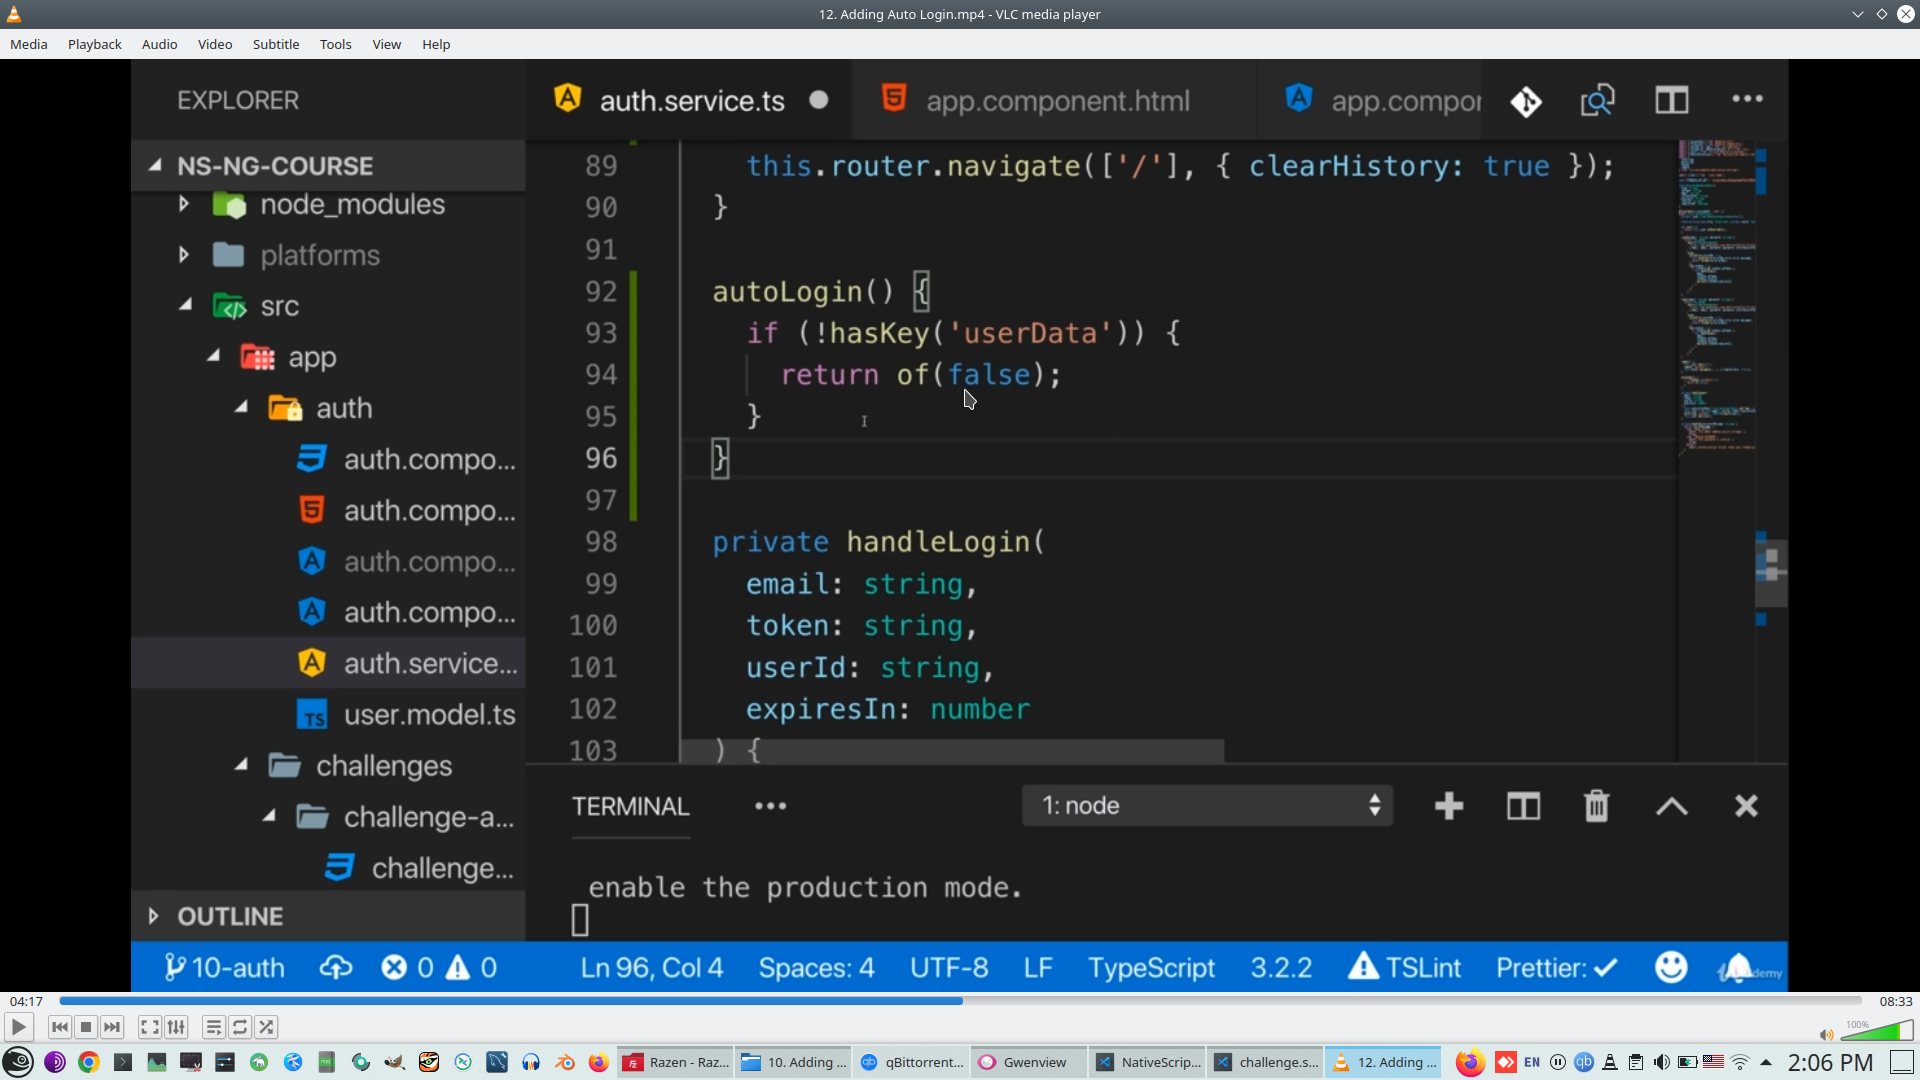
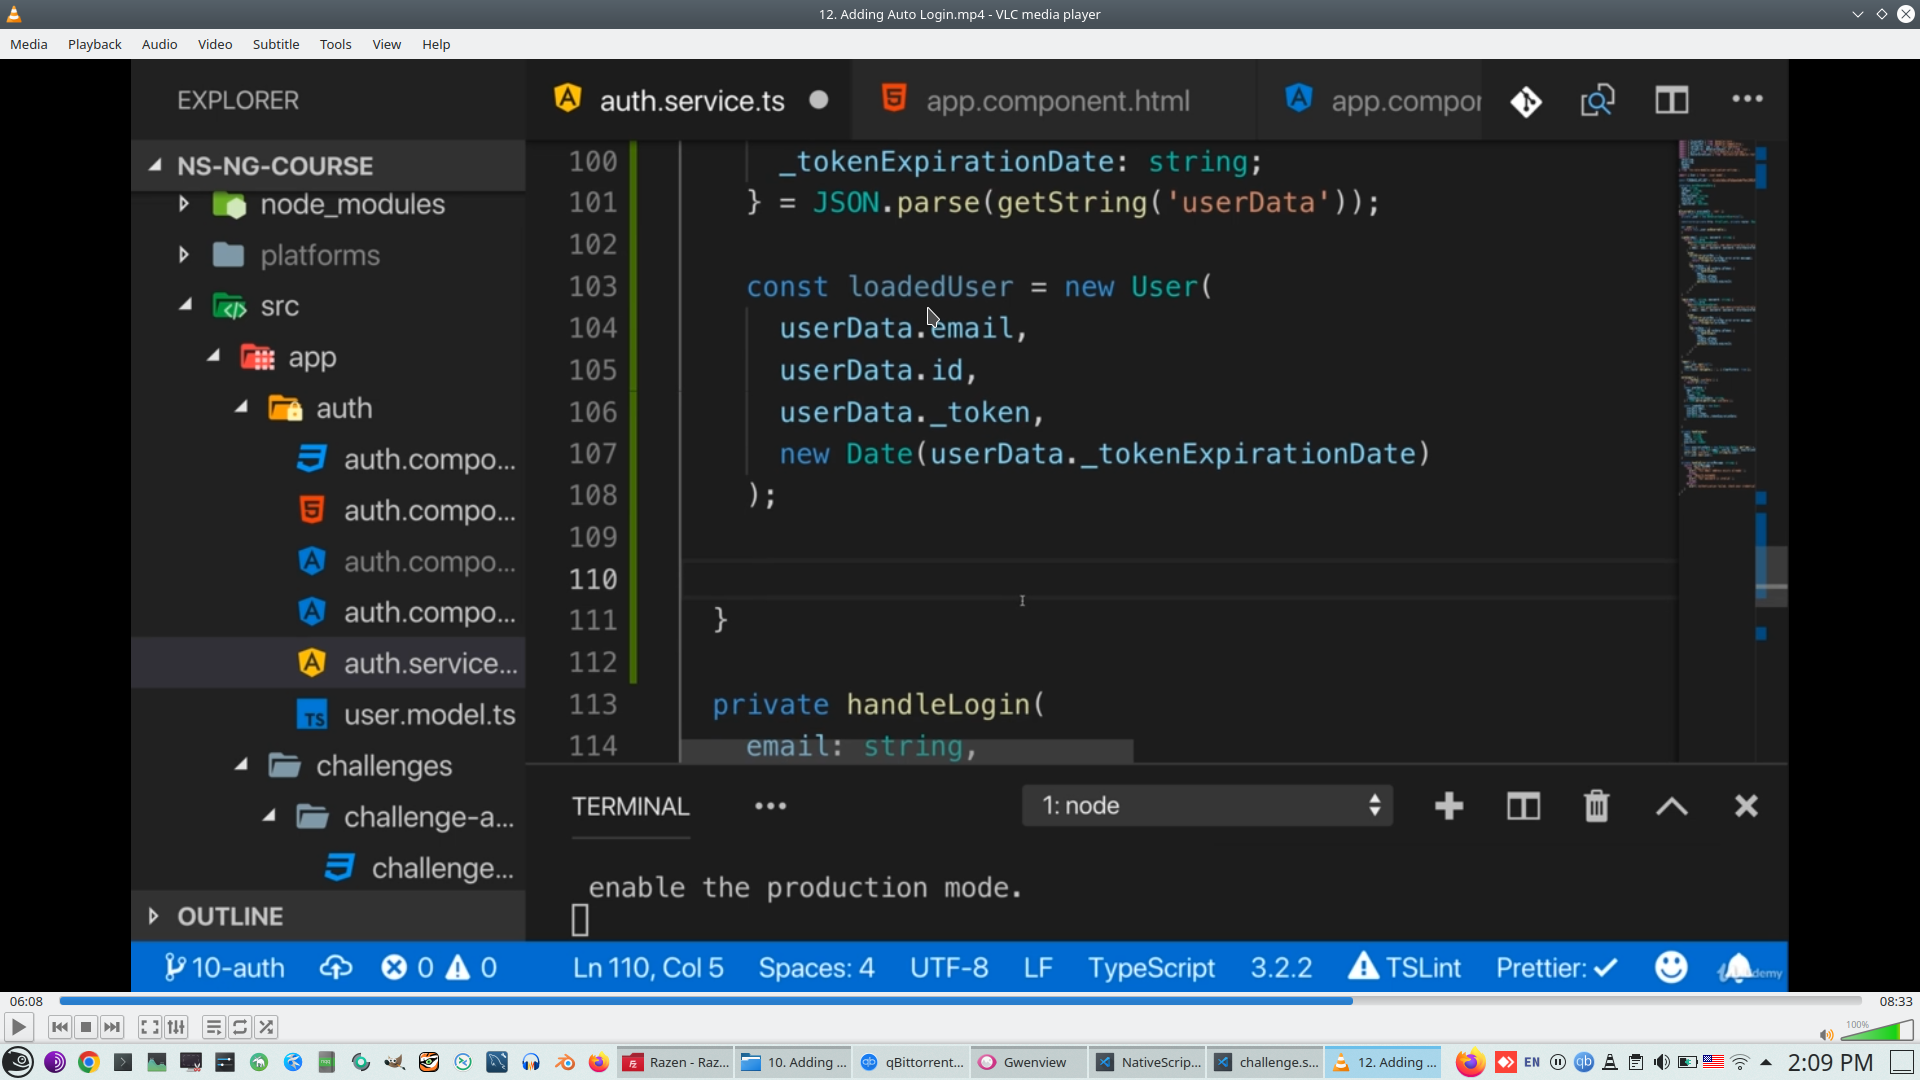
Or Restore object from Application Setting


Create Typed data fron Json.Parse
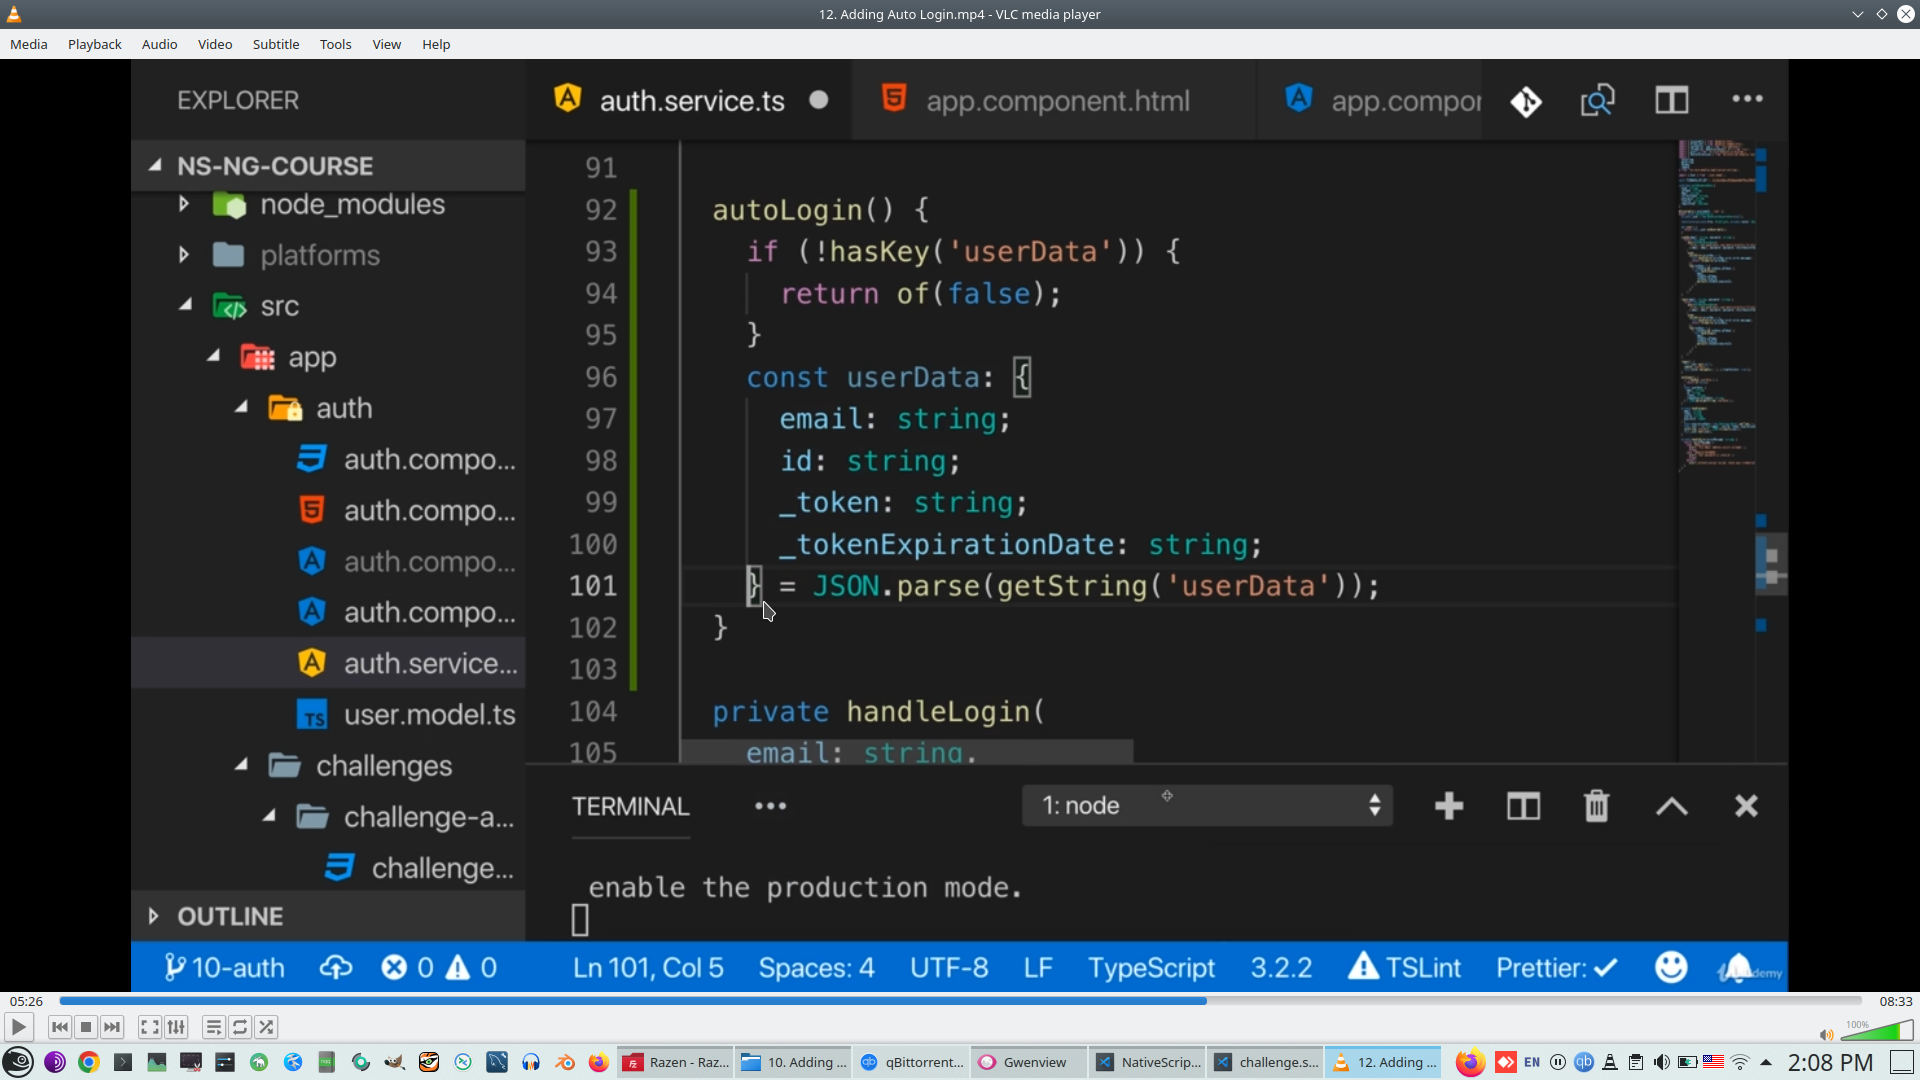
And create Observable from srestored User object
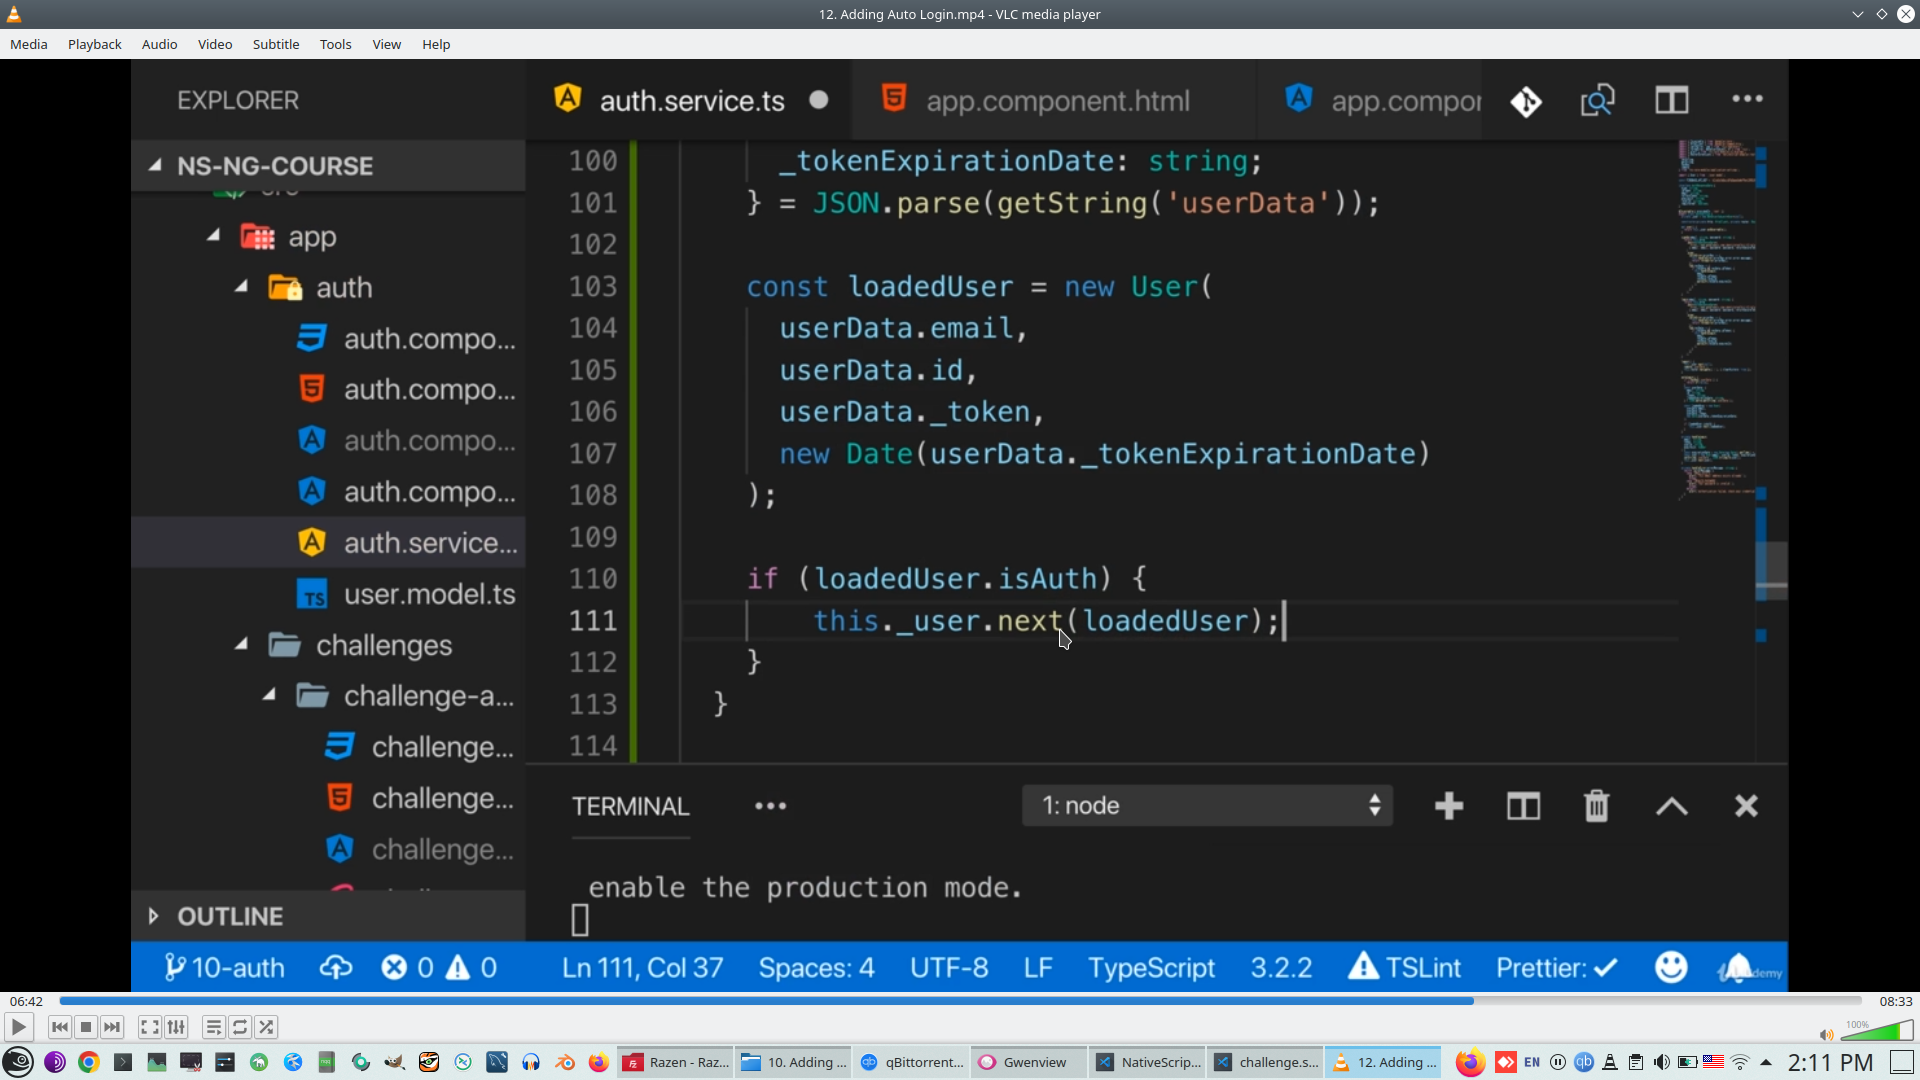
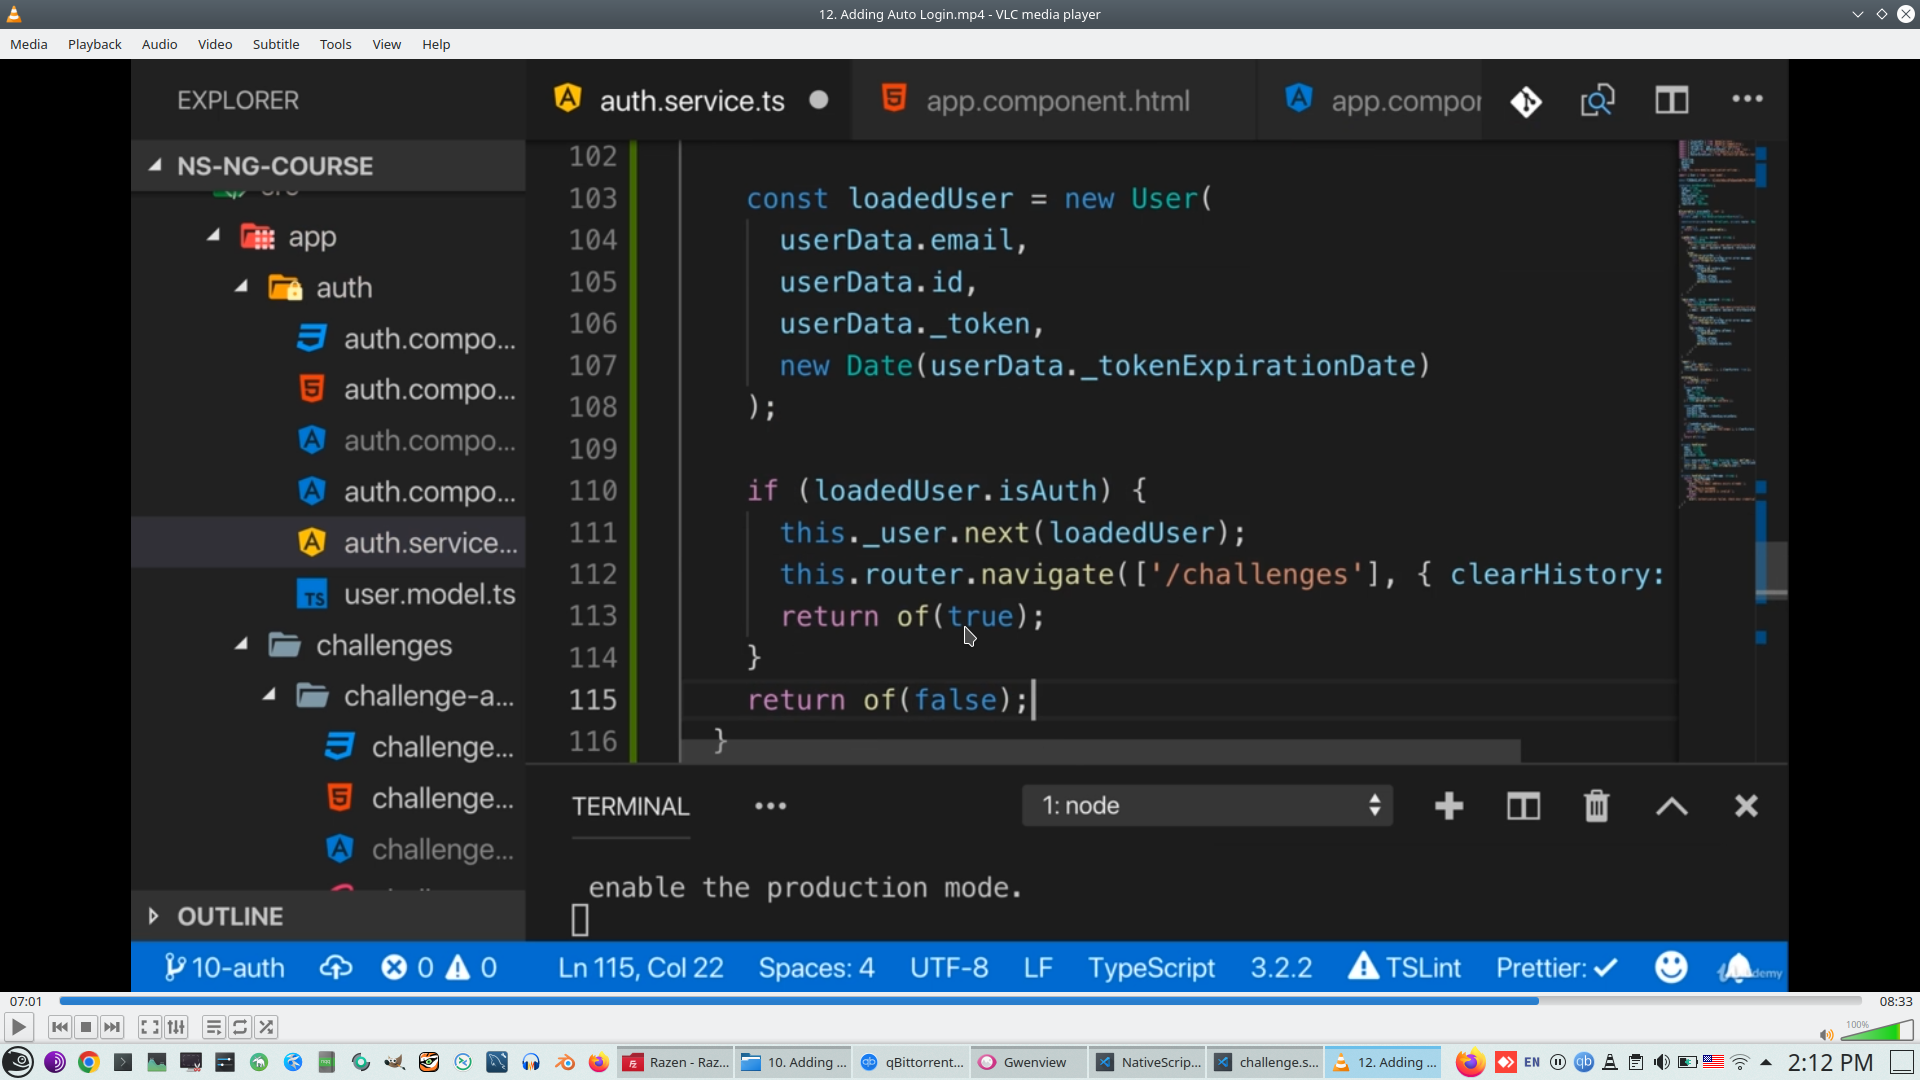
Now for create AutoLogin we can only Subscribe to Auth Service
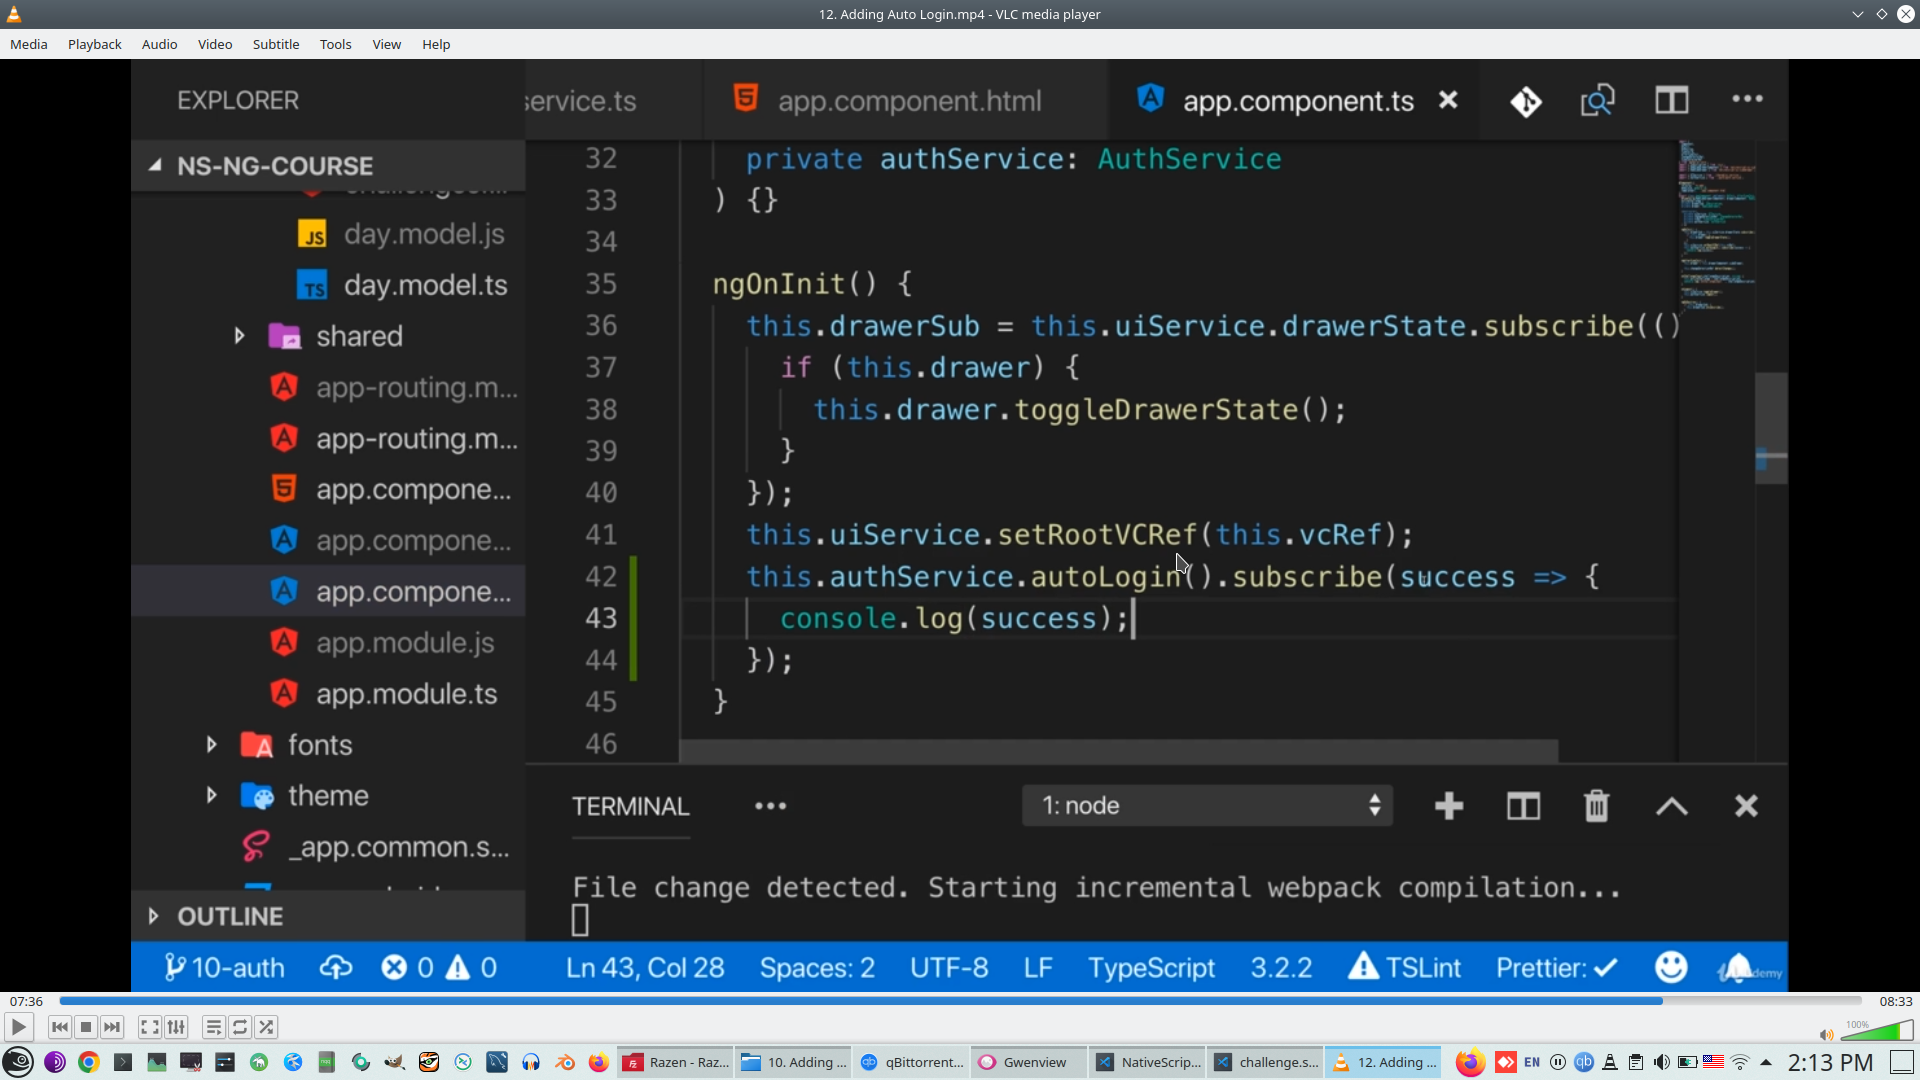
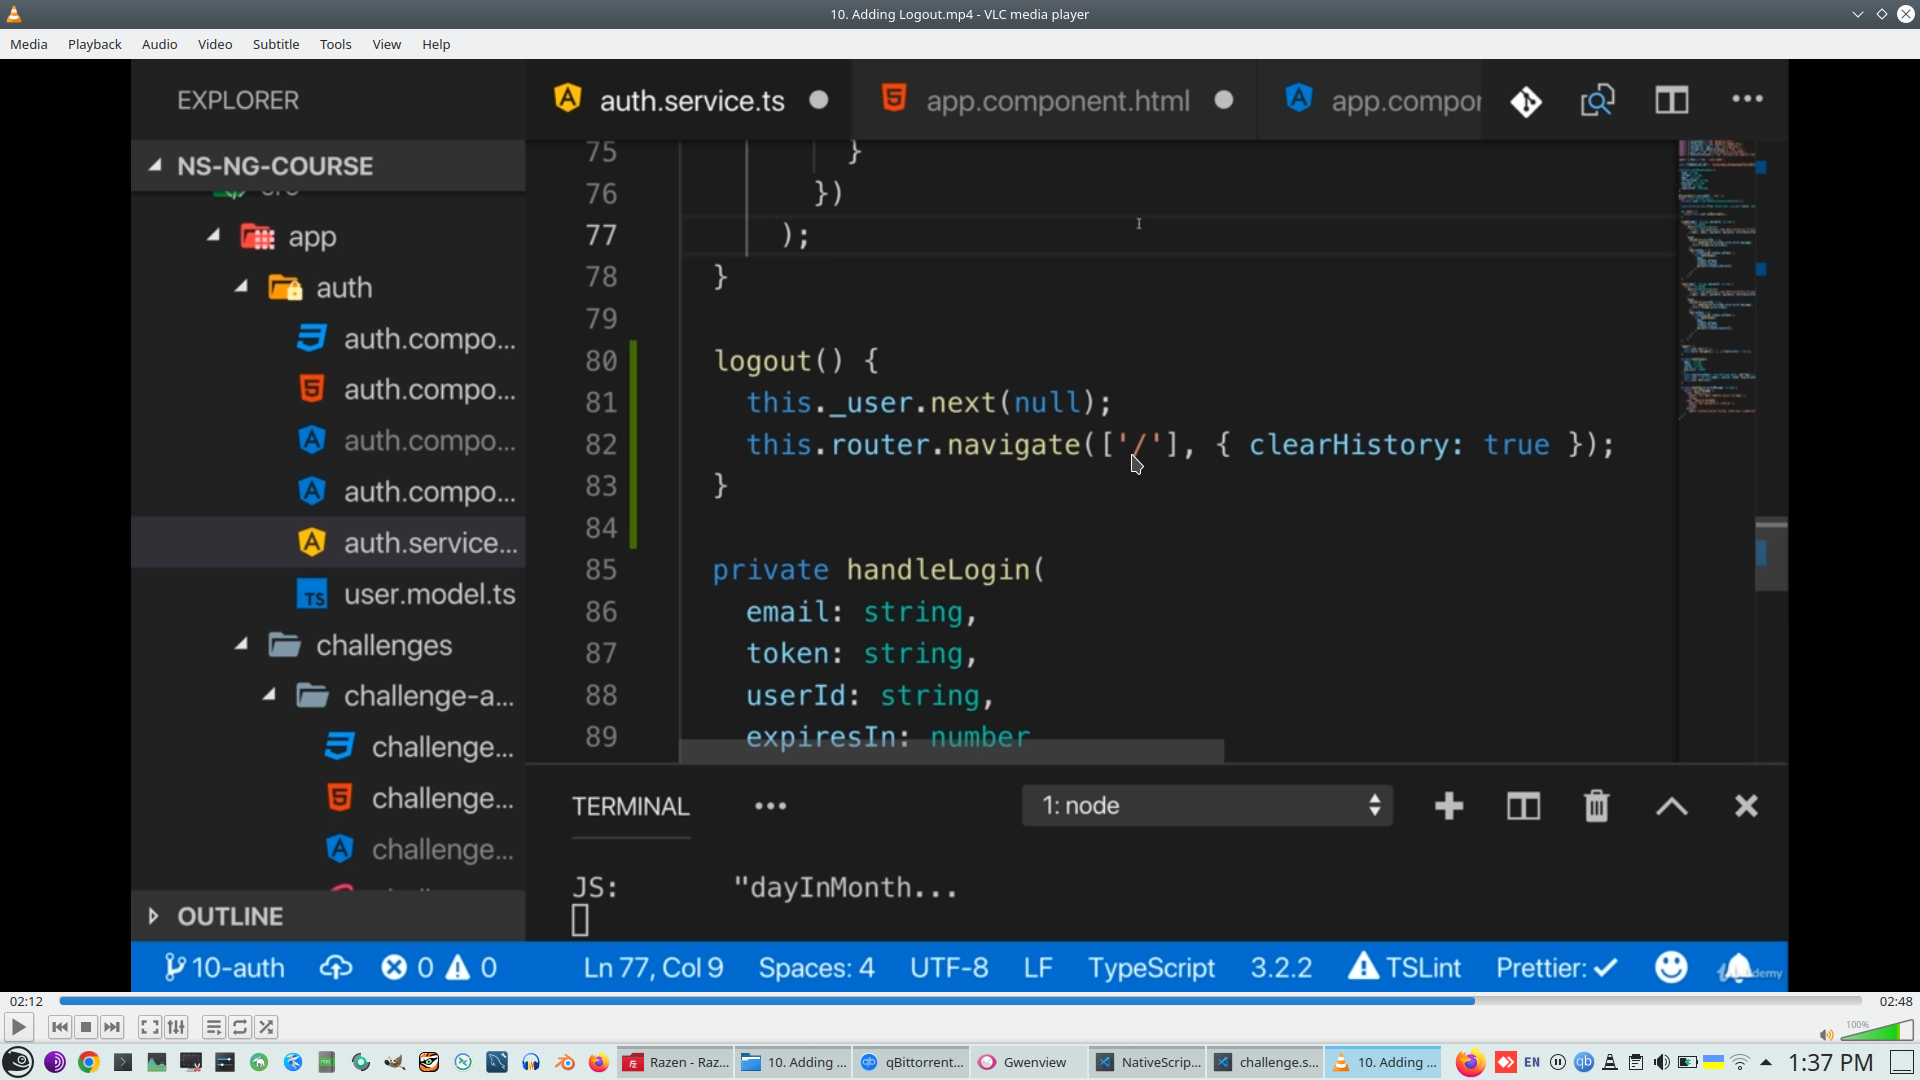
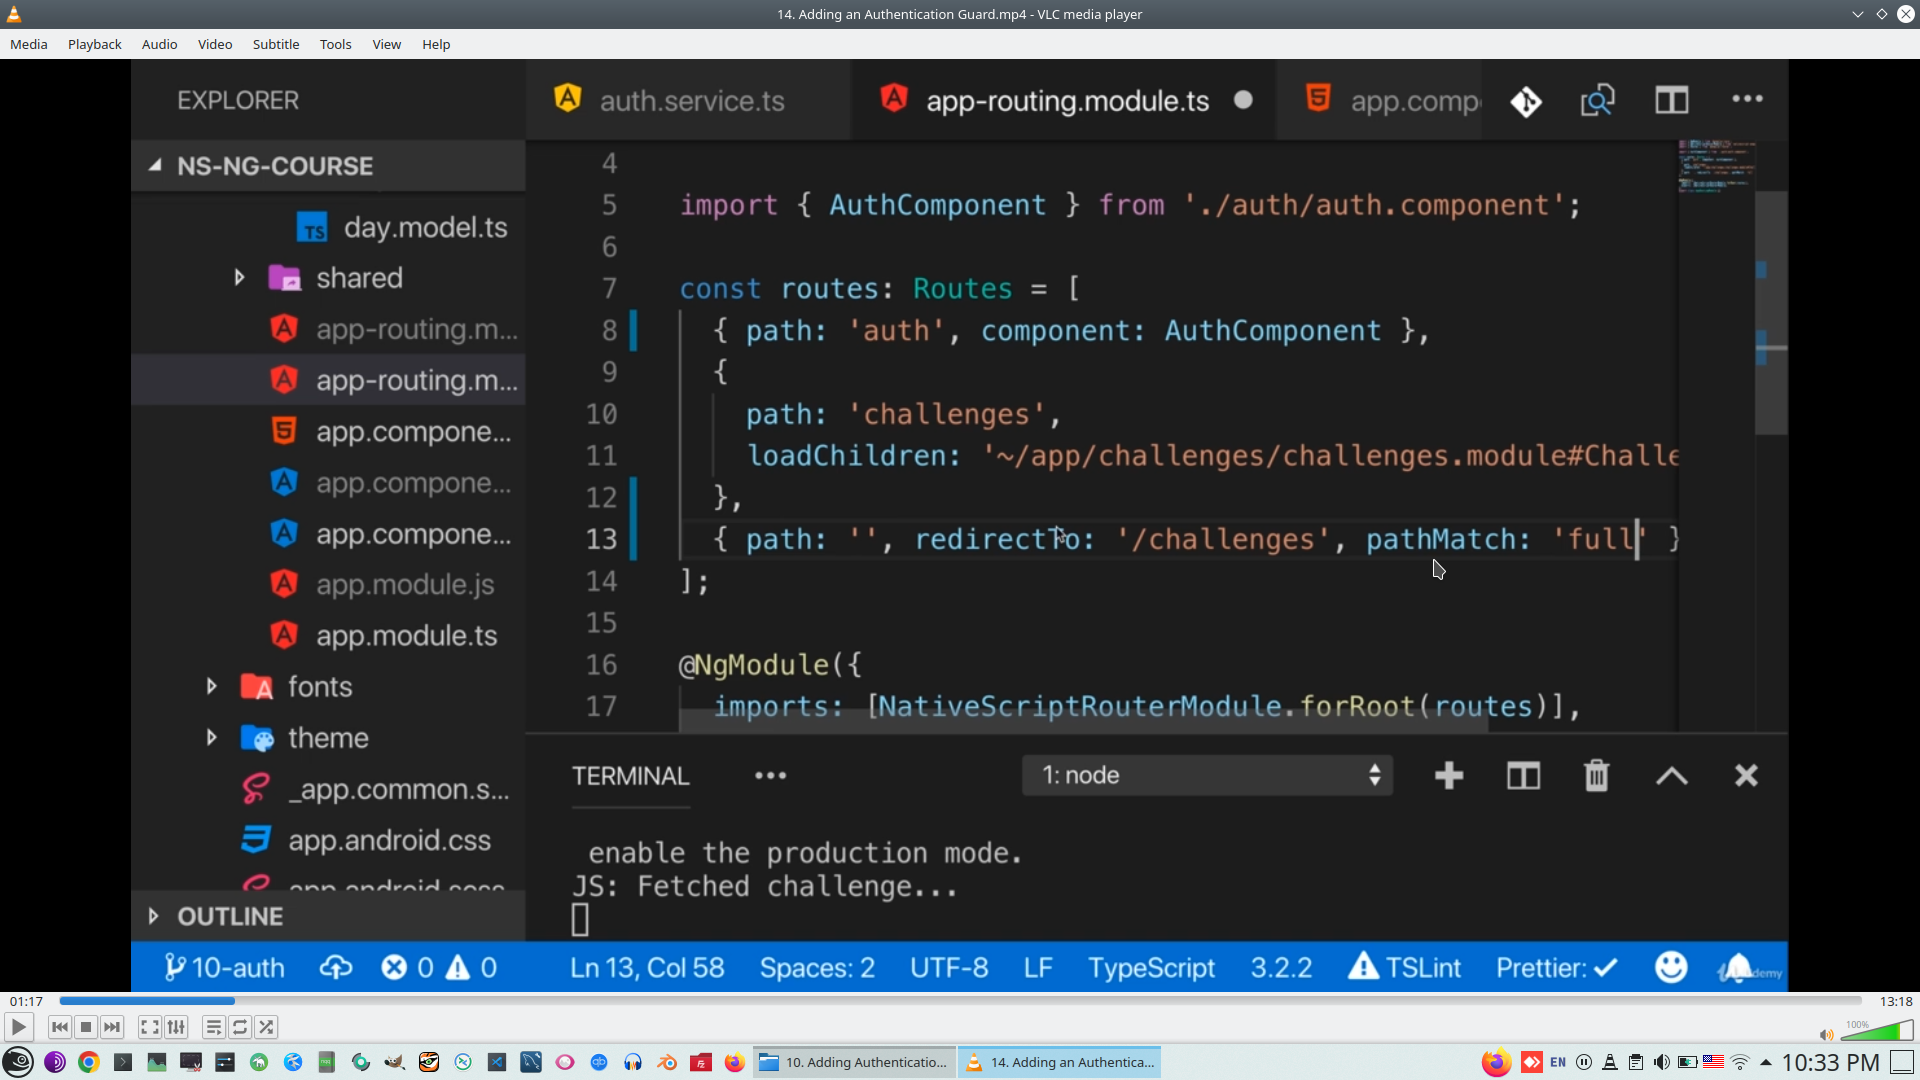
Change Route for Autologin, in this case defaul path '' redirect /change
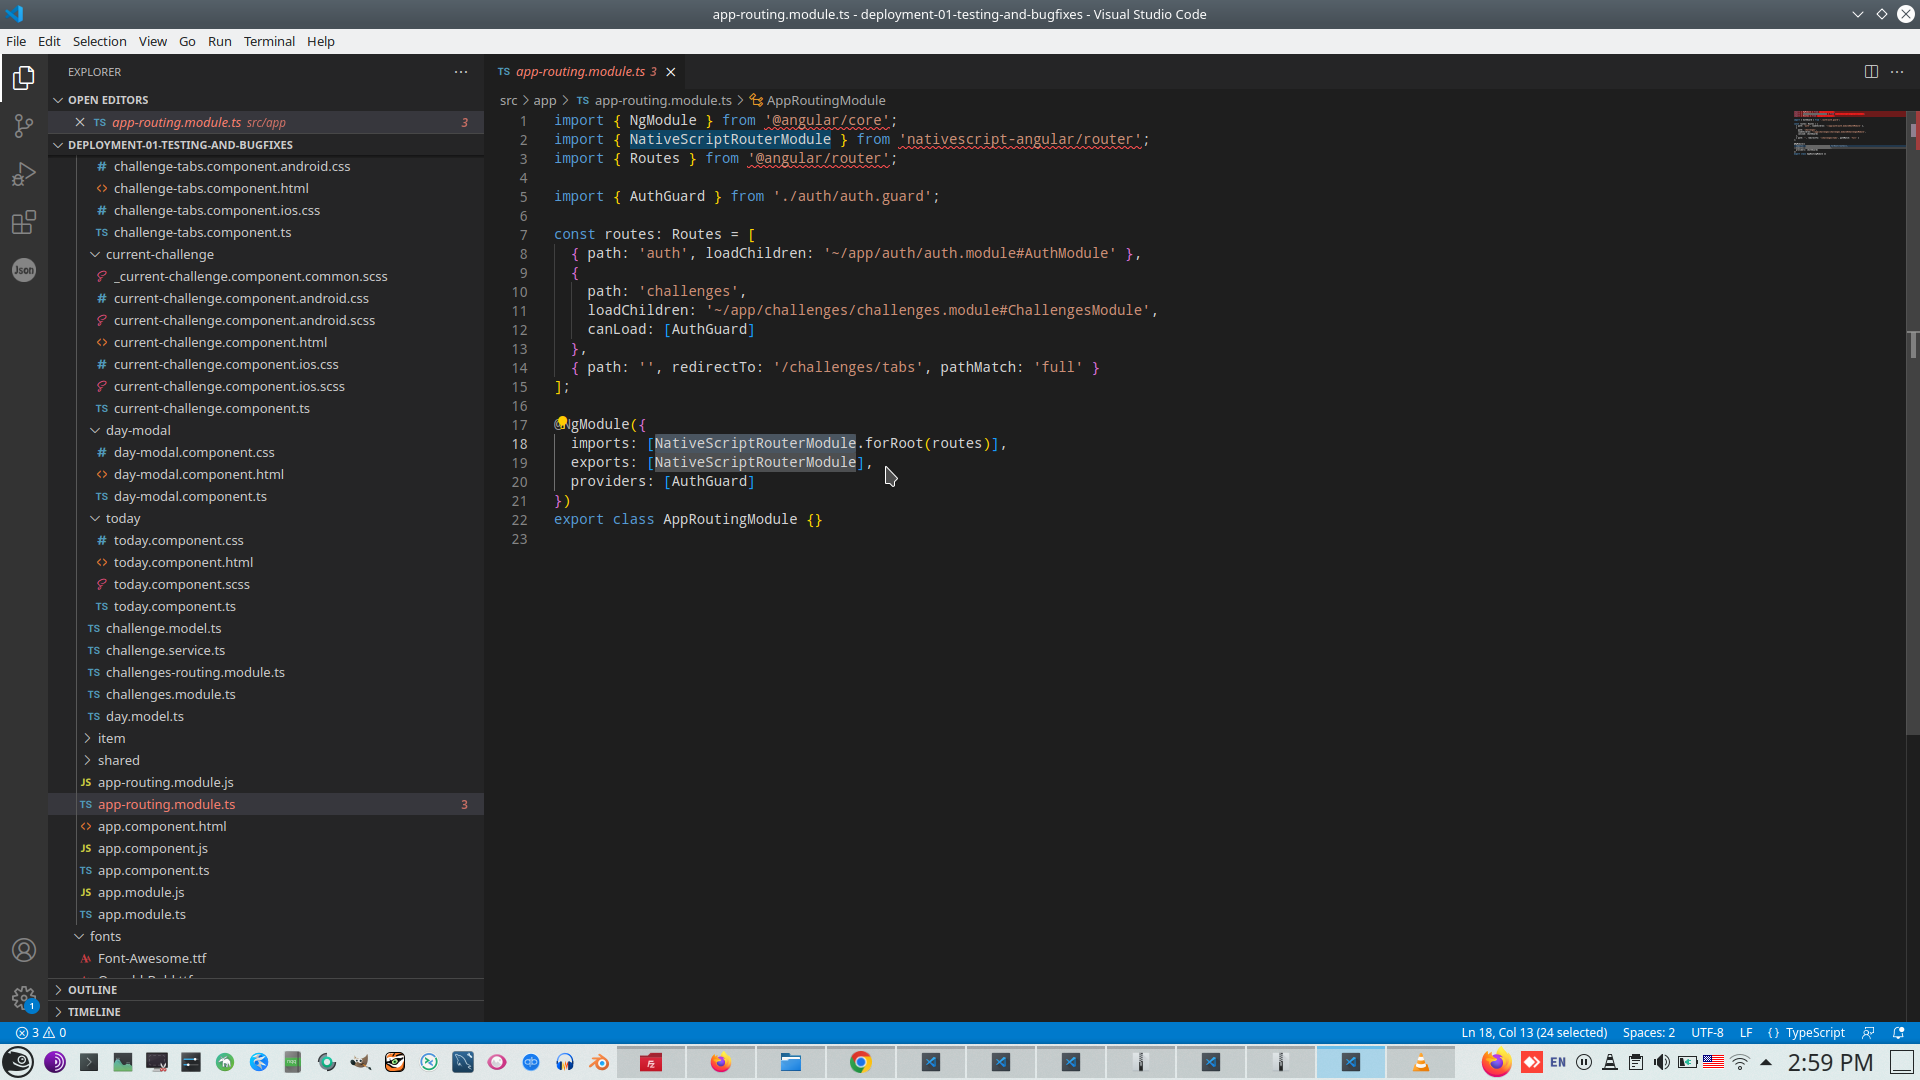
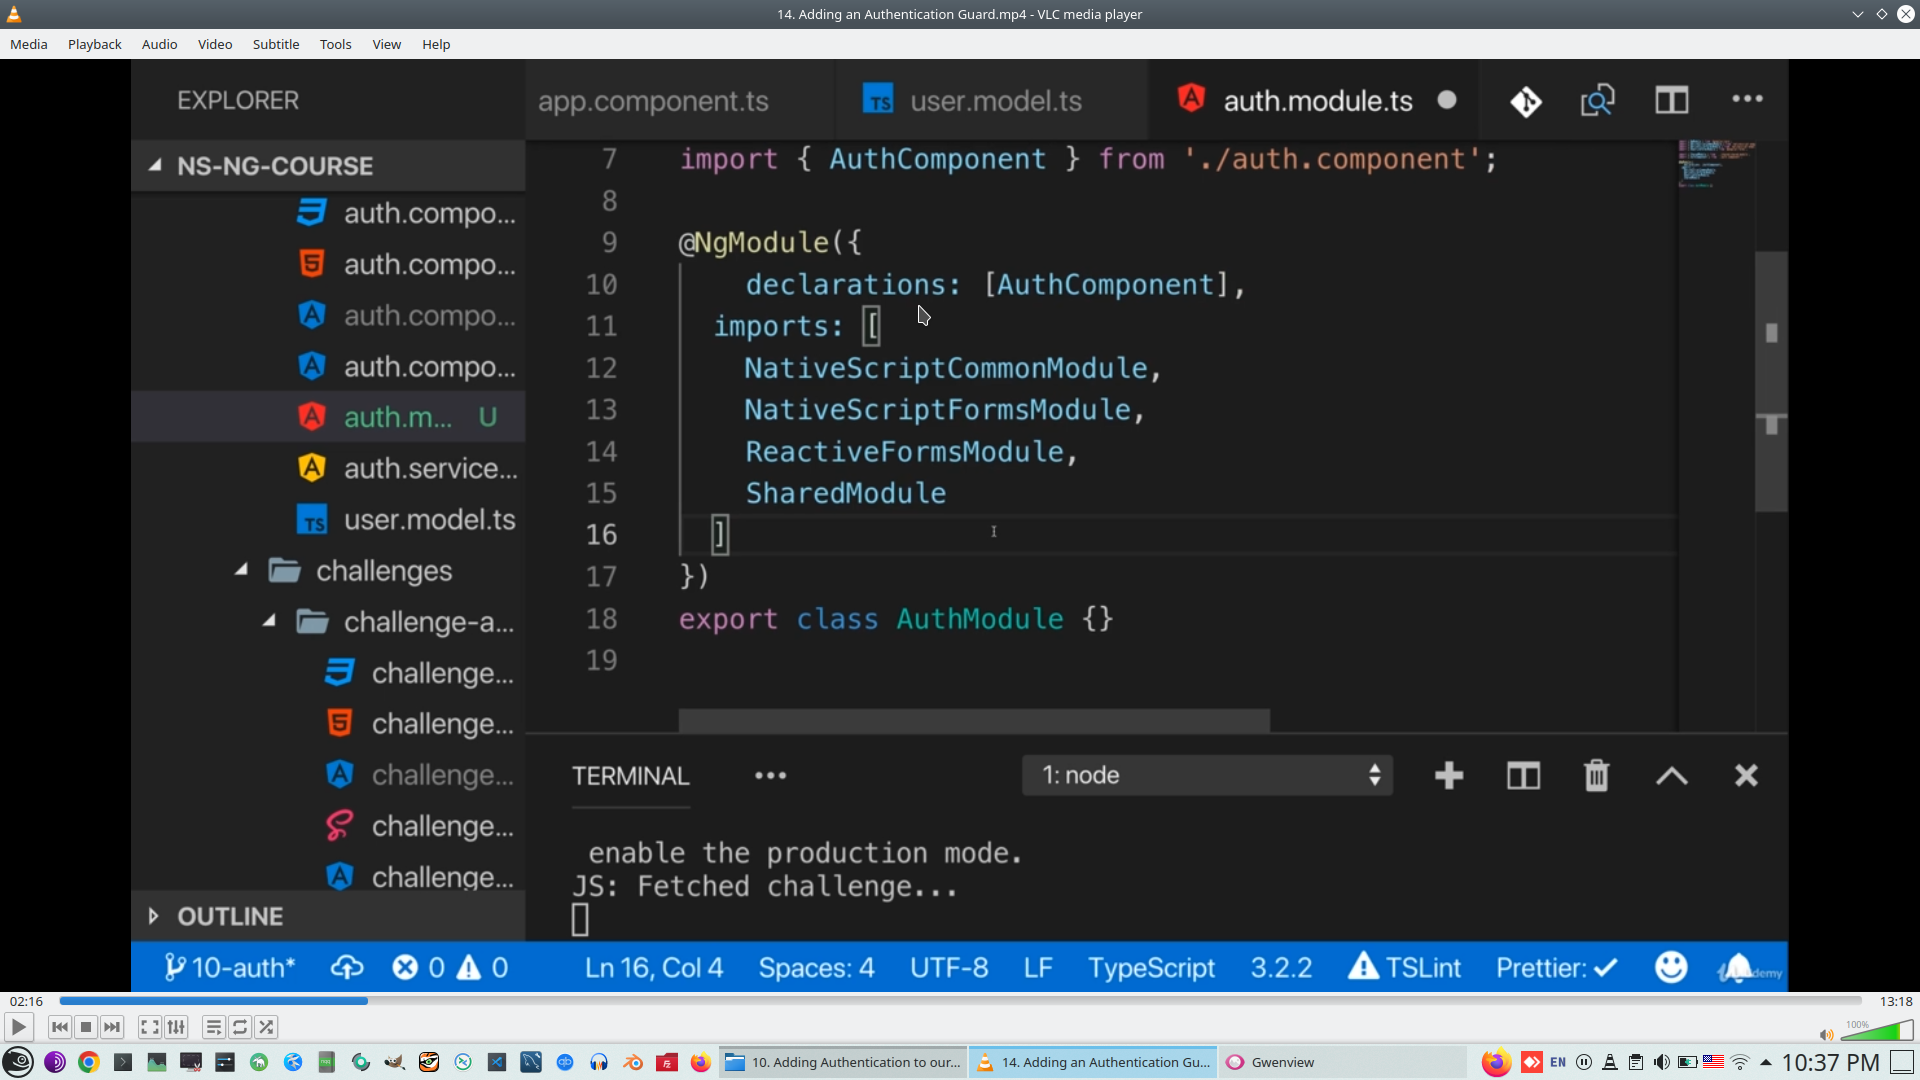
28. Create Lazy loading AuthModule
We need to remove Lazy loading module from Root Module, and create separate module
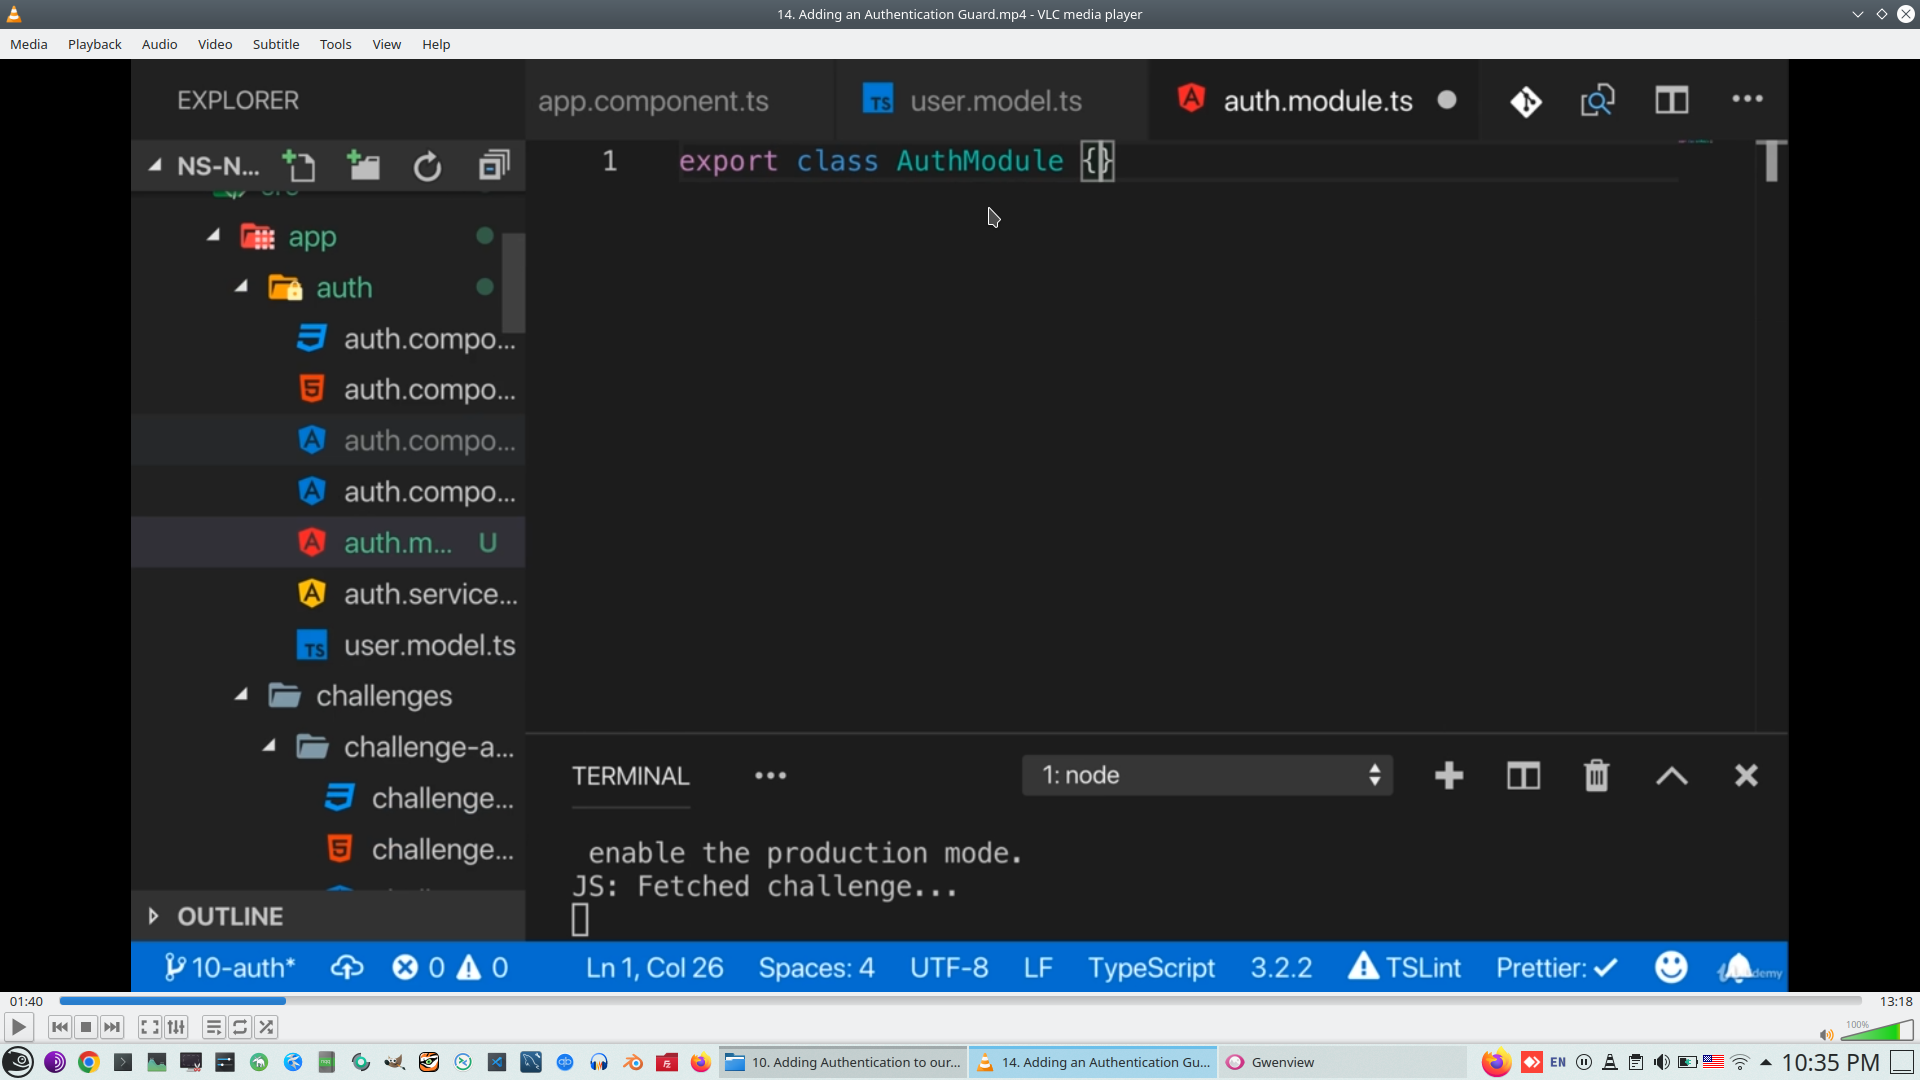
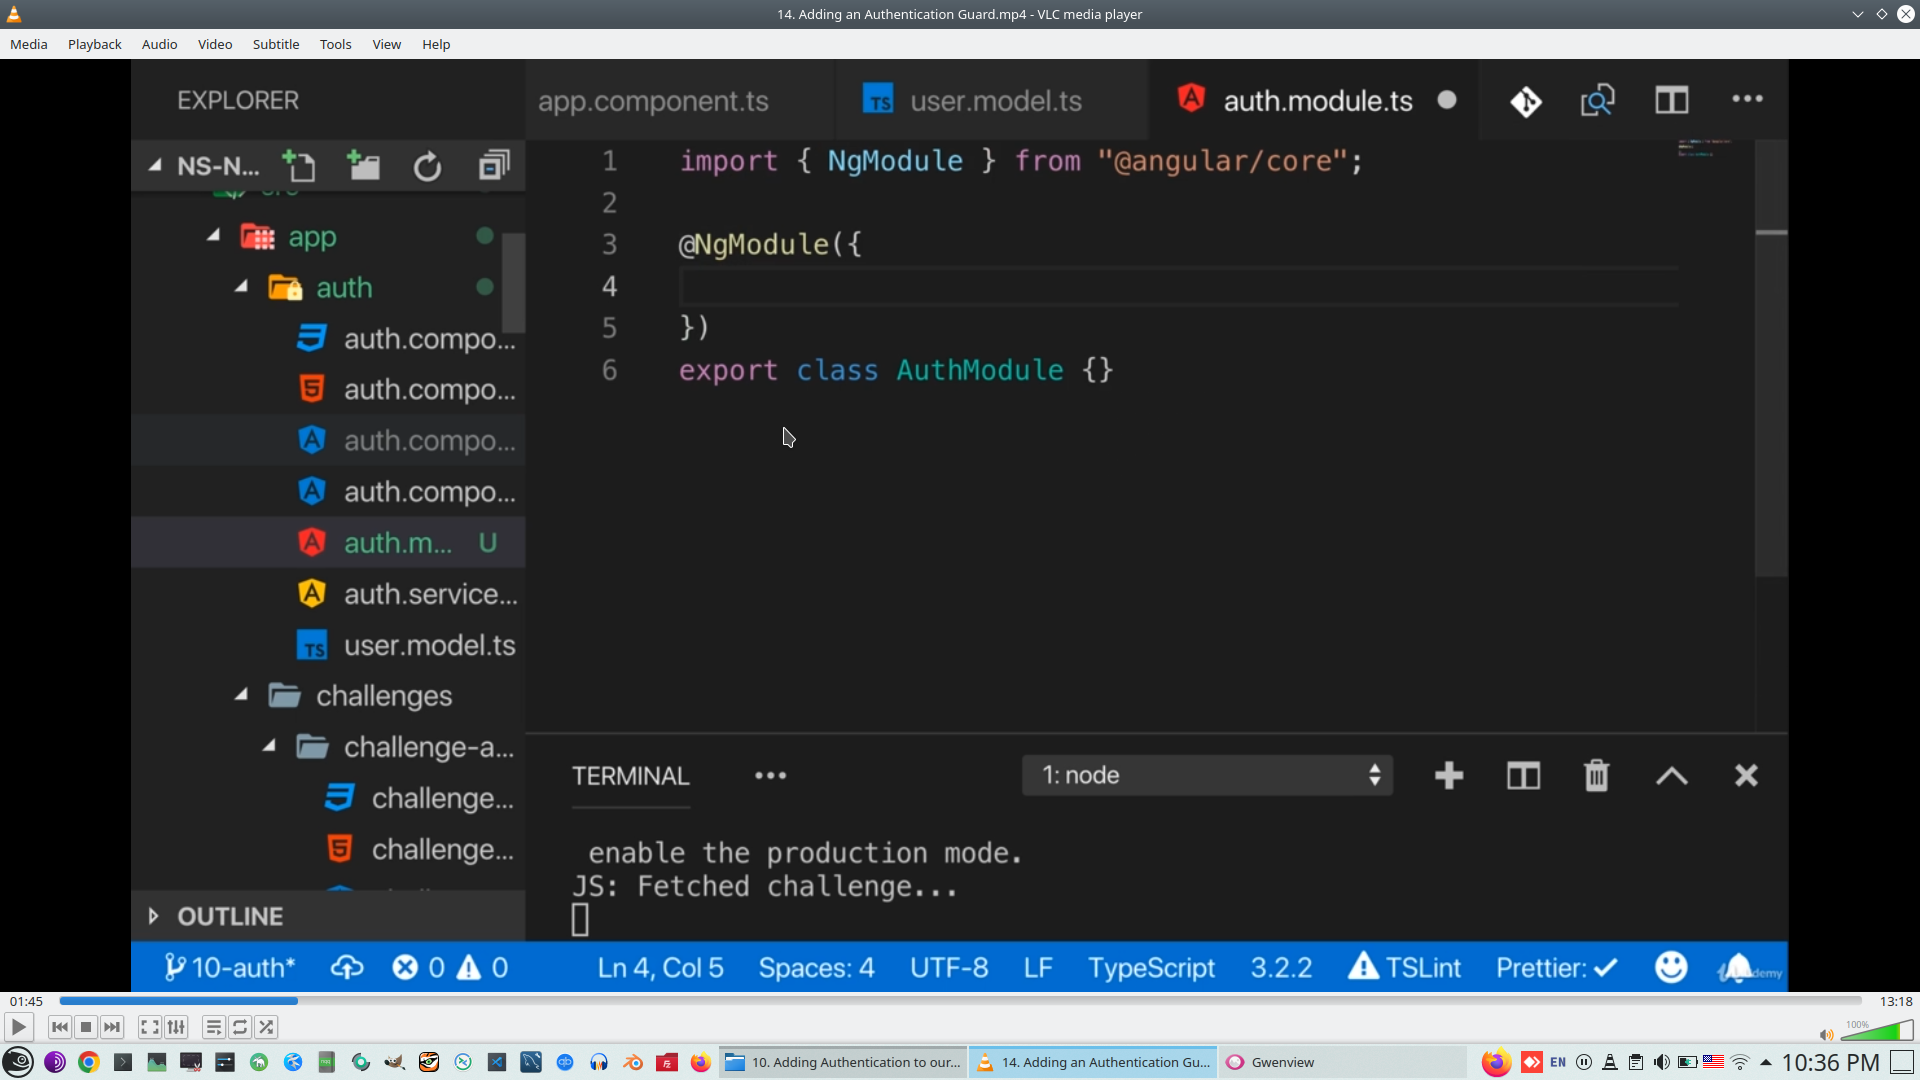
Configure declaration
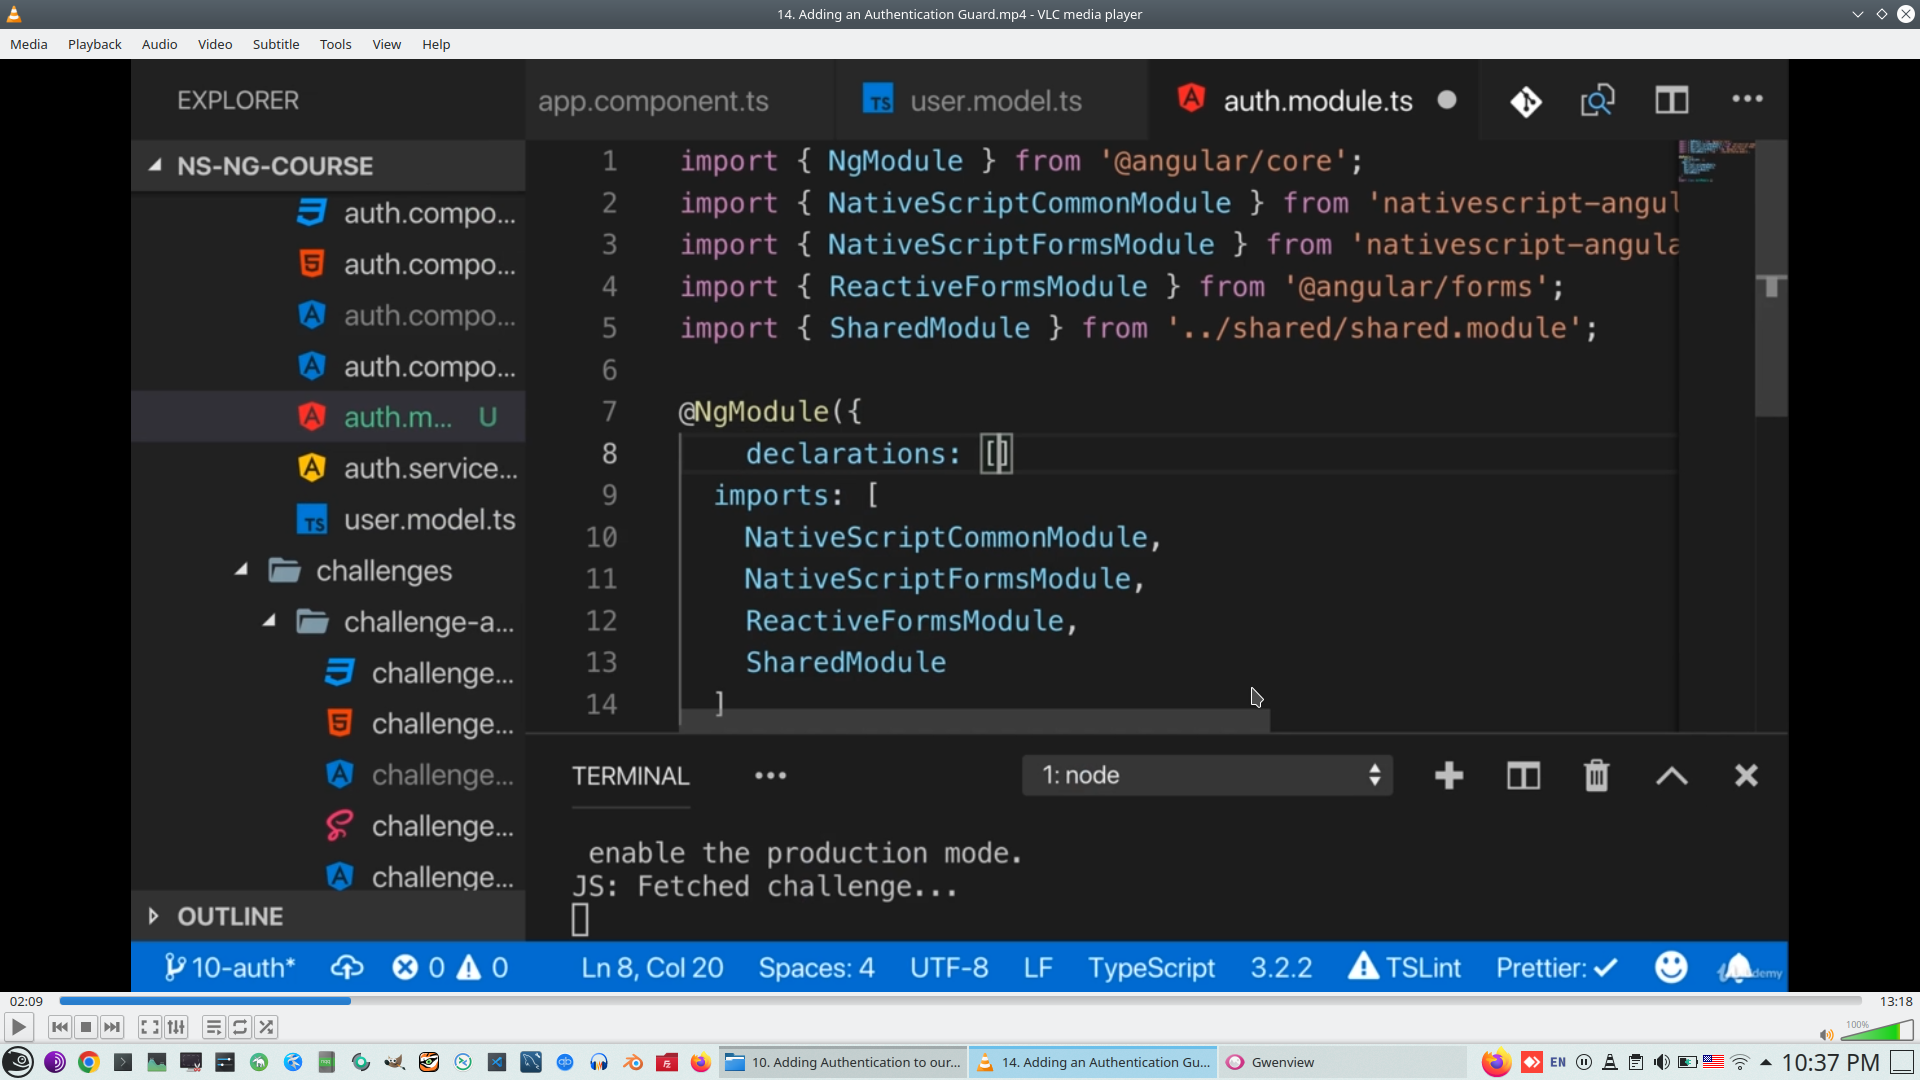
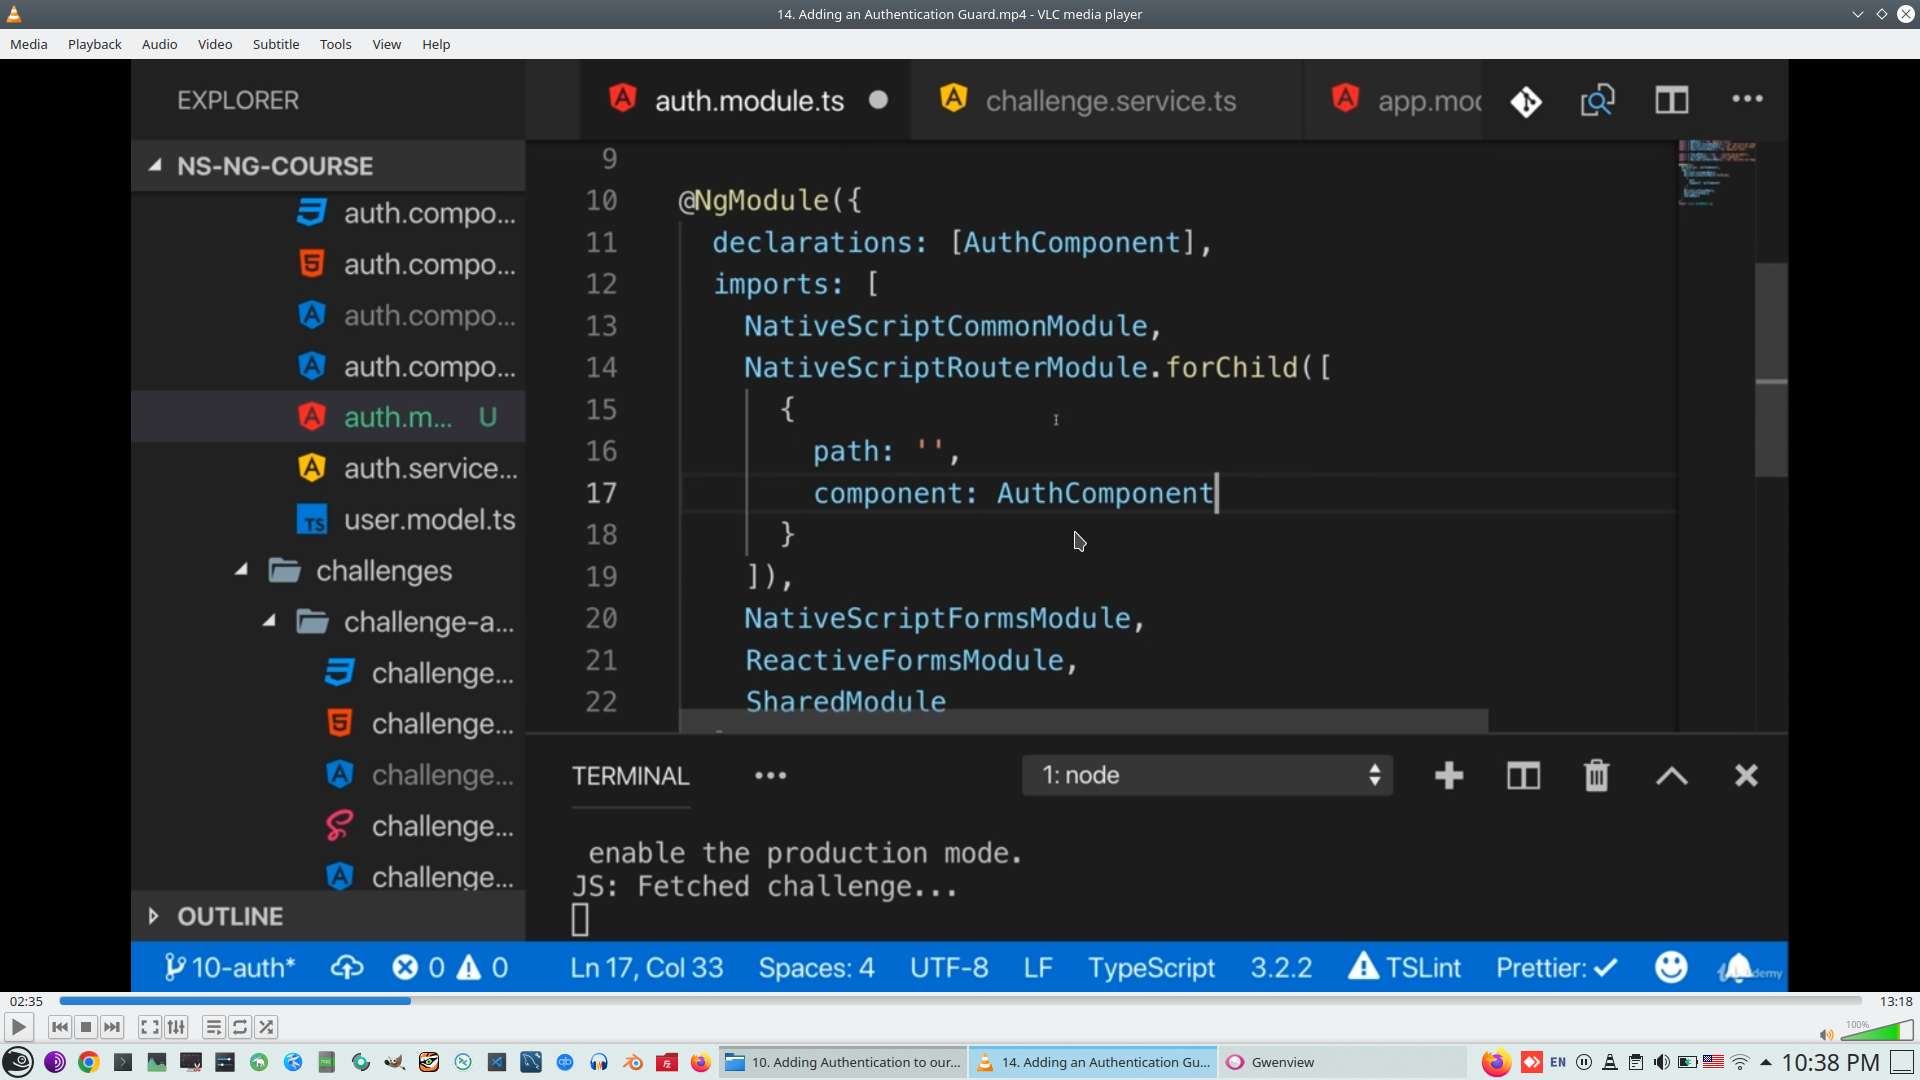
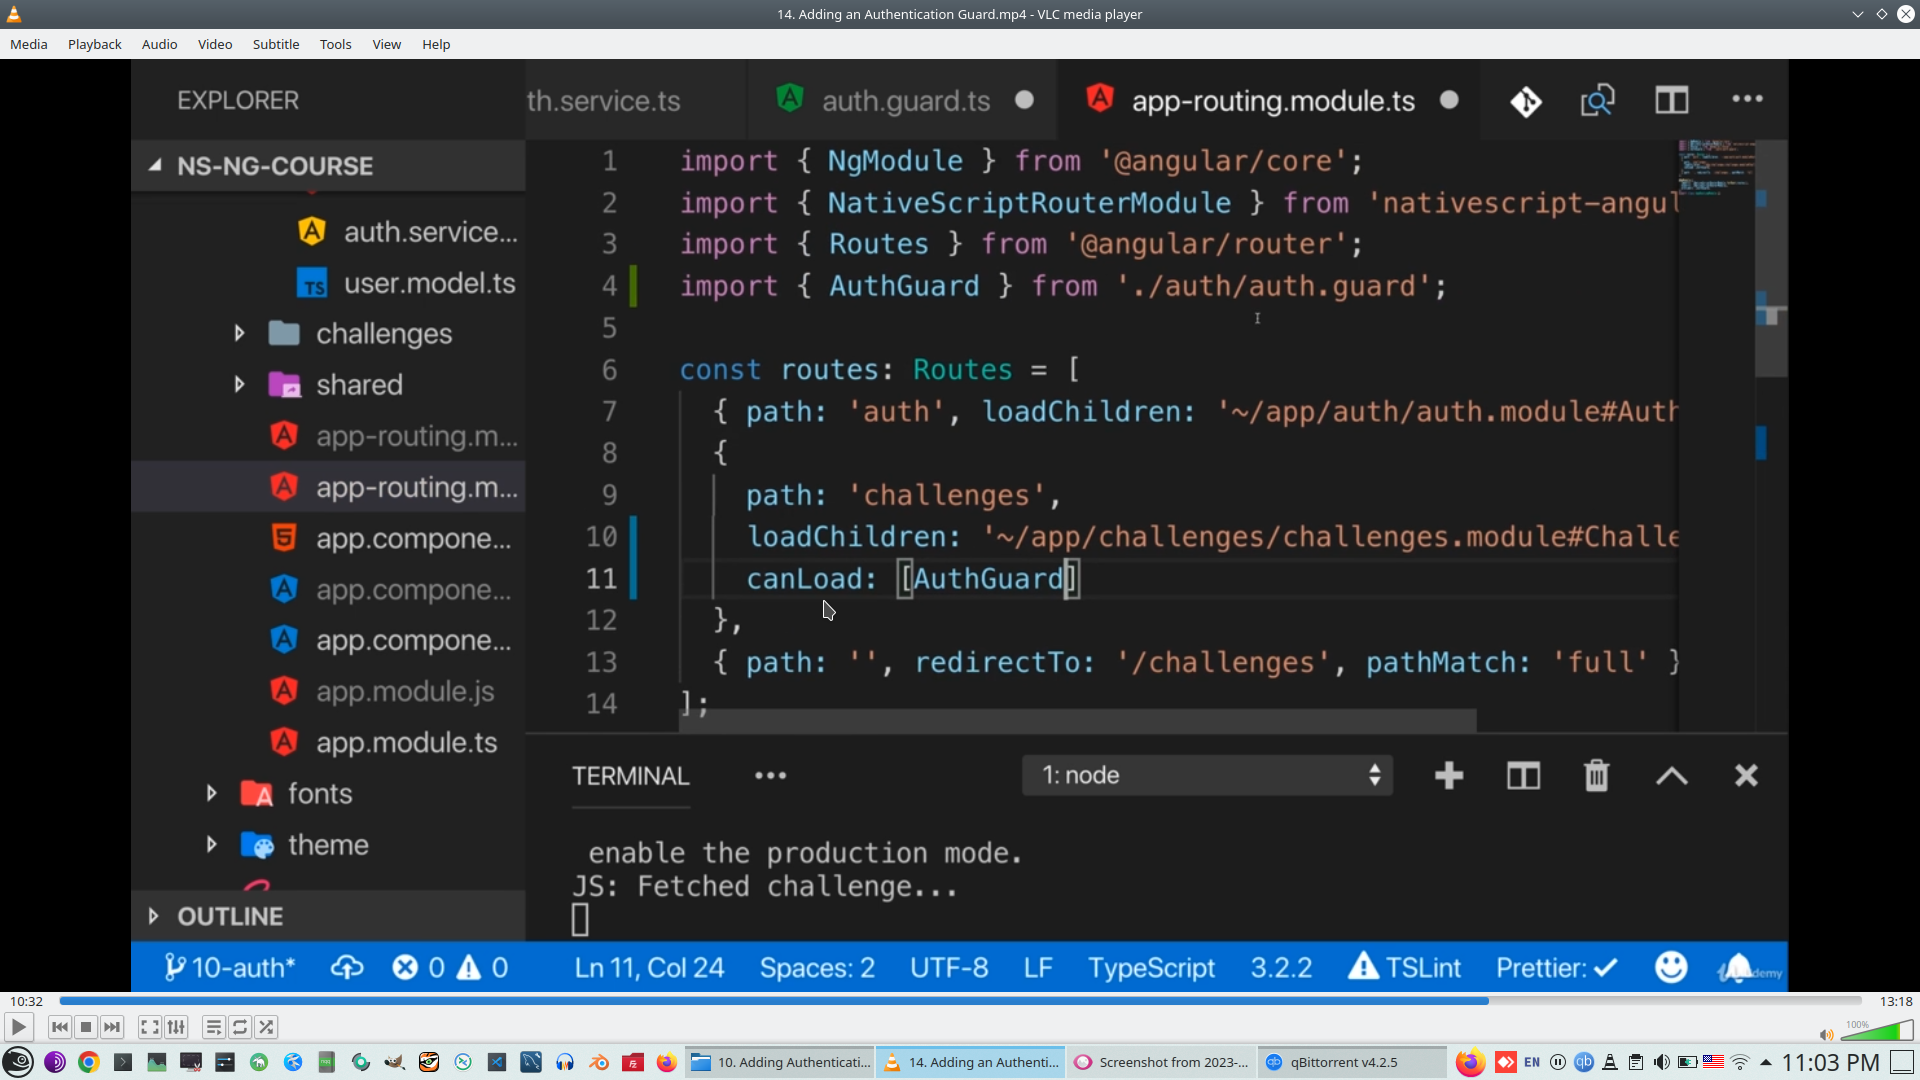
Configure Router path and loaded component
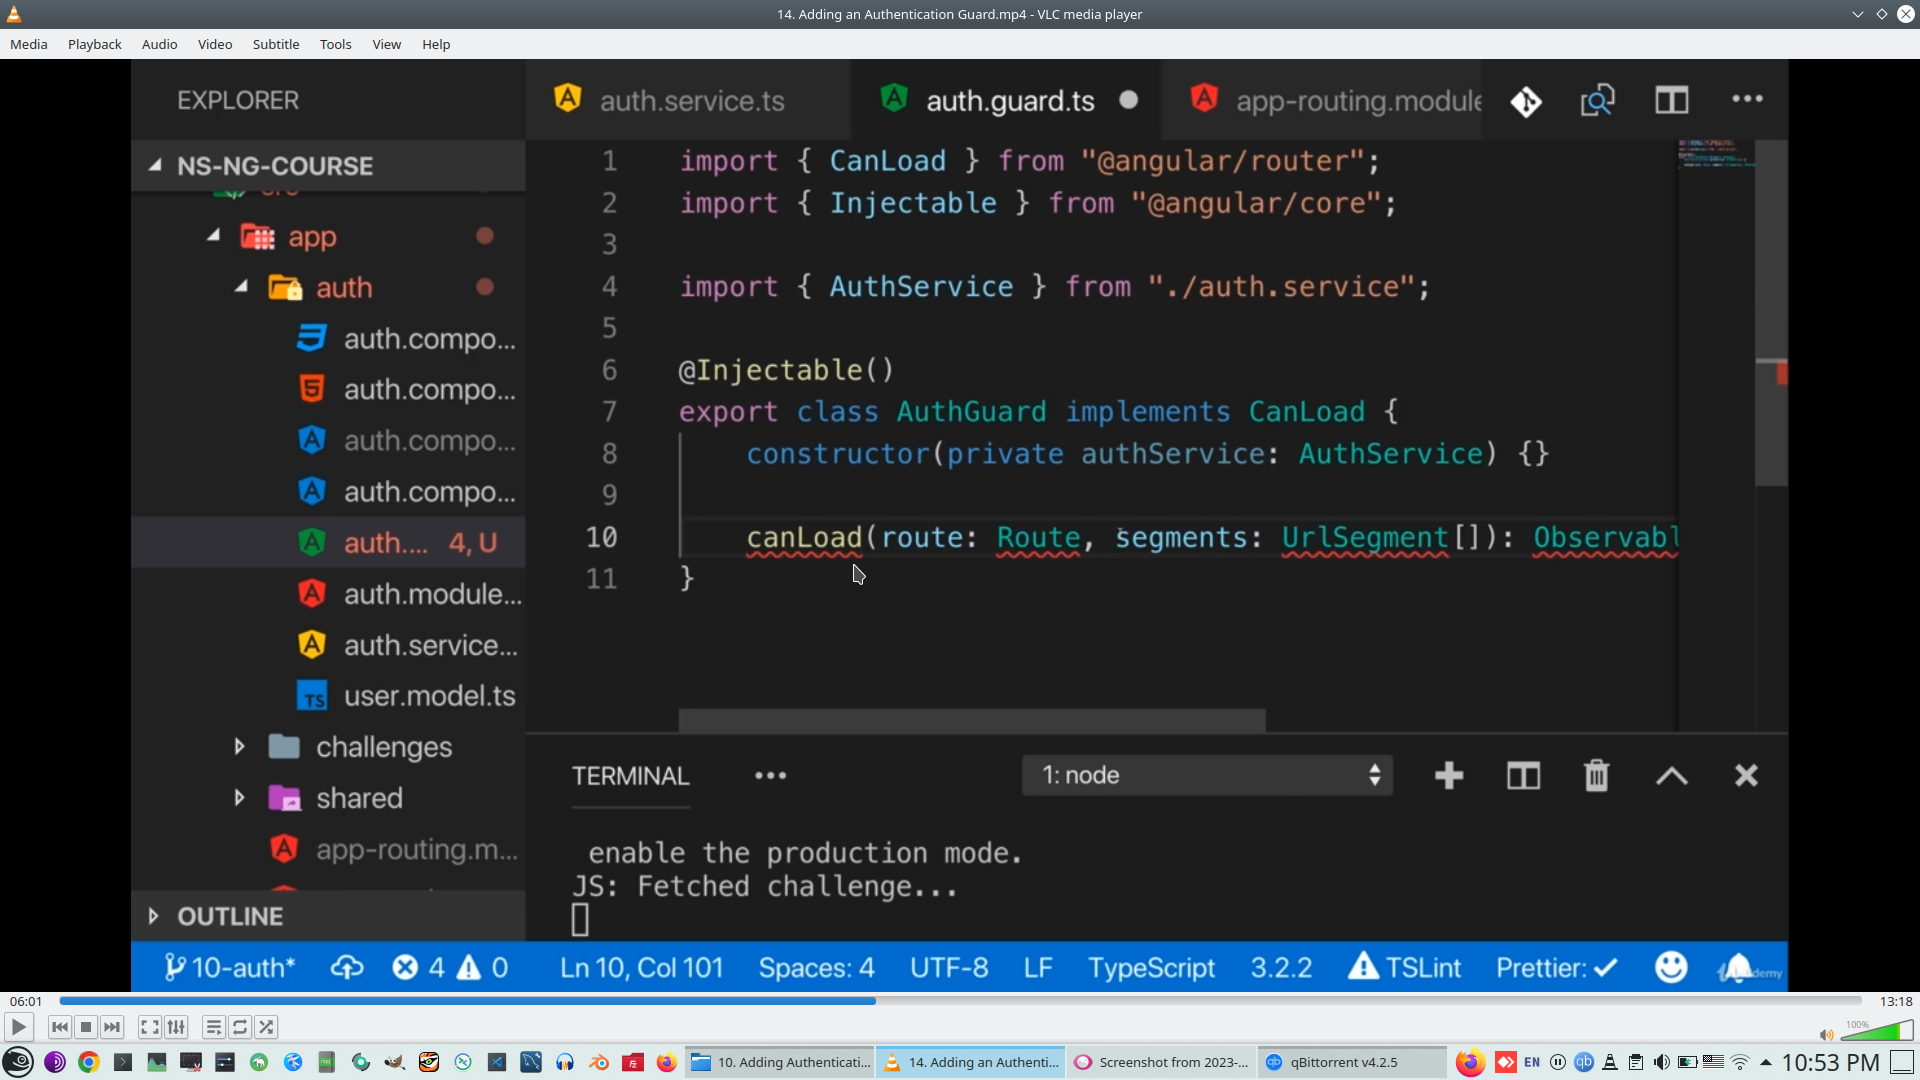
AuthGuard provided by Angular, need implement CanLoad method https://angular.io/api/router/CanLoad
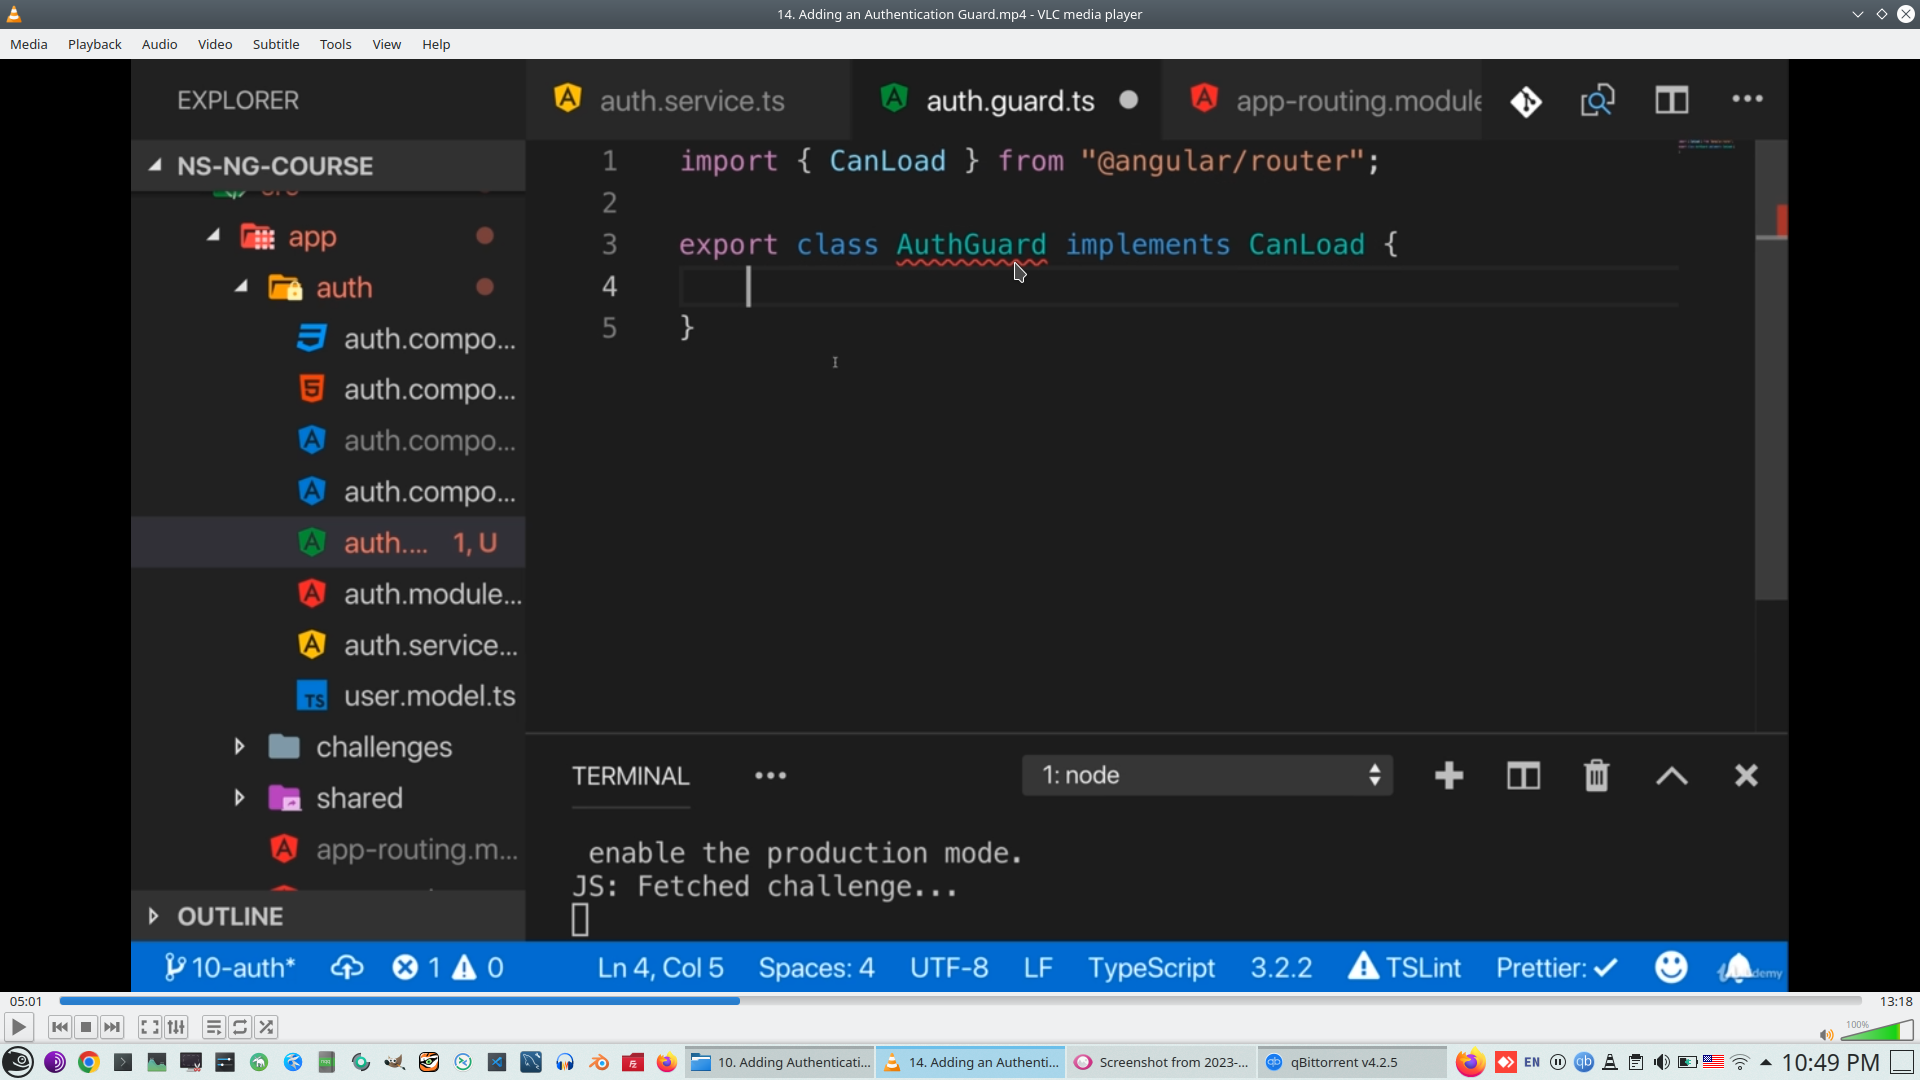
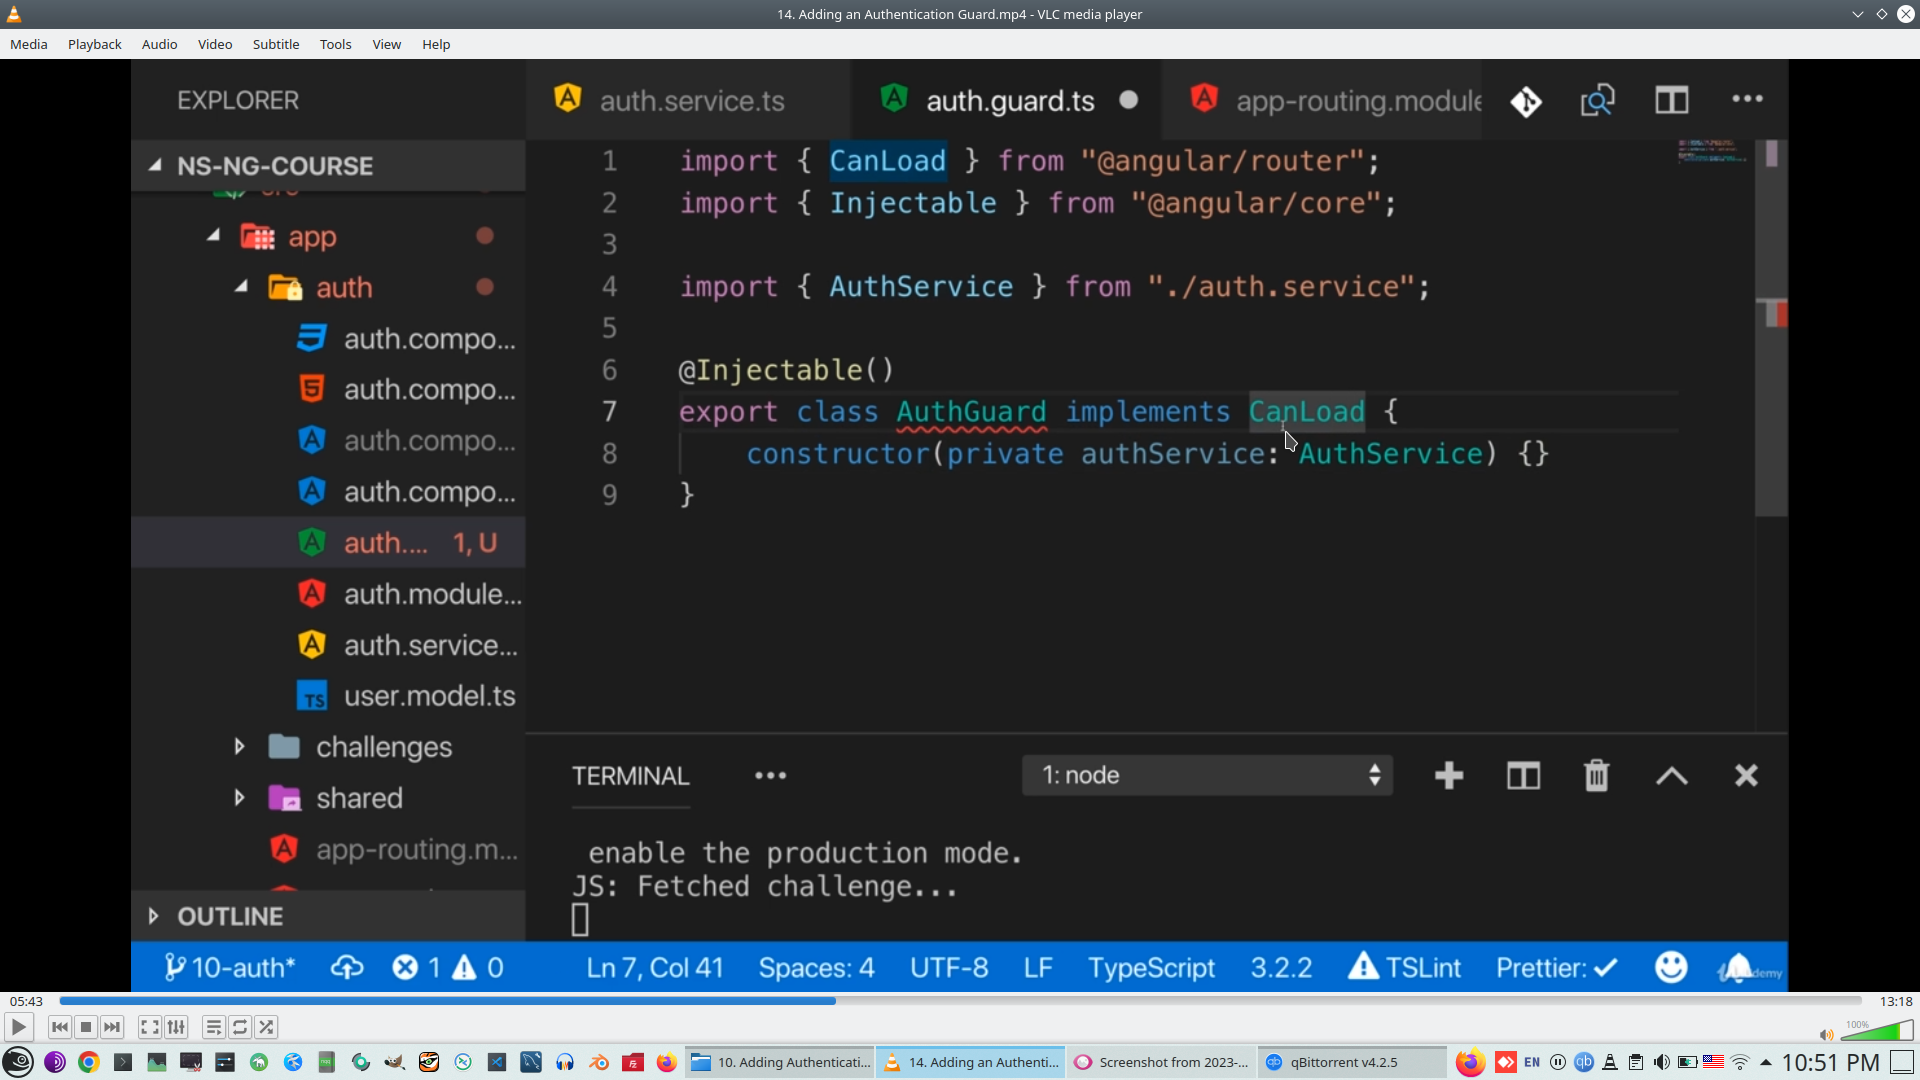
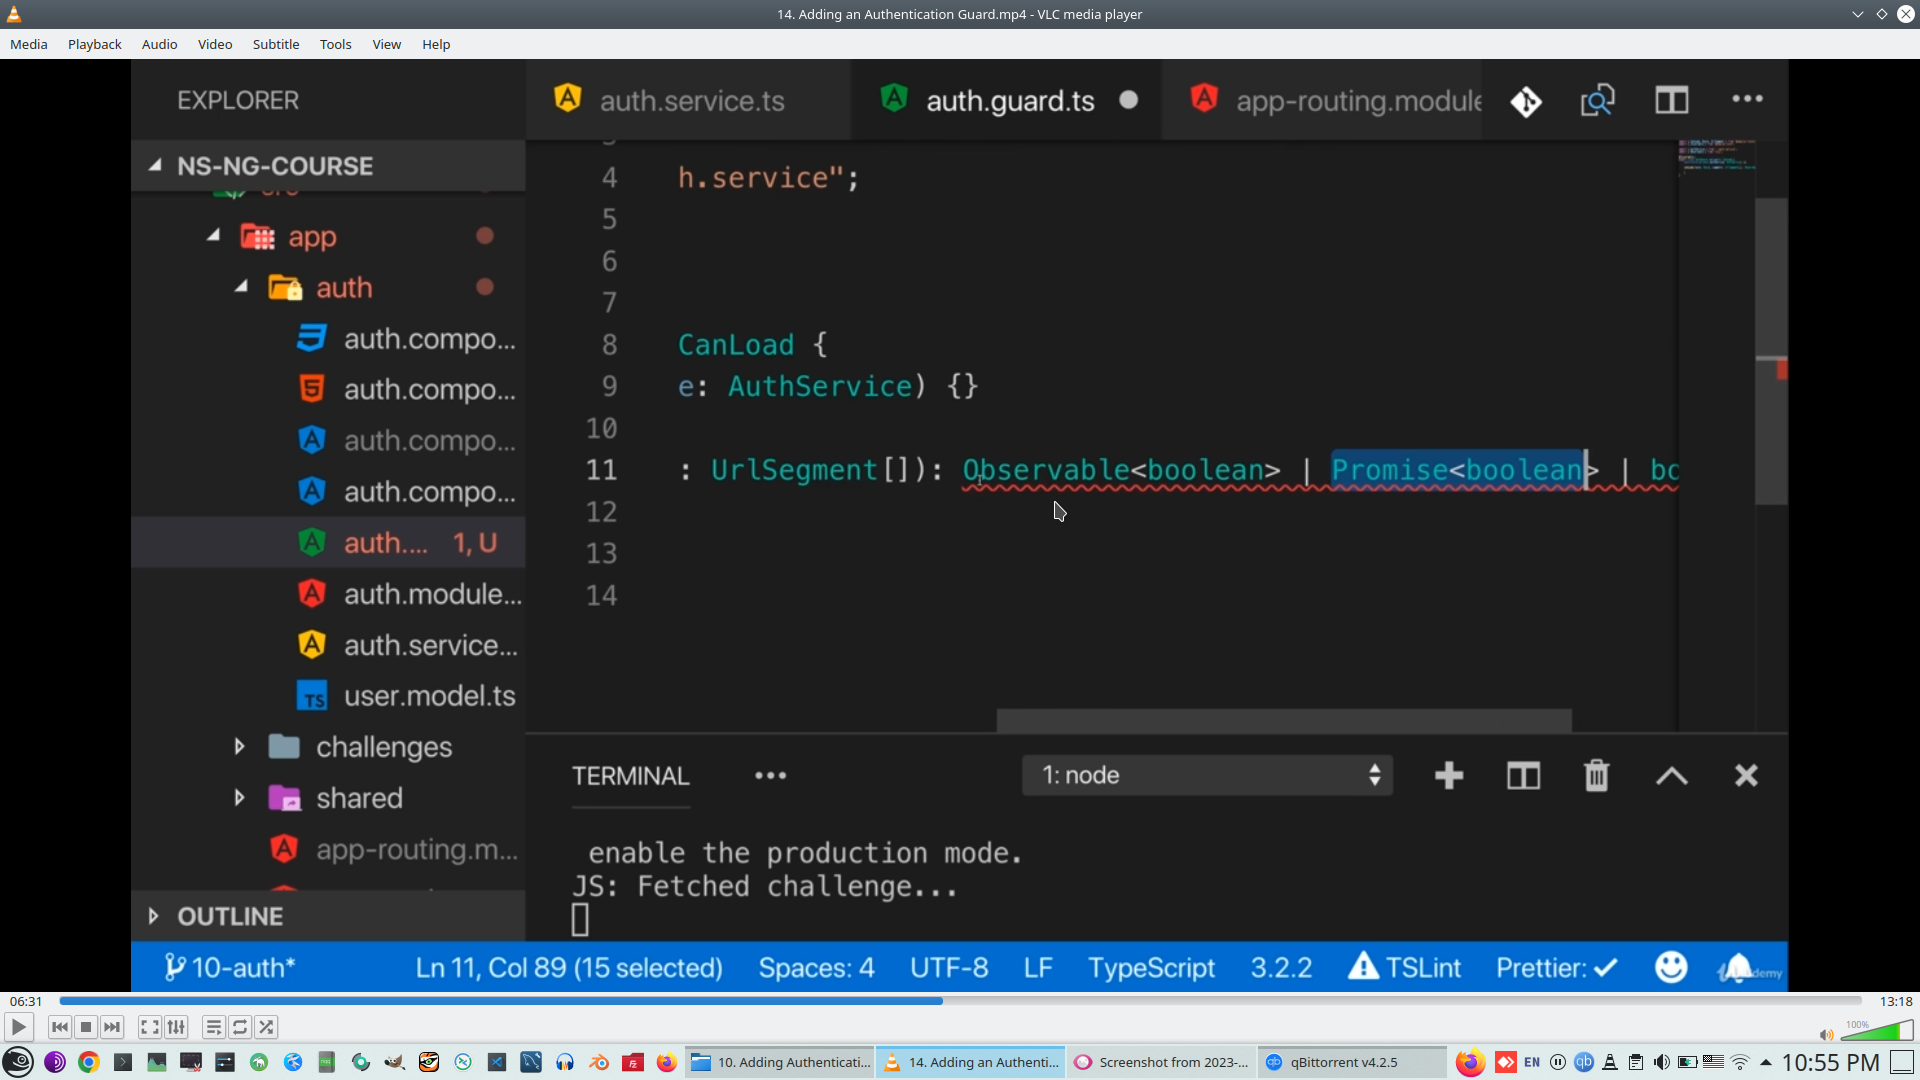
Click CanLoad and copy interfaces to constructor
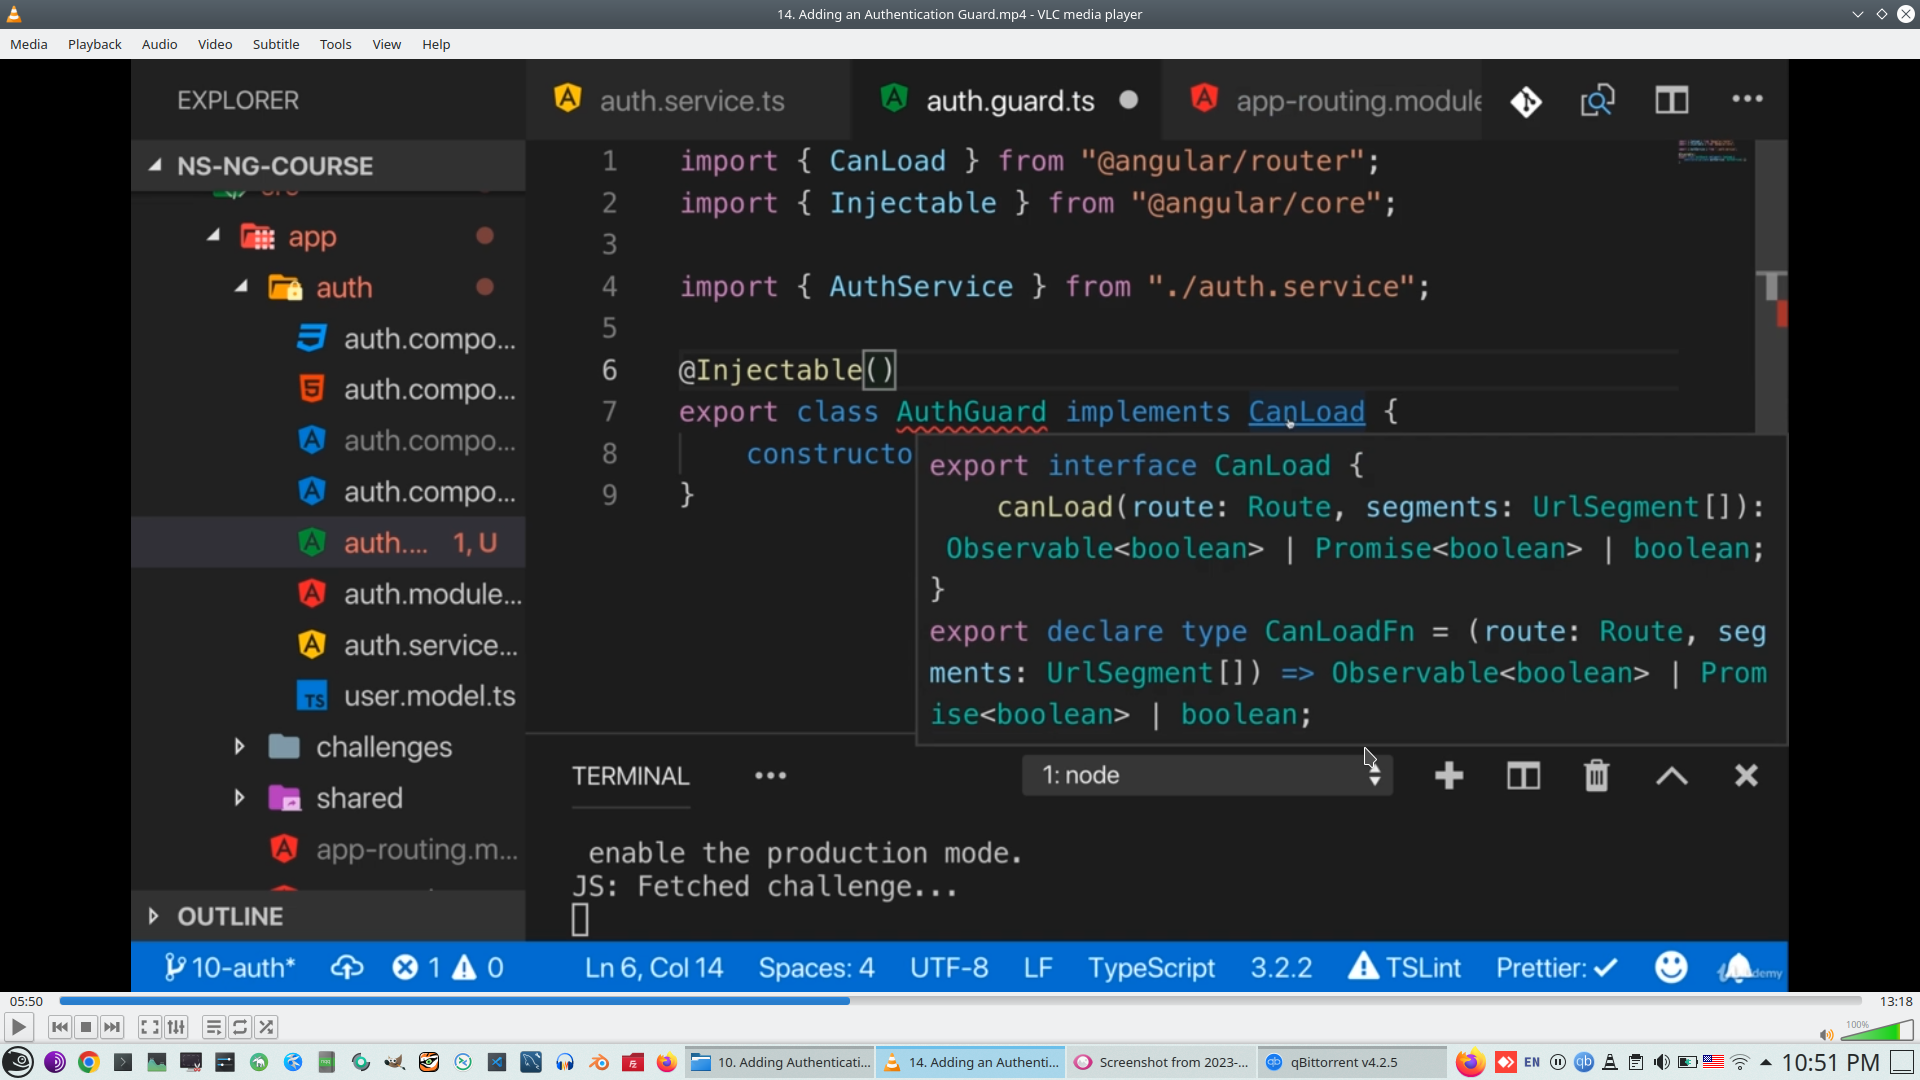
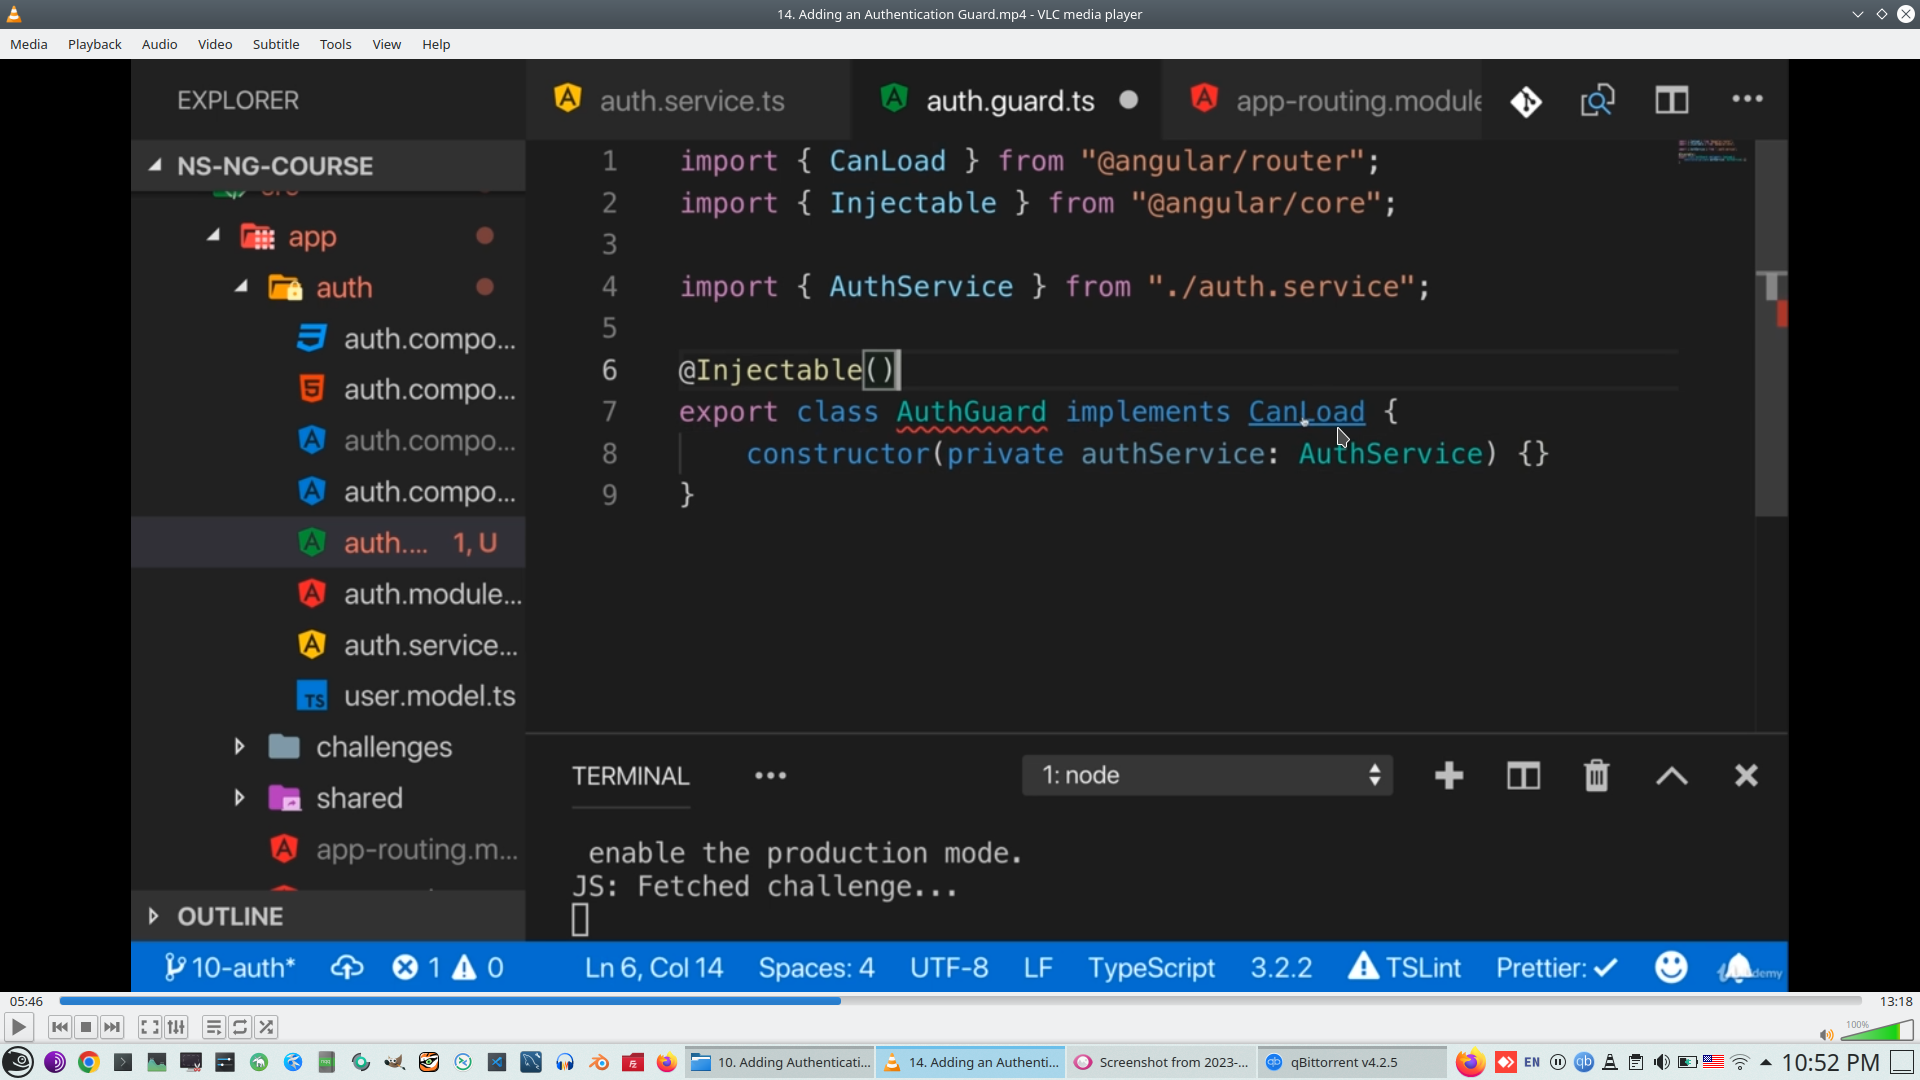

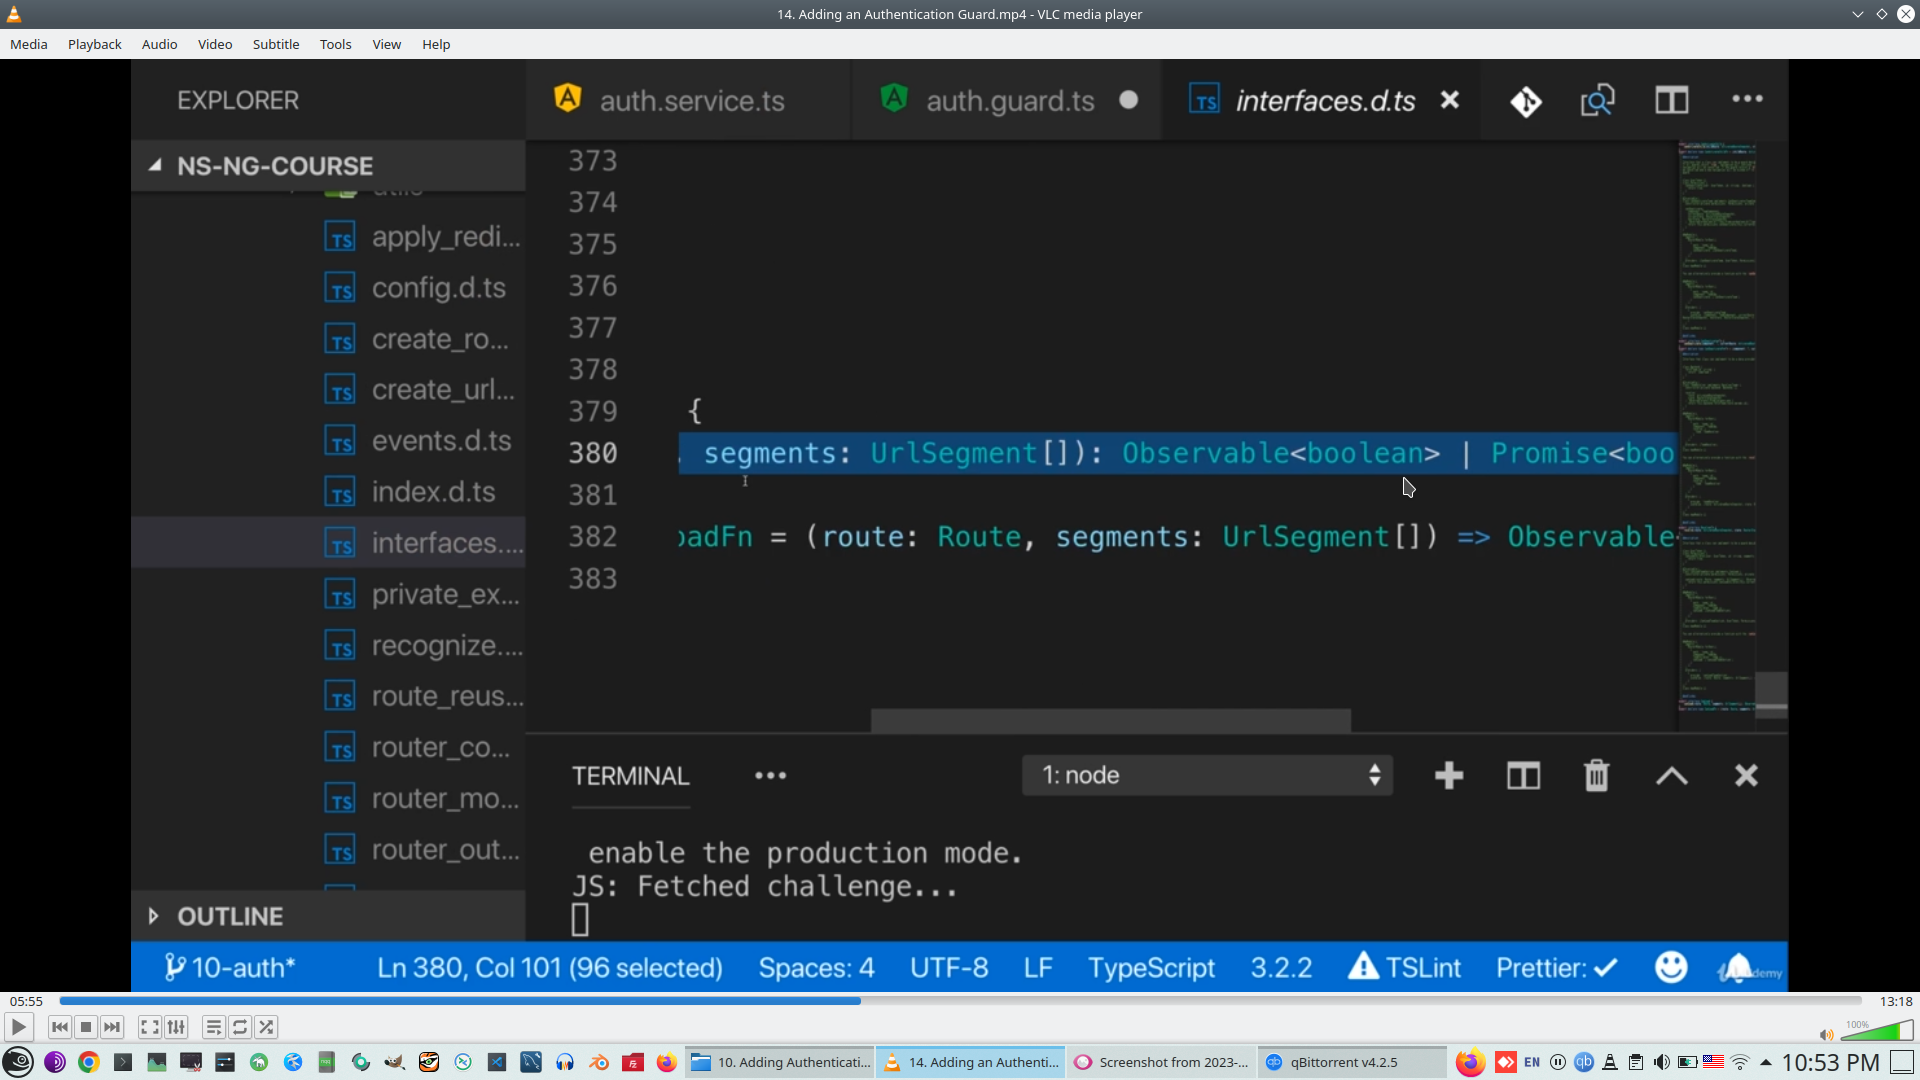
Interface require Promise wrapper of Boolean or observable wrapper of Boolean
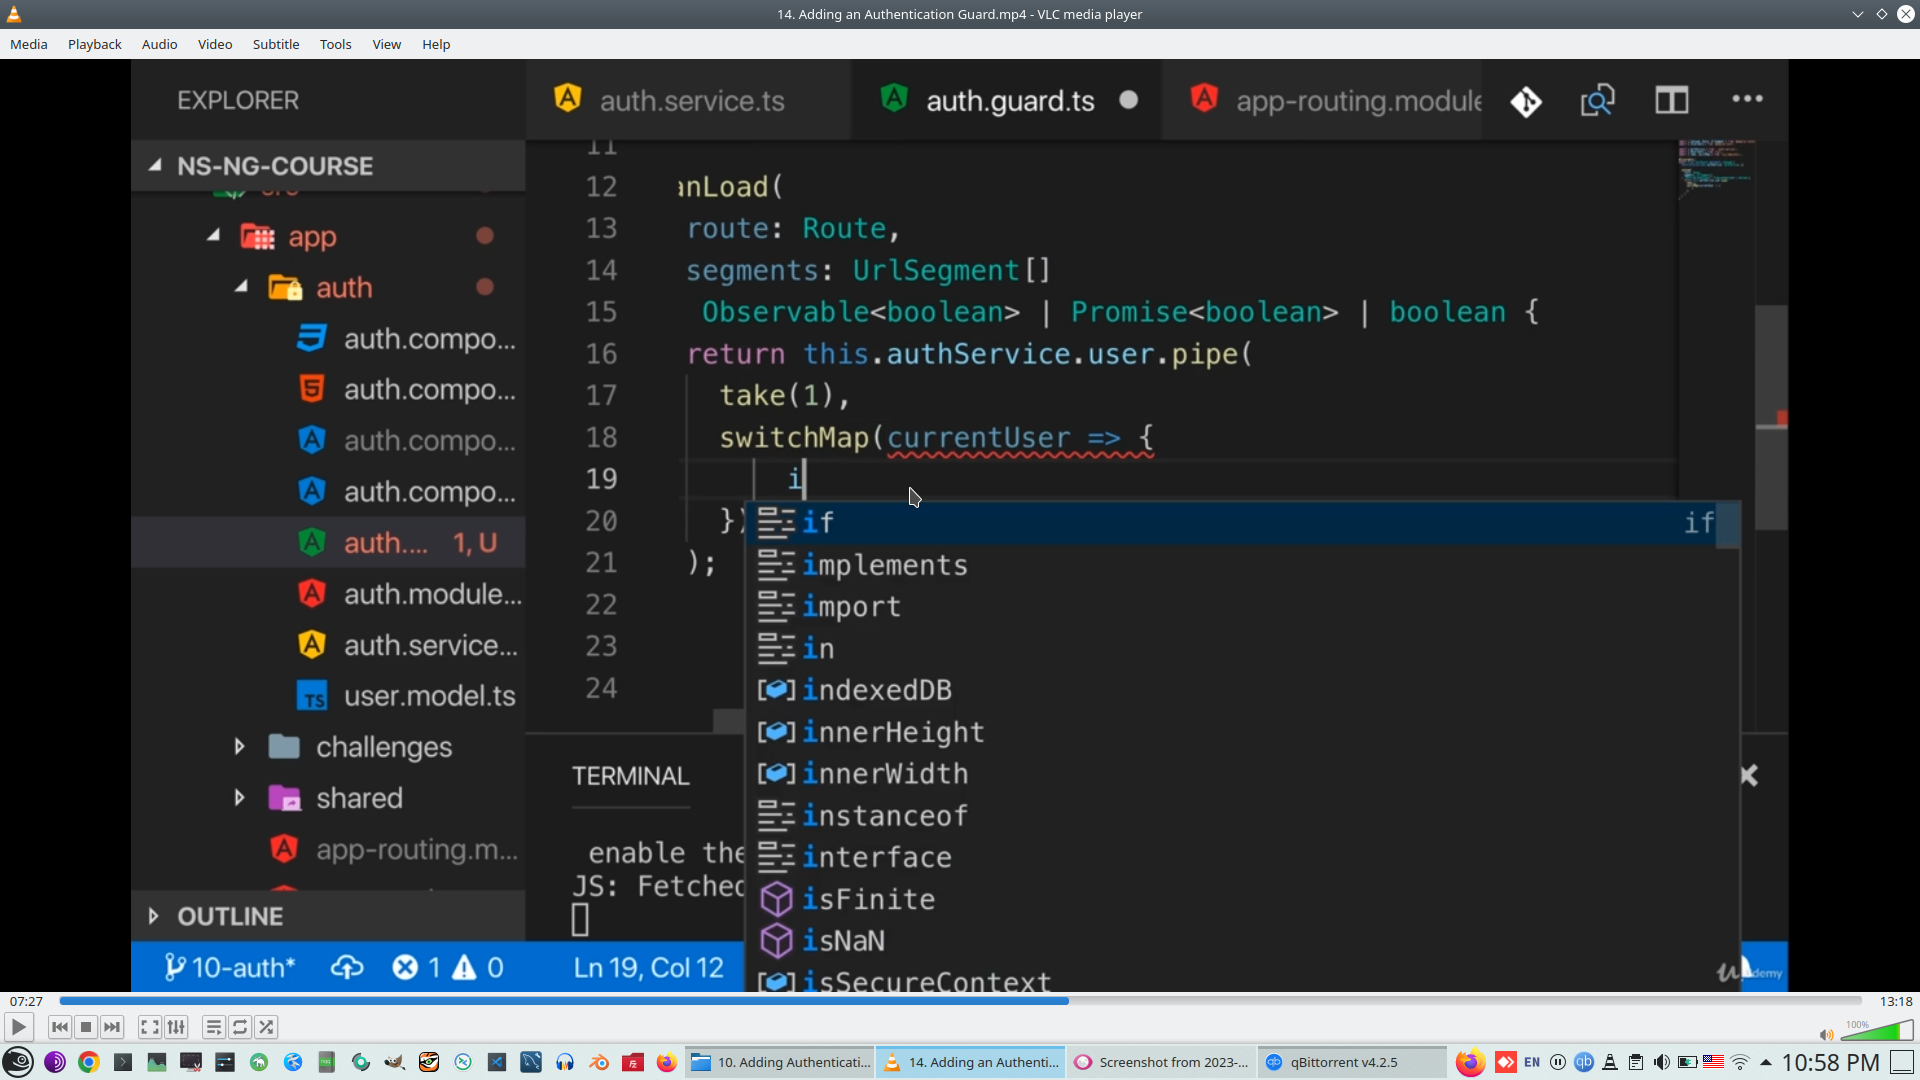
Use Take from RxJs inside Pipe - https://rxjs.dev/api/index/function/take

Use SwithMap and Tap from RxJs
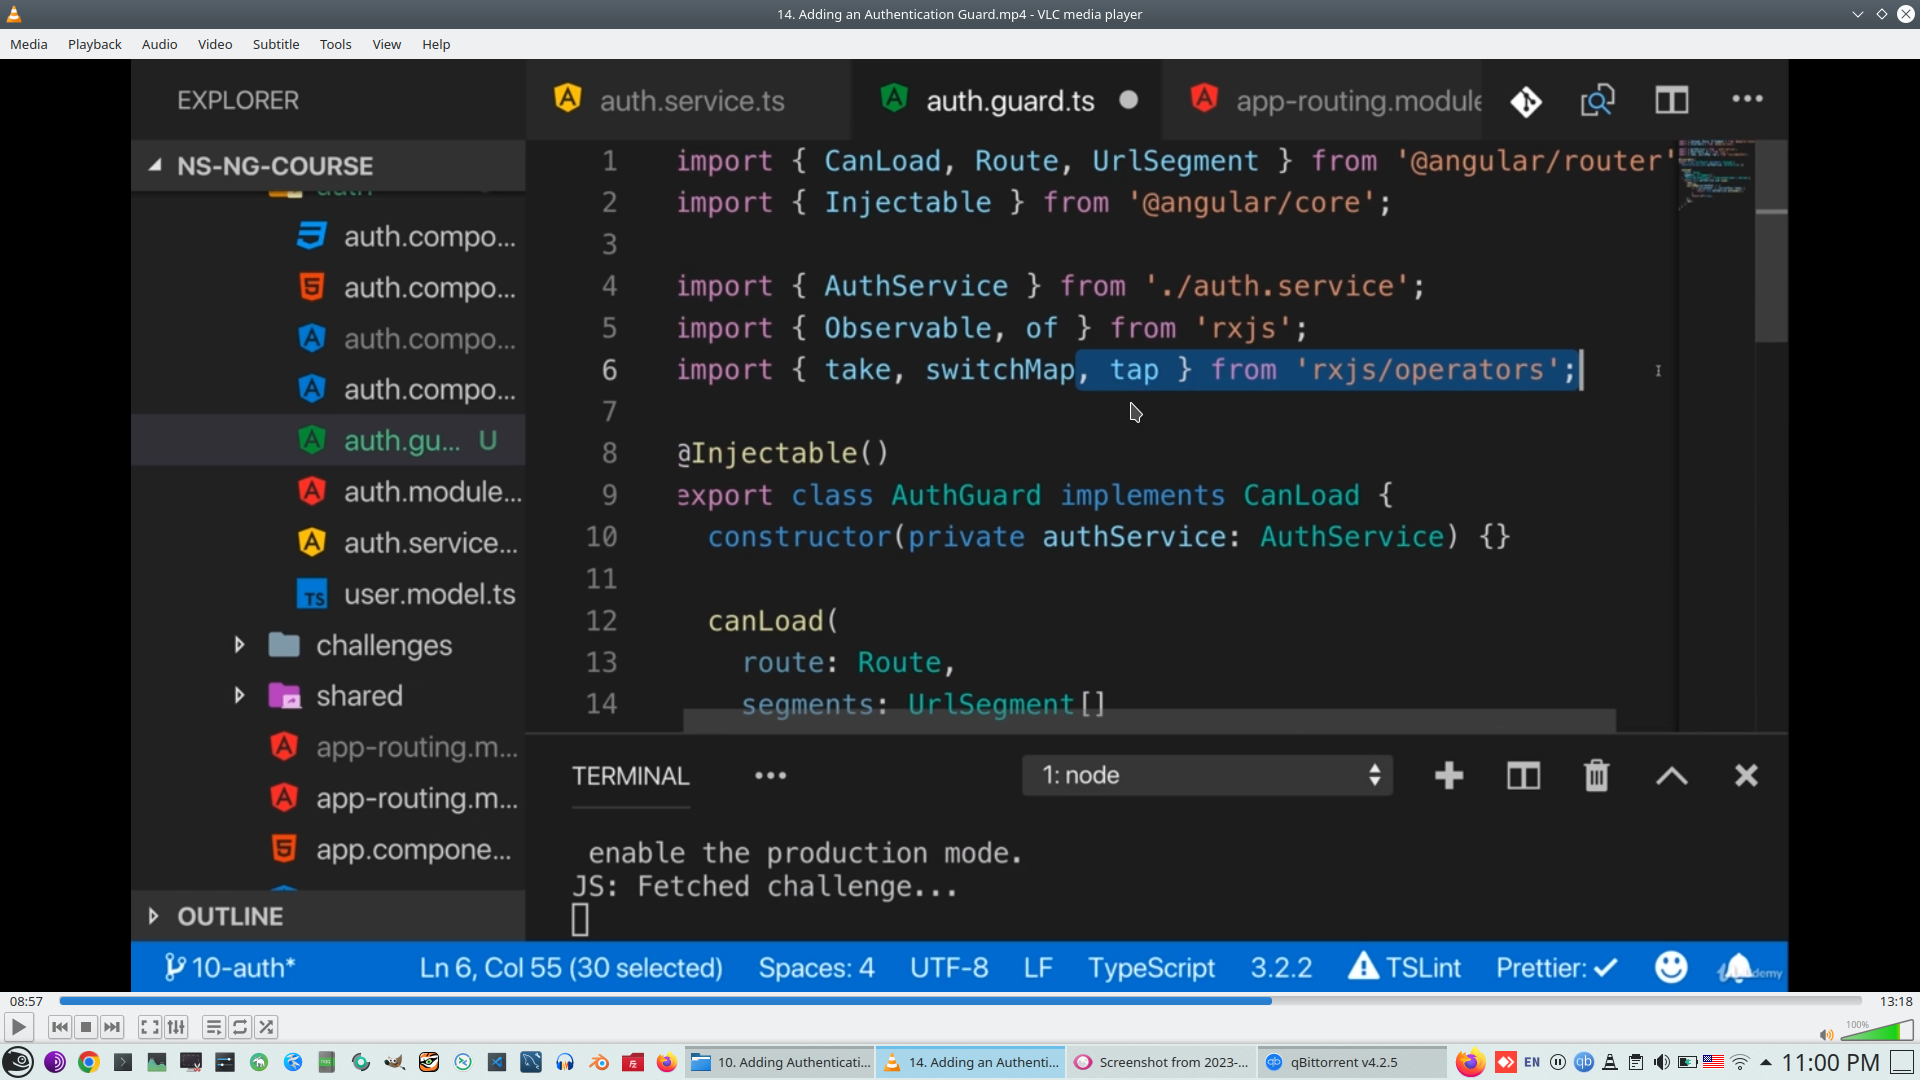
AuthGuard loaded as provider
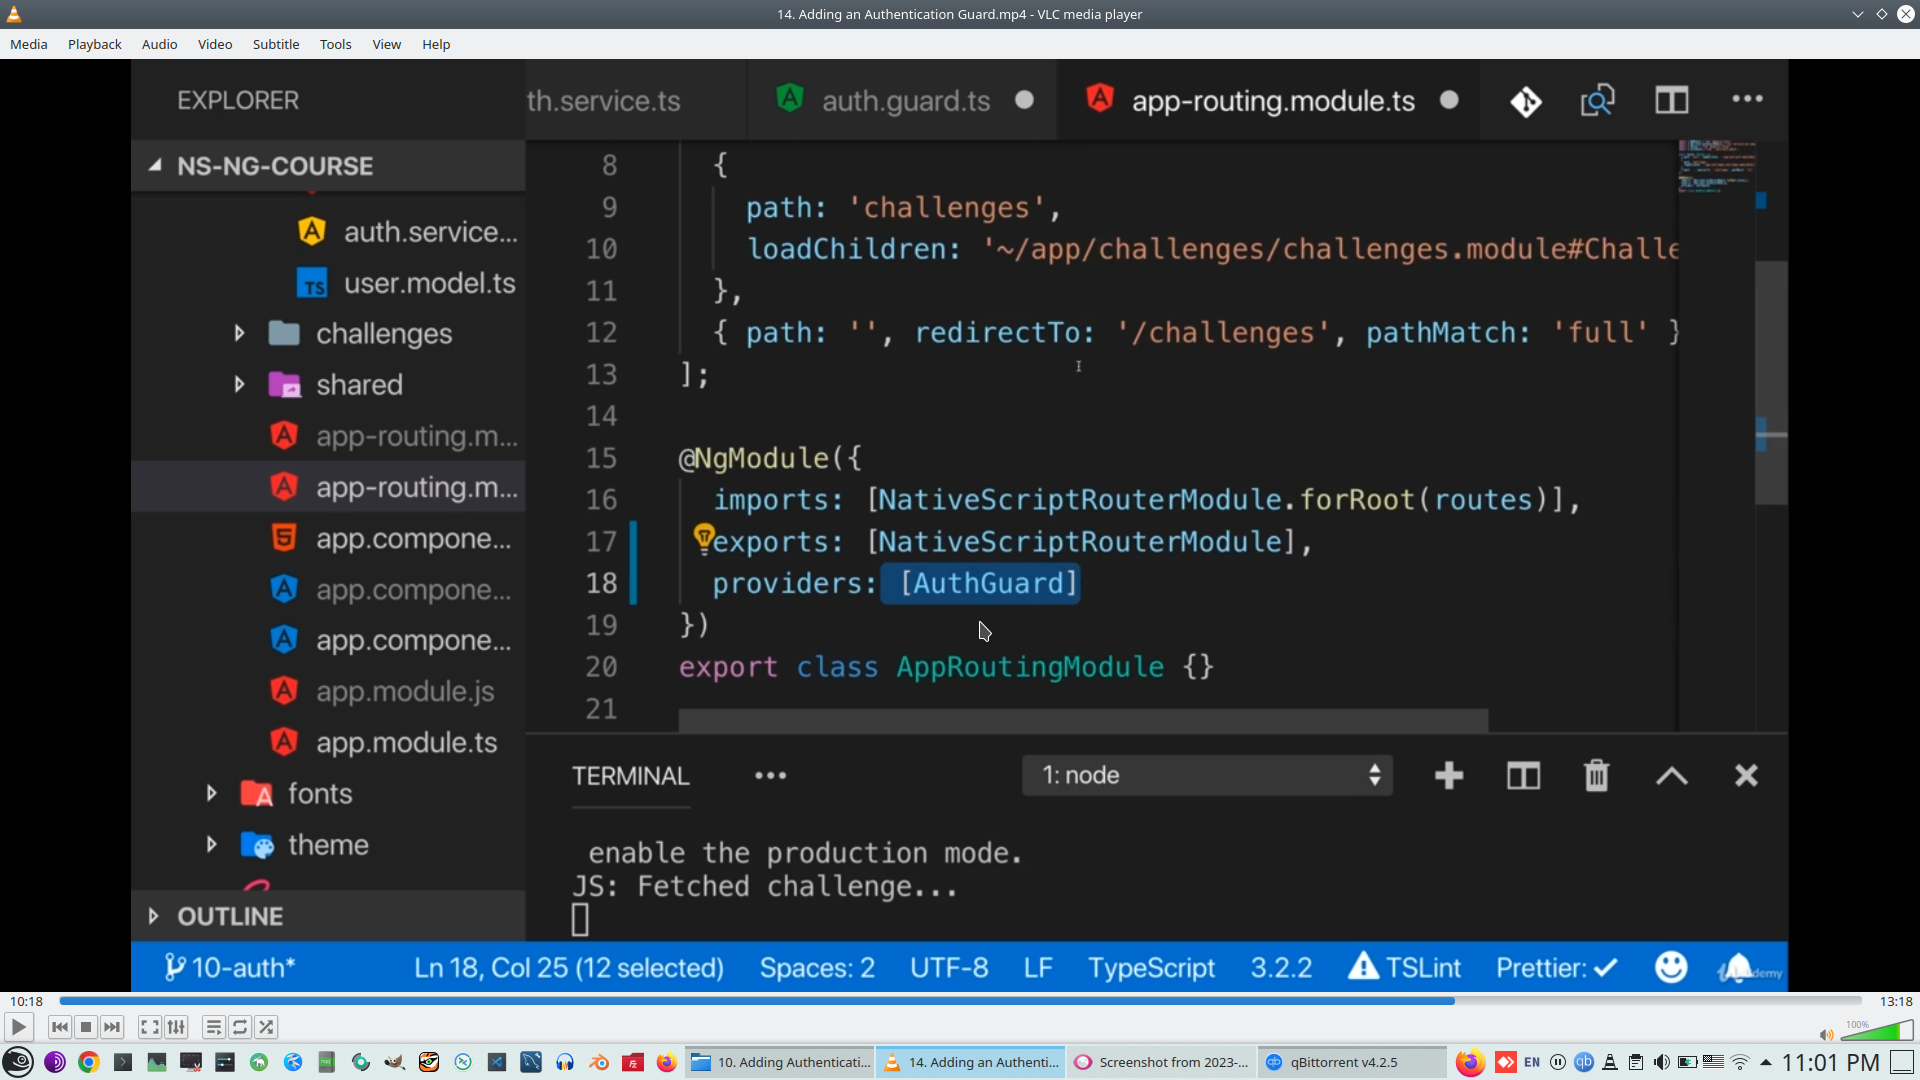
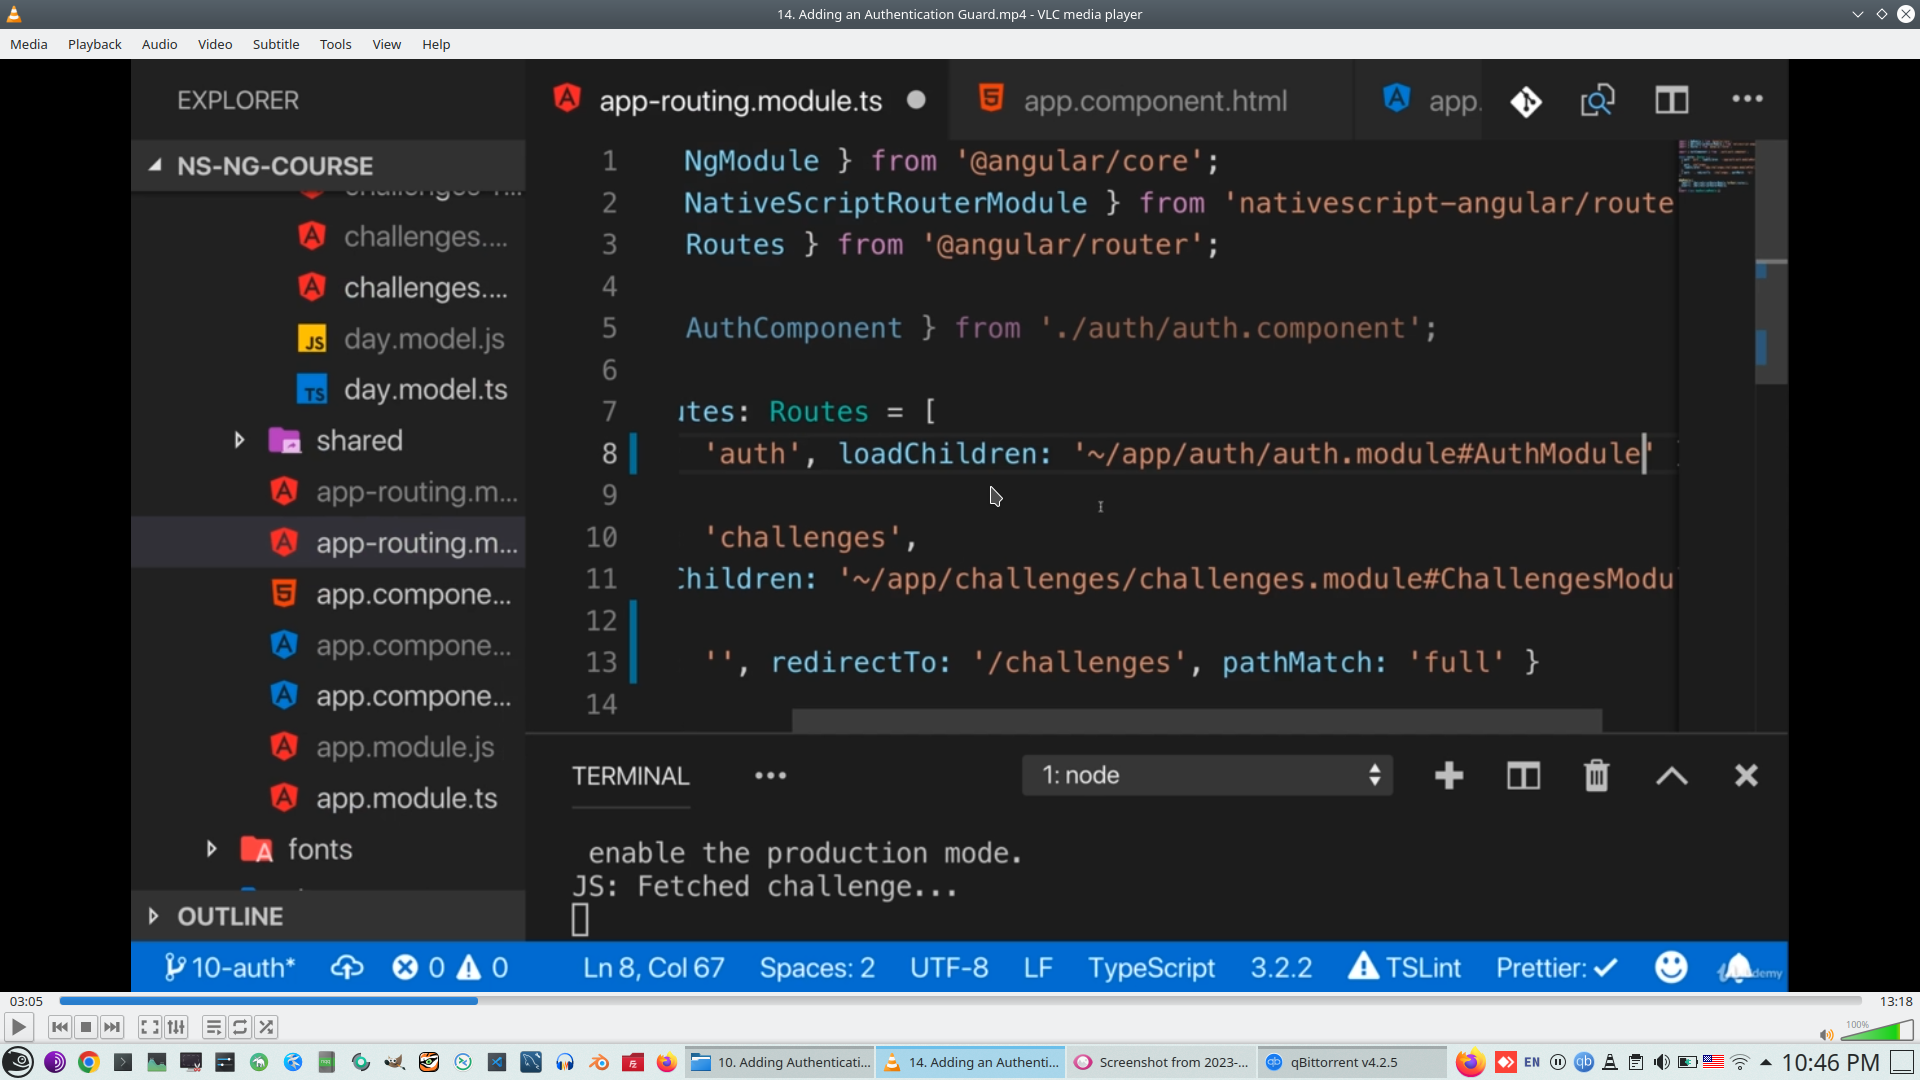
Configure main route module
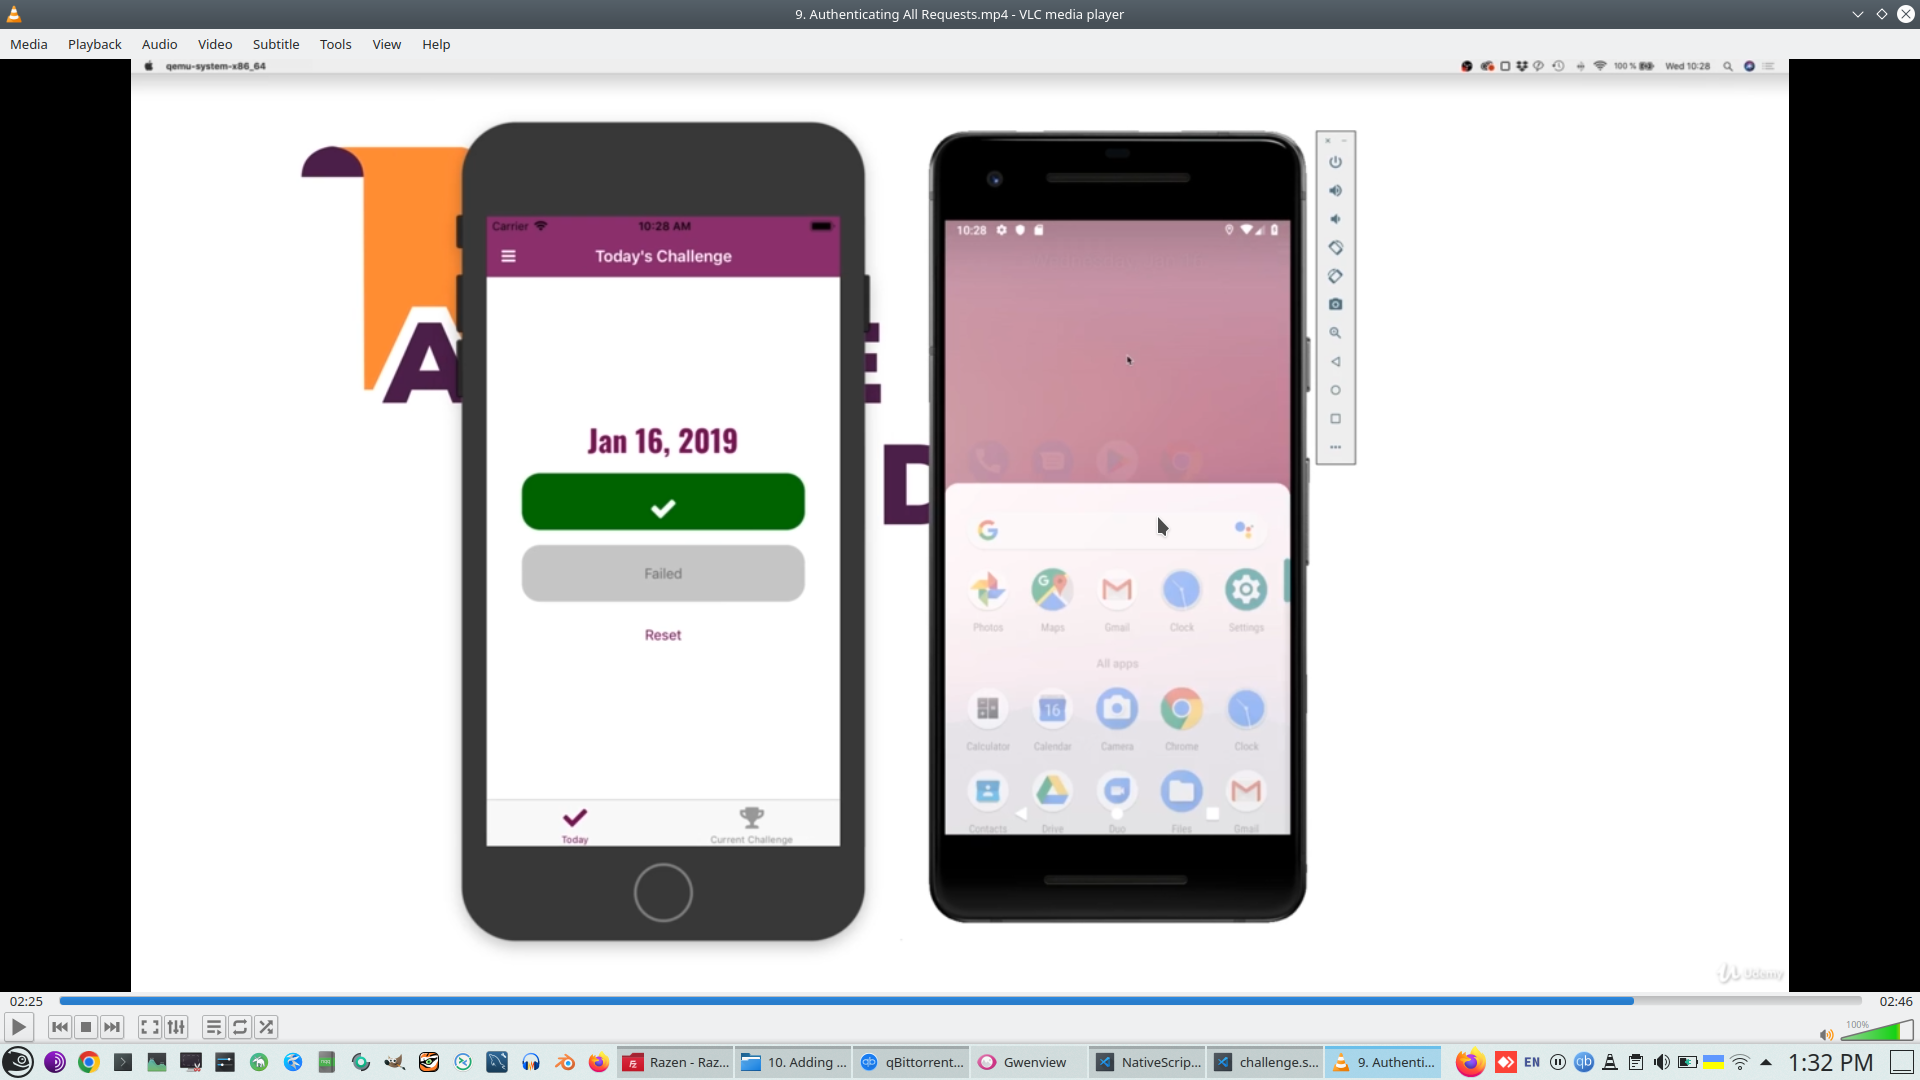
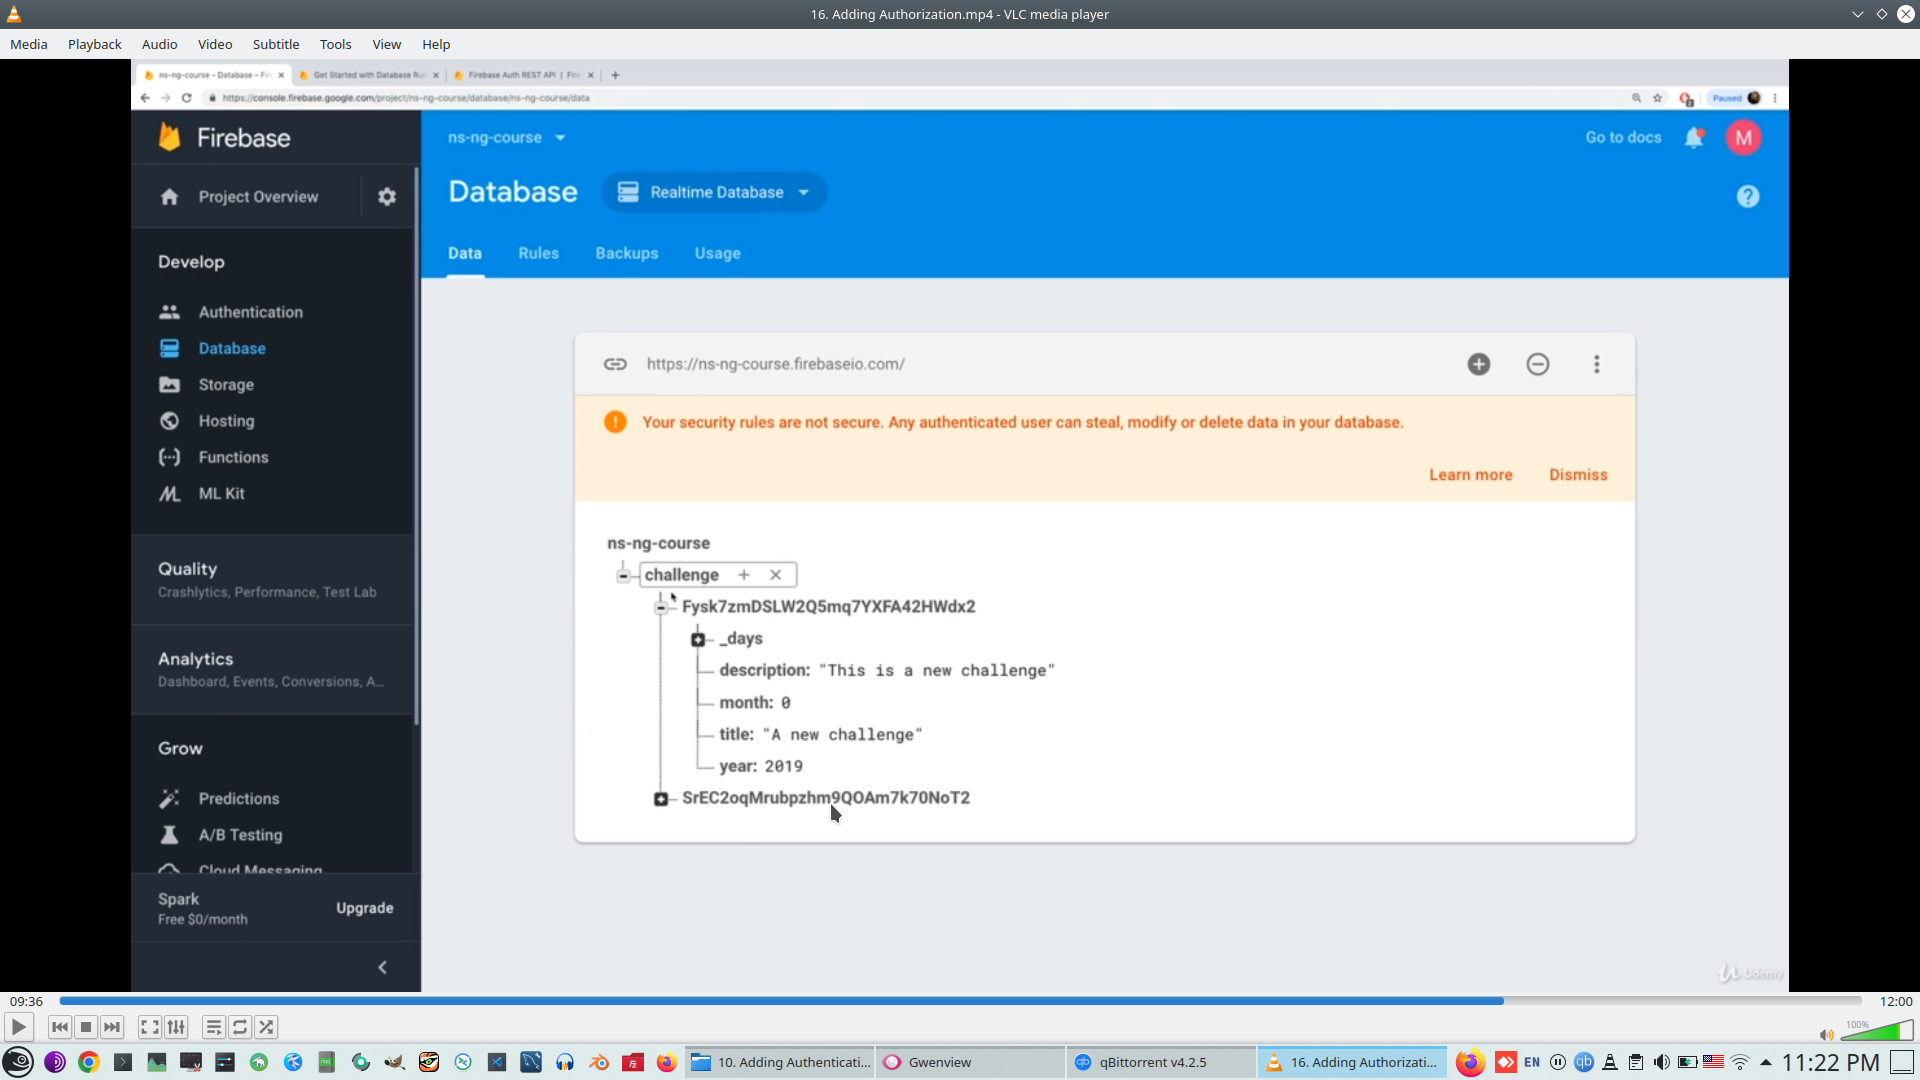
29. And finally made authorization on Firebase, each user has own chalenge in Firebase.
Firstly we need to add additional suffix to URL
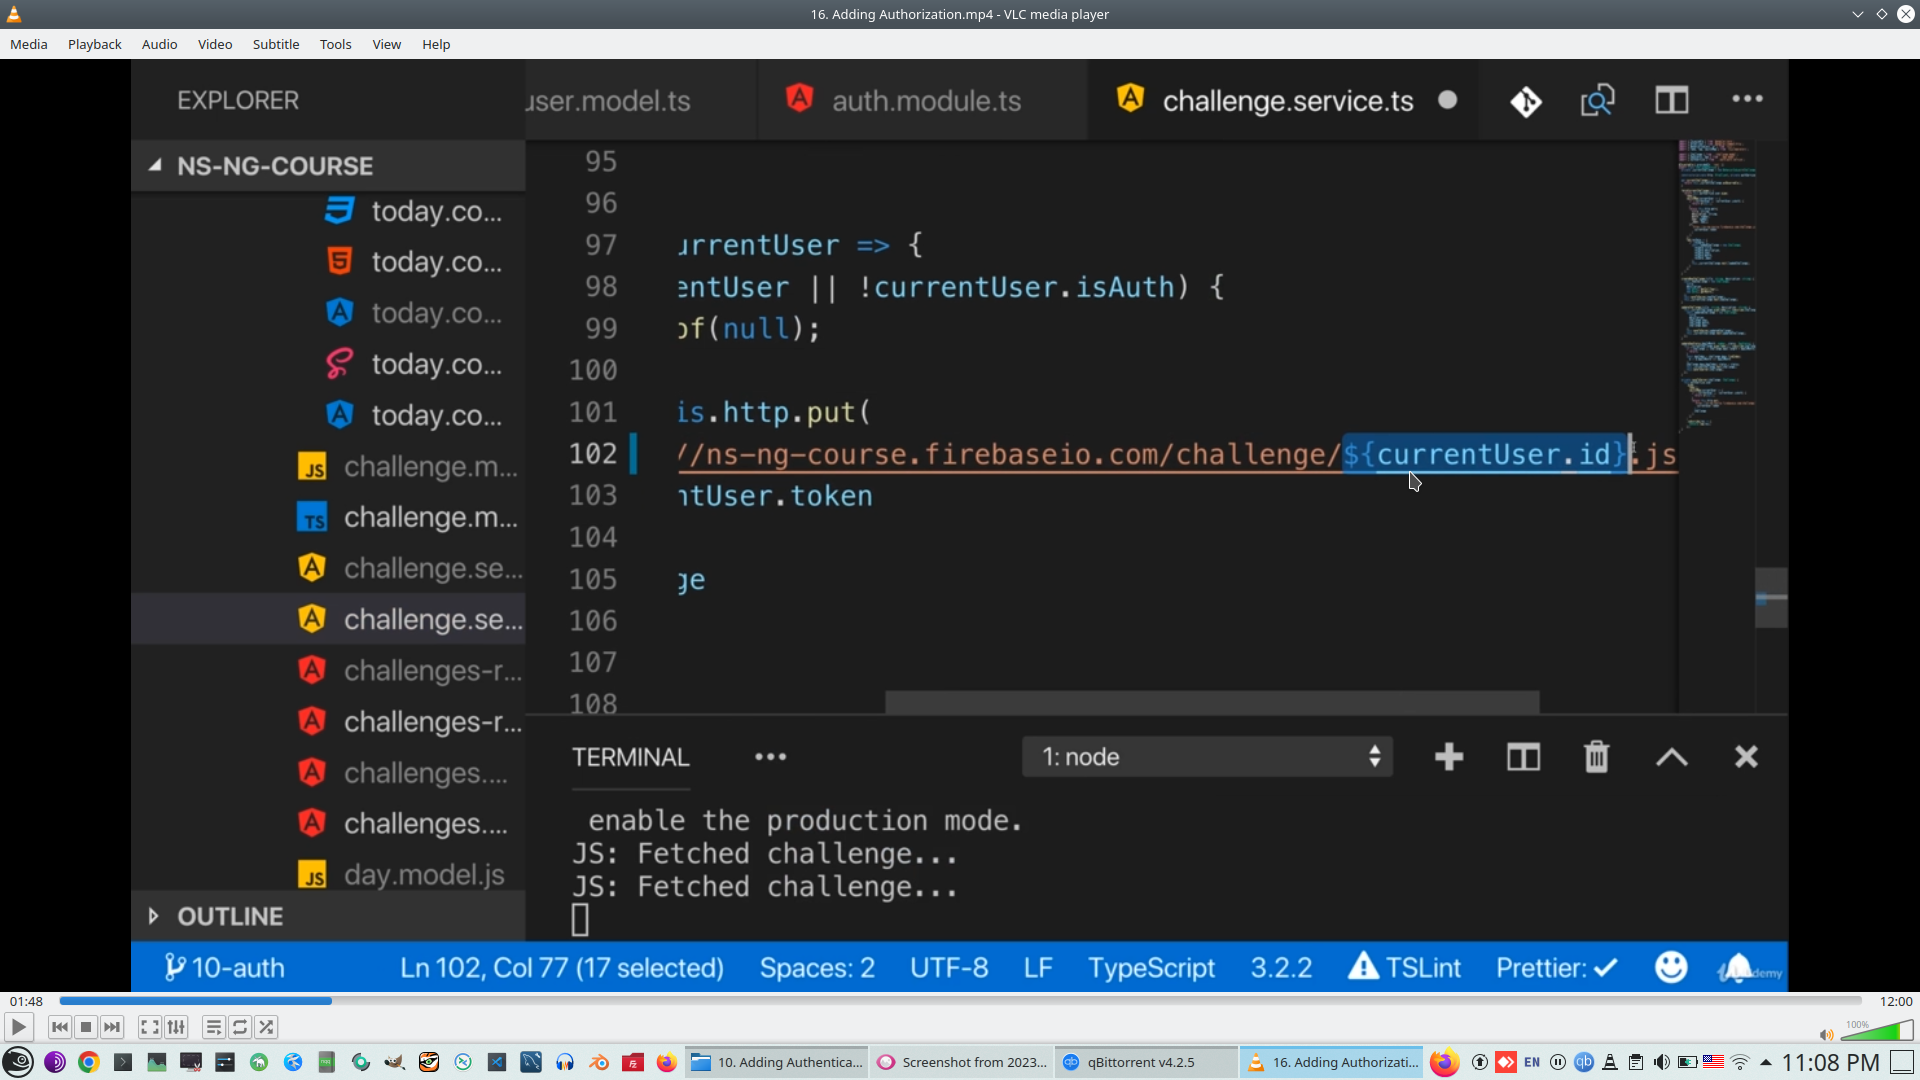
And check this, each user has own key on Firebase
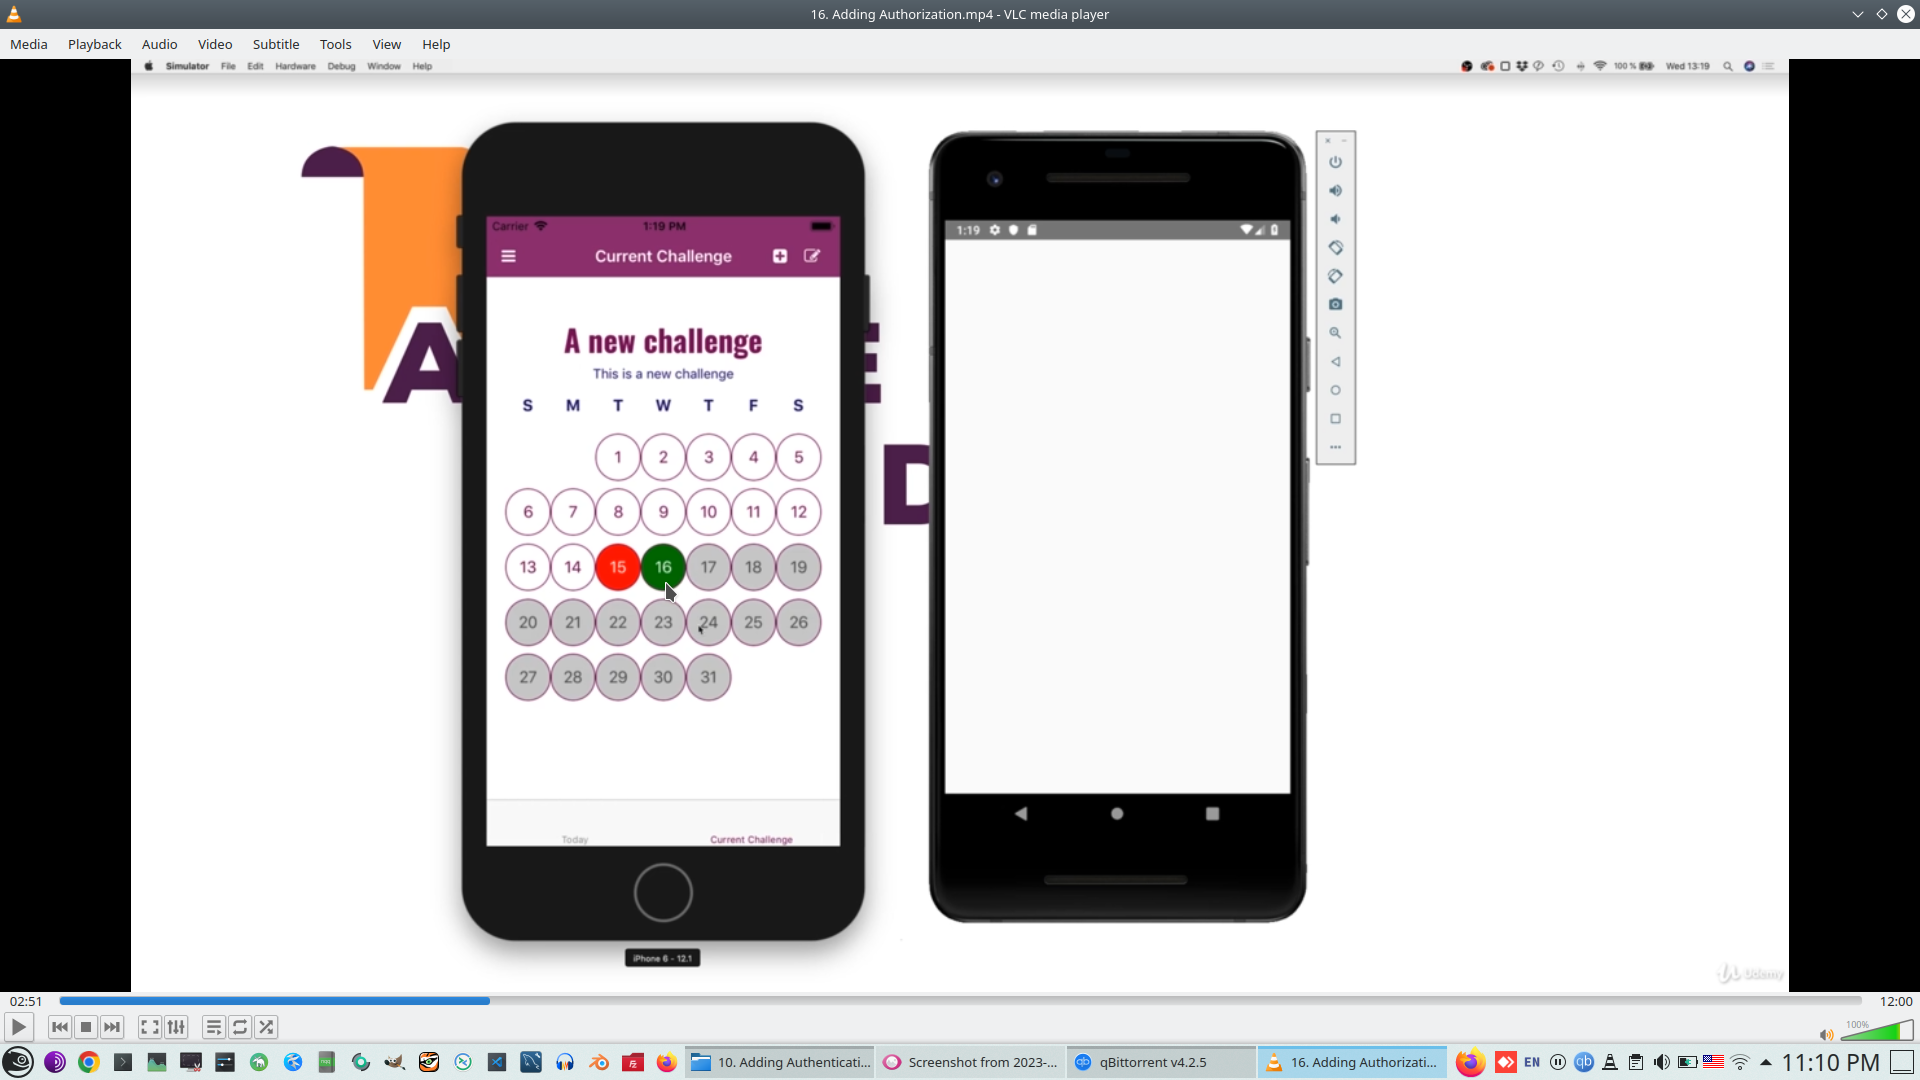
One chalenge to all user can be deleted now
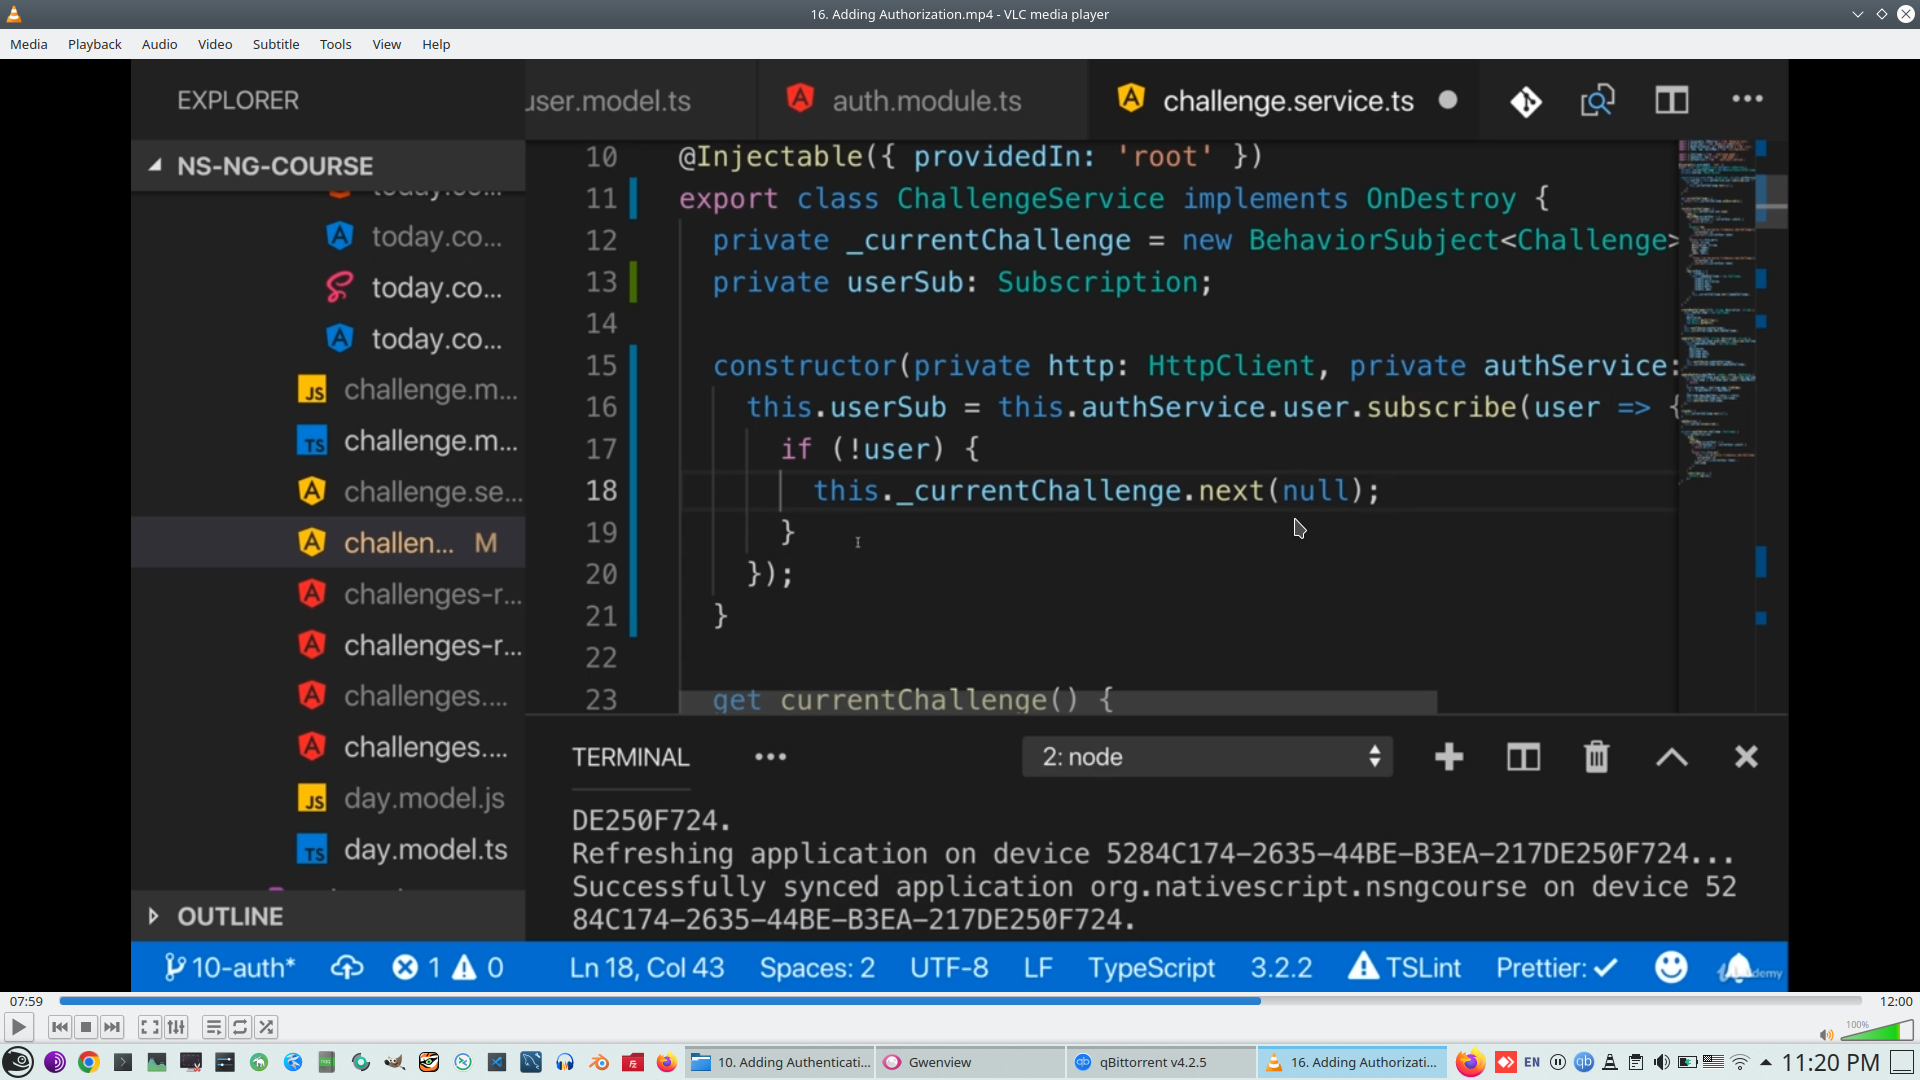
Import Subscription from RxJs https://rxjs.dev/api/index/class/Subscription
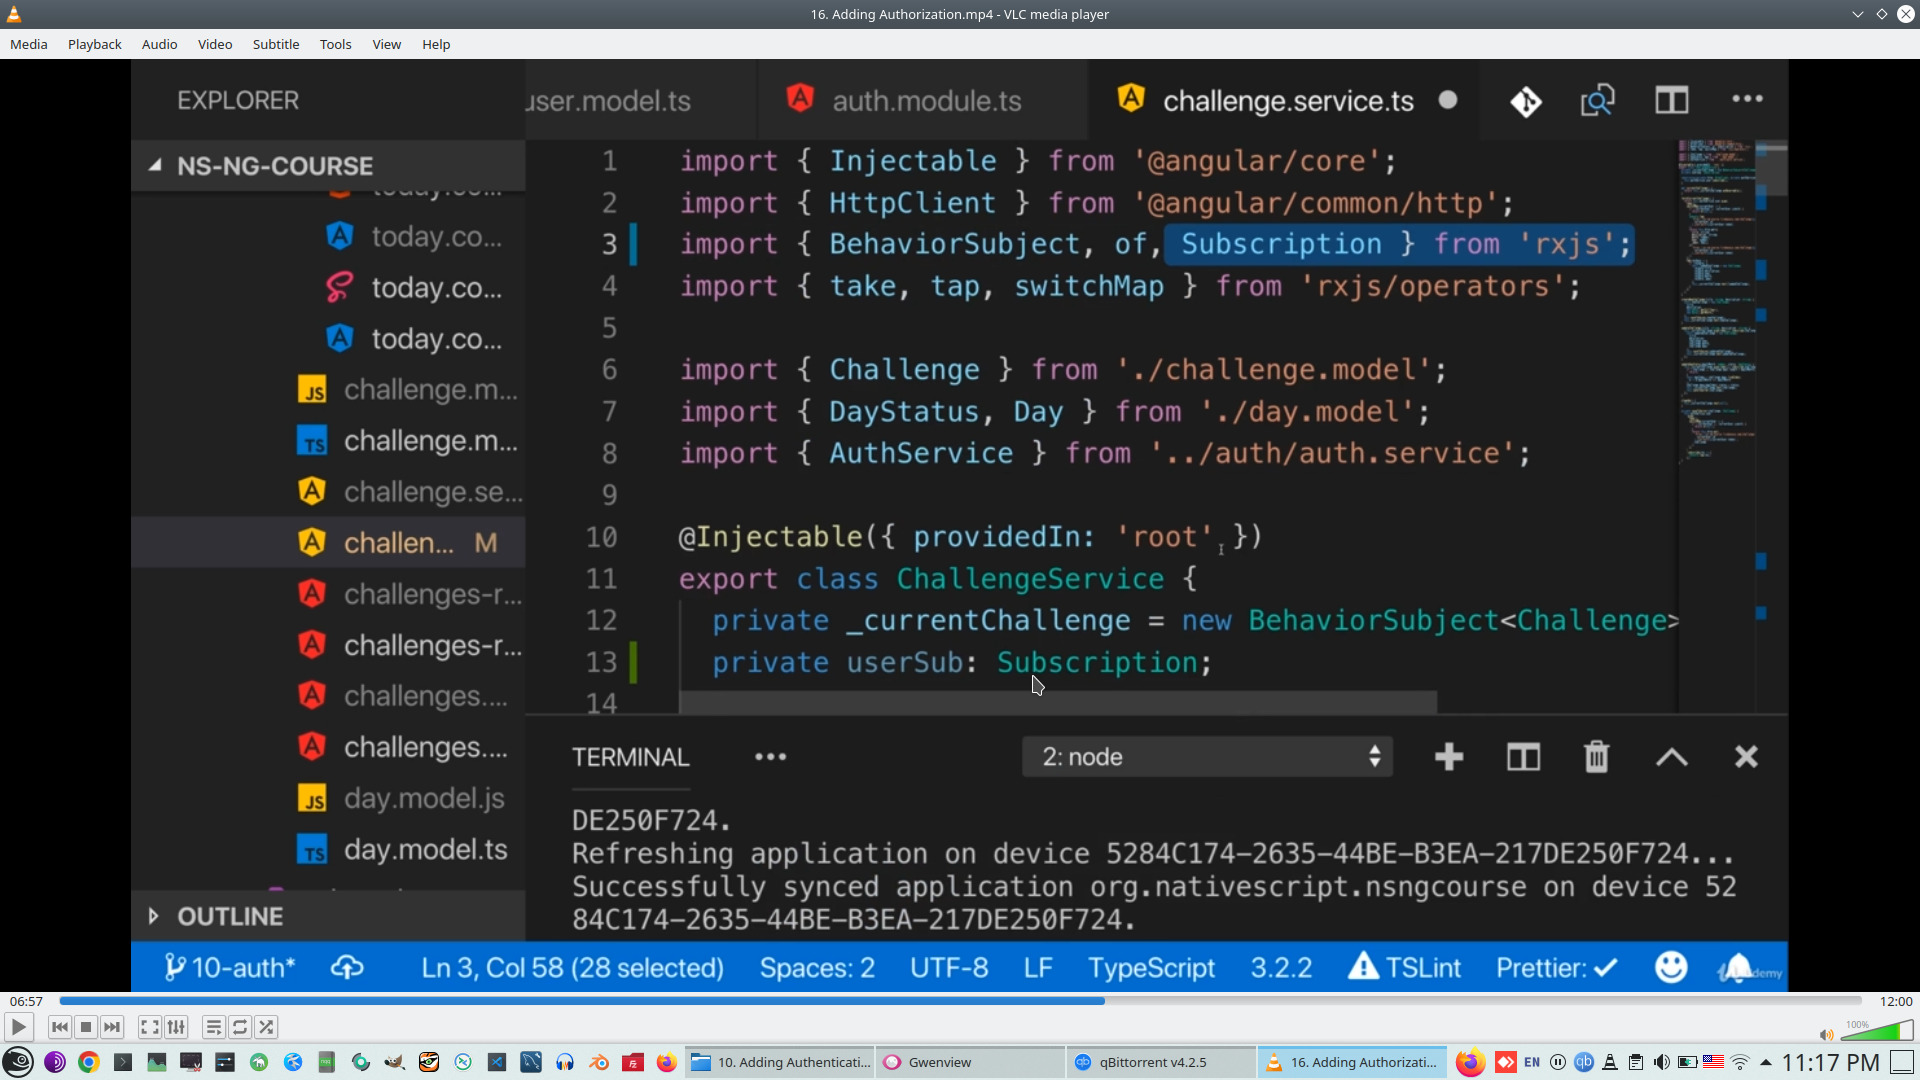
Subscribe to store user info
Generate empty user by BehaviorSubject Next
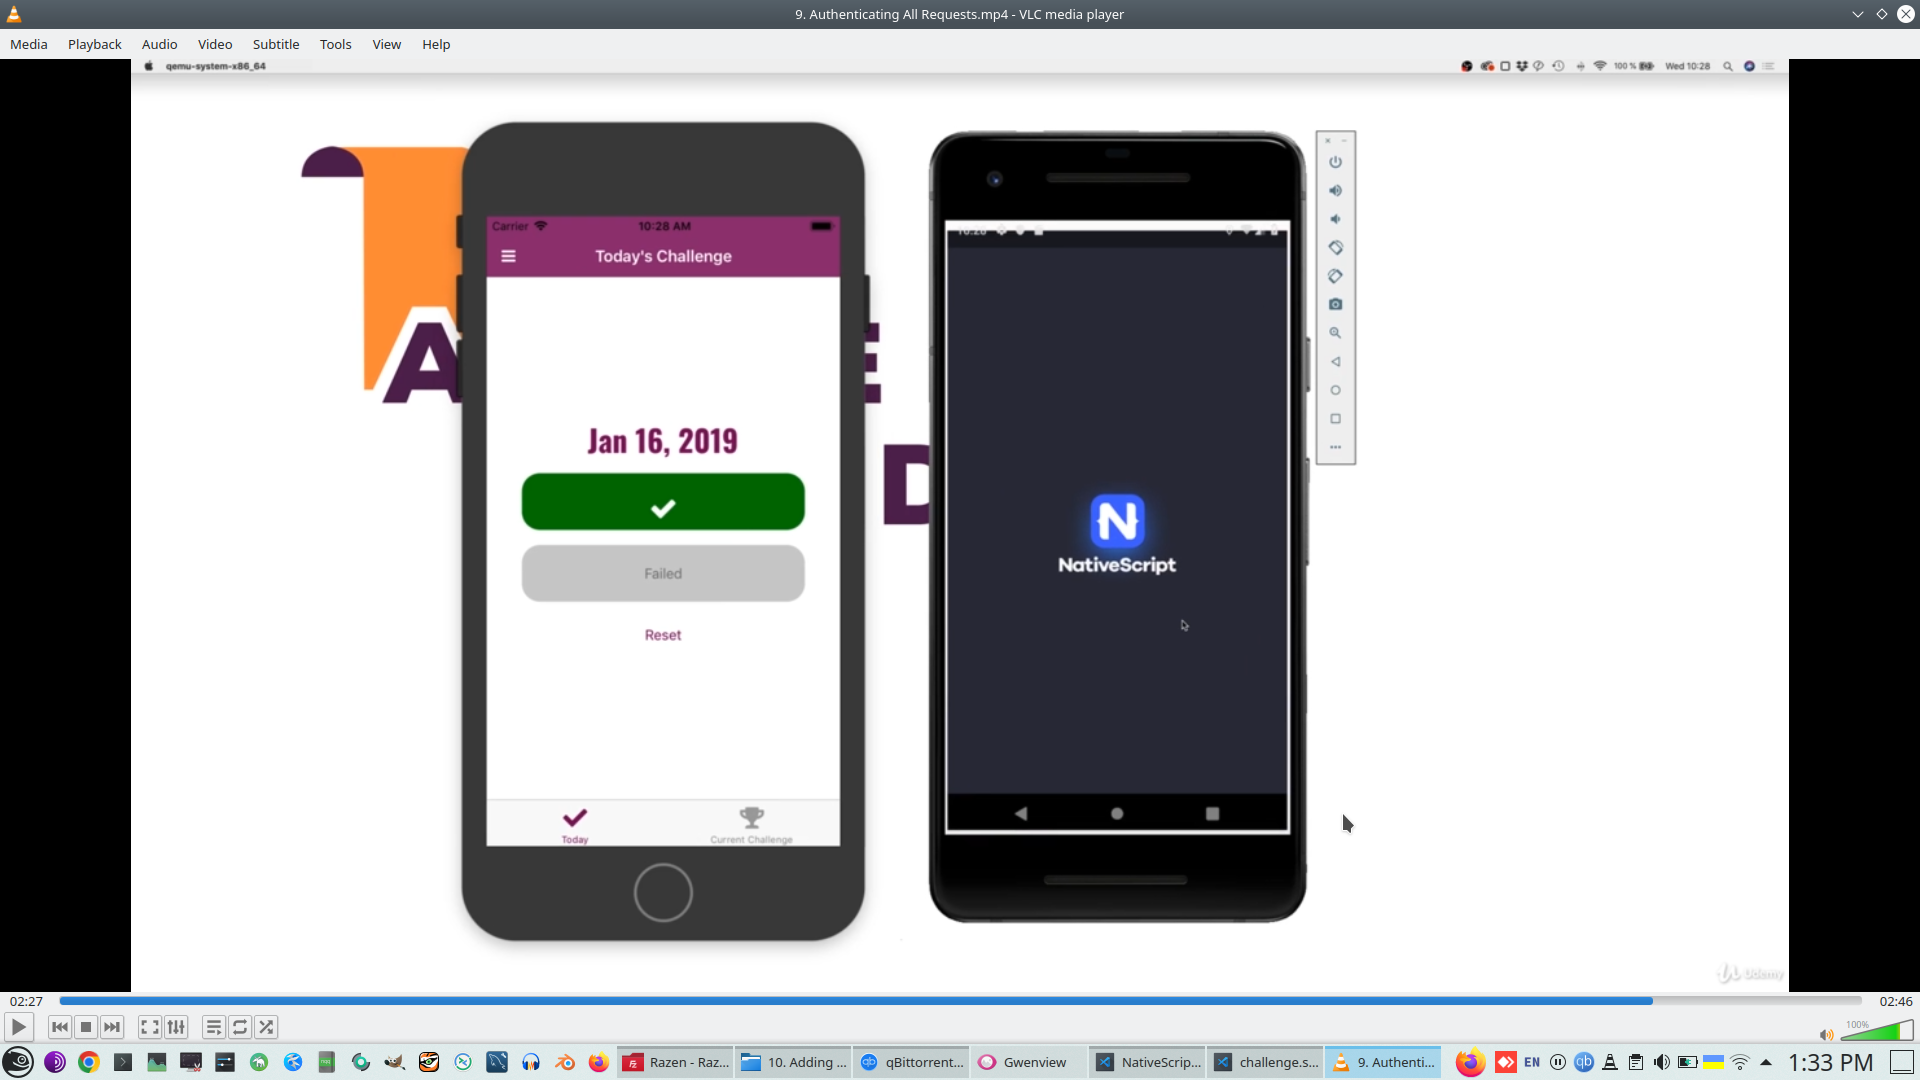
And finally check how Authorization working in firebase
Change Firebase rules to firbid access for other user's token

This is full final code code of this service
30. Deploynment.
- 1. Module Introduction
- 2. The Publishing Process
- 3. Testing our App on Different Devices
- 4. Adding the App Icon & Splash Screen Icons
- 5. Further Resources
- 6. Publishing the iOS App
- 7. Publishing the Android App
Iphone emulator.

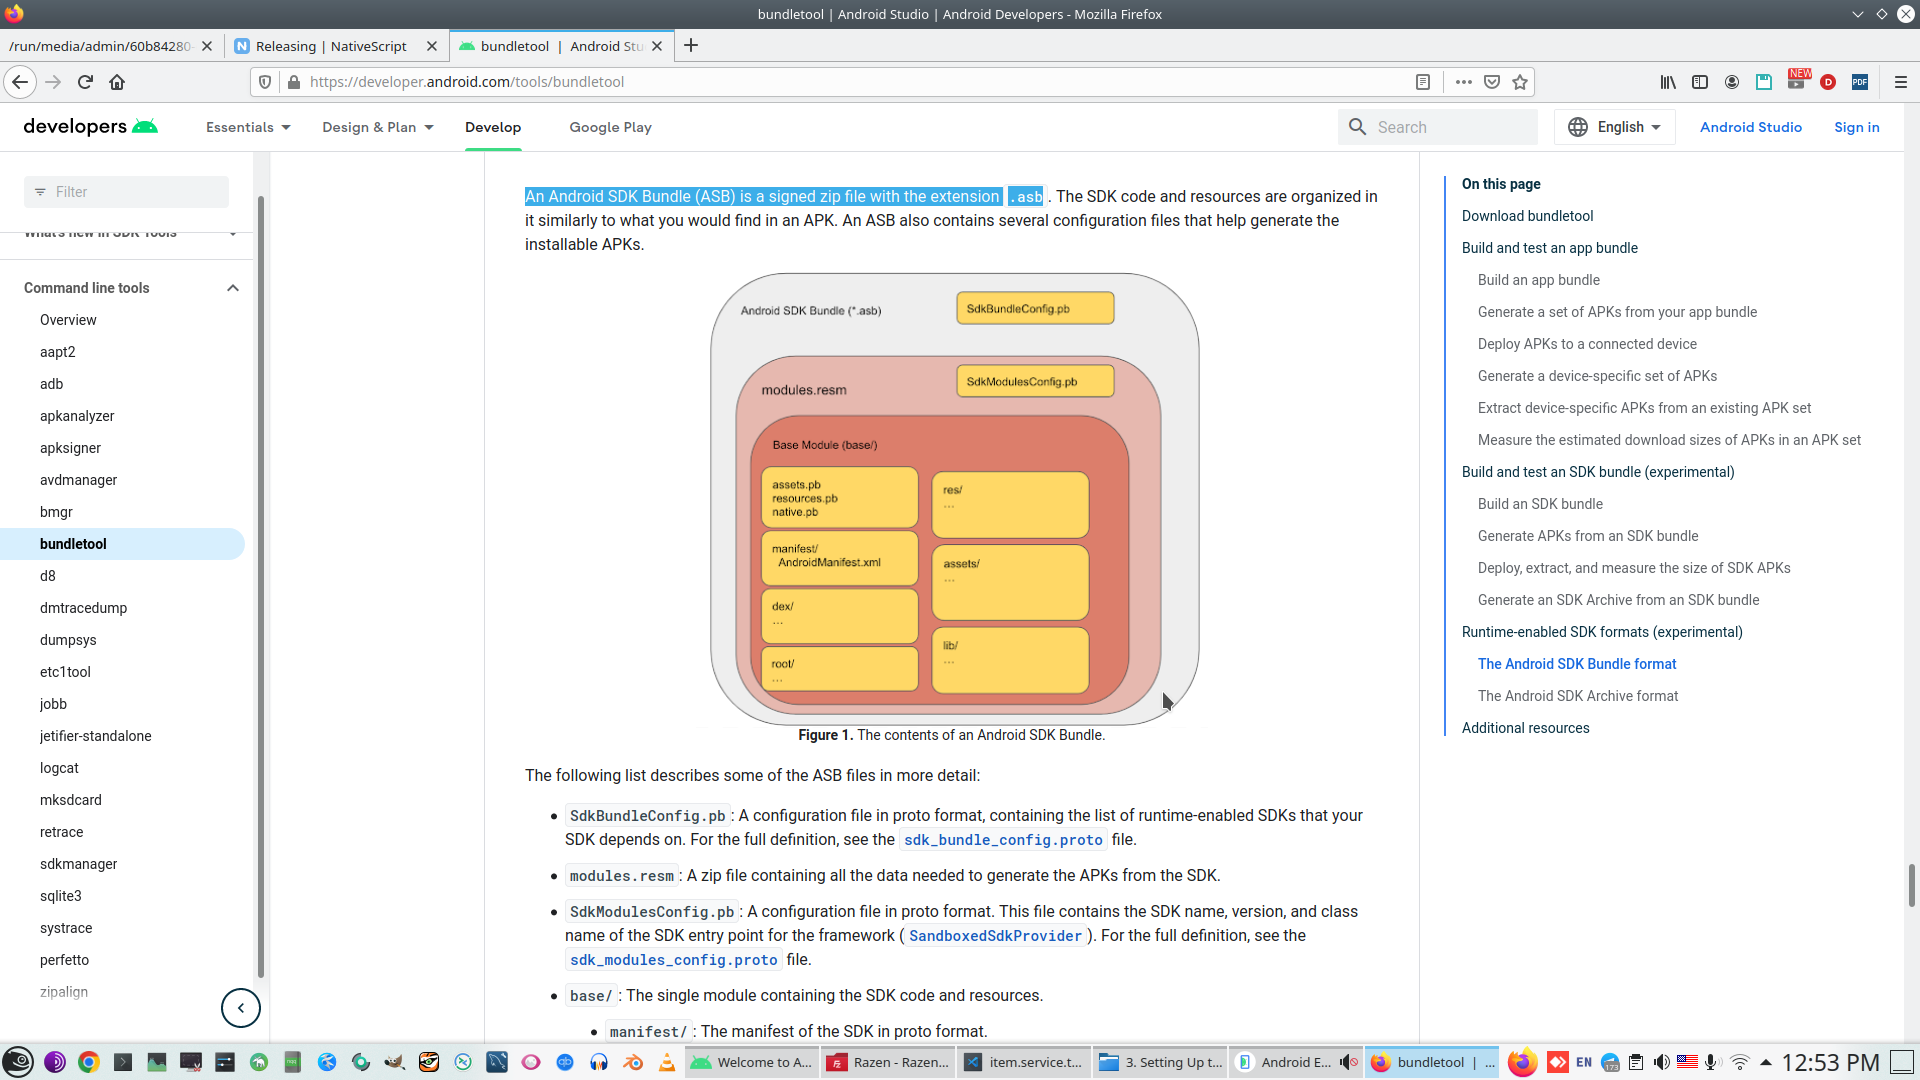
Bundle APK.

Related page:
Nativescript context:
Front context:
FrontLearning context:
 )
)
|
|