This tutorial series will teach you the basics of building an ASP.NET Web Forms application using ASP.NET 4.5 and Microsoft Visual Studio Express 2013 for Web. A Visual Studio 2013 project with C# source code is available to accompany this tutorial series.
This tutorial describes how to modify the Wingtip Toys sample application to include user authorization, registration, and payment using PayPal. Only users who are logged in will have authorization to purchase products. The ASP.NET 4.5 Web Forms project template’s built-in user registration functionality already includes much of what you need. You will add PayPal Express Checkout functionality. In this tutorial you be using the PayPal developer testing environment, so no actual funds will be transferred. At the end of the tutorial, you will test the application by selecting products to add to the shopping cart, clicking the checkout button, and transferring data to the PayPal testing web site. On the PayPal testing web site, you will confirm your shipping and payment information and then return to the local Wingtip Toys sample application to confirm and complete the purchase.
There are several experienced third-party payment processors that specialize in online shopping that address scalability and security. ASP.NET developers should consider the advantages of utilizing a third party payment solution before implementing a shopping and purchasing solution.
[!NOTE]
The Wingtip Toys sample application was designed to shown specific ASP.NET concepts and features available to ASP.NET web developers. This sample application was not optimized for all possible circumstances in regard to scalability and security.
What you’ll learn:
How to restrict access to specific pages in a folder.
How to create a known shopping cart from an anonymous shopping cart.
How to enable SSL for the project.
How to add an OAuth provider to the project.
How to use PayPal to purchase products using the PayPal testing environment.
How to display details from PayPal in a DetailsView control.
How to update the database of the Wingtip Toys application with details obtained from PayPal.
Adding Order Tracking
In this tutorial, you’ll create two new classes to track data from the order a user has created. The classes will track data regarding shipping information, purchase total, and payment confirmation.
Add the Order and OrderDetail Model Classes
Earlier in this tutorial series, you defined the schema for categories, products, and shopping cart items by creating the Category, Product, and CartItem classes in the Models folder. Now you will add two new classes to define the schema for the product order and the details of the order.
In the Models folder, add a new class named Order.cs.
The new class file is displayed in the editor.
The Order and OrderDetail classes contain the schema to define the order information used for purchasing and shipping.
In addition, you will need to update the database context class that manages the entity classes and that provides data access to the database. To do this, you will add the newly created Order and OrderDetail model classes to ProductContext class.
In Solution Explorer, find and open the ProductContext.cs file.
Add the highlighted code to the ProductContext.cs file as shown below:
11: public DbSet<Category> Categories { get; set; }
12: public DbSet<Product> Products { get; set; }
13: public DbSet<CartItem> ShoppingCartItems { get; set; }
14: public DbSet<Order> Orders { get; set; }
15: public DbSet<OrderDetail> OrderDetails { get; set; }
16: }
17: }
As mentioned previously in this tutorial series, the code in the ProductContext.cs file adds the System.Data.Entity namespace so that you have access to all the core functionality of the Entity Framework. This functionality includes the capability to query, insert, update, and delete data by working with strongly typed objects. The above code in the ProductContext class adds Entity Framework access to the newly added Order and OrderDetail classes.
Adding Checkout Access
The Wingtip Toys sample application allows anonymous users to review and add products to a shopping cart. However, when anonymous users choose to purchase the products they added to the shopping cart, they must log on to the site. Once they have logged on, they can access the restricted pages of the Web application that handle the checkout and purchase process. These restricted pages are contained in the Checkout folder of the application.
Add a Checkout Folder and Pages
You will now create the Checkout folder and the pages in it that the customer will see during the checkout process. You will update these pages later in this tutorial.
Right-click the project name (Wingtip Toys) in Solution Explorer and select Add a New Folder.
Name the new folder Checkout.
Right-click the Checkout folder and then select Add->New Item.
The Add New Item dialog box is displayed.
Select the Visual C# -> Web templates group on the left. Then, from the middle pane, select Web Form with Master Pageand name it CheckoutStart.aspx.
As before, select the Site.Master file as the master page.
Add the following additional pages to the Checkout folder using the same steps above:
CheckoutReview.aspx
CheckoutComplete.aspx
CheckoutCancel.aspx
CheckoutError.aspx
Add a Web.config File
By adding a new Web.config file to the Checkout folder, you will be able to restrict access to all the pages contained in the folder.
Right-click the Checkout folder and select Add -> New Item.
The Add New Item dialog box is displayed.
Select the Visual C# -> Web templates group on the left. Then, from the middle pane, select Web Configuration File, accept the default name of Web.config, and then select Add.
Replace the existing XML content in the Web.config file with the following:
The Web.config file specifies that all unknown users of the Web application must be denied access to the pages contained in the Checkout folder. However, if the user has registered an account and is logged on, they will be a known user and will have access to the pages in the Checkout folder.
It’s important to note that ASP.NET configuration follows a hierarchy, where each Web.config file applies configuration settings to the folder that it is in and to all of the child directories below it.
## Enable SSL for the Project
Secure Sockets Layer (SSL) is a protocol defined to allow Web servers and Web clients to communicate more securely through the use of encryption. When SSL is not used, data sent between the client and server is open to packet sniffing by anyone with physical access to the network. Additionally, several common authentication schemes are not secure over plain HTTP. In particular, Basic authentication and forms authentication send unencrypted credentials. To be secure, these authentication schemes must use SSL.
In Solution Explorer, click the WingtipToys project, then press F4 to display the Properties window.
Change SSL Enabled to true.
Copy the SSL URL so you can use it later.
The SSL URL will be https://localhost:44300/ unless you’ve previously created SSL Web Sites (as shown below).
In Solution Explorer, right click the WingtipToys project and click Properties.
In the left tab, click Web.
Change the Project Url to use the SSL URL that you saved earlier.
Save the page by pressing CTRL+S.
Press Ctrl+F5 to run the application. Visual Studio will display an option to allow you to avoid SSL warnings.
Click Yes to trust the IIS Express SSL certificate and continue.
A Security Warning is displayed.
Click Yes to install the certificate to your localhost.
The browser window will be displayed.
You can now easily test your Web application locally using SSL.
## Add an OAuth 2.0 Provider
ASP.NET Web Forms provides enhanced options for membership and authentication. These enhancements include OAuth. OAuth is an open protocol that allows secure authorization in a simple and standard method from web, mobile, and desktop applications. The ASP.NET Web Forms template uses OAuth to expose Facebook, Twitter, Google and Microsoft as authentication providers. Although this tutorial uses only Google as the authentication provider, you can easily modify the code to use any of the providers. The steps to implement other providers are very similar to the steps you will see in this tutorial.
In addition to authentication, the tutorial will also use roles to implement authorization. Only those users you add to the canEdit role will be able to change data (create, edit, or delete contacts).
[!NOTE]
Windows Live applications only accept a live URL for a working website, so you cannot use a local website URL for testing logins.
The following steps will allow you to add a Google authentication provider.
Open the App_Start.Auth.cs file.
Remove the comment characters from the app.UseGoogleAuthentication() method so that the method appears as follows:
Navigate to the Google Developers Console. You will also need to sign-in with your Google developer email account (gmail.com). If you do not have a Google account, select the Create an account link.
Next, you’ll see the Google Developers Console.
Click the Create Project button and enter a project name and ID (you can use the default values). Then, click the agreement checkbox and the Create button.
Google - New Project
In a few seconds the new project will be created and your browser will display the new projects page. 5. In the left tab, click APIs & auth, and then click Credentials. 6. Click the Create New Client ID under OAuth.
The Create Client ID dialog will be displayed. 7. In the Create Client ID dialog, keep the default Web application for the application type. 8. Set the Authorized JavaScript Origins to the SSL URL you used earlier in this tutorial (https://localhost:44300/ unless you’ve created other SSL projects).
This URL is the origin for your application. For this sample, you will only enter the localhost test URL. However, you can enter multiple URLs to account for localhost and production. 9. Set the Authorized Redirect URI to the following:
This value is the URI that ASP.NET OAuth users to communicate with the google OAuth server. Remember the SSL URL you used above ( https://localhost:44300/ unless you’ve created other SSL projects). 10. Click the Create Client ID button. 11. On the left menu of the Google Developers Console, click the Consent screen menu item, then set your email address and product name. When you have completed the form, click Save. 12. Click the APIs menu item, scroll down and click the off button next to Google+ API.
Accepting this option will enable the Google+ API. 13. You must also update the Microsoft.Owin NuGet package to version 3.0.0.
From the Tools menu, select NuGet Package Manager and then select Manage NuGet Packages for Solution.
From the Manage NuGet Packages window, find and update the Microsoft.Owin package to version 3.0.0. 14. In Visual Studio, update the UseGoogleAuthentication method of the Startup.Auth.cs page by copying and pasting the Client ID and Client Secret into the method. The Client ID and Client Secret values shown below are samples and will not work.
41: // Enables the application to temporarily store user information when they are verifying the second factor in the two-factor authentication process.
44: // Enables the application to remember the second login verification factor such as phone or email.
45: // Once you check this option, your second step of verification during the login process will be remembered on the device where you logged in from.
46: // This is similar to the RememberMe option when you log in.
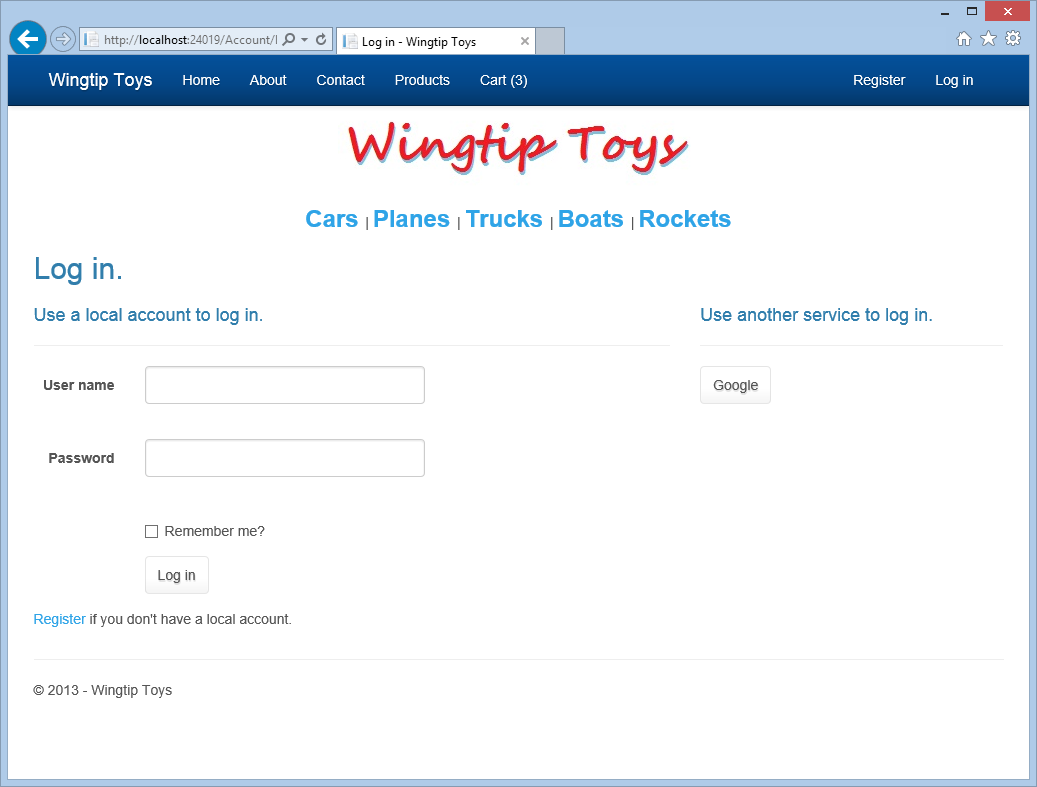
Press CTRL+F5 to build and run the application. Click the Log in link.
Under Use another service to log in, click Google.
If you need to enter your credentials, you will be redirected to the google site where you will enter your credentials.
After you enter your credentials, you will be prompted to give permissions to the web application you just created.
Click Accept. You will now be redirected back to the Register page of the WingtipToys application where you can register your Google account.
You have the option of changing the local email registration name used for your Gmail account, but you generally want to keep the default email alias (that is, the one you used for authentication). Click Log in as shown above.
Modifying Login Functionality
As previously mentioned in this tutorial series, much of the user registration functionality has been included in the ASP.NET Web Forms template by default. Now you will modify the default Login.aspx and Register.aspx pages to call the MigrateCart method. The MigrateCart method associates a newly logged in user with an anonymous shopping cart. By associating the user and shopping cart, the Wingtip Toys sample application will be able to maintain the shopping cart of the user between visits.
In Solution Explorer, find and open the Account folder.
Modify the code-behind page named Login.aspx.cs to include the code highlighted in yellow, so that it appears as follows:
For now, you can ignore the warning that there is no definition for the MigrateCart method. You will be adding it a bit later in this tutorial.
The Login.aspx.cs code-behind file supports a LogIn method. By inspecting the Login.aspx page, you’ll see that this page includes a “Log in” button that when click triggers the LogIn handler on the code-behind.
When the Login method on the Login.aspx.cs is called, a new instance of the shopping cart named usersShoppingCart is created. The ID of the shopping cart (a GUID) is retrieved and set to the cartId variable. Then, the MigrateCart method is called, passing both the cartId and the name of the logged-in user to this method. When the shopping cart is migrated, the GUID used to identify the anonymous shopping cart is replaced with the user name.
In addition to modifying the Login.aspx.cs code-behind file to migrate the shopping cart when the user logs in, you must also modify the Register.aspx.cs code-behind file to migrate the shopping cart when the user creates a new account and logs in.
In the Account folder, open the code-behind file named Register.aspx.cs.
Modify the code-behind file by including the code in yellow, so that it appears as follows:
Save the Register.aspx.cs file. Once again, ignore the warning about the MigrateCart method.
Notice that the code you used in the CreateUser_Click event handler is very similar to the code you used in the LogIn method. When the user registers or logs in to the site, a call to the MigrateCart method will be made.
Migrating the Shopping Cart
Now that you have the log-in and registration process updated, you can add the code to migrate the shopping cart using the MigrateCart method.
In Solution Explorer, find the Logic folder and open the ShoppingCartActions.cs class file.
Add the code highlighted in yellow to the existing code in the ShoppingCartActions.cs file, so that the code in the ShoppingCartActions.cs file appears as follows:
142: publicvoid RemoveItem(string removeCartID, int removeProductID)
143: {
144: using (var _db = new WingtipToys.Models.ProductContext())
145: {
146: try
147: {
148: var myItem = (from c in _db.ShoppingCartItems where c.CartId == removeCartID && c.Product.ProductID == removeProductID select c).FirstOrDefault();
163: publicvoid UpdateItem(string updateCartID, int updateProductID, int quantity)
164: {
165: using (var _db = new WingtipToys.Models.ProductContext())
166: {
167: try
168: {
169: var myItem = (from c in _db.ShoppingCartItems where c.CartId == updateCartID && c.Product.ProductID == updateProductID select c).FirstOrDefault();
The MigrateCart method uses the existing cartId to find the shopping cart of the user. Next, the code loops through all the shopping cart items and replaces the CartId property (as specified by the CartItem schema) with the logged-in user name.
Updating the Database Connection
If you are following this tutorial using the prebuilt Wingtip Toys sample application, you must recreate the default membership database. By modifying the default connection string, the membership database will be created the next time the application runs.
Open the Web.config file at the root of the project.
Update the default connection string so that it appears as follows:
PayPal is a web-based billing platform that accepts payments by online merchants. This tutorial next explains how to integrate PayPal’s Express Checkout functionality into your application. Express Checkout allows your customers to use PayPal to pay for the items they have added to their shopping cart.
Create PaylPal Test Accounts
To use the PayPal testing environment, you must create and verify a developer test account. You will use the developer test account to create a buyer test account and a seller test account. The developer test account credentials also will allow the Wingtip Toys sample application to access the PayPal testing environment.
If you don’t have a PayPal developer account, create a new account by clicking Sign Upand following the sign up steps. If you have an existing PayPal developer account, sign in by clicking Log In. You will need your PayPal developer account to test the Wingtip Toys sample application later in this tutorial.
If you have just signed up for your PayPal developer account, you may need to verify your PayPal developer account with PayPal. You can verify your account by following the steps that PayPal sent to your email account. Once you have verified your PayPal developer account, log back into the PayPal developer testing site.
After you are logged in to the PayPal developer site with your PayPal developer account you need to create a PayPal buyer test account if you don’t already have one. To create a buyer test account, on the PayPal site click the Applications tab and then click Sandbox accounts.
The Sandbox test accounts page is shown.
[!NOTE]
The PayPal Developer site already provides a merchant test account.
On the Sandbox test accounts page, click Create Account.
On the Create test account page choose a buyer test account email and password of your choice.
[!NOTE]
You will need the buyer email addresses and password to test the Wingtip Toys sample application at the end of this tutorial.
Create the buyer test account by clicking the Create Account button.
The Sandbox Test accounts page is displayed.
On the Sandbox test accounts page, click the facilitator email account. Profile and Notification options appear.
Select the Profile option, then click API credentials to view your API credentials for the merchant test account.
Copy the TEST API credentials to notepad.
You will need your displayed Classic TEST API credentials (Username, Password, and Signature) to make API calls from the Wingtip Toys sample application to the PayPal testing environment. You will add the credentials in the next step.
Add PayPal Class and API Credentials
You will place the majority of the PayPal code into a single class. This class contains the methods used to communicate with PayPal. Also, you will add your PayPal credentials to this class.
In the Wingtip Toys sample application within Visual Studio, right-click the Logic folder and then select Add -> New Item.
The Add New Item dialog box is displayed.
Under Visual C# from the Installed pane on the left, select Code.
From the middle pane, select Class. Name this new class PayPalFunctions.cs.
Click Add.
The new class file is displayed in the editor.
Add the Merchant API credentials (Username, Password, and Signature) that you displayed earlier in this tutorial so that you can make function calls to the PayPal testing environment.
In this sample application you are simply adding credentials to a C# file (.cs). However, in a implemented solution, you should consider encrypting your credentials in a configuration file.
The NVPAPICaller class contains the majority of the PayPal functionality. The code in the class provides the methods needed to make a test purchase from the PayPal testing environment. The following three PayPal functions are used to make purchases:
SetExpressCheckout function
GetExpressCheckoutDetails function
DoExpressCheckoutPayment function
The ShortcutExpressCheckout method collects the test purchase information and product details from the shopping cart and calls the SetExpressCheckout PayPal function. The GetCheckoutDetails method confirms purchase details and calls the GetExpressCheckoutDetails PayPal function before making the test purchase. The DoCheckoutPayment method completes the test purchase from the testing environment by calling the DoExpressCheckoutPayment PayPal function. The remaining code supports the PayPal methods and process, such as encoding strings, decoding strings, processing arrays, and determining credentials.
[!NOTE]
PayPal allows you to include optional purchase details based on PayPal’s API specification. By extending the code in the Wingtip Toys sample application, you can include localization details, product descriptions, tax, a customer service number, as well as many other optional fields.
Notice that the return and cancel URLs that are specified in the ShortcutExpressCheckout method use a port number.
When Visual Web Developer runs a web project using SSL, commonly the port 44300 is used for the web server. As shown above, the port number is 44300. When you run the application, you could see a different port number. Your port number needs to be correctly set in the code so that you can successful run the Wingtip Toys sample application at the end of this tutorial. The next section of this tutorial explains how to retrieve the local host port number and update the PayPal class.
Update the LocalHost Port Number in the PayPal Class
The Wingtip Toys sample application purchases products by navigating to the PayPal testing site and returning to your local instance of the Wingtip Toys sample application. In order to have PayPal return to the correct URL, you need to specify the port number of the locally running sample application in the PayPal code mentioned above.
Right-click the project name (WingtipToys) in Solution Explorer and select Properties.
In the left column, select the Web tab.
Retrieve the port number from the Project Url box.
If needed, update the returnURL and cancelURL in the PayPal class (NVPAPICaller) in the PayPalFunctions.cs file to use the port number of your web application:
Now the code that you added will match the expected port for your local Web application. PayPal will be able to return to the correct URL on your local machine.
Add the PayPal Checkout Button
Now that the primary PayPal functions have been added to the sample application, you can begin adding the markup and code needed to call these functions. First, you must add the checkout button that the user will see on the shopping cart page.
Open the ShoppingCart.aspx file.
Scroll to the bottom of the file and find the <!--Checkout Placeholder --> comment.
Replace the comment with an ImageButton control so that the mark up is replaced as follows:
16: ShoppingCartTitle.InnerText = "Shopping Cart is Empty";
17: UpdateBtn.Visible = false;
18: CheckoutImageBtn.Visible = false;
19: }
20: }
21: }
Save your changes to both the ShoppingCart.aspx file and the ShoppingCart.aspx.cs file.
From the menu, select Debug->Build WingtipToys.
The project will be rebuilt with the newly added ImageButton control.
Send Purchase Details to PayPal
When the user clicks the Checkout button on the shopping cart page (ShoppingCart.aspx), they’ll begin the purchase process. The following code calls the first PayPal function needed to purchase products.
From the Checkout folder, open the code-behind file named CheckoutStart.aspx.cs.
Be sure to open the code-behind file.
When the user of the application clicks the Checkout button on the shopping cart page, the browser will navigate to the CheckoutStart.aspx page. When the CheckoutStart.aspx page loads, the ShortcutExpressCheckout method is called. At this point, the user is transferred to the PayPal testing web site. On the PayPal site, the user enters their PayPal credentials, reviews the purchase details, accepts the PayPal agreement and returns to the Wingtip Toys sample application where the ShortcutExpressCheckout method completes. When the ShortcutExpressCheckout method is complete, it will redirect the user to the CheckoutReview.aspx page specified in the ShortcutExpressCheckout method. This allows the user to review the order details from within the Wingtip Toys sample application.
Review Order Details
After returning from PayPal, the CheckoutReview.aspx page of the Wingtip Toys sample application displays the order details. This page allows the user to review the order details before purchasing the products. The CheckoutReview.aspx page must be created as follows:
In the Checkout folder, open the page named CheckoutReview.aspx.
The DetailsView control is used to display the order details that have been returned from PayPal. Also, the above code saves the order details to the Wingtip Toys database as an OrderDetail object. When the user clicks on the Complete Order button, they are redirected to the CheckoutComplete.aspx page.
[!NOTE]
Tip
In the markup of the CheckoutReview.aspx page, notice that the <ItemStyle> tag is used to change the style of the items within the DetailsView control near the bottom of the page. By viewing the page in Design View (by selecting Design at the lower left corner of Visual Studio), then selecting the DetailsView control, and selecting the Smart Tag (the arrow icon at the top right of the control), you will be able to see the DetailsView Tasks.
Checkout and Payment with PayPal - Edit Fields
By selecting Edit Fields, the Fields dialog box will appear. In this dialog box you can easily control the visual properties, such as ItemStyle, of the DetailsView control.
Checkout and Payment with PayPal - Fields Dialog
Complete Purchase
CheckoutComplete.aspx page makes the purchase from PayPal. As mentioned above, the user must click on the Complete Order button before the application will navigate to the CheckoutComplete.aspx page.
In the Checkout folder, open the page named CheckoutComplete.aspx.
When the CheckoutComplete.aspx page is loaded, the DoCheckoutPayment method is called. As mentioned earlier, the DoCheckoutPayment method completes the purchase from the PayPal testing environment. Once PayPal has completed the purchase of the order, the CheckoutComplete.aspx page displays a payment transaction ID to the purchaser.
Handle Cancel Purchase
If the user decides to cancel the purchase, they will be directed to the CheckoutCancel.aspx page where they will see that their order has been cancelled.
Open the page named CheckoutCancel.aspx in the Checkout folder.
Errors during the purchase process will be handled by the CheckoutError.aspx page. The code-behind of the CheckoutStart.aspx page, the CheckoutReview.aspx page, and the CheckoutComplete.aspx page will each redirect to the CheckoutError.aspx page if an error occurs.
Open the page named CheckoutError.aspx in the Checkout folder.
The CheckoutError.aspx page is displayed with the error details when an error occurs during the checkout process.
Running the Application
Run the application to see how to purchase products. Note that you will be running in the PayPal testing environment. No actual money is being exchanged.
Make sure all your files are saved in Visual Studio.
Login with your PayPal developer account that you created earlier in this tutorial.
For PayPal’s developer sandbox, you need to be logged in at https://developer.paypal.com to test express checkout. This only applies to PayPal’s sandbox testing, not to PayPal’s live environment.
In Visual Studio, press F5 to run the Wingtip Toys sample application.
After the database rebuilds, the browser will open and show the Default.aspx page.
Add three different products to the shopping cart by selecting the product category, such as “Cars” and then clicking Add to Cart next to each product.
The shopping cart will display the product you have selected.
Click the PayPal button to checkout.
Checkout and Payment with PayPal - Cart
Checking out will require that you have a user account for the Wingtip Toys sample application. 7. Click the Google link on the right of the page to log in with an existing gmail.com email account.
If you do not have a gmail.com account, you can create one for testing purposes at www.gmail.com. You can also use a standard local account by clicking “Register”.
Sign in with your gmail account and password.
Click the Log in button to register your gmail account with your Wingtip Toys sample application user name.
On the PayPal test site, add your buyer email address and password that you created earlier in this tutorial, then click the Log In button.
Agree to the PayPal policy and click the Agree and Continue button.
Note that this page is only displayed the first time you use this PayPal account. Again note that this is a test account, no real money is exchanged.
Review the order information on the PayPal testing environment review page and click Continue.
On the CheckoutReview.aspx page, verify the order amount and view the generated shipping address. Then, click the Complete Order button.
The CheckoutComplete.aspx page is displayed with a payment transaction ID.
Checkout and Payment with PayPal - Checkout Complete
## Reviewing the Database
By reviewing the updated data in the Wingtip Toys sample application database after running the application, you can see that the application successfully recorded the purchase of the products.
You can inspect the data contained in the Wingtiptoys.mdf database file by using the Database Explorer window (Server Explorer window in Visual Studio) as you did earlier in this tutorial series.
Close the browser window if it is still open.
In Visual Studio, select the Show All Files icon at the top of Solution Explorer to allow you to expand the App_Data folder.
Expand the App_Data folder.
You may need to select the Show All Files icon for the folder.
Right-click the Wingtiptoys.mdf database file and select Open. Server Explorer is displayed.
Expand the Tables folder.
Right-click the Orderstable and select Show Table Data.
The Orders table is displayed.
Review the PaymentTransactionID column to confirm successful transactions.
Close the Orders table window.
In the Server Explorer, right-click the OrderDetails table and select Show Table Data.
Review the OrderId and Username values in the OrderDetails table. Note that these values match the OrderId and Username values included in the Orders table.
Close the OrderDetails table window.
Right-click the Wingtip Toys database file (Wingtiptoys.mdf) and select Close Connection.
If you do not see the Solution Explorer window, click Solution Explorer at the bottom of the Server Explorer window to show the Solution Explorer again.
Summary
In this tutorial you added order and order detail schemas to track the purchase of products. You also integrated PayPal functionality into the Wingtip Toys sample application.
This tutorial contains sample code. Such sample code is provided “as is” without warranty of any kind. Accordingly, Microsoft does not guarantee the accuracy, integrity, or quality of the sample code. You agree to use the sample code at your own risk. Under no circumstances will Microsoft be liable to you in any way for any sample code, content, including but not limited to, any errors or omissions in any sample code, content, or any loss or damage of any kind incurred as a result of the use of any sample code. You are hereby notified and do hereby agree to indemnify, save and hold Microsoft harmless from and against any and all loss, claims of loss, injury or damage of any kind including, without limitation, those occasioned by or arising from material that you post, transmit, use or rely on including, but not limited to, the views expressed therein.


 7. In the Create Client ID dialog, keep the default Web application for the application type. 8. Set the Authorized JavaScript Origins to the SSL URL you used earlier in this tutorial (


 )
)