Enabling authentication using Facebook, Google, and other external providers
By Valeriy Novytskyy and Rick Anderson
This tutorial demonstrates how to build an ASP.NET Core 2.x app that enables users to log in using OAuth 2.0 with credentials from external authentication providers.
Facebook, Twitter, Google, and Microsoft providers are covered in the following sections. Other providers are available in third-party packages such as AspNet.Security.OAuth.Providers and AspNet.Security.OpenId.Providers.

Enabling users to sign in with their existing credentials is convenient for the users and shifts many of the complexities of managing the sign-in process onto a third party. For examples of how social logins can drive traffic and customer conversions, see case studies by Facebook and Twitter.
Note: Packages presented here abstract a great deal of complexity of the OAuth authentication flow, but understanding the details may become necessary when troubleshooting. Many resources are available; for example, see Introduction to OAuth 2 or Understanding OAuth 2. Some issues can be resolved by looking at the ASP.NET Core source code for the provider packages.
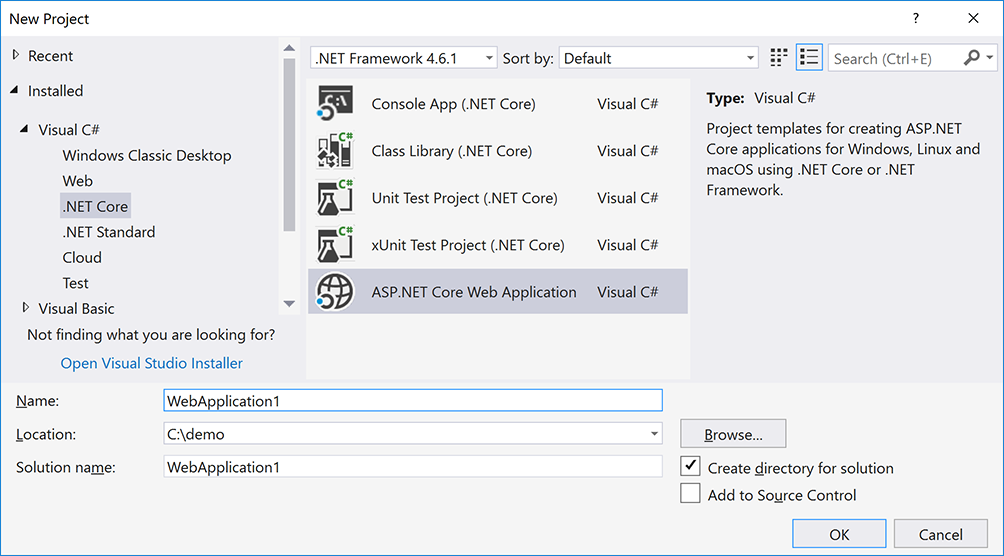
Create a New ASP.NET Core Project
In Visual Studio 2017, create a new project from the Start Page, or via File > New > Project.
Select the ASP.NET Core Web Application template available in Visual C# > .NET Core category:
- Tap Web Application and verify Authentication is set to Individual User Accounts:
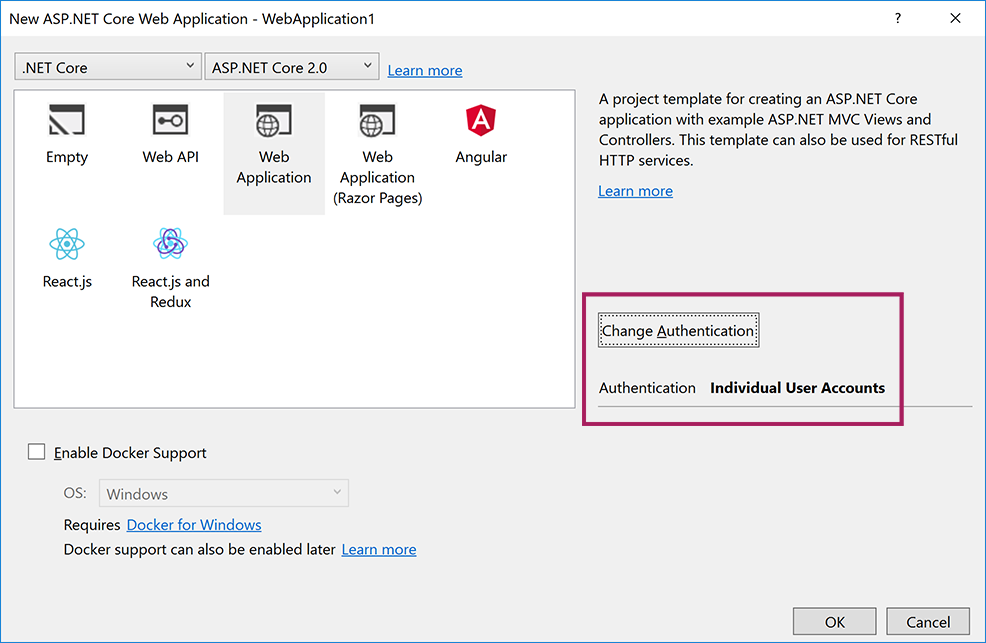
Note: This tutorial applies to ASP.NET Core 2.0 SDK version which can be selected at the top of the wizard.
Require SSL
OAuth 2.0 requires the use of SSL for authentication over the HTTPS protocol.
Note: Projects created using Web Application or Web API project templates for ASP.NET Core 2.x are automatically configured to enable SSL and launch with https URL if the Individual User Accounts option was selected on Change Authentication dialog in the project wizard as shown above.
- Require SSL on your site by following the steps in (xref:)Enforcing SSL in an ASP.NET Core app topic.
Use SecretManager to store tokens assigned by login providers
Social login providers assign Application Id and Application Secret tokens during the registration process (exact naming varies by provider).
These values are effectively the user name and password your application uses to access their API, and constitute the “secrets” that can be linked to your application configuration with the help of Secret Manager instead of storing them in configuration files directly or hard-coding them.
Follow the steps in (xref:)Safe storage of app secrets during development in ASP.NET Core topic so that you can store tokens assigned by each login provider below.
Setup login providers required by your application
Use the following topics to configure your application to use the respective providers:
- Facebook instructions
- Twitter instructions
- Google instructions
- Microsoft instructions
- Other provider instructions
Optionally set password
When you register with an external login provider, you do not have a password registered with the app. This alleviates you from creating and remembering a password for the site, but it also makes you dependent on the external login provider. If the external login provider is unavailable, you won’t be able to log in to the web site.
To create a password and sign in using your email that you set during the sign in process with external providers:
- Tap the Hello
link at the top right corner to navigate to the Manage view.
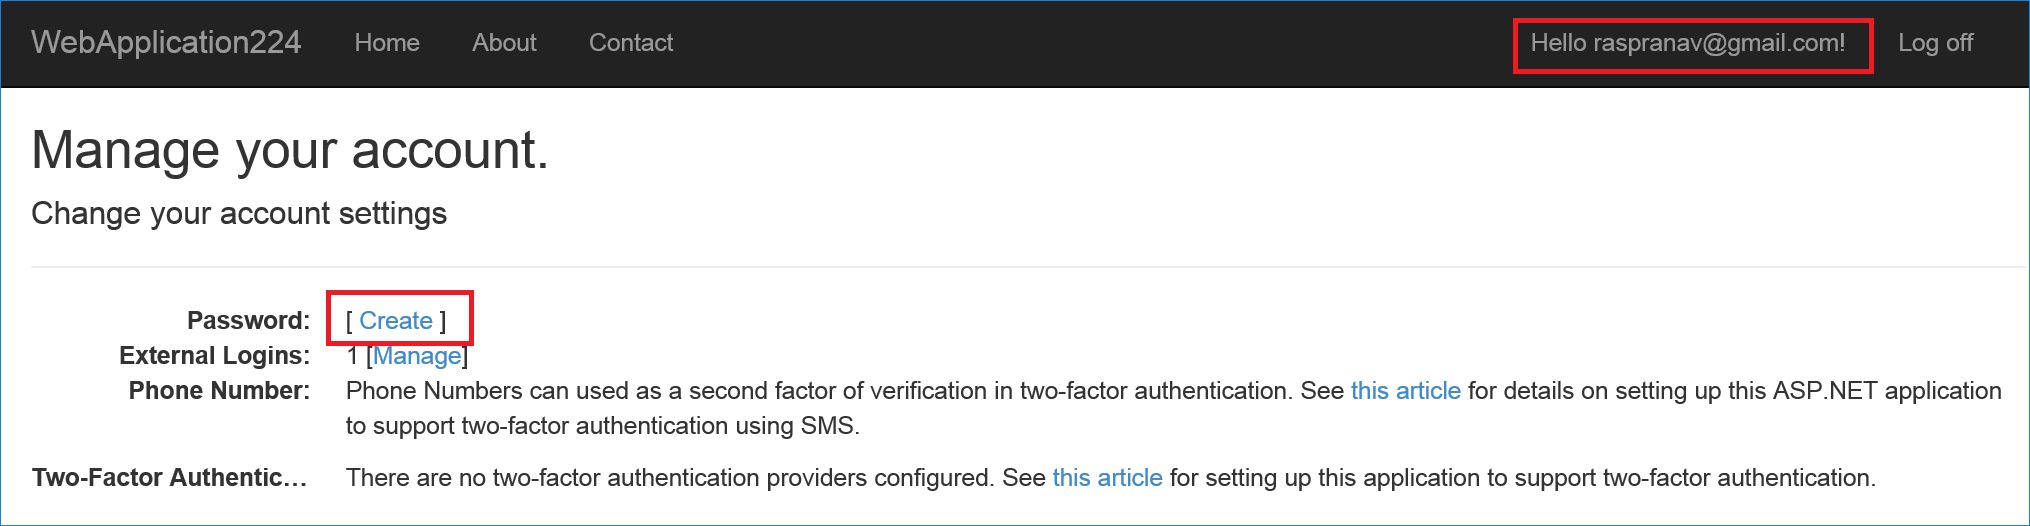
- Tap Create
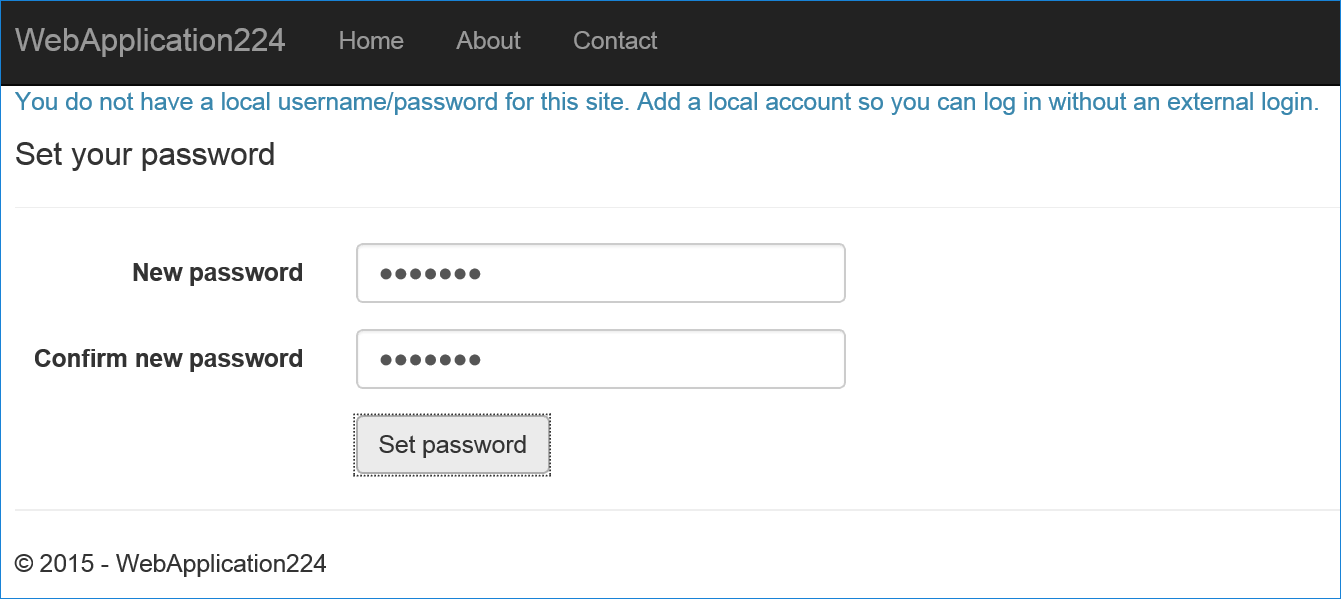
- Set a valid password and you can use this to sign in with your email.
Next steps
This article introduced external authentication and explained the prerequisites required to add external logins to your ASP.NET Core app.
Reference provider-specific pages to configure logins for the providers required by your app.
 )
)
|
|