Cloudflare Worker and Supabase learning start point.
Cloudflare my liked cloud service, I use it in many my project, for example:
- Cloudflare feature overview.
- Transfer domain to Cloudflare CDN and than to Cloudflare ZeroTrust VPN.
- How to protect your business from DDOS attack by Cloudflare WAF
This is some my real project in that environment (Cloudflare + Supabase) - Supabase integration project.
And currently I decide to learning deeper Cloudflare Worker.

Also I'm admiring Supabase. Comparing Firebase vs Supabase,
I found interesting courses about this workers.
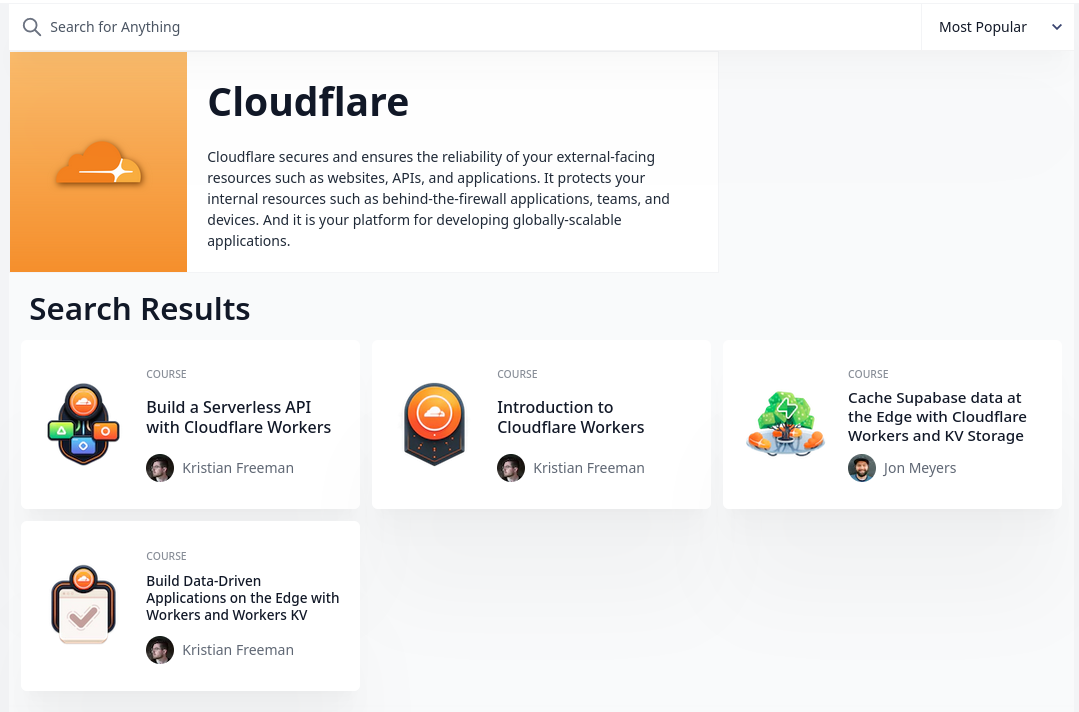
- Introduction to Cloudflare WorkersKristian Freeman
- Build a Serverless API with Cloudflare WorkersKristian Freeman
- Cache Supabase data at the Edge with Cloudflare Workers and KV StorageJon Meyers
- Build Data-Driven Applications on the Edge with Workers and Workers KVKristian Freeman
So, this is my learning conspectus about Cloudflare and Supabase.
1. Introduction to Cloudflare Workers
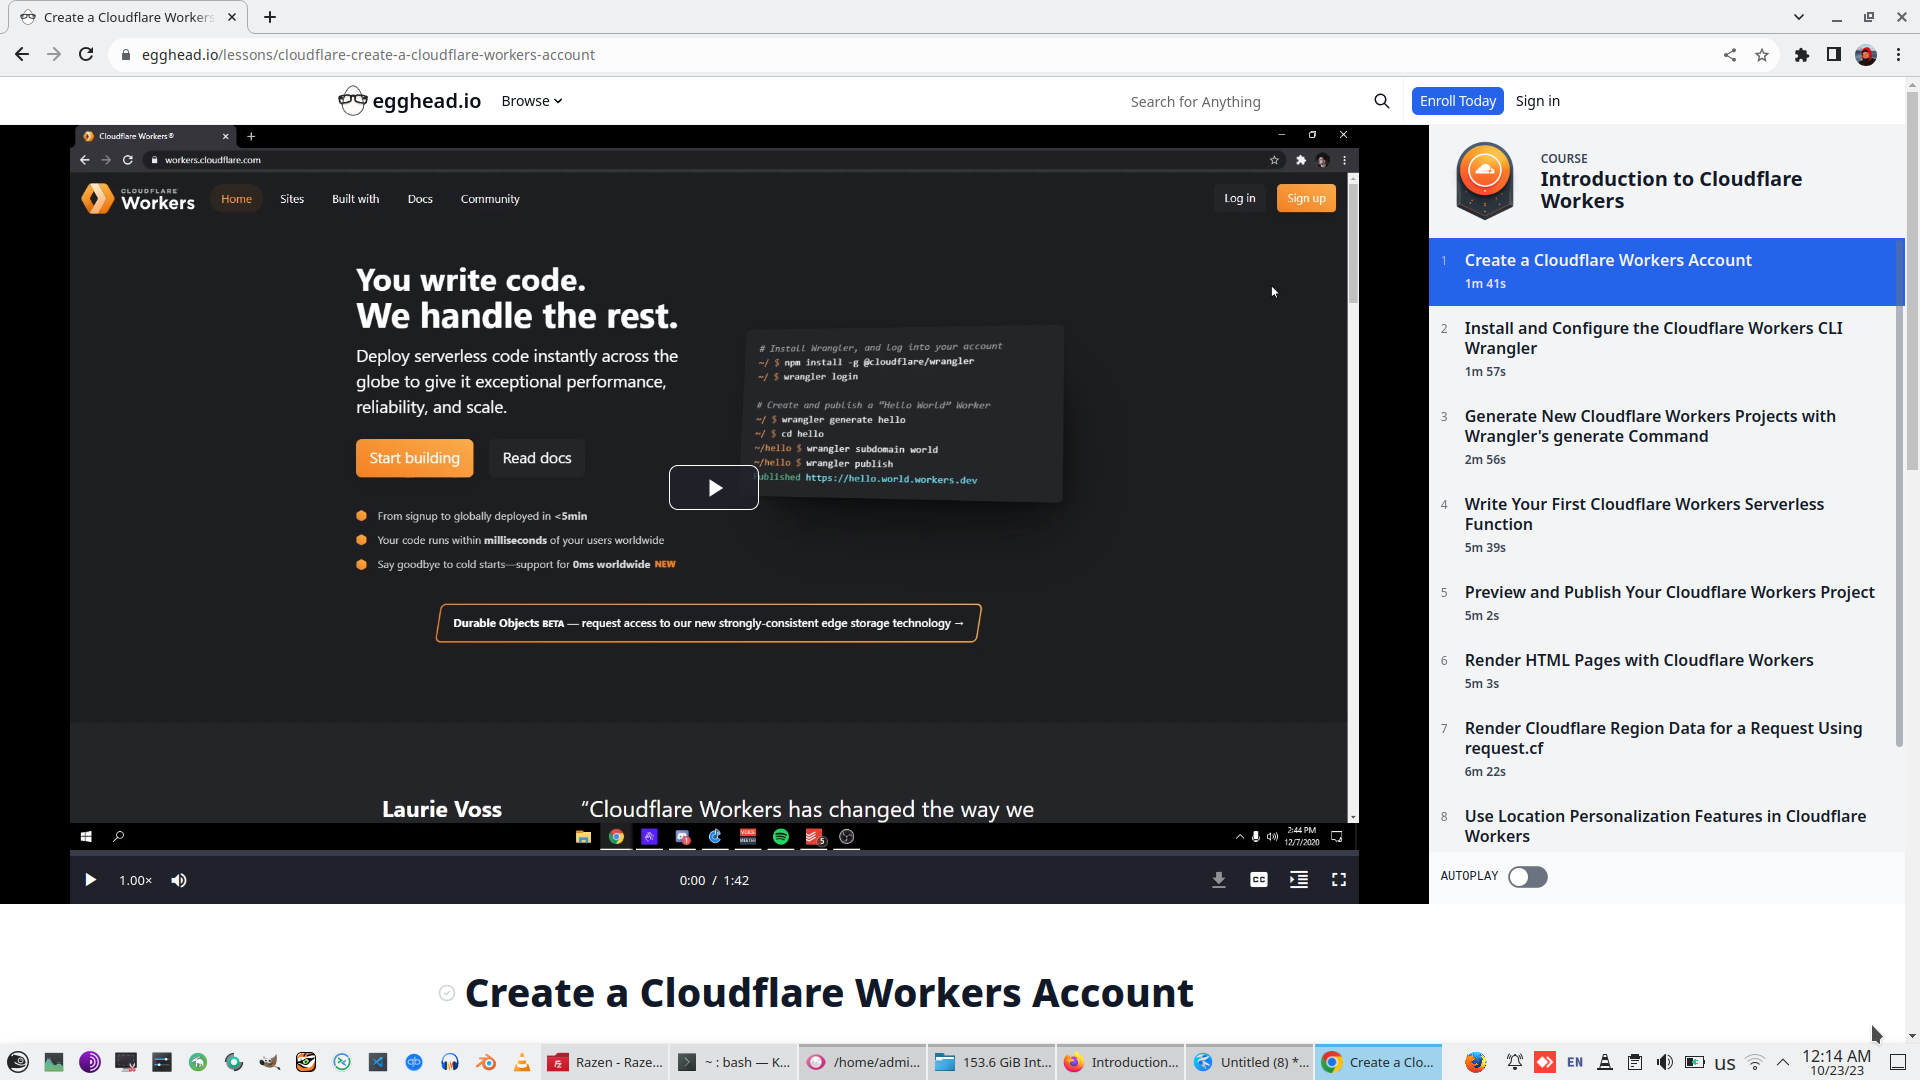
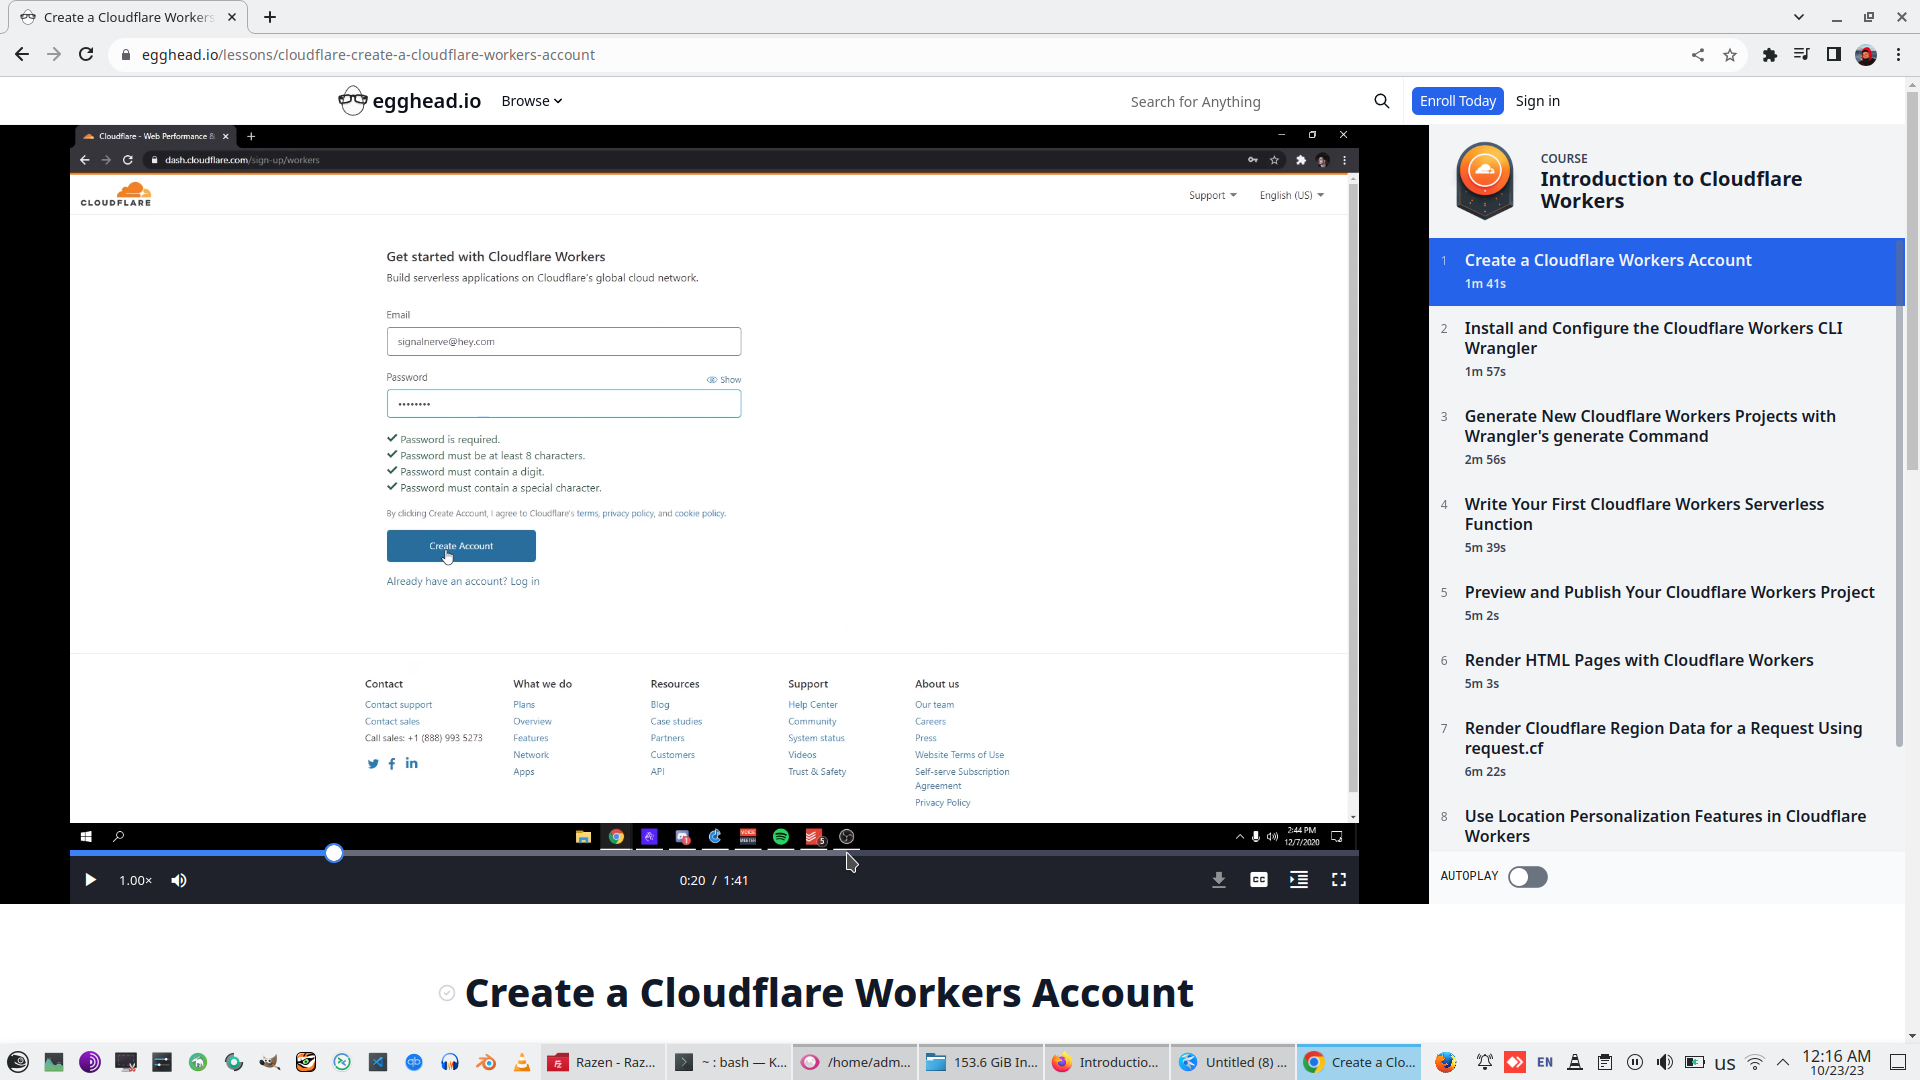
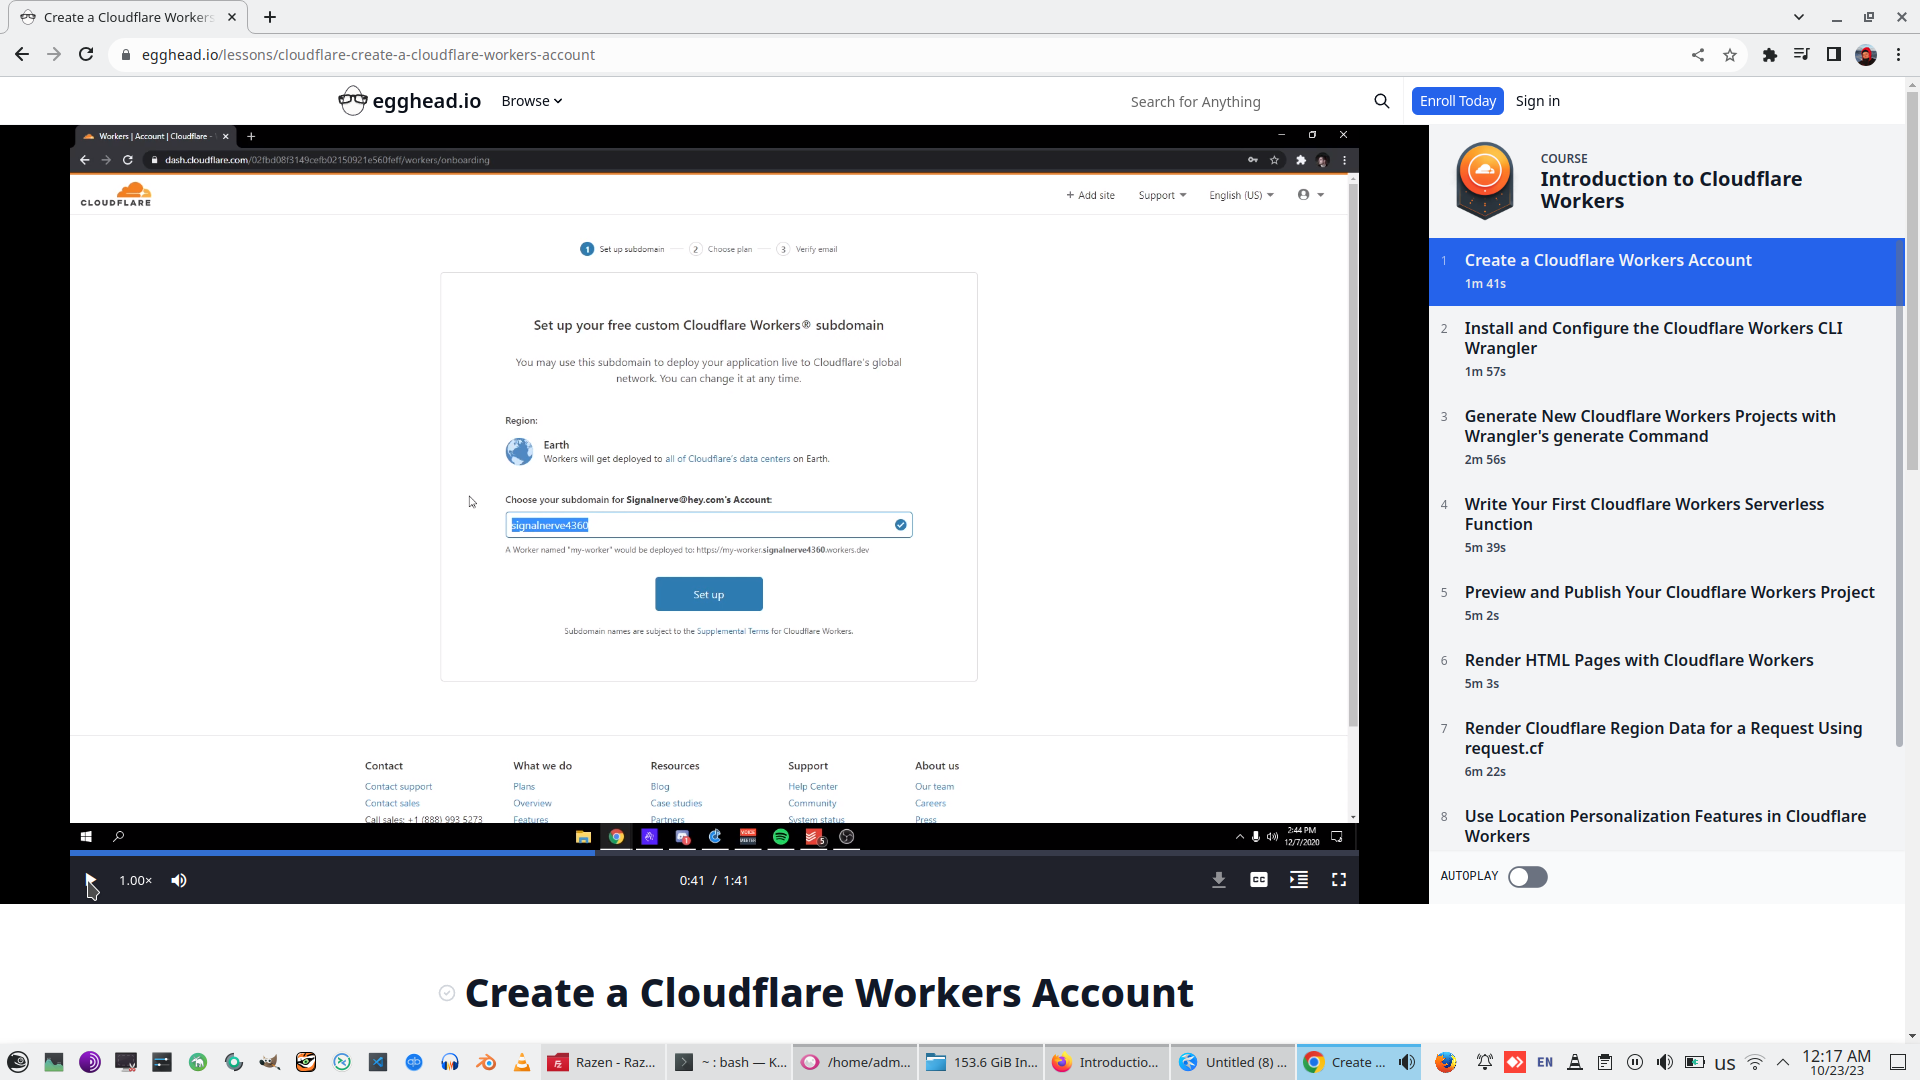
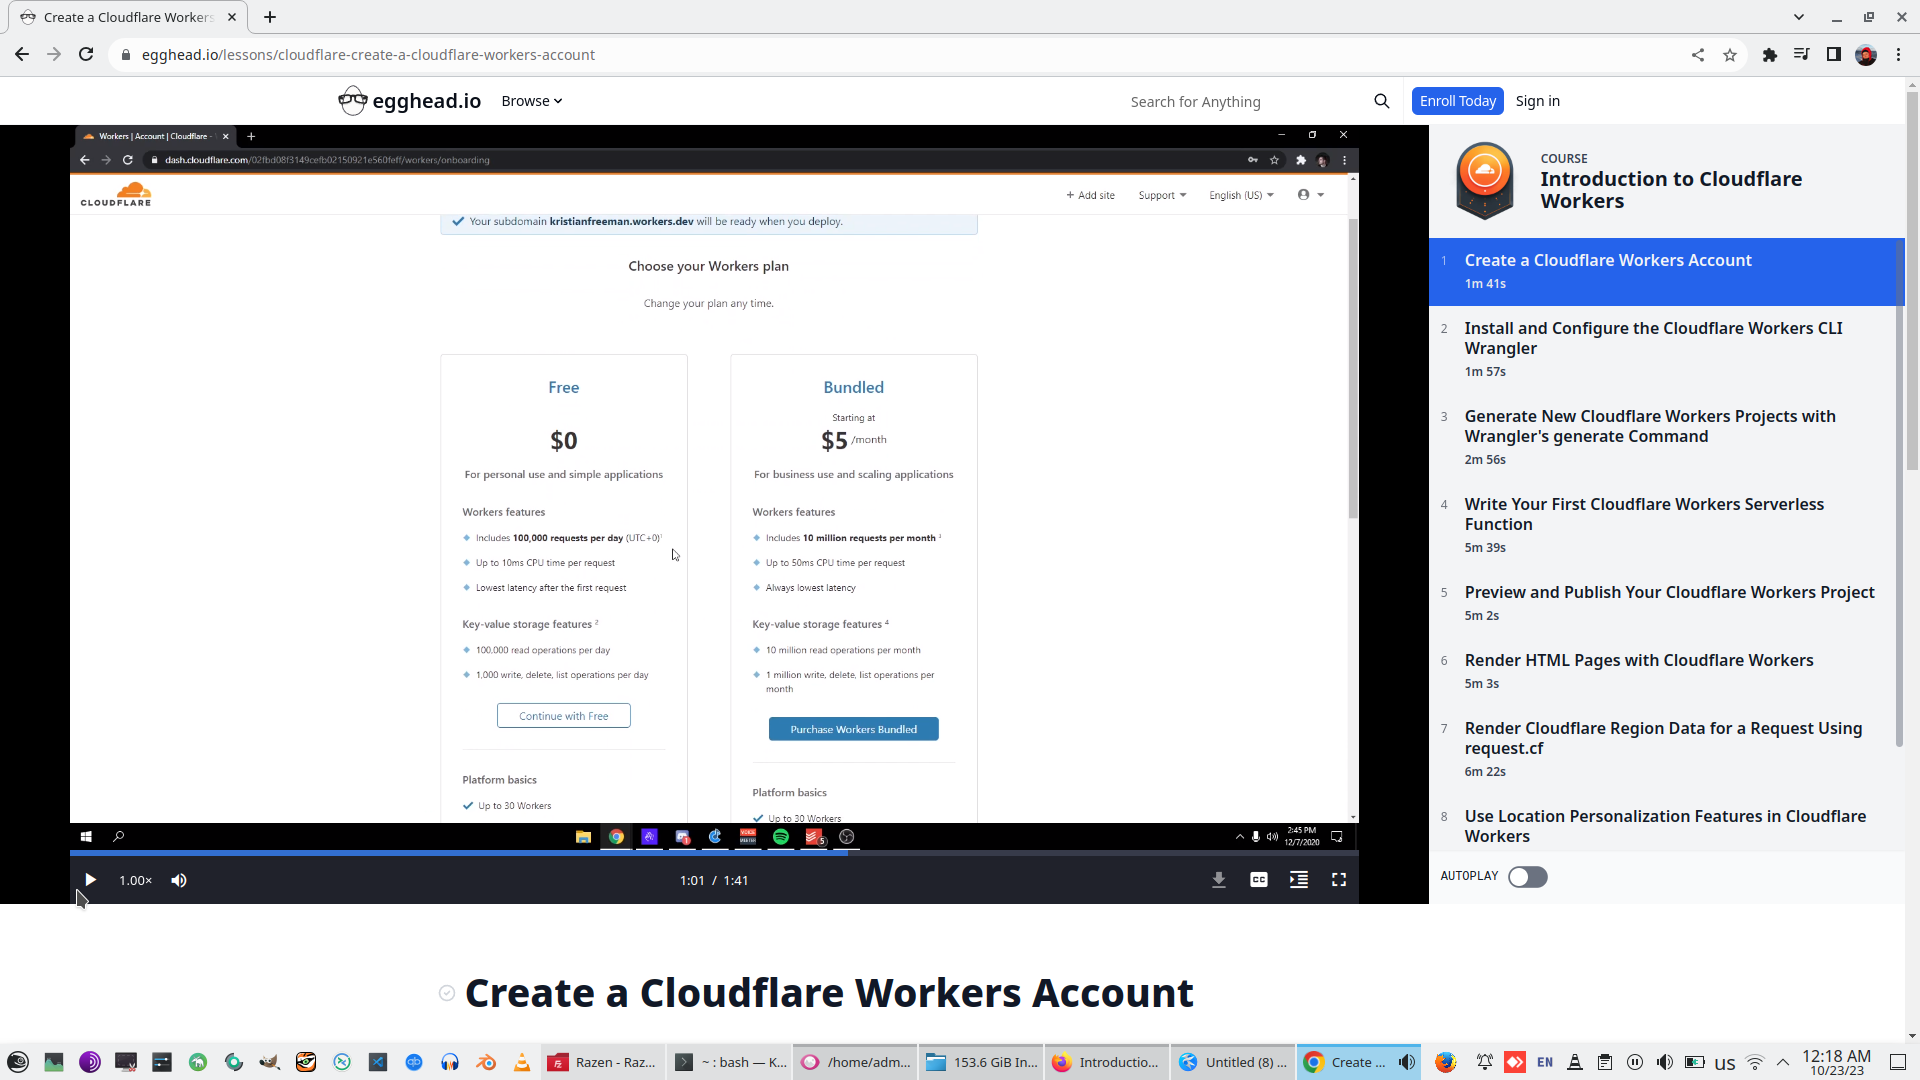
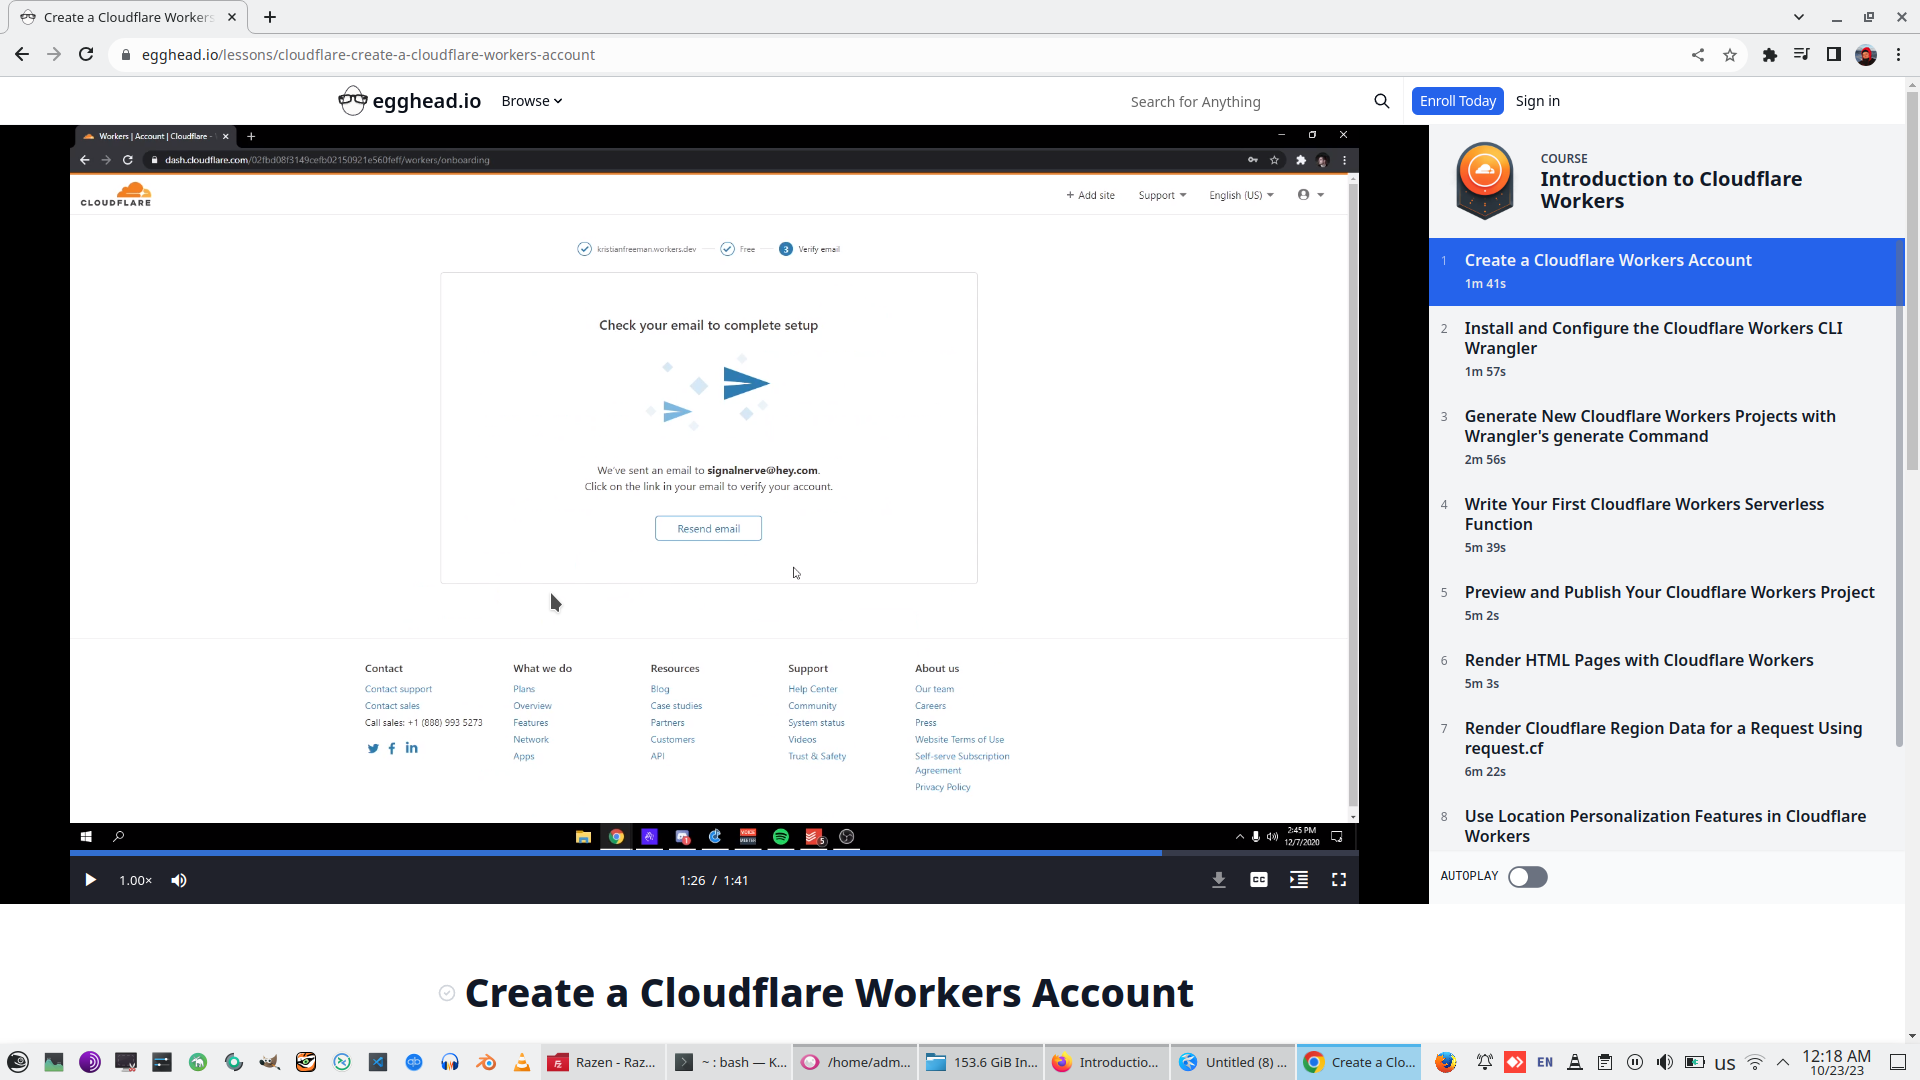
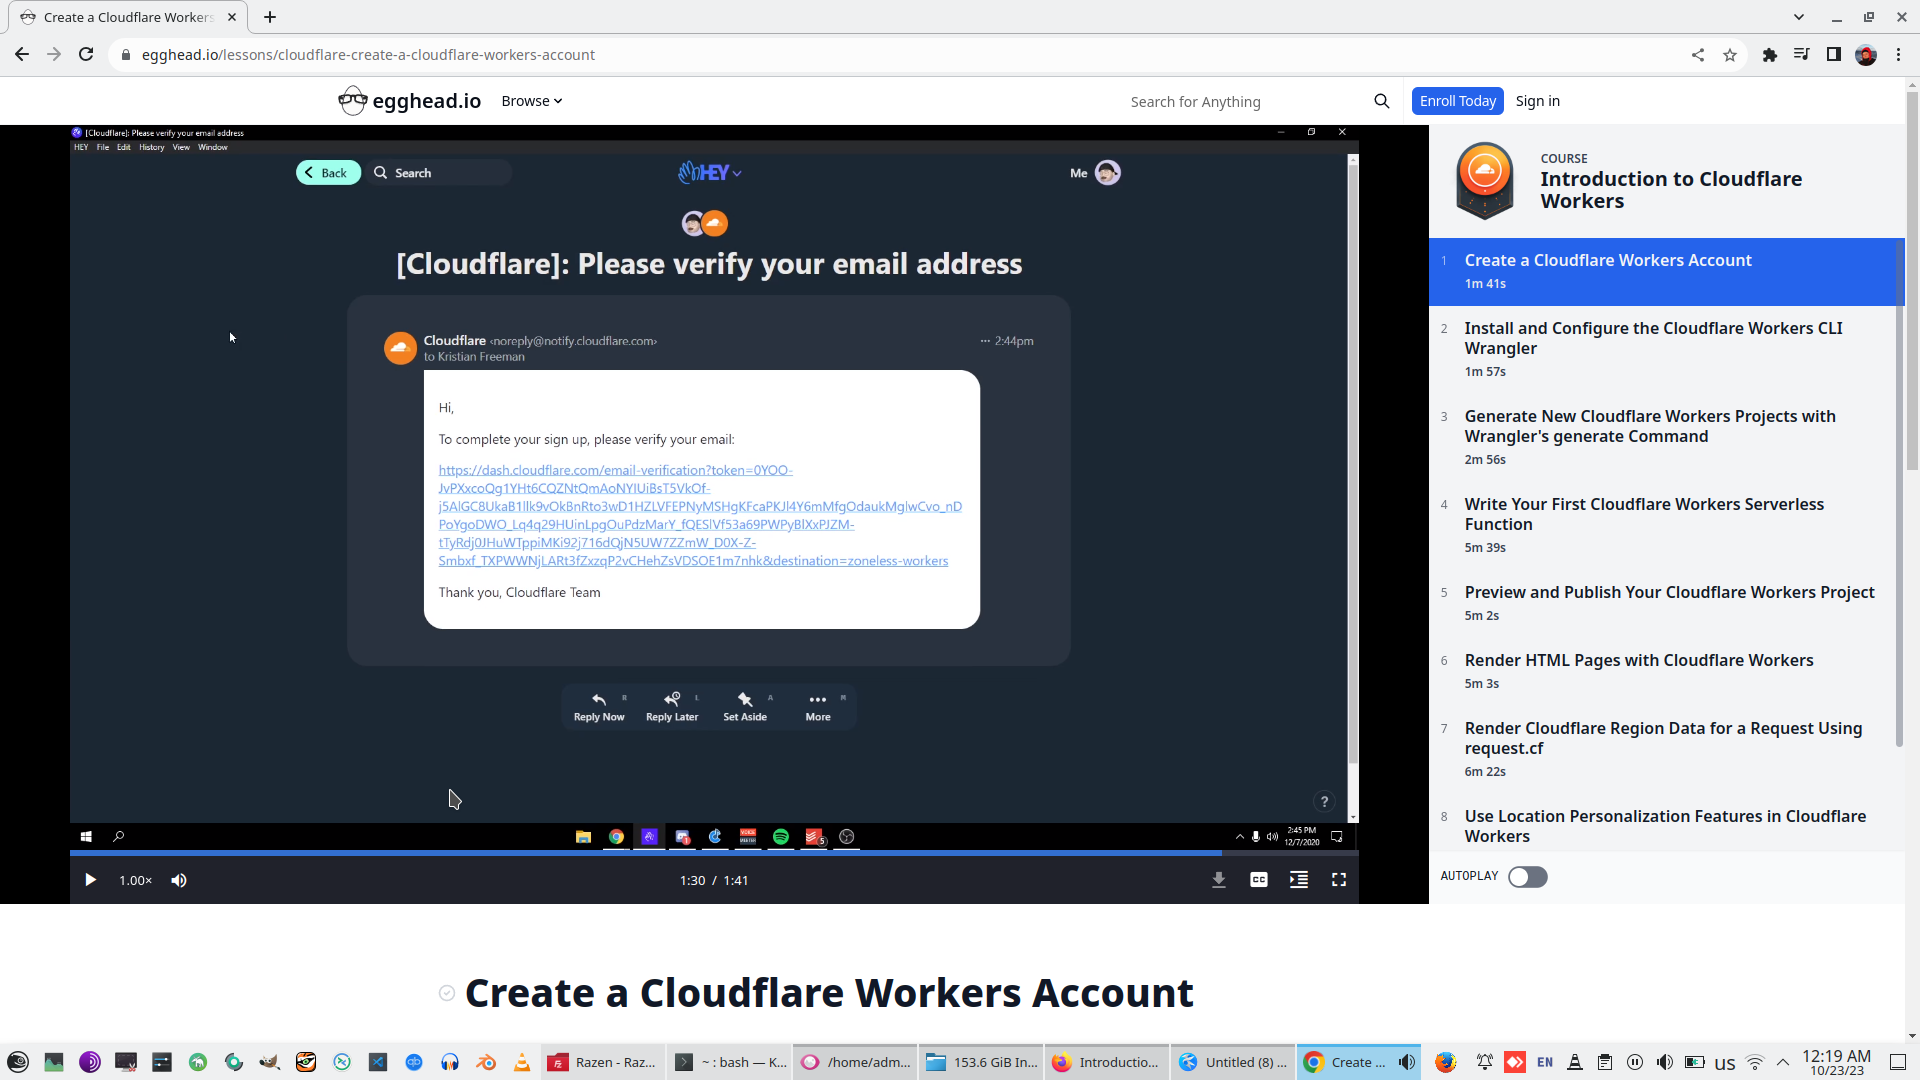
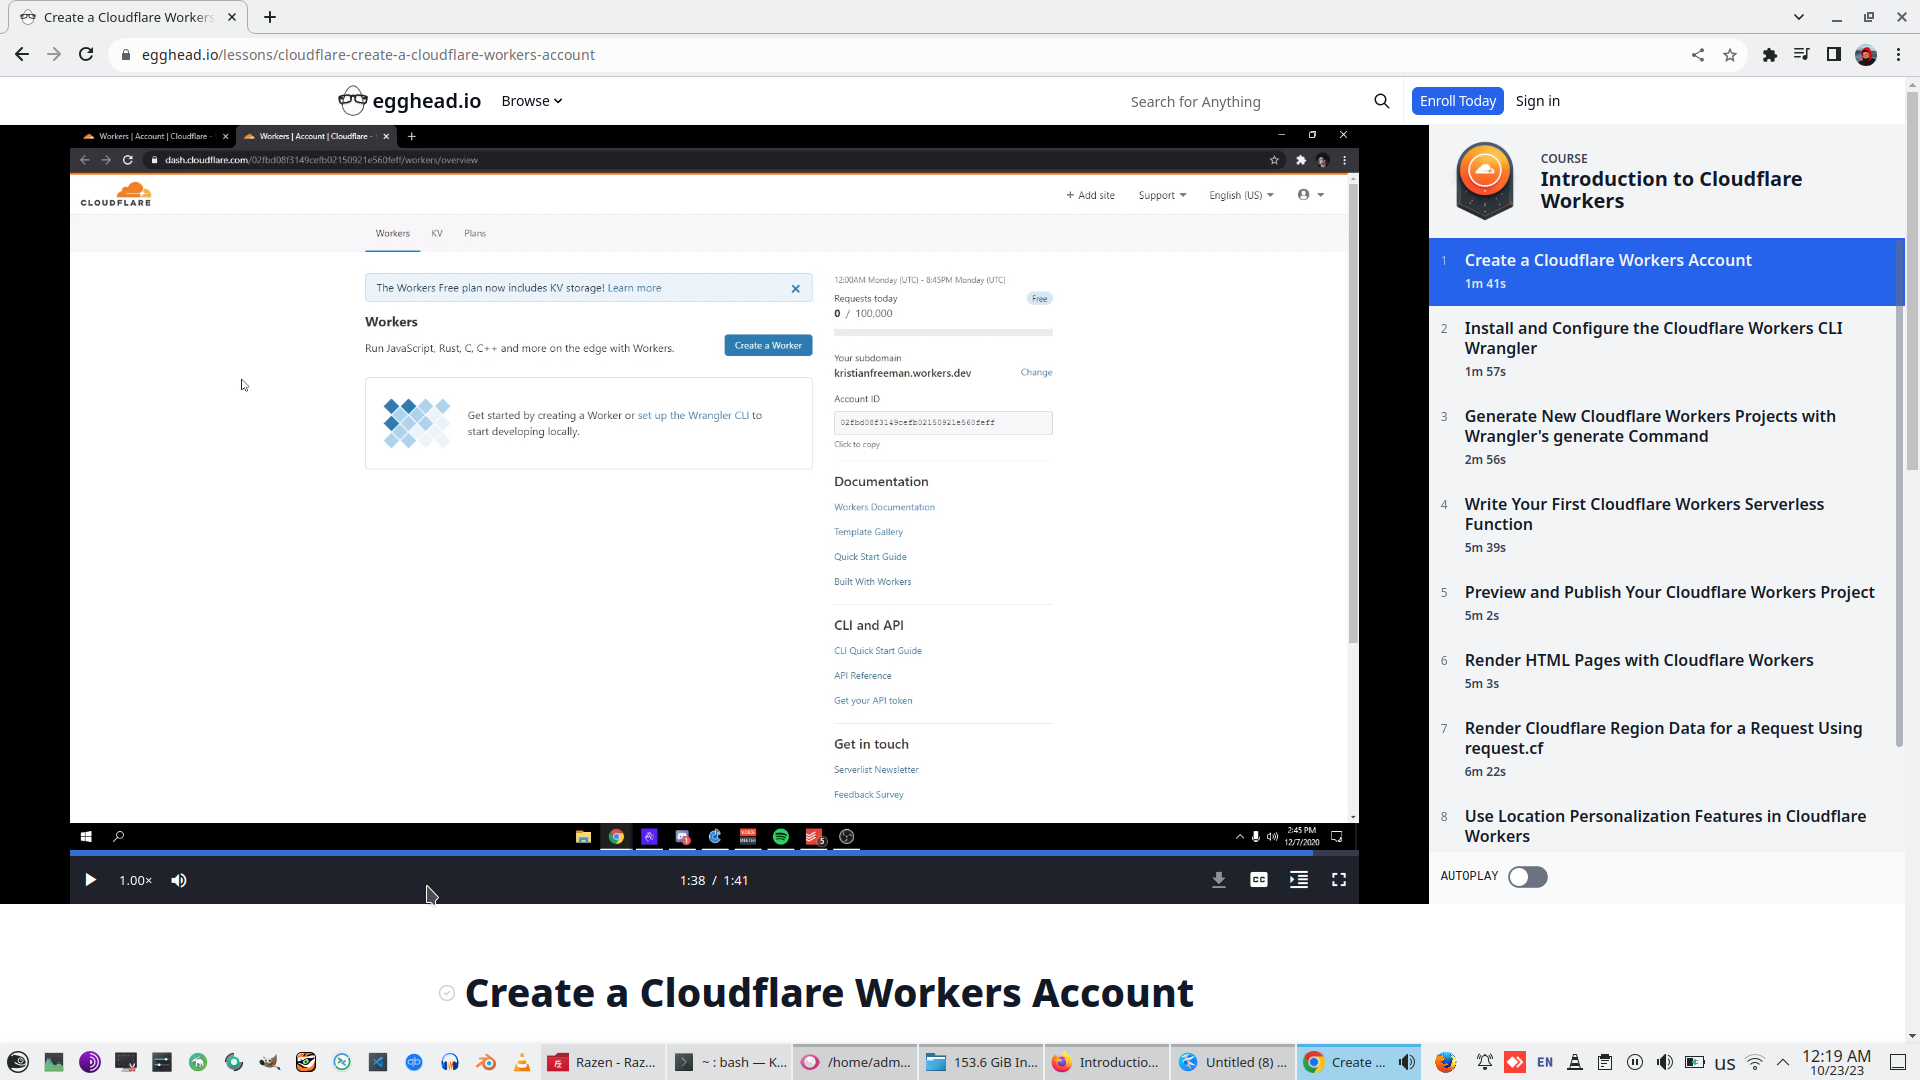
1. Create a Cloudflare Workers Account

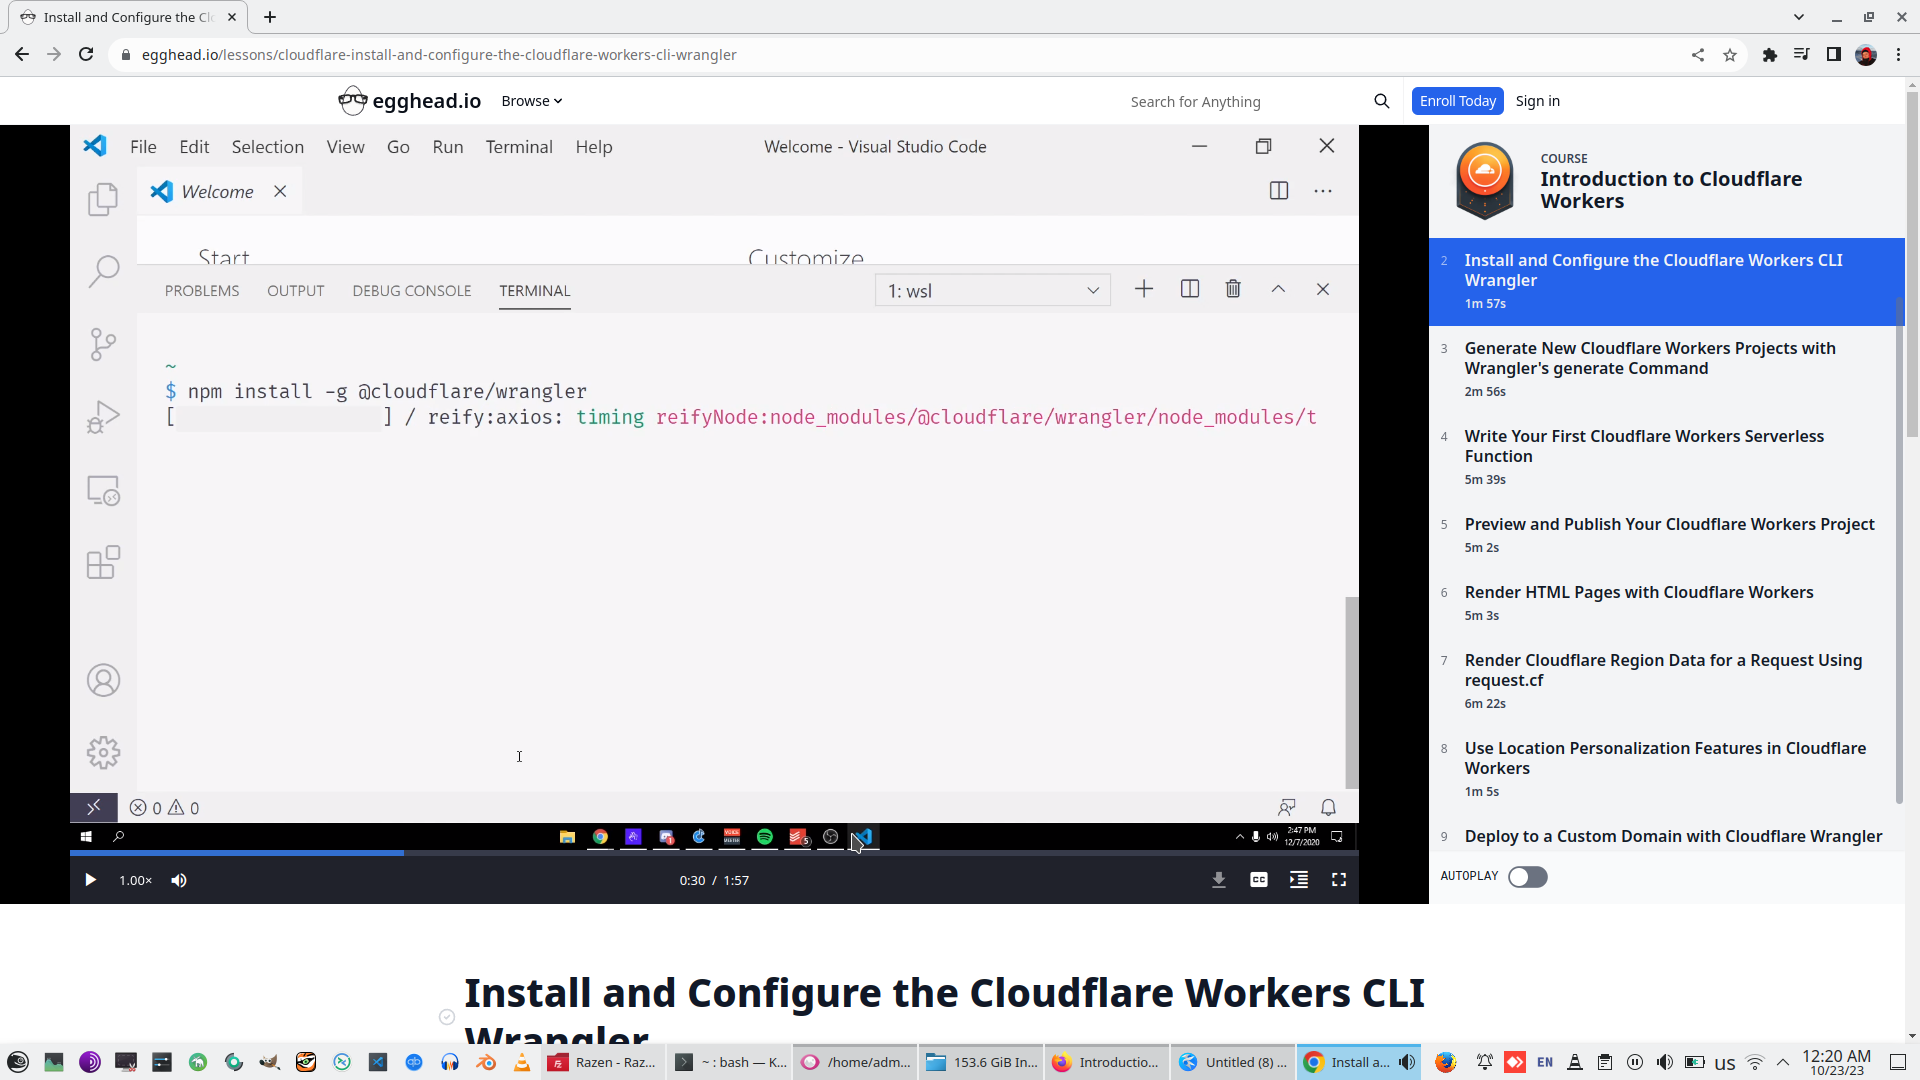
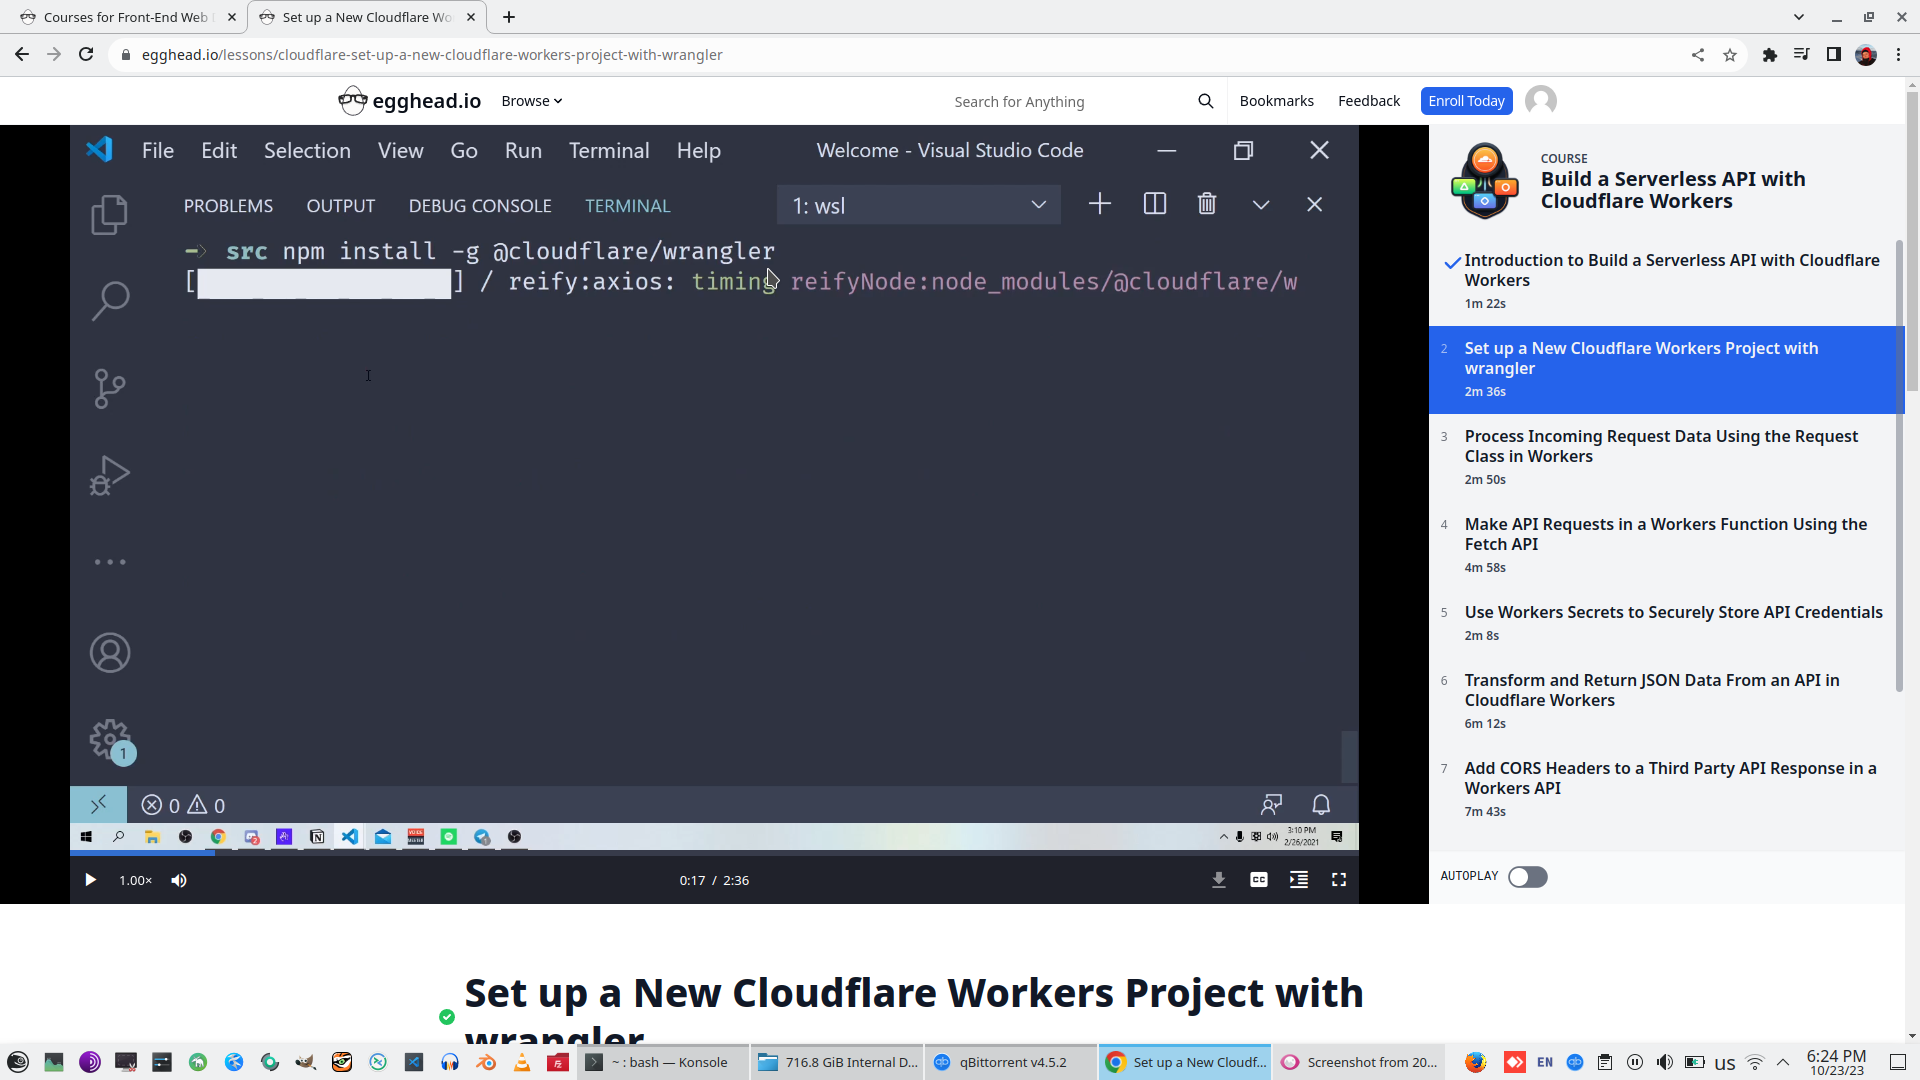
2. Install and Configure the Cloudflare Workers CLI Wrangler
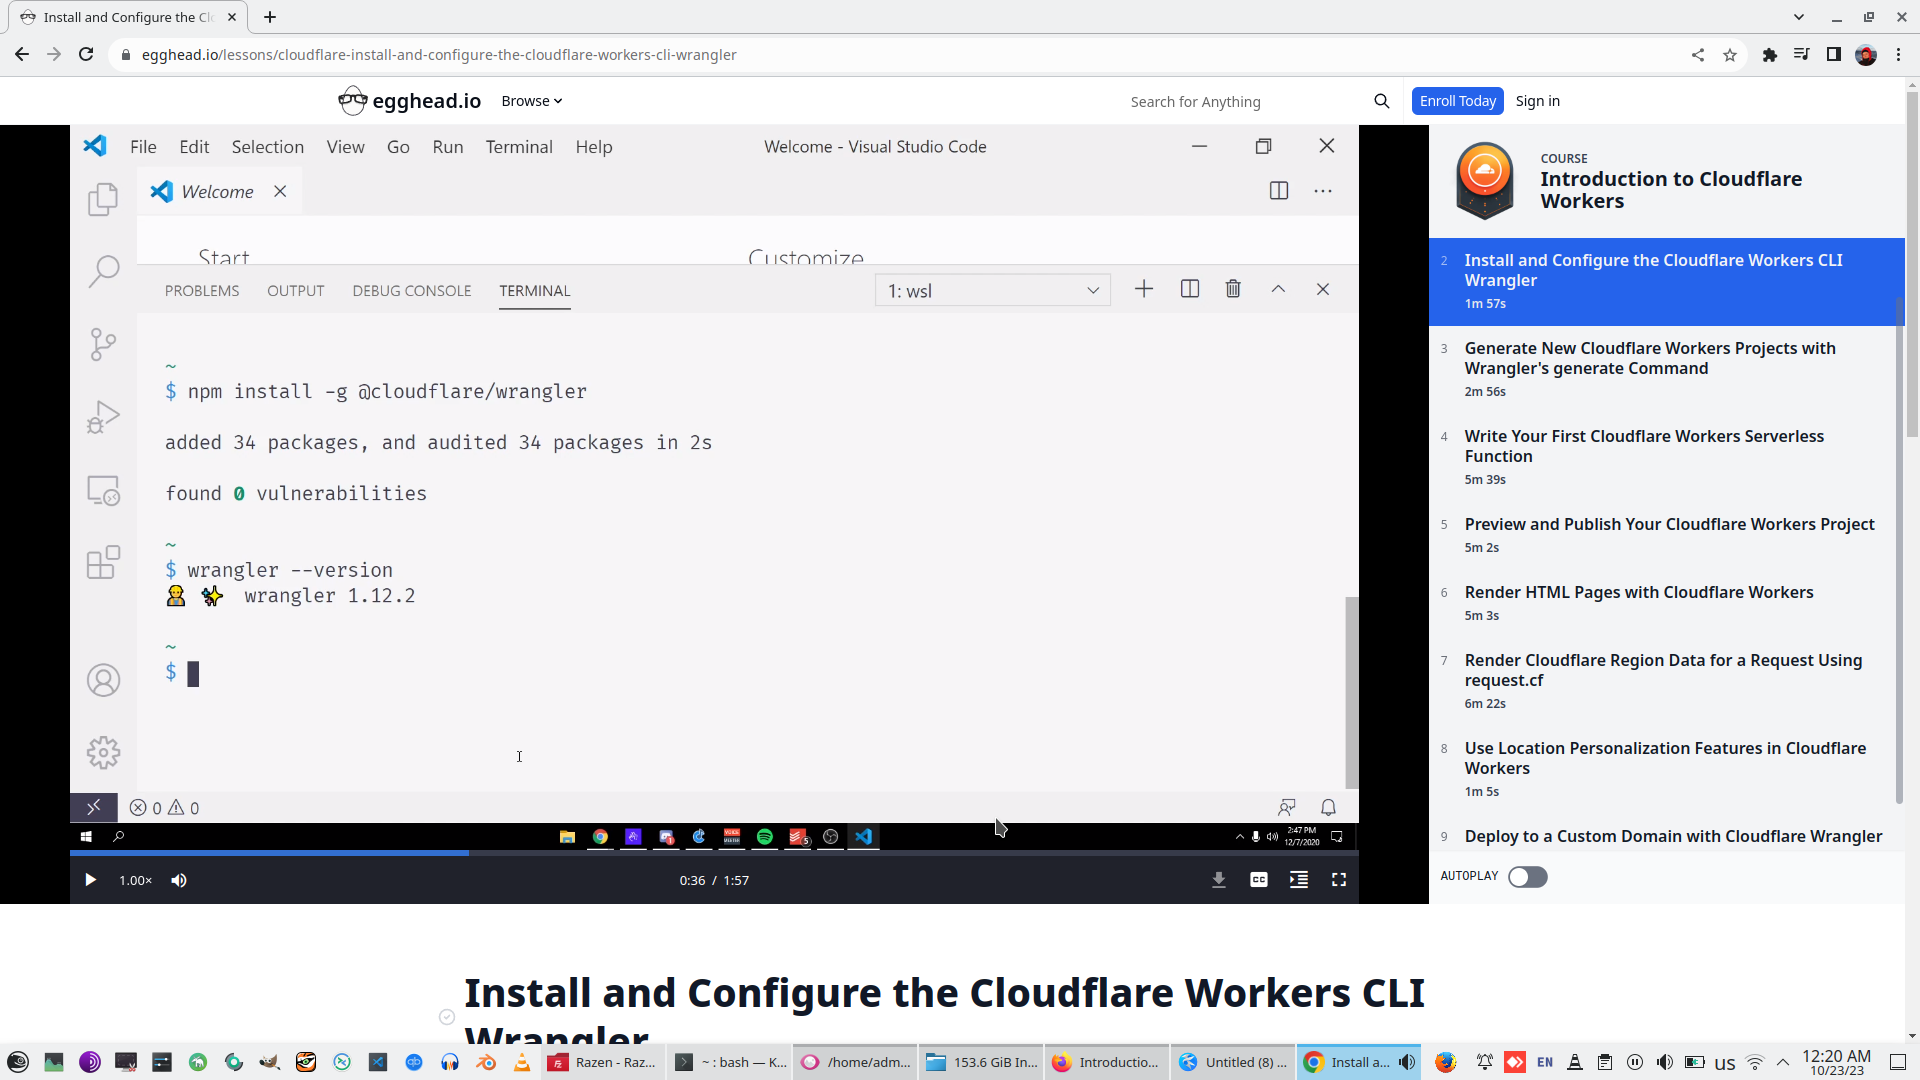
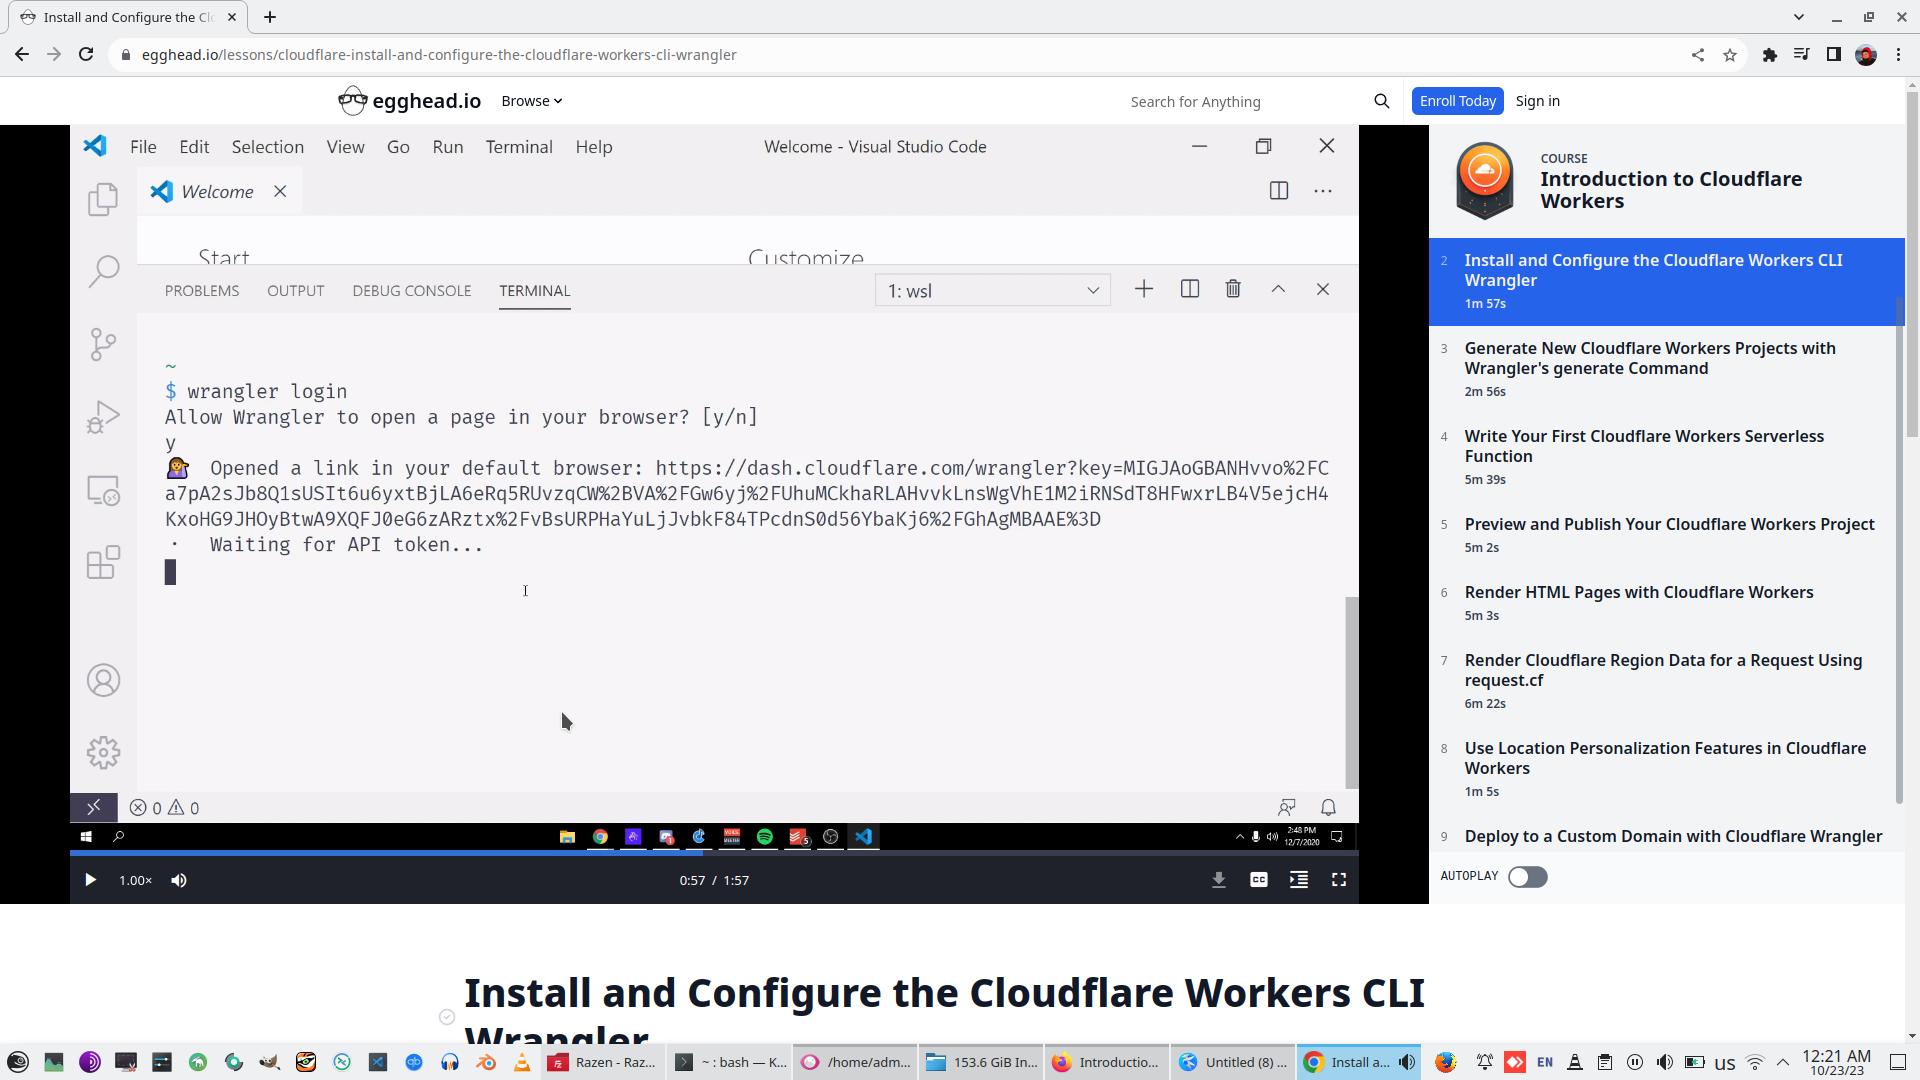
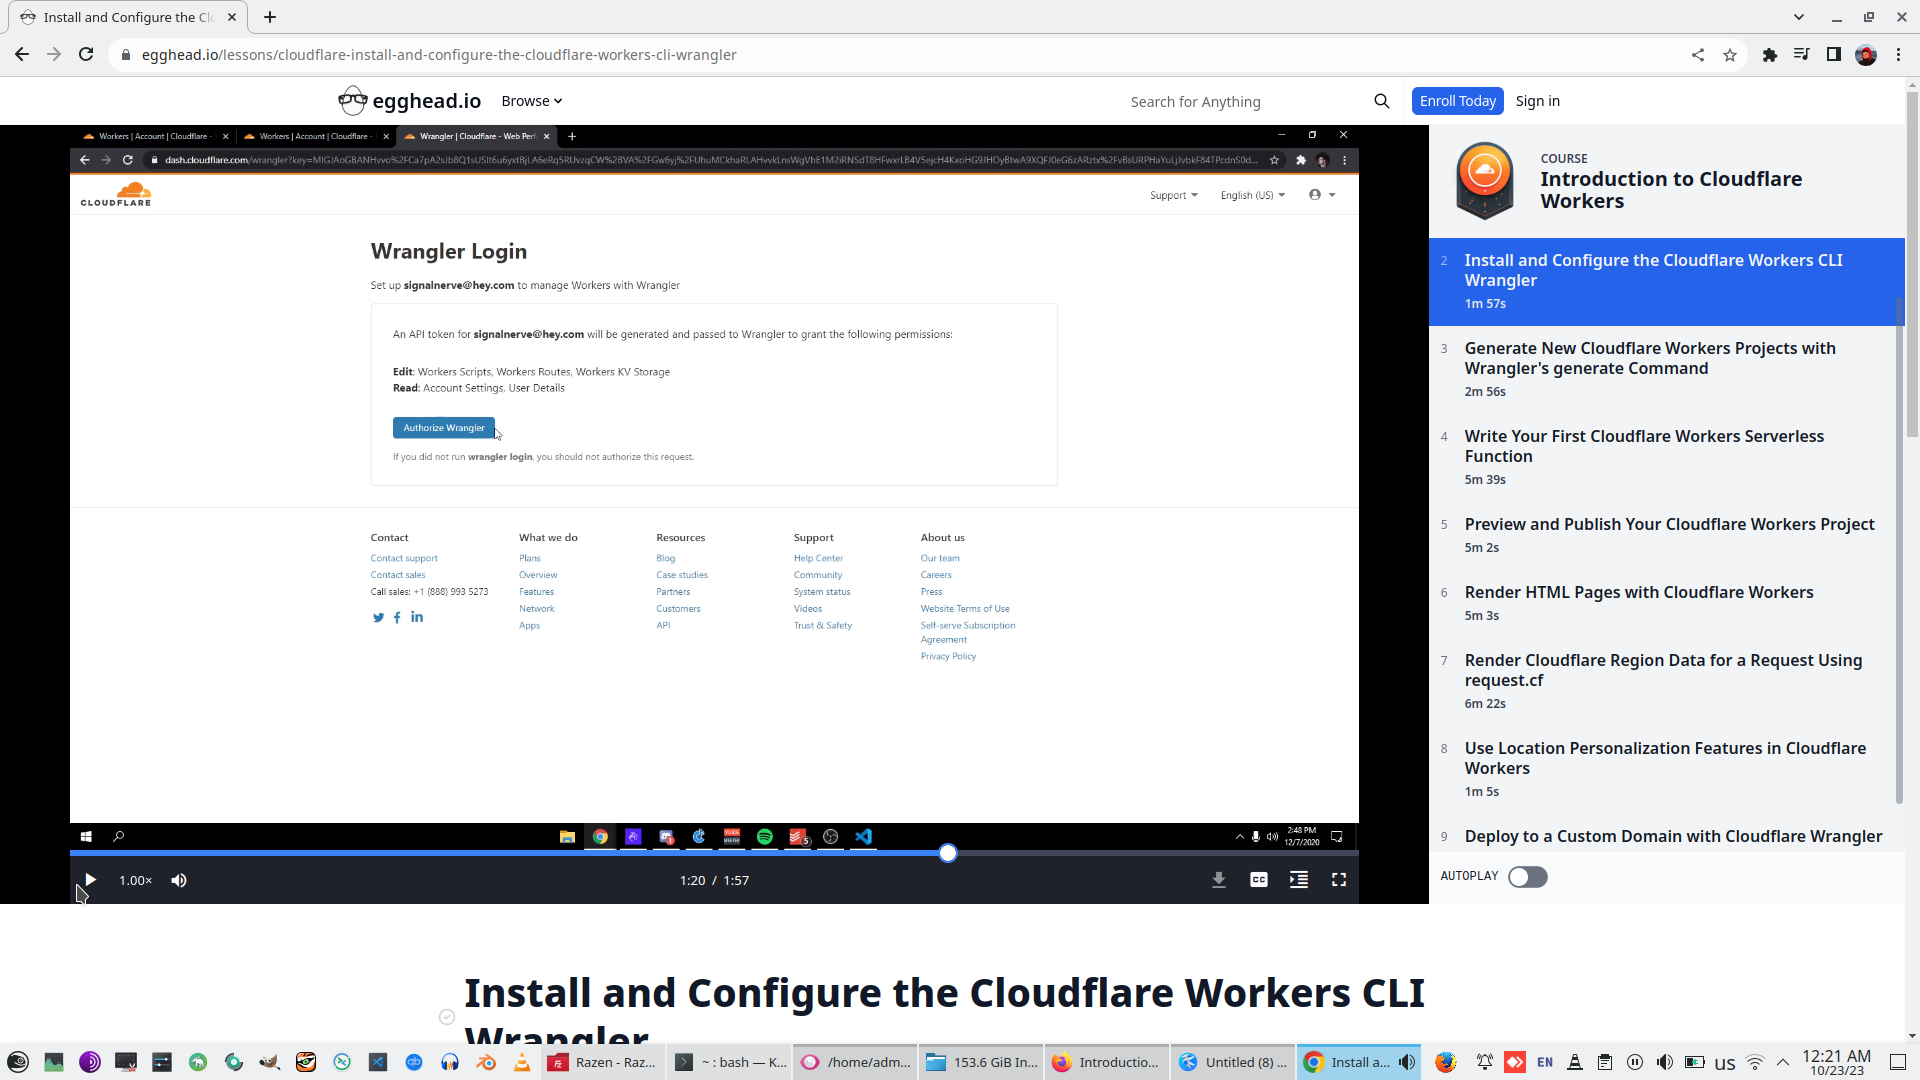


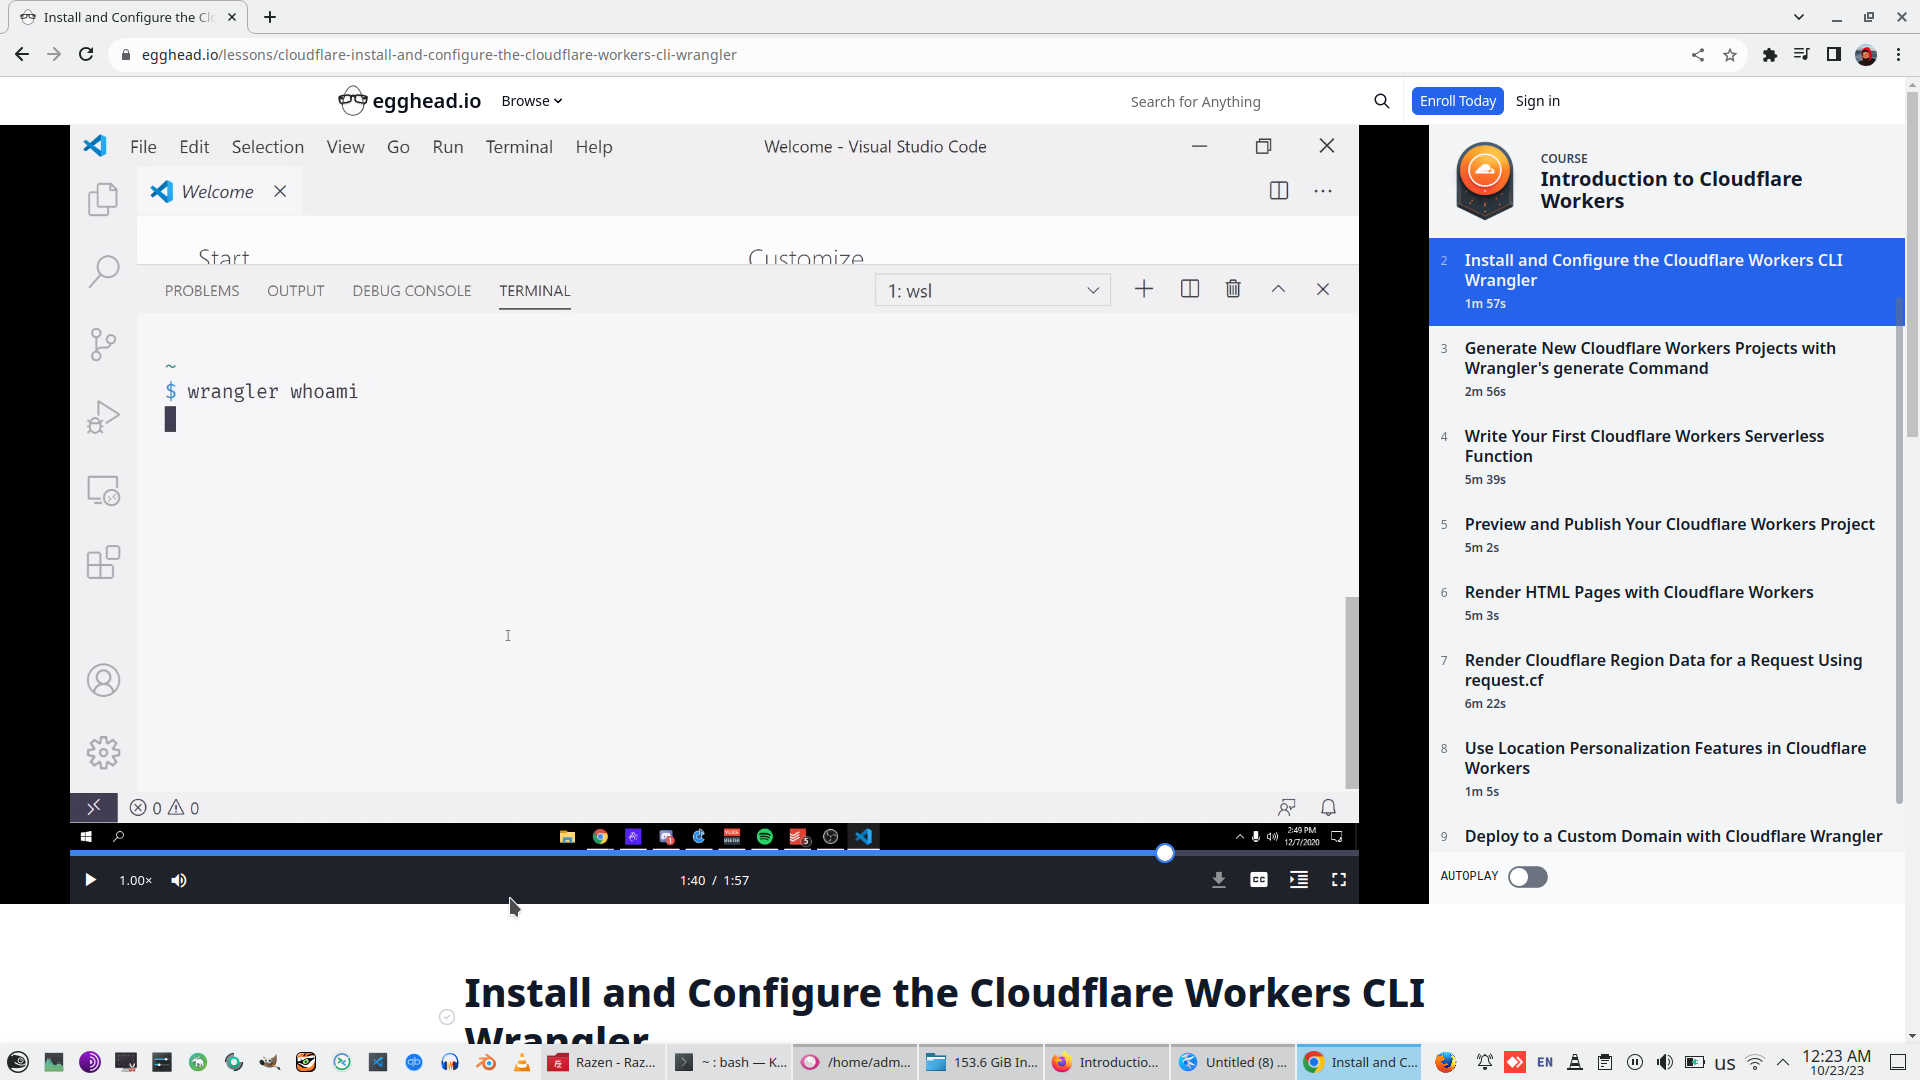
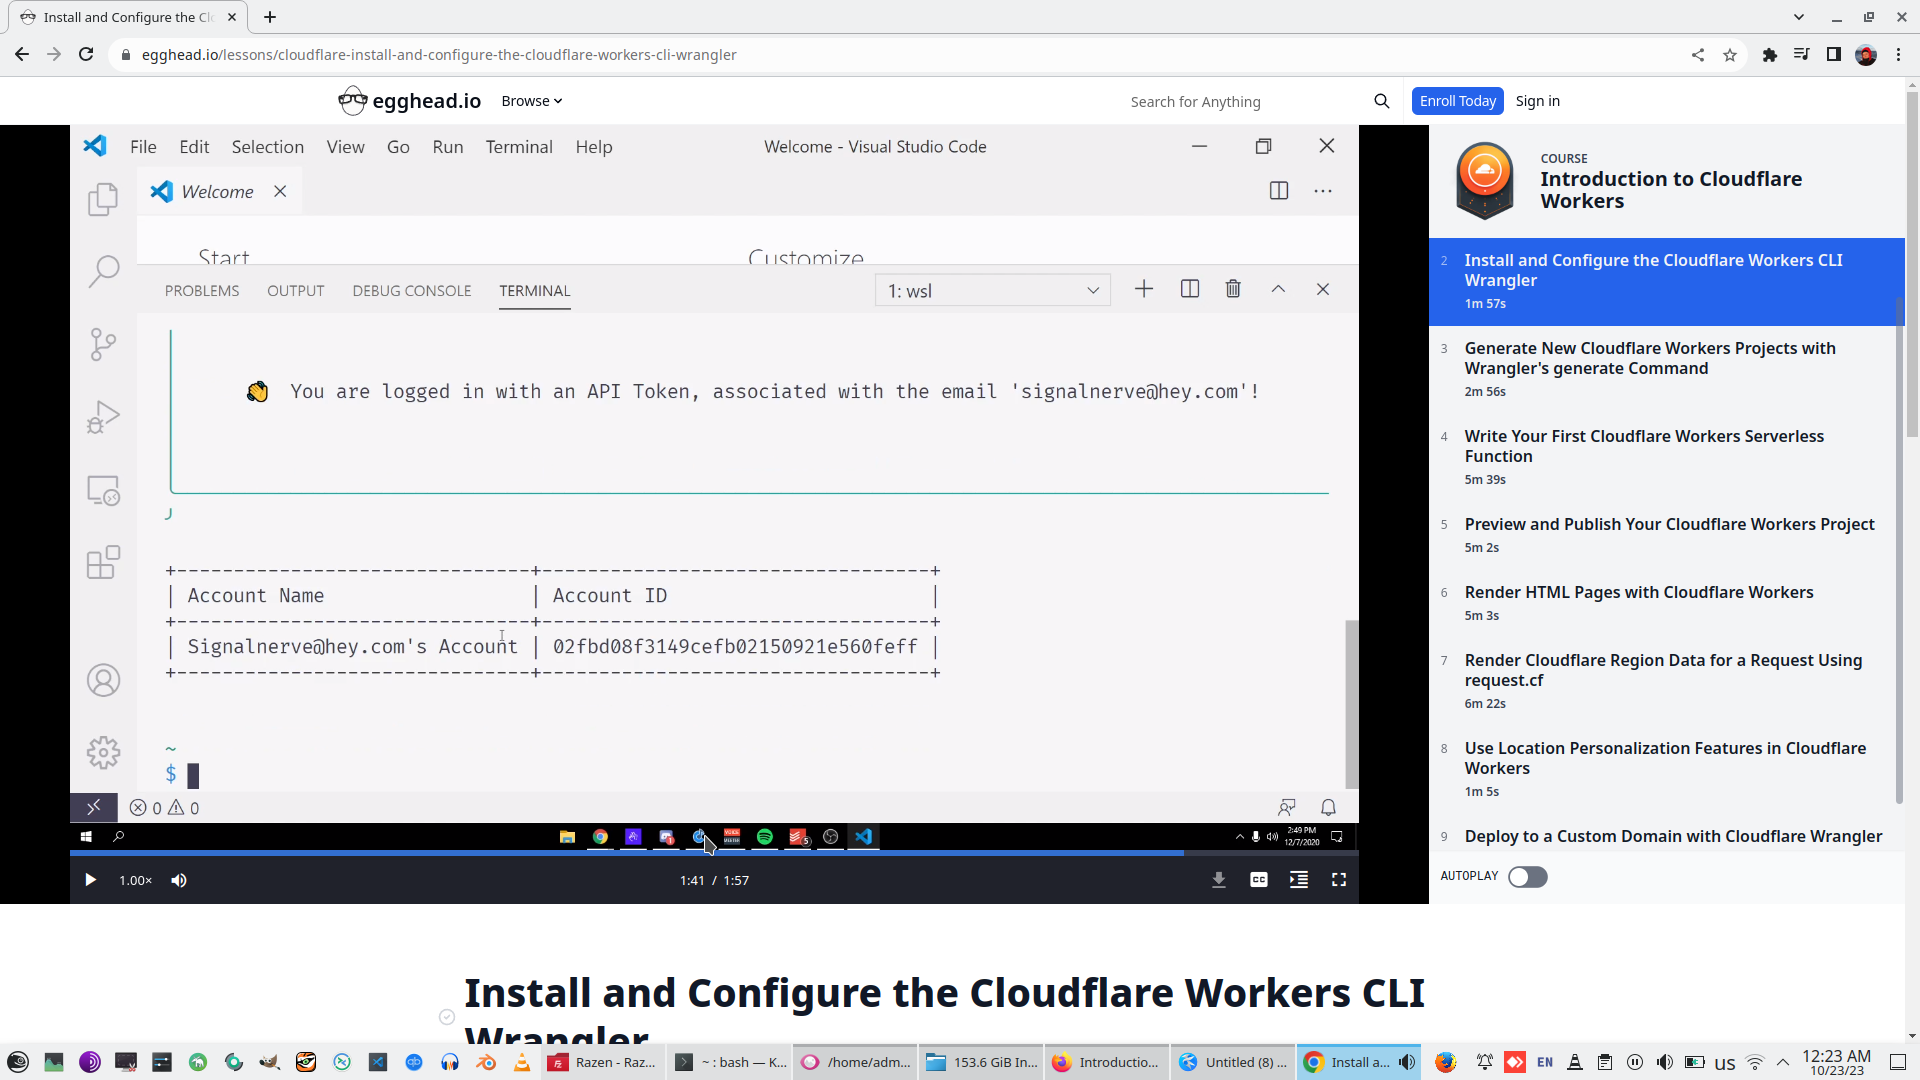
Check login
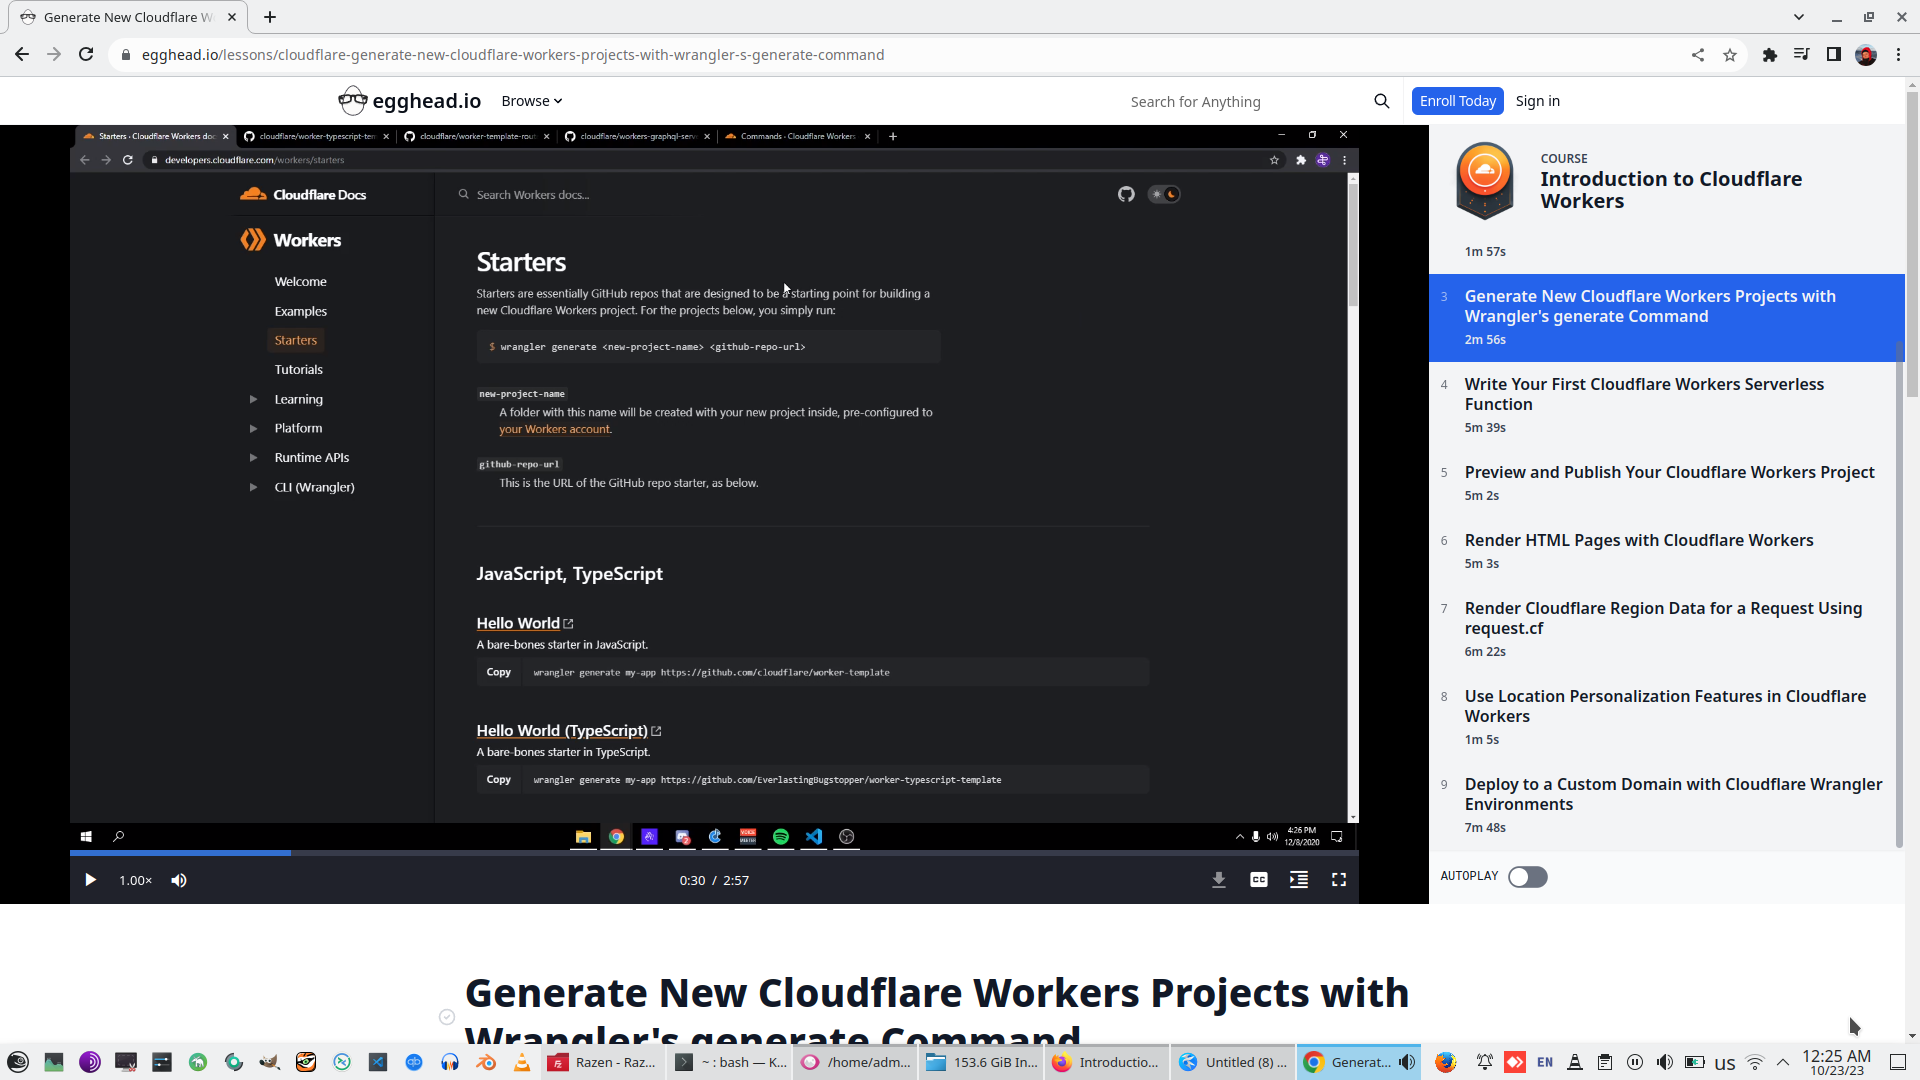
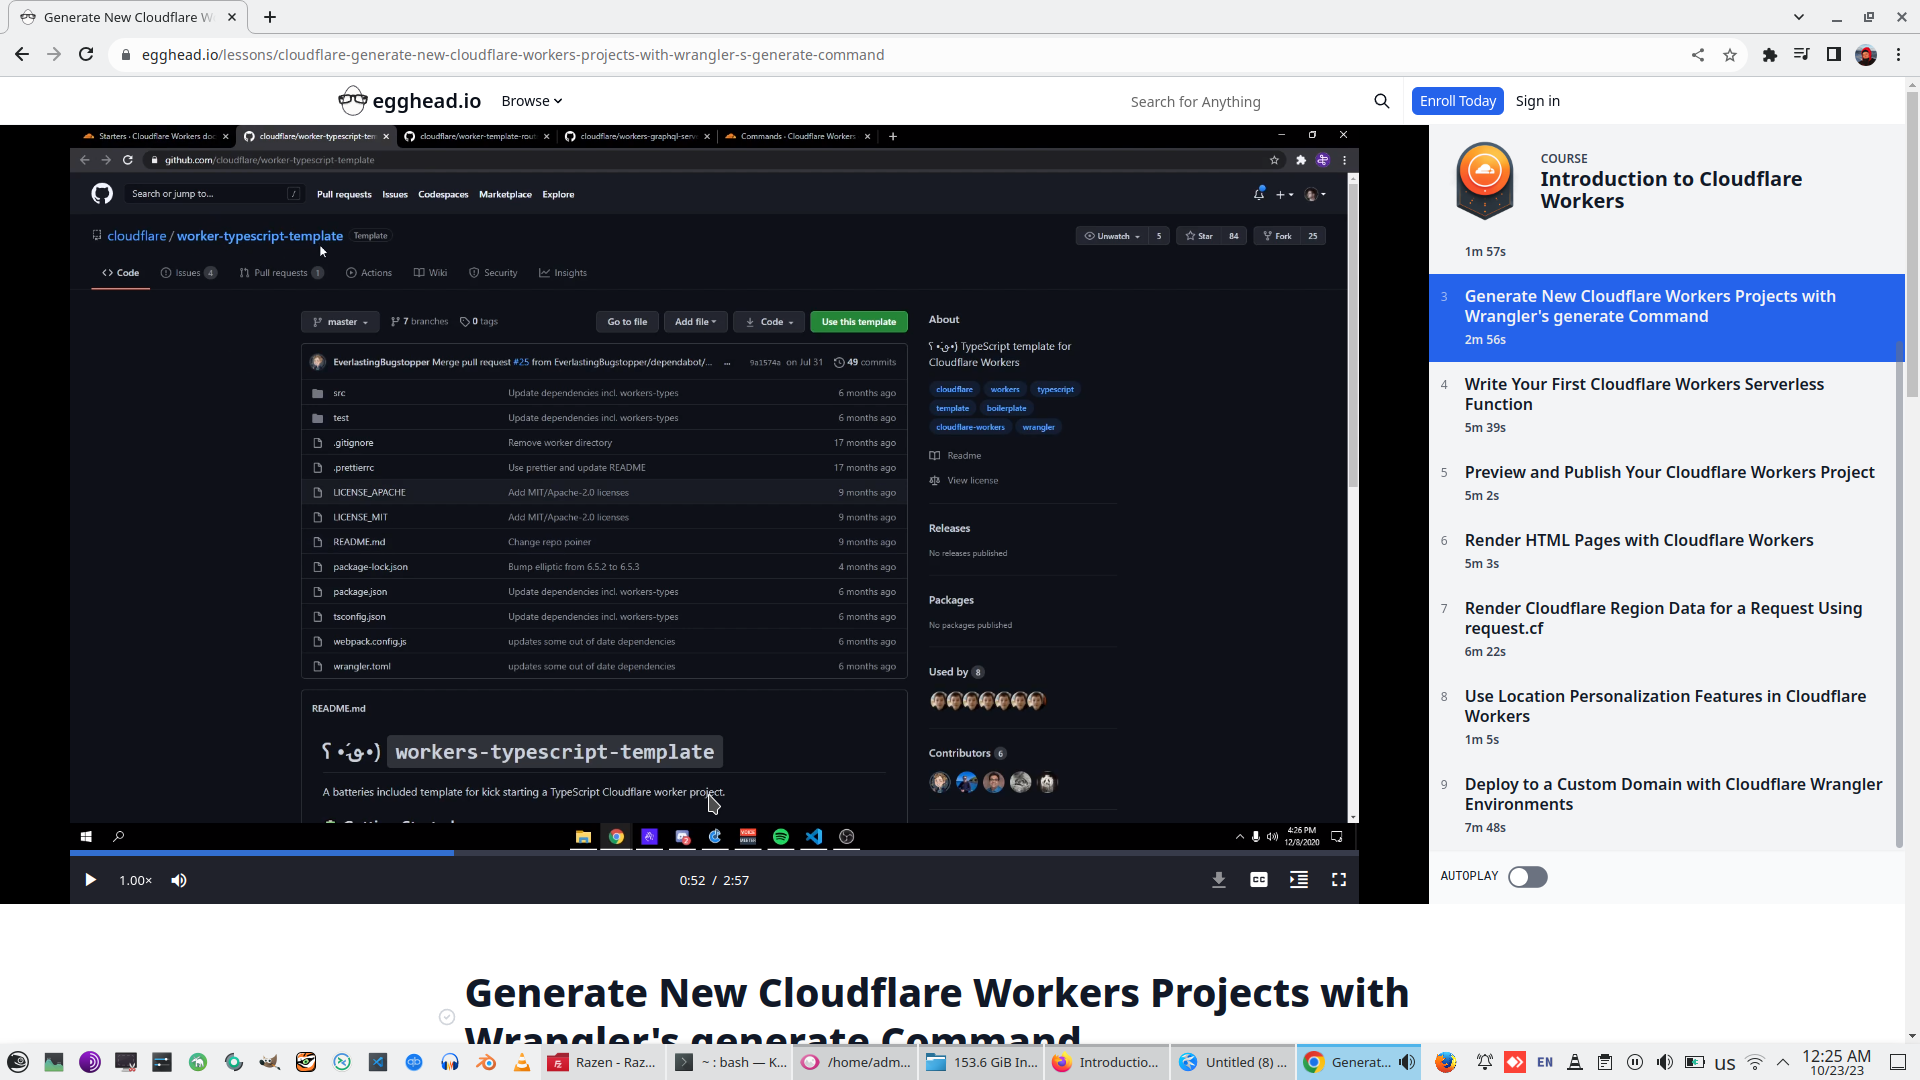
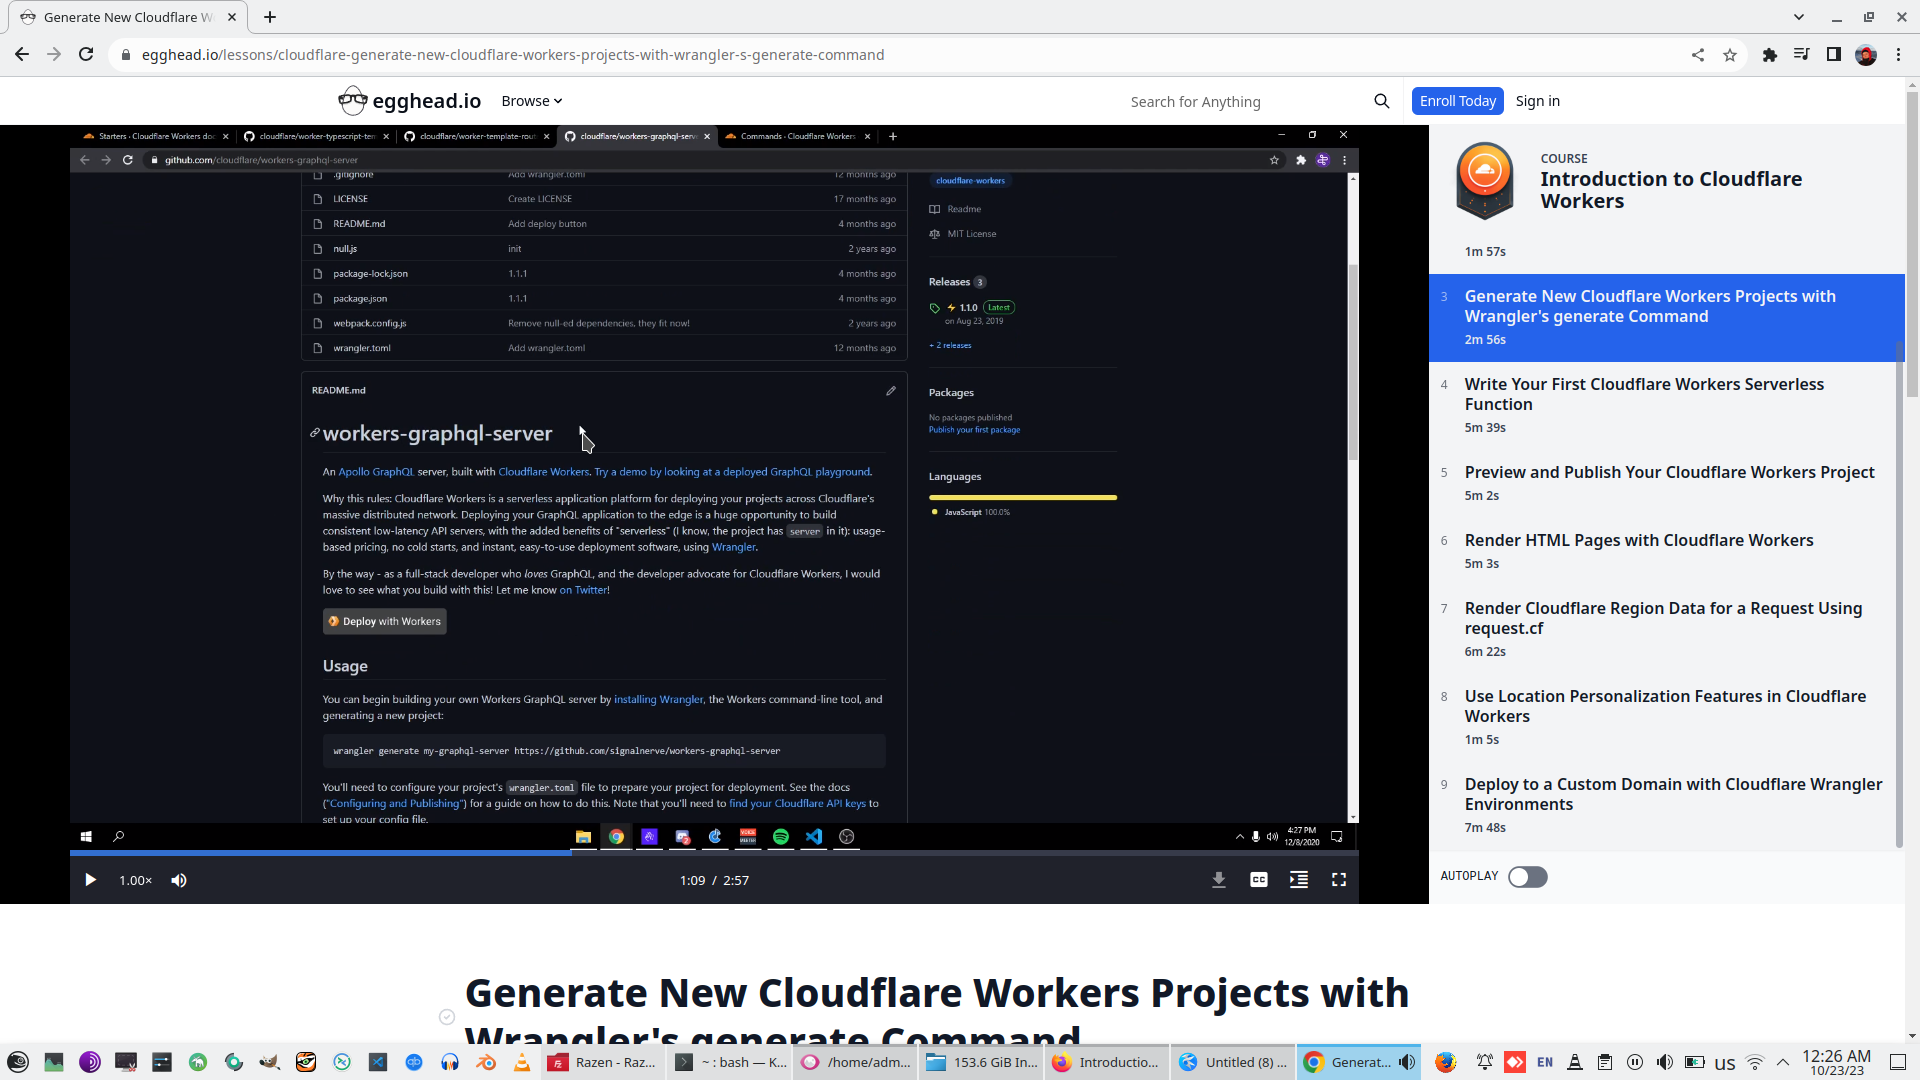
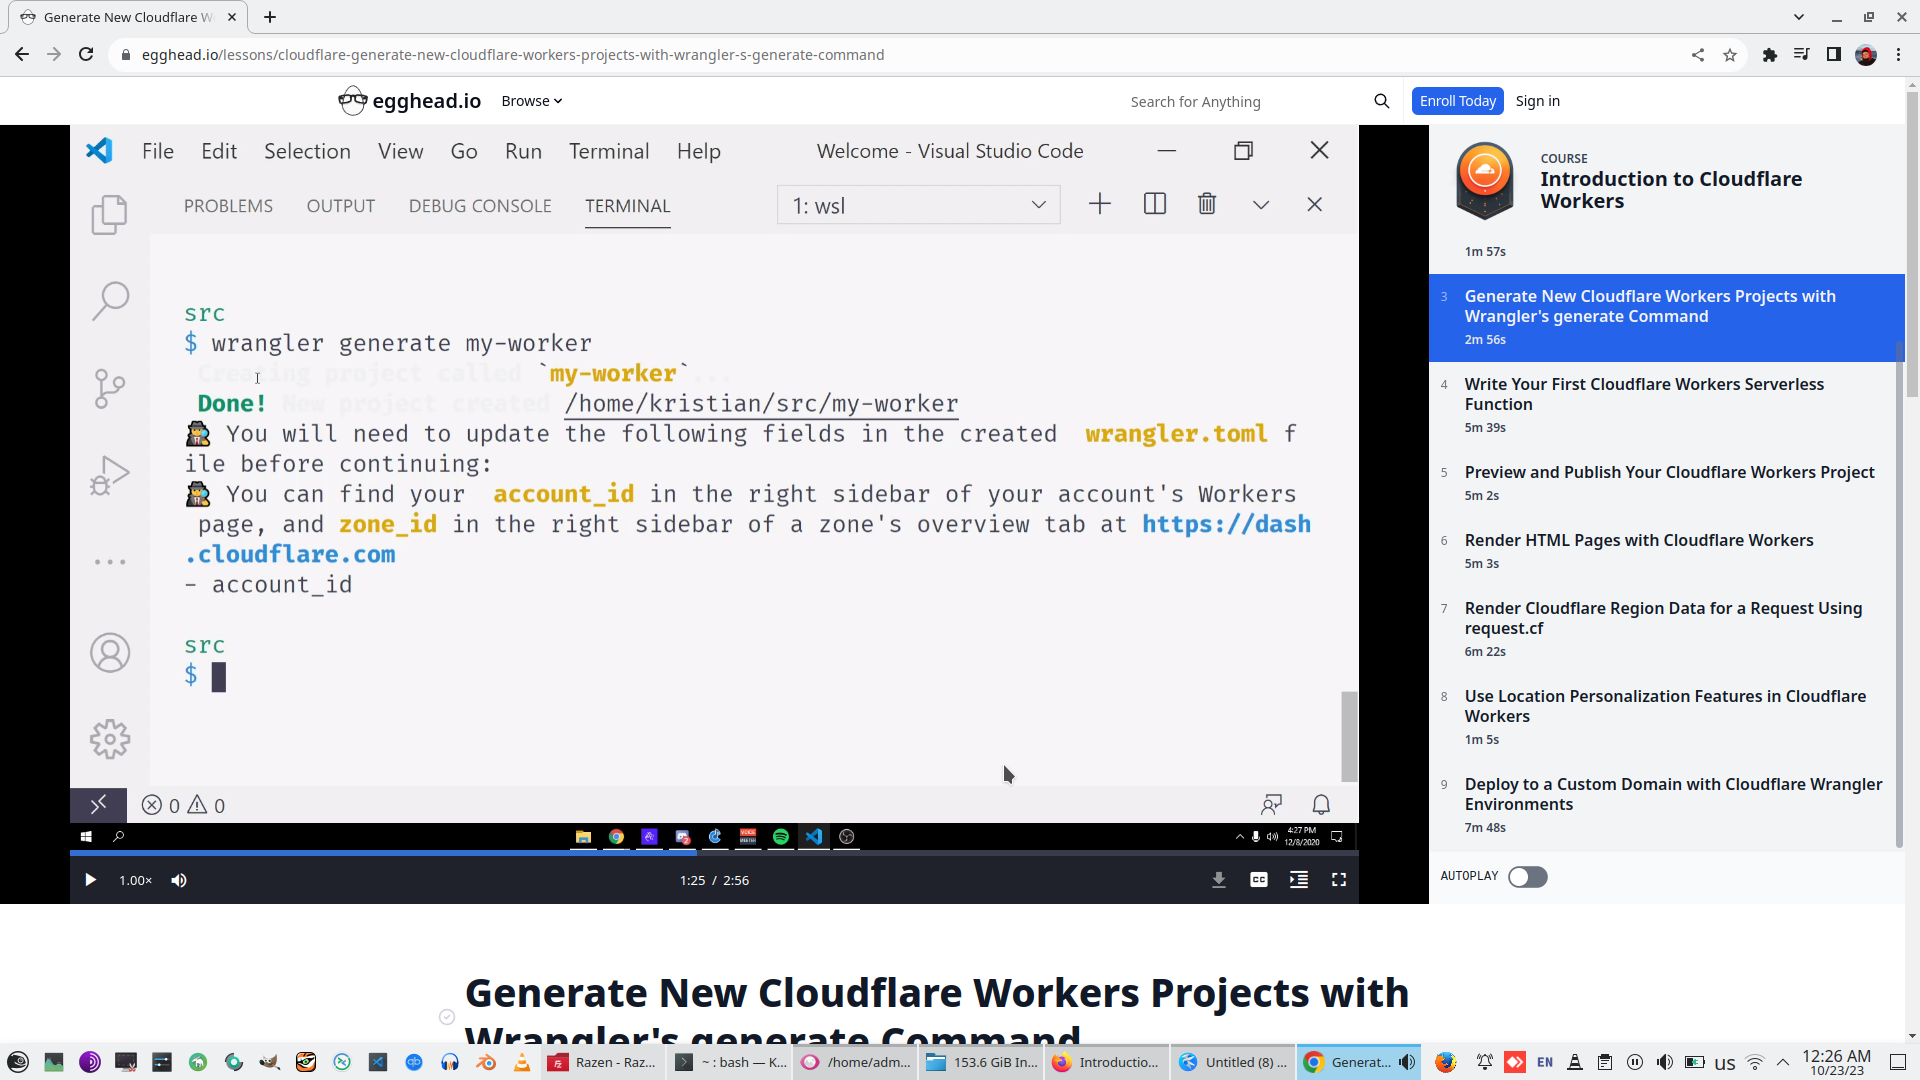
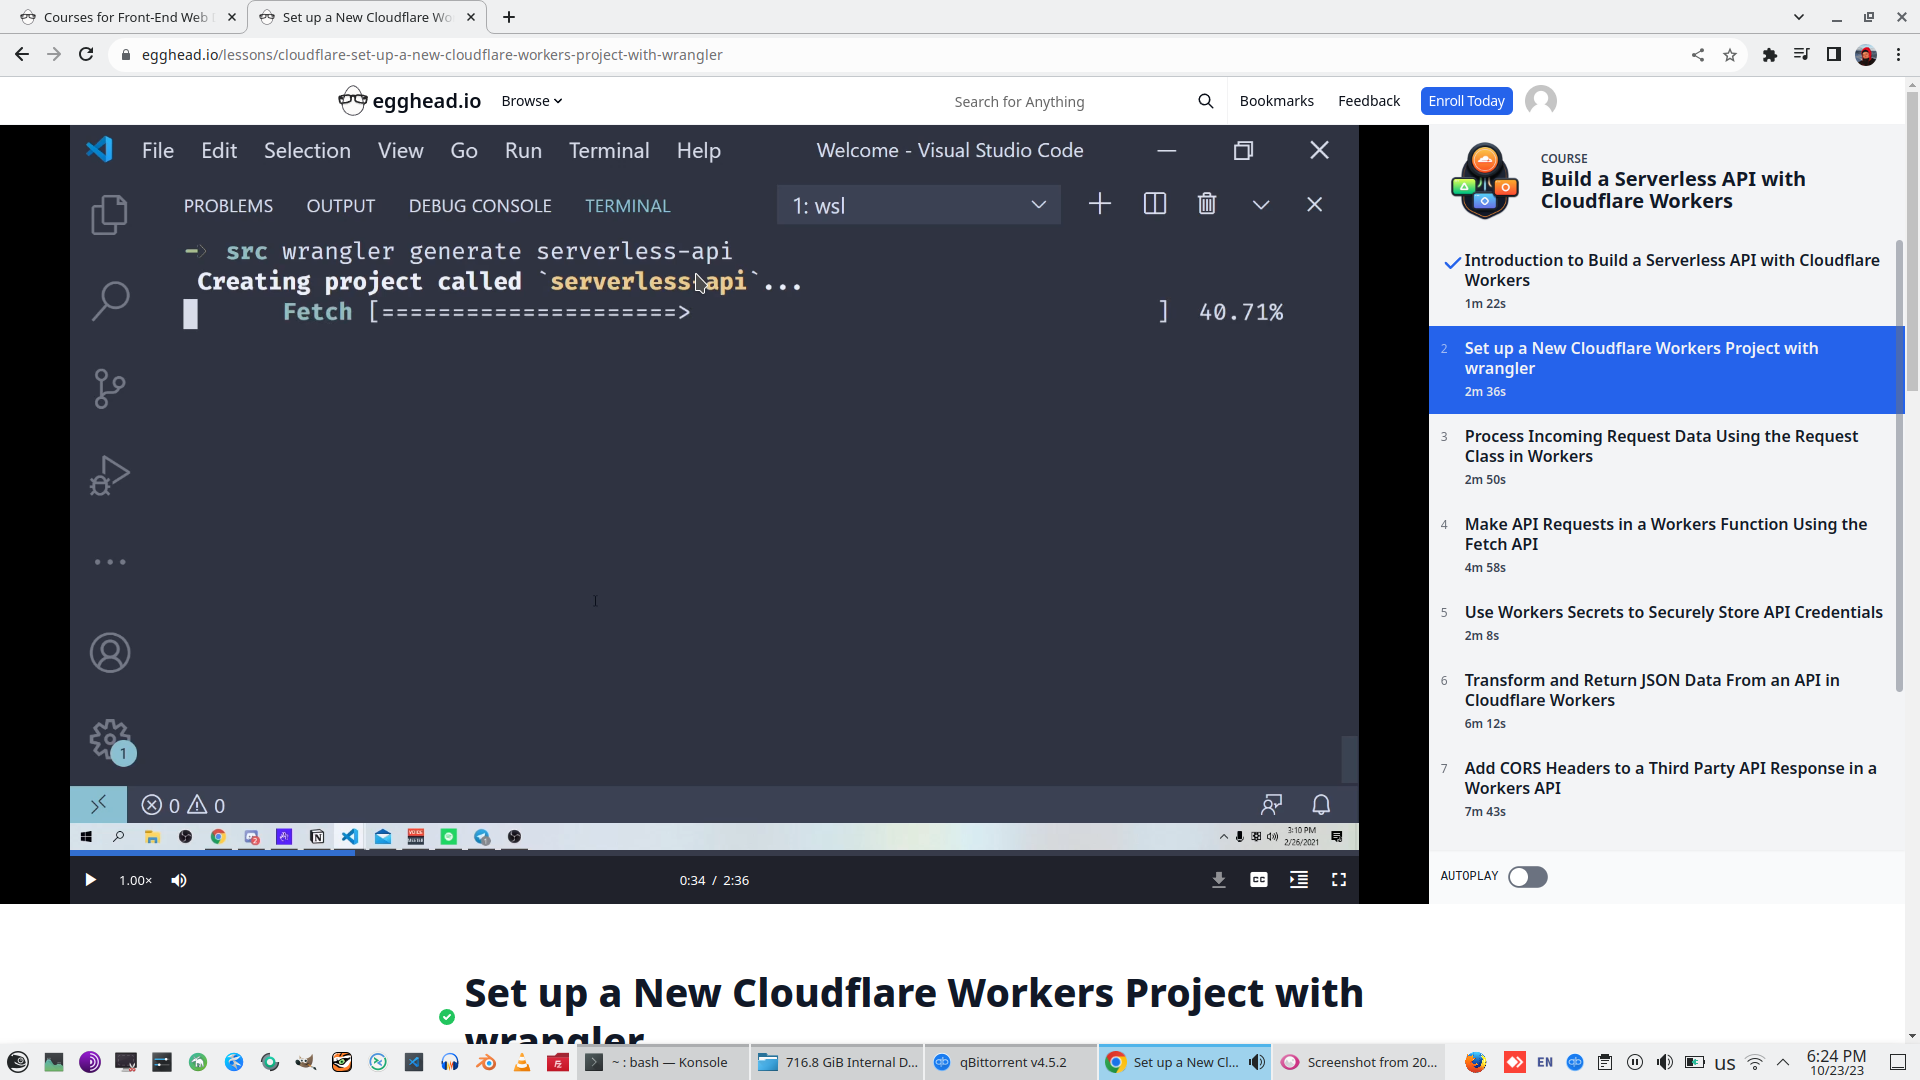
3. Generate New Cloudflare Workers Projects with Wrangler's generate Command

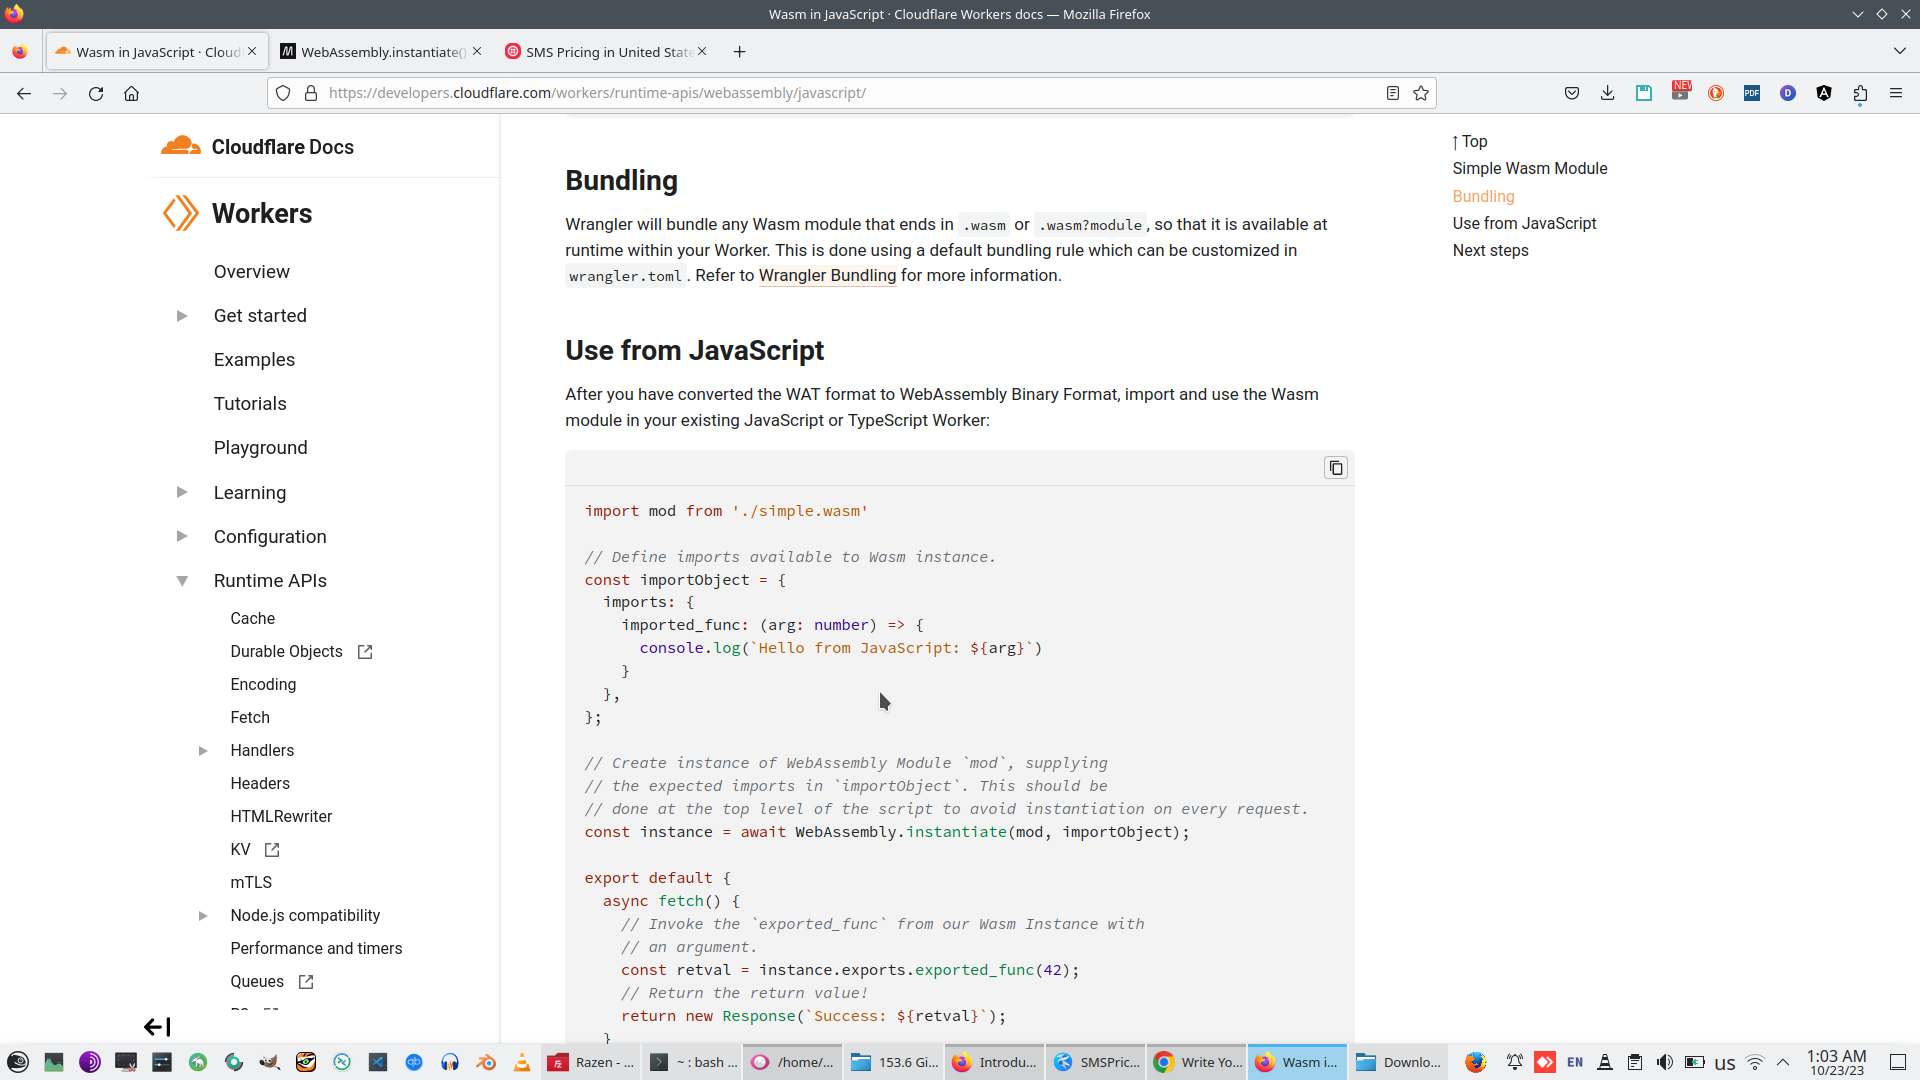
Documentation and TS project template for Cloudflare Worker.
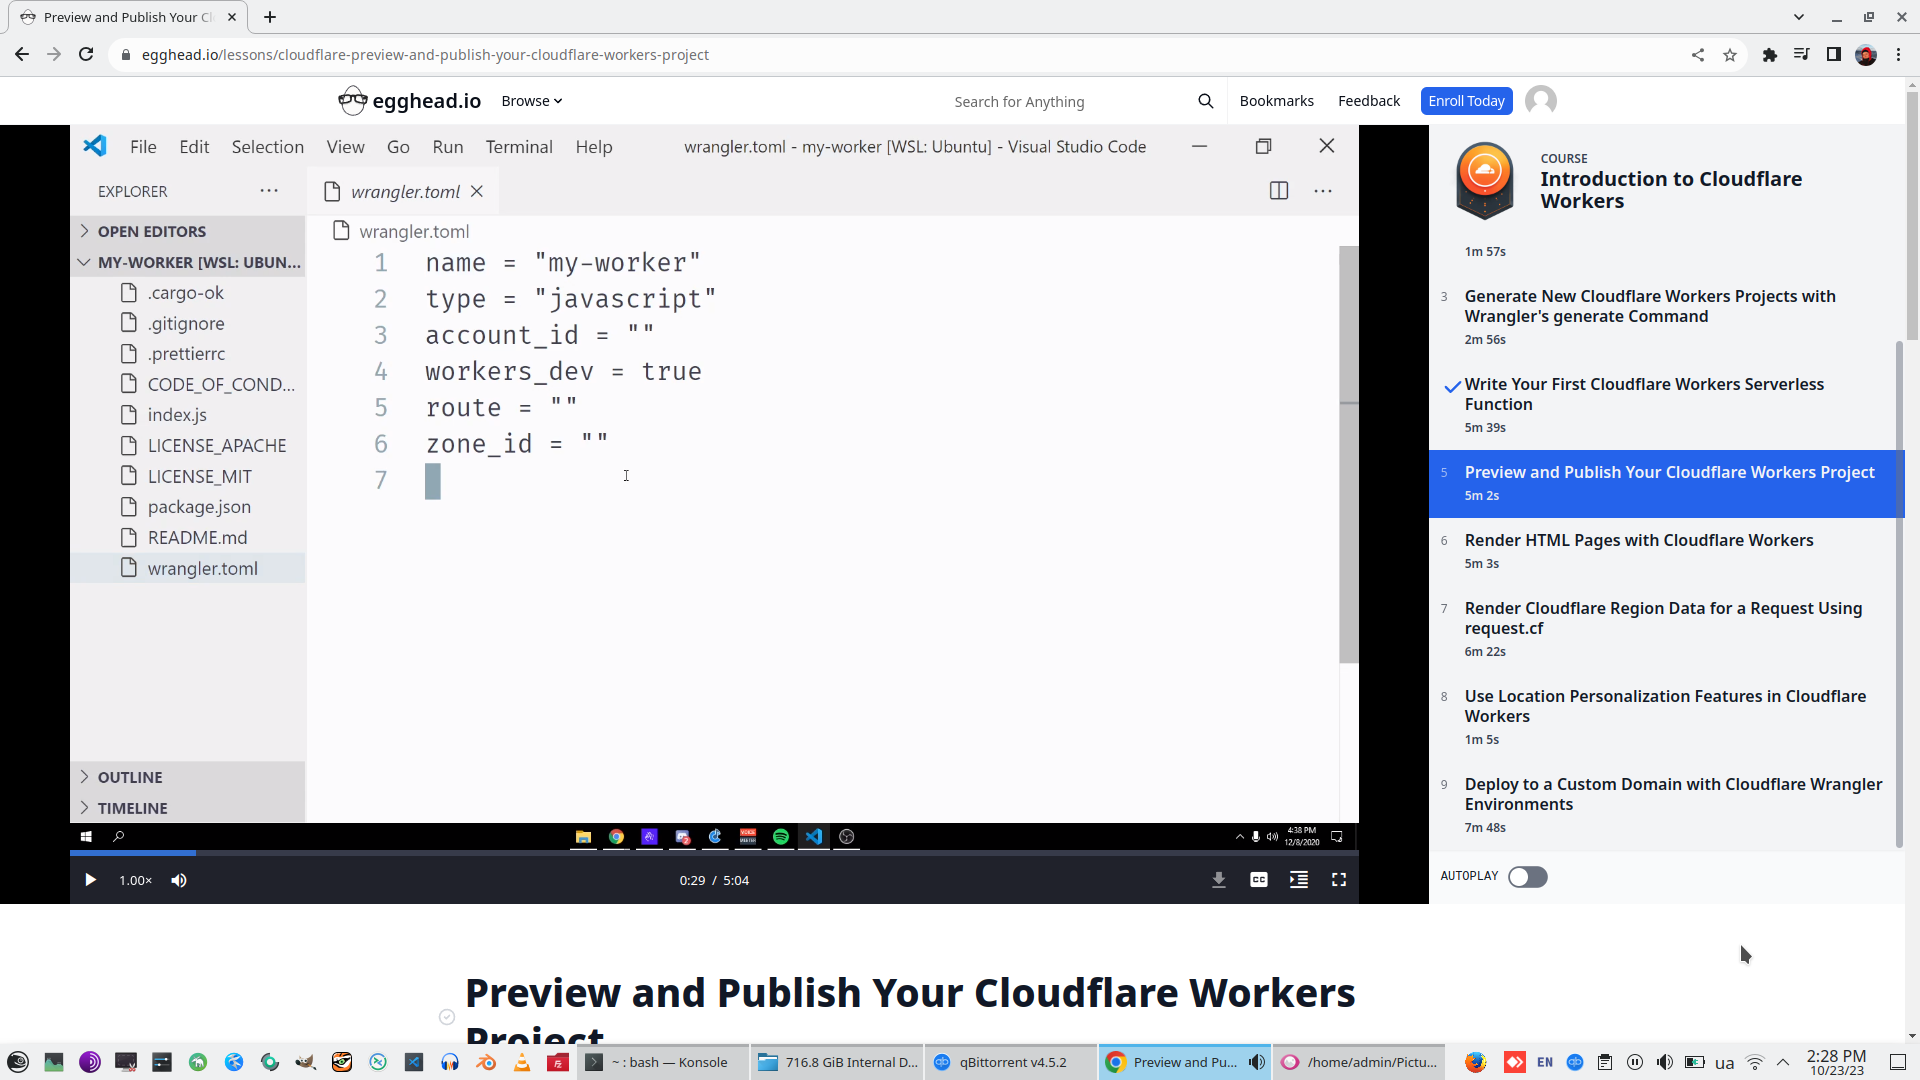
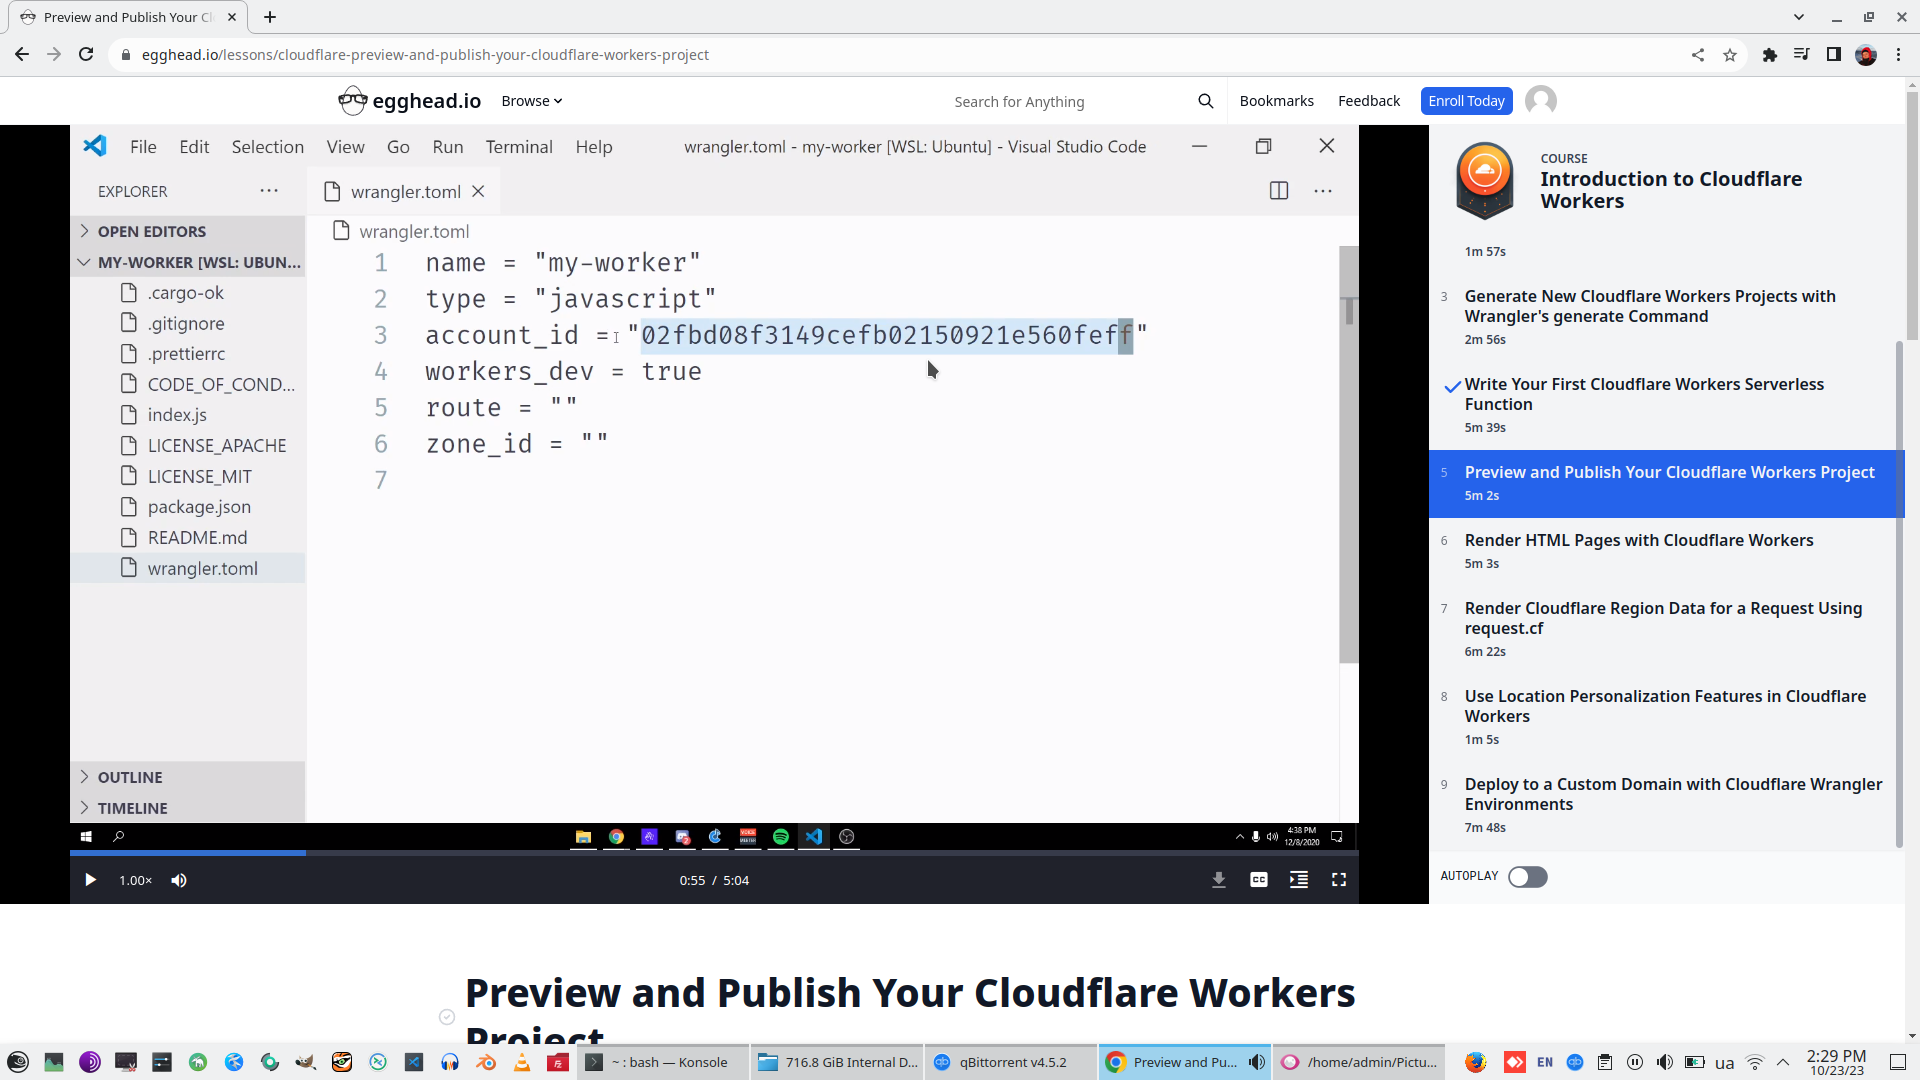
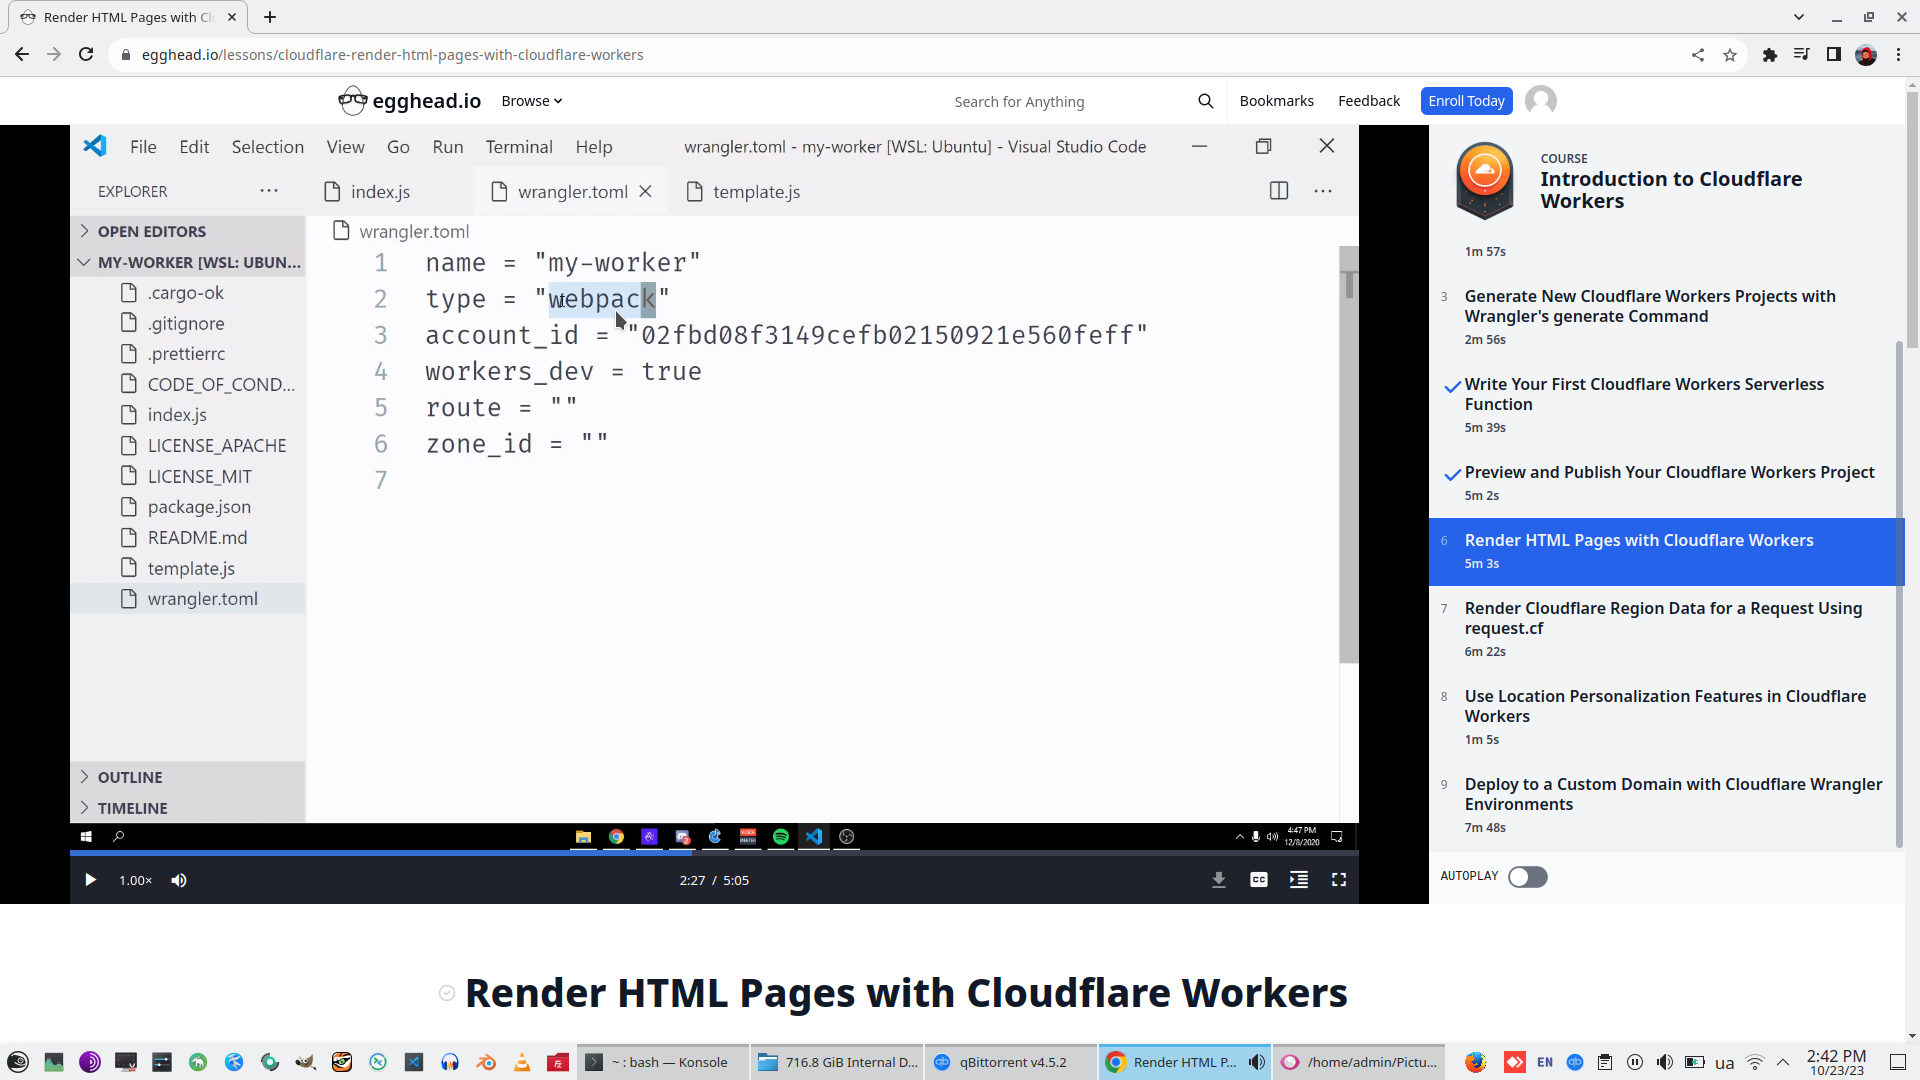
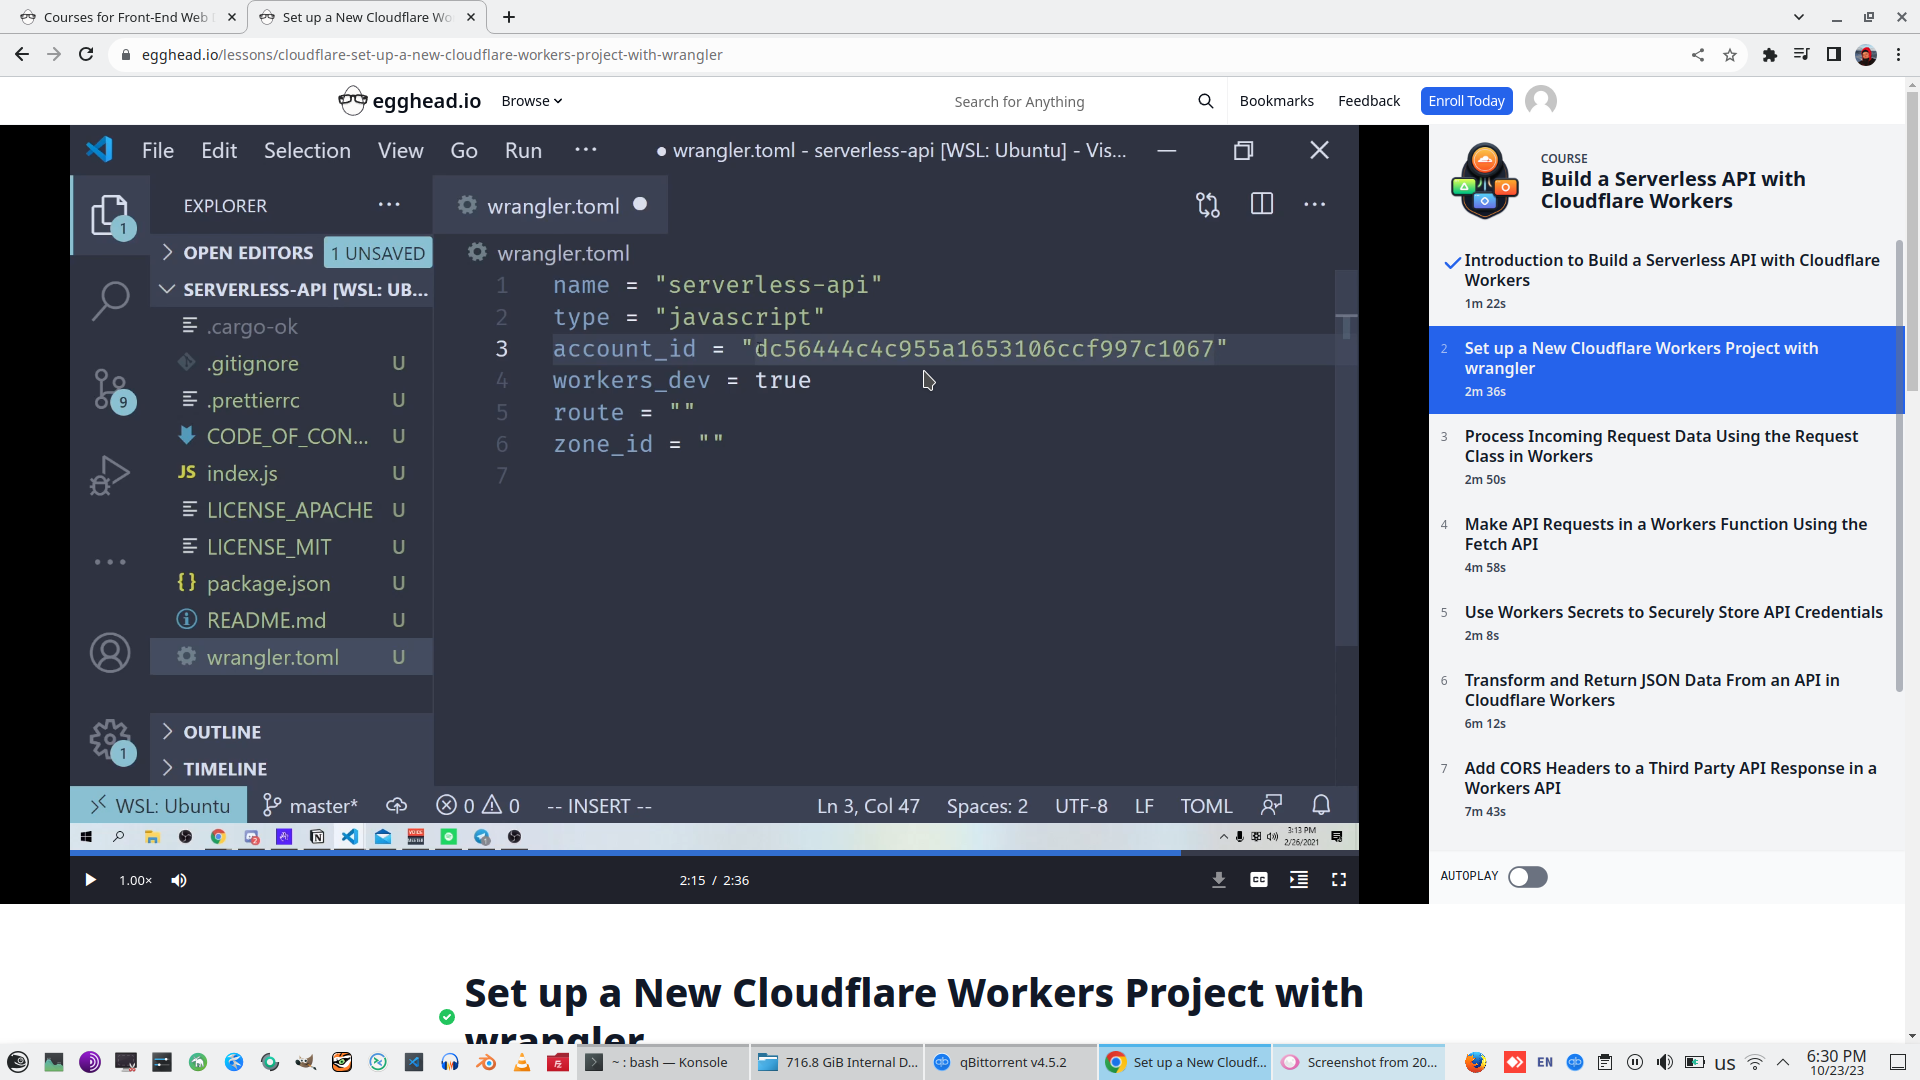
Wrangler.toml apears. This file contains all Cloudflare tuning.

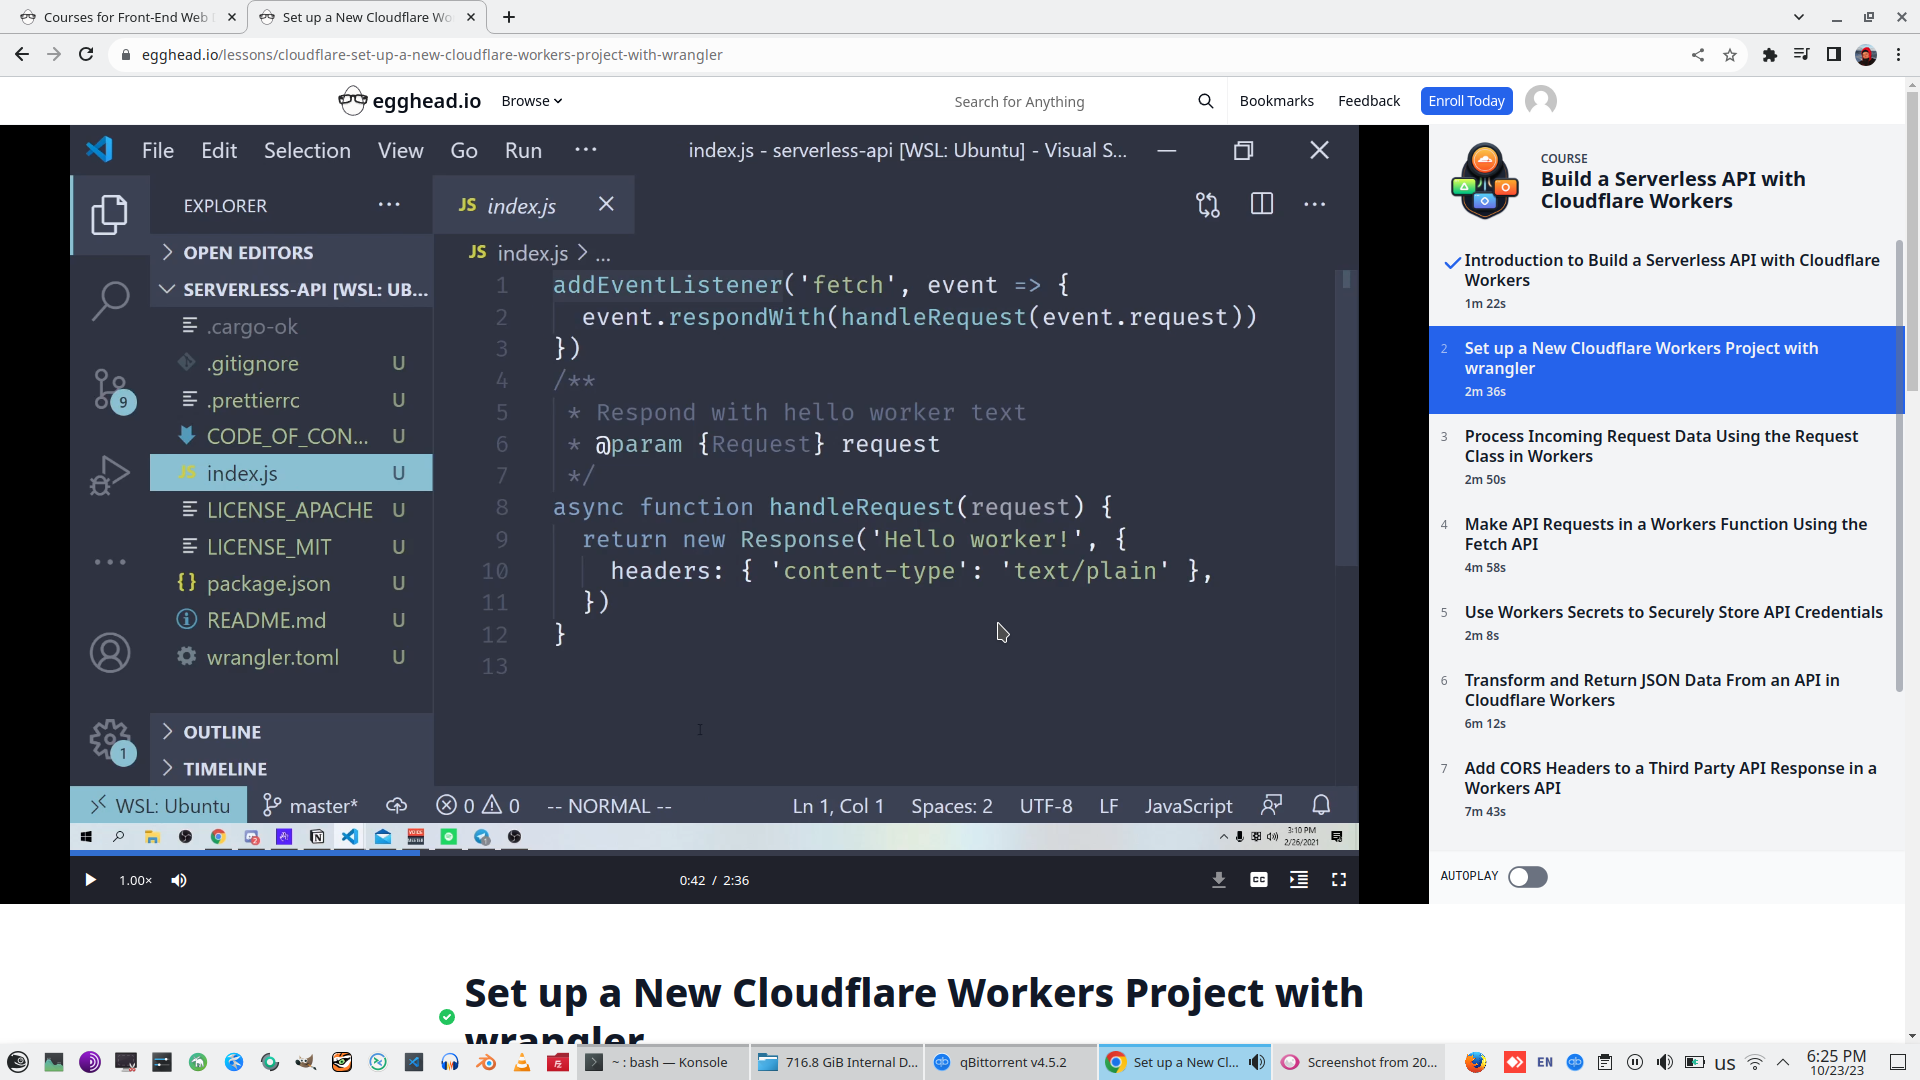
4. Write Your First Cloudflare Workers Serverless Function, HandleRequest is Async function and need to return Promise.
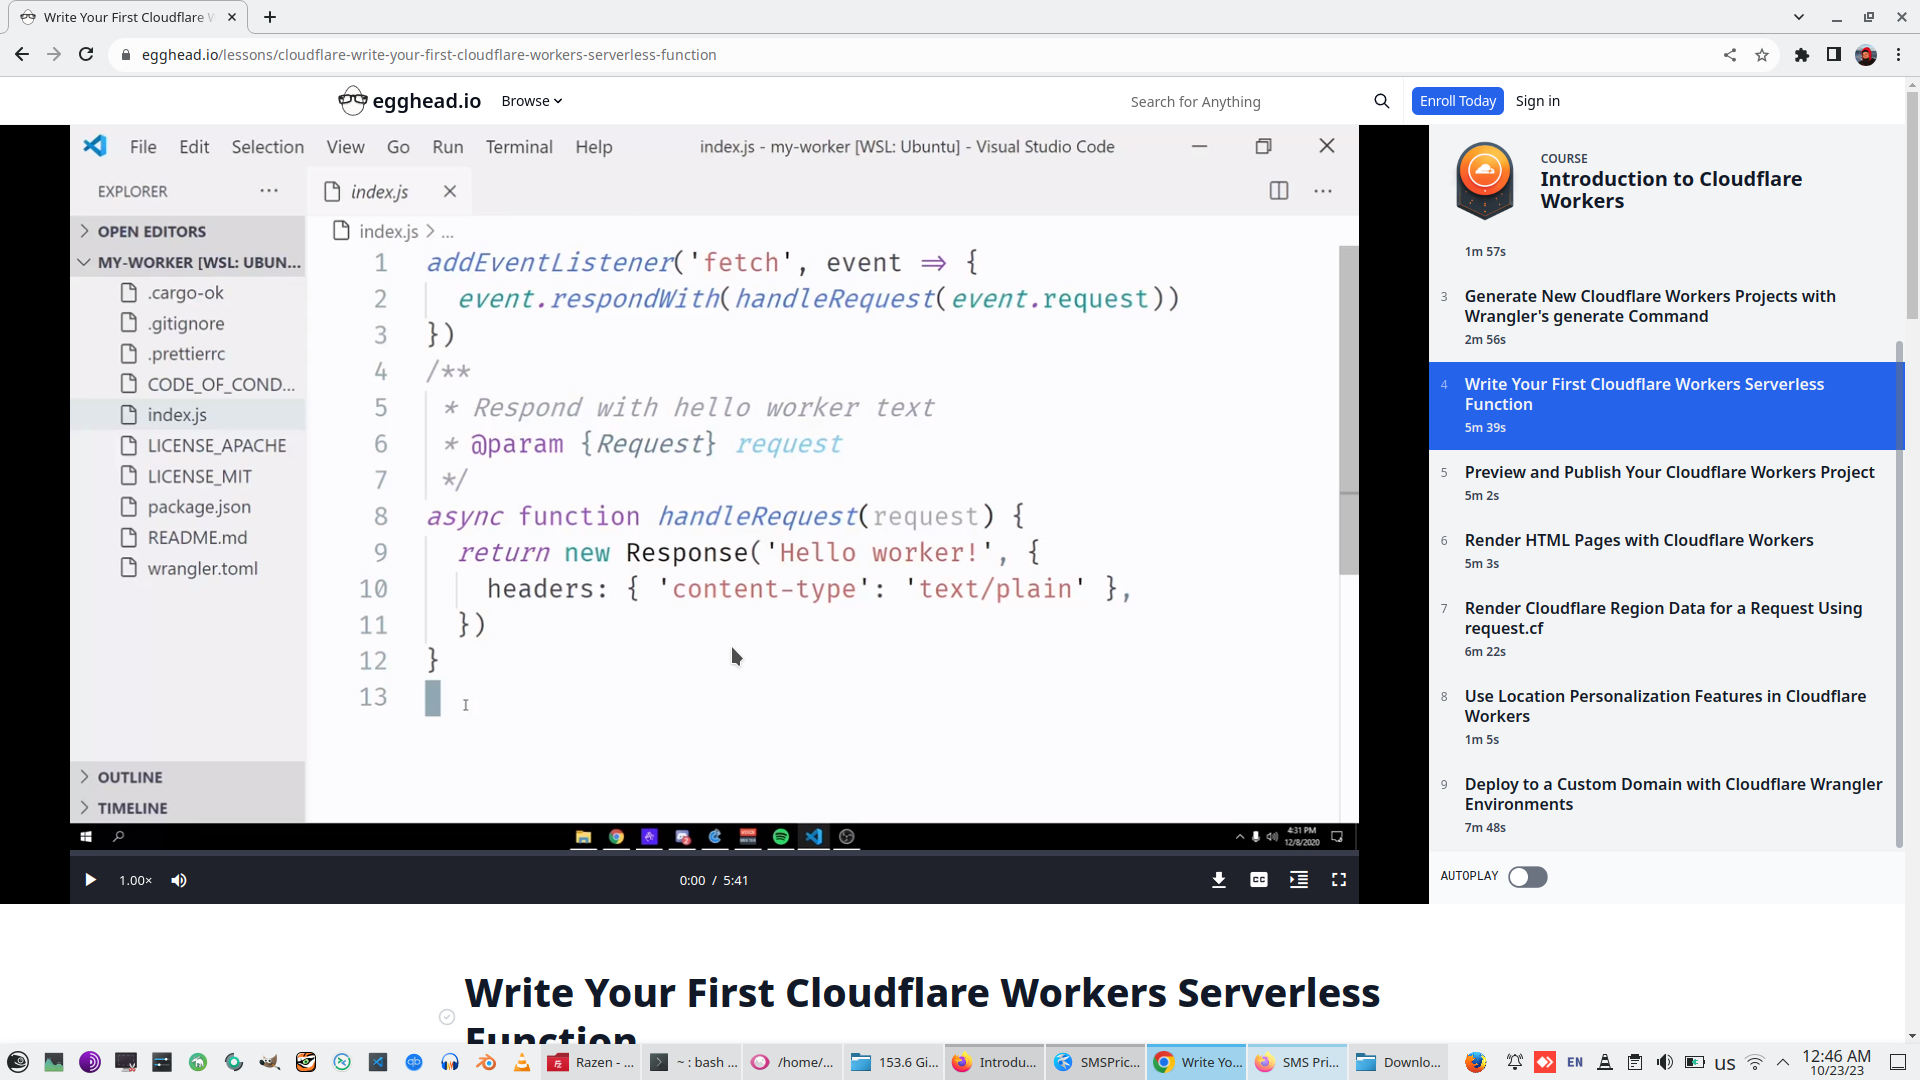
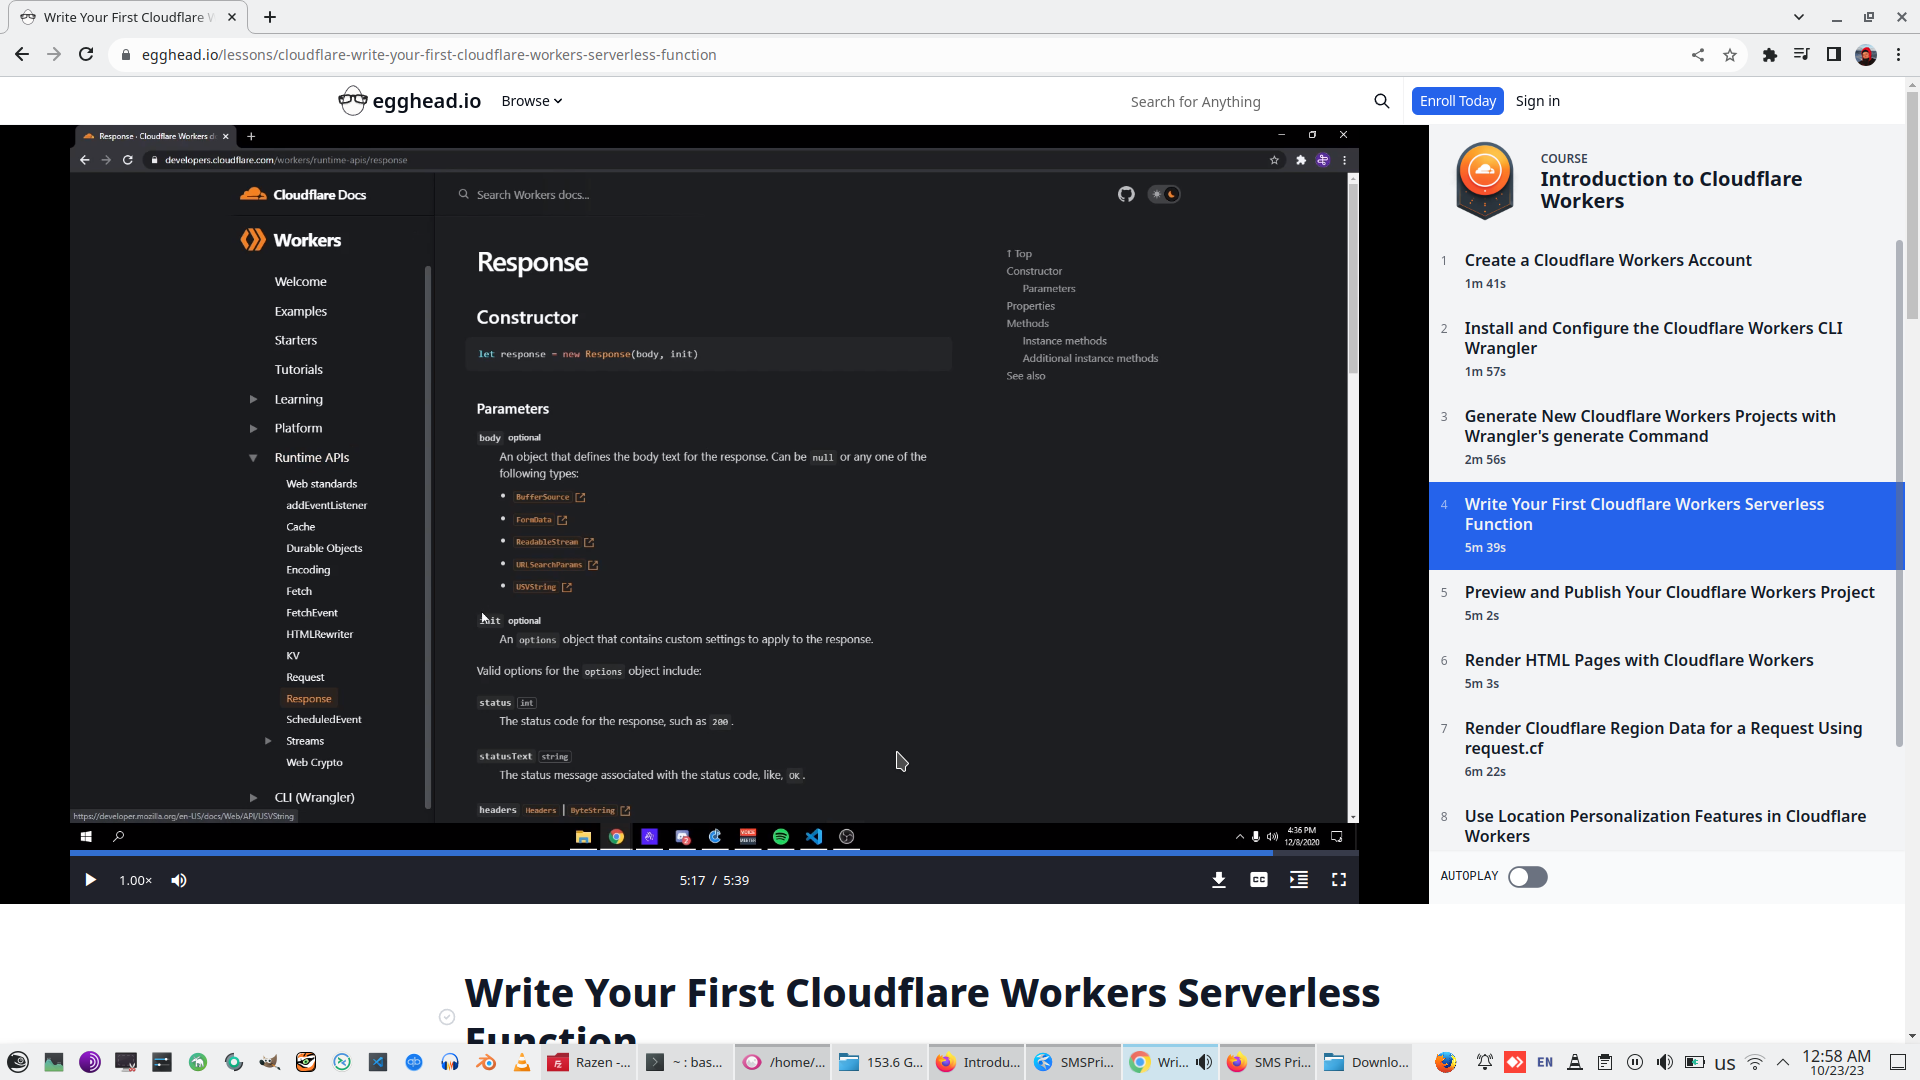
Look to all opportunity of Response function, Request function is more interesting, it can be two types - simple fitch and schedule for timeout !
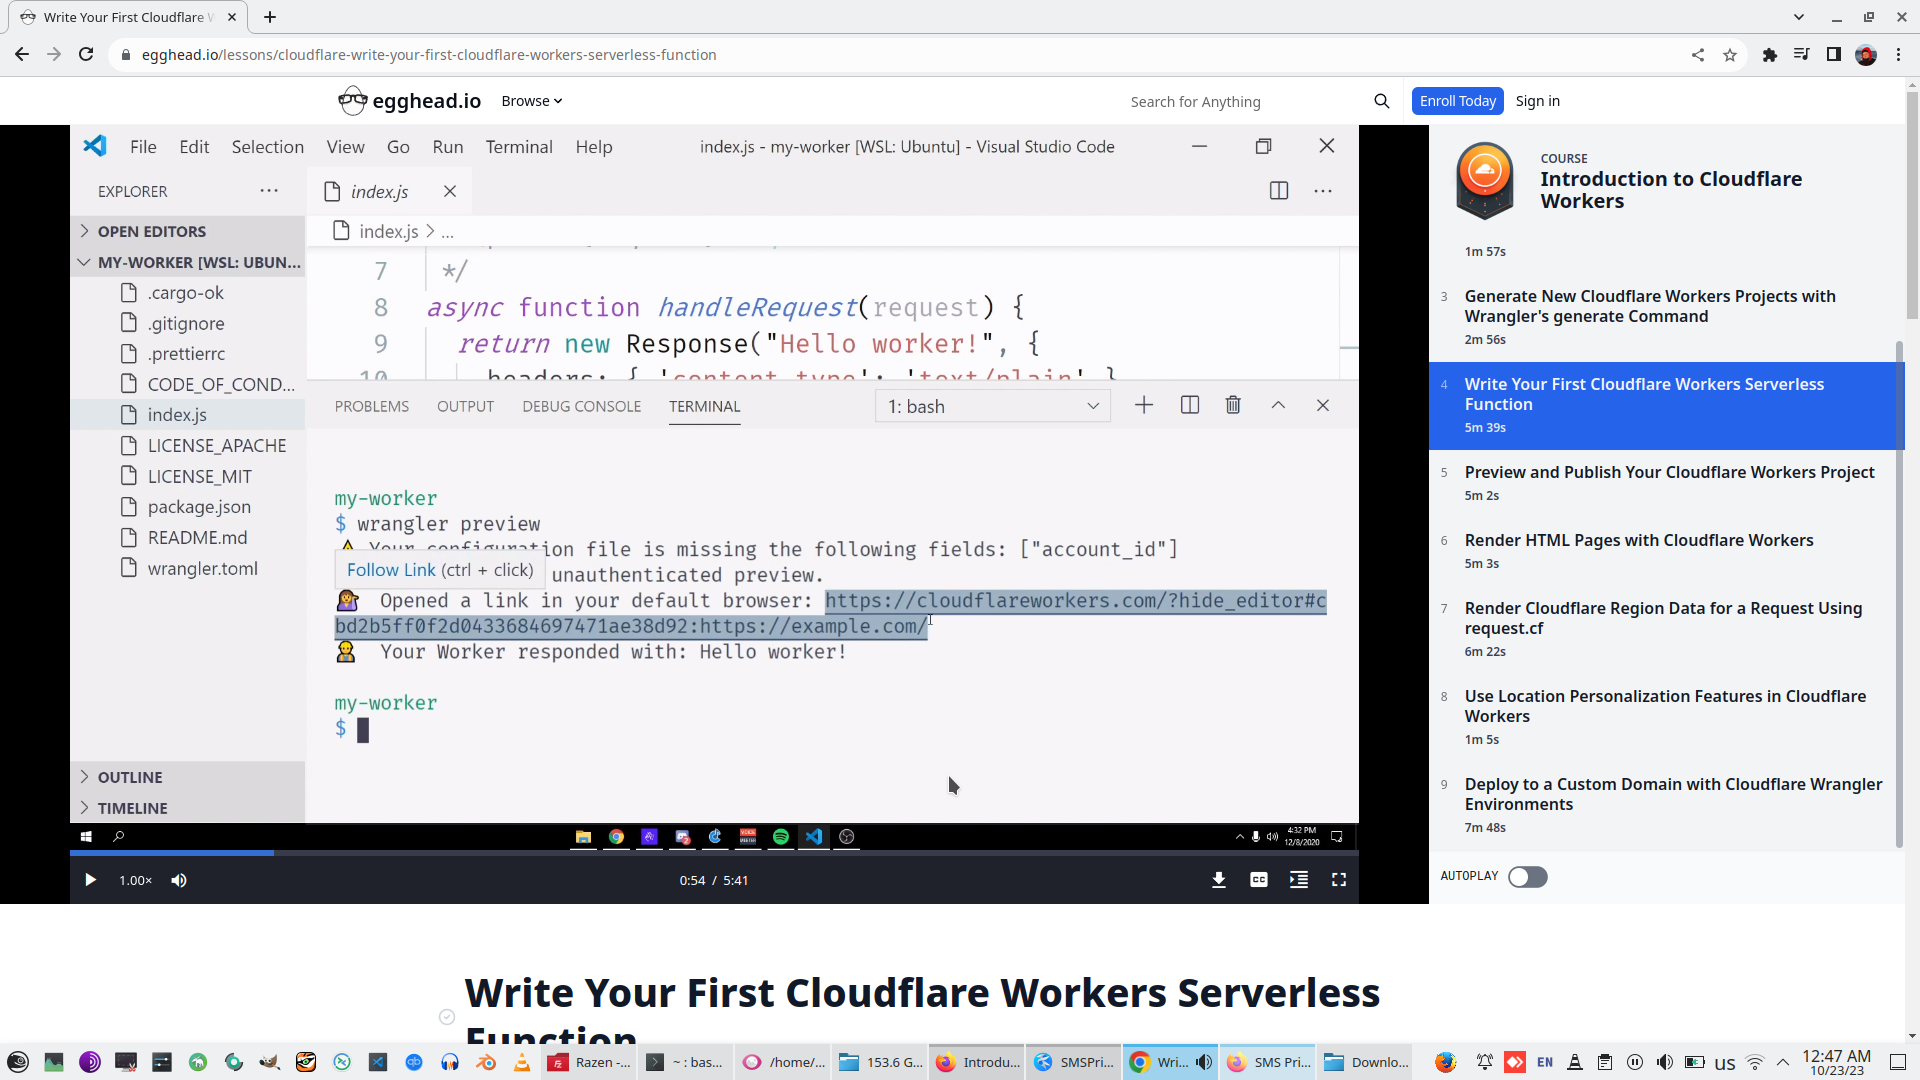
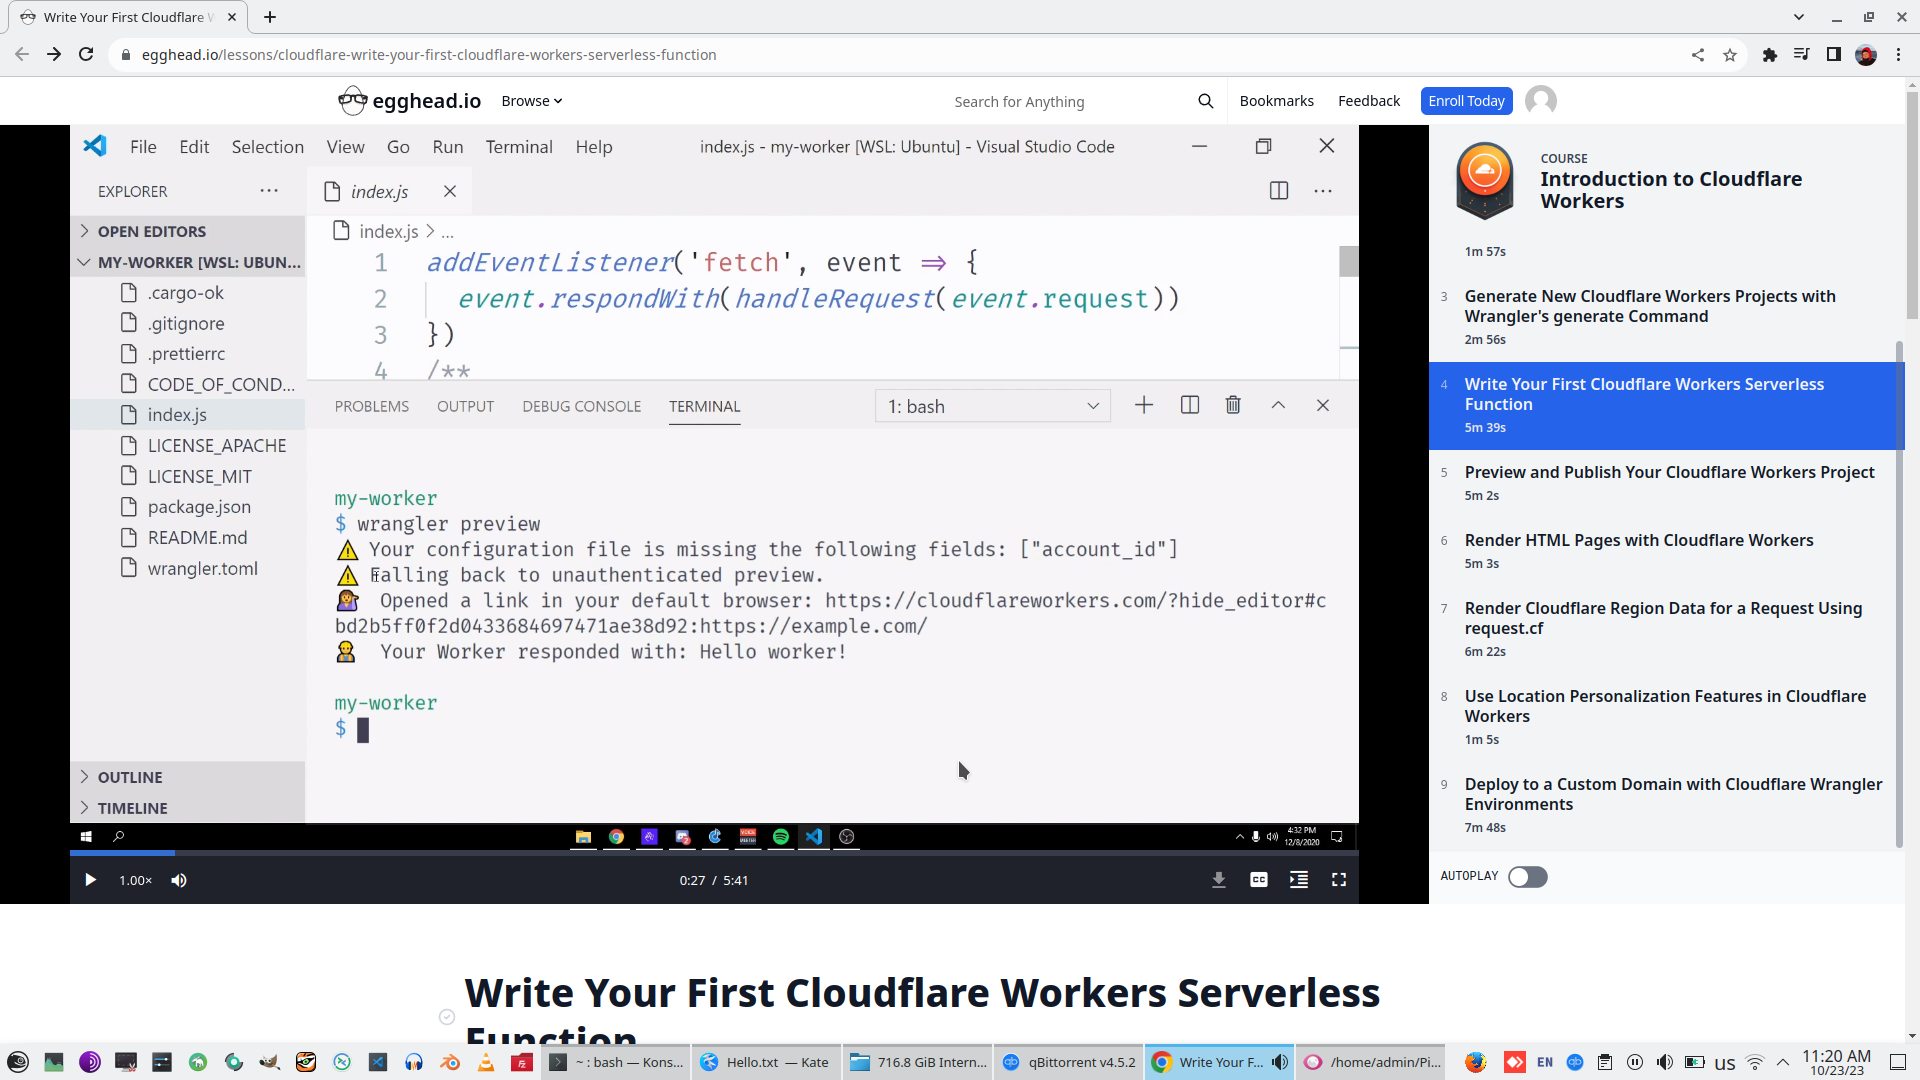
Wrangler Preview

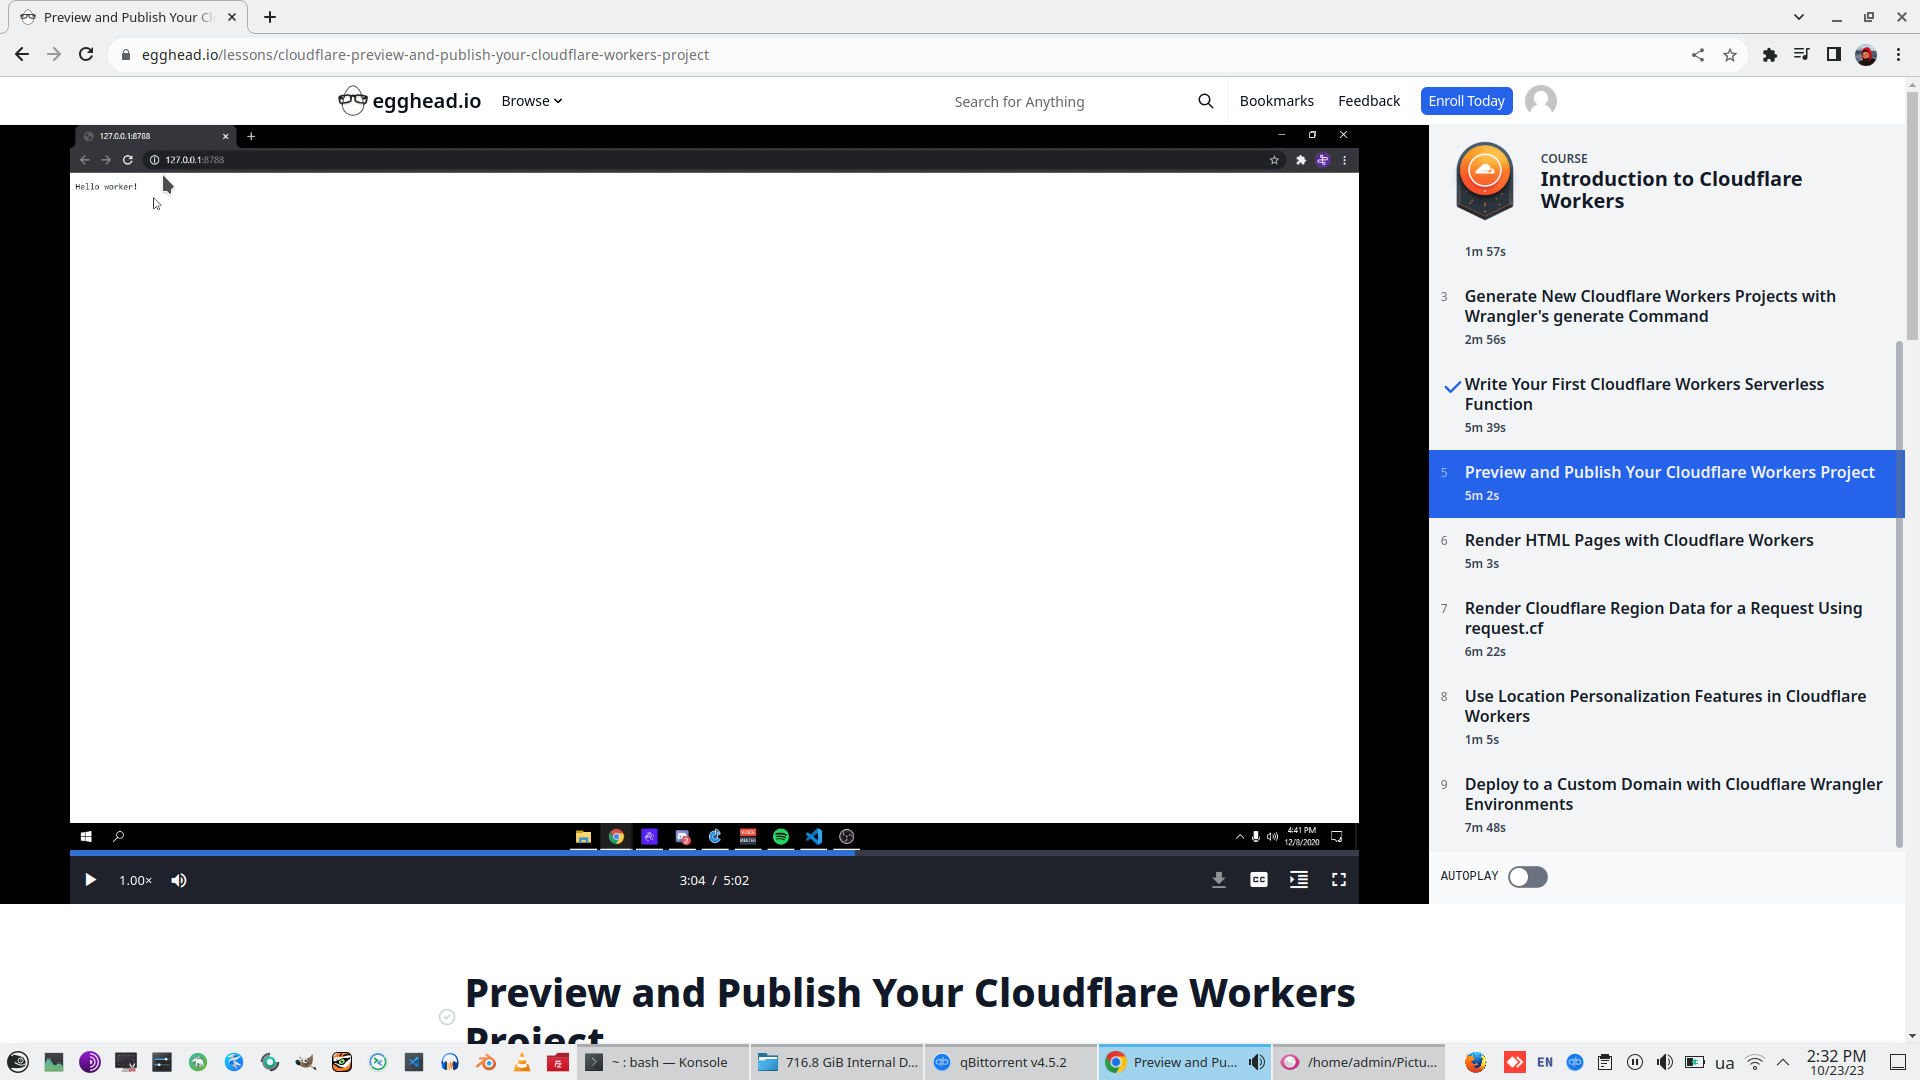
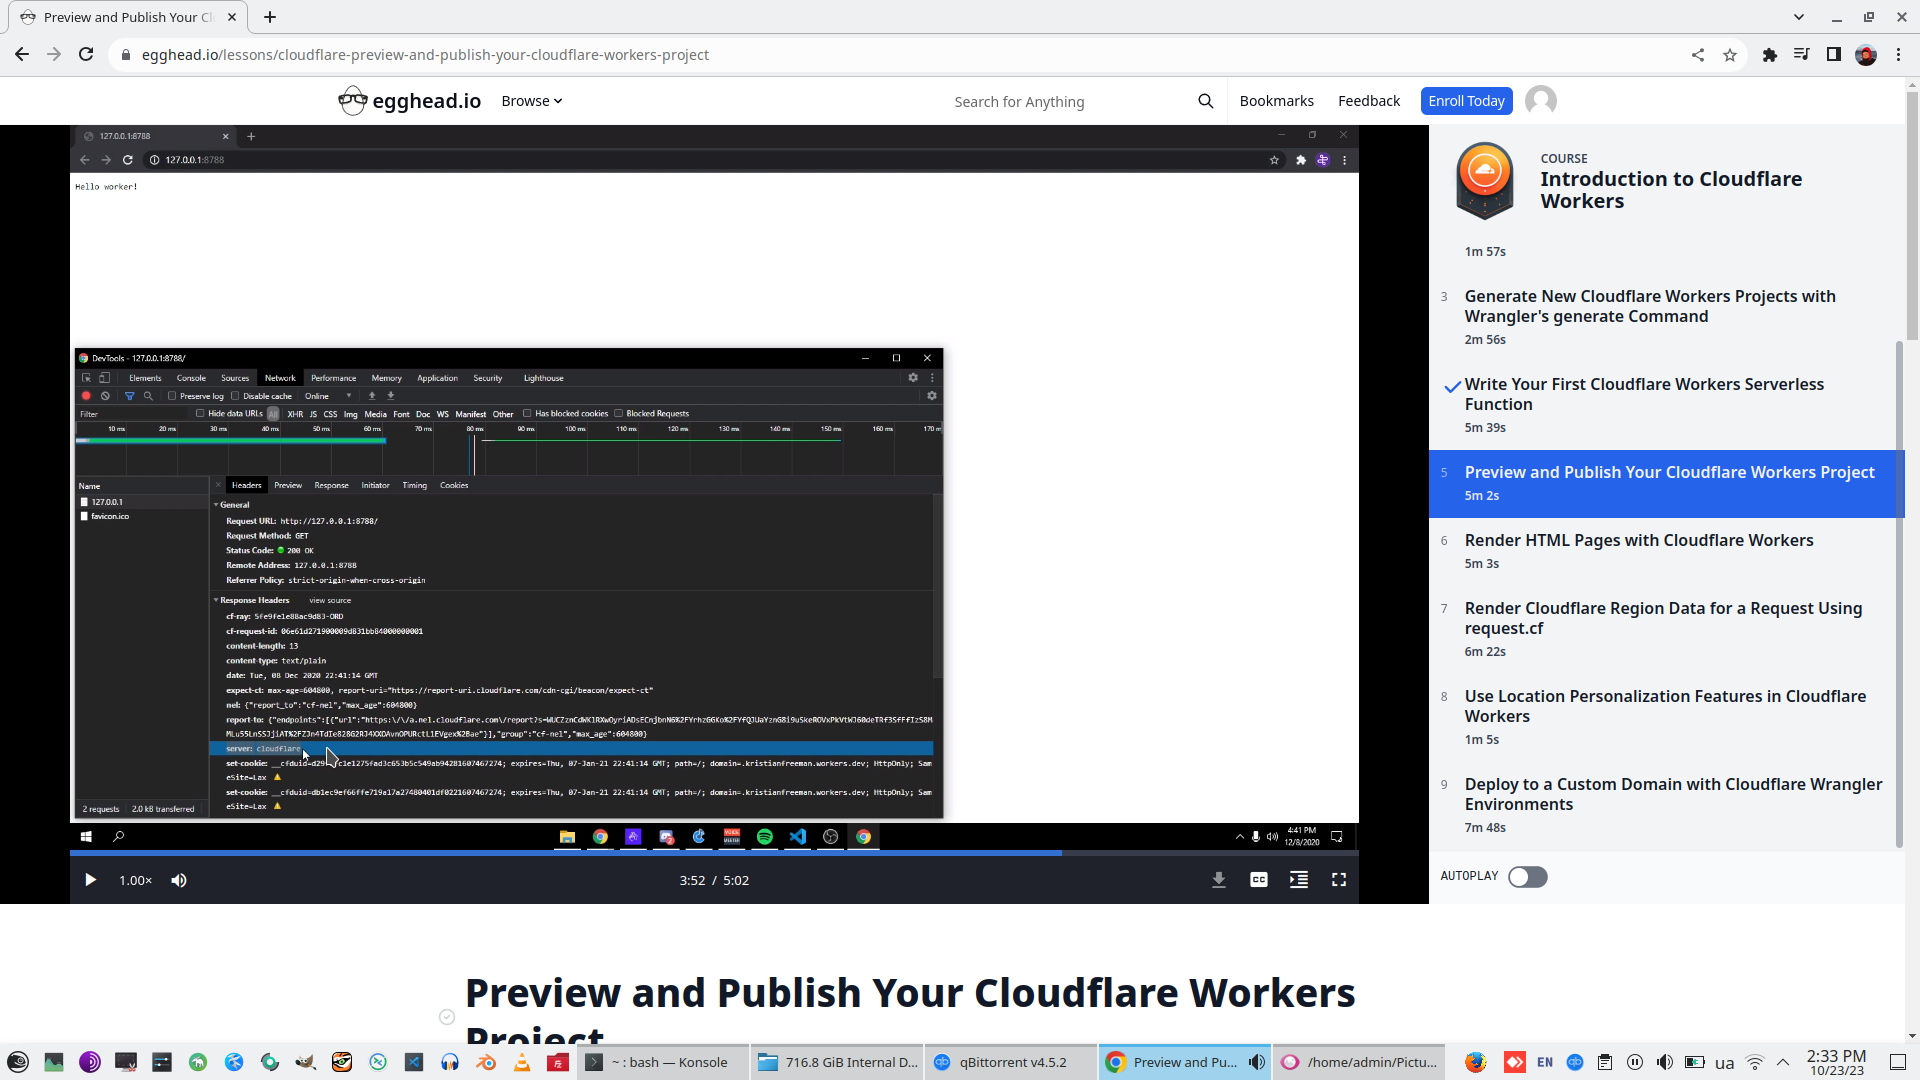
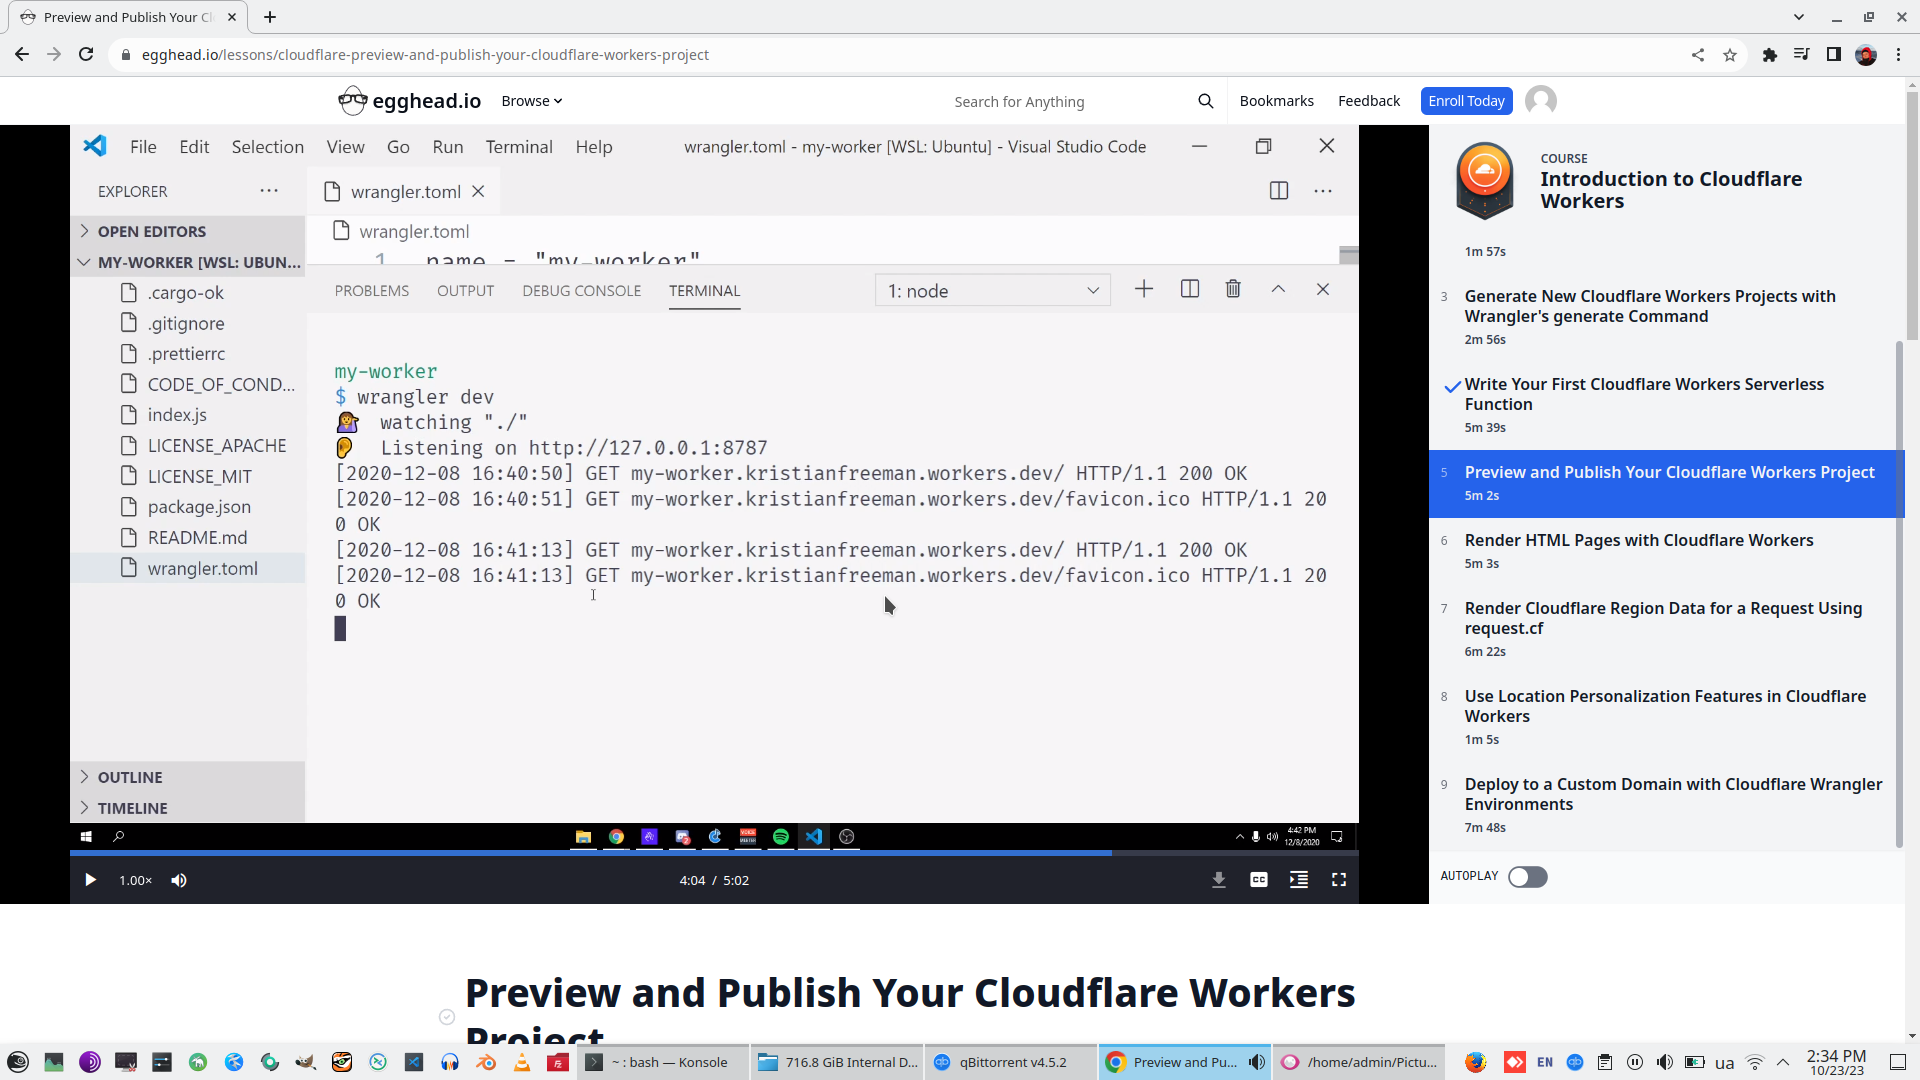
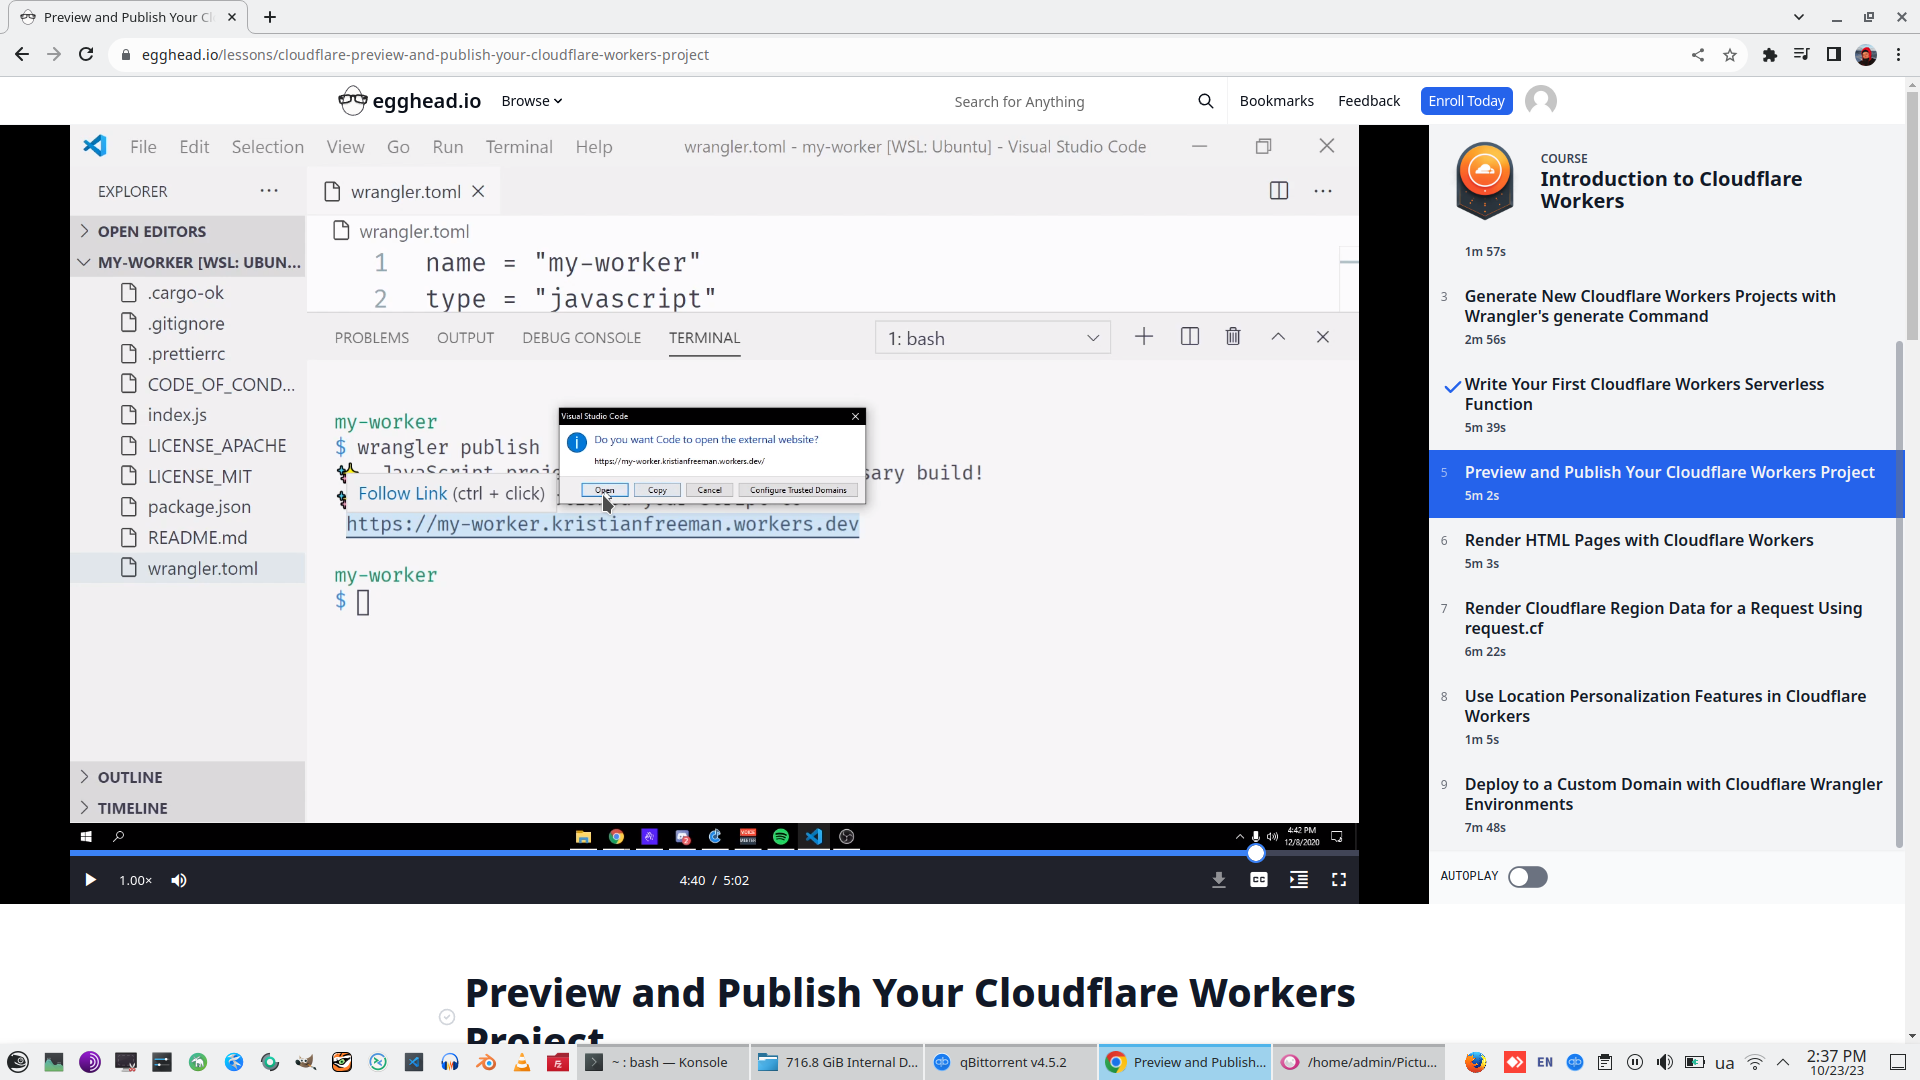
5. Preview and Publish Your Cloudflare Workers Project

Grab data from Cloudflare site and insert it to TOML file.
Wrangler dev - start developer server and check result locally.


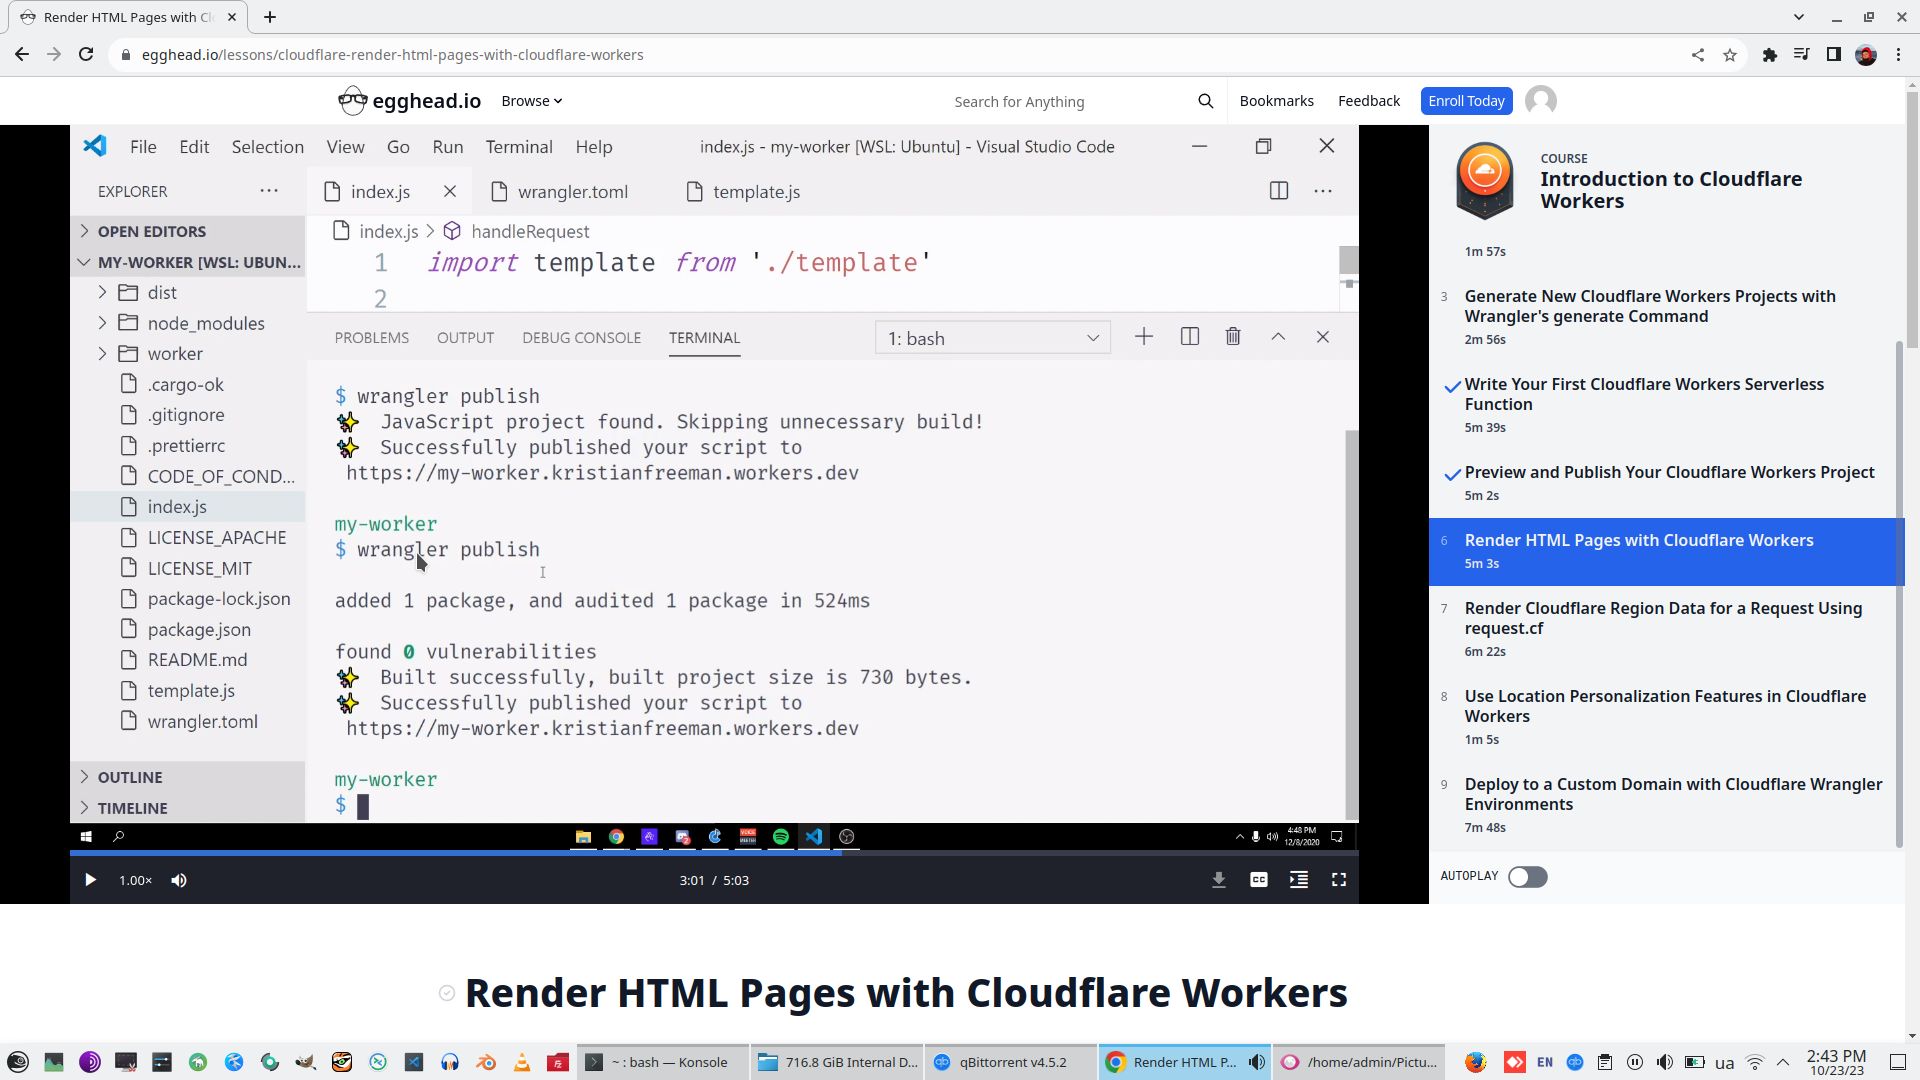
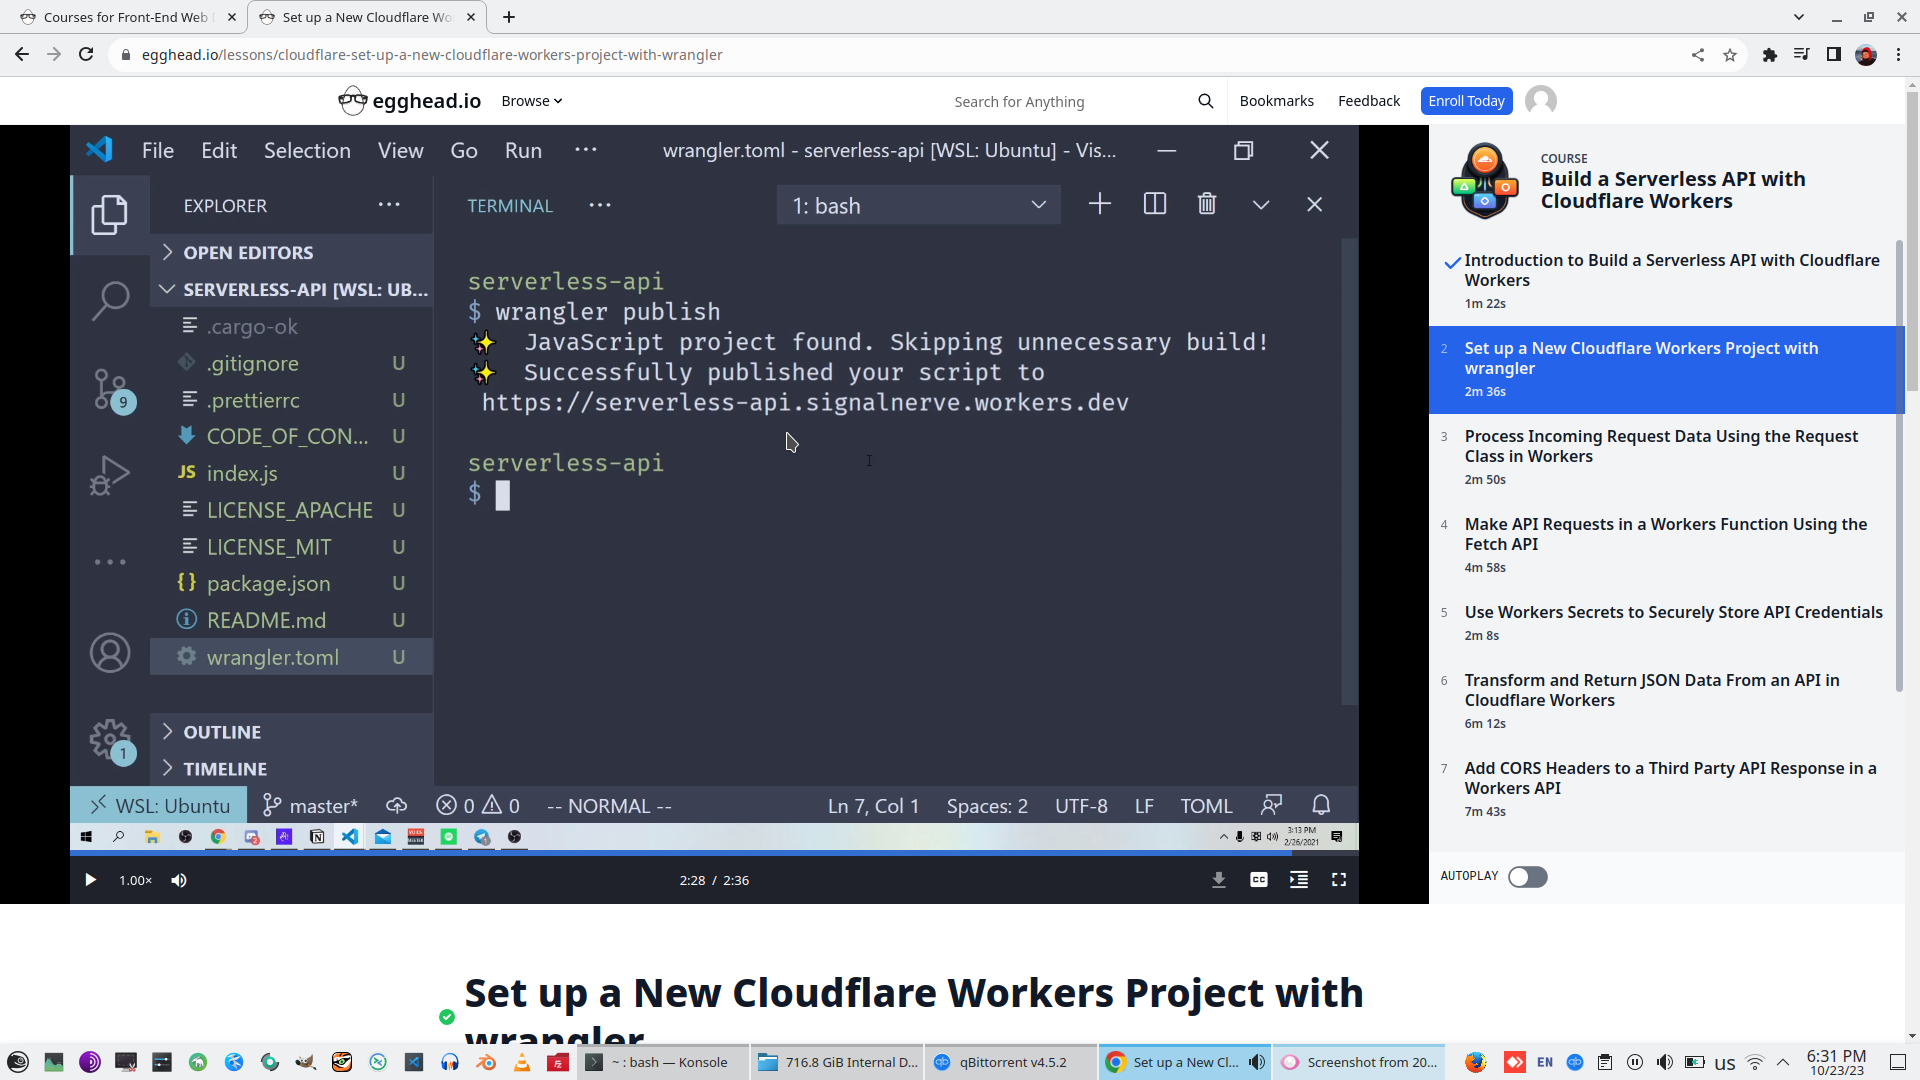
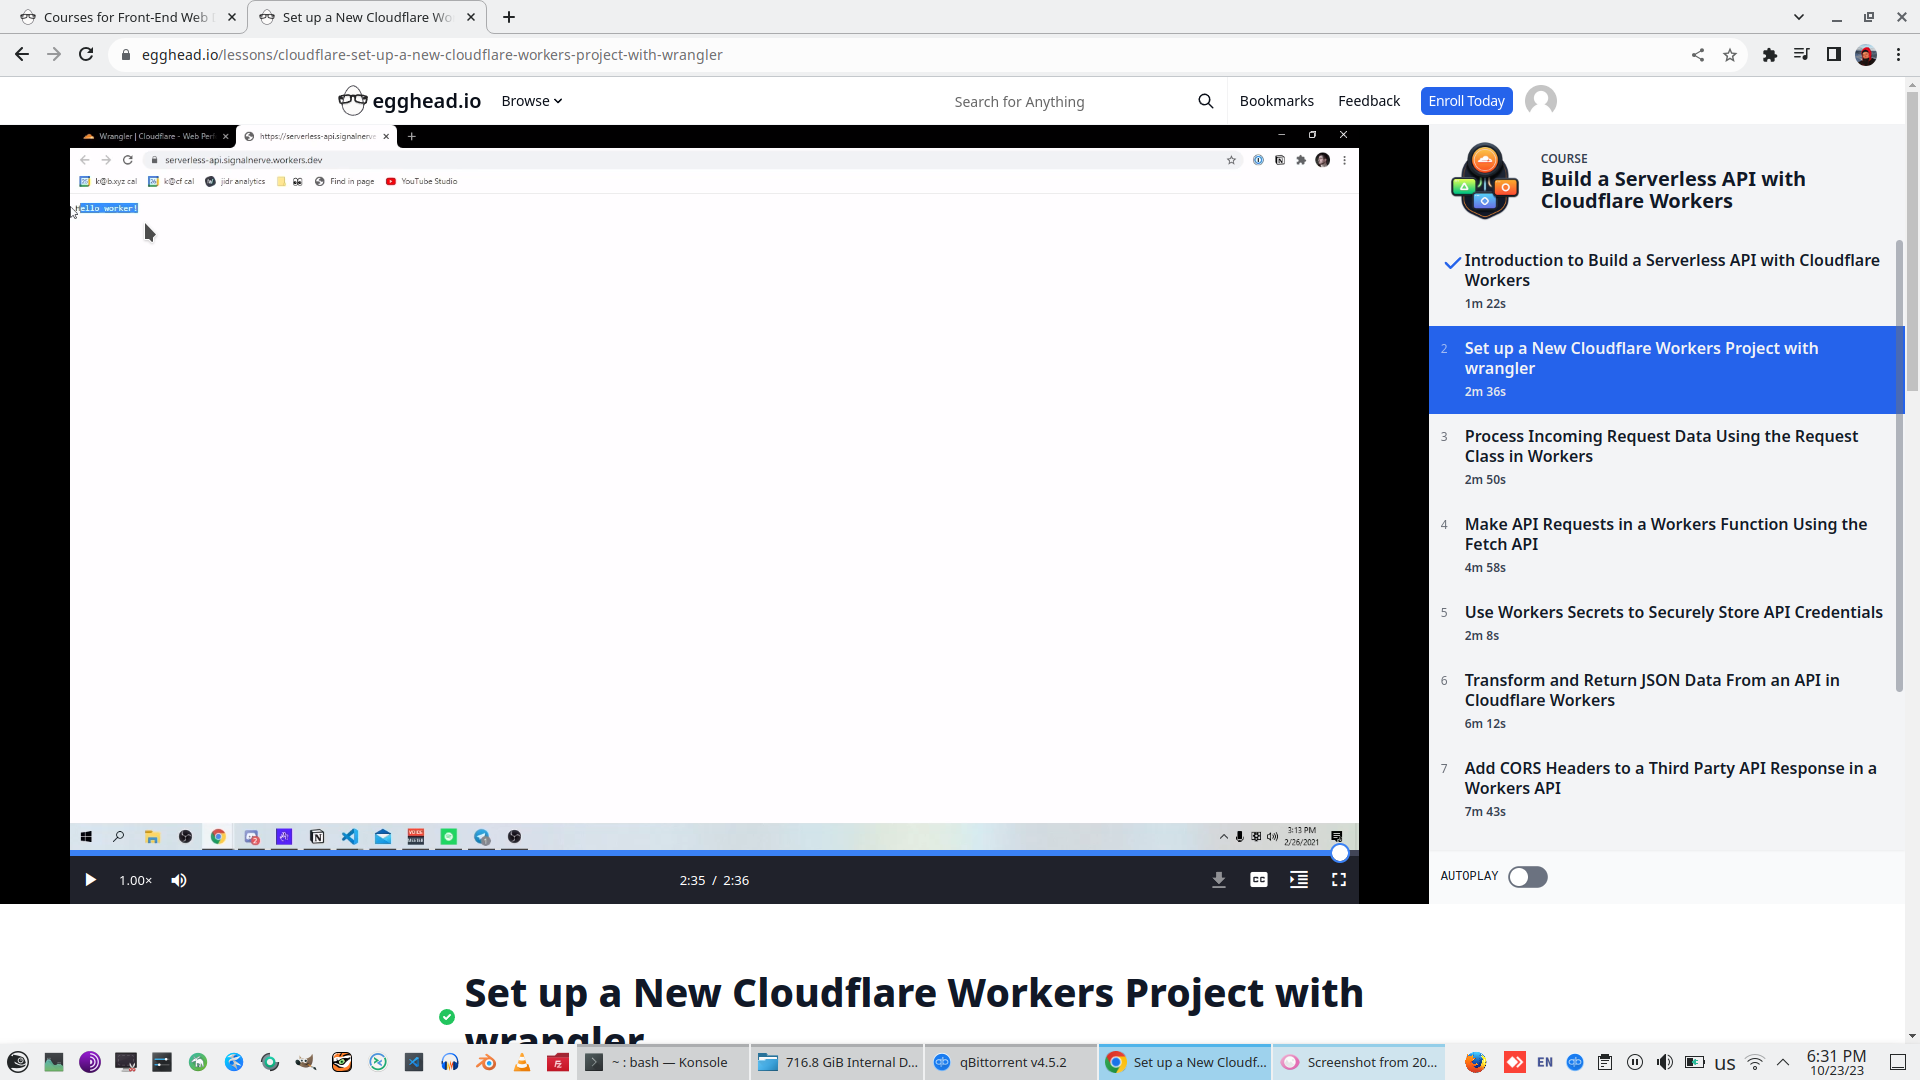
Wrangler publish - publish custom page to Cloudflare

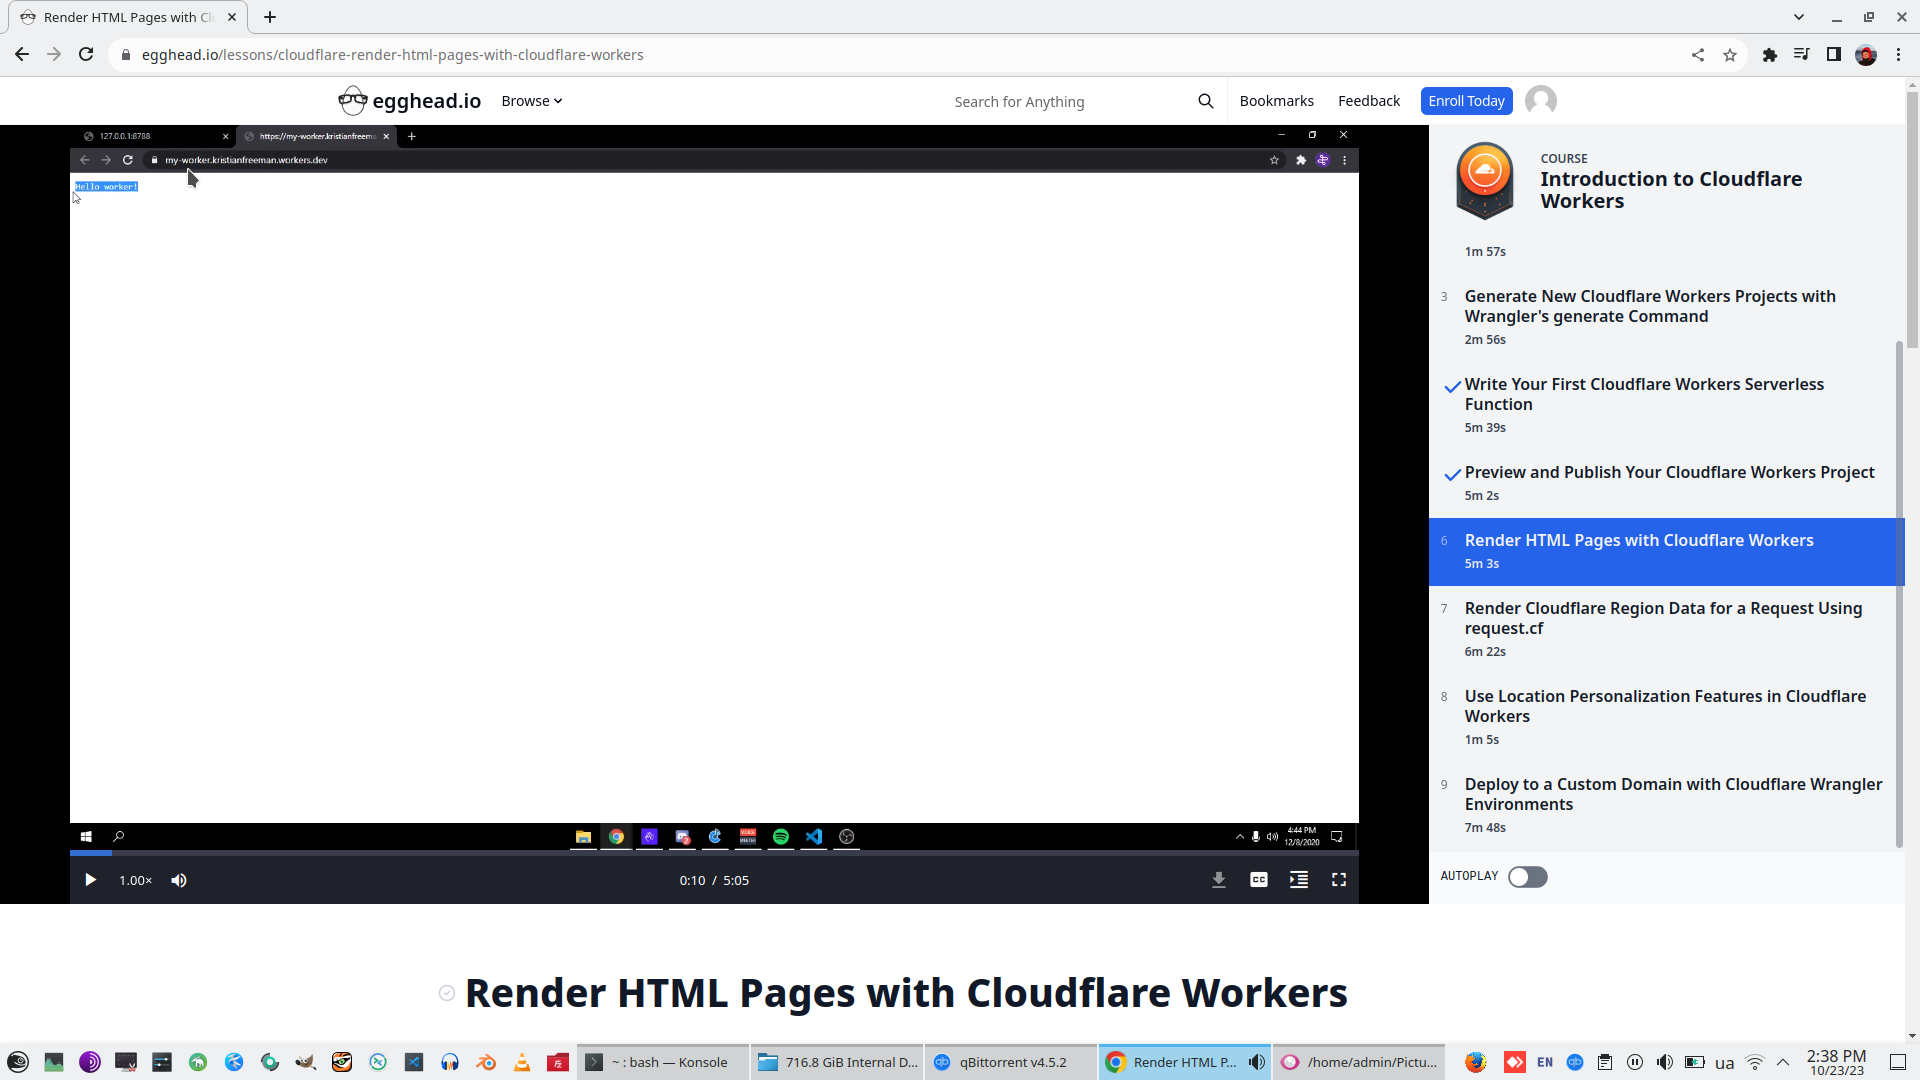
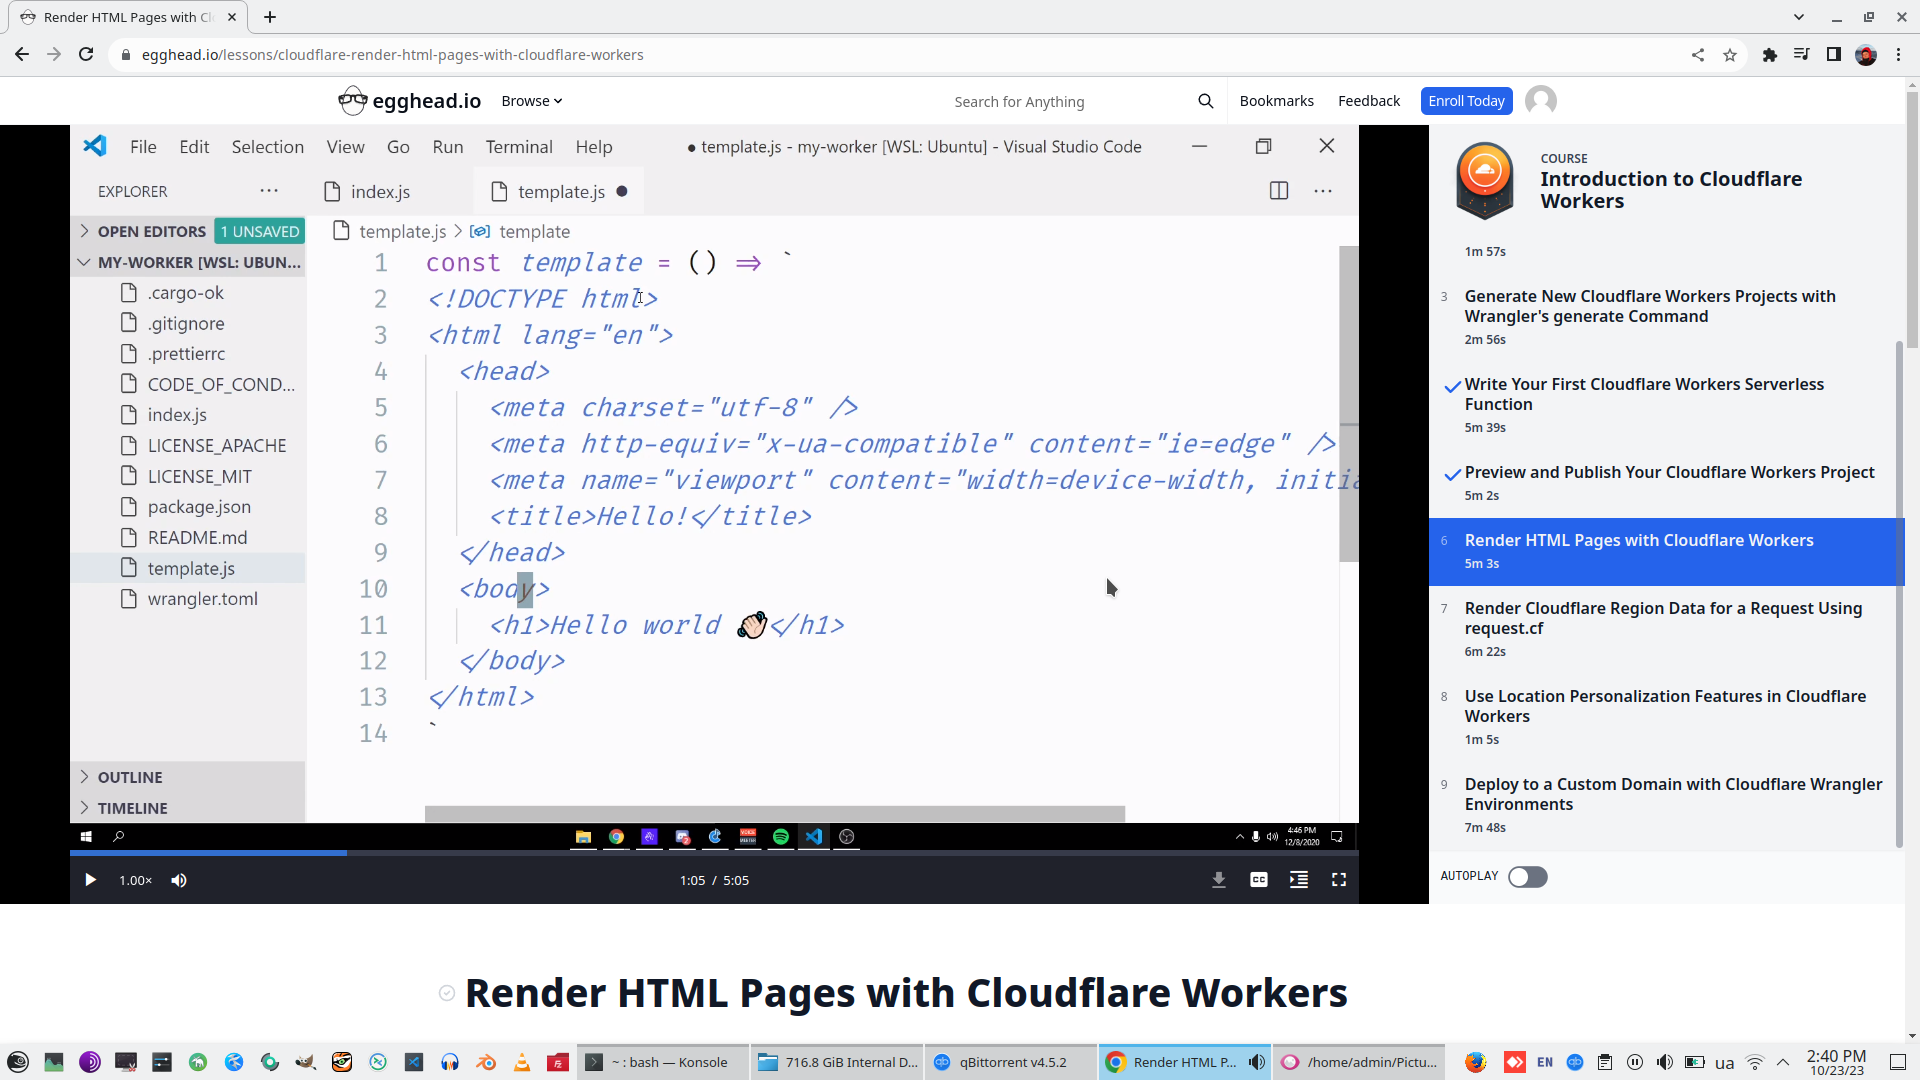
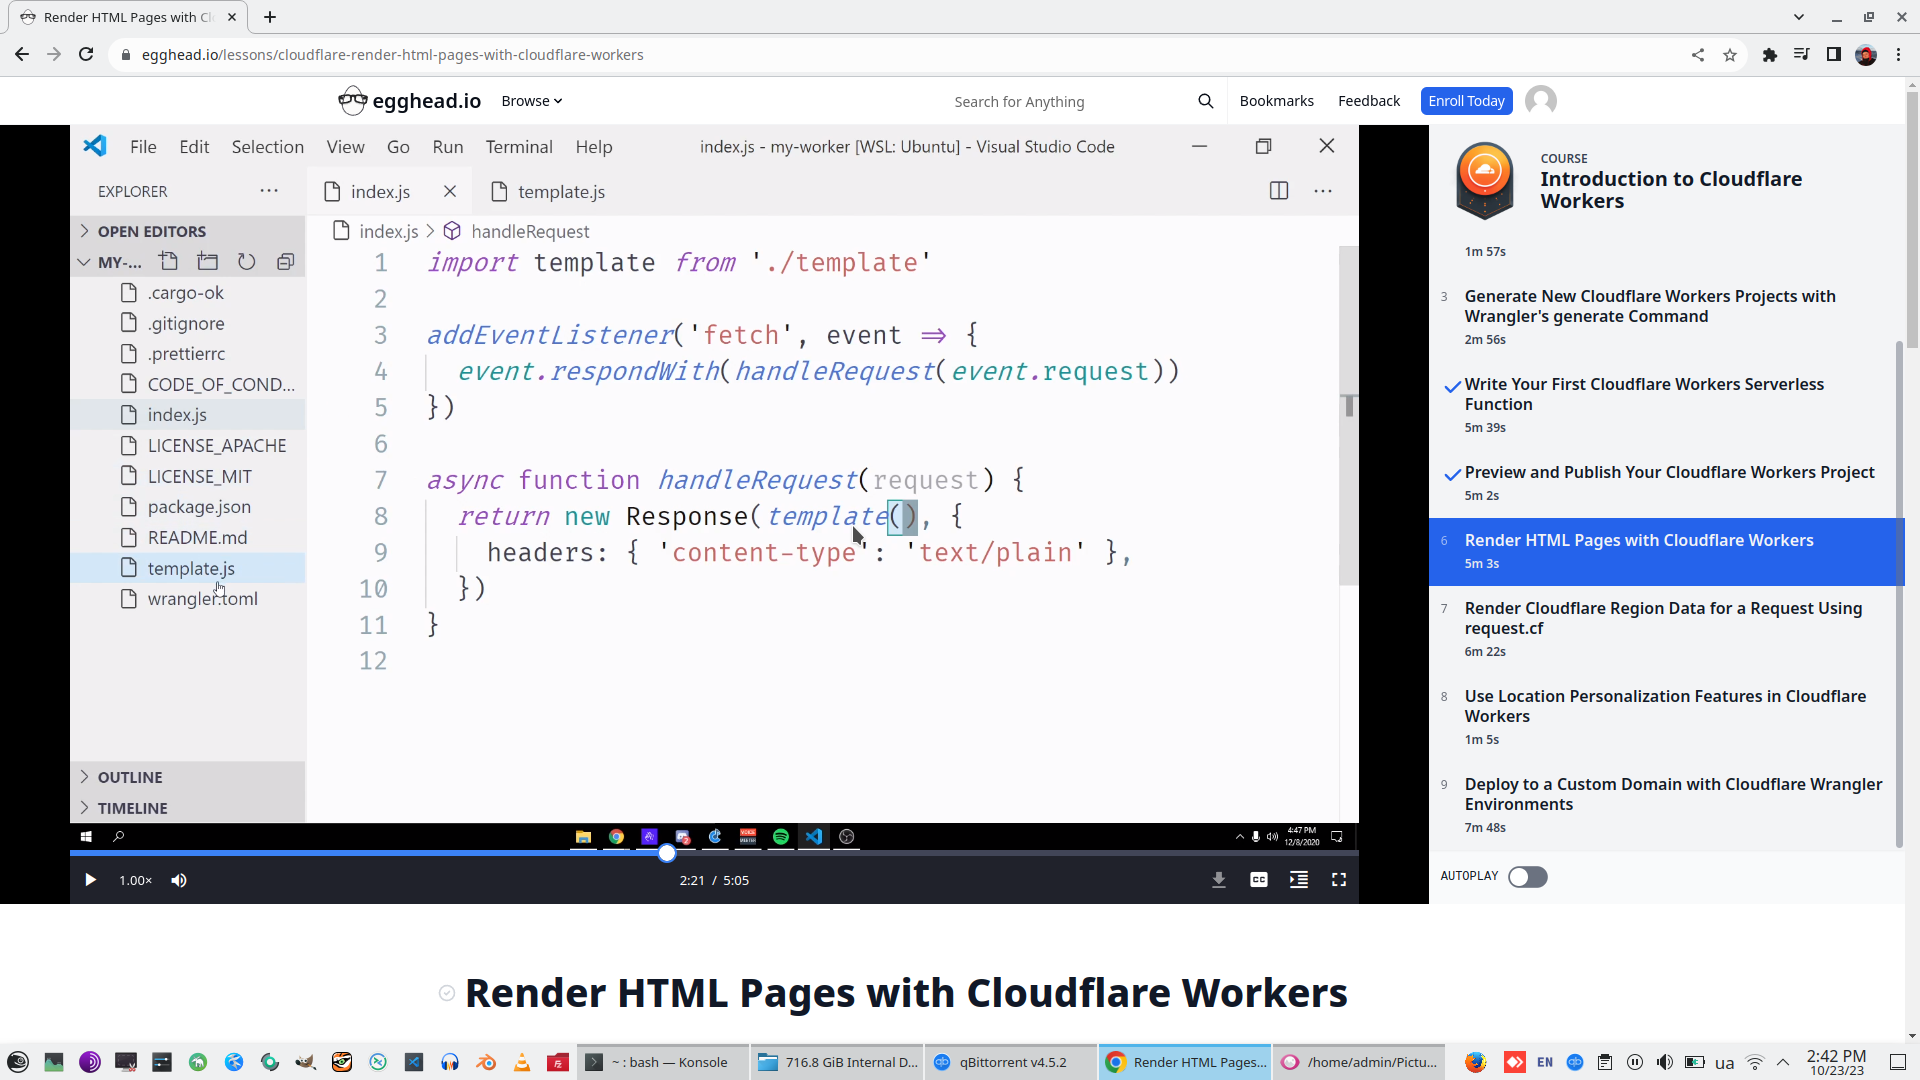
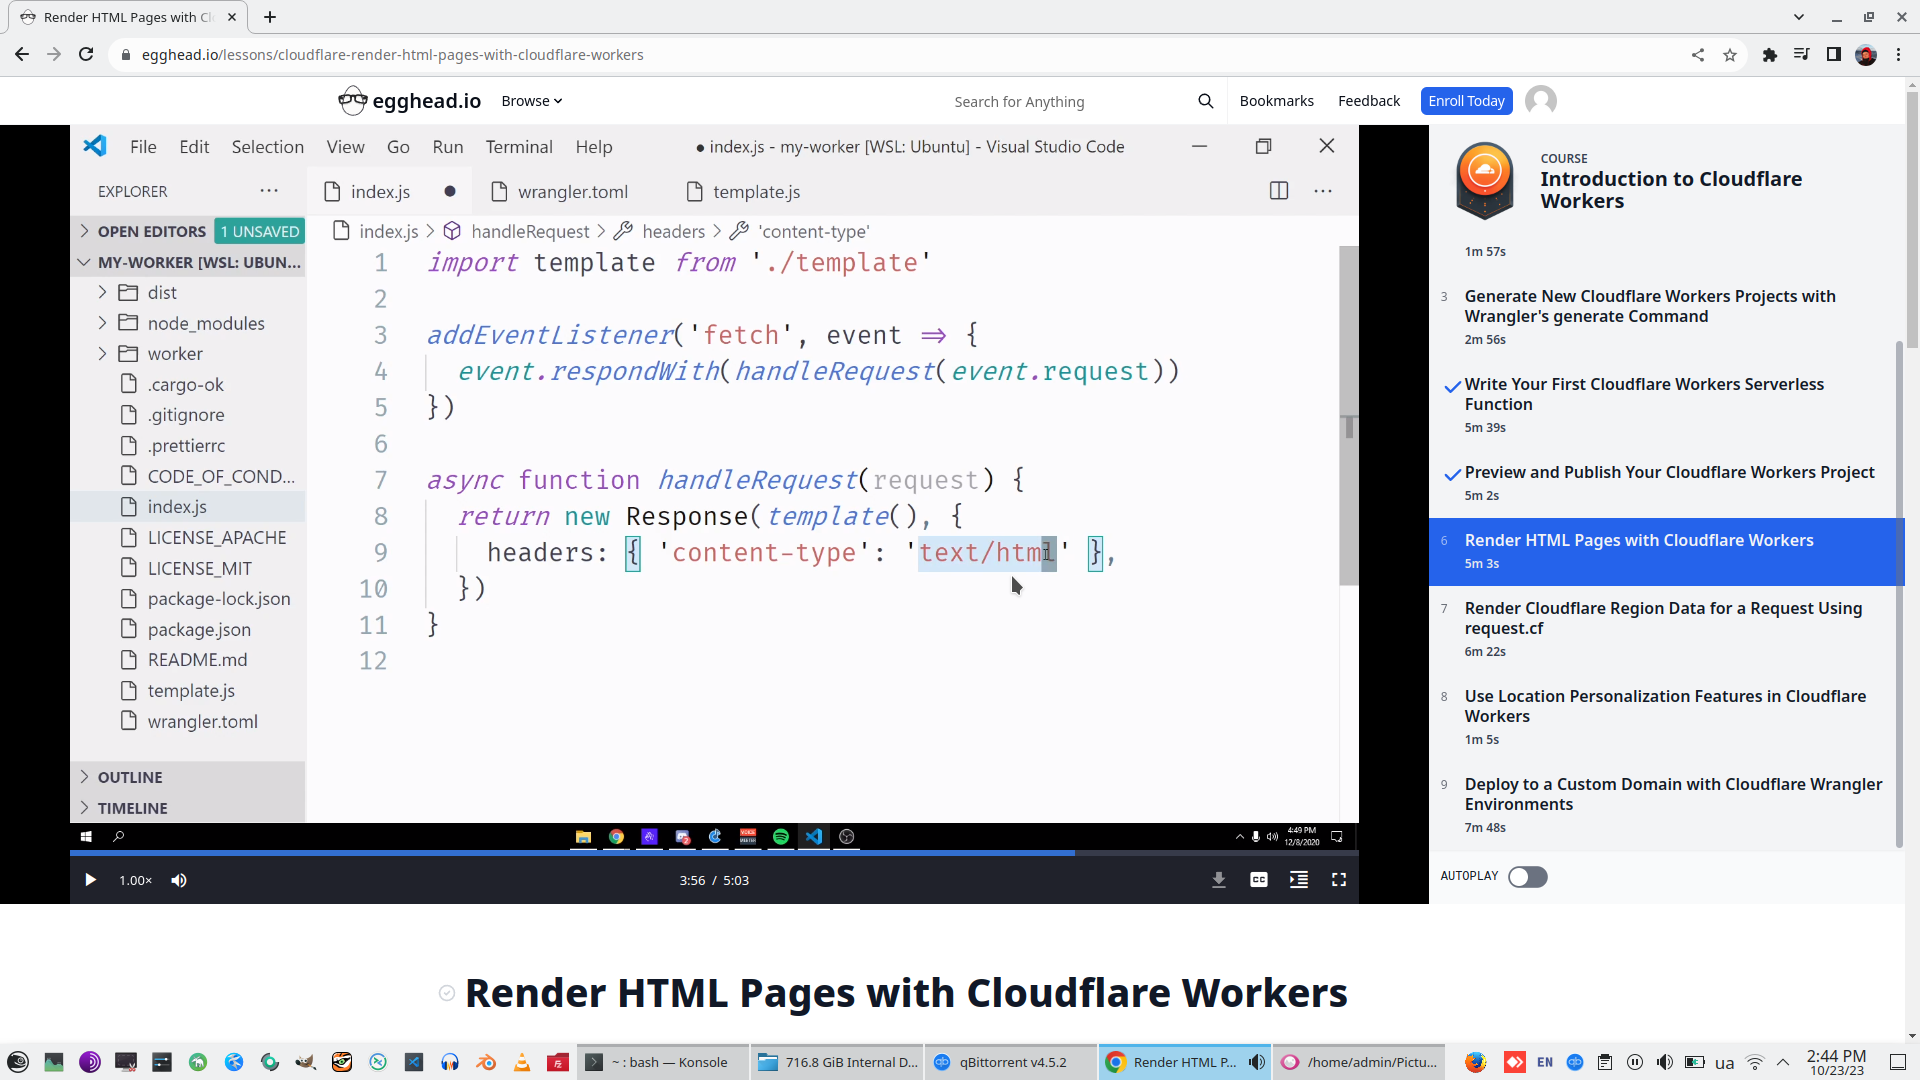
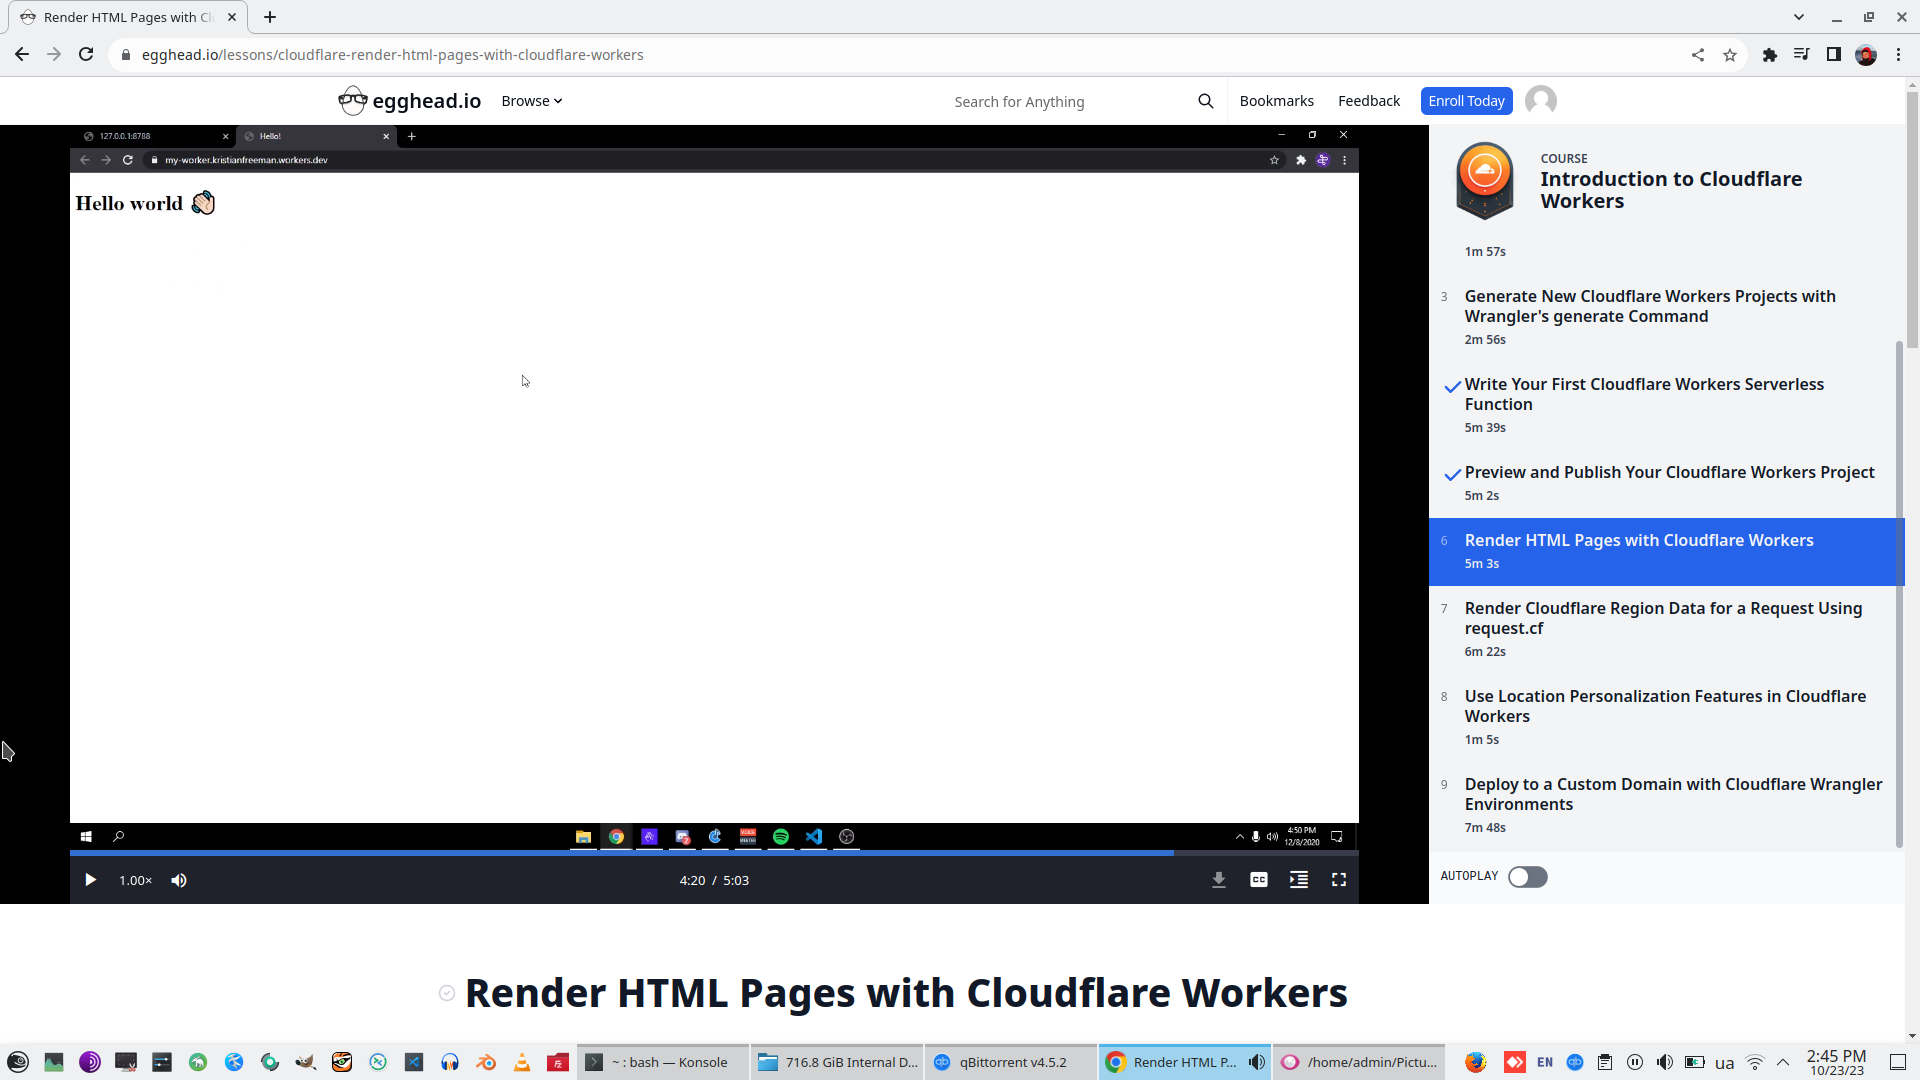
6. Render HTML Pages with Cloudflare Workers
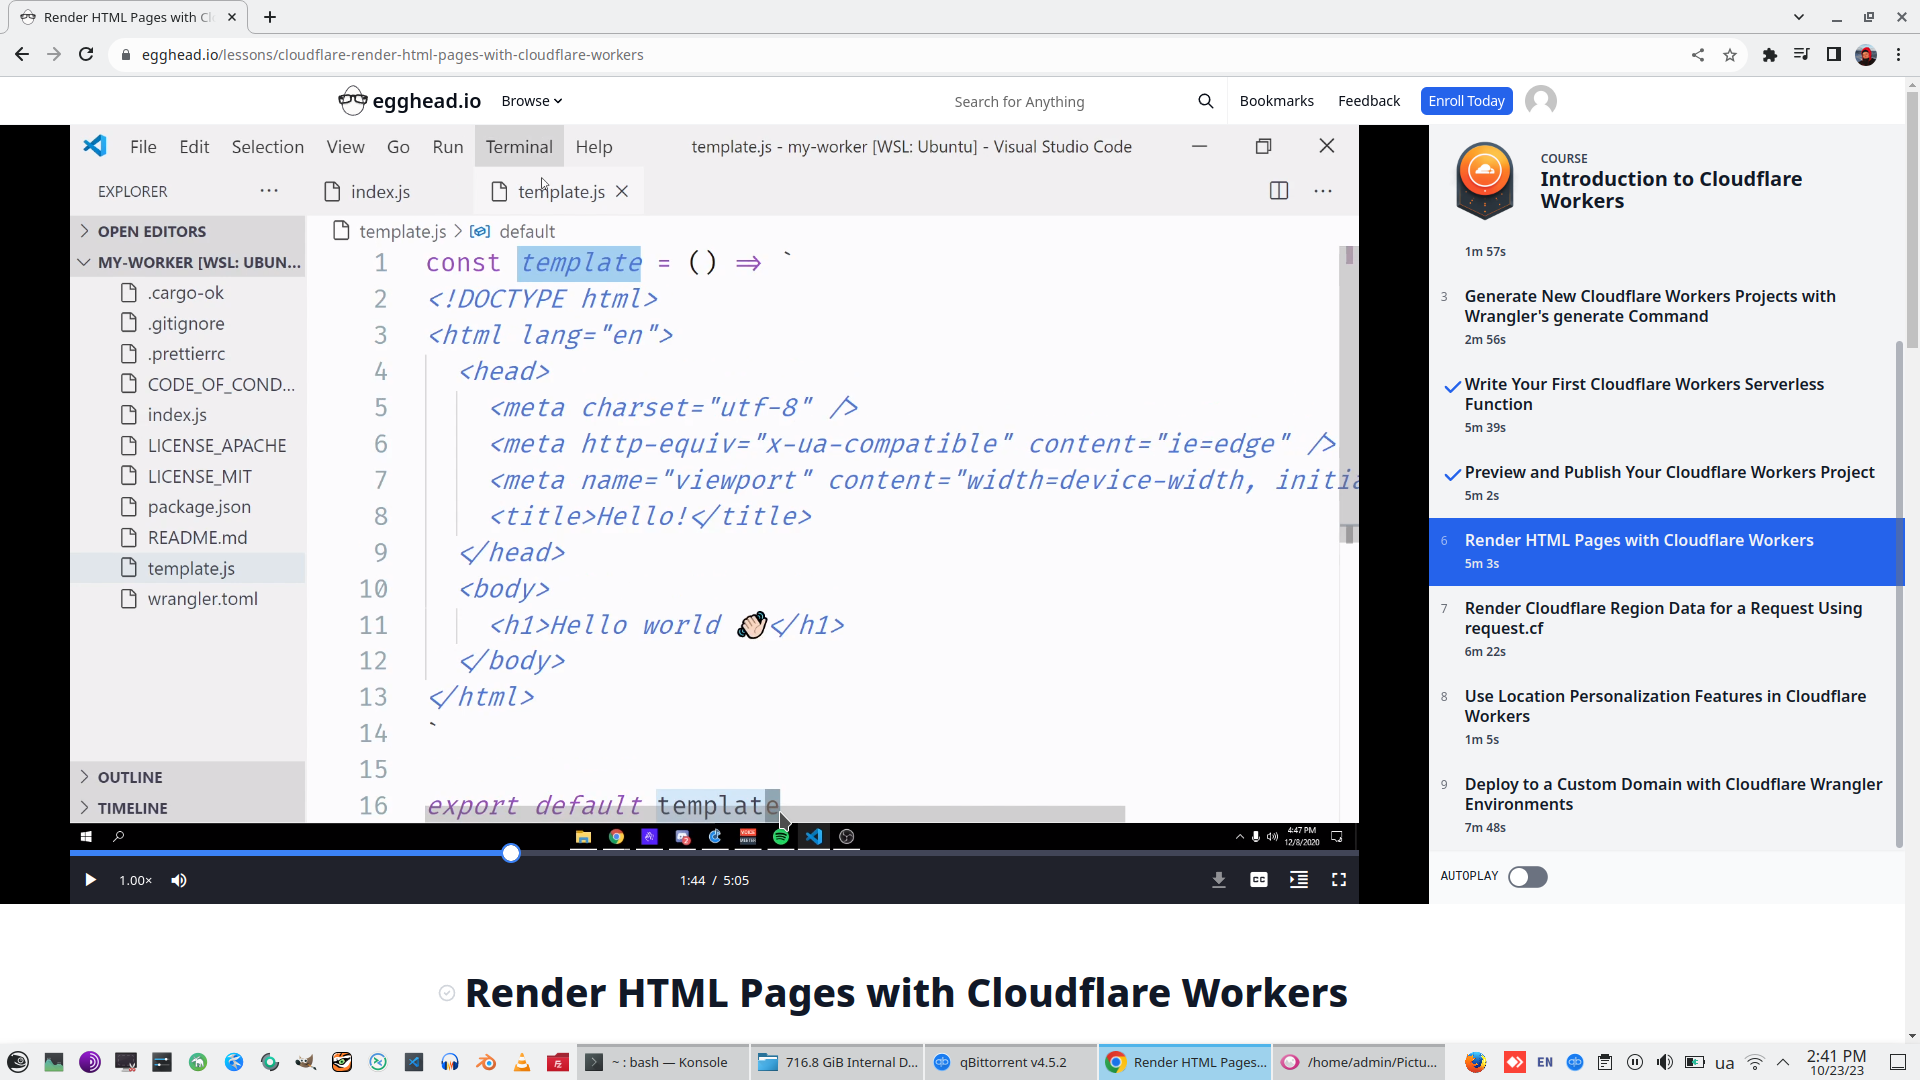
Create new function with HTML-template and export that function from Template.js
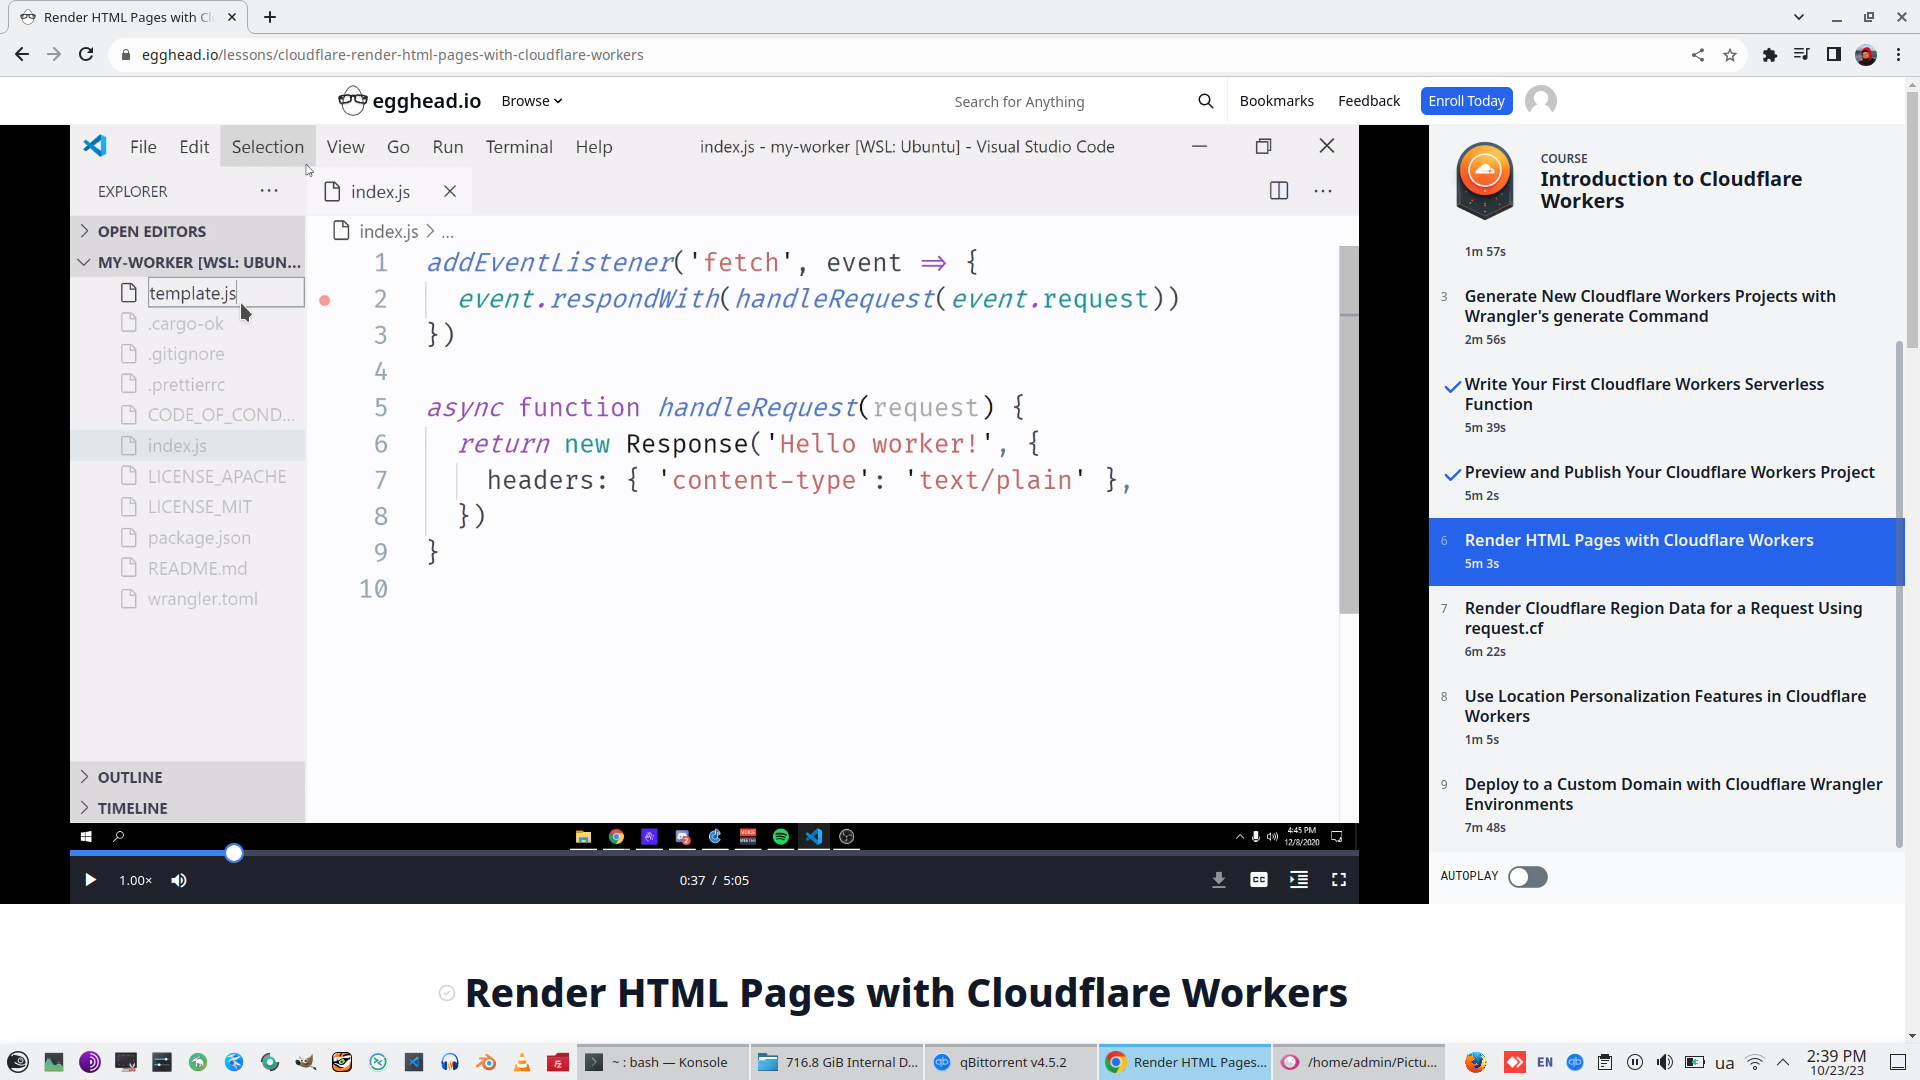
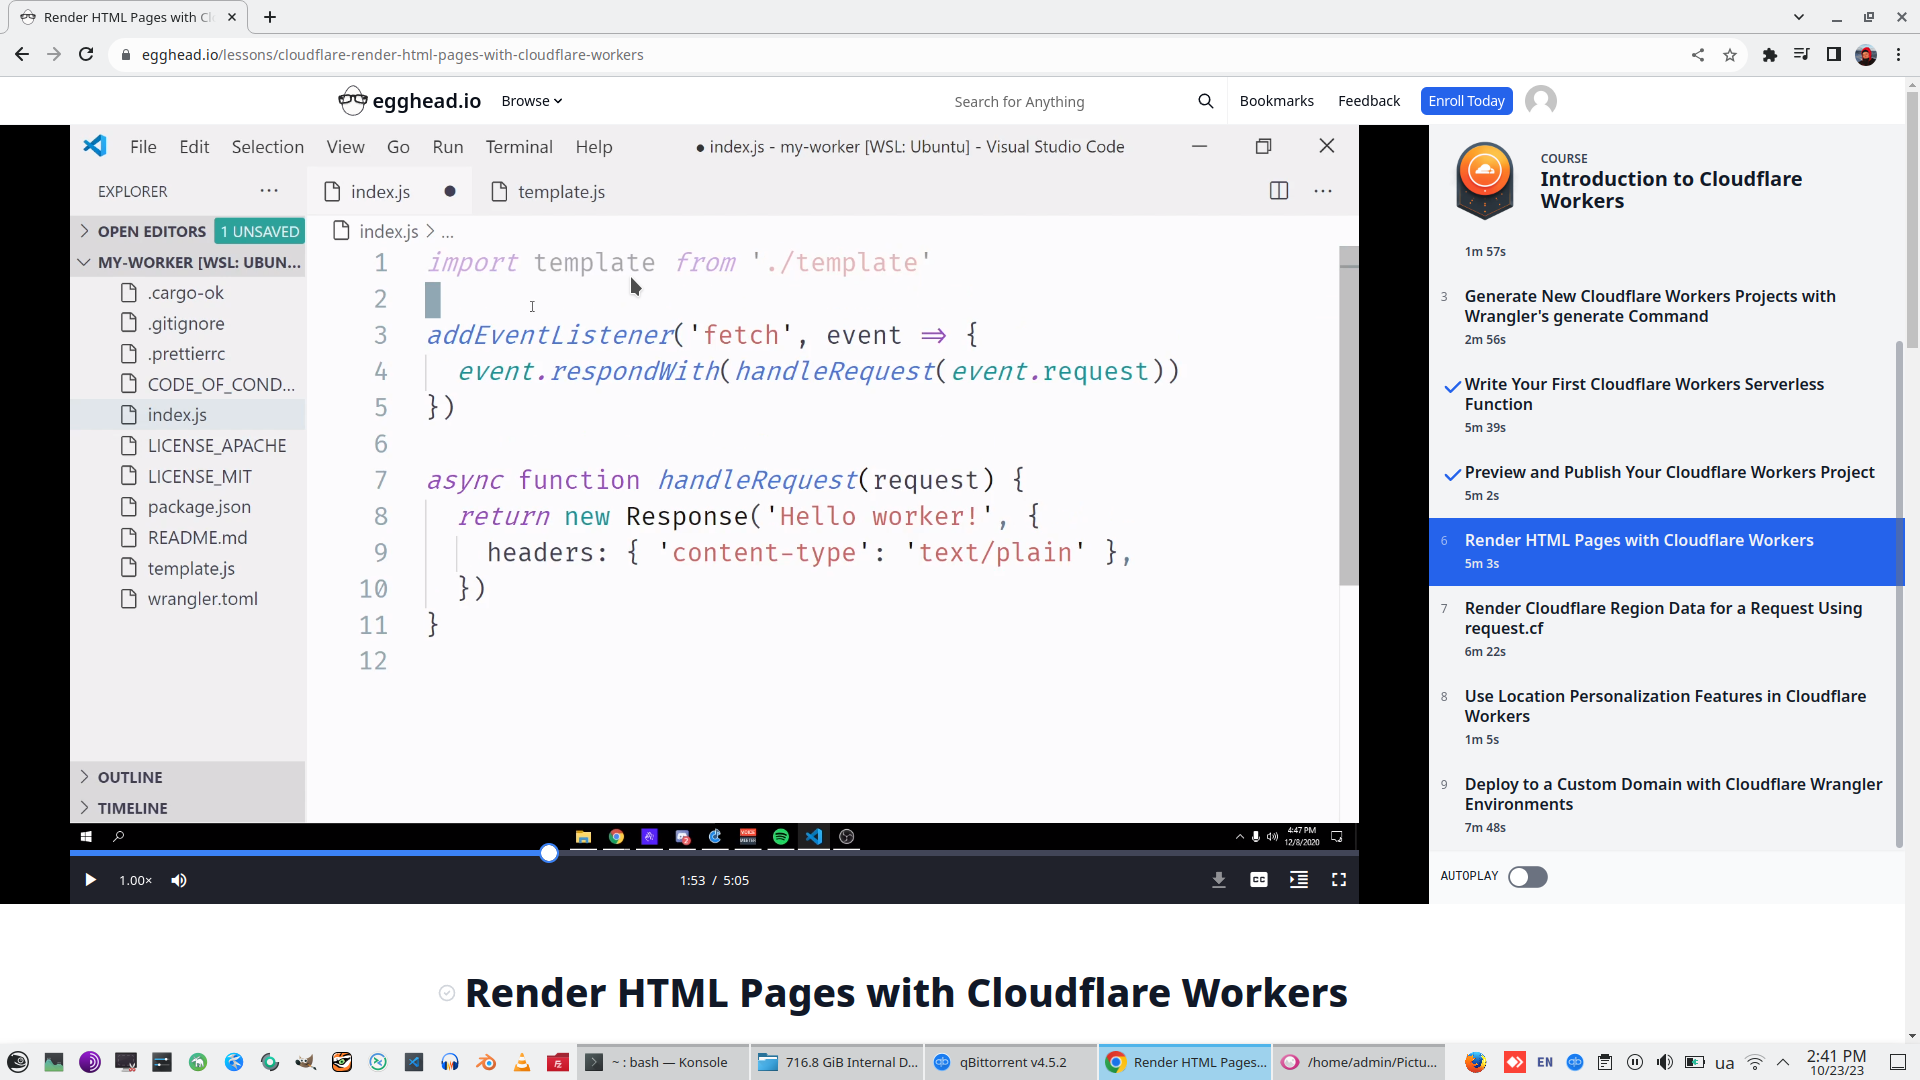
Import Template.js to Index.js
Export function Template.js as ServerWorker Response. Change response.content.type from Javascript to Webpack
Publish and check result.
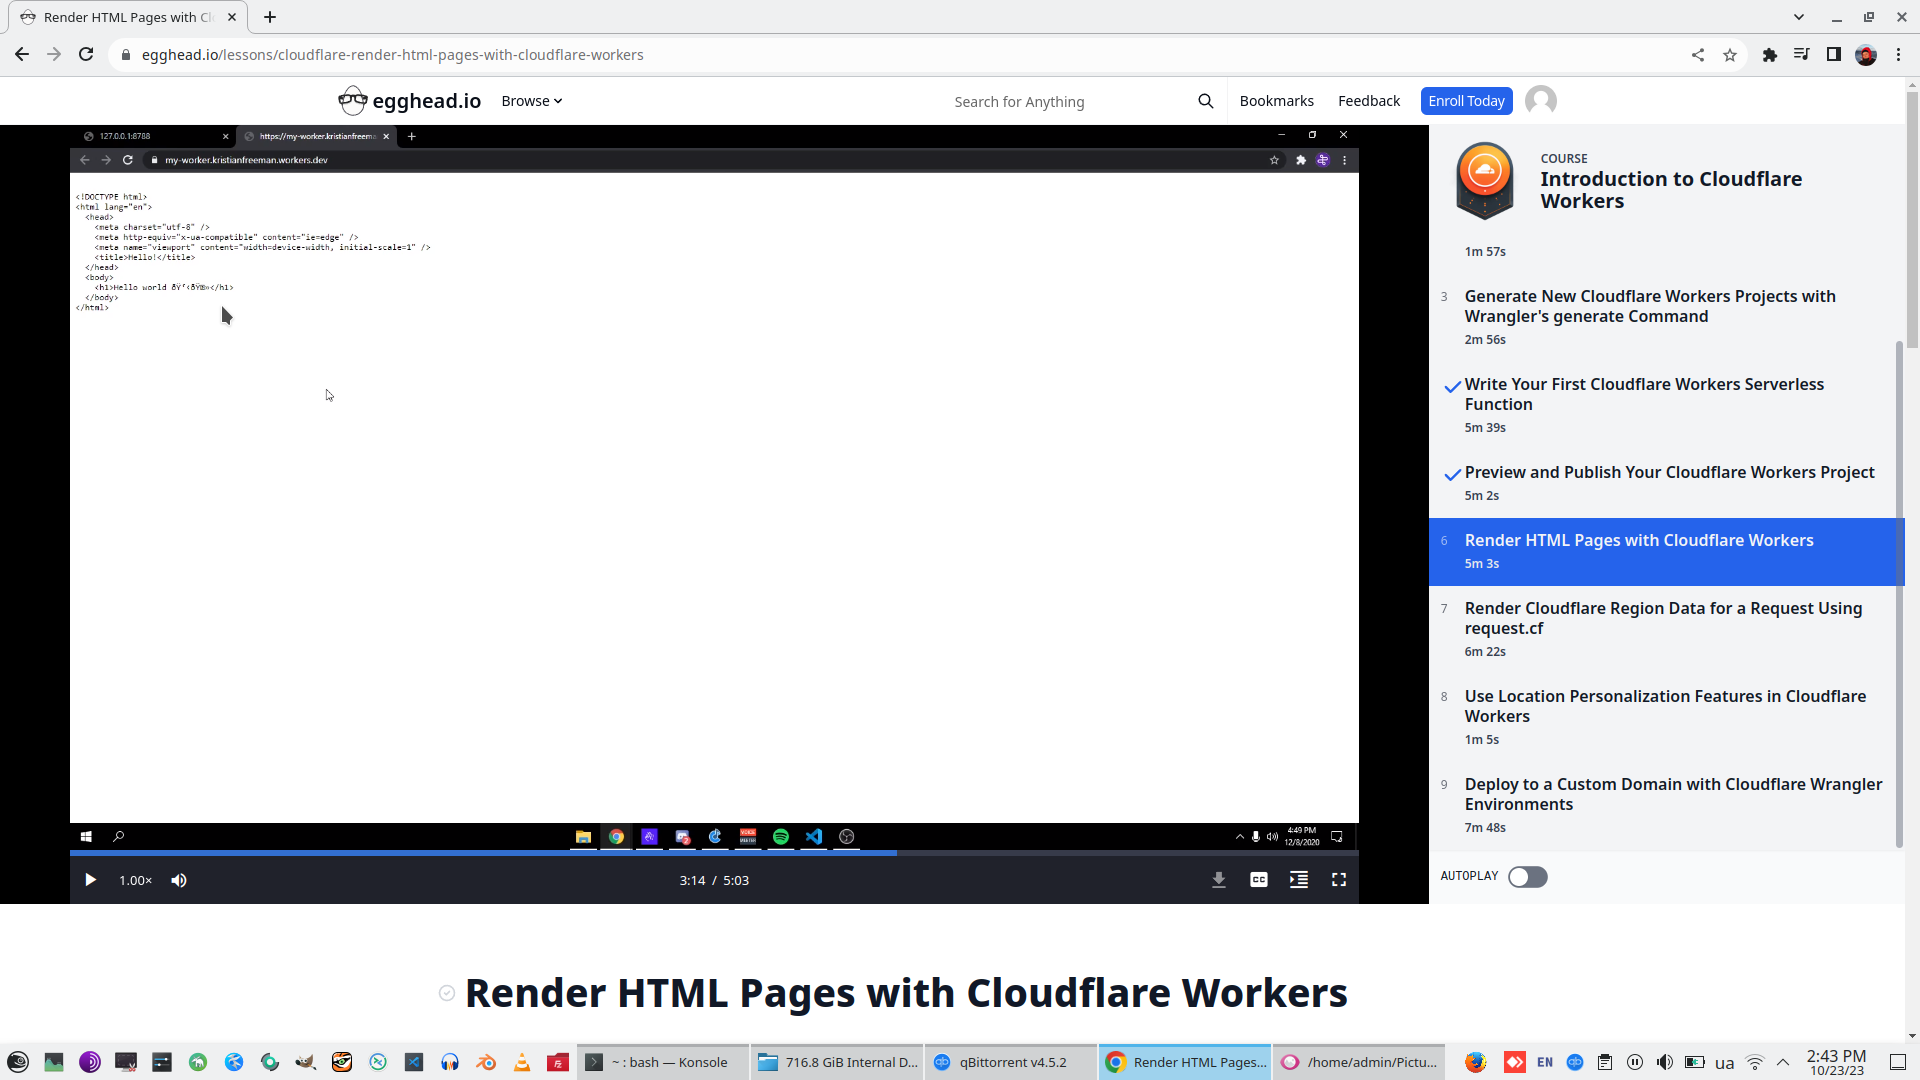
Change Response.type and receive finally workable page on custom domain.

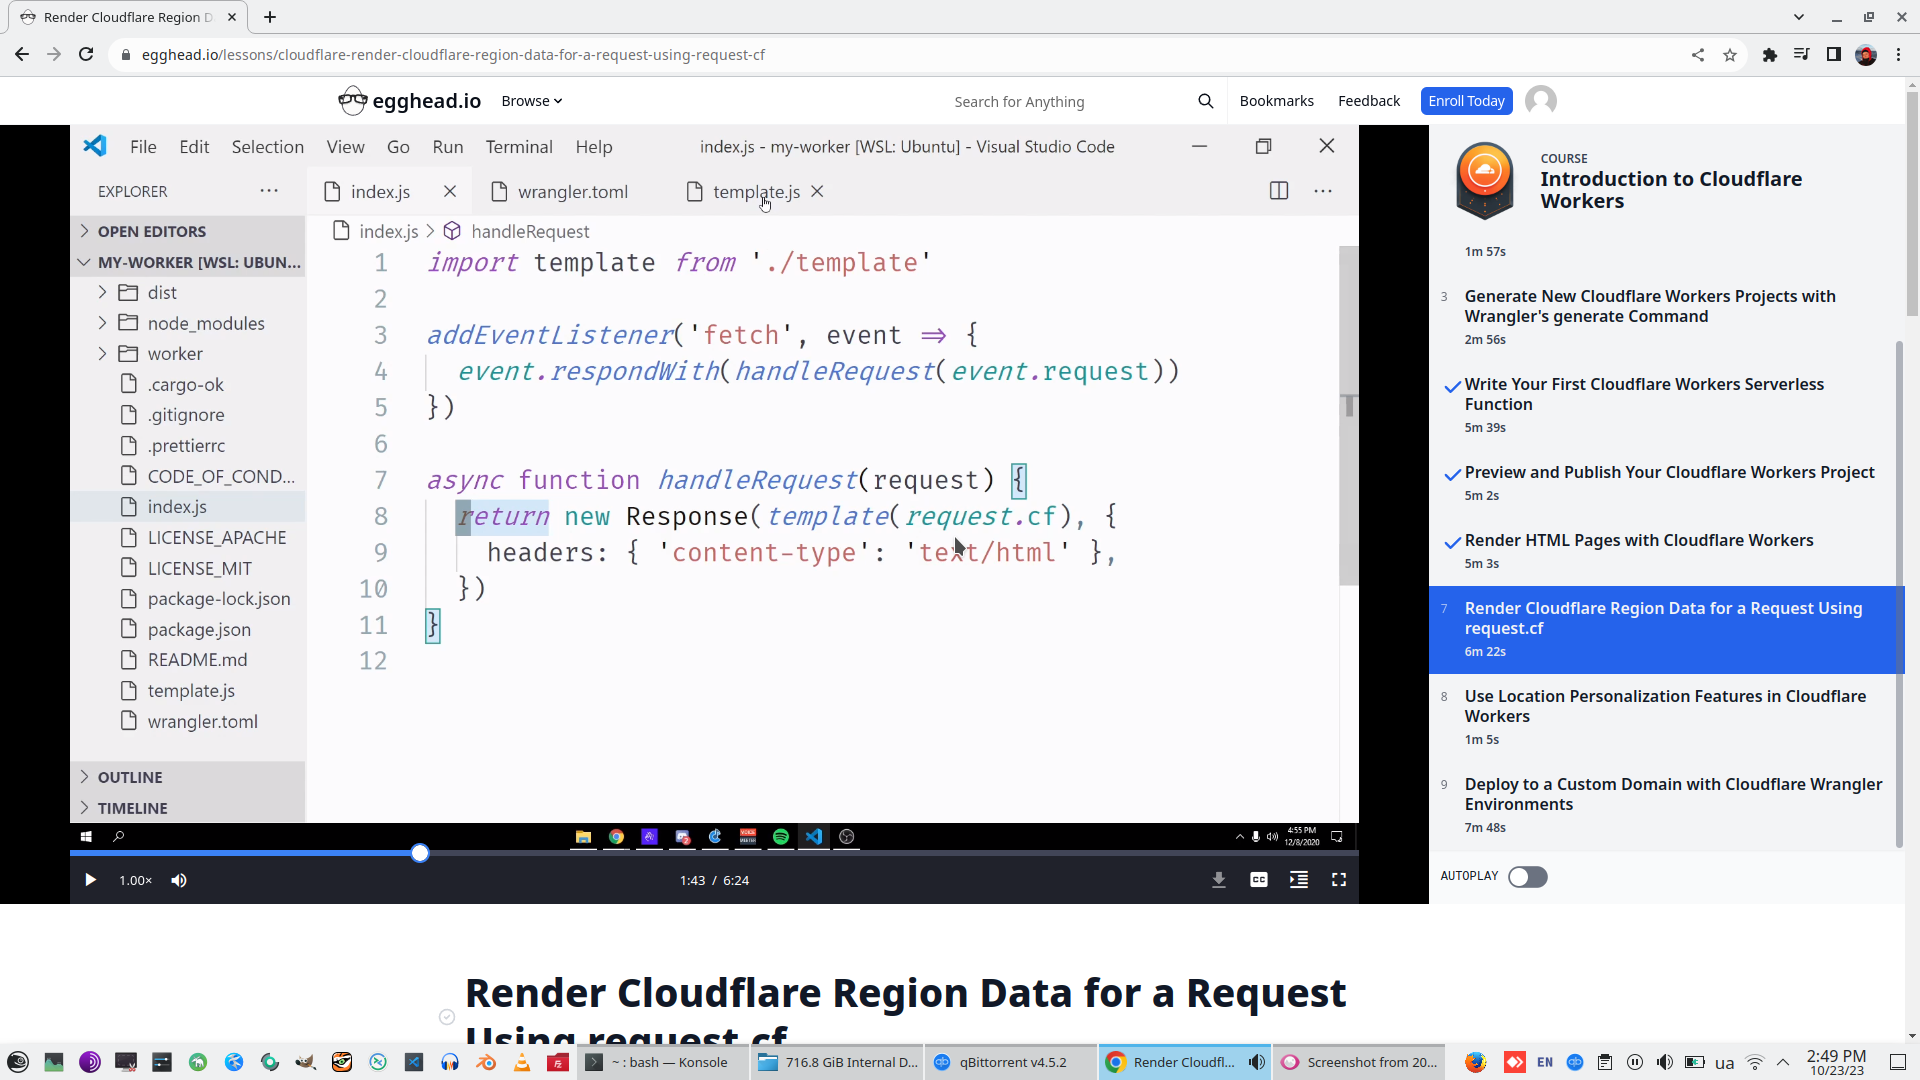
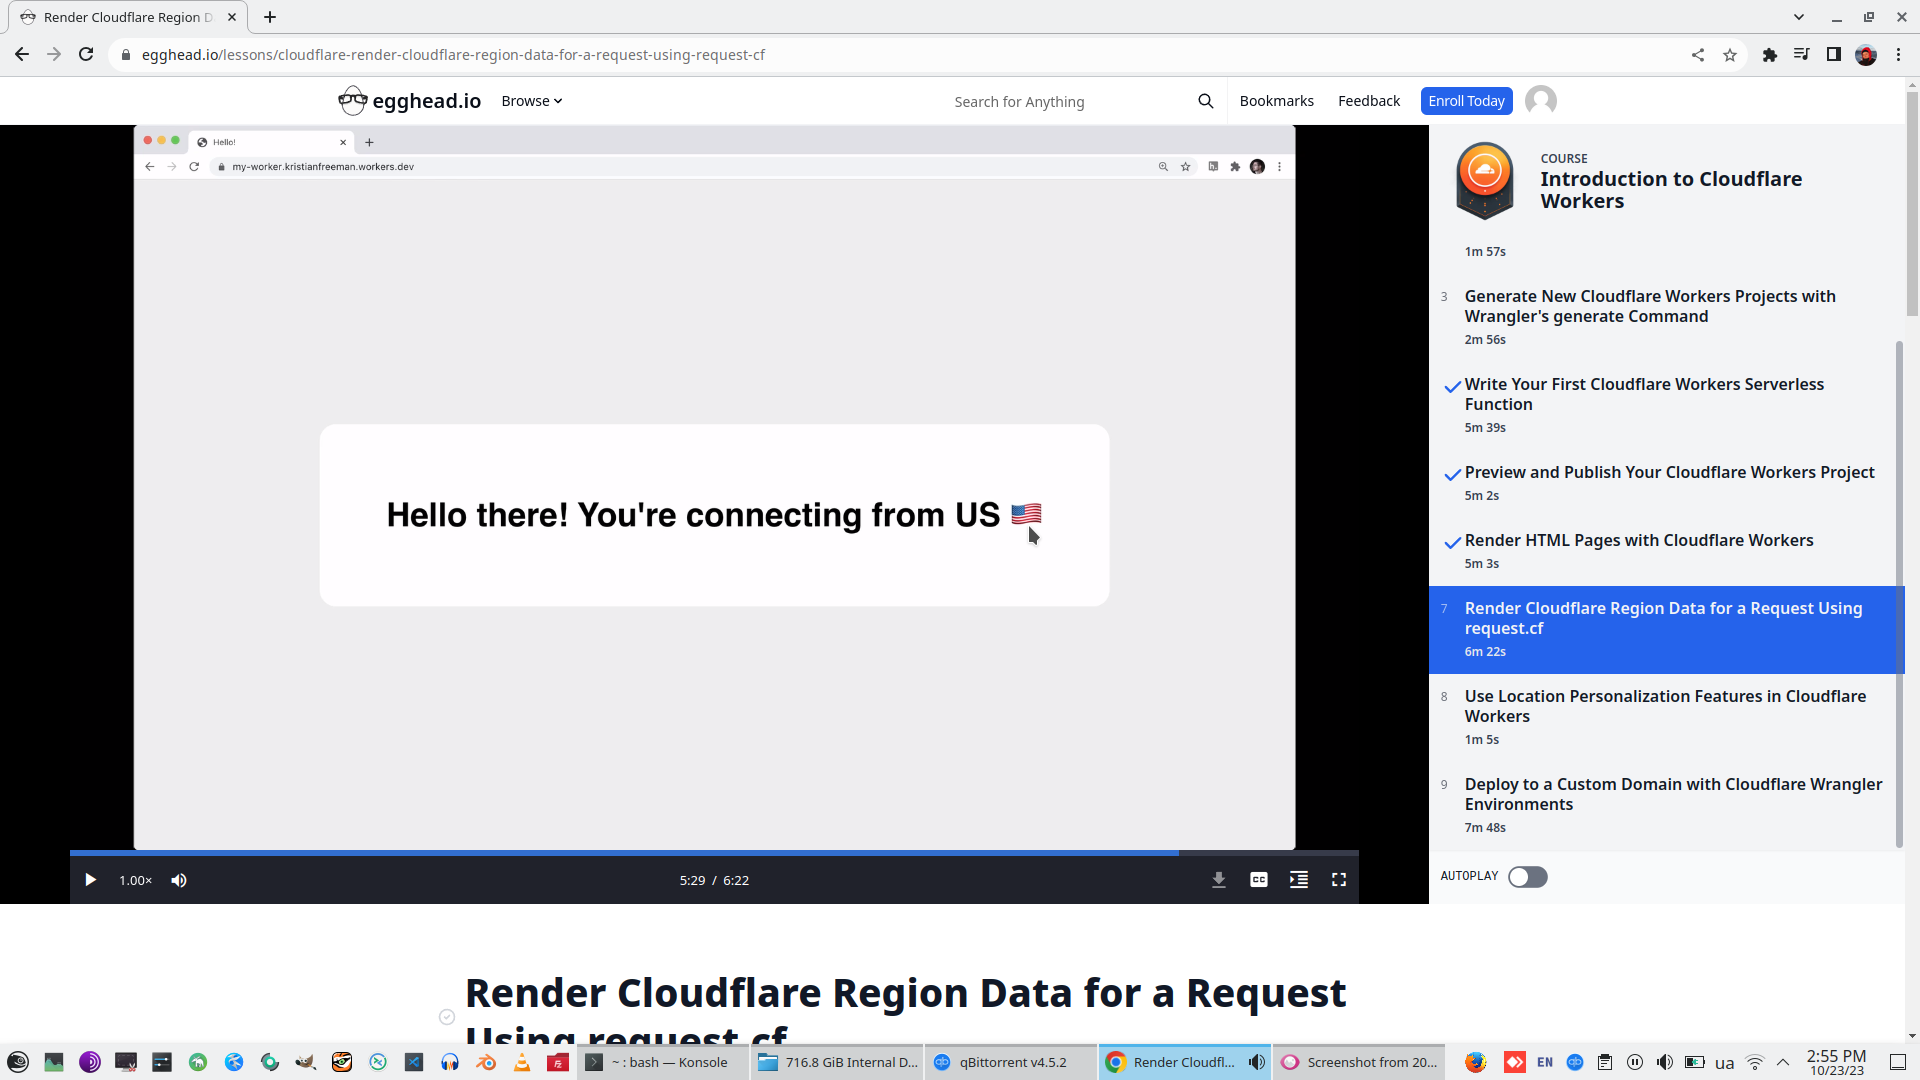
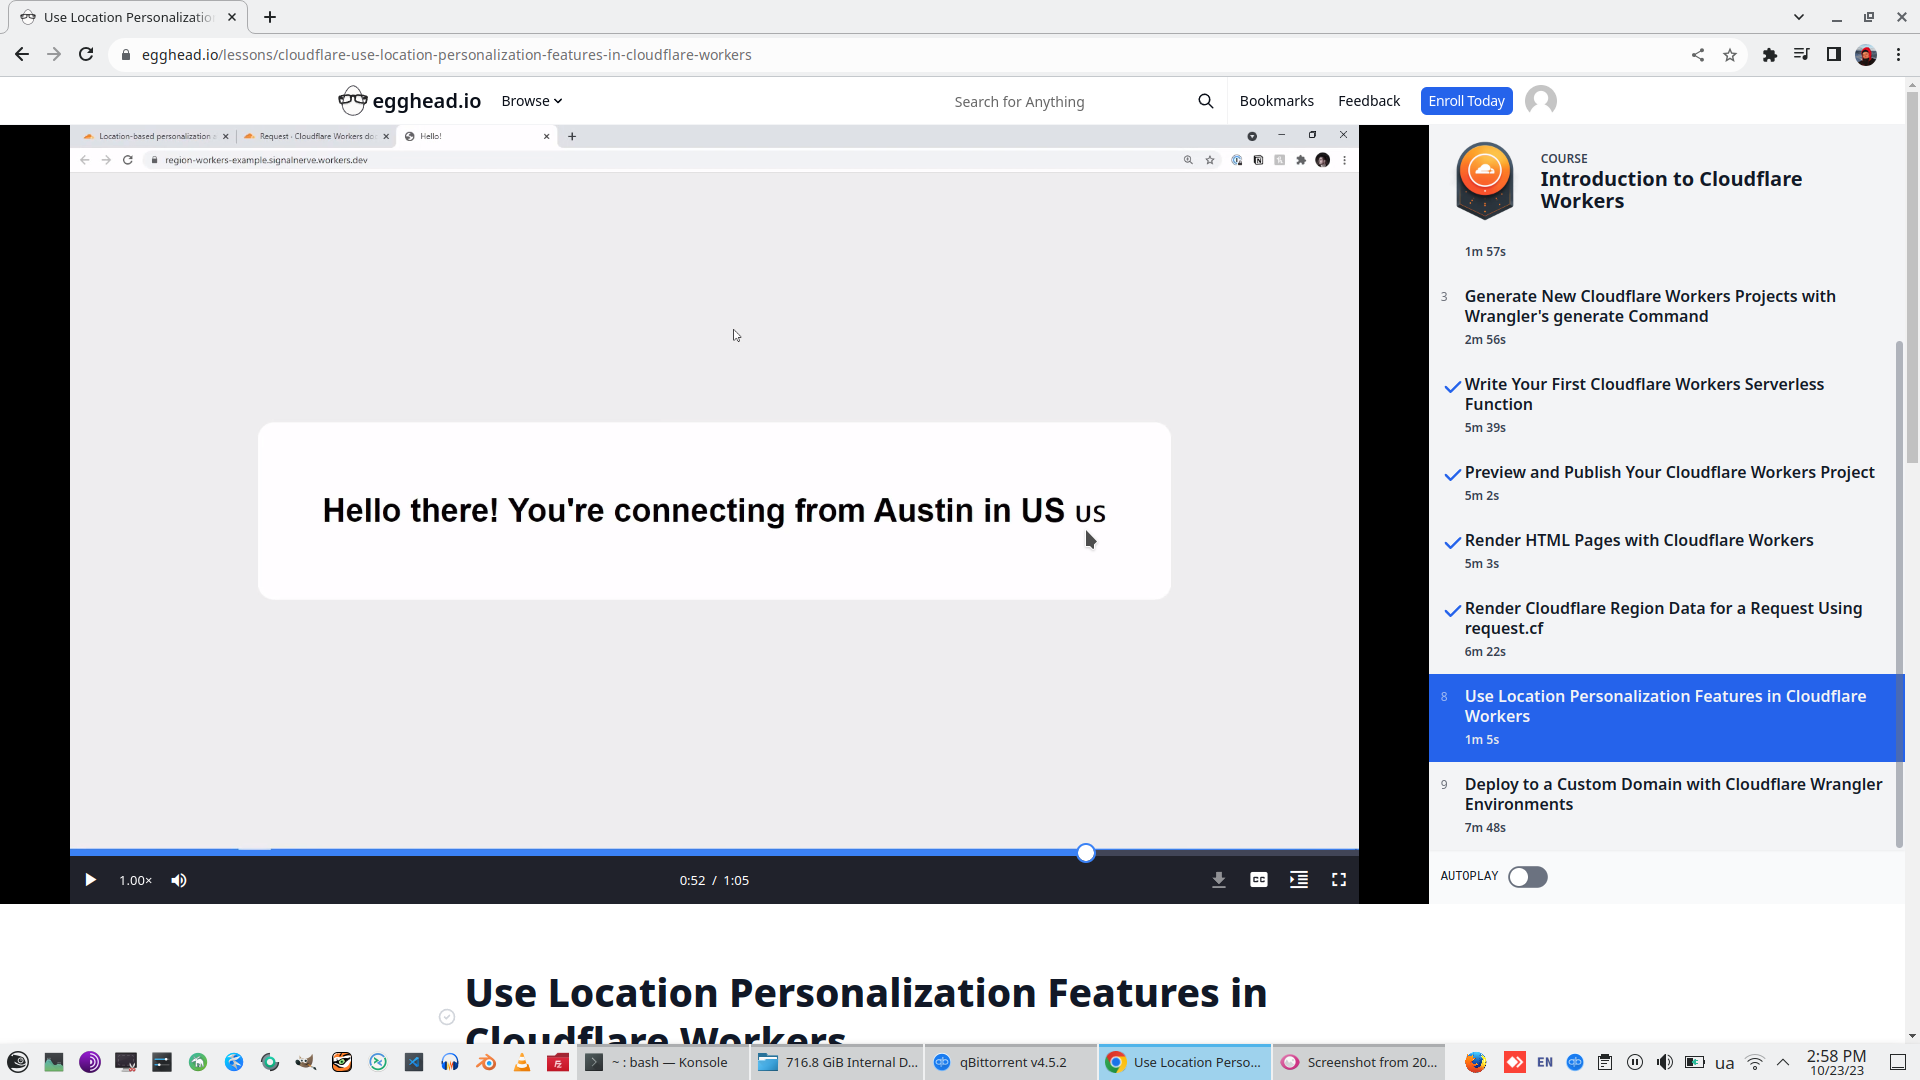
7. Render Cloudflare Region Data for a Request Using request.cf
Look to full documentation of ServiceWorker Request.

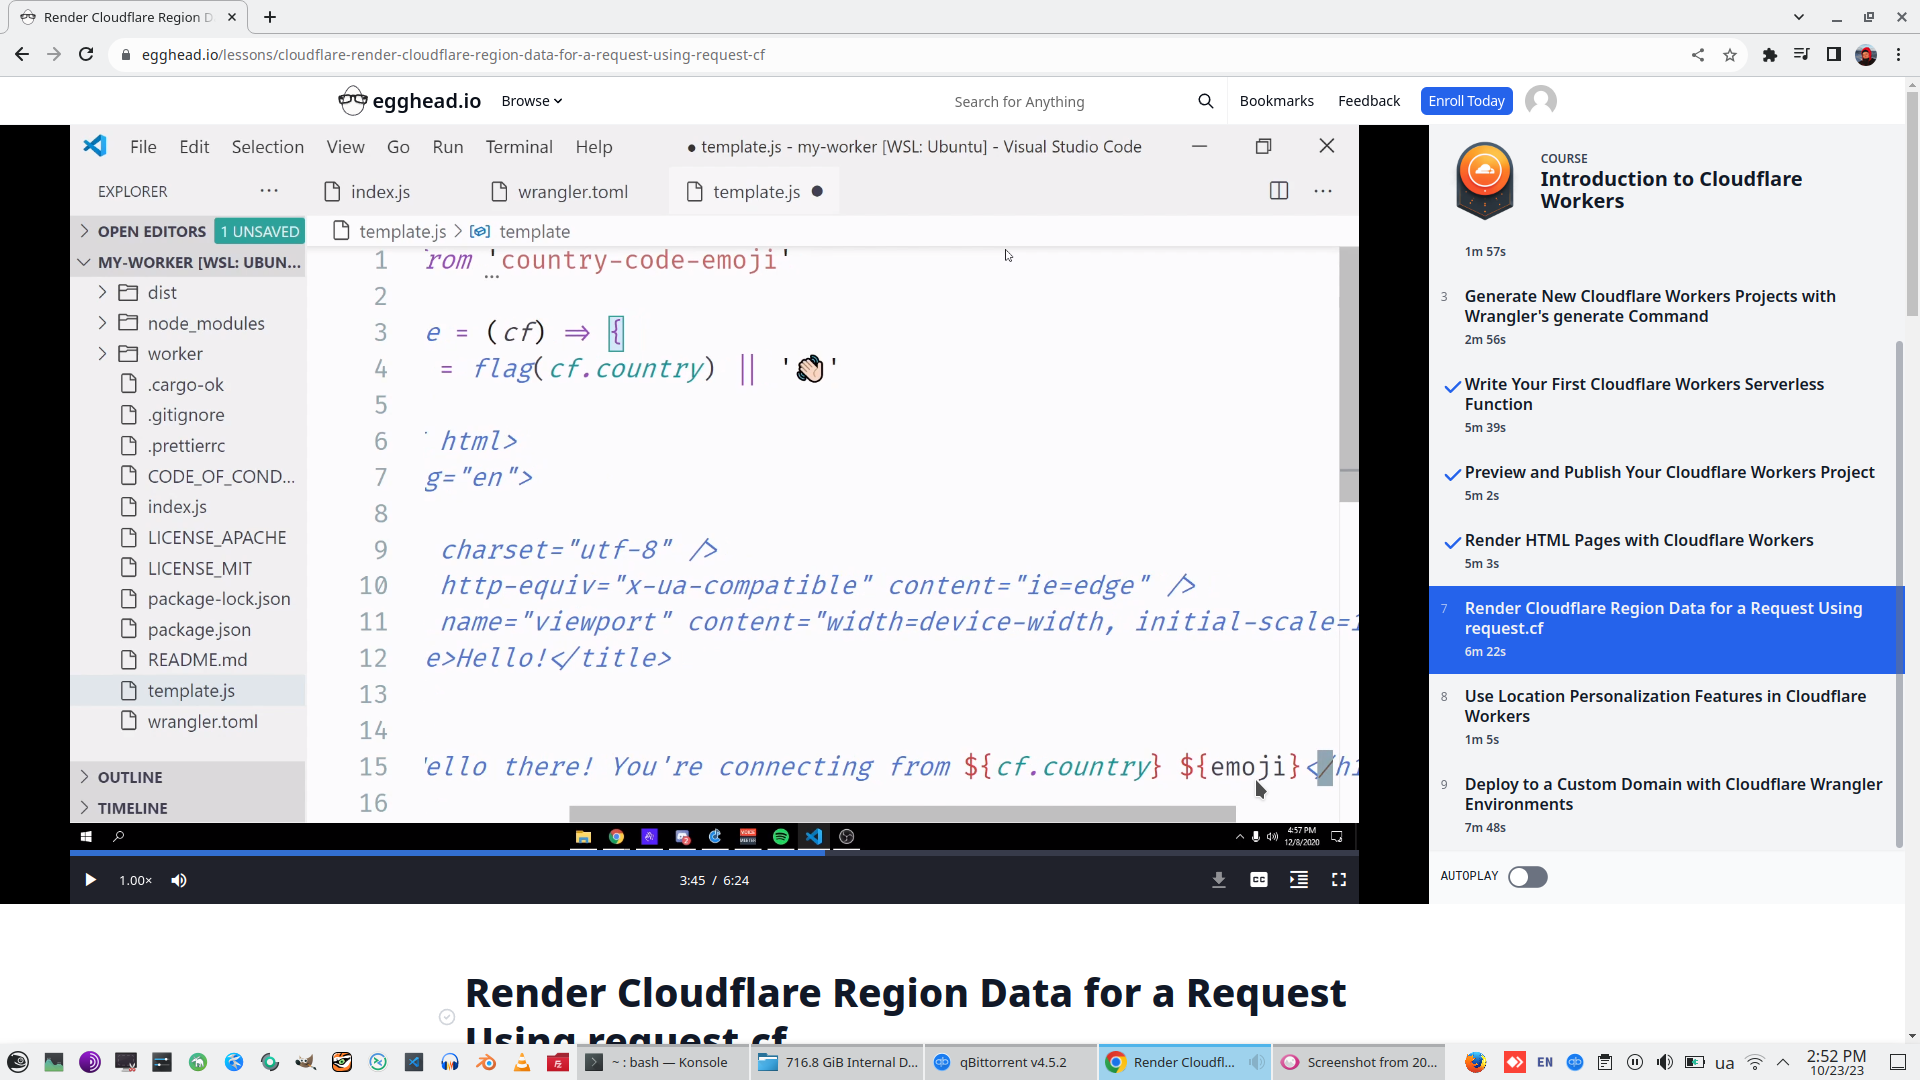
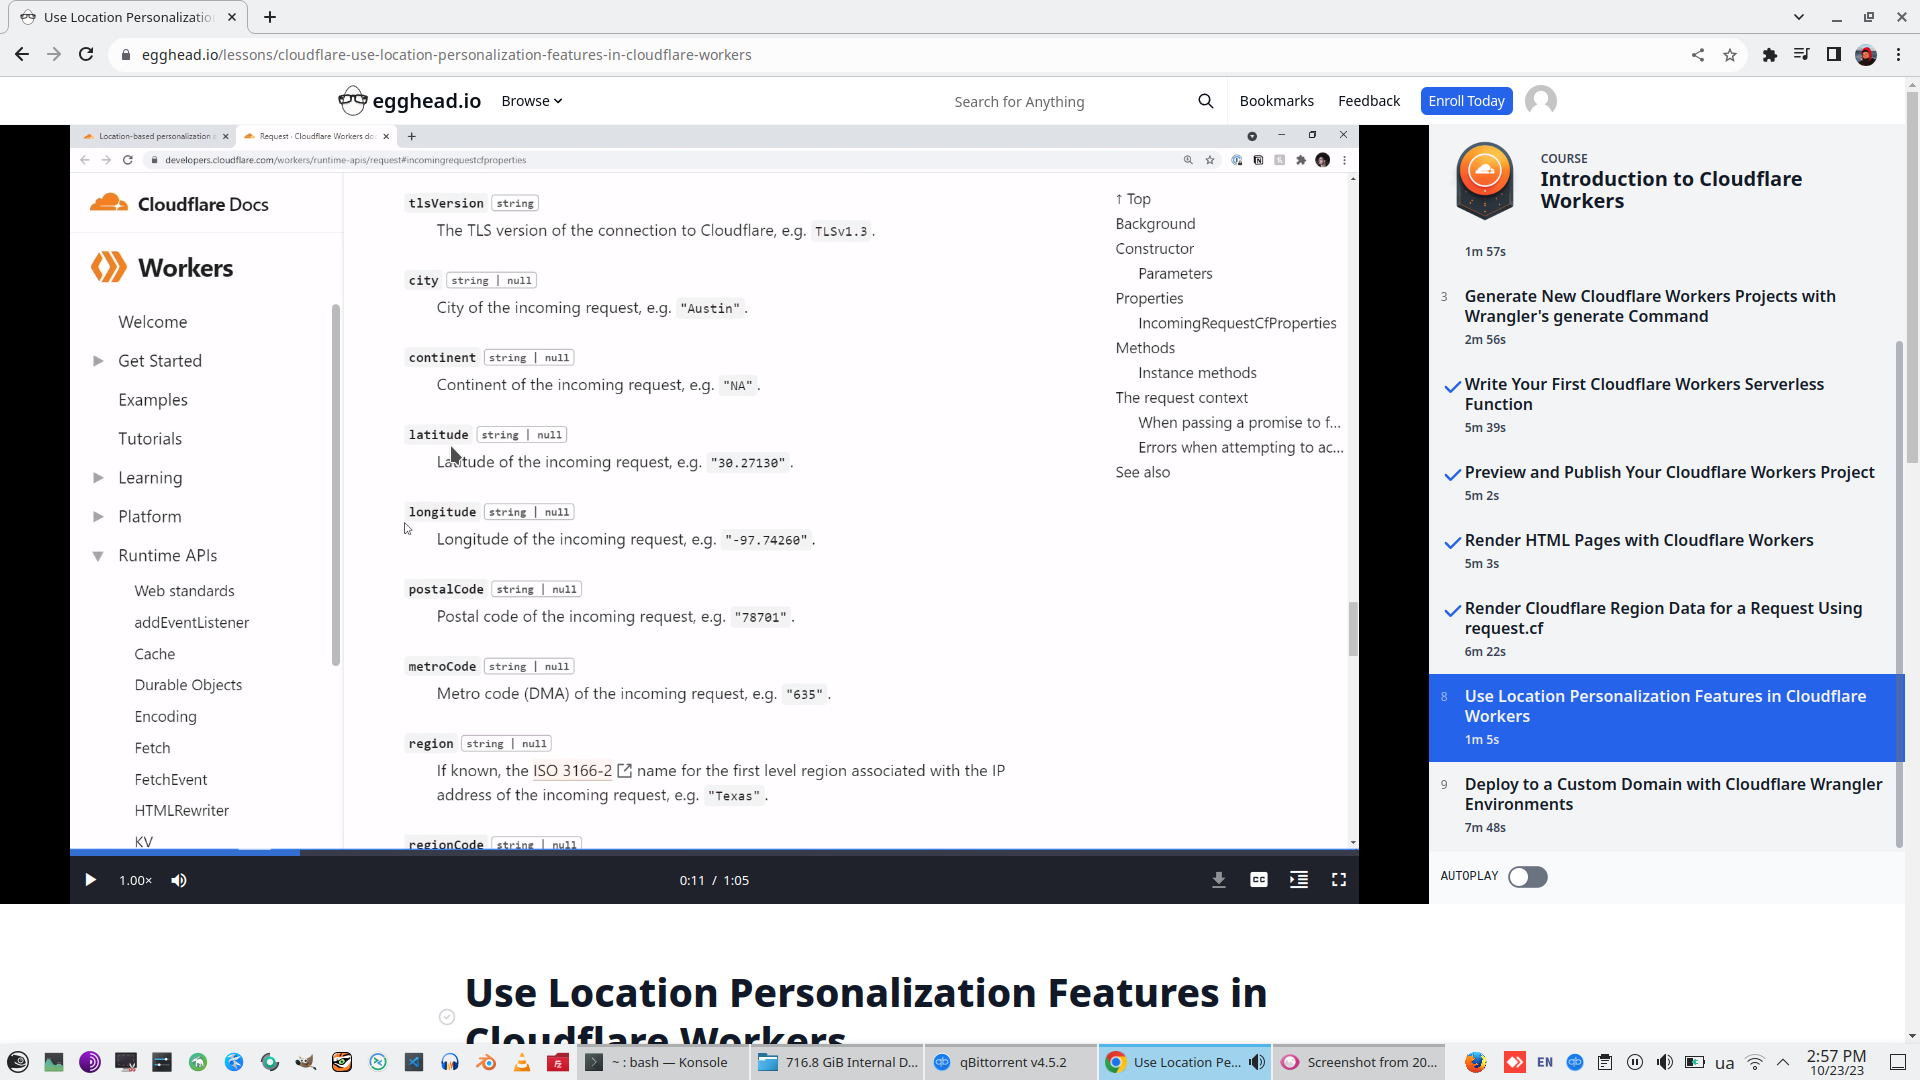
Request.CF contains all additional Cloudflare information, for example country.
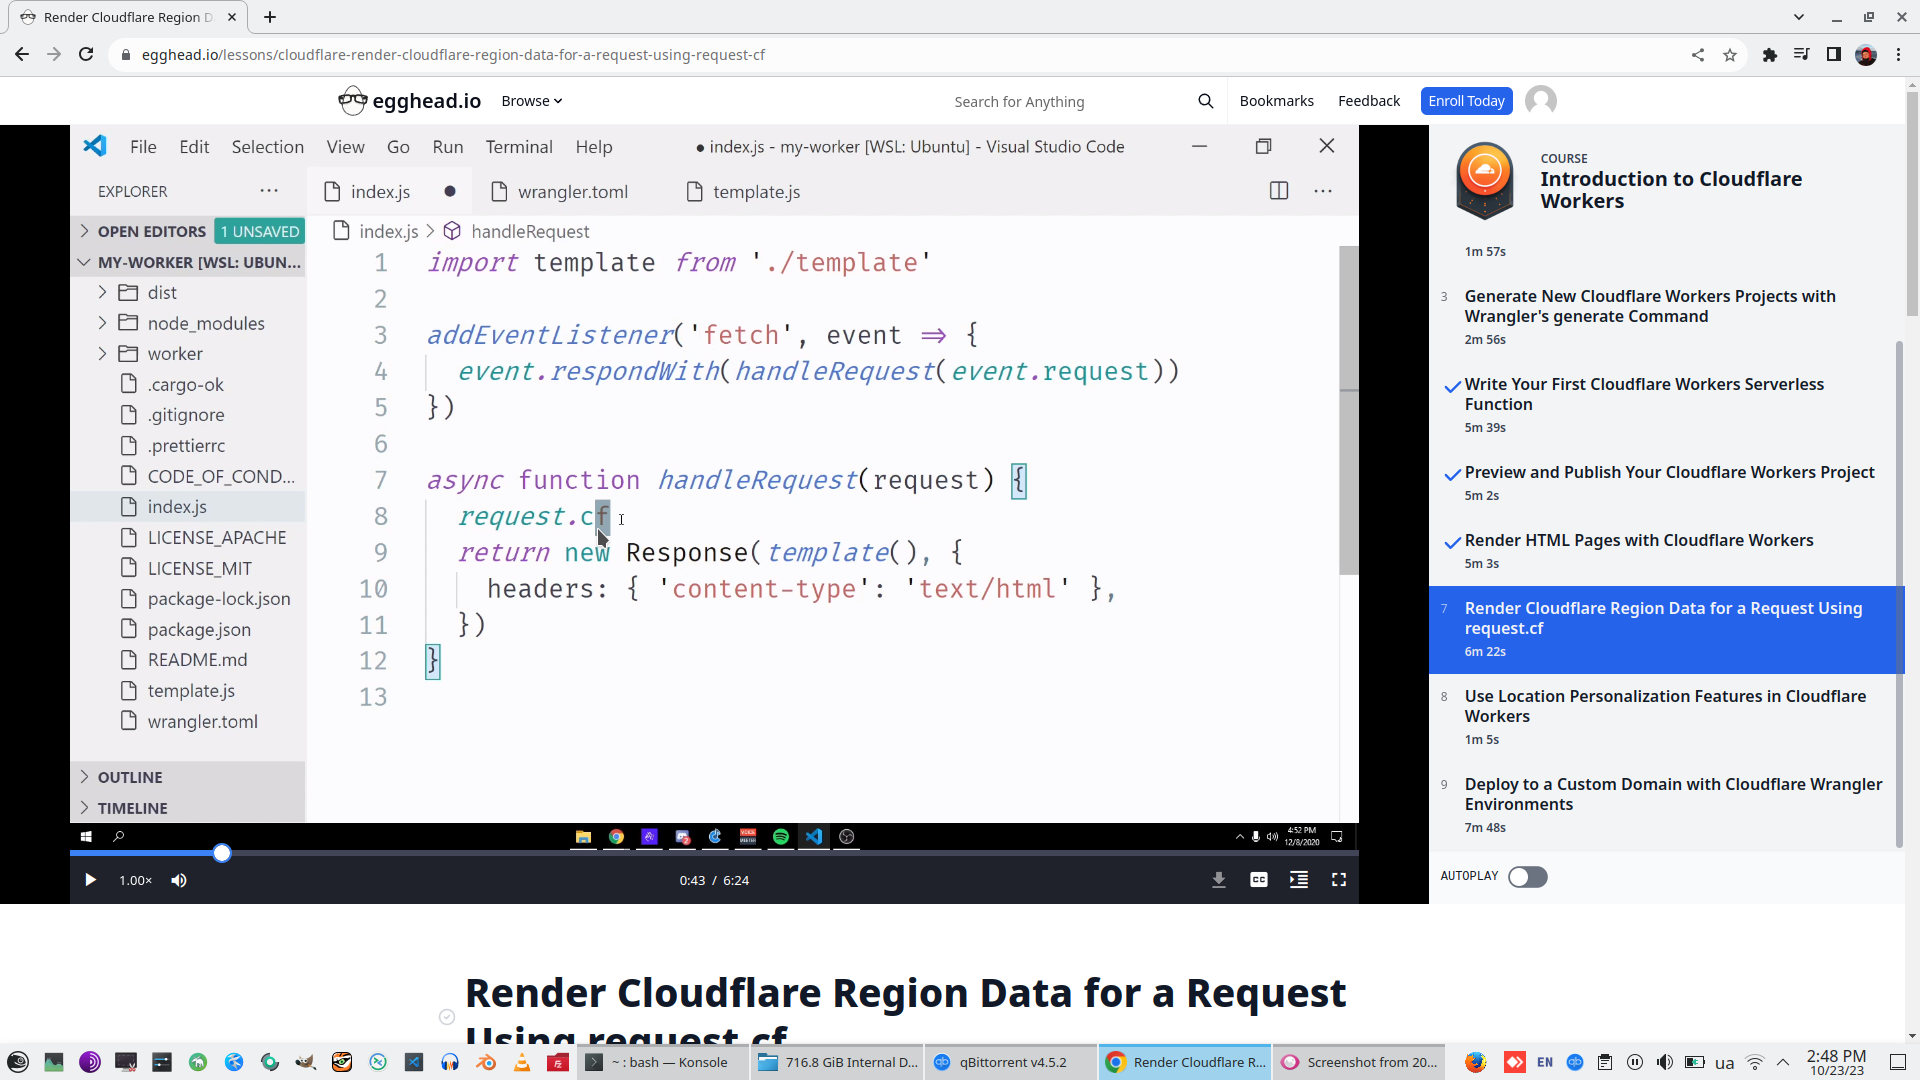
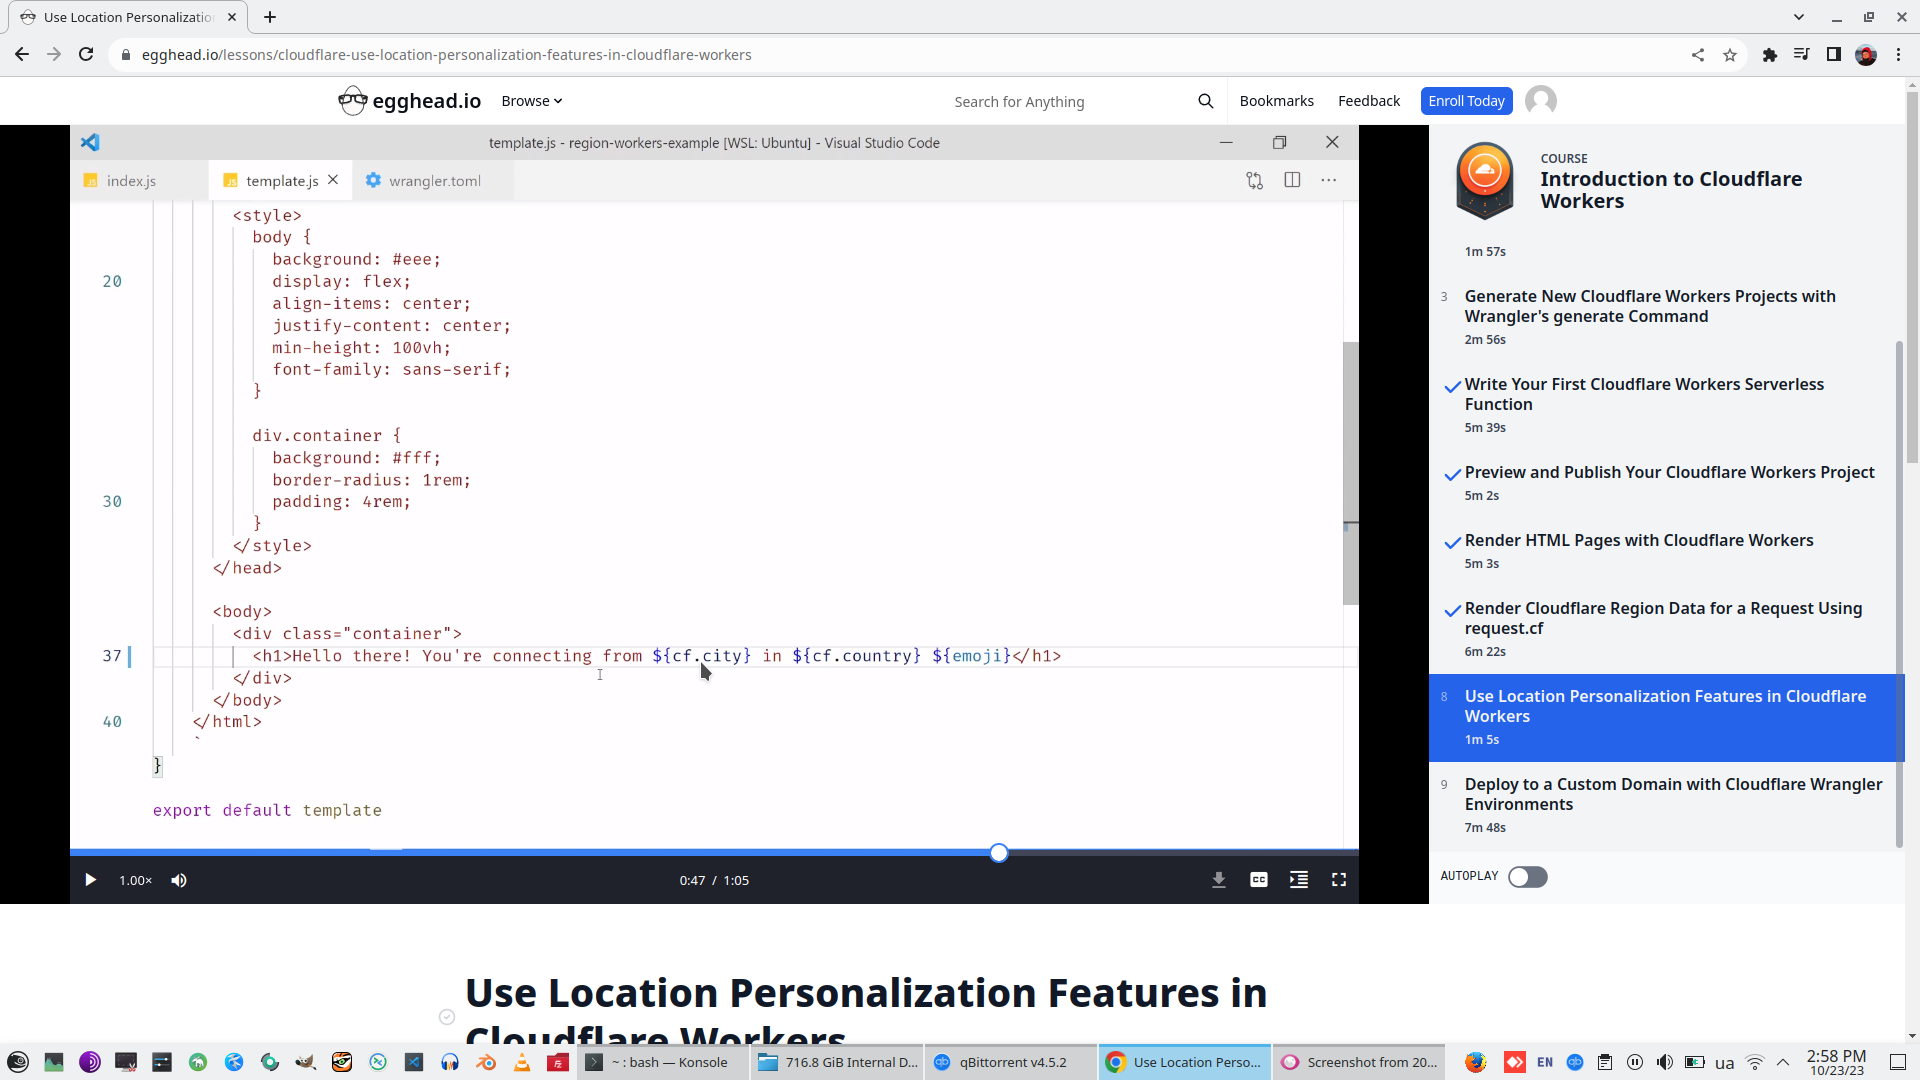
Pass this function as parameters to Html Template function.

Install country code and import it to Template.js
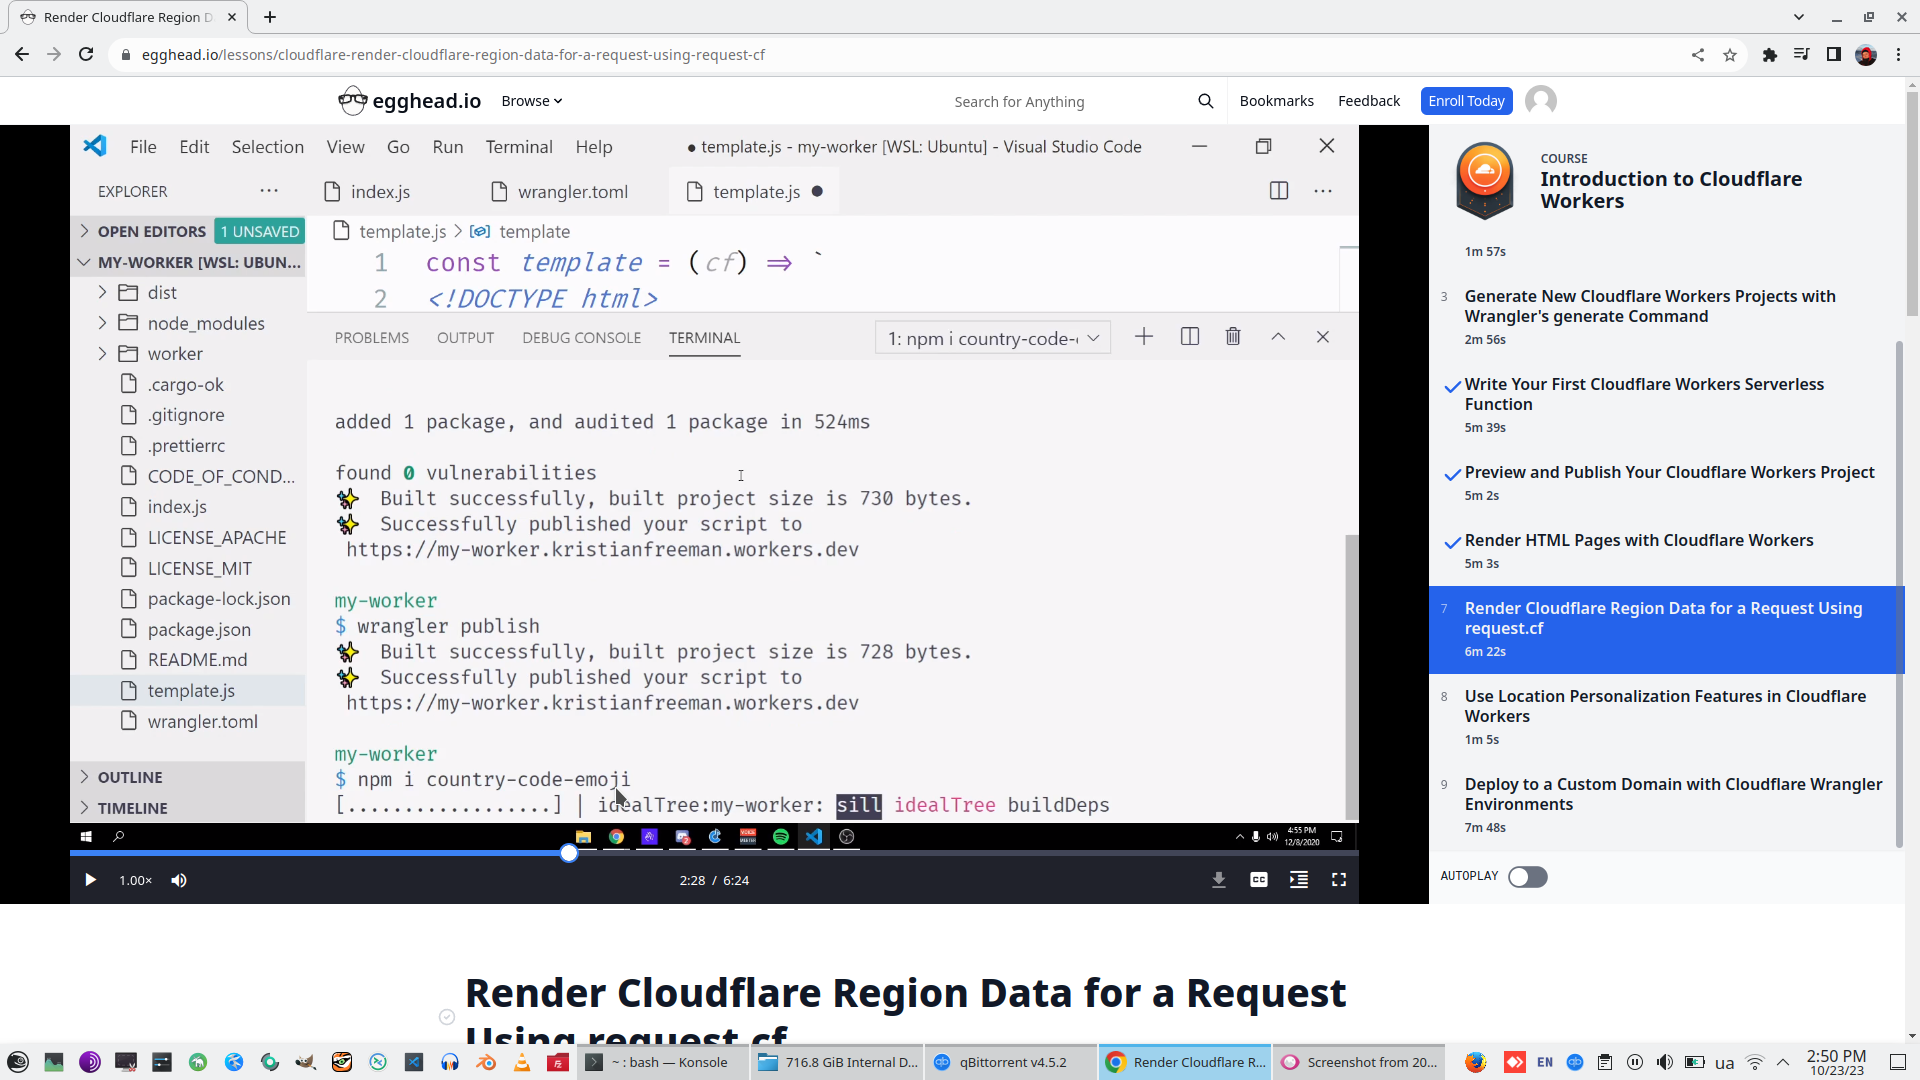

Show Country code and flag


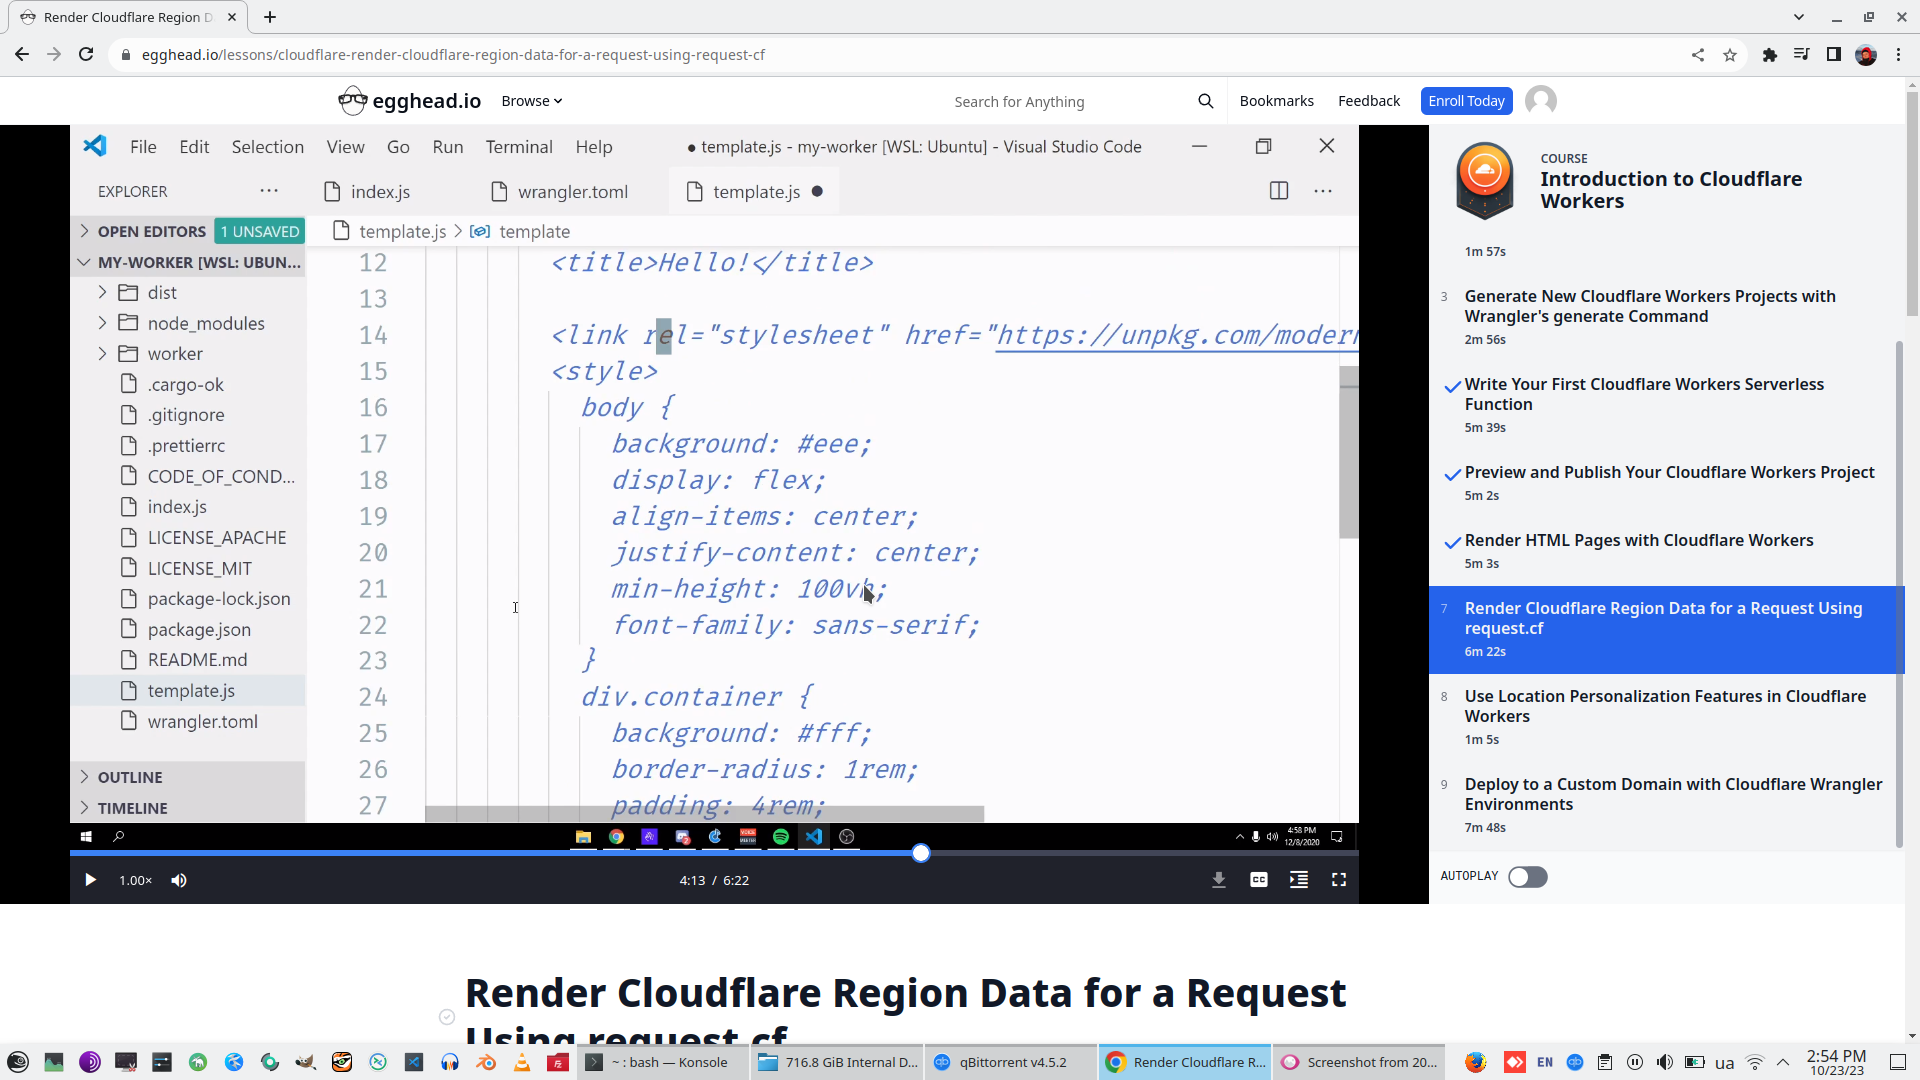
Add CSS style from Unpkg.com
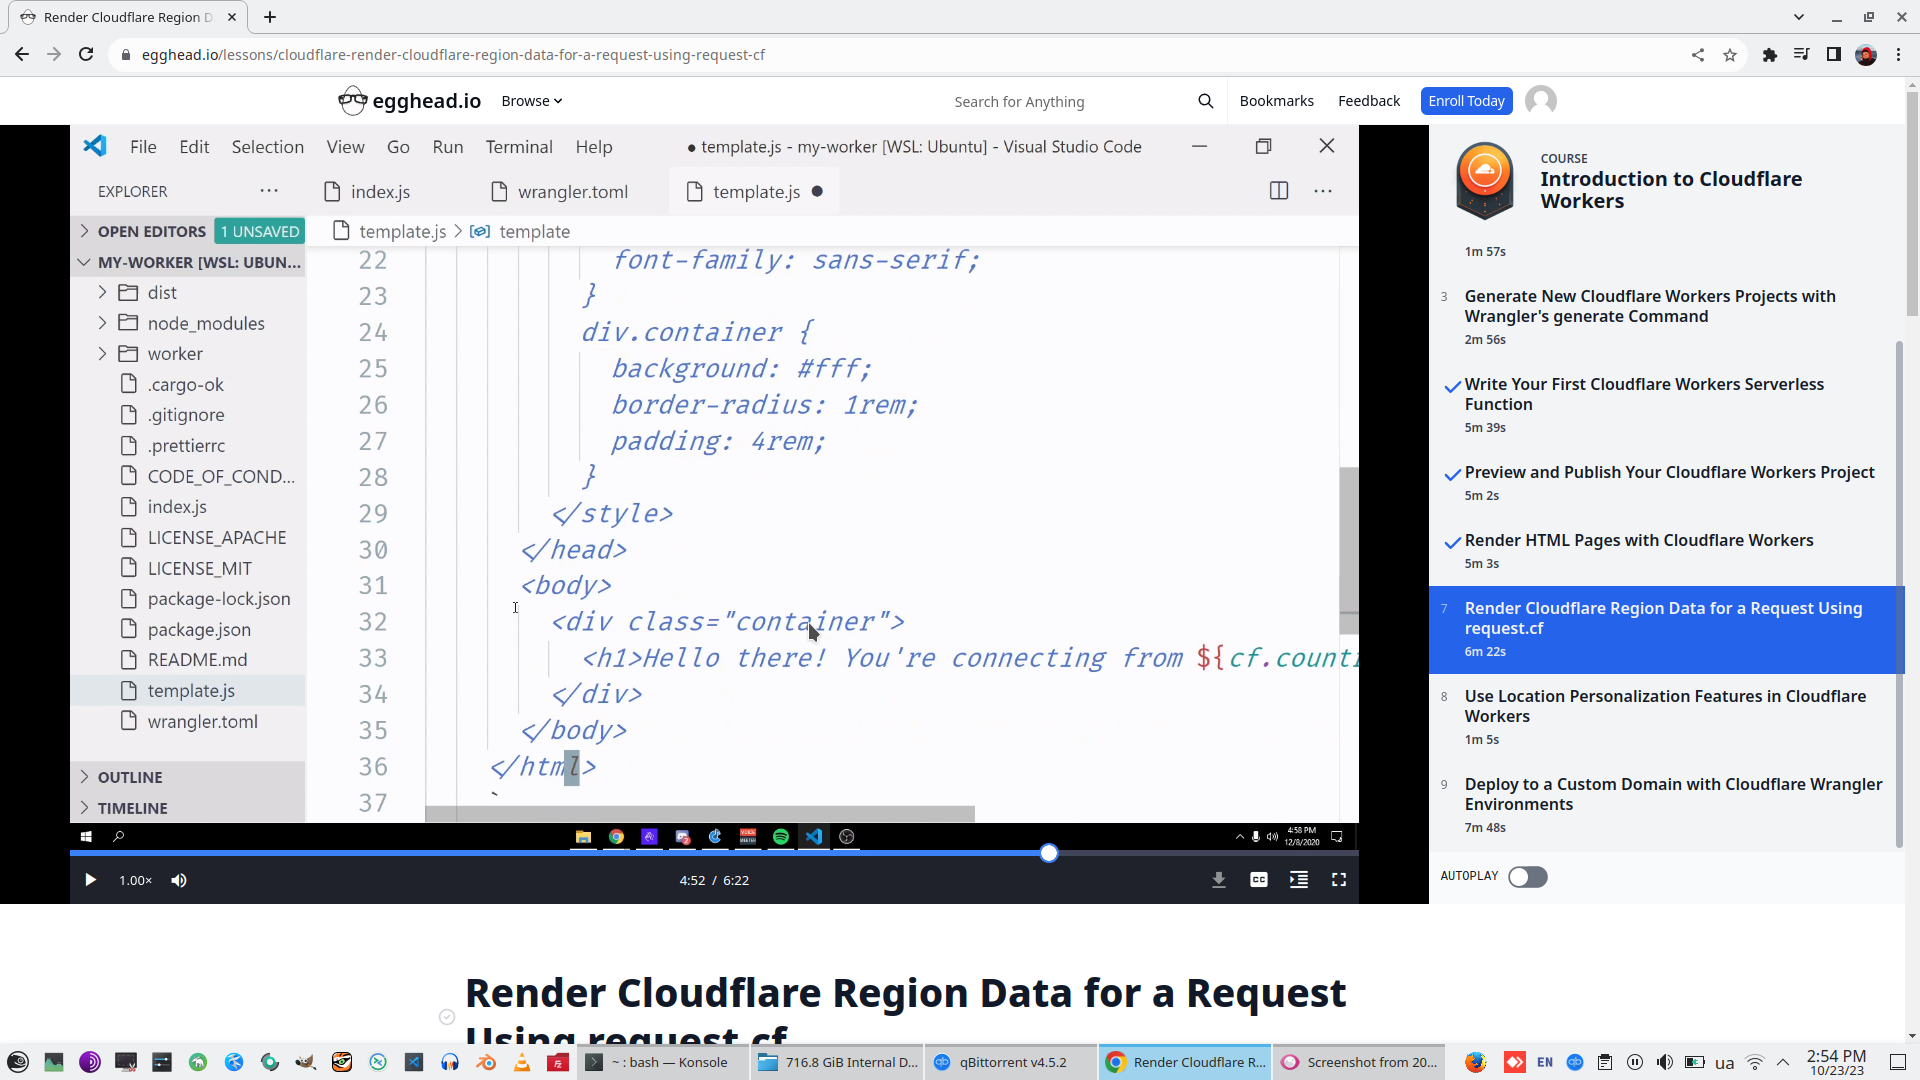
Check full result with Image

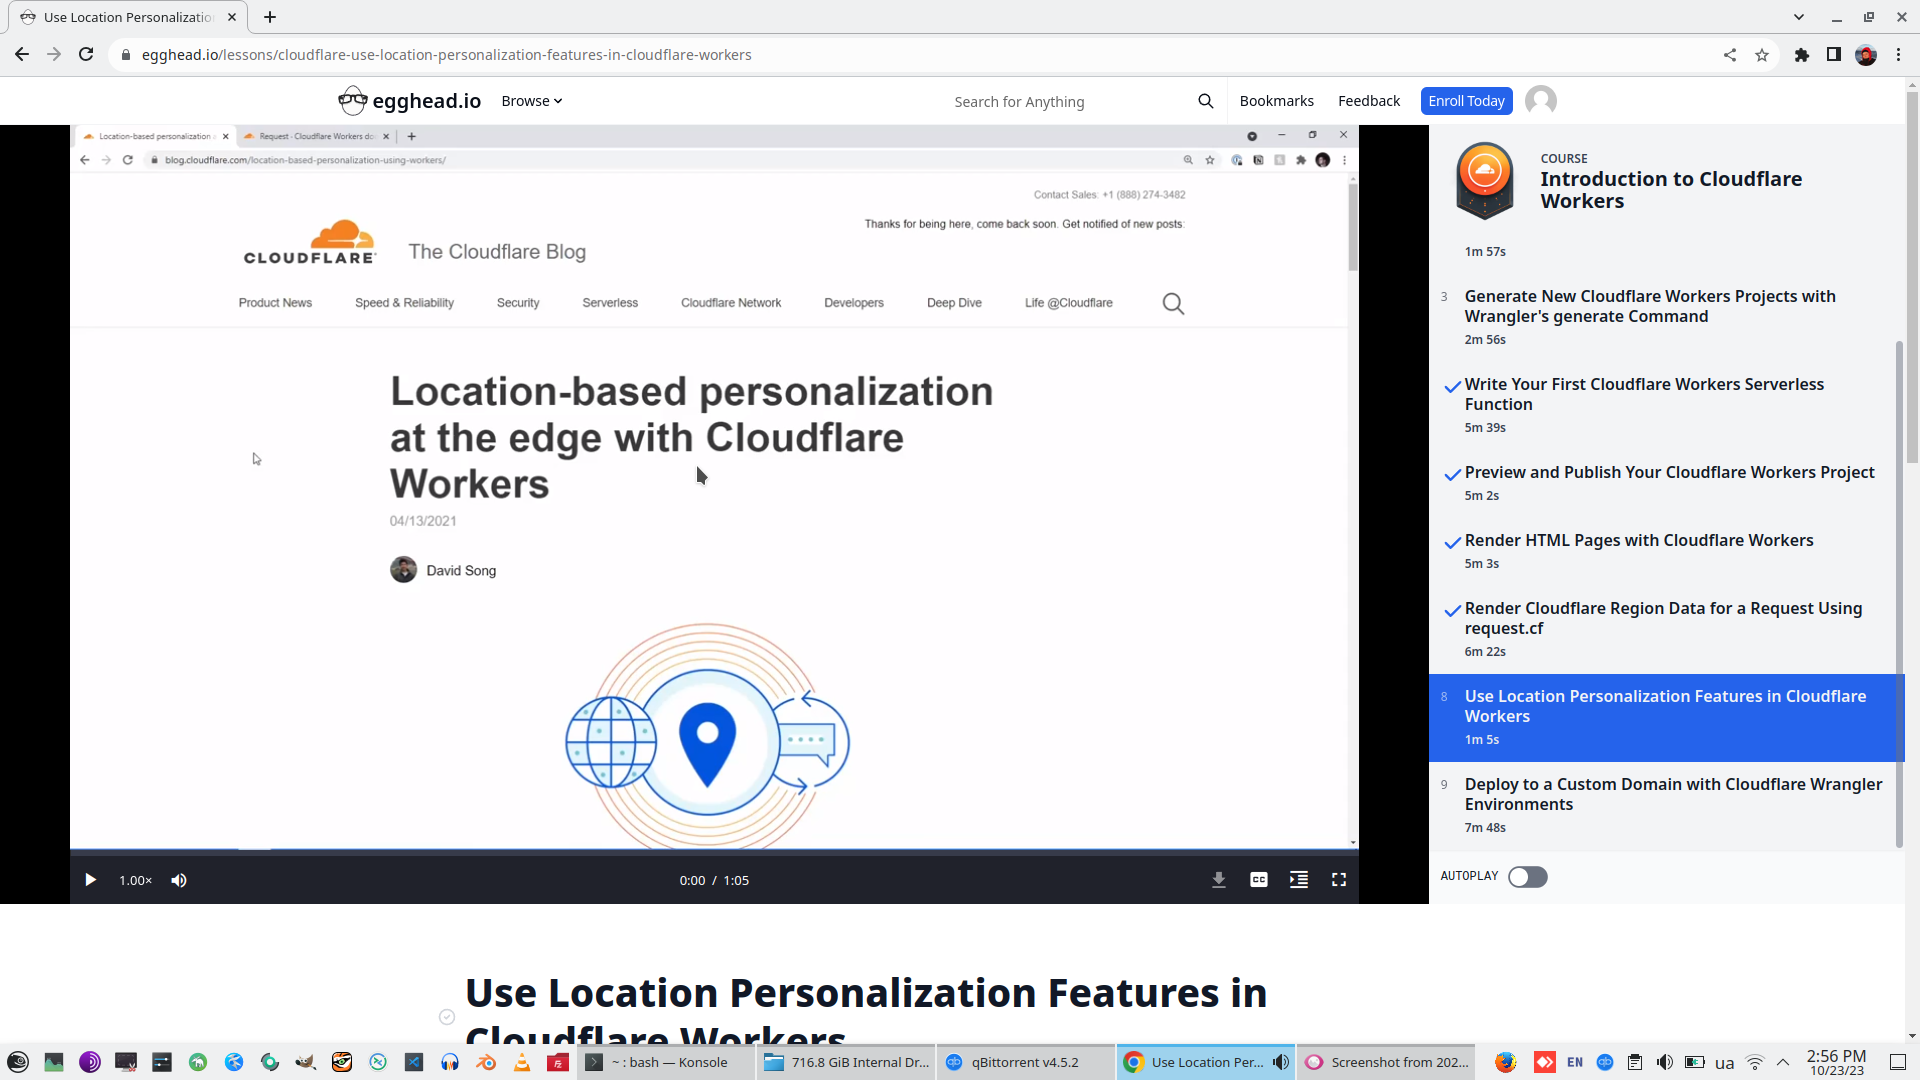
8. Use Location Personalization Features in Cloudflare Workers
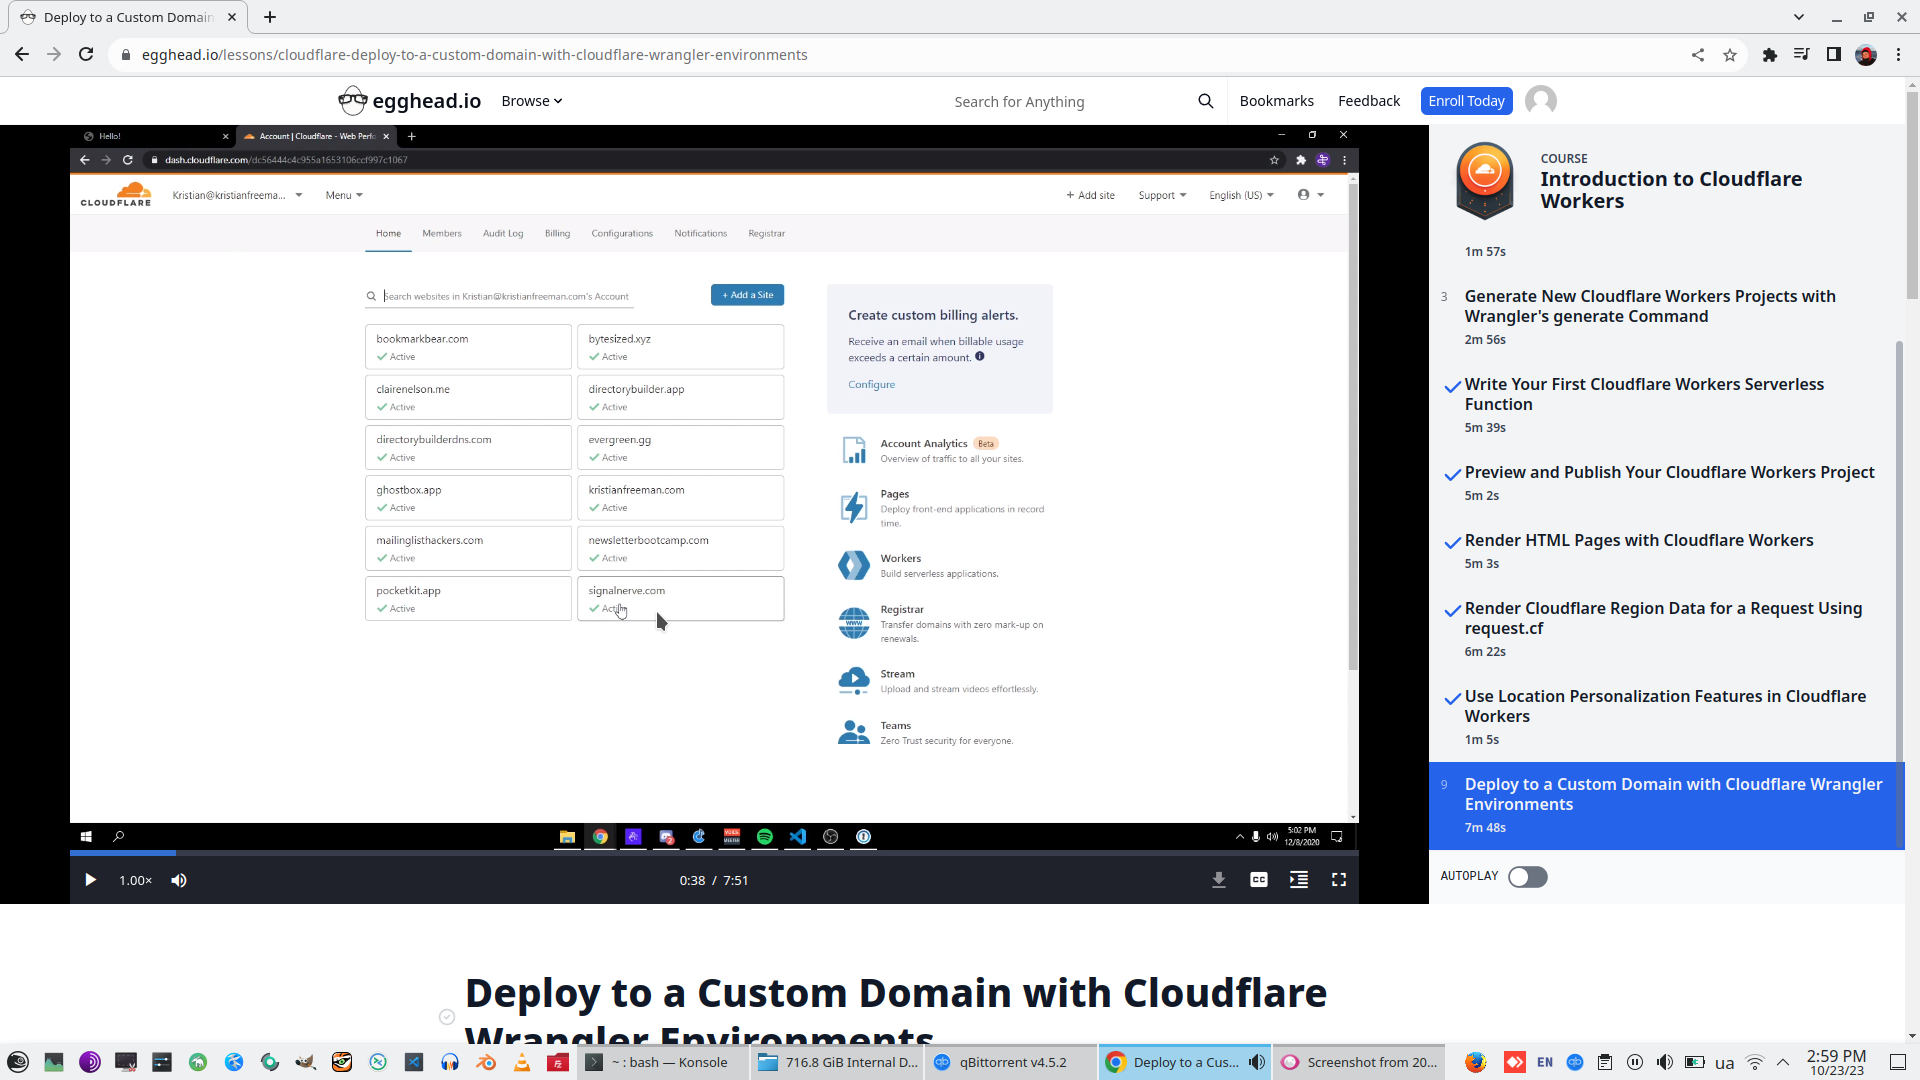
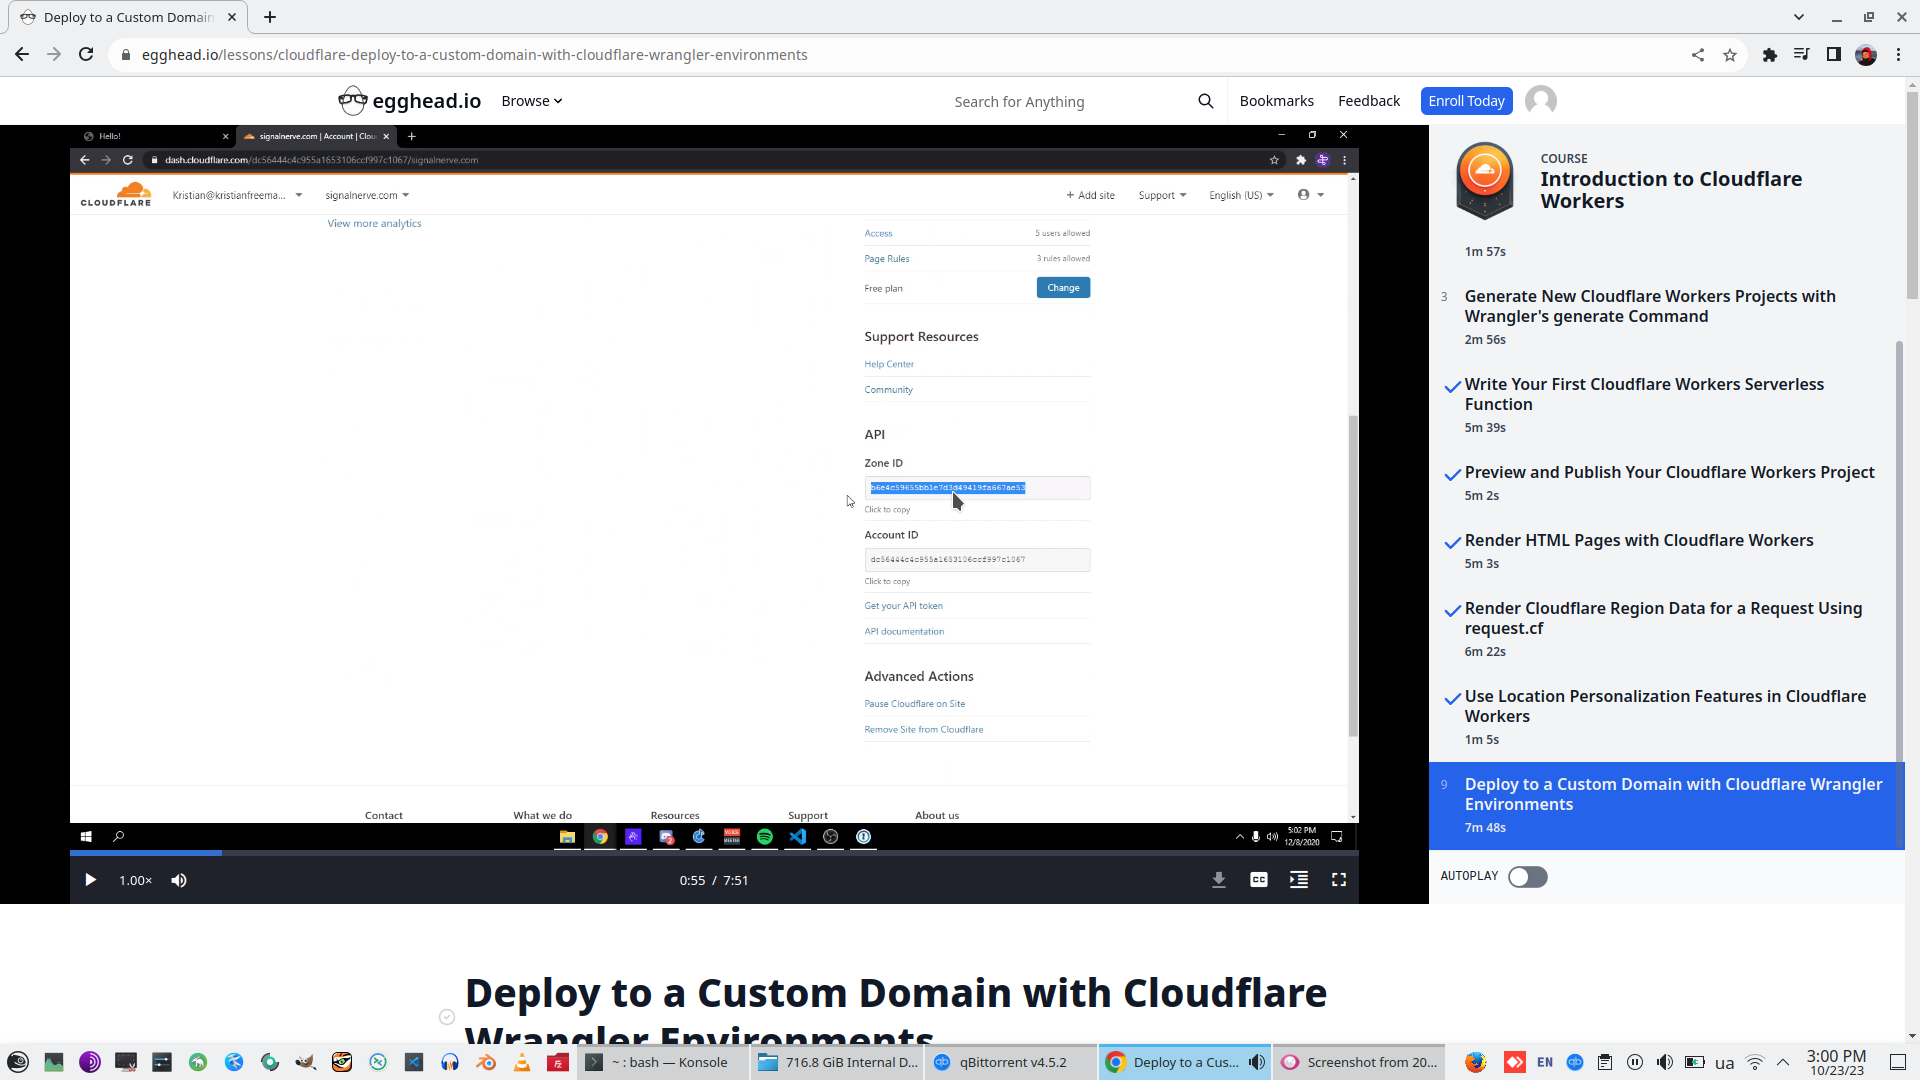
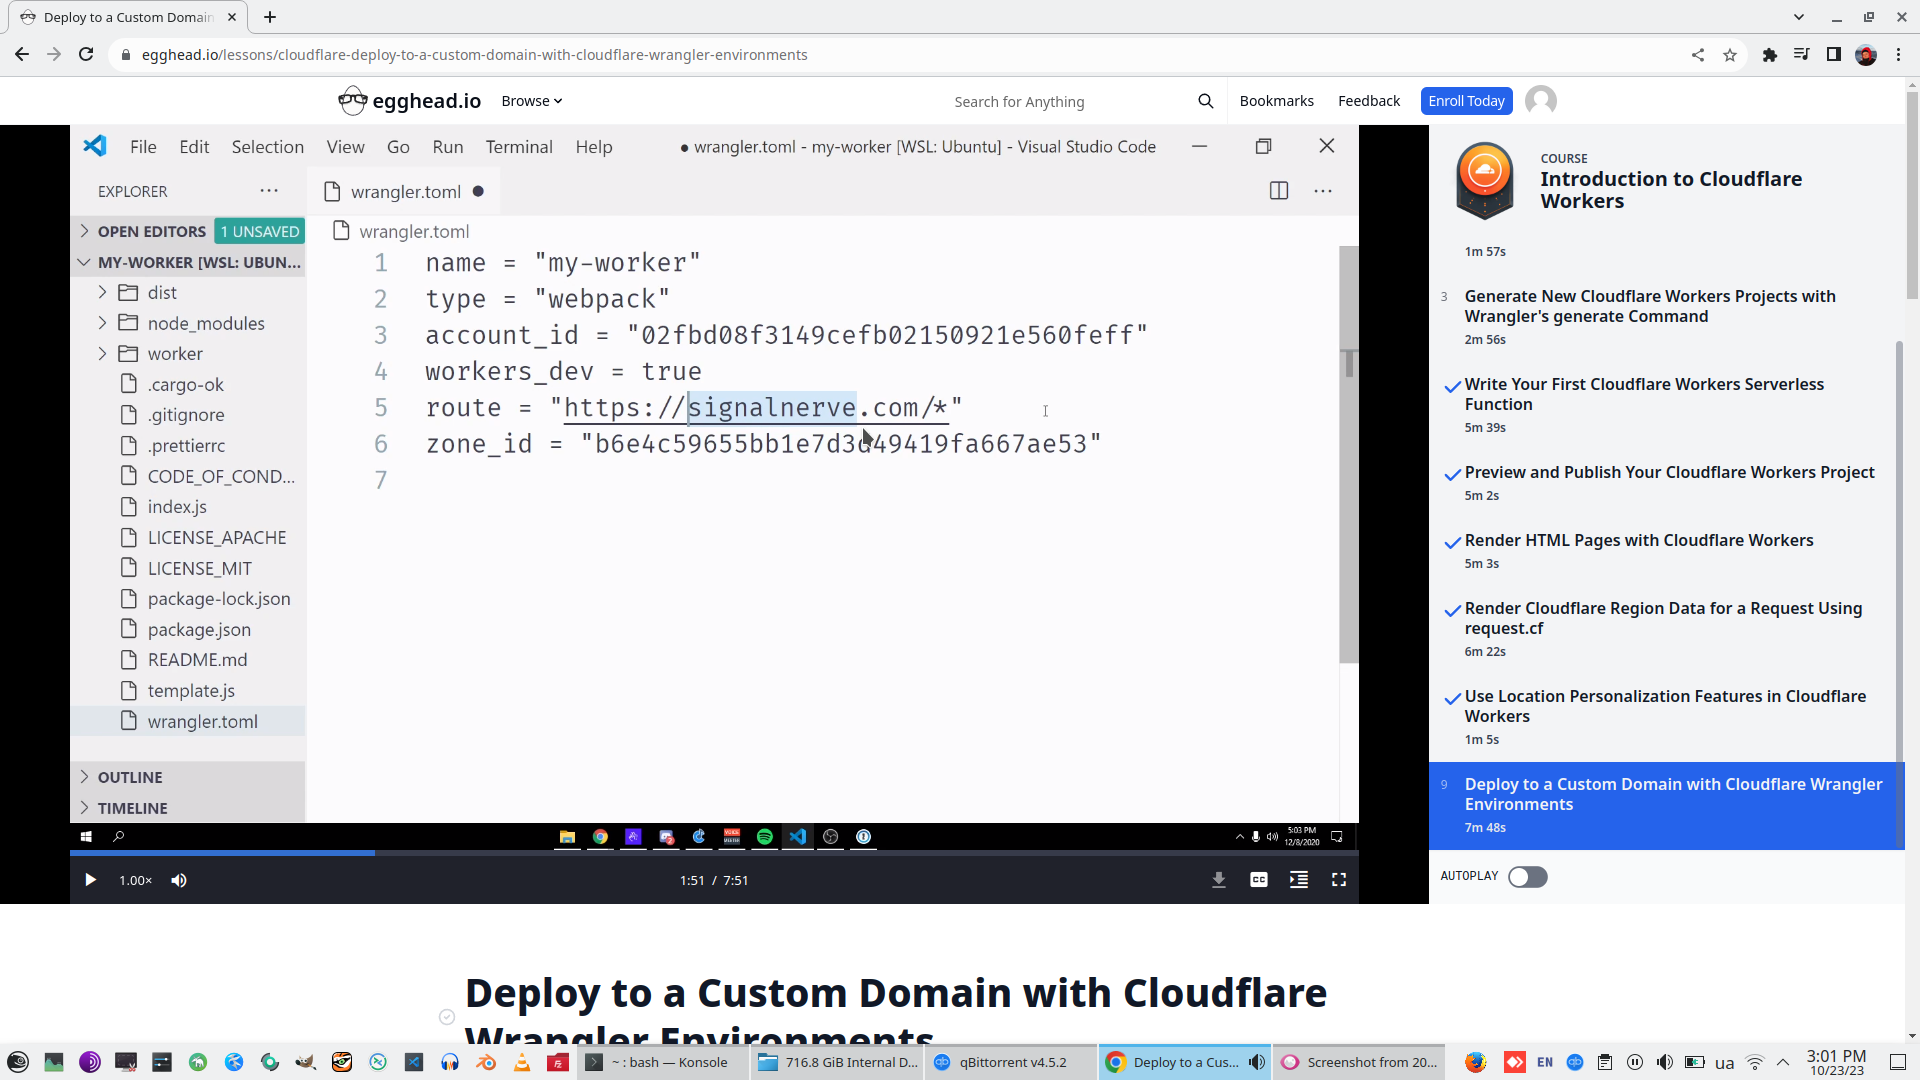
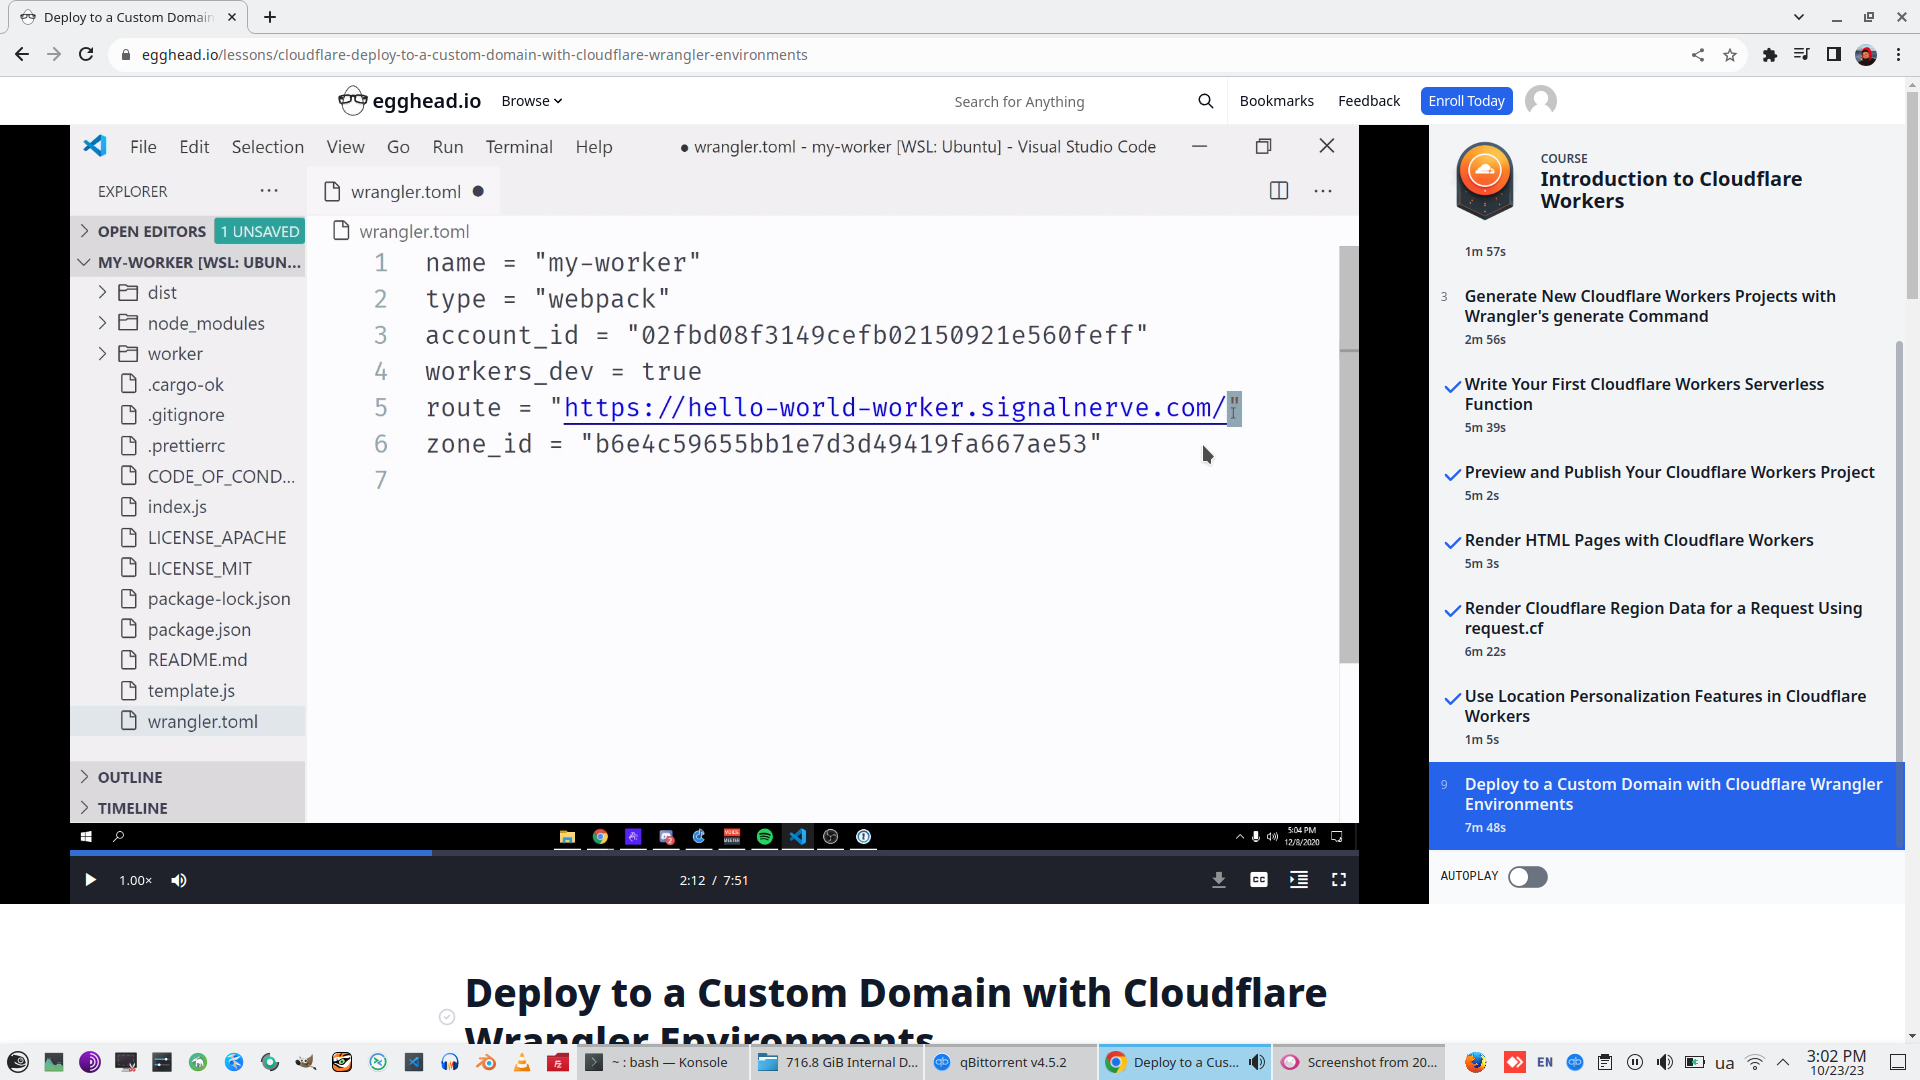
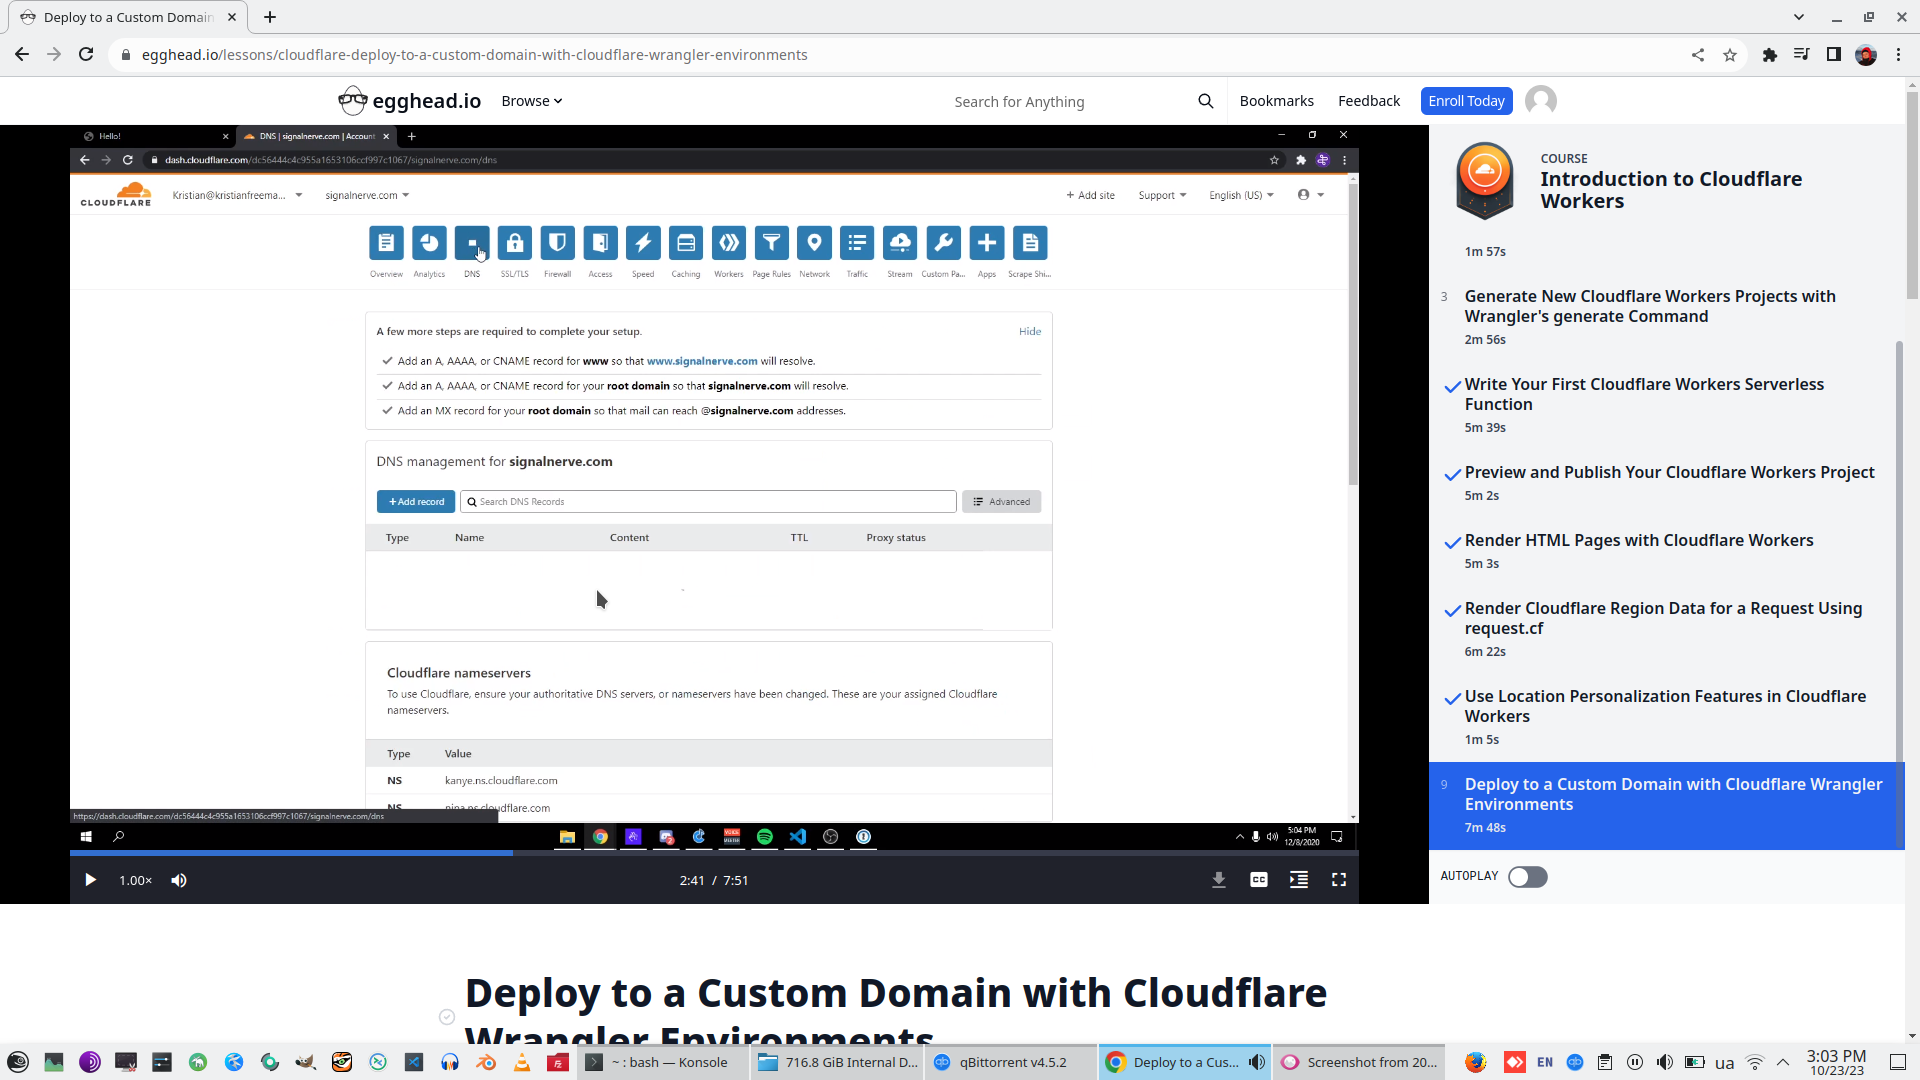
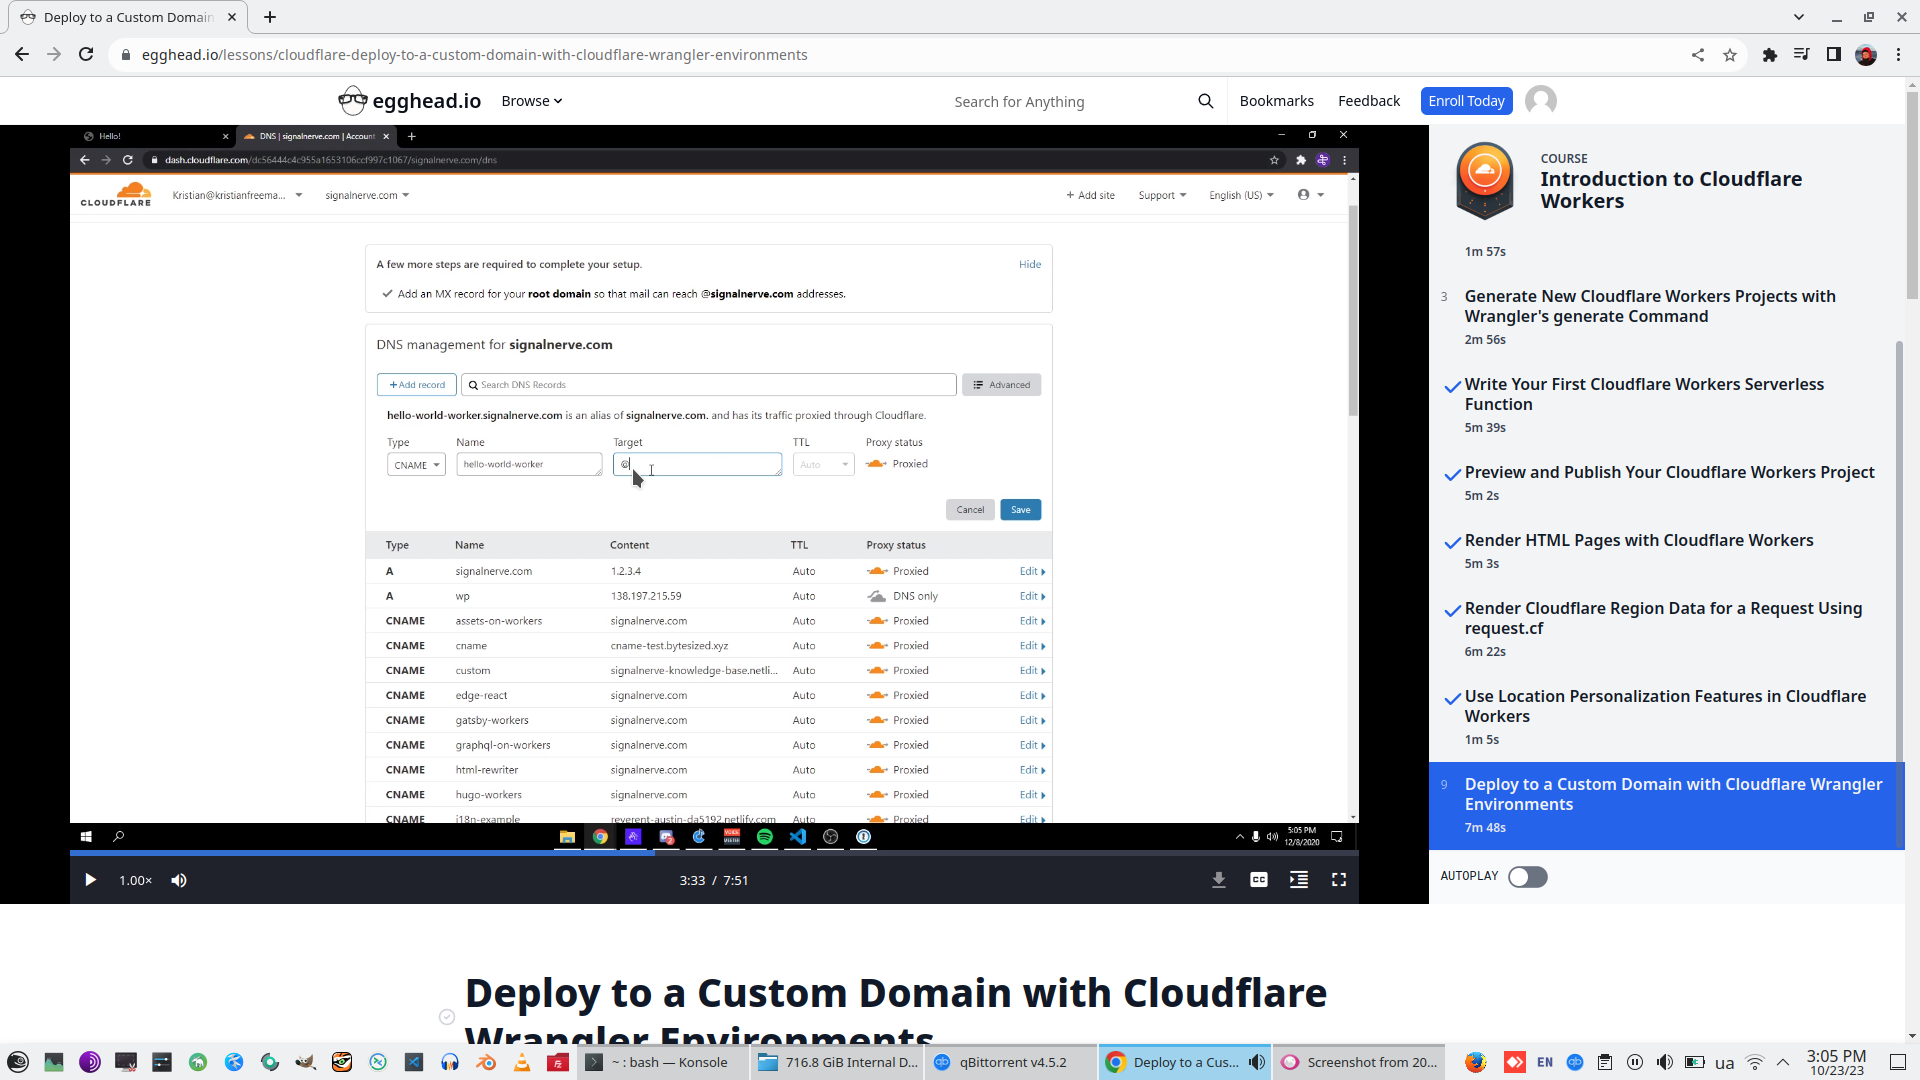
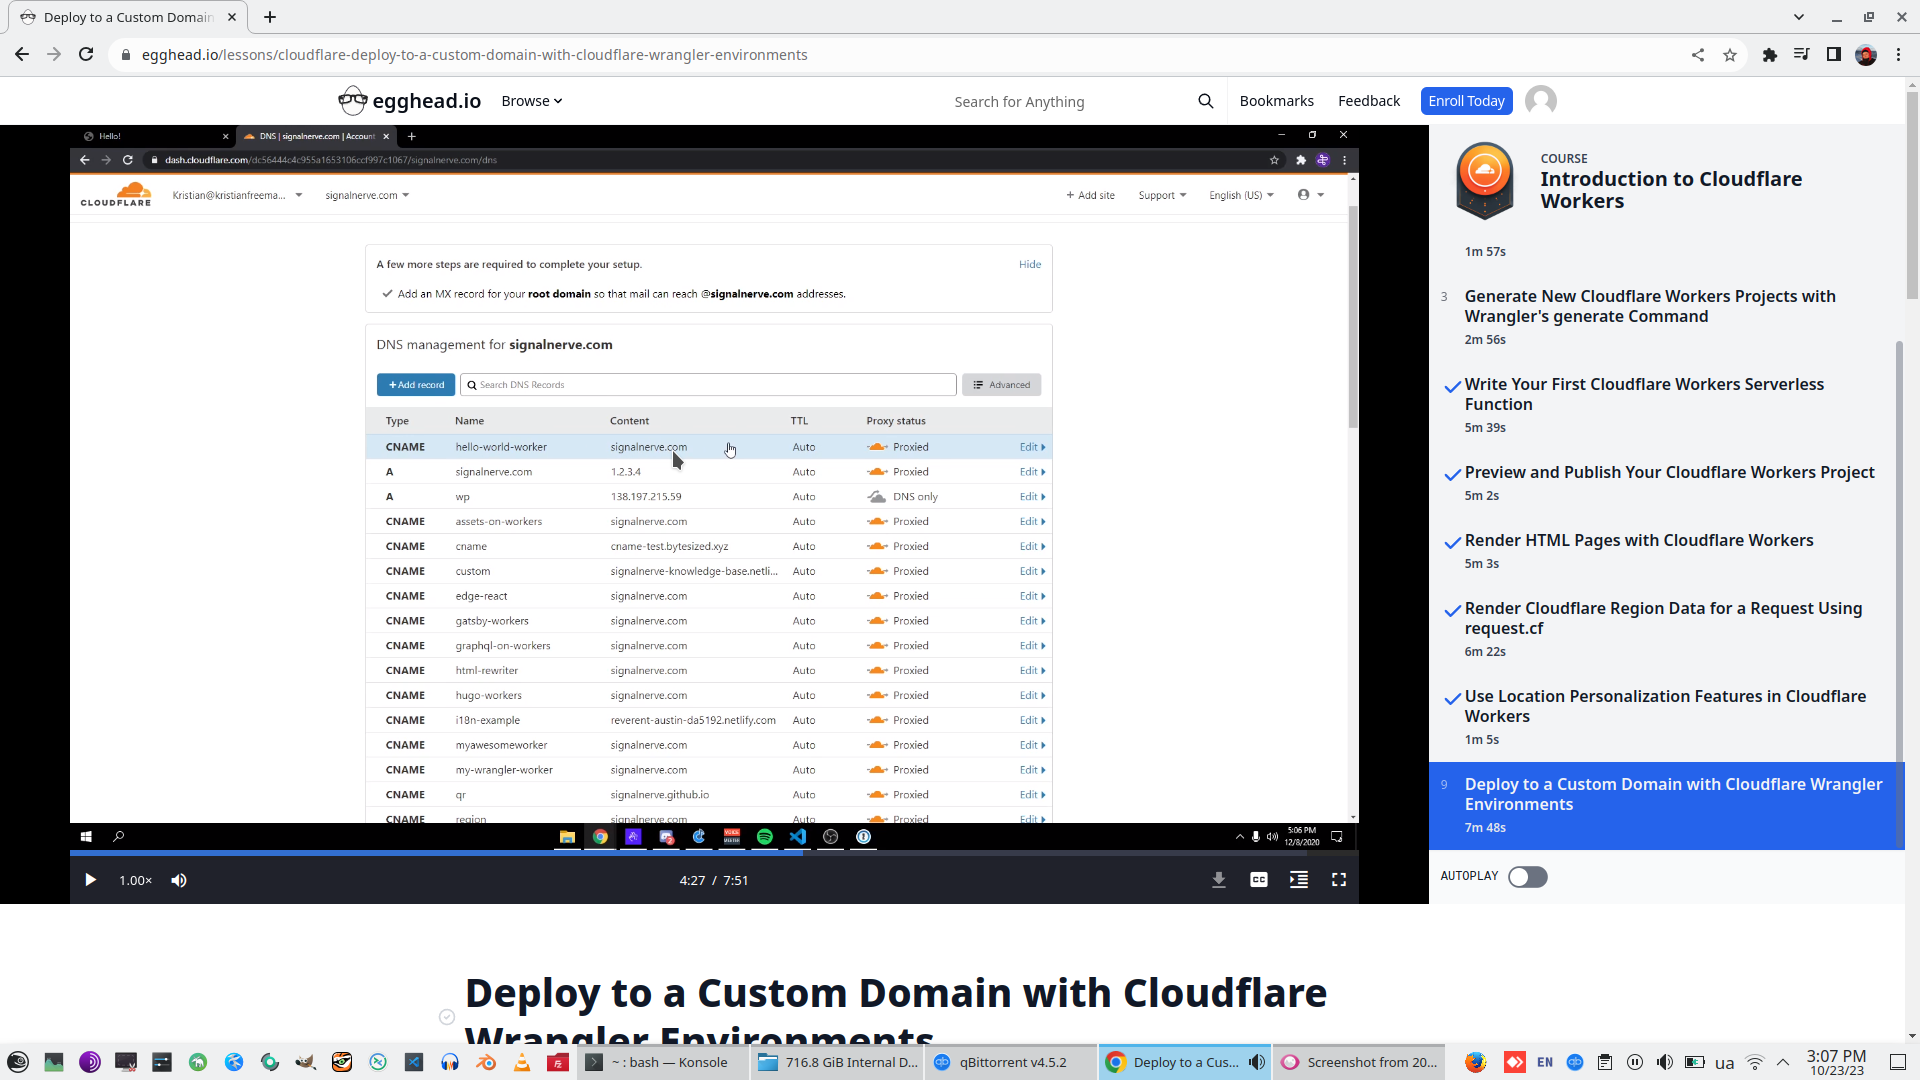
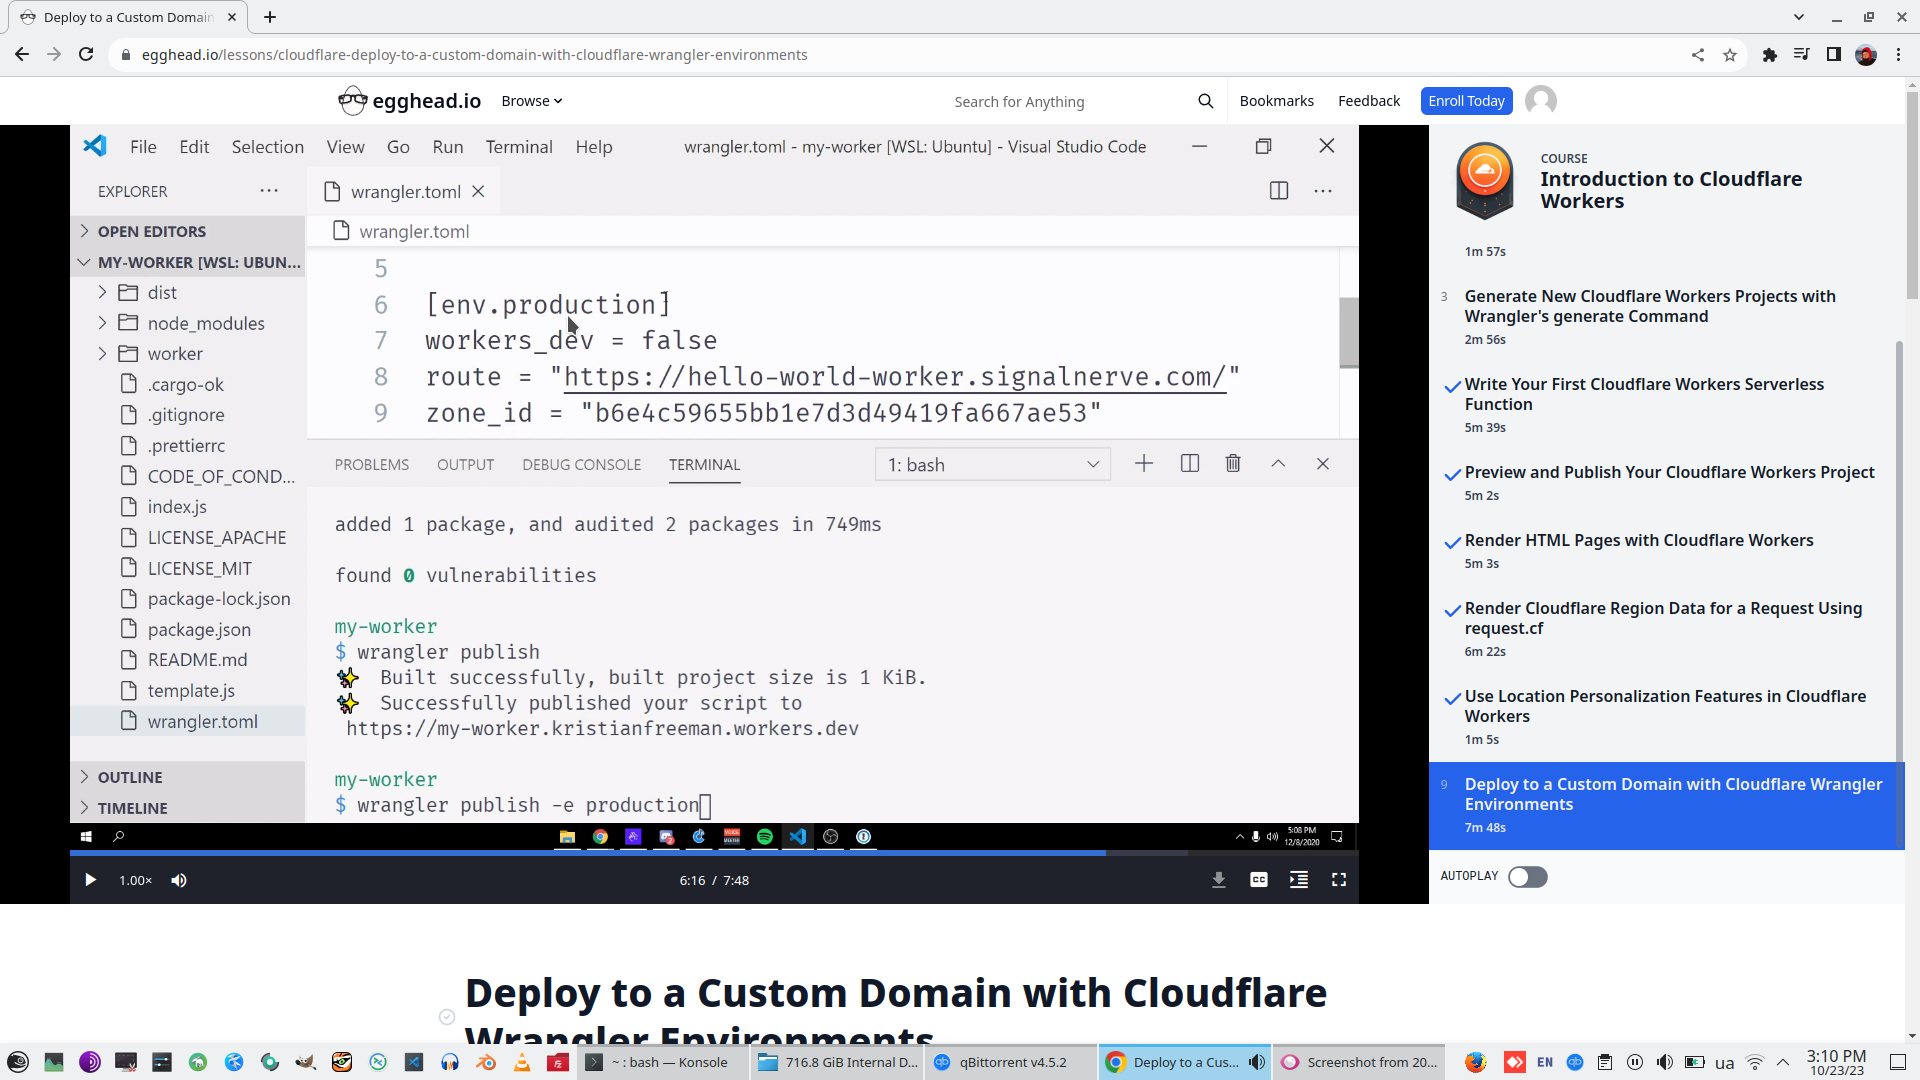
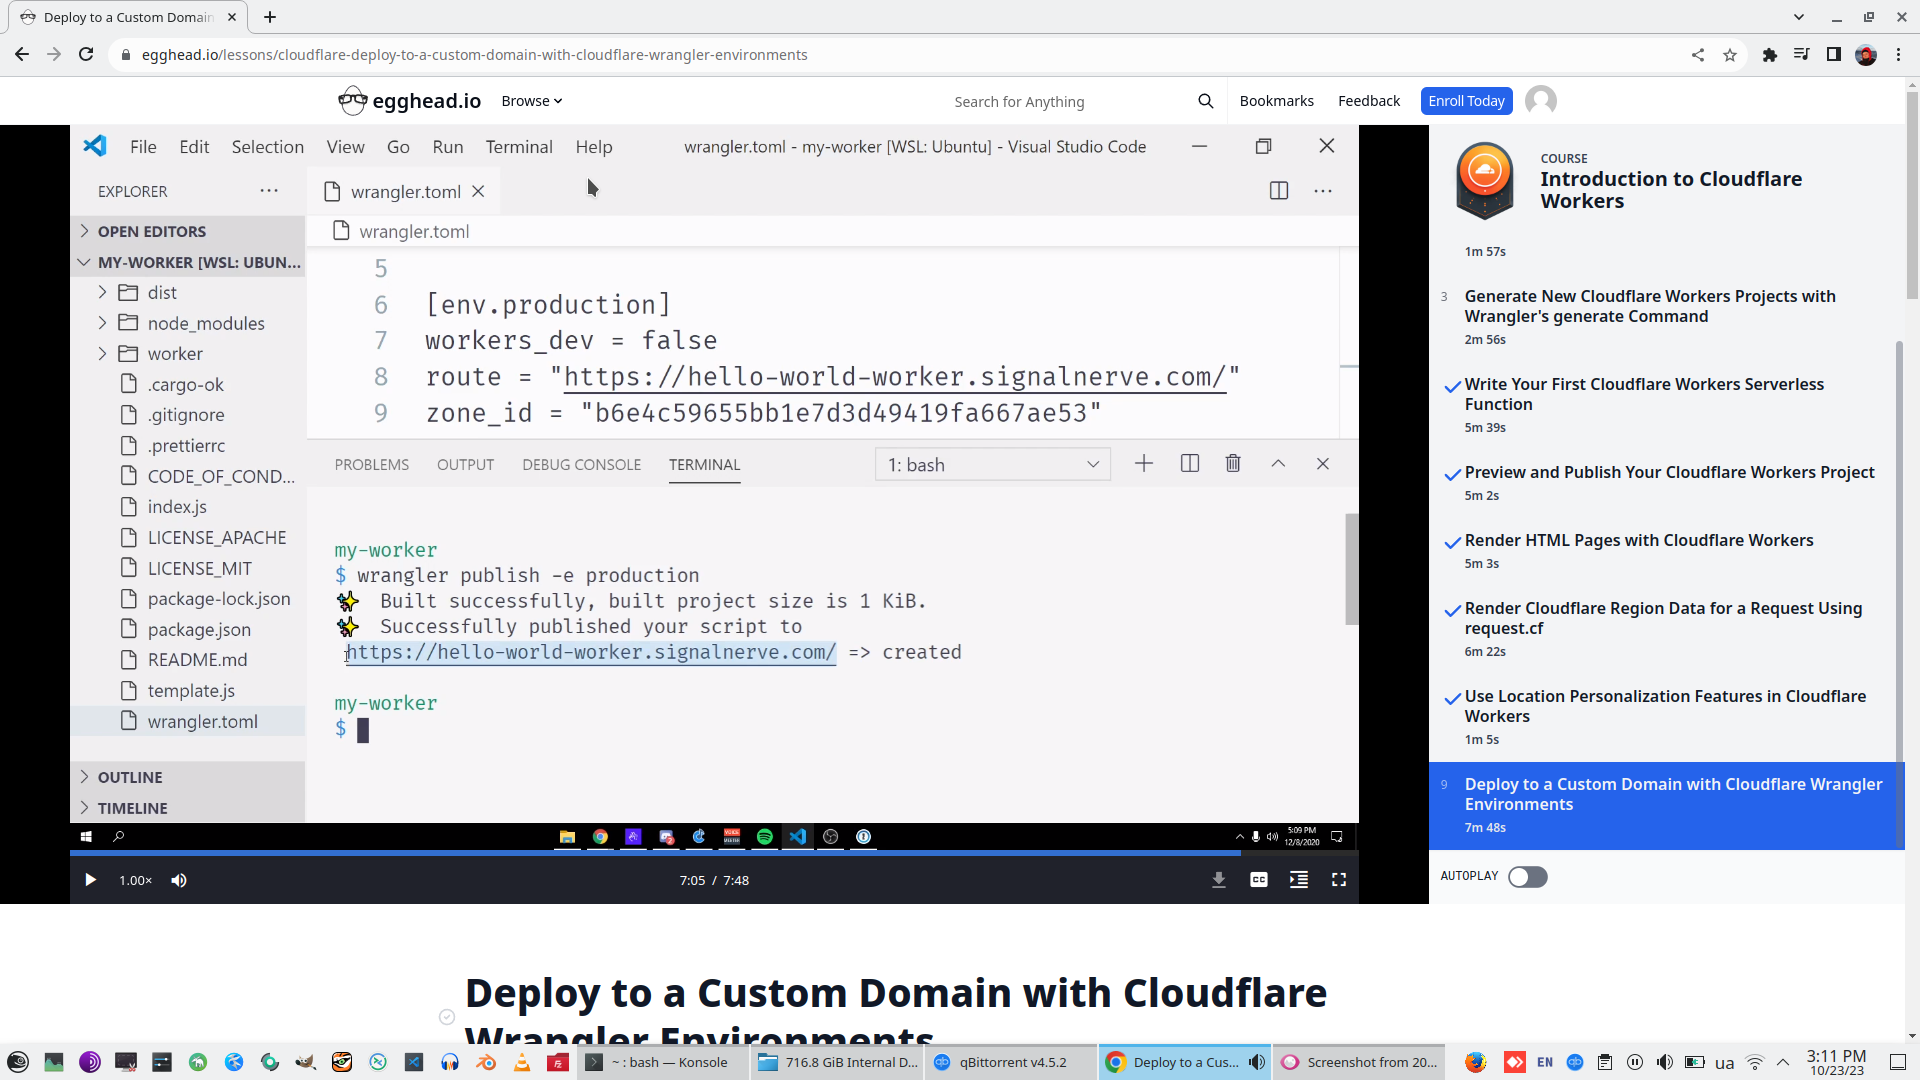
9. Deploy to a Custom Domain with Cloudflare Wrangler Environments
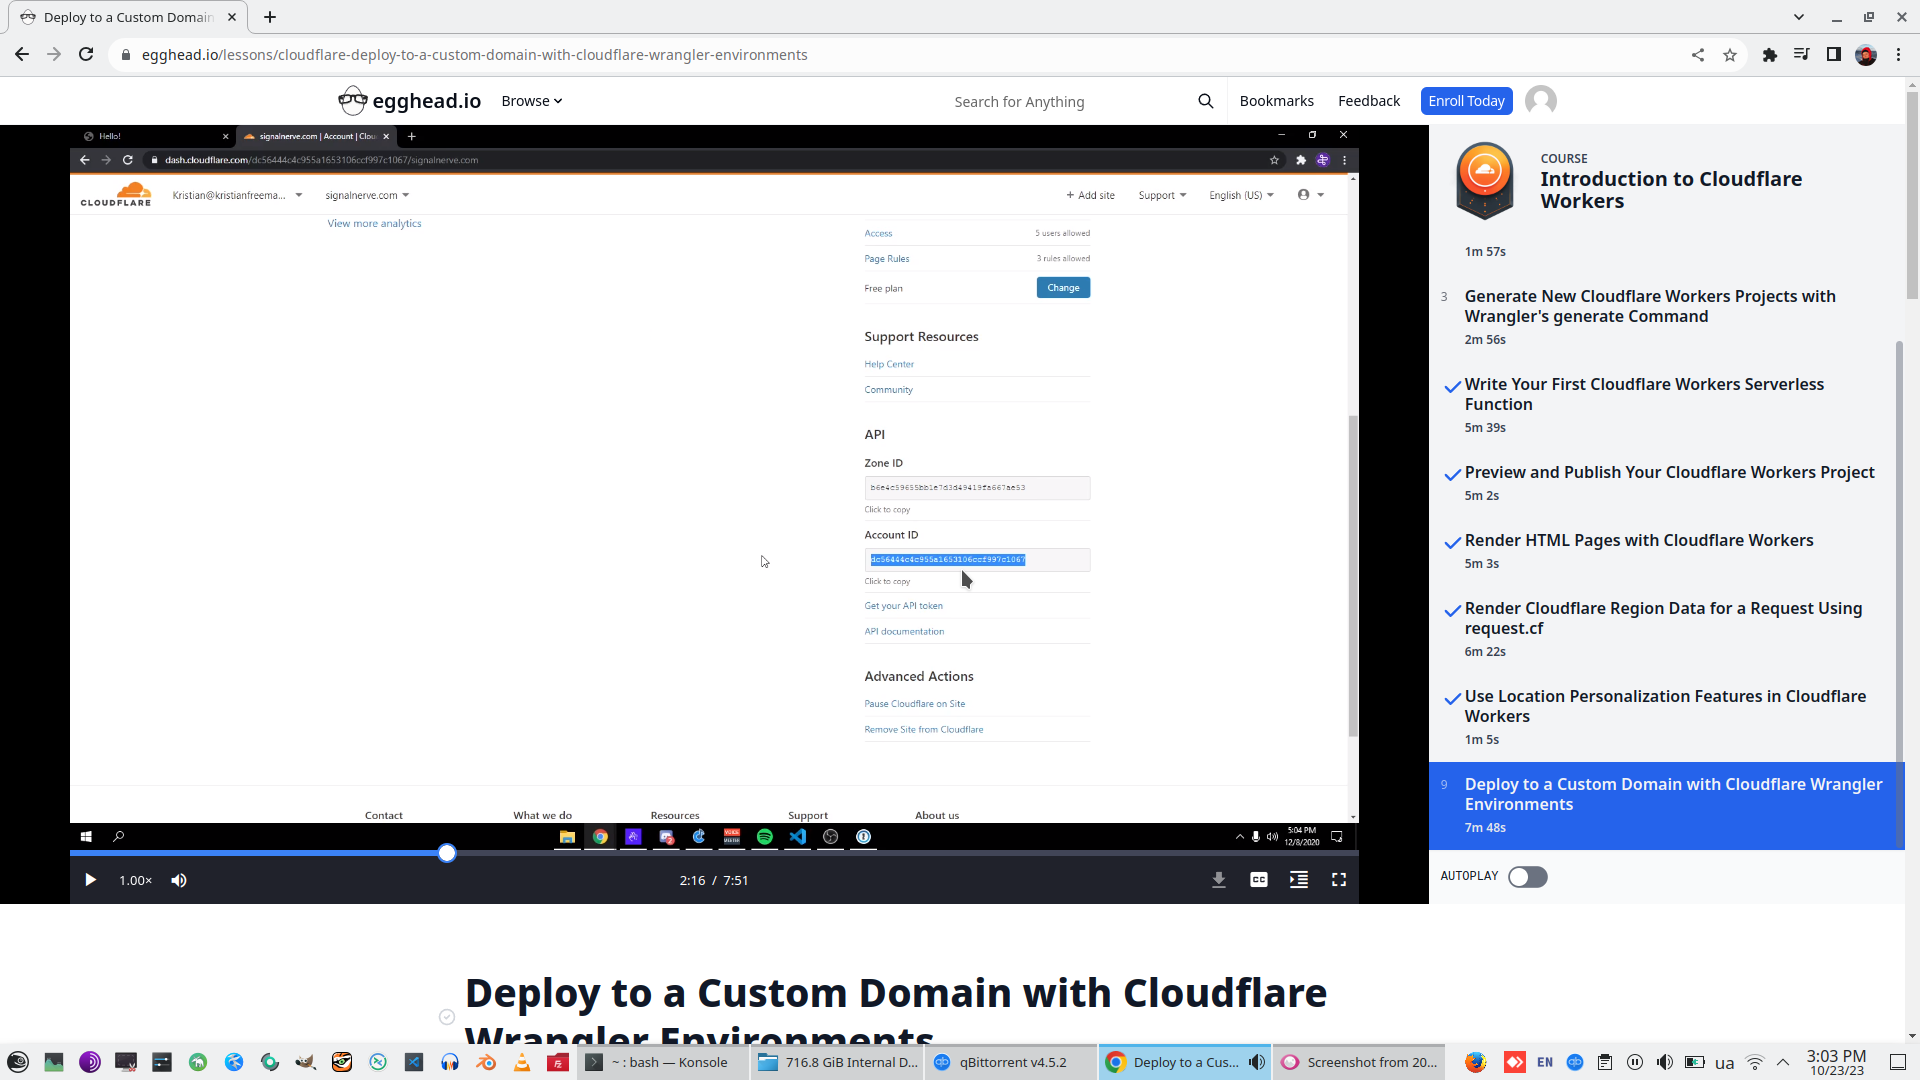
Add custom domatin to Cloudflare
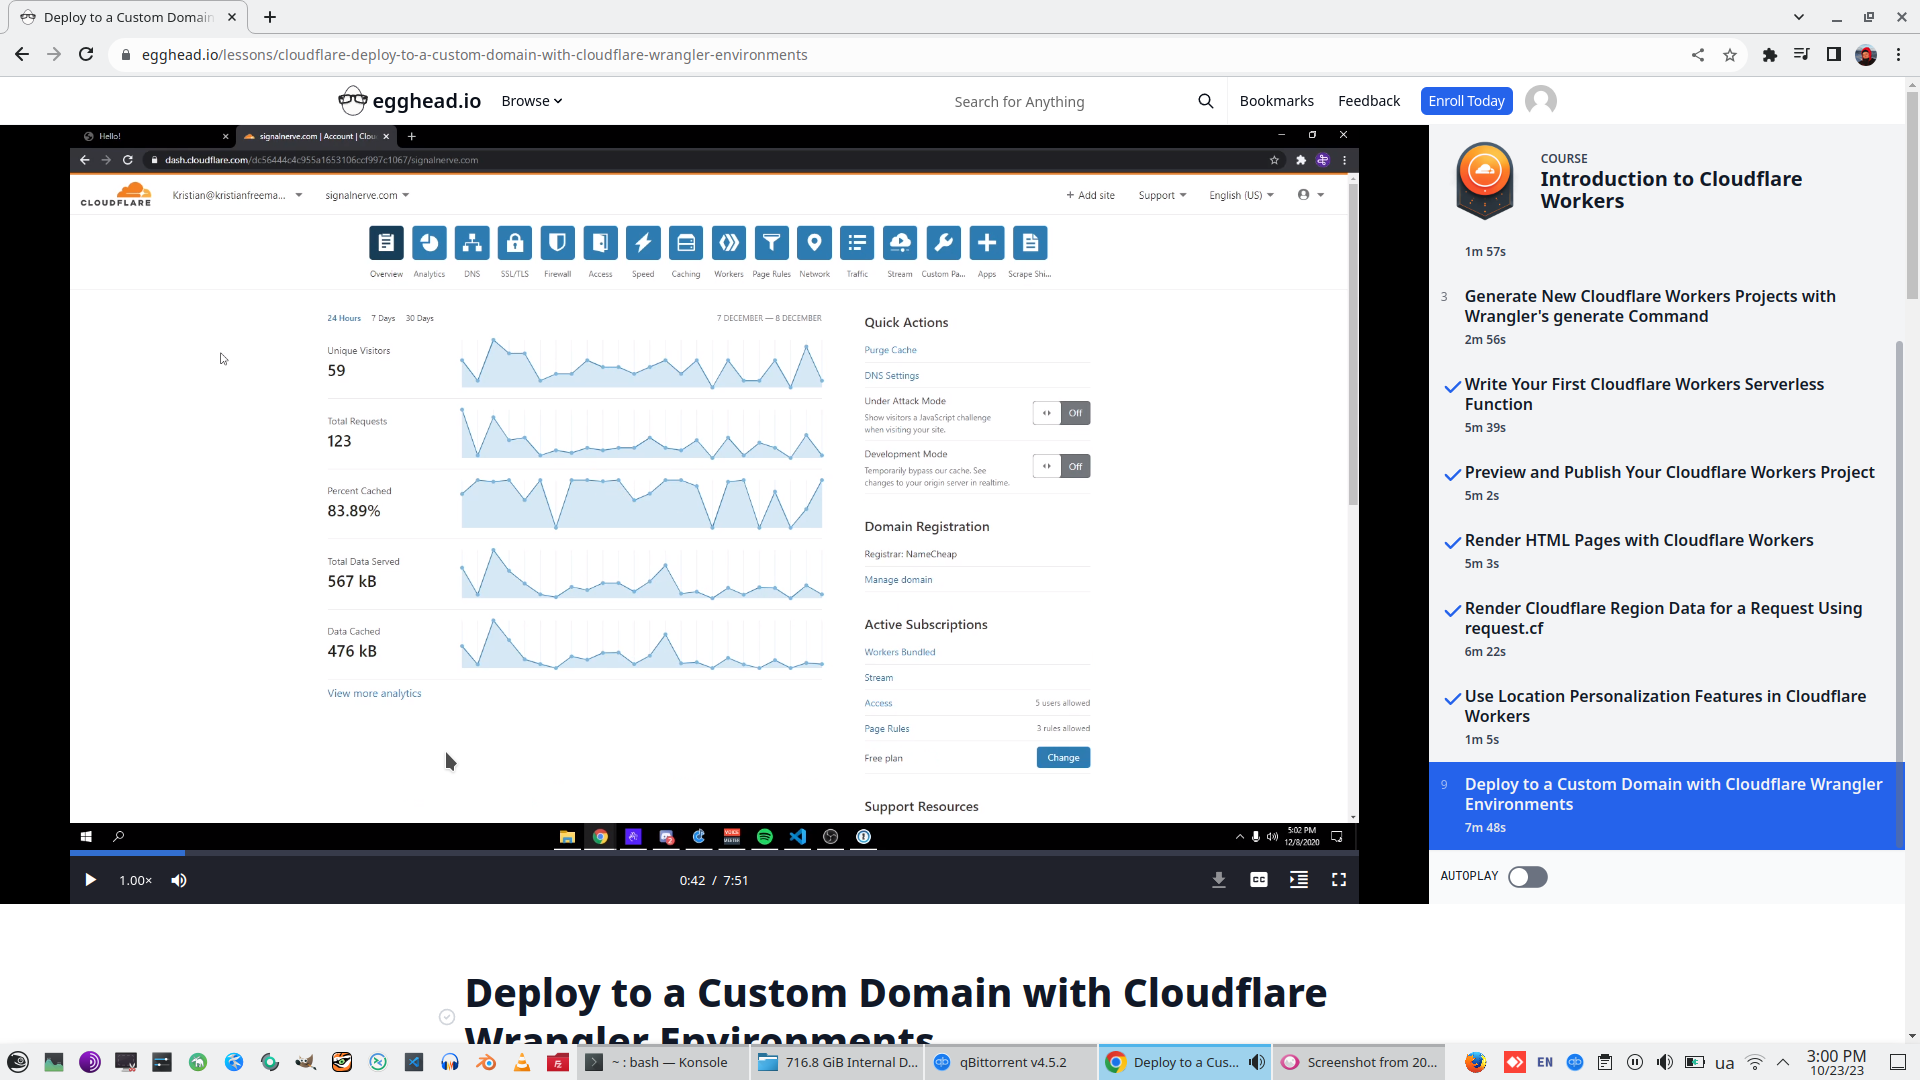
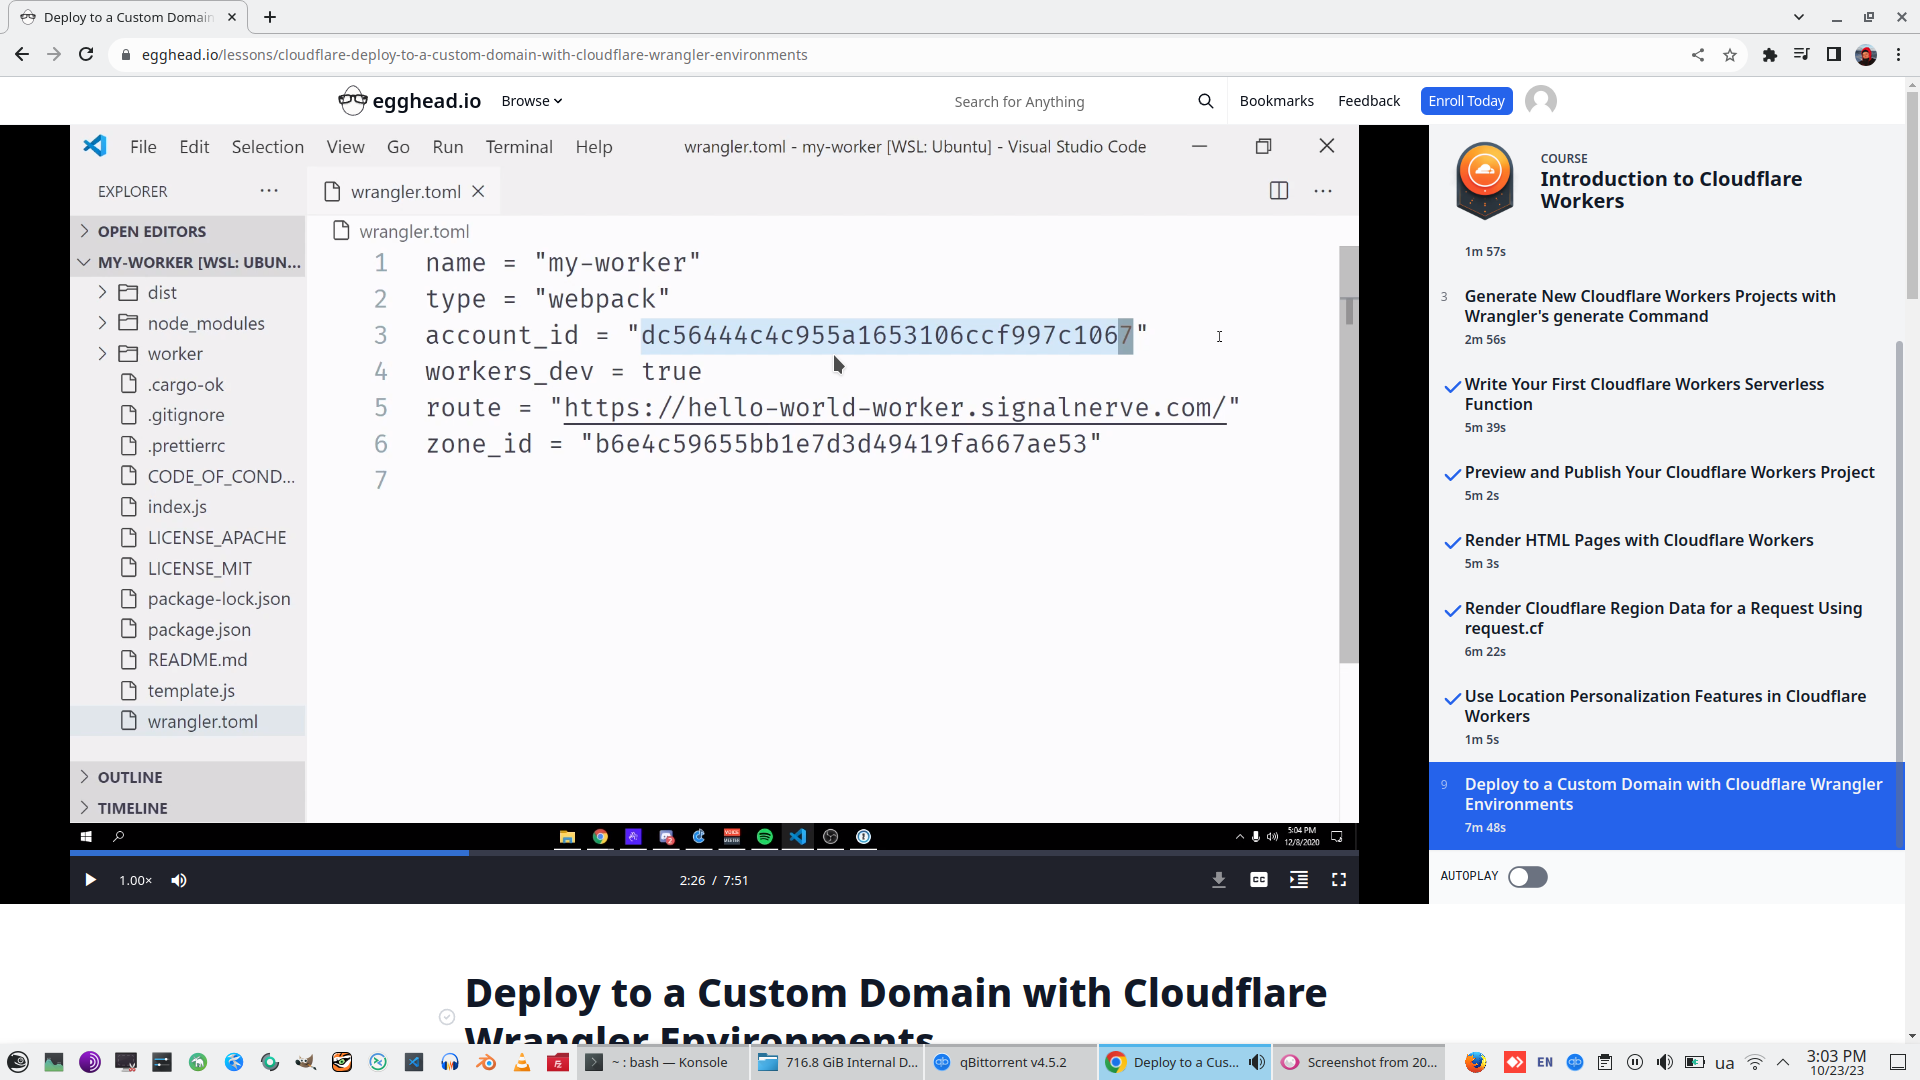
Add DomainID (ZoneID) to Wrangler.TOML

Set concrete page from Domain on Wrangler.TOML


Manipulate DNS record on Cloudlare
Create production configuration
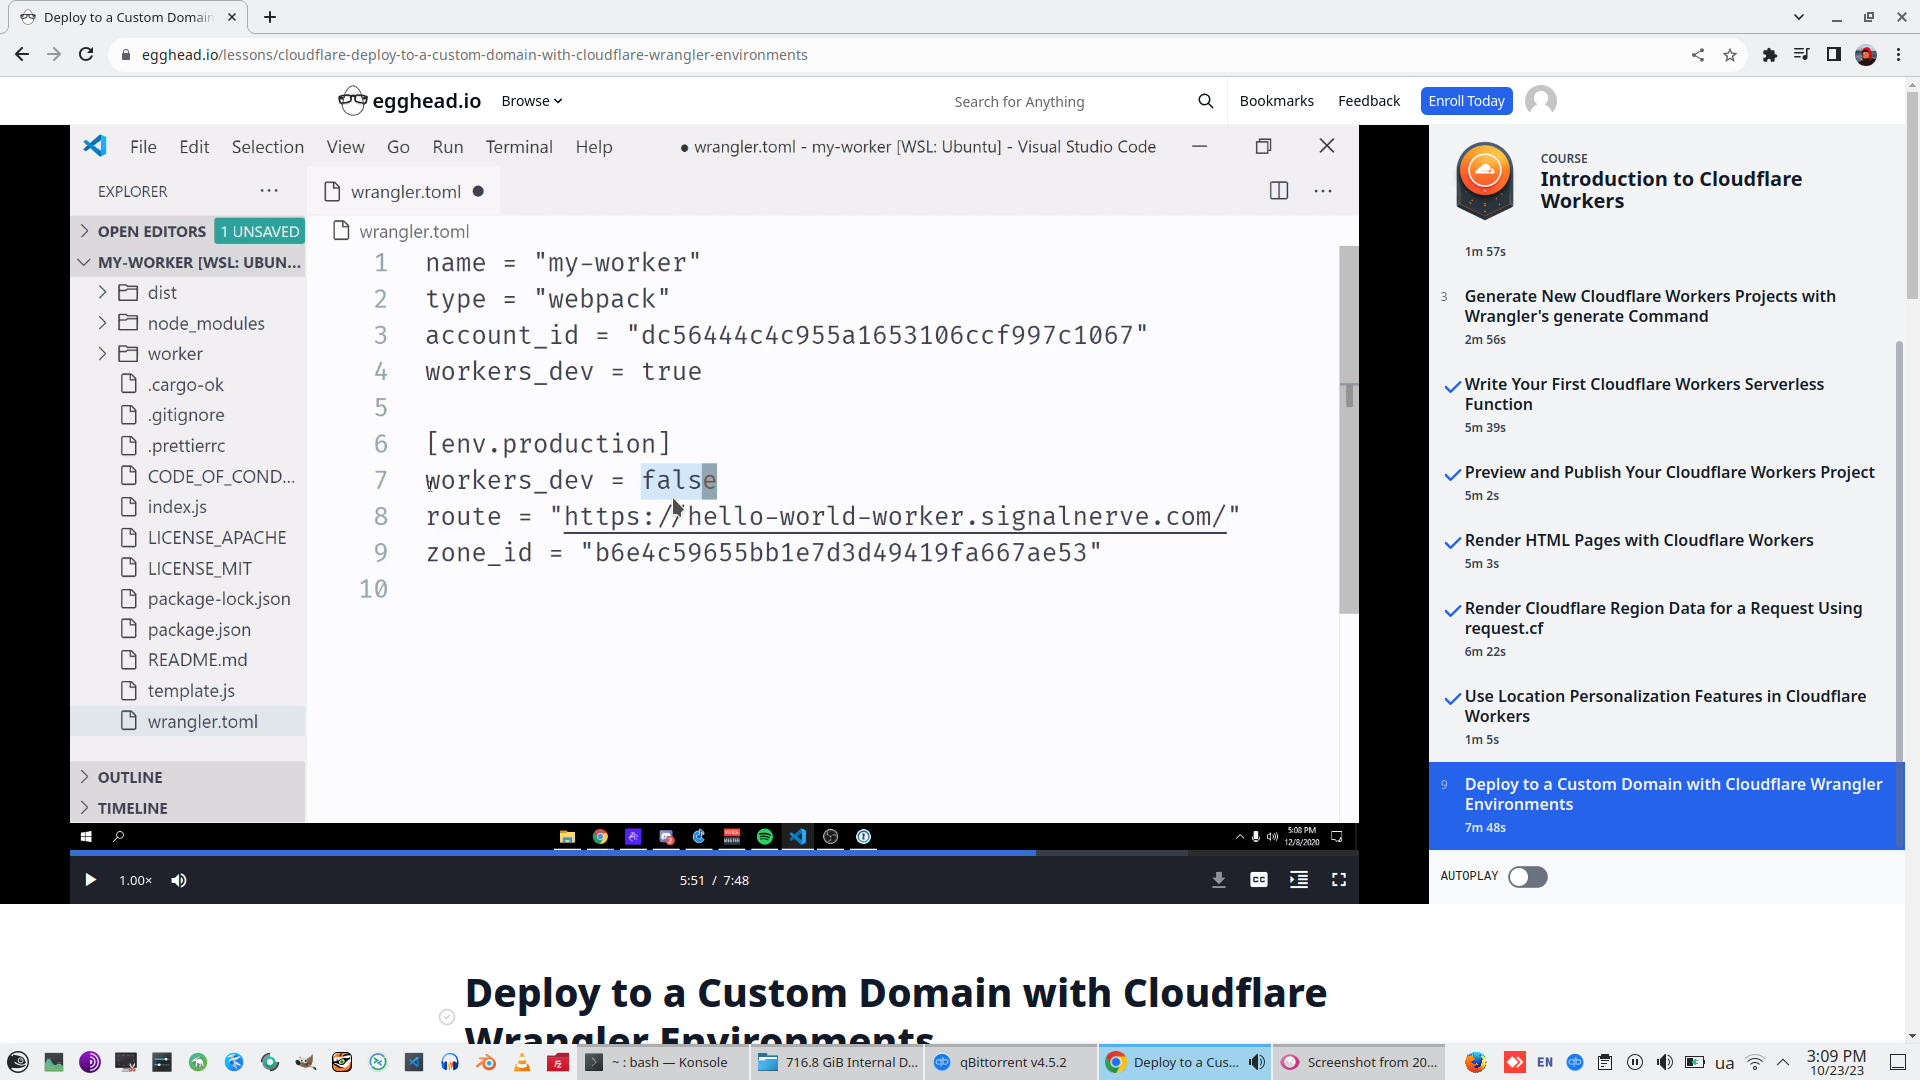
Wrangler publish with production environment variable
2. Build a Serverless API with Cloudflare Workers (CORS details)

2. Set up a New Cloudflare Workers Project with wrangler
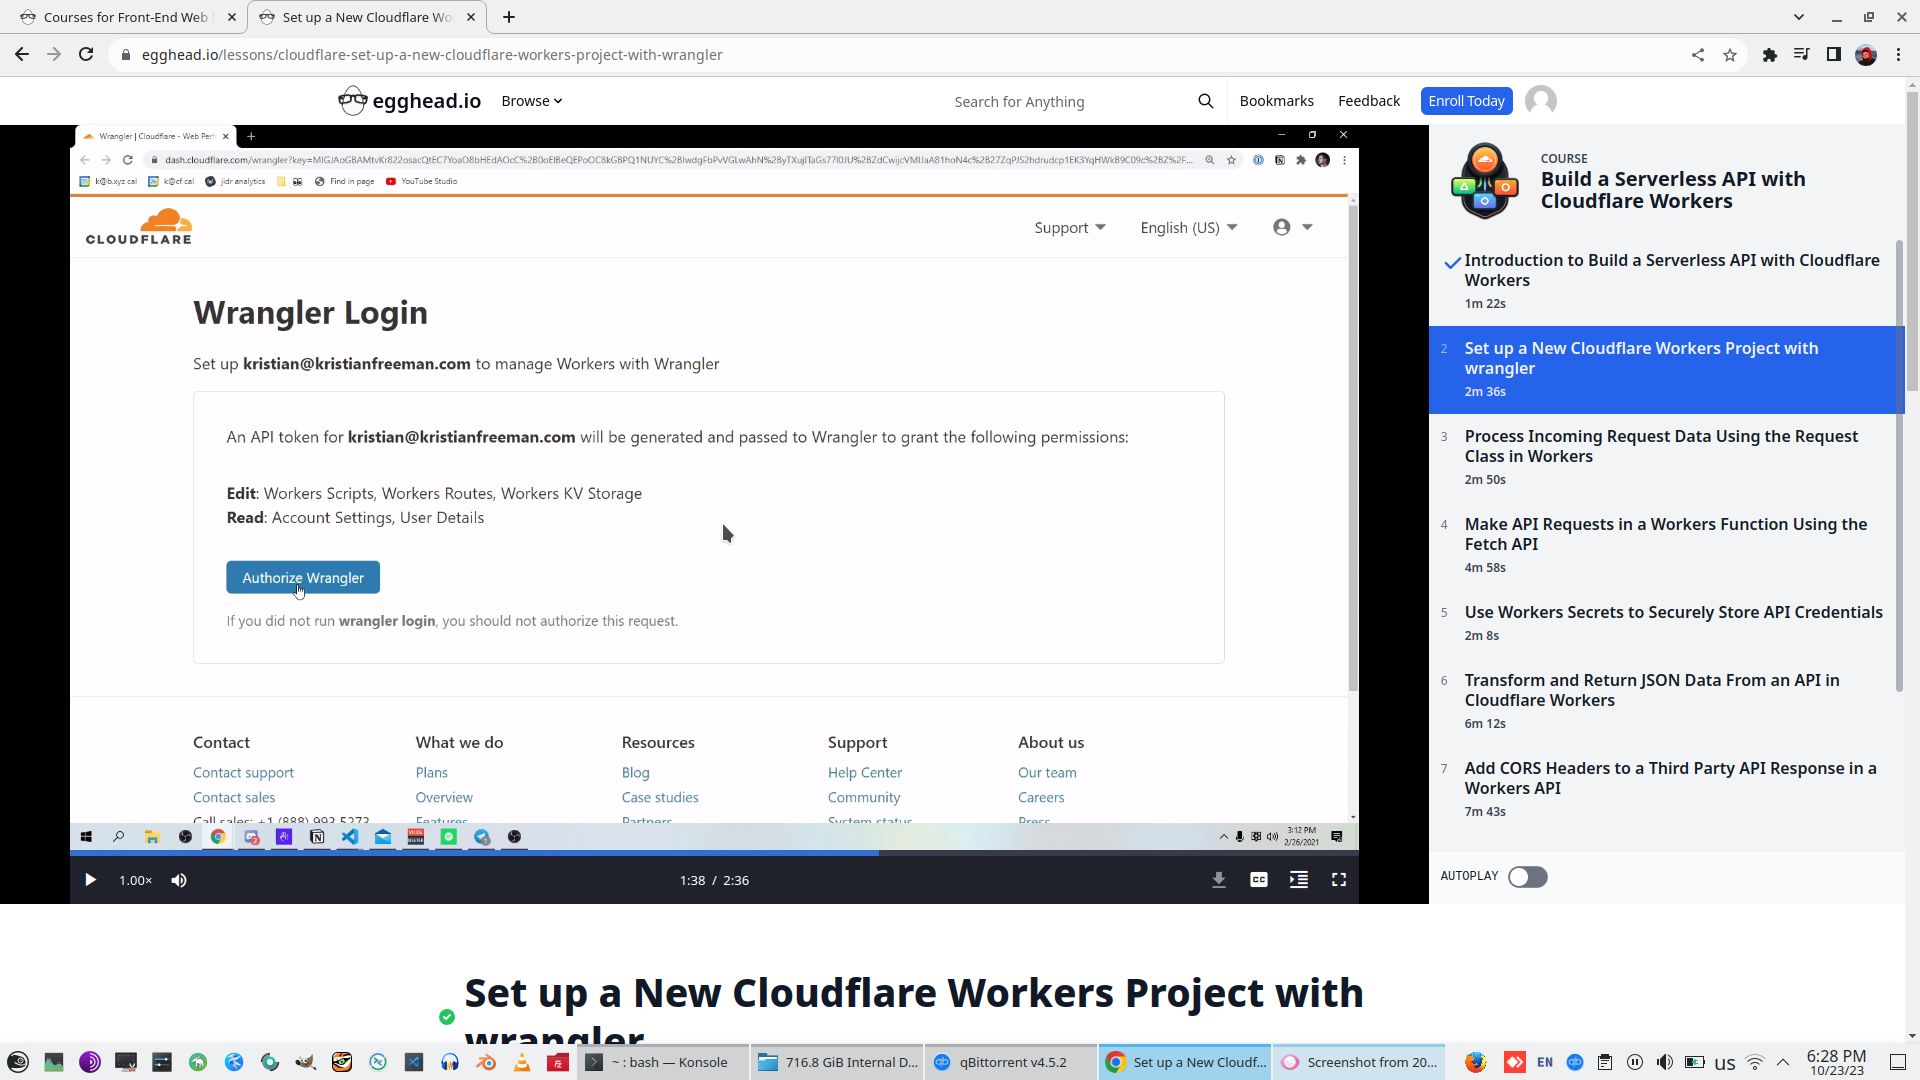
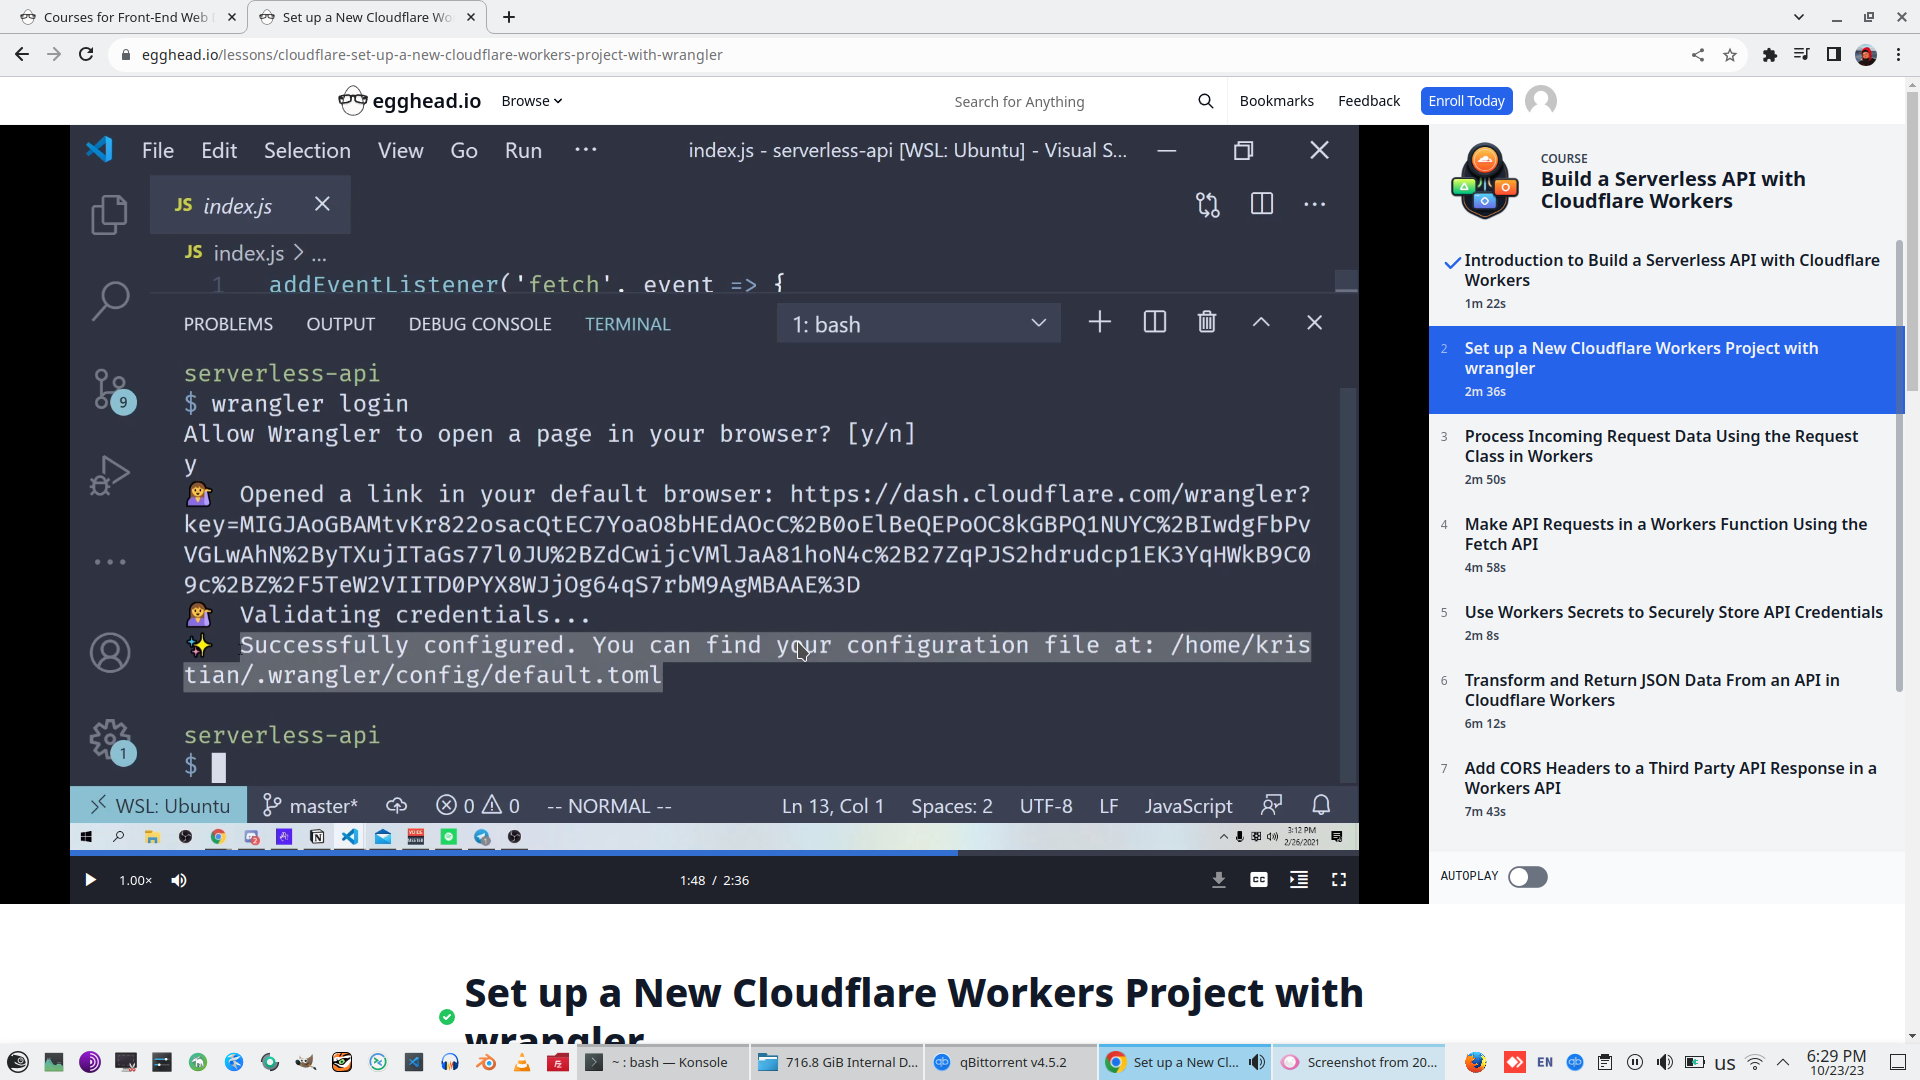
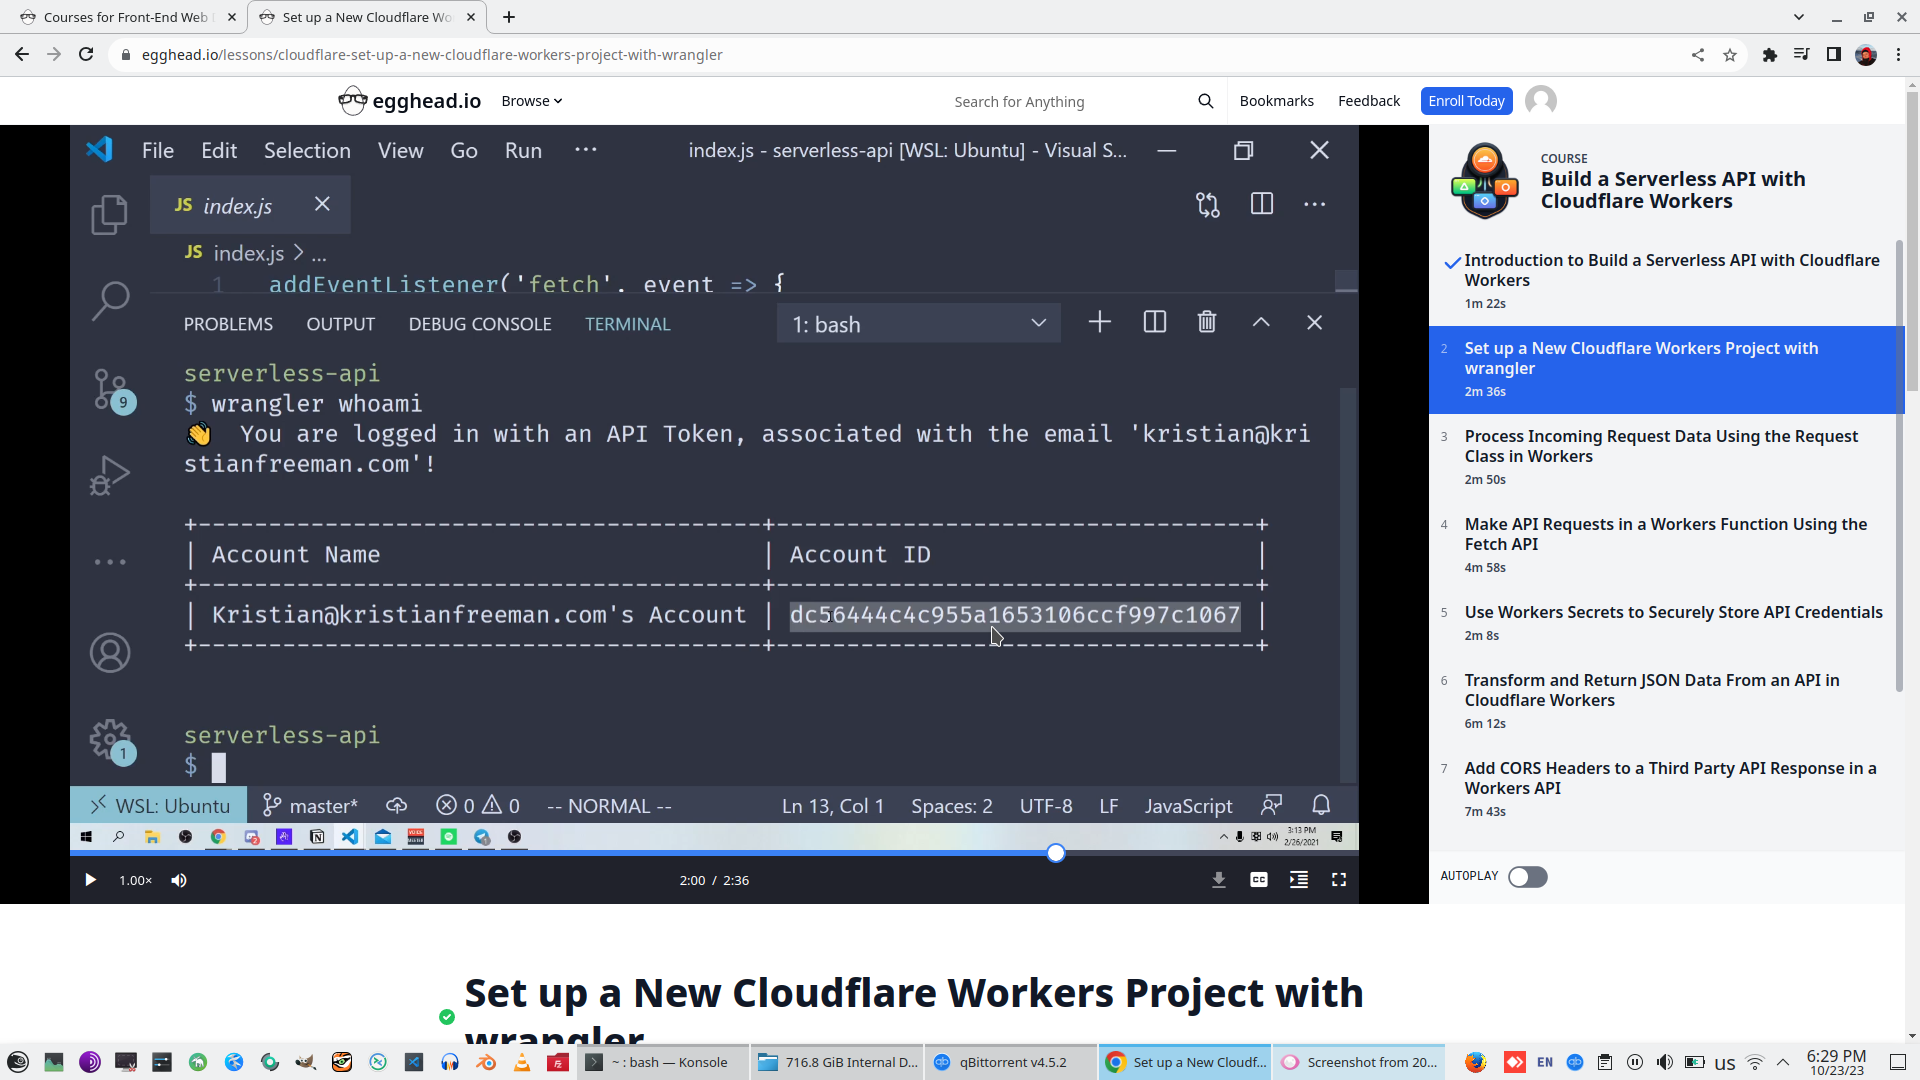
Install Wrangler, Wrangler generate - create new project and Wrangler Login to create default.TOML to current Linux user


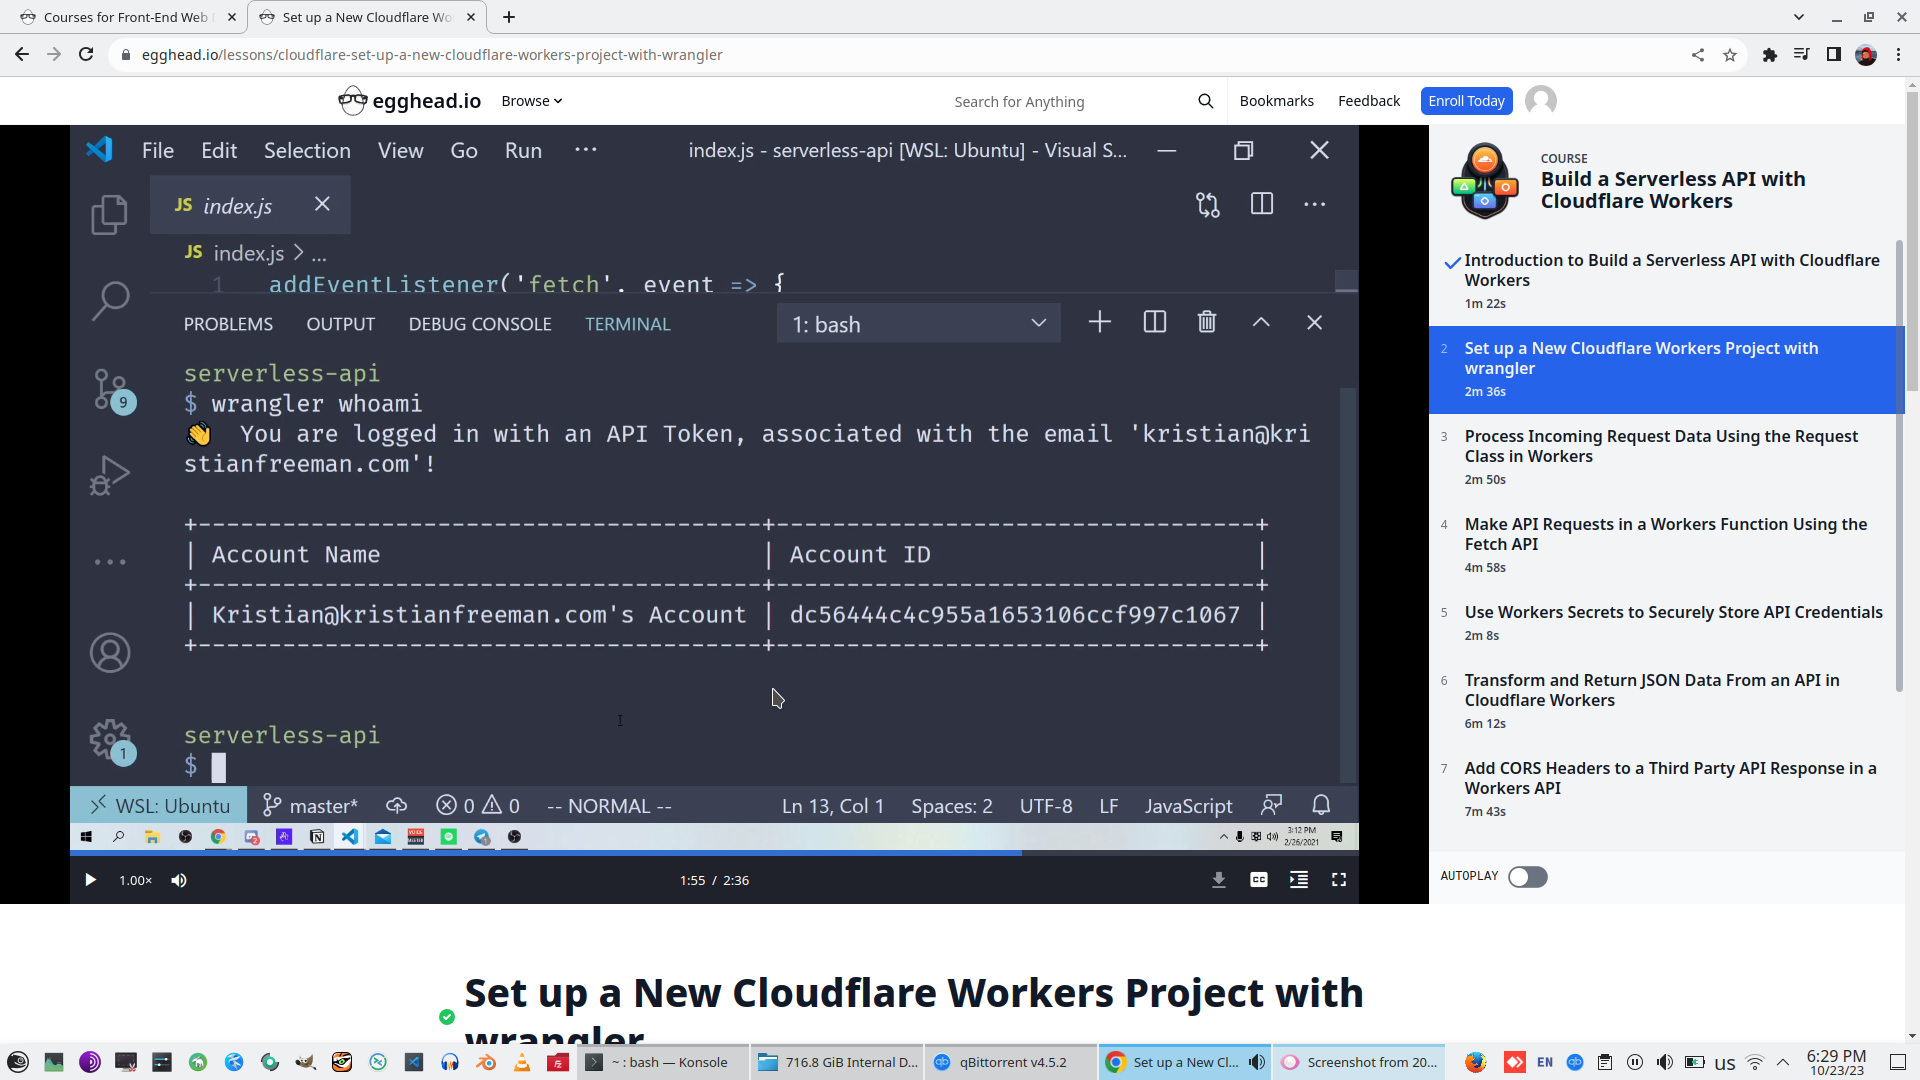
Wrangler Whoami - check defaul user context
Set Wrangler.TOML, Wrangler Publish to custom domain and check result.
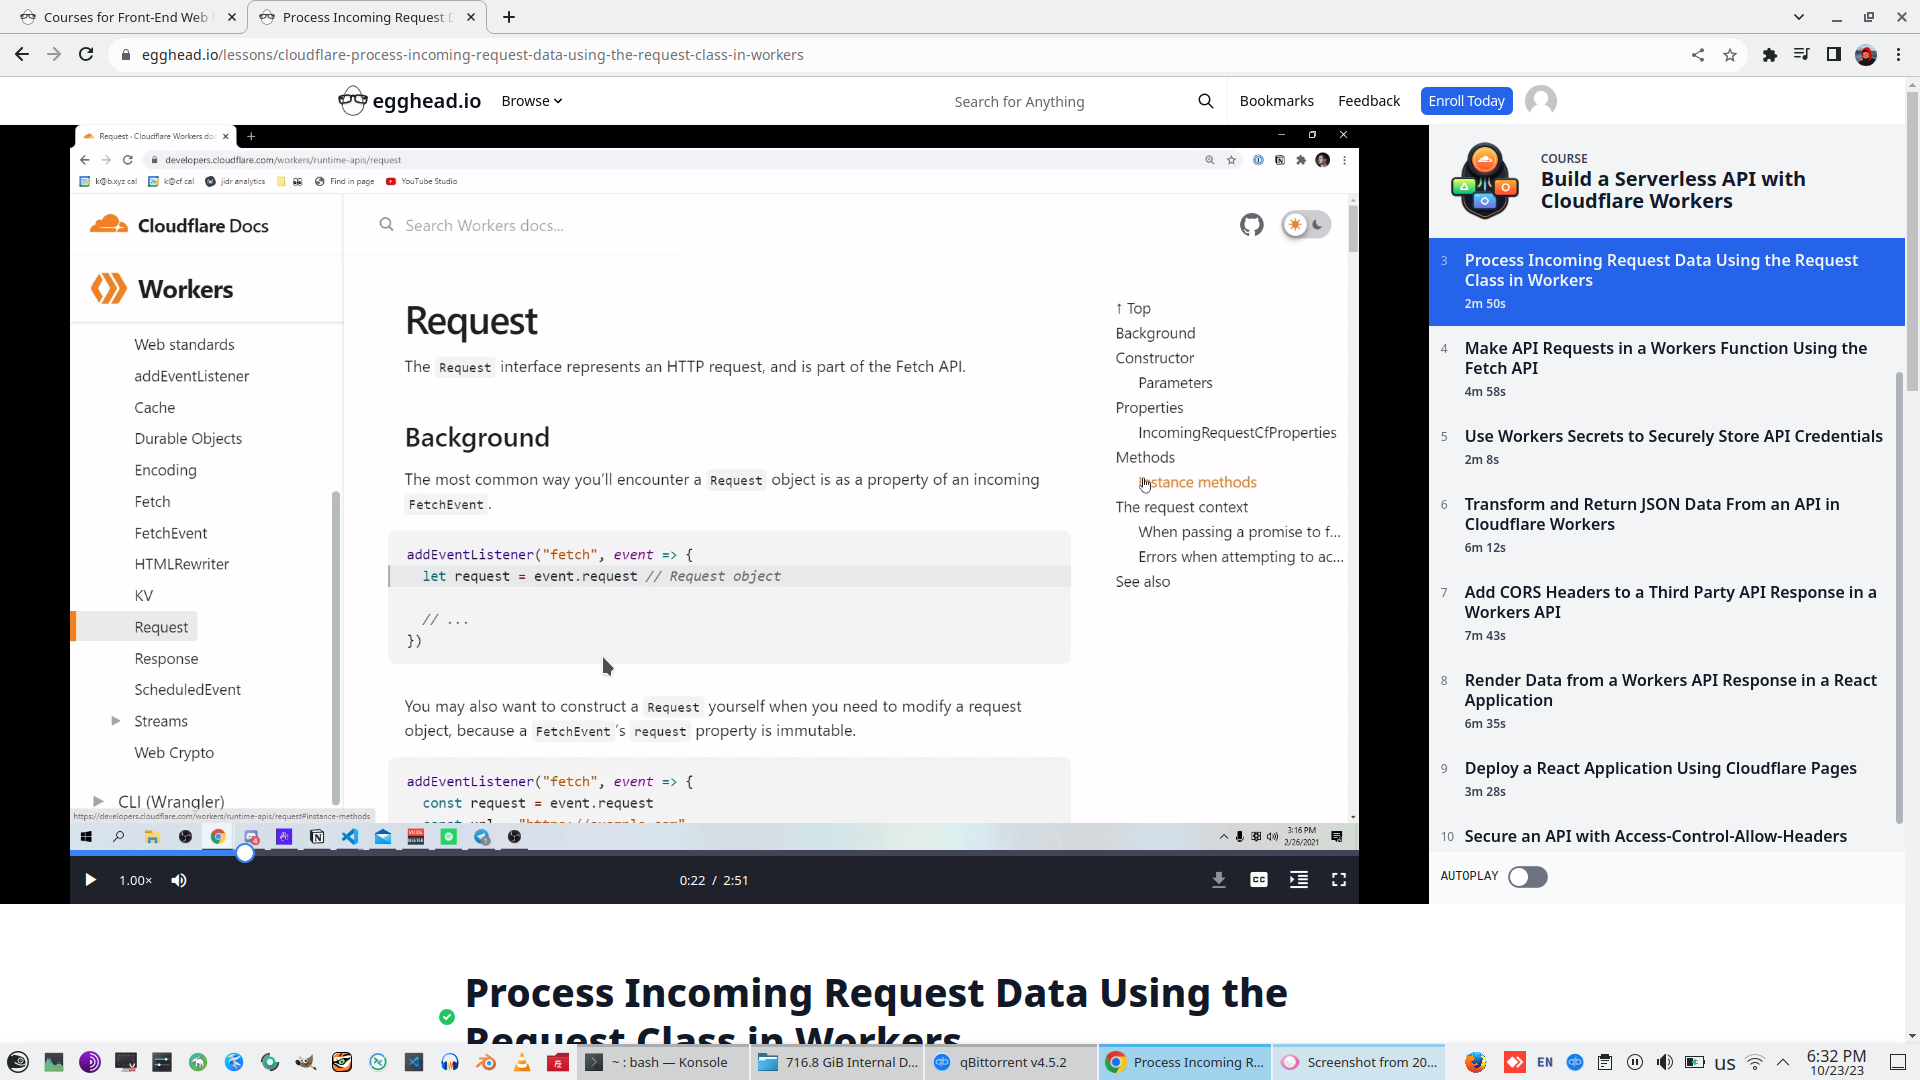
3. Process Incoming Request Data Using the Request Class in Workers
Two type of request - Request.Fitch and Request.Schedule
HandleRequest is Async function and need to return Promise. We need to Await something in Async function, we will Await request and return Awaited result, exactly Promise.
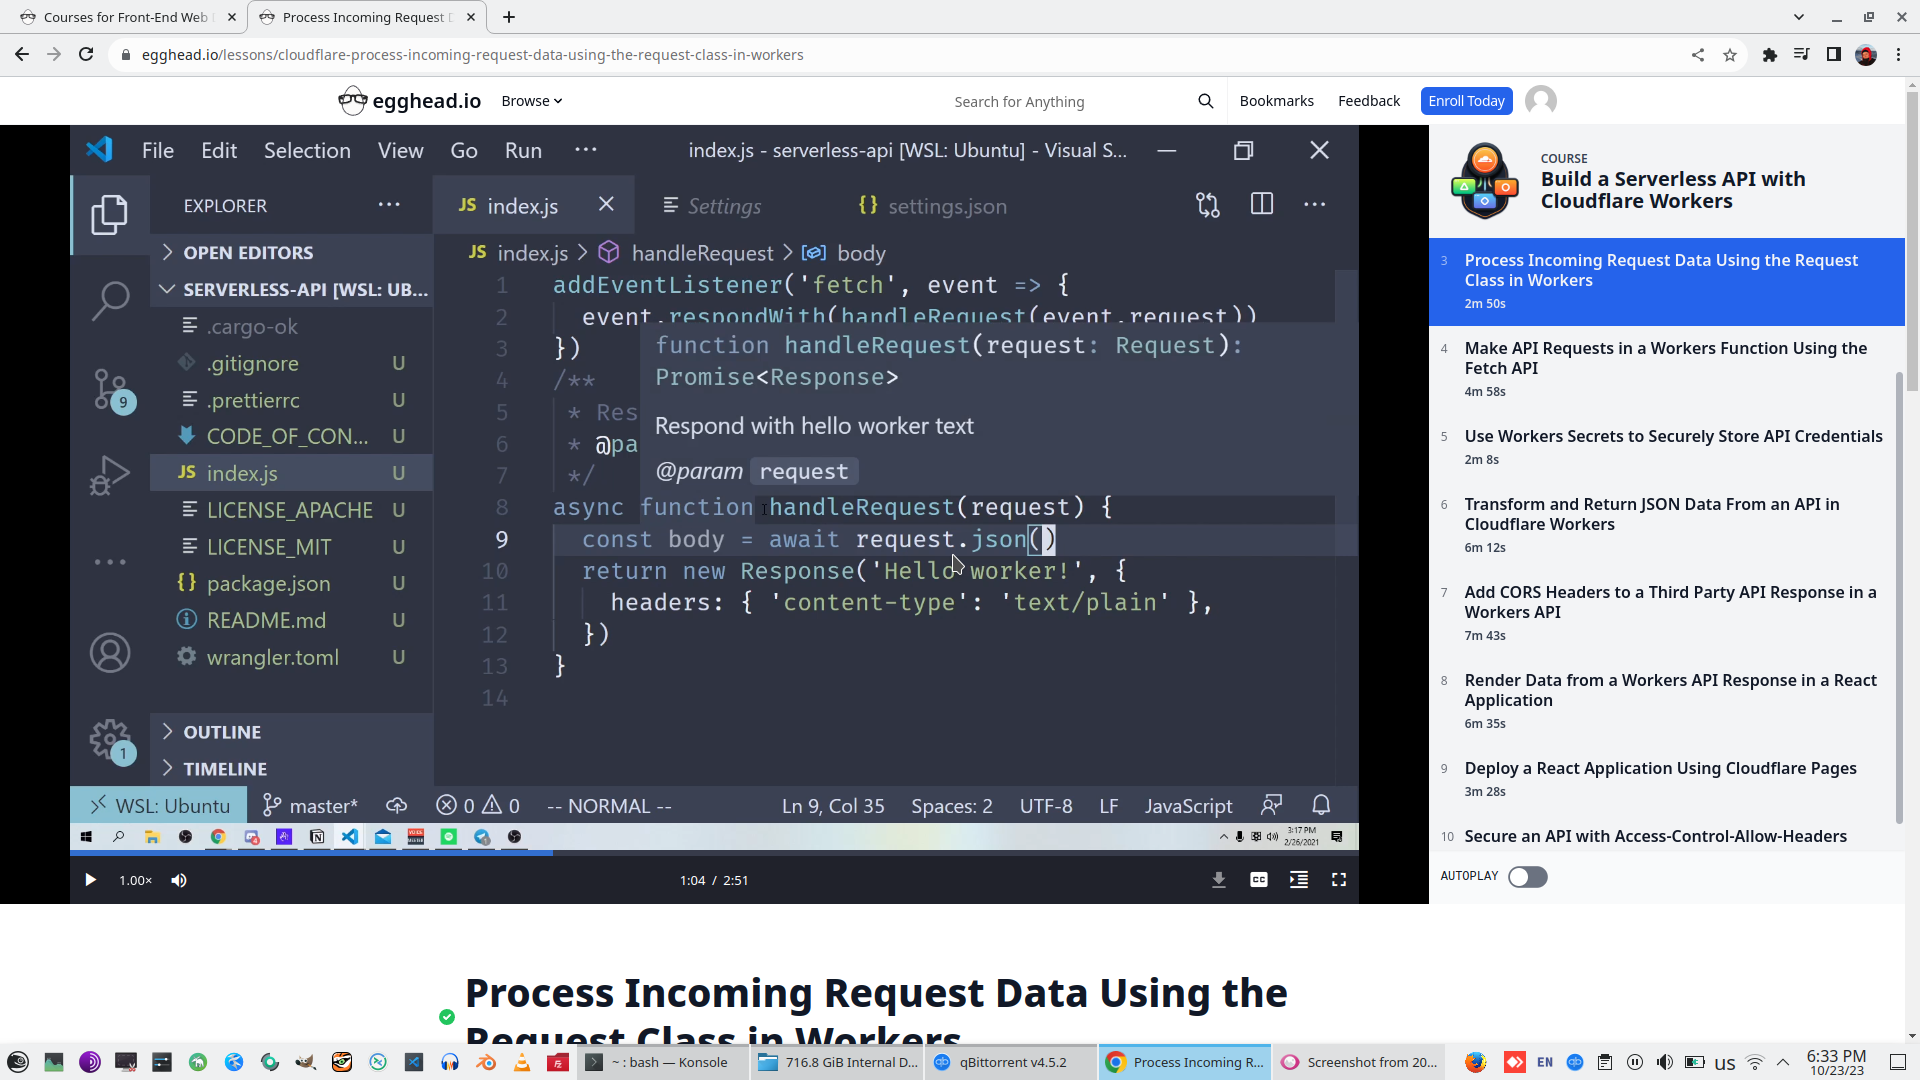
Firstly we simple return to result input parameters, but Stringfy object to string.
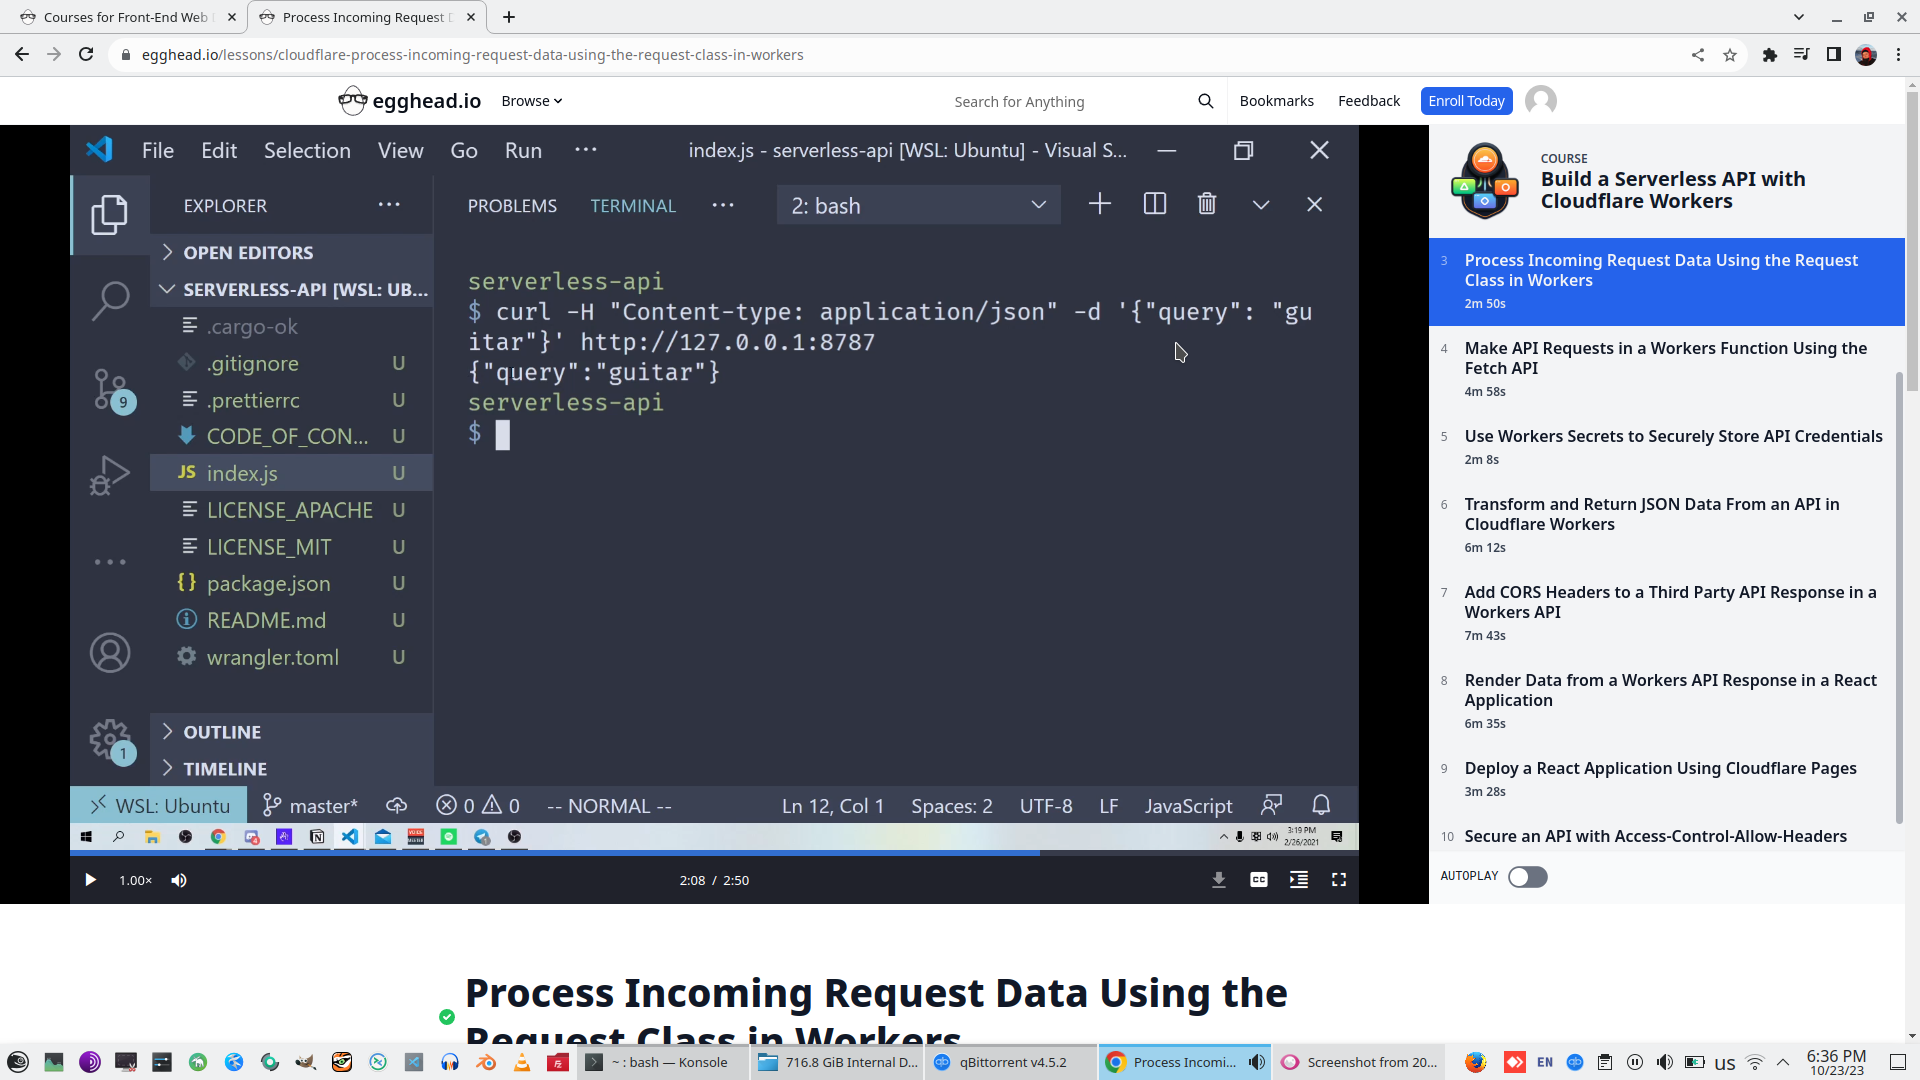
Wrangler publish - we publish to custom domain and than Wrangler dev - to start server locally

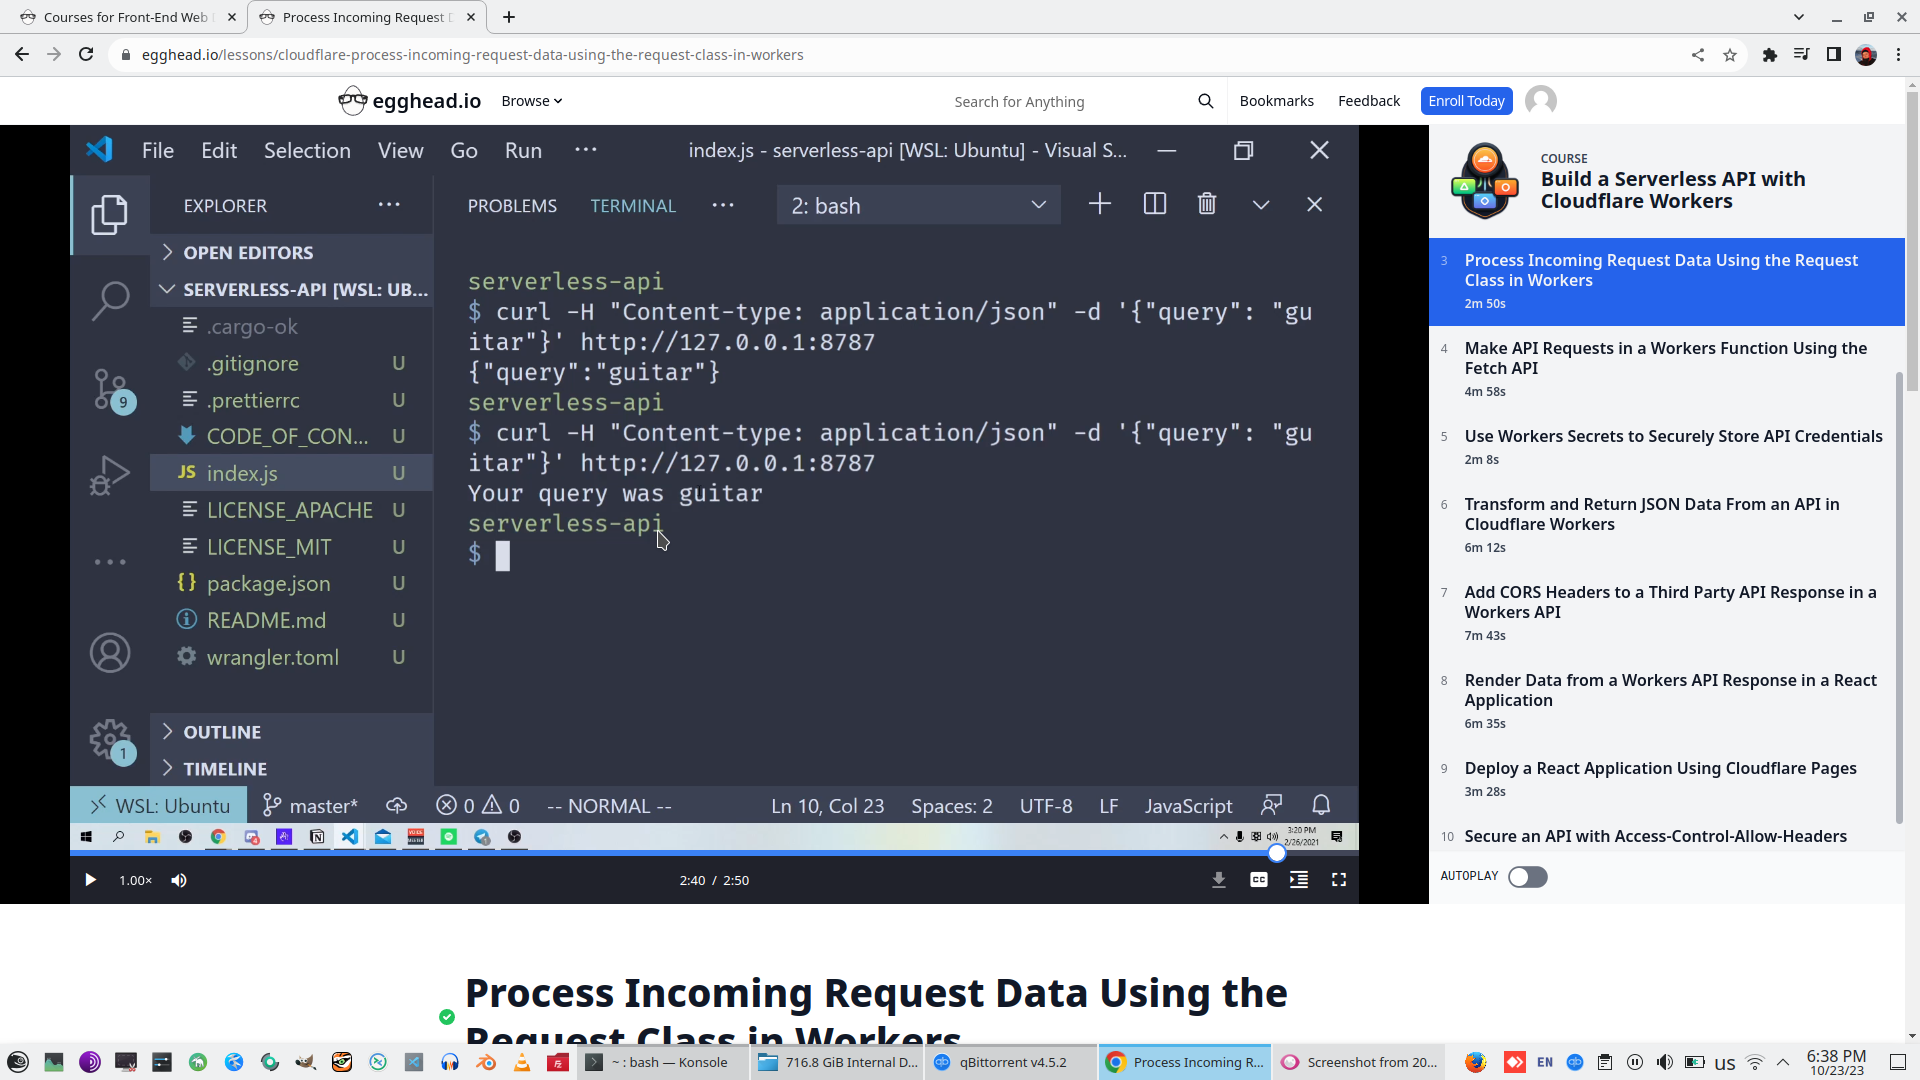
We swith to another BASH and we can see result without Browser with CURL
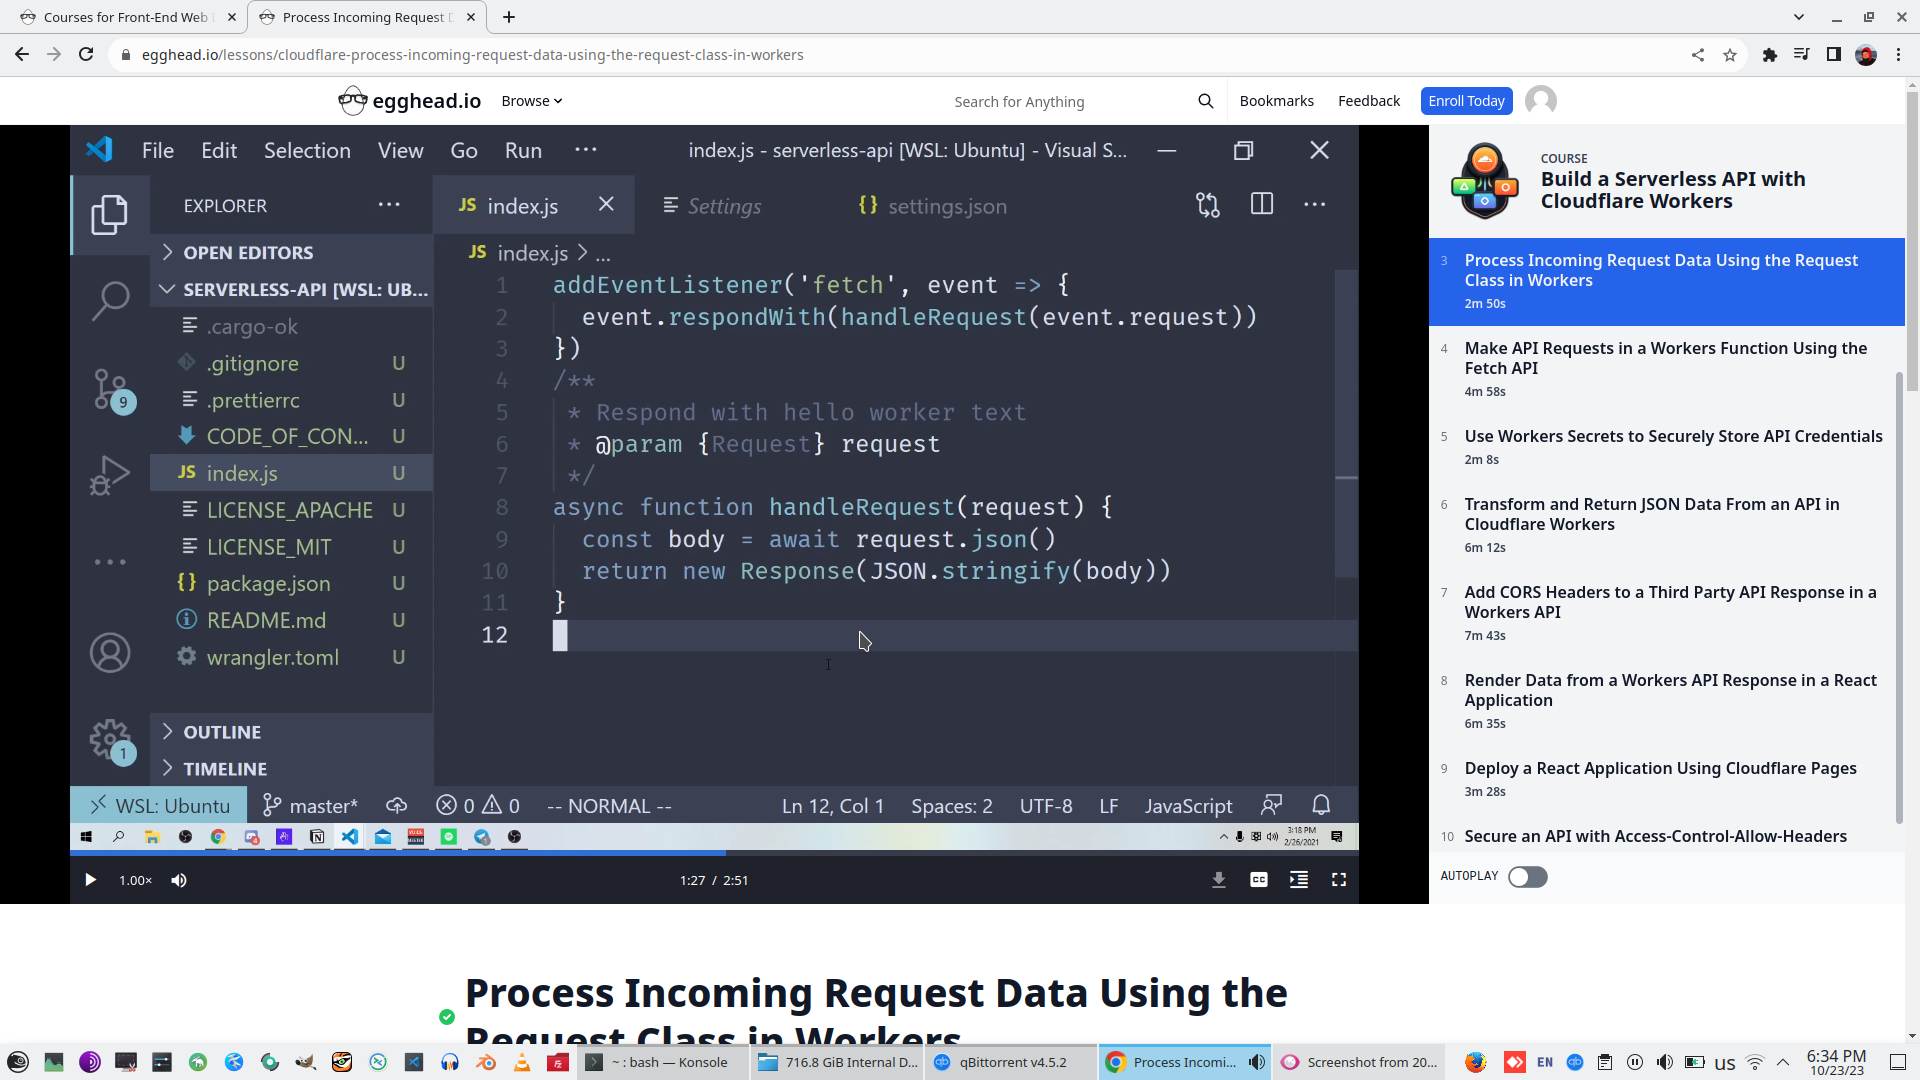
We will use destructive assignment to unpackage Request.JSON to JS Object named Query.

Wrangler automatically tracking changing and redirect request to custom domain to local server.
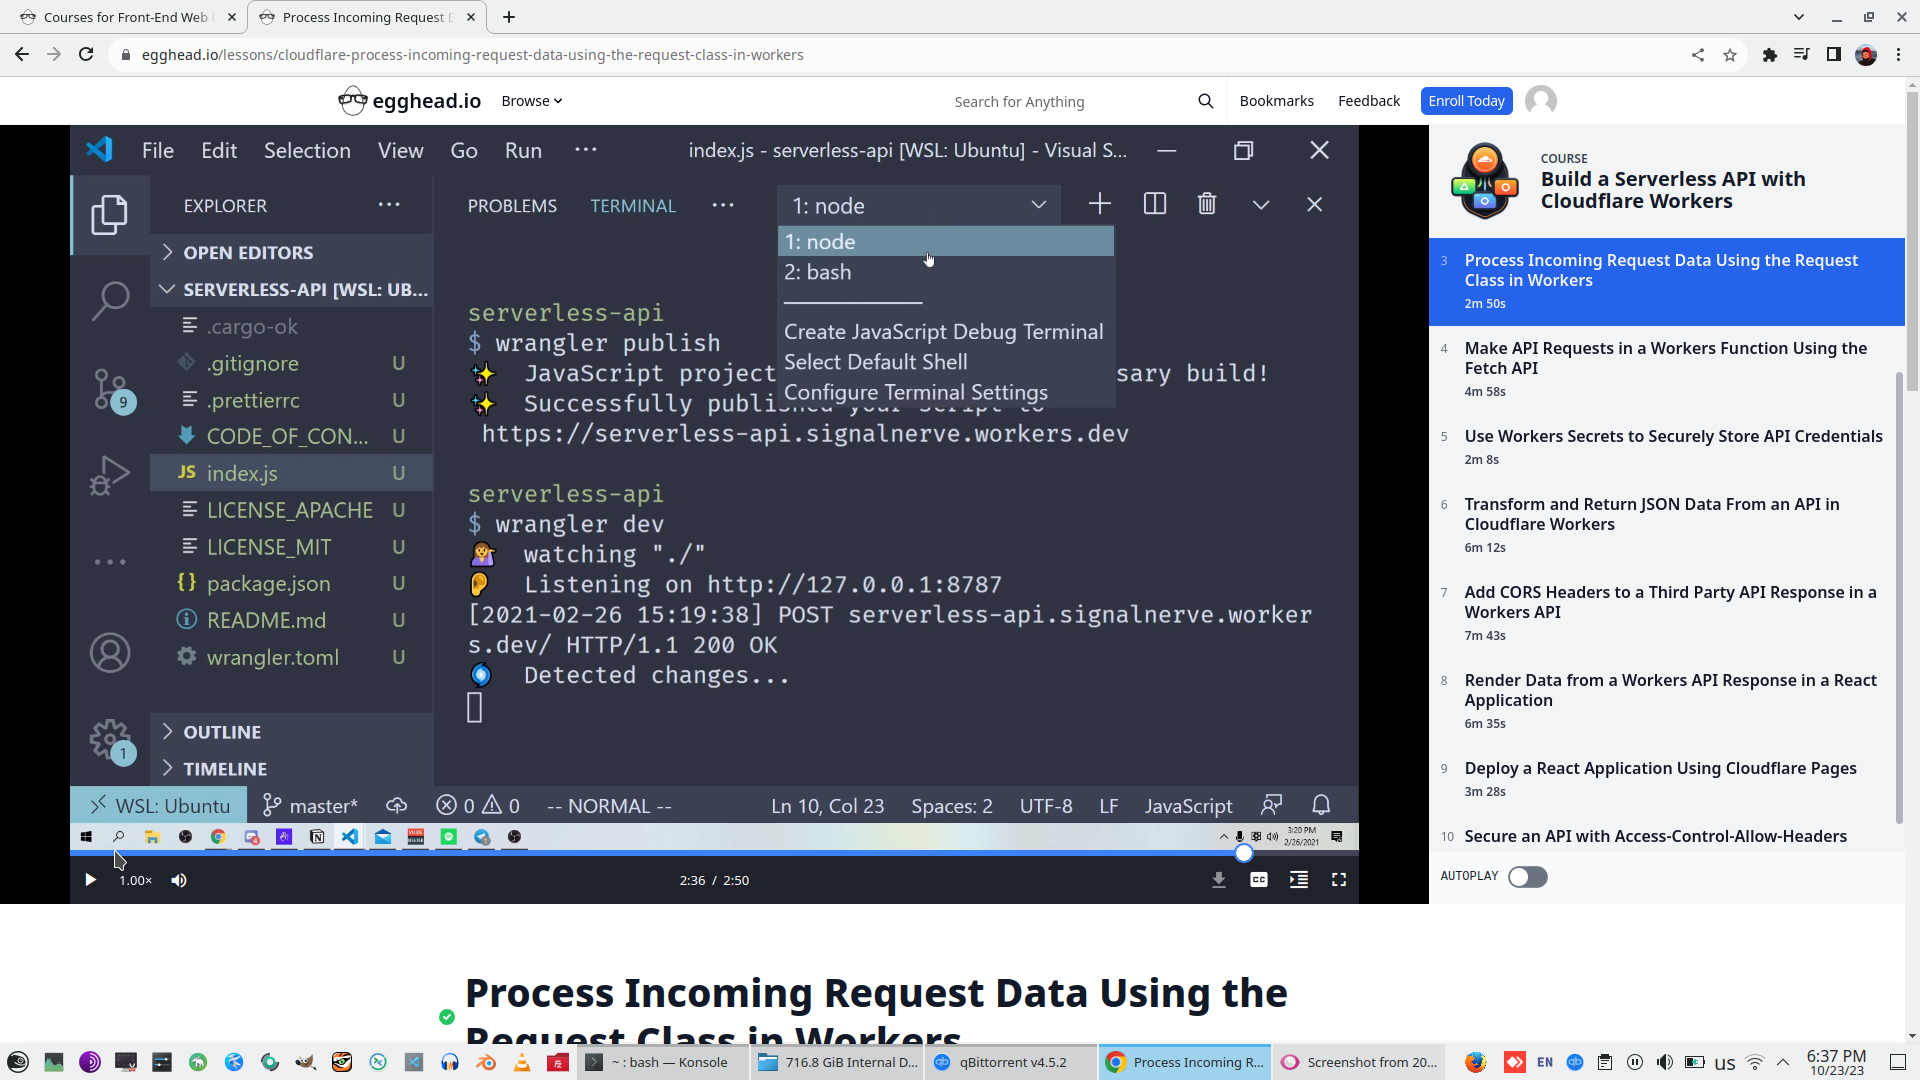
In this case we can return Query as simple text
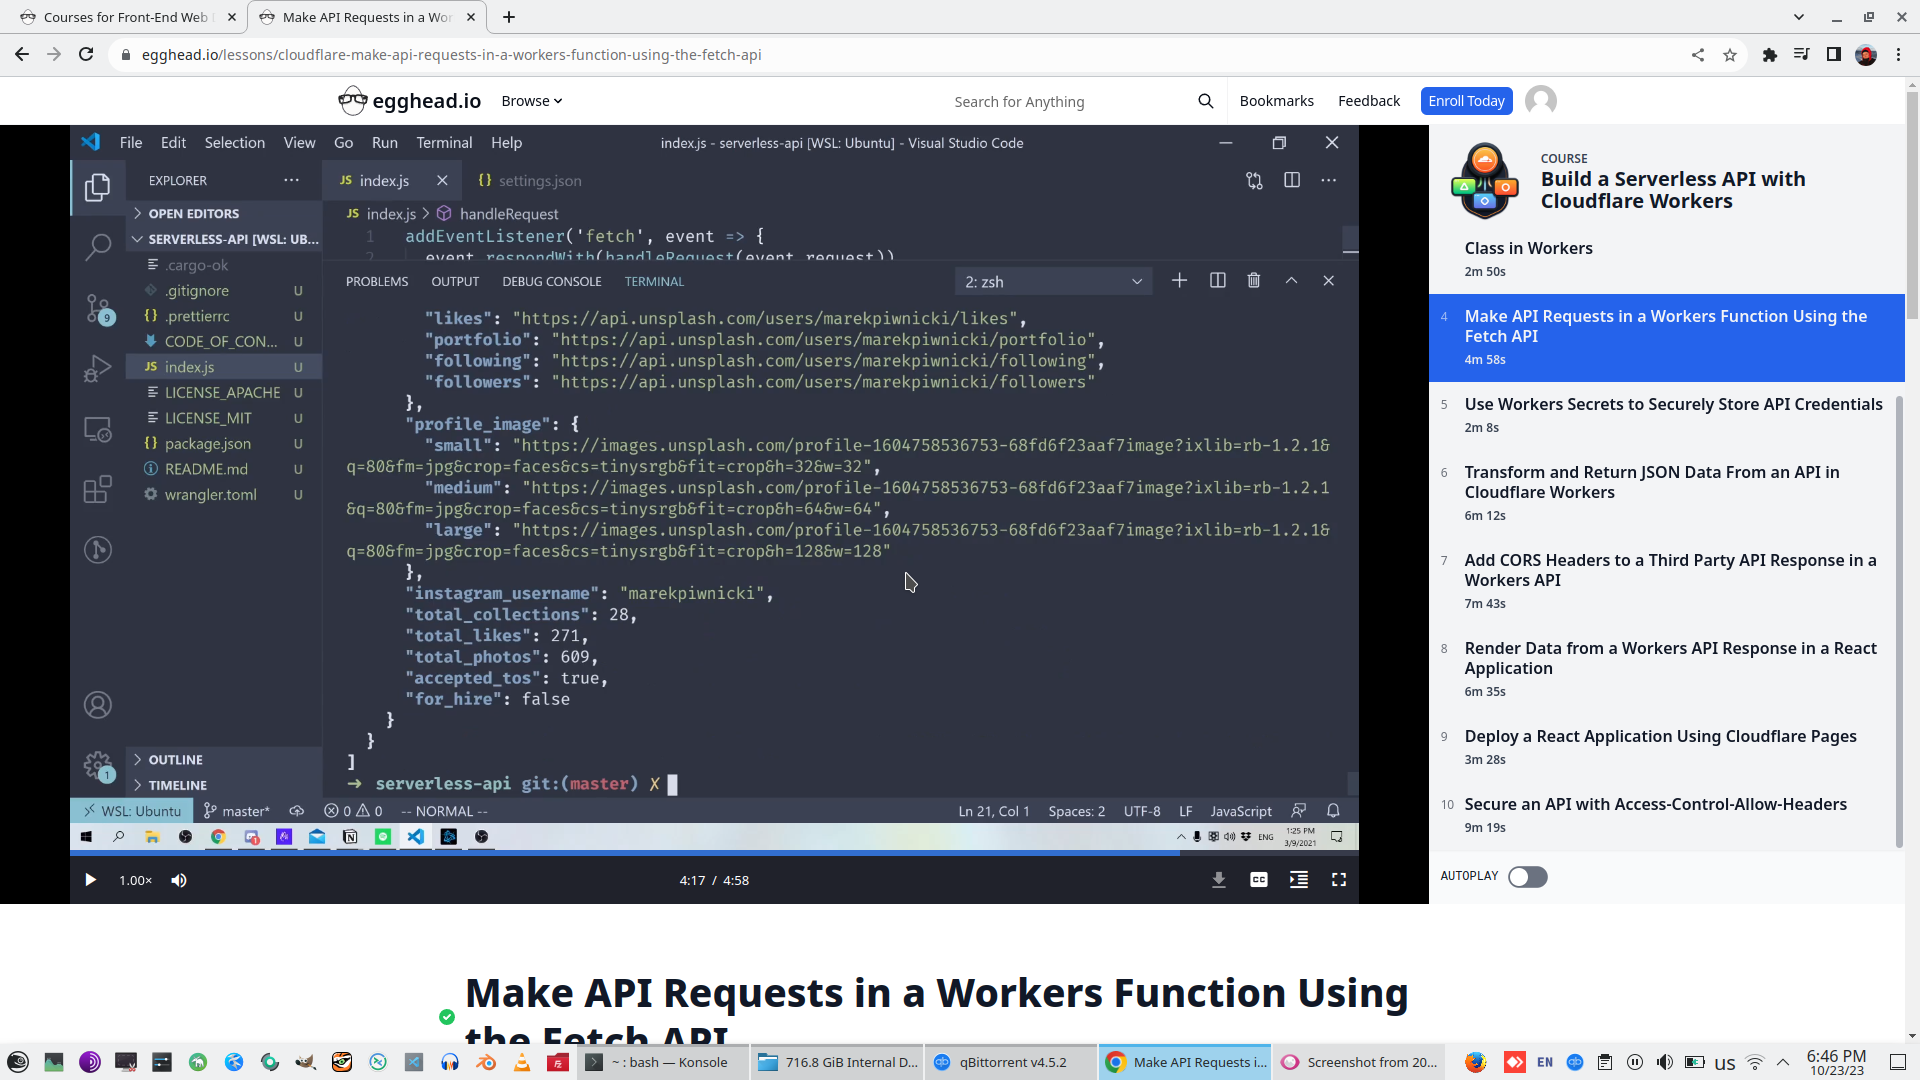
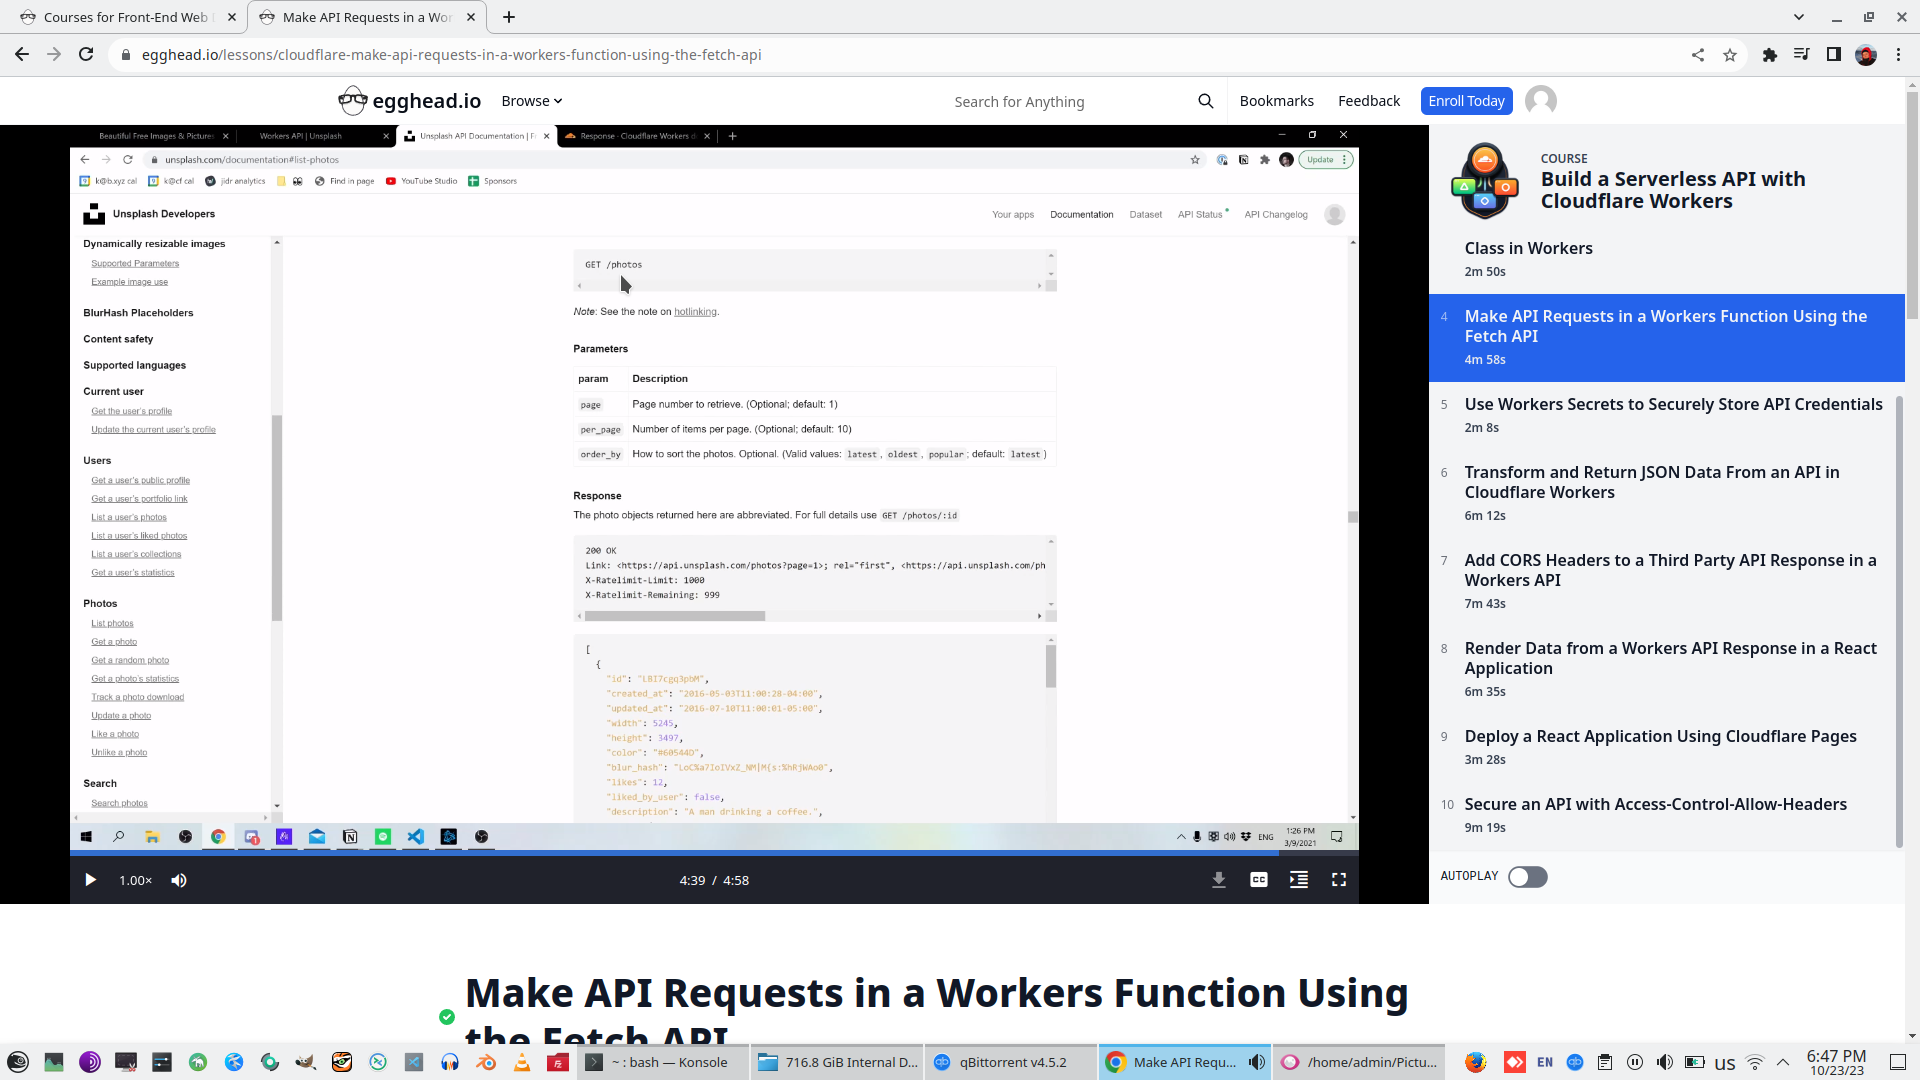
4. Make API Requests in a Workers Function Using the Fetch API
As example of secure JWT token and wirking with API we will use Unsplash.com

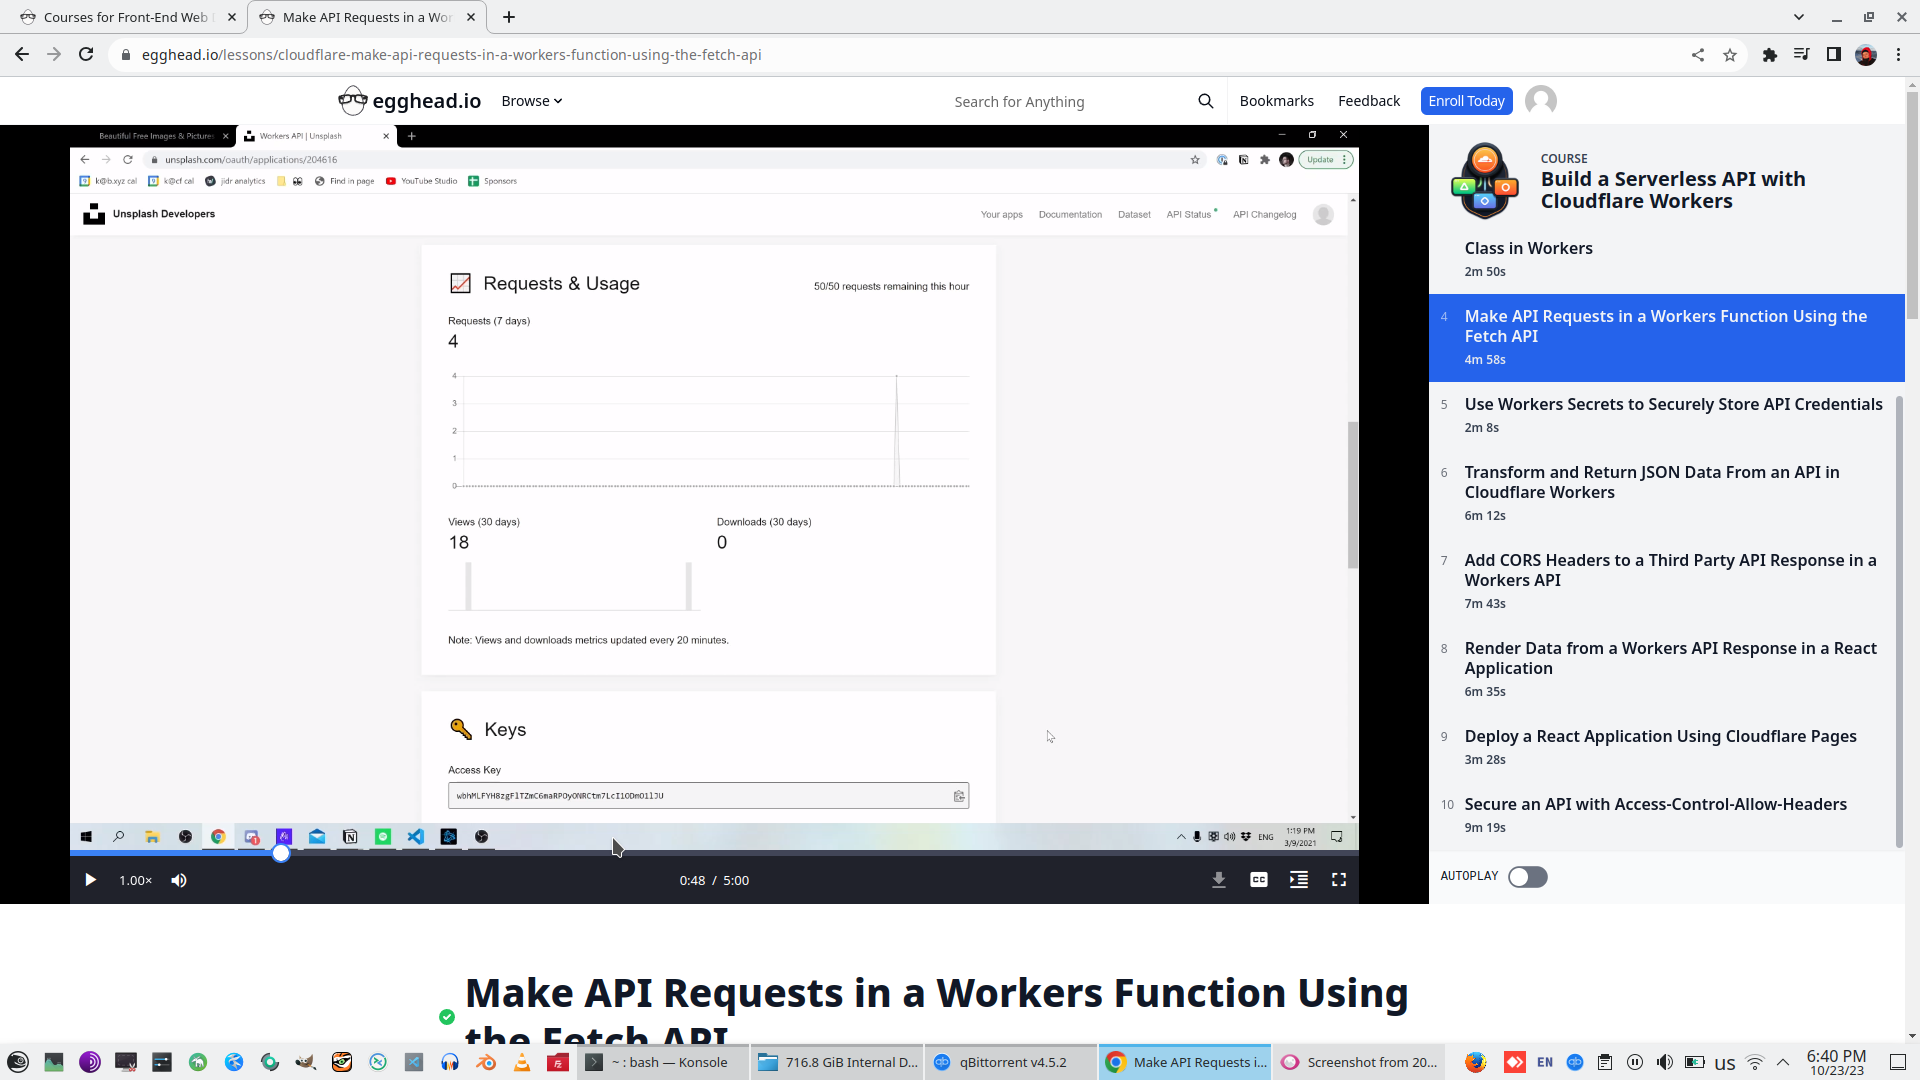
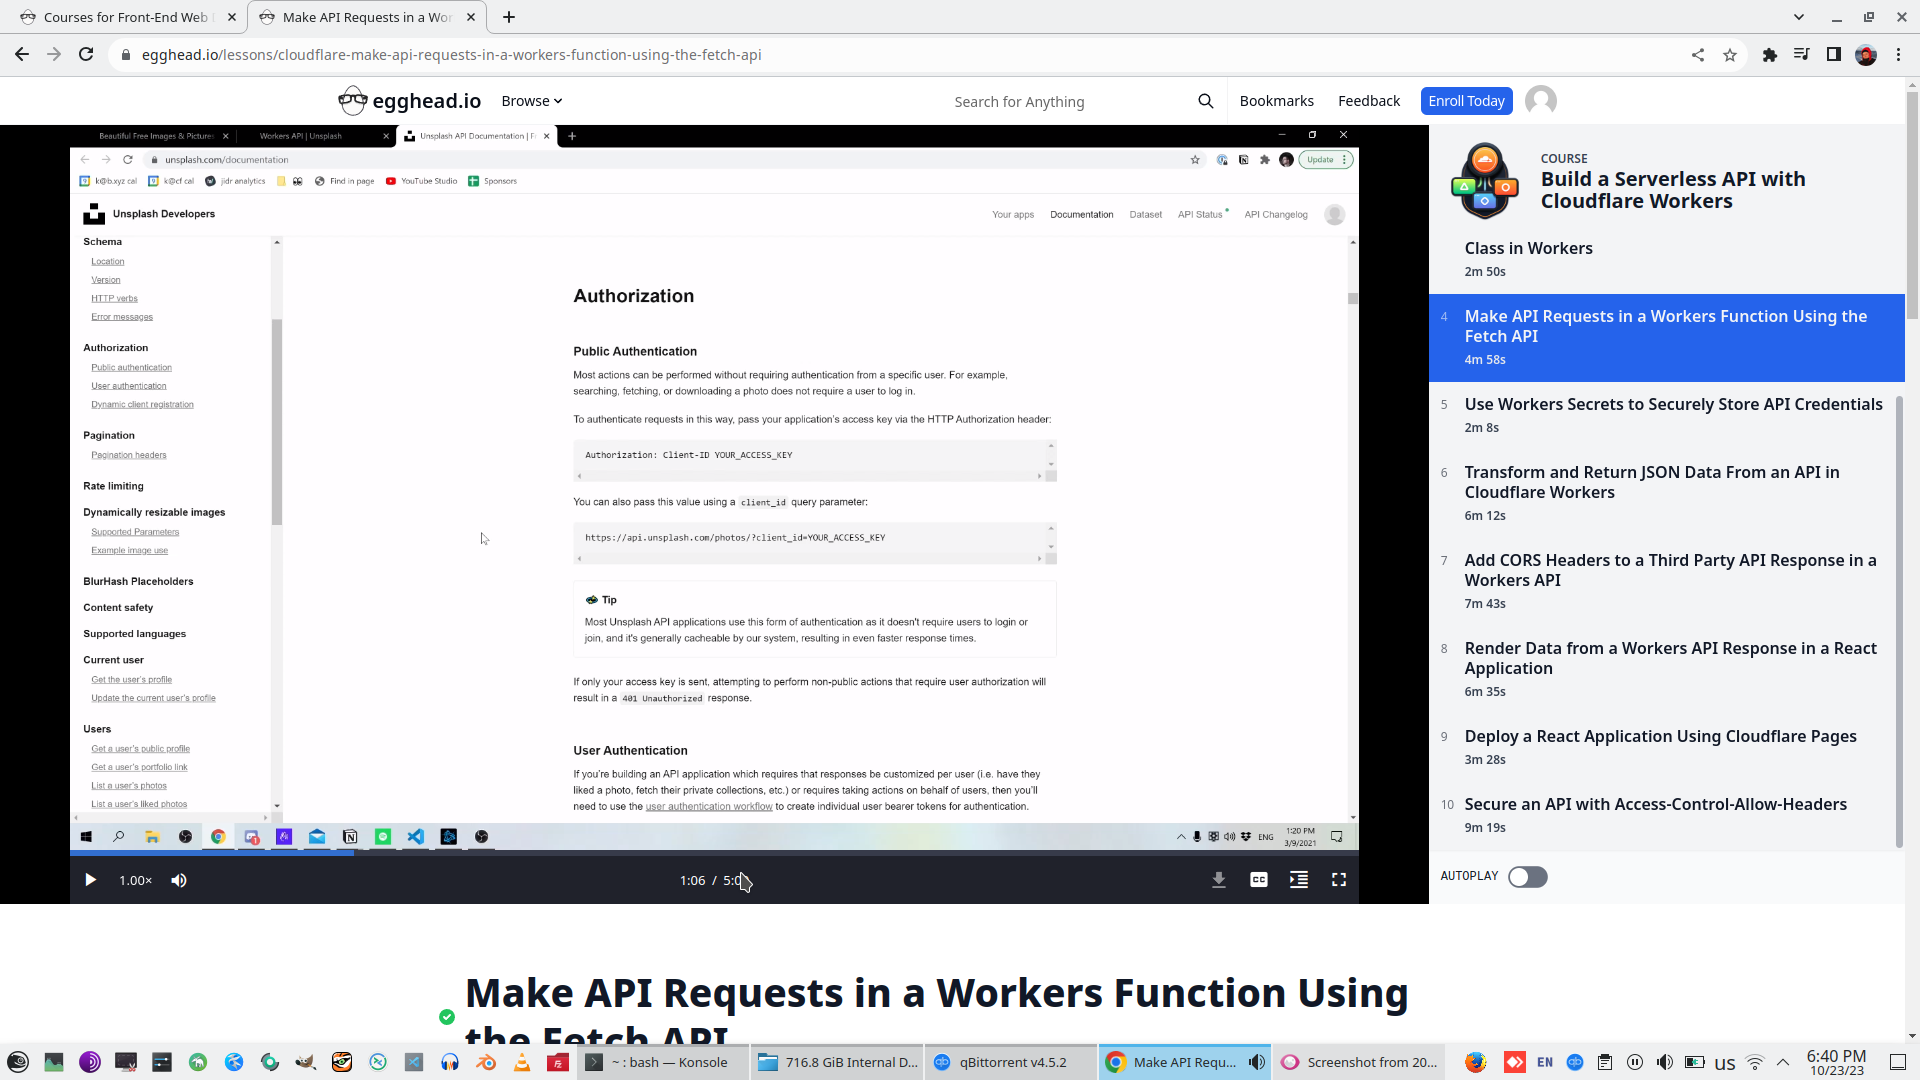
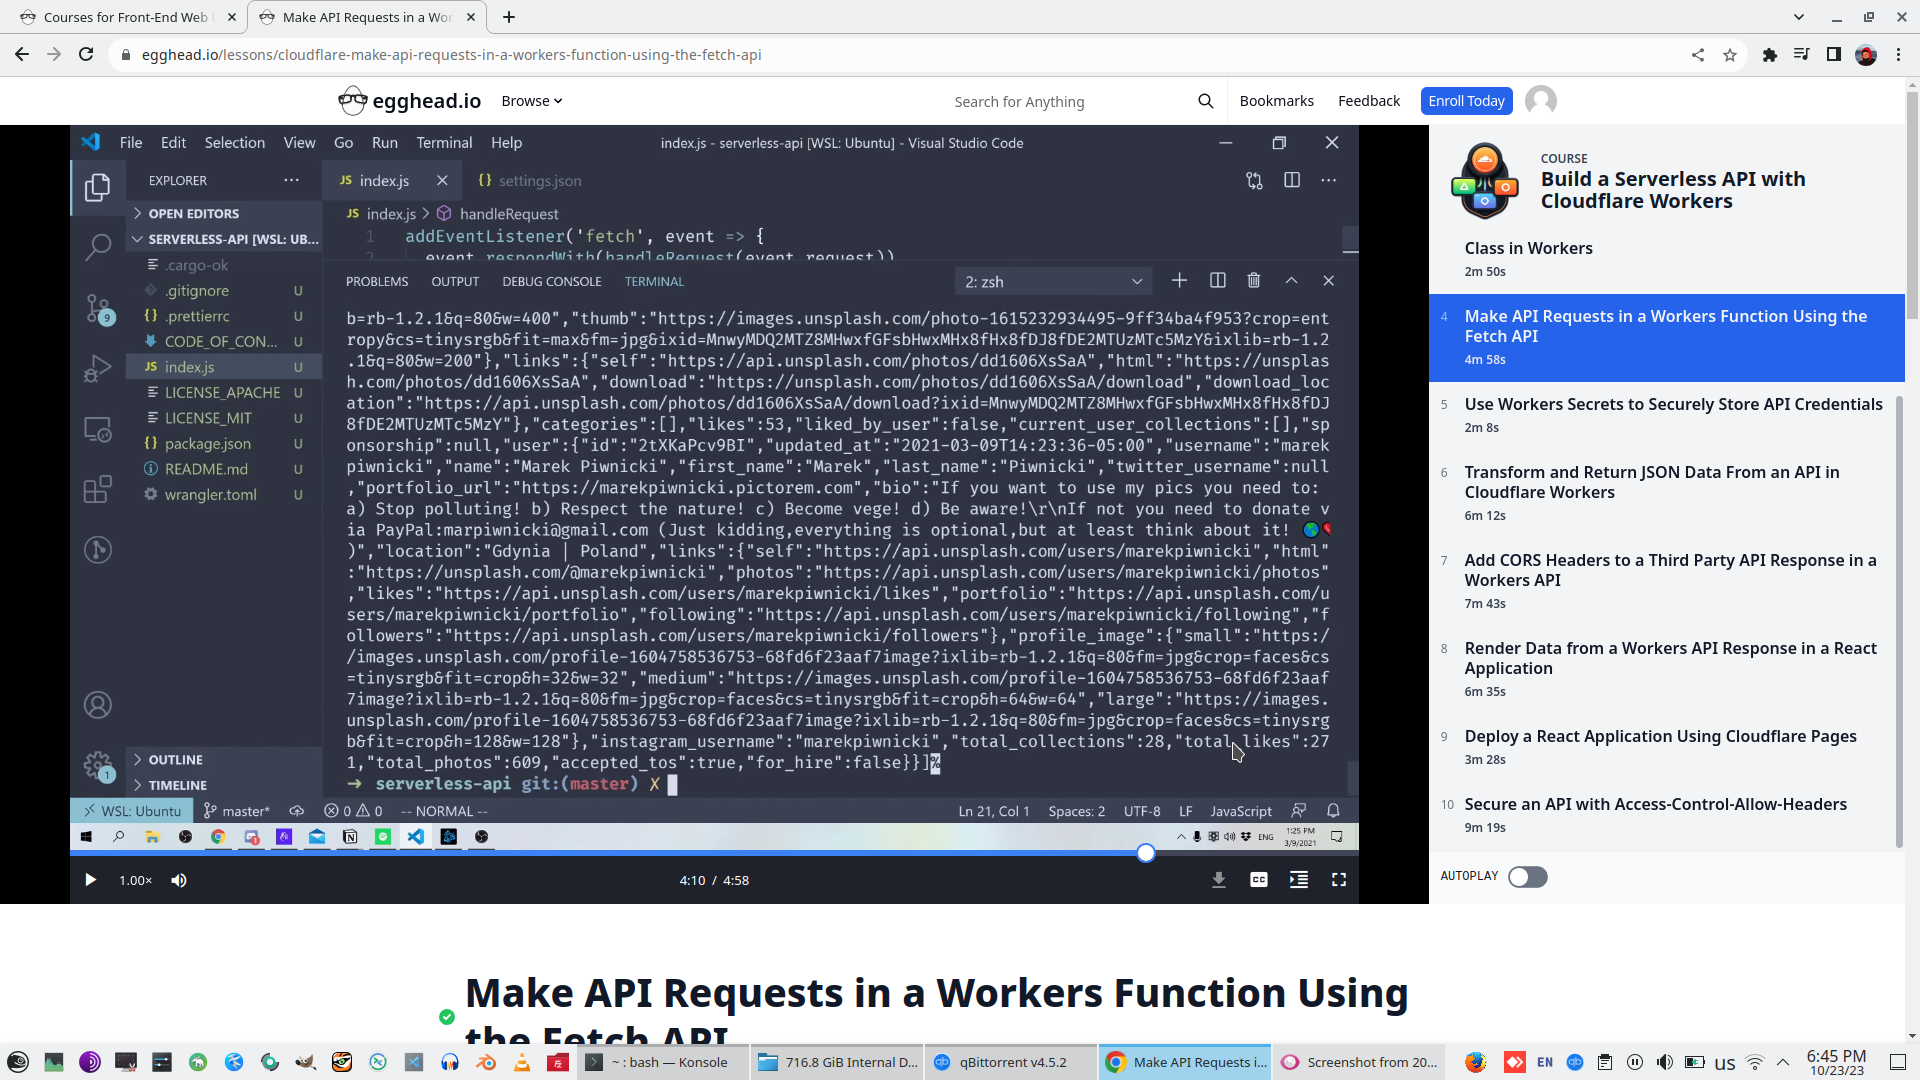
Set Unsplash.com ClientID to code and create Fetch to Api.Unsplash.com with ClientID from Unsplash.Com.

StringFy API result to string and return it as Json result for Cloudflare worker

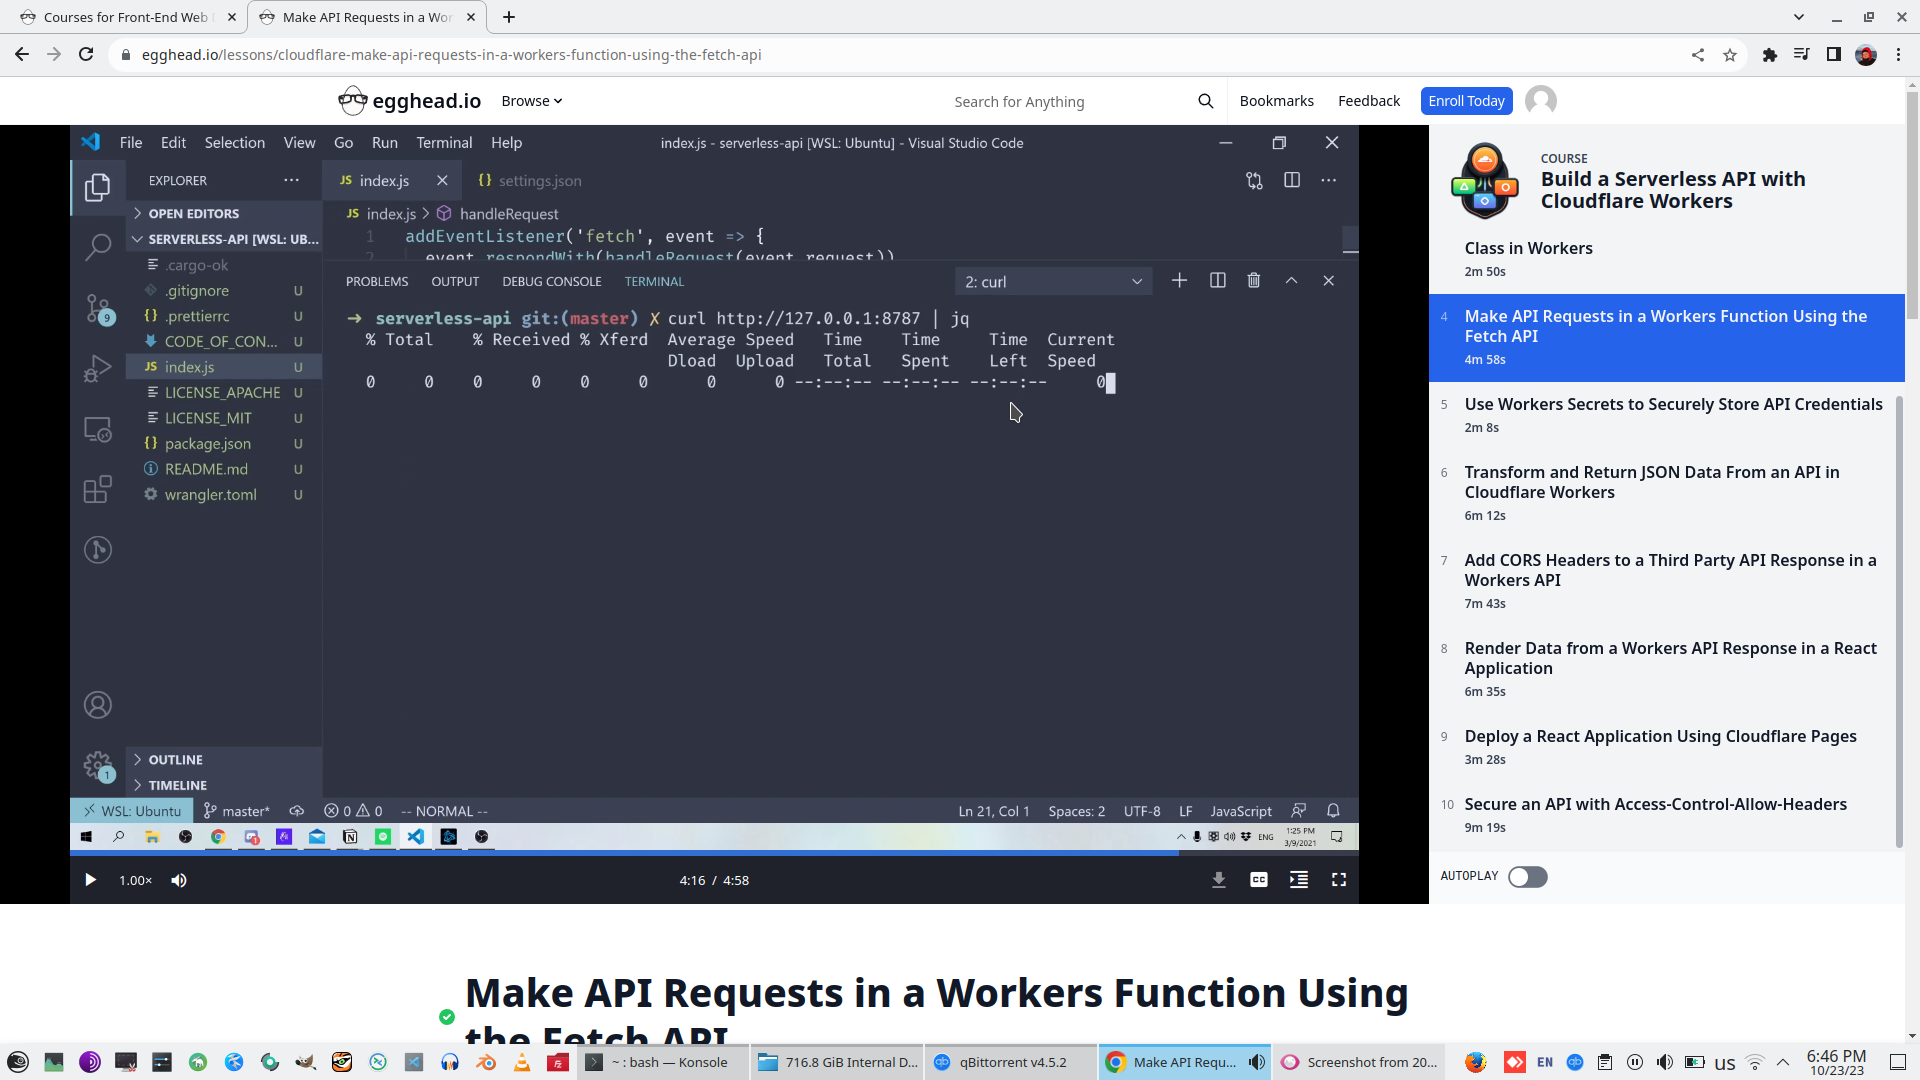
Start Wrangler dev server on one BASH and look result with CURL on another BASH.


Awesome result, but unformated
Install JQ and look to formatted JSON-result.
Check API log on Unsplash.com
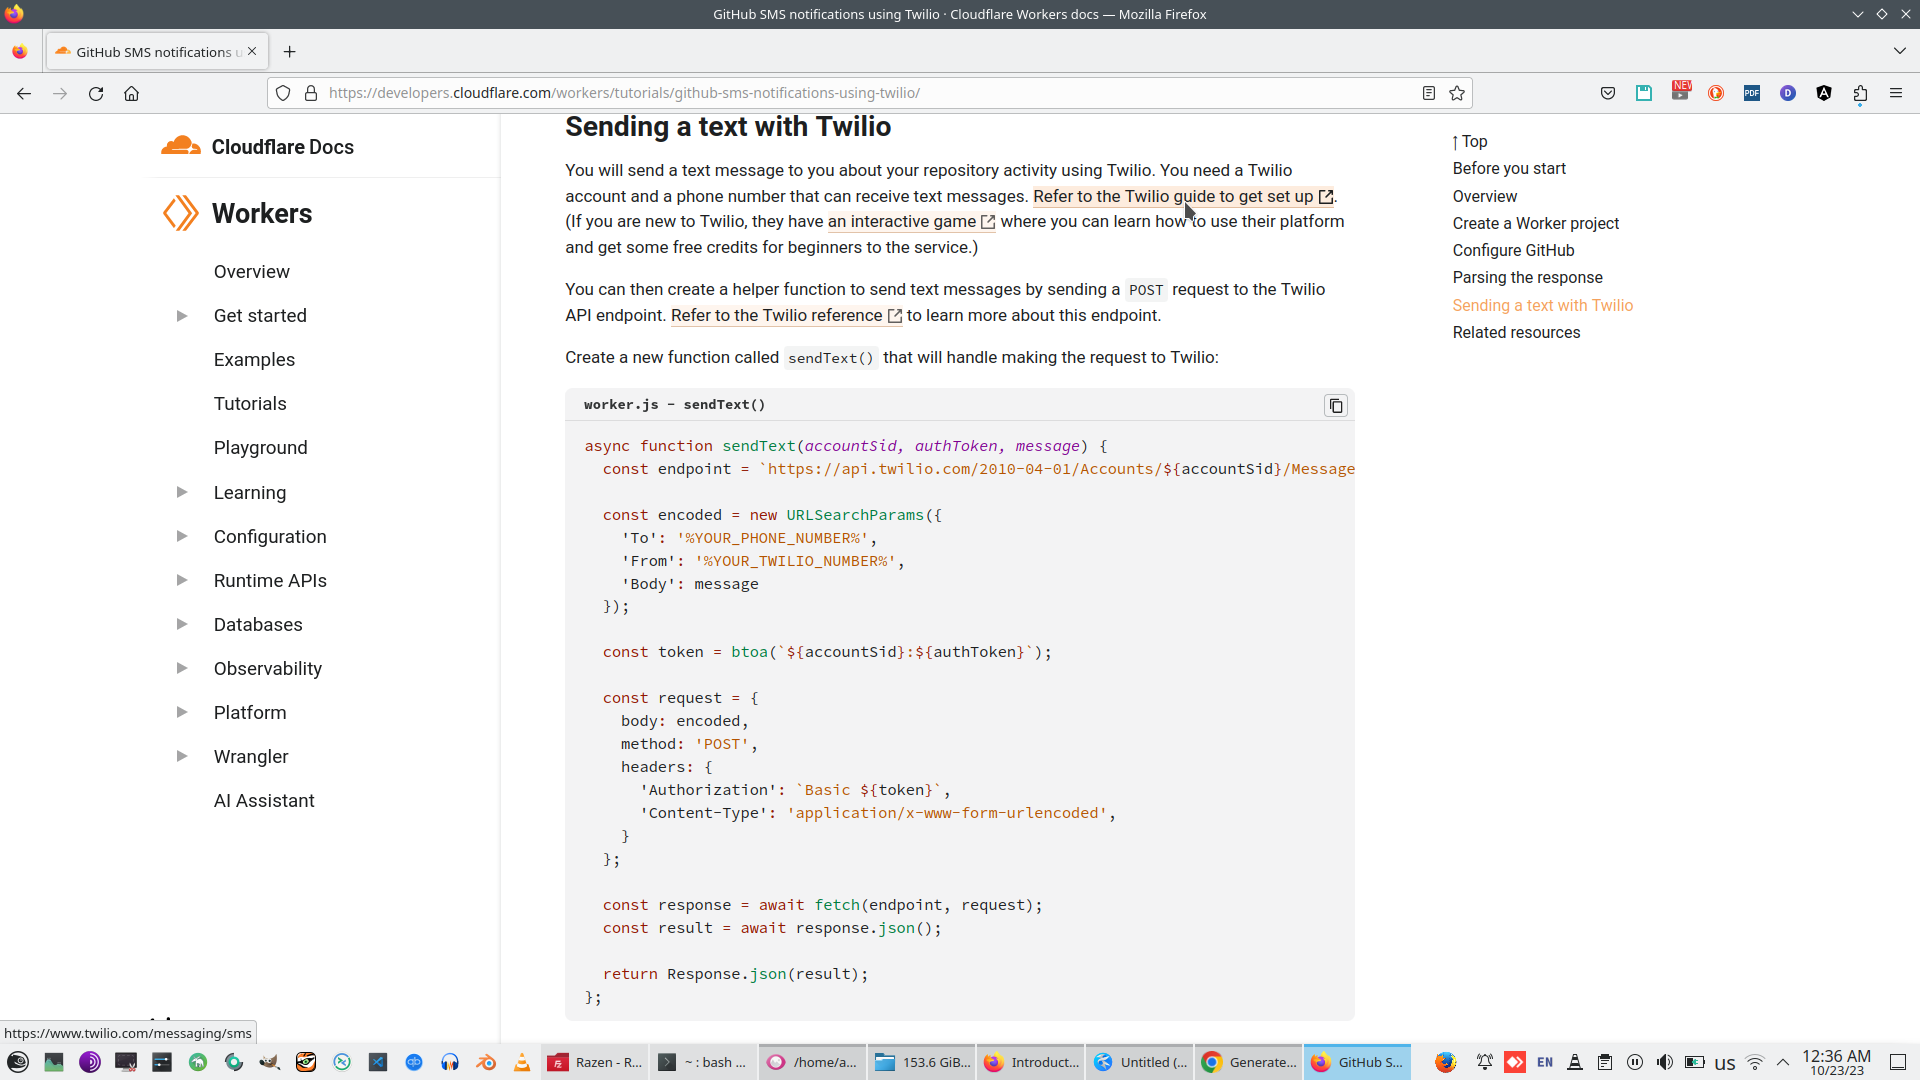
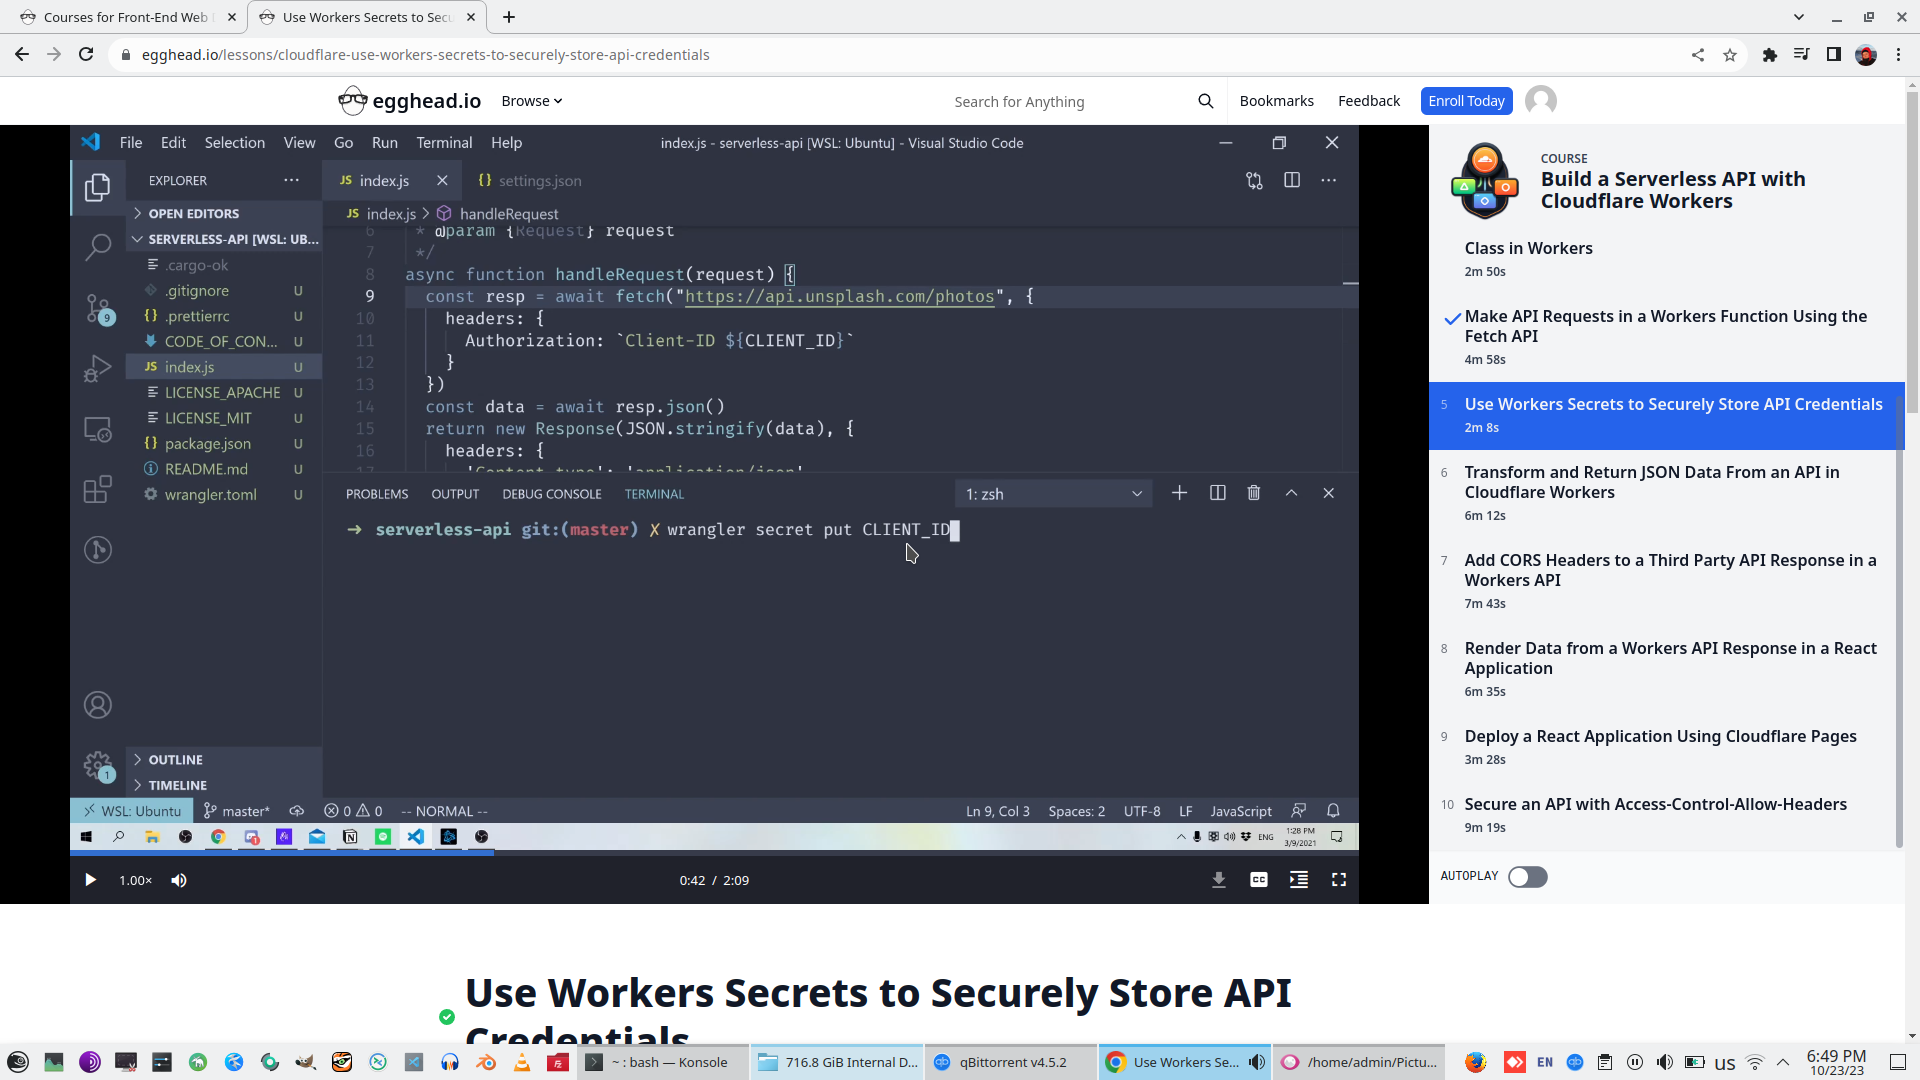
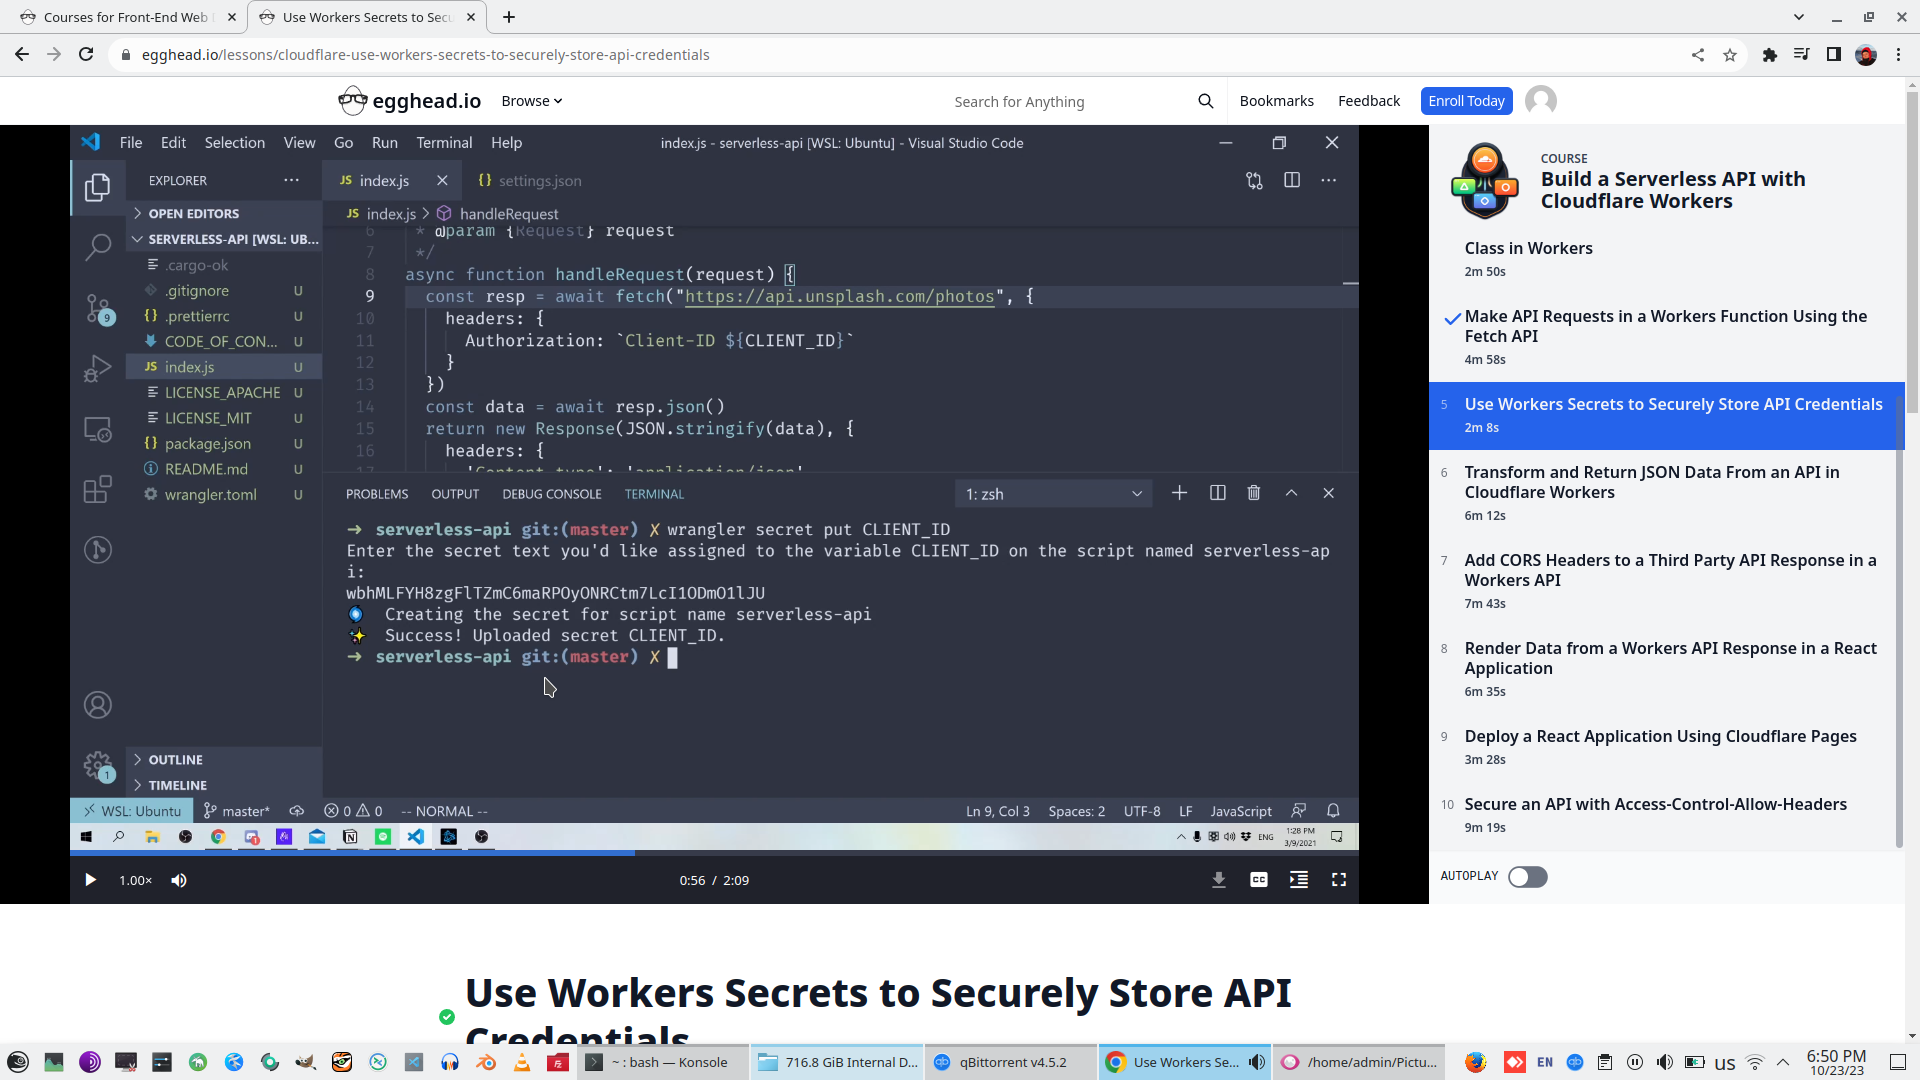
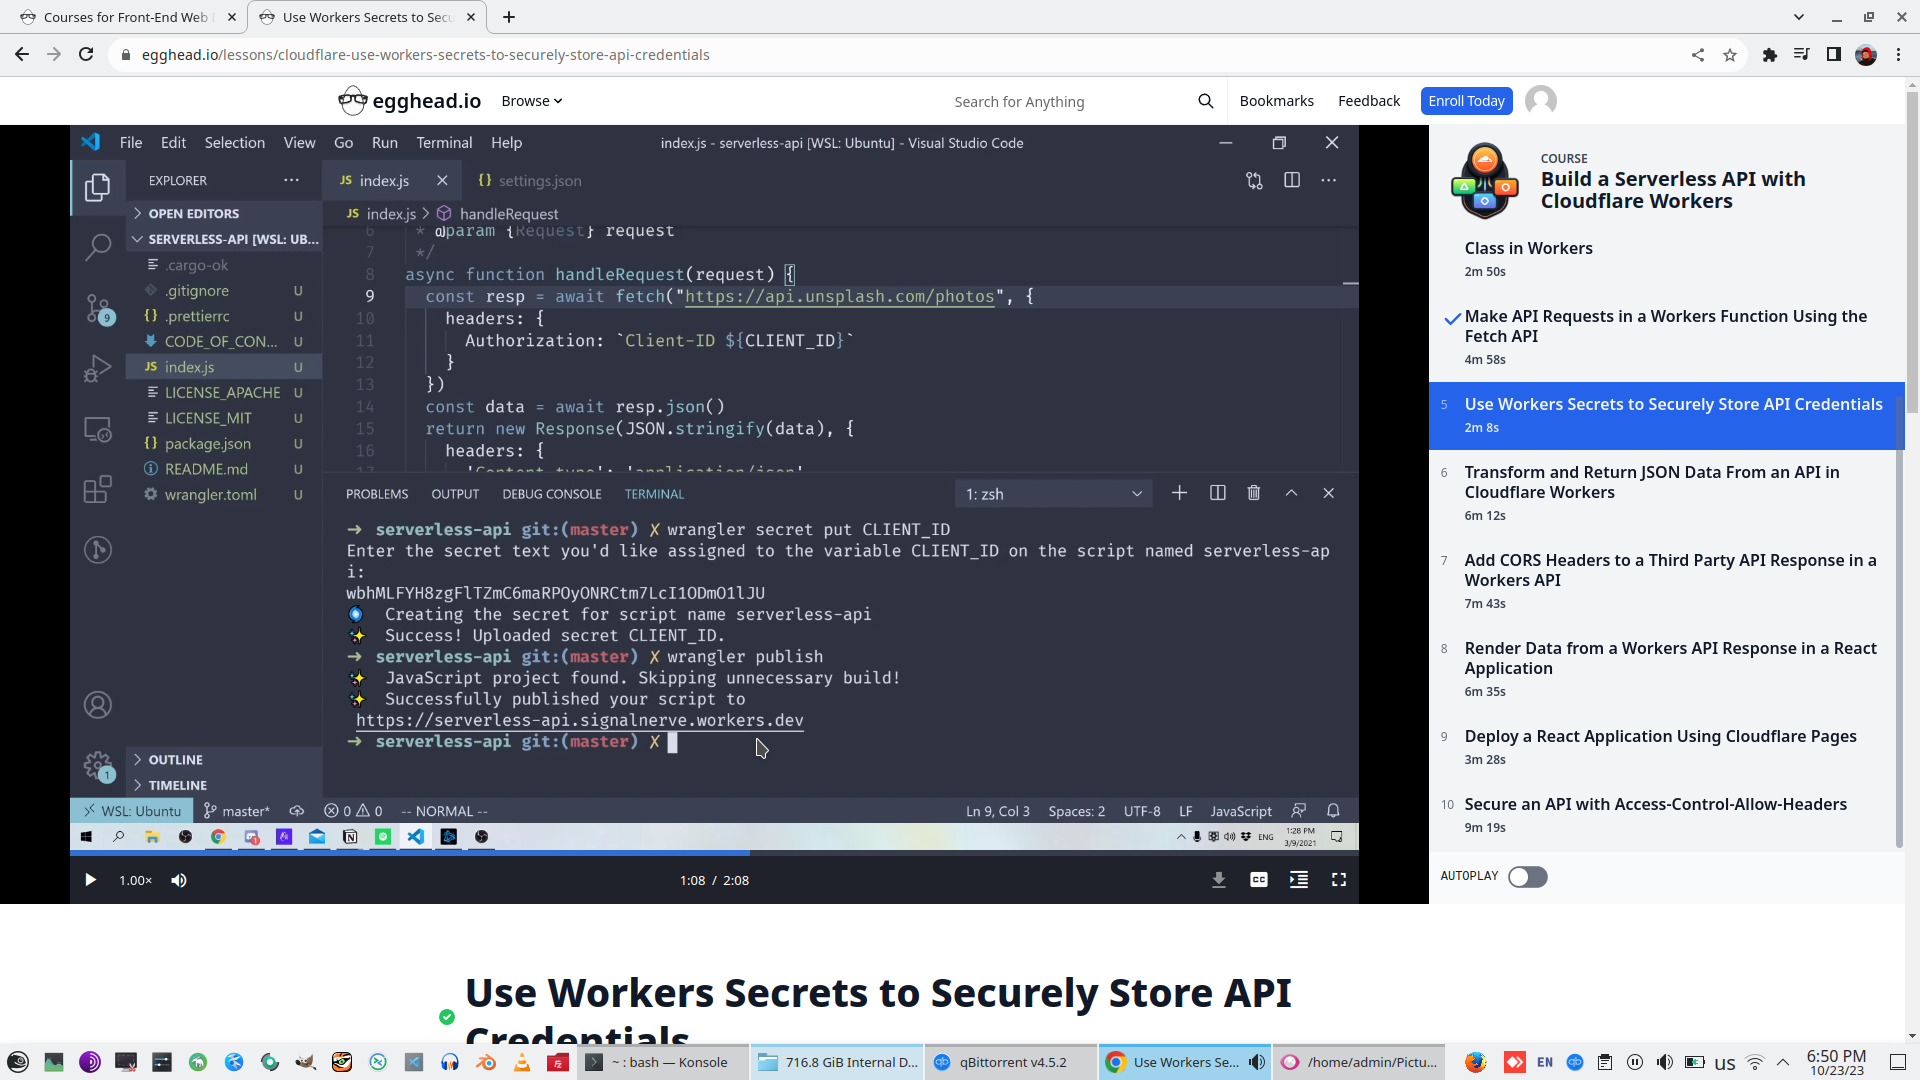
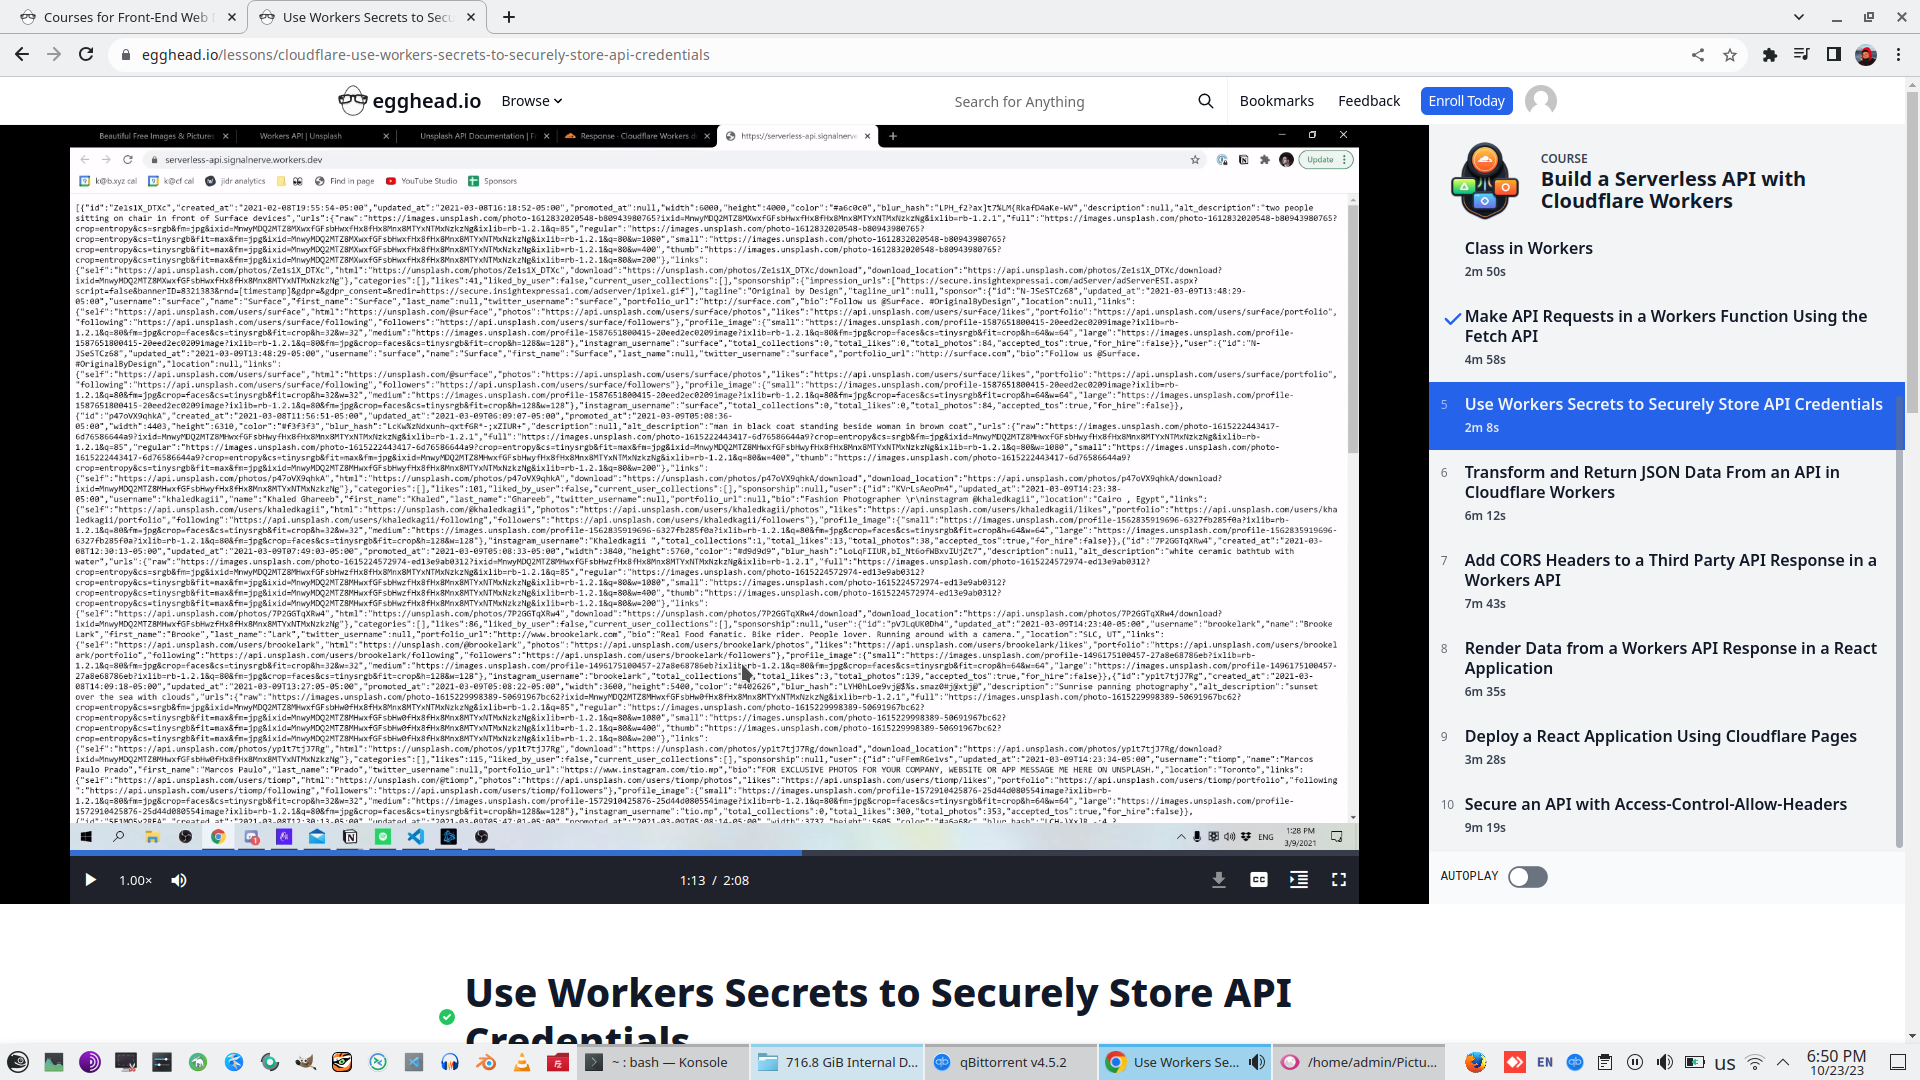
5. Use Workers Secrets to Securely Store API Credentials

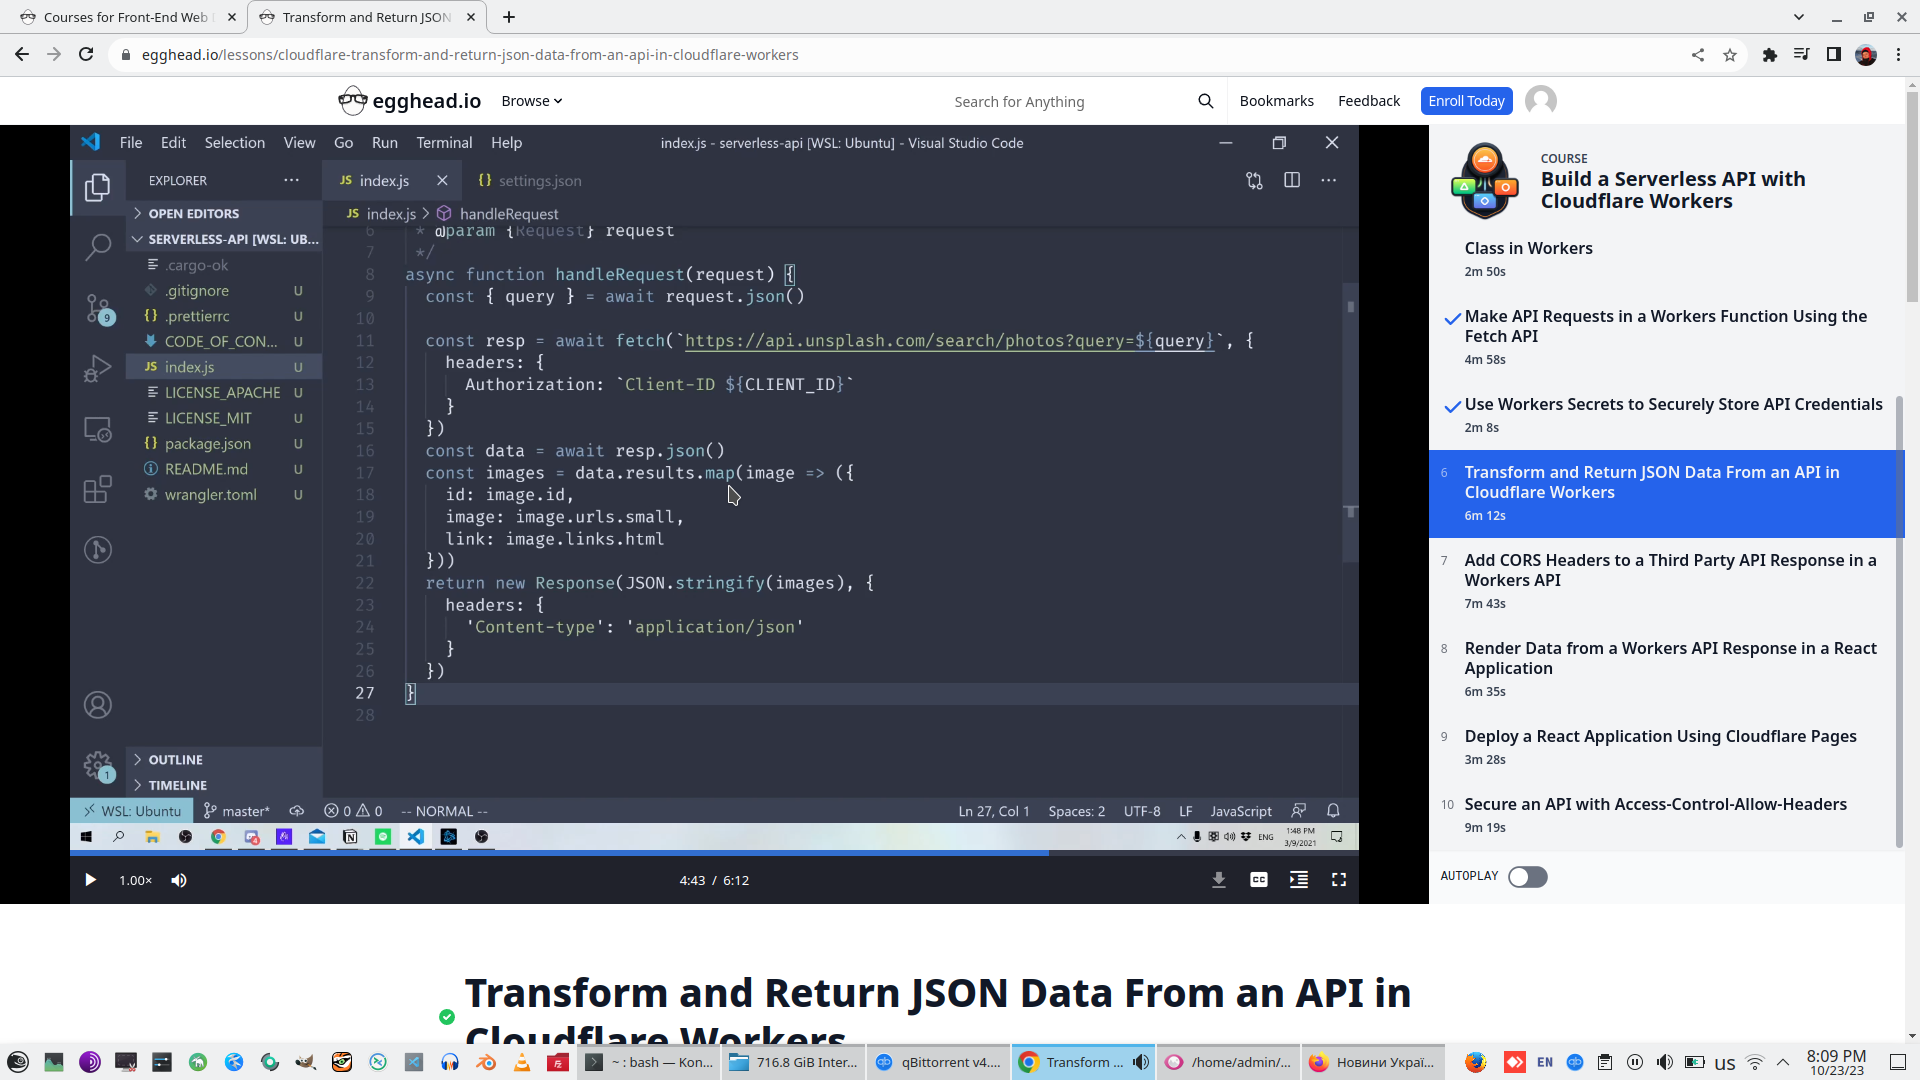
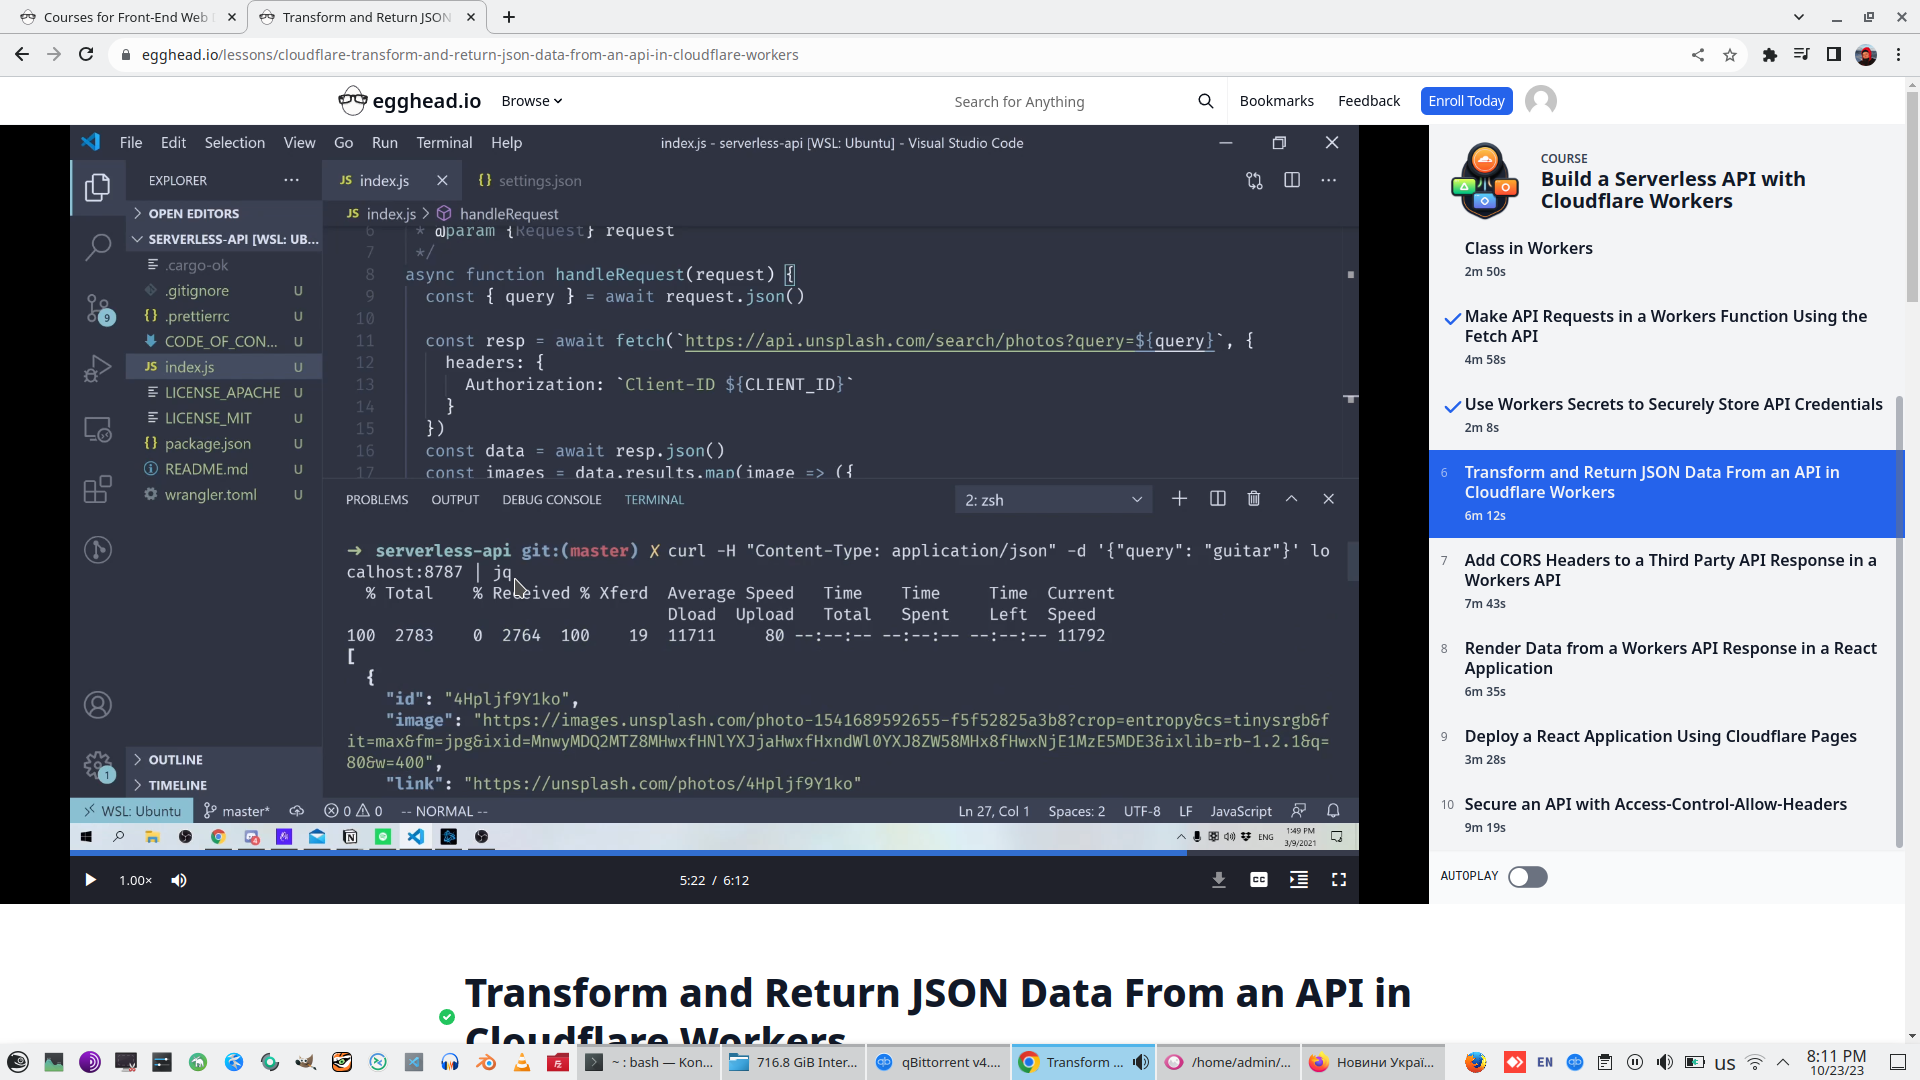
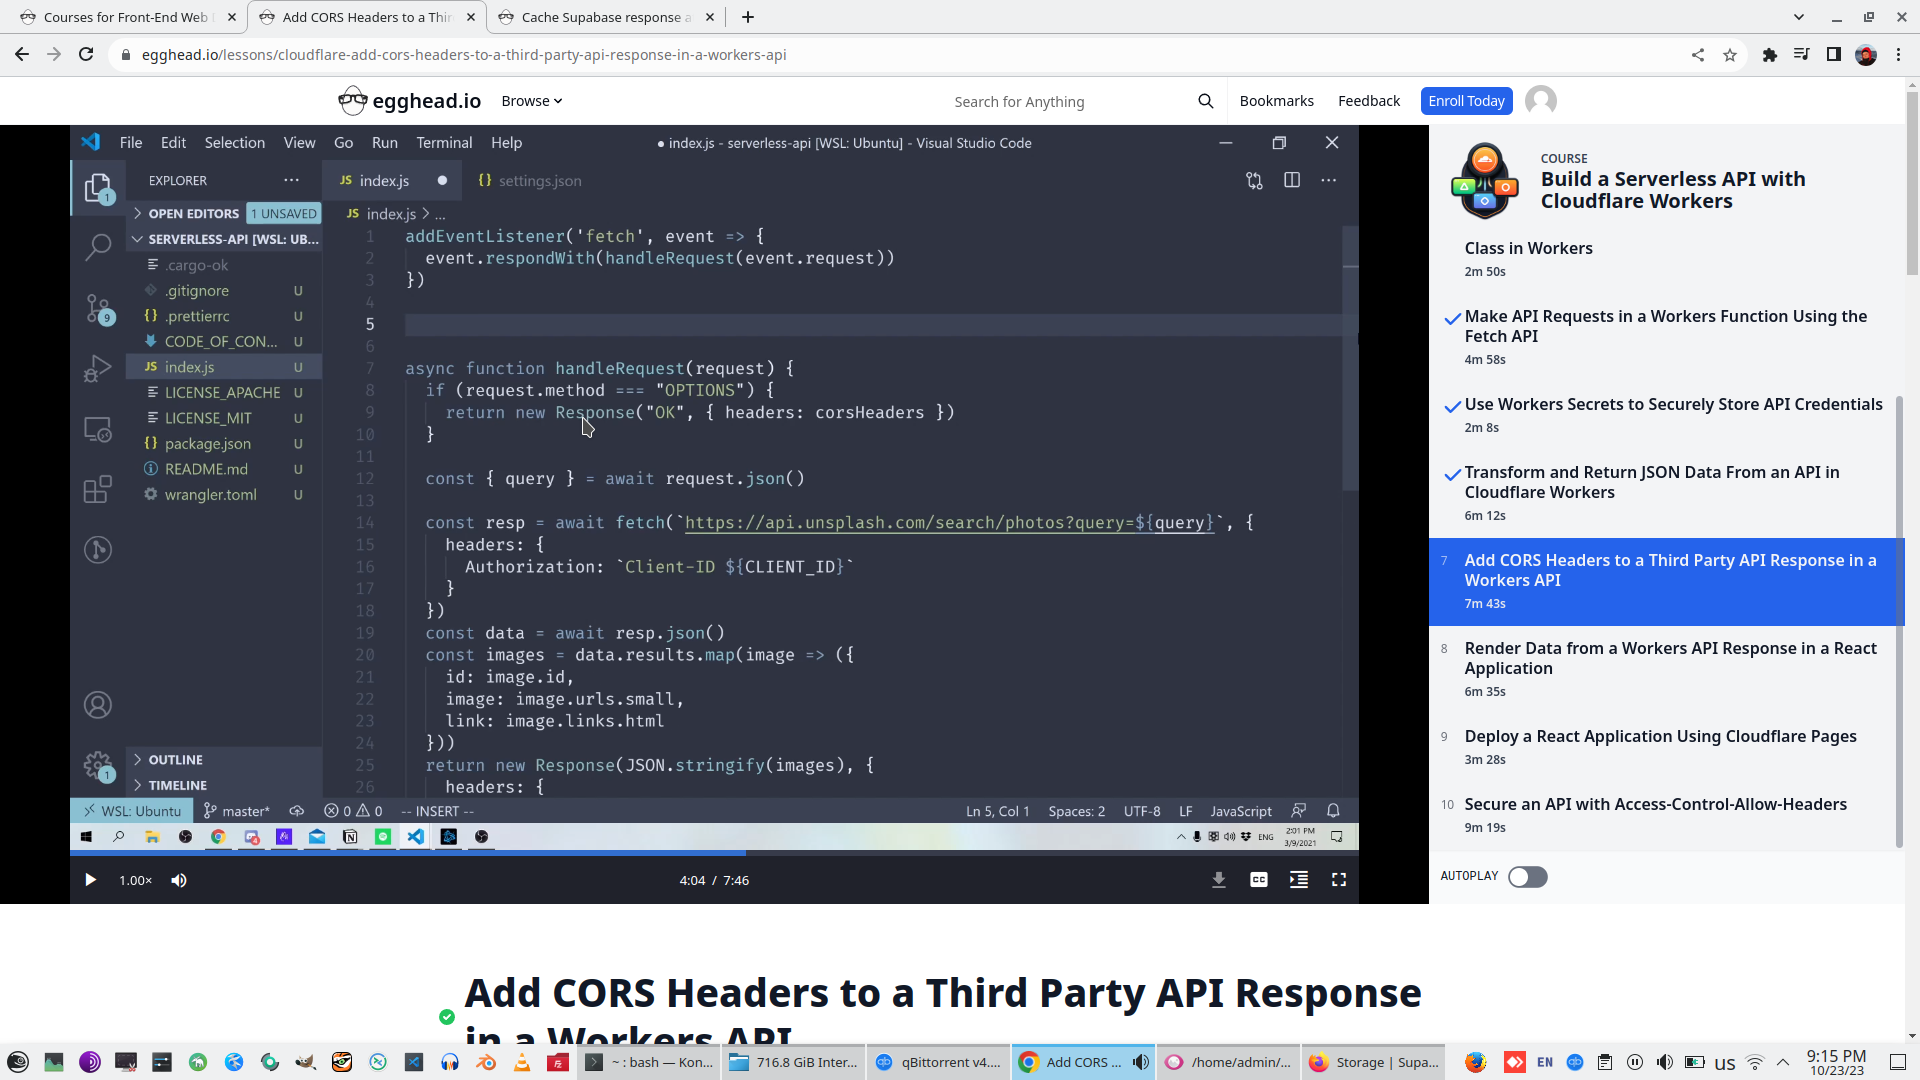
6. Transform and Return JSON Data From an API in Cloudflare Workers
Create array Images with JS function MAP, based on API result.
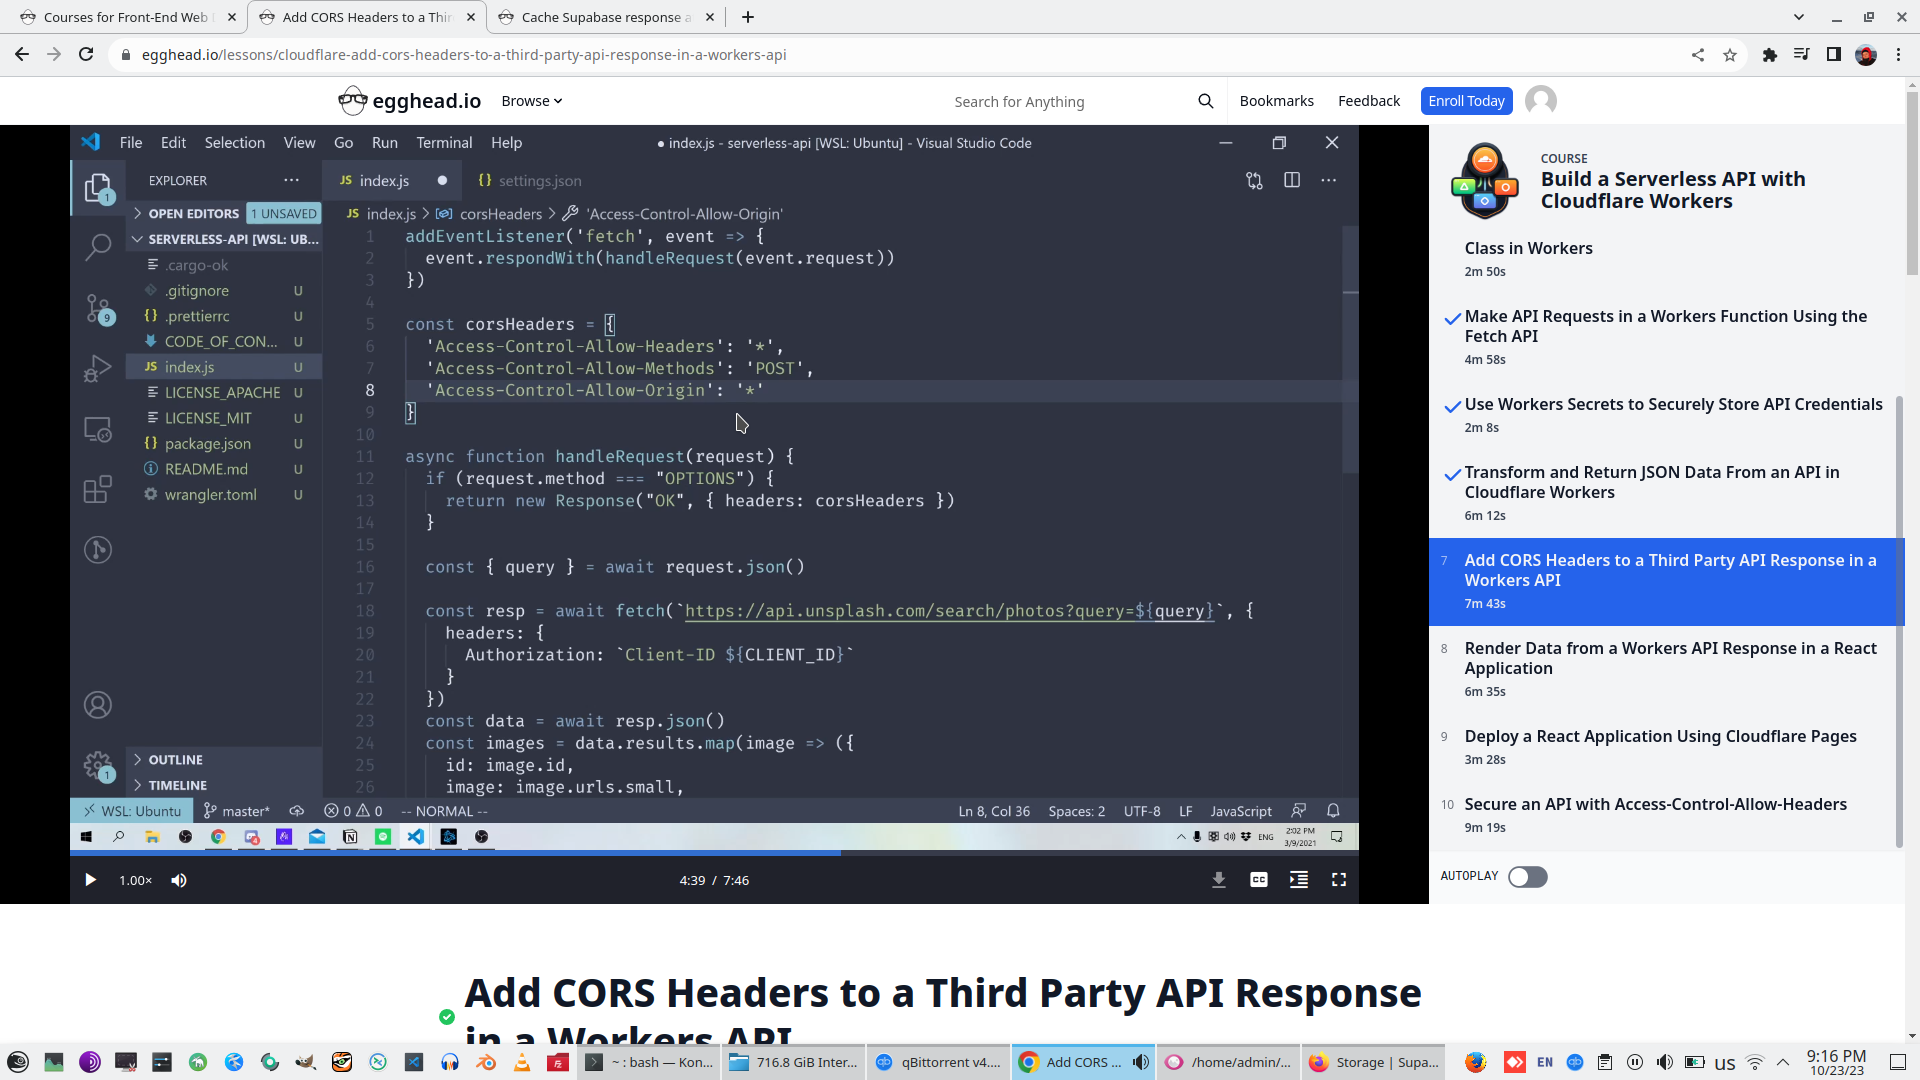
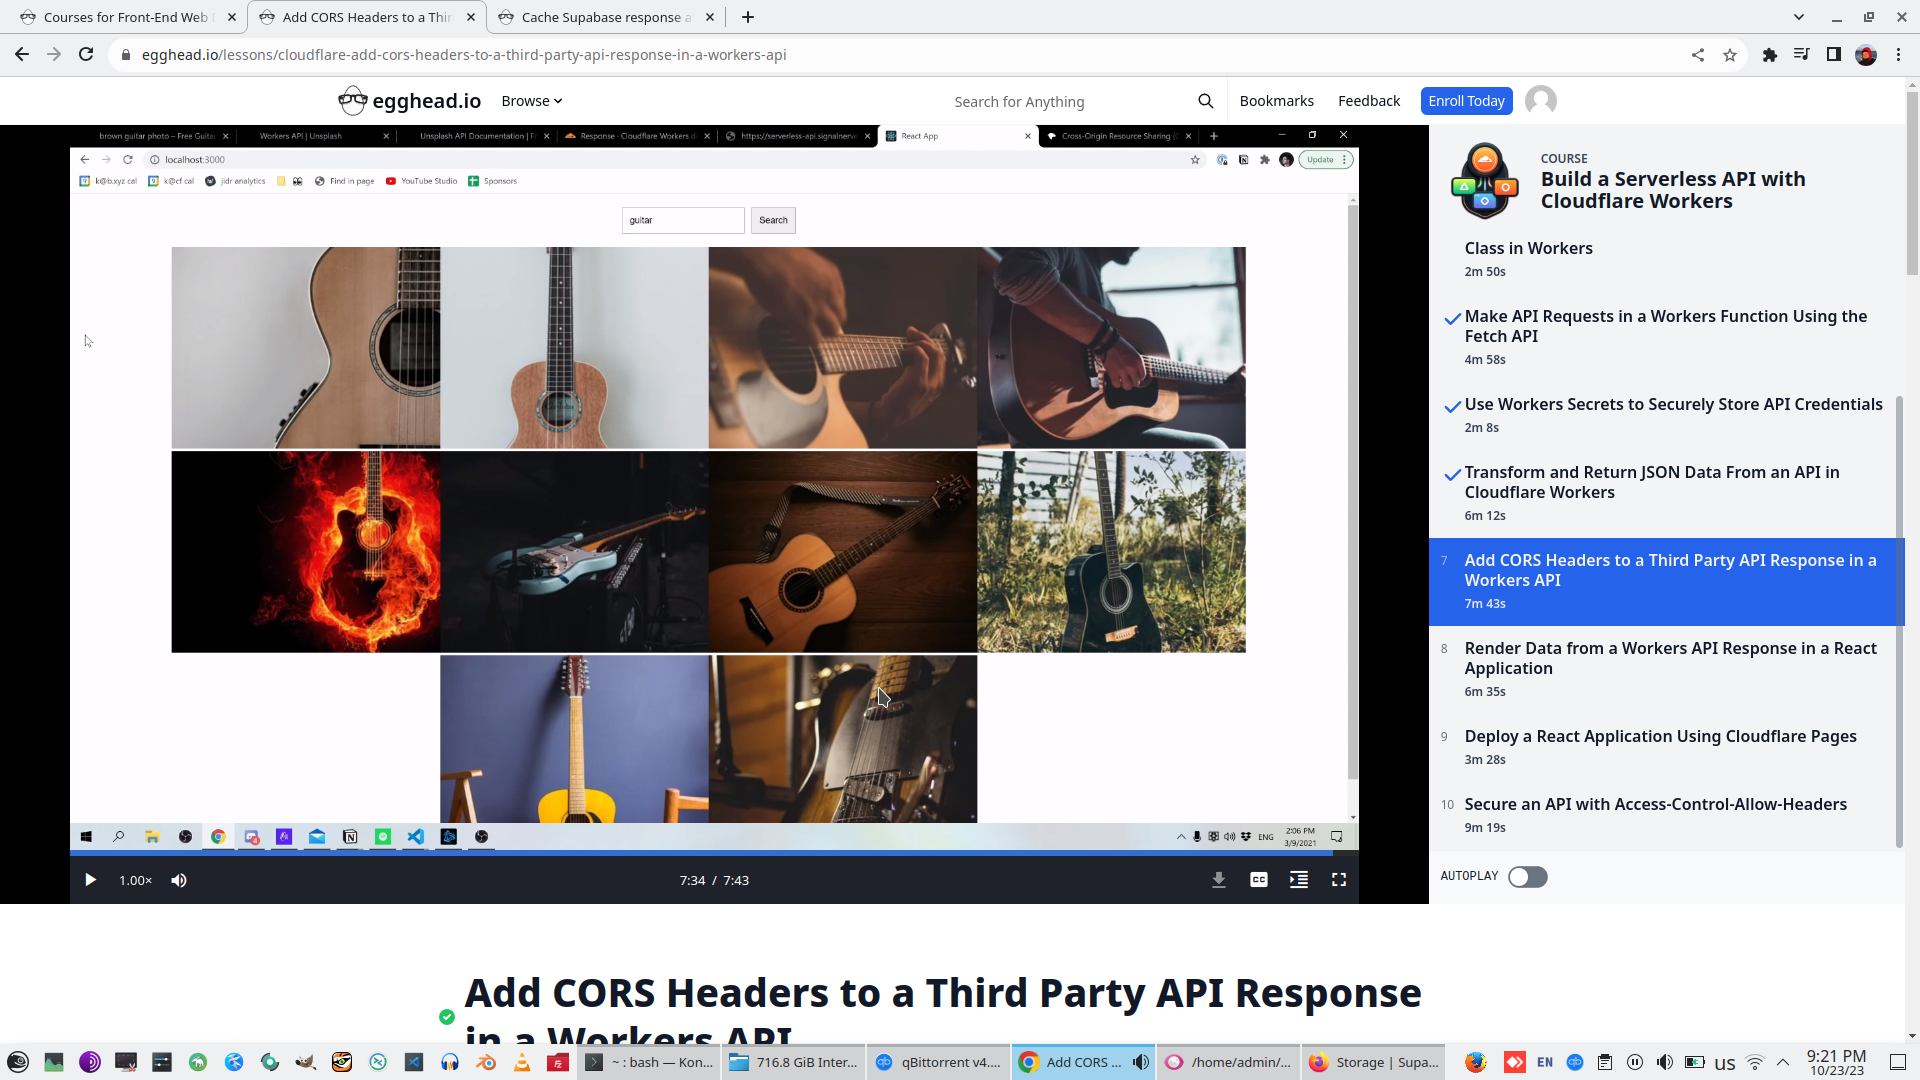
7. Add CORS Headers to a Third Party API Response in a Workers API
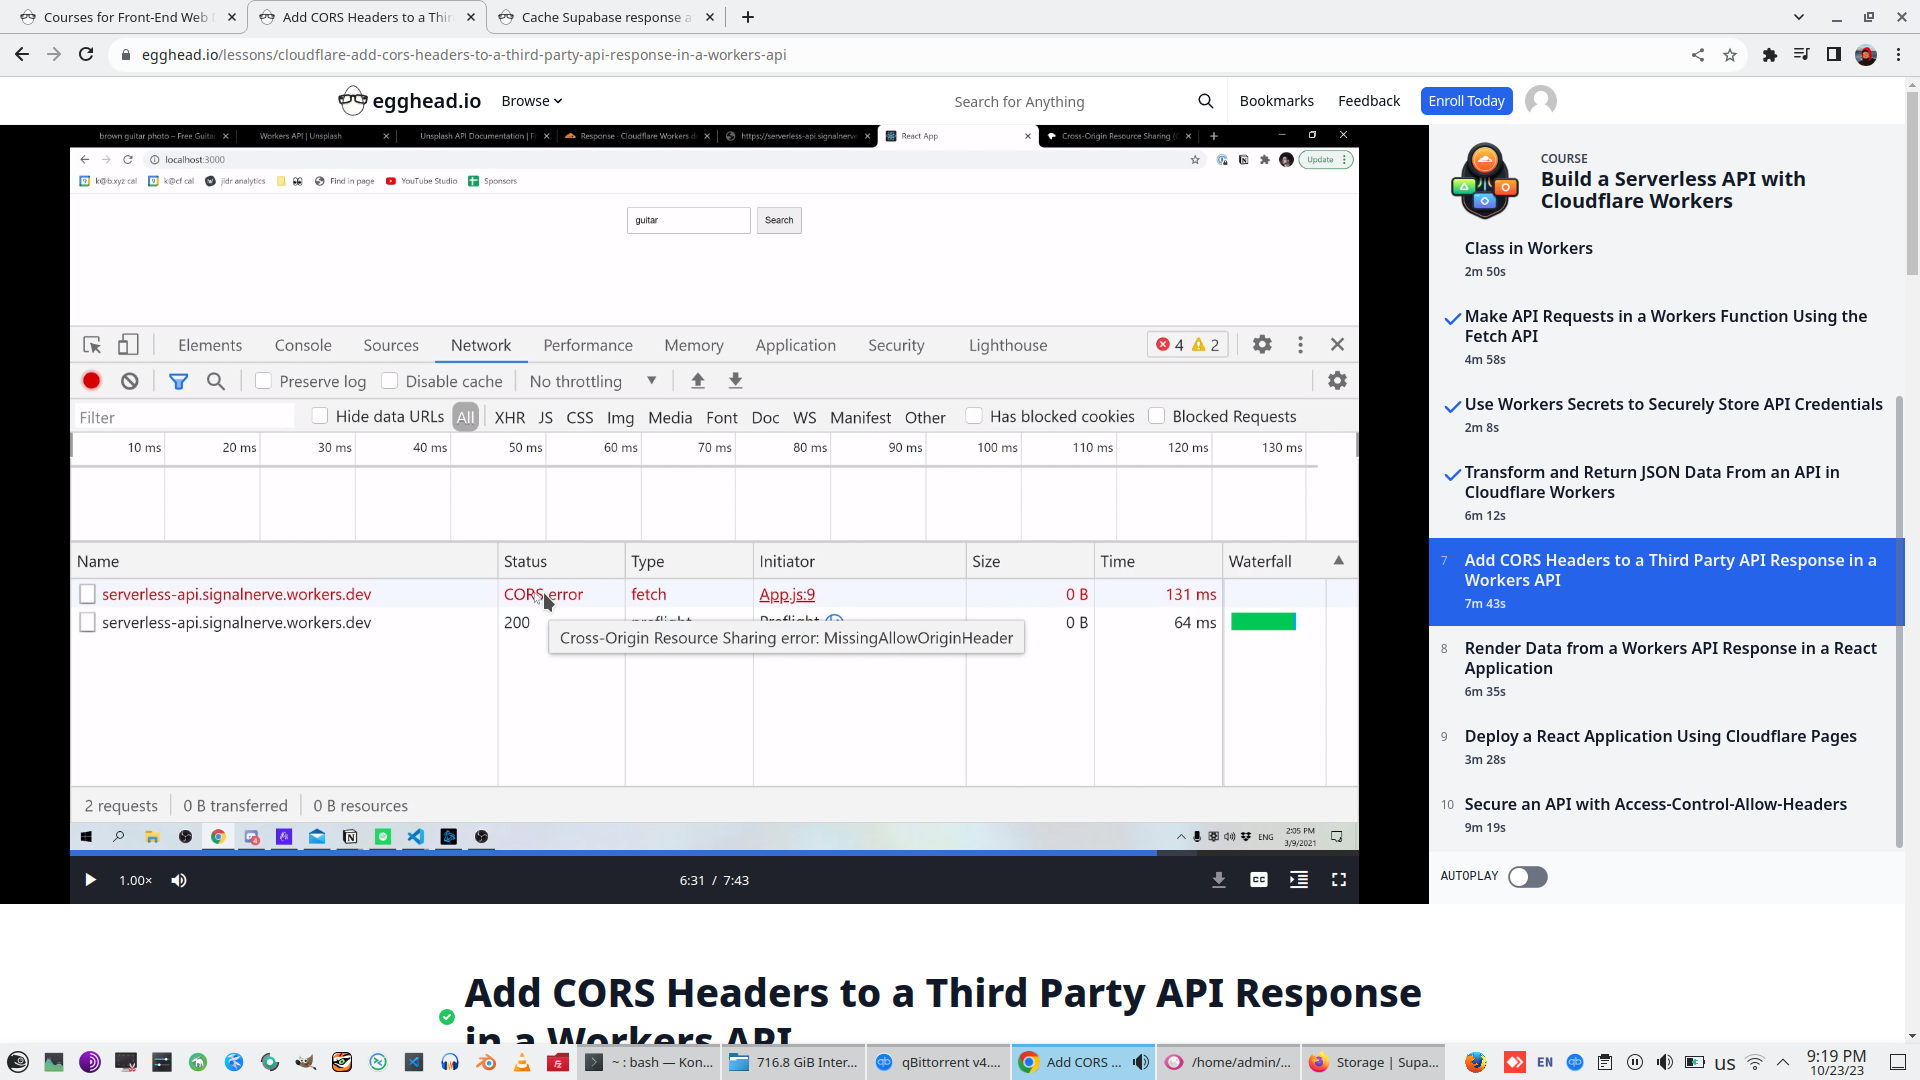
Request from Custom domain blocked to Api.Unsplash.Com by Browser
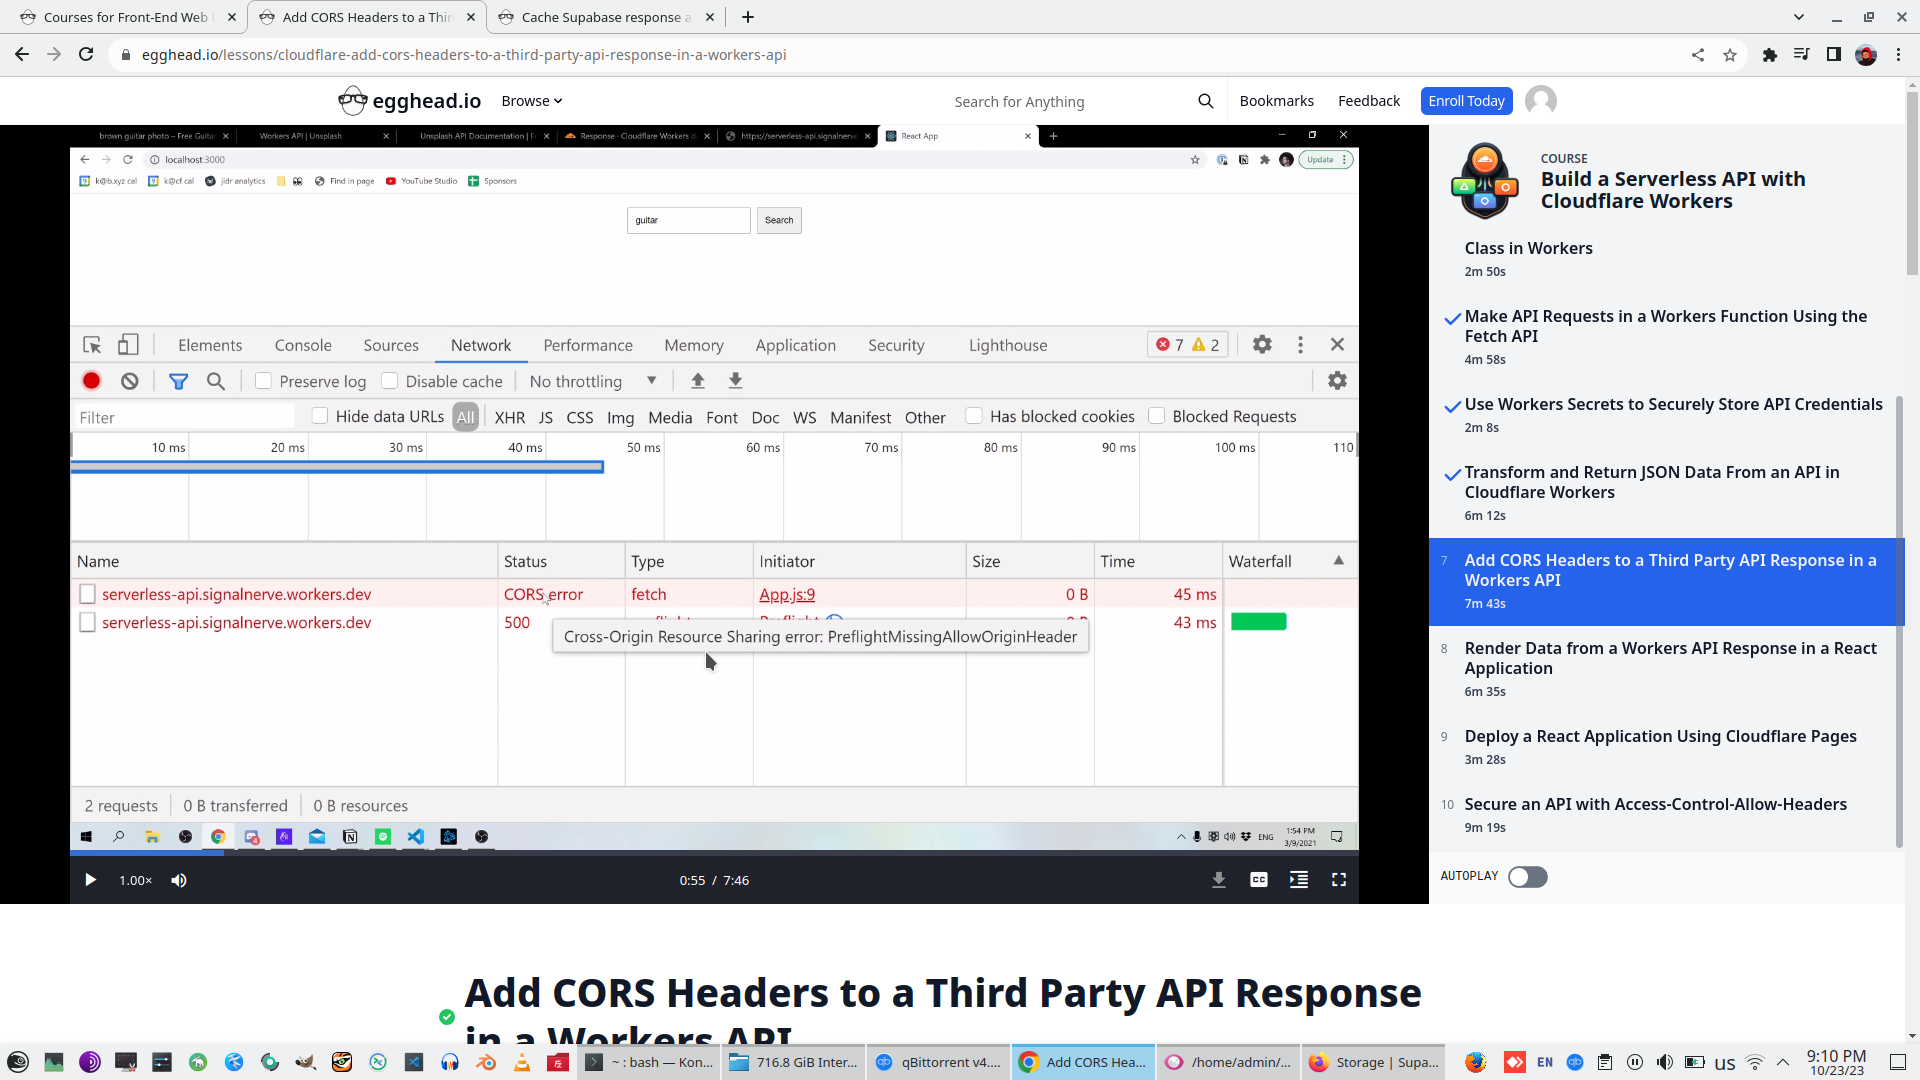
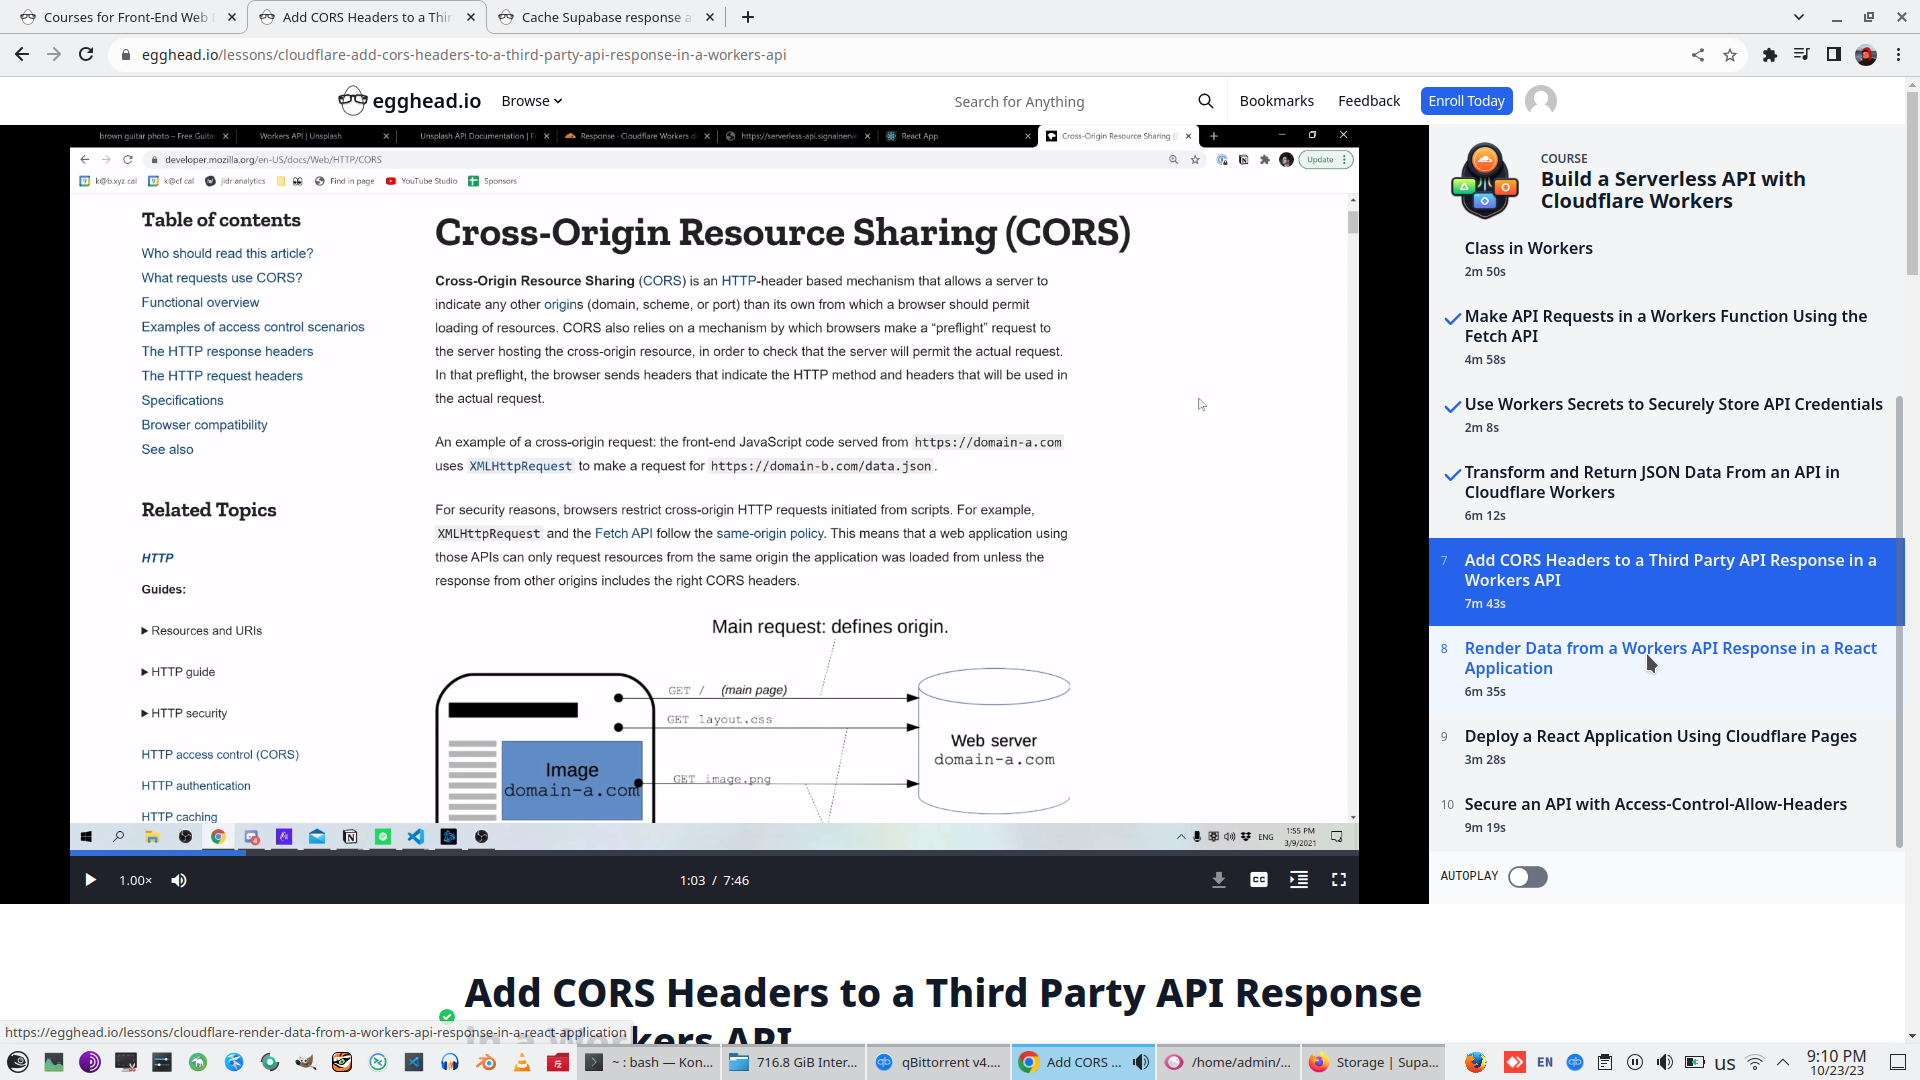
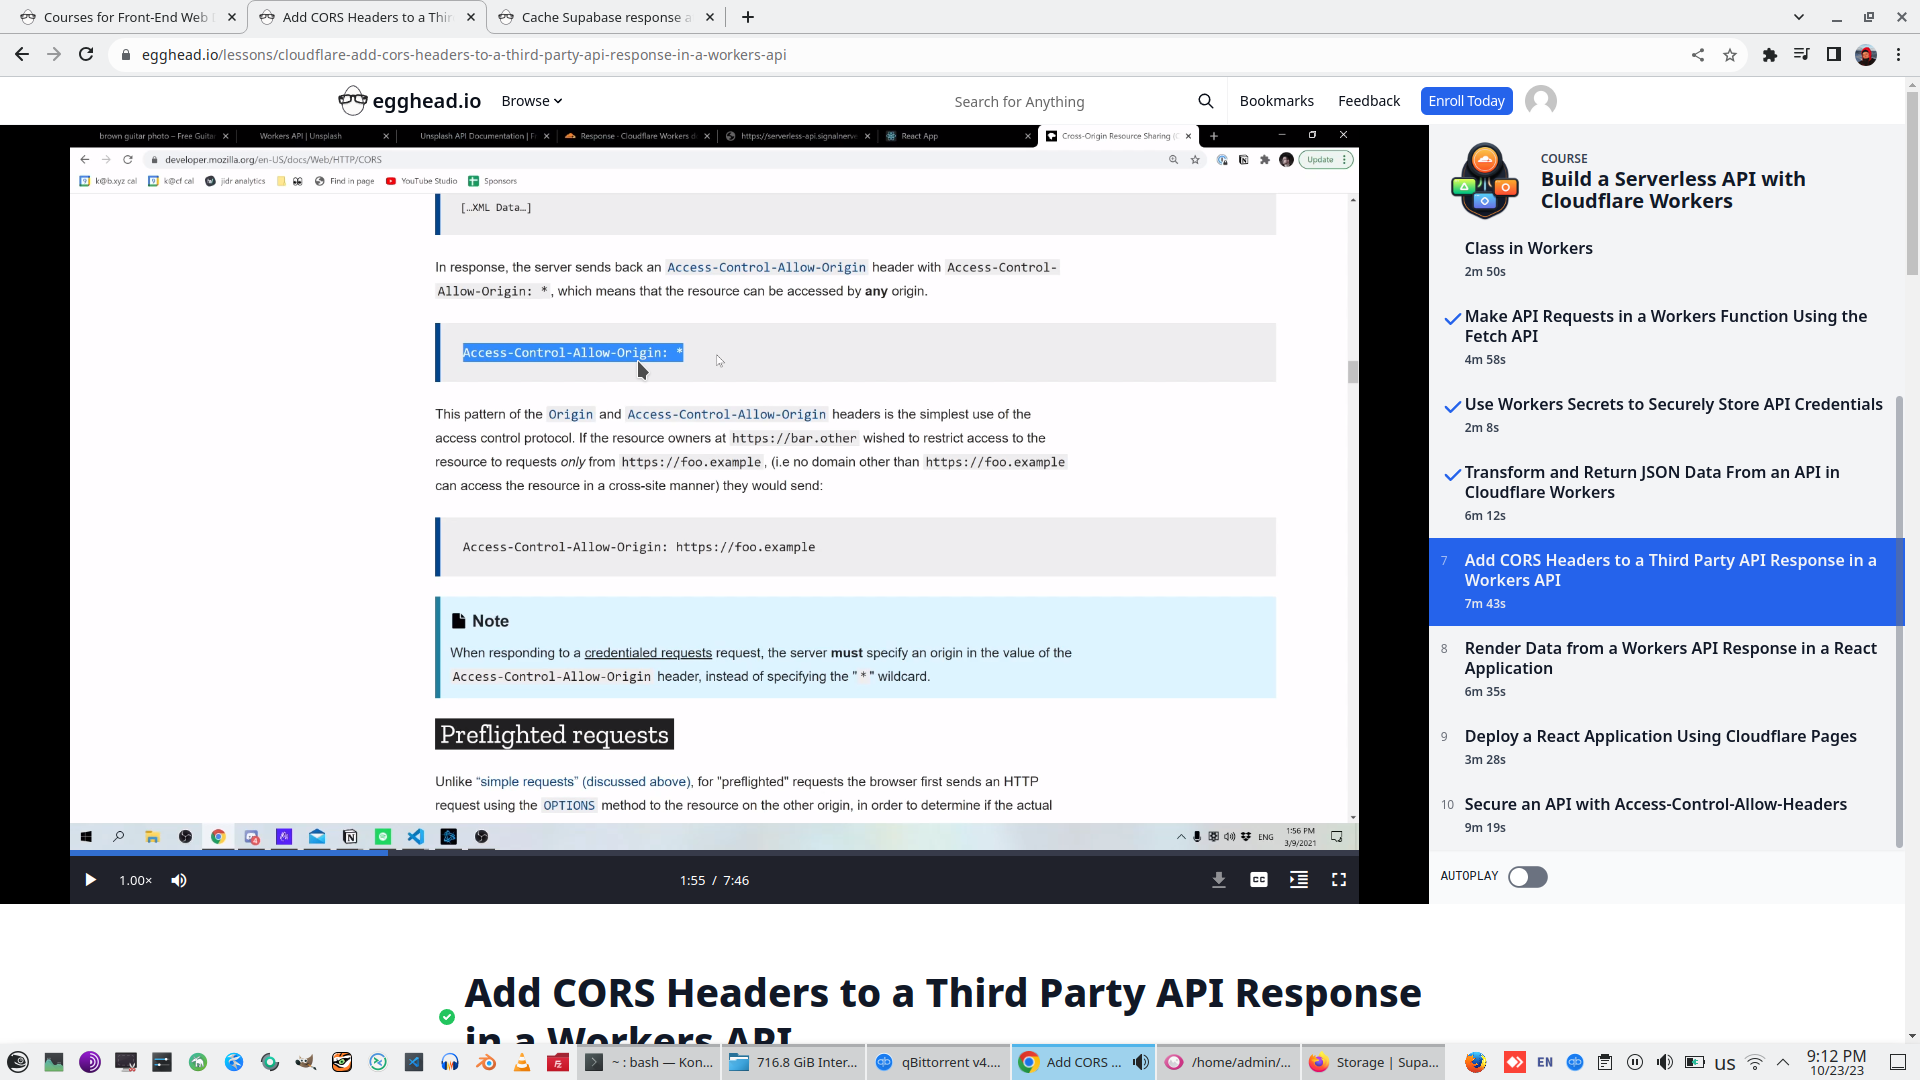
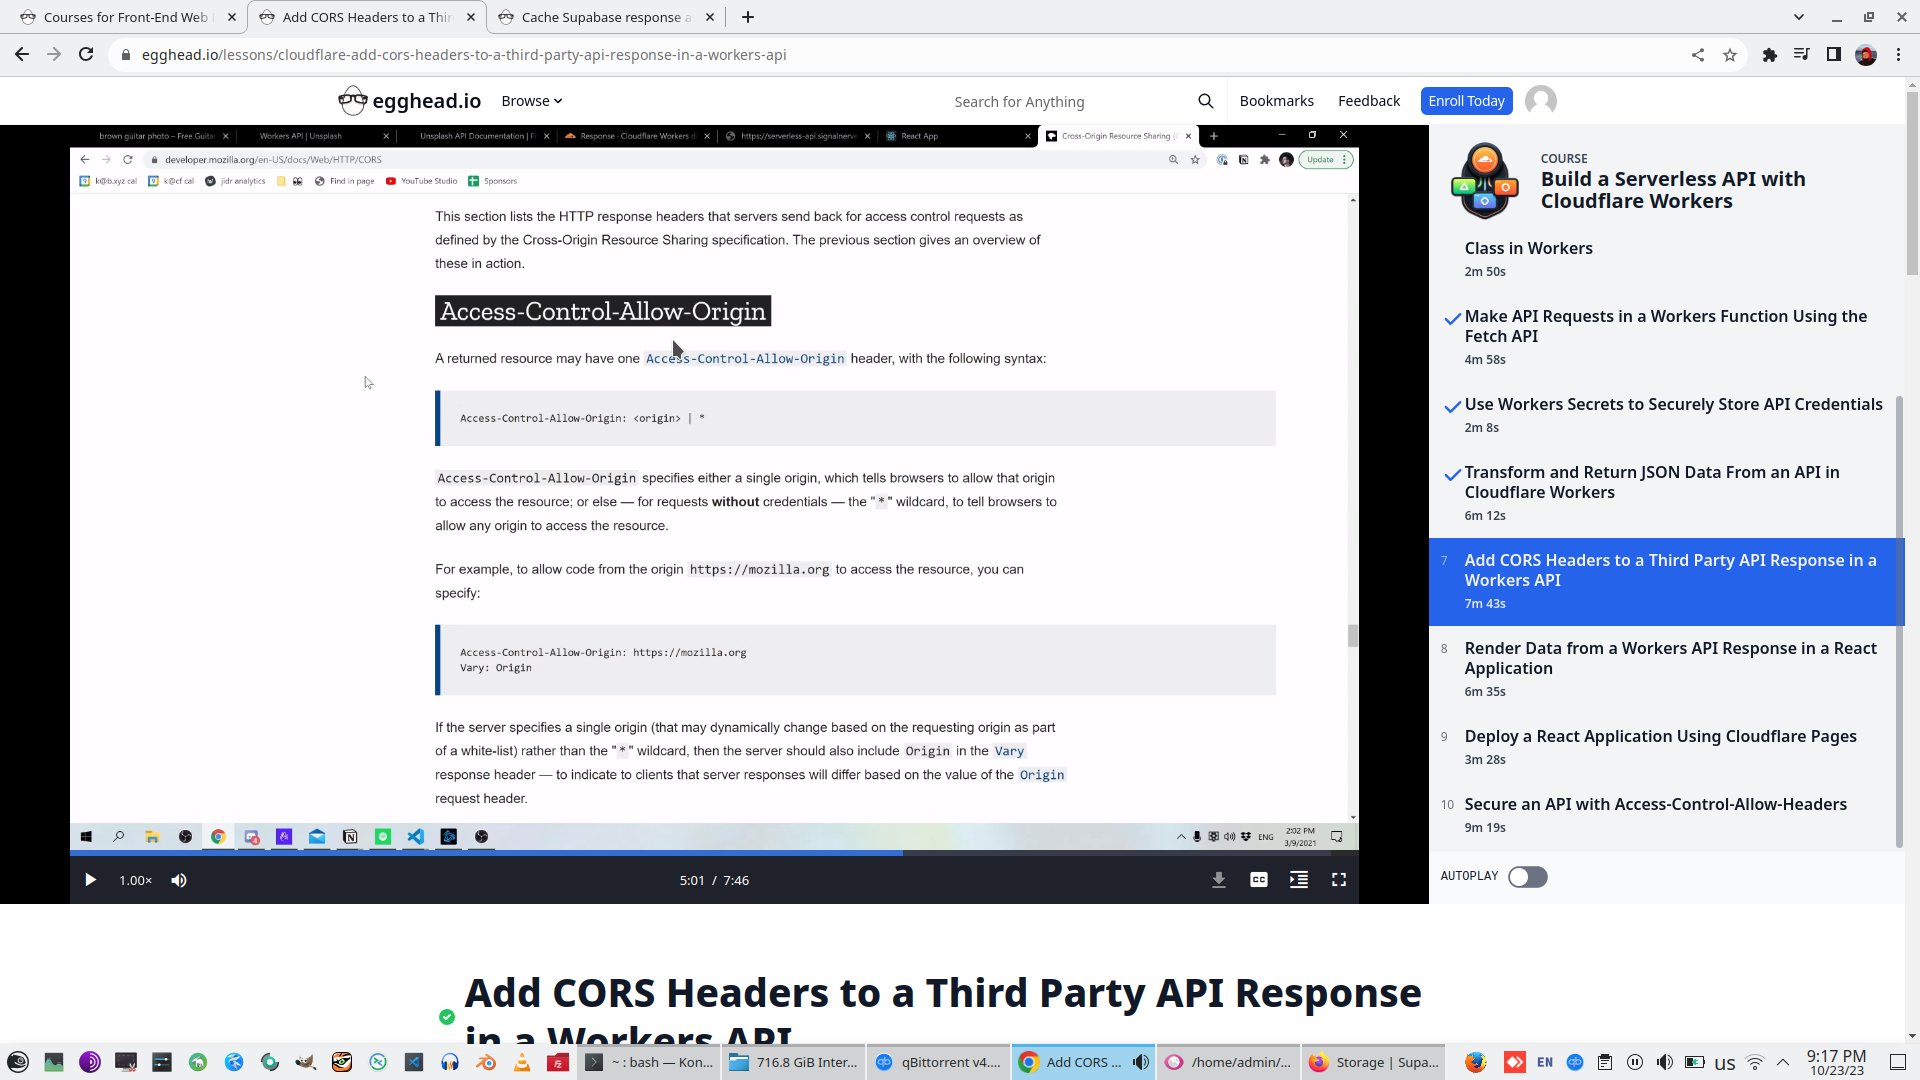
More about CORS
OPTIONS request used to check CORS policy


We need return from OPTION Request three headers to allow browser require 3-rd party API.
- "Access-Control-Allow-Headers": "*"
- "Access-Control-Allow-Methods": "POST"
- "Access-Control-Allow-Origin": "*"
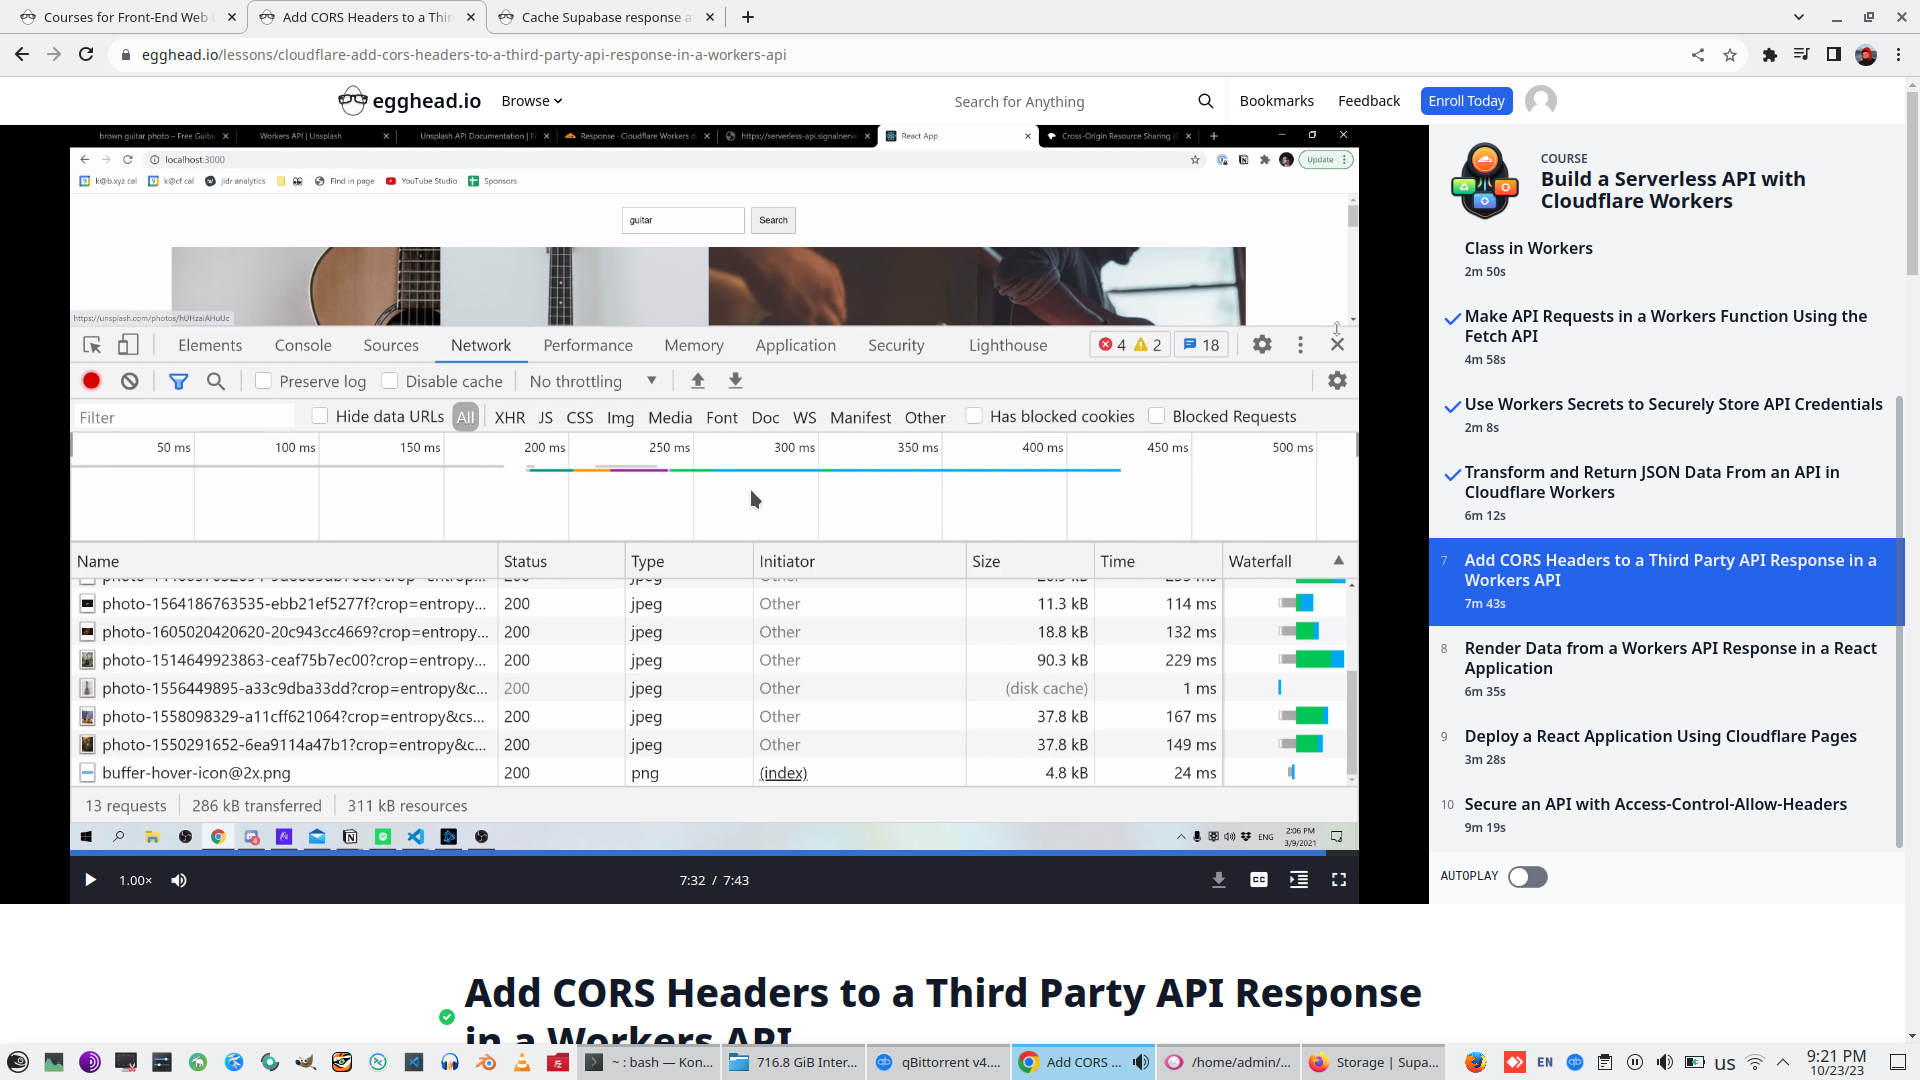
And finally we can see result on Browser
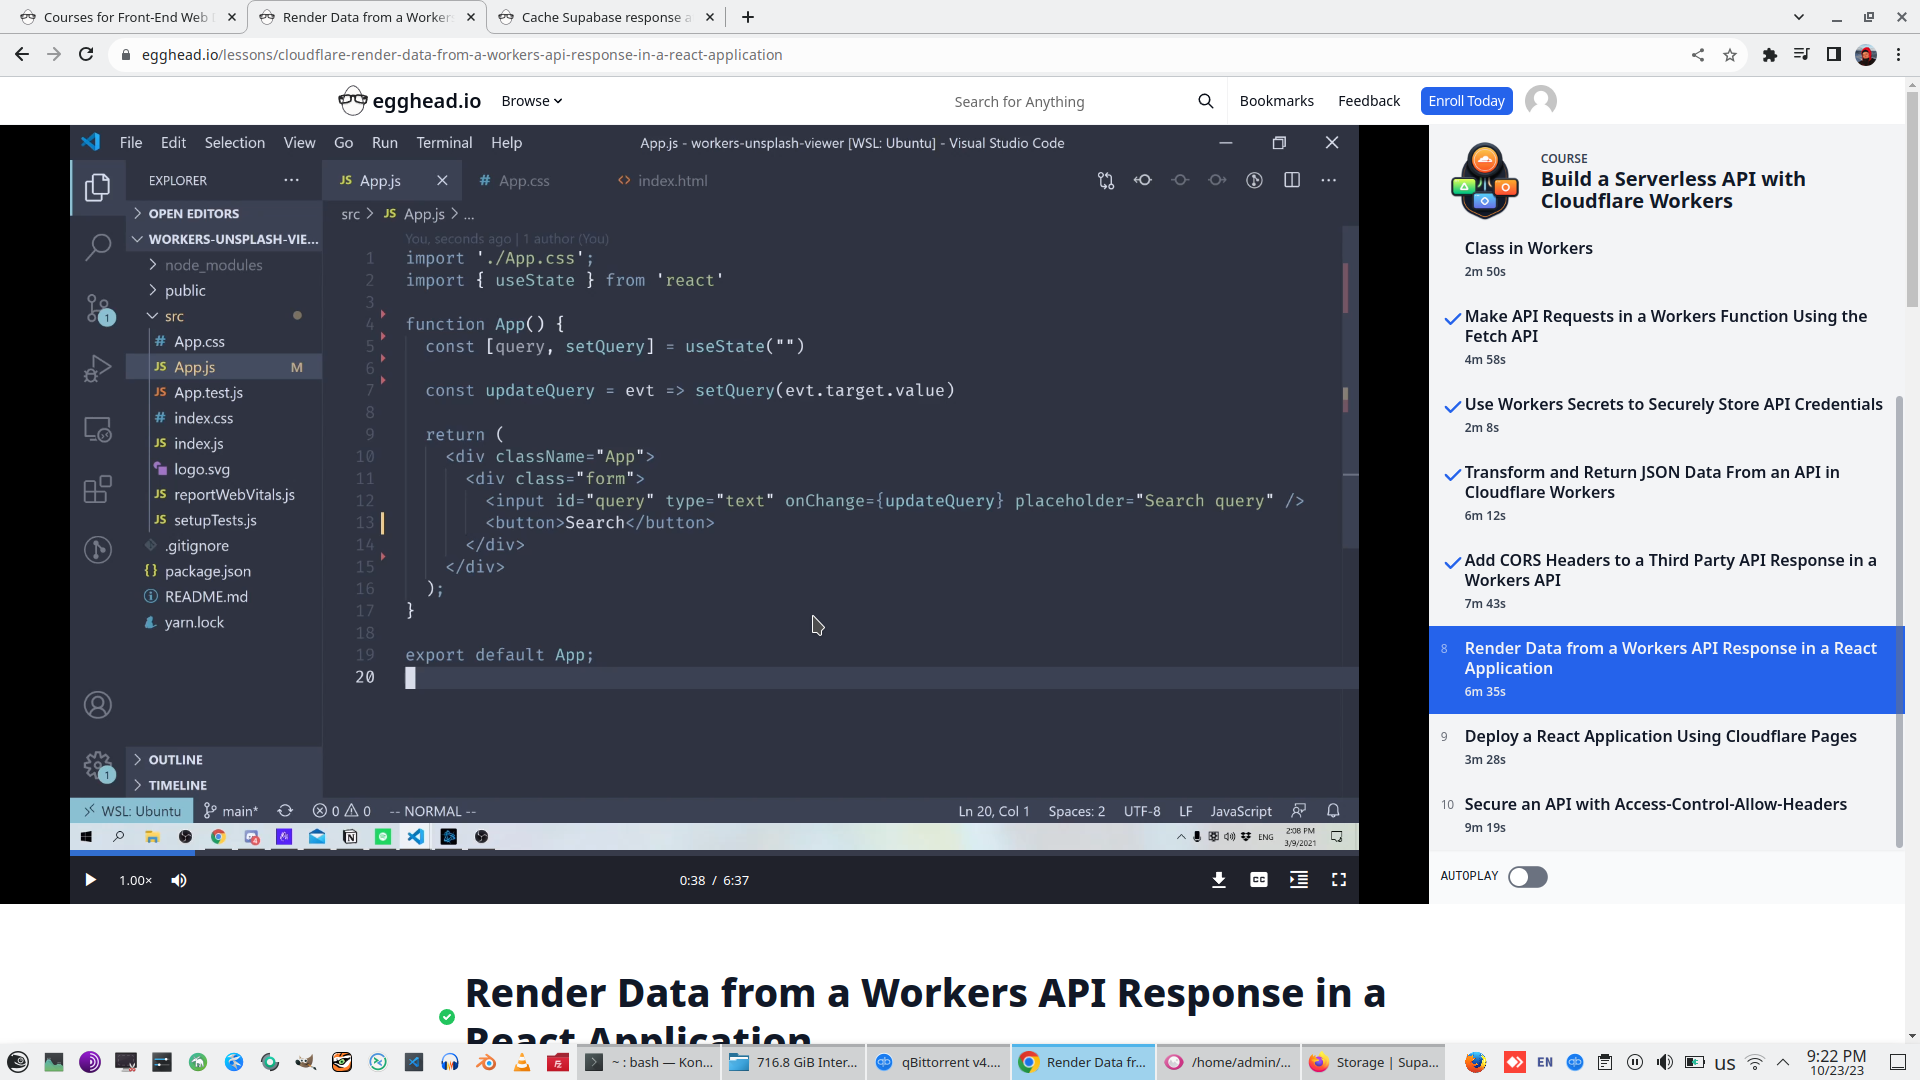
8. Render Data from a Workers API Response in a React Application
More ...
3. Cache Supabase data at the Edge with Cloudflare Workers and KV Storage
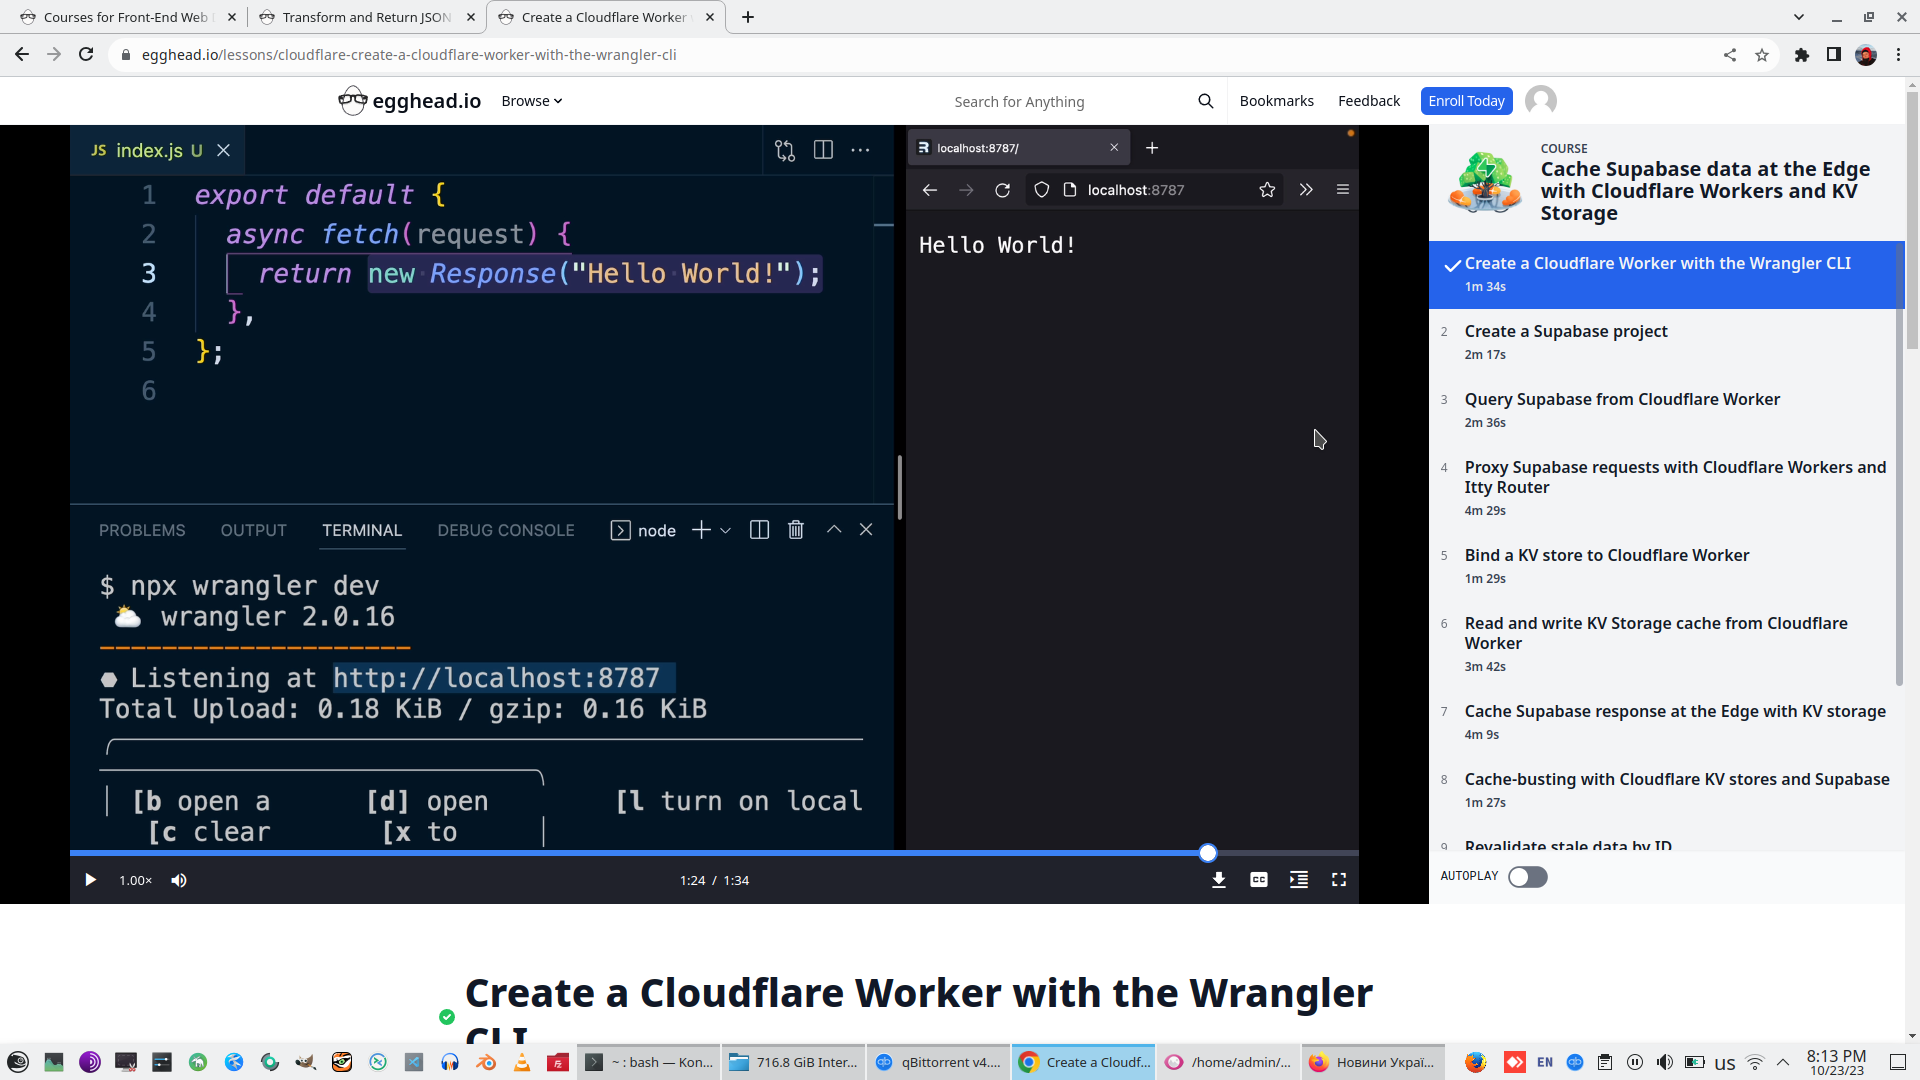
1. Create a Cloudflare Worker with the Wrangler CLI (see more on lecture 1-2)
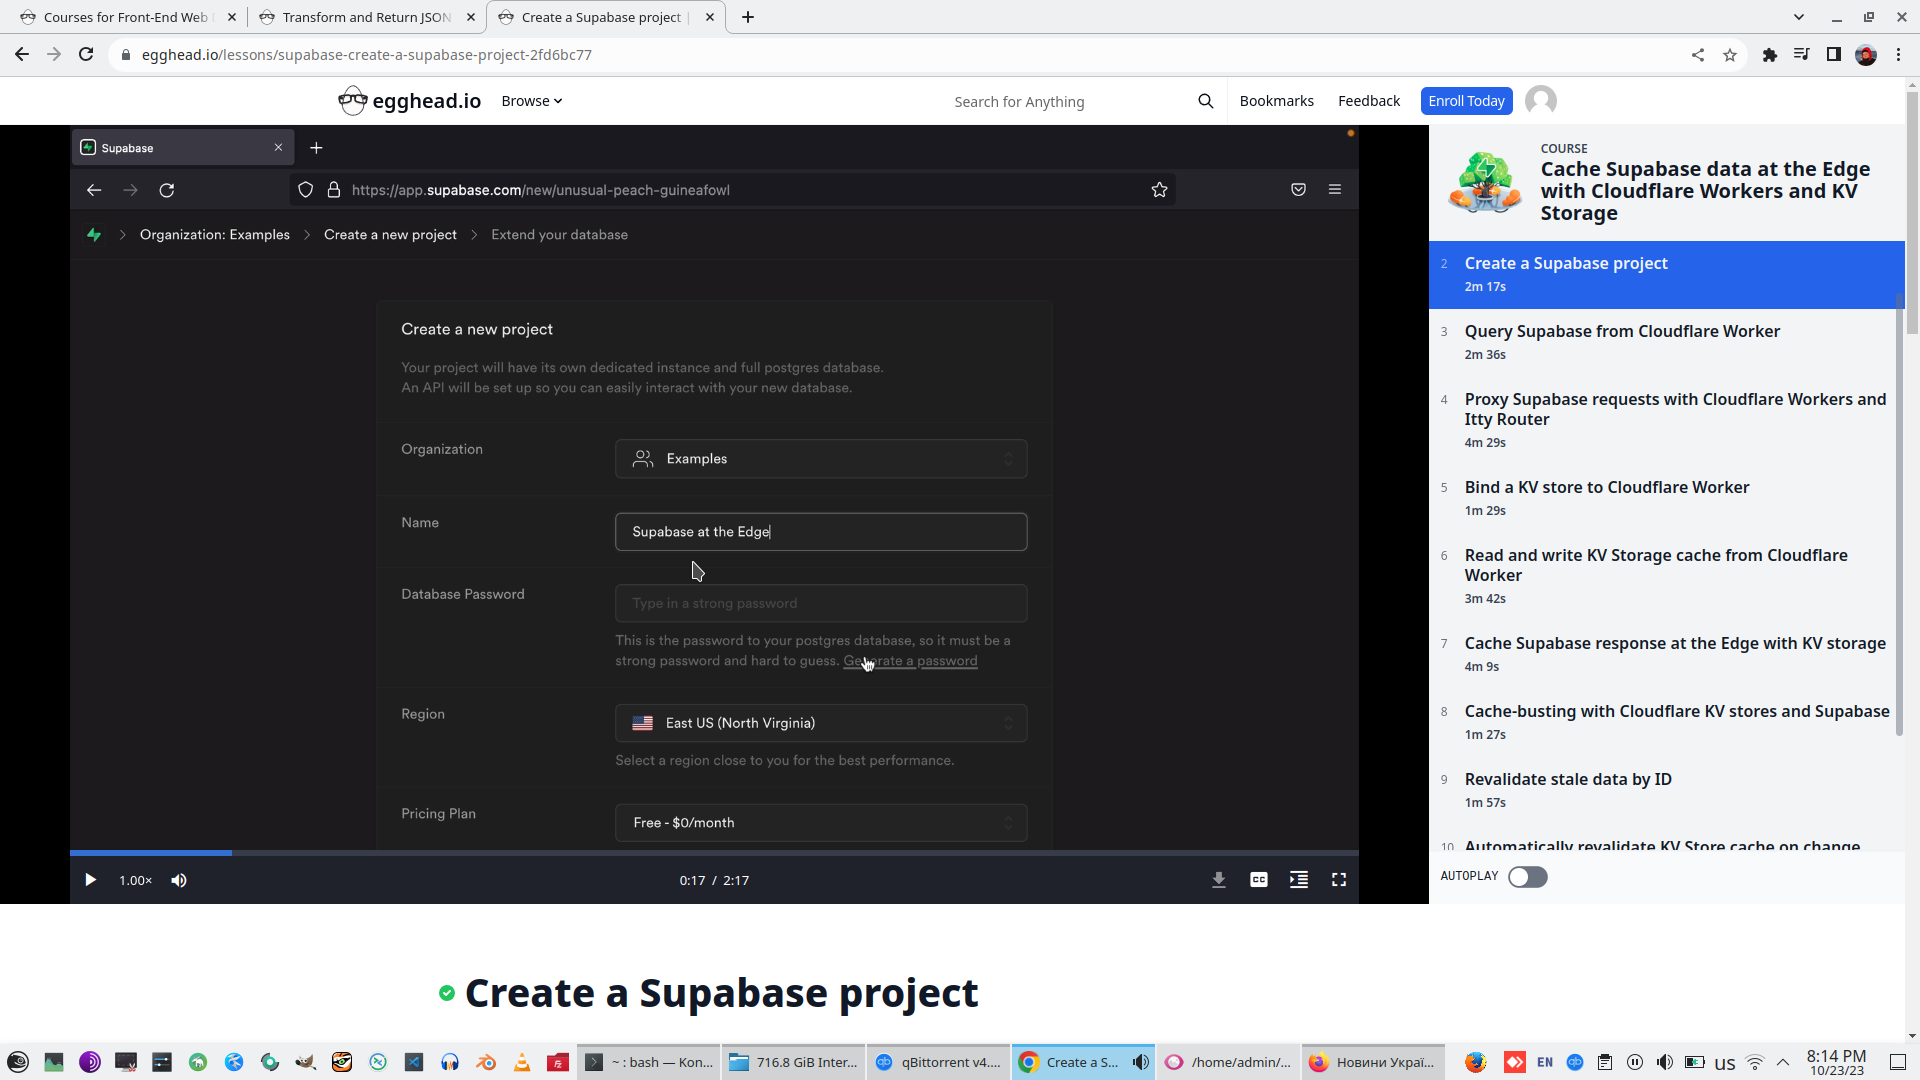
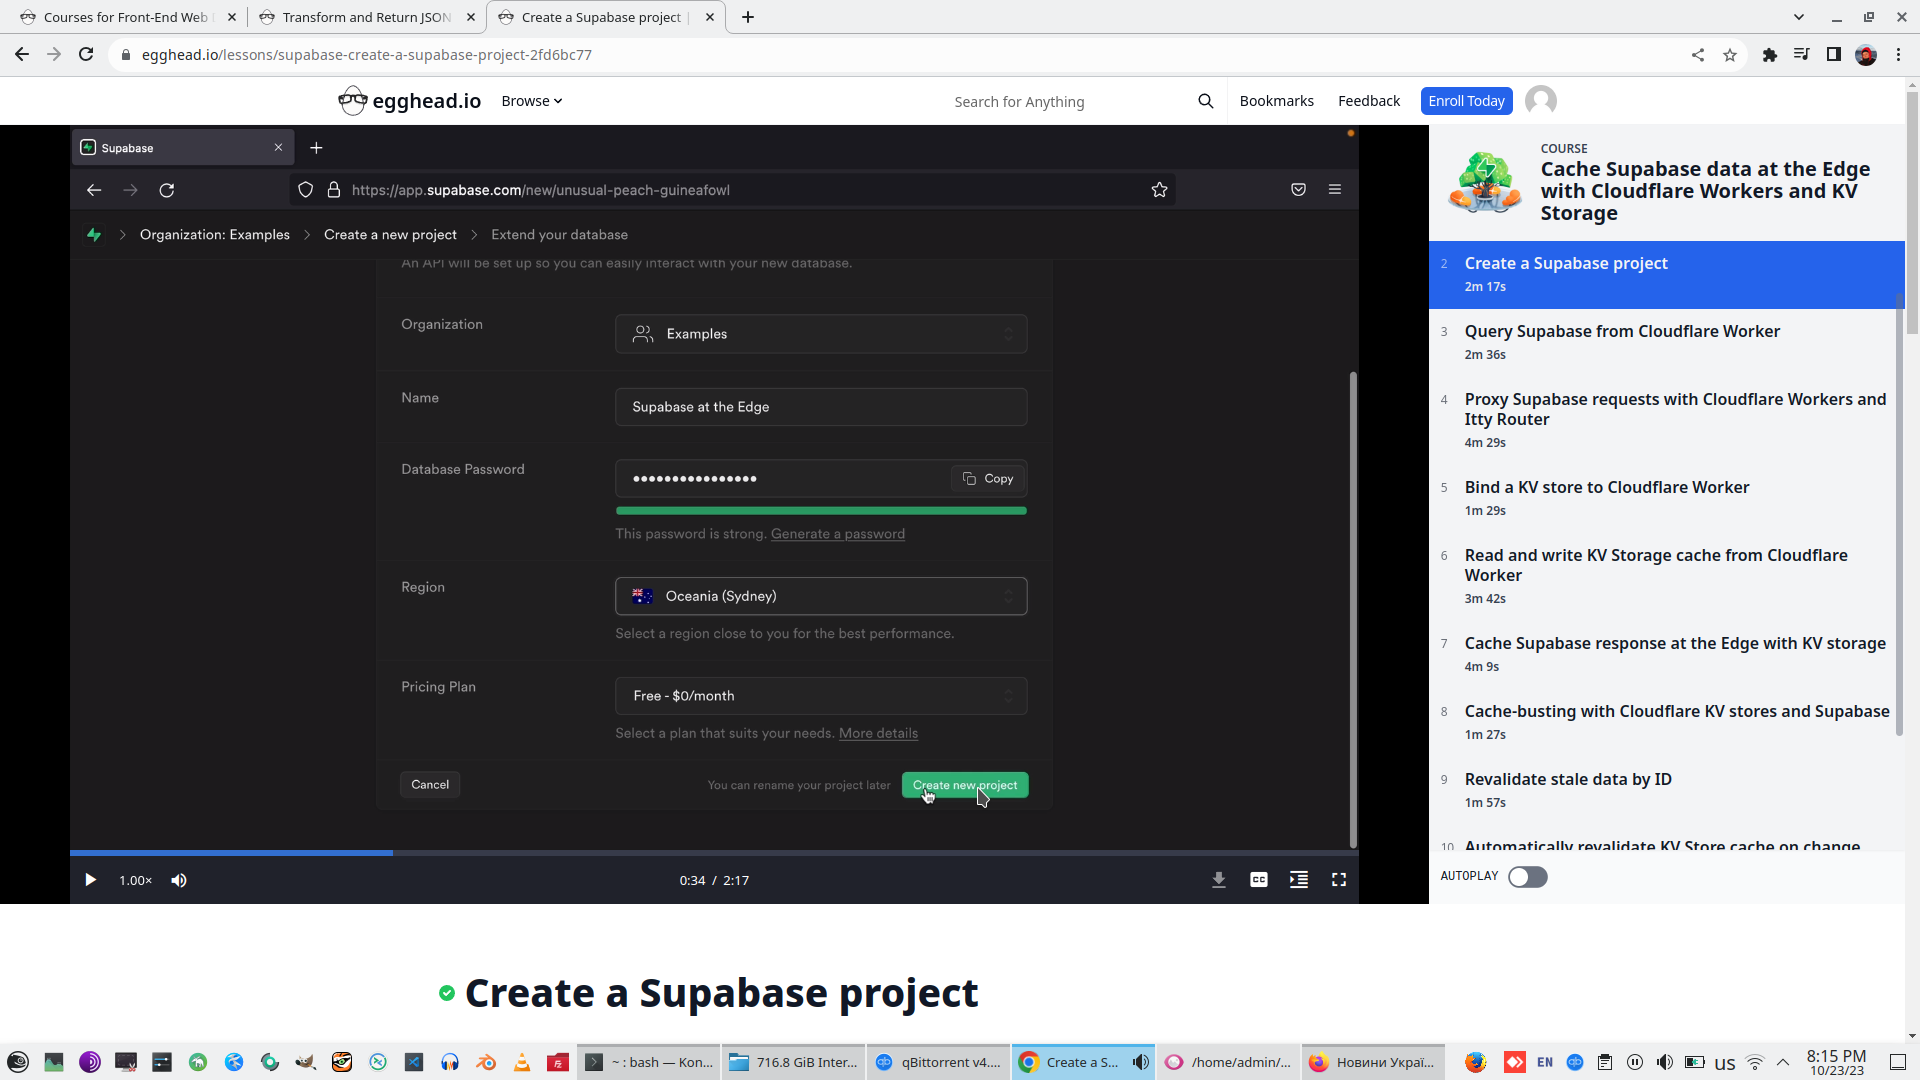
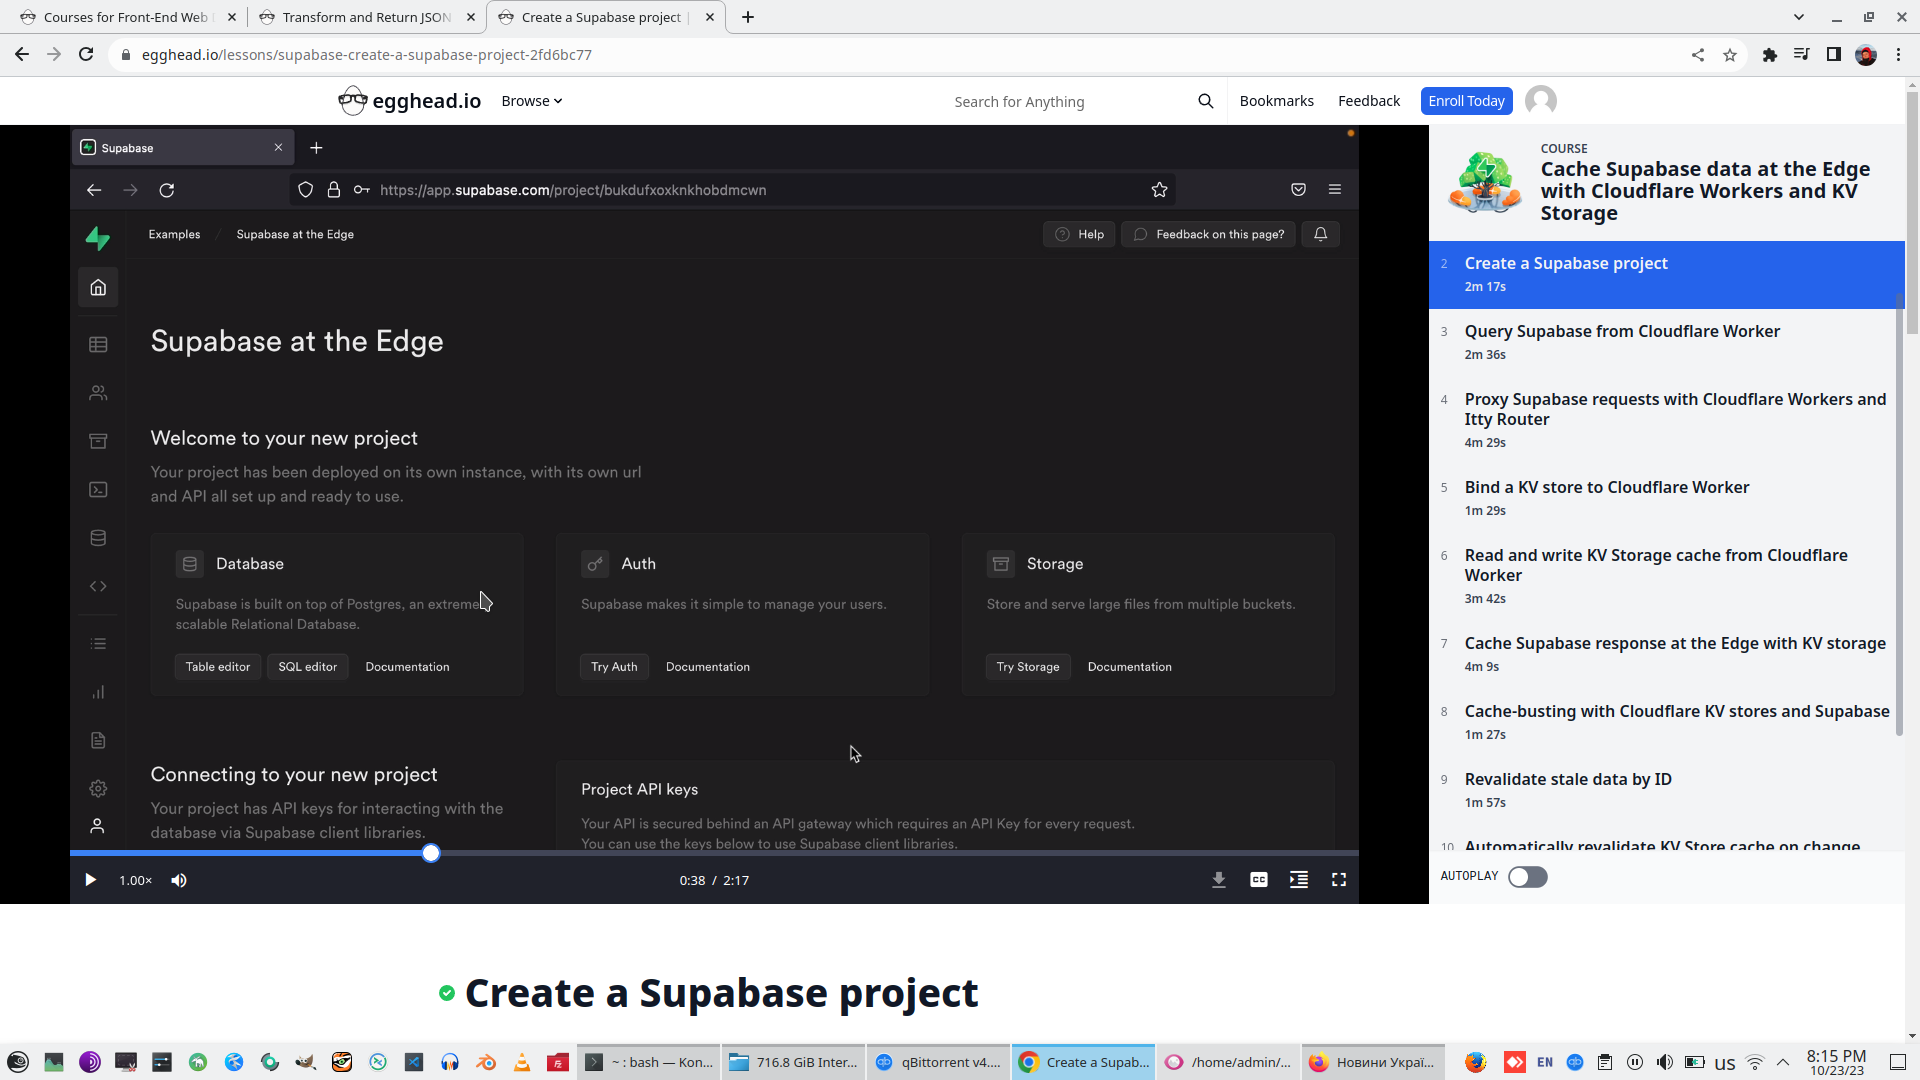
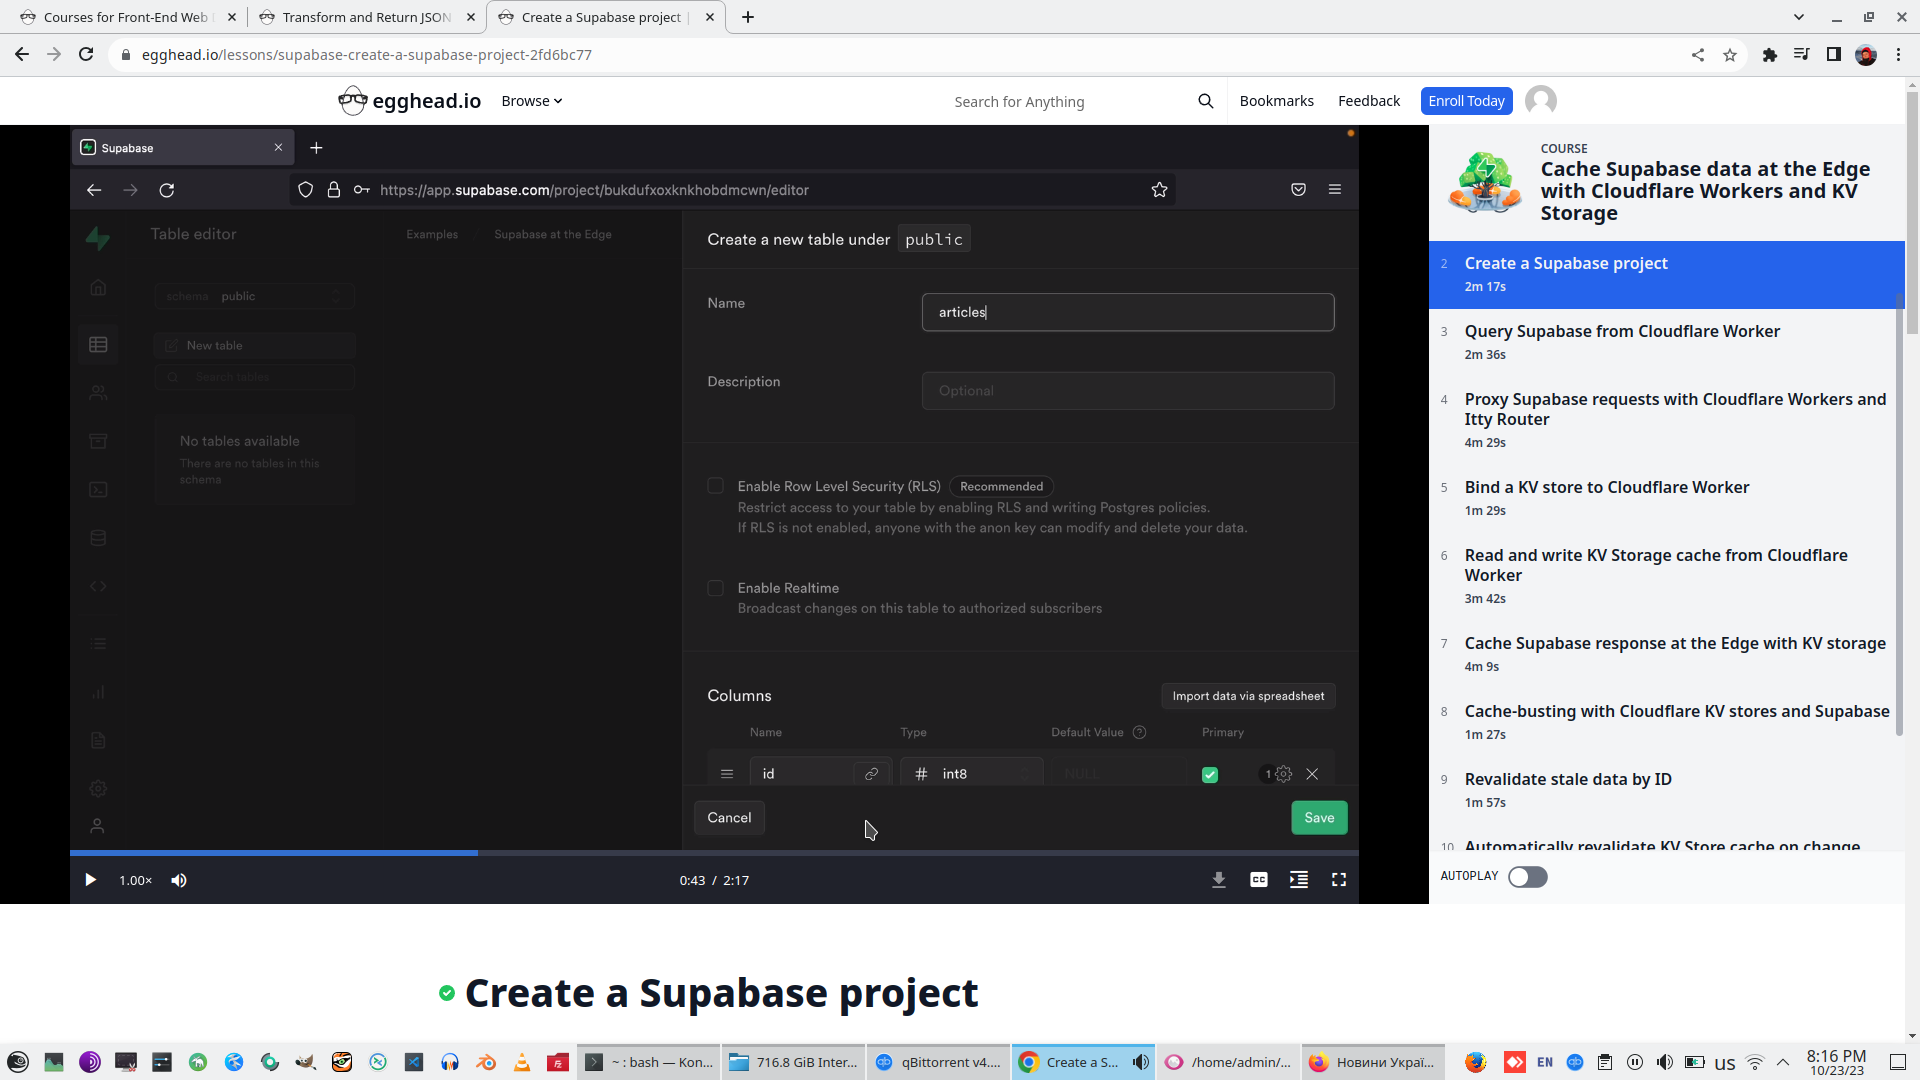
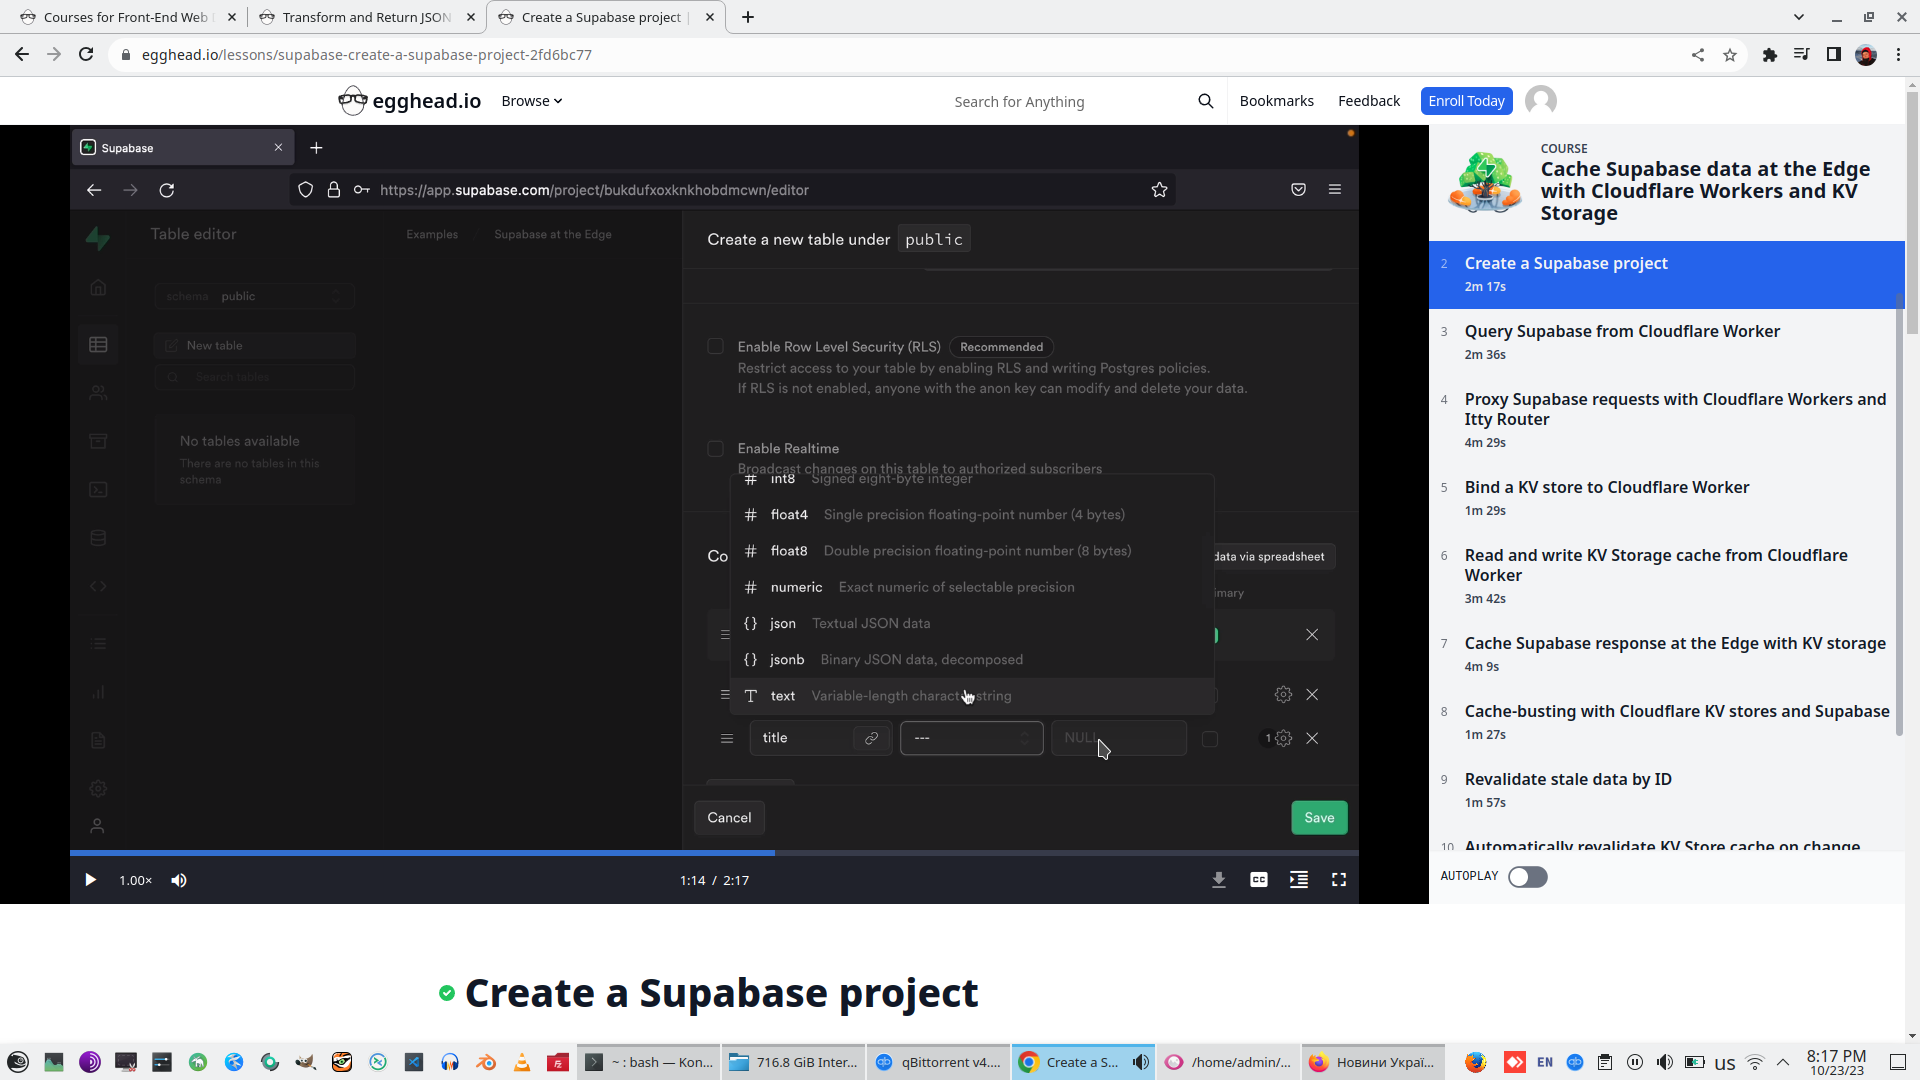
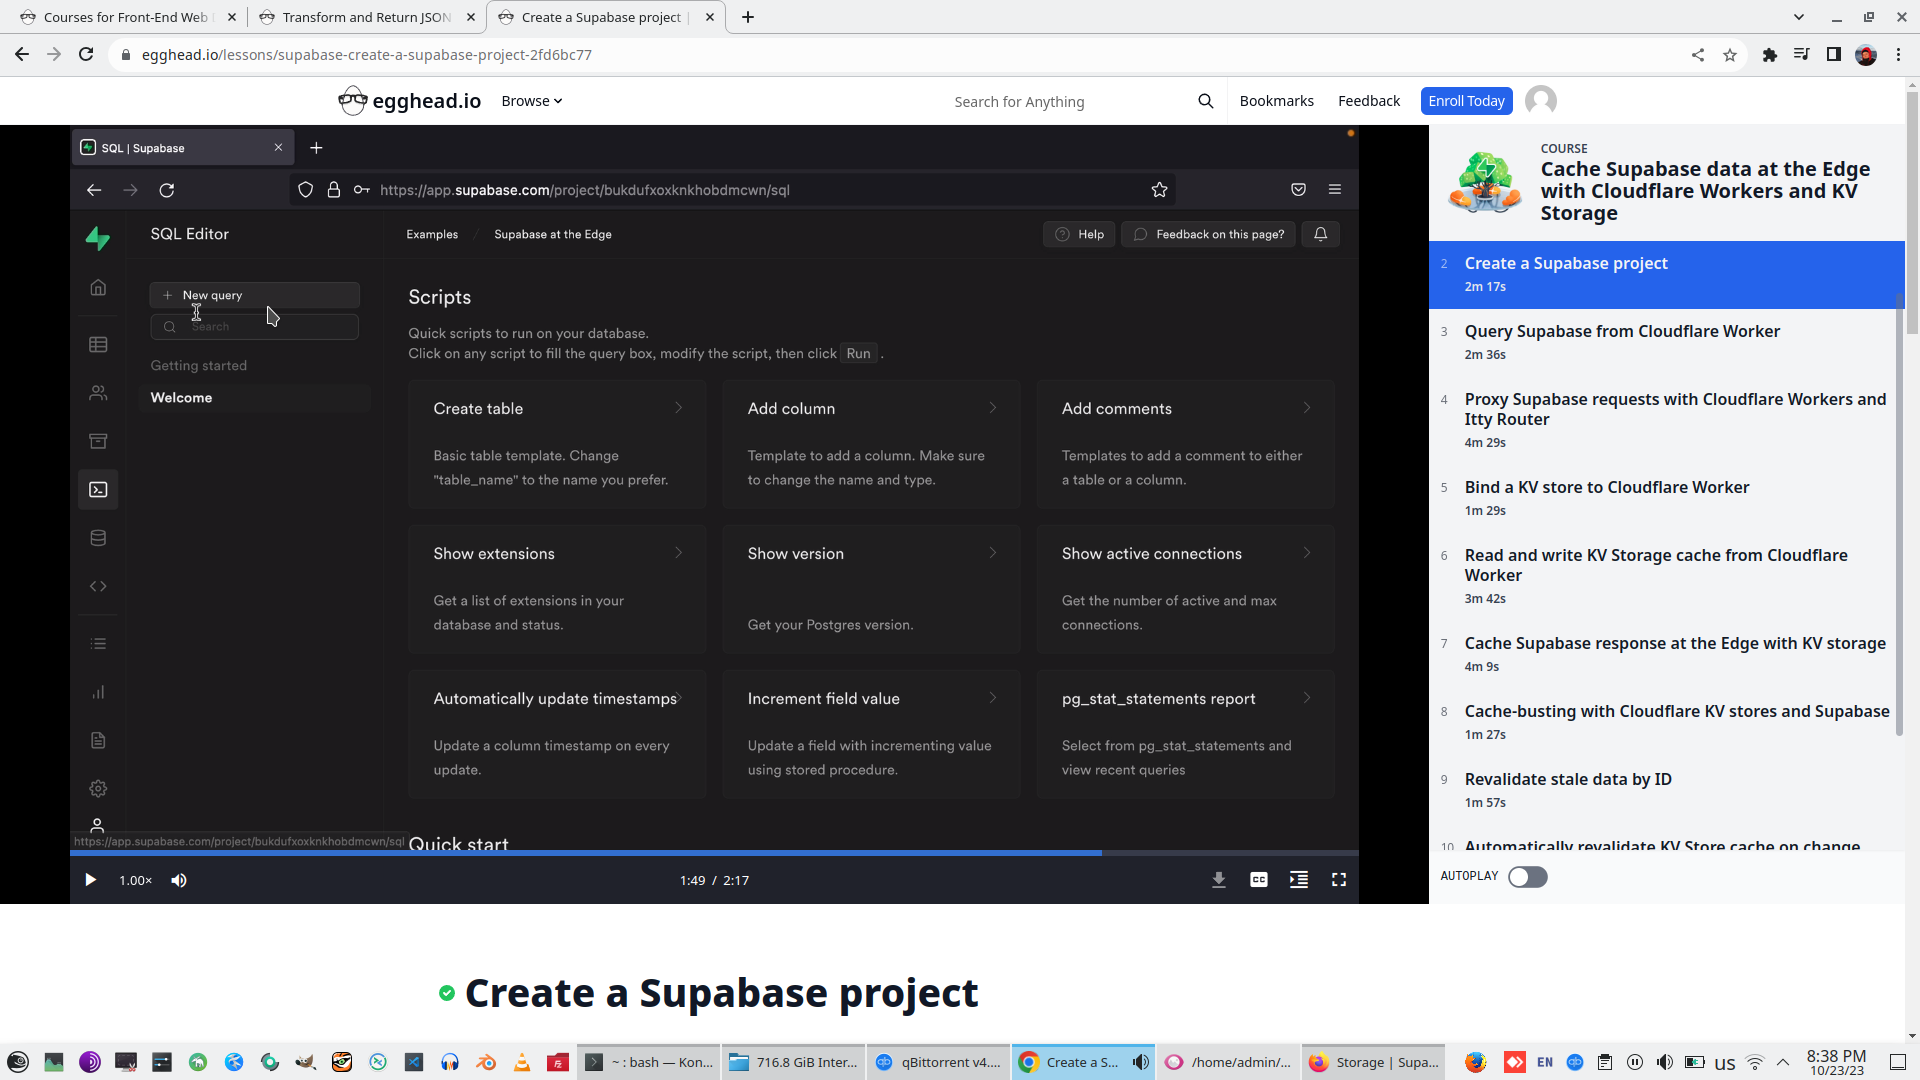
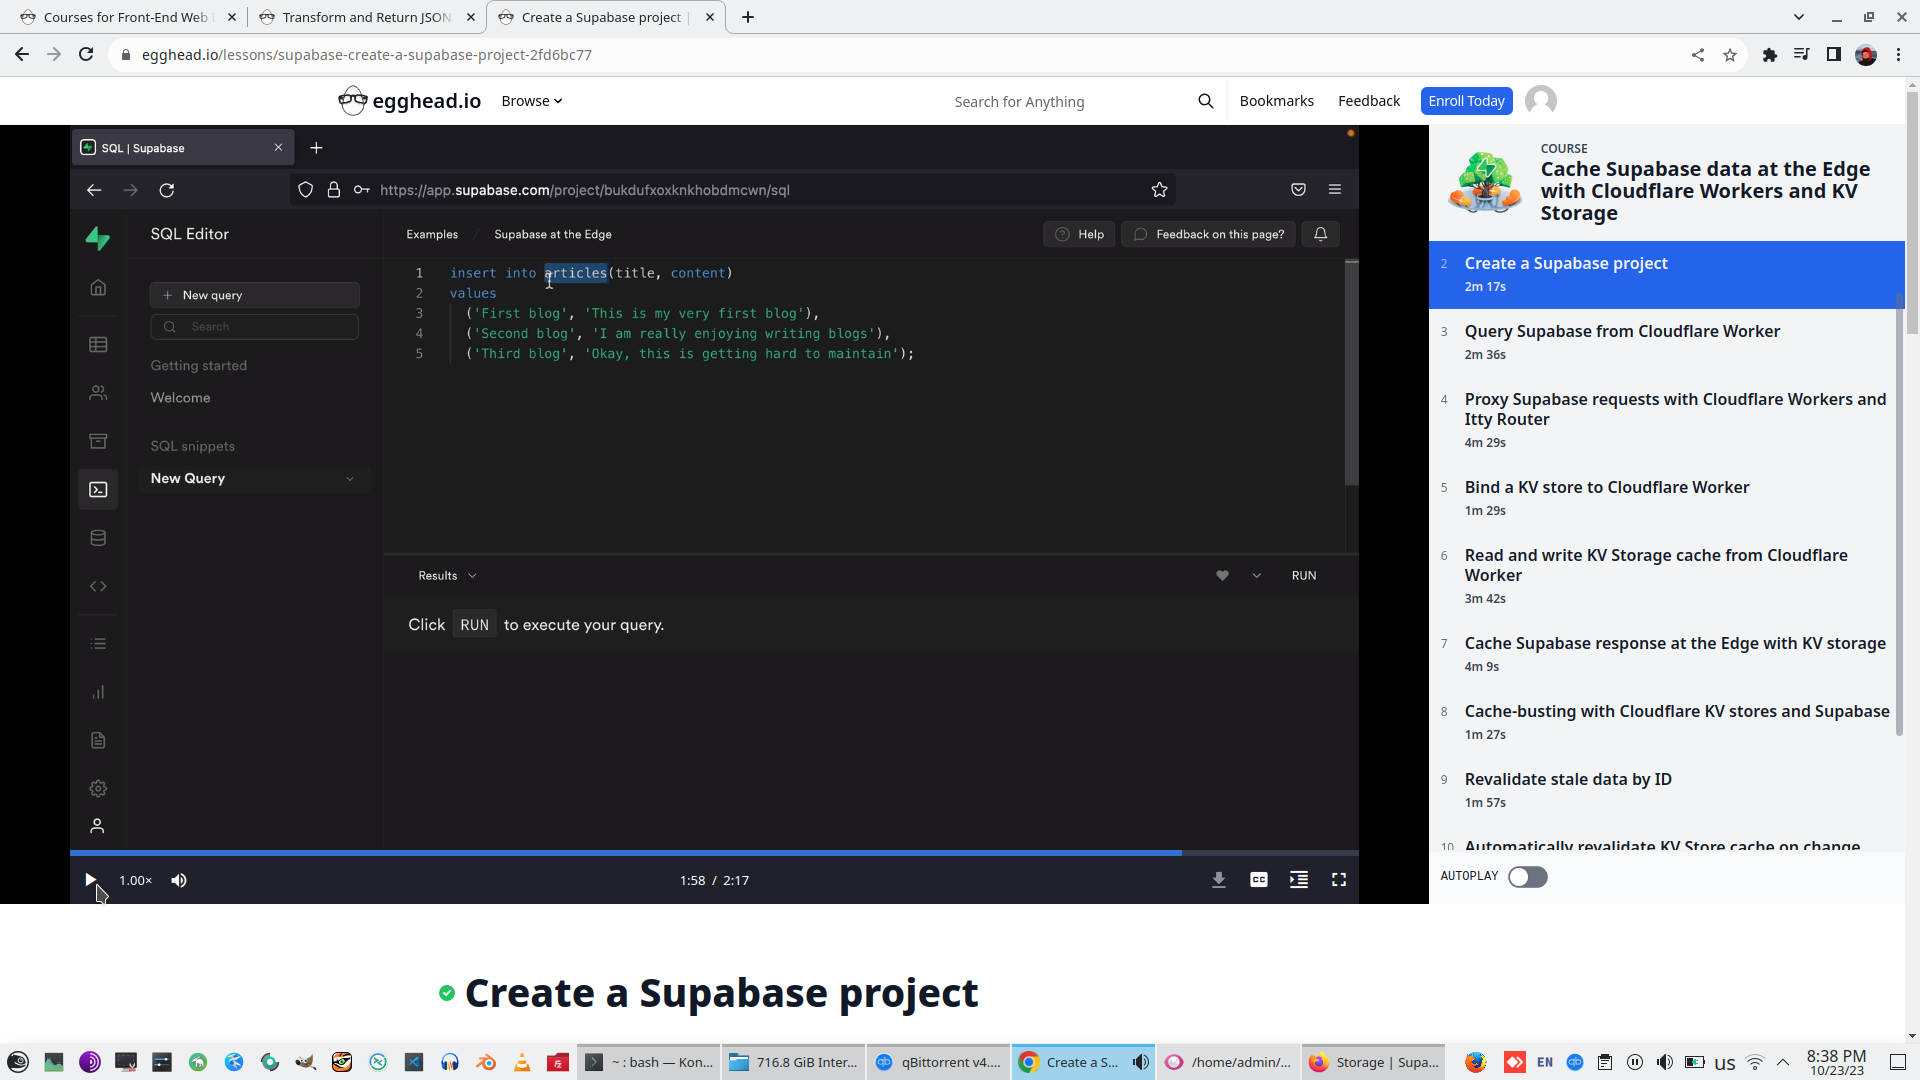
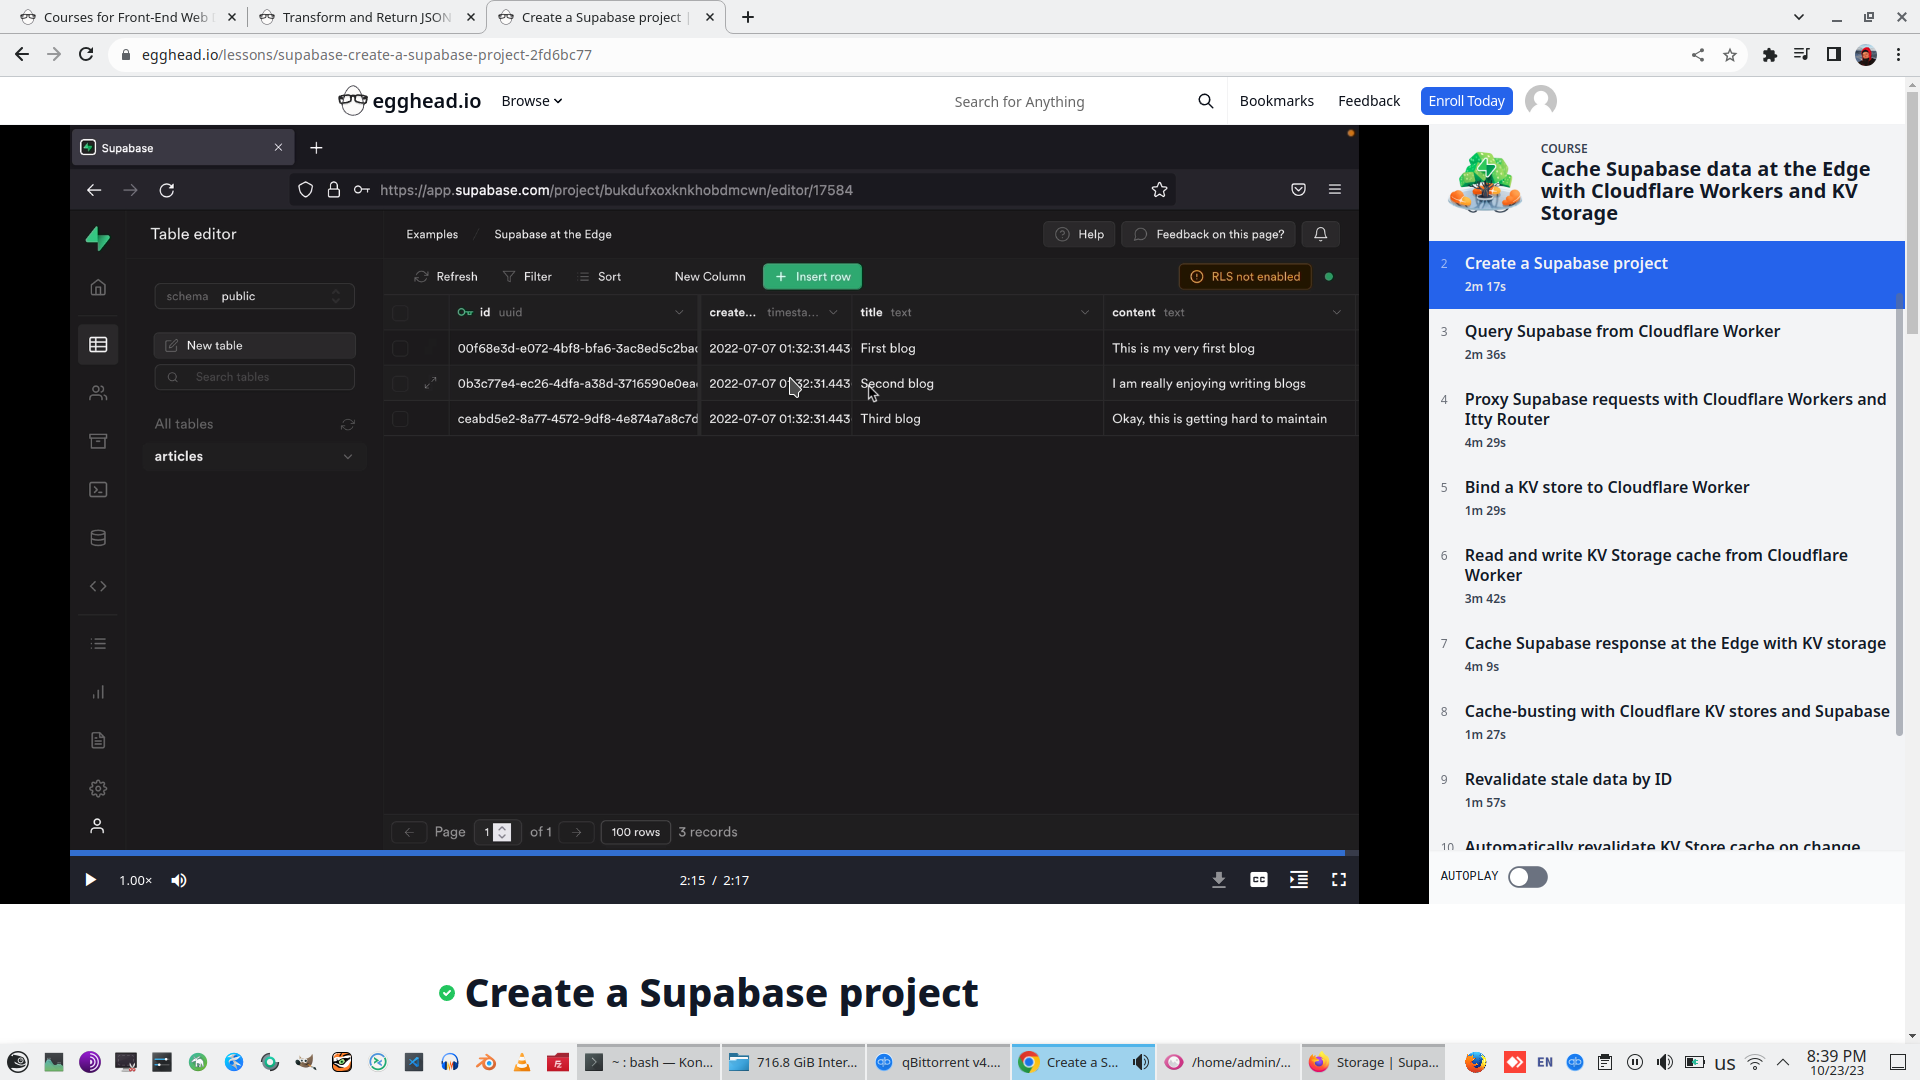
2. Create a Supabase project (Supabase is Web interface for PostgreSQL)


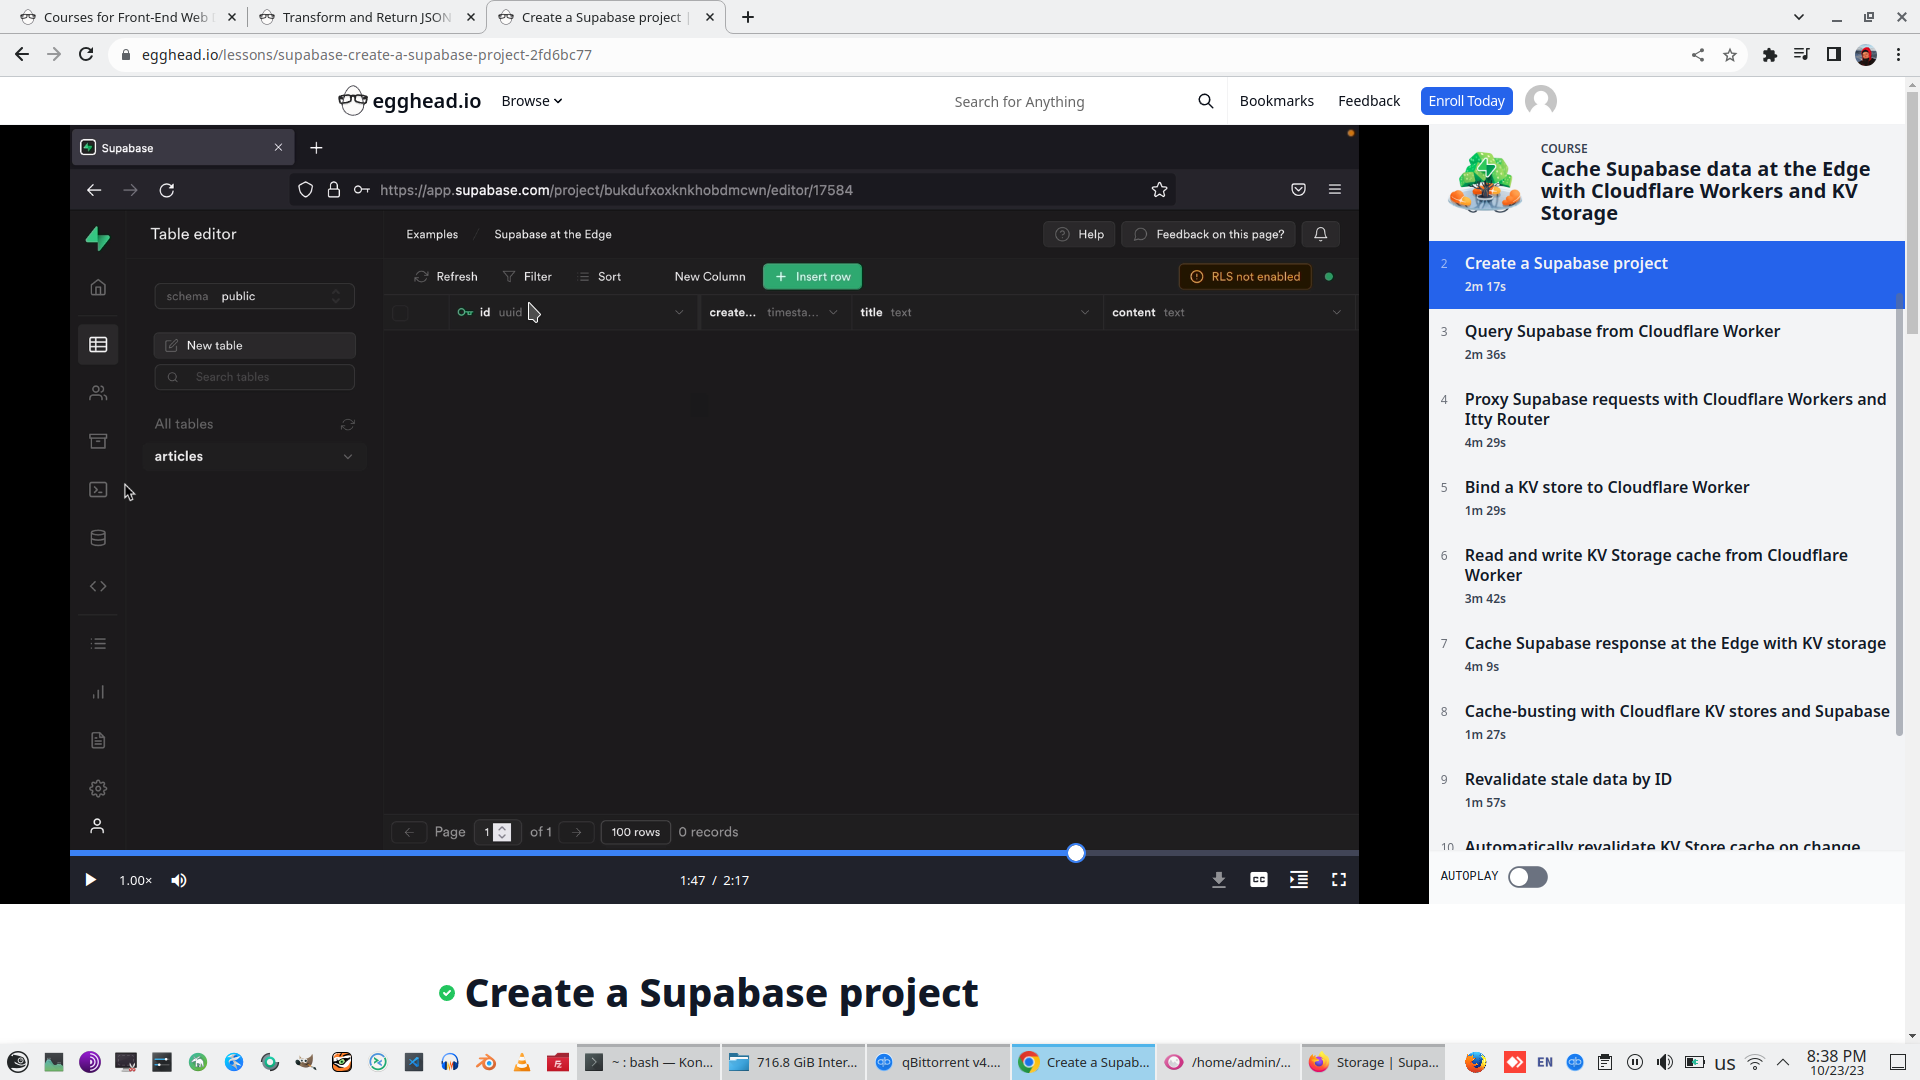
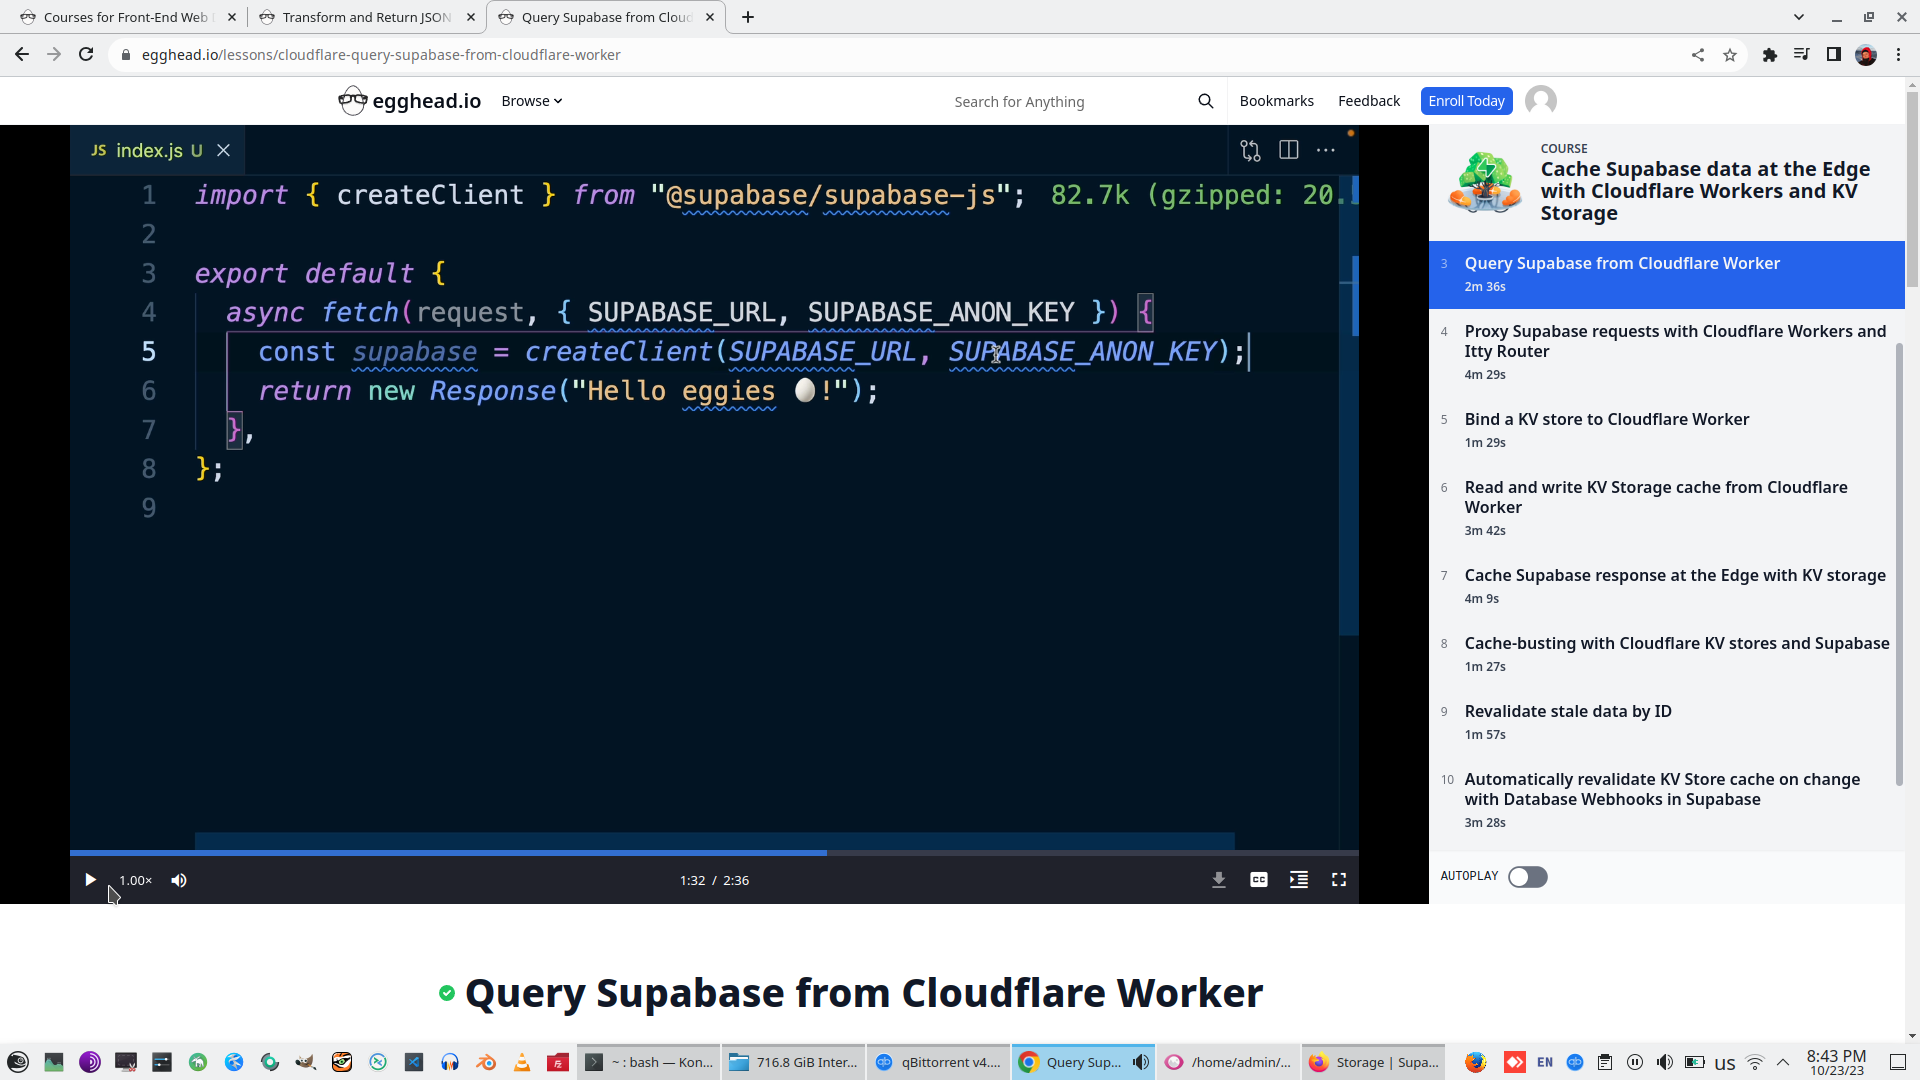
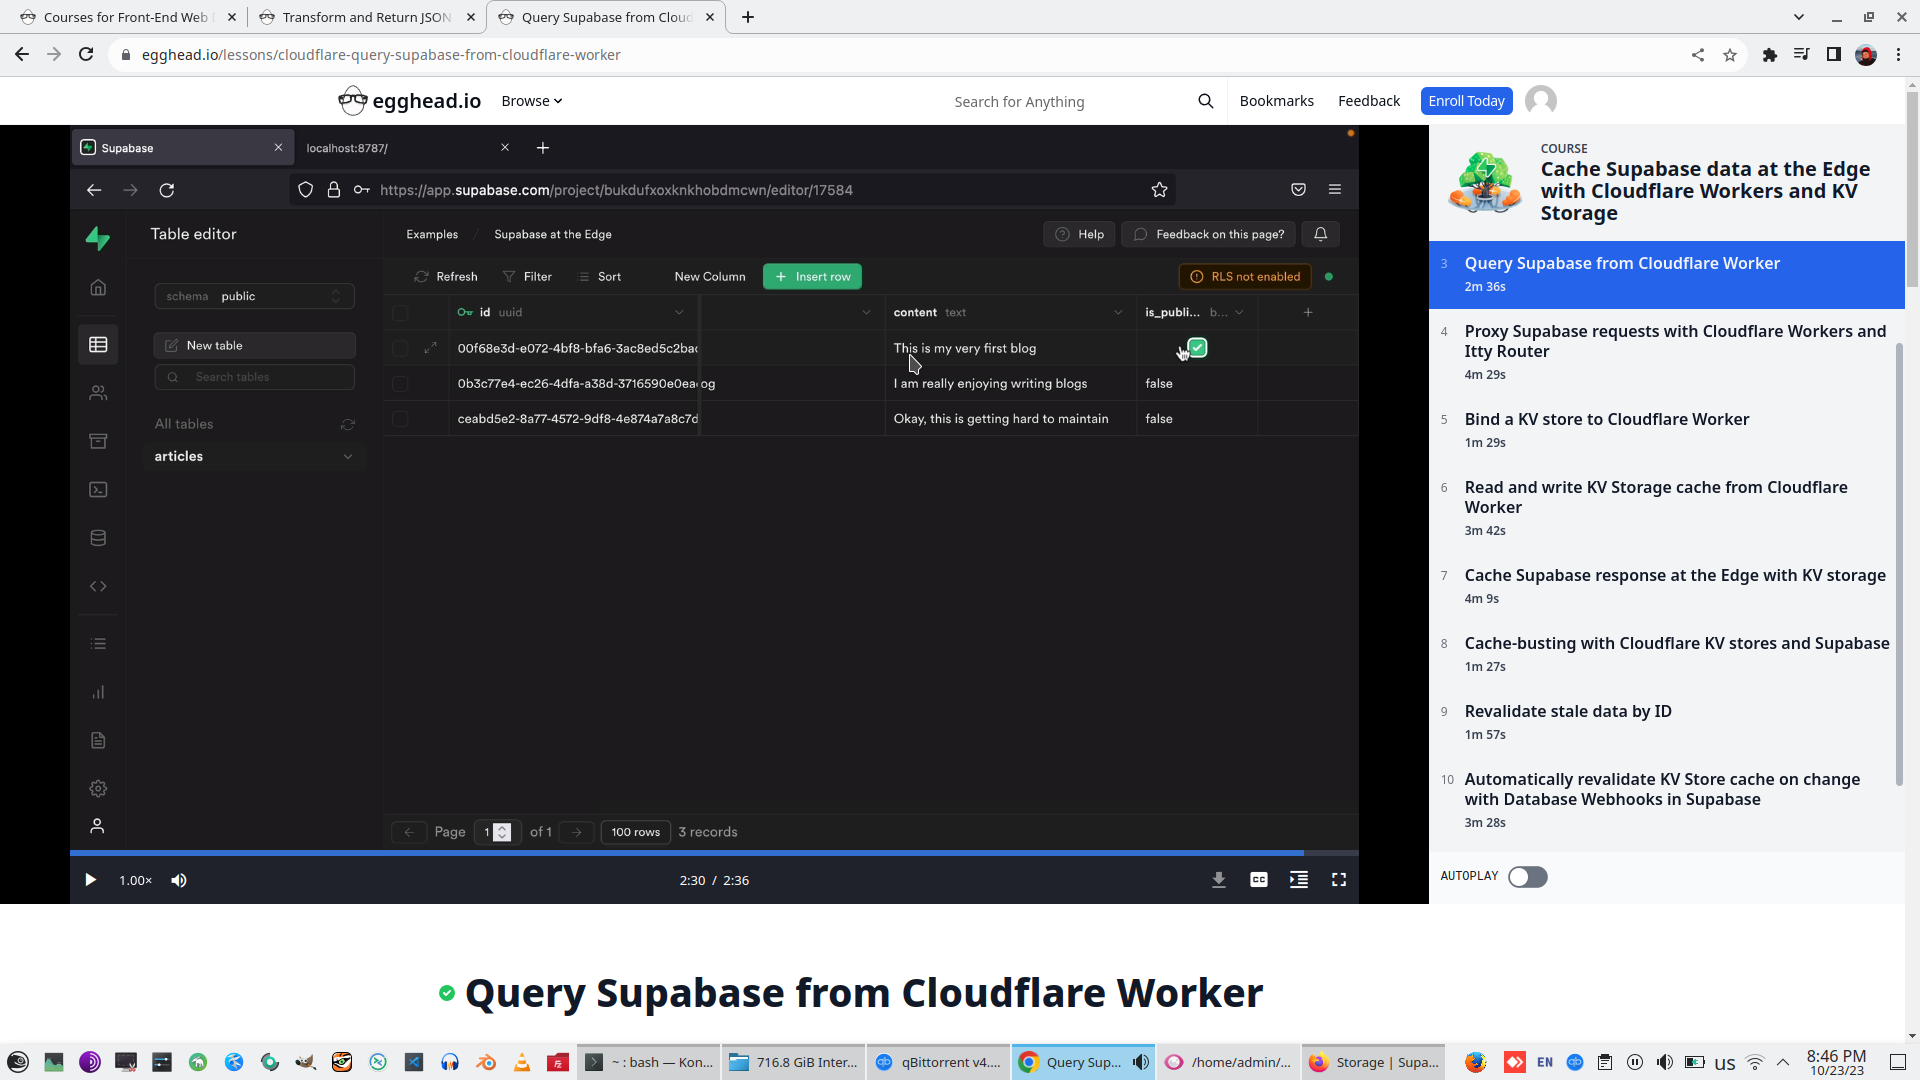
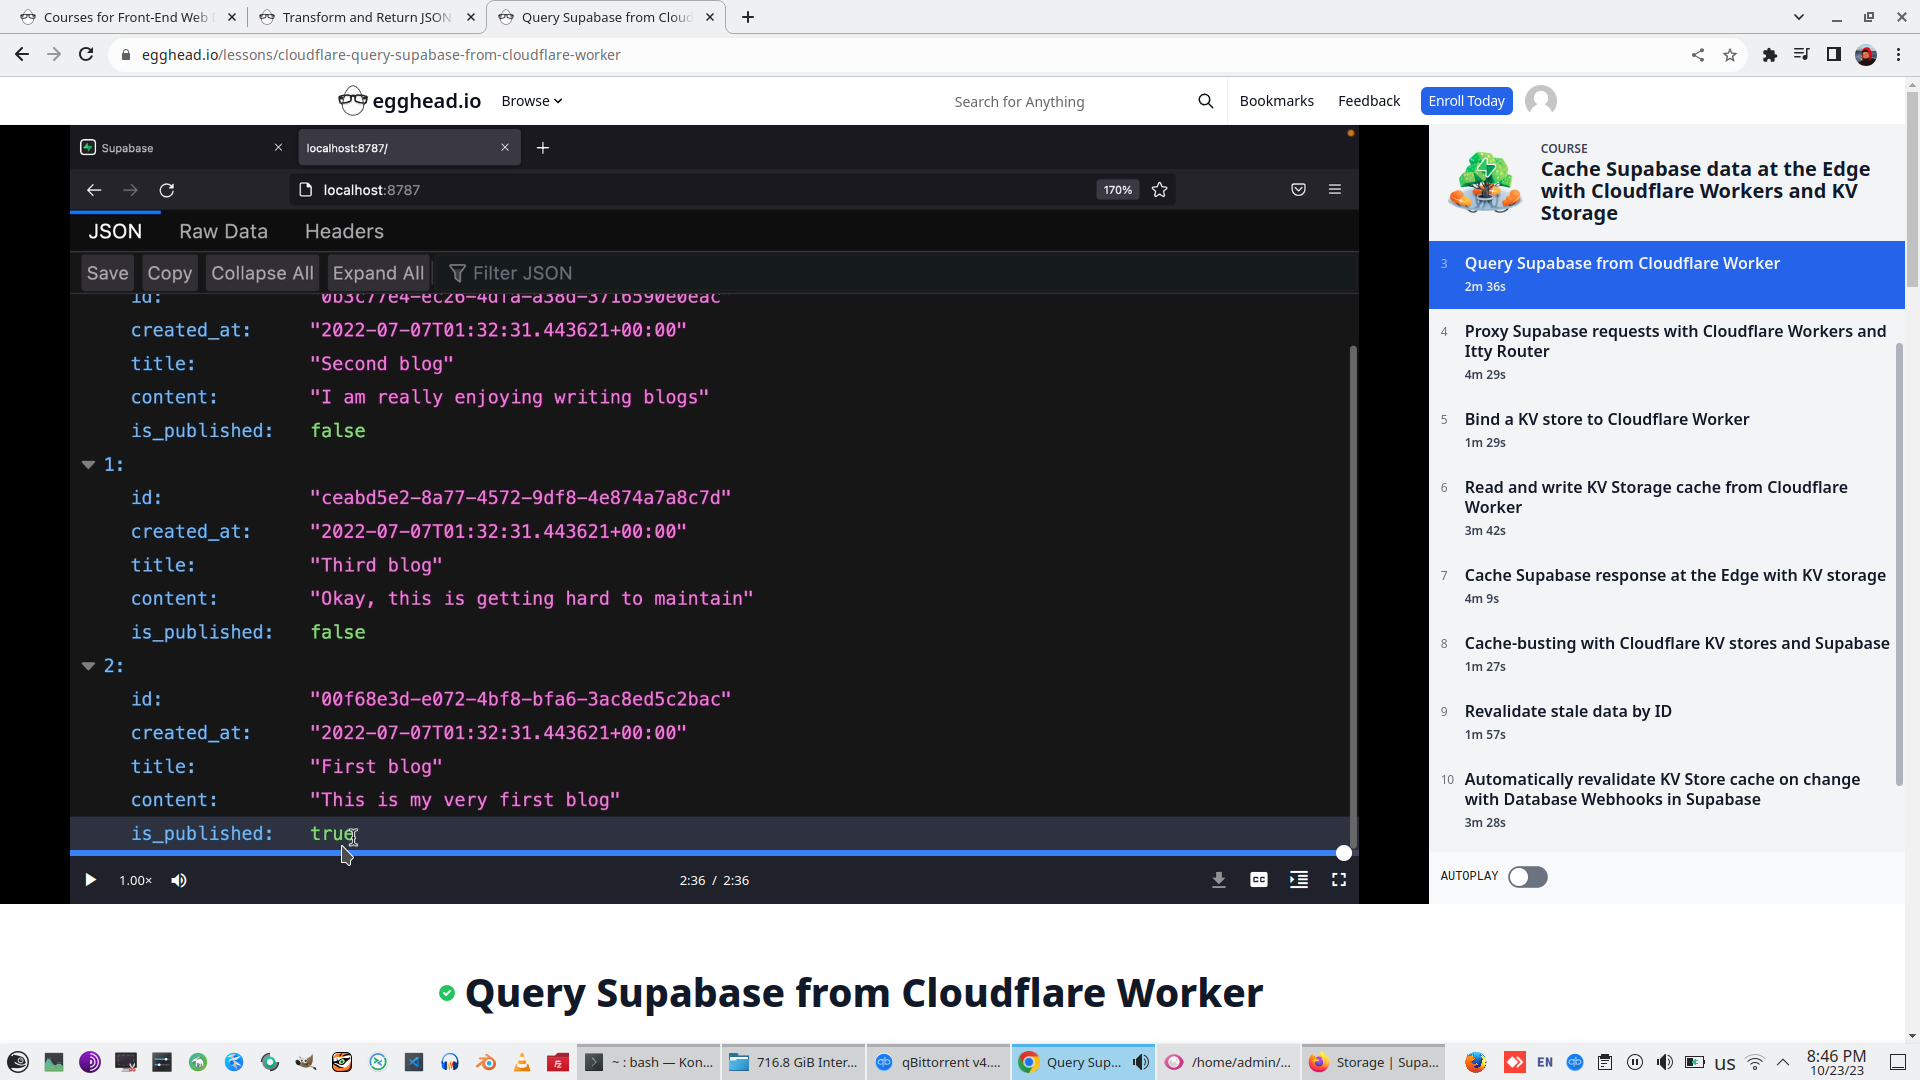
3. Query Supabase from Cloudflare Worker
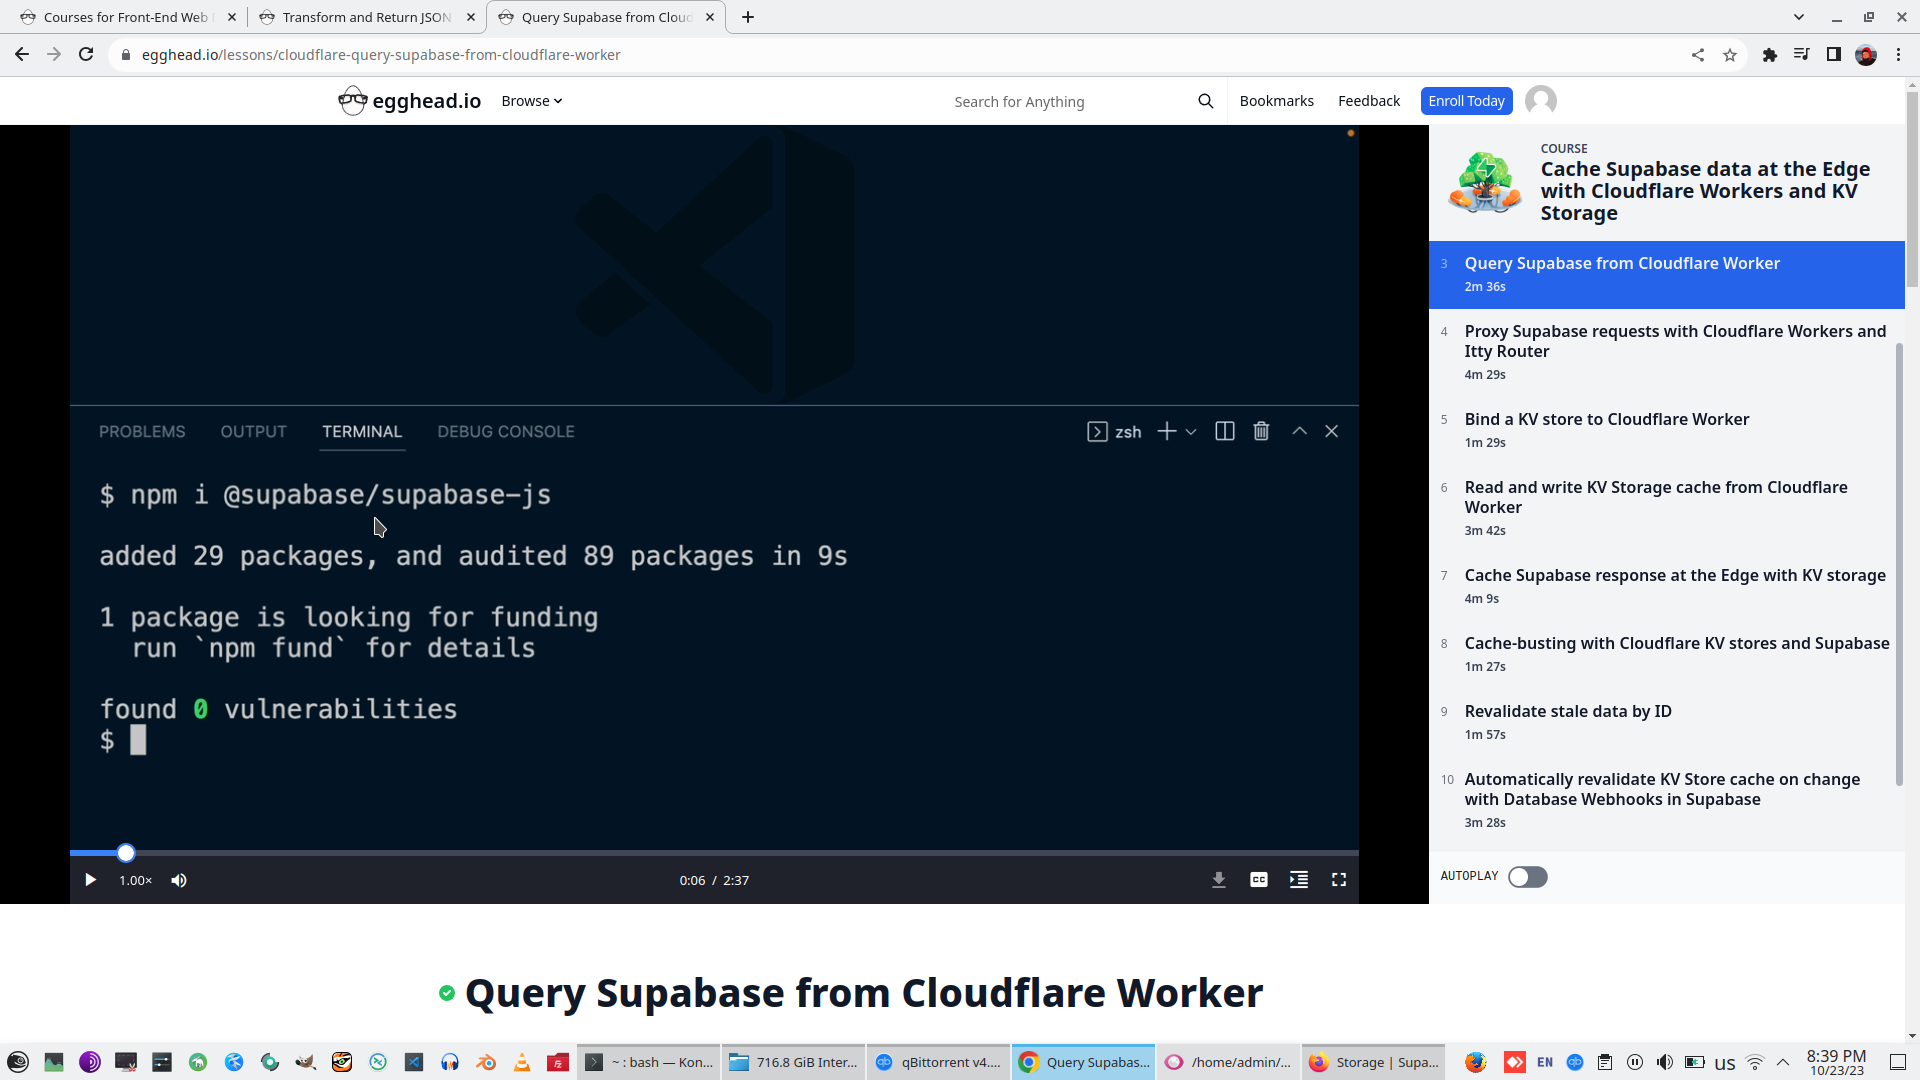
Install Supabase JS Library - npm i @supabase/supabase-js
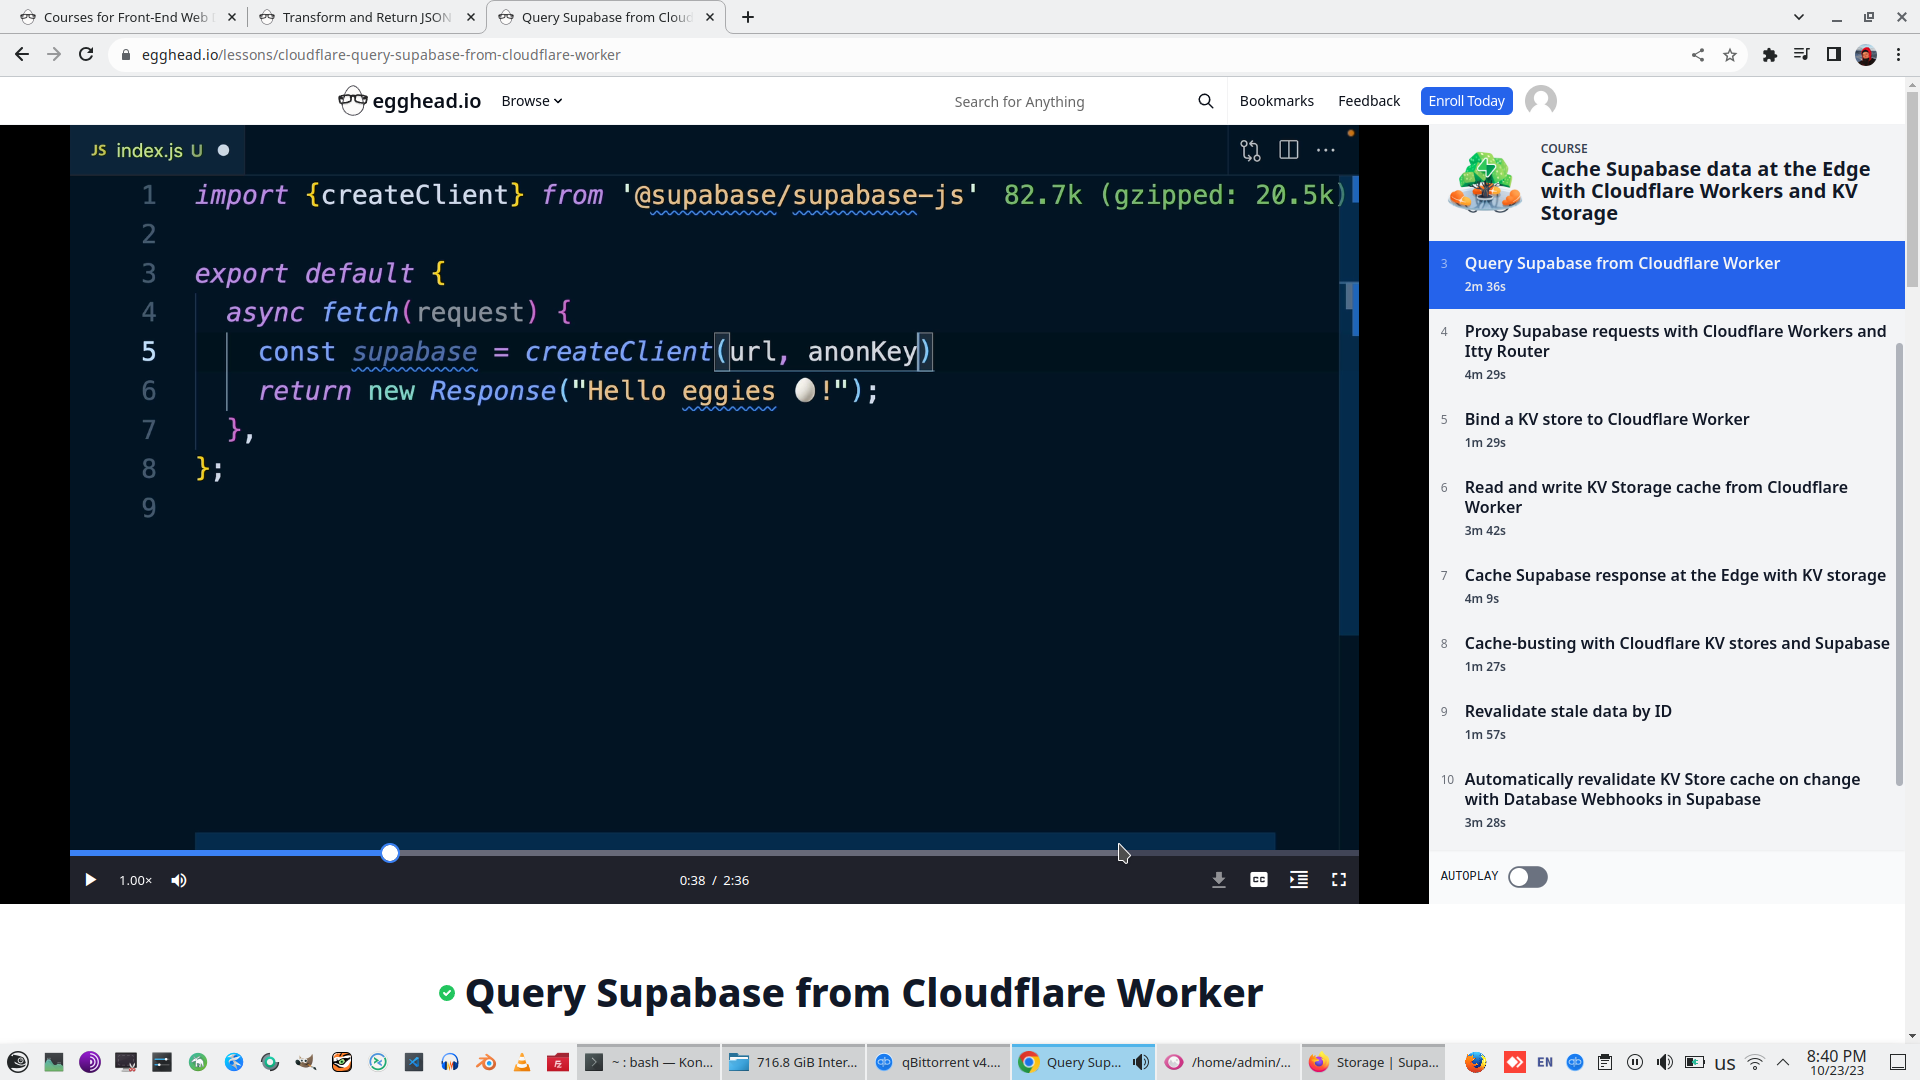
Add supabase support to module Index.js (look to Interesting VS Code plugin - it show size of imported JS library)

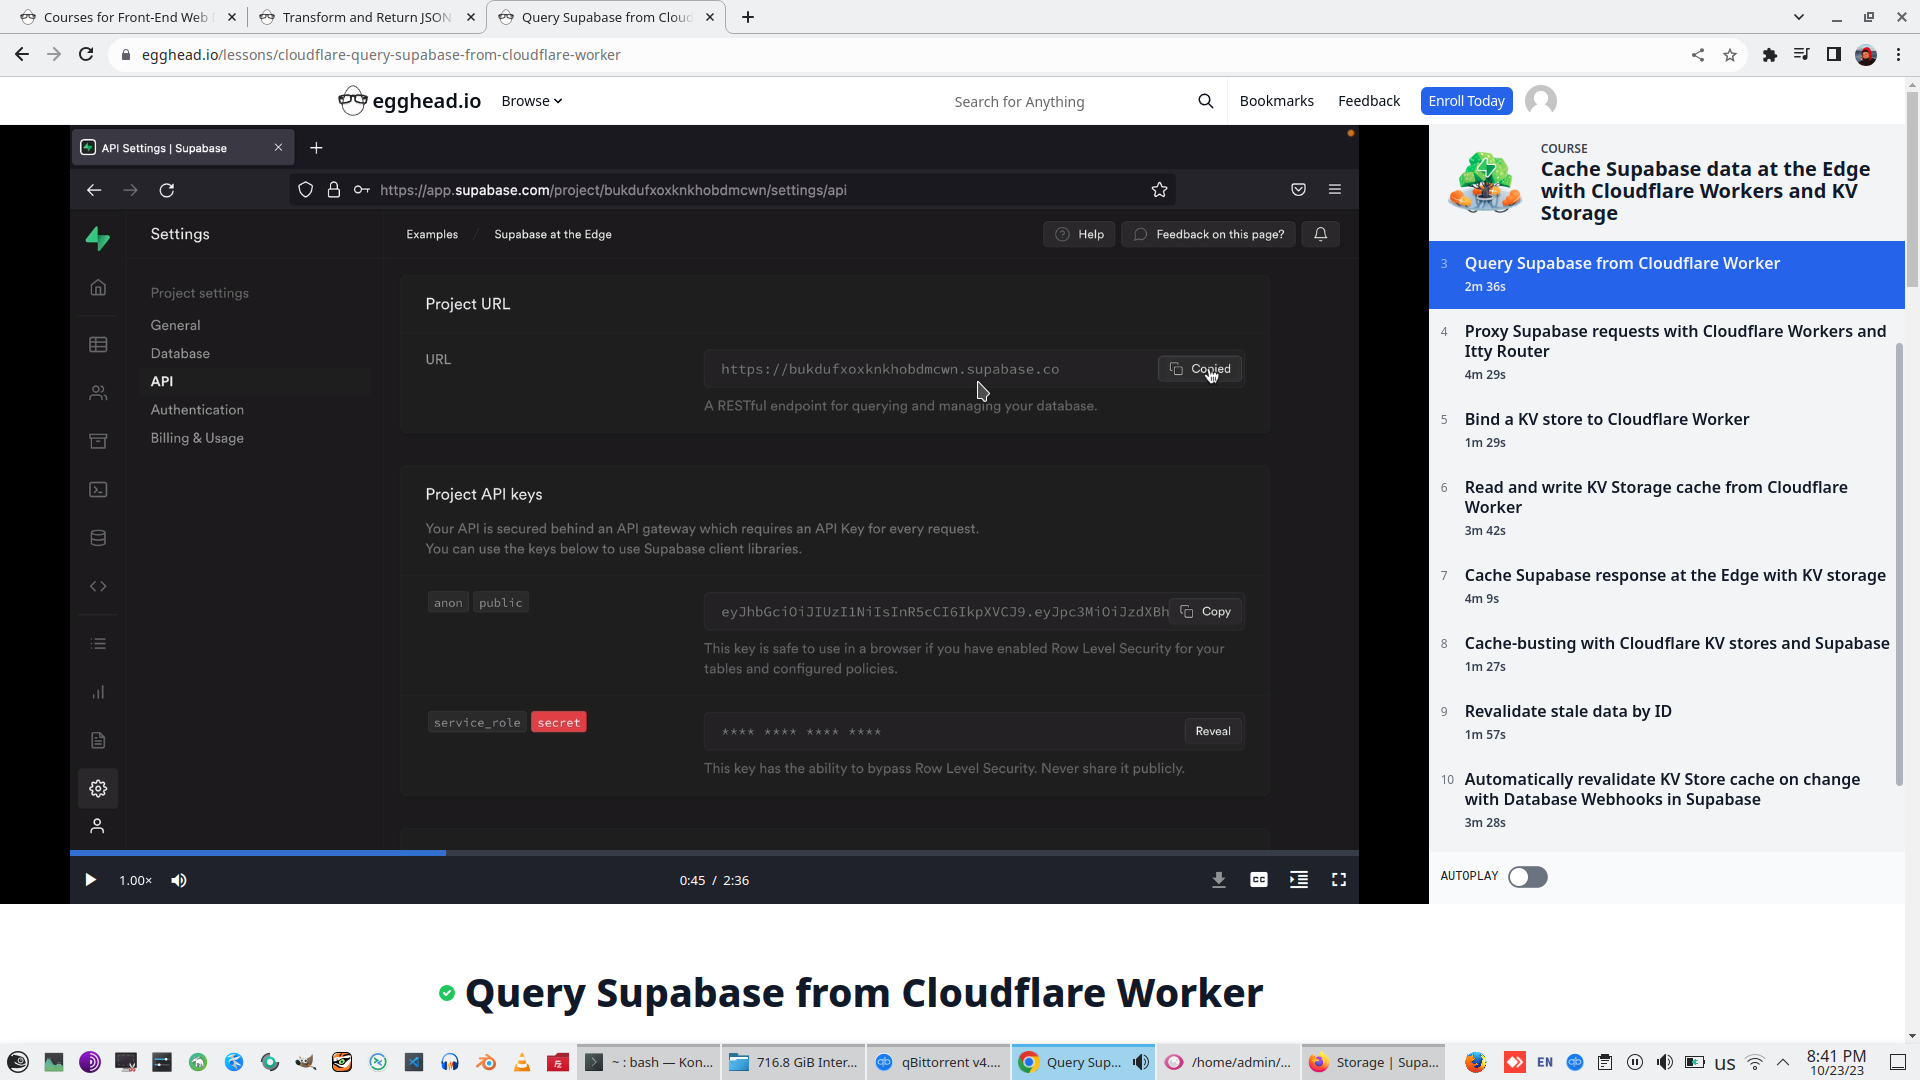
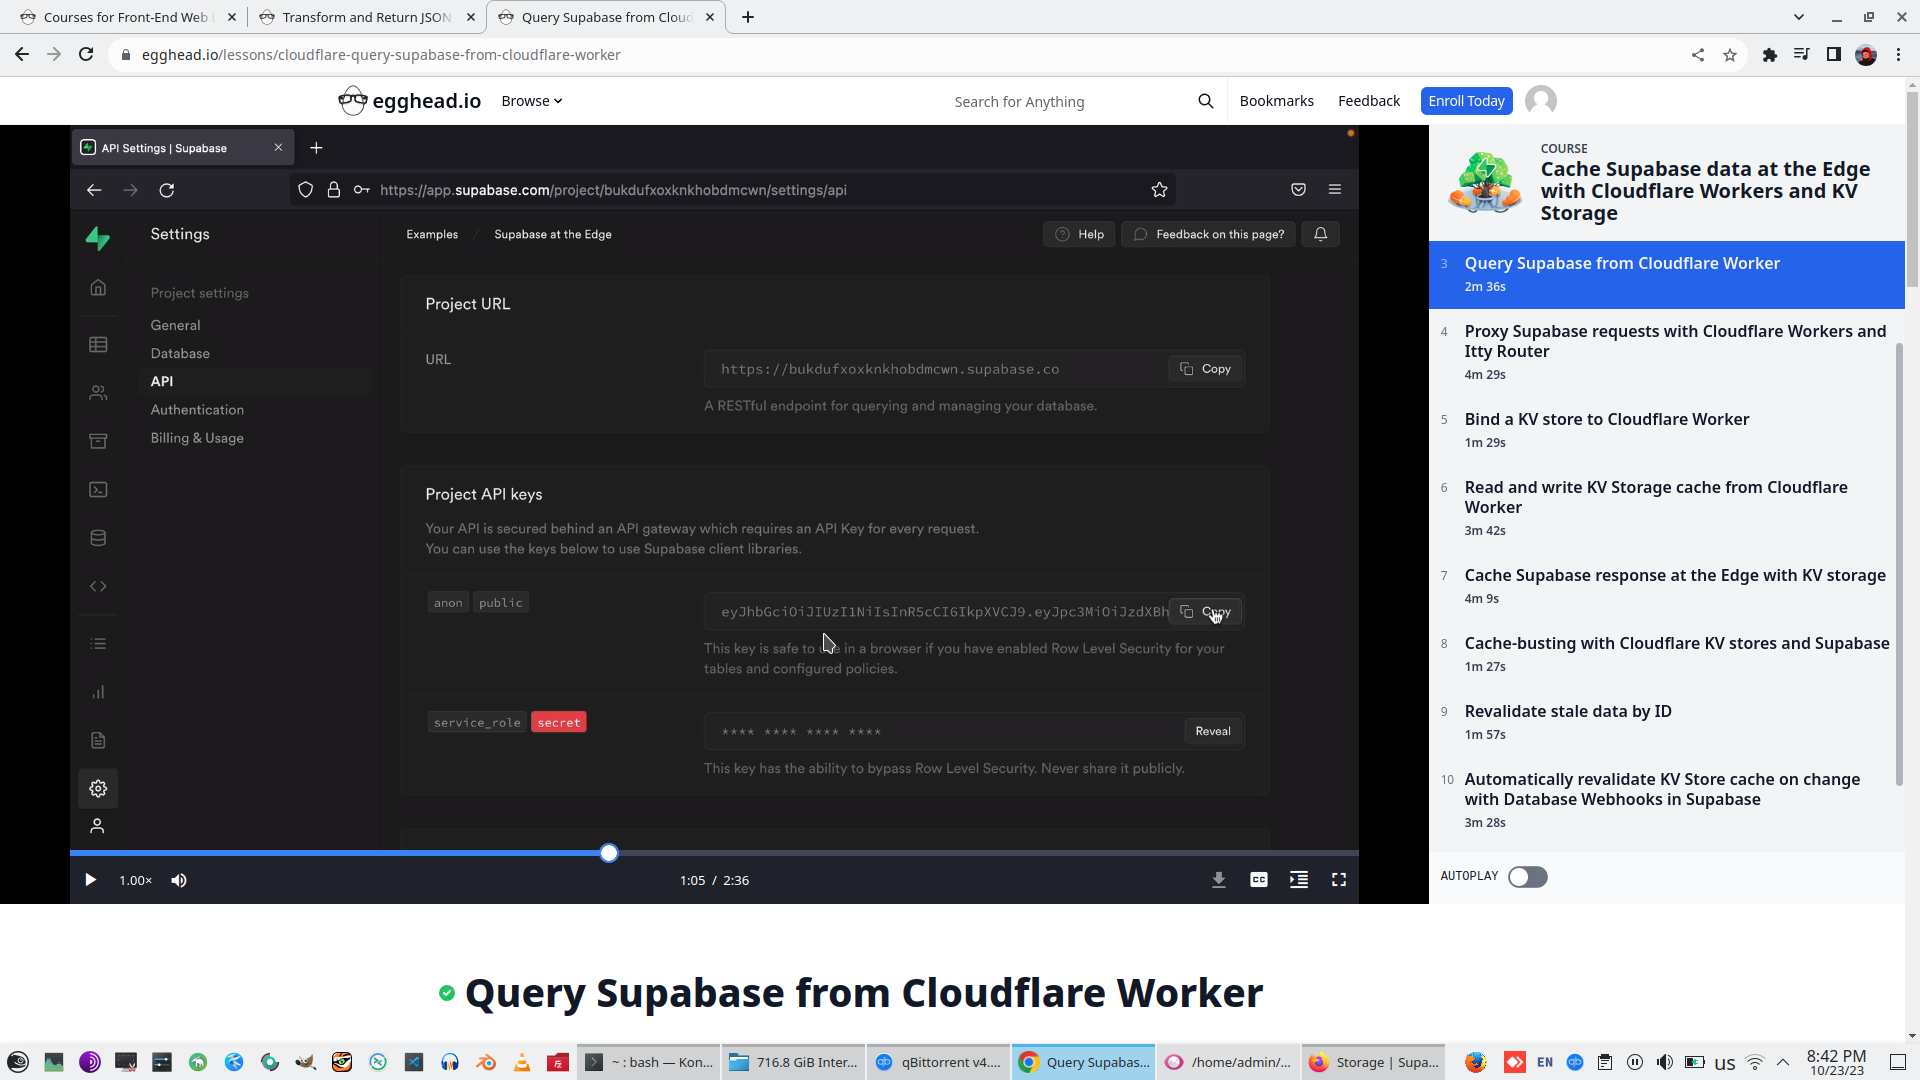
Create SupabaseClient (URL and AnonKey is parameters), take its from Supabase panel
Npx wrangler secret put SUPABASE_URL - (create secret and upload secret to Cloudflare)
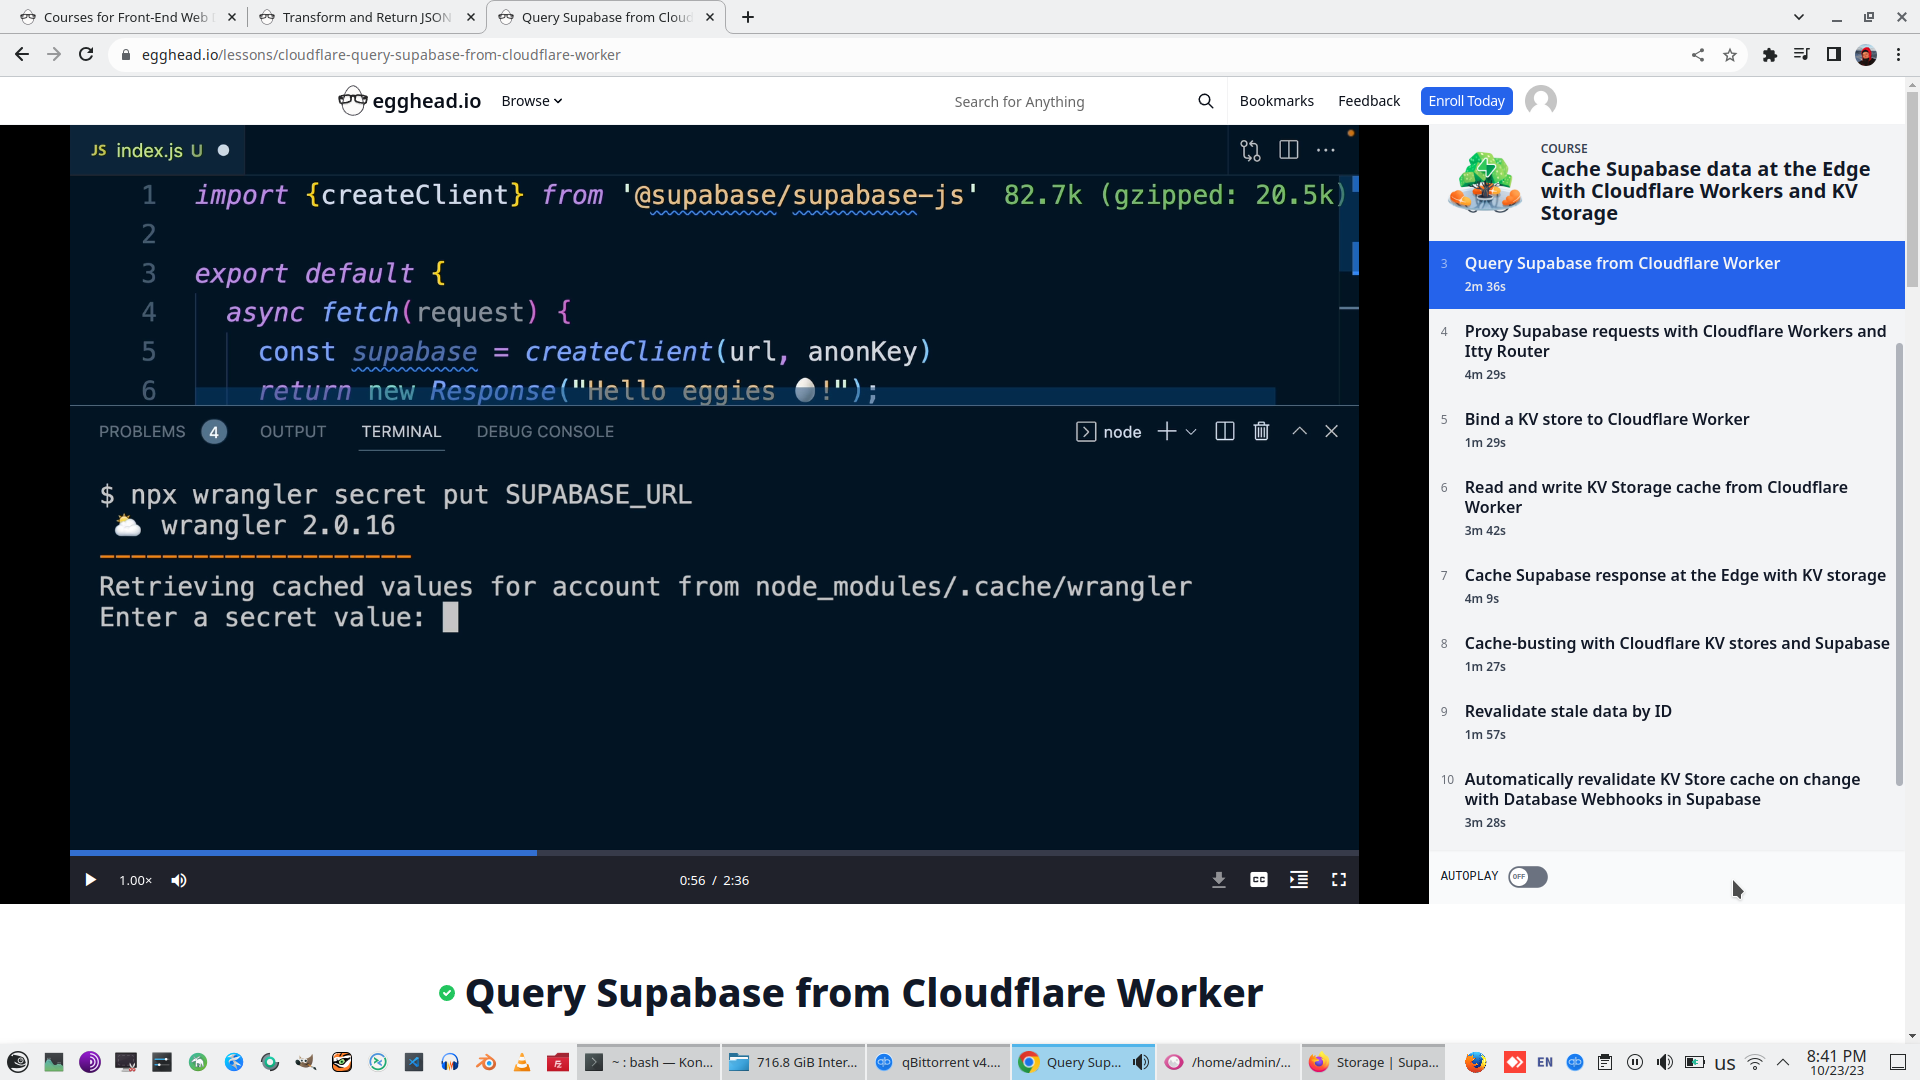
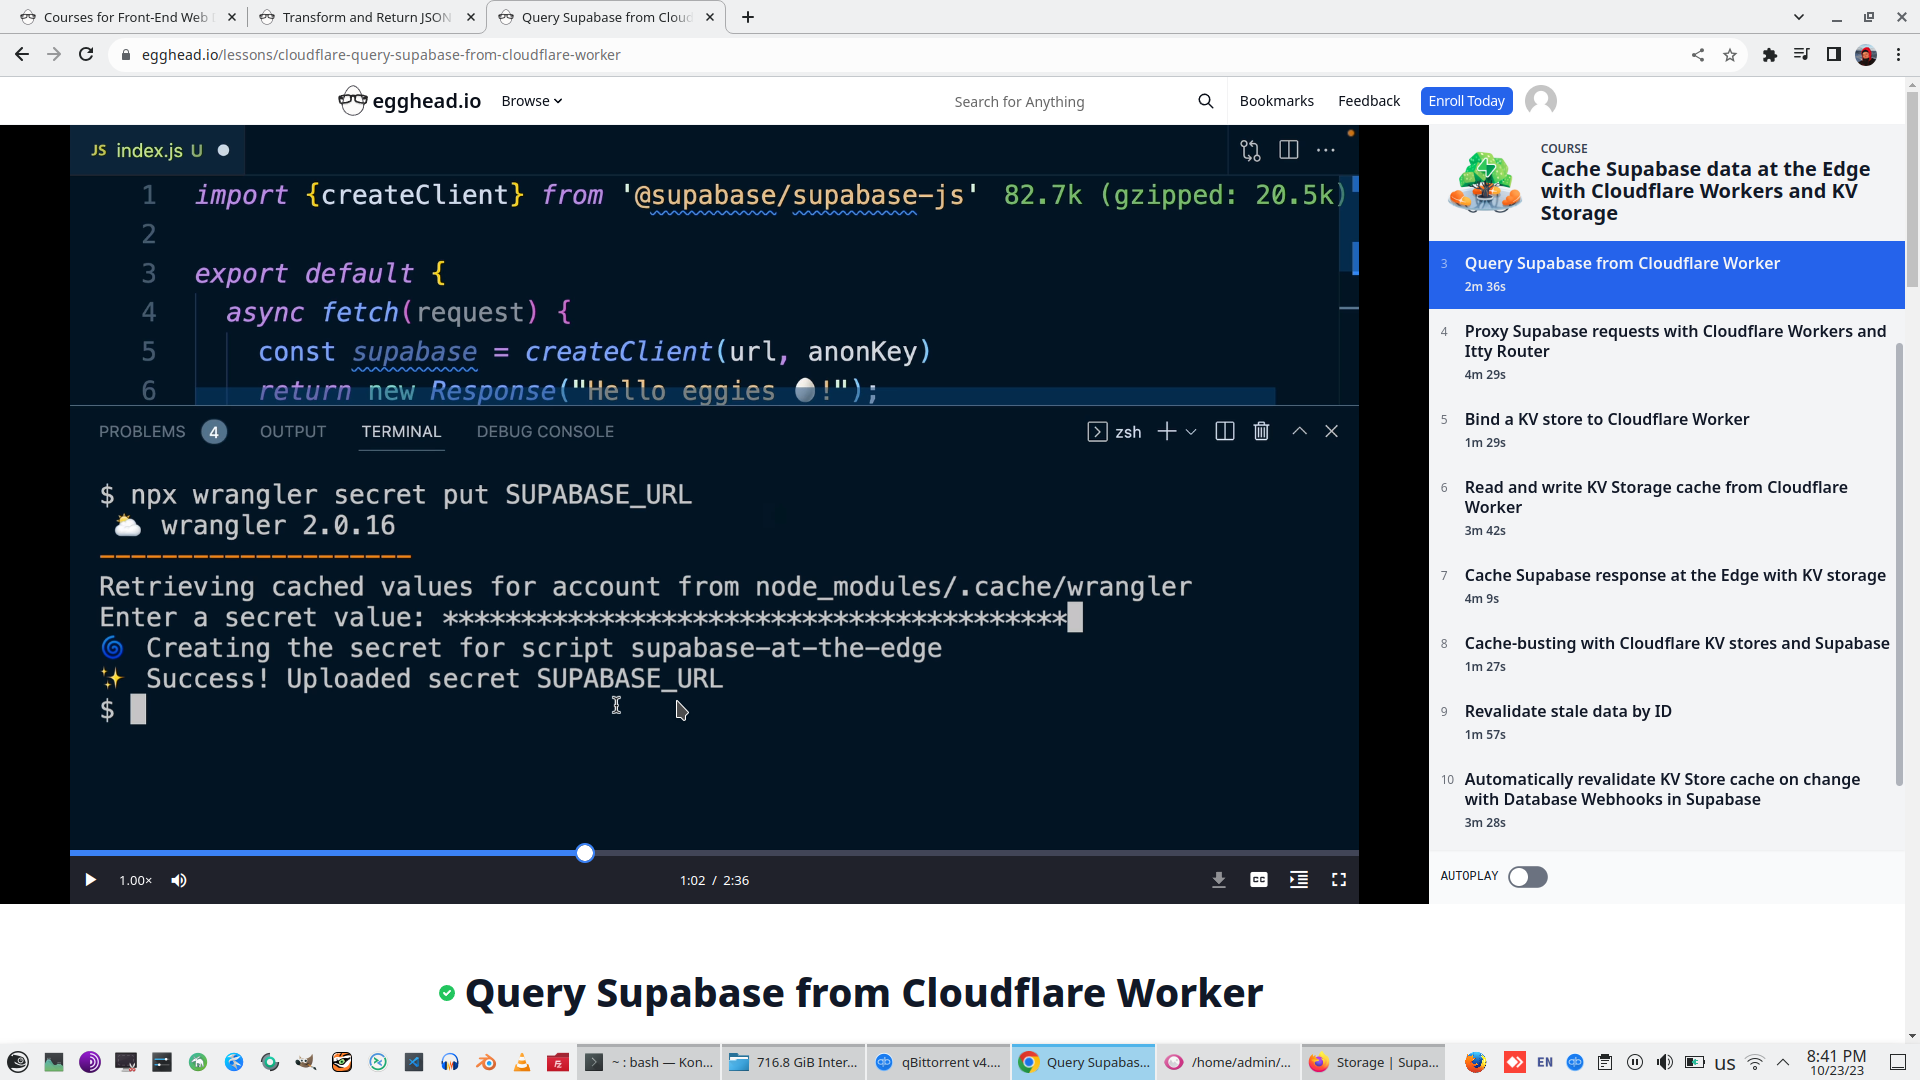
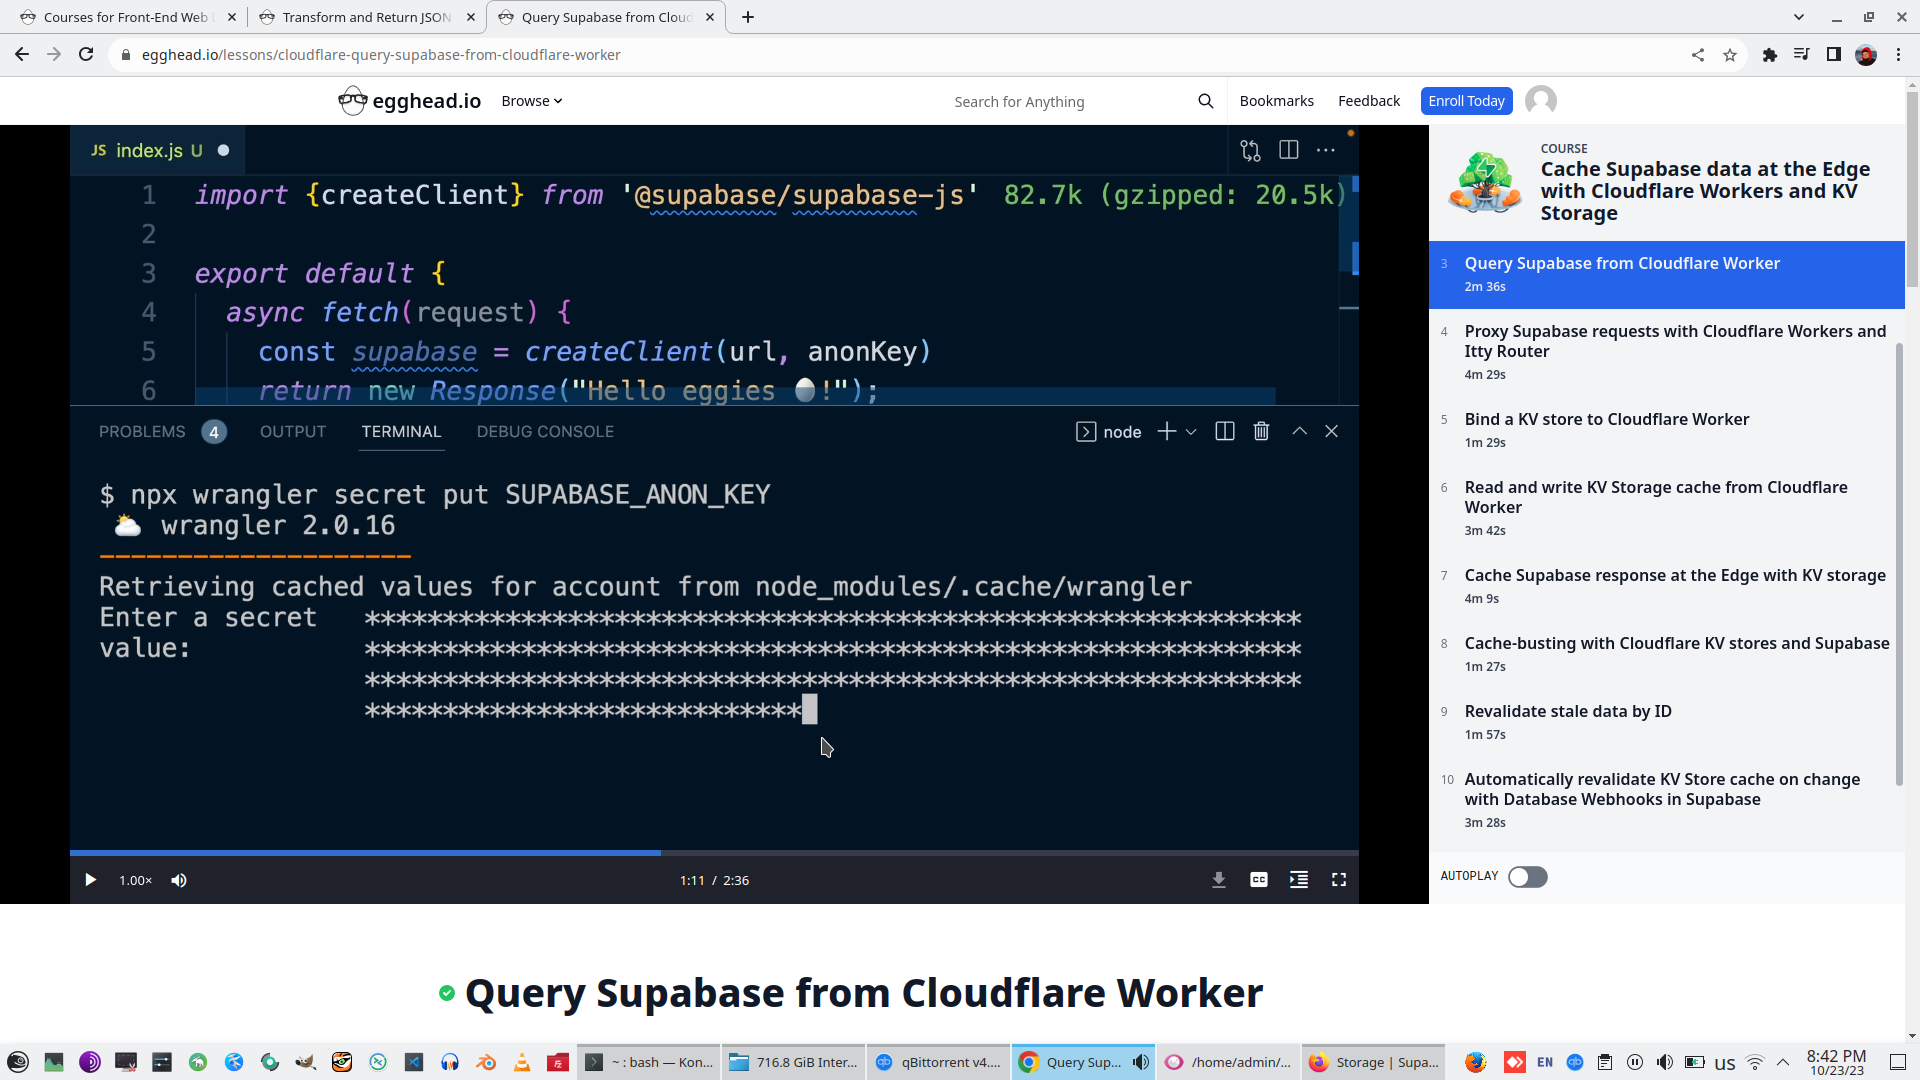
Repeate operation with Supabase Anon key - upload key to Cloadflare Secrets store.
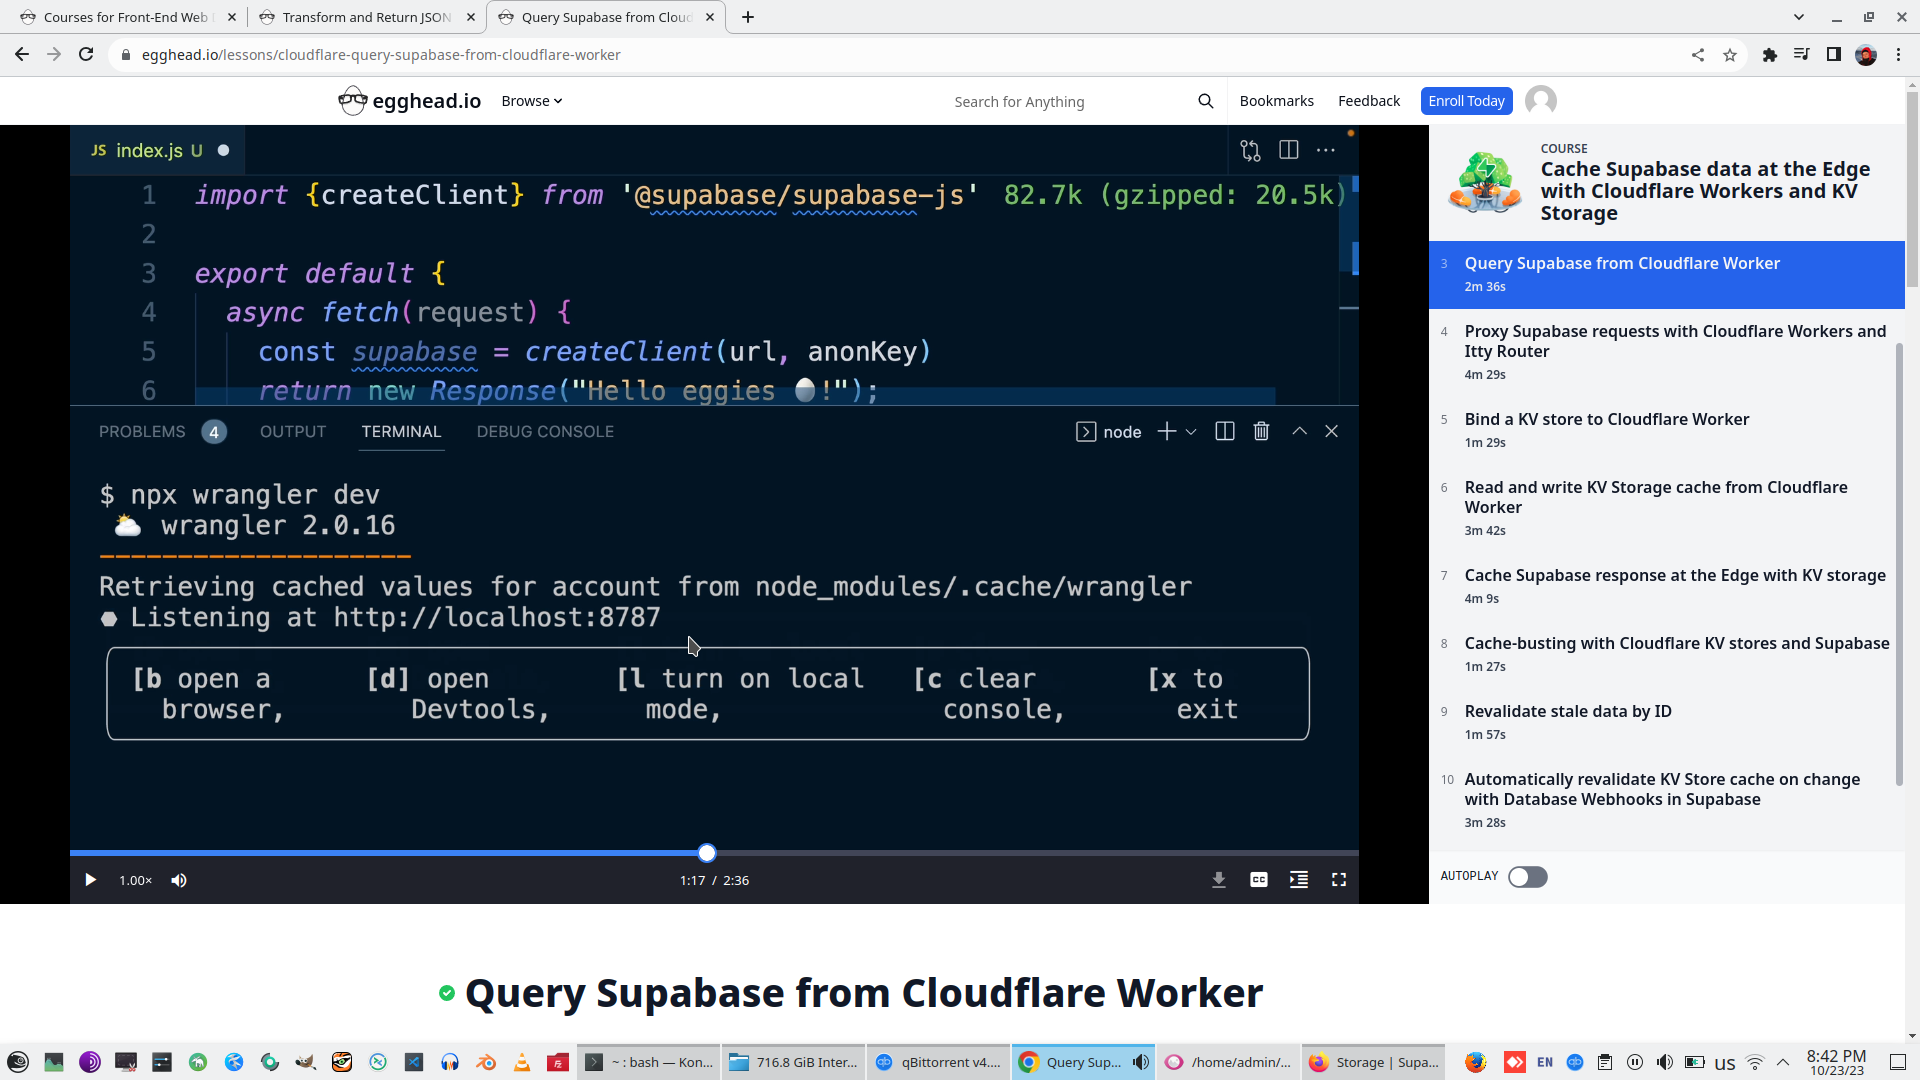
npx wrangler dev - start local server with uploaded secrets to Cloadflare
Inject Cloudflare Secrets to Cloadflare Fitch eventhandler and pass secrets to Supabase client
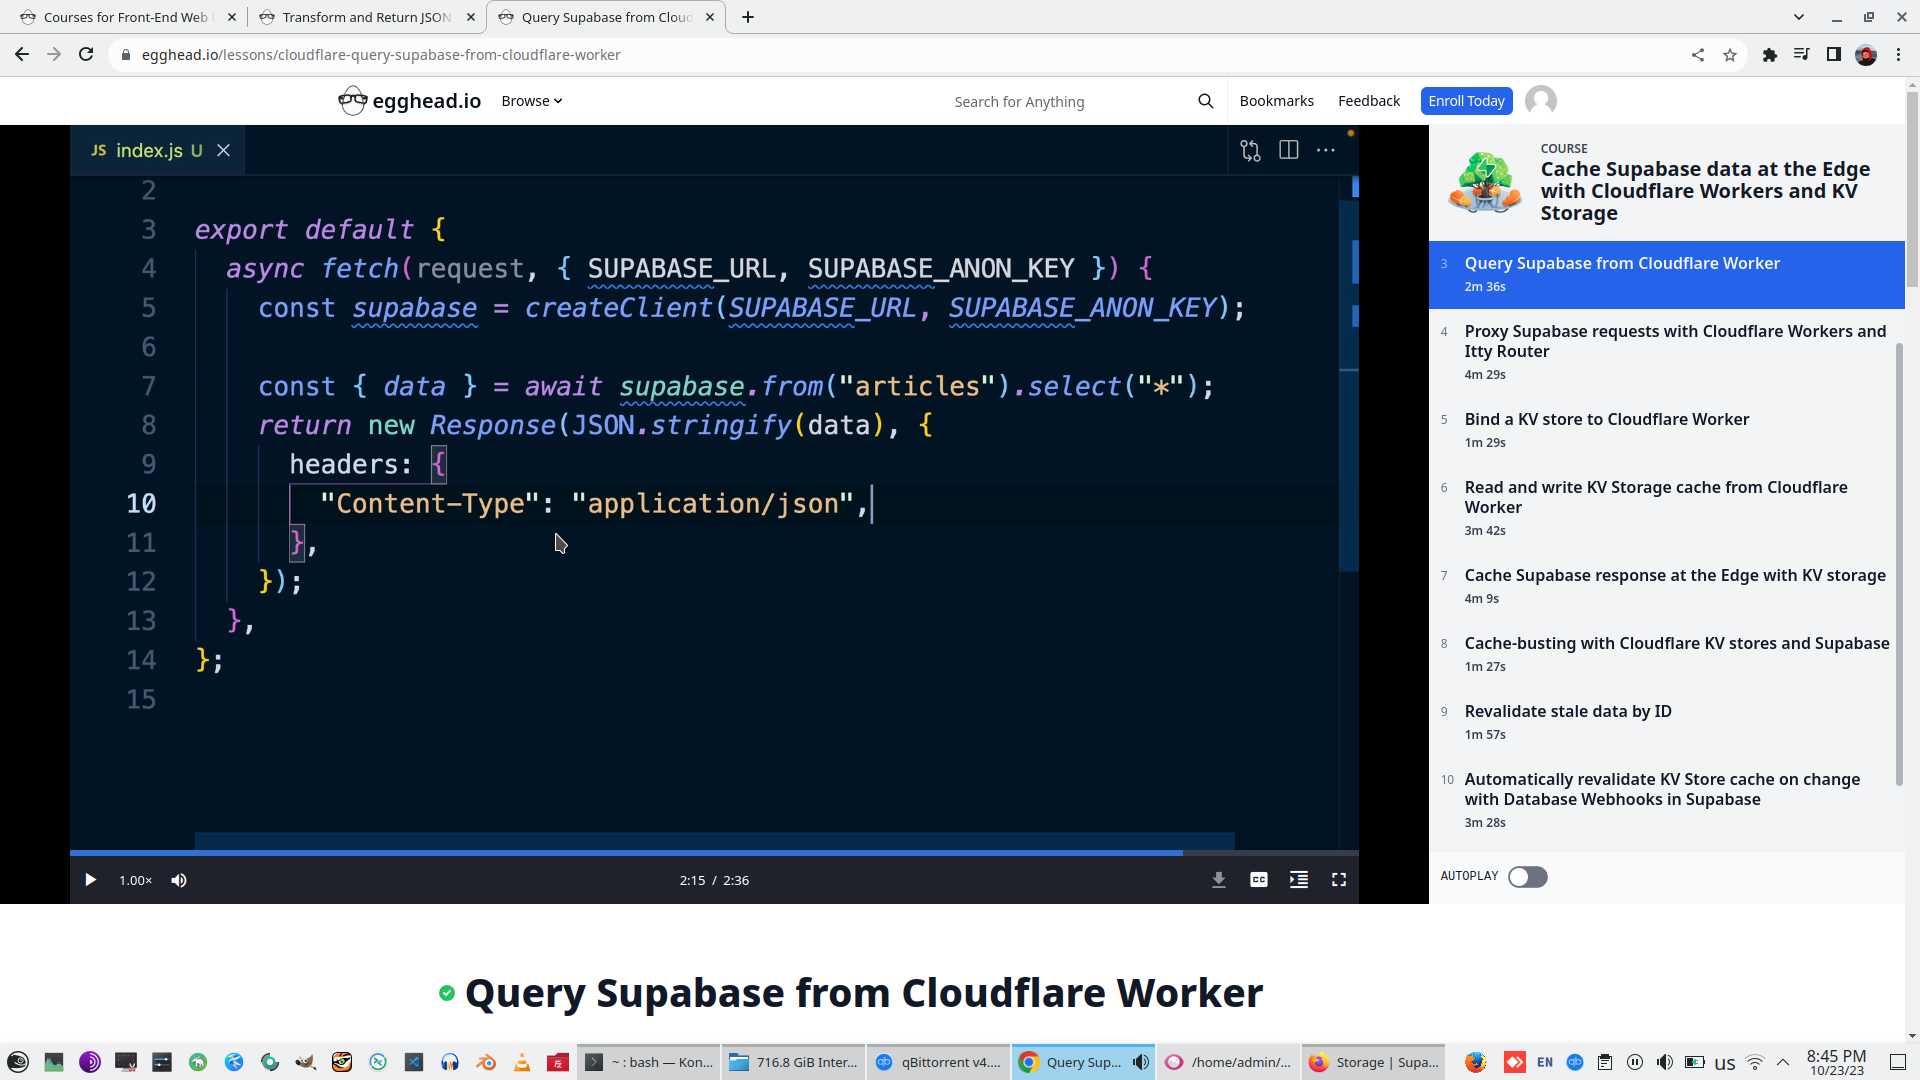
Create first simplest query to Supabase data and unpack client response as destructive assignment to object Data.
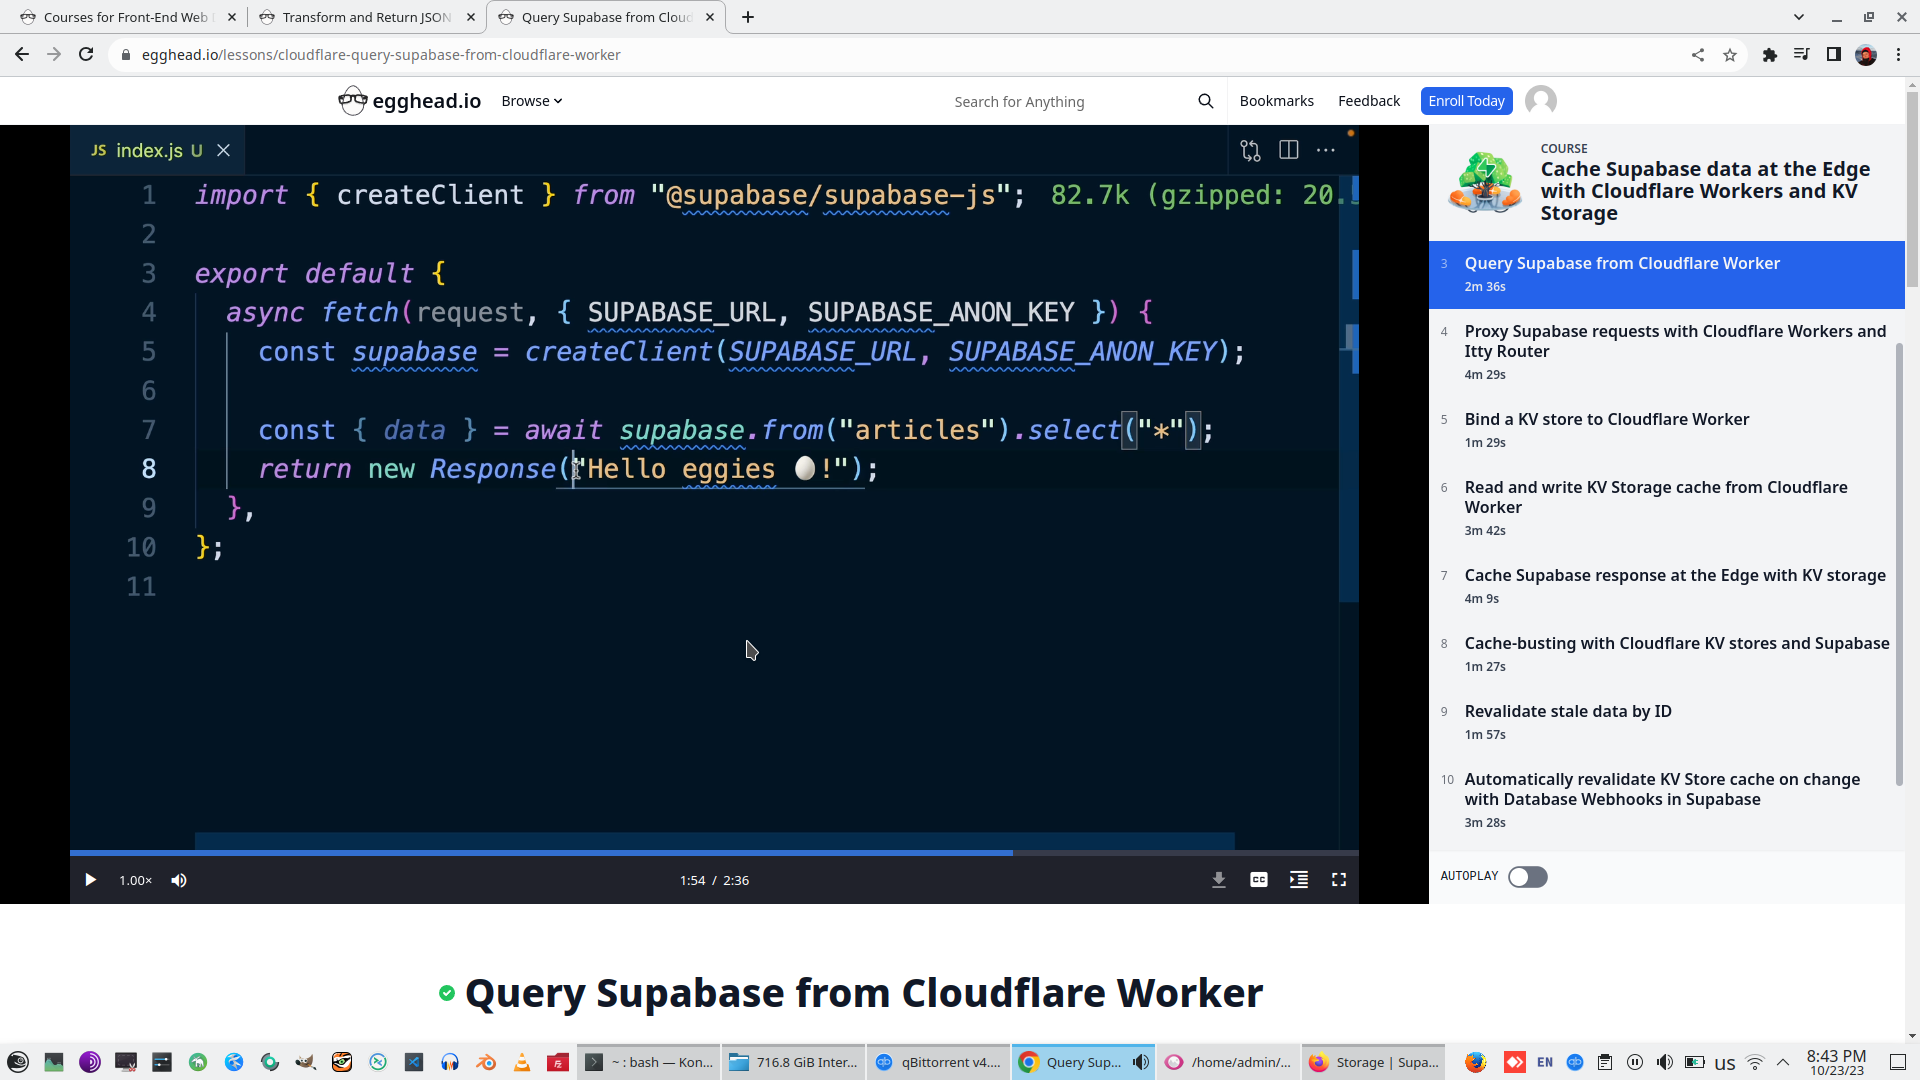
StringFY Data as Json and reeturn it as JSON result on EventHandler
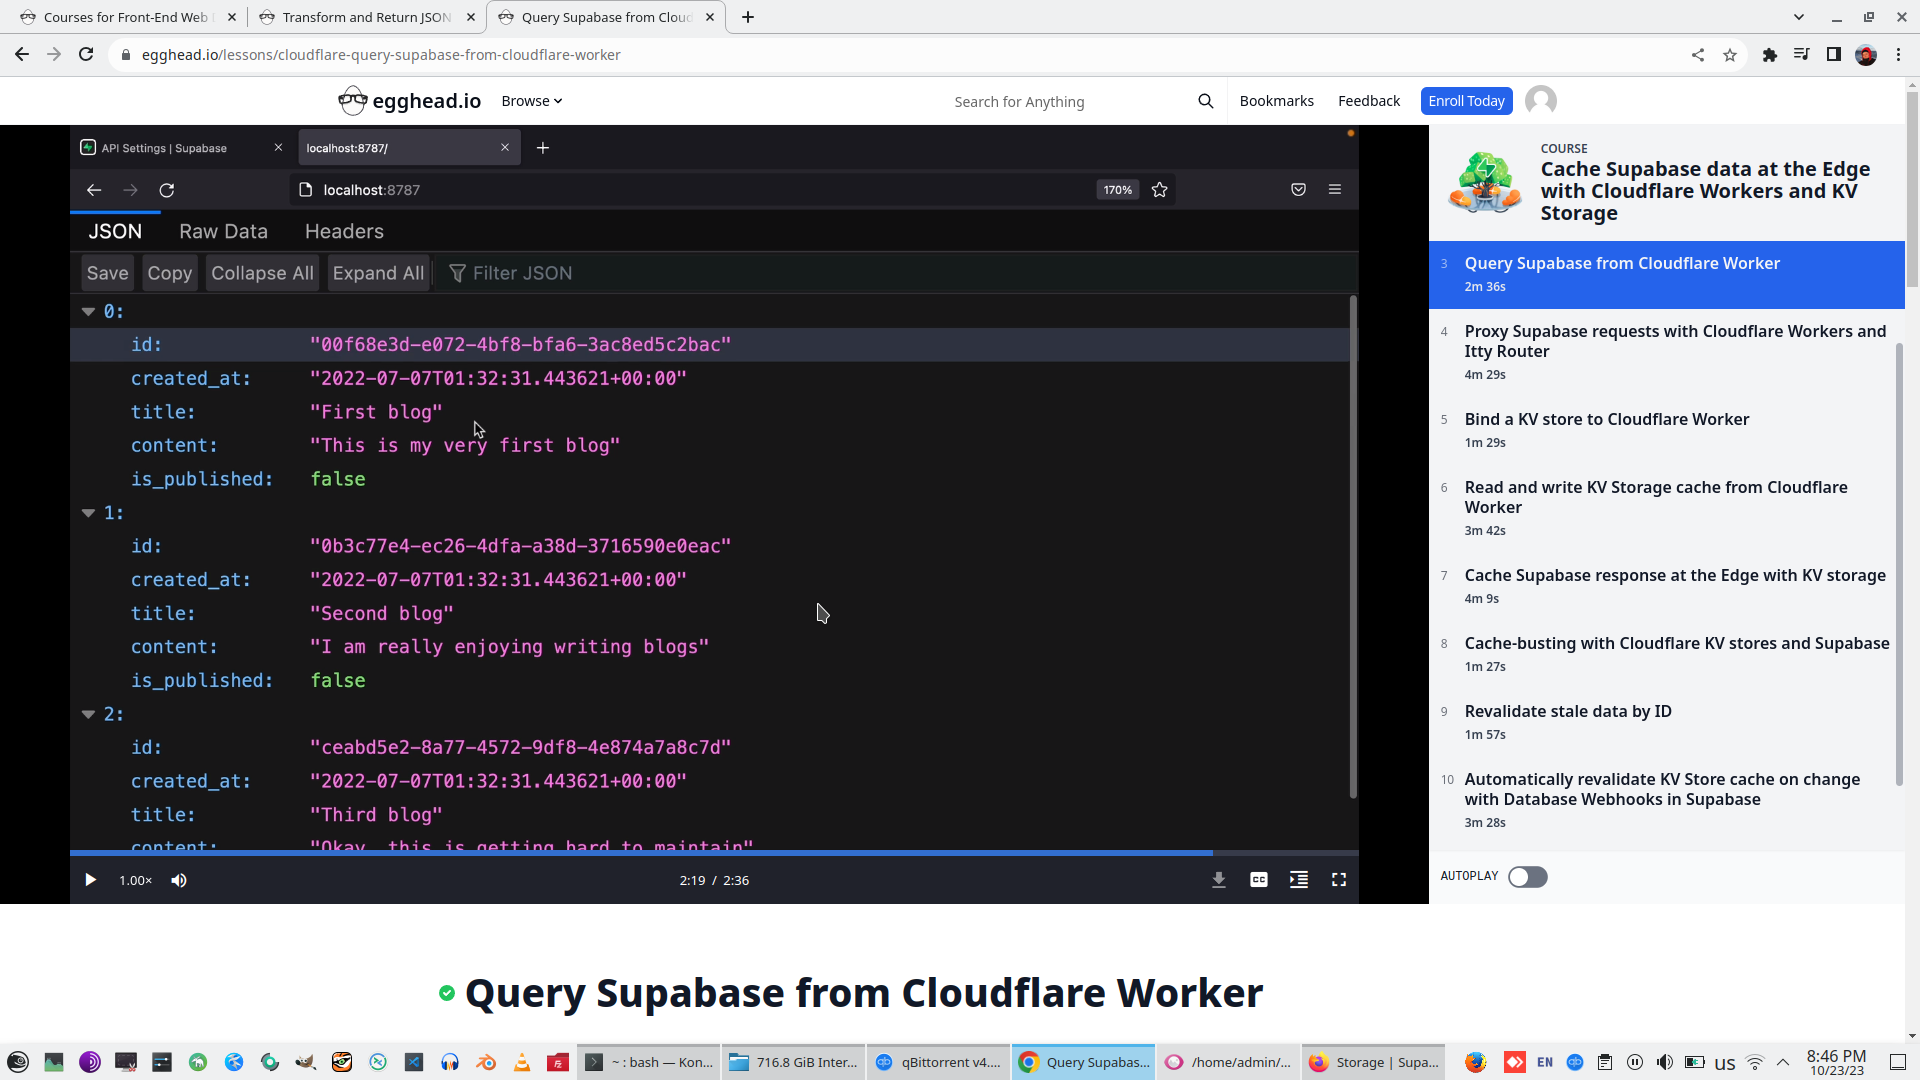
Look result on Browser, modify data on Supabase and check modification result
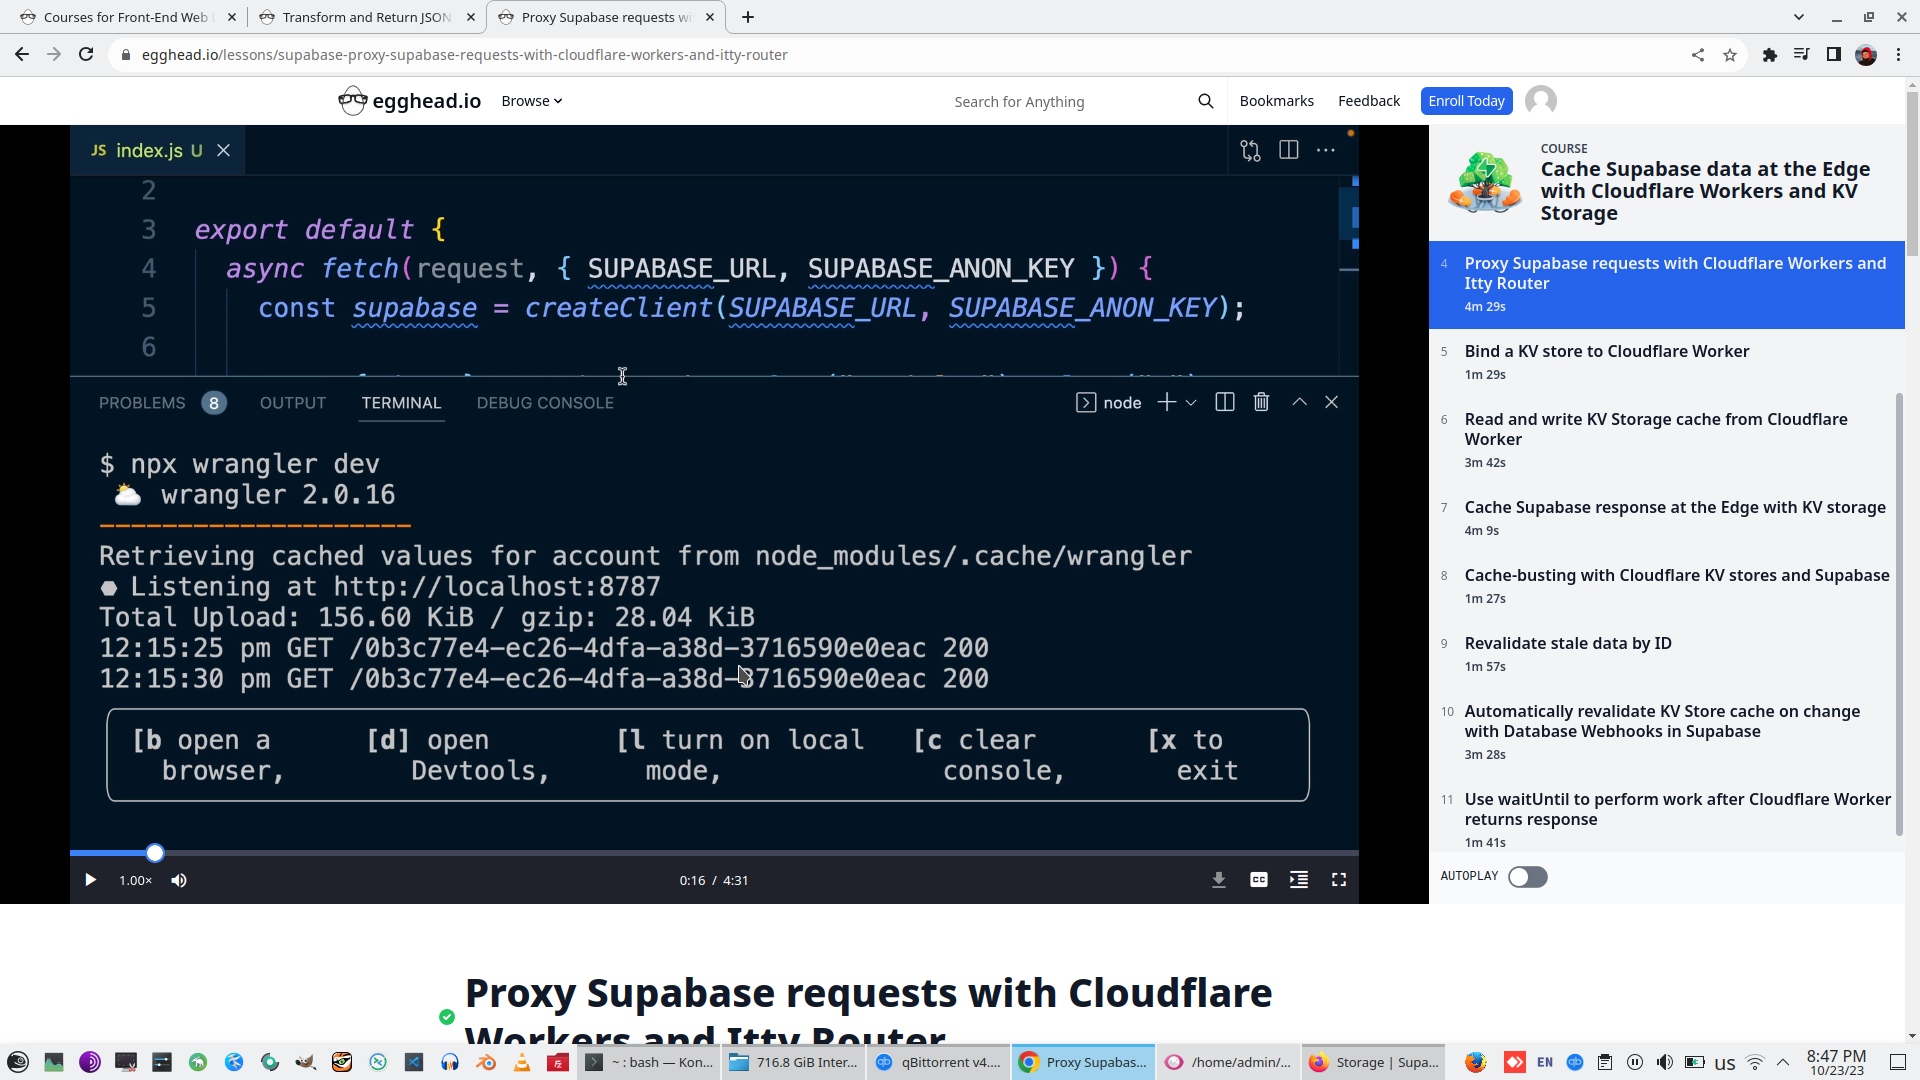
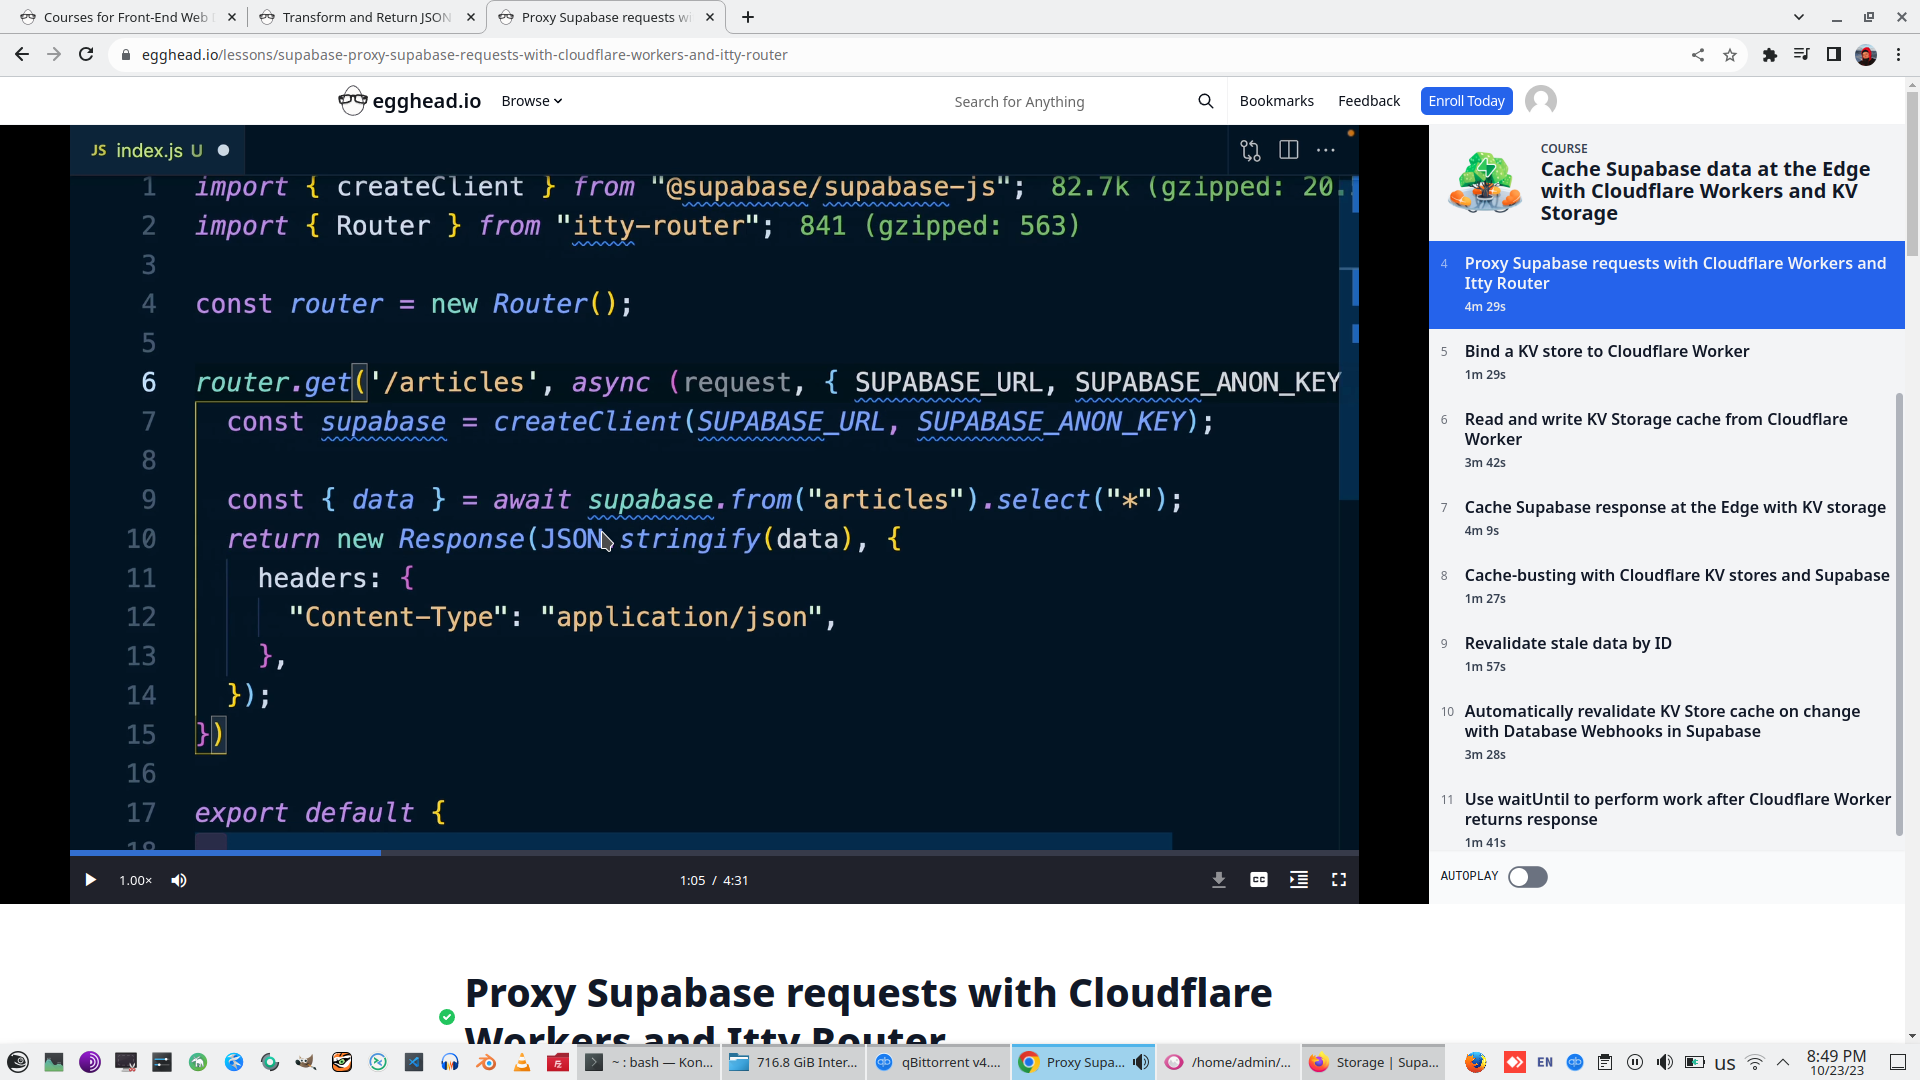
4. Proxy Supabase requests with Cloudflare Workers and Itty Router
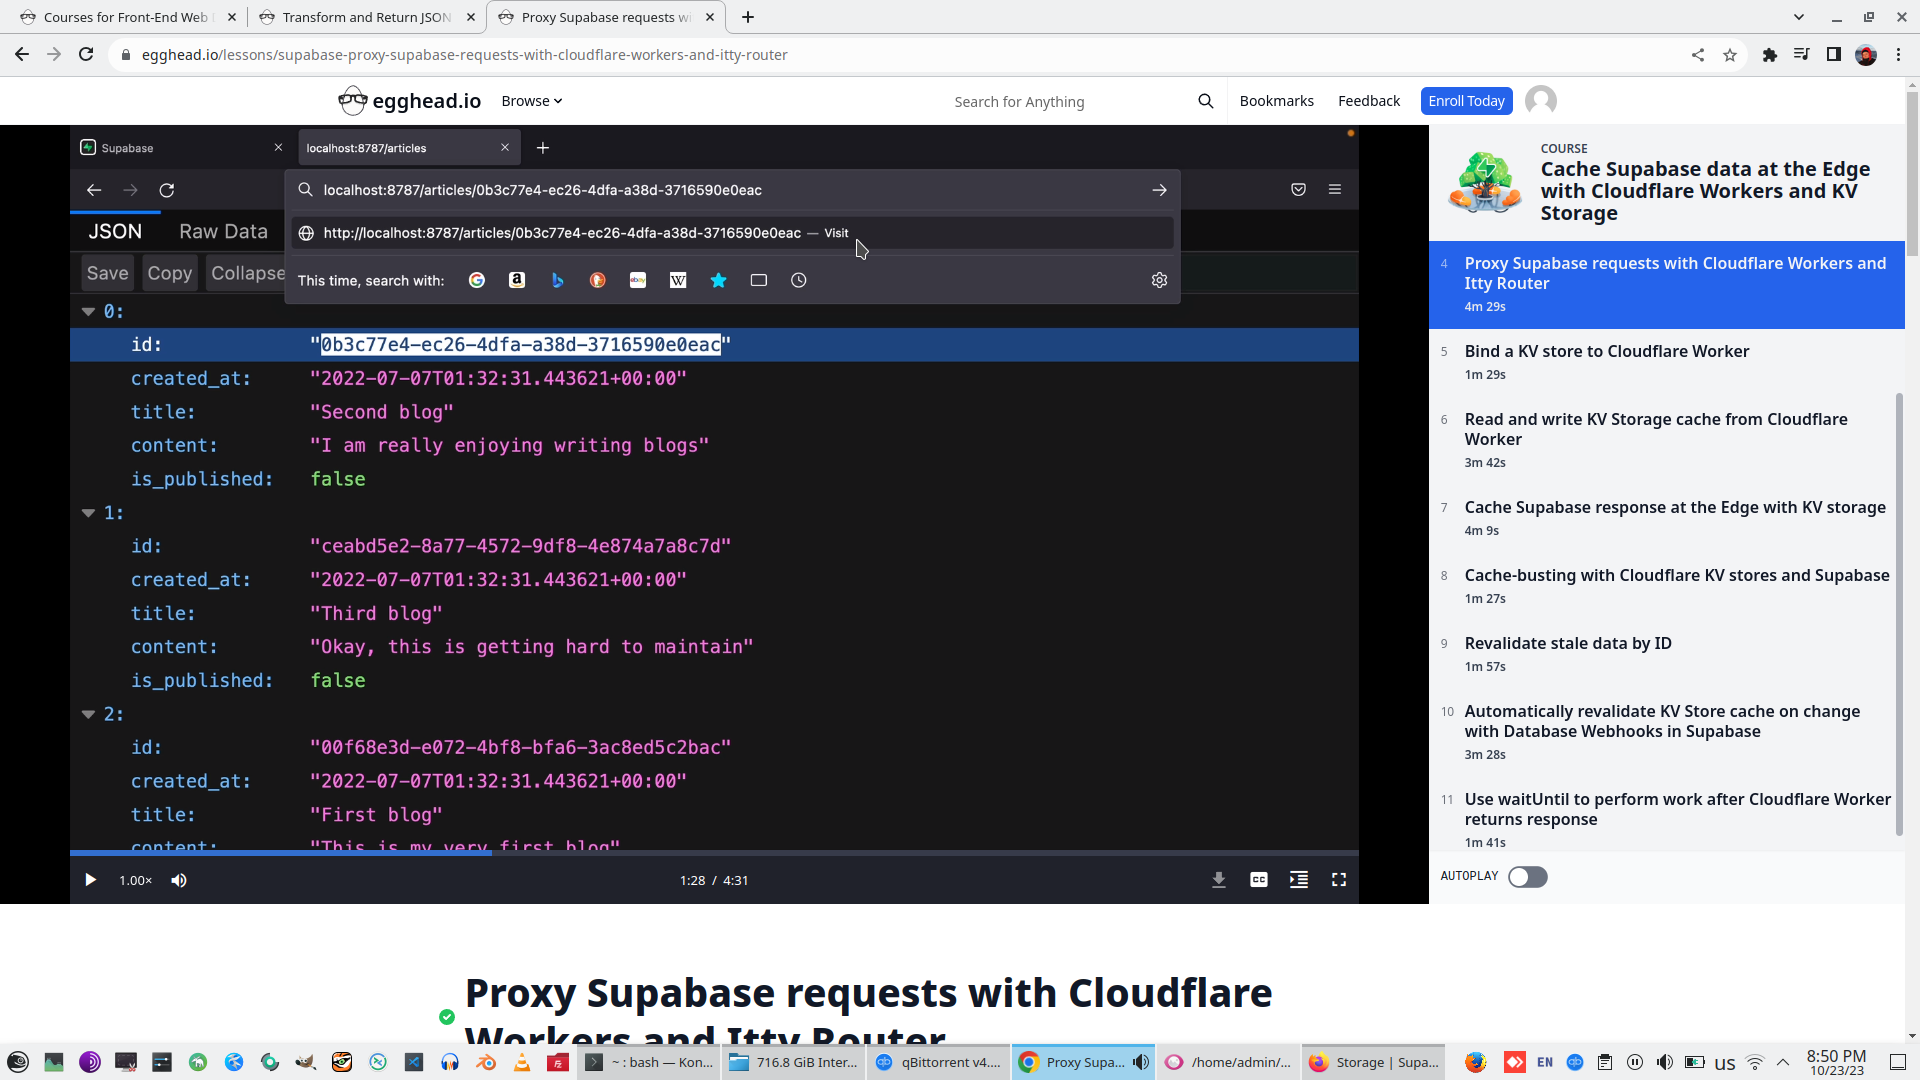
Look request log of browser request to local development server
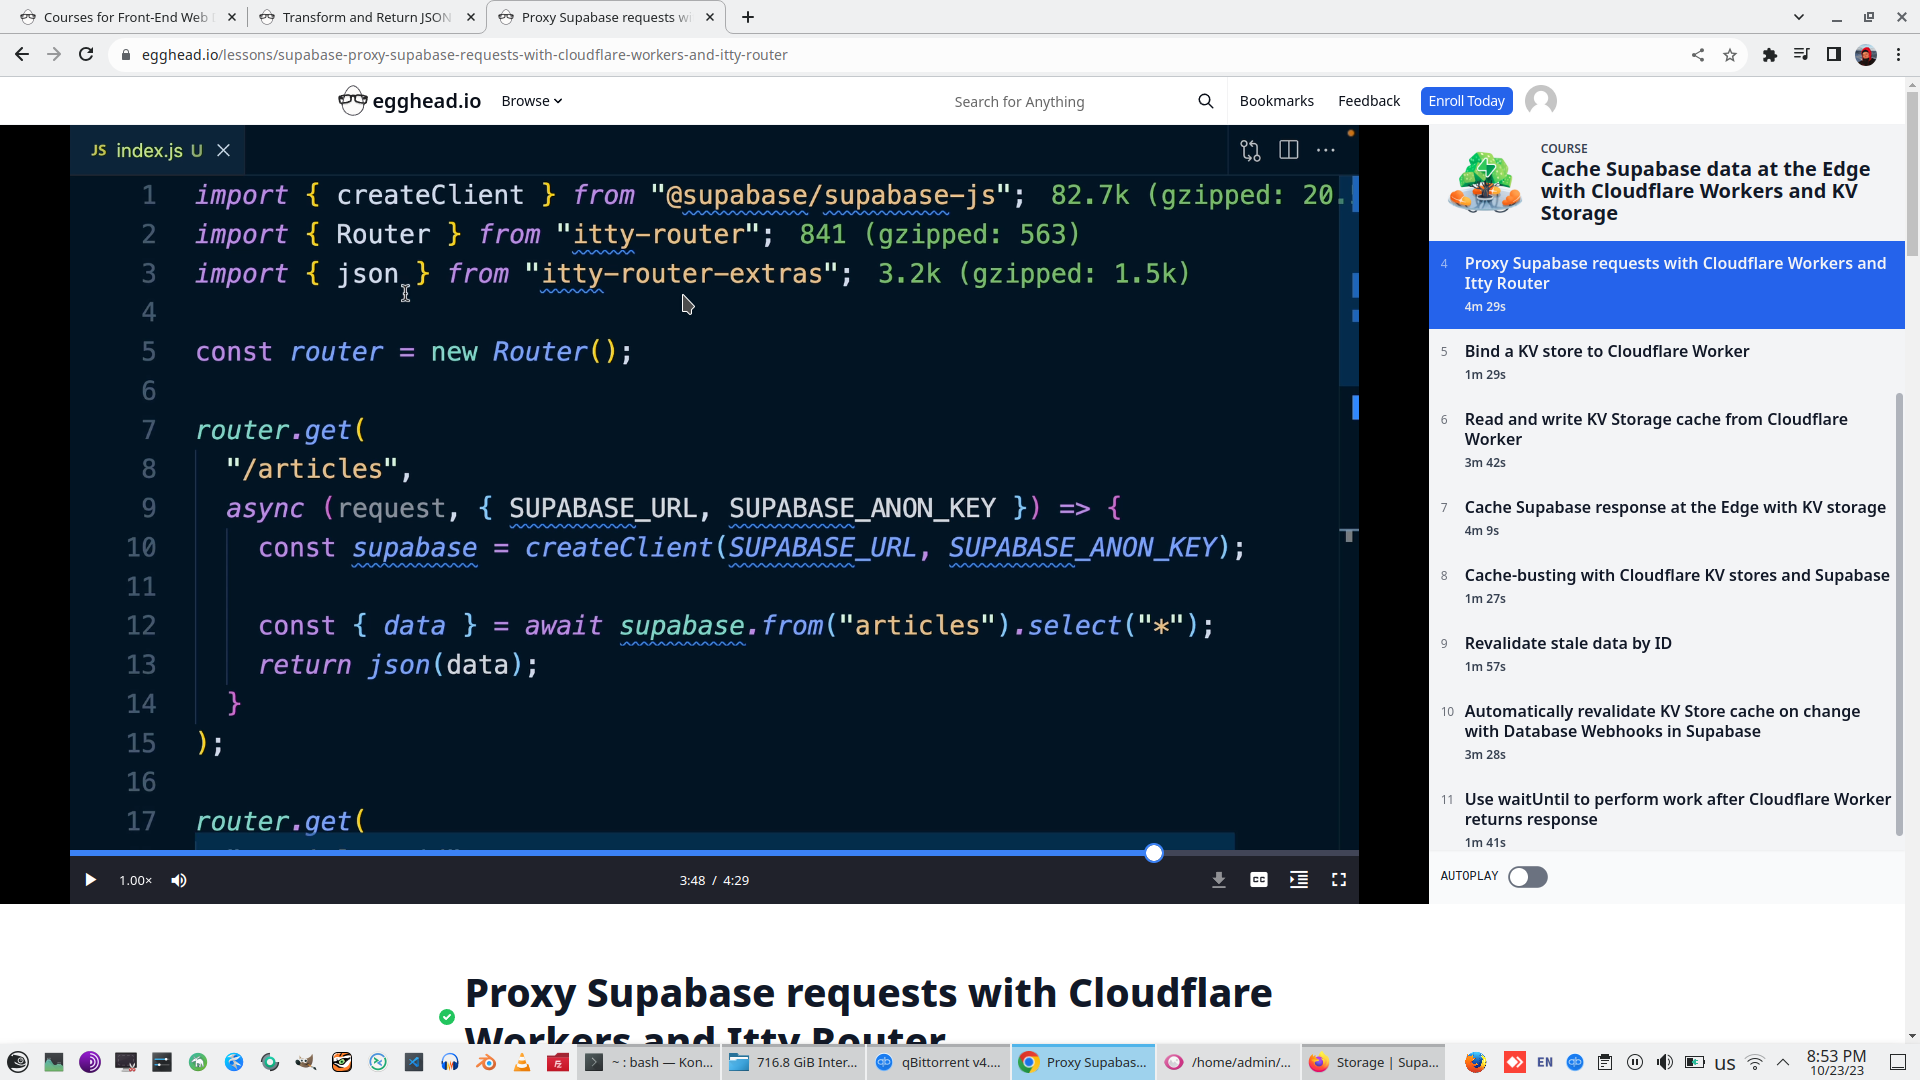
npm i itty-router itti-router-extras - (start building multipage application)

Import itti-router to index.js
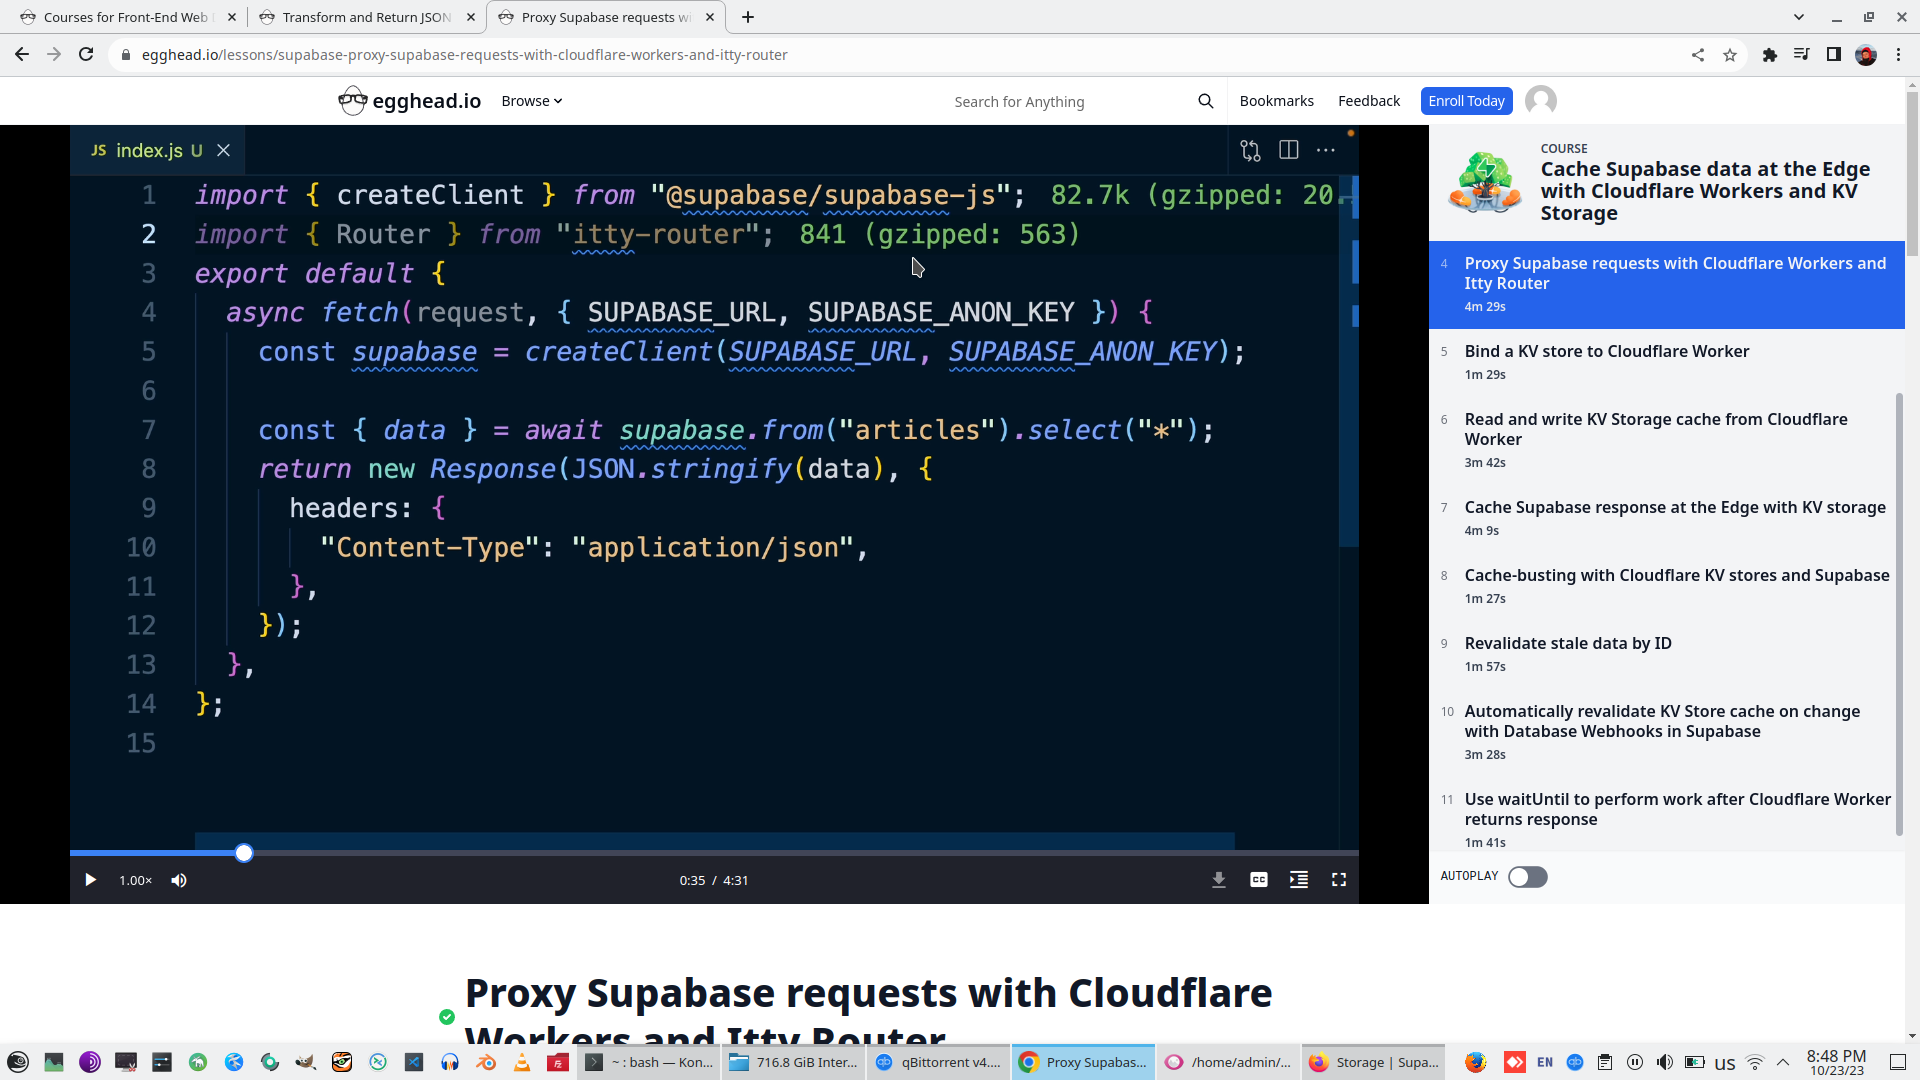
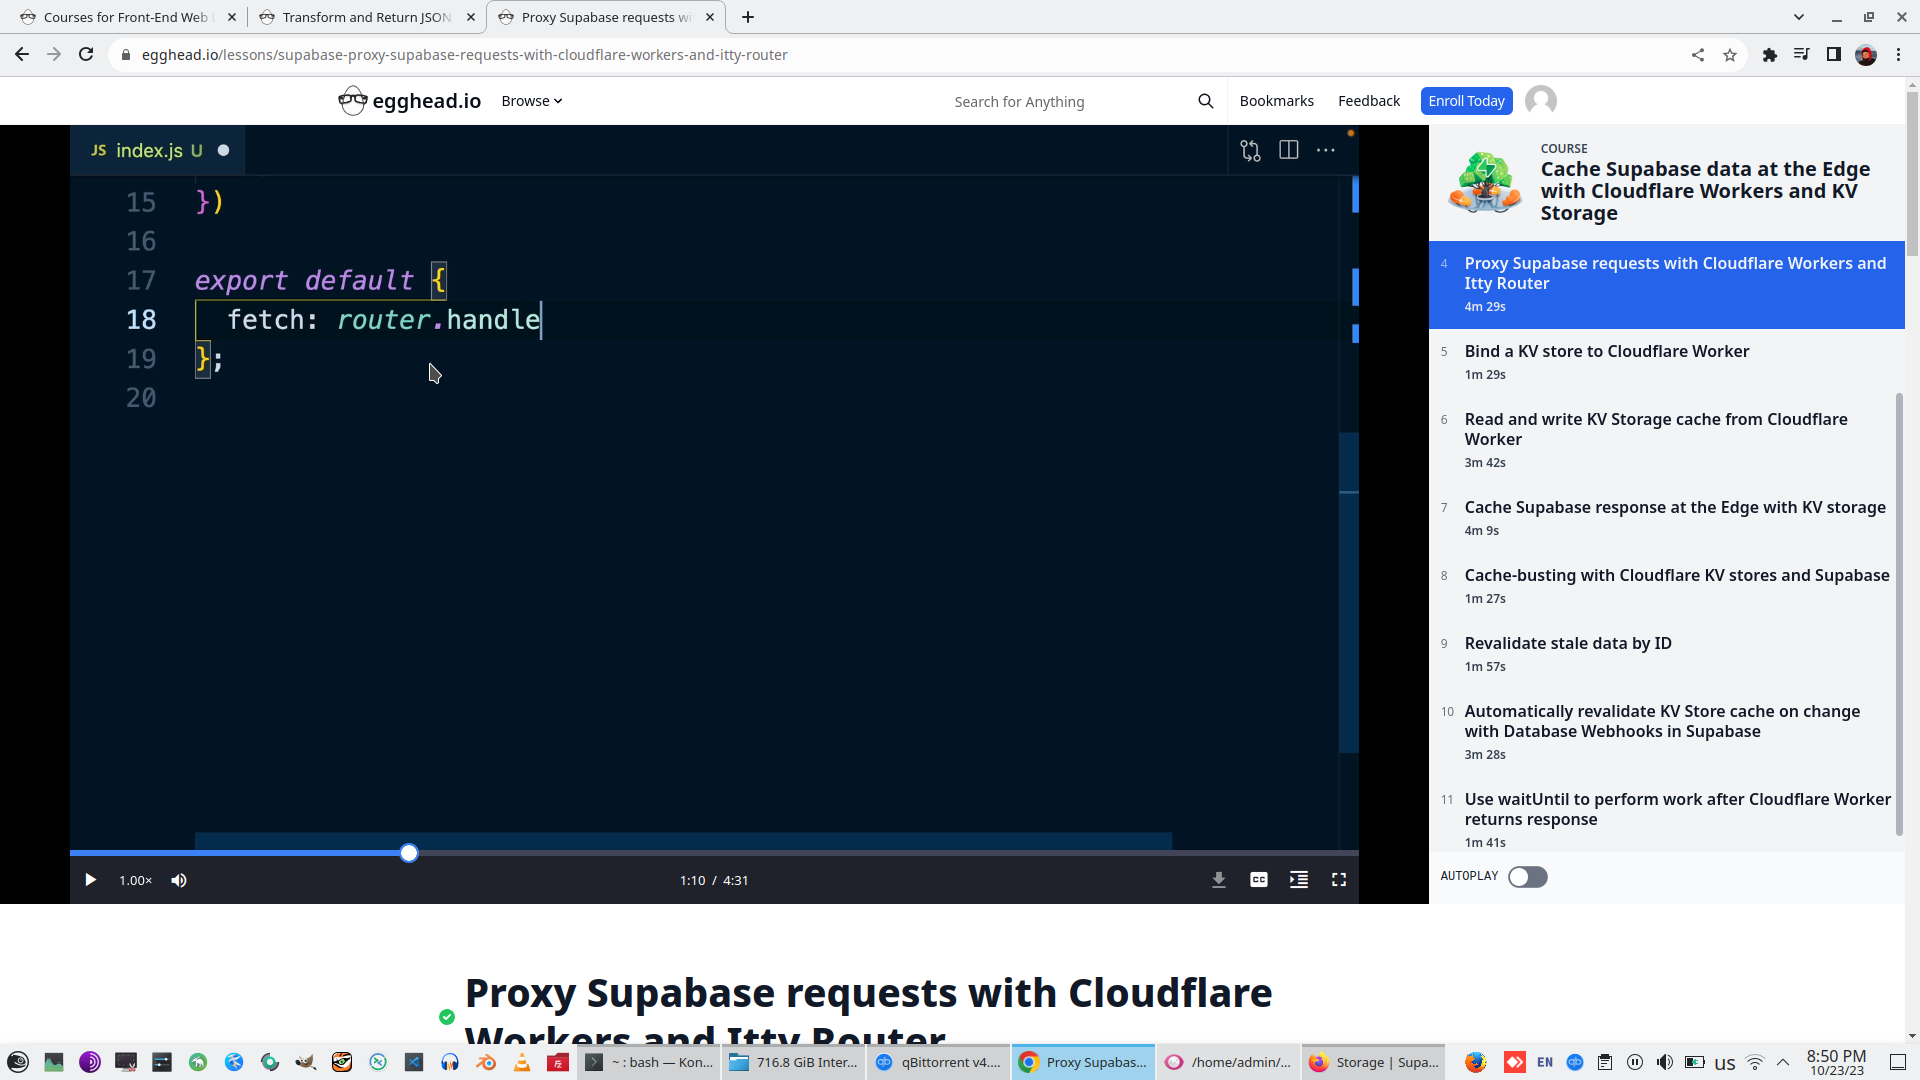
Export Router event handler with fitch key from module Index.js
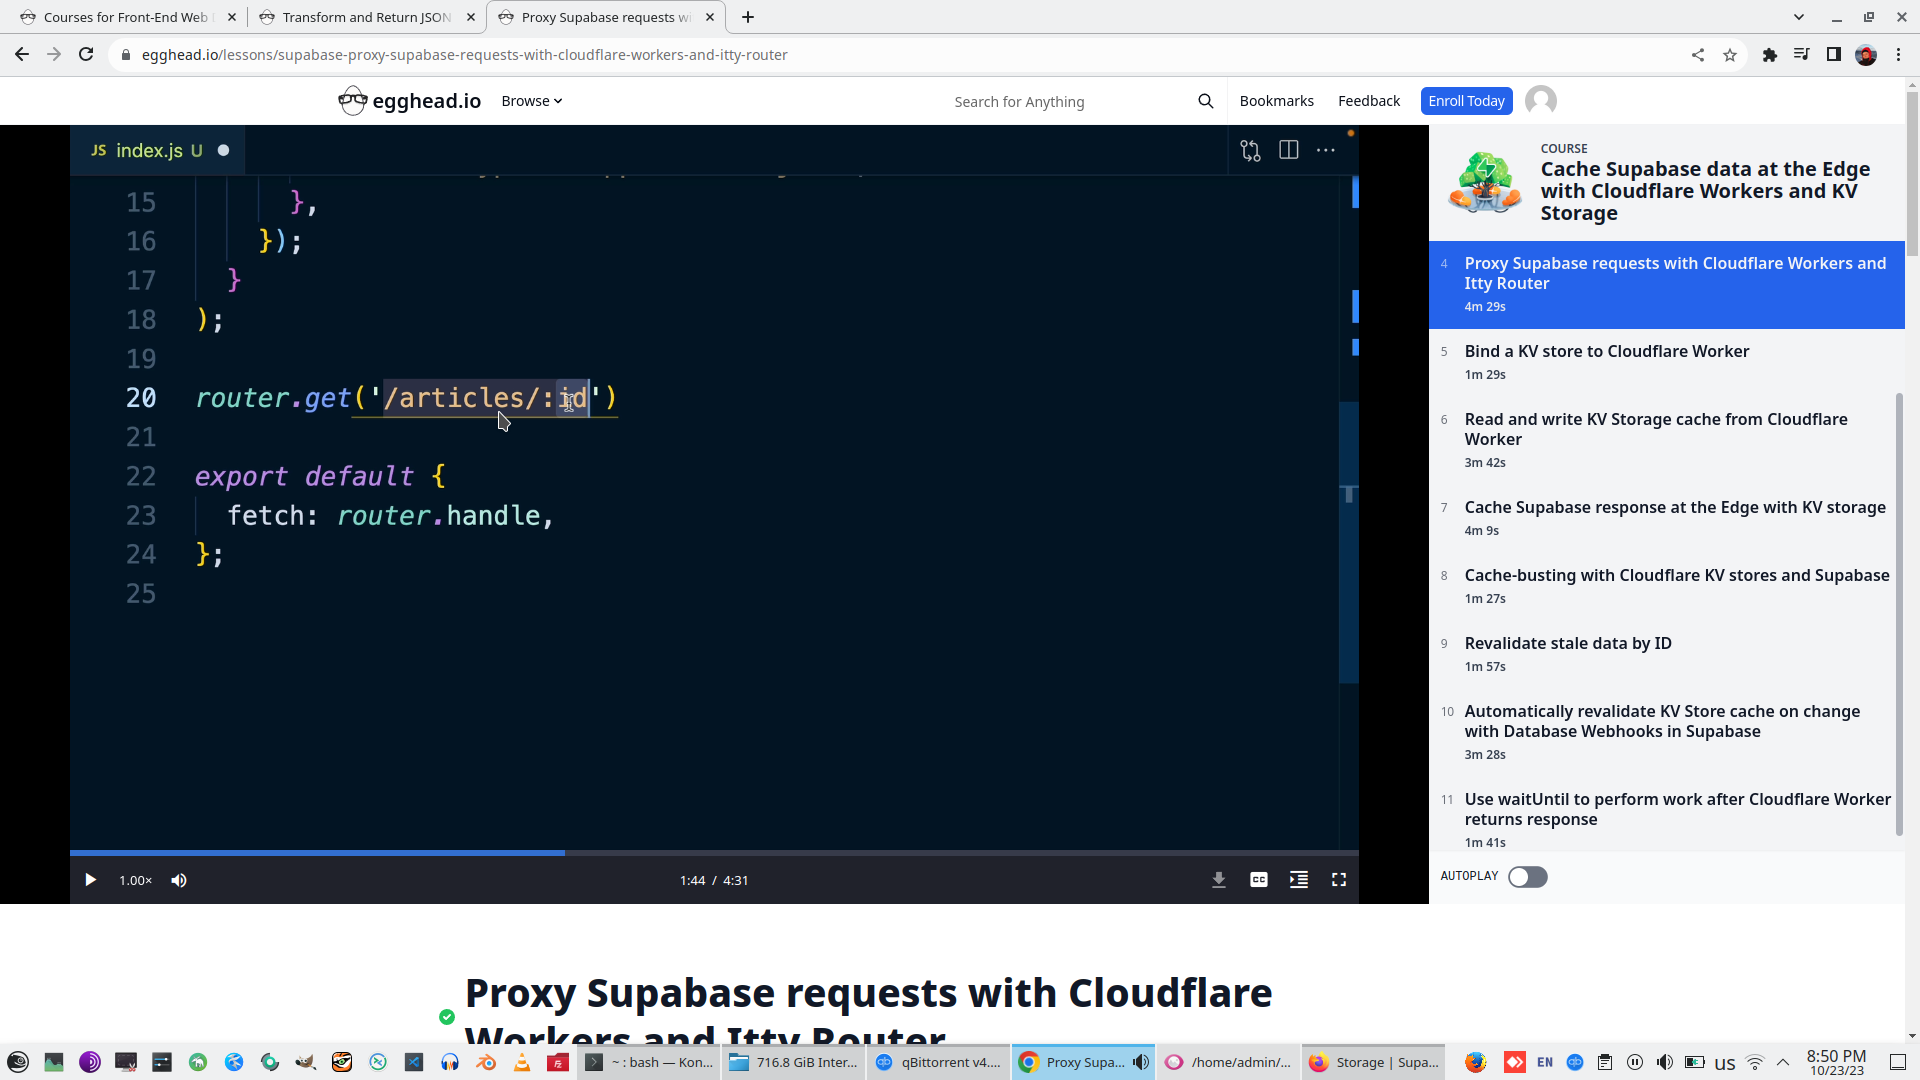
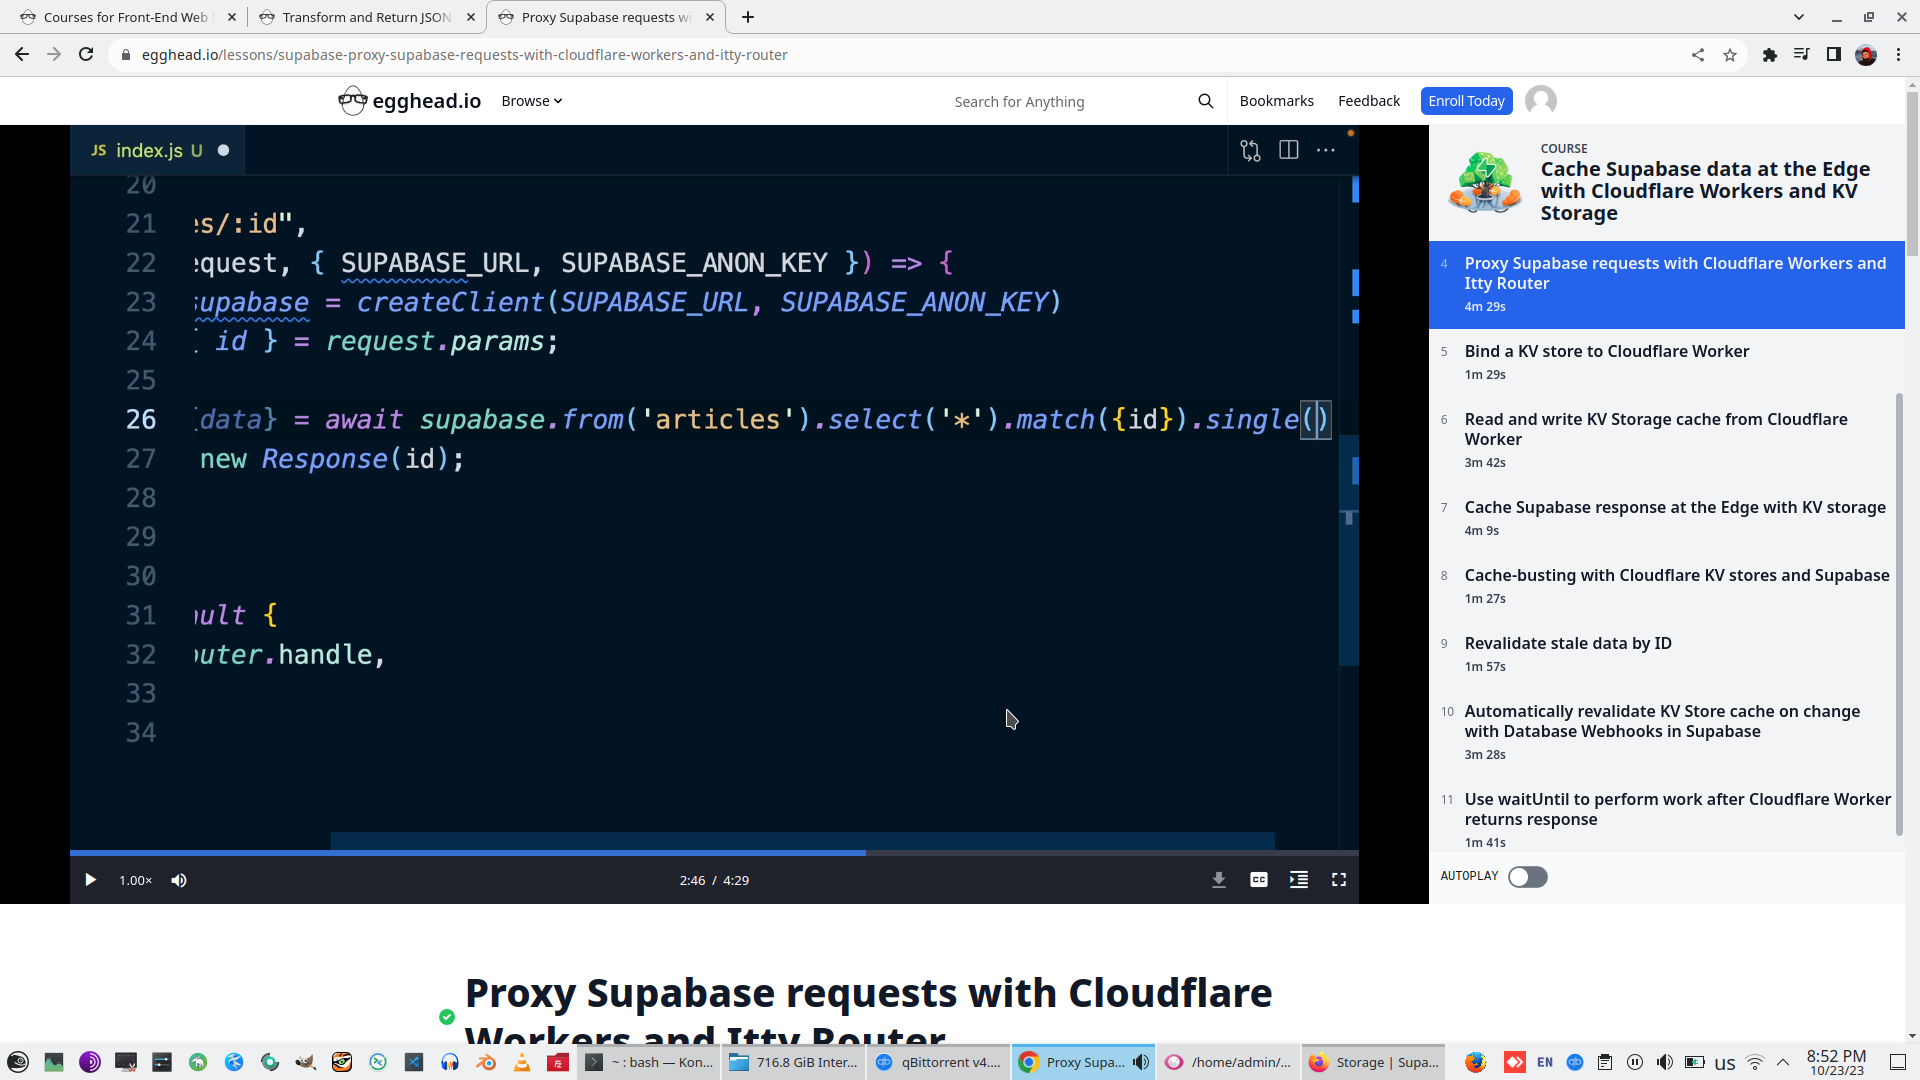
Take SupabaseID
Create router Entry point (Router looks as Express)
Create promise function with Request to cloudflare url entry point and return the same ID whar we receive
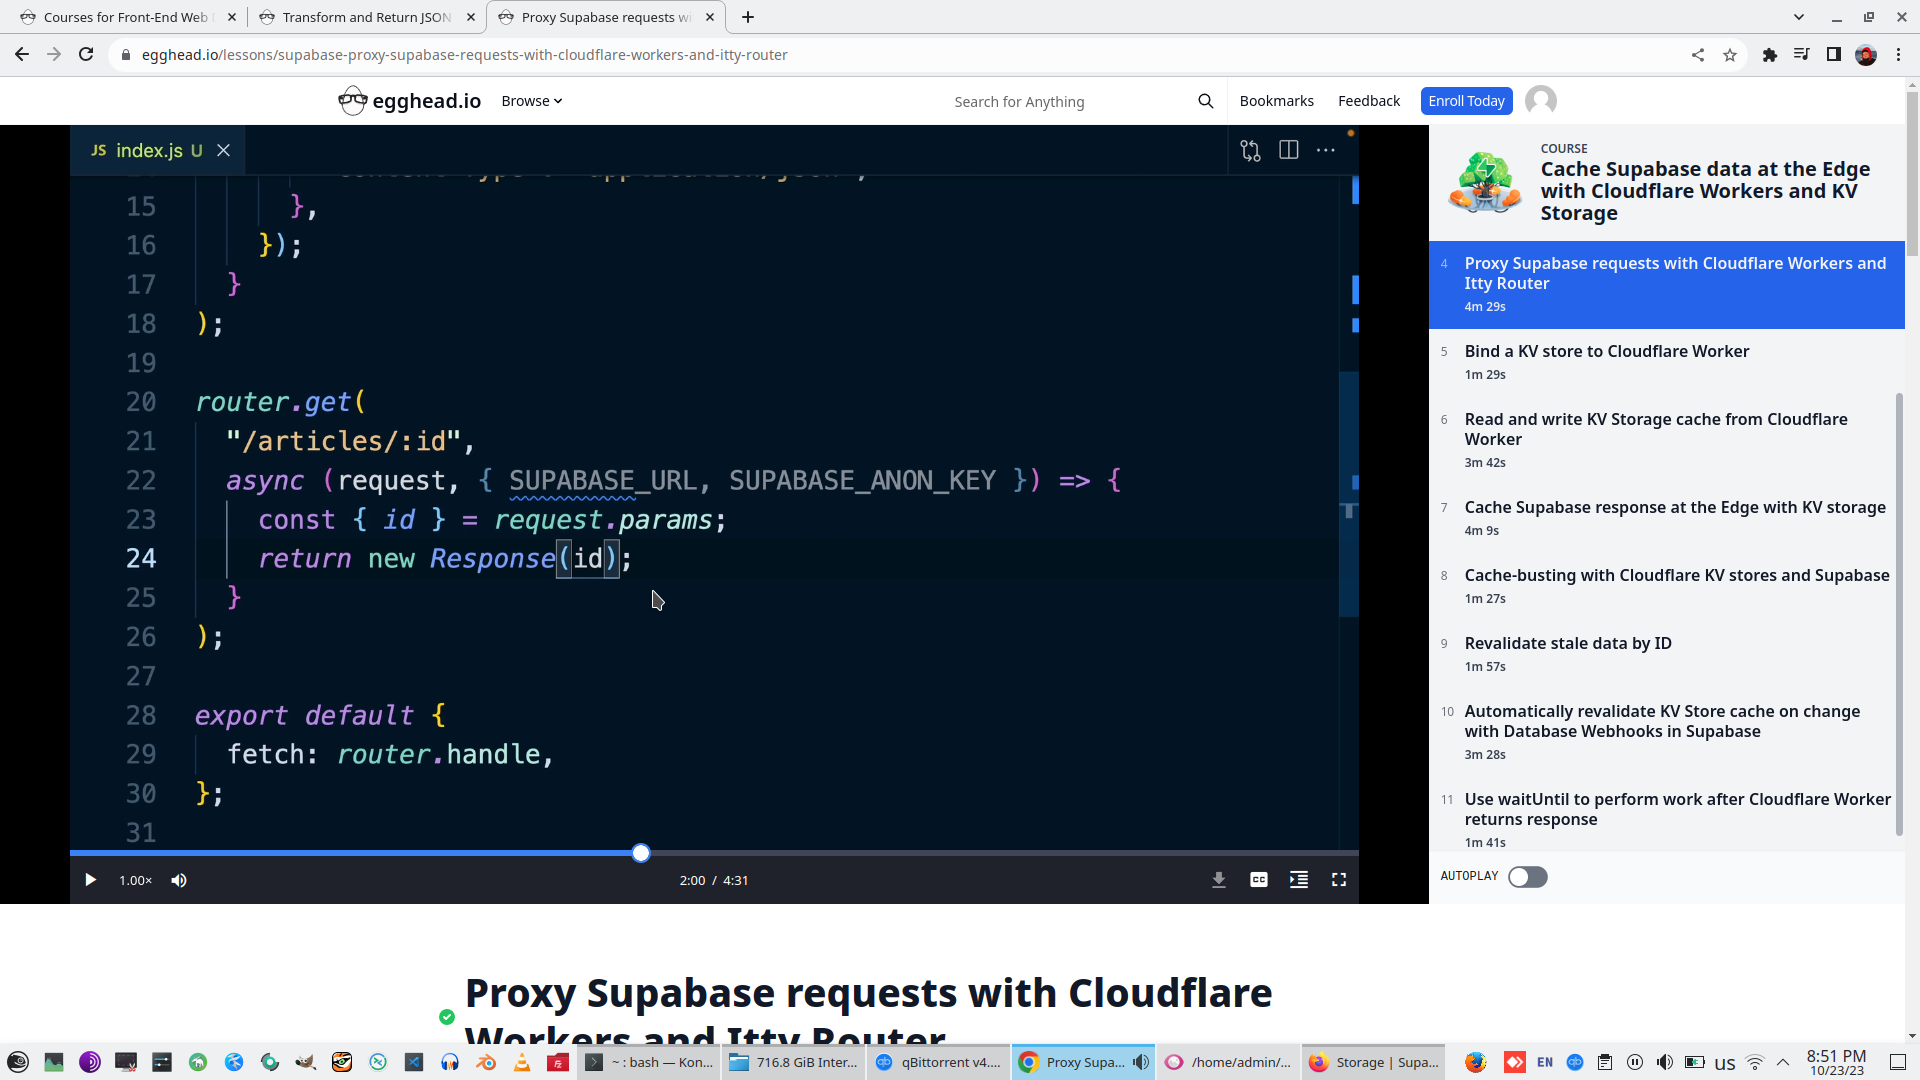

Request DataEntity on Supabase related to thad ID (use Supabase Client and two Cloudflare secrets)
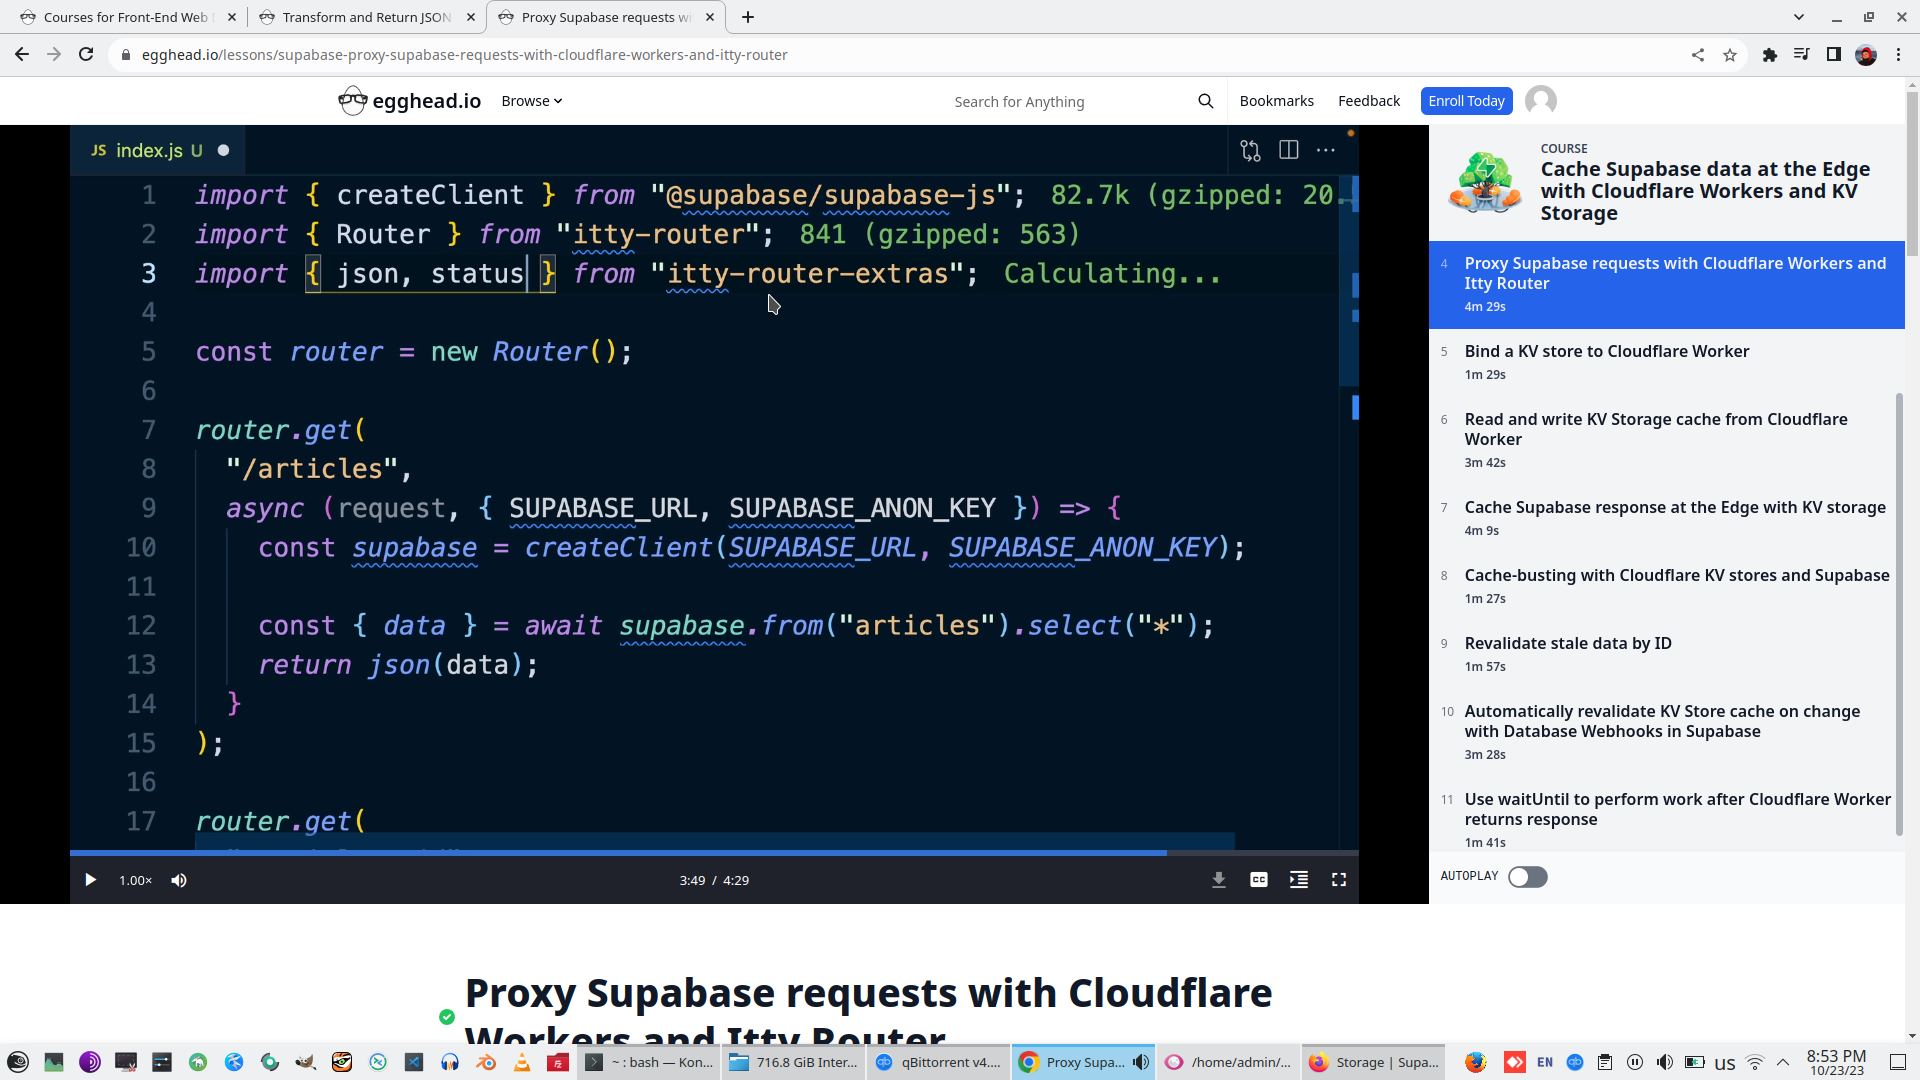
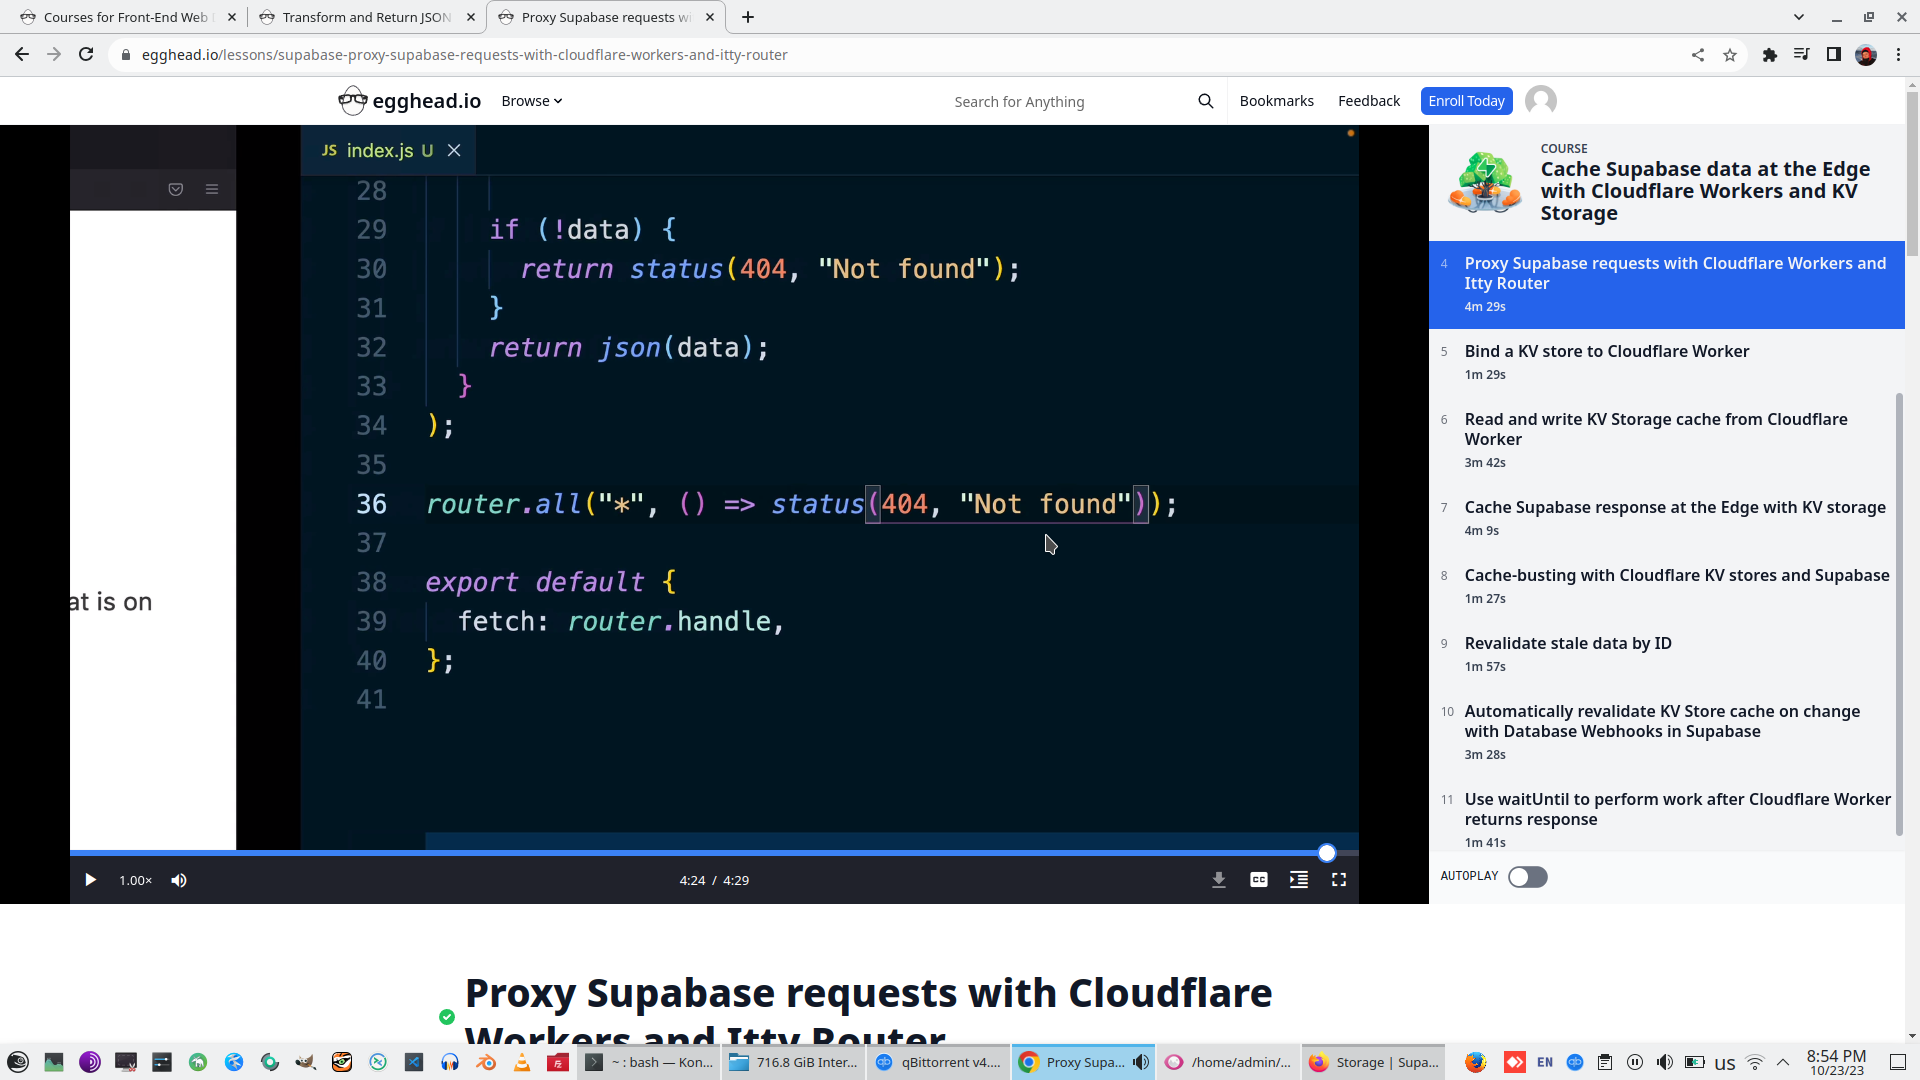
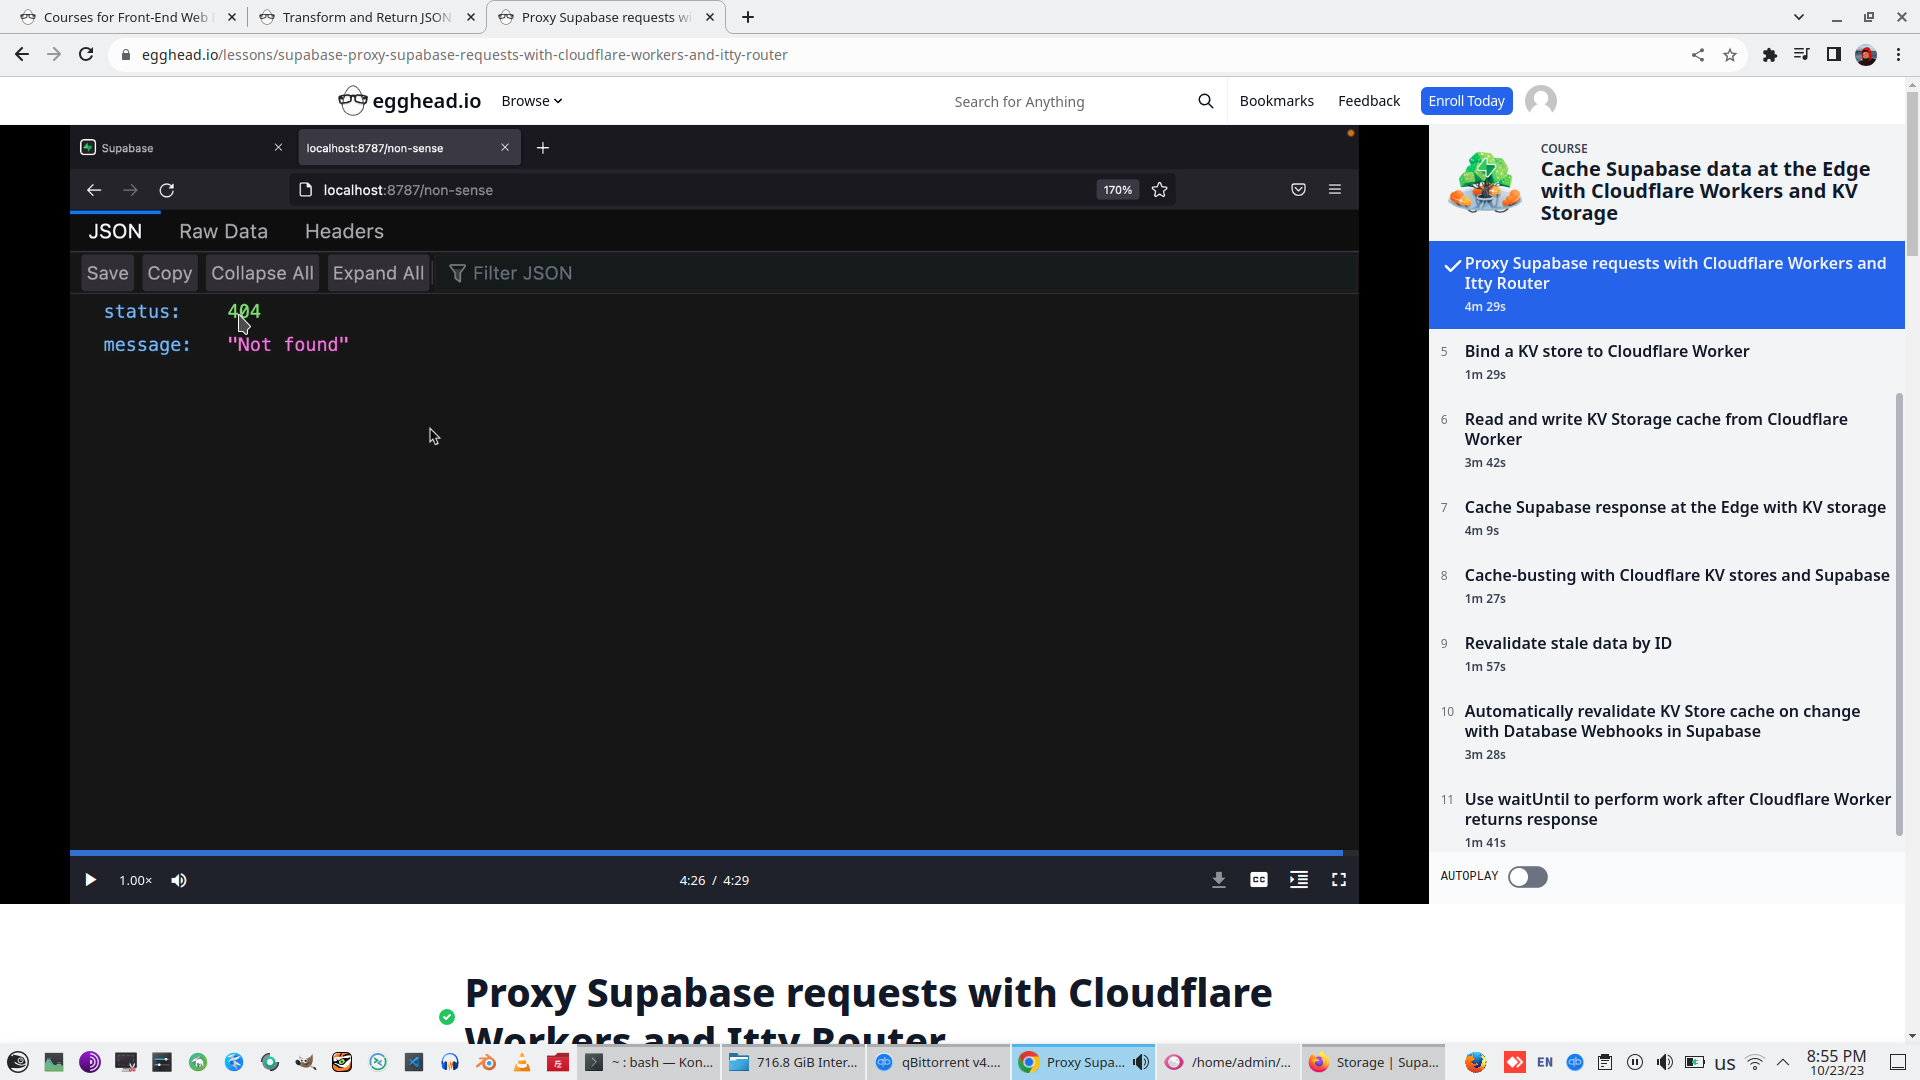
Import Json from itti-router-extras and return result as Json
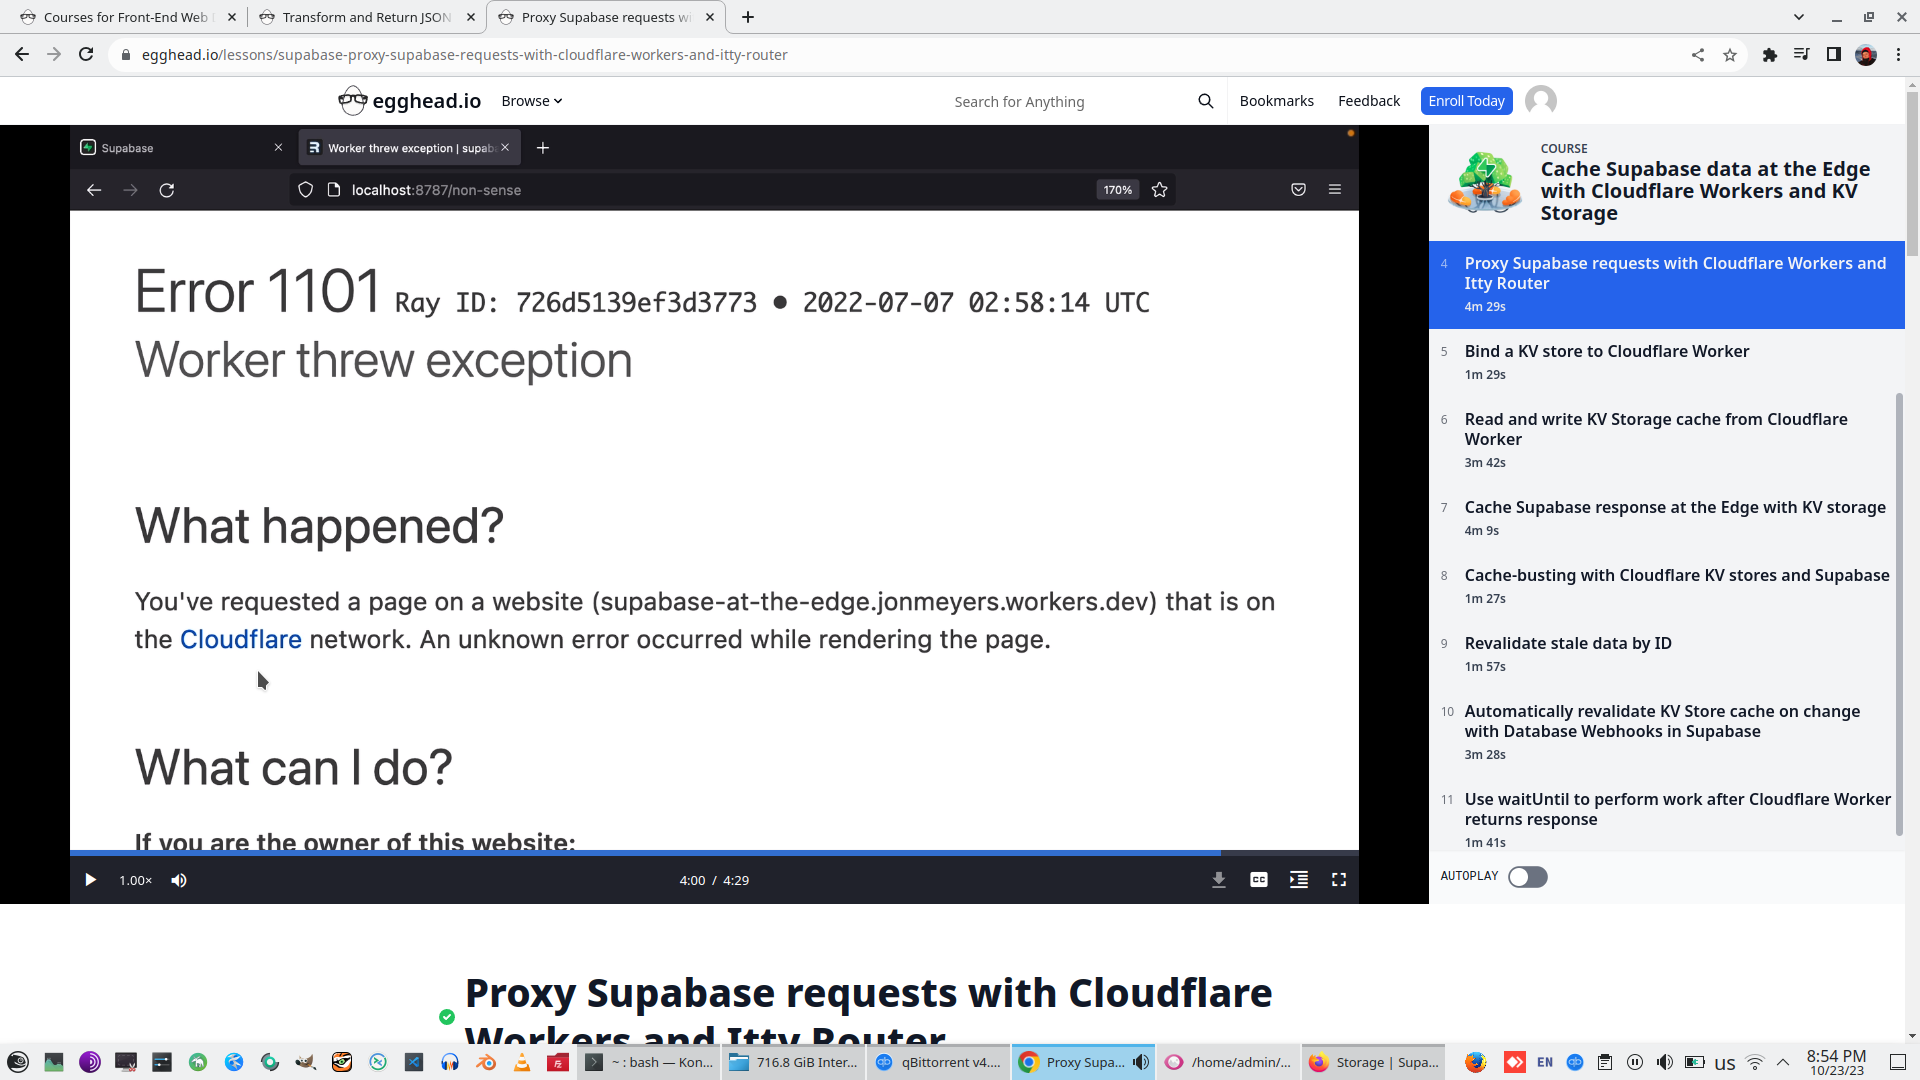
Add entry point to wrong request (without correct ID) and check 404 response code
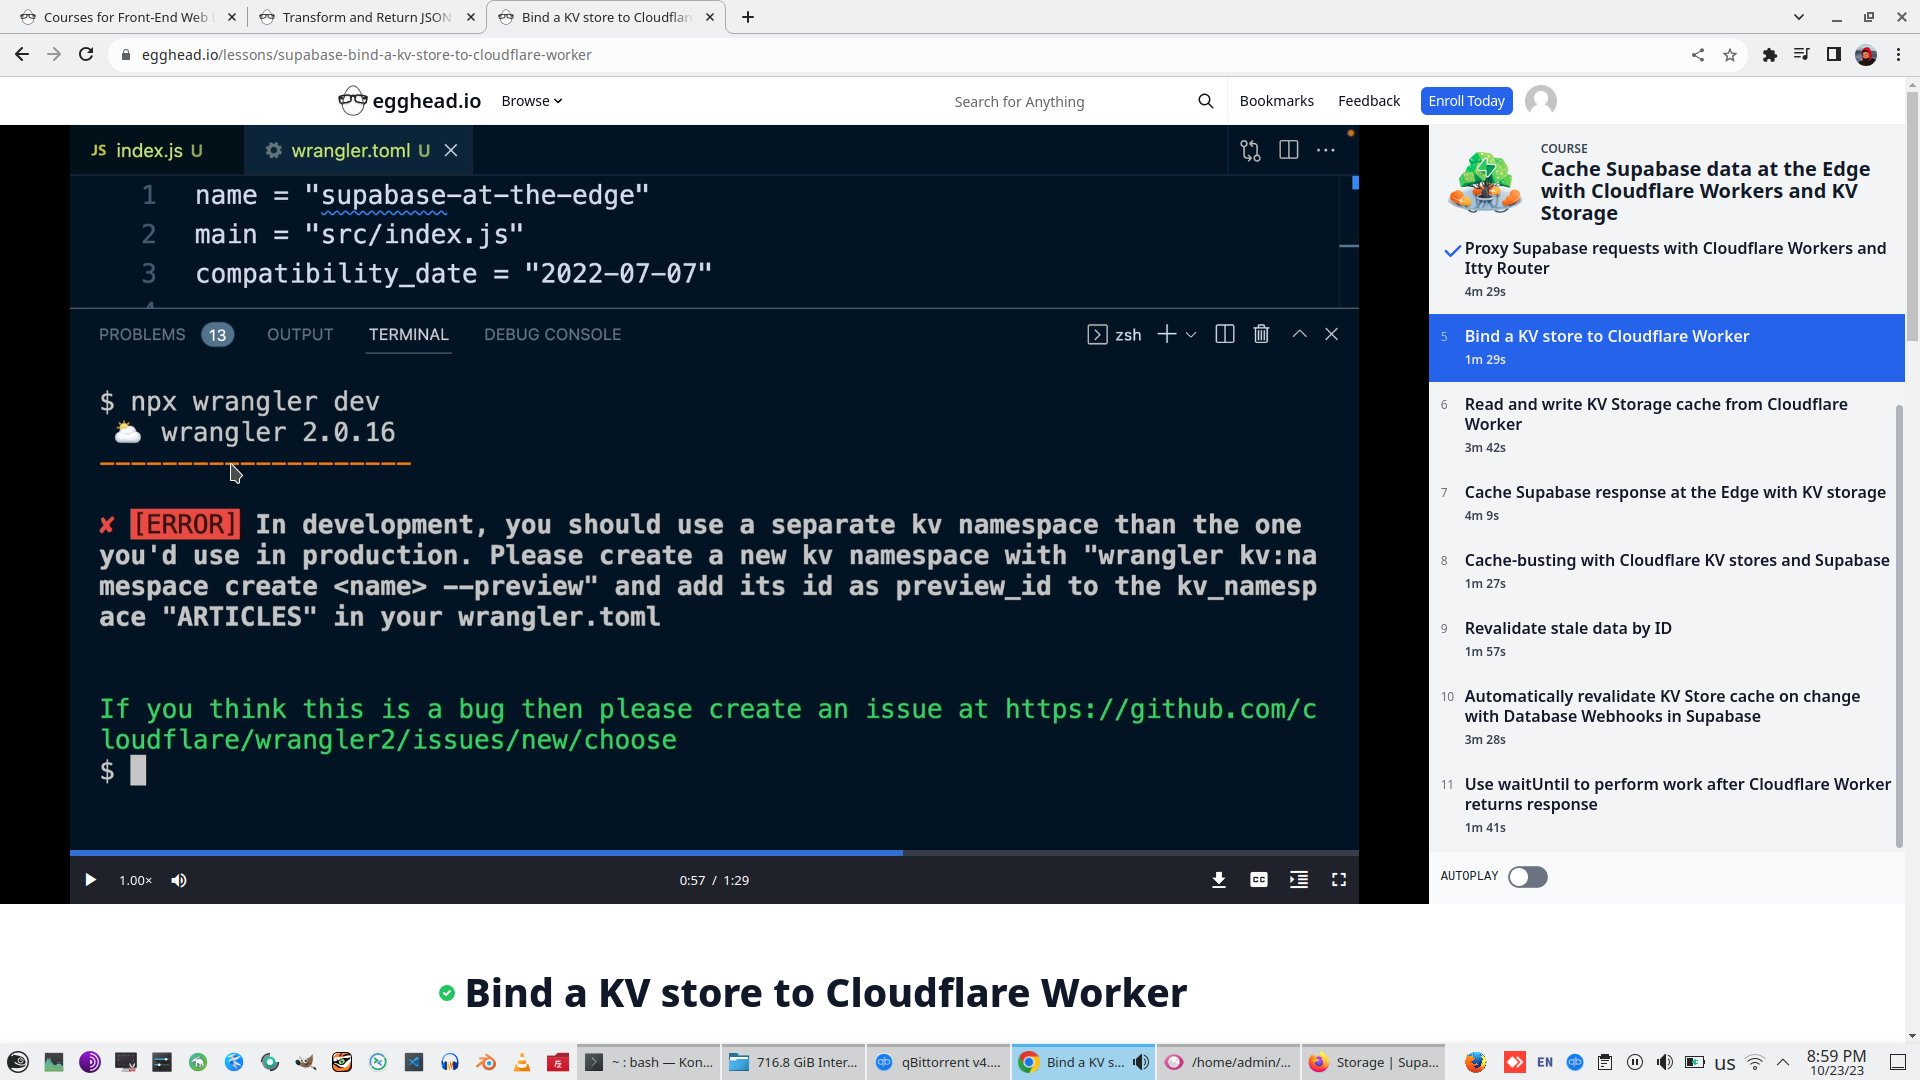
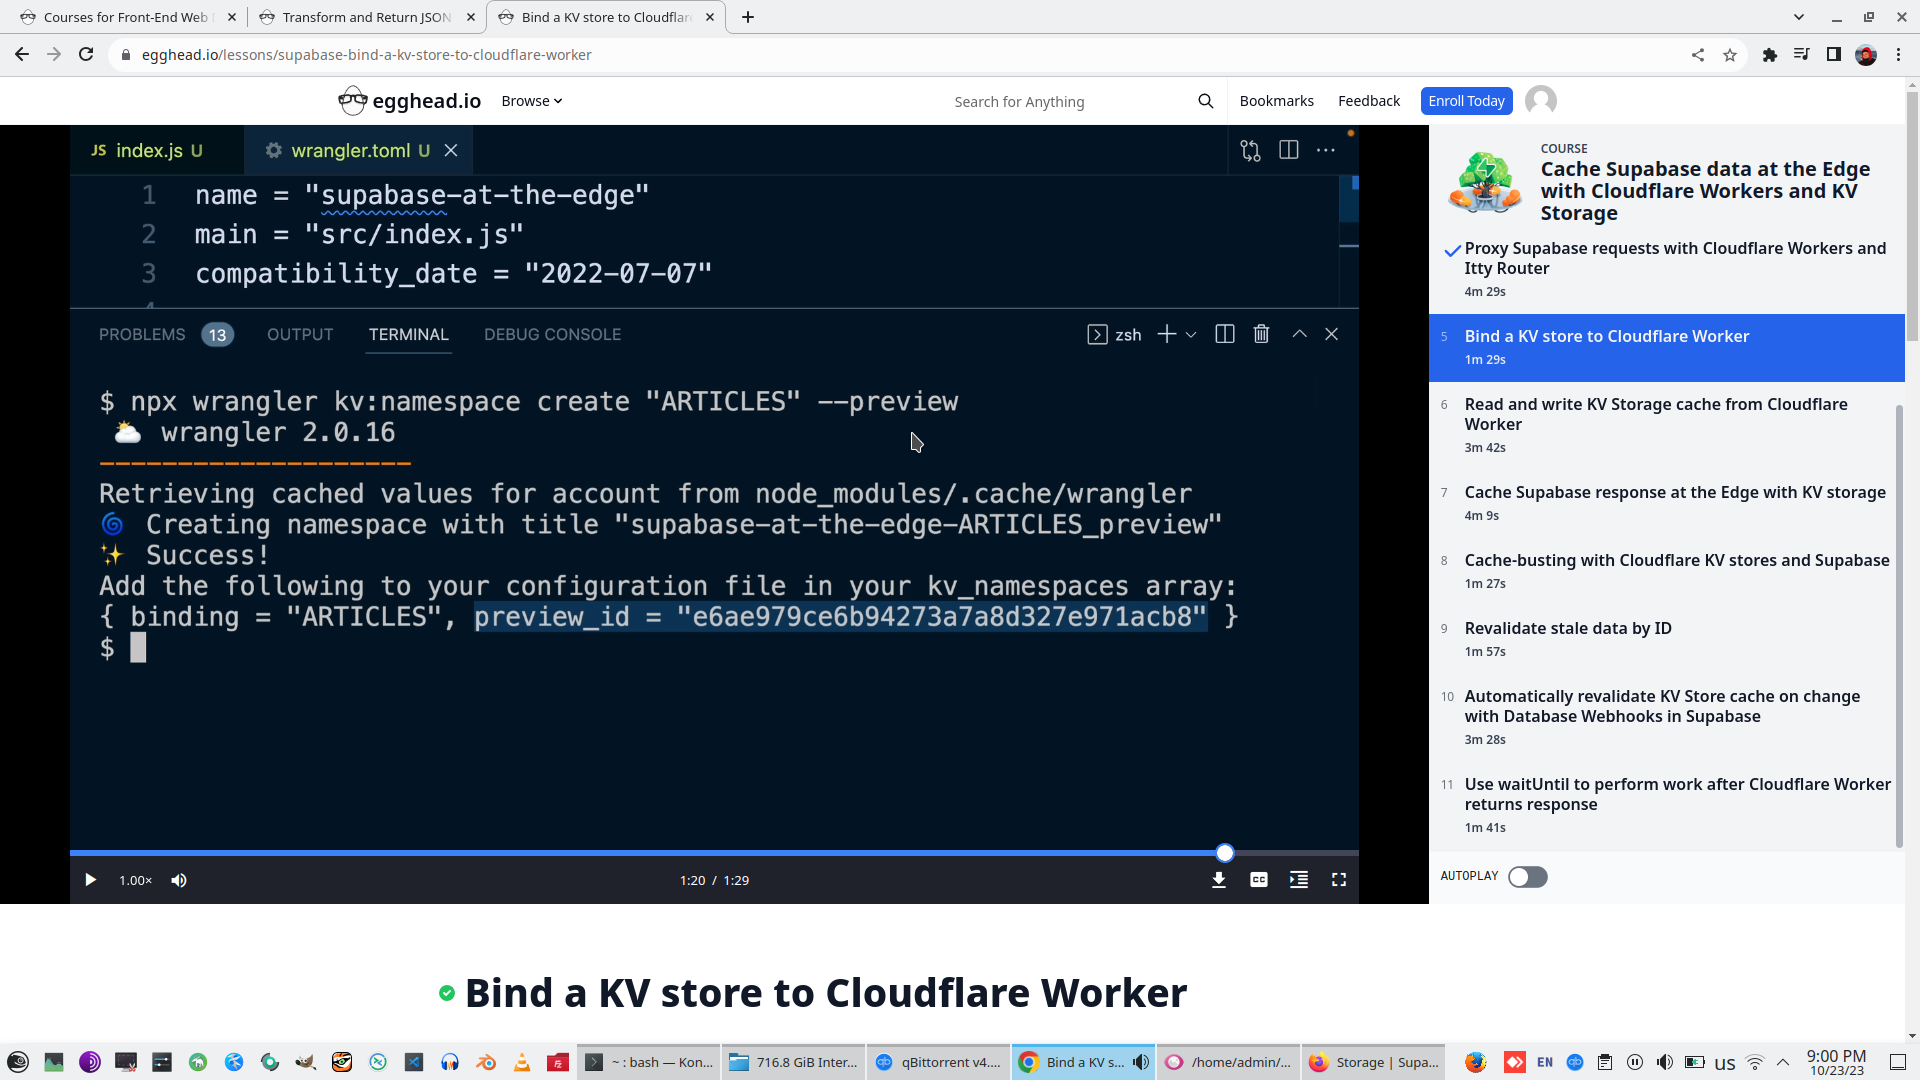
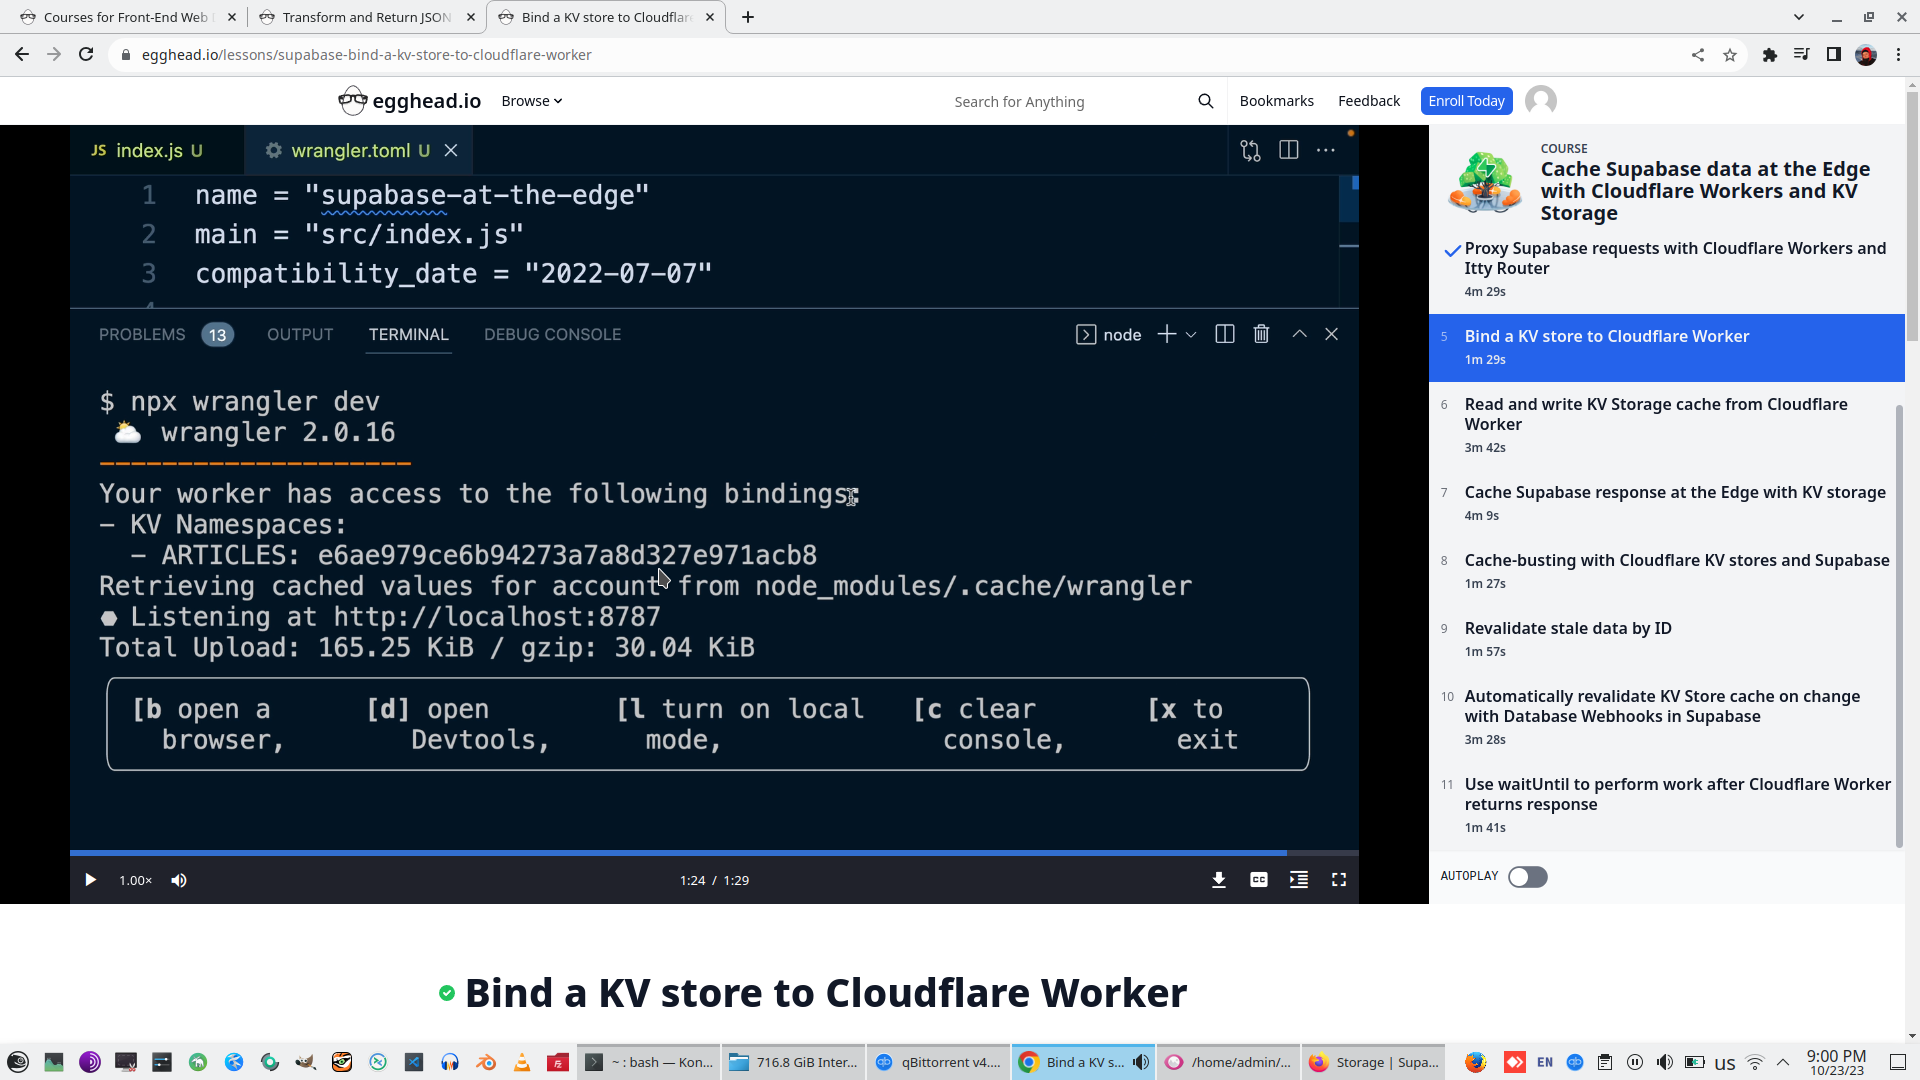
5. Bind a KV store to Cloudflare Worker
npx wrangler kv:namespace create "Articles" - create KV-storage (look as Local storage) on Cloudflare KV
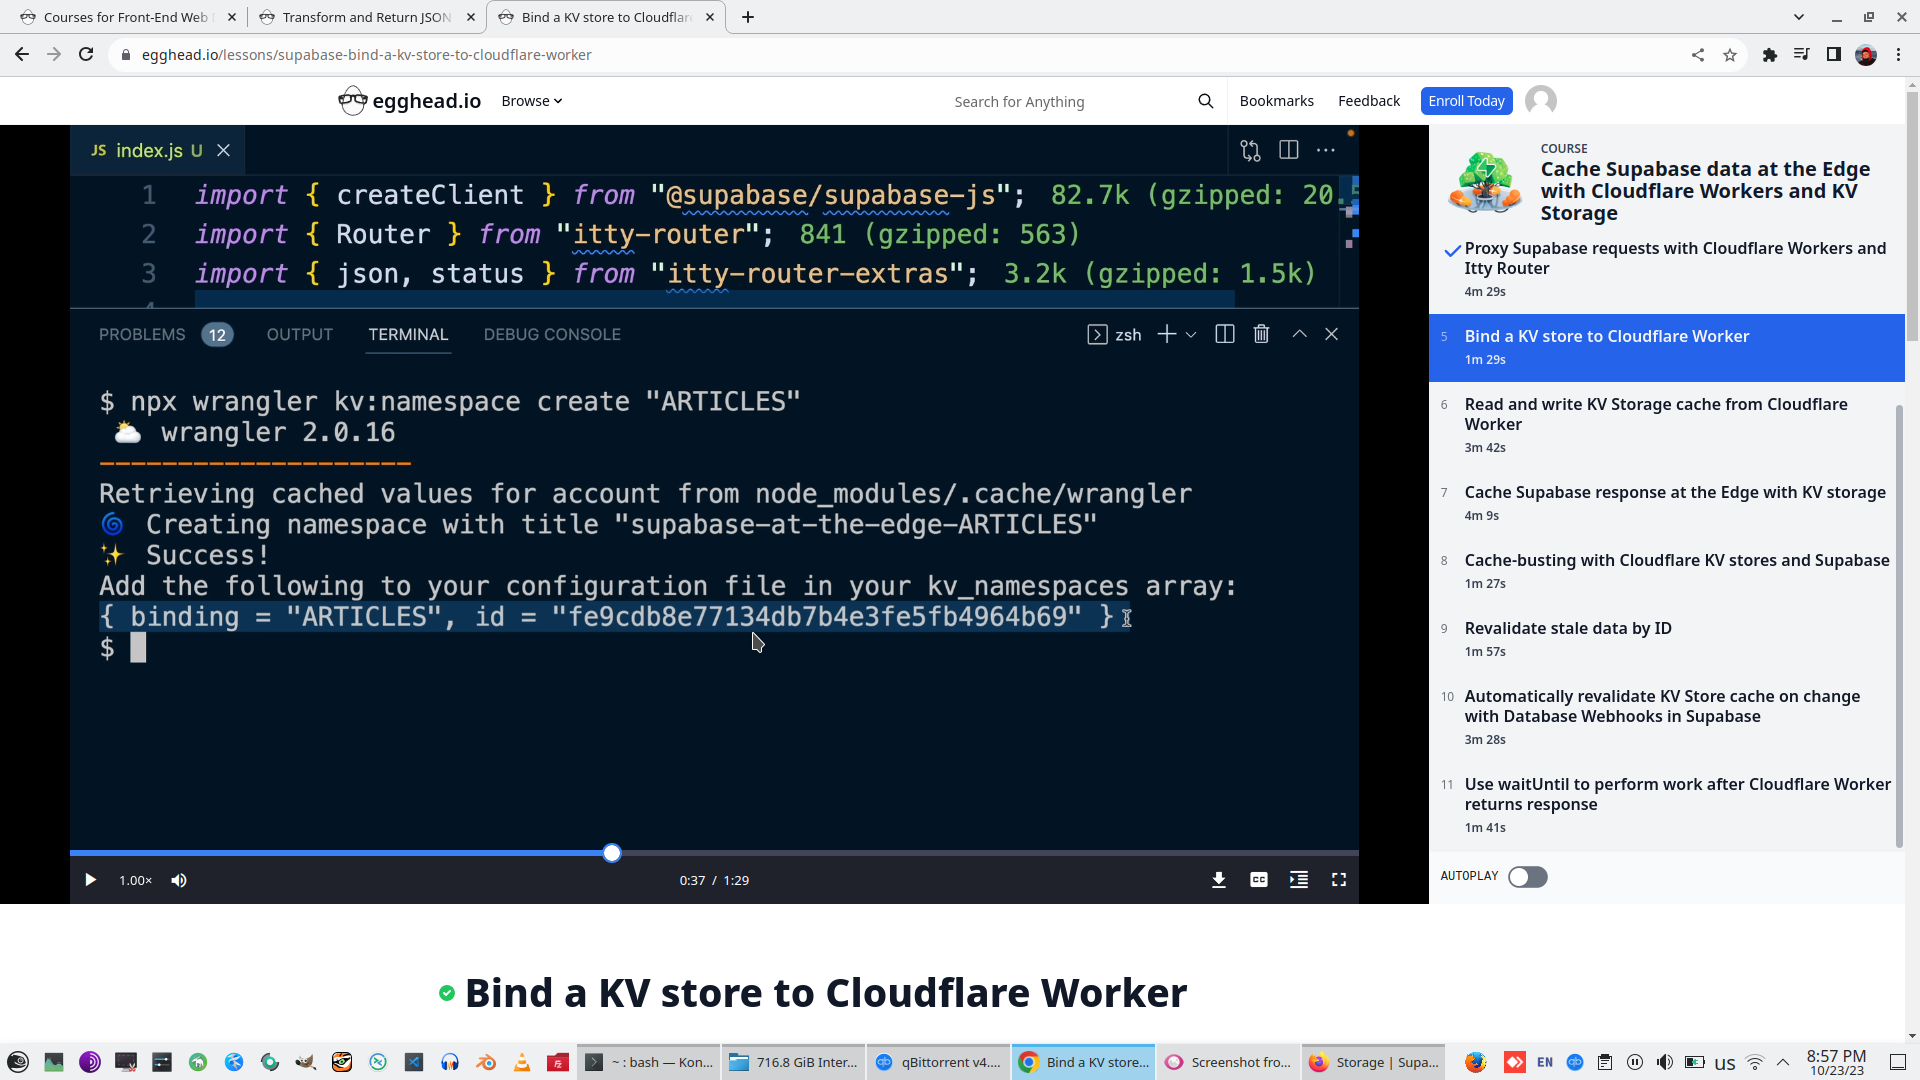
Add this storage to Wrangler.TOML
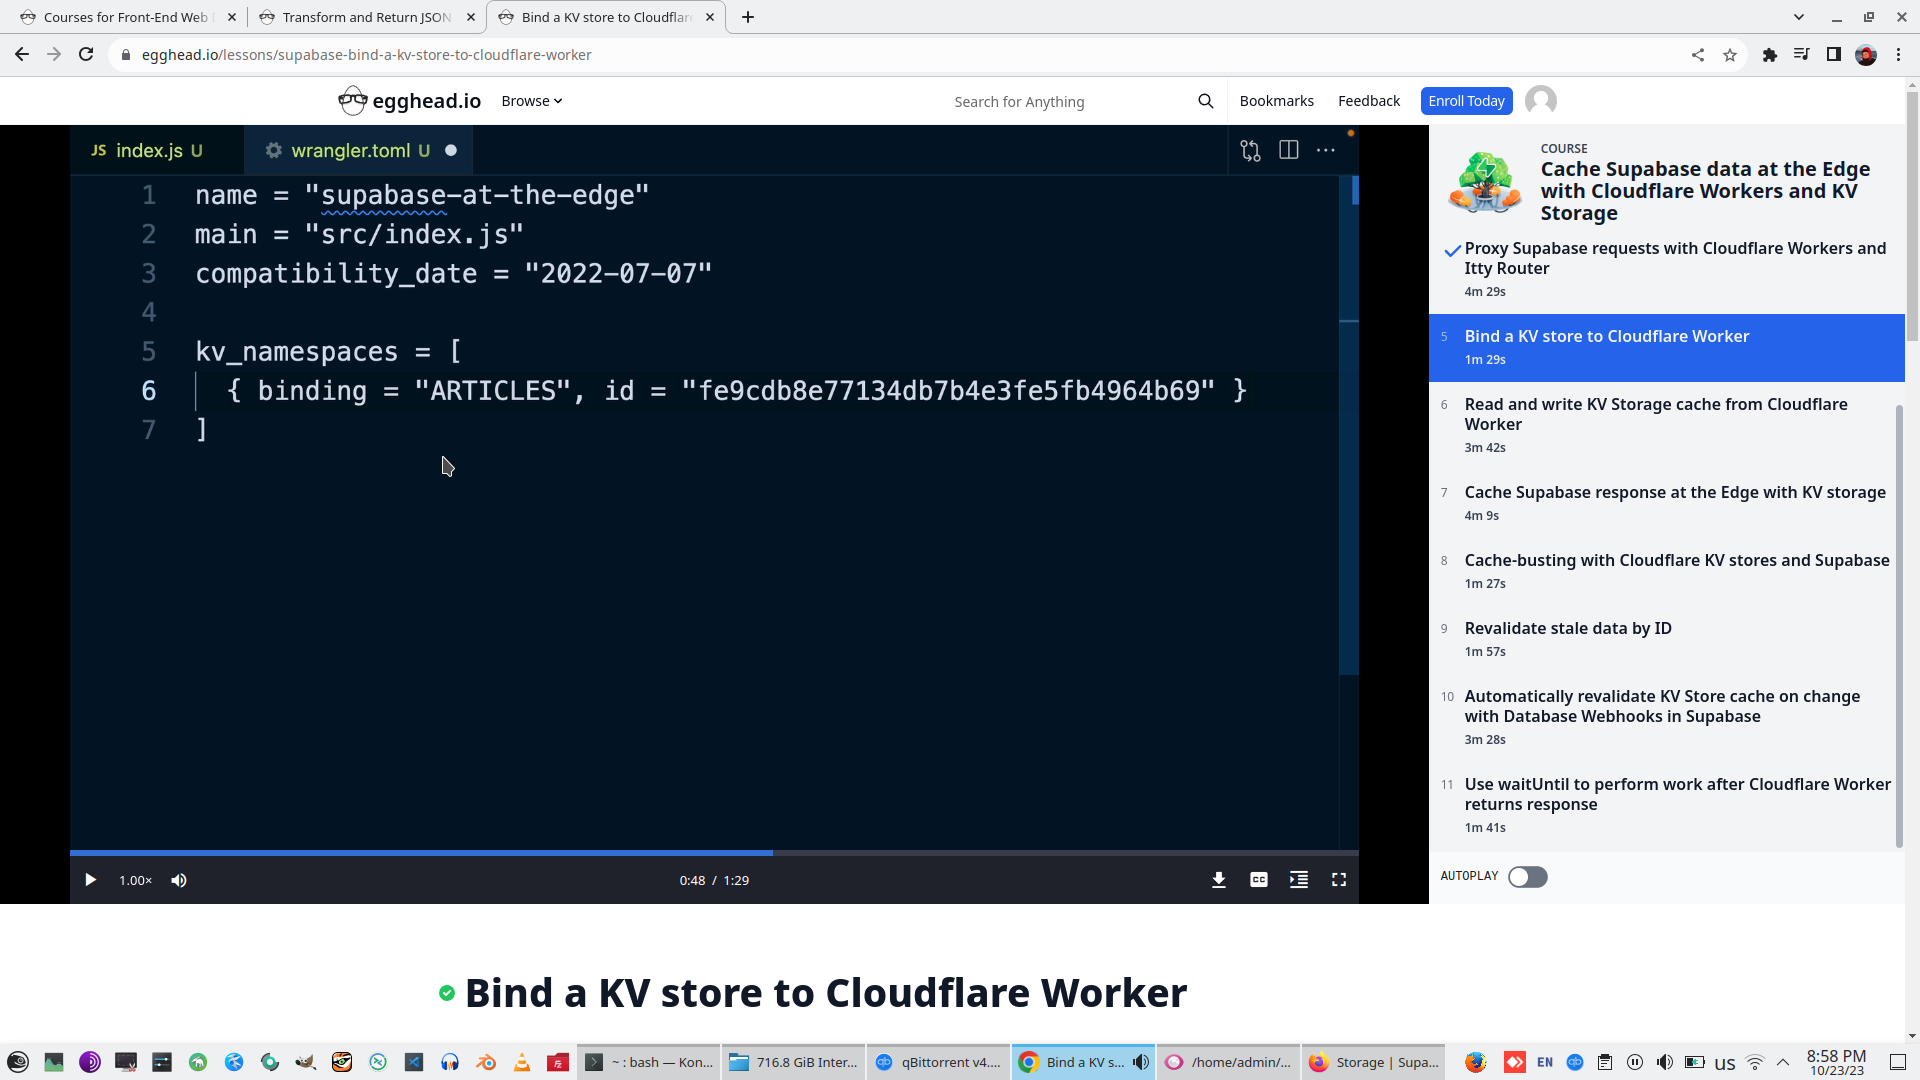
Locally KV storage need to create with "--preview"
"npx wrangler dev" - finally local server started with KV storage
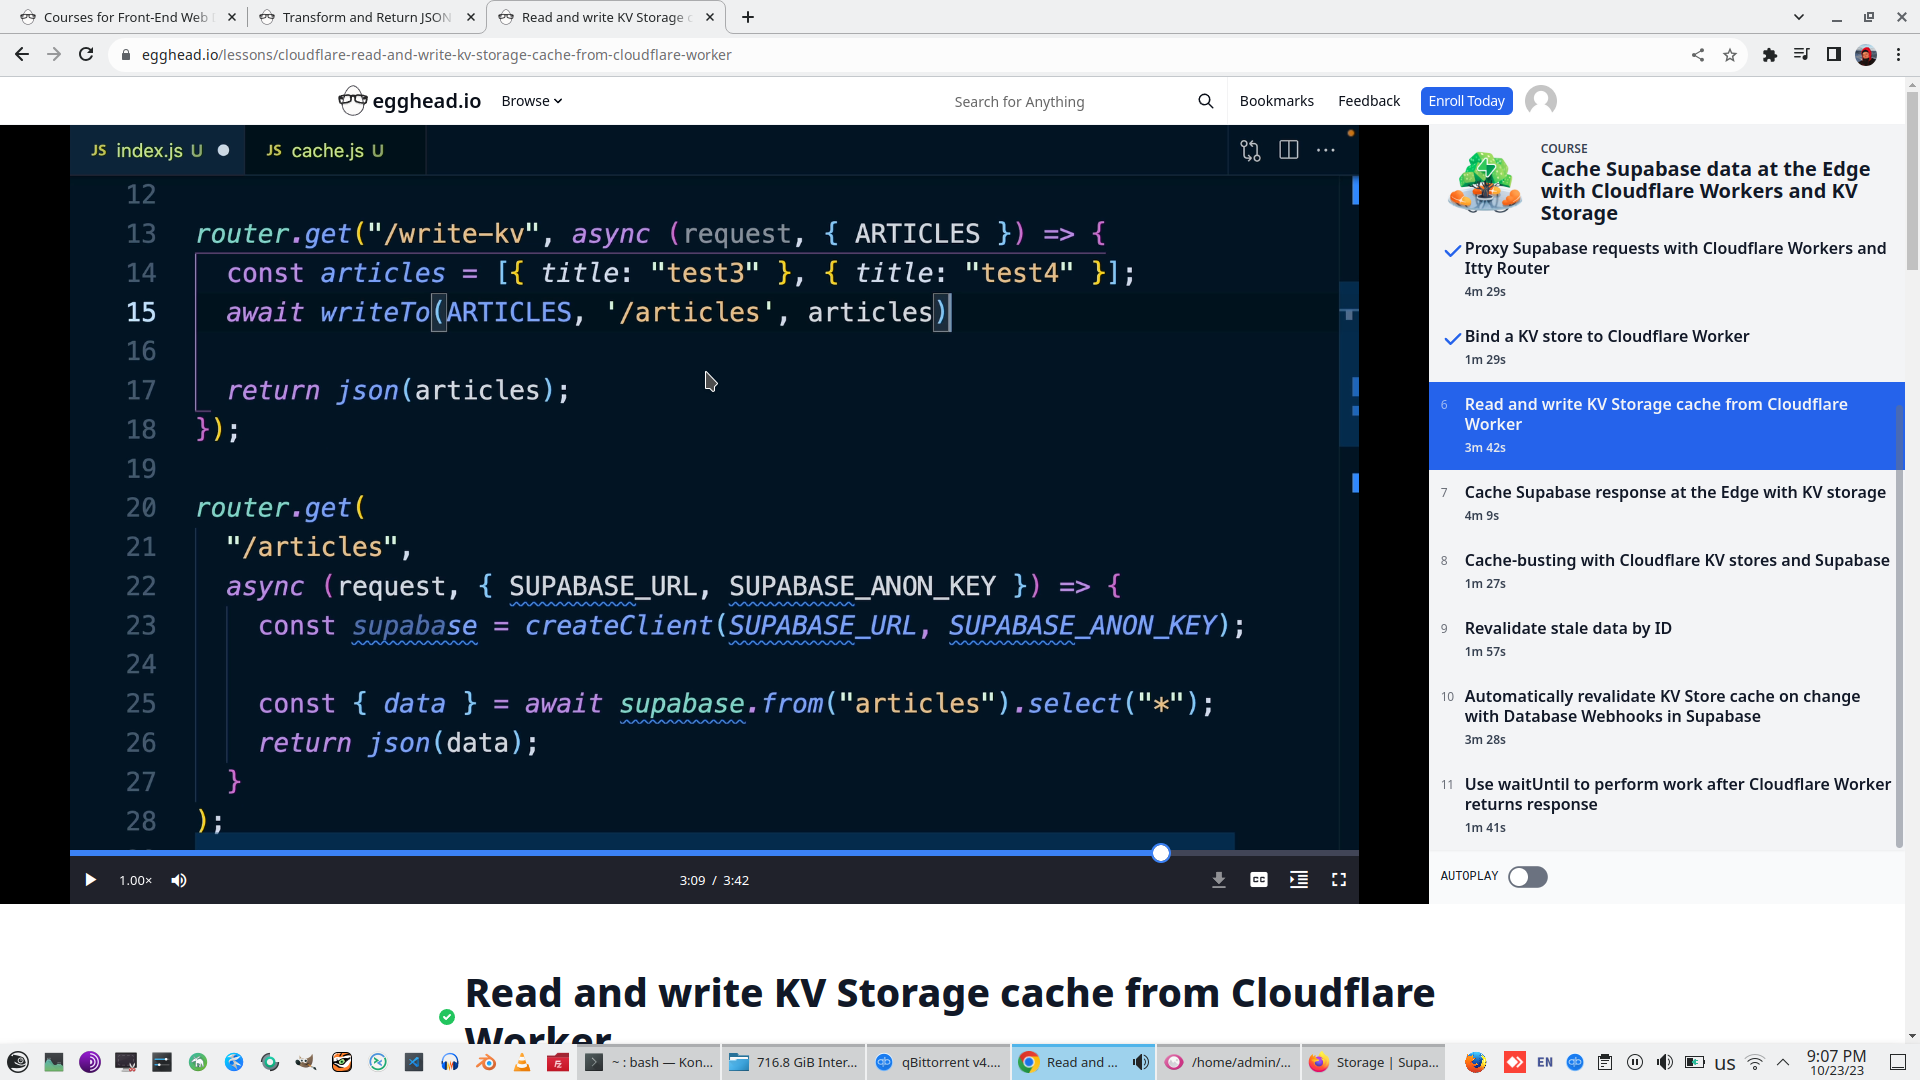
6. Read and write KV Storage cache from Cloudflare Worker
Inject KV storage as Request parameter and create entry point to look KV storage
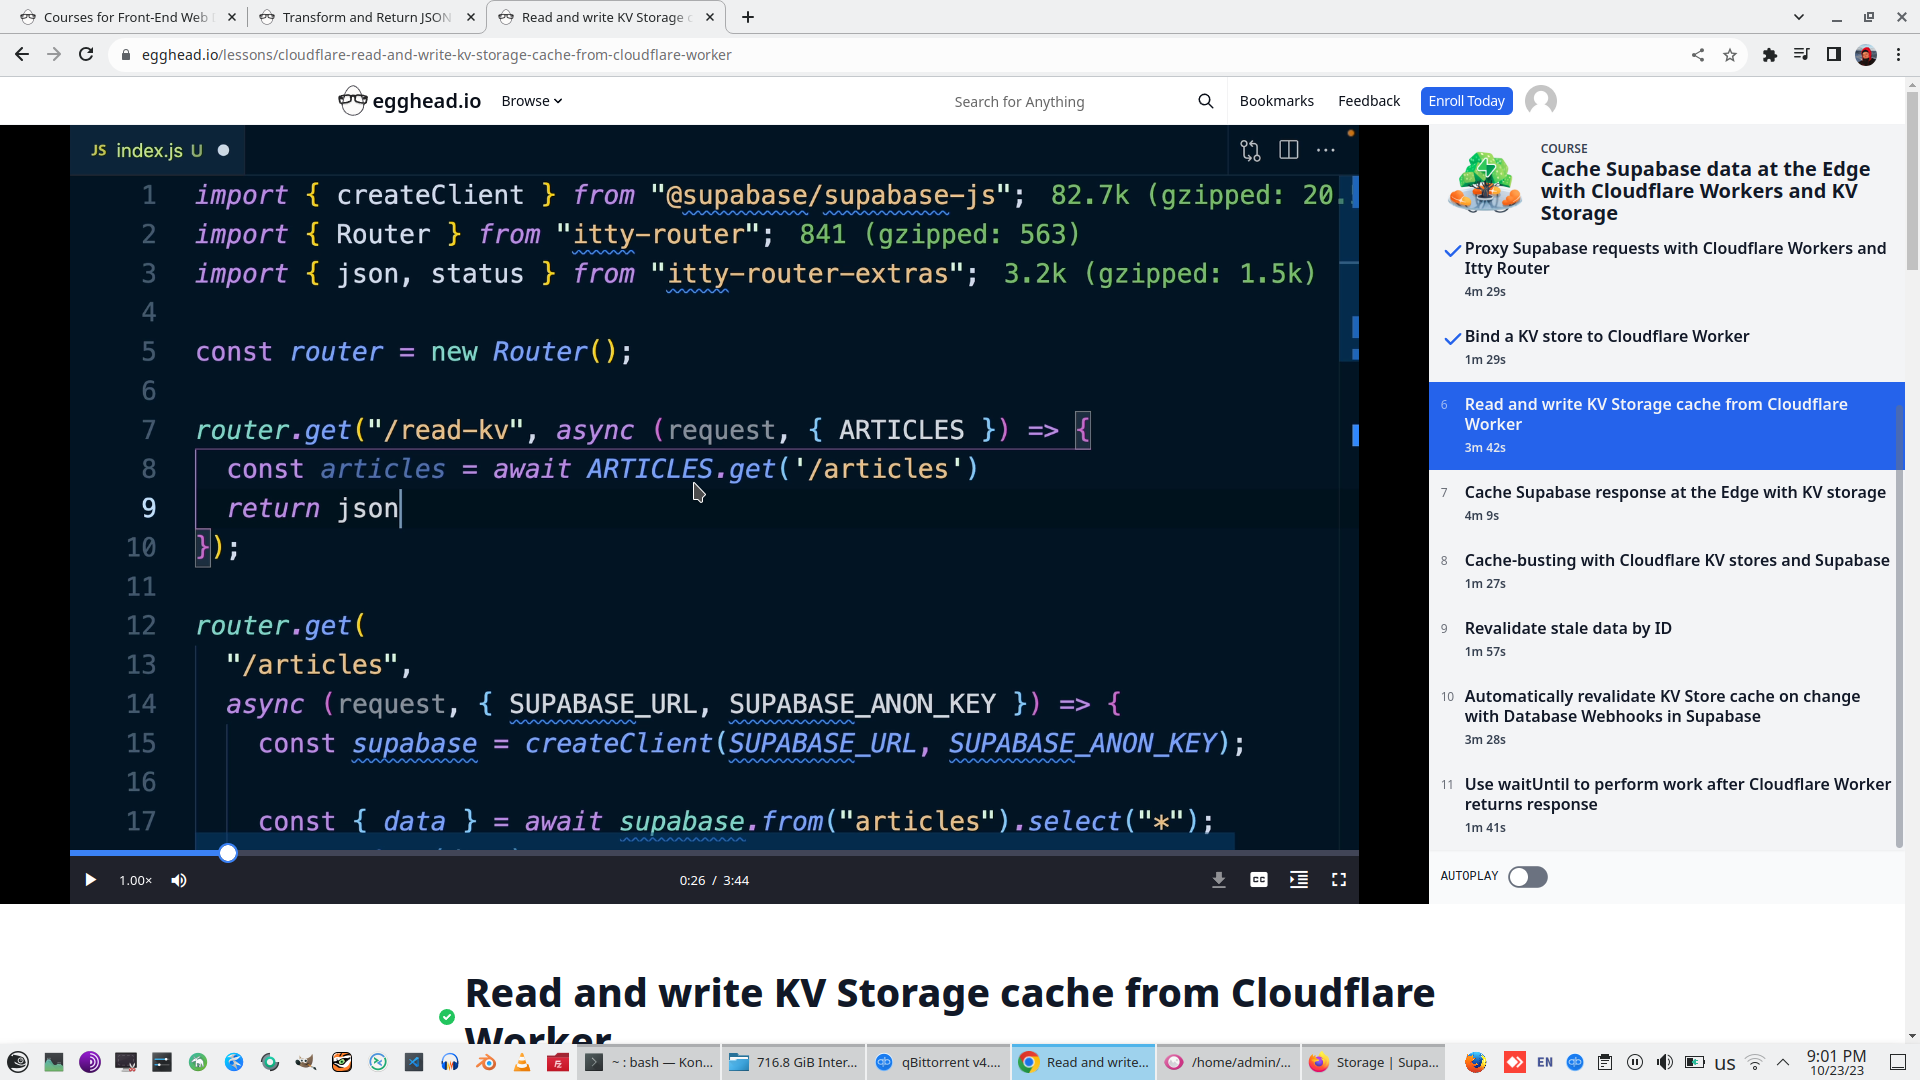

Put array with test data to KV storage and retrieve result on browser
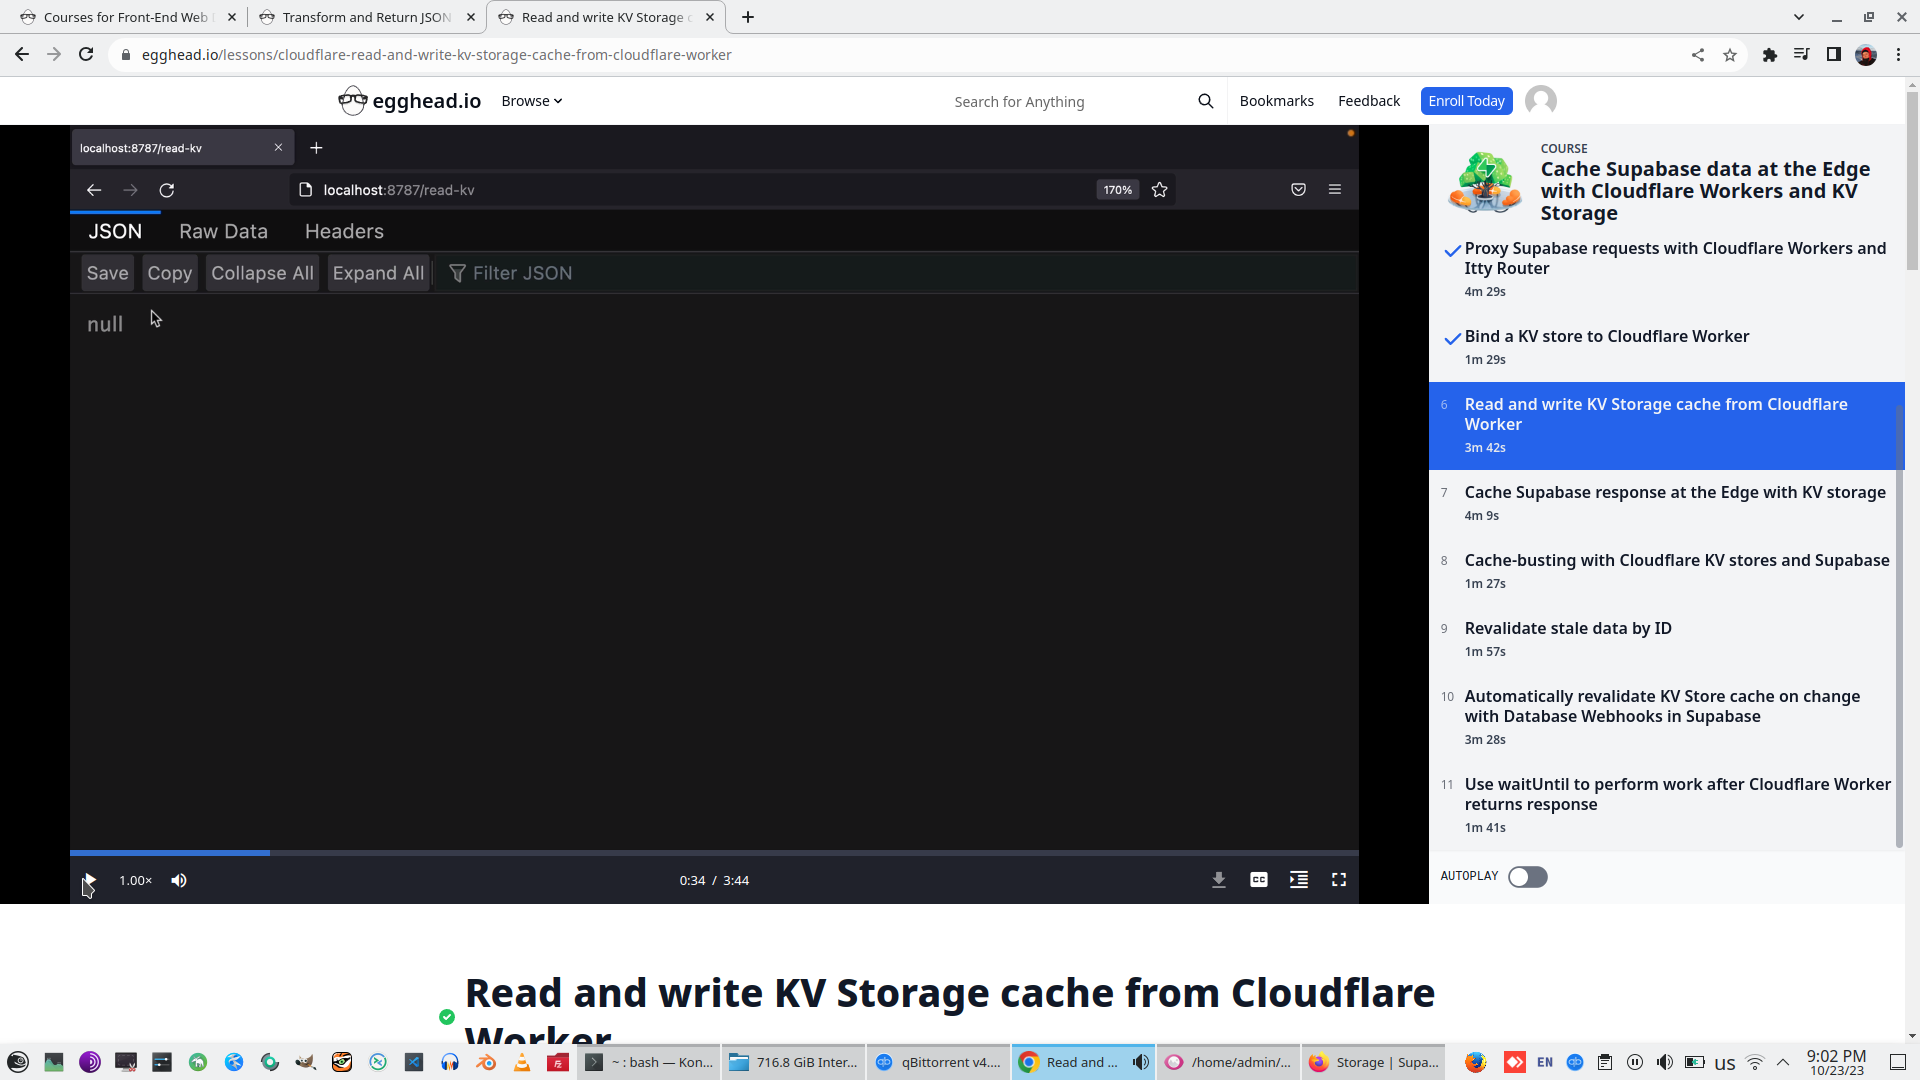
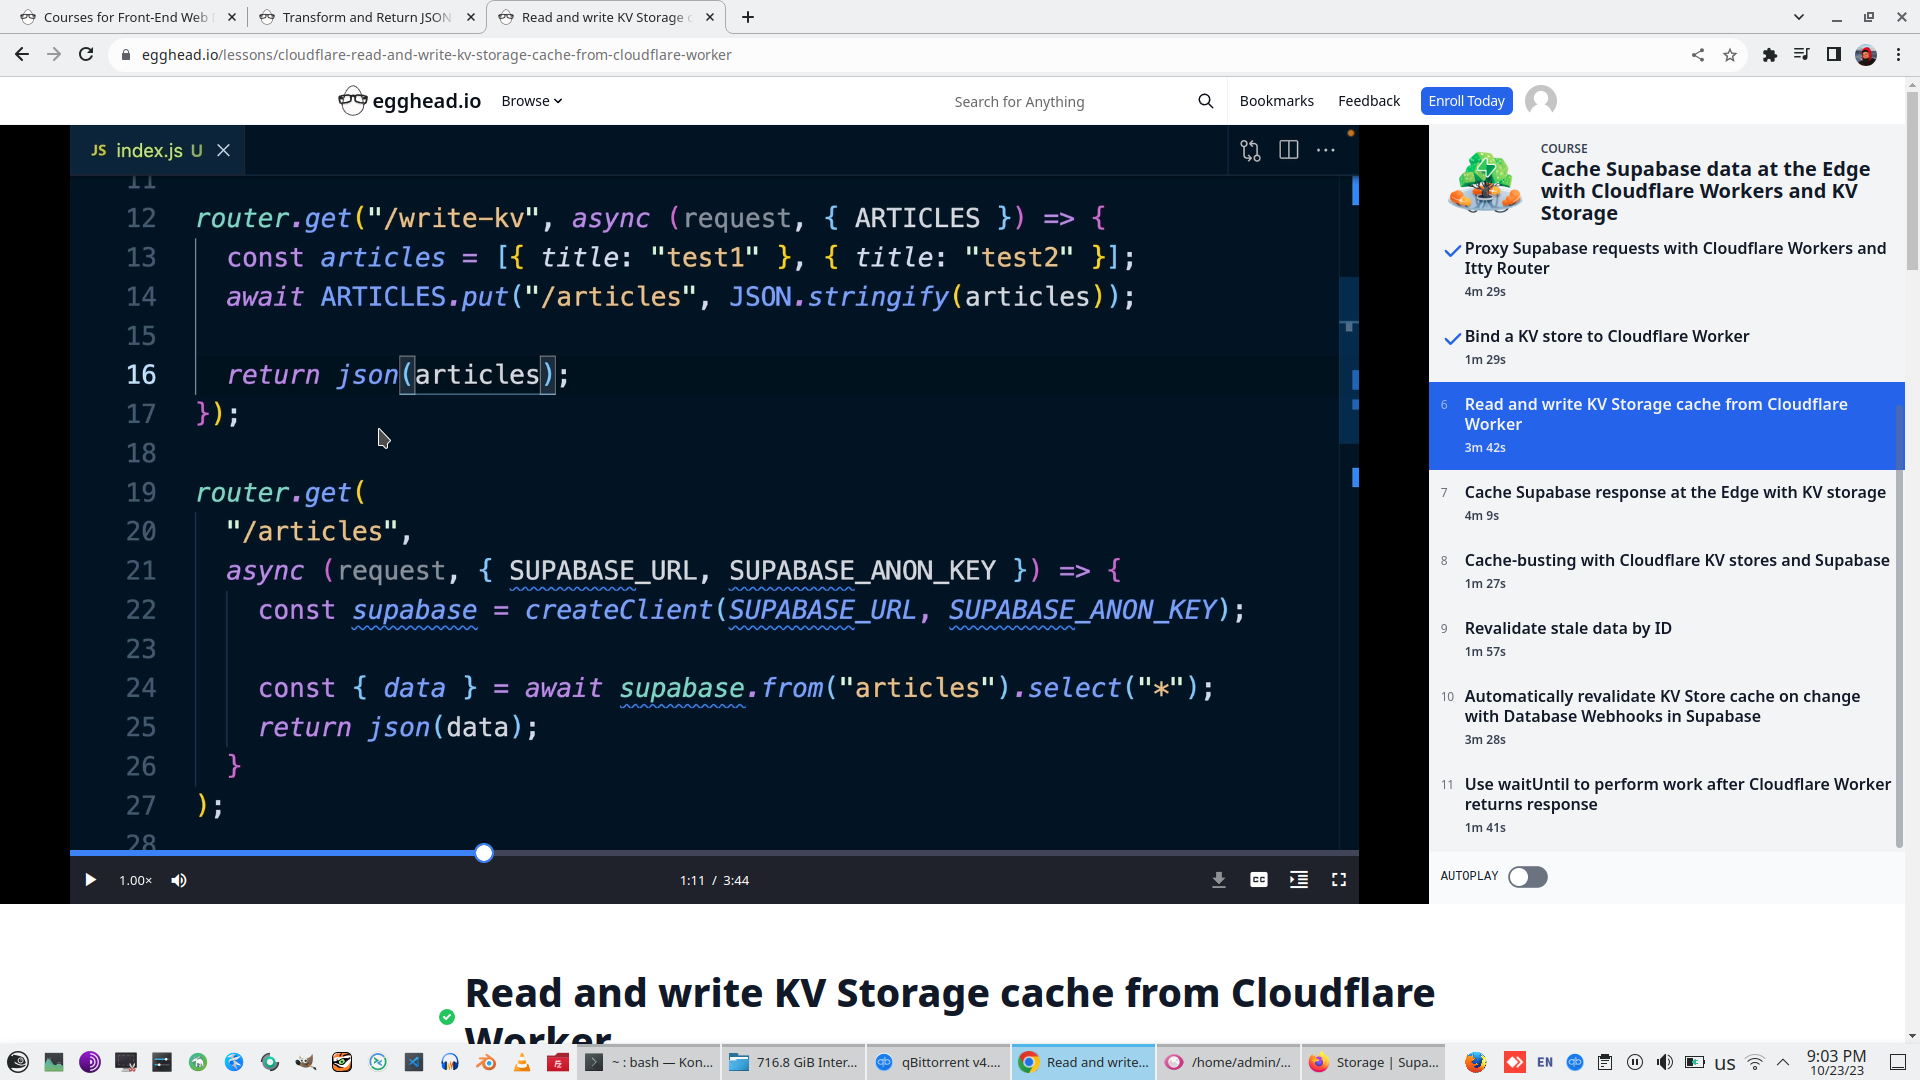
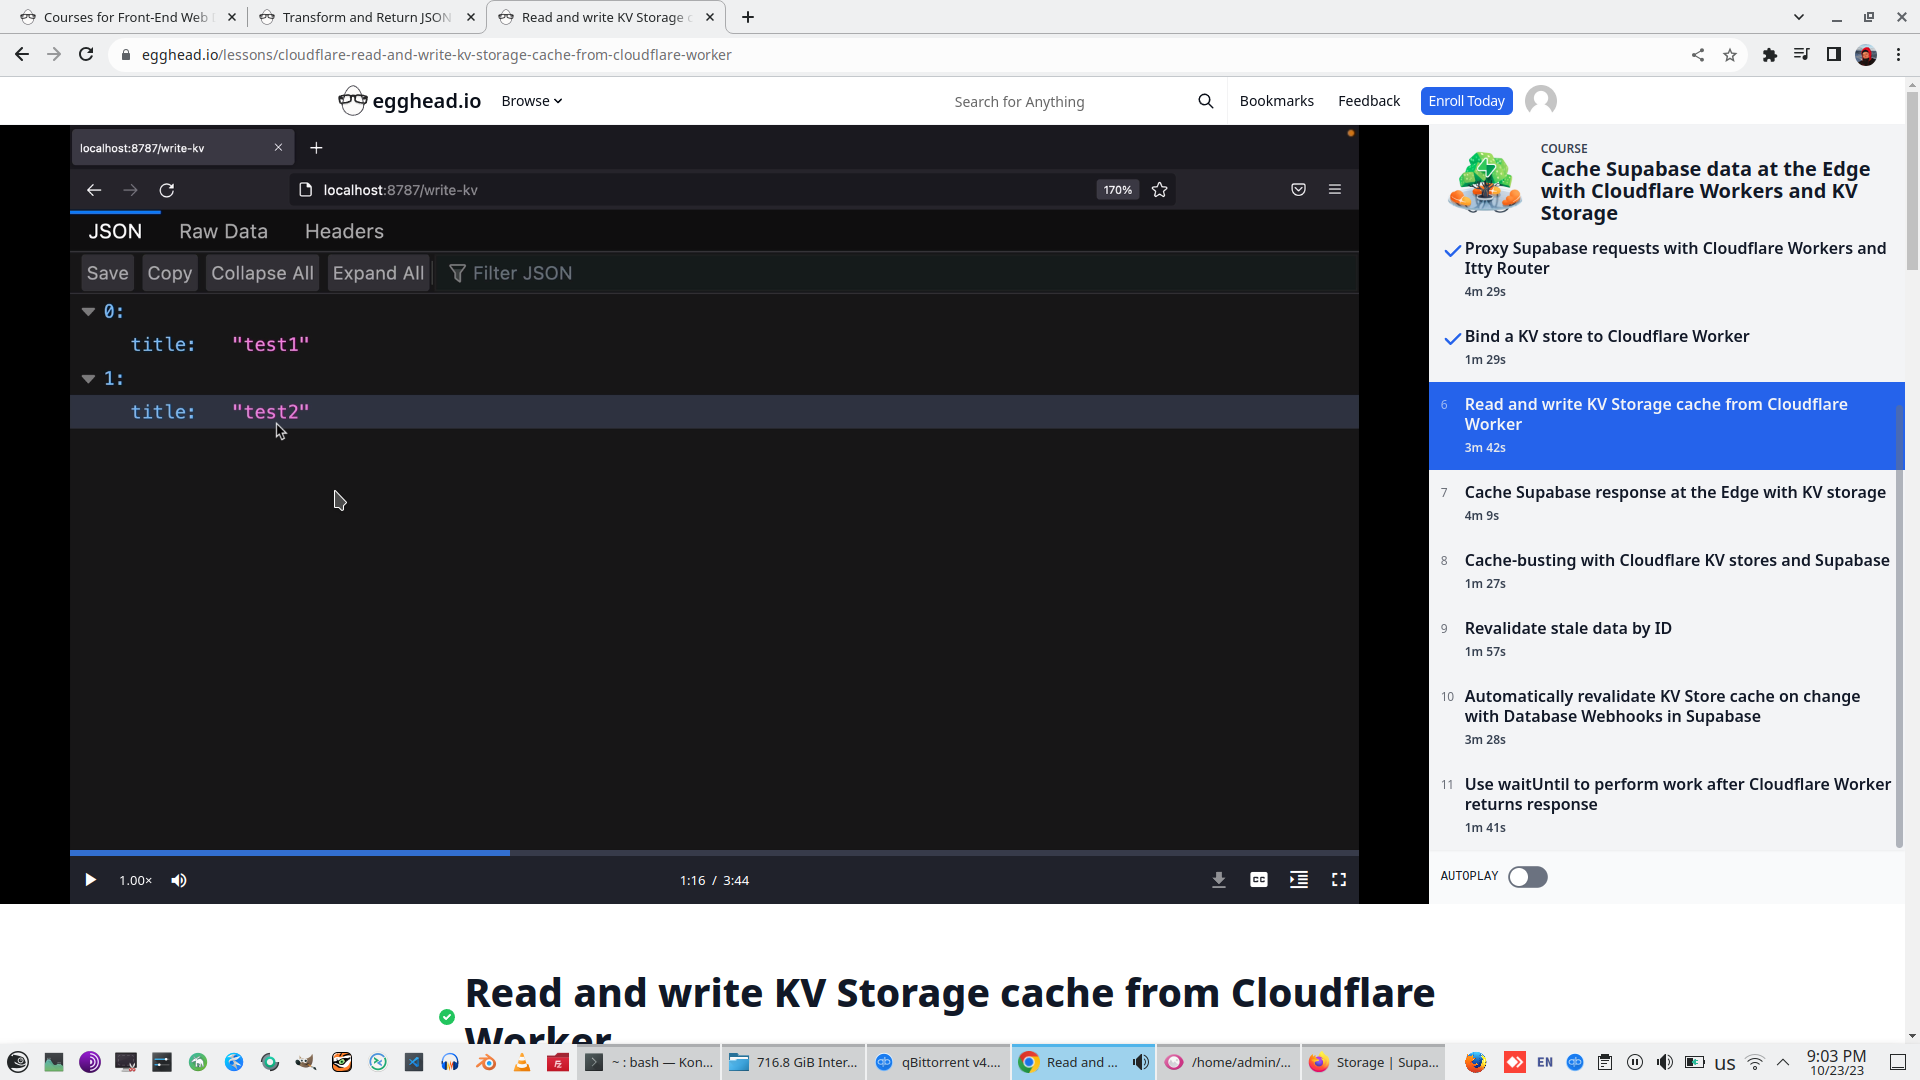
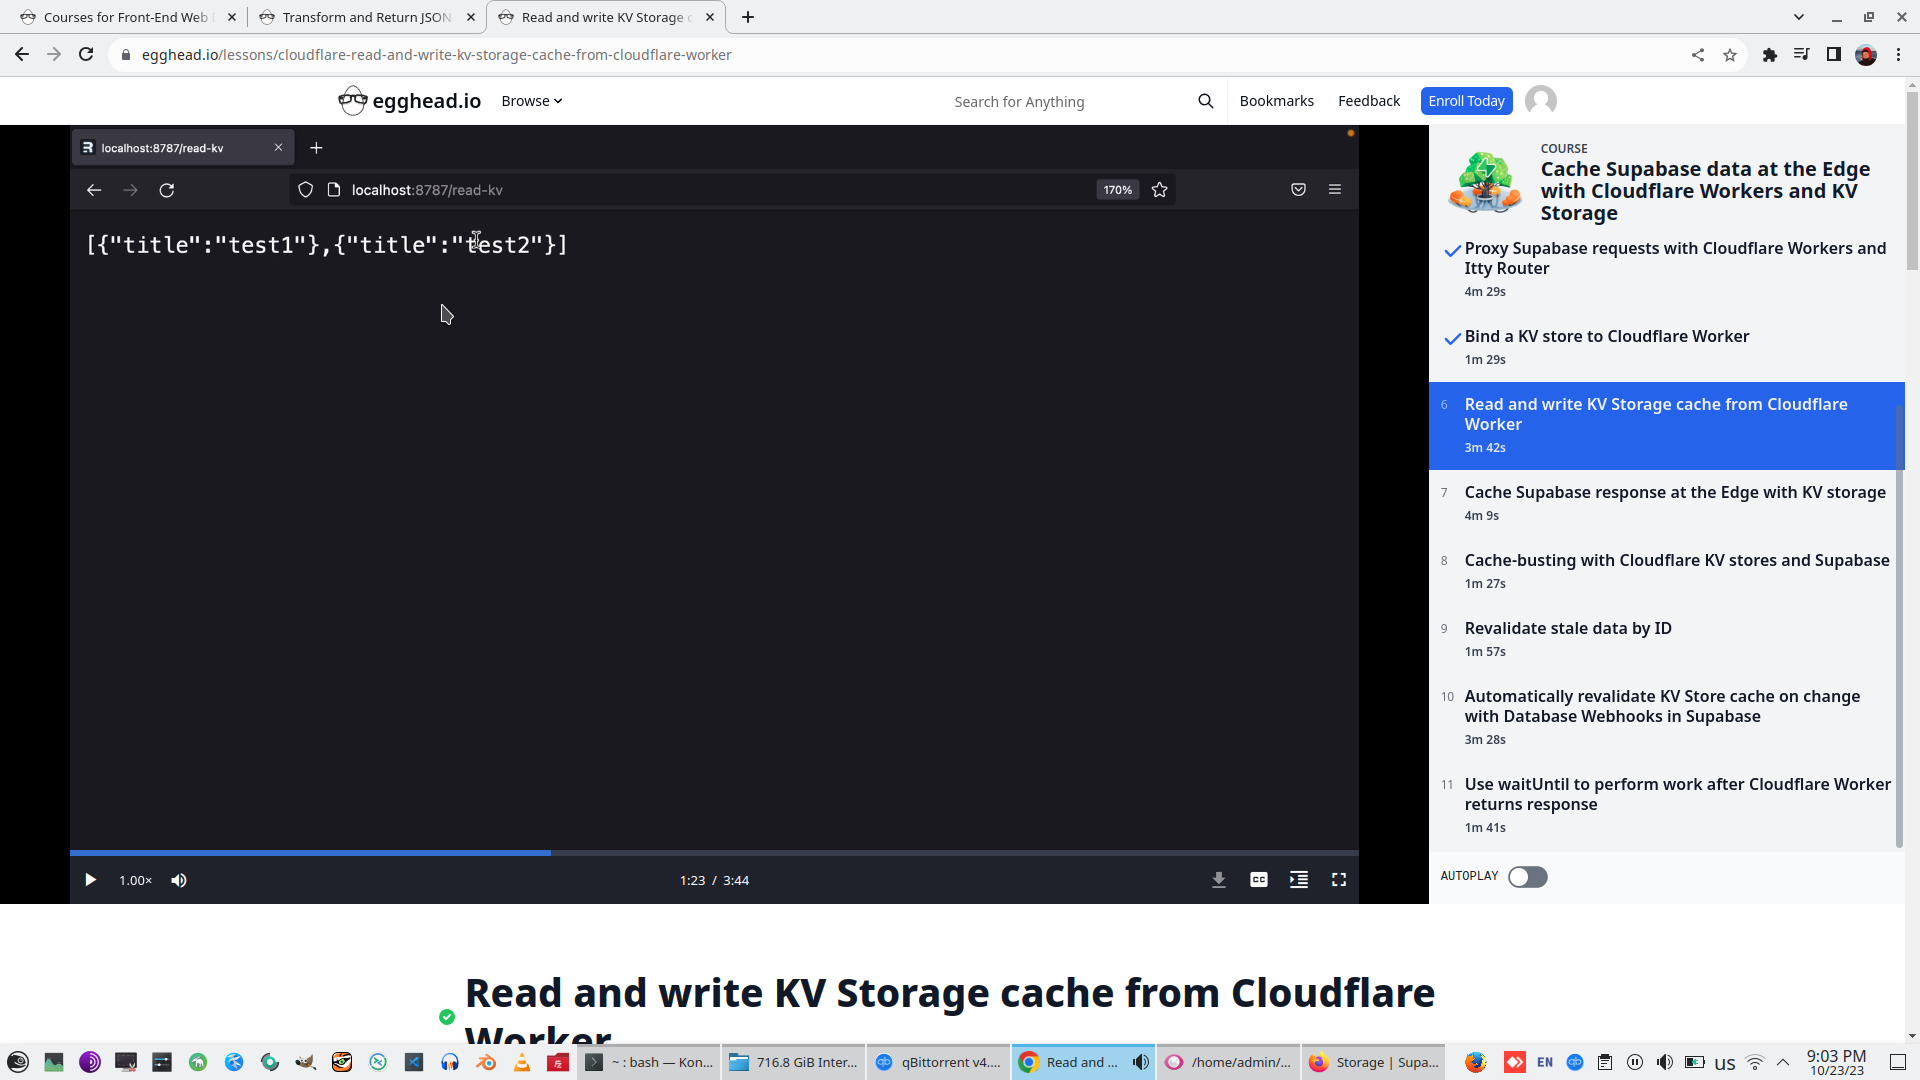
So, we have workable Read-KV and and Write-KV methods


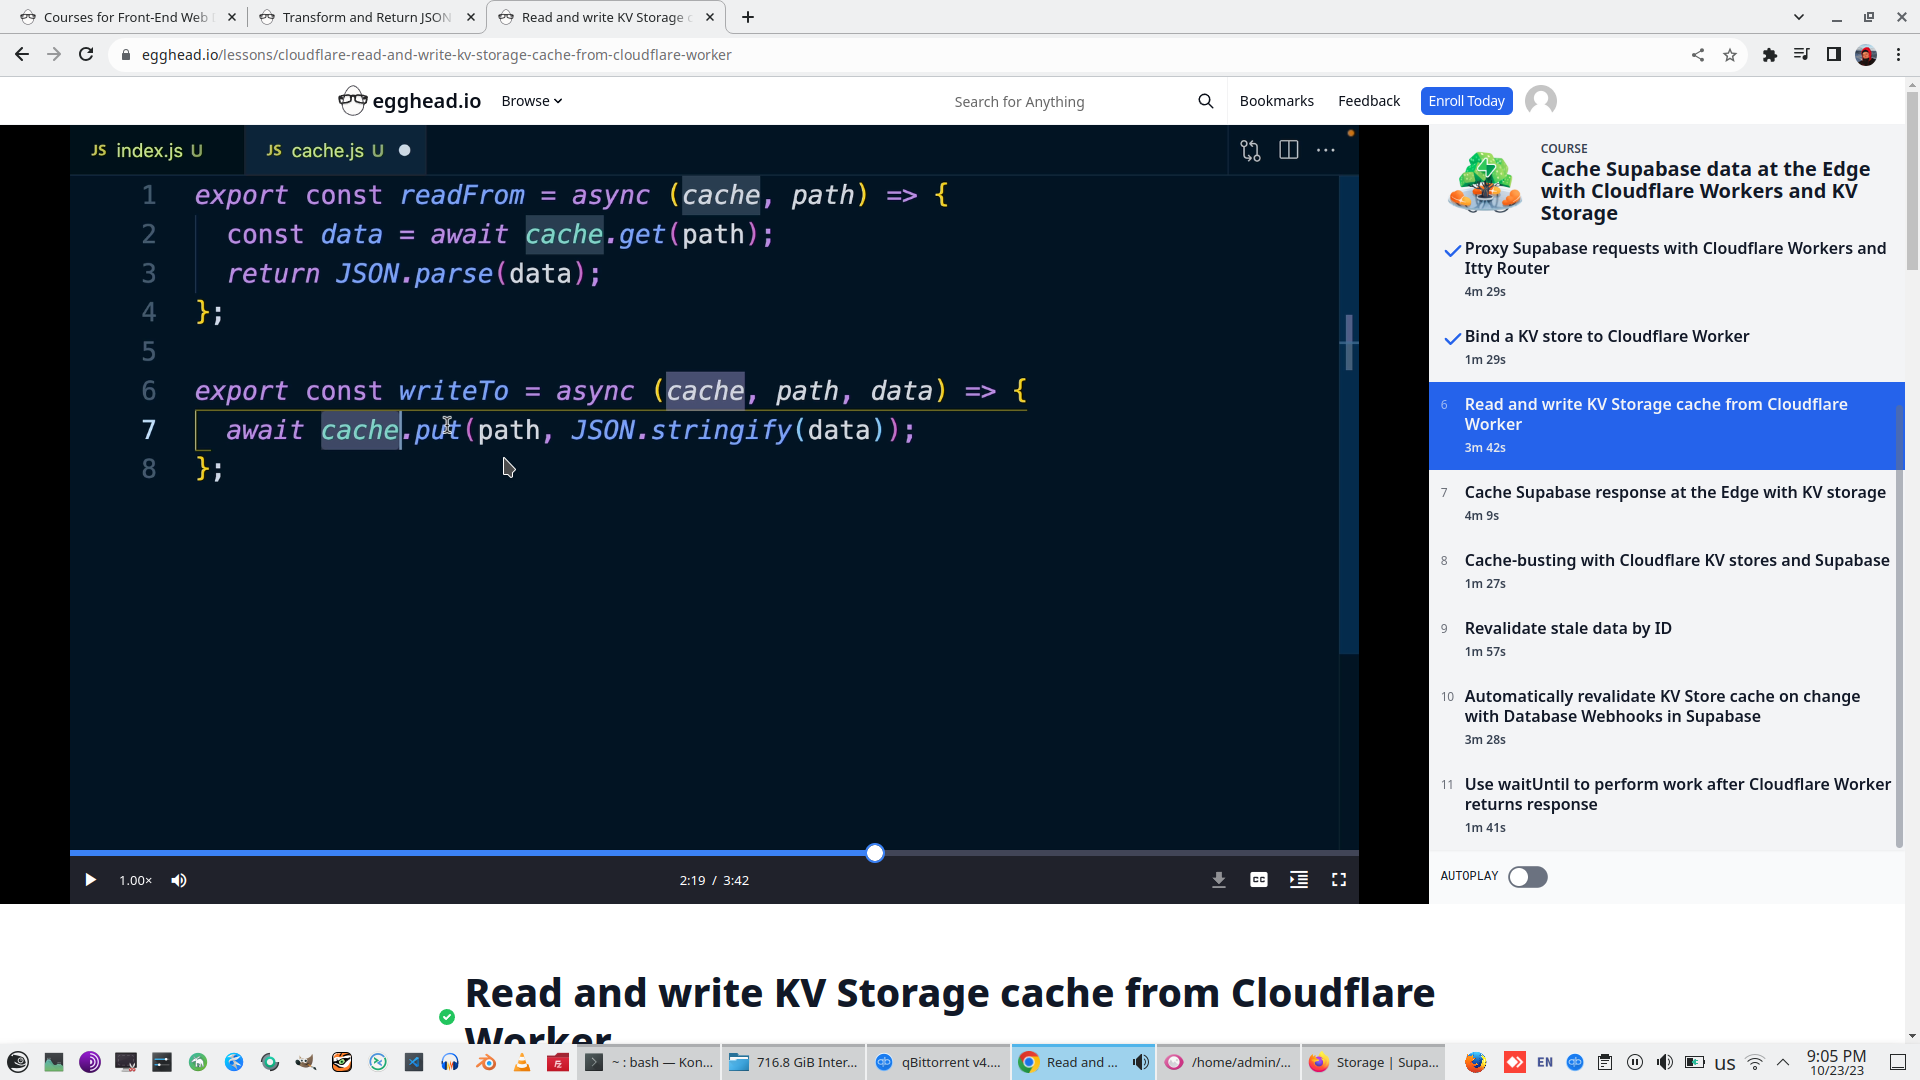
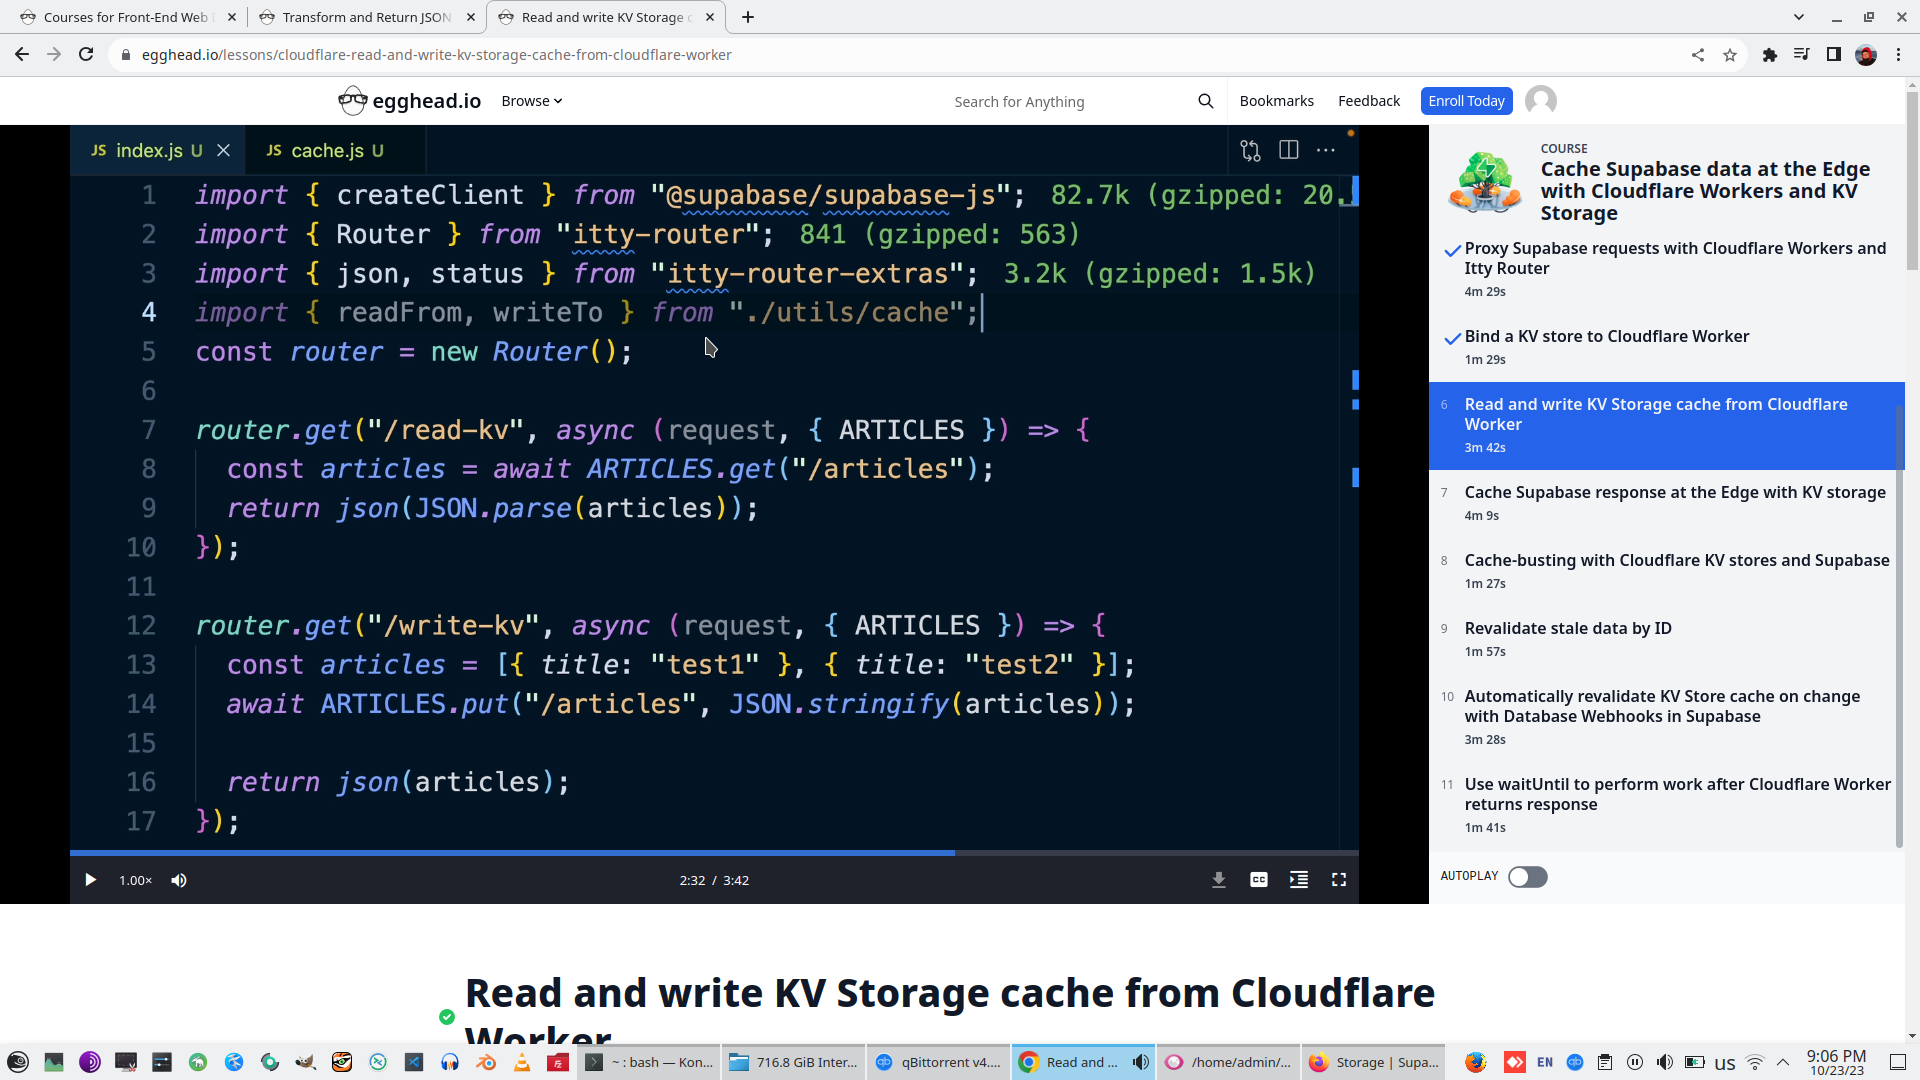
Create new module util/cache.js and create readFrom and WriteFrom, pass KV storage as parameter to that functions
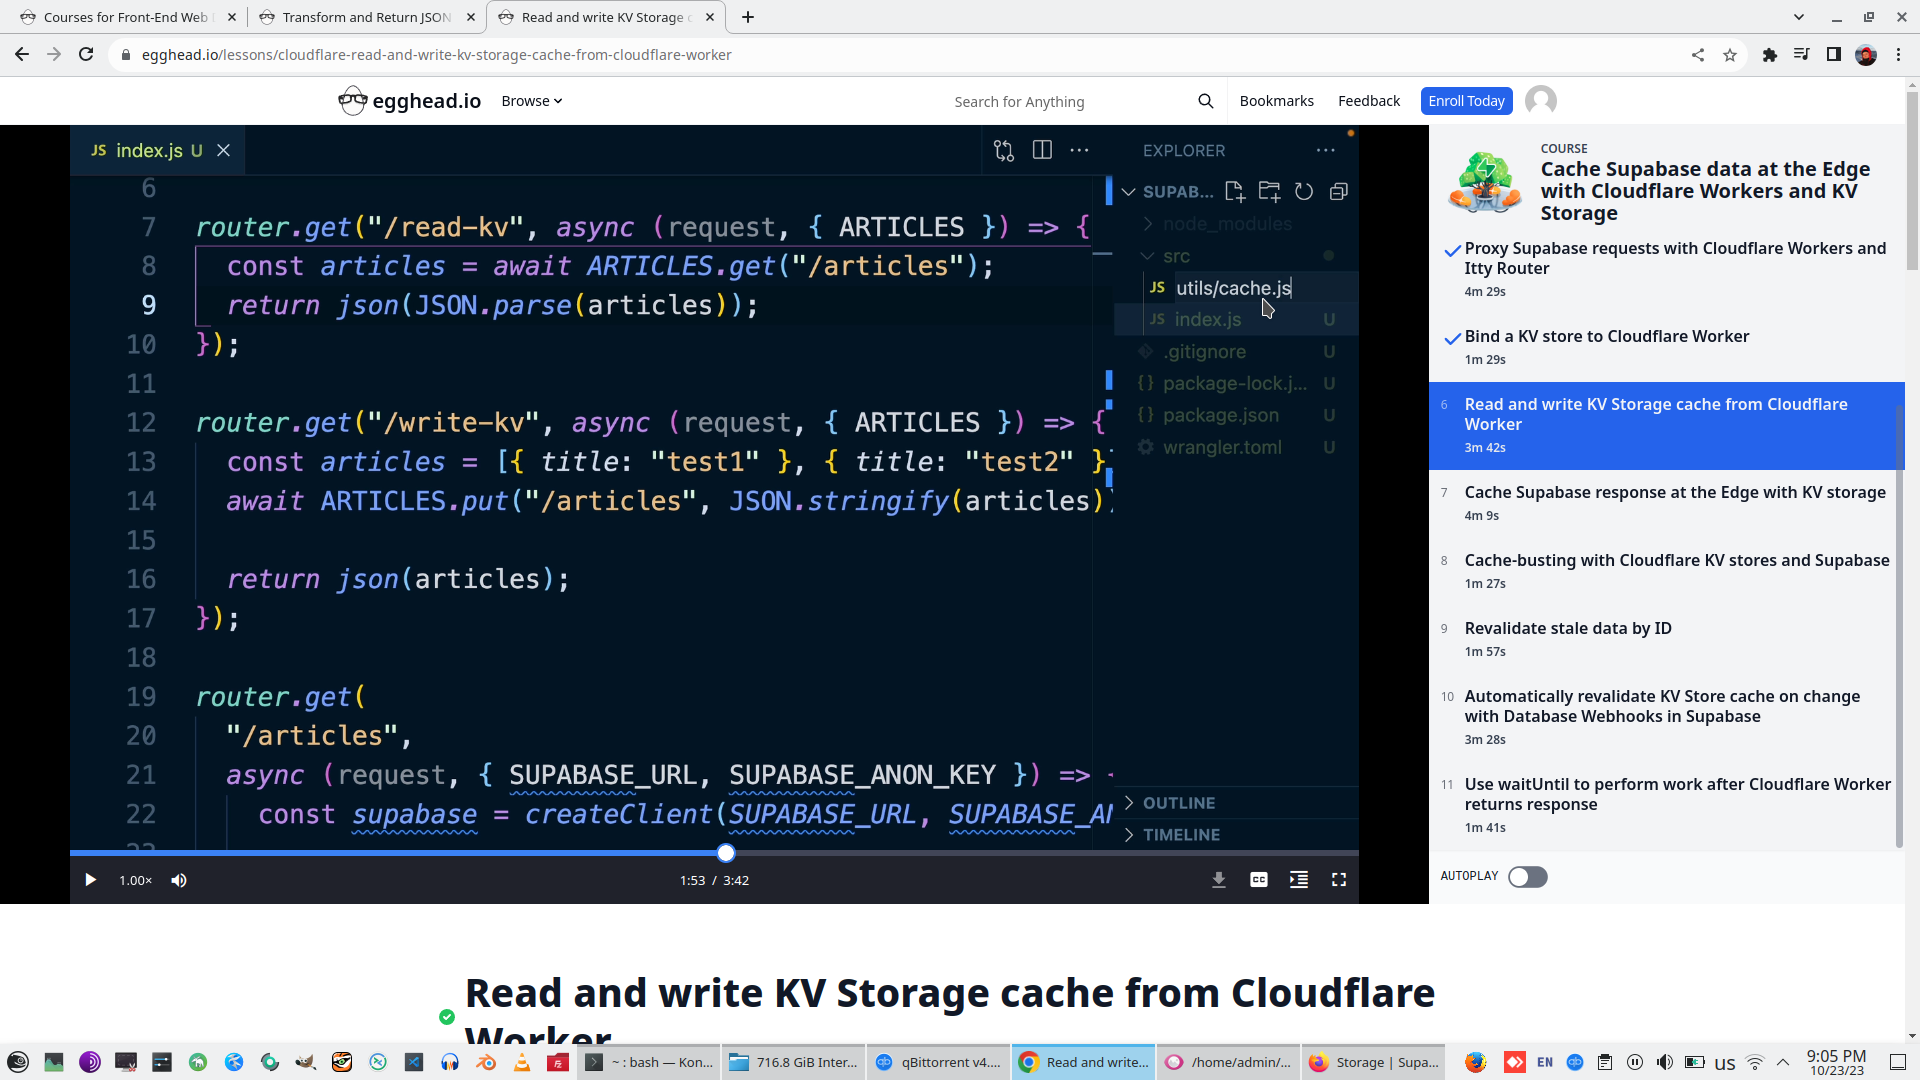
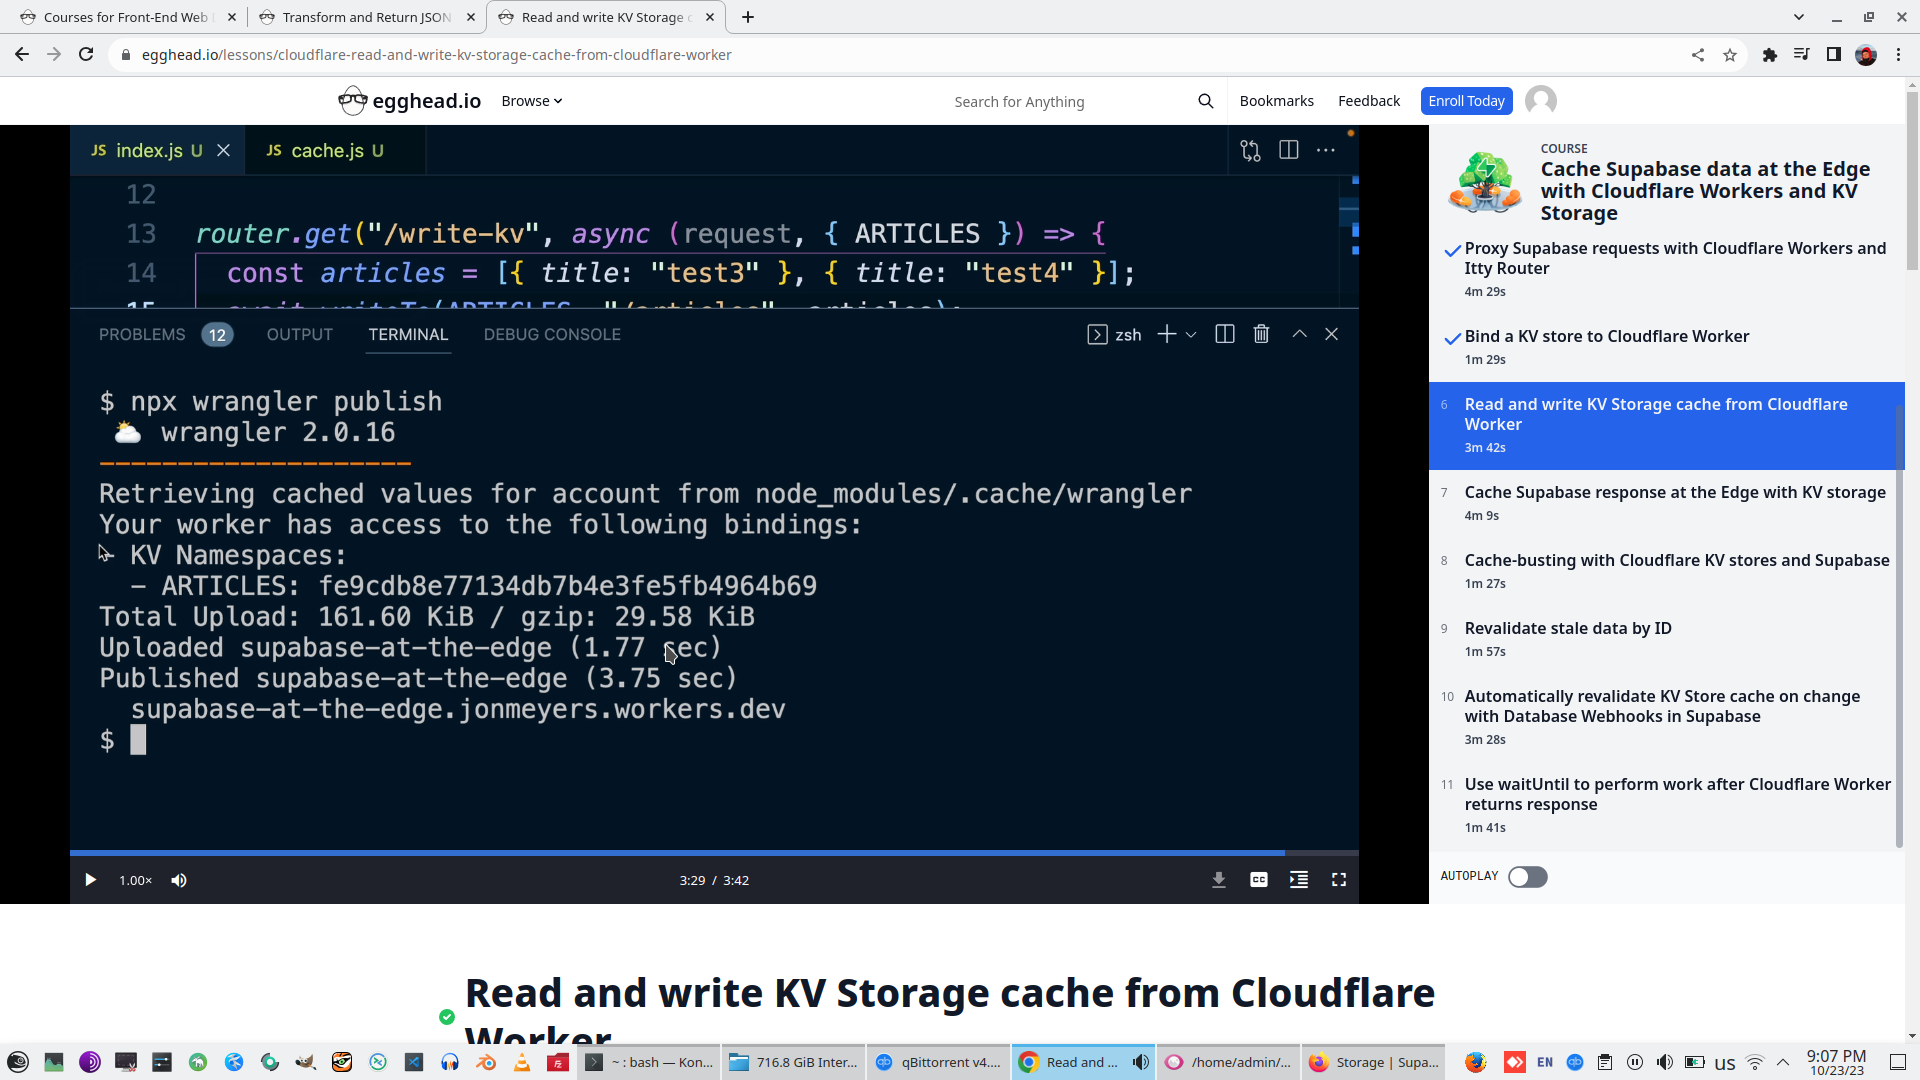
Import that function on index.js and call its
Publish code to Cloudflare server
7. Cache Supabase response at the Edge with KV storage
8. Cache-busting with Cloudflare KV stores and Supabase
9. Revalidate stale data by ID
10. Automatically revalidate KV Store cache on change with Database Webhooks in Supabase
11. Use waitUntil to perform work after Cloudflare Worker returns response
4. Build a Realtime Chat App with Remix and Supabase, sourceCode - https://github.com/dijonmusters/chatter
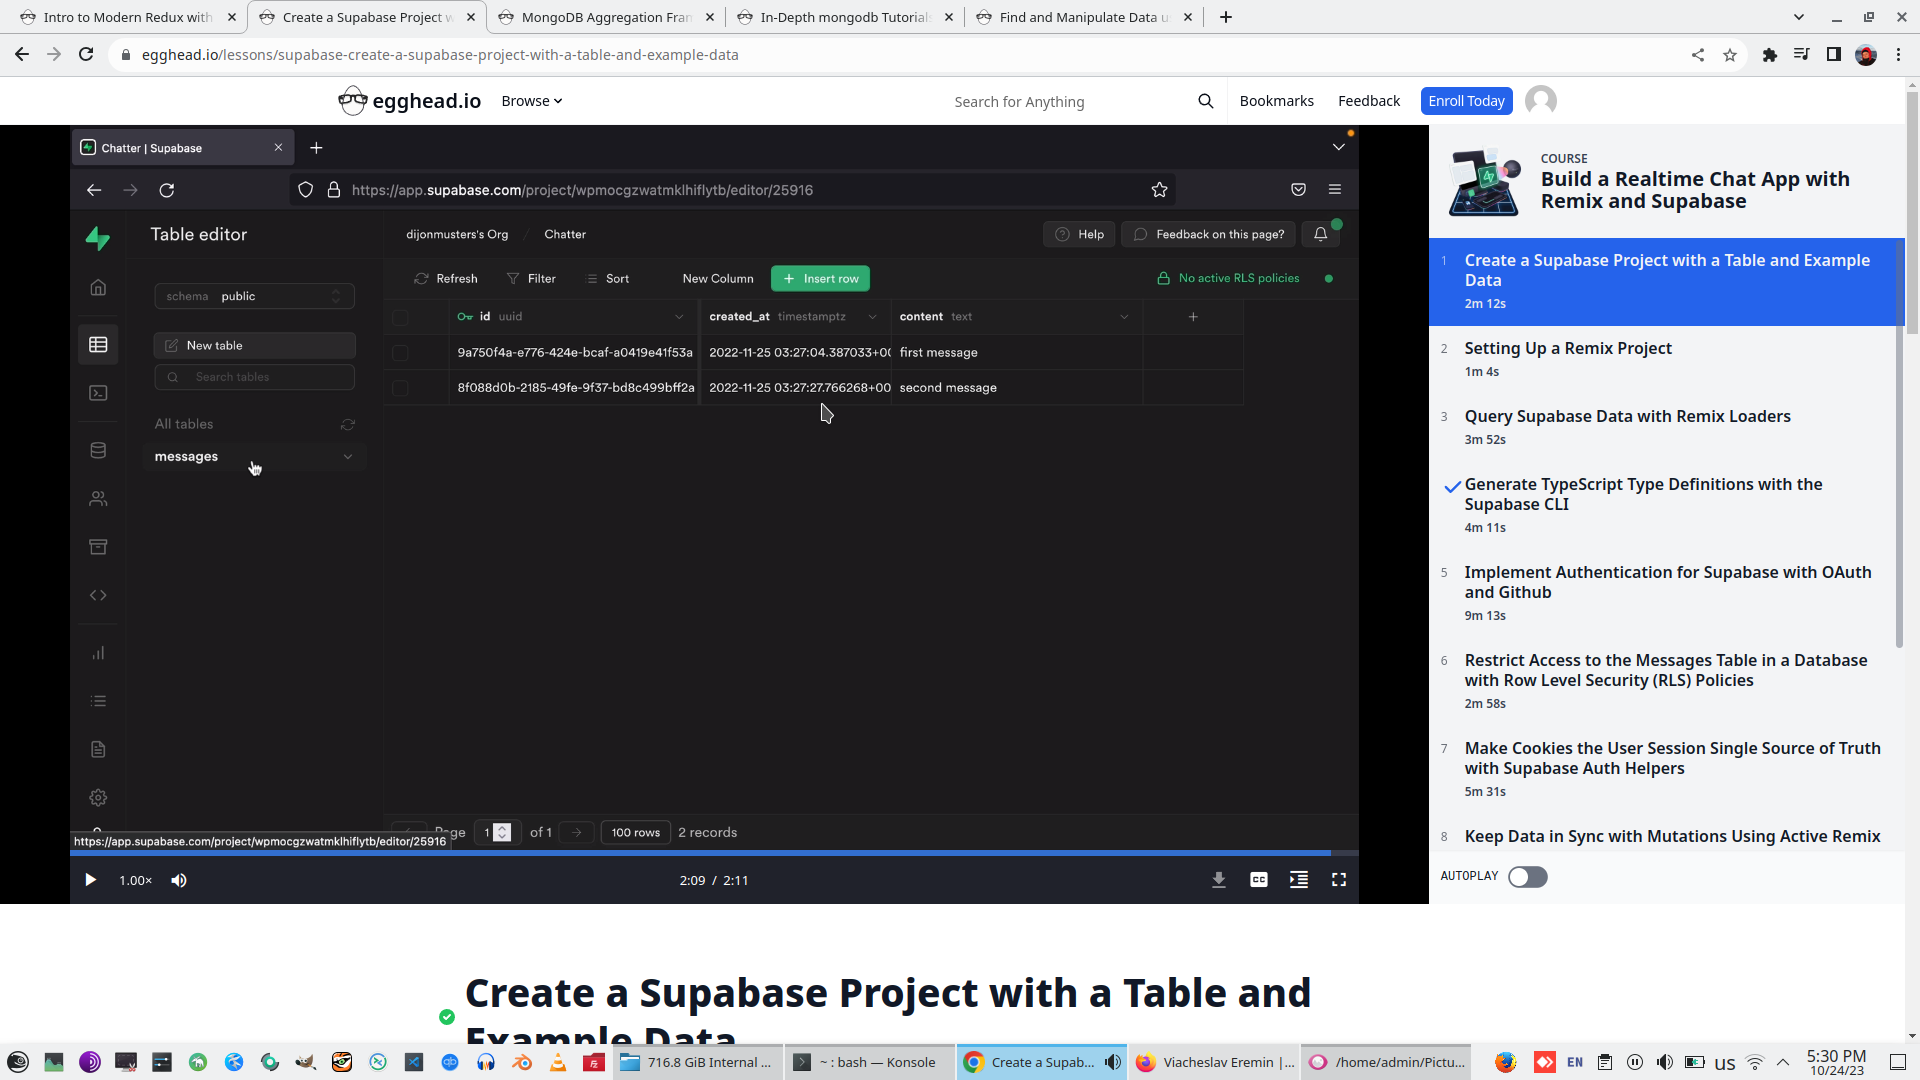
1. Create Supabase Project with a table and example data


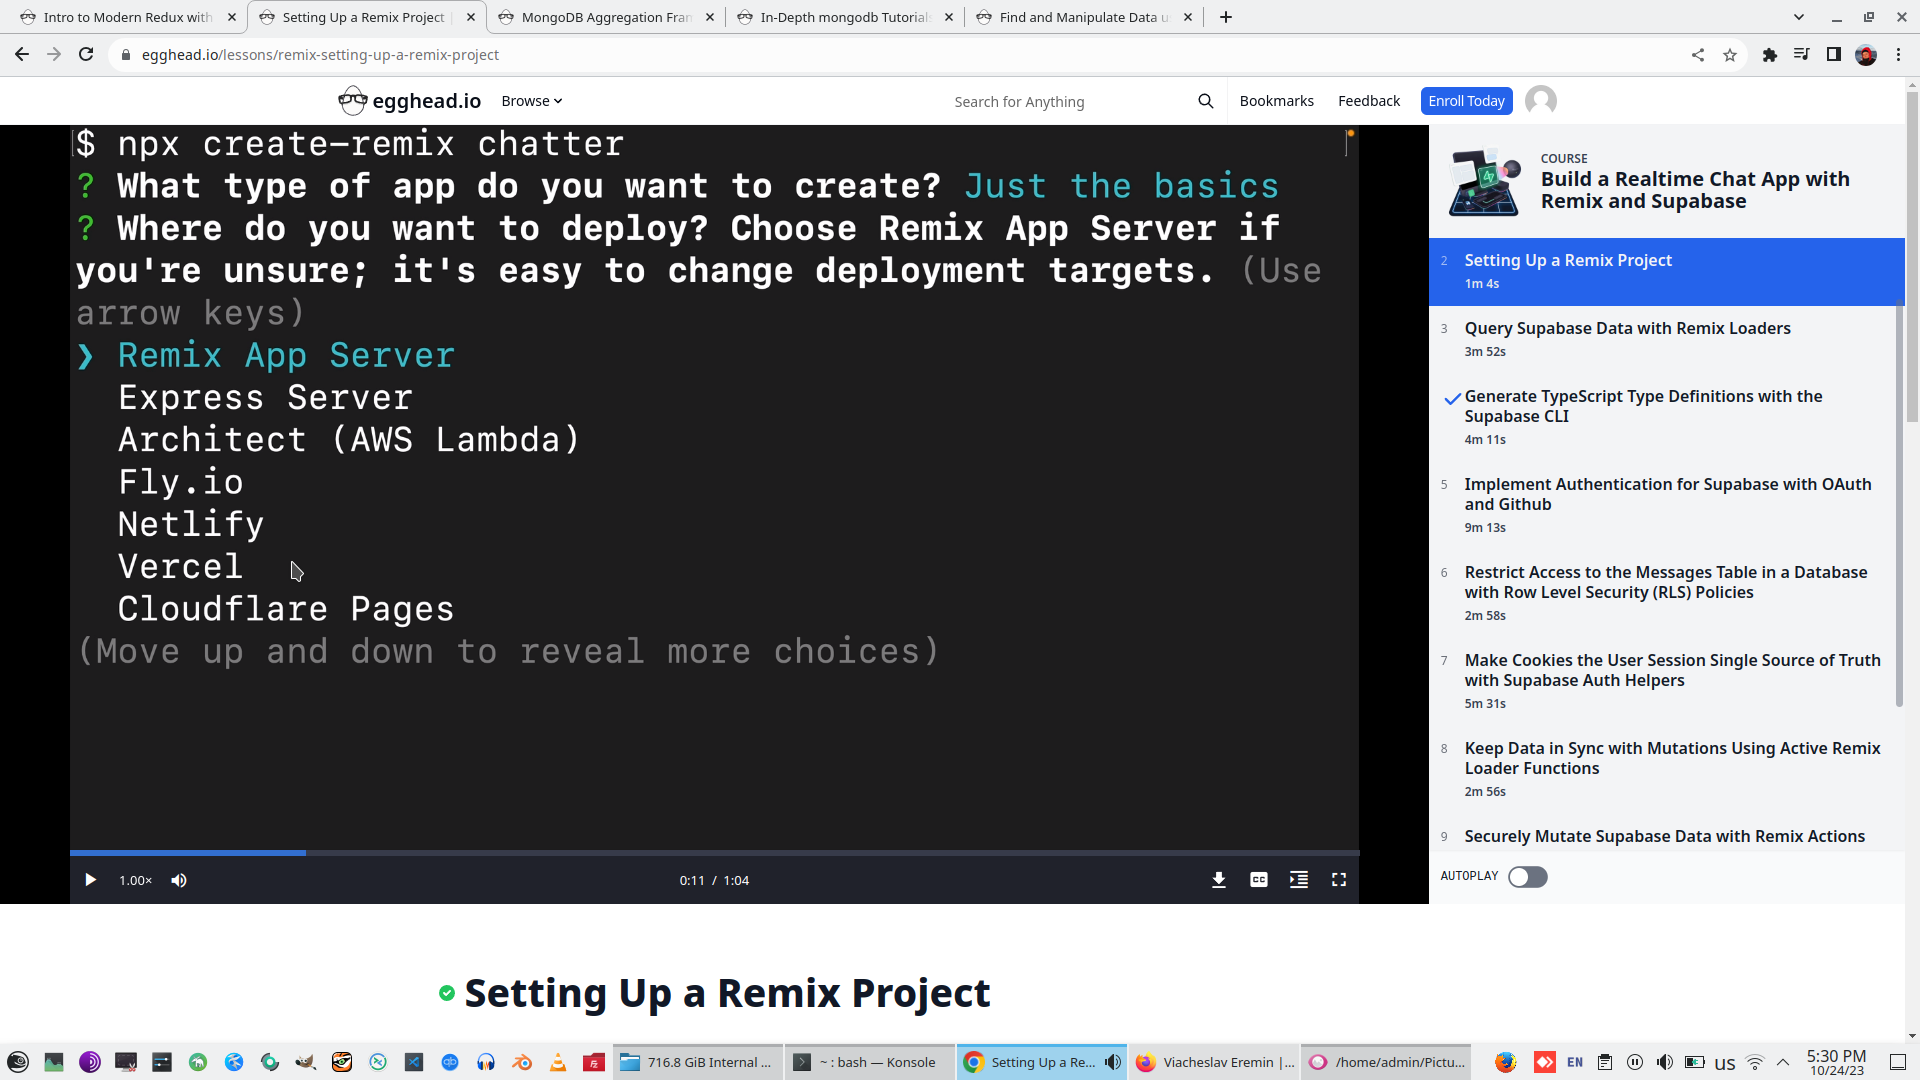
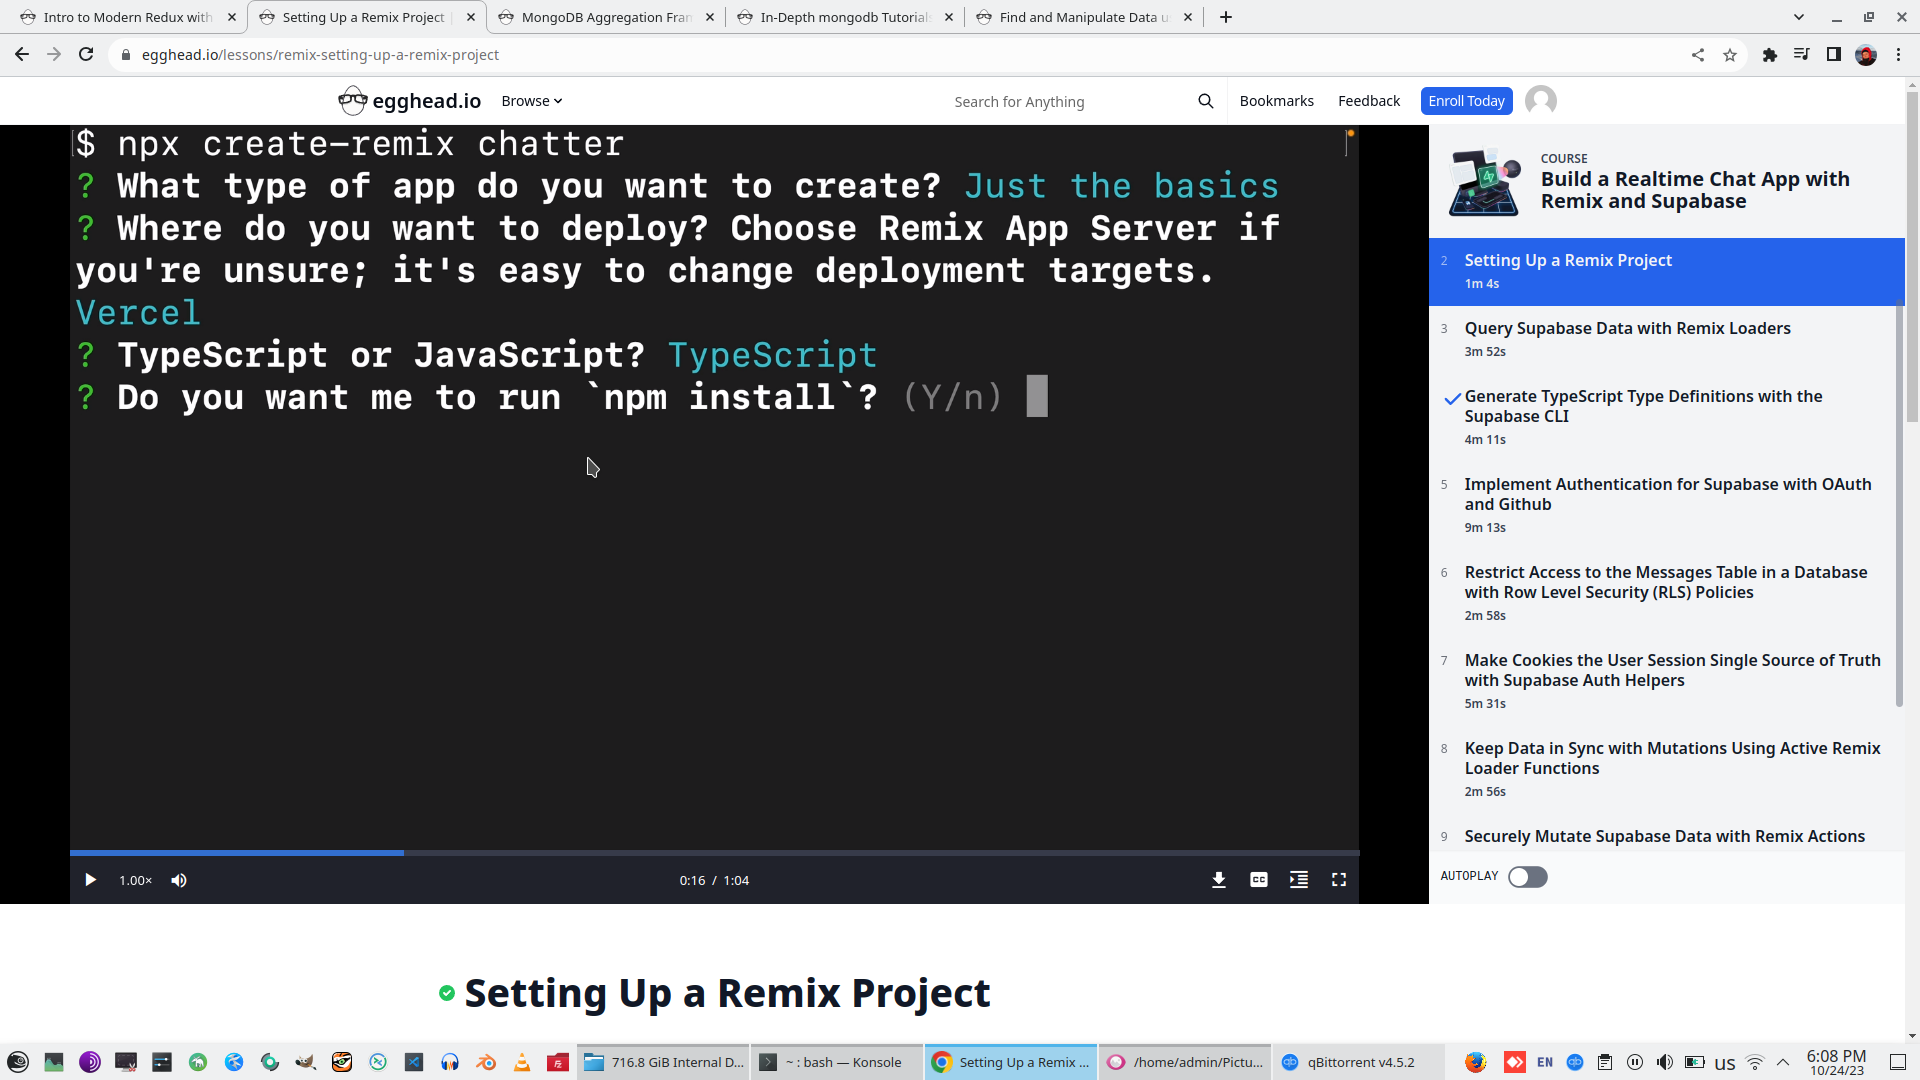
2. Setting Up a Remix Project
- Remix App Srver
- Express Server
- Architect (AWS Lambda)
- Fly.io
- Netlify
- Vercel
- Cloudflare pages
Typescript or Javascript
Code .
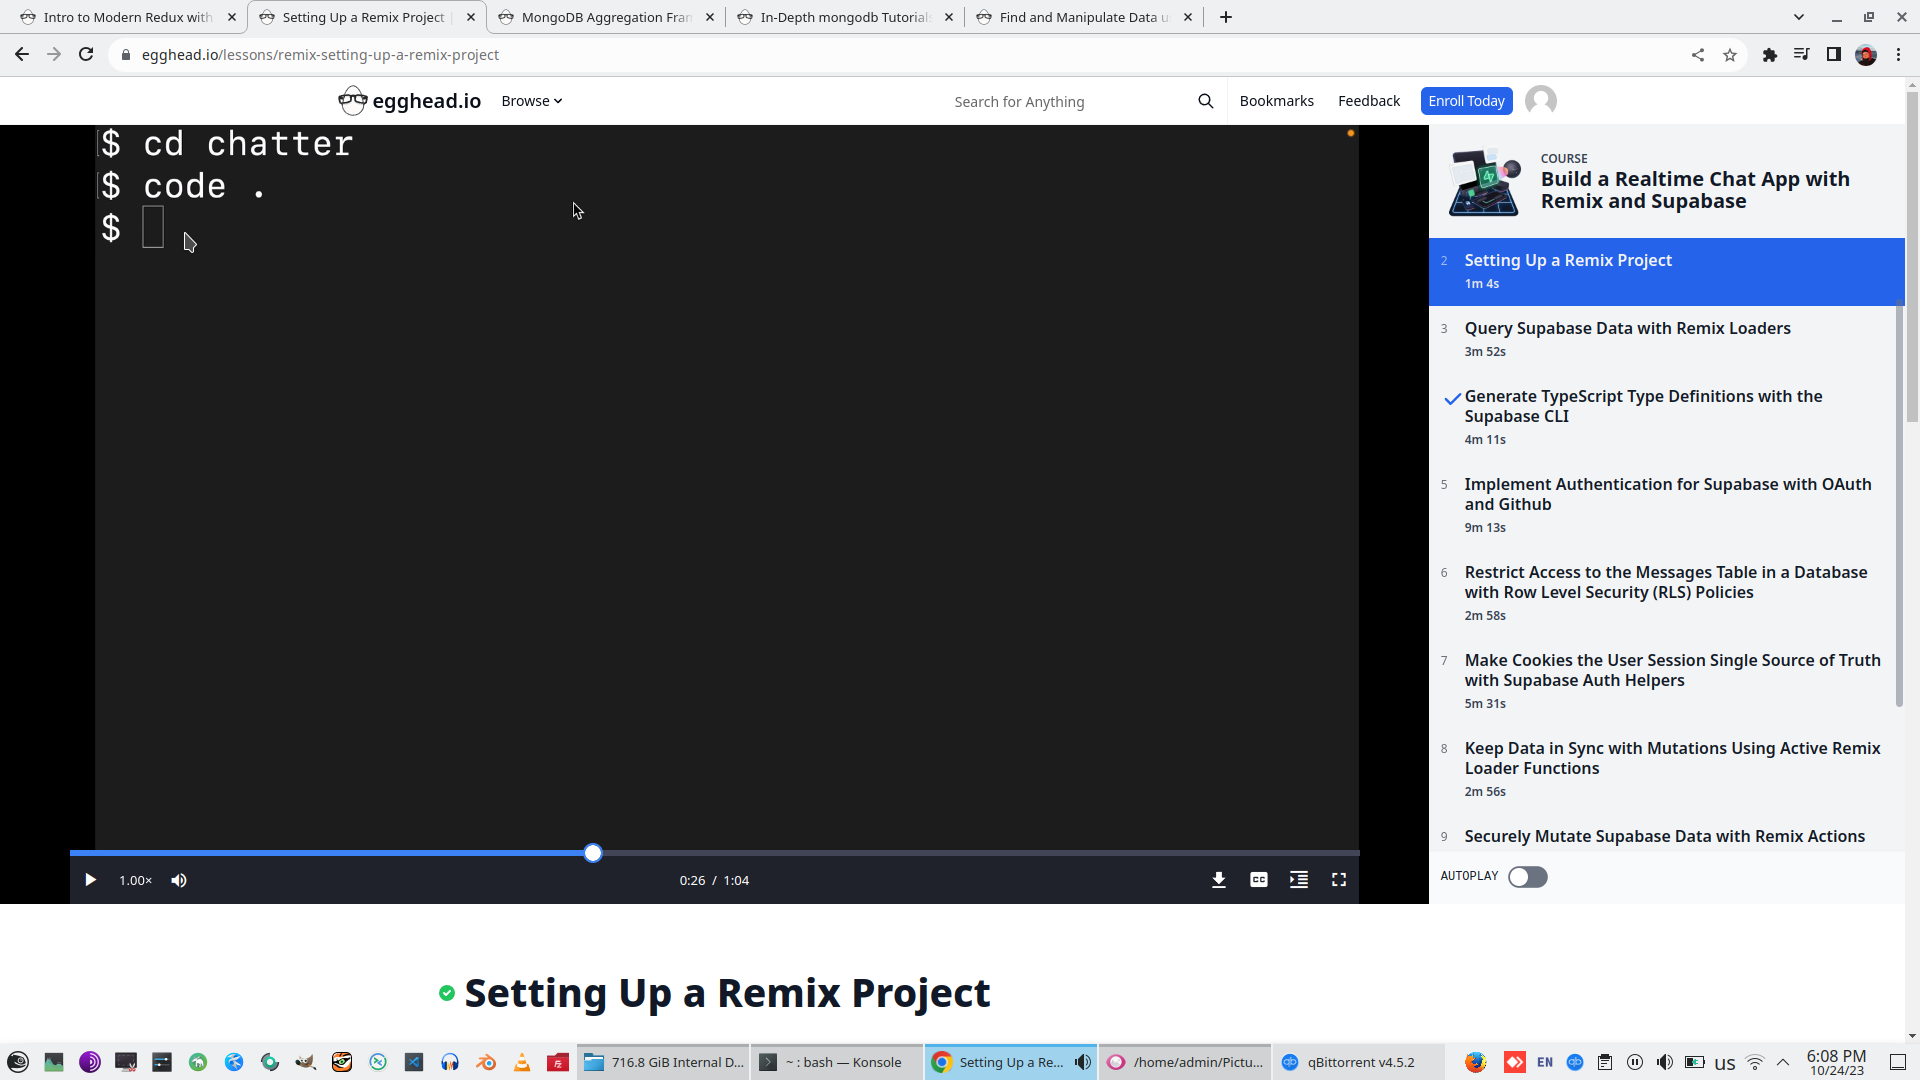
npm run dev - remix dev (start remix local sever)

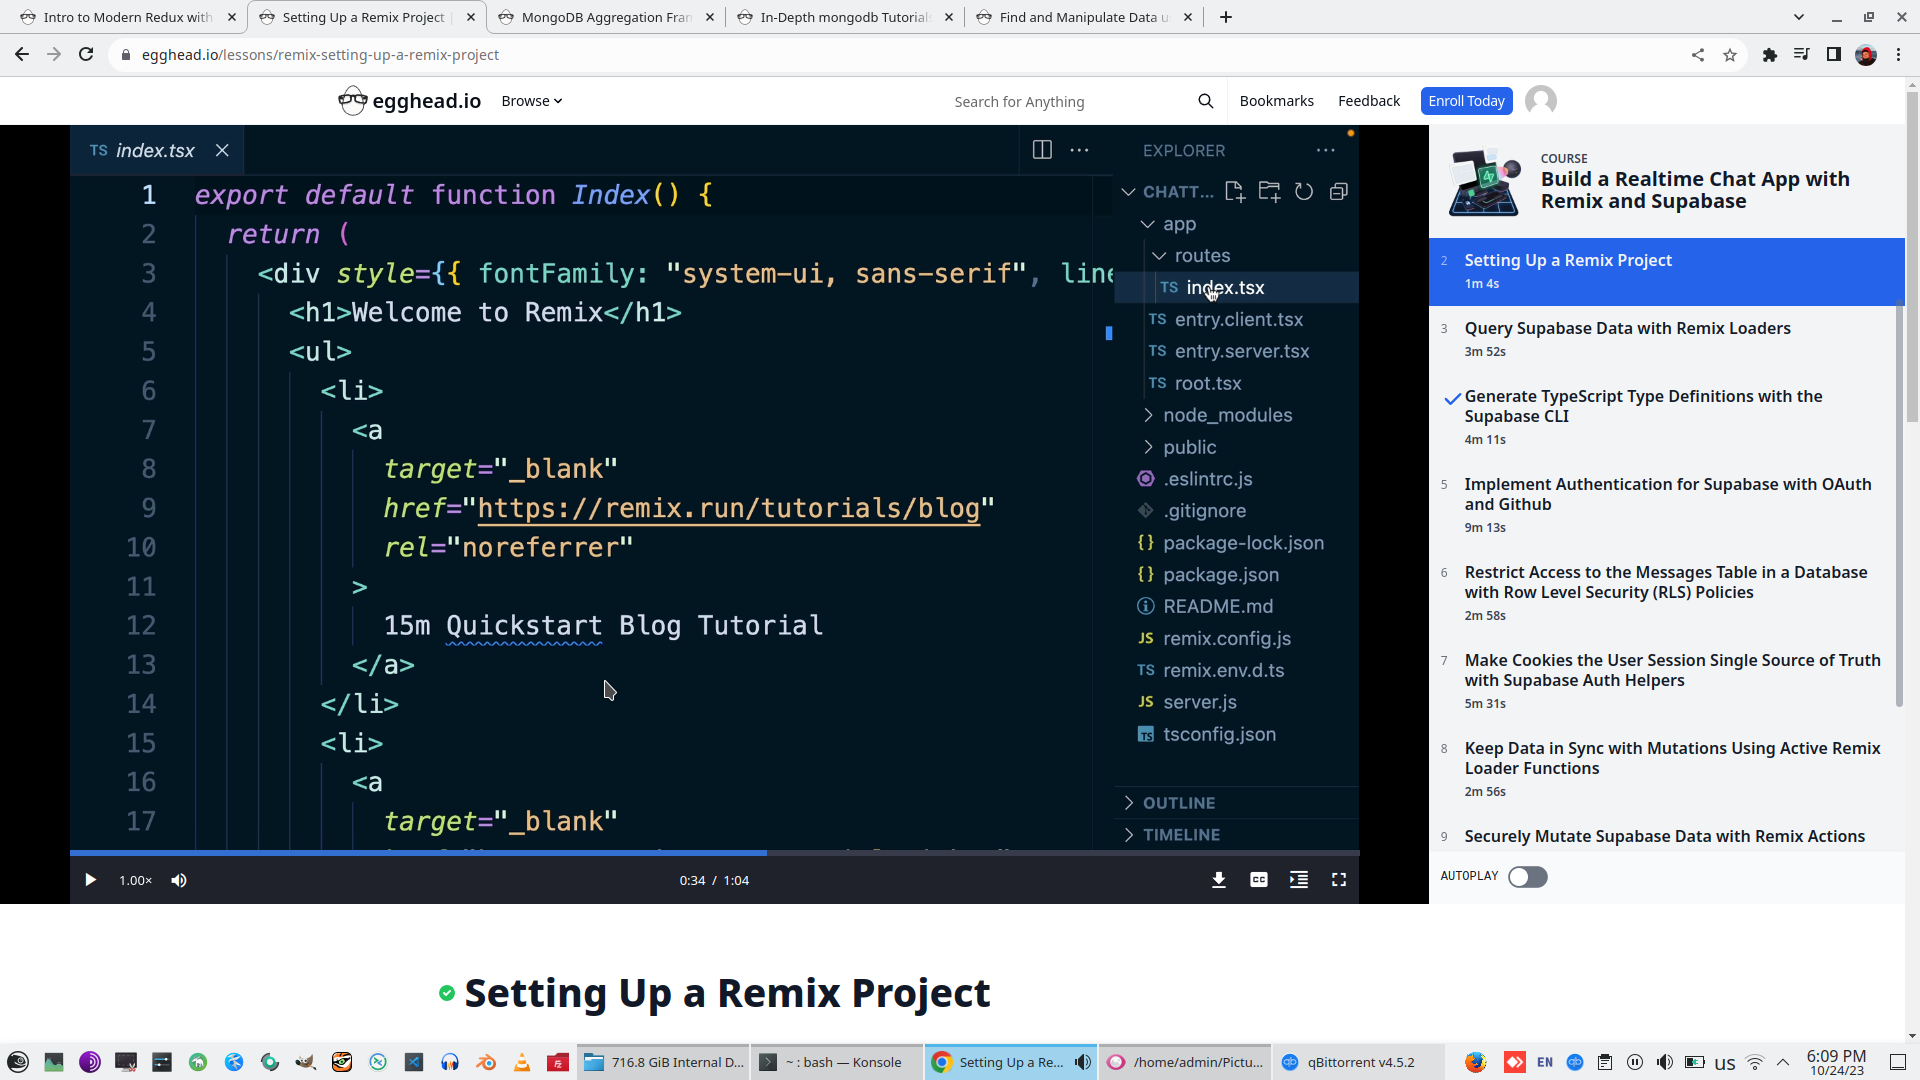
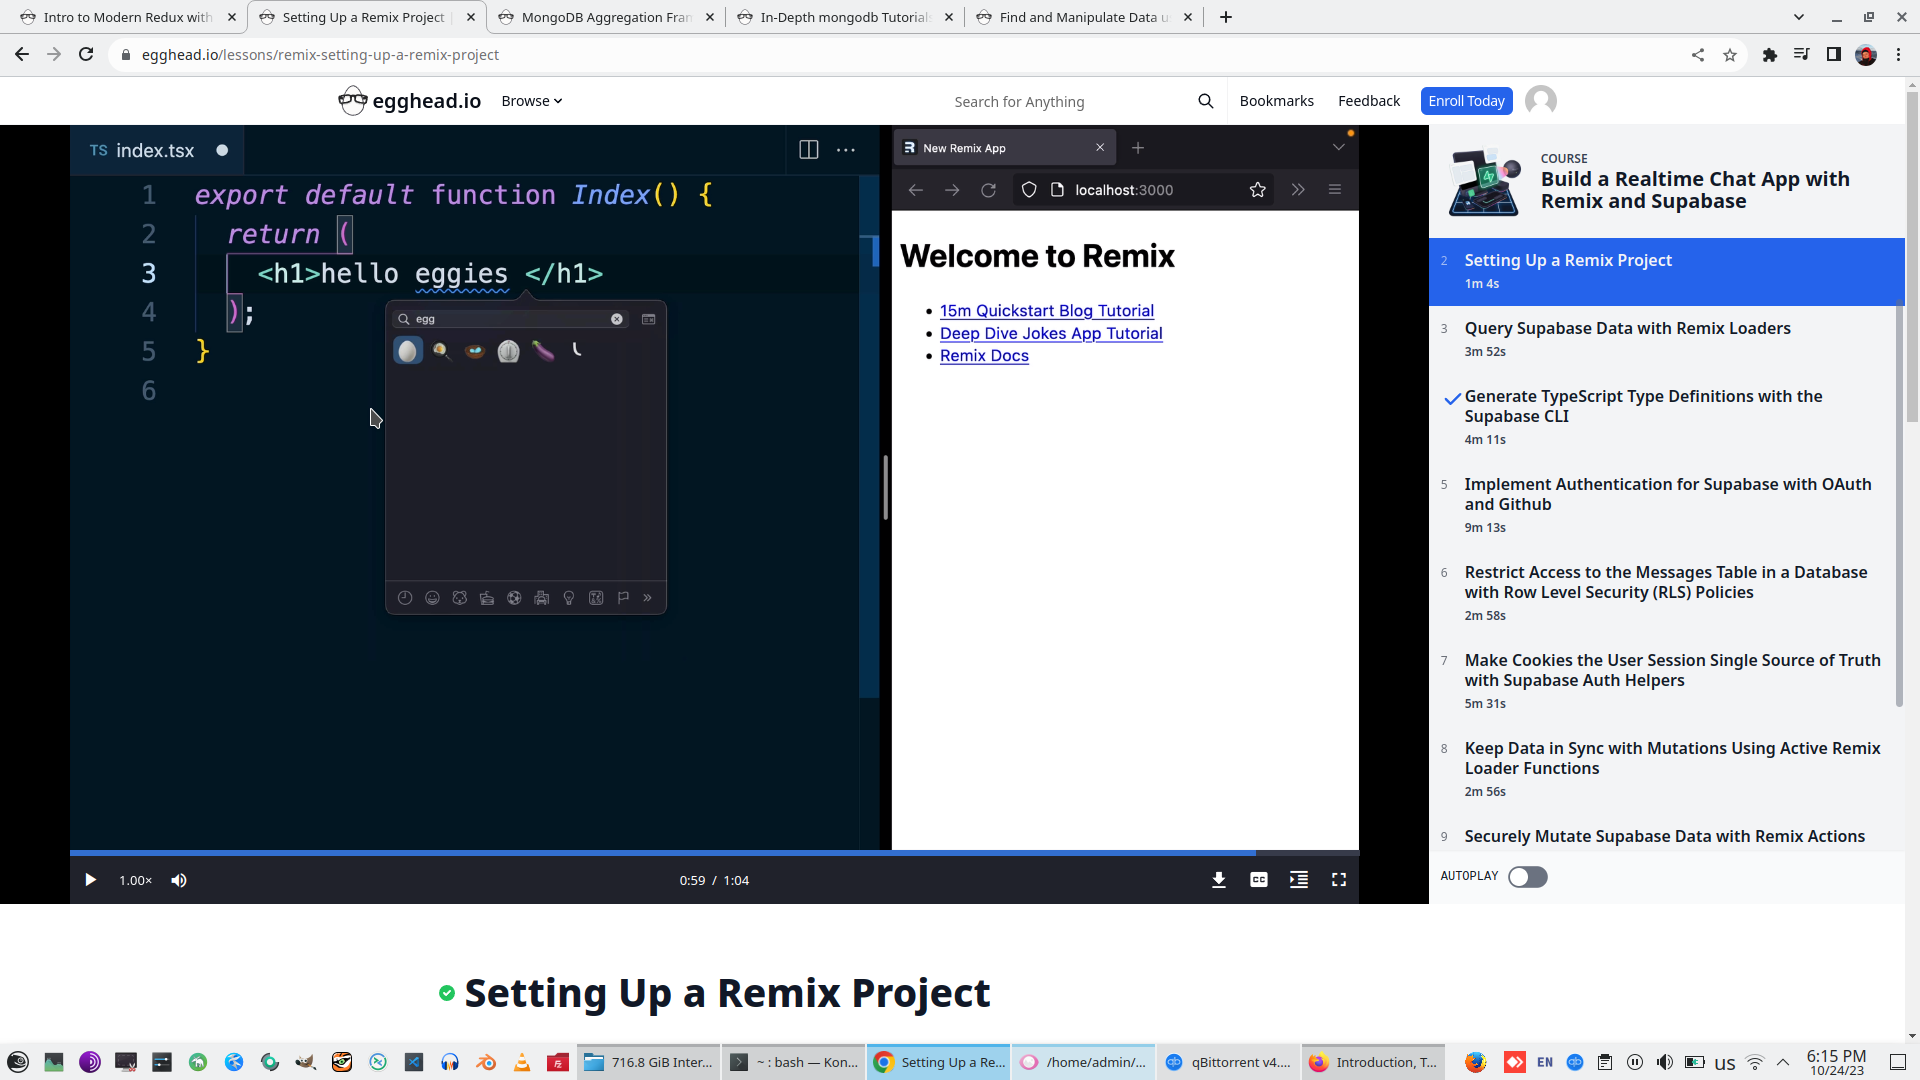
Change default JS pages for Worker - TSX page for React

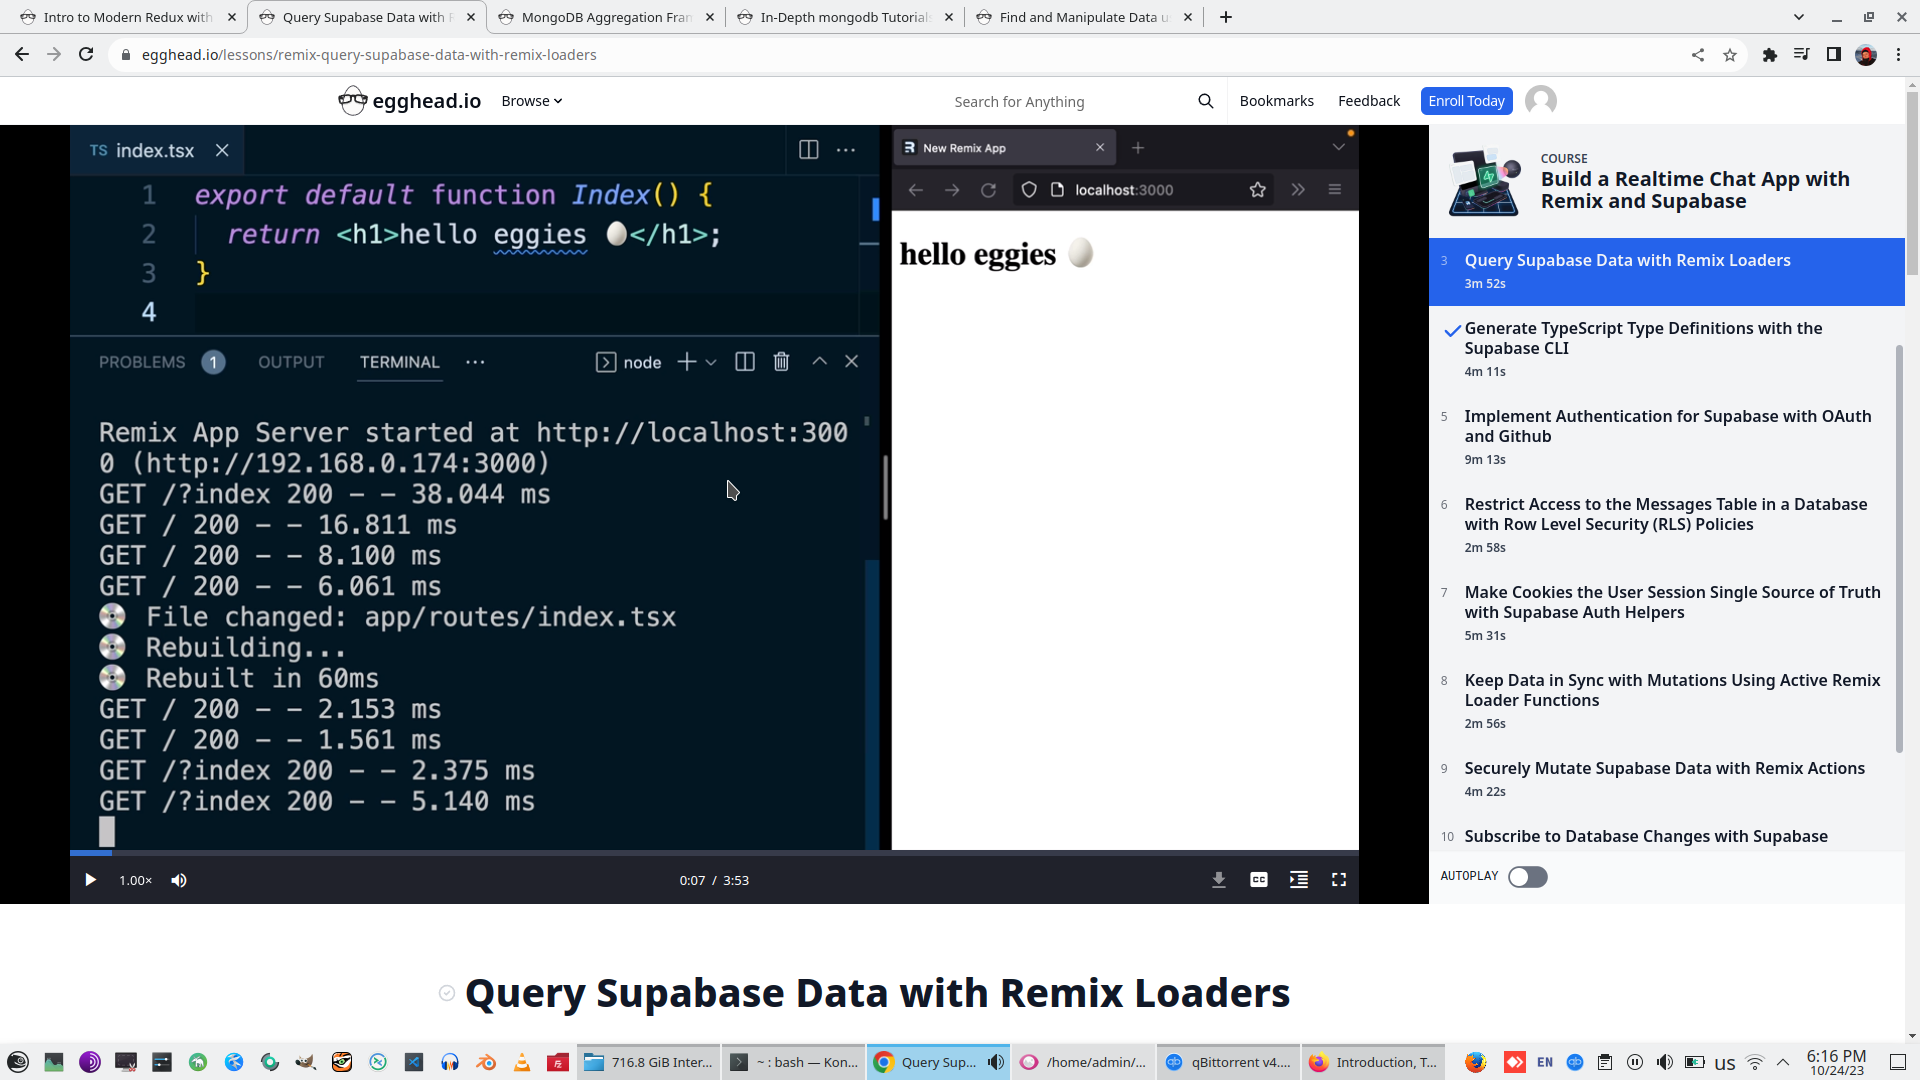
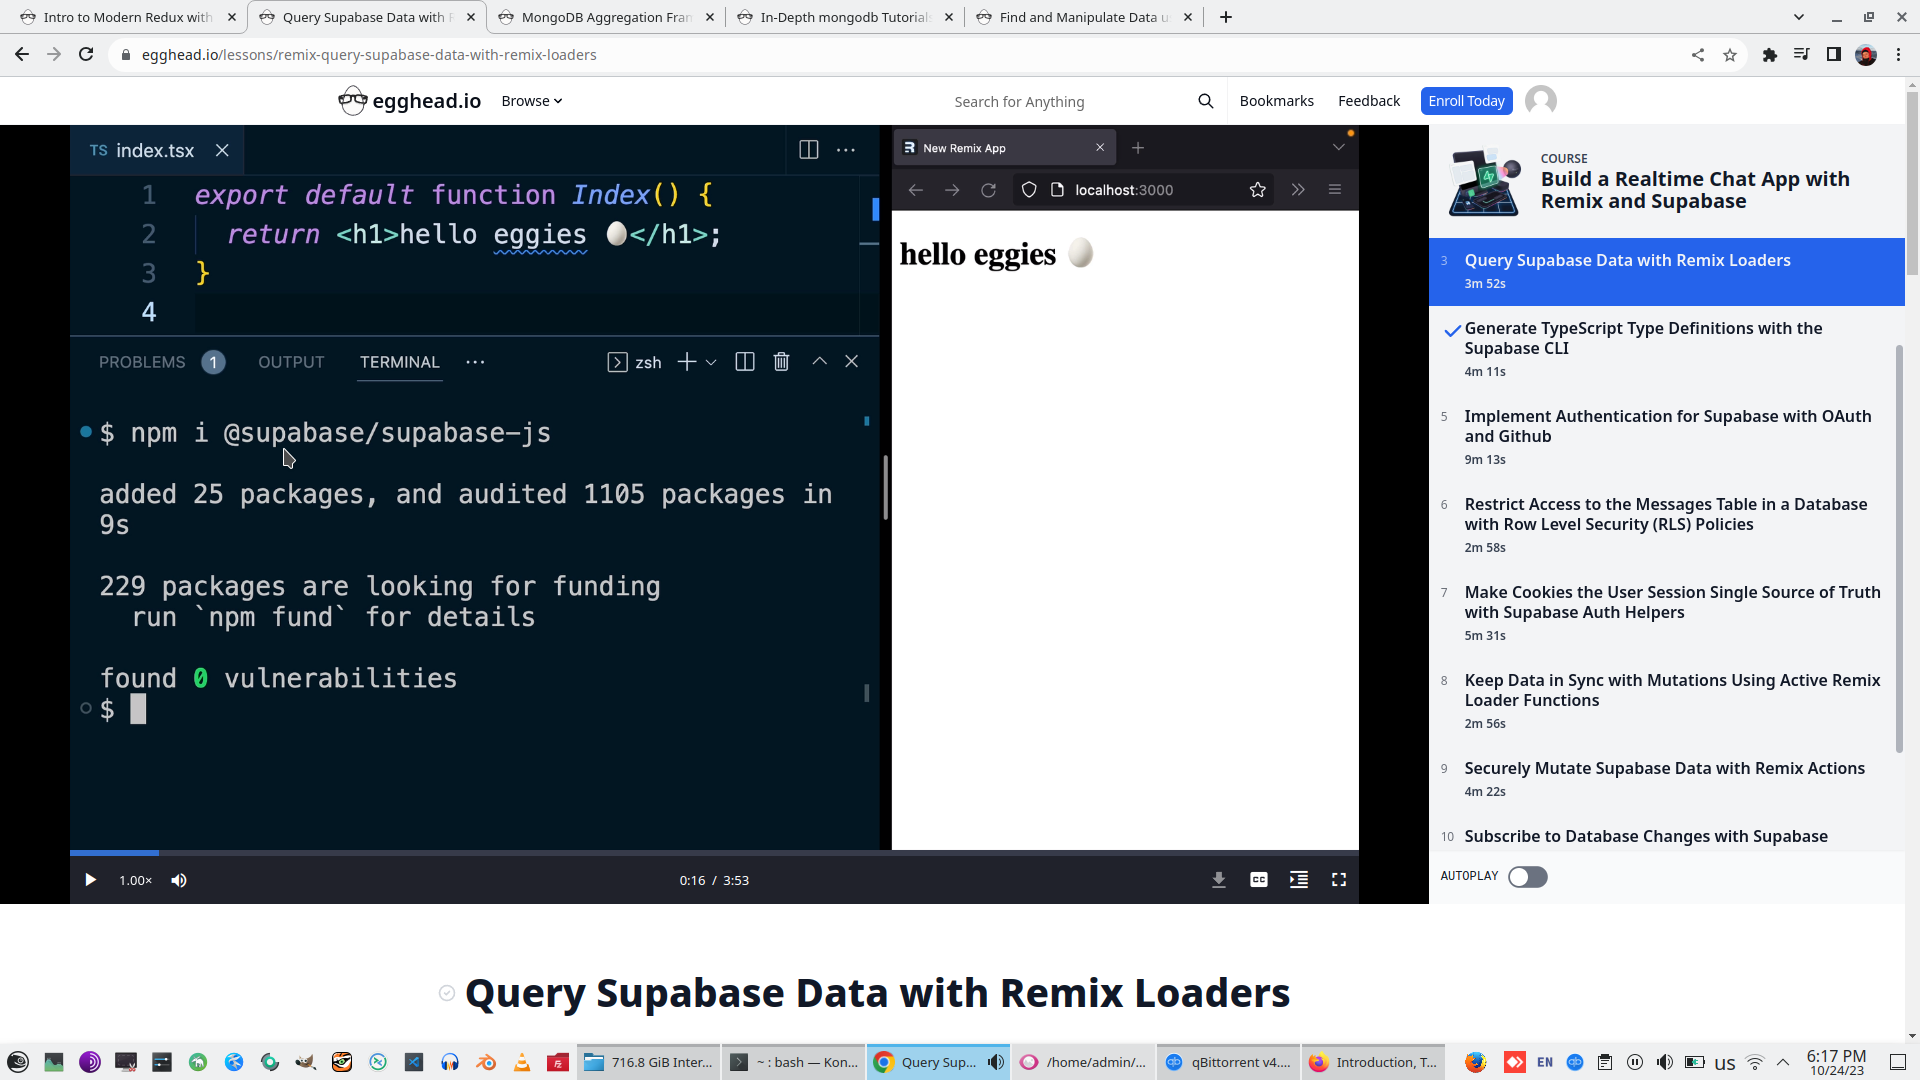
3. Query Supabase Data with Remix Loaders
npm i @supabase/supabase-js (install JS Supabase support)
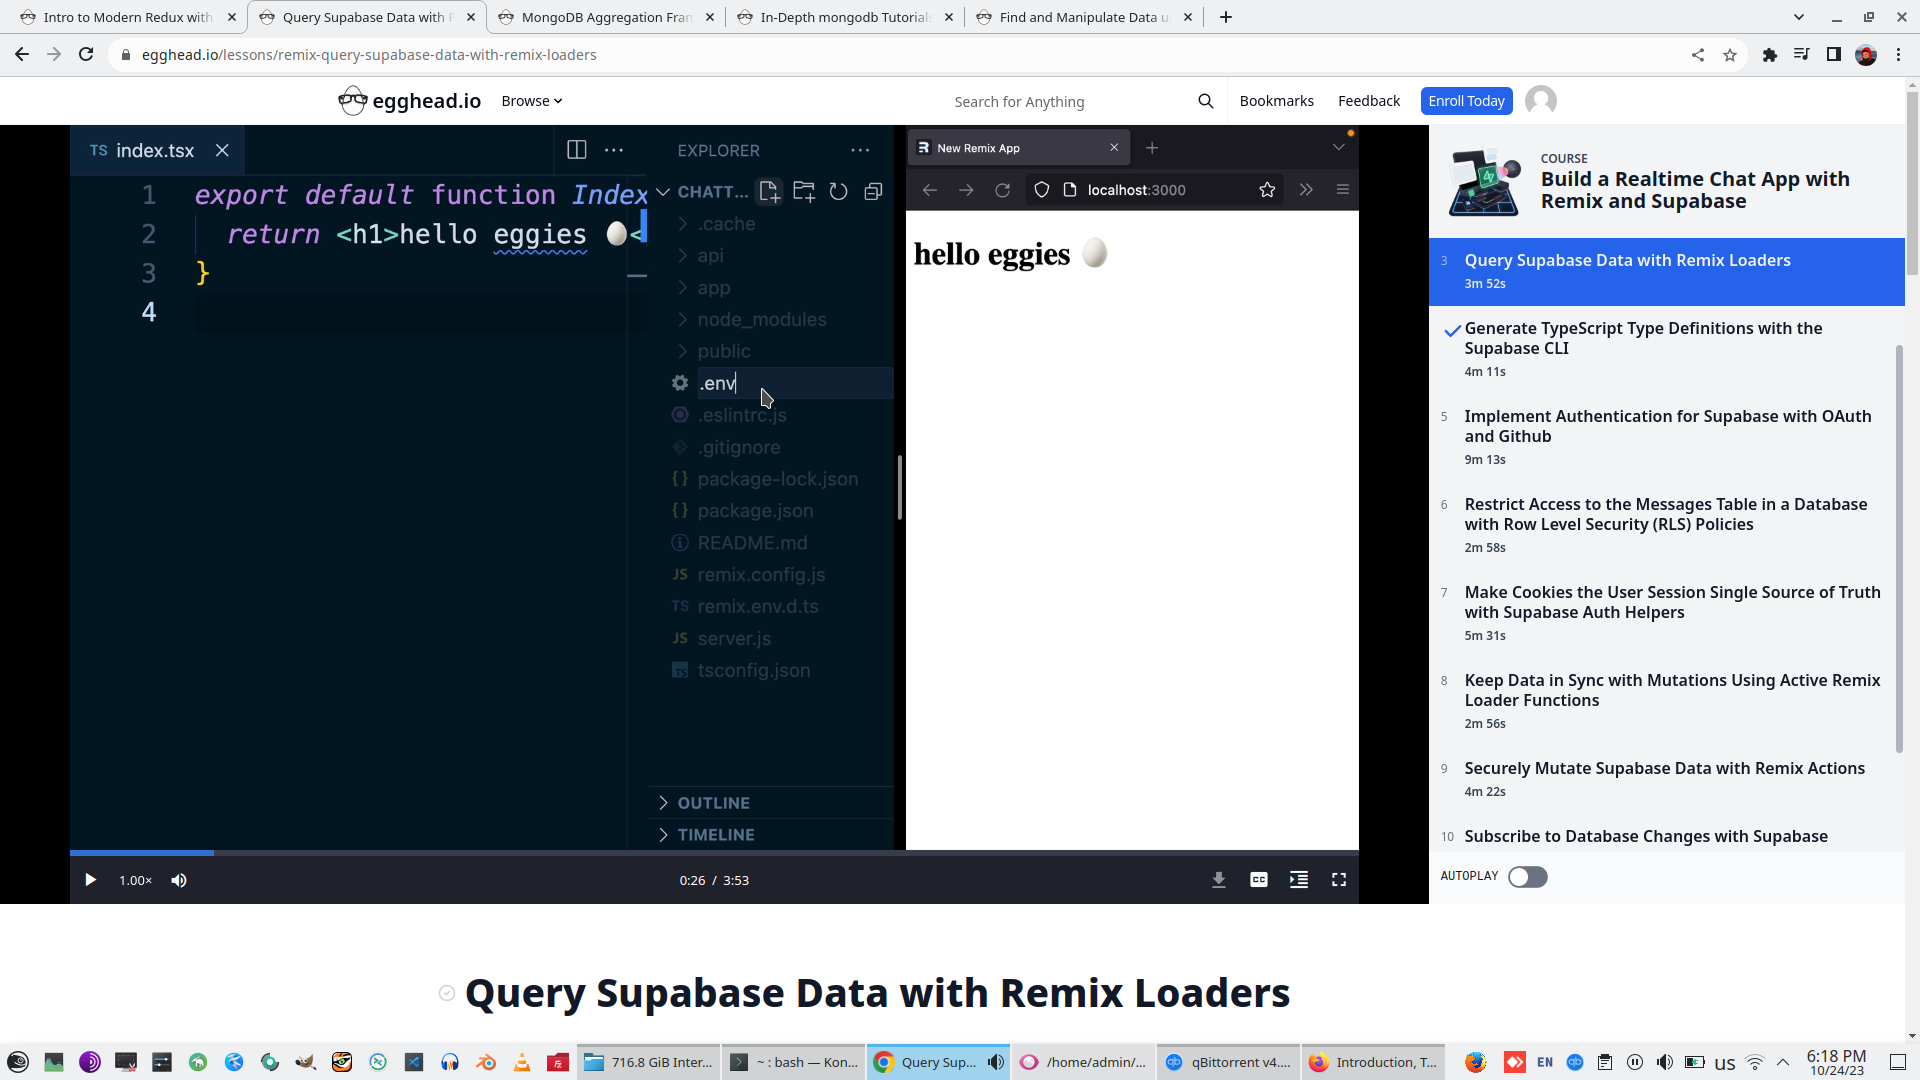
Change .GitIgnore to avoid moving secret environment variables to Github

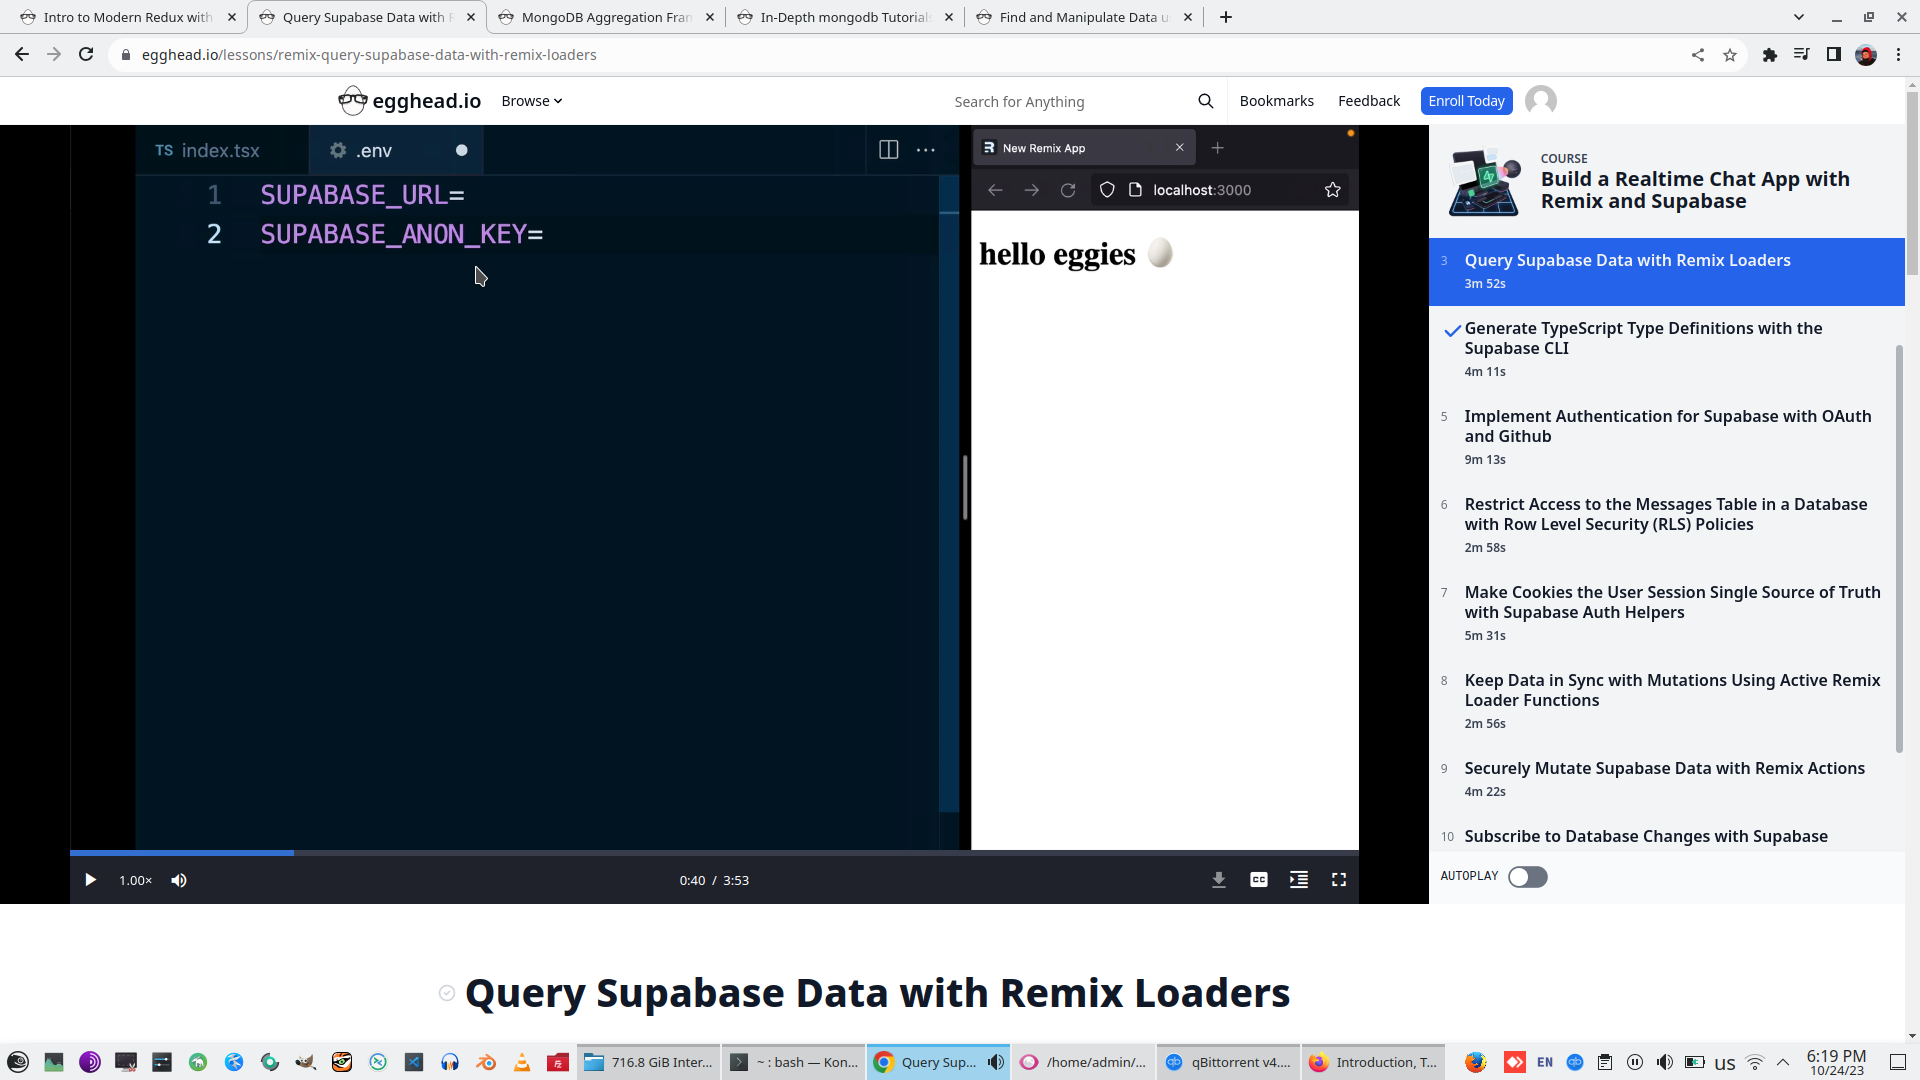
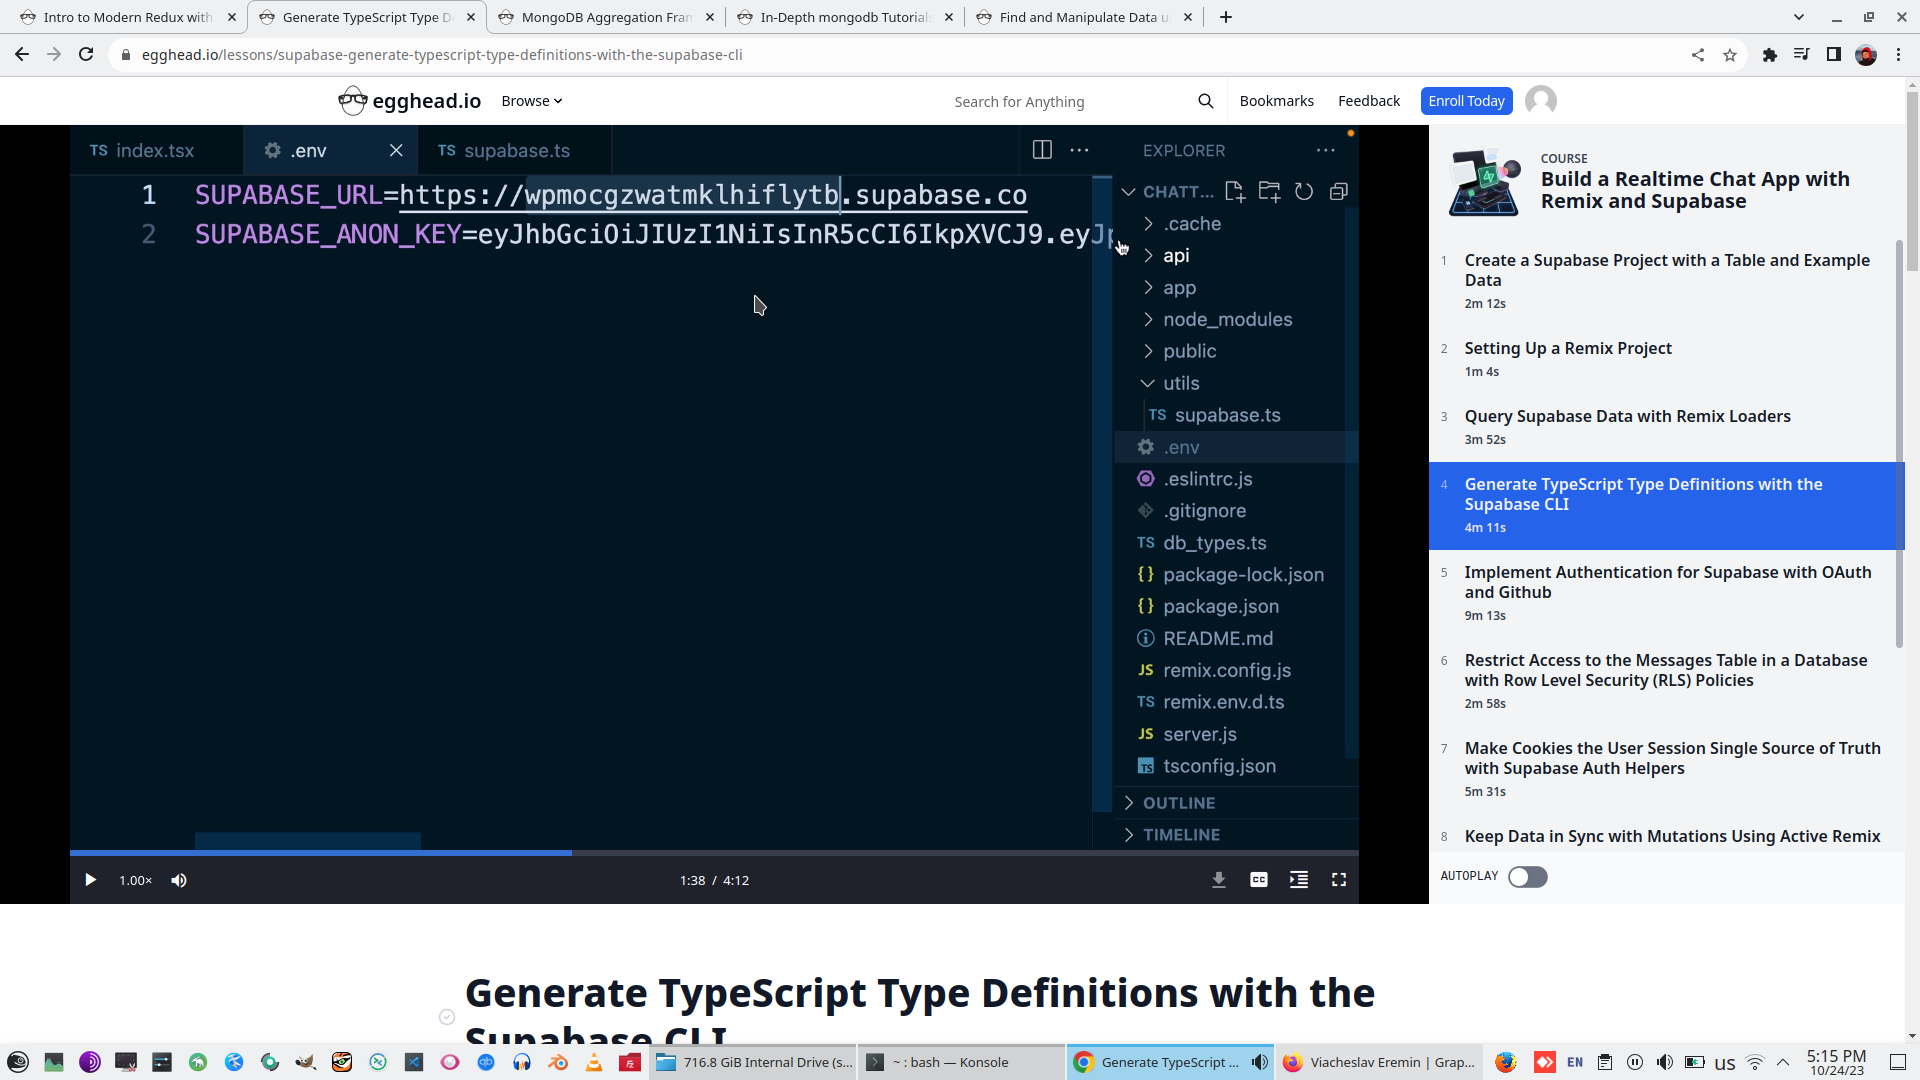
Create two environment variable on file .ENV
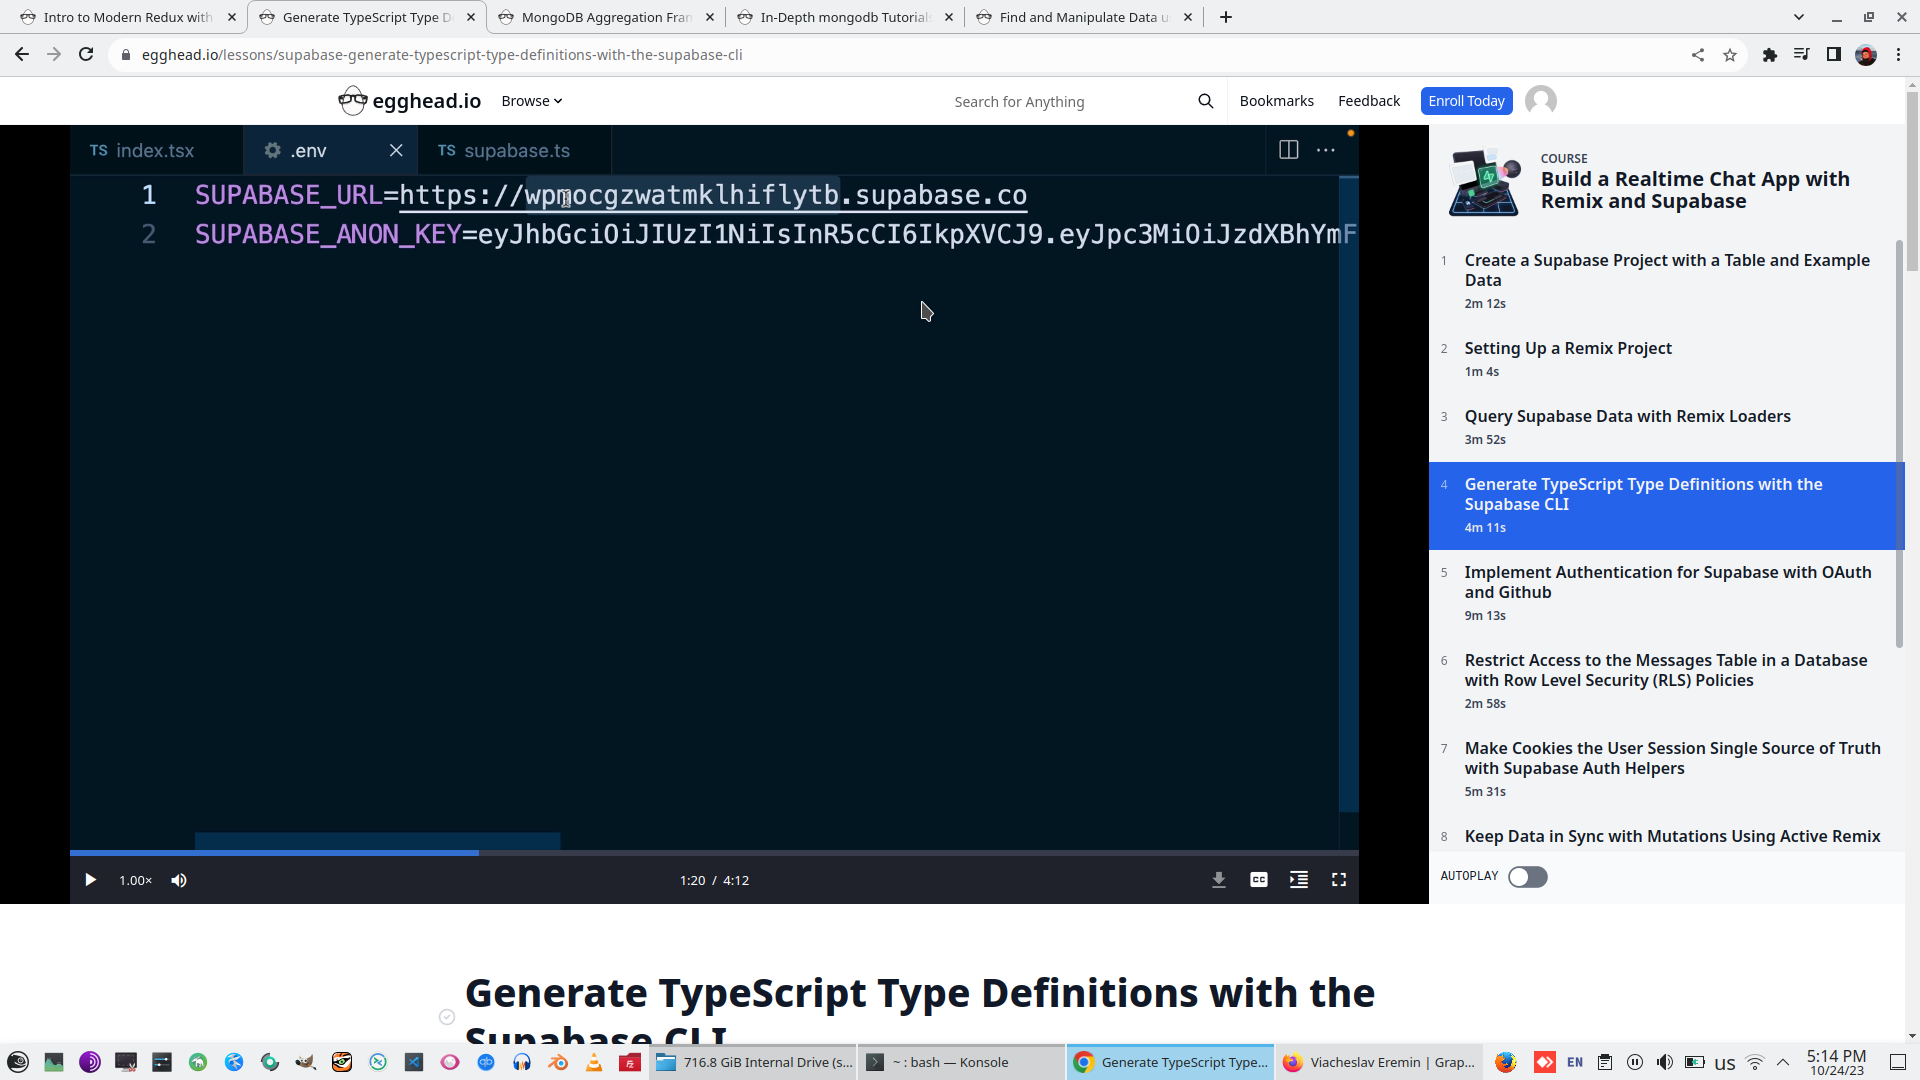
- SUPABASE_URL=
- SUPABASE_ANON_KEY=
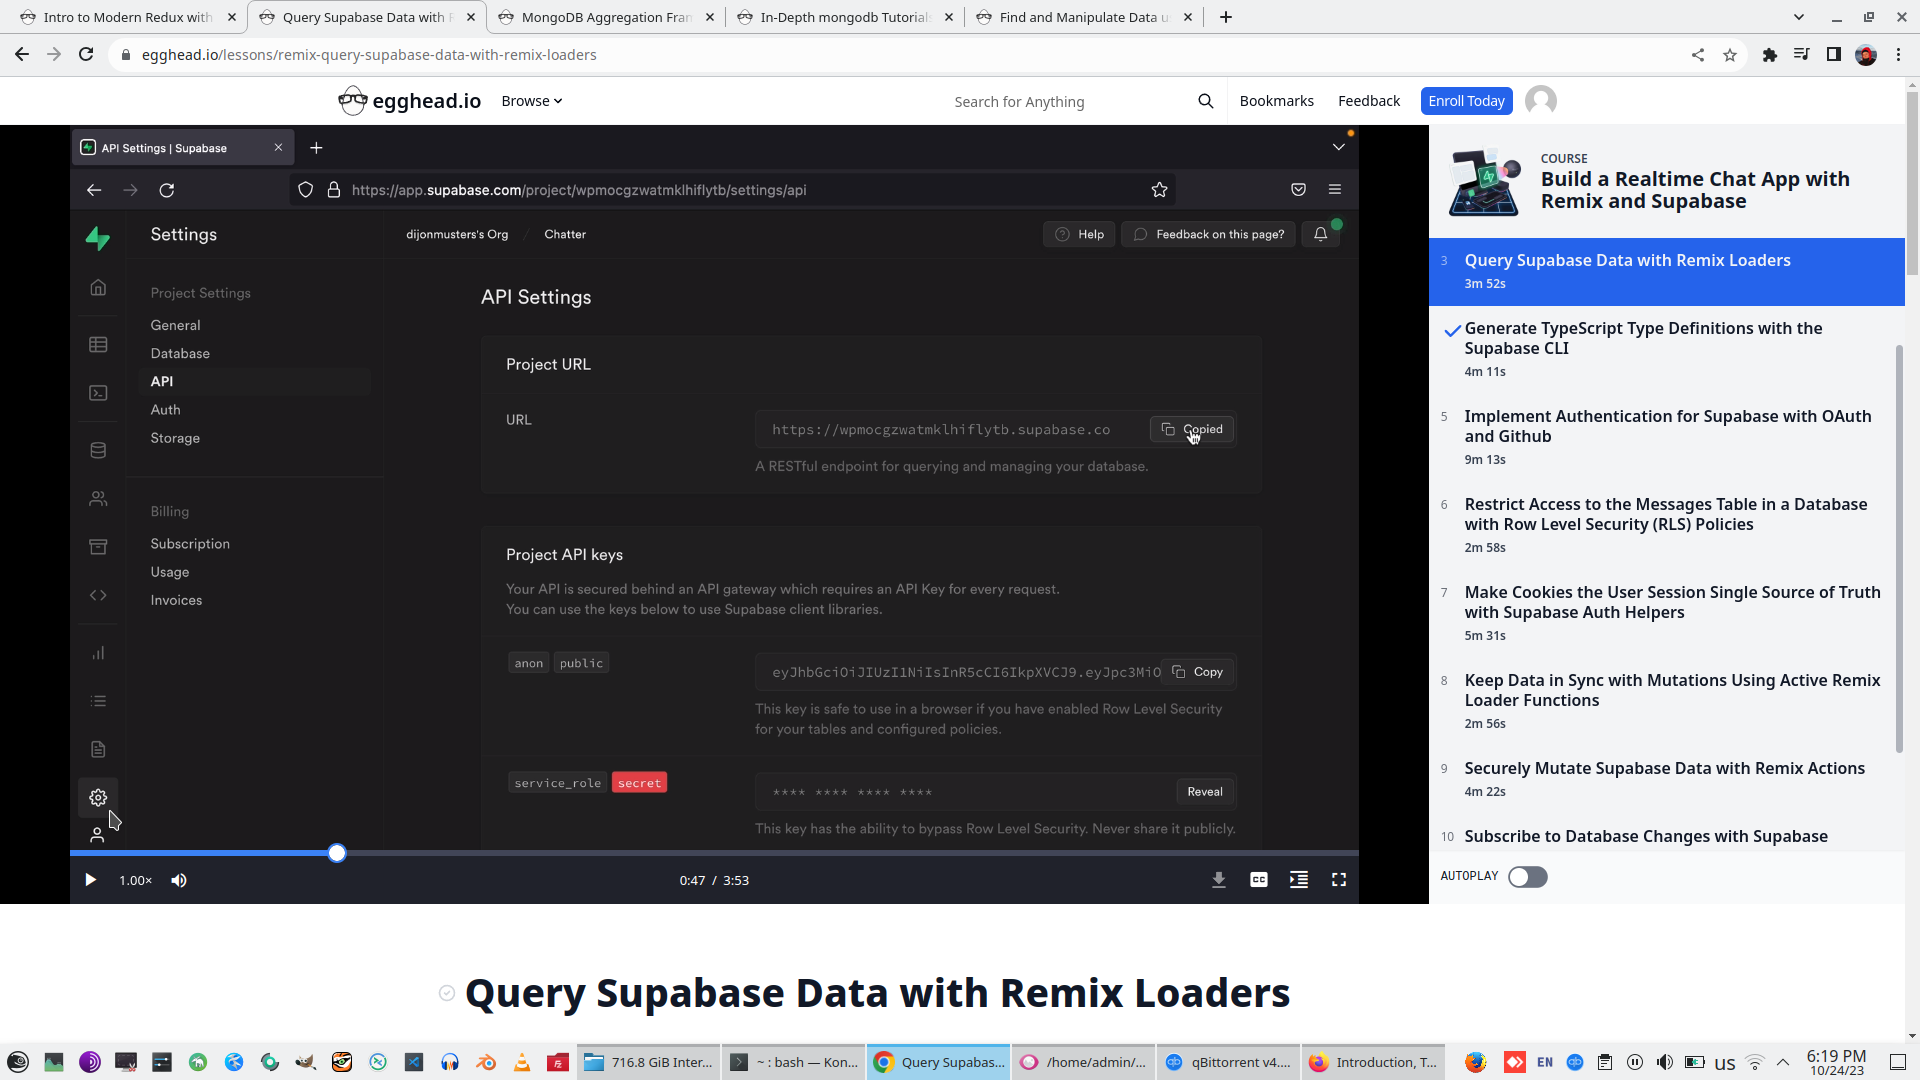
And grab it from Supabase panel
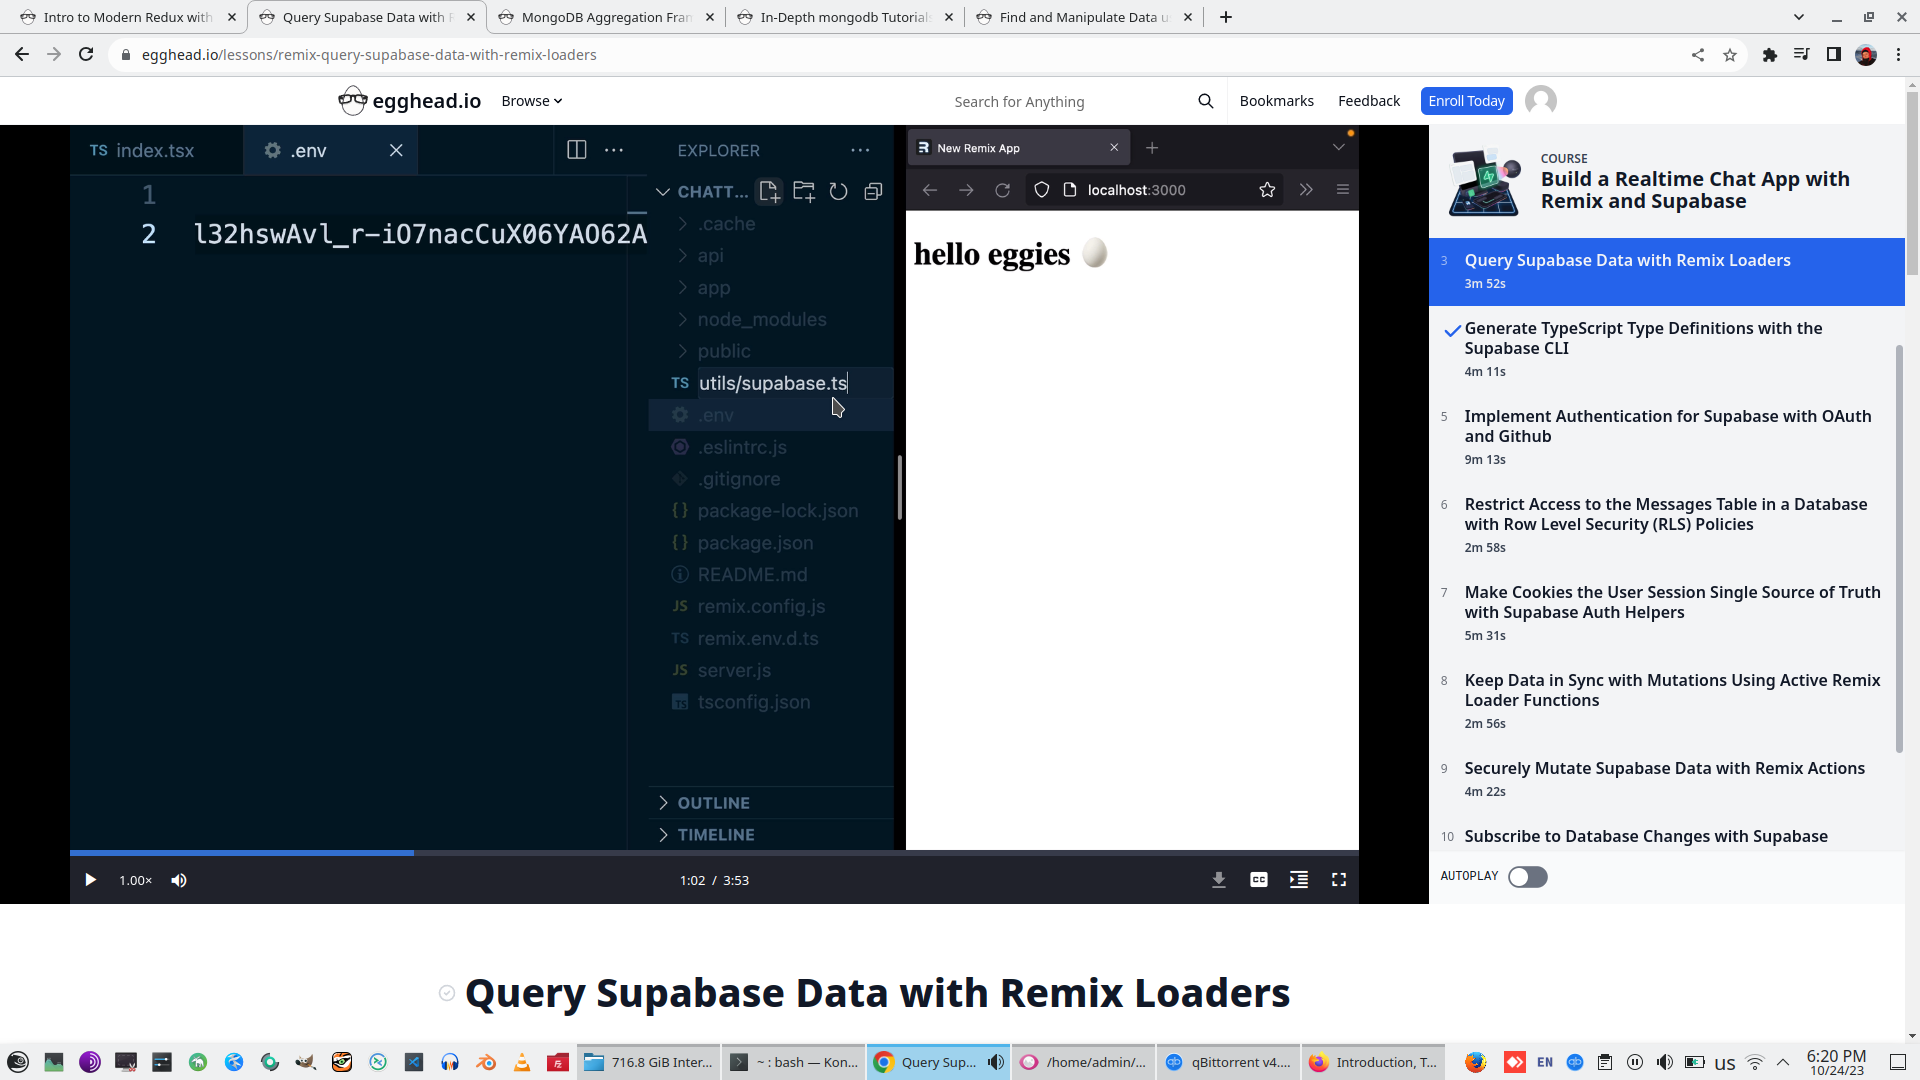
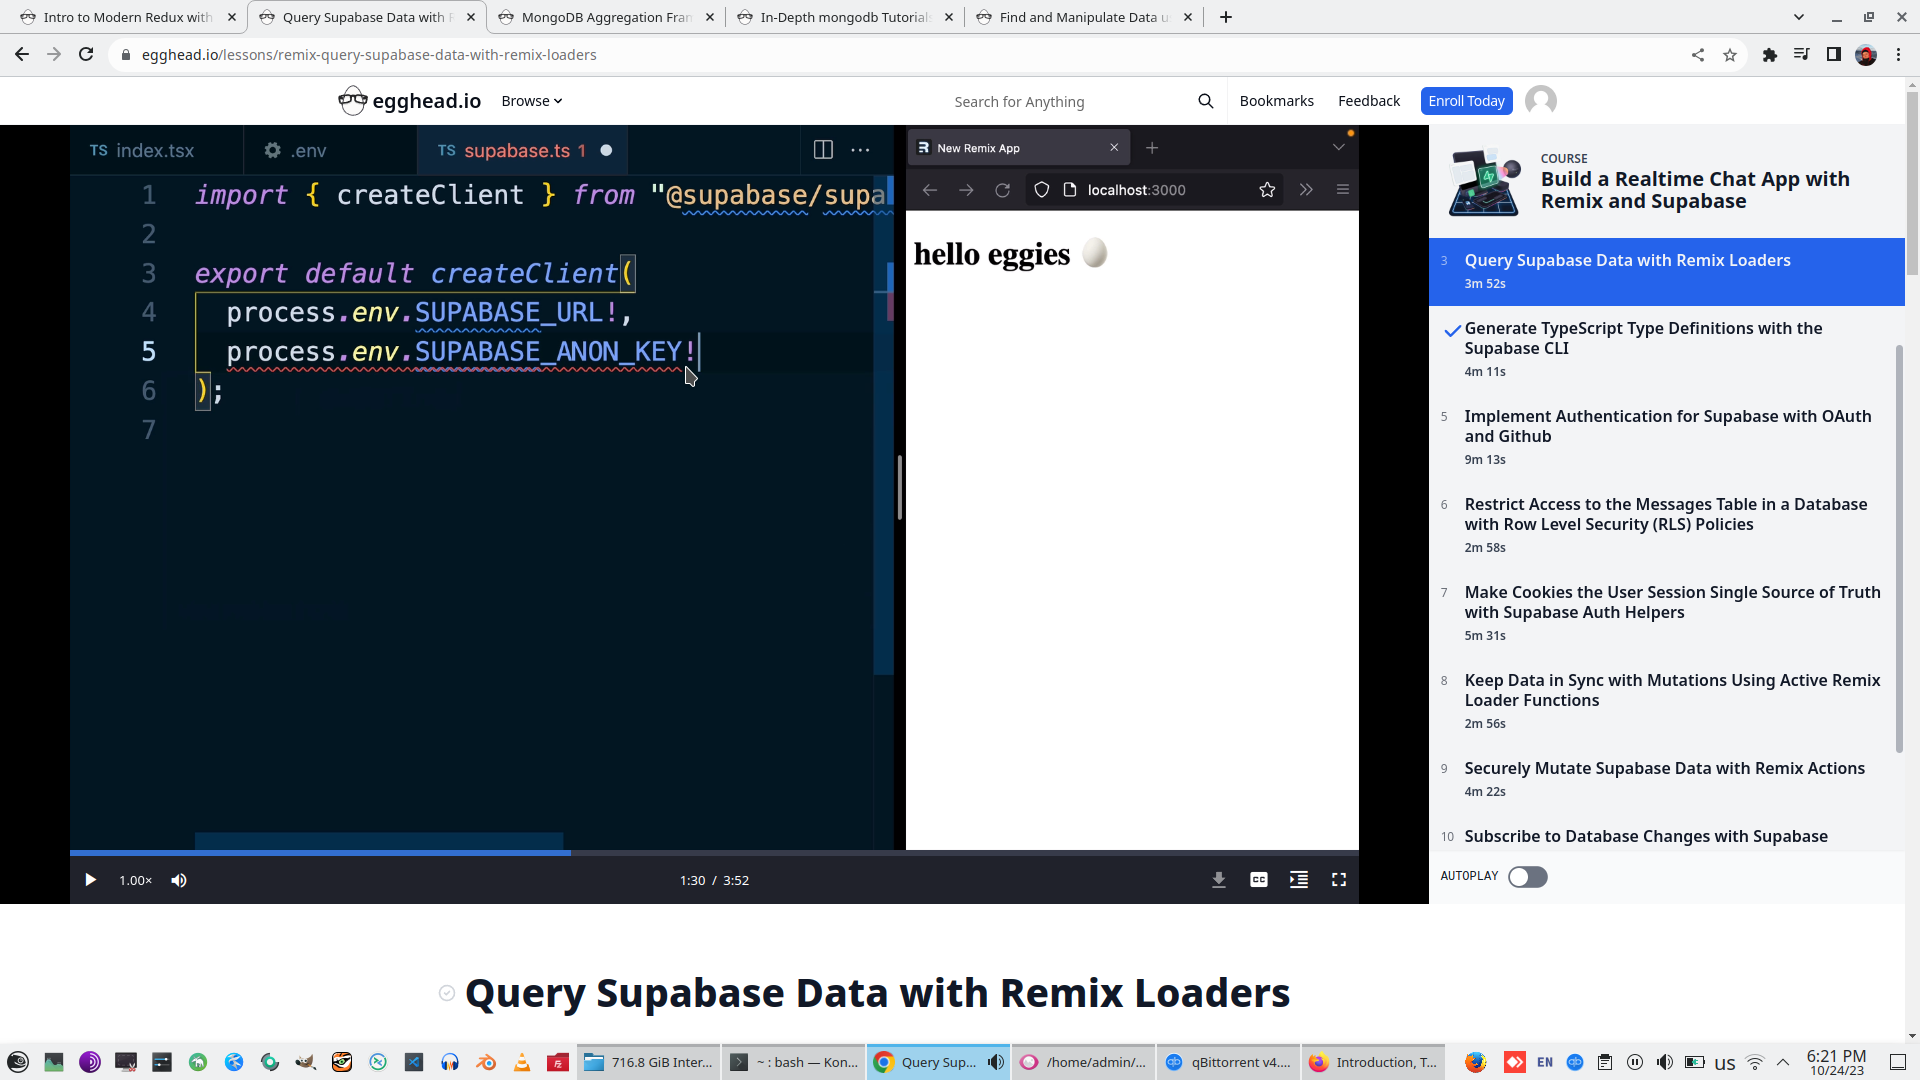
Create new file utils/supabase.ts and export to JS Supabase client two secret environment variables with access to Supabase
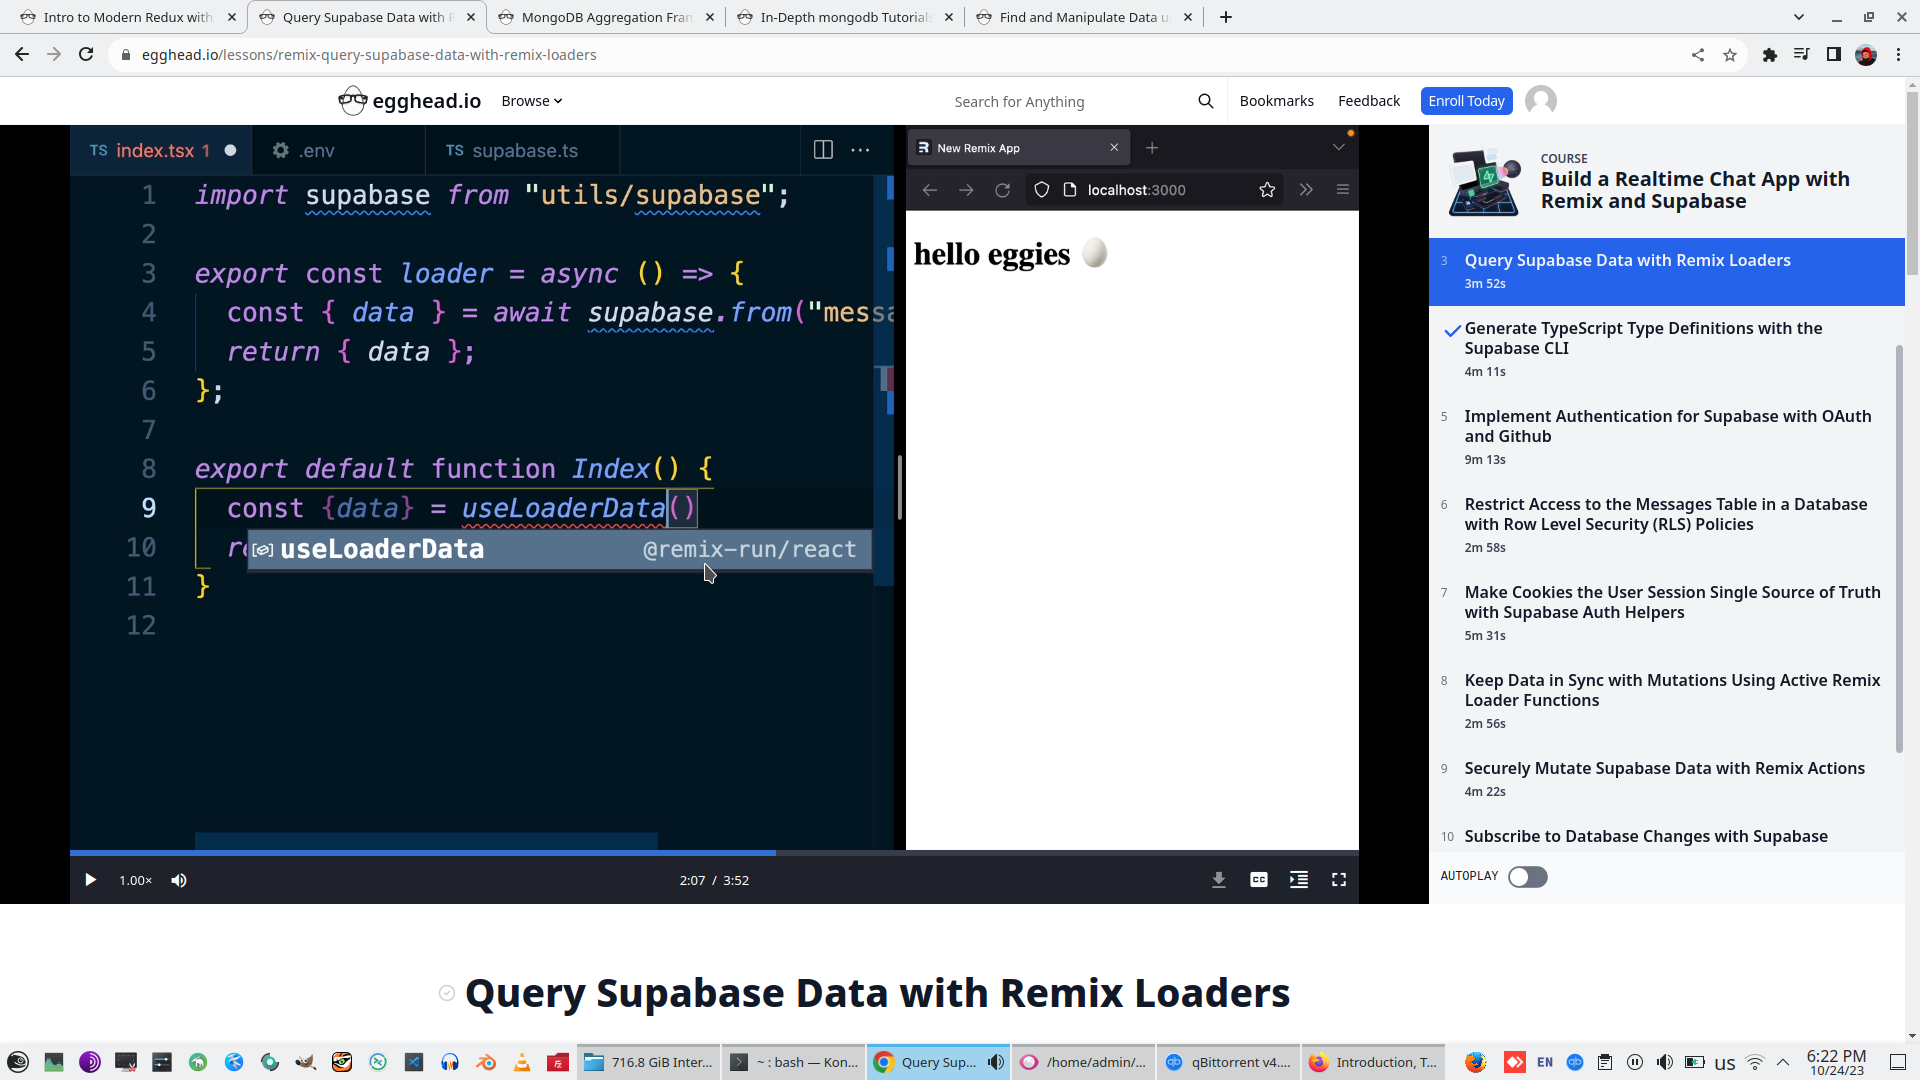
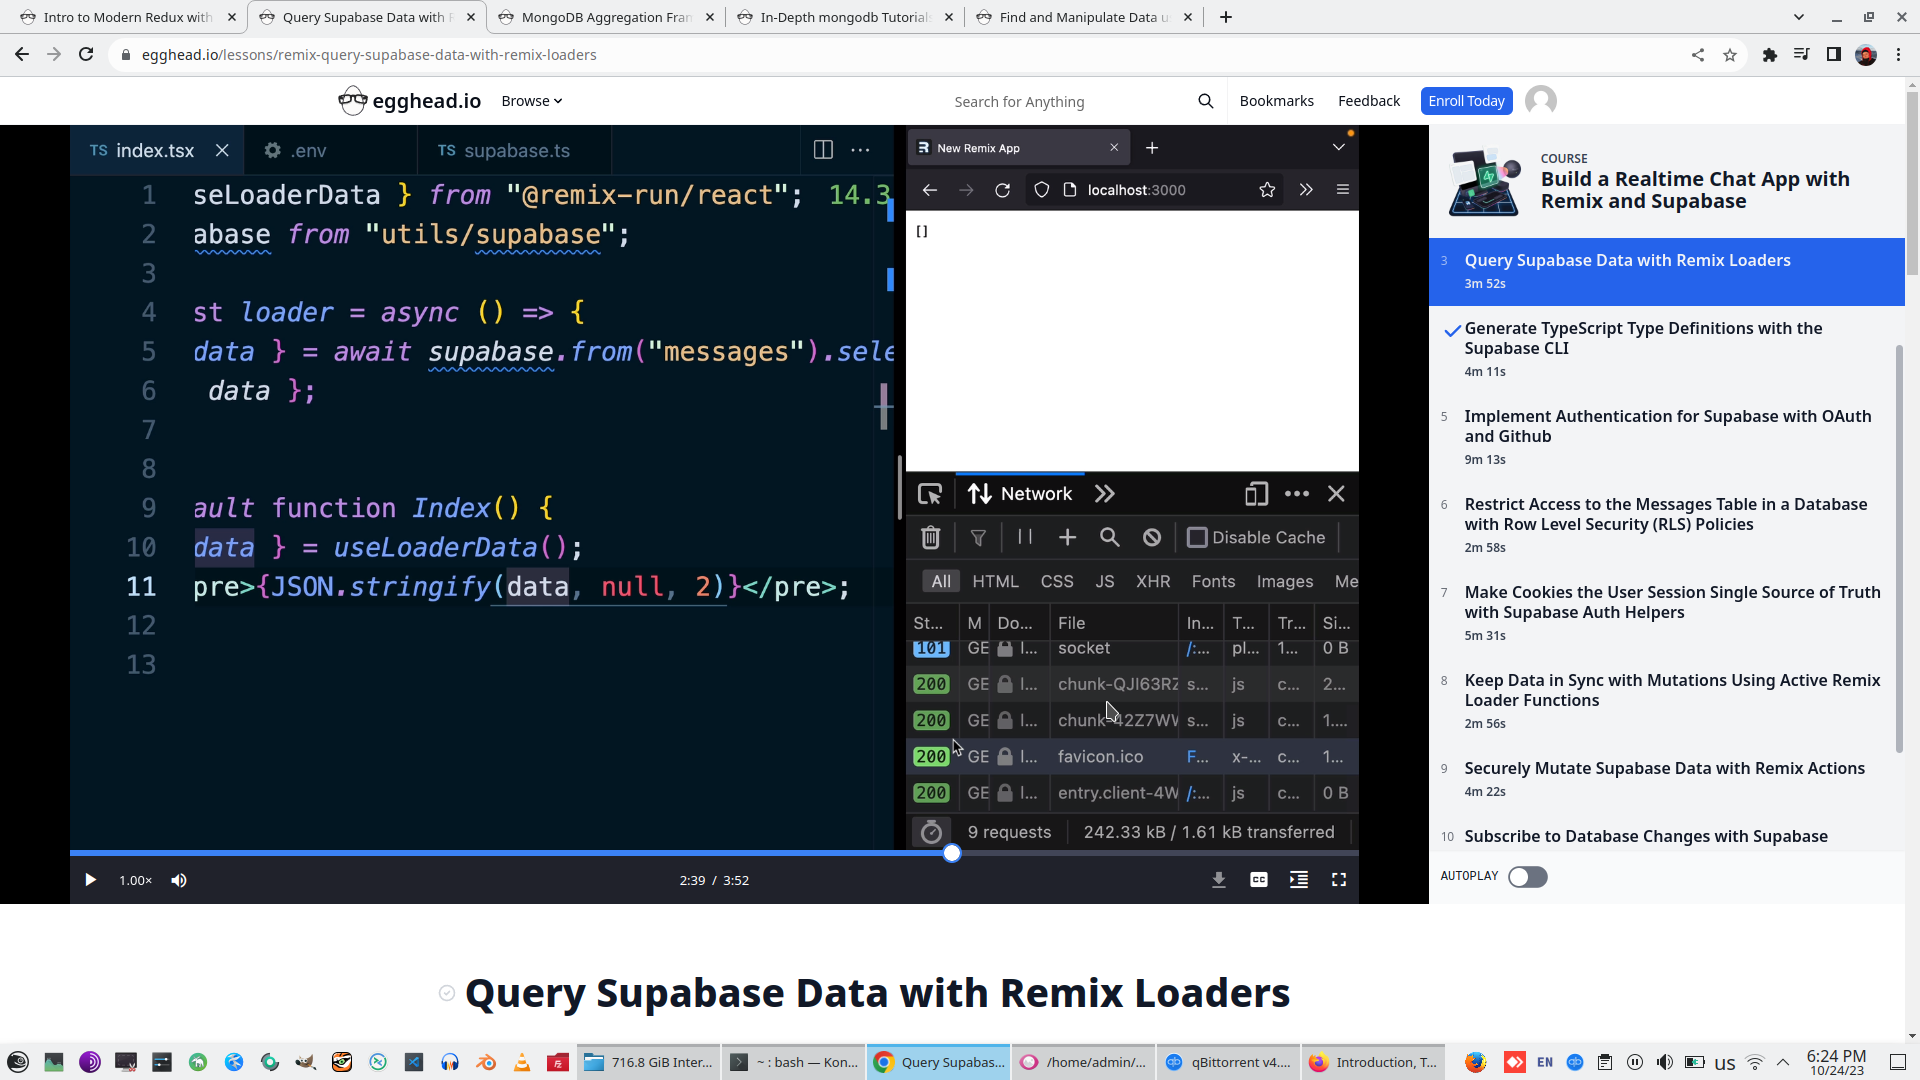
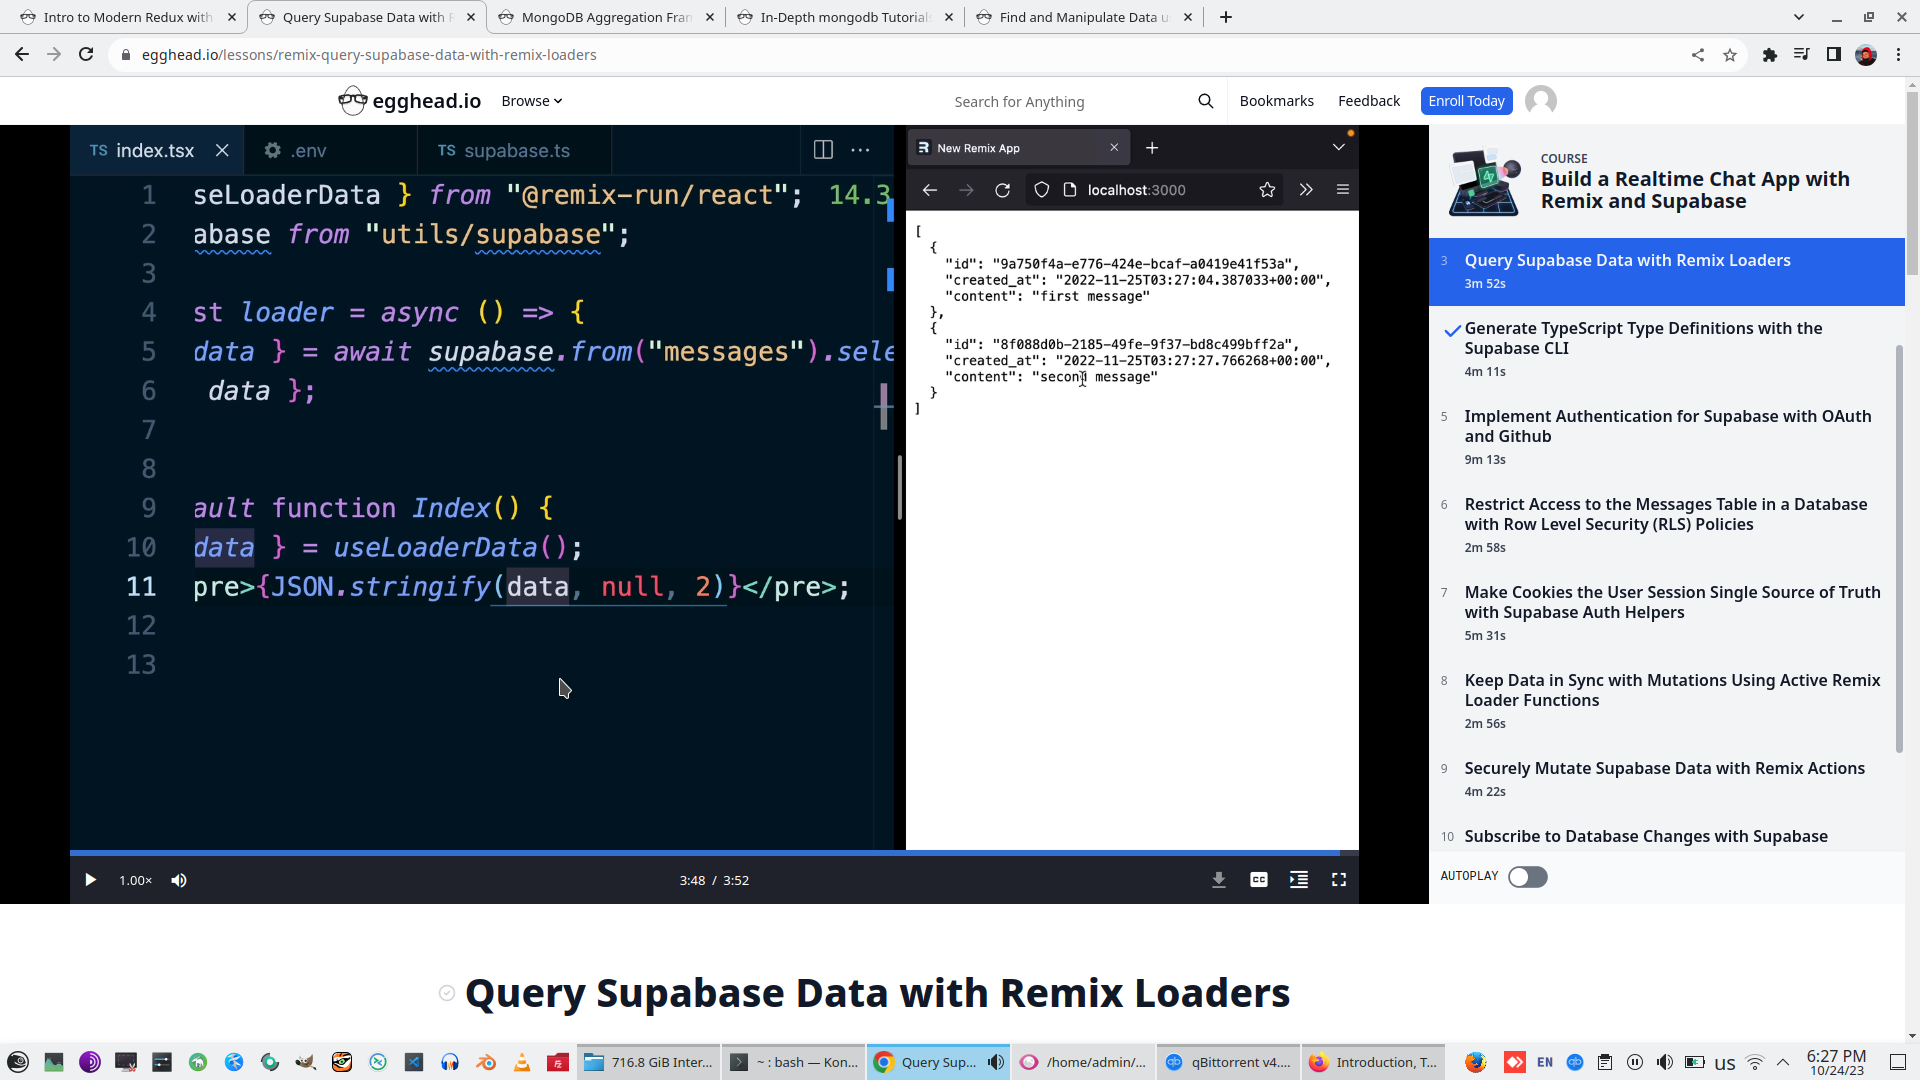
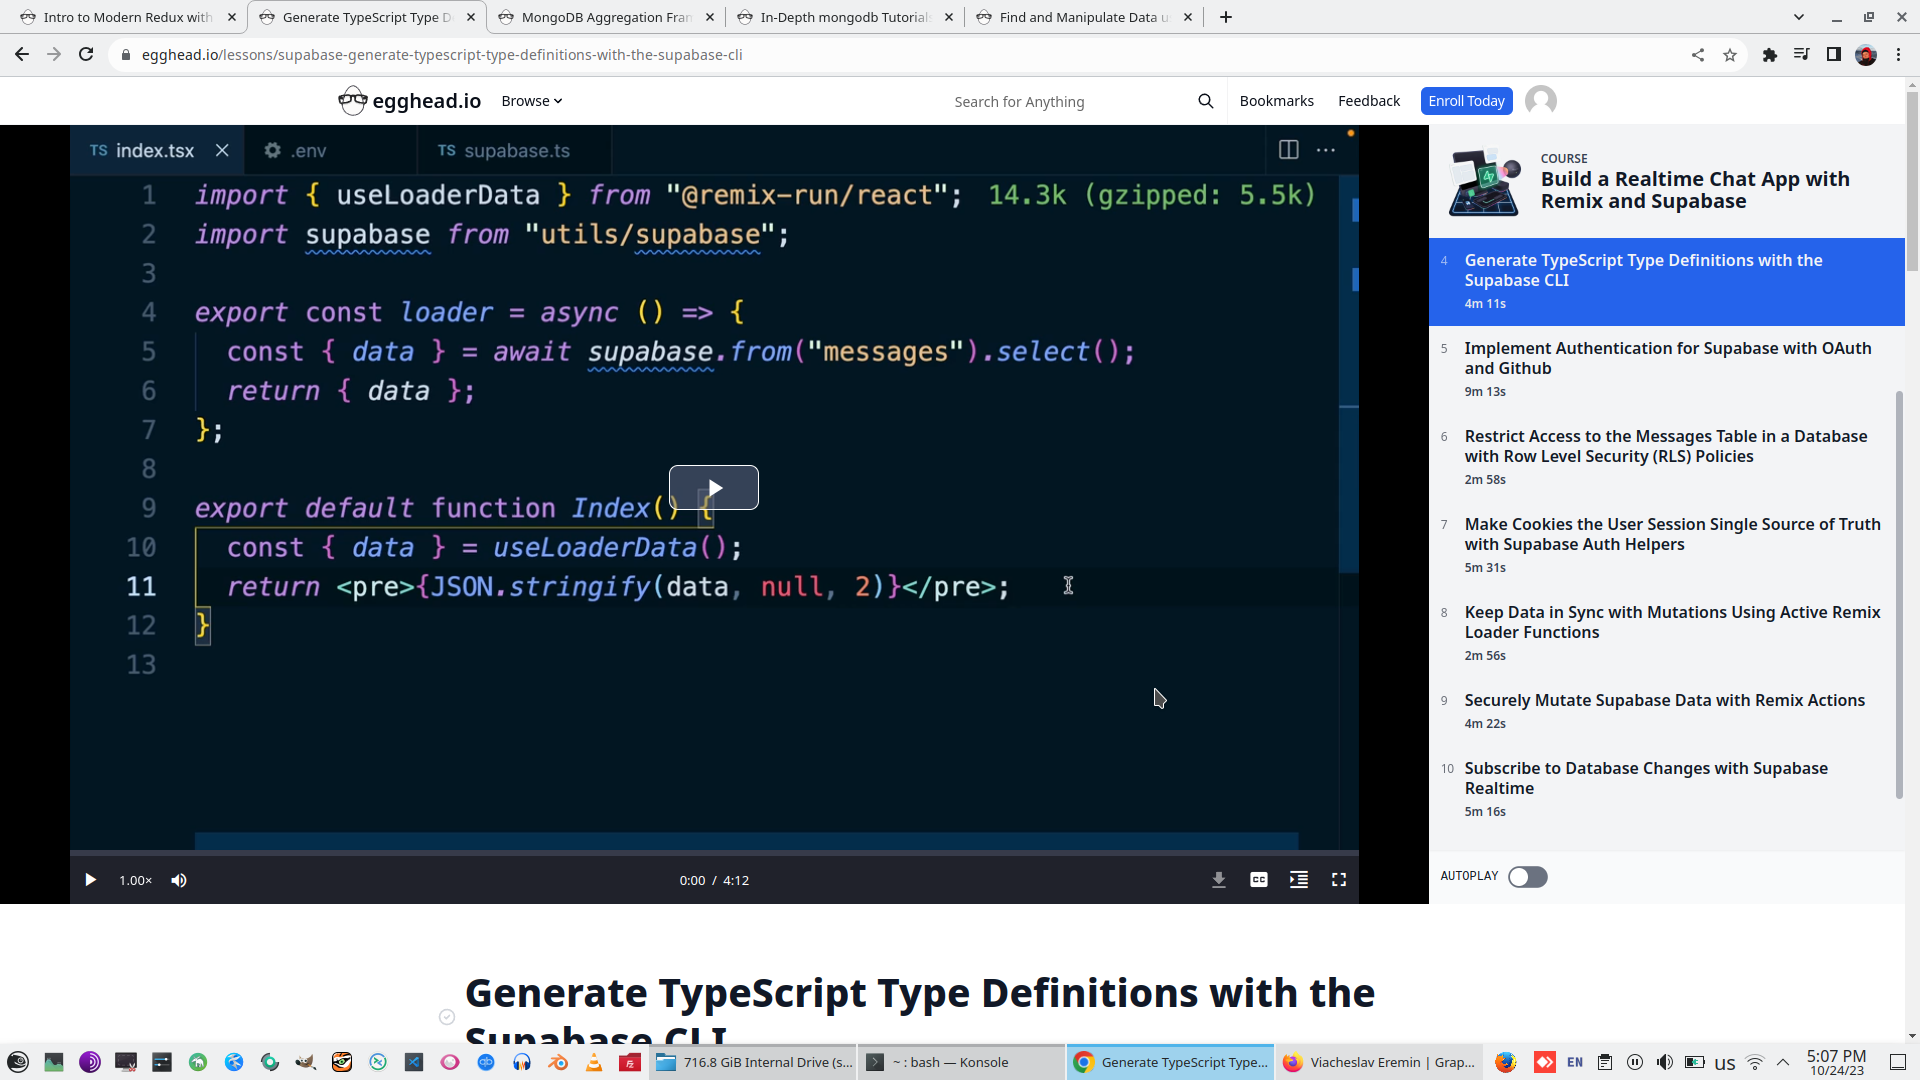
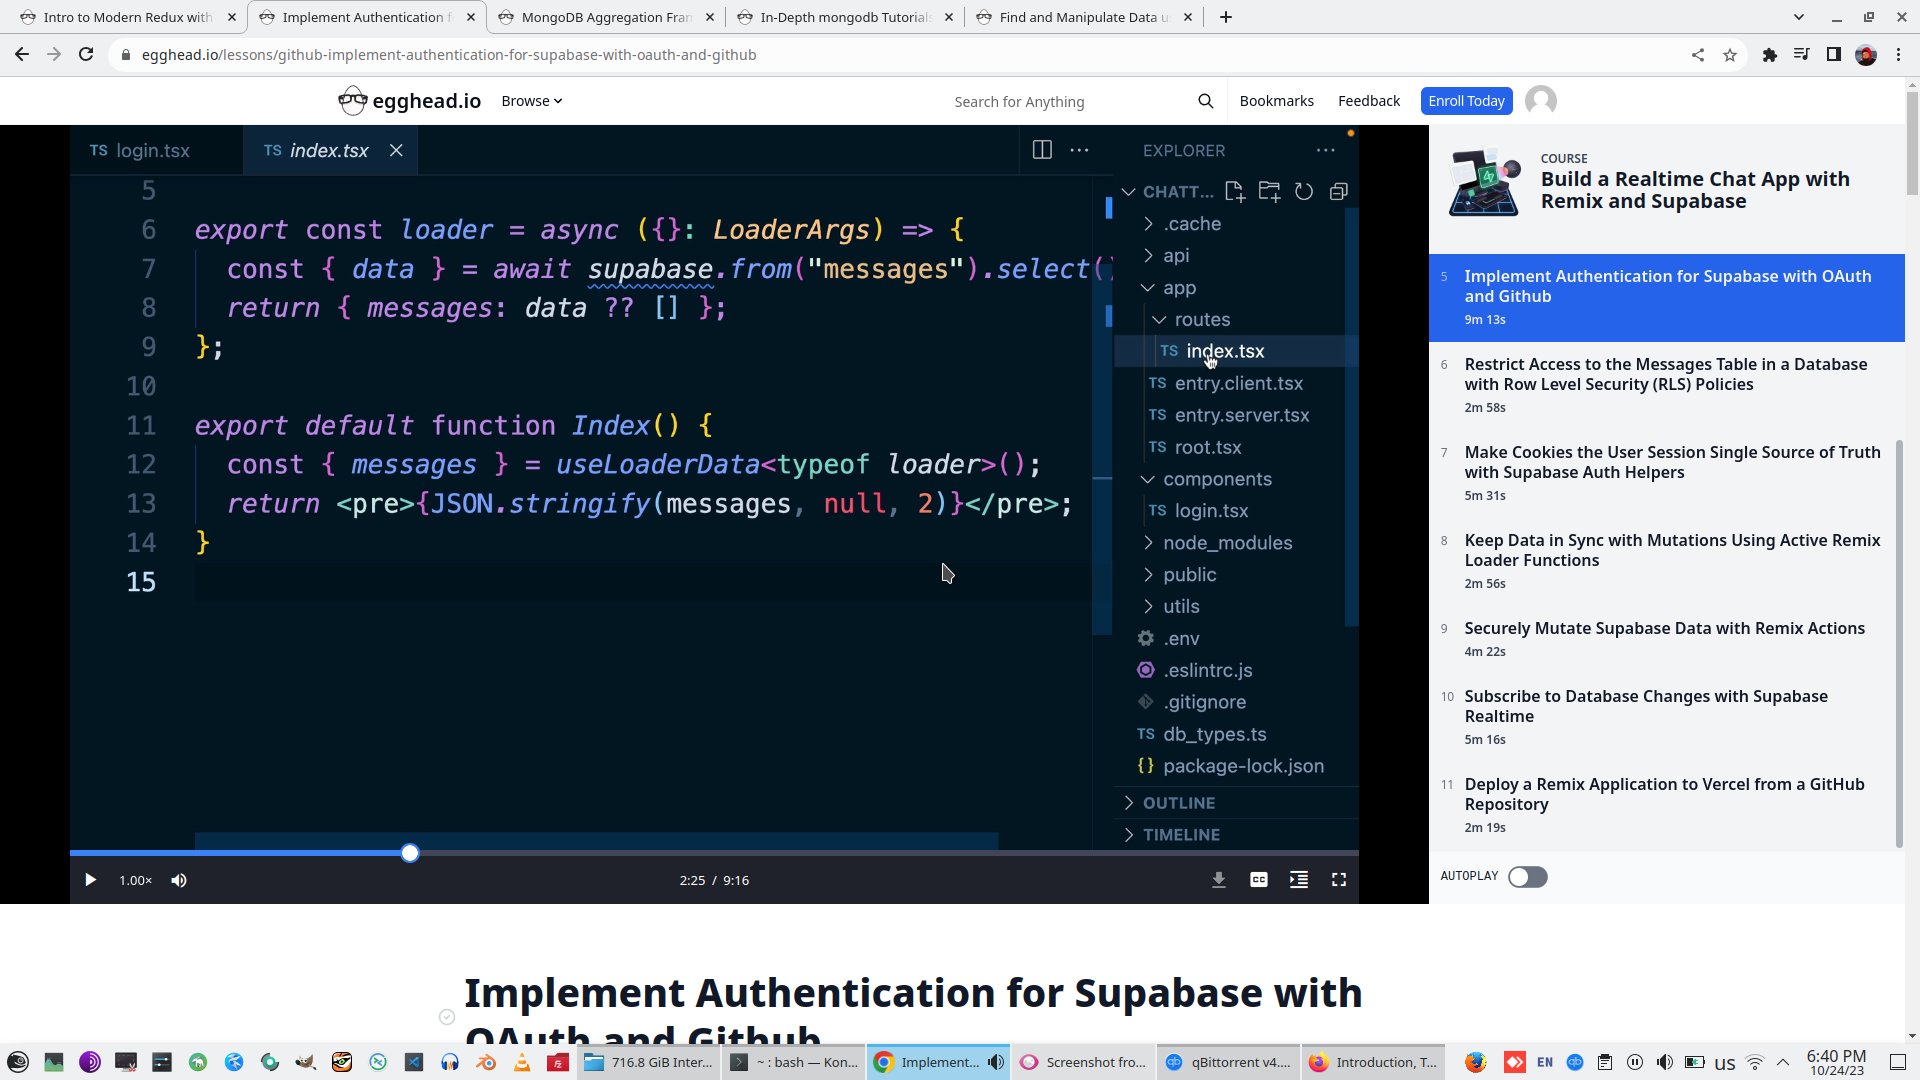
Import to Index.tsx Supabase clent with access and create promise function Loader with first Query to Supabase - unpack result to Data object

Import function useLoaderData from @remix-run/react, this function really require data from Promise
Start Remix development server and try to export query result as StringFY result
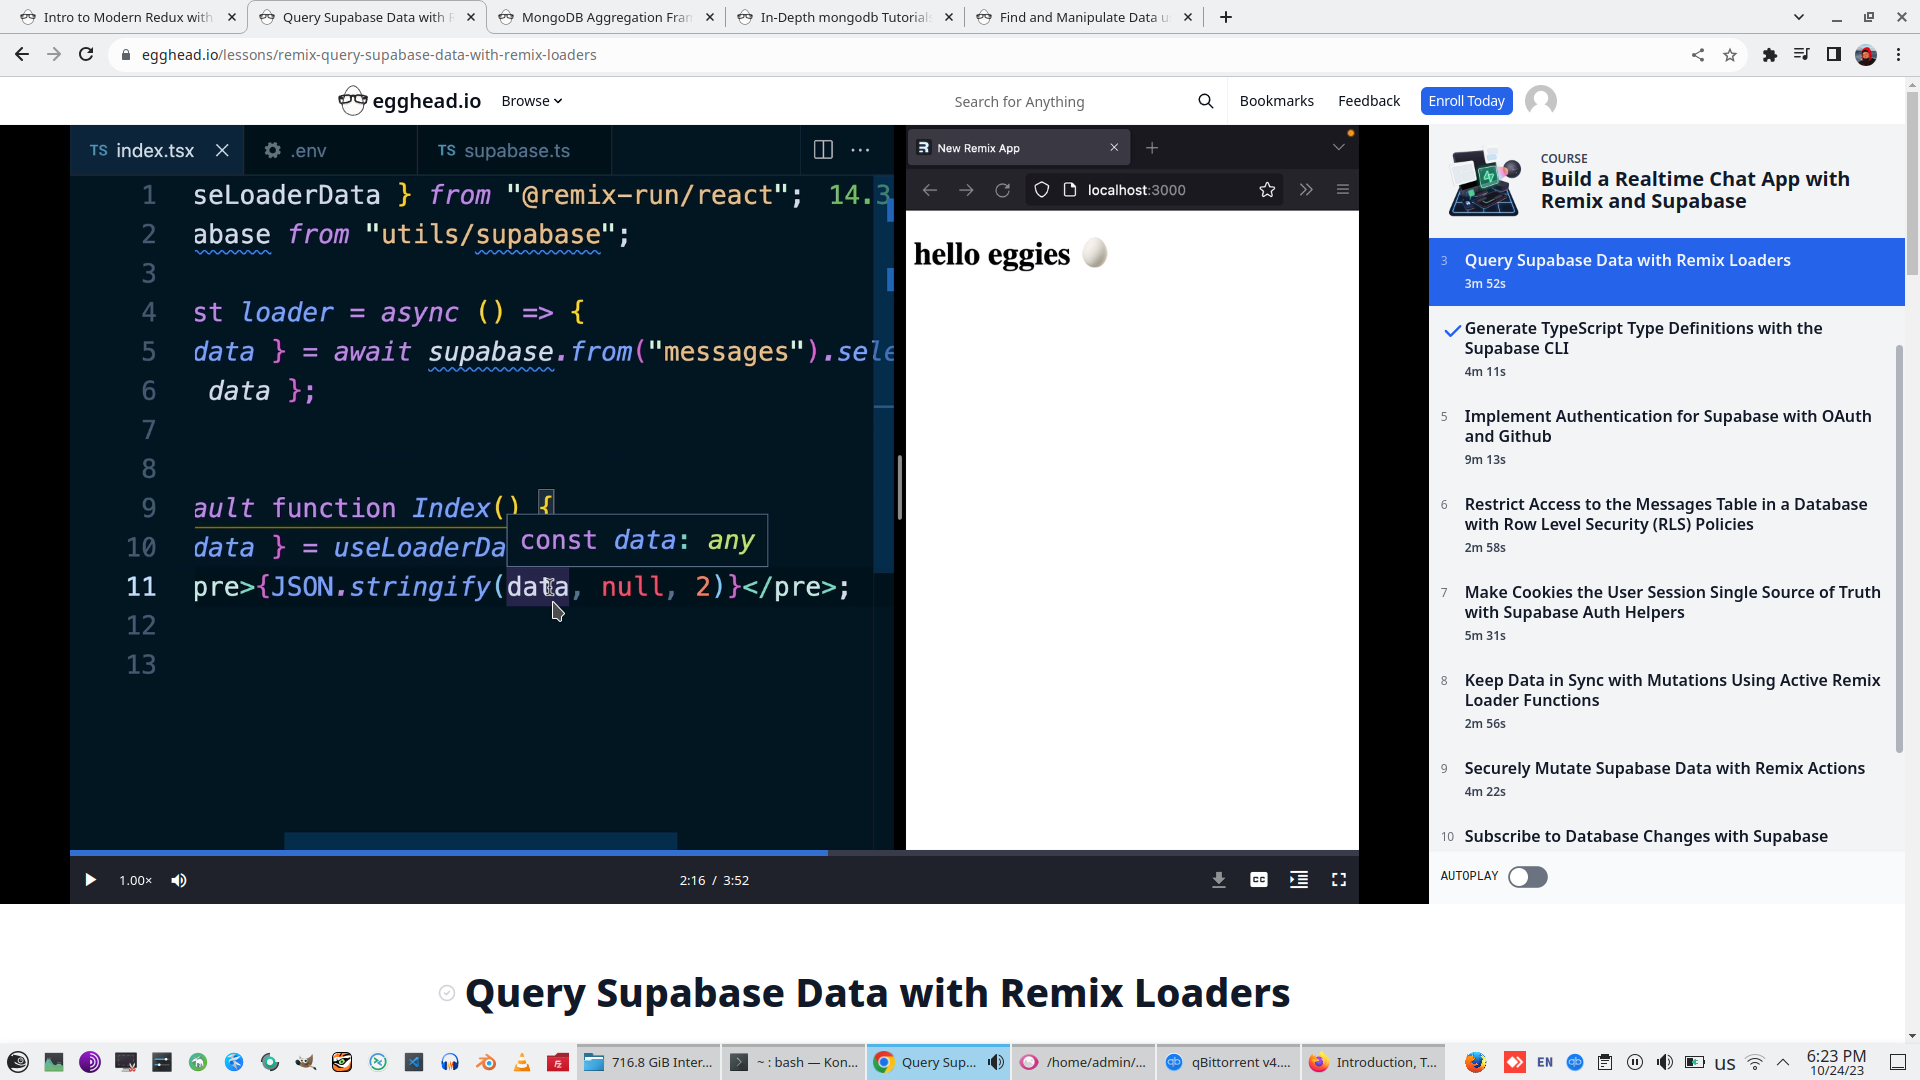
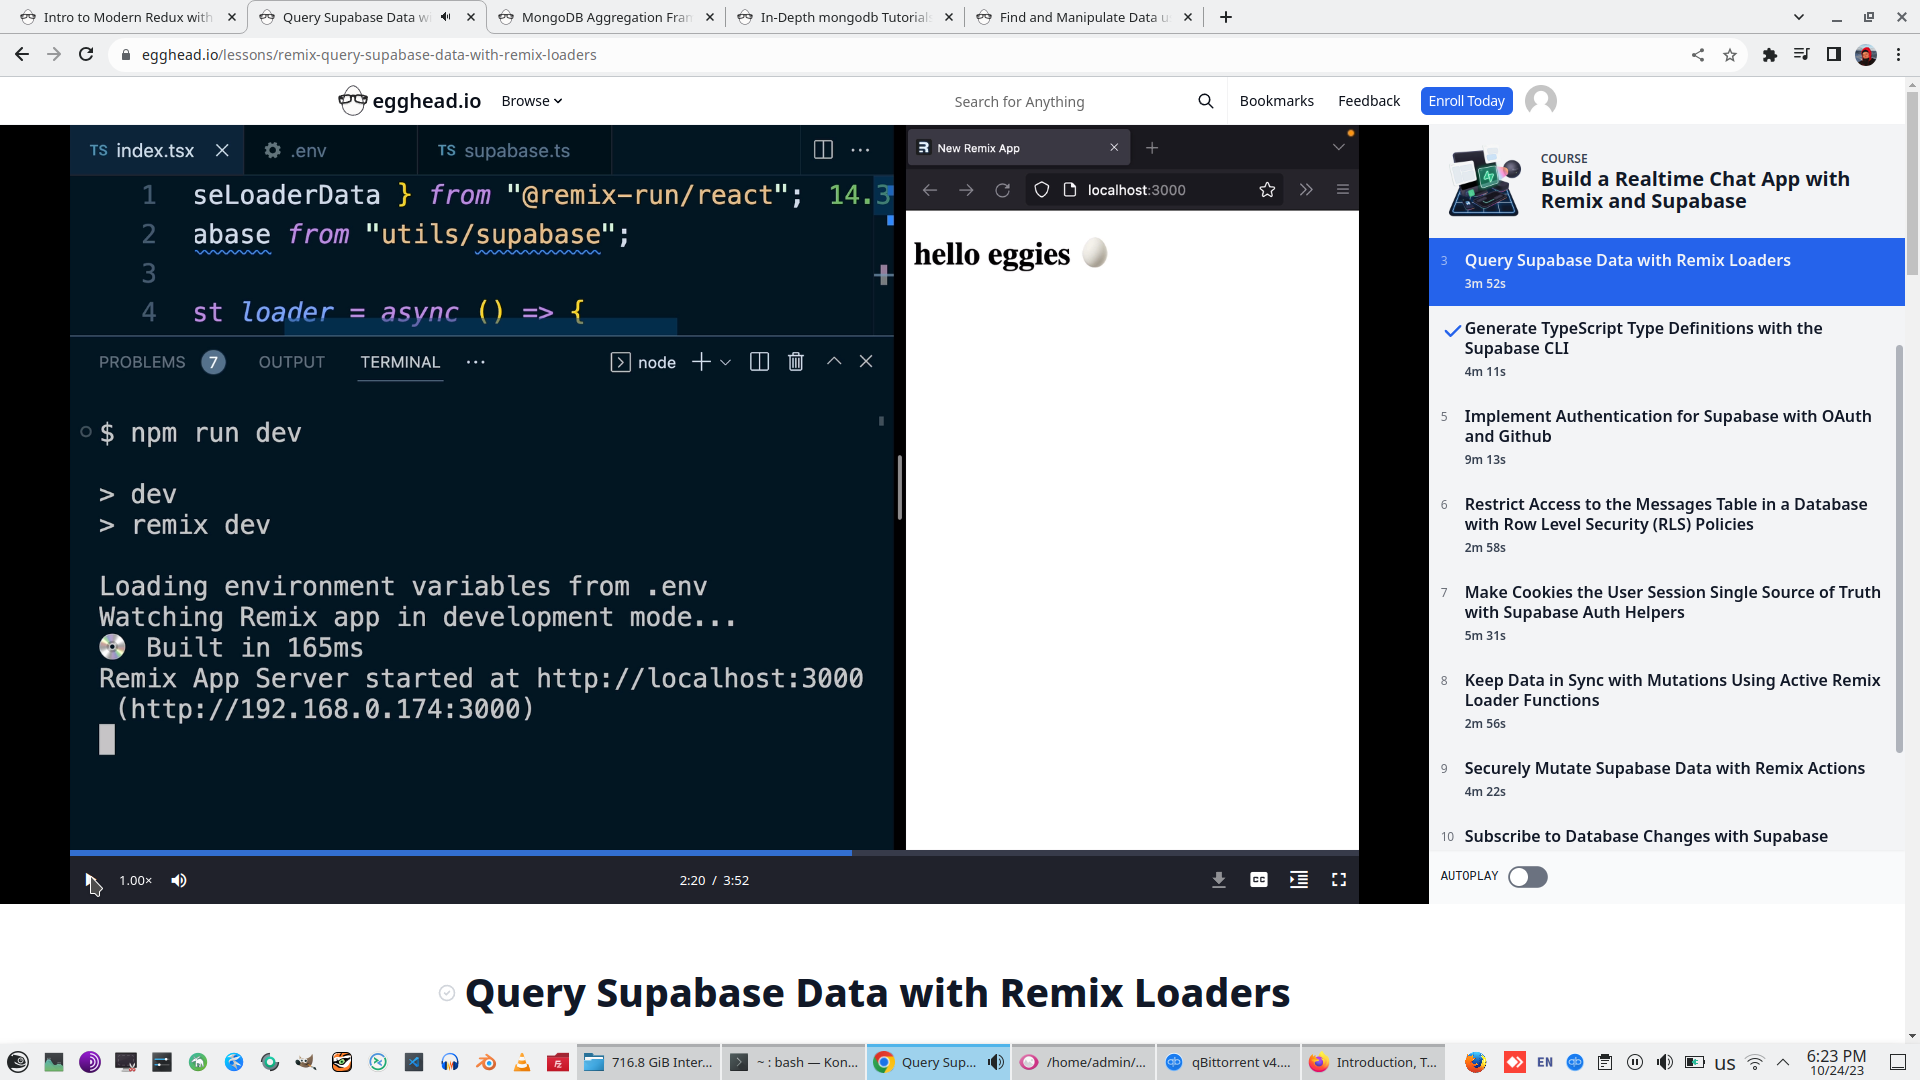
Result on page is empty, however database has meaningful rows
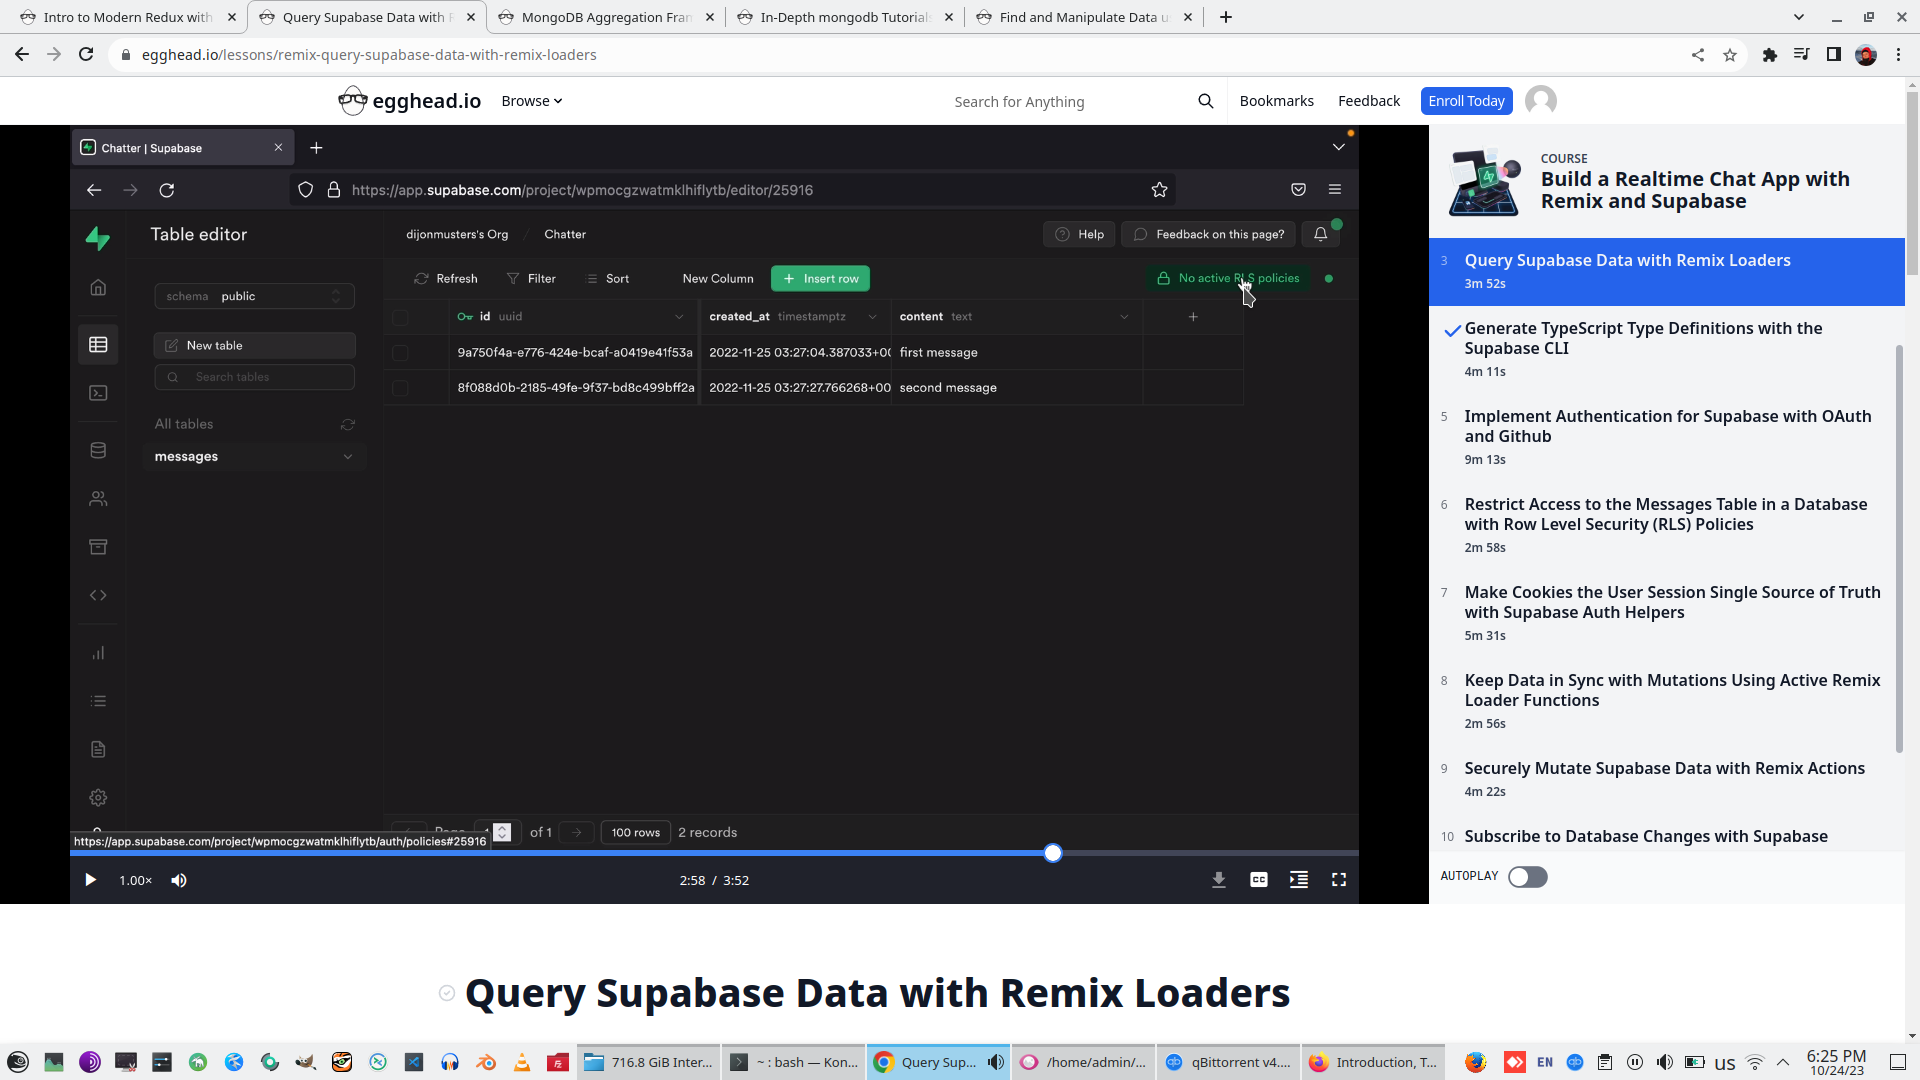
We have no access to data, we need to create new access policy (from scratch) and set access policy for Select=true
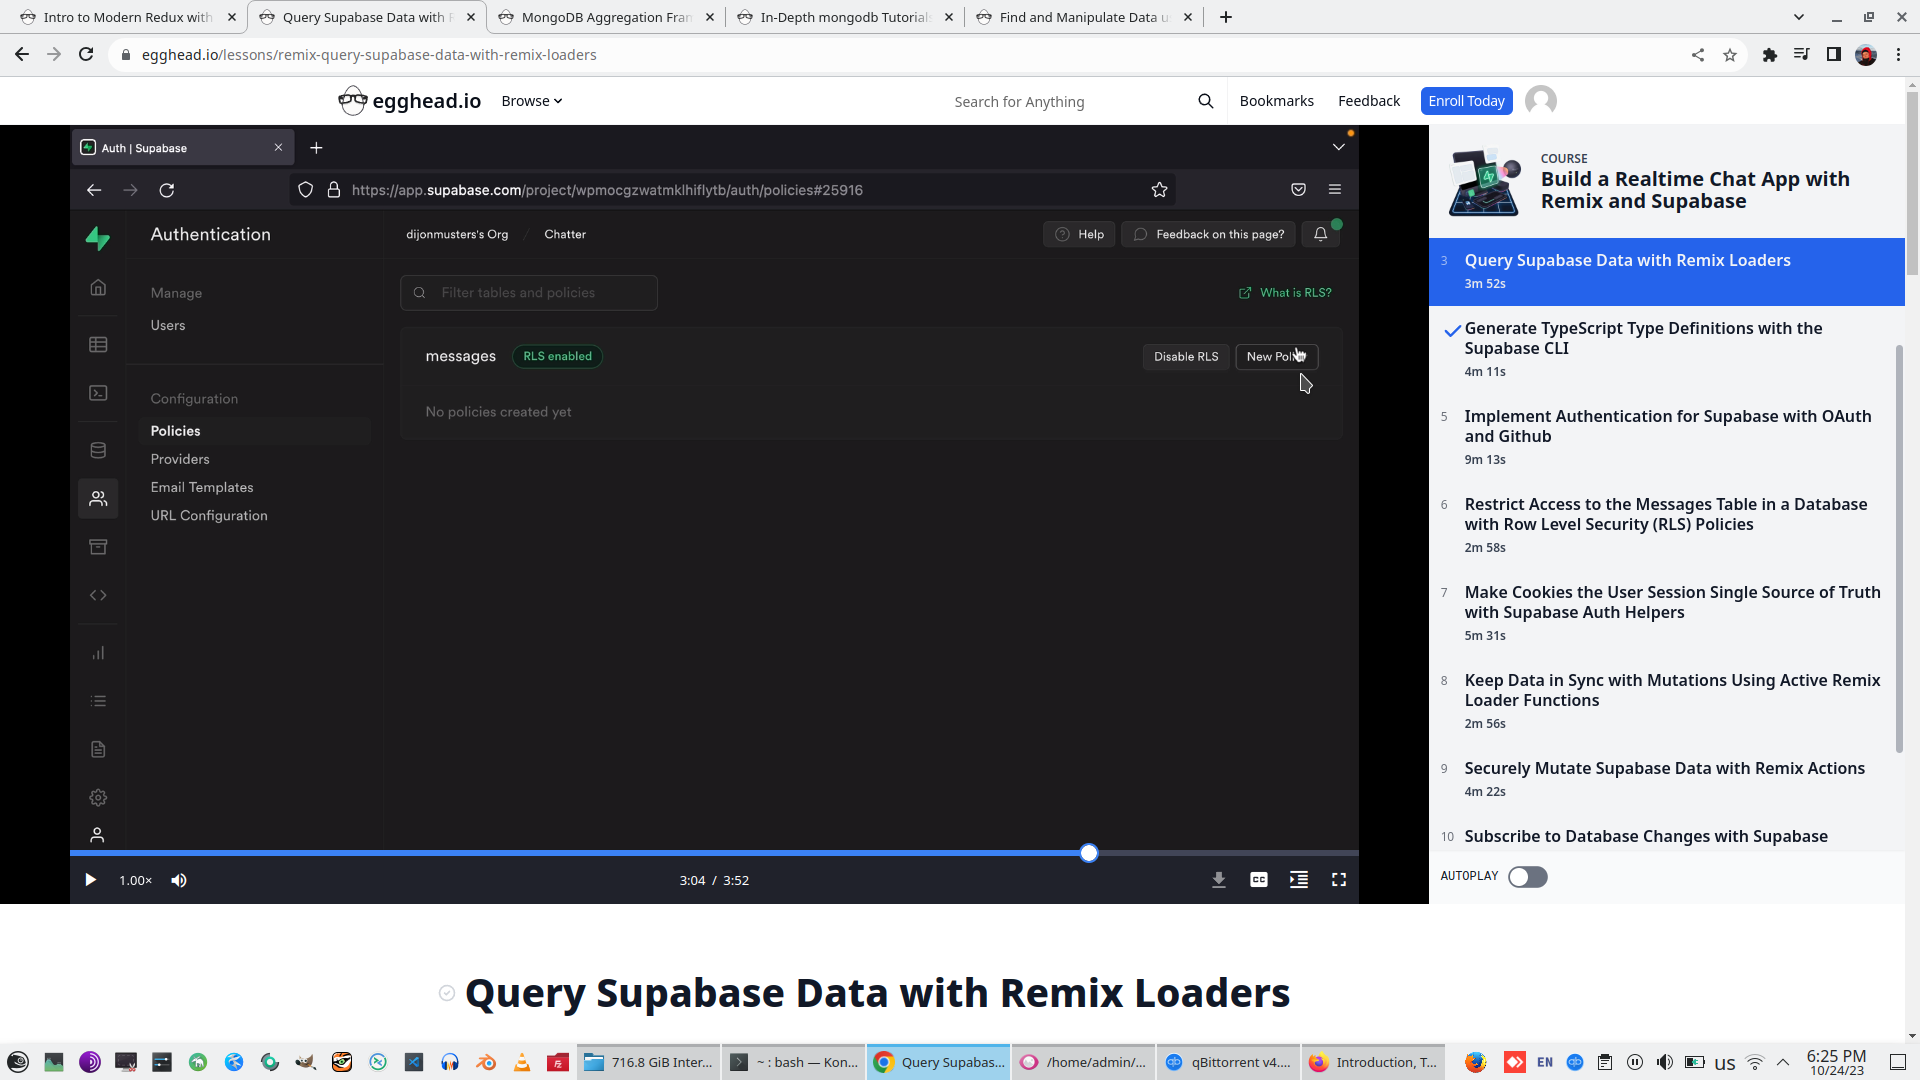
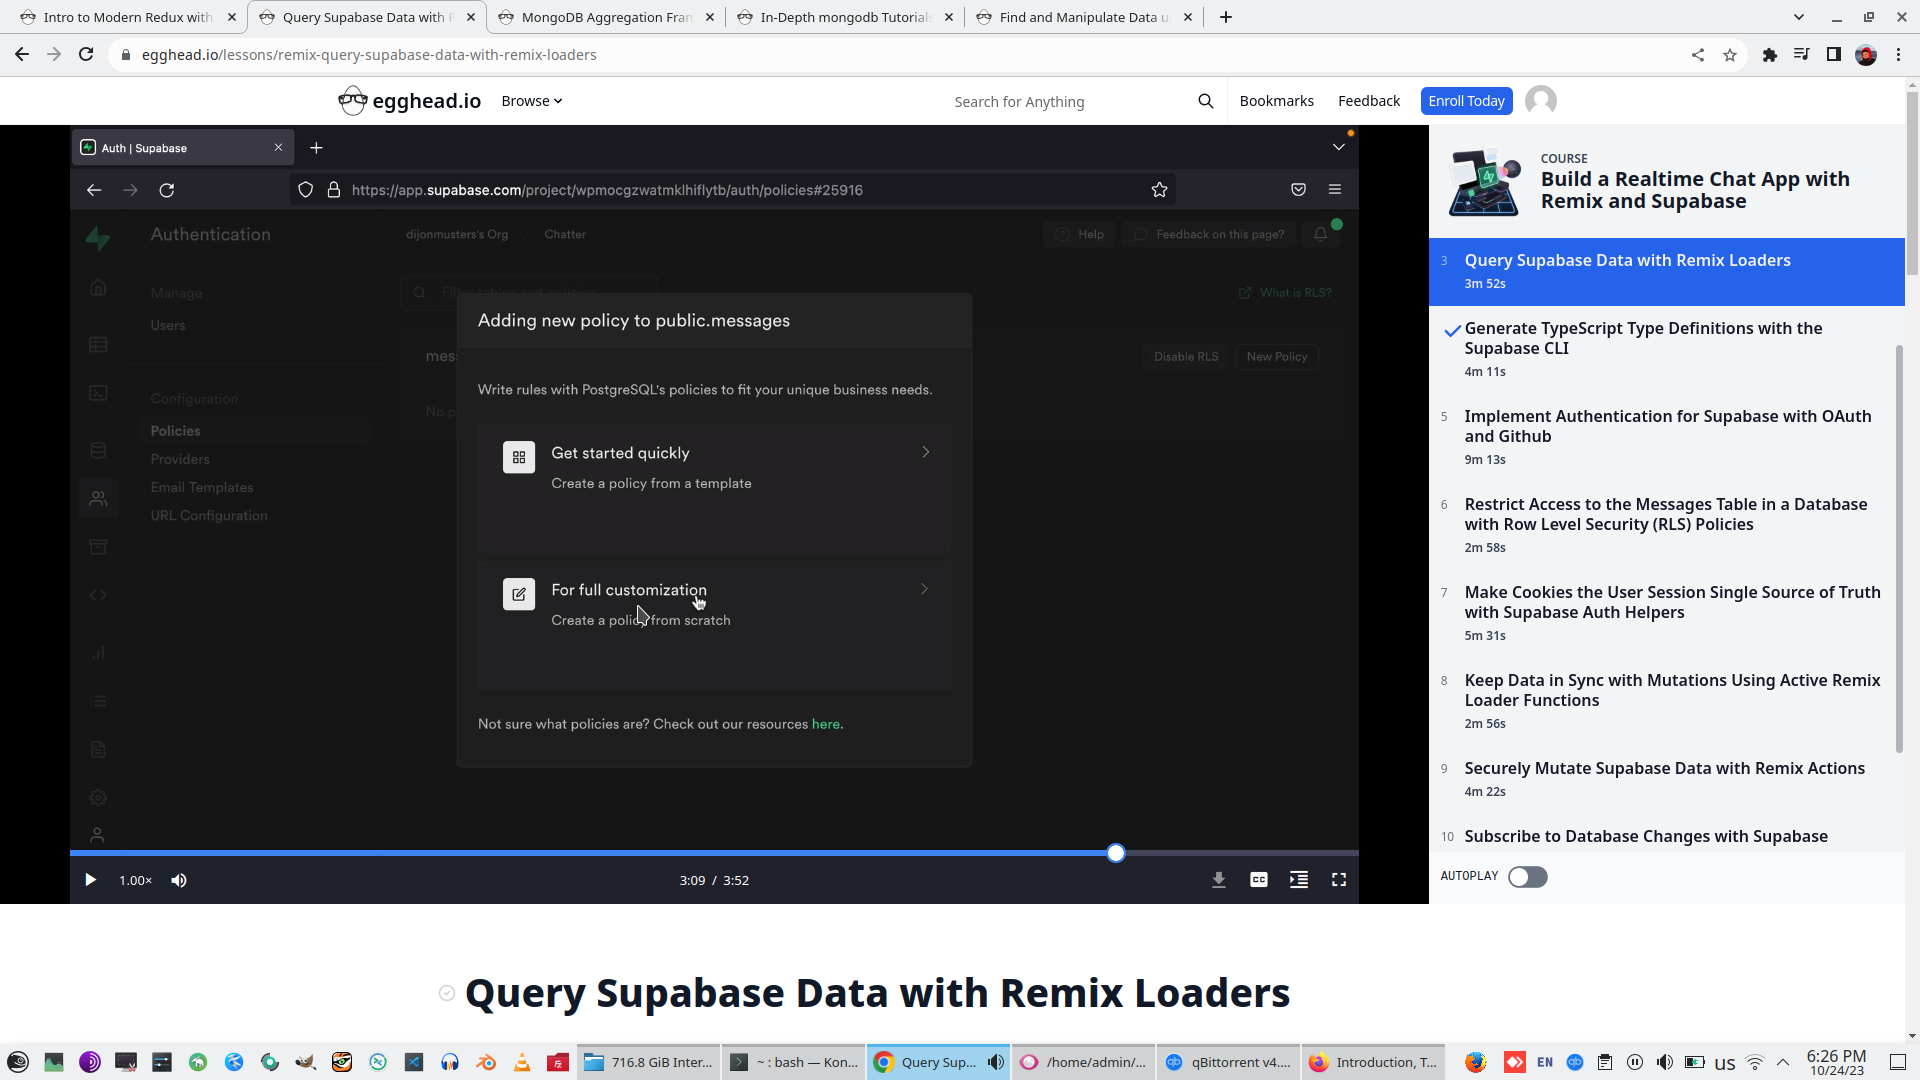
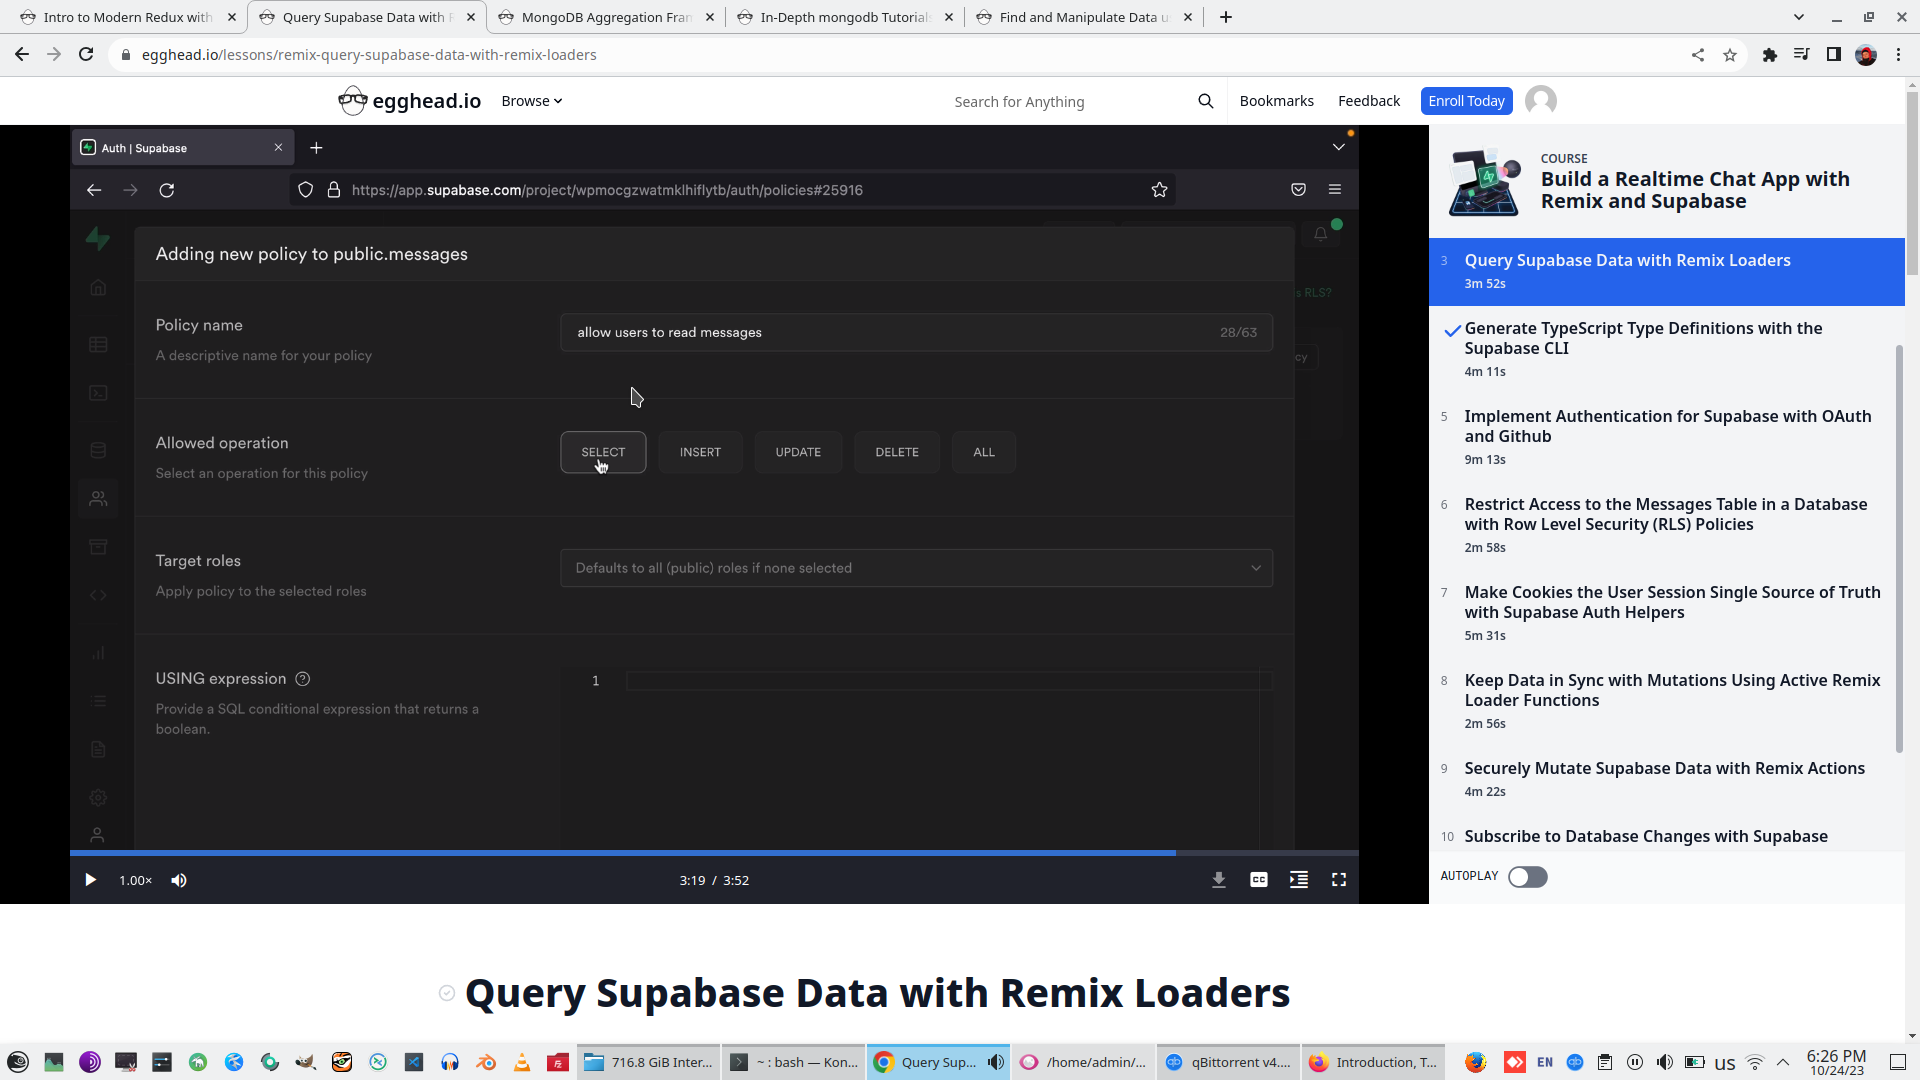
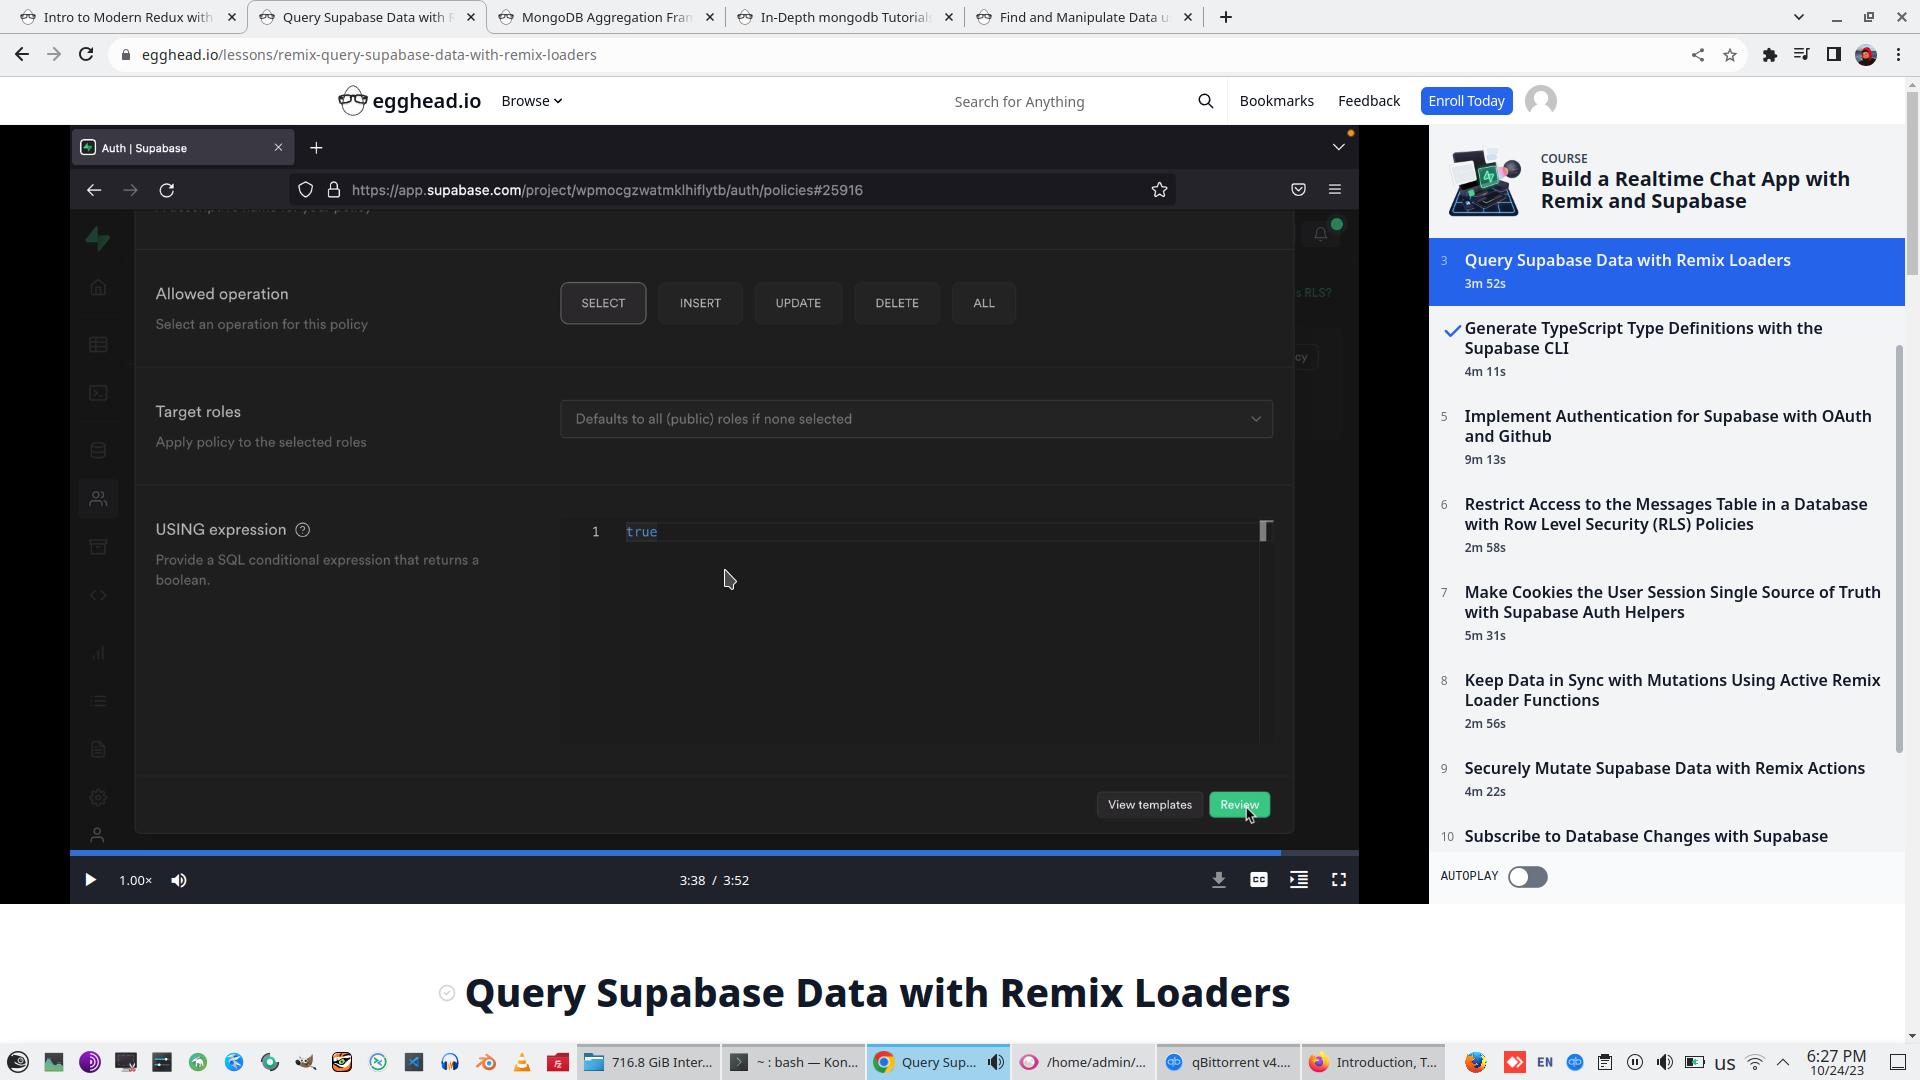
This is equivalent PostgreSQL policy command

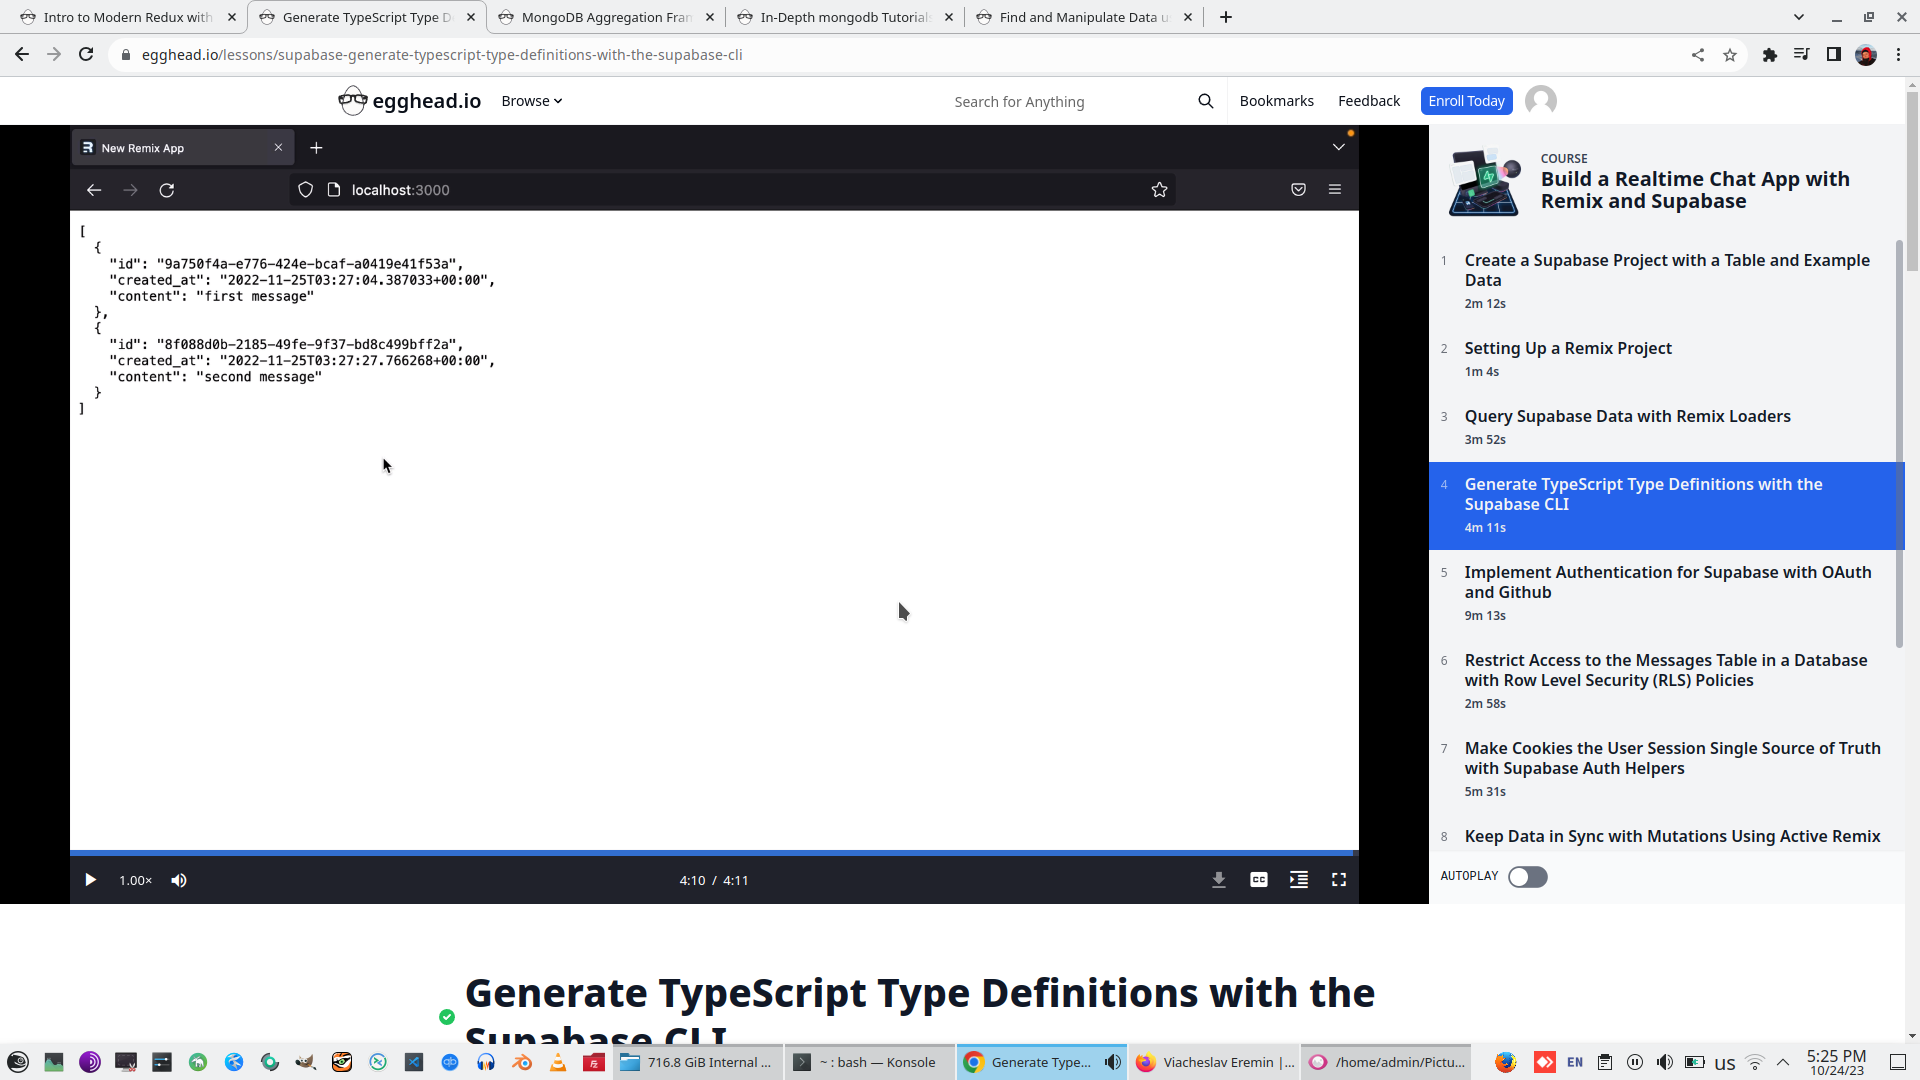
And check final result - access policy working, client with connection string working, data reading and reading result writing to Browser
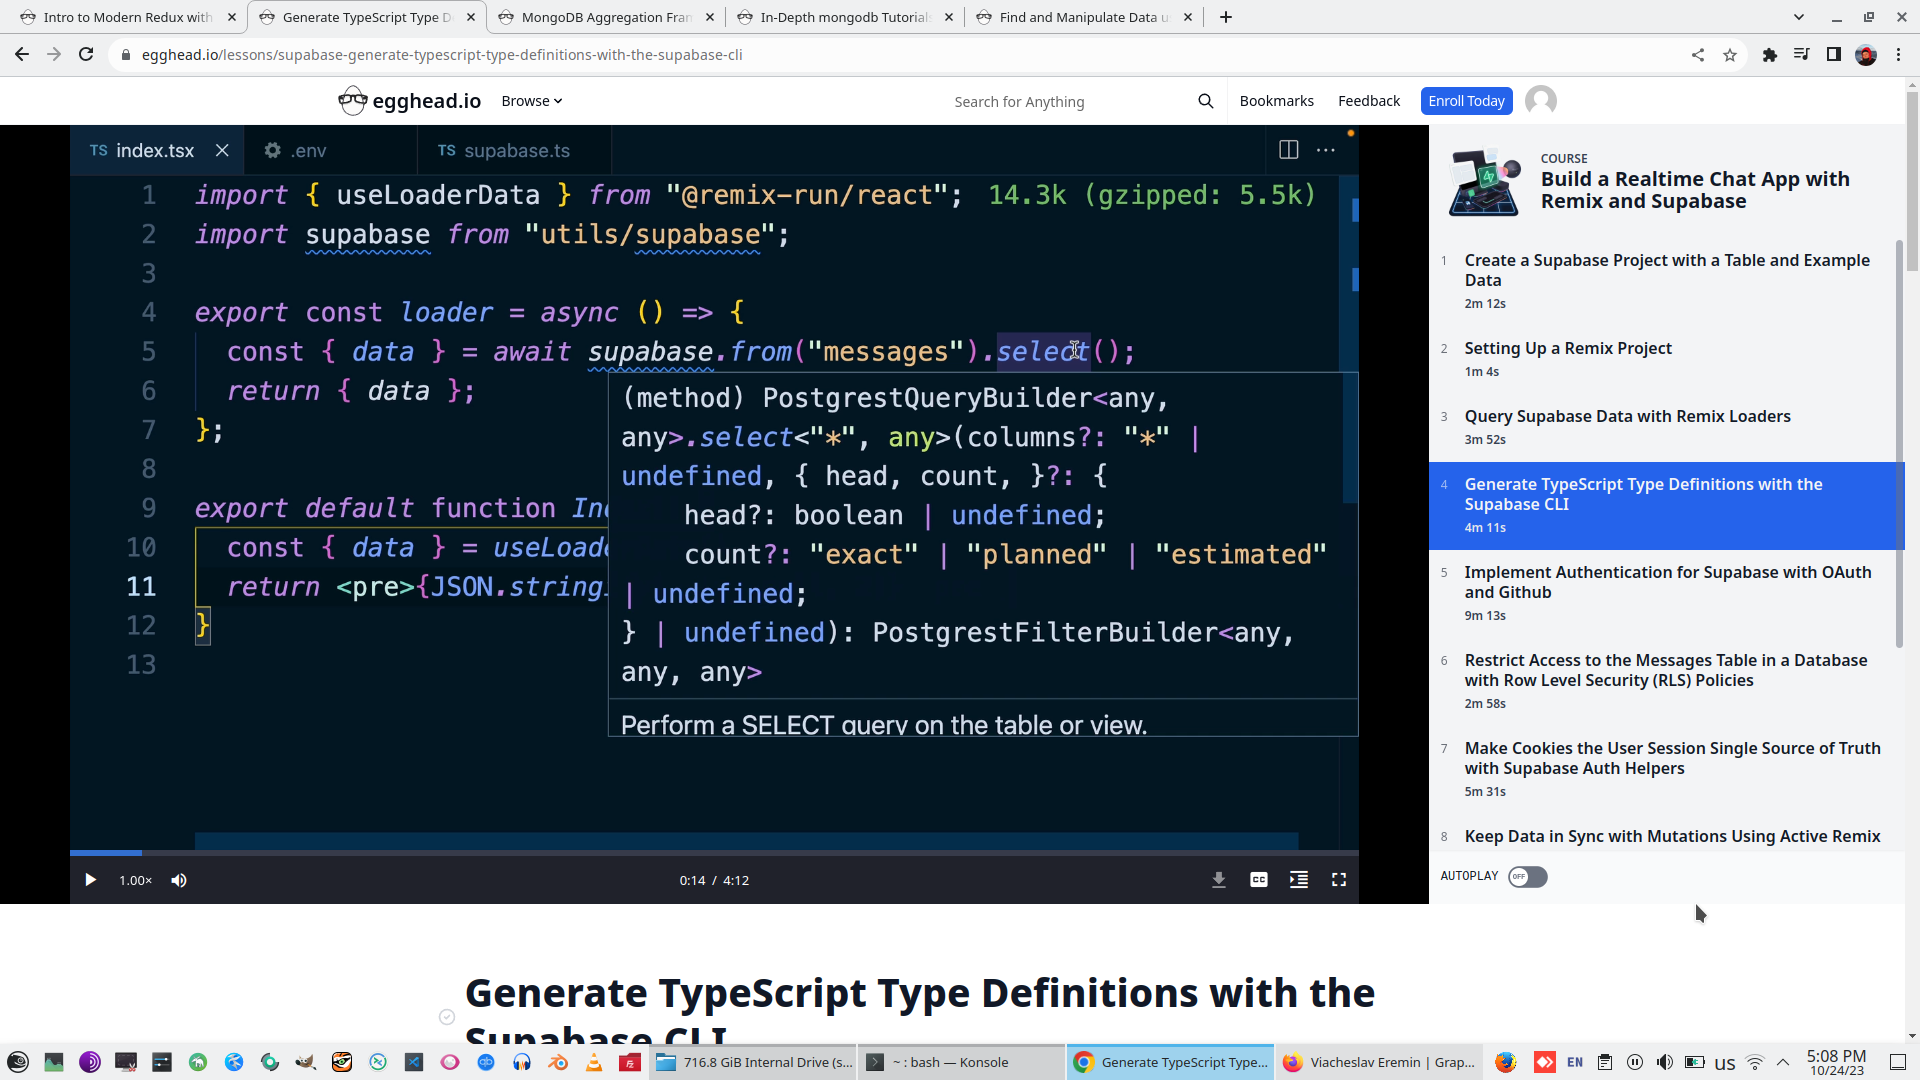
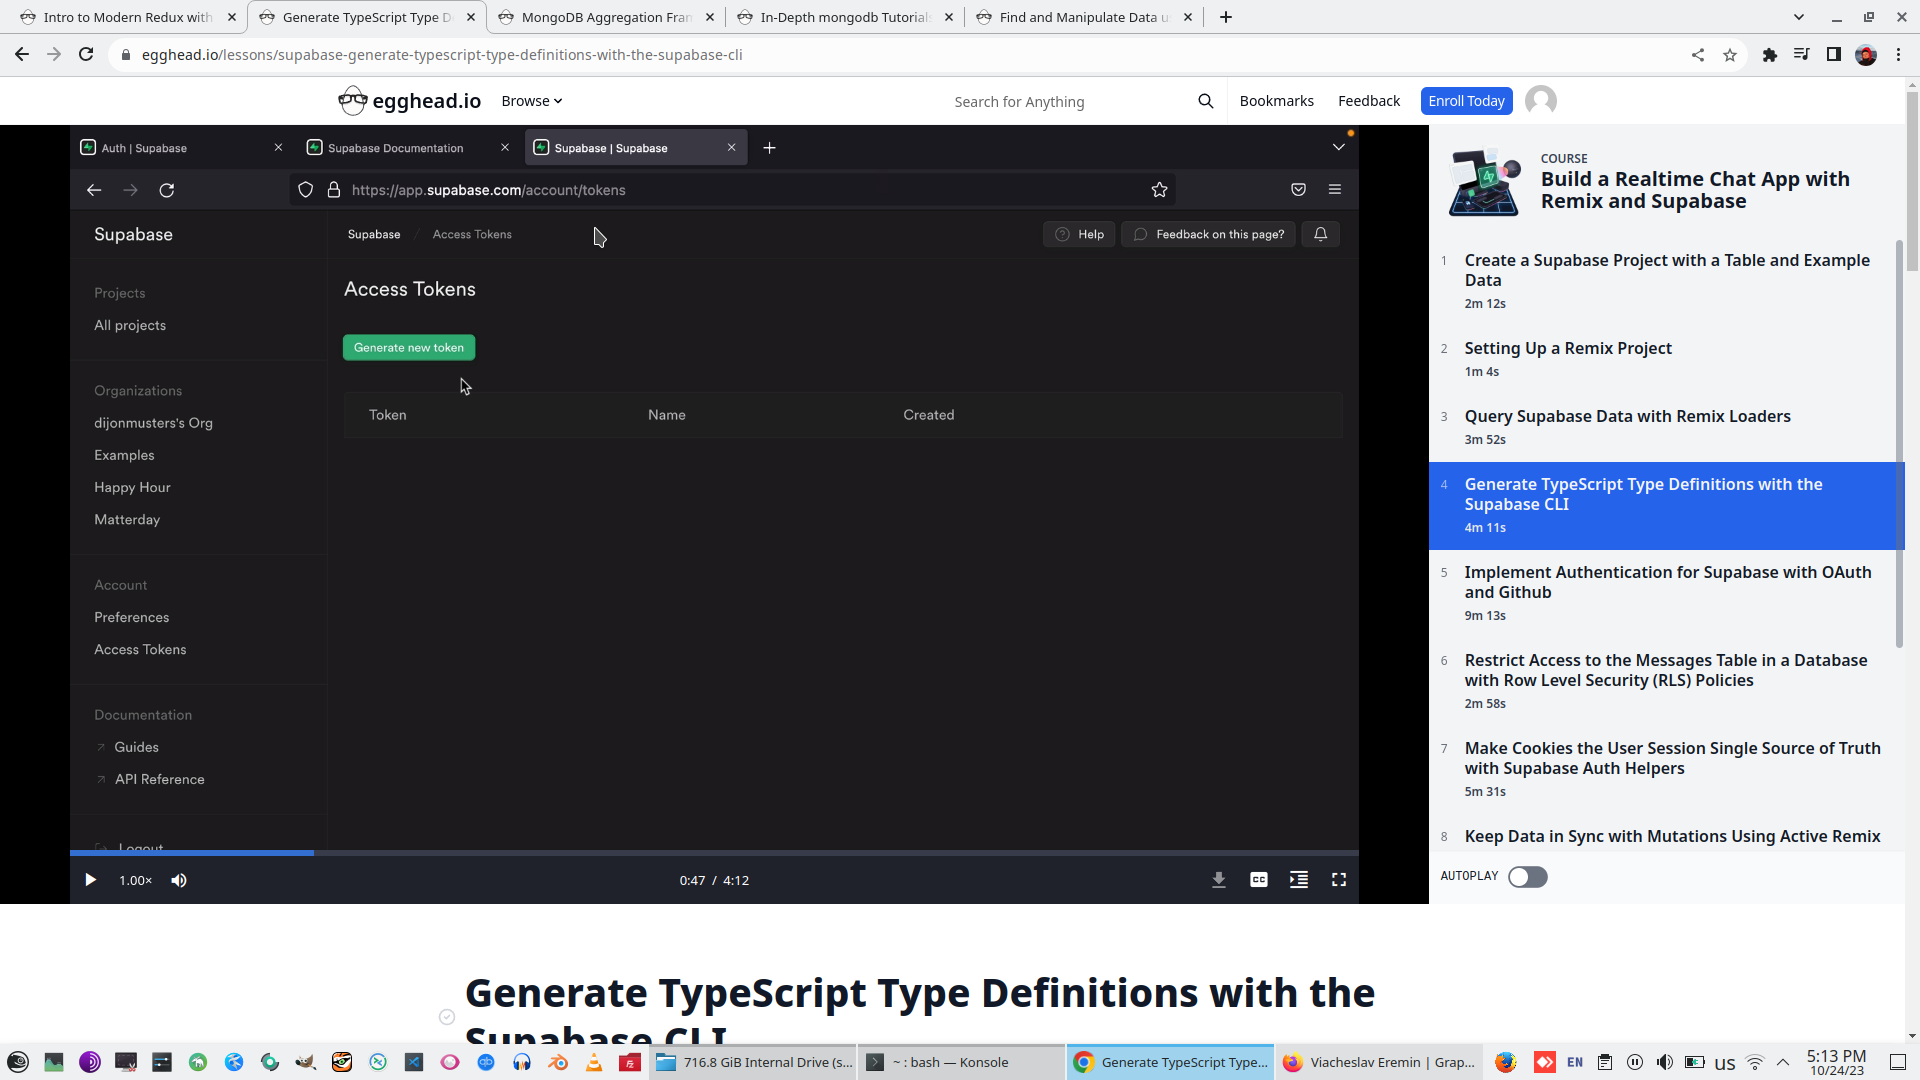
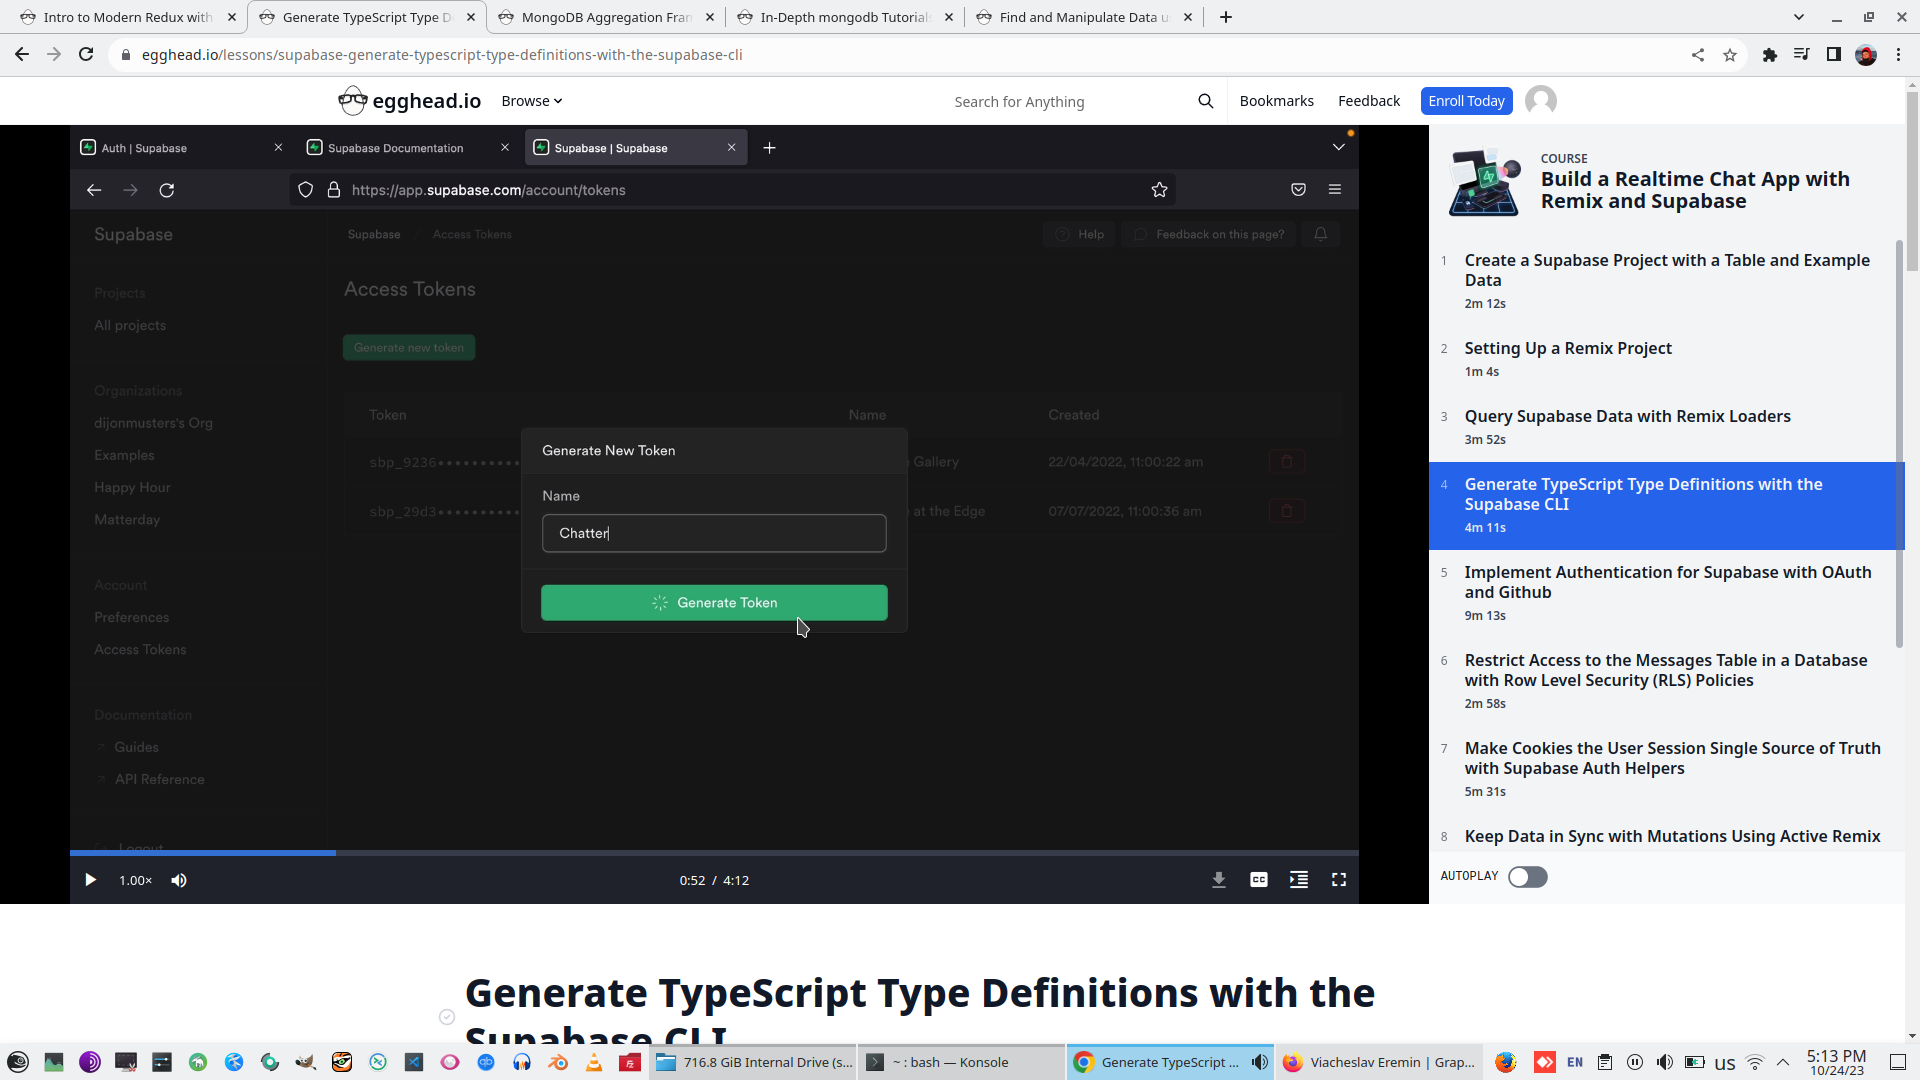
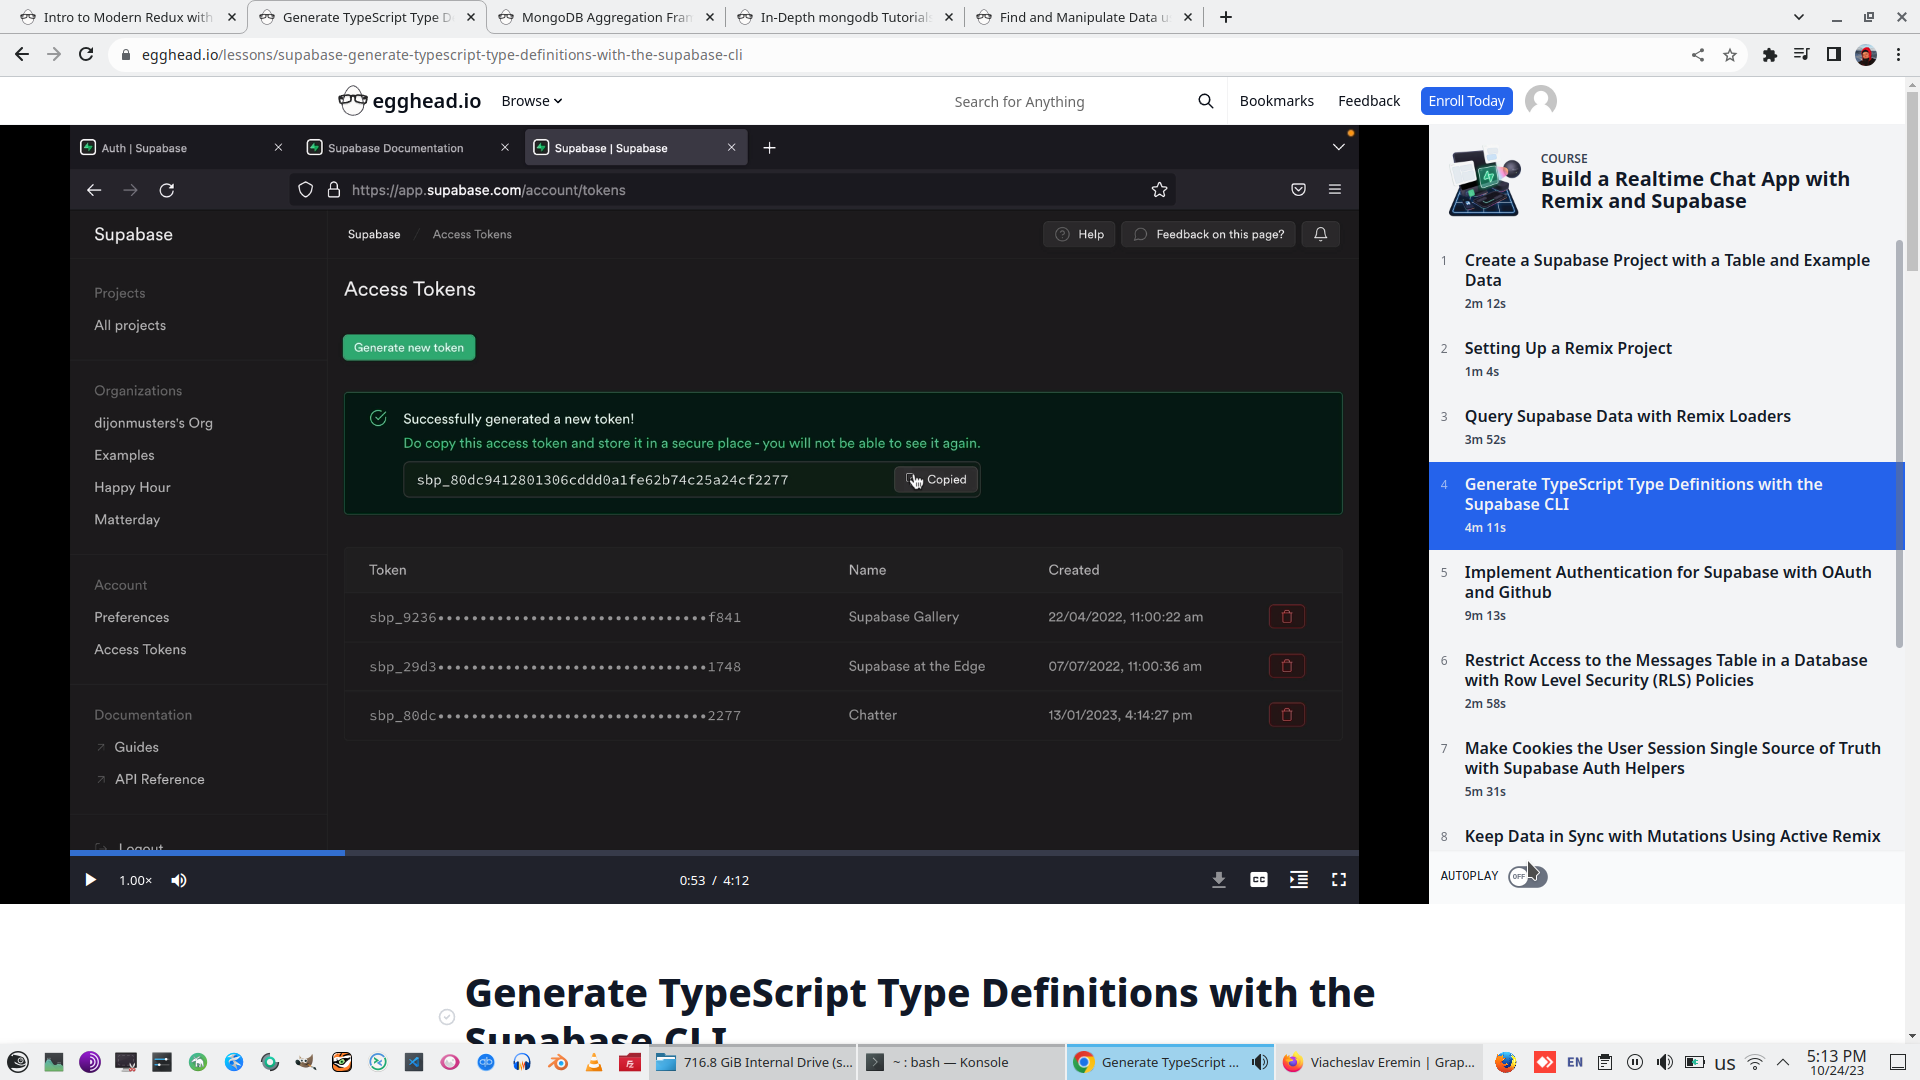
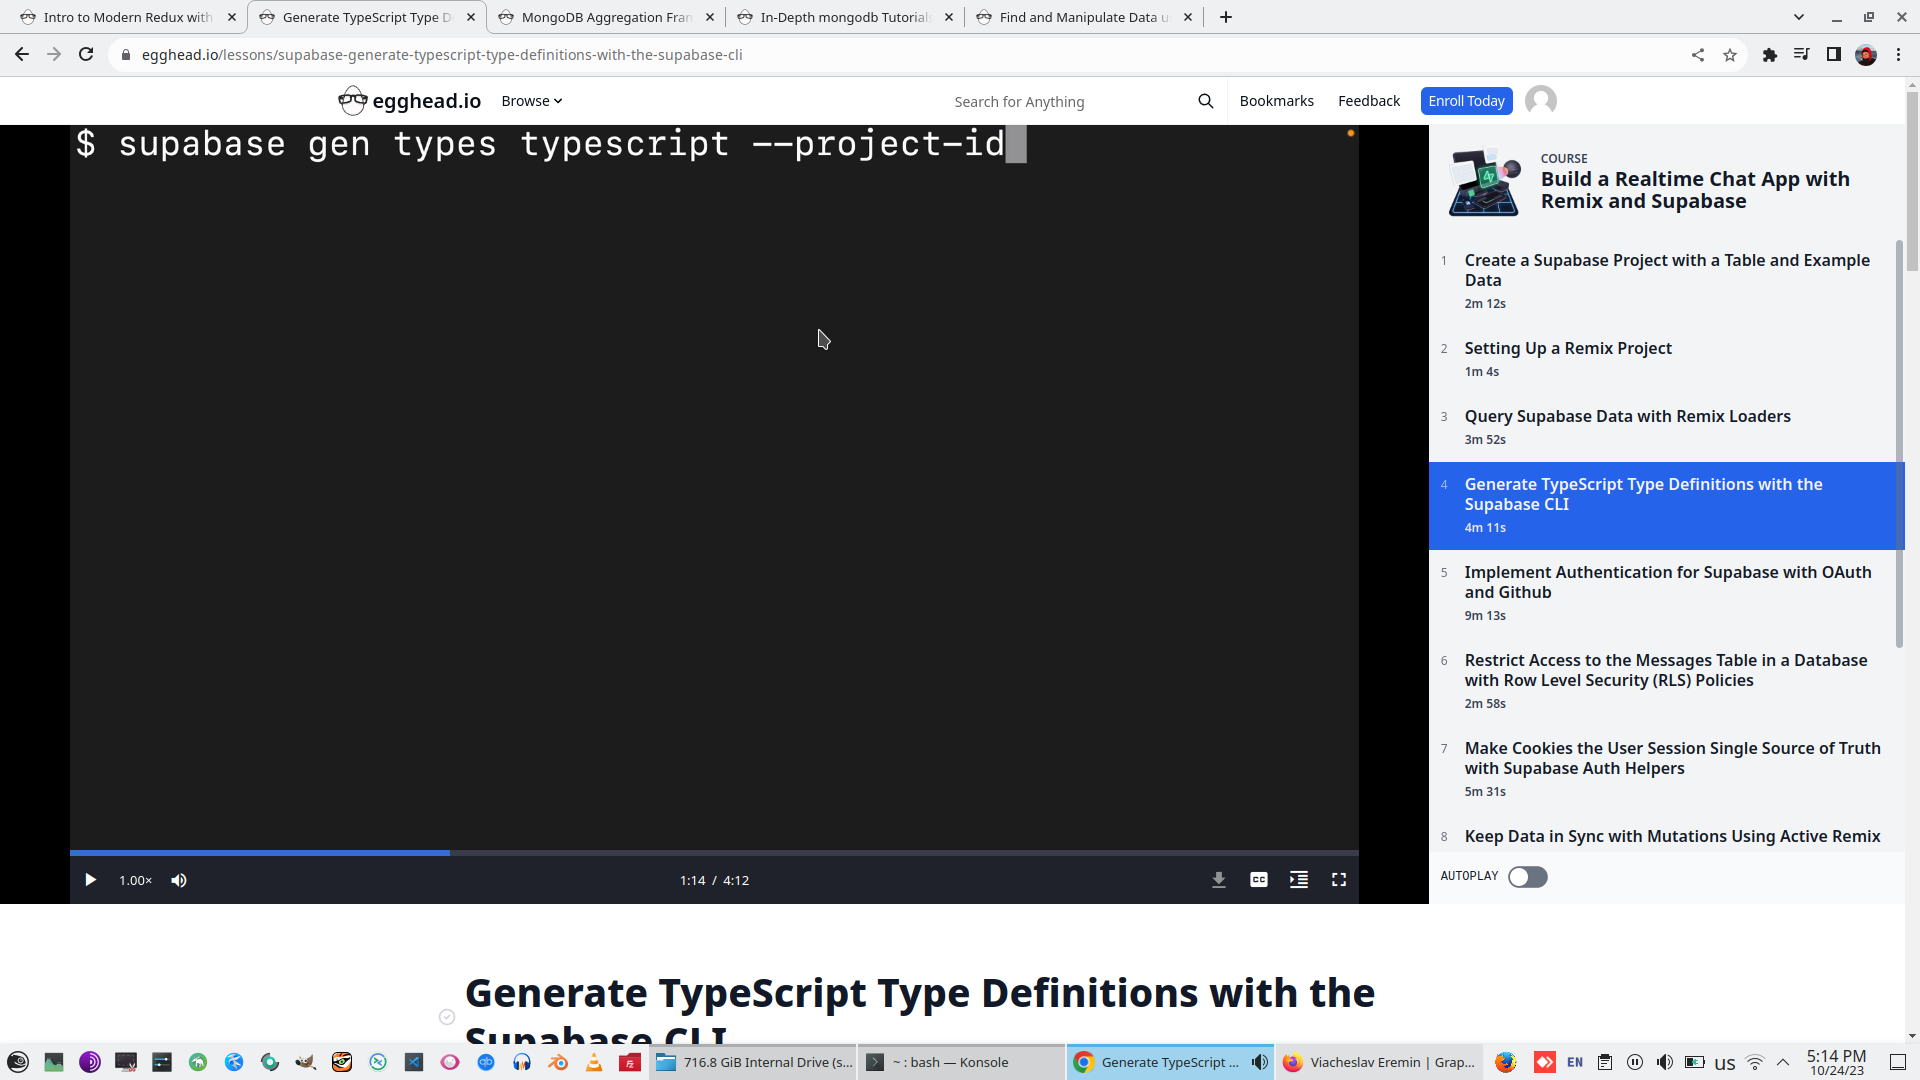
4. Generate TypeScript Type Definitions with the Supabase CLI
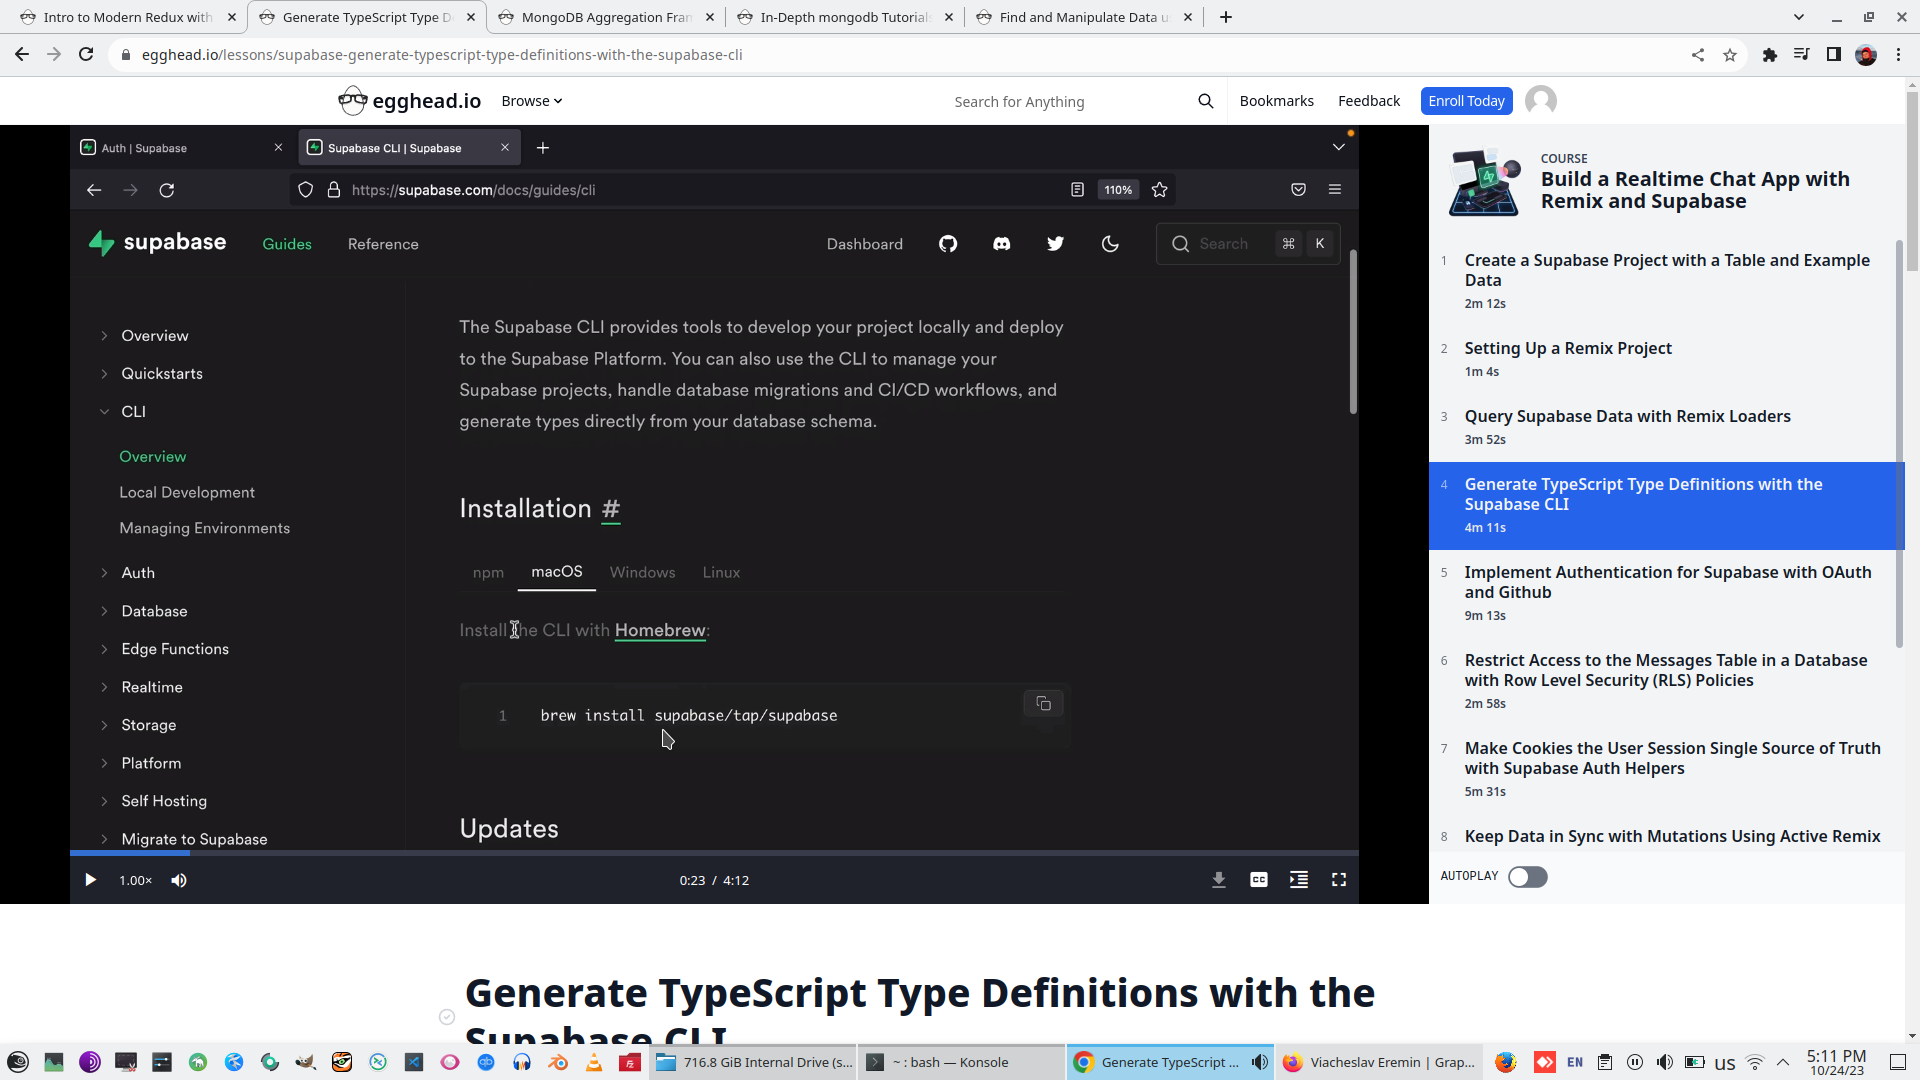
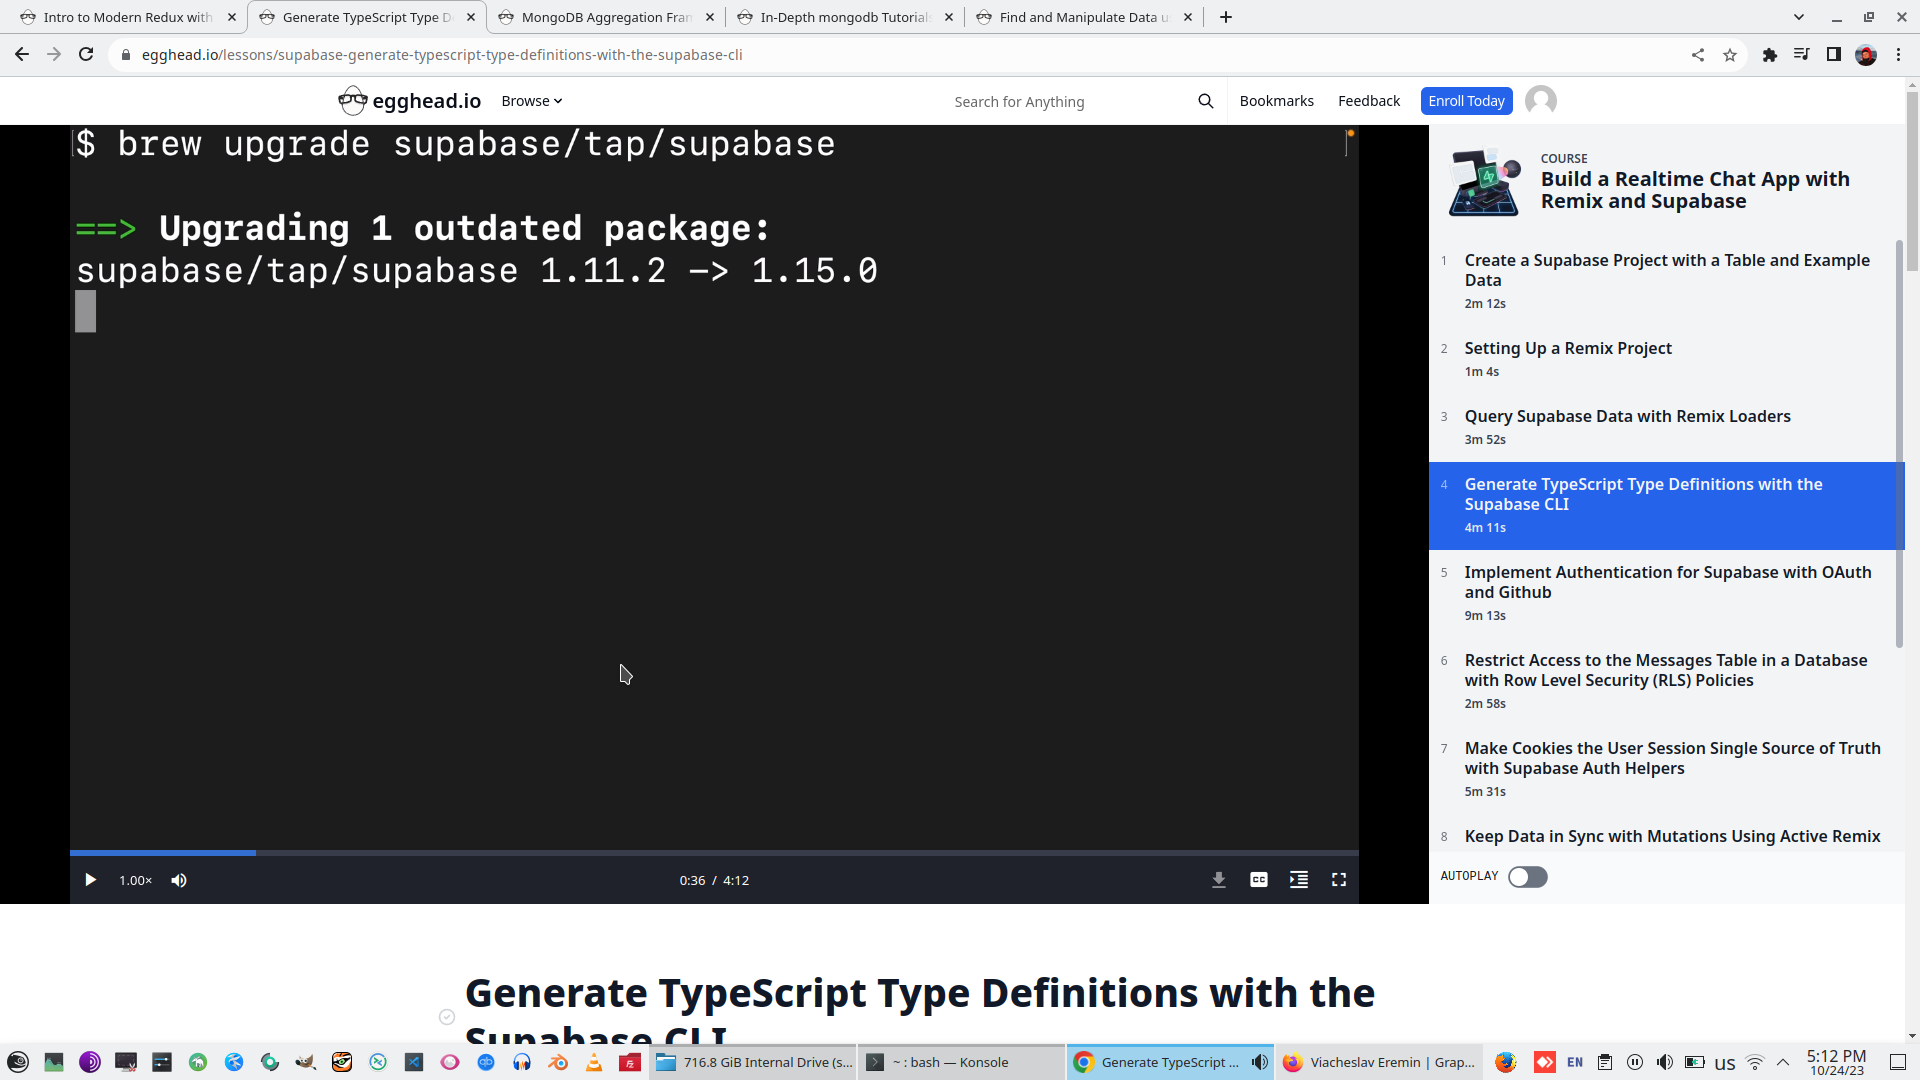
Check QuesryBulder syntax and install supabase/tap/supabase
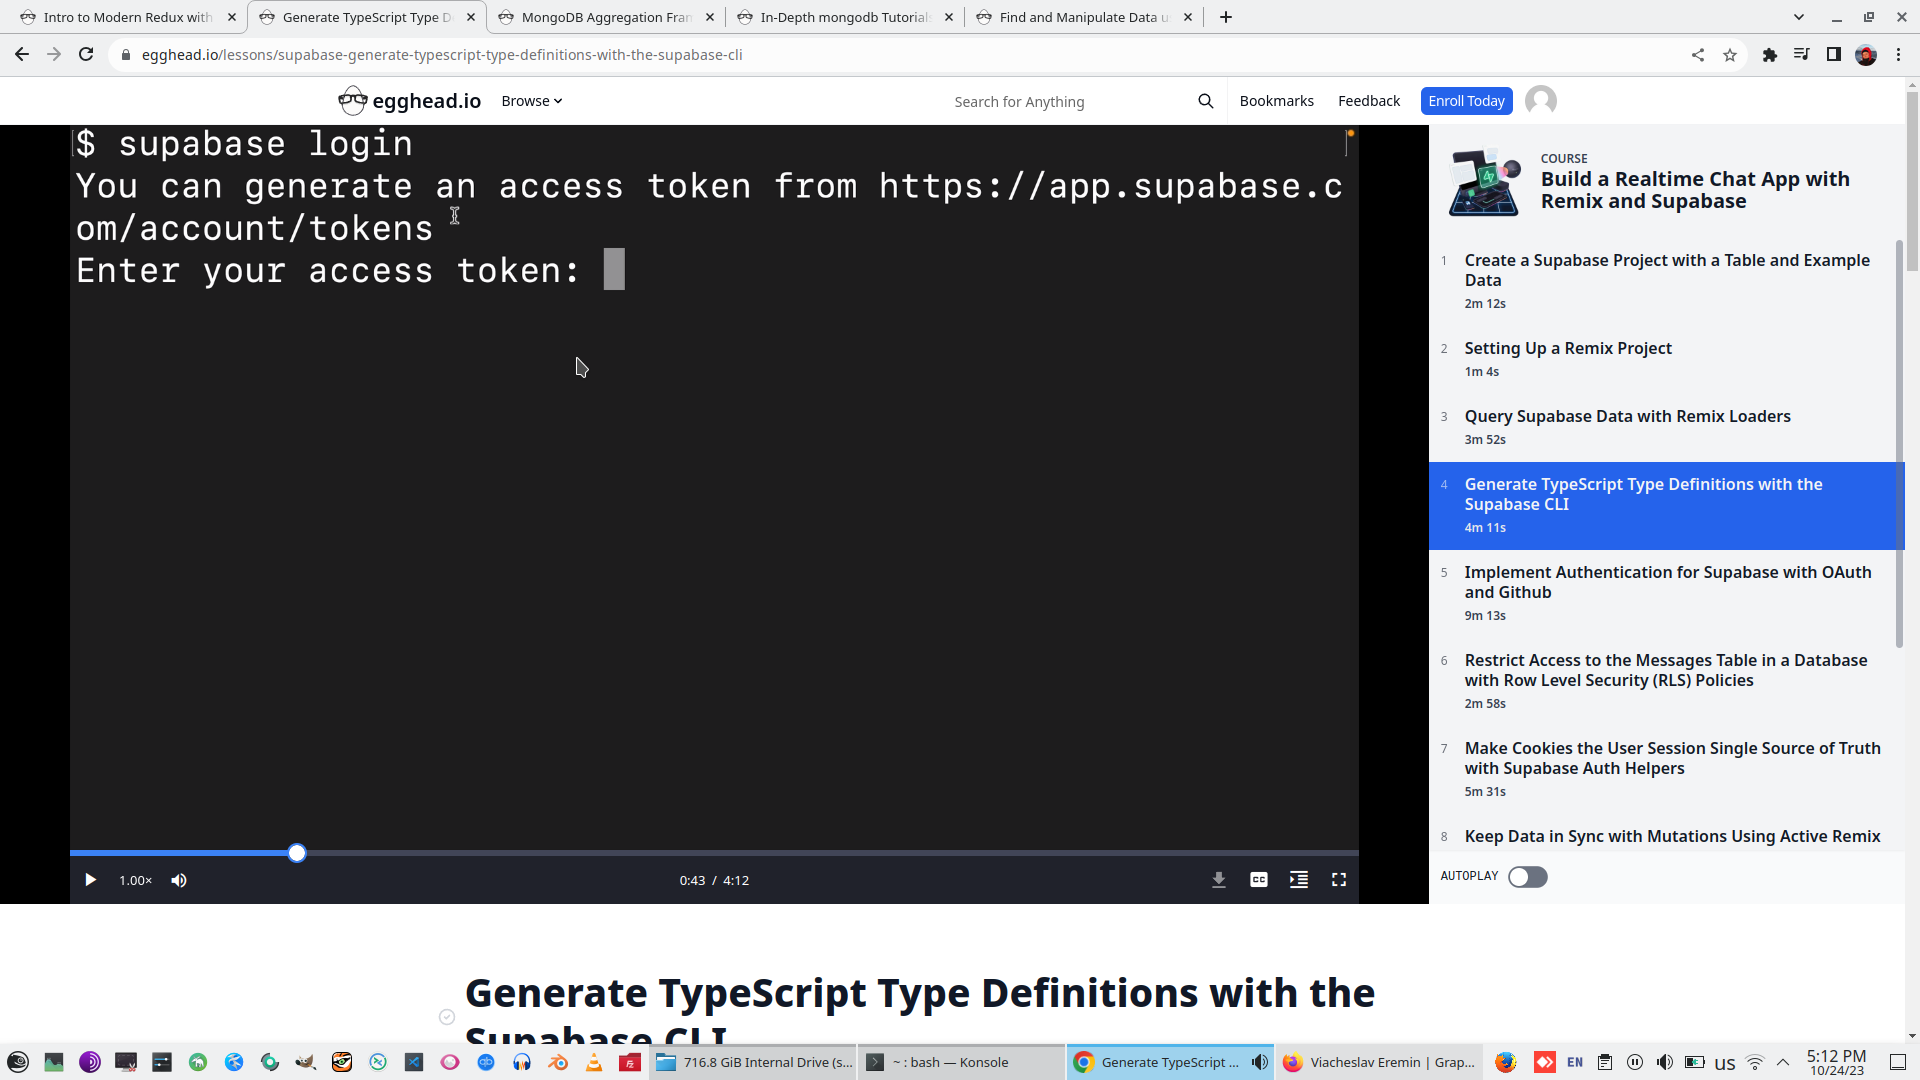
Login to supabase, generate access token on Supabase site and pass access token to local dvelopment server.
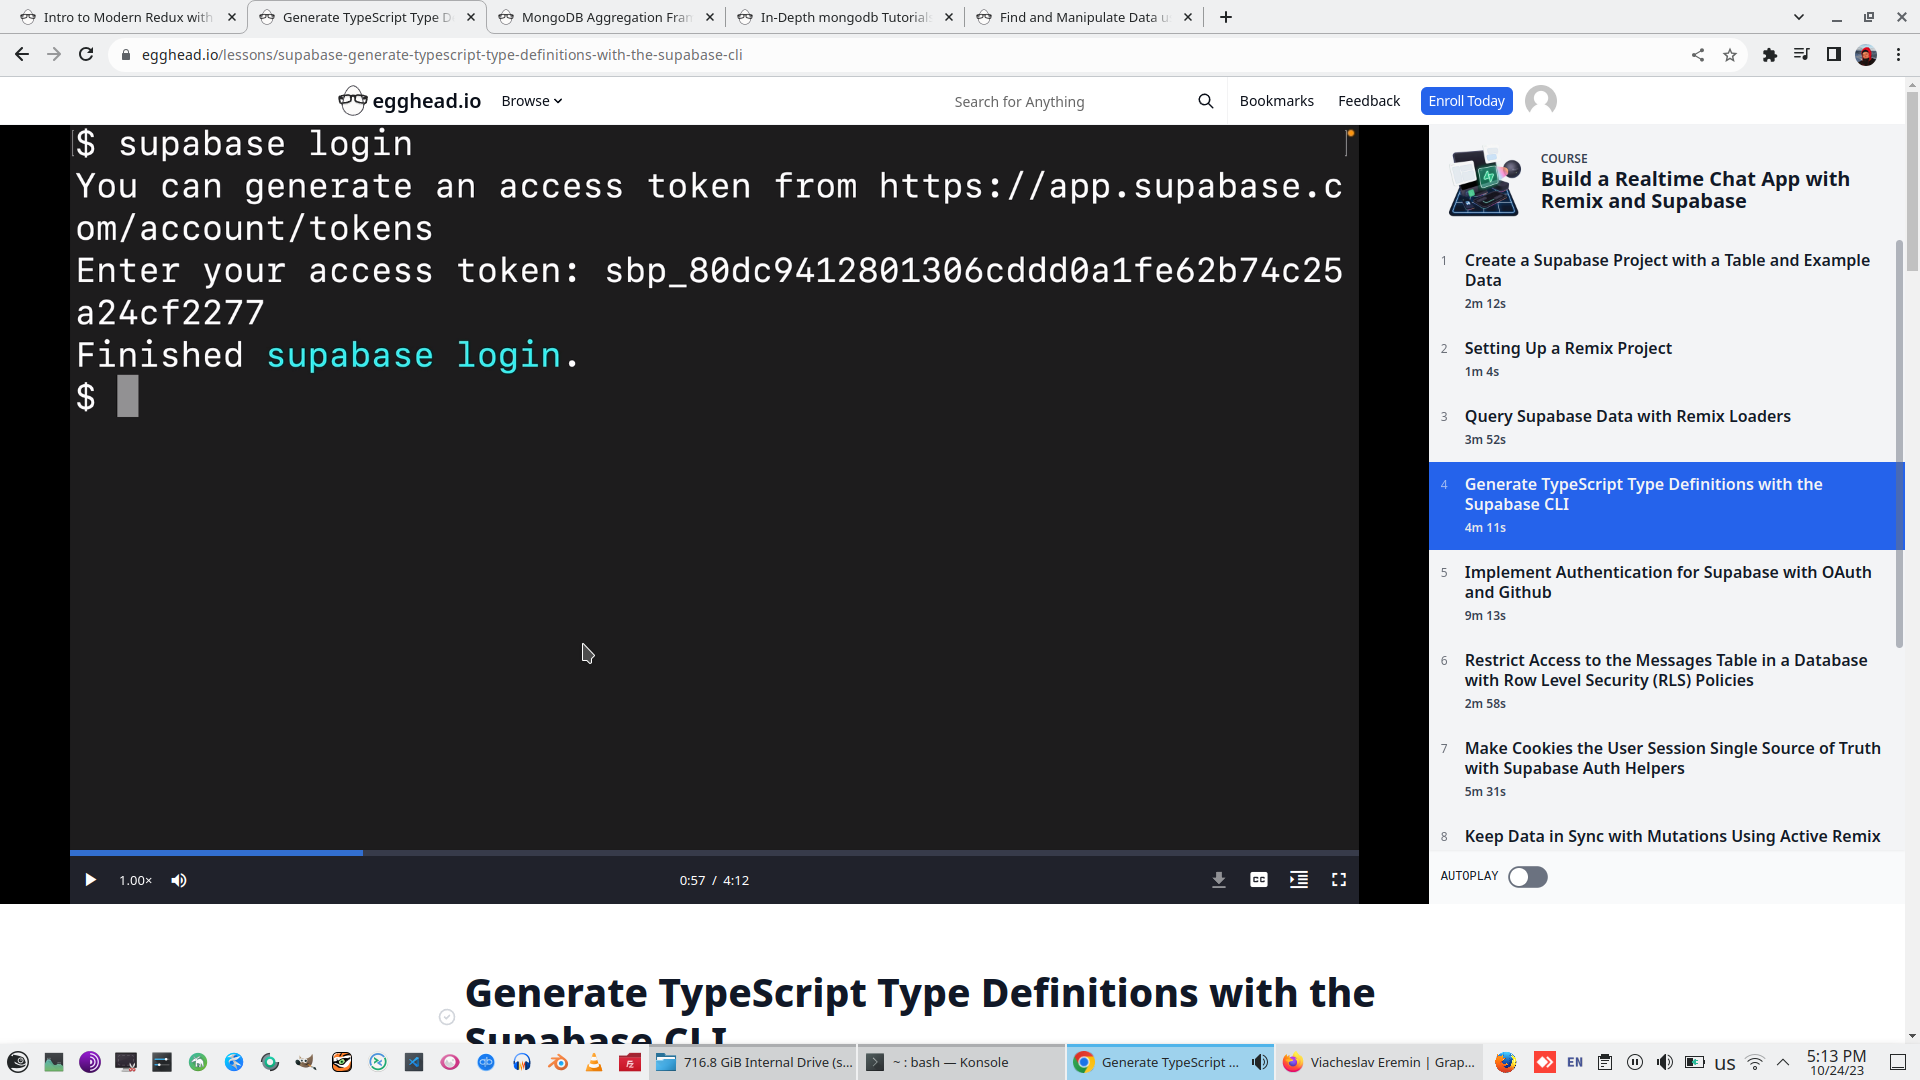
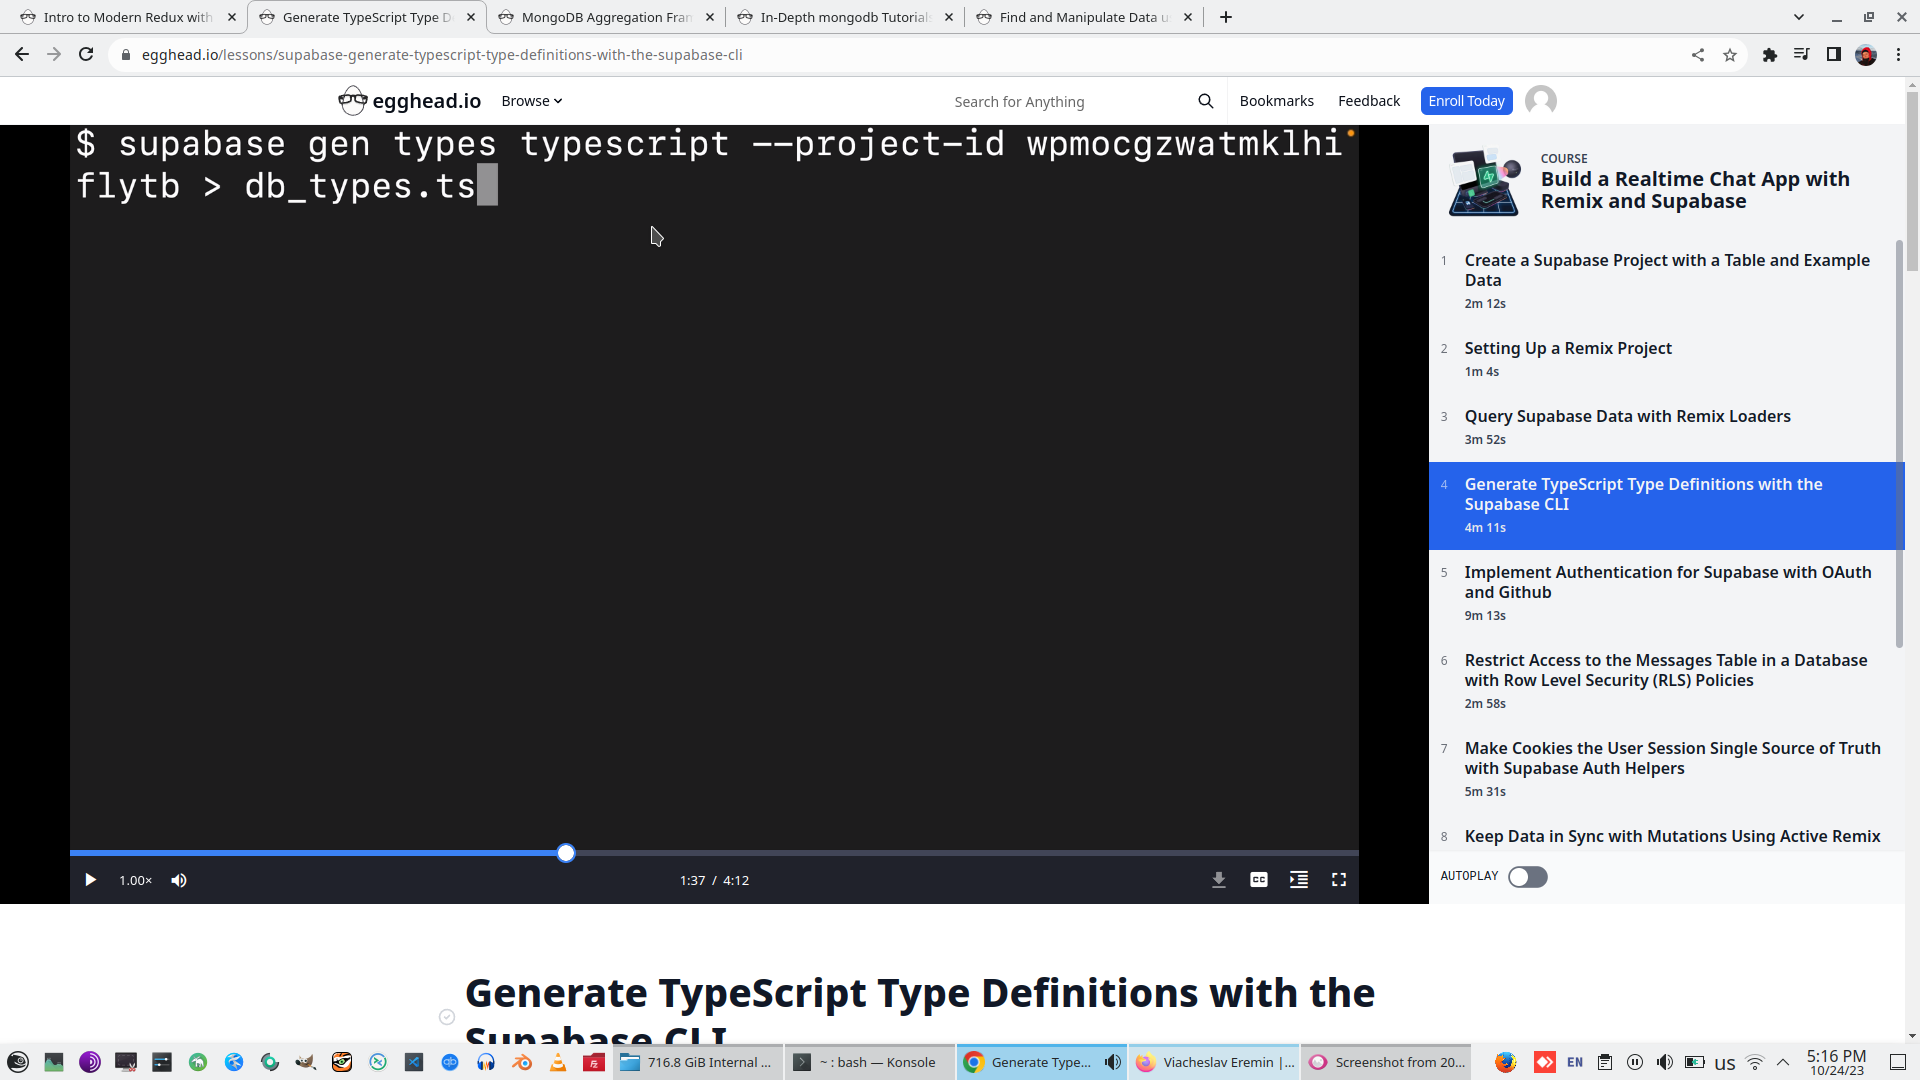
Grab supabase Project-ID and generate database schema db_types.ts from our Supabase DB with command - supabase gen types typescript --project-id xxxxxxxxxxxxxx flyb > db_types.ts
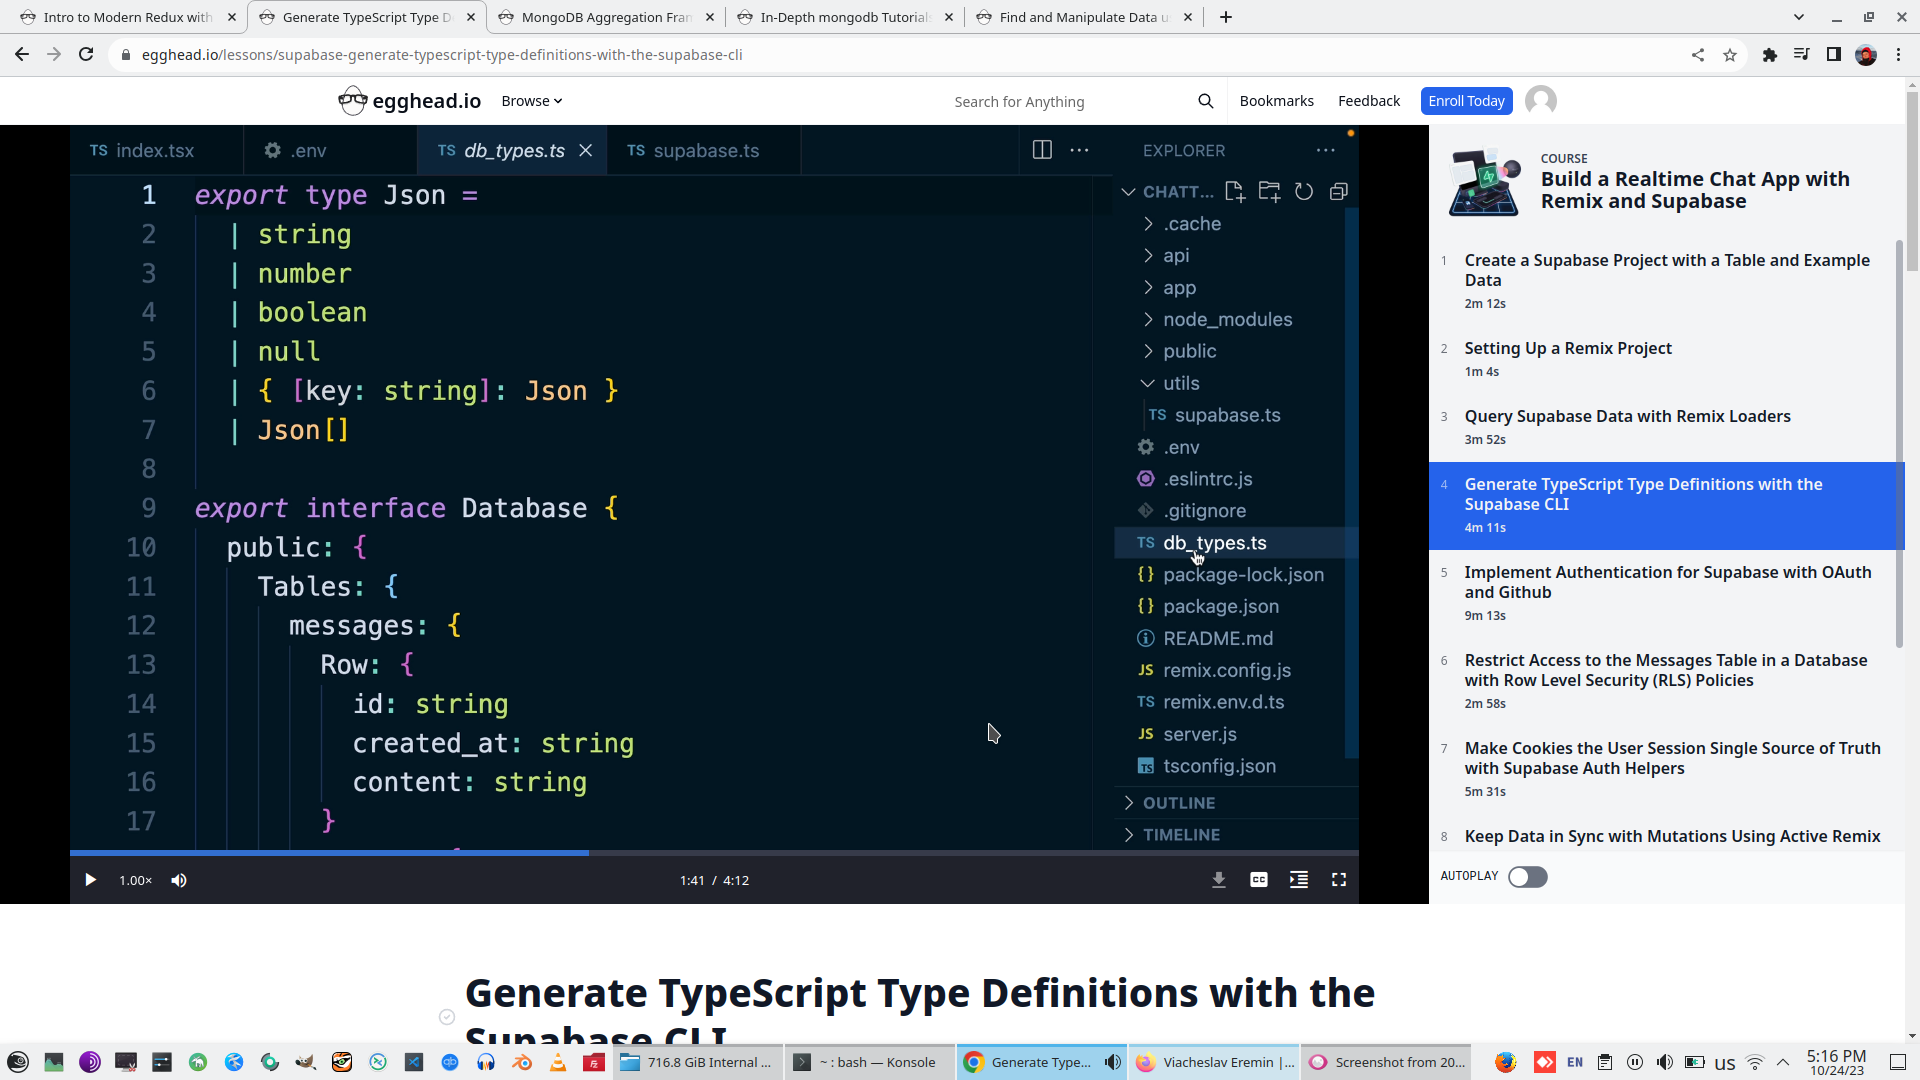
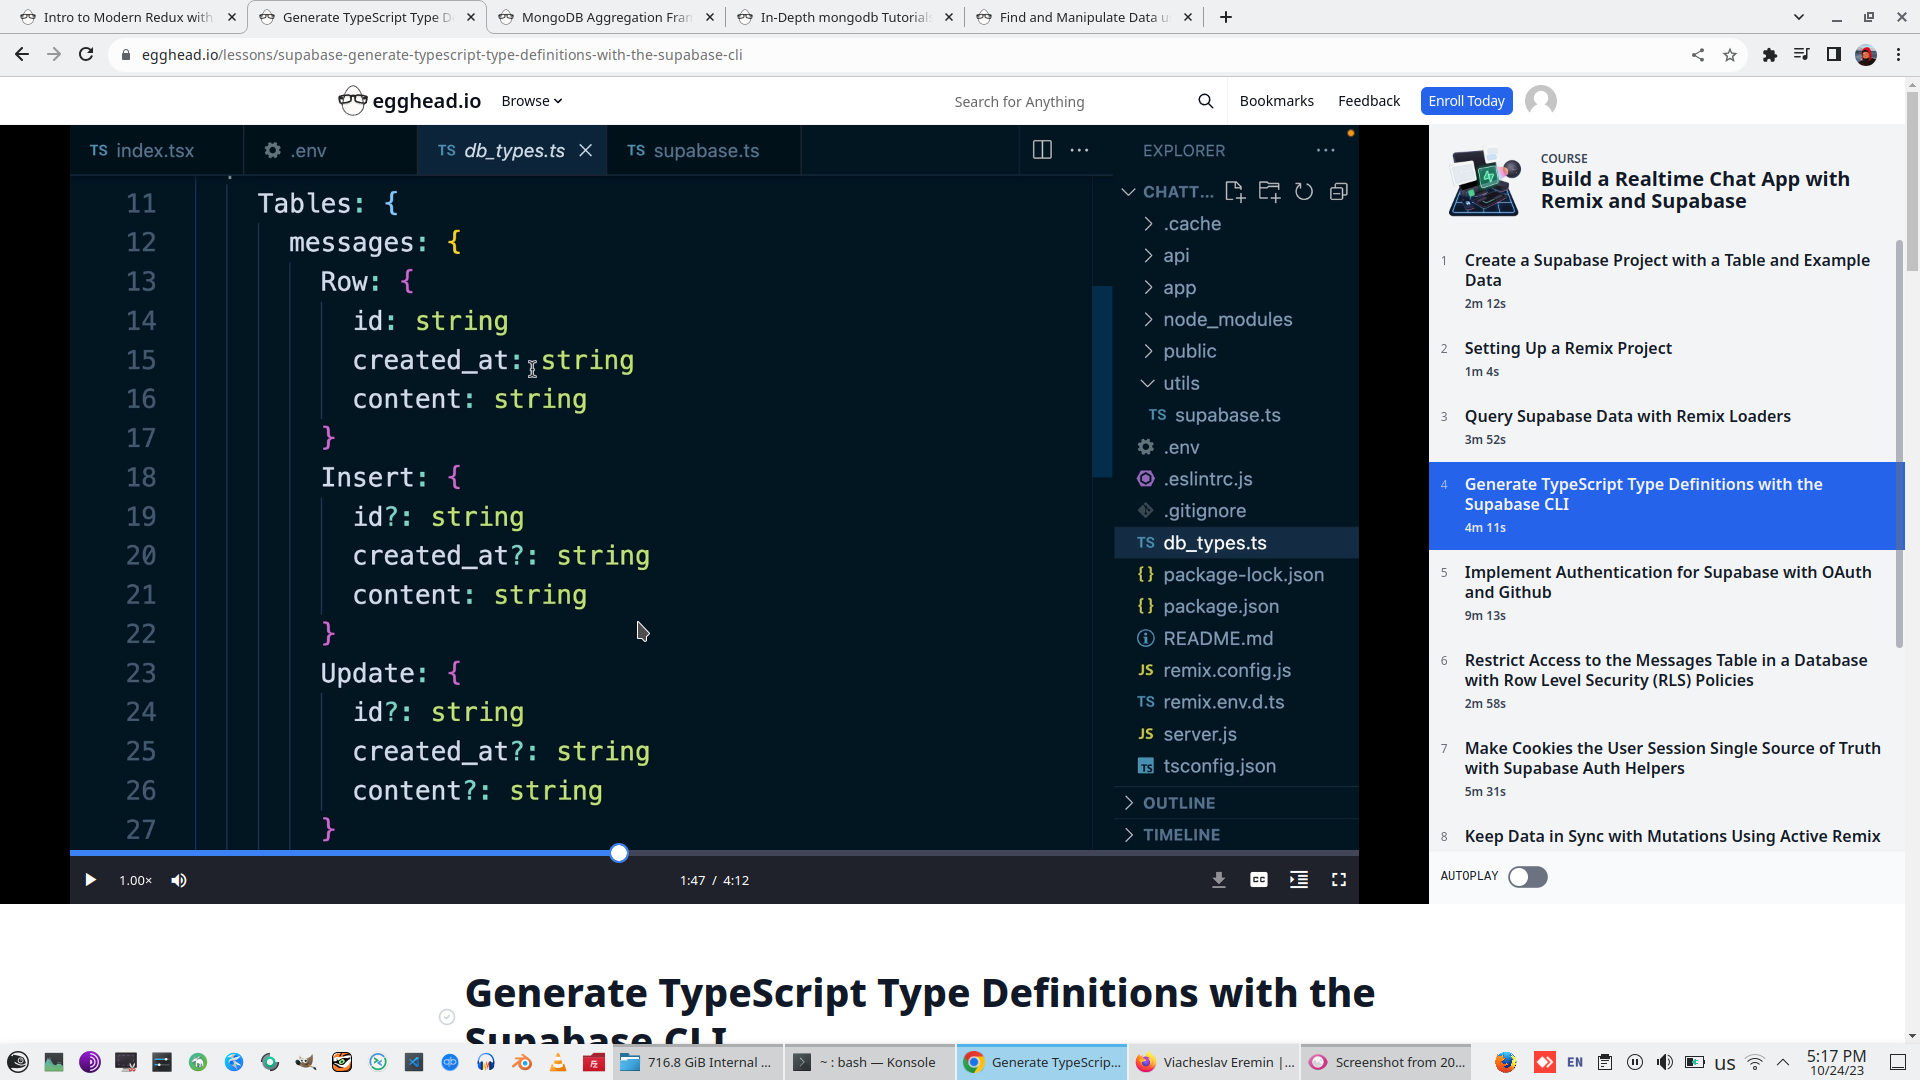
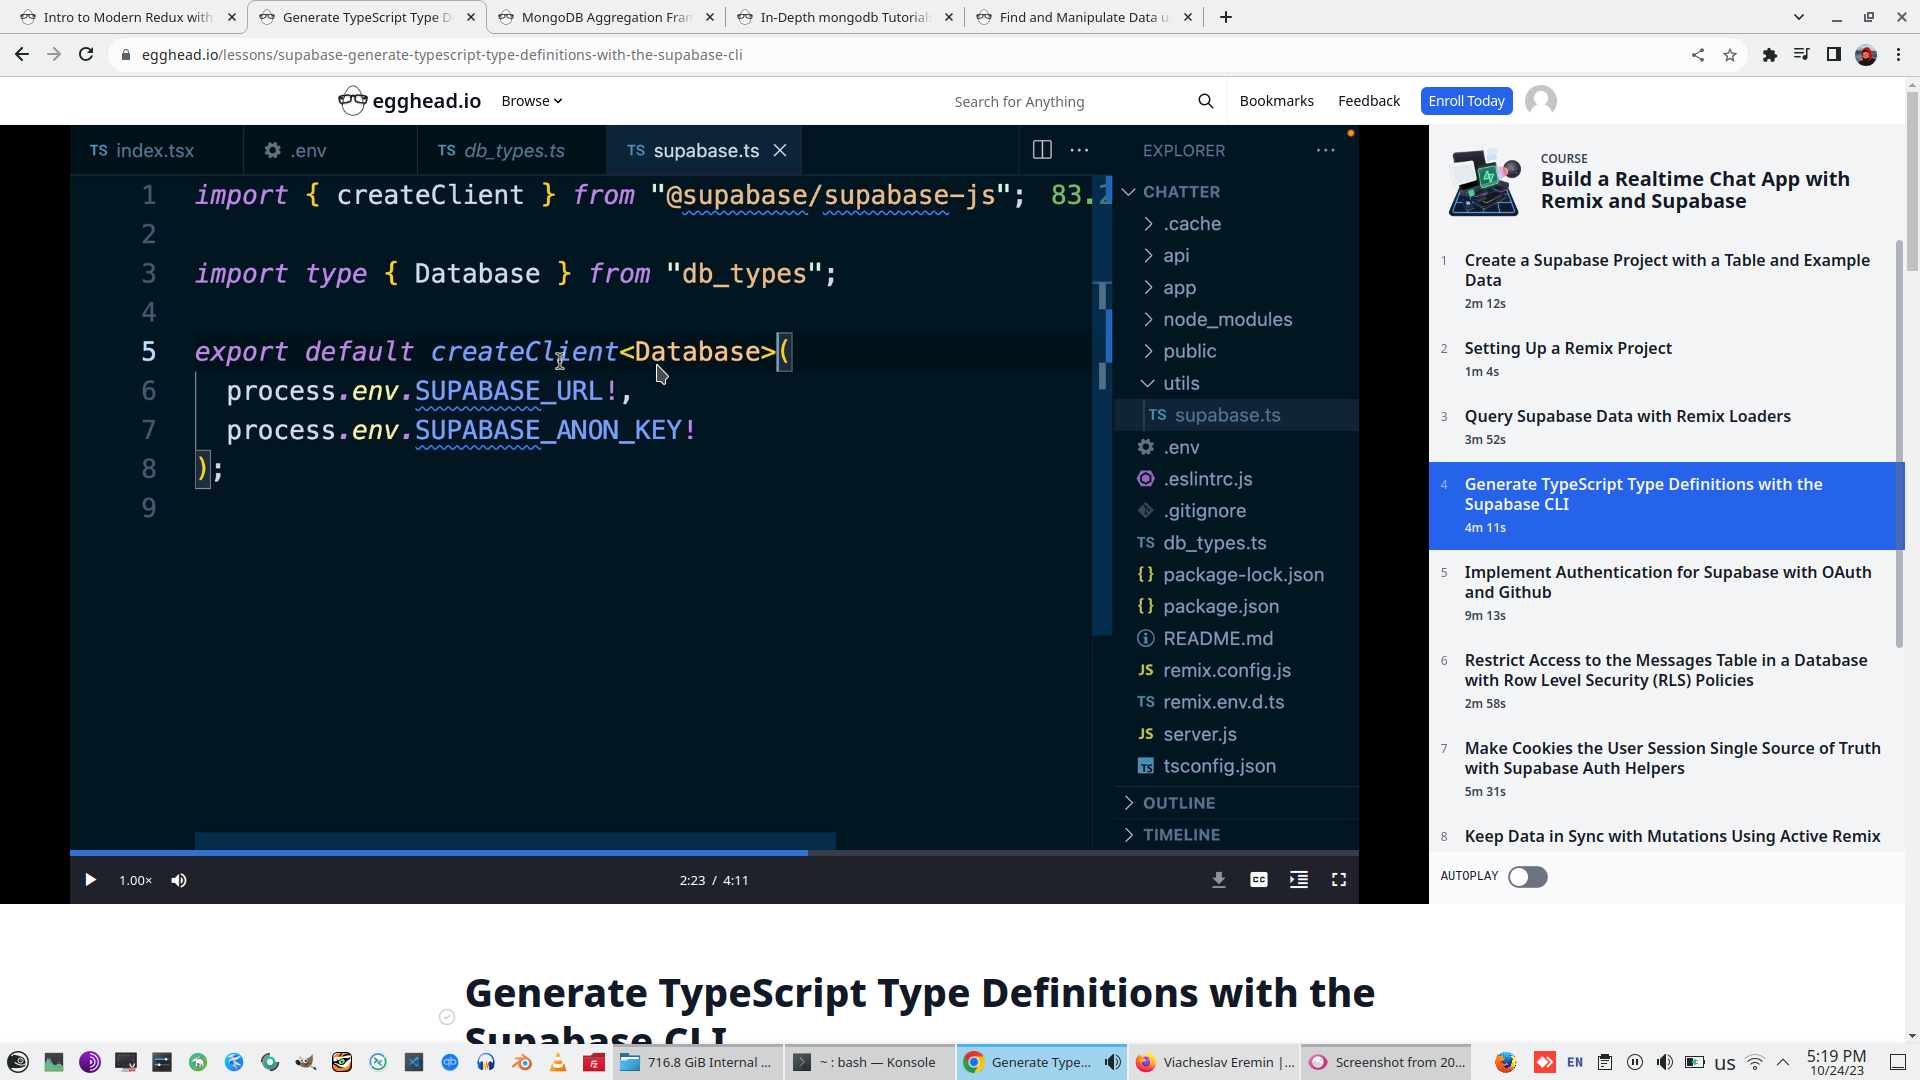
Import database schema to Supabase client JS module and now SupabaseClient return typed data
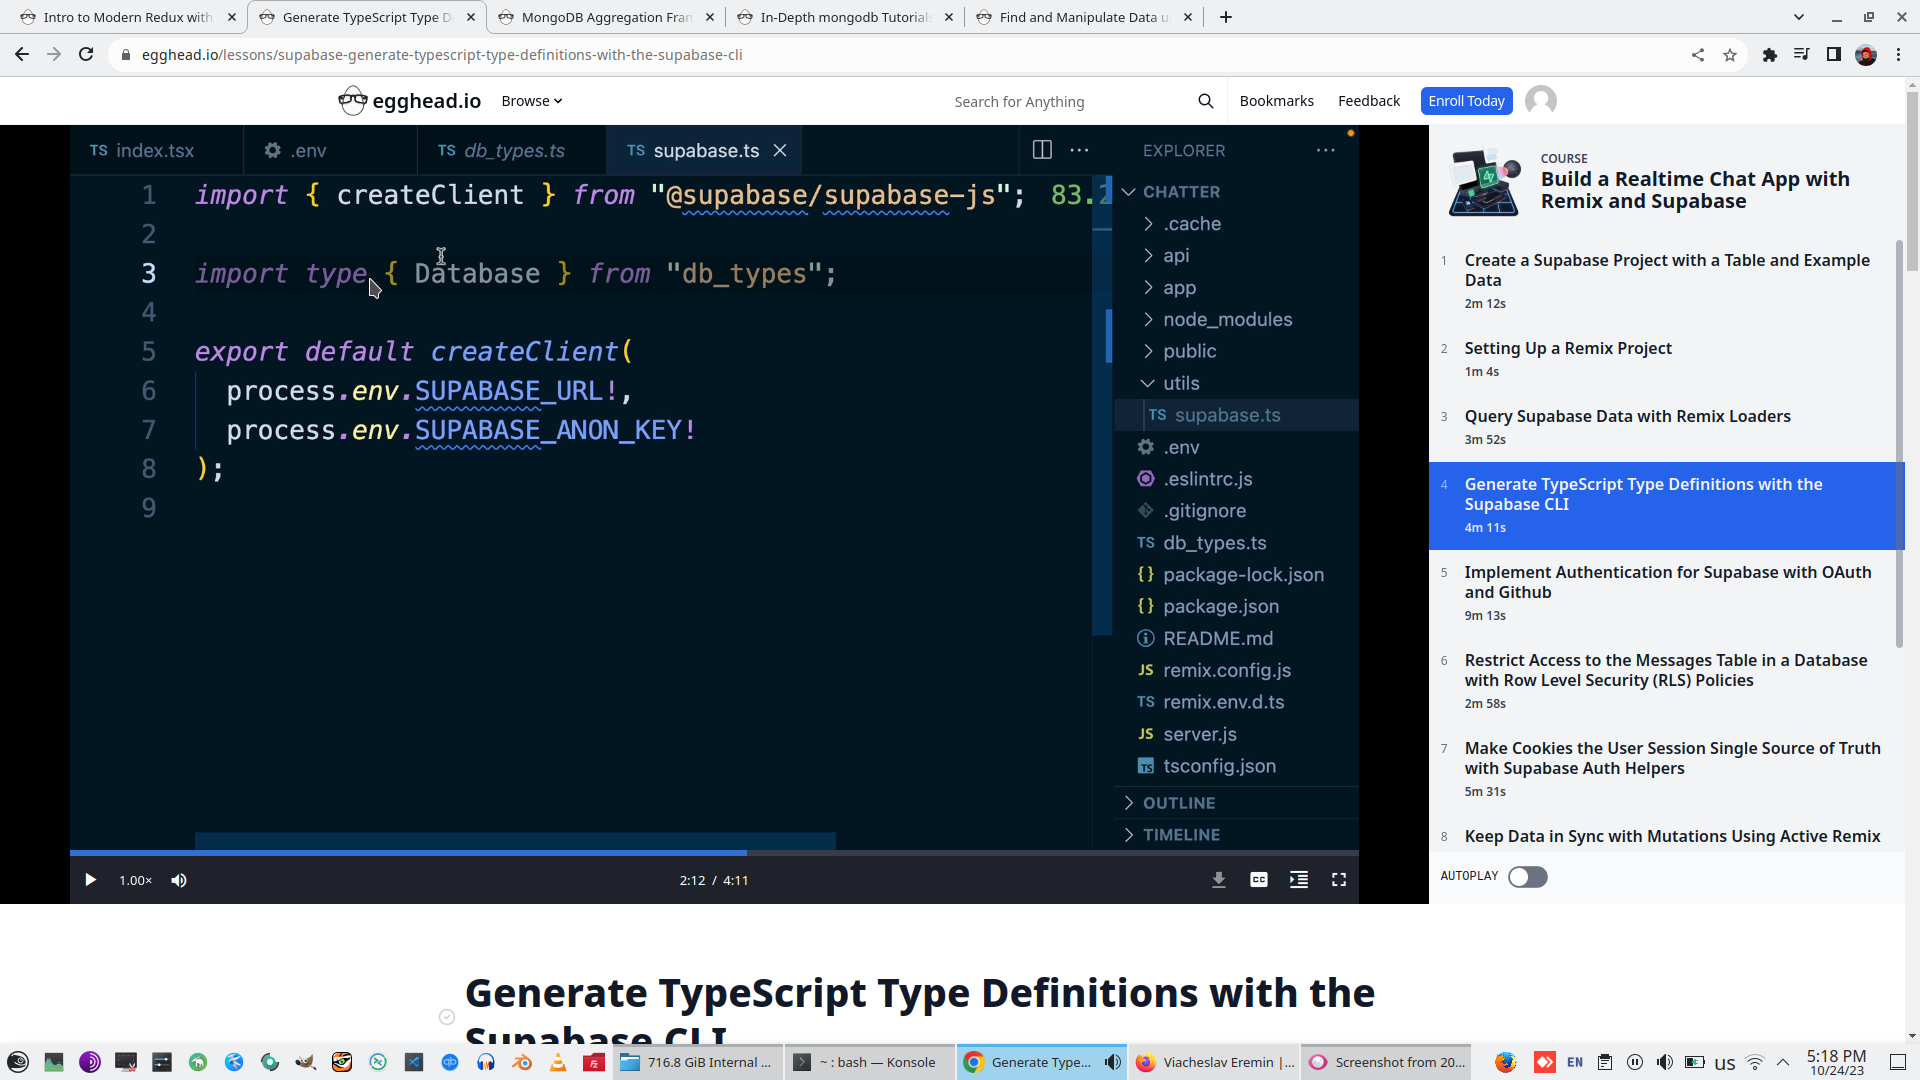
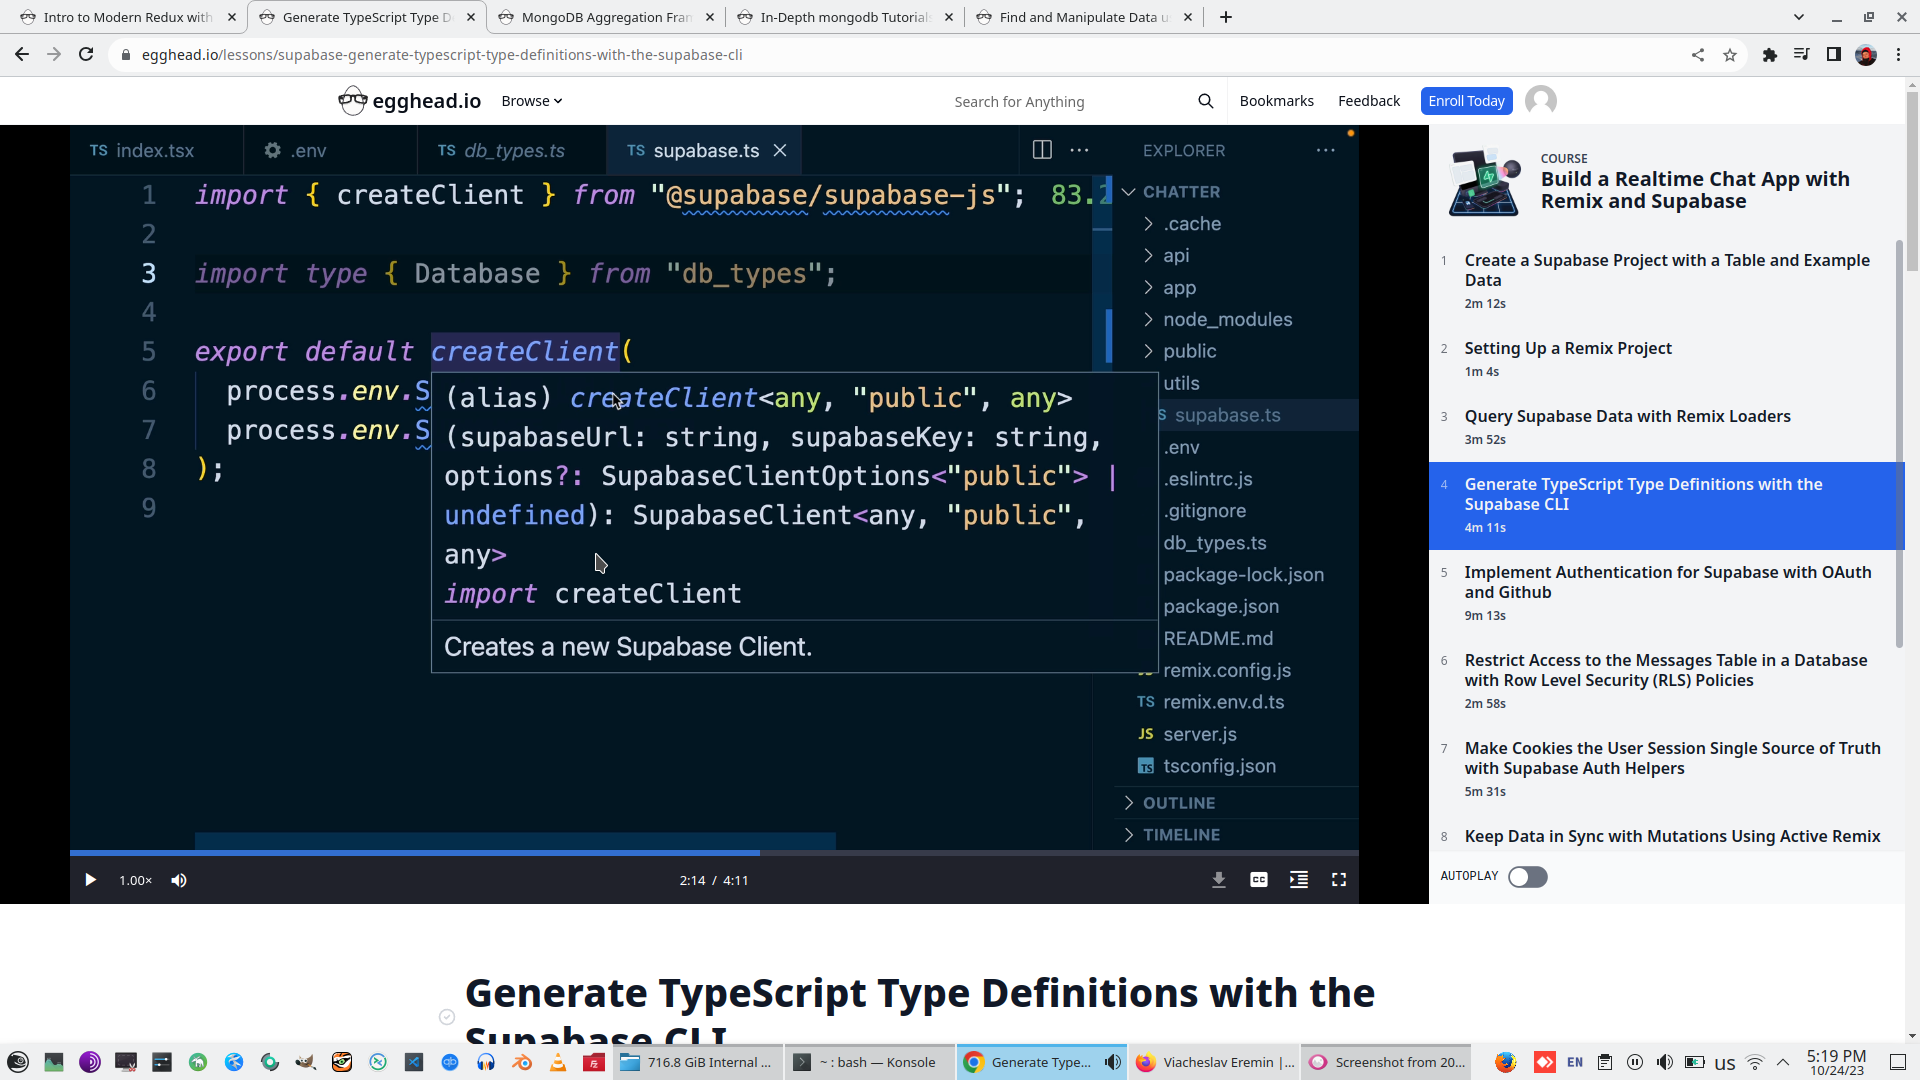
Pass type Database as output of module
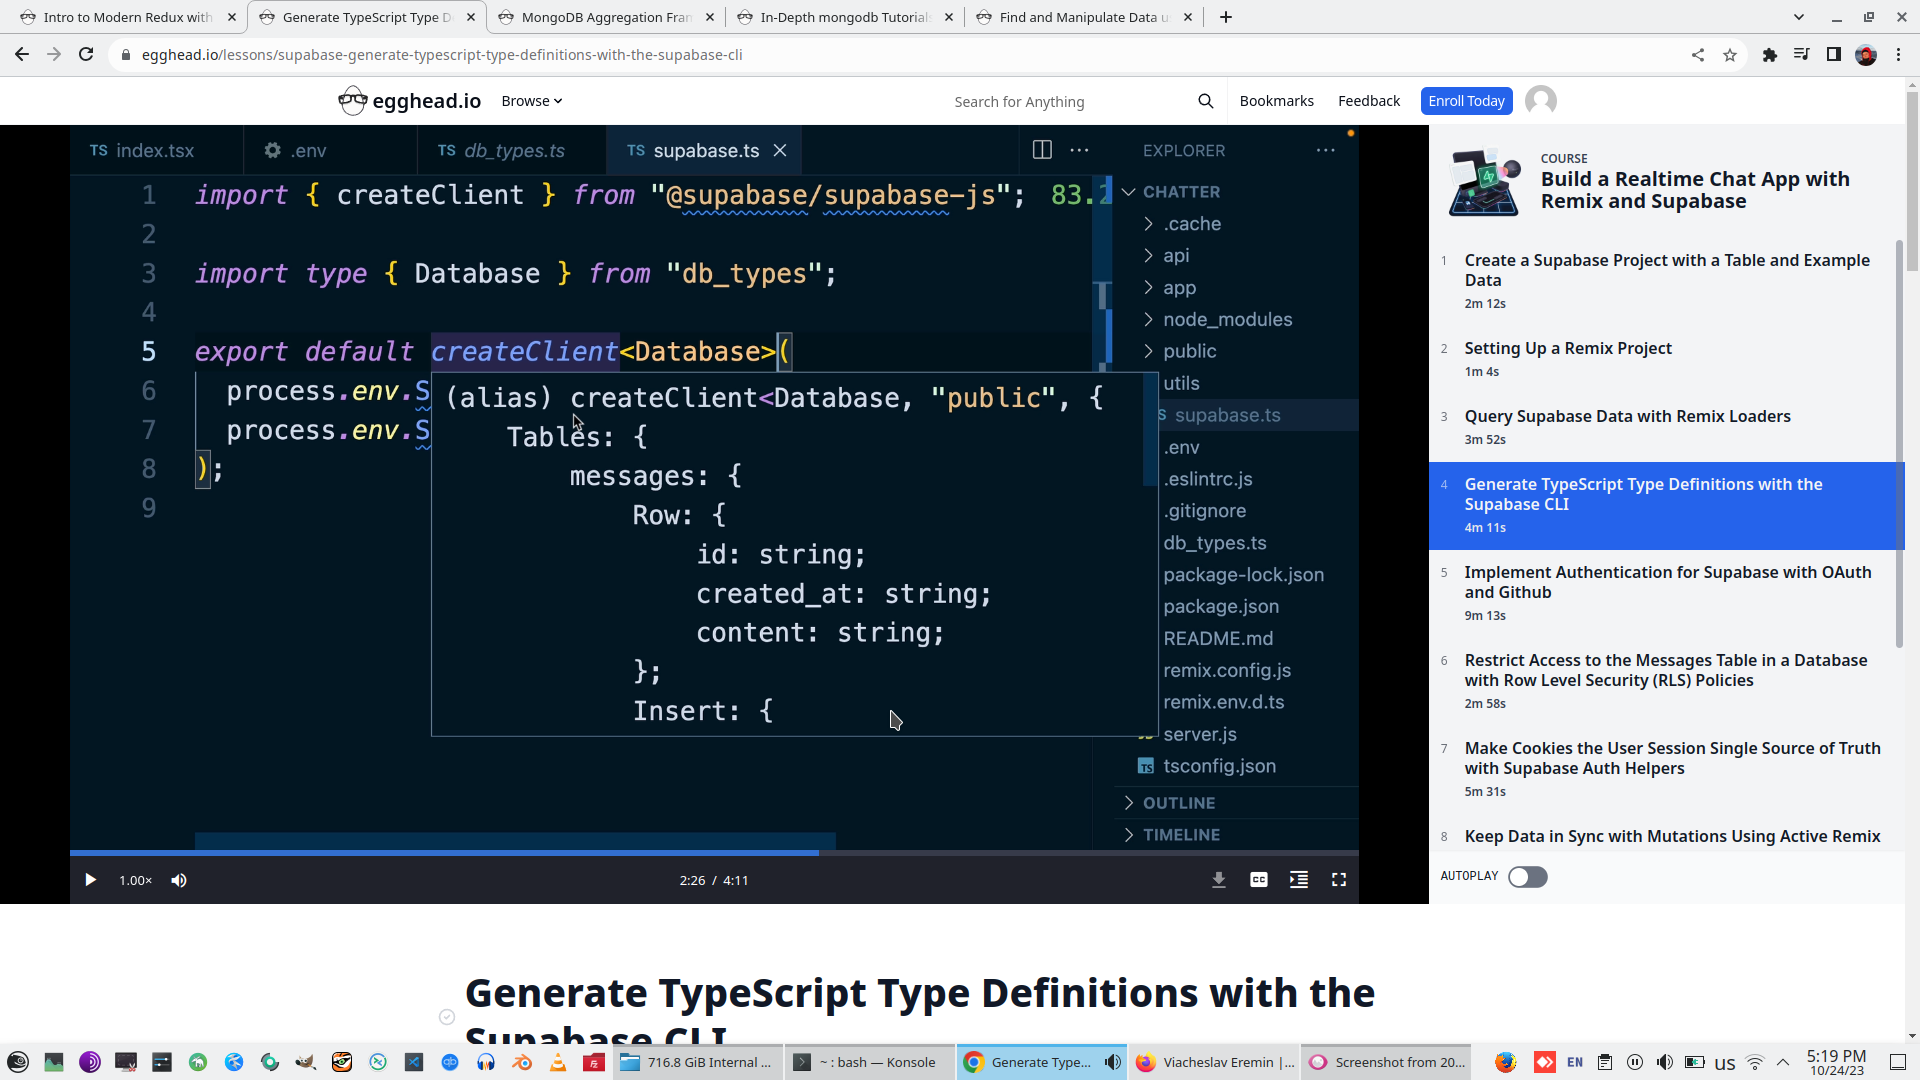
But Supabase Client still working with untyped data.

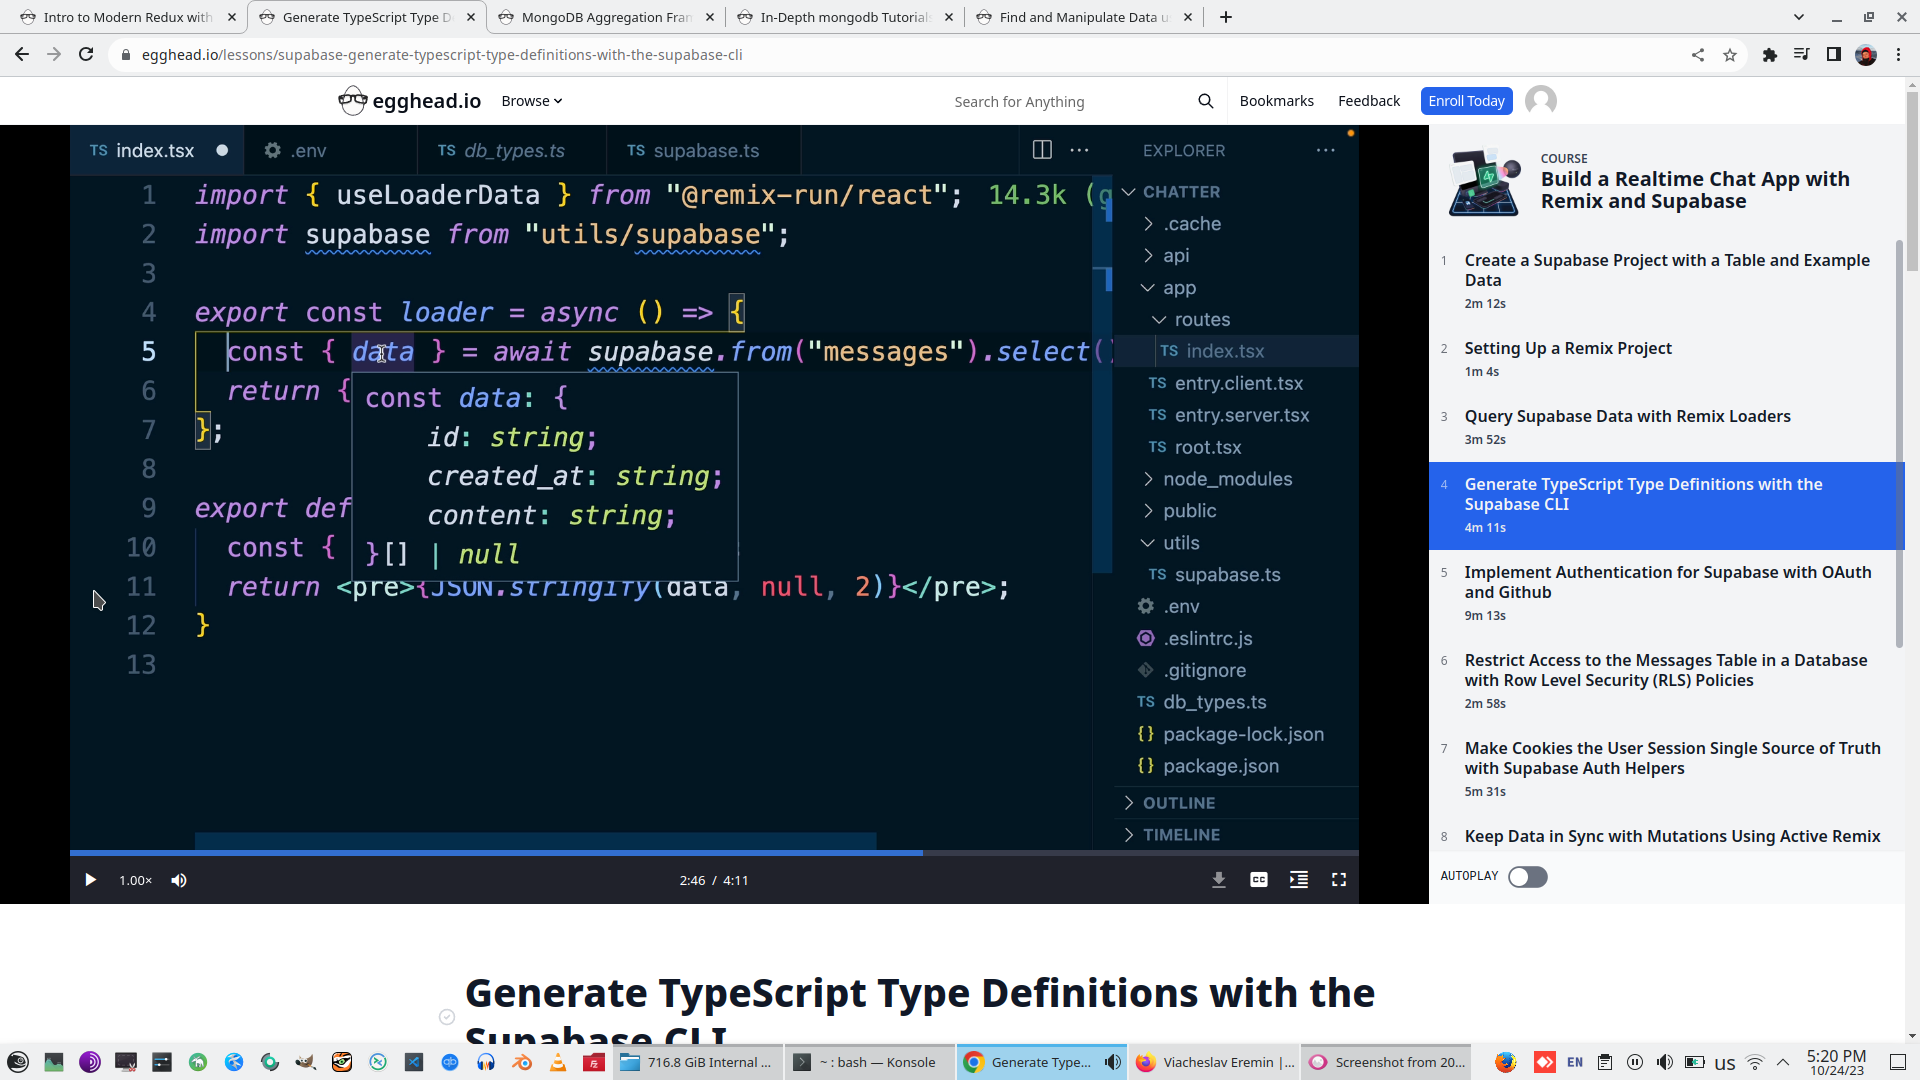
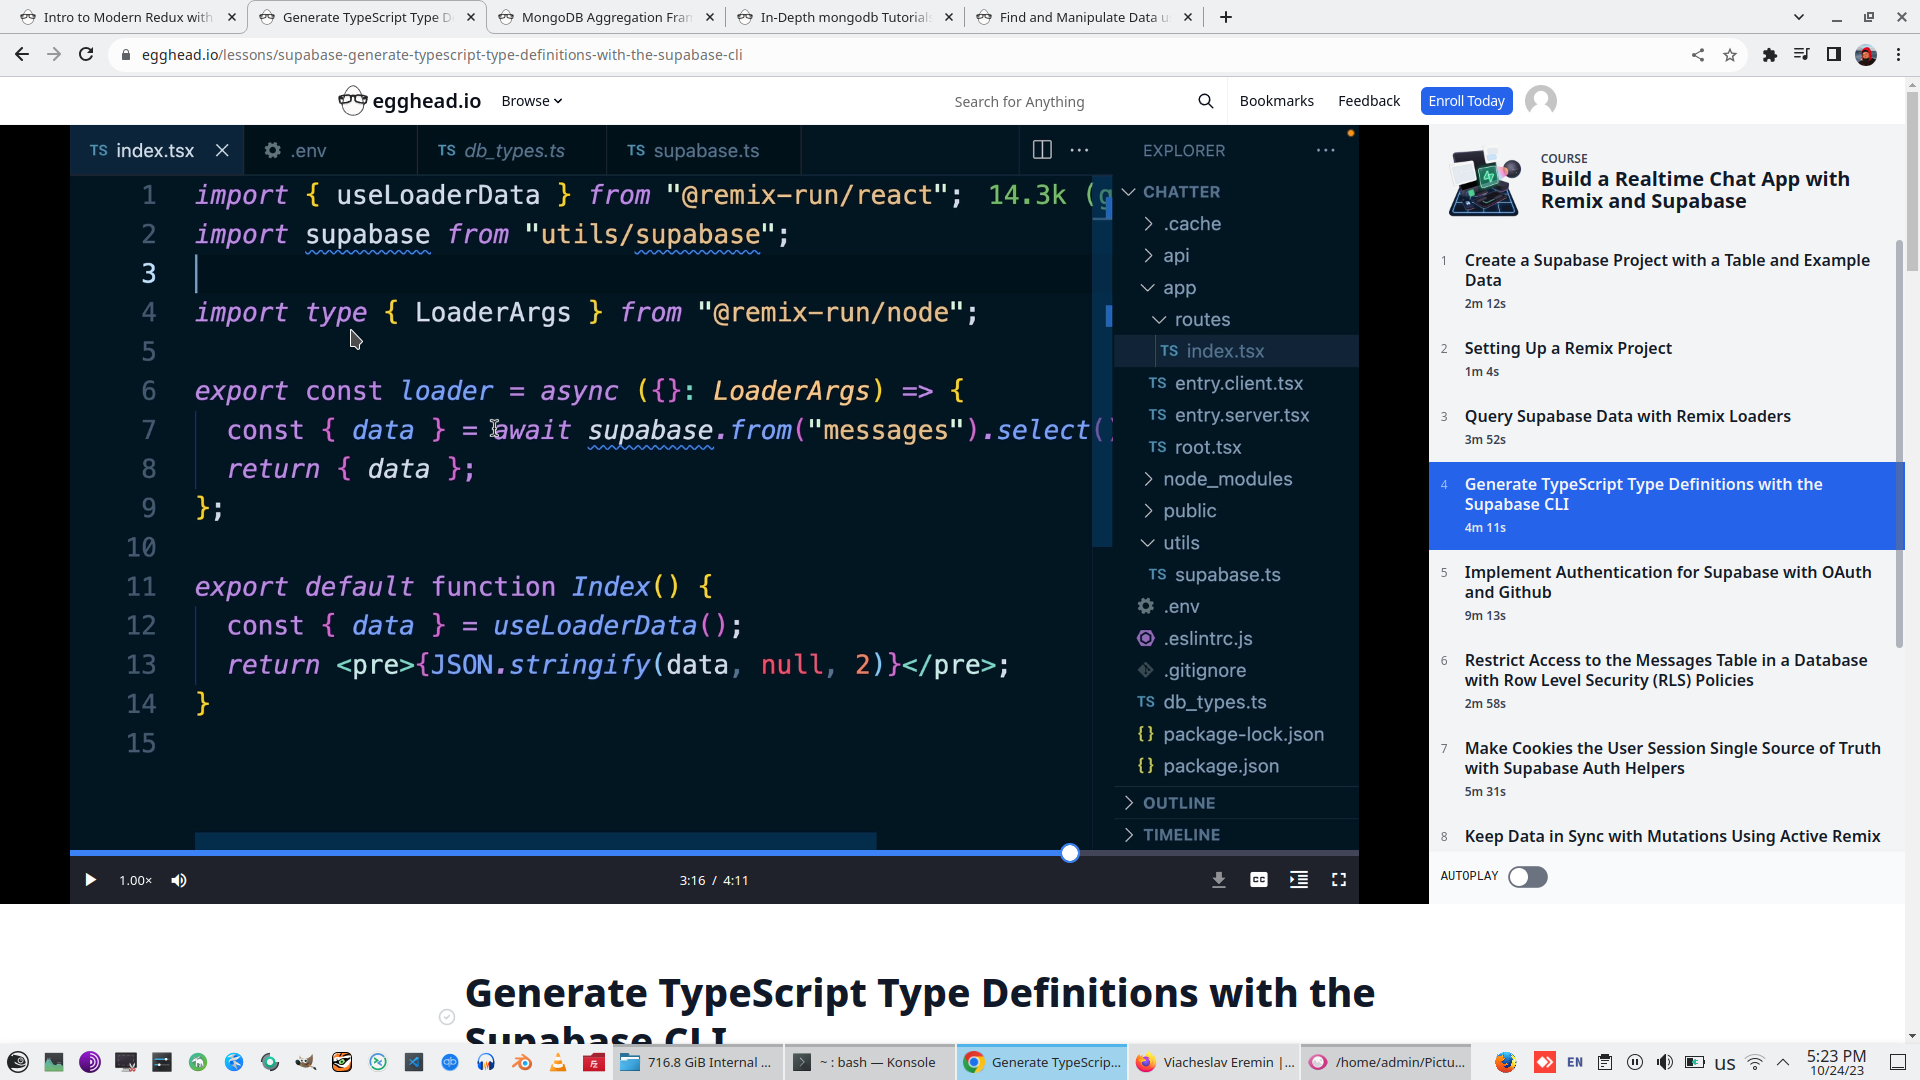
To solve that we need to import function LoaderArgs from @remix-run/node and pass this function as type of parameters for Loader function
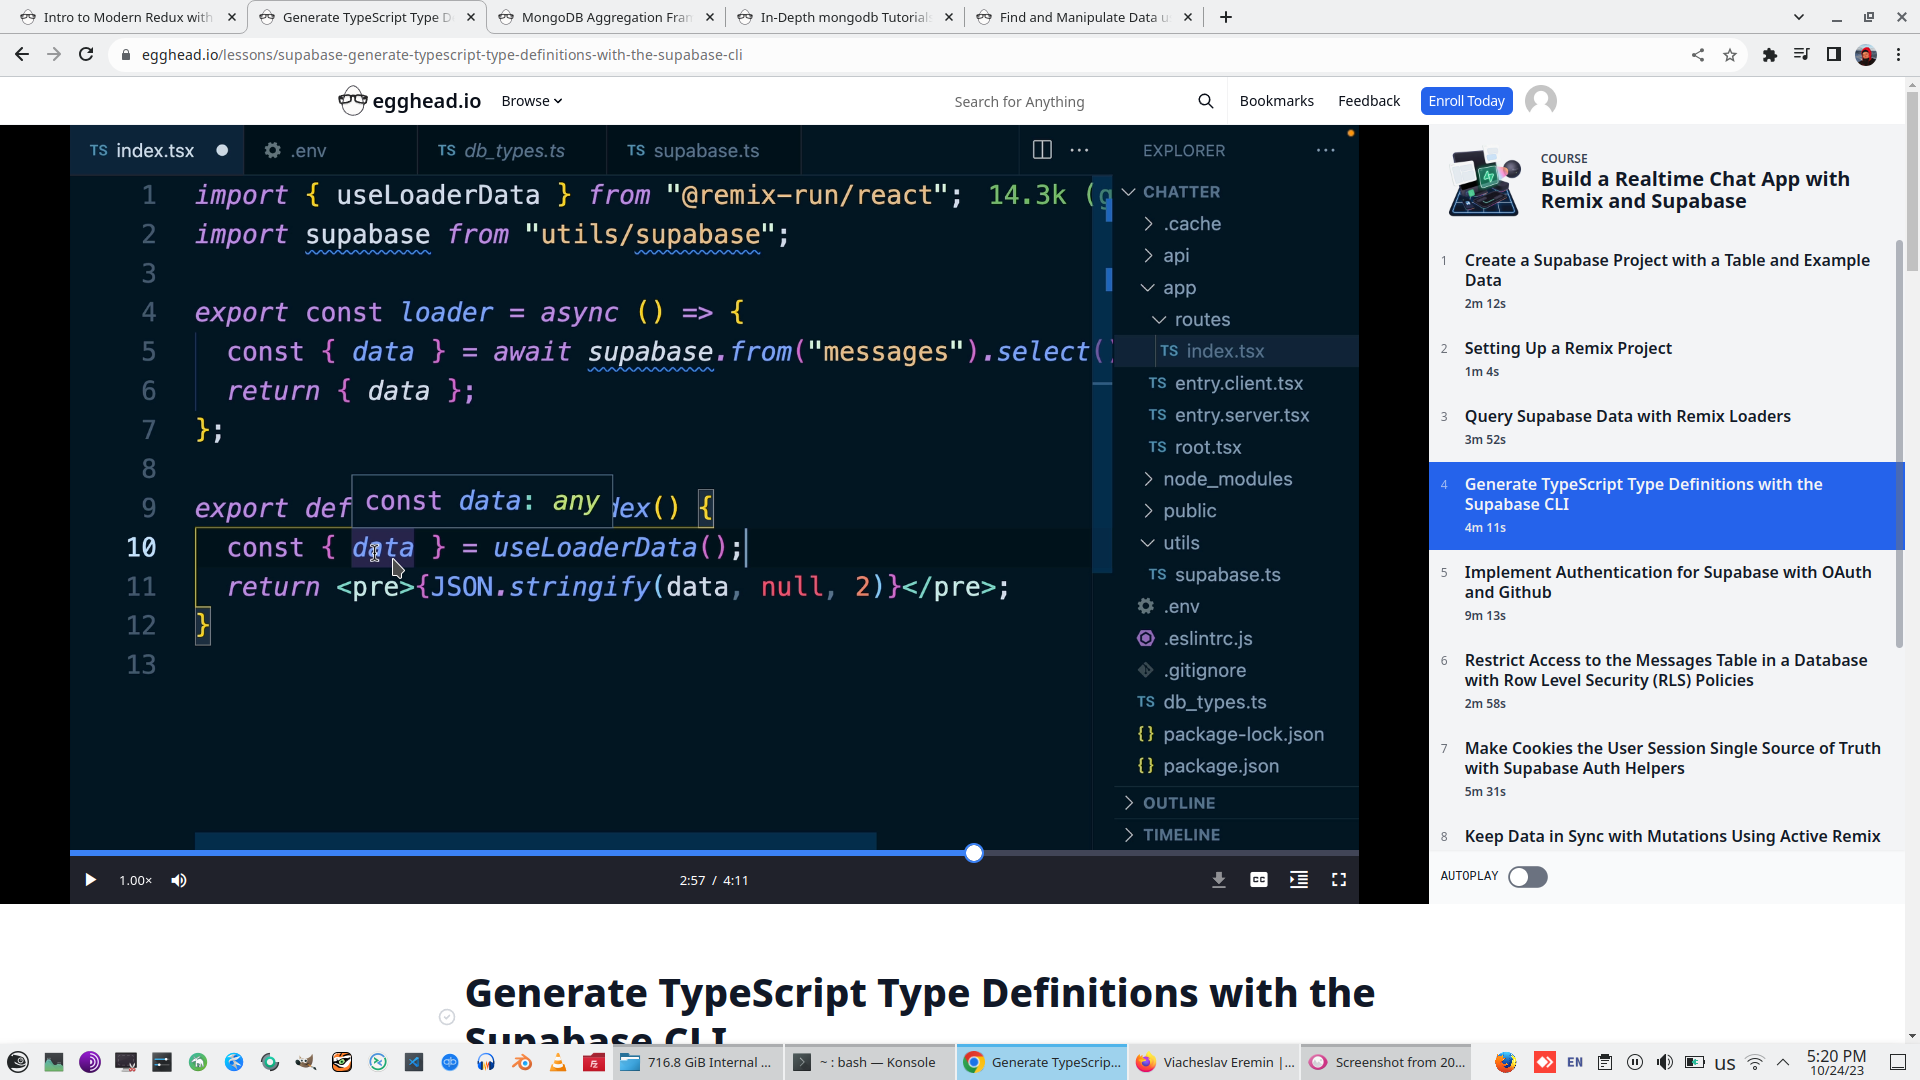
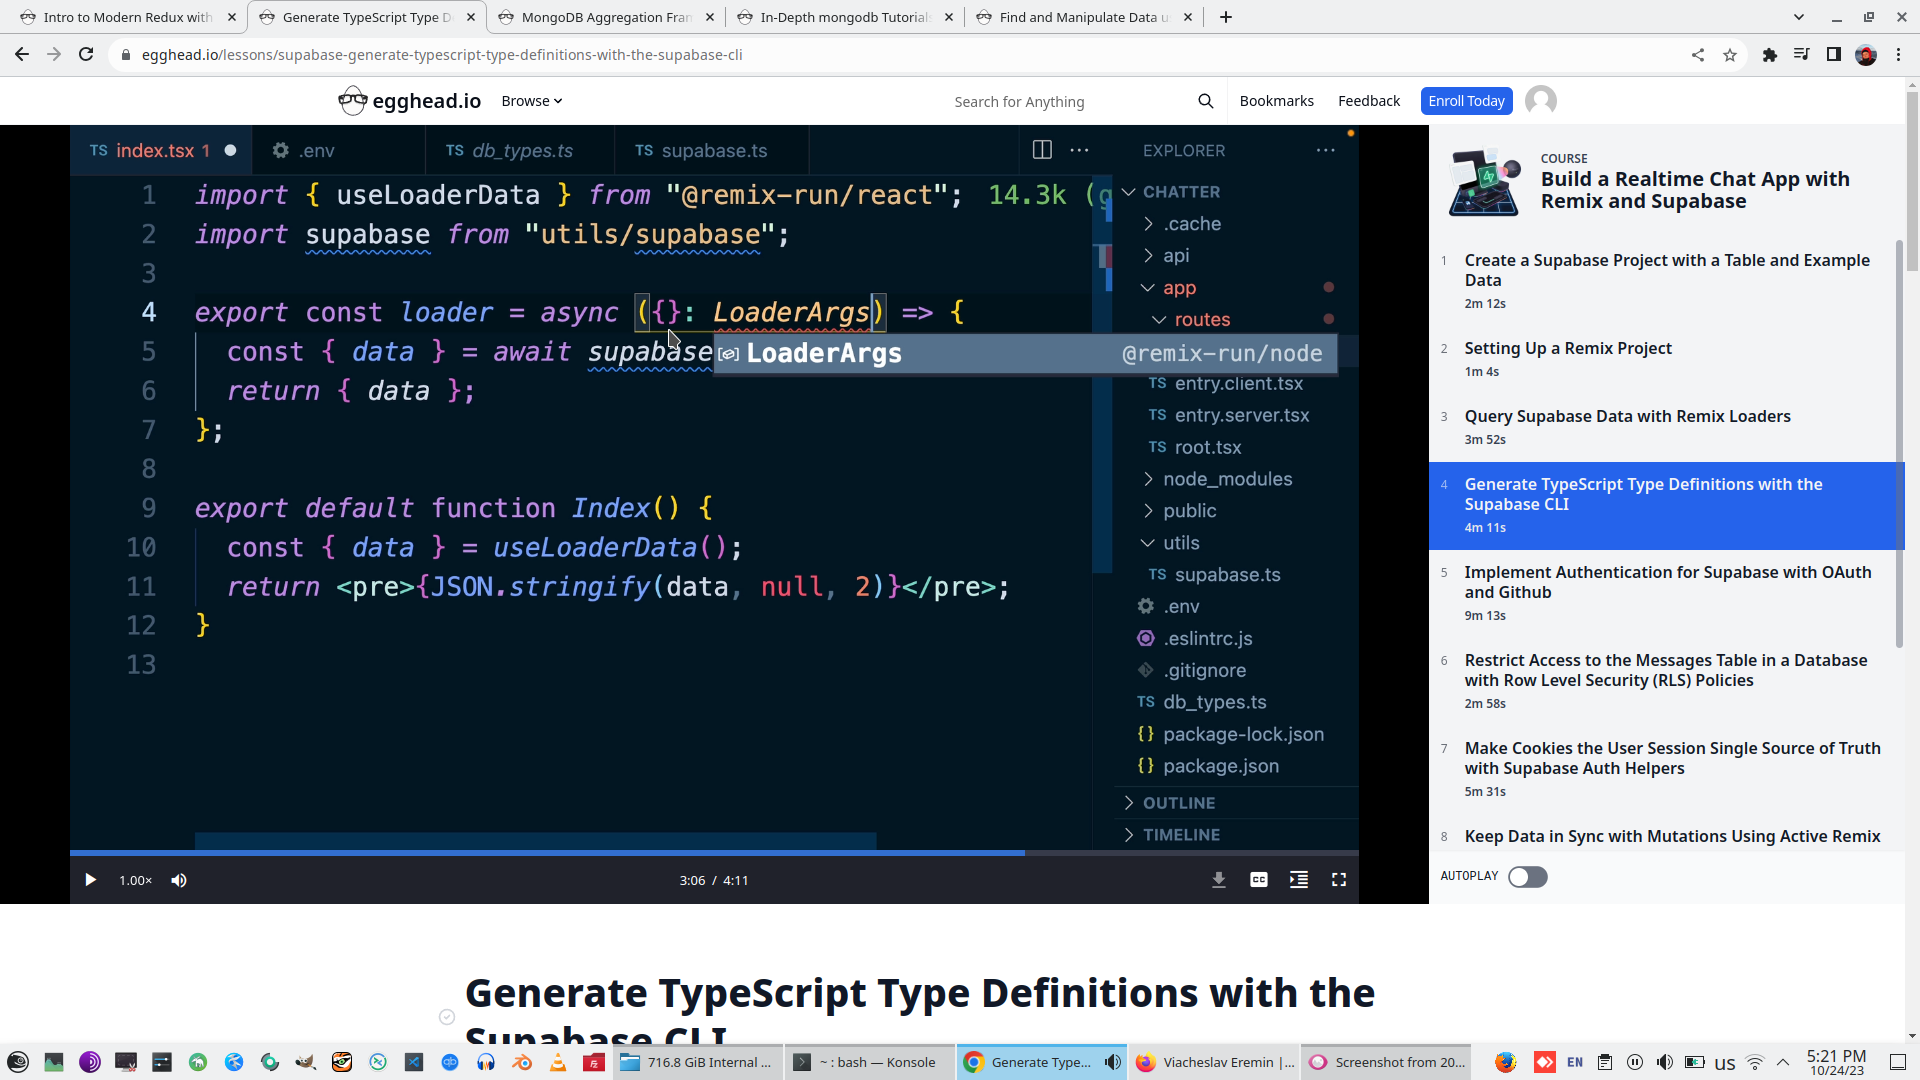
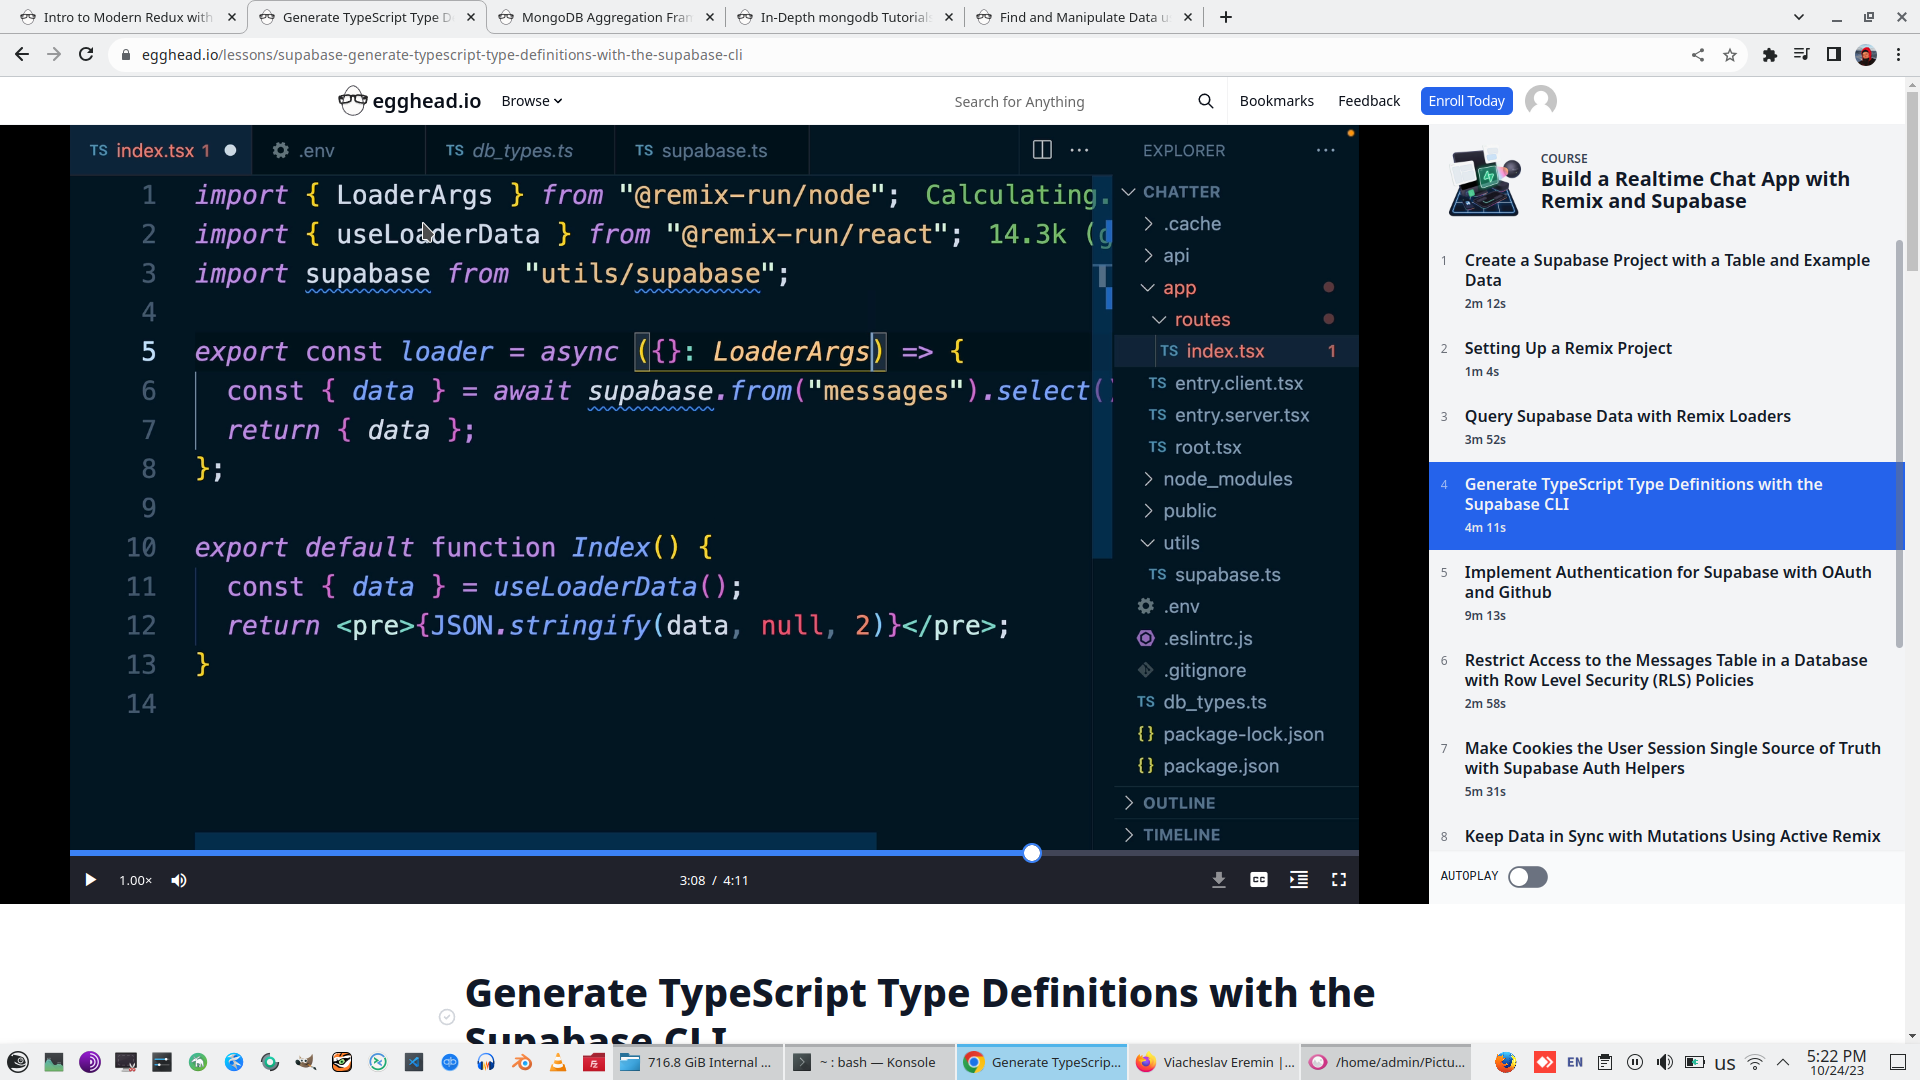
But result of Loading still Any
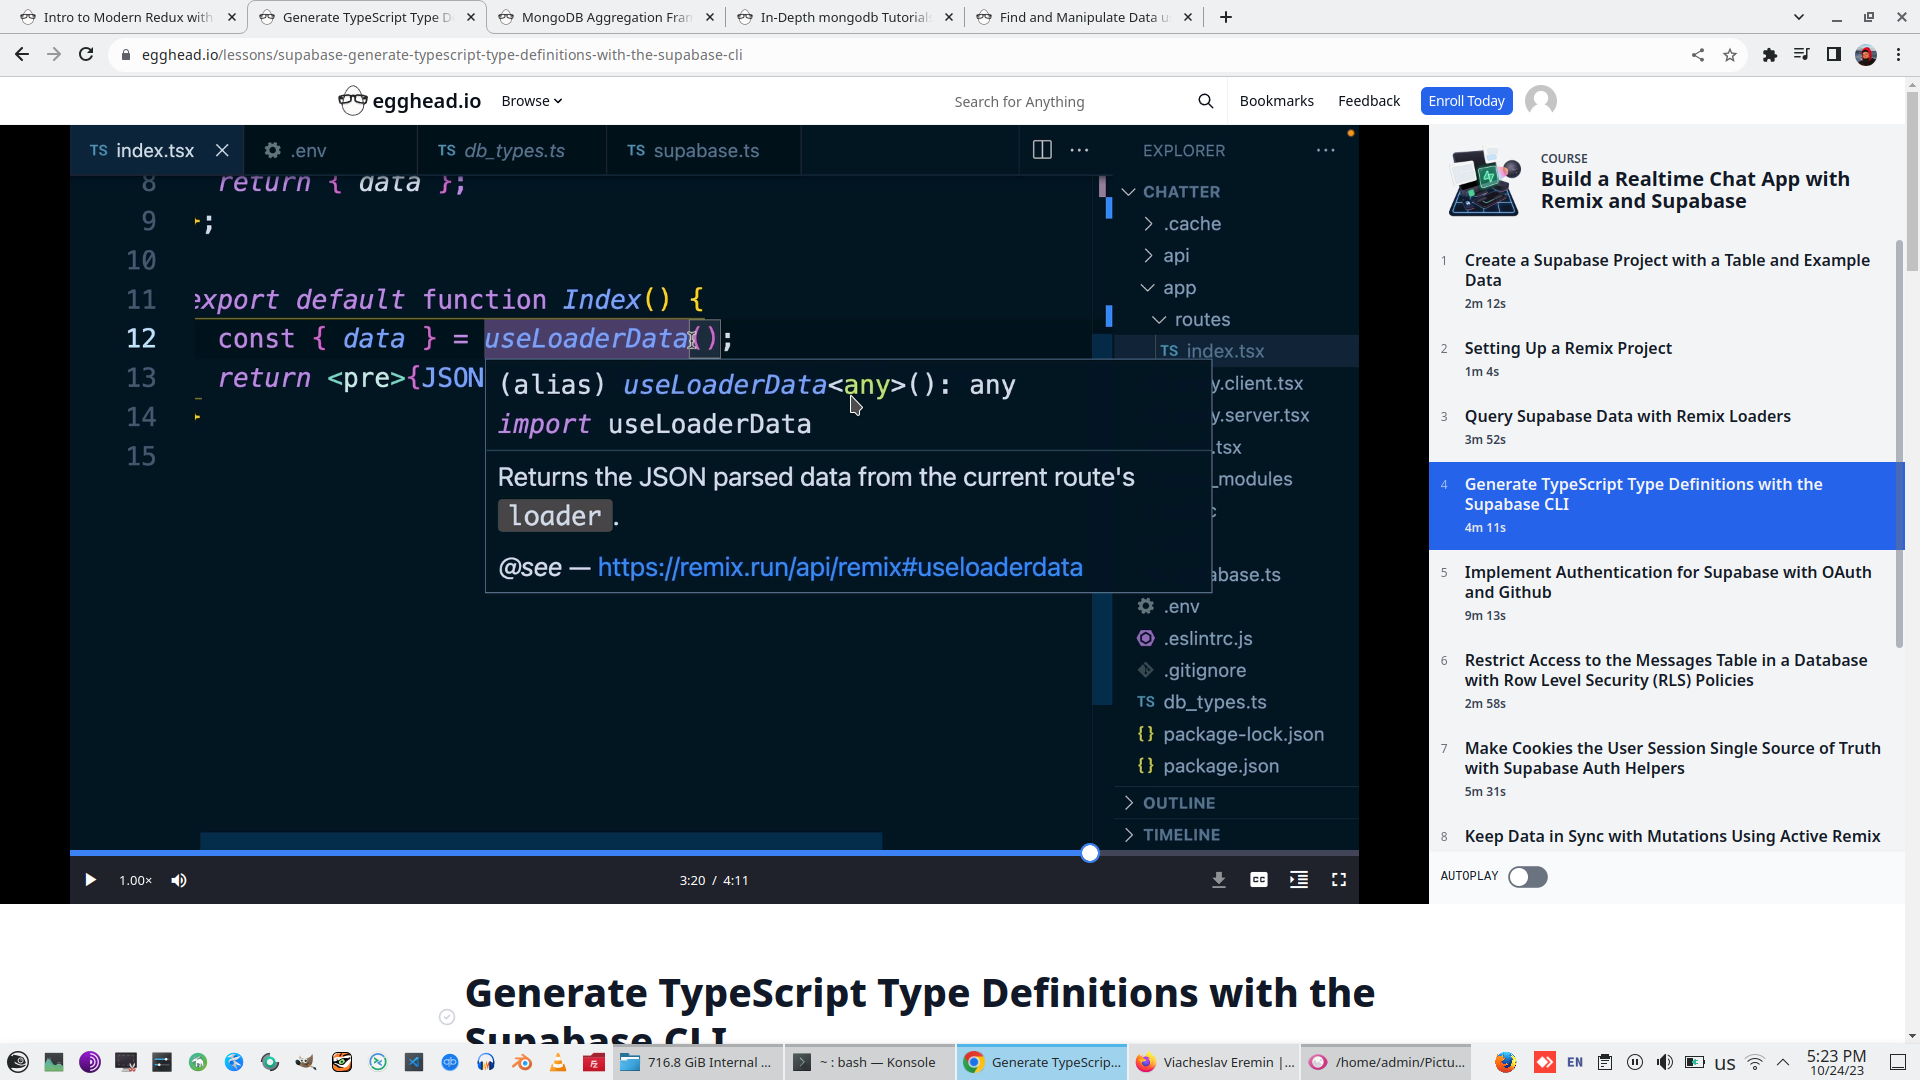
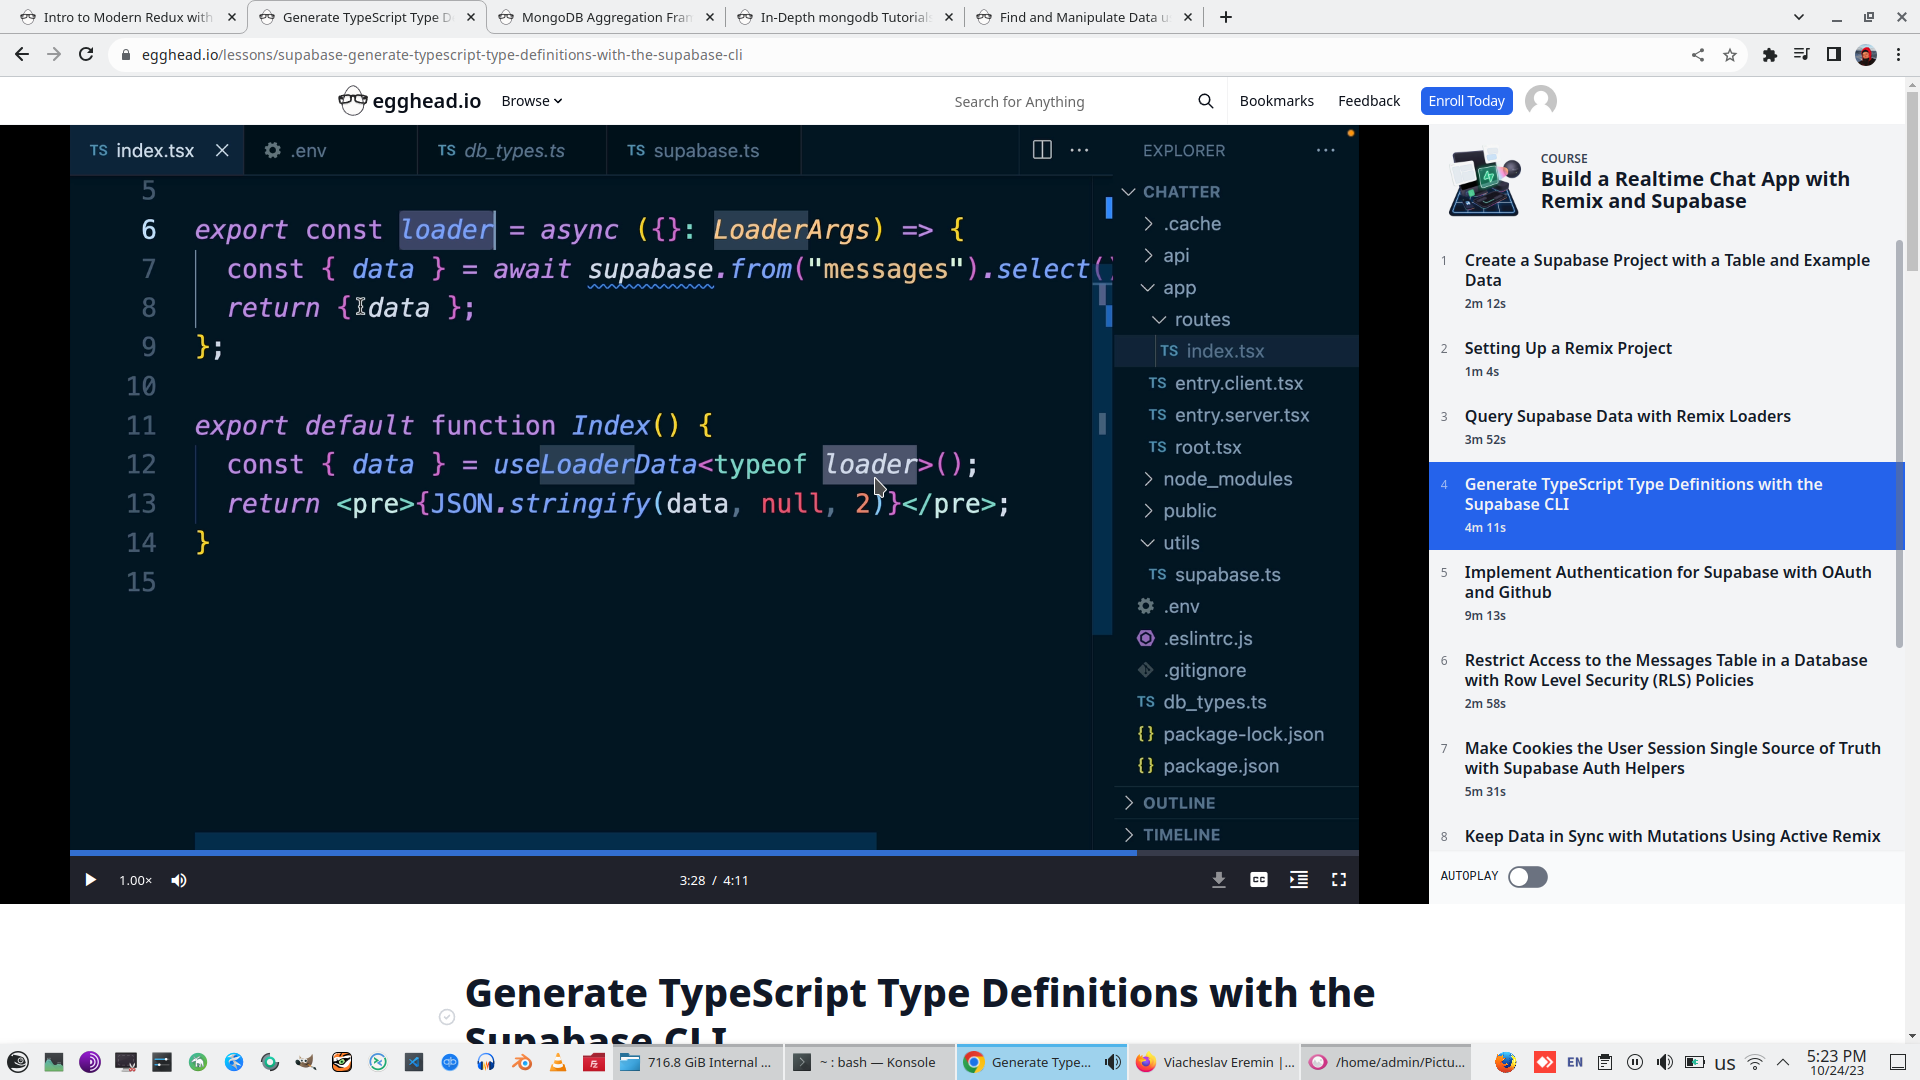
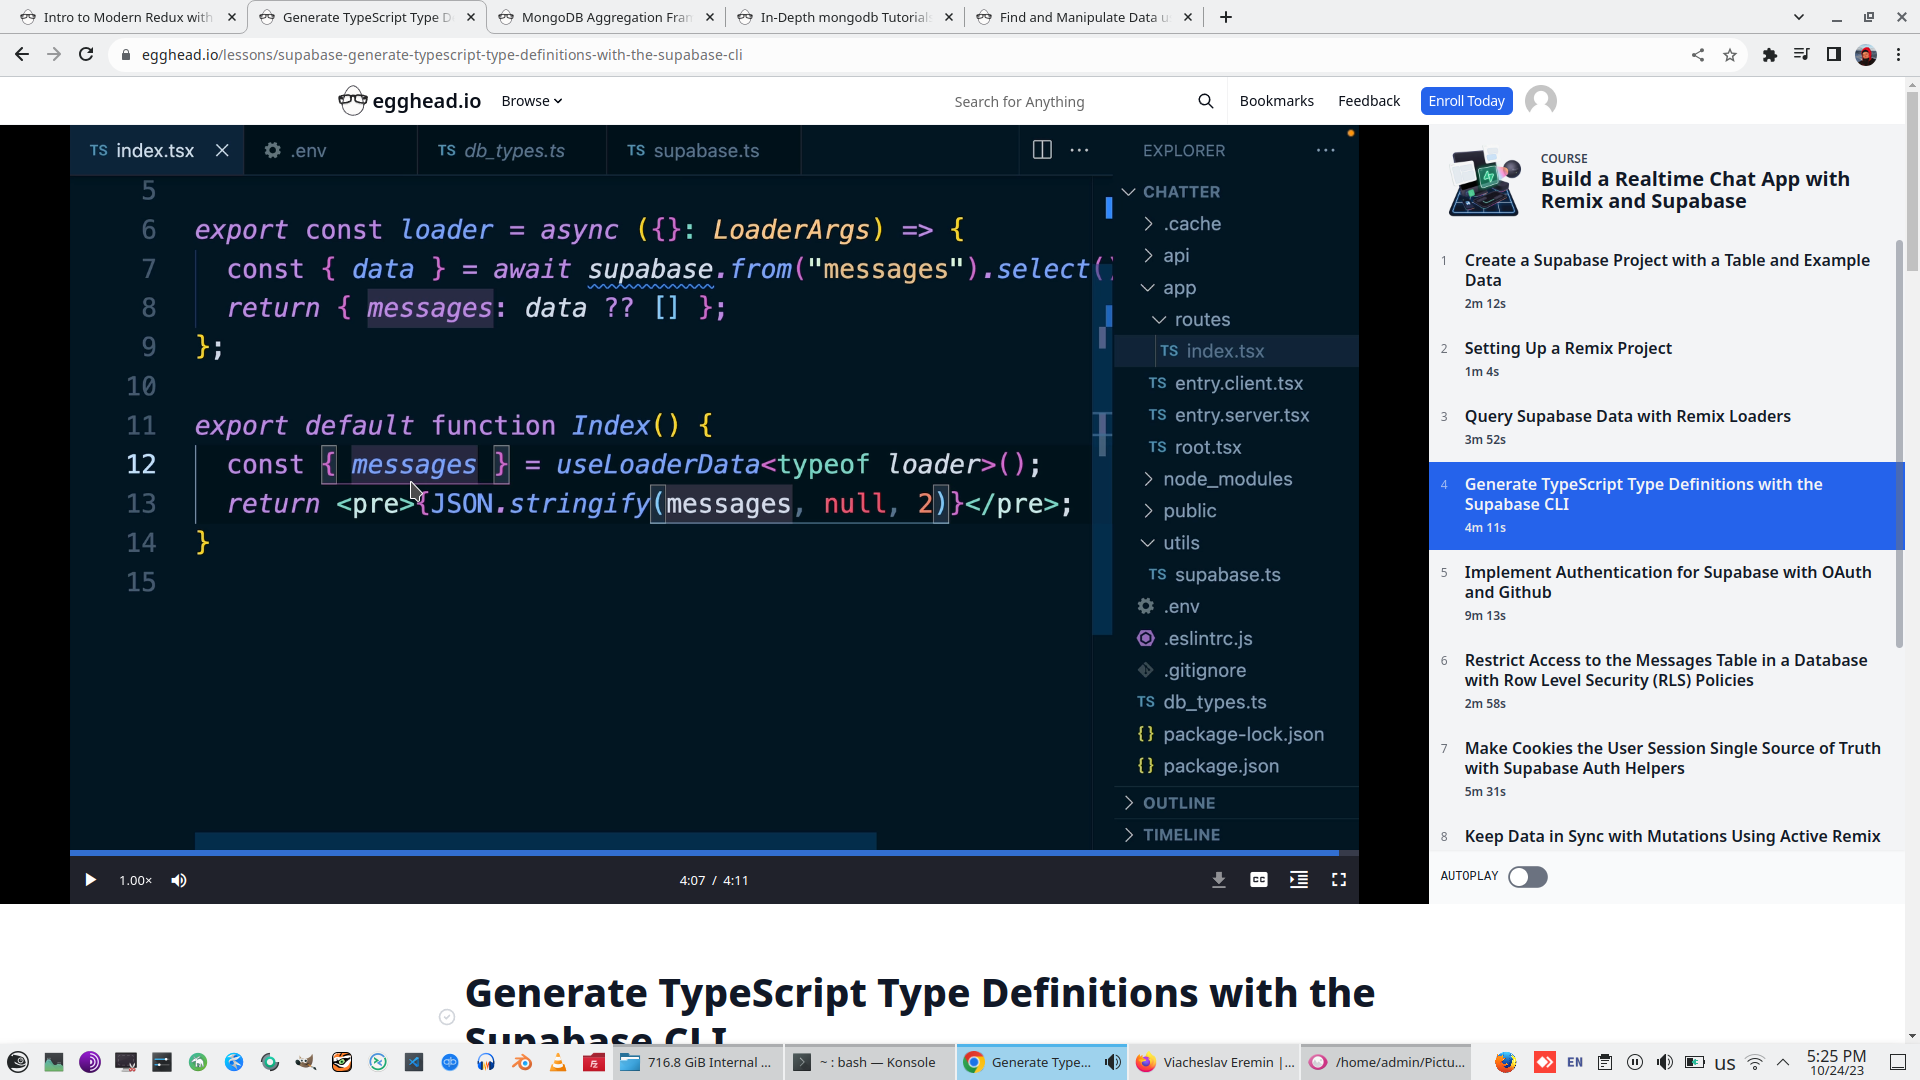
And finally we need to cast useLoadData with type of Loader
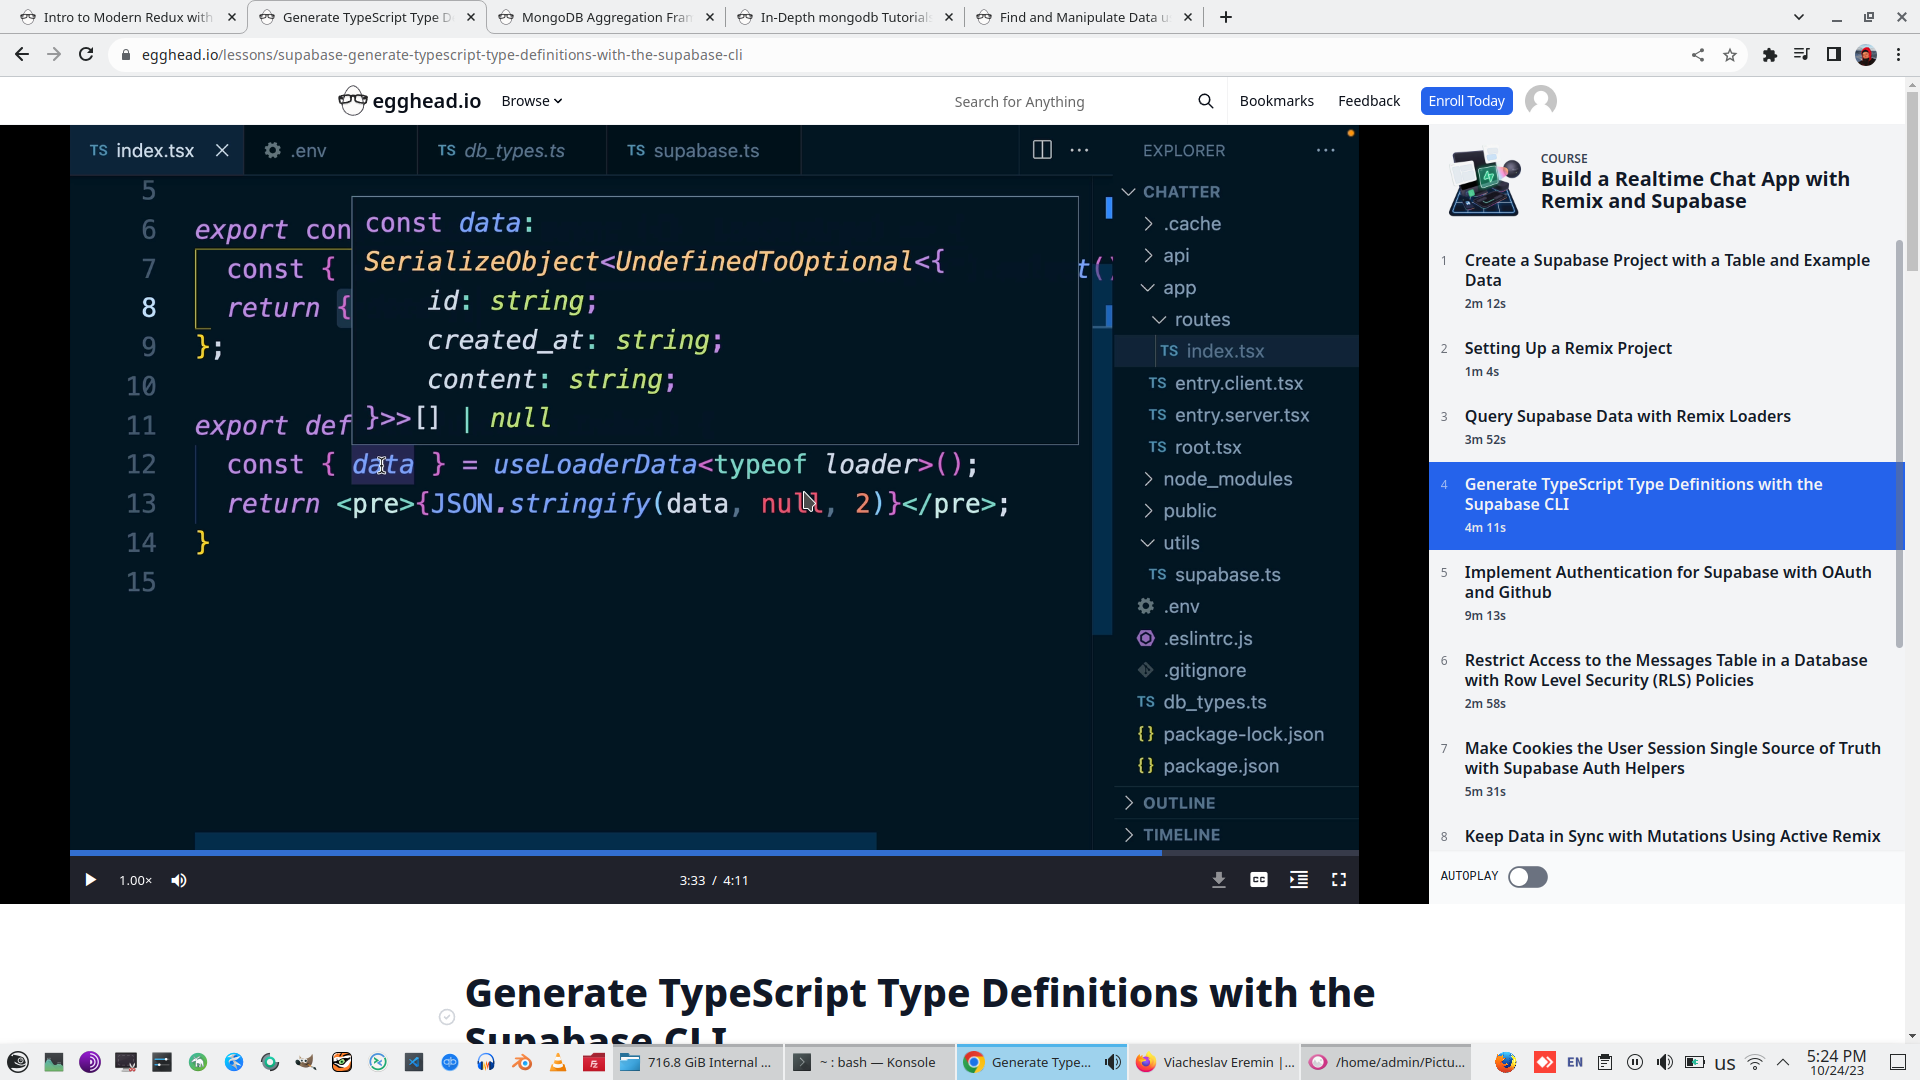
Unpack only table messages from all reading result from Supabase
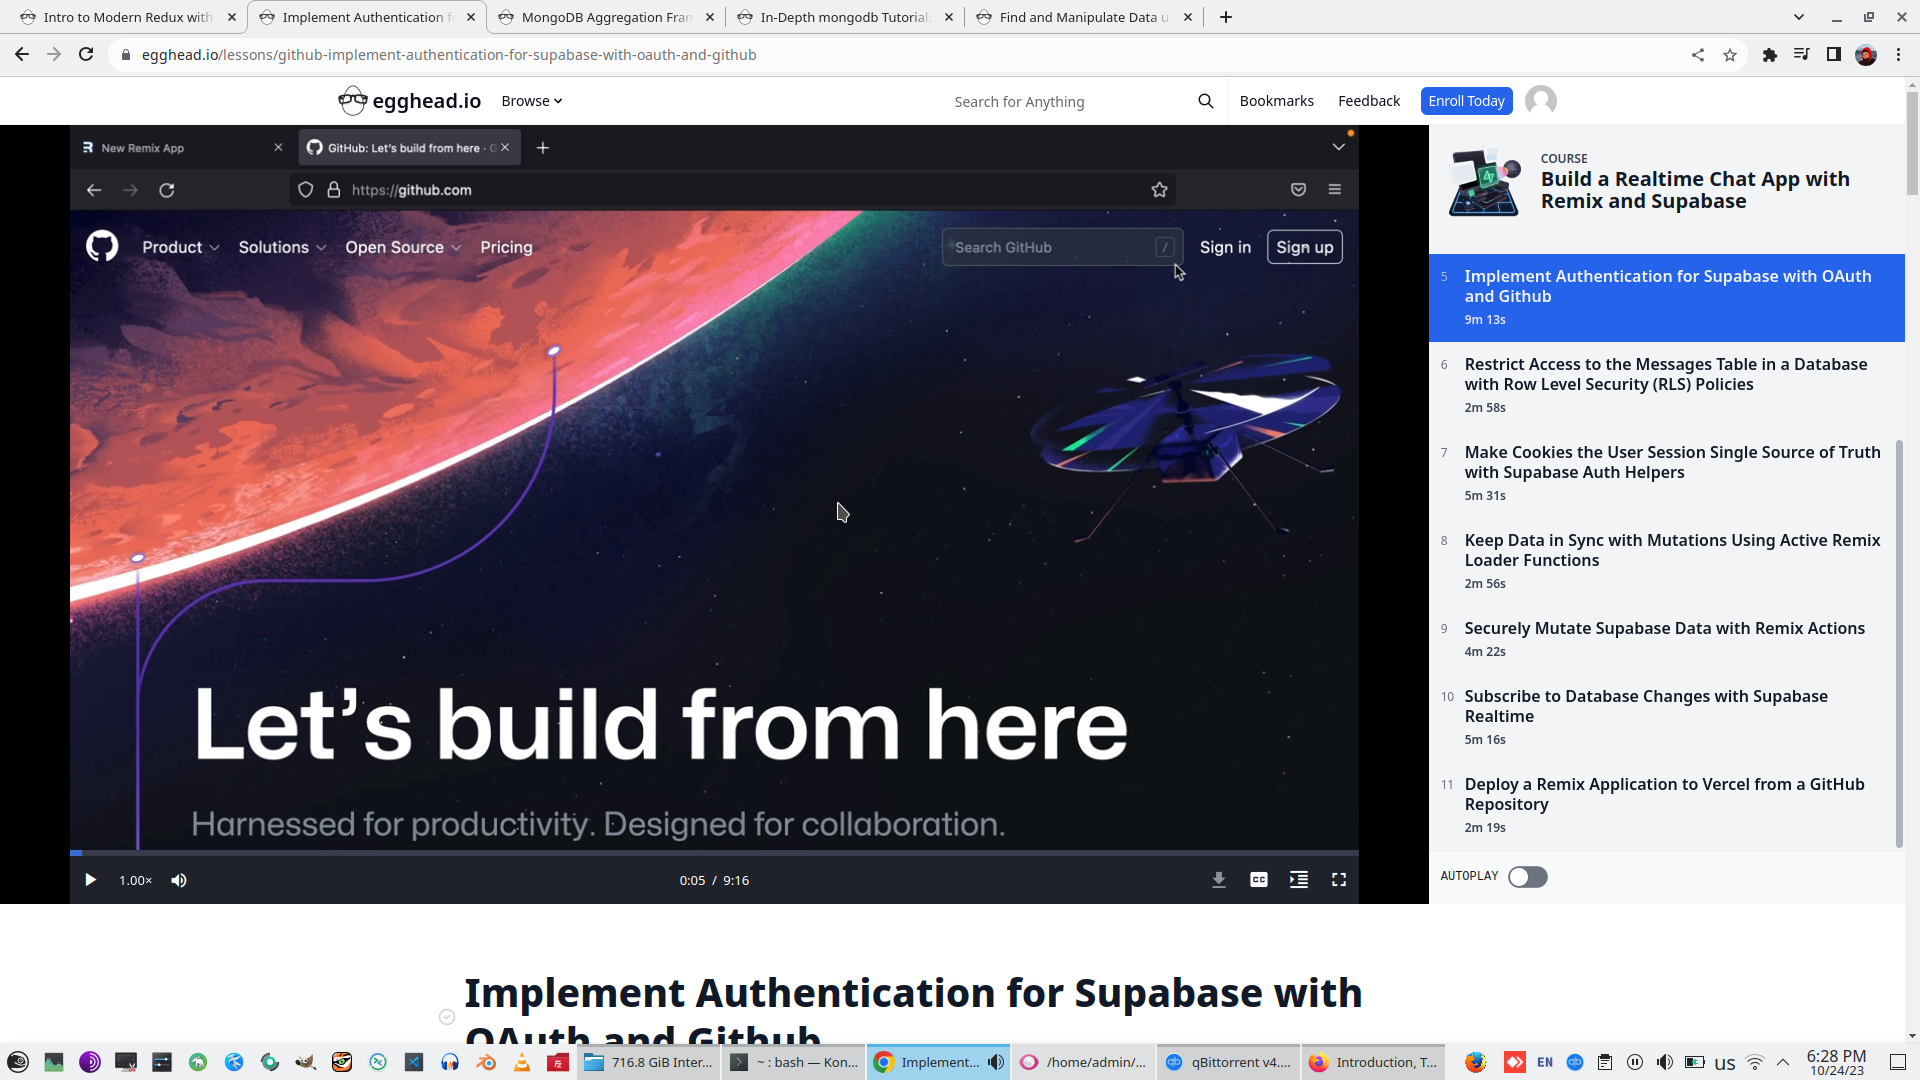
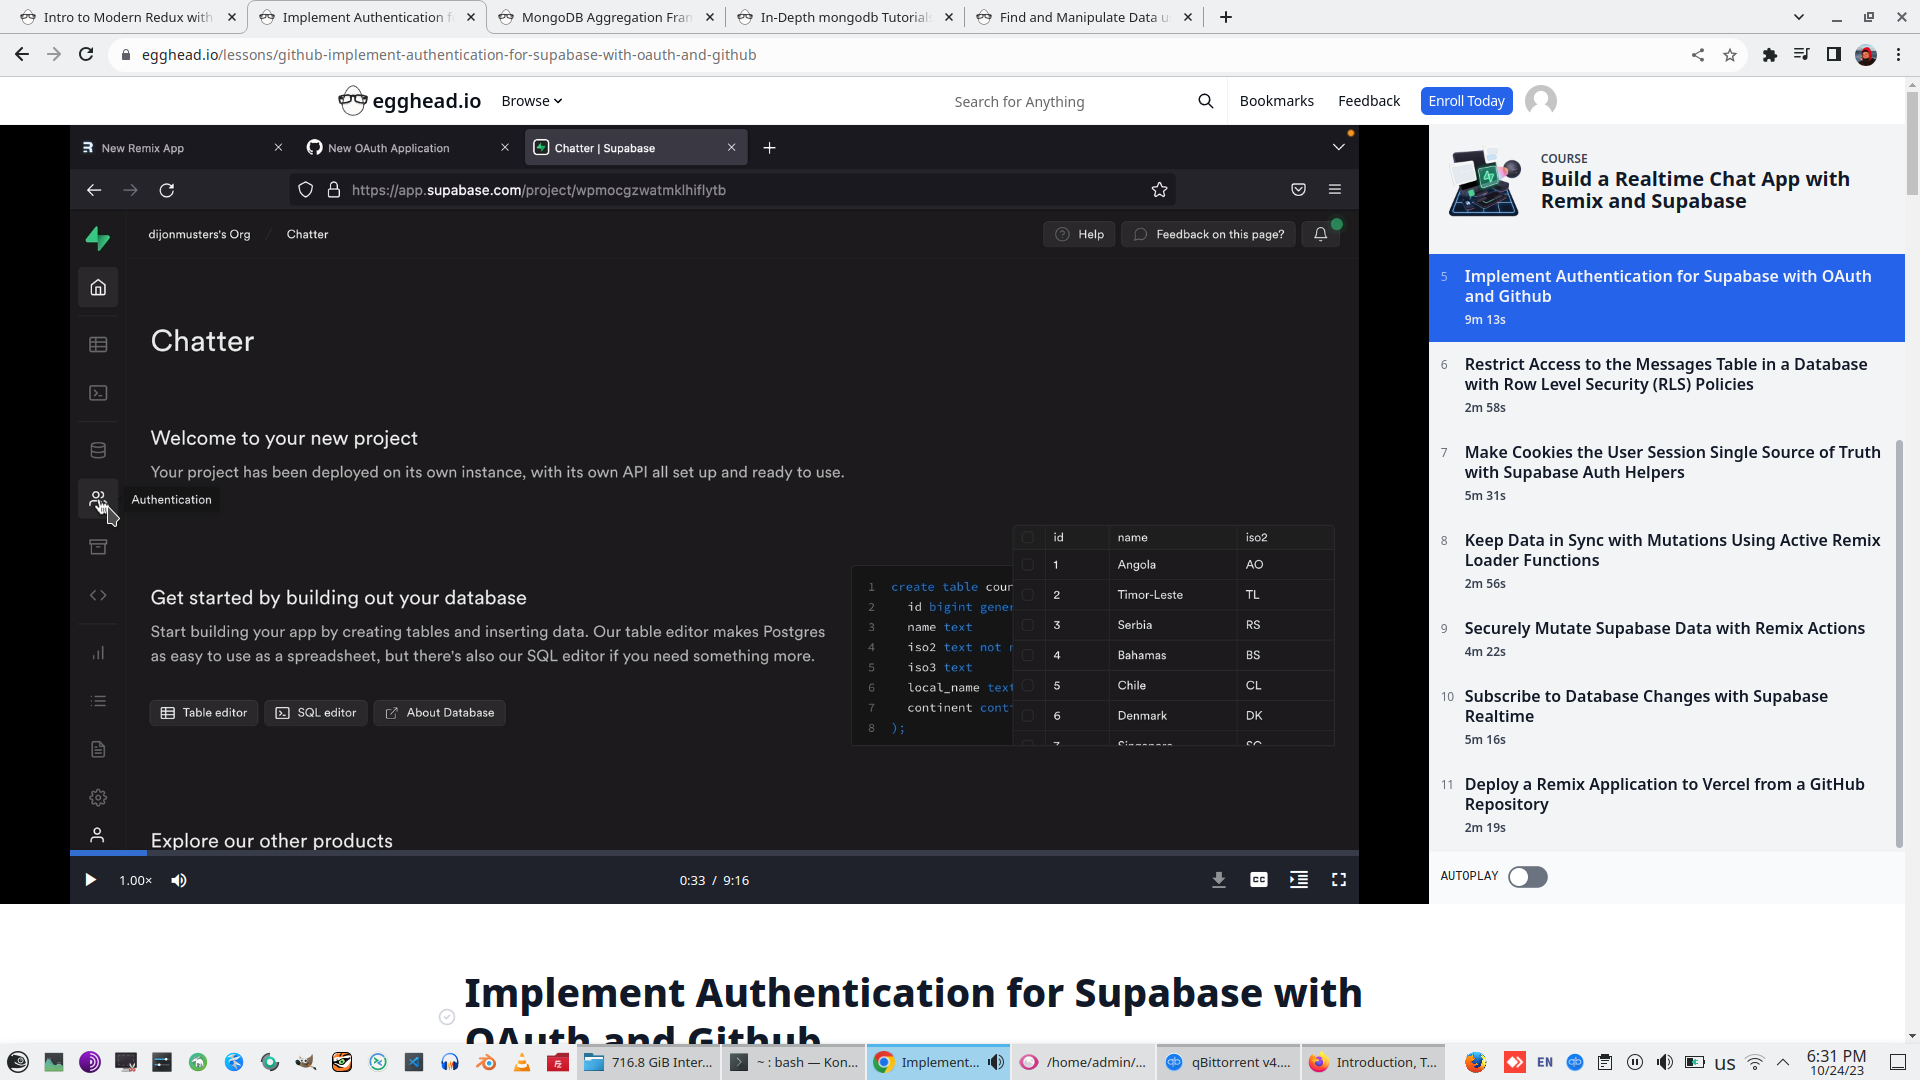
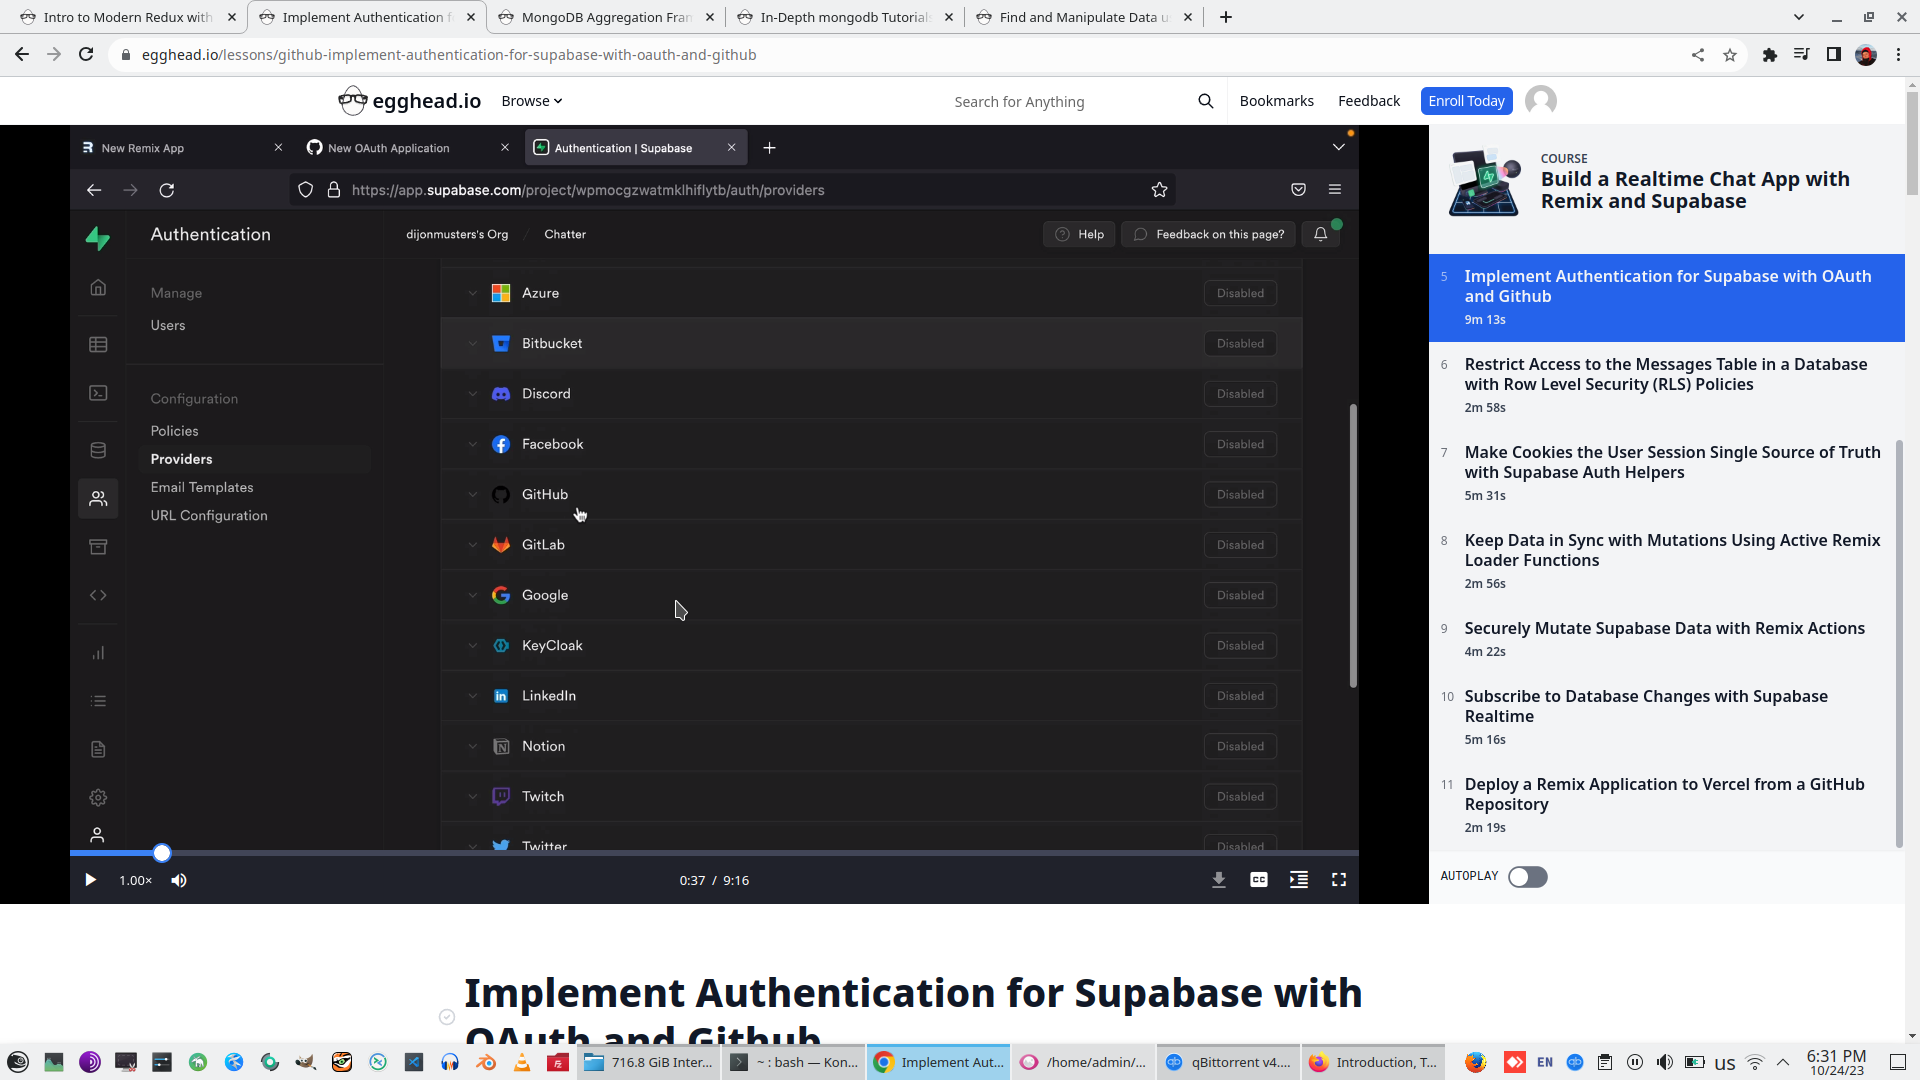
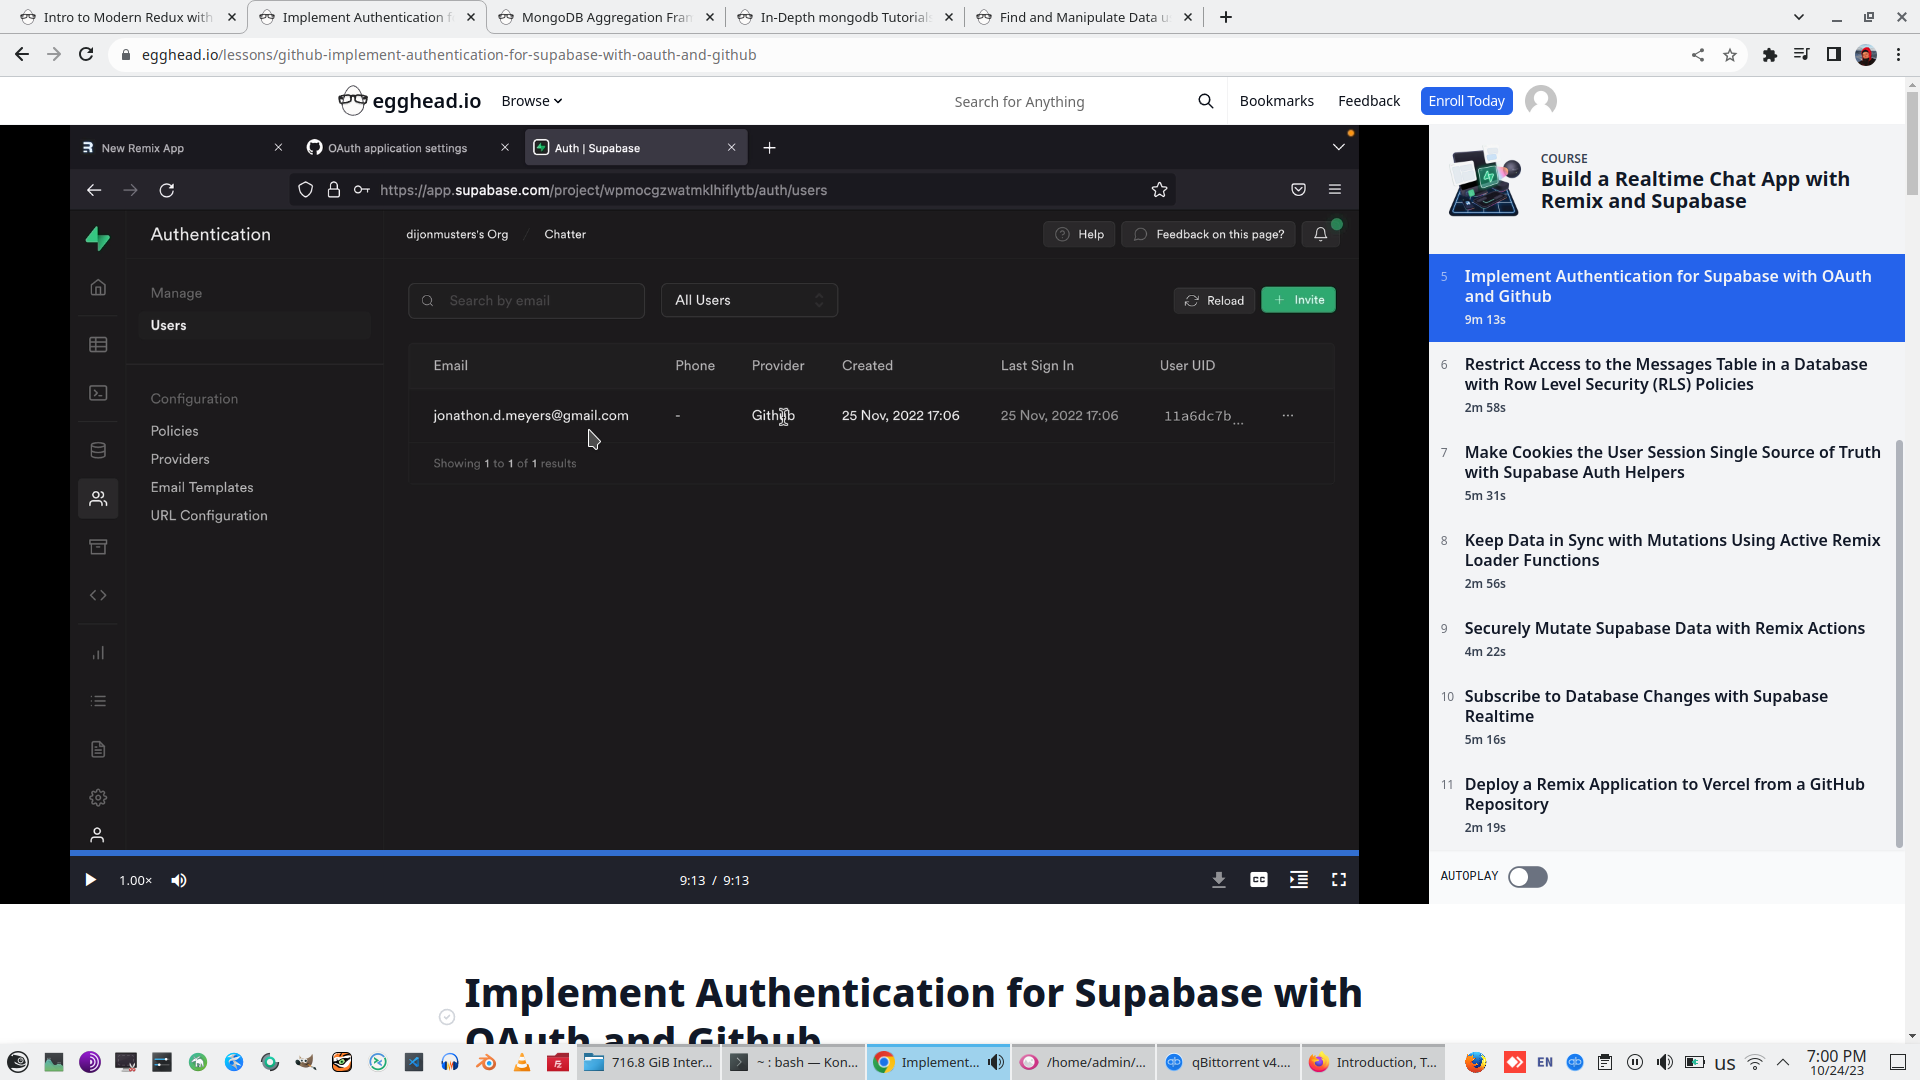
5. Implement Authentication for Supabase with OAuth and Github
List of standard Supabase Oauth providers

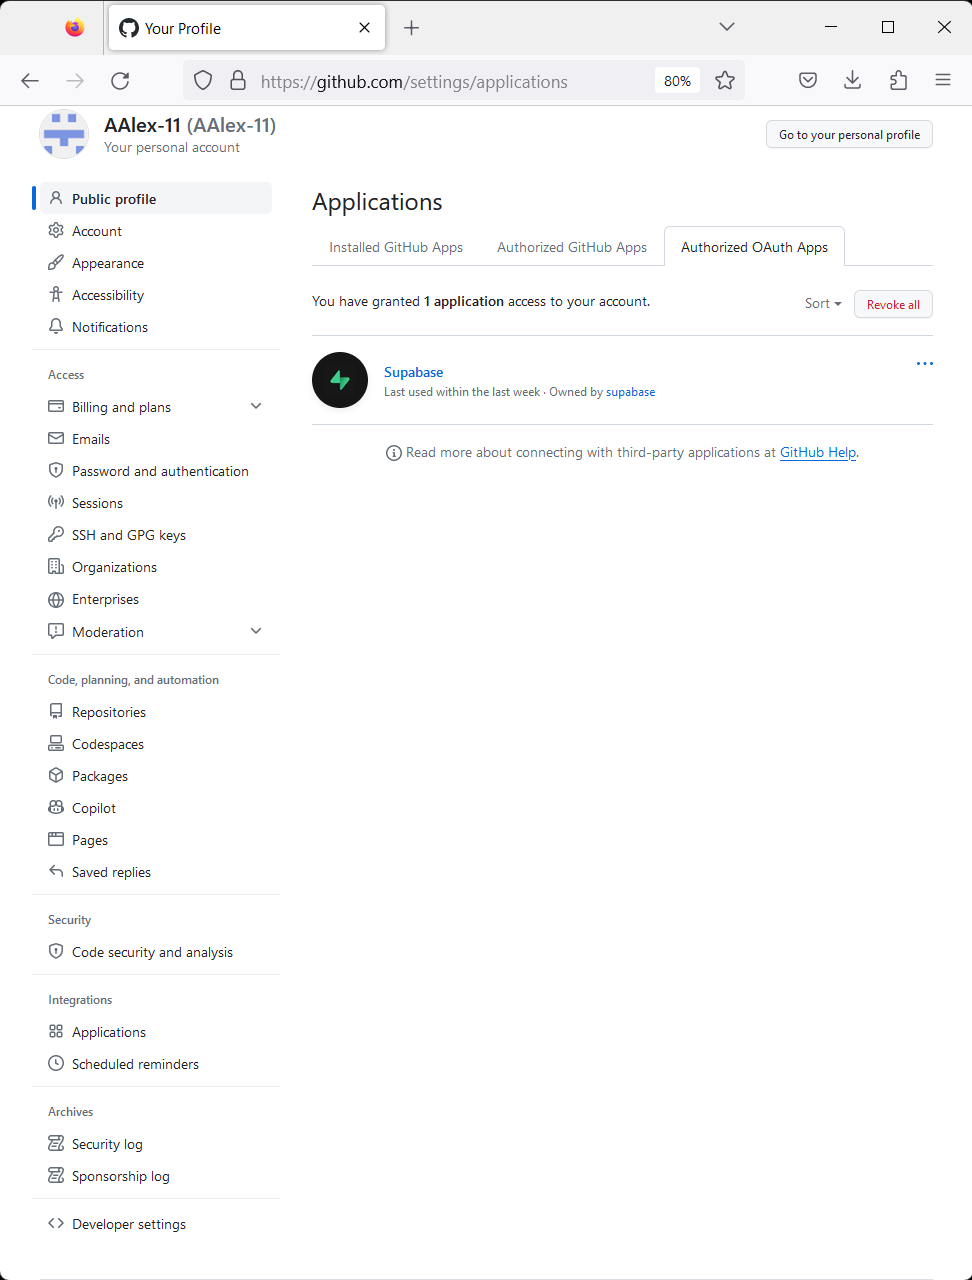
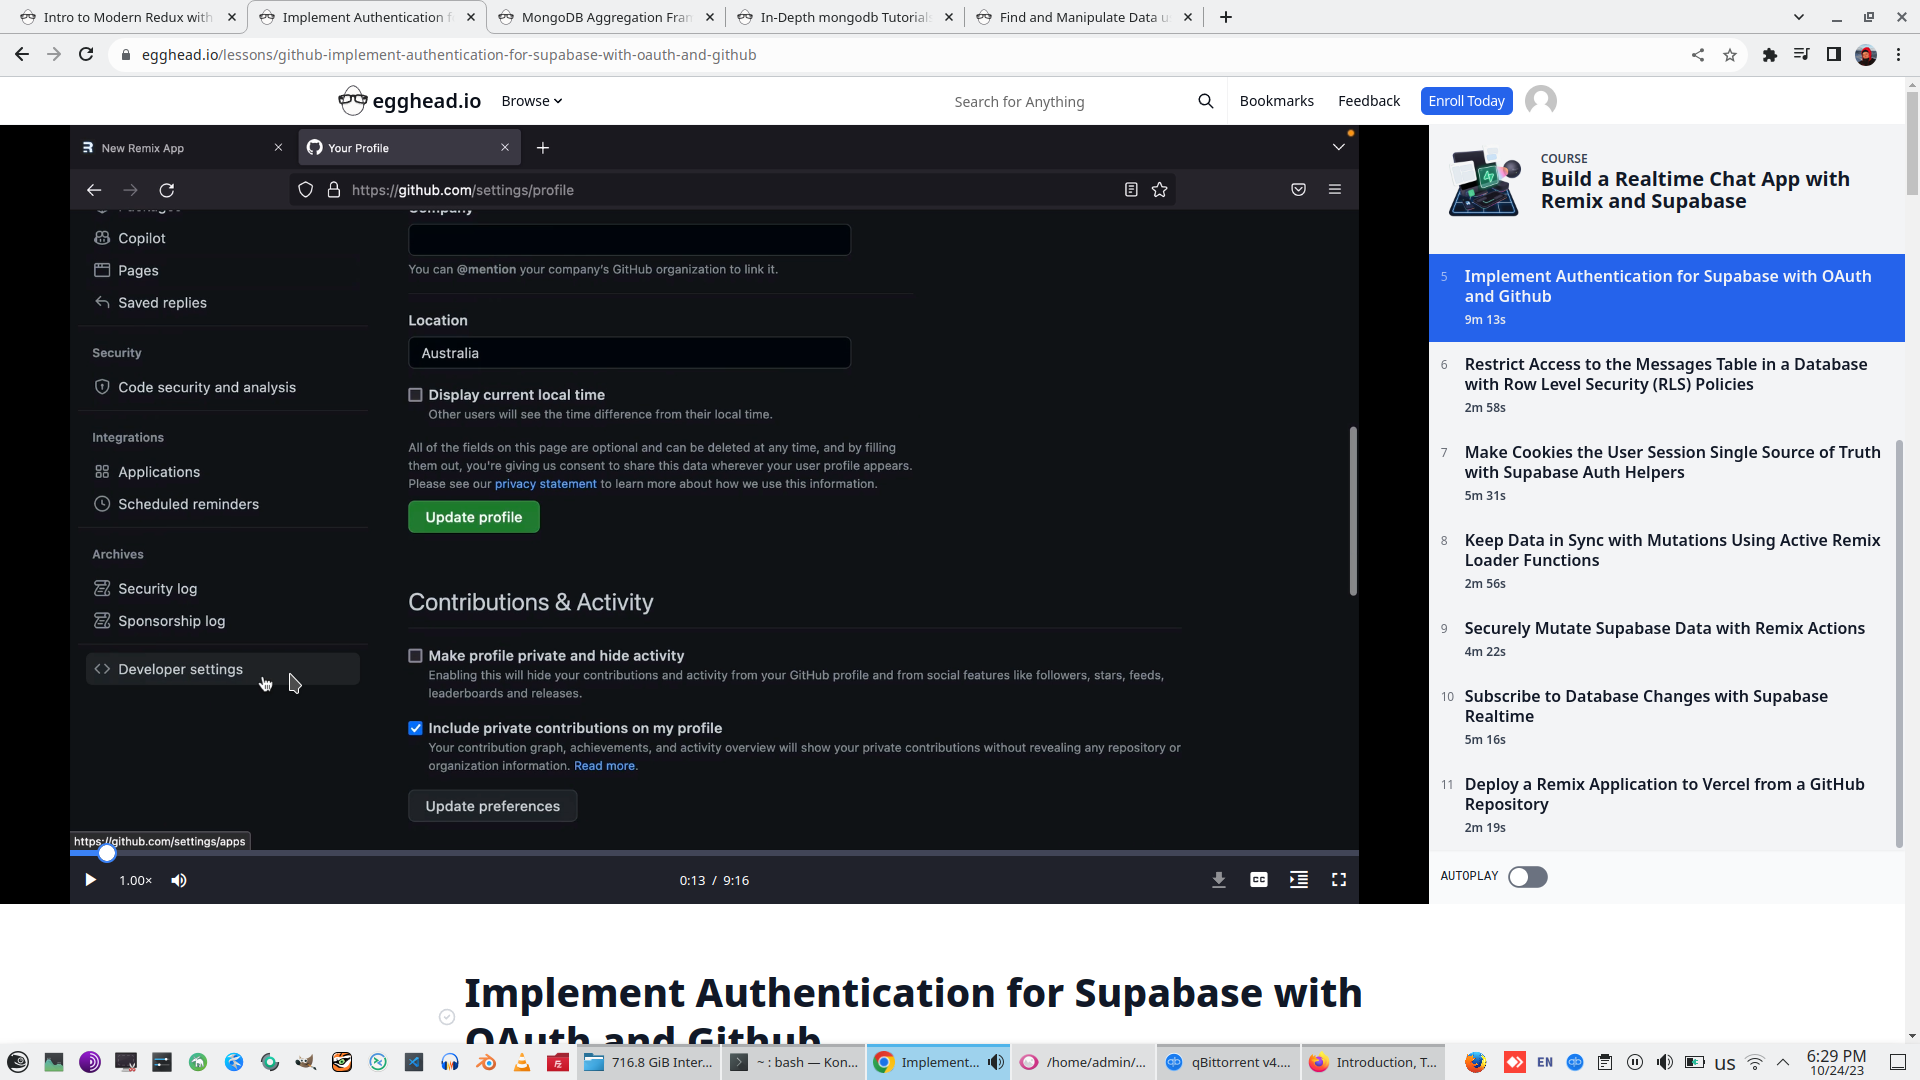
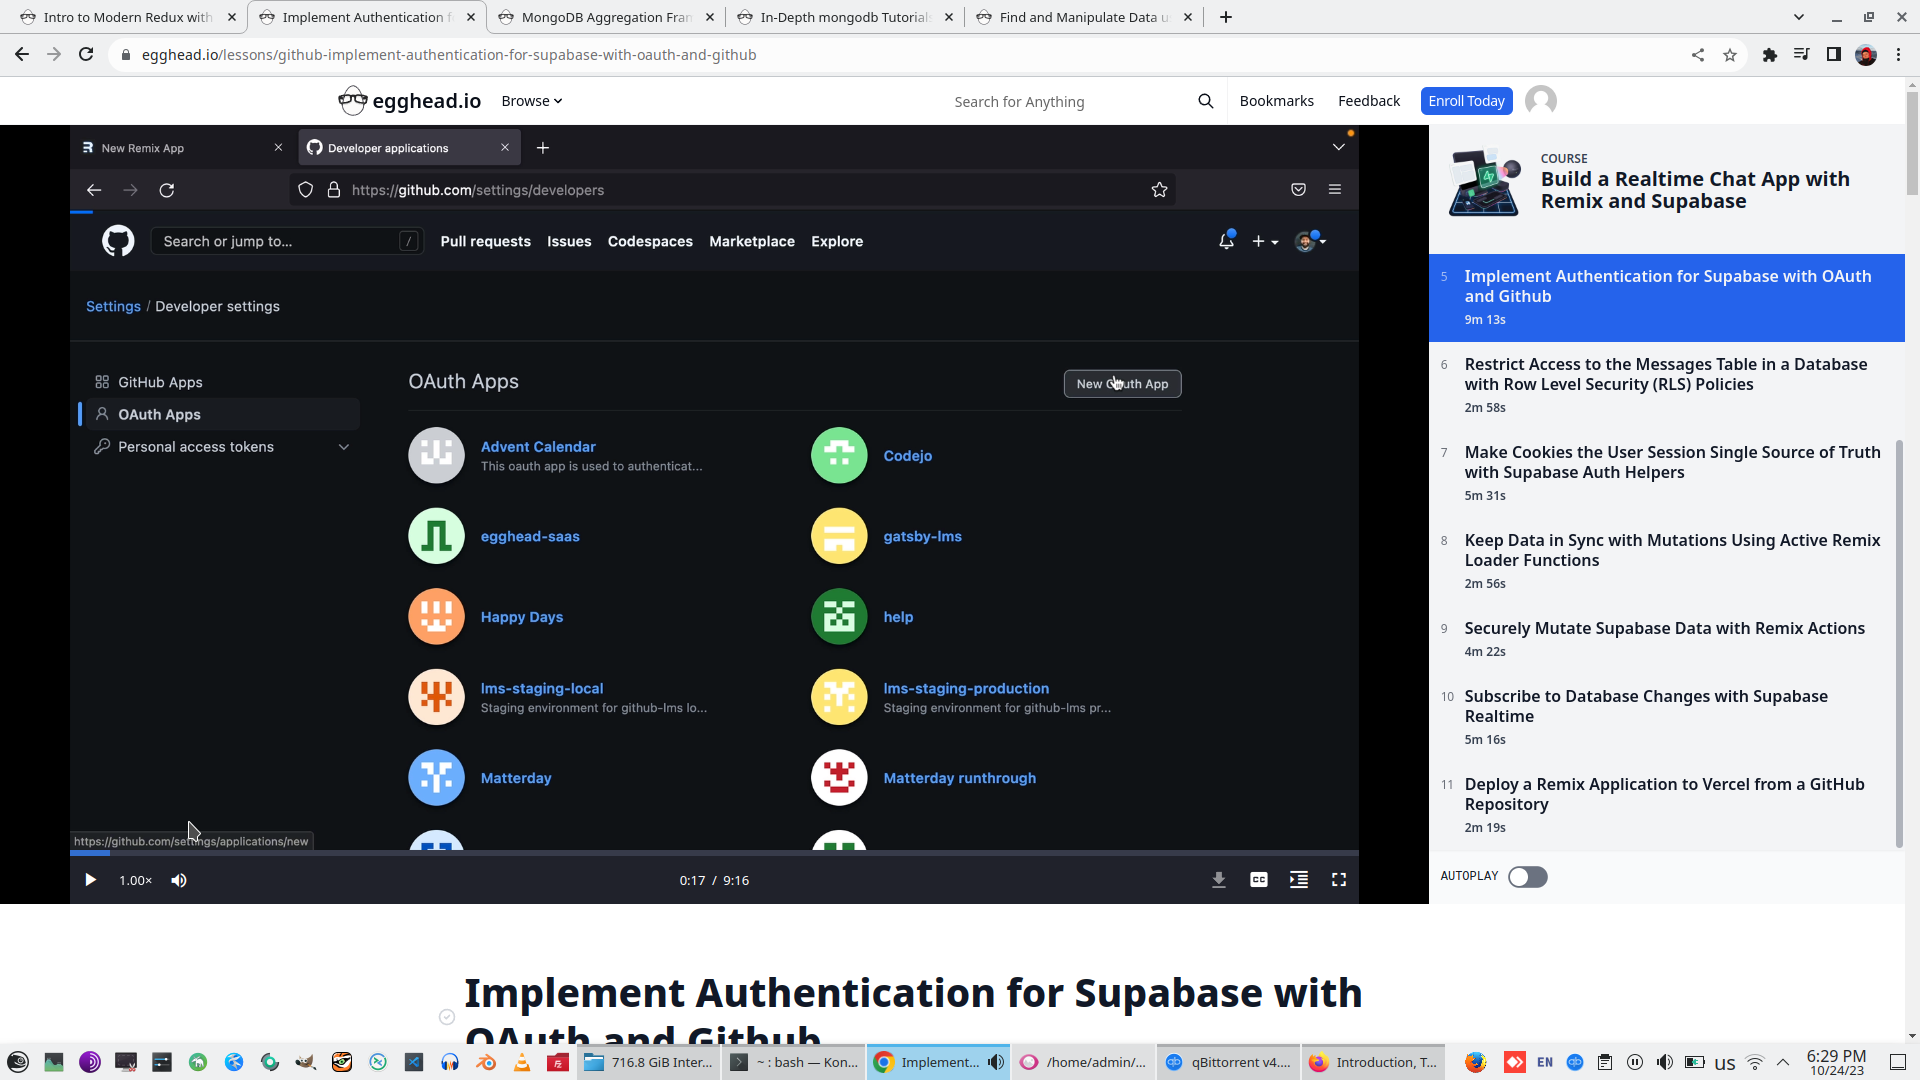
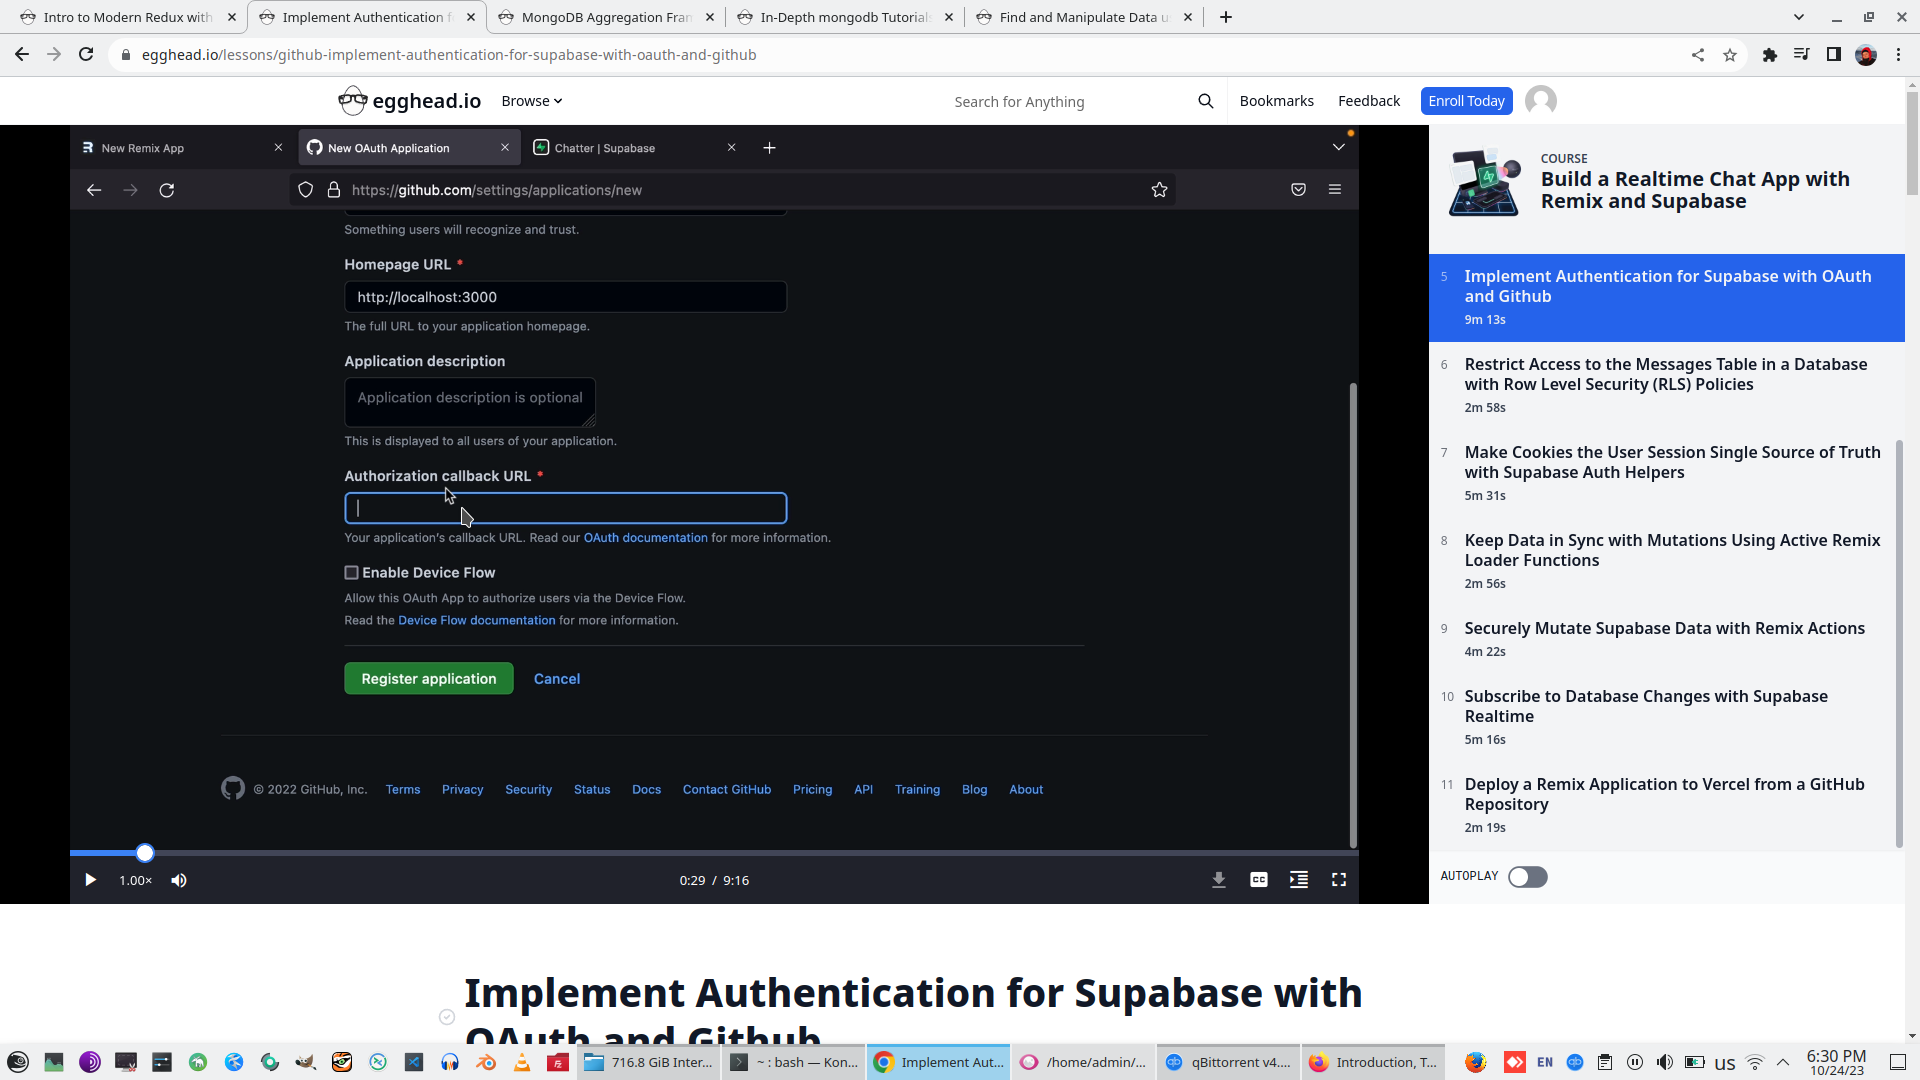
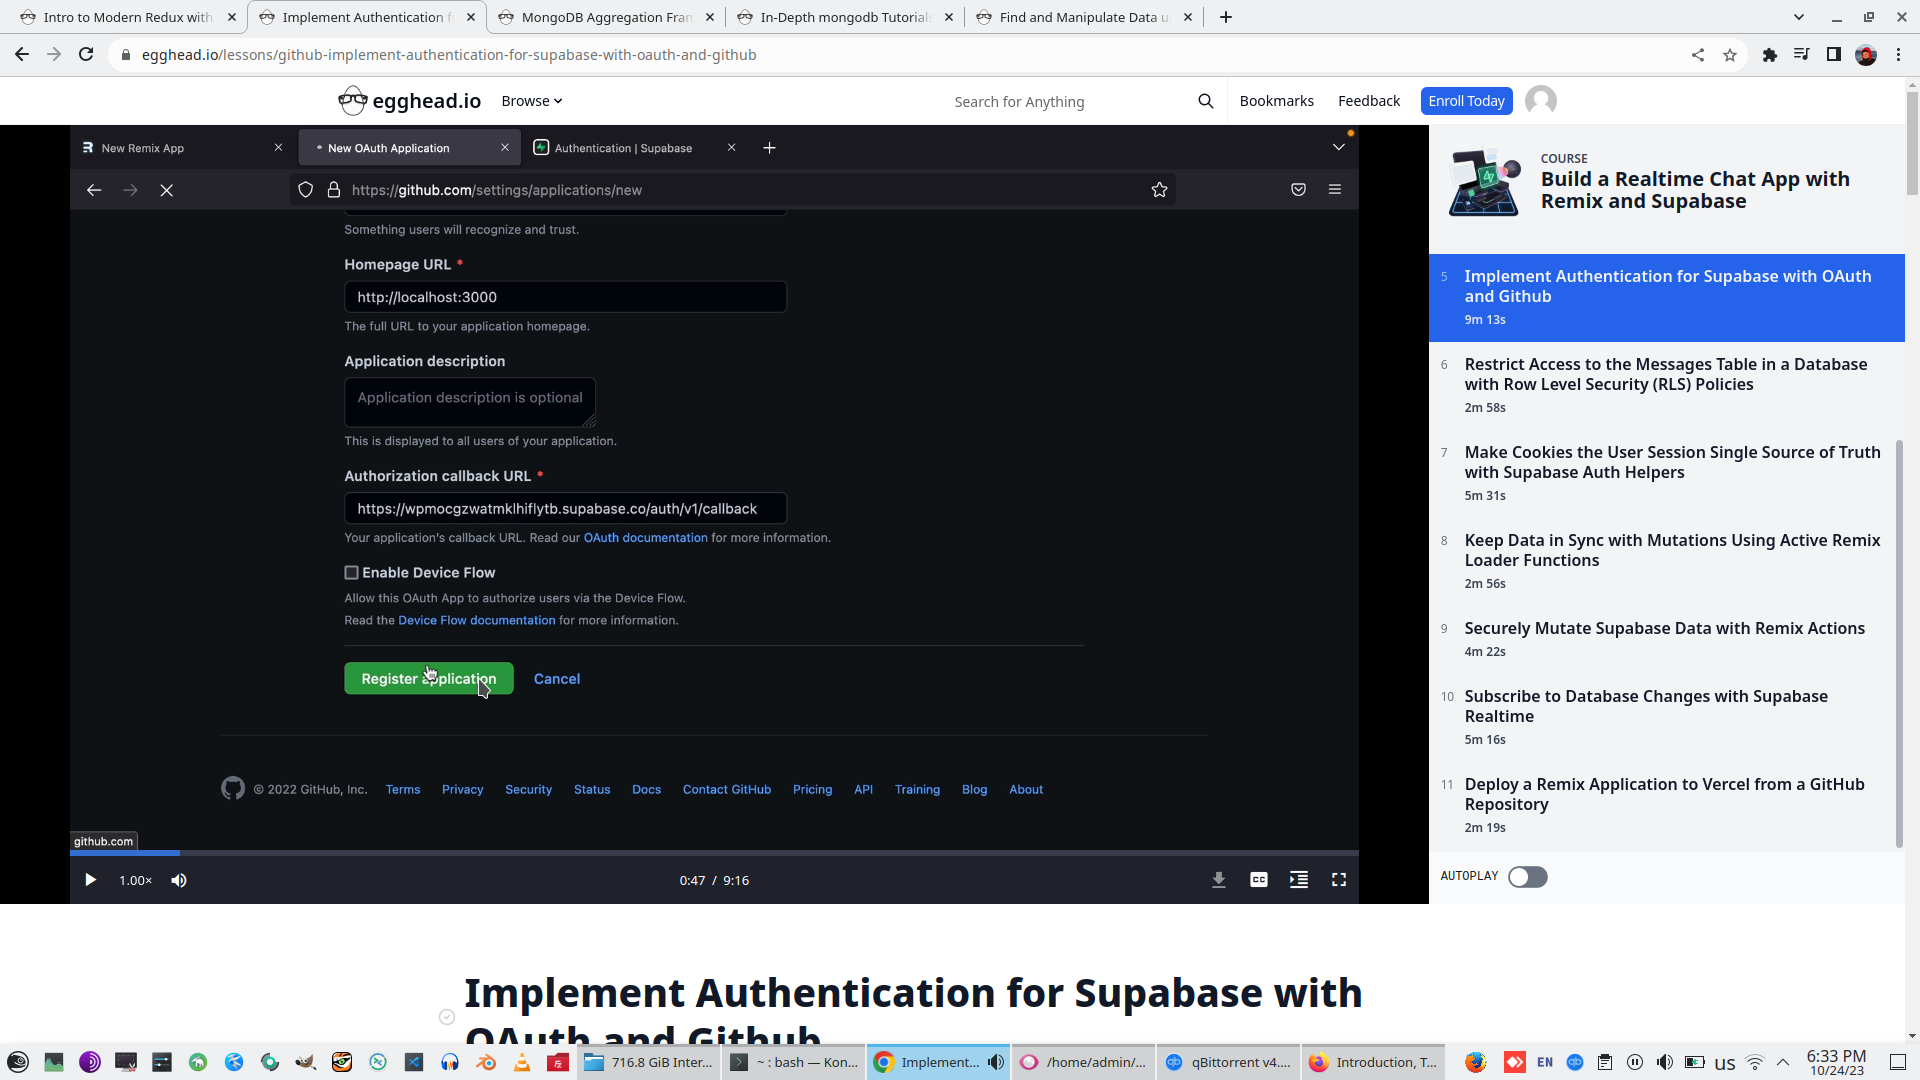
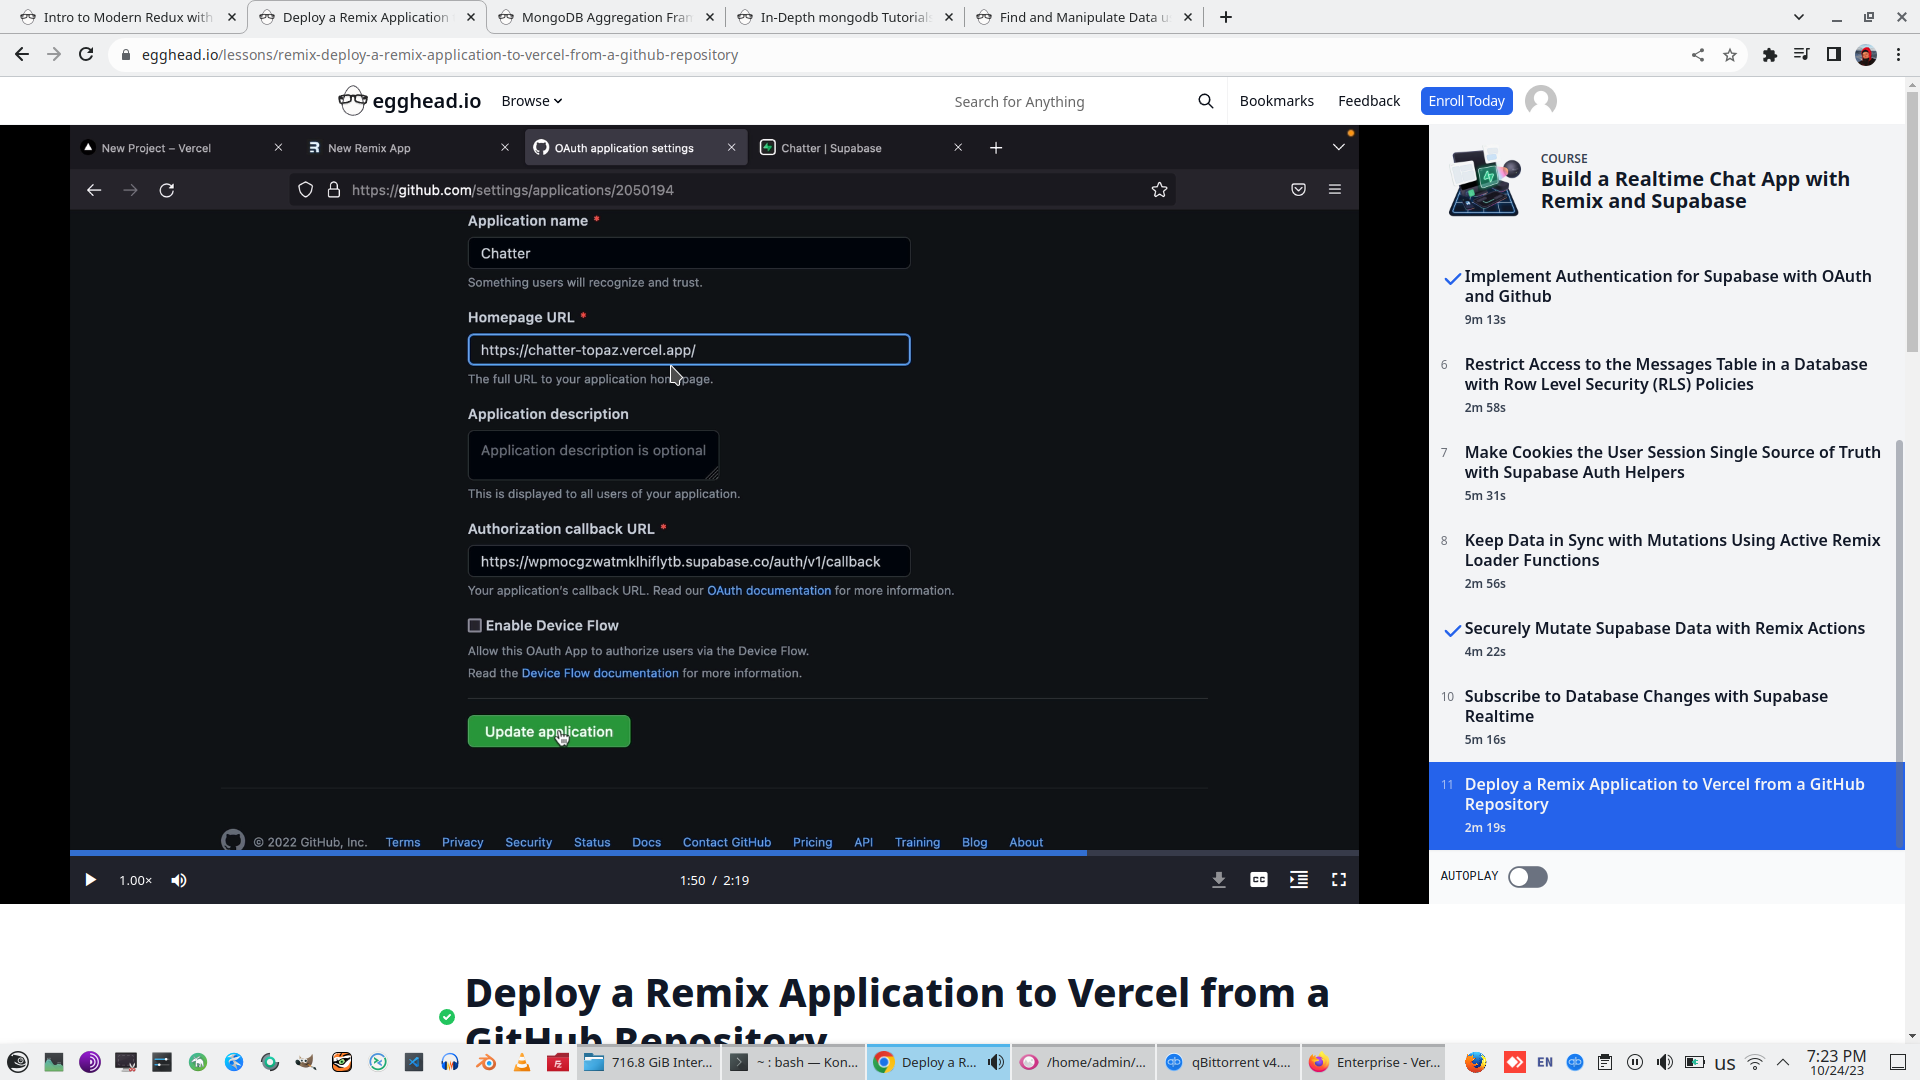
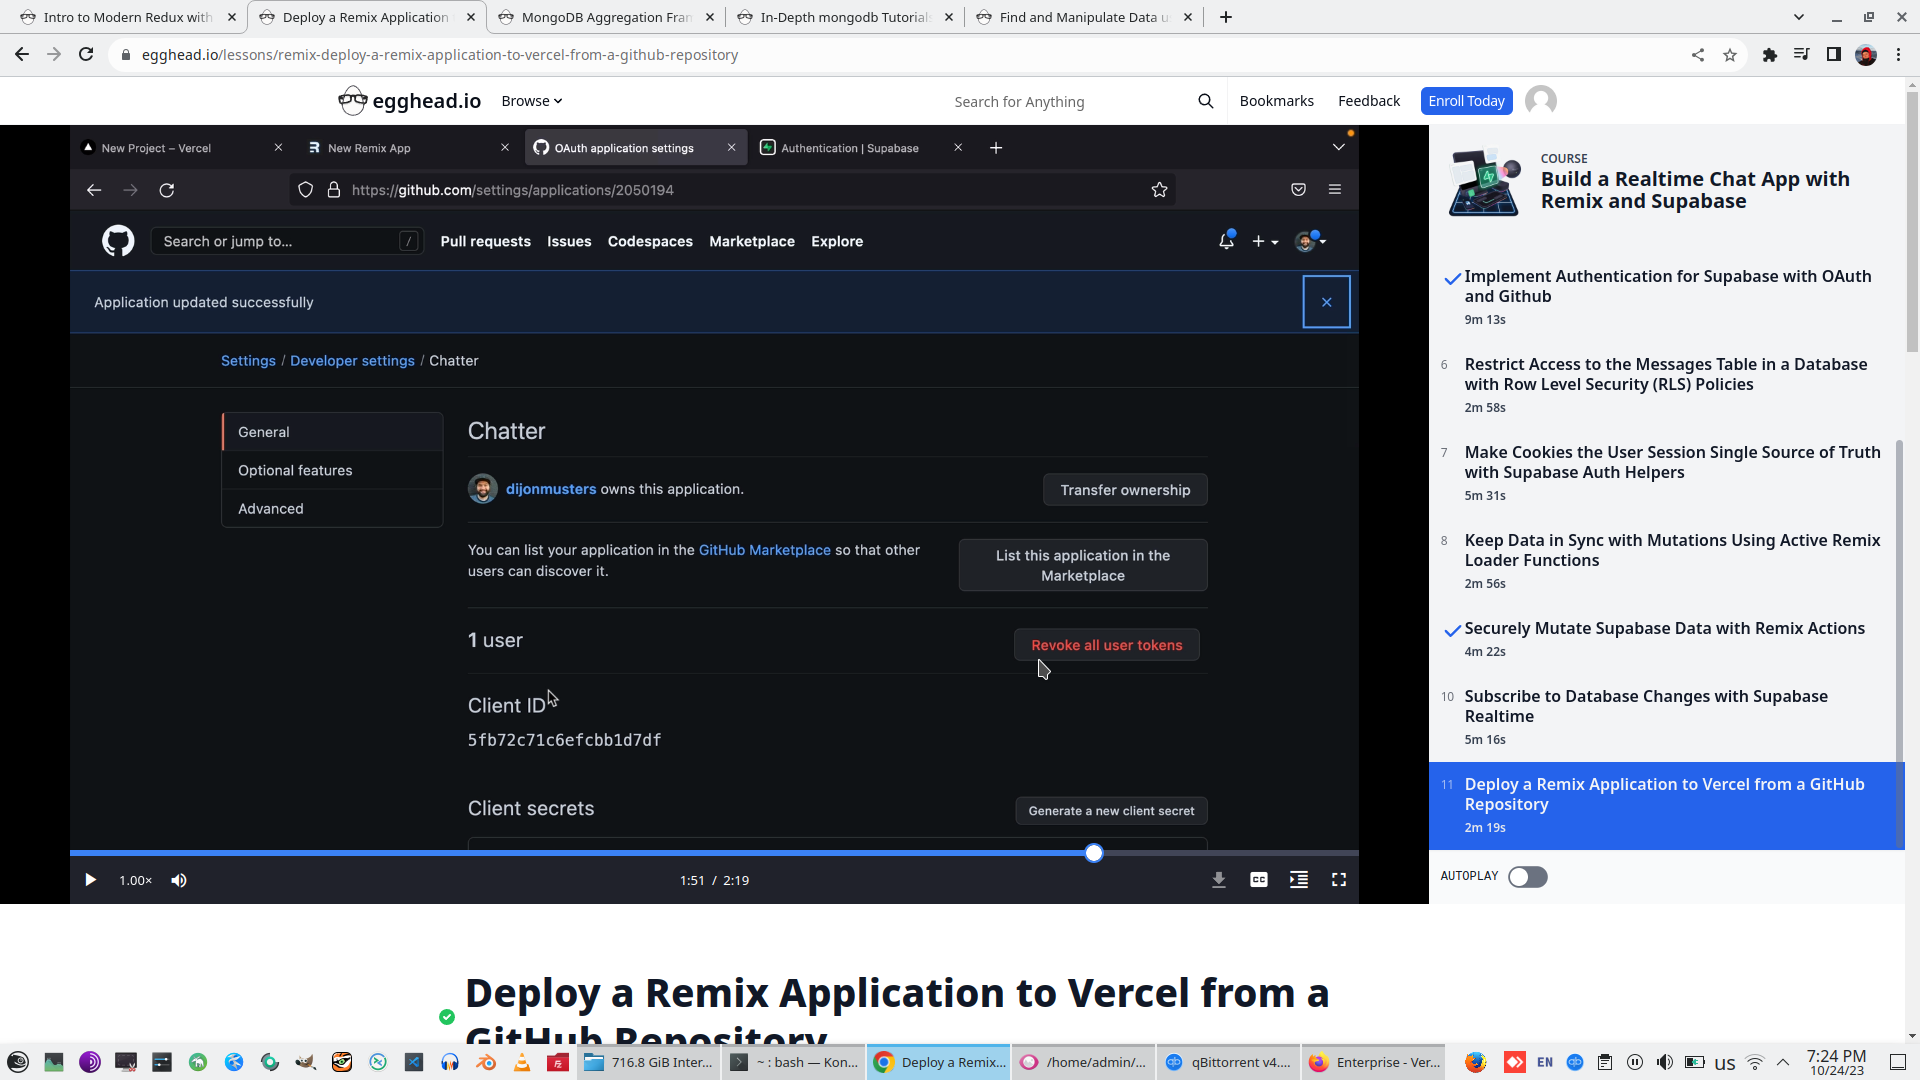
Goto Setting, Developer Setting and create new Oauth application with URL - Localhost:3000


For Ouath we need to set CallbackURL
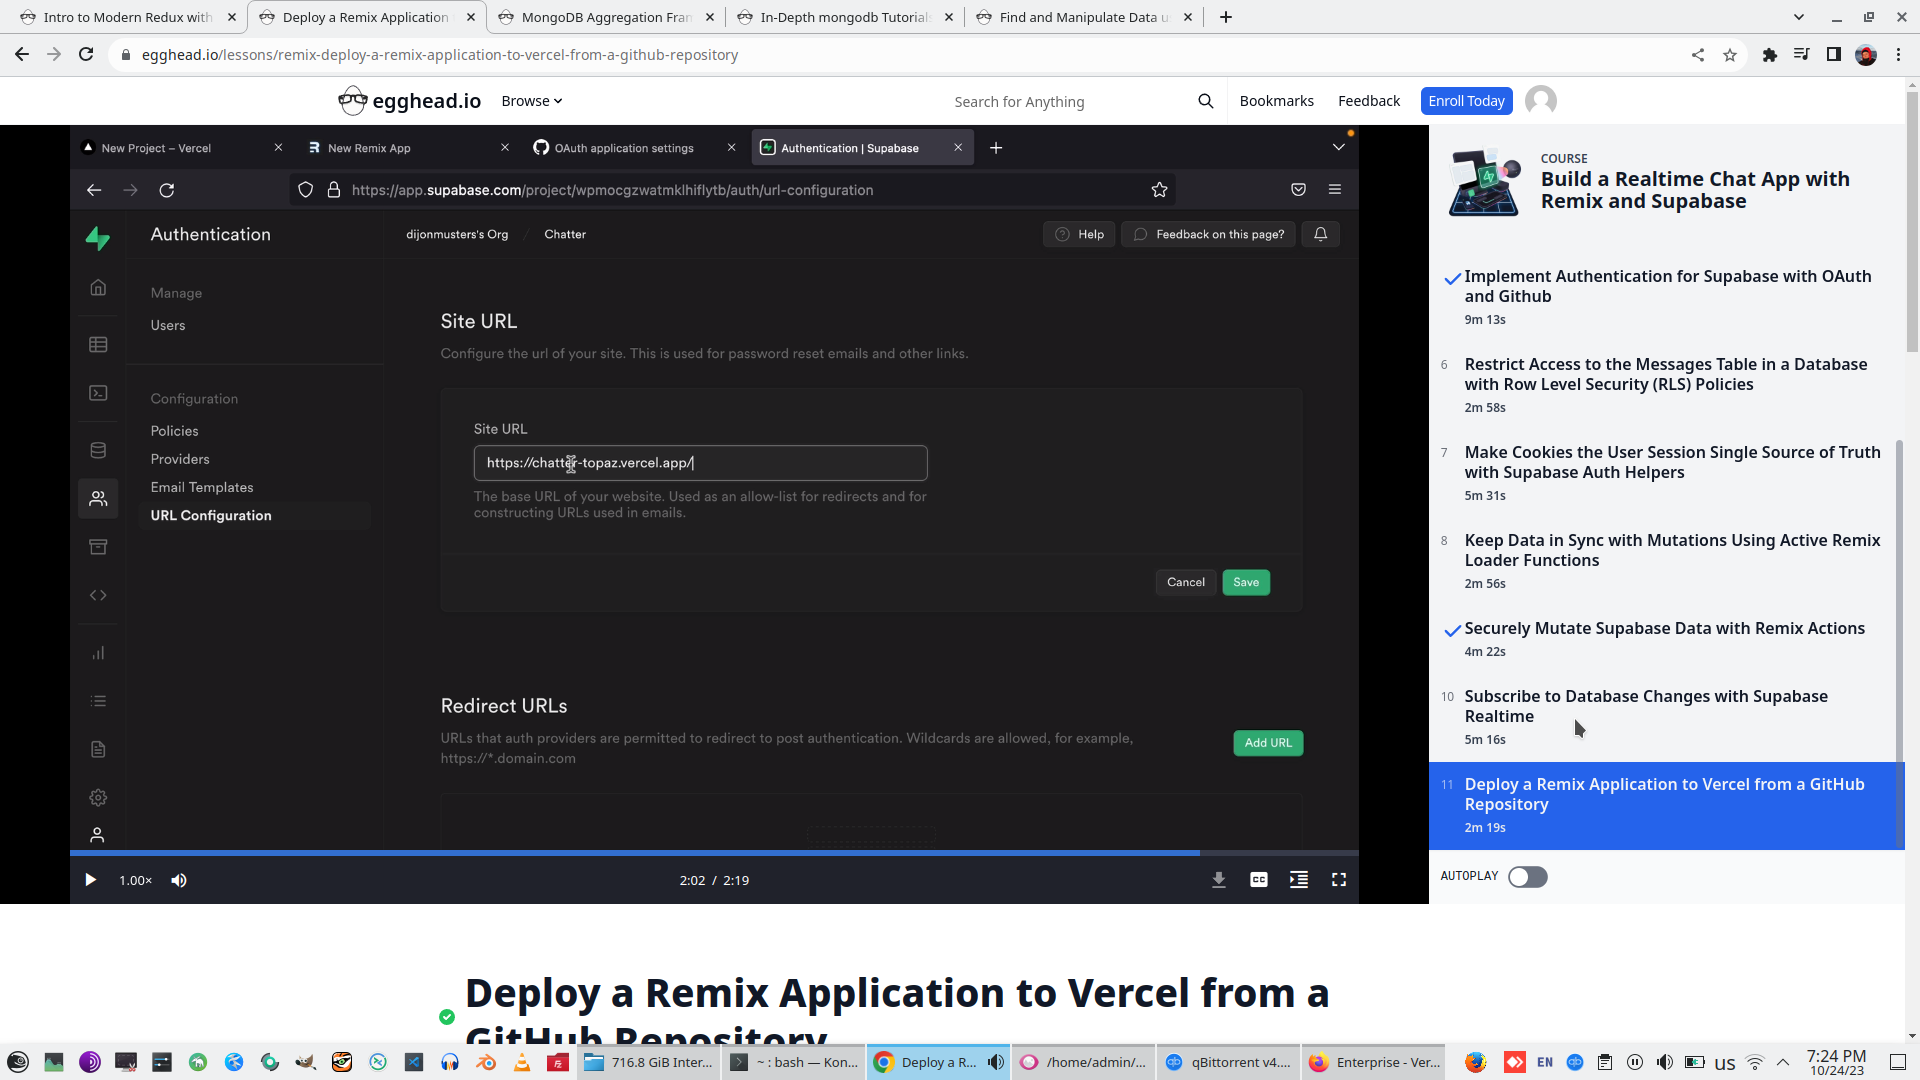
Goto Supabase panel, select Github as authentication site, and grab Callback URL from supabase and set up it to Github.

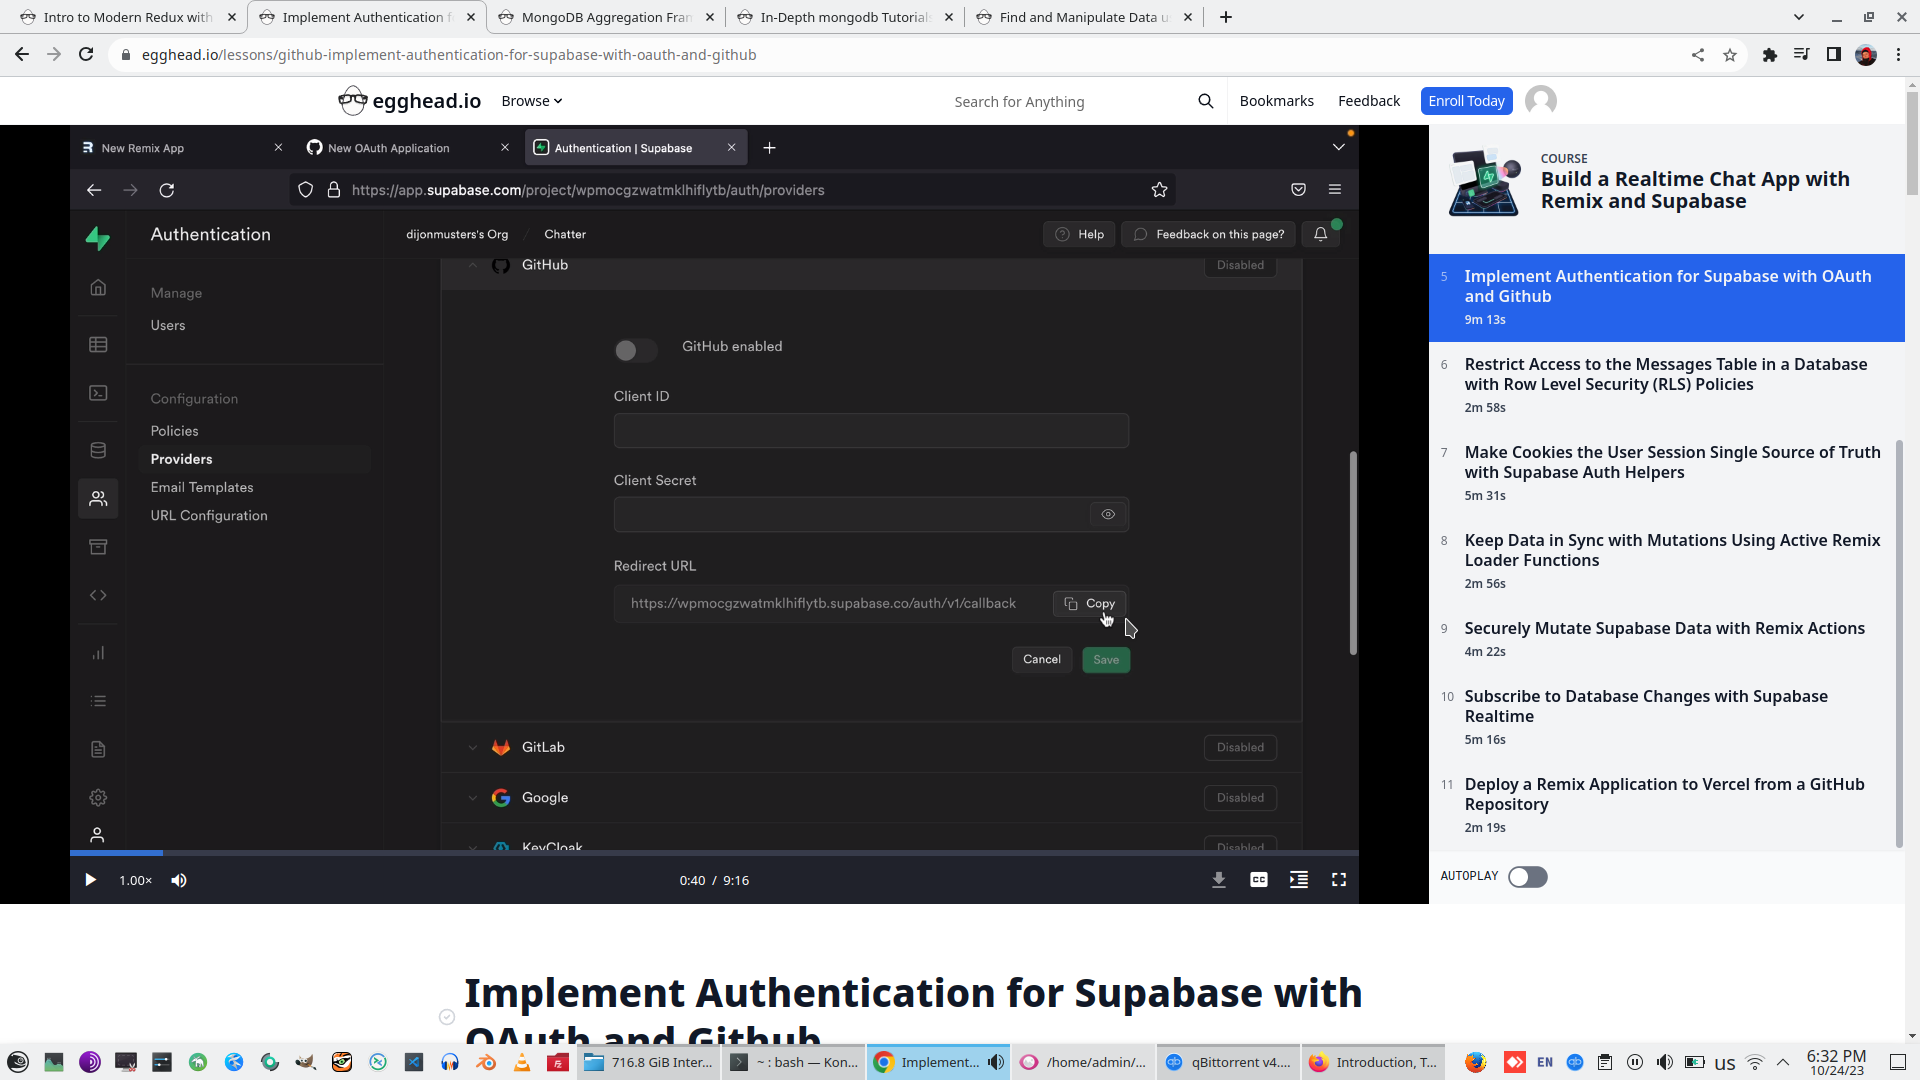
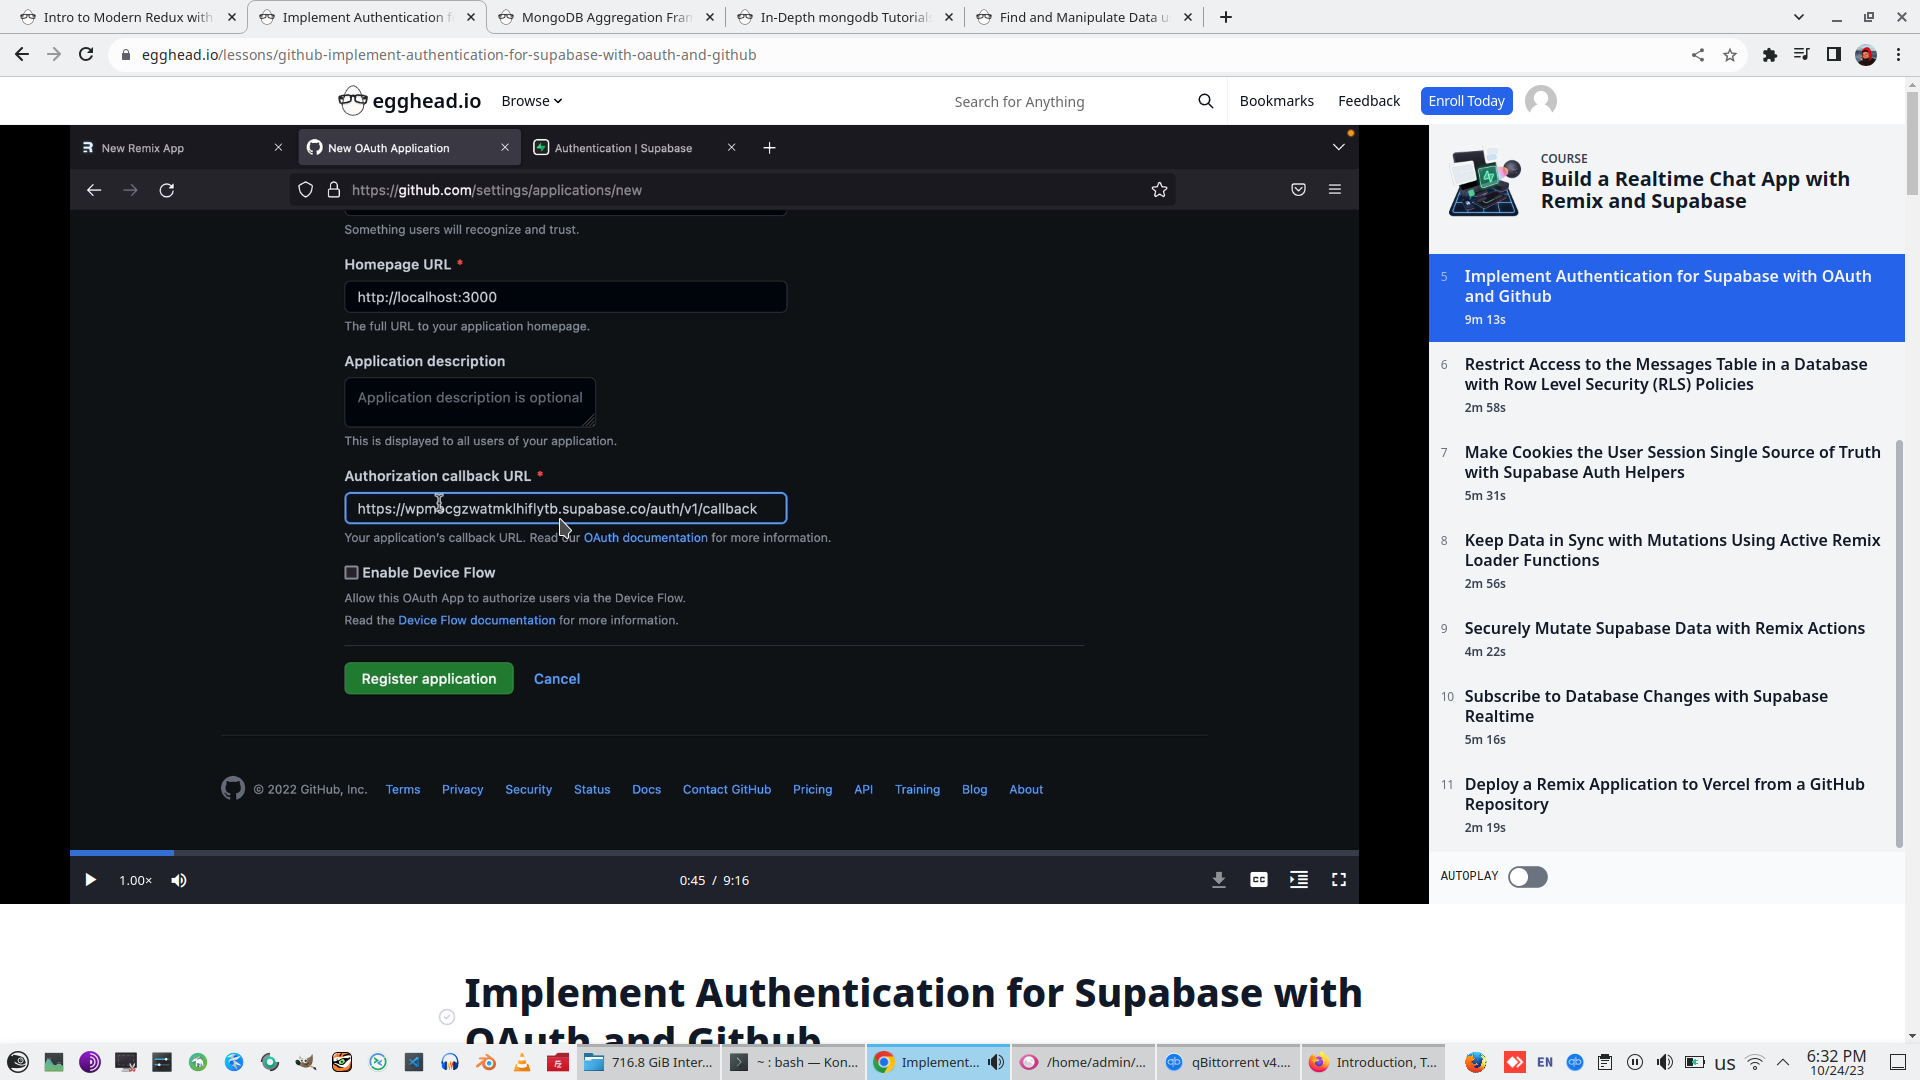
Than register application on Github, Grub Gihub AplicationID and set up it on Supabase for Github Provider.
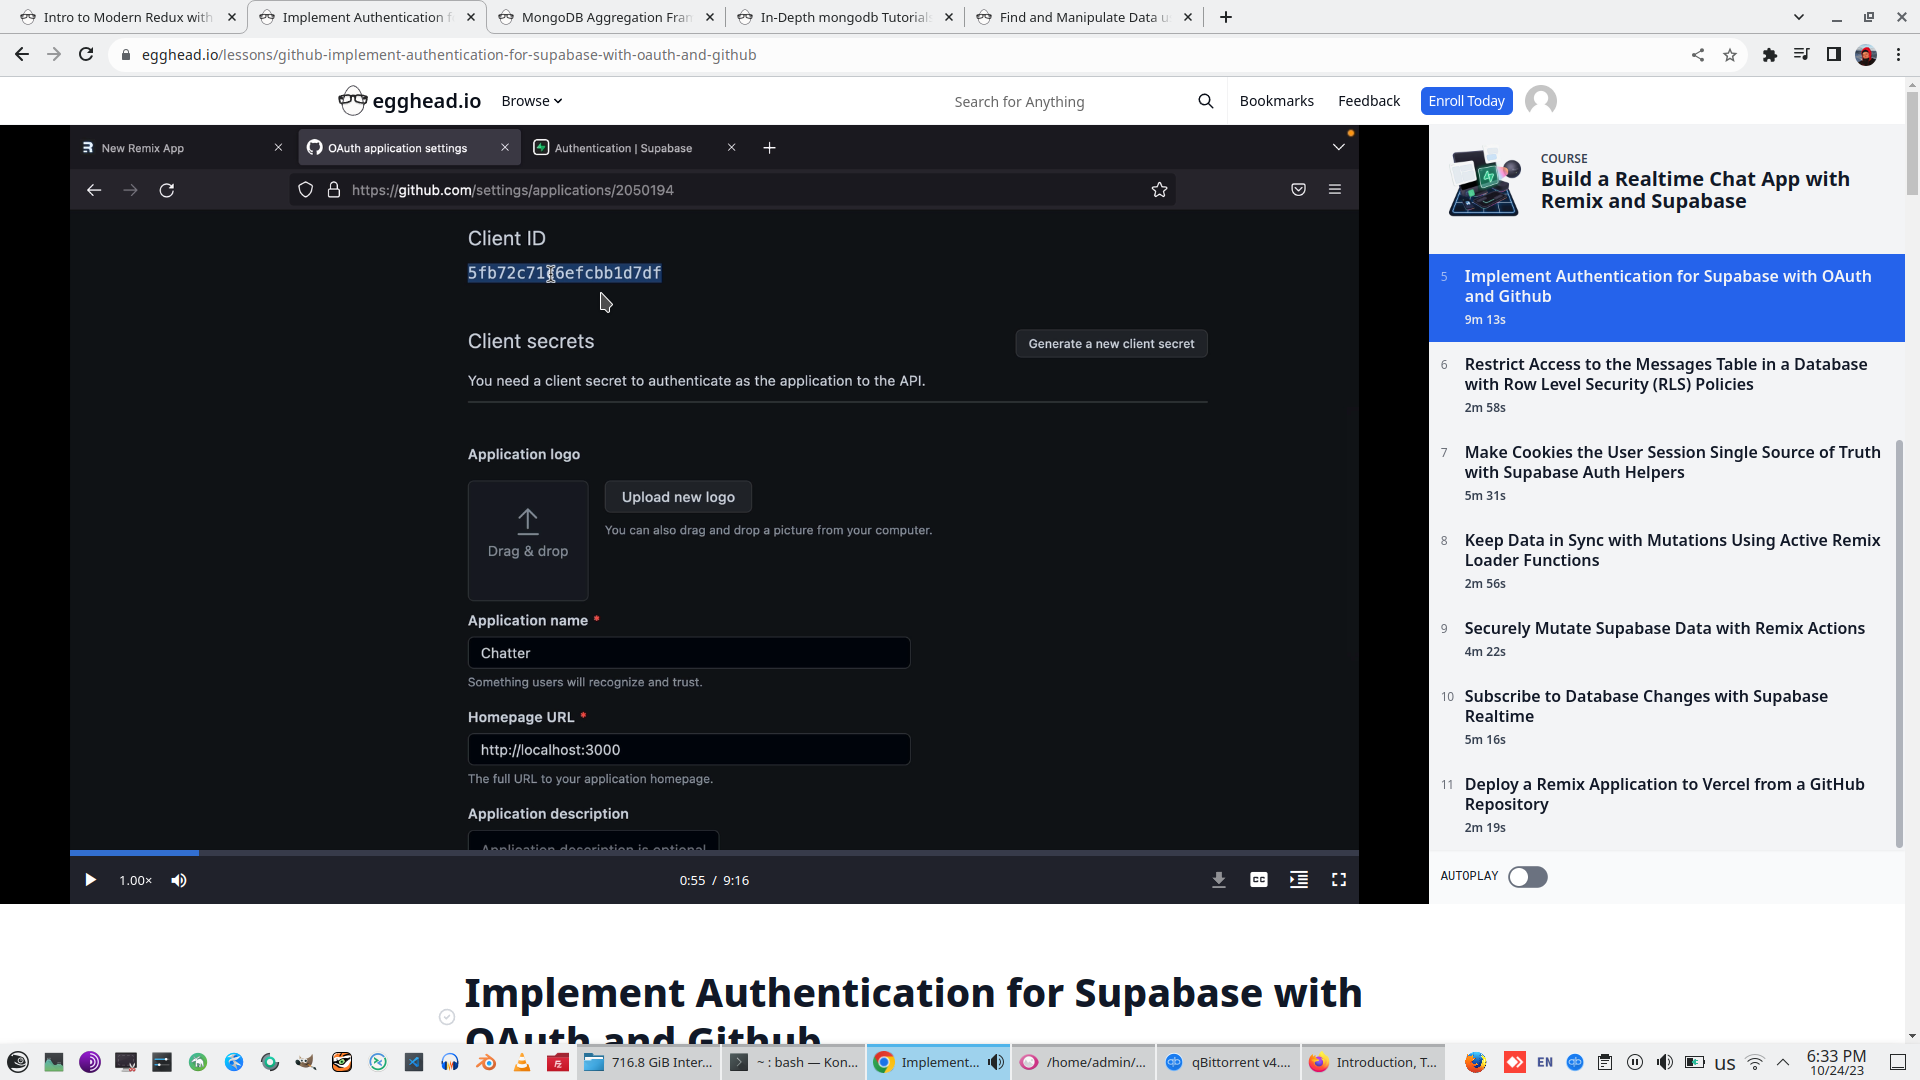

Generate new Client Secret on Github and grab ID of Client secret


Setup up ID of Github Client Secret to Supabase, additionally to Github ClientID
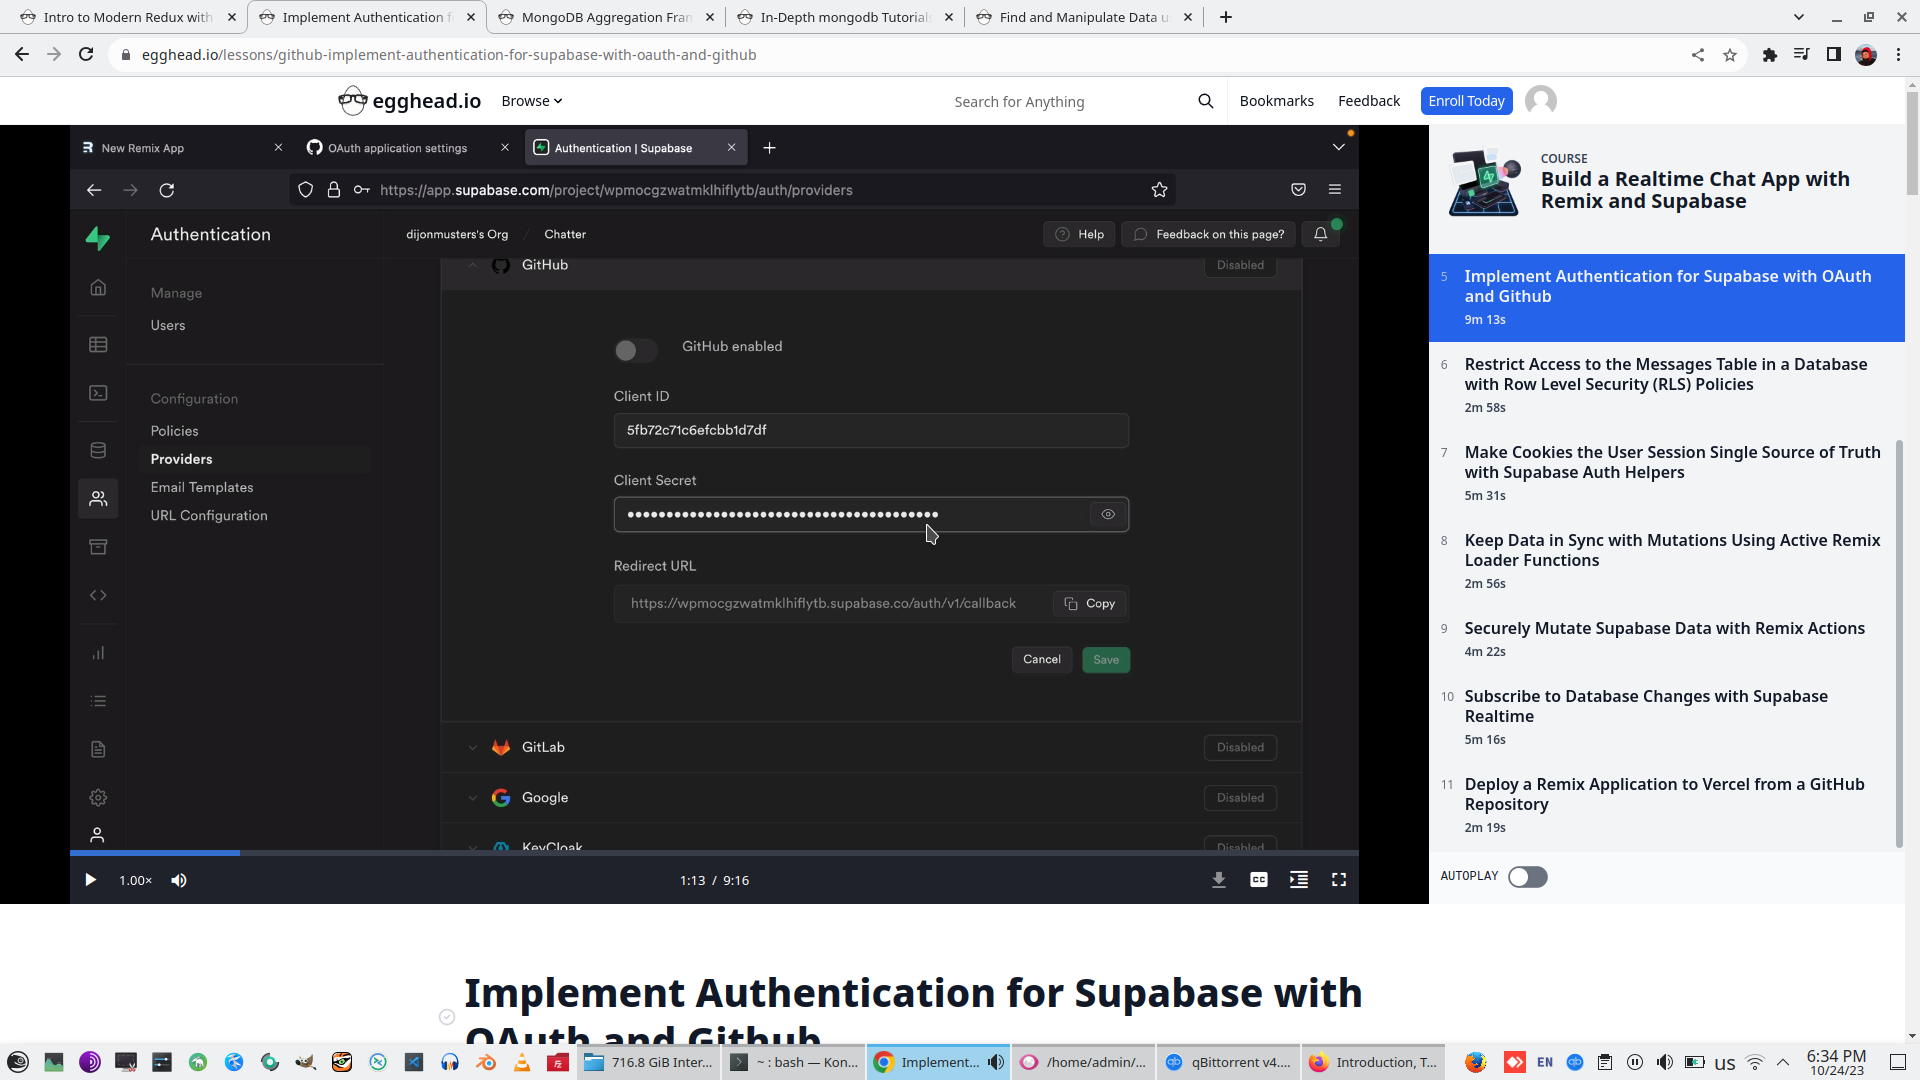

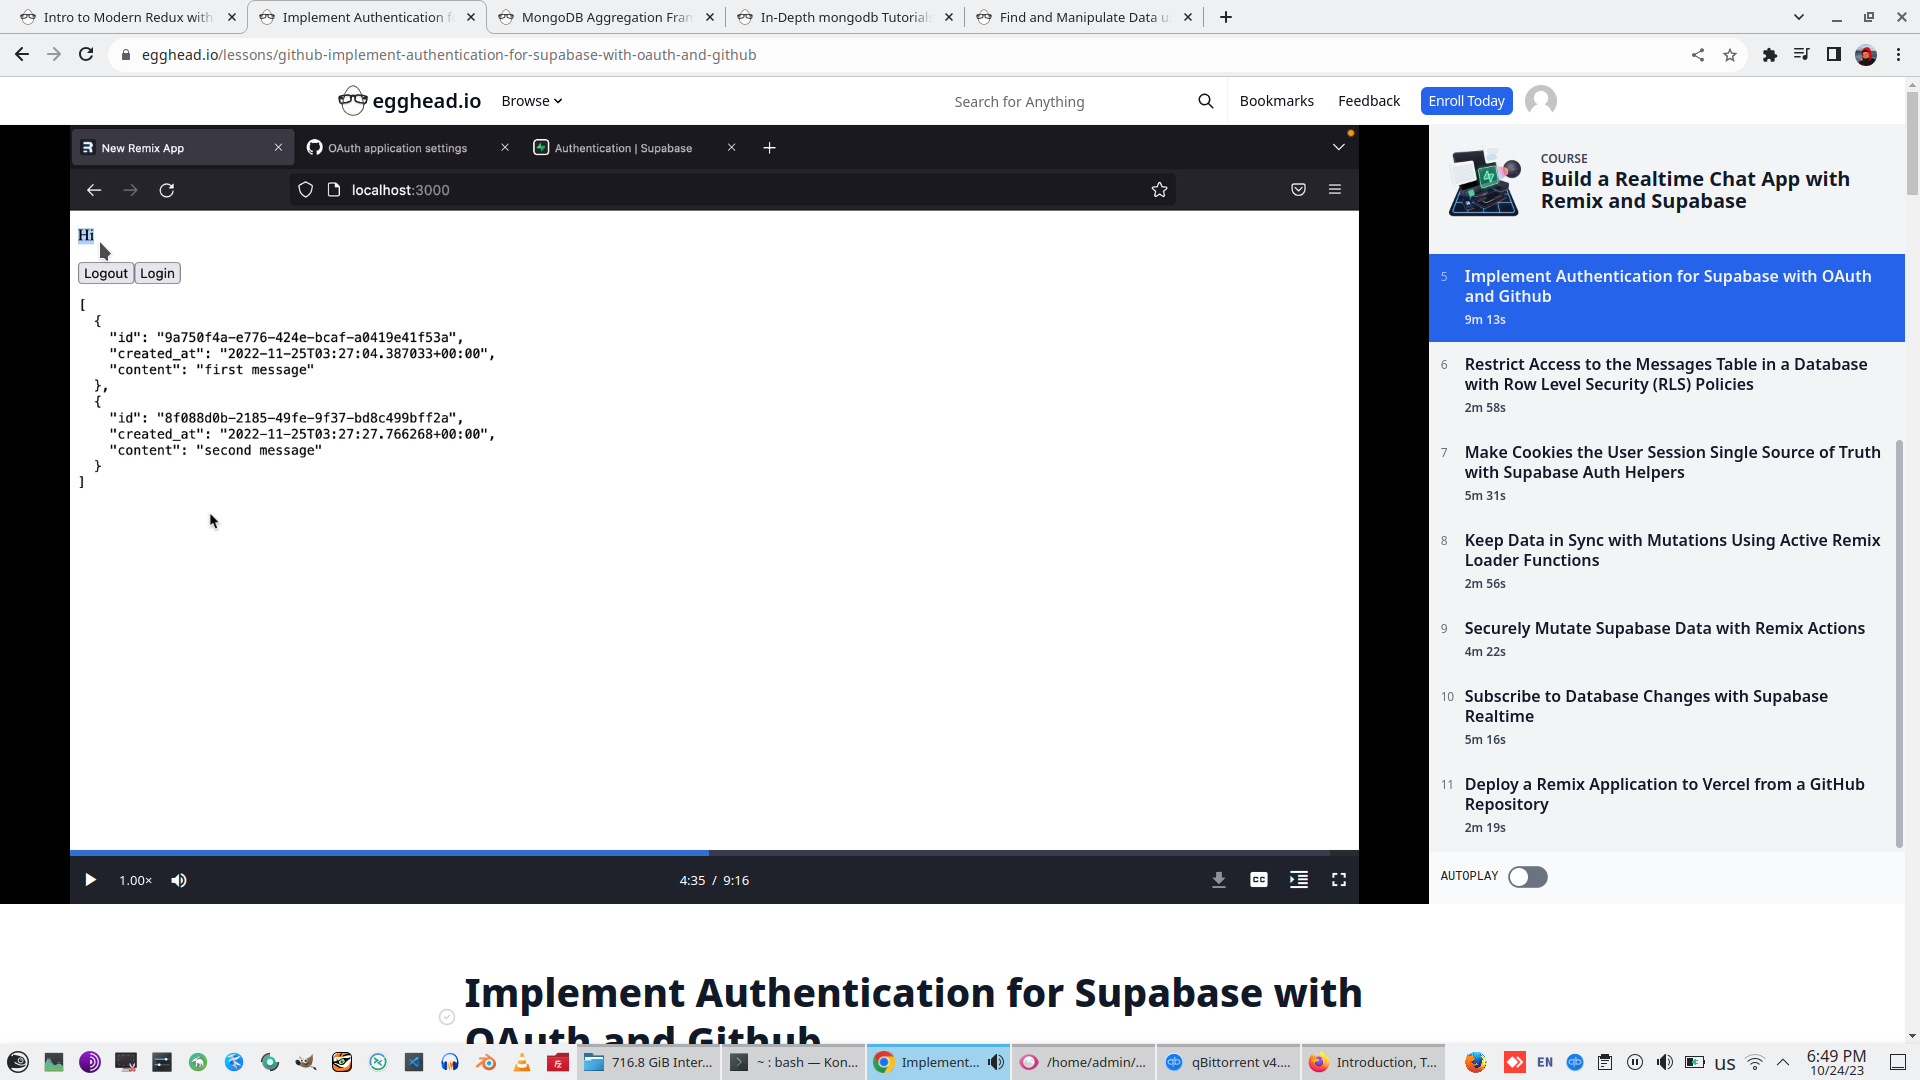
So, currently we have two way of Authentication for supabase - Email and with Github Oauth provider.

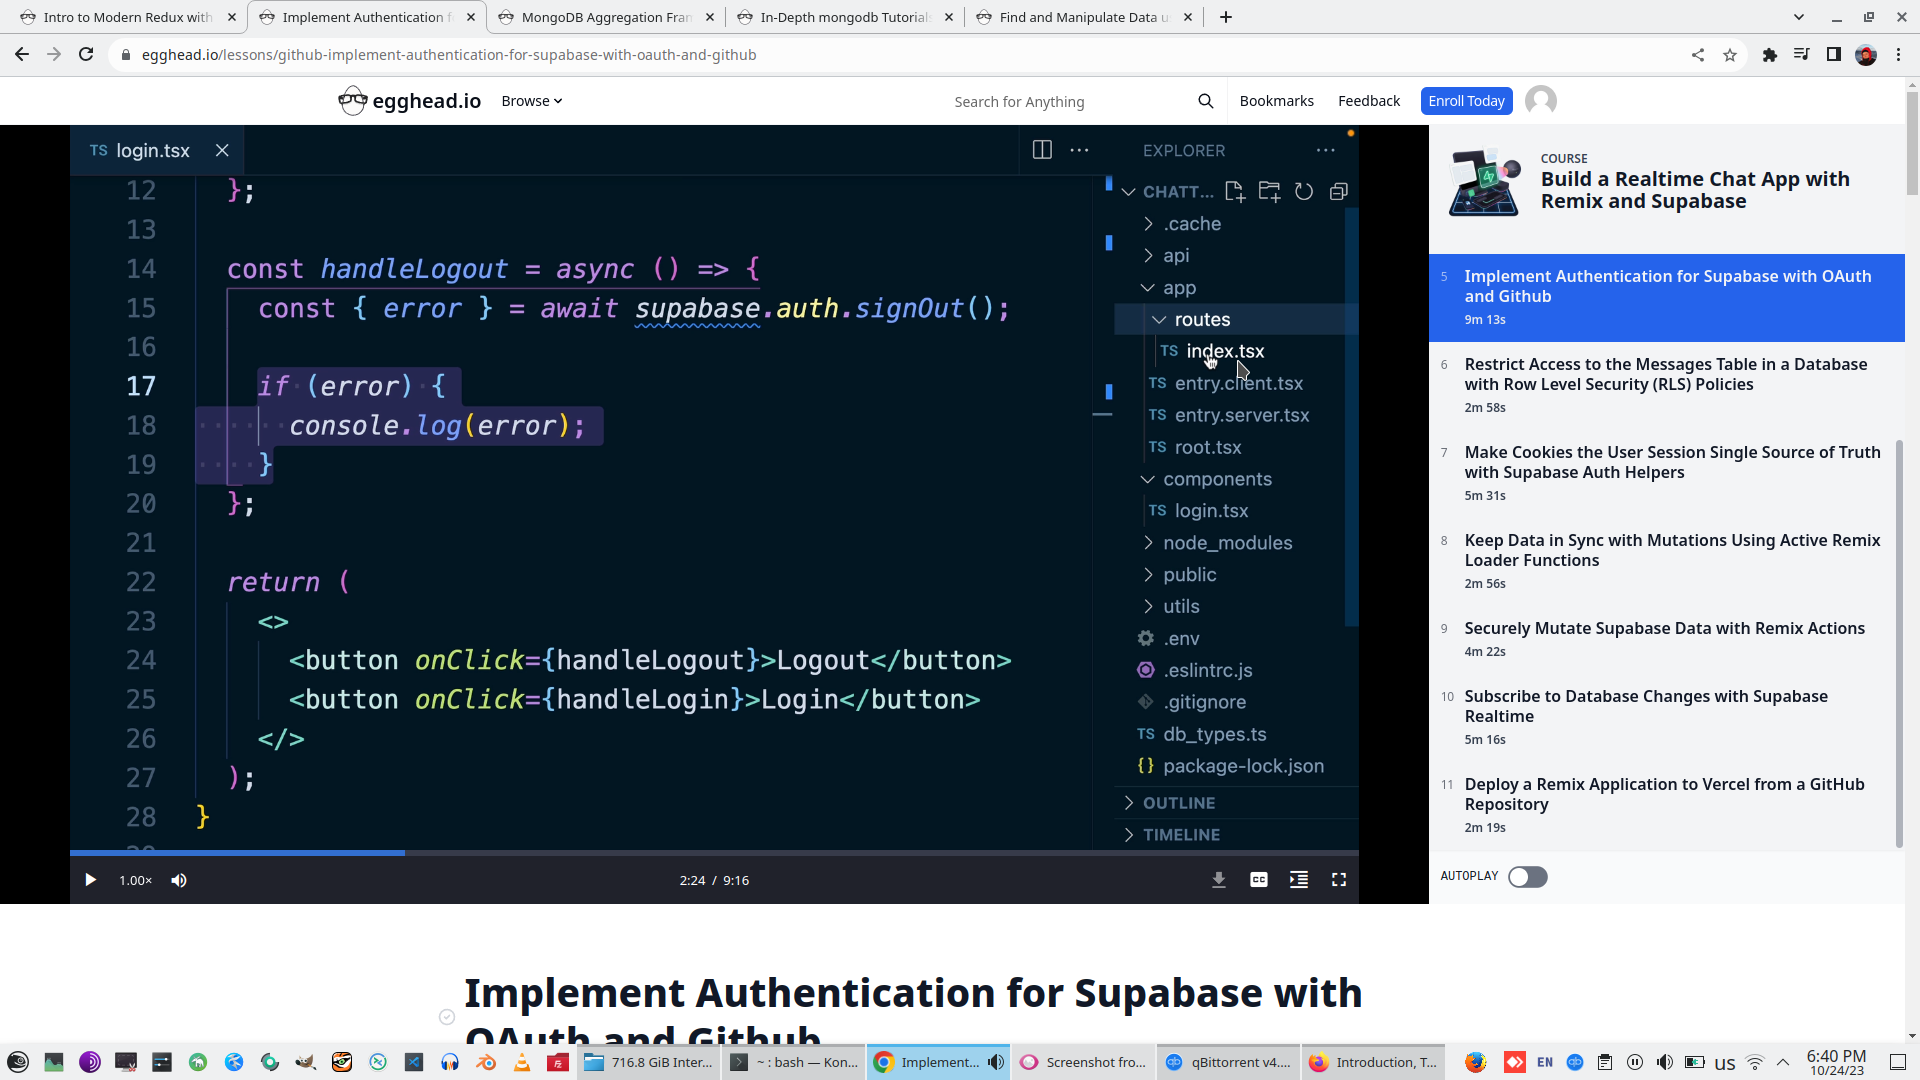
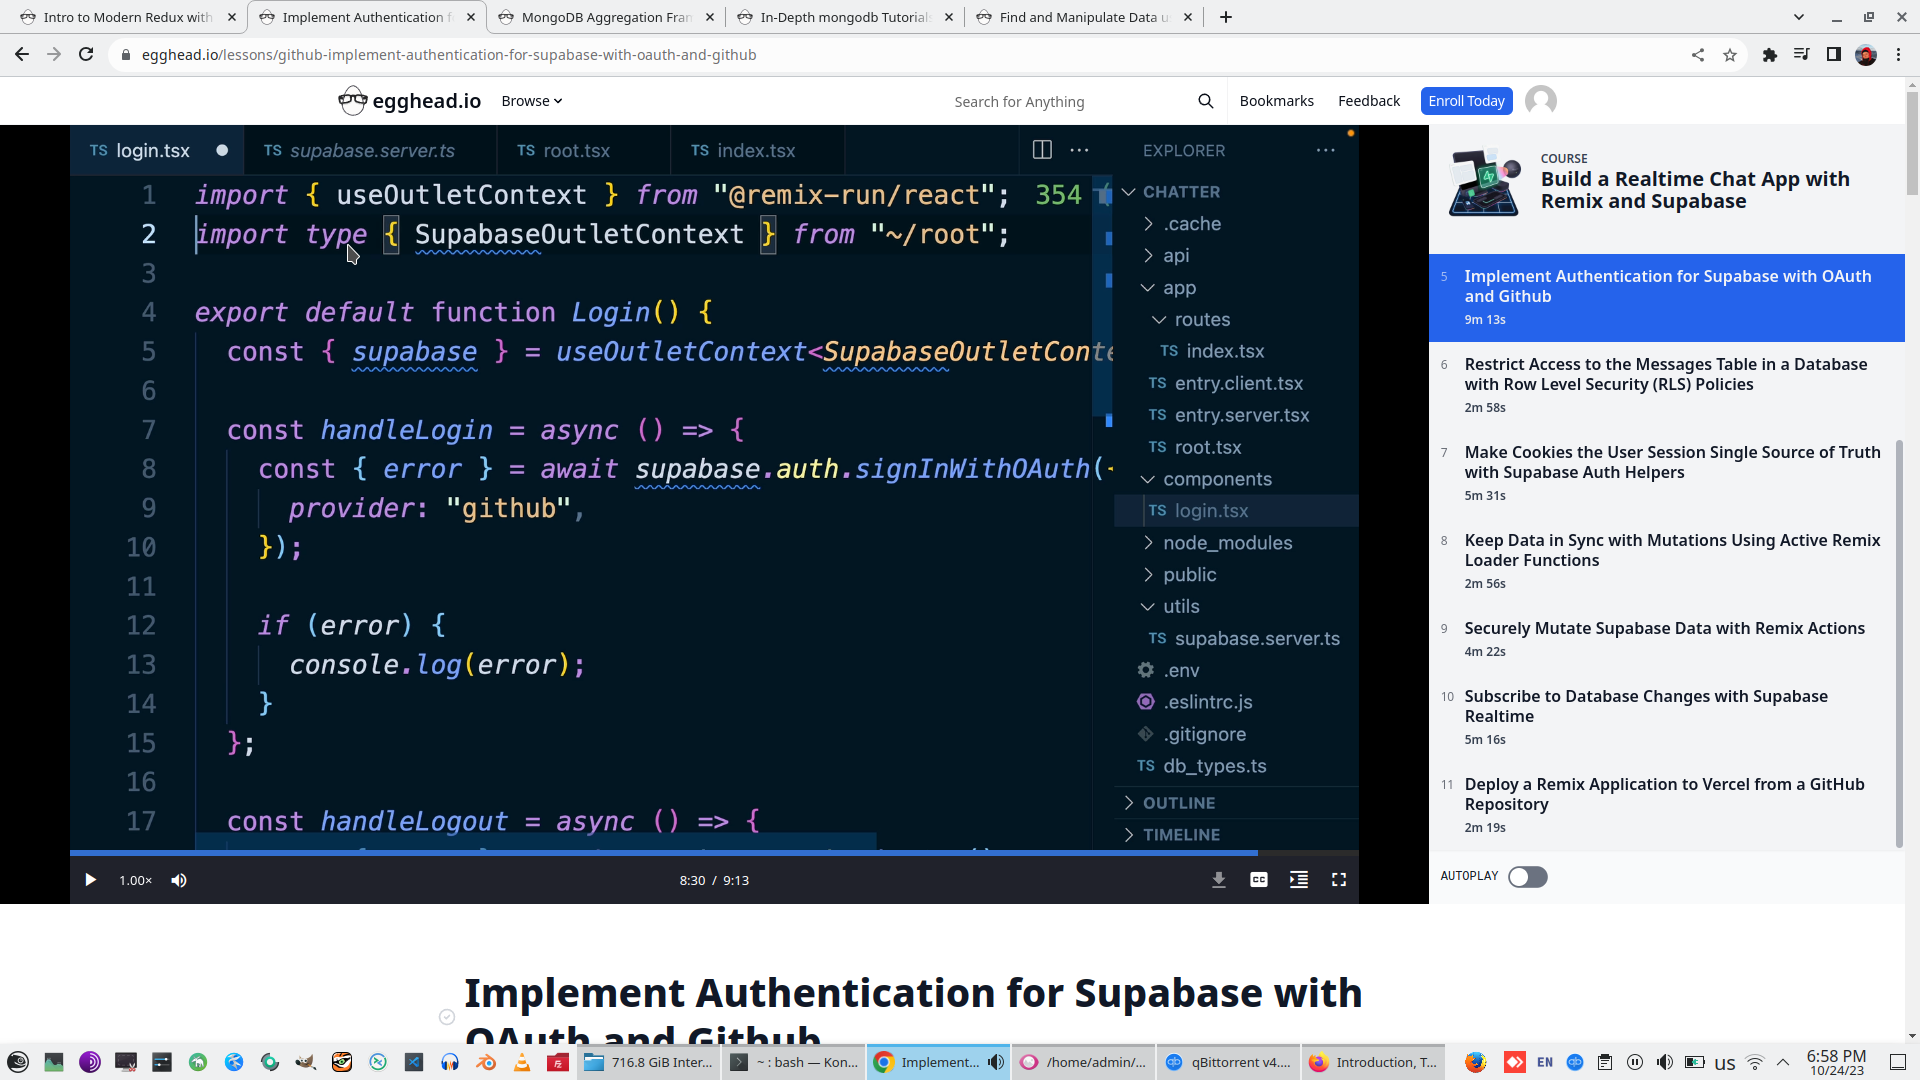
Create Login.TSX page, this page has only two button Login/Logout with event handler
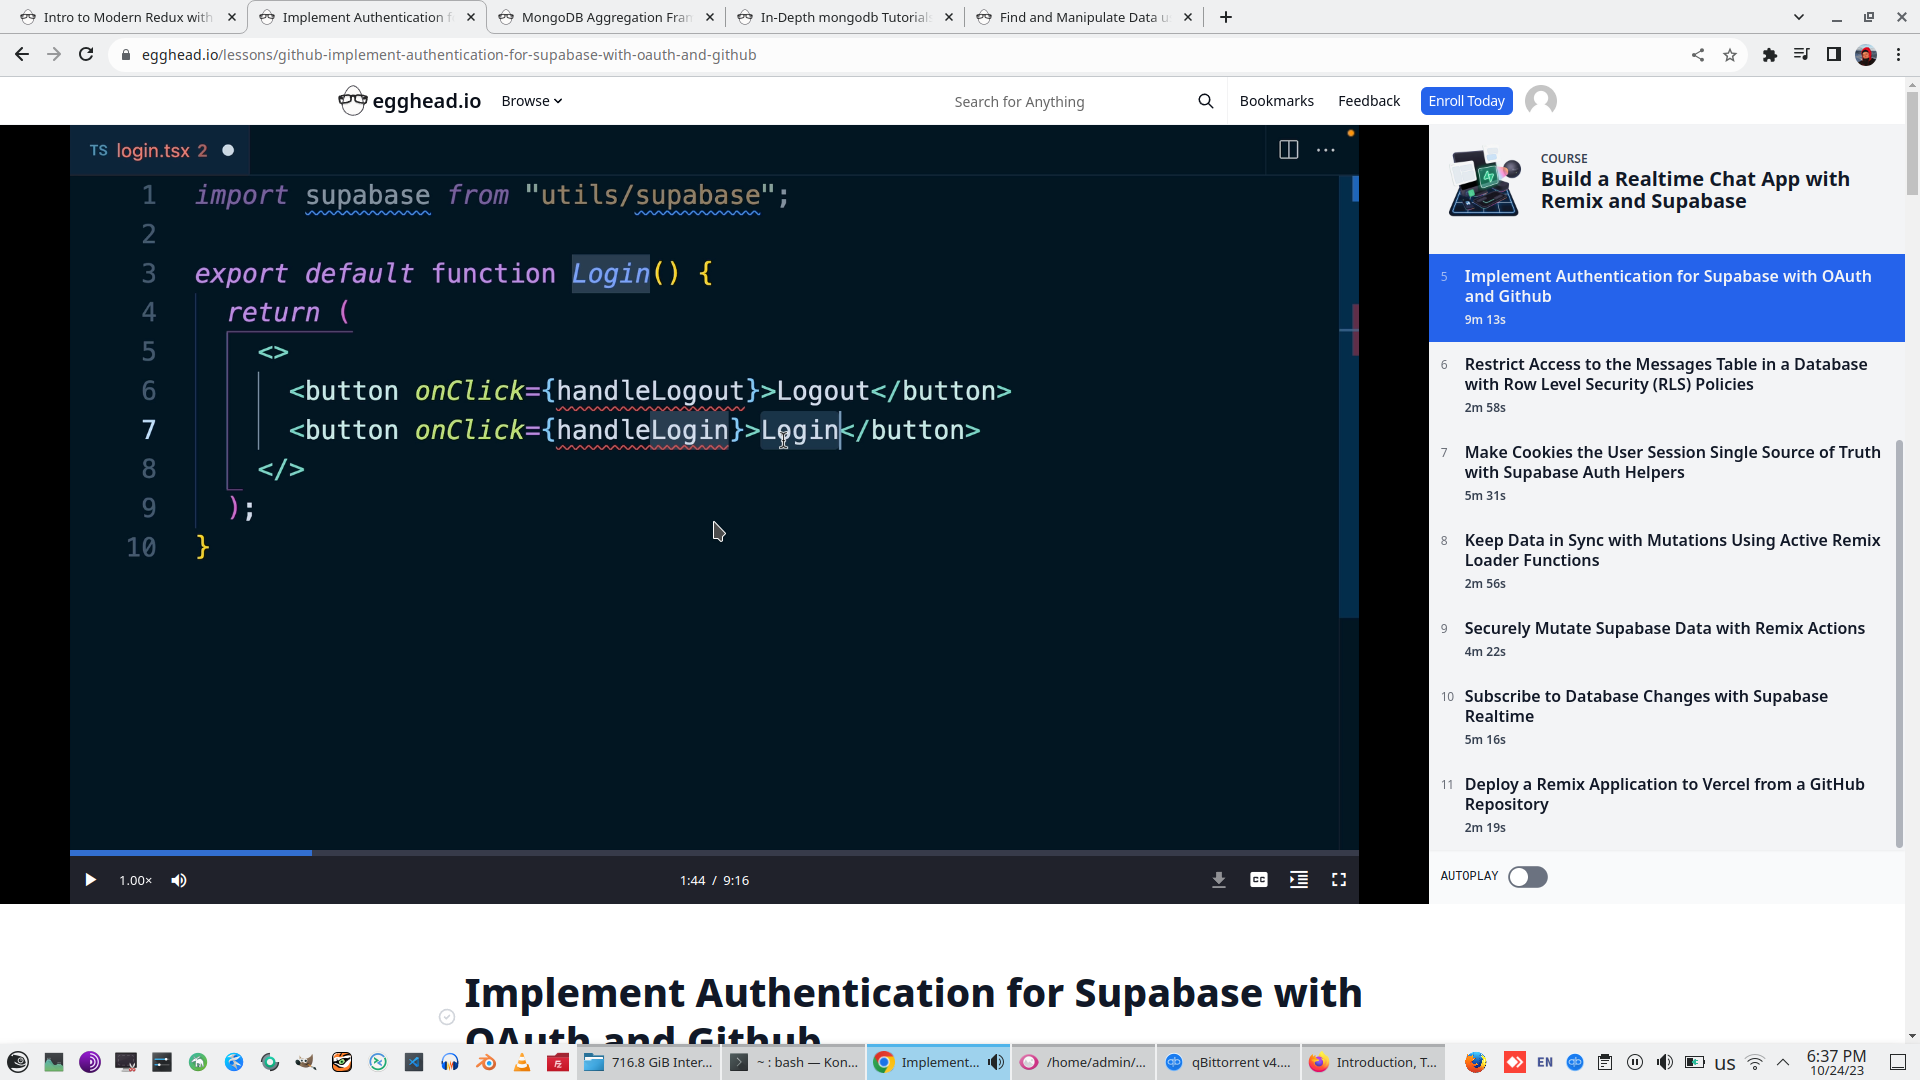
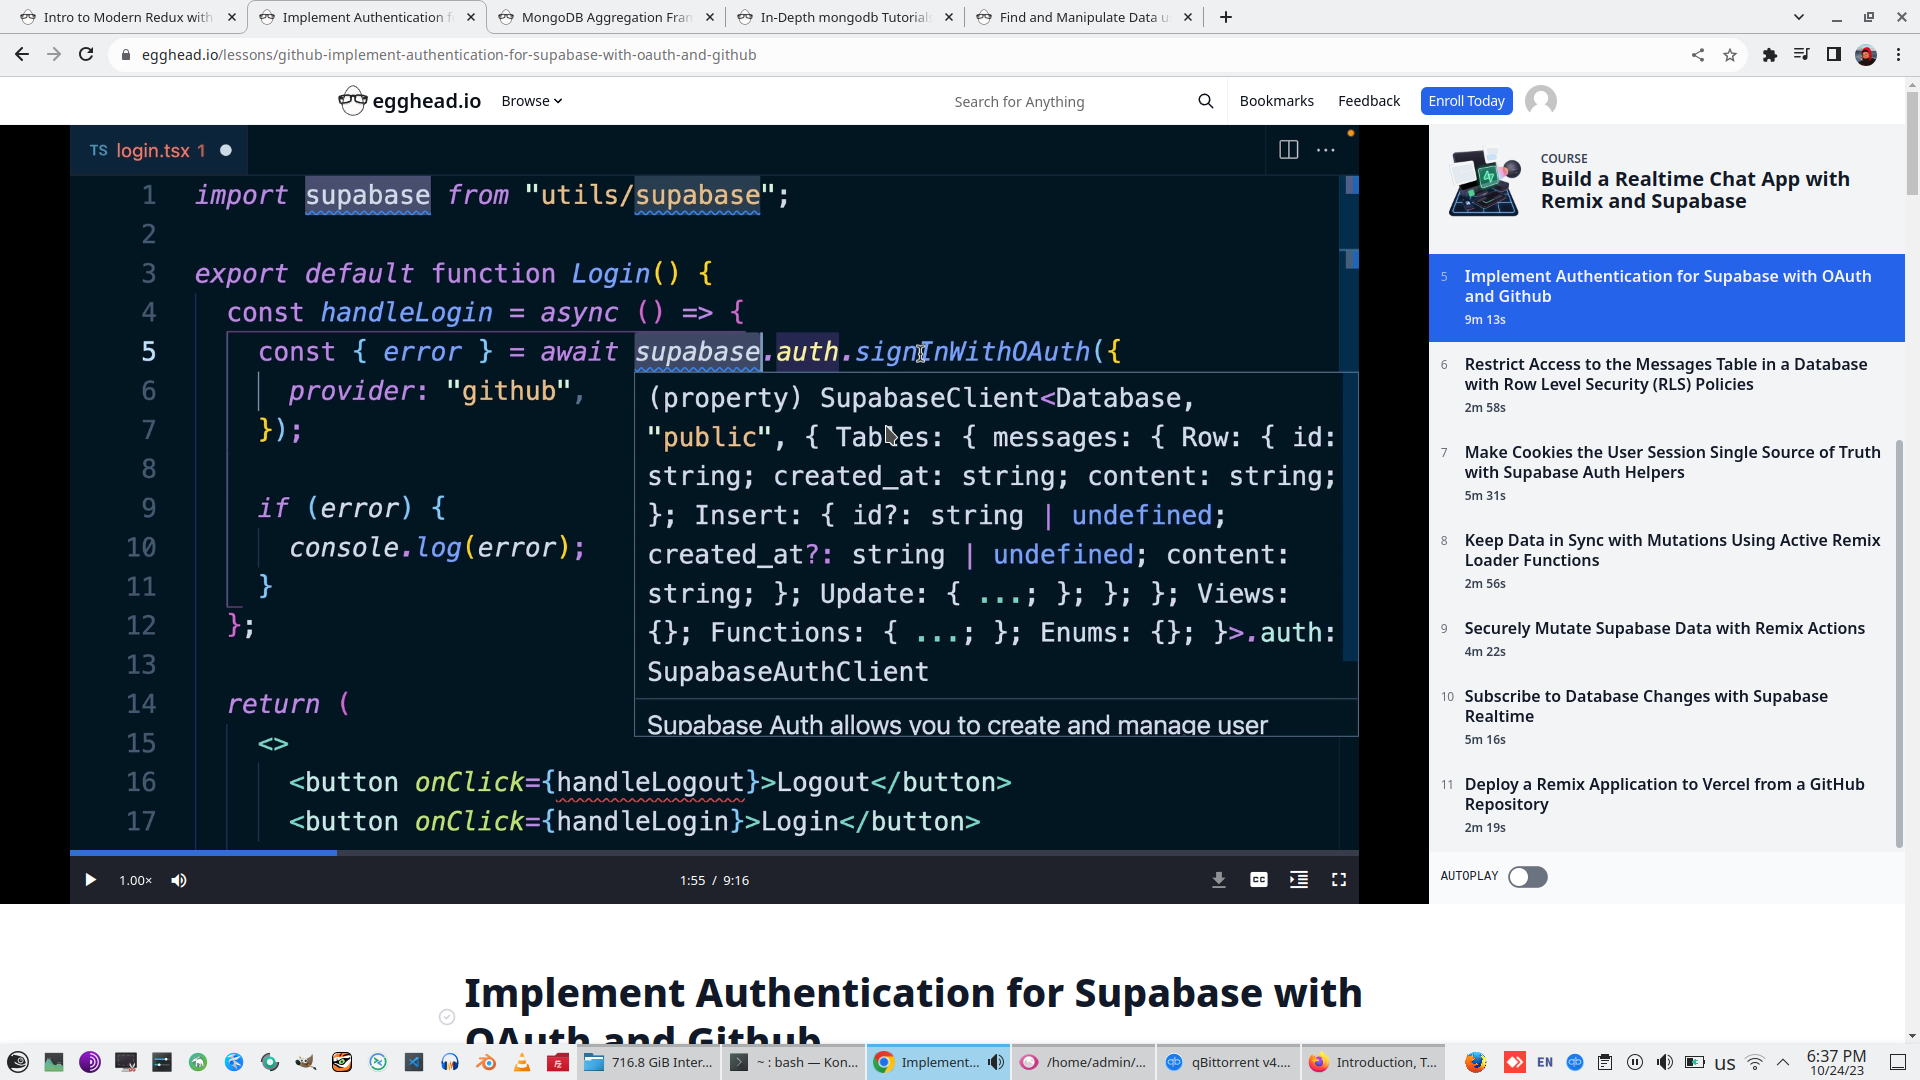
Call on Login Async/Await function supabase.aith.signInWithOAuth with Provider=Github
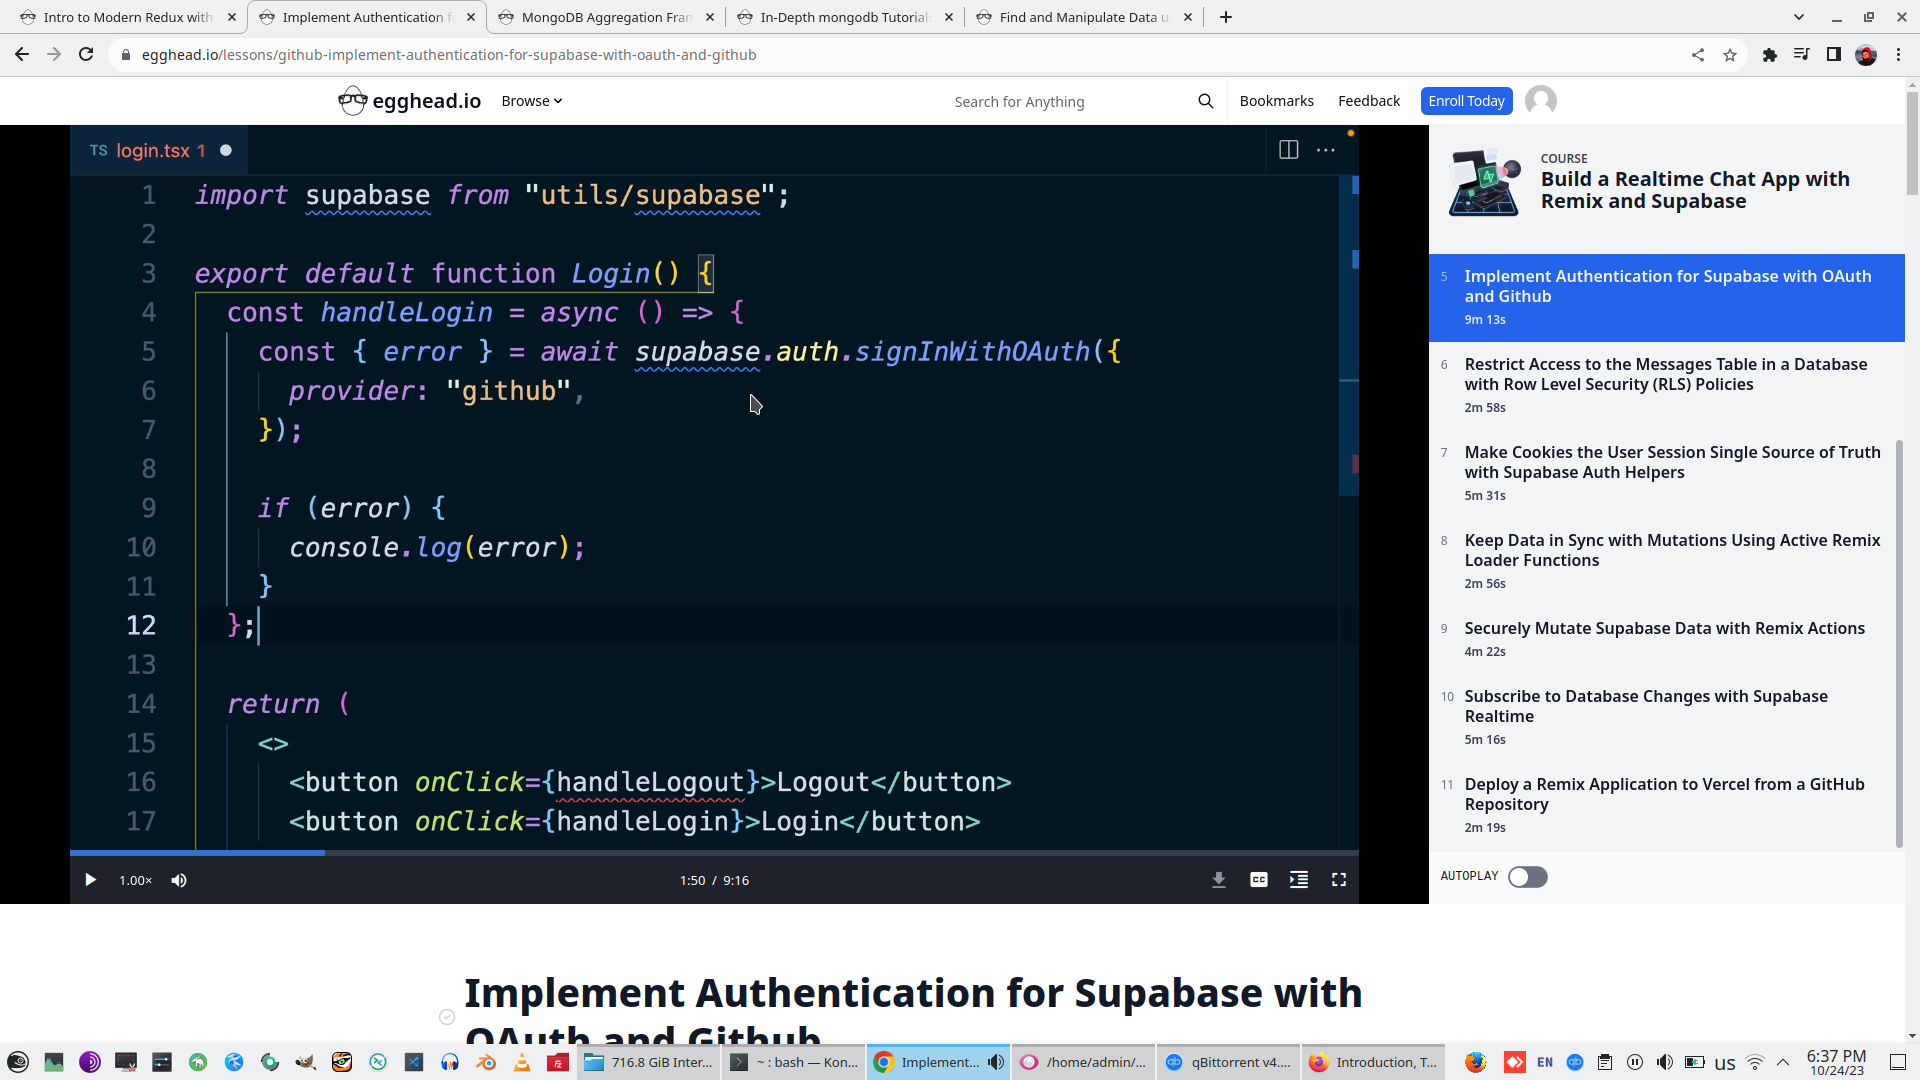
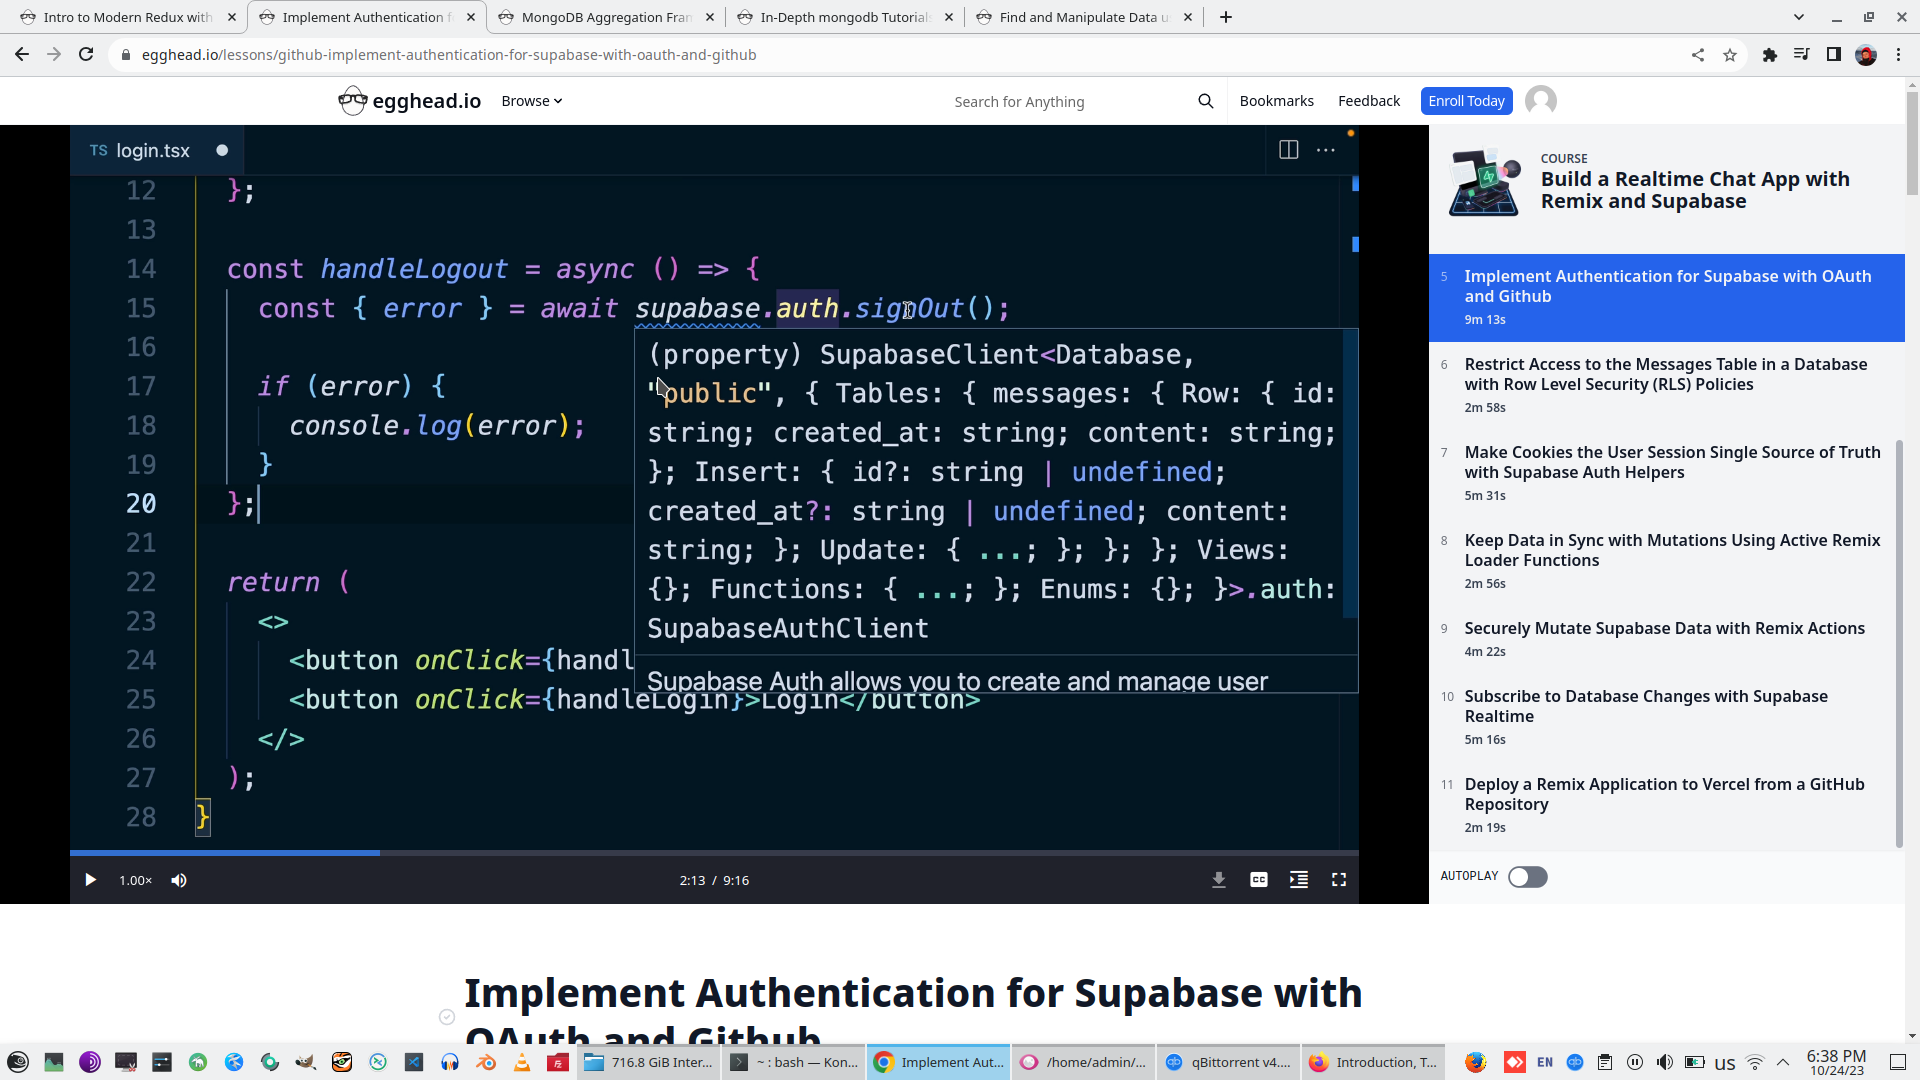
Also create callback for supabase.aith.SignOut
Add login component to Index.tsx page
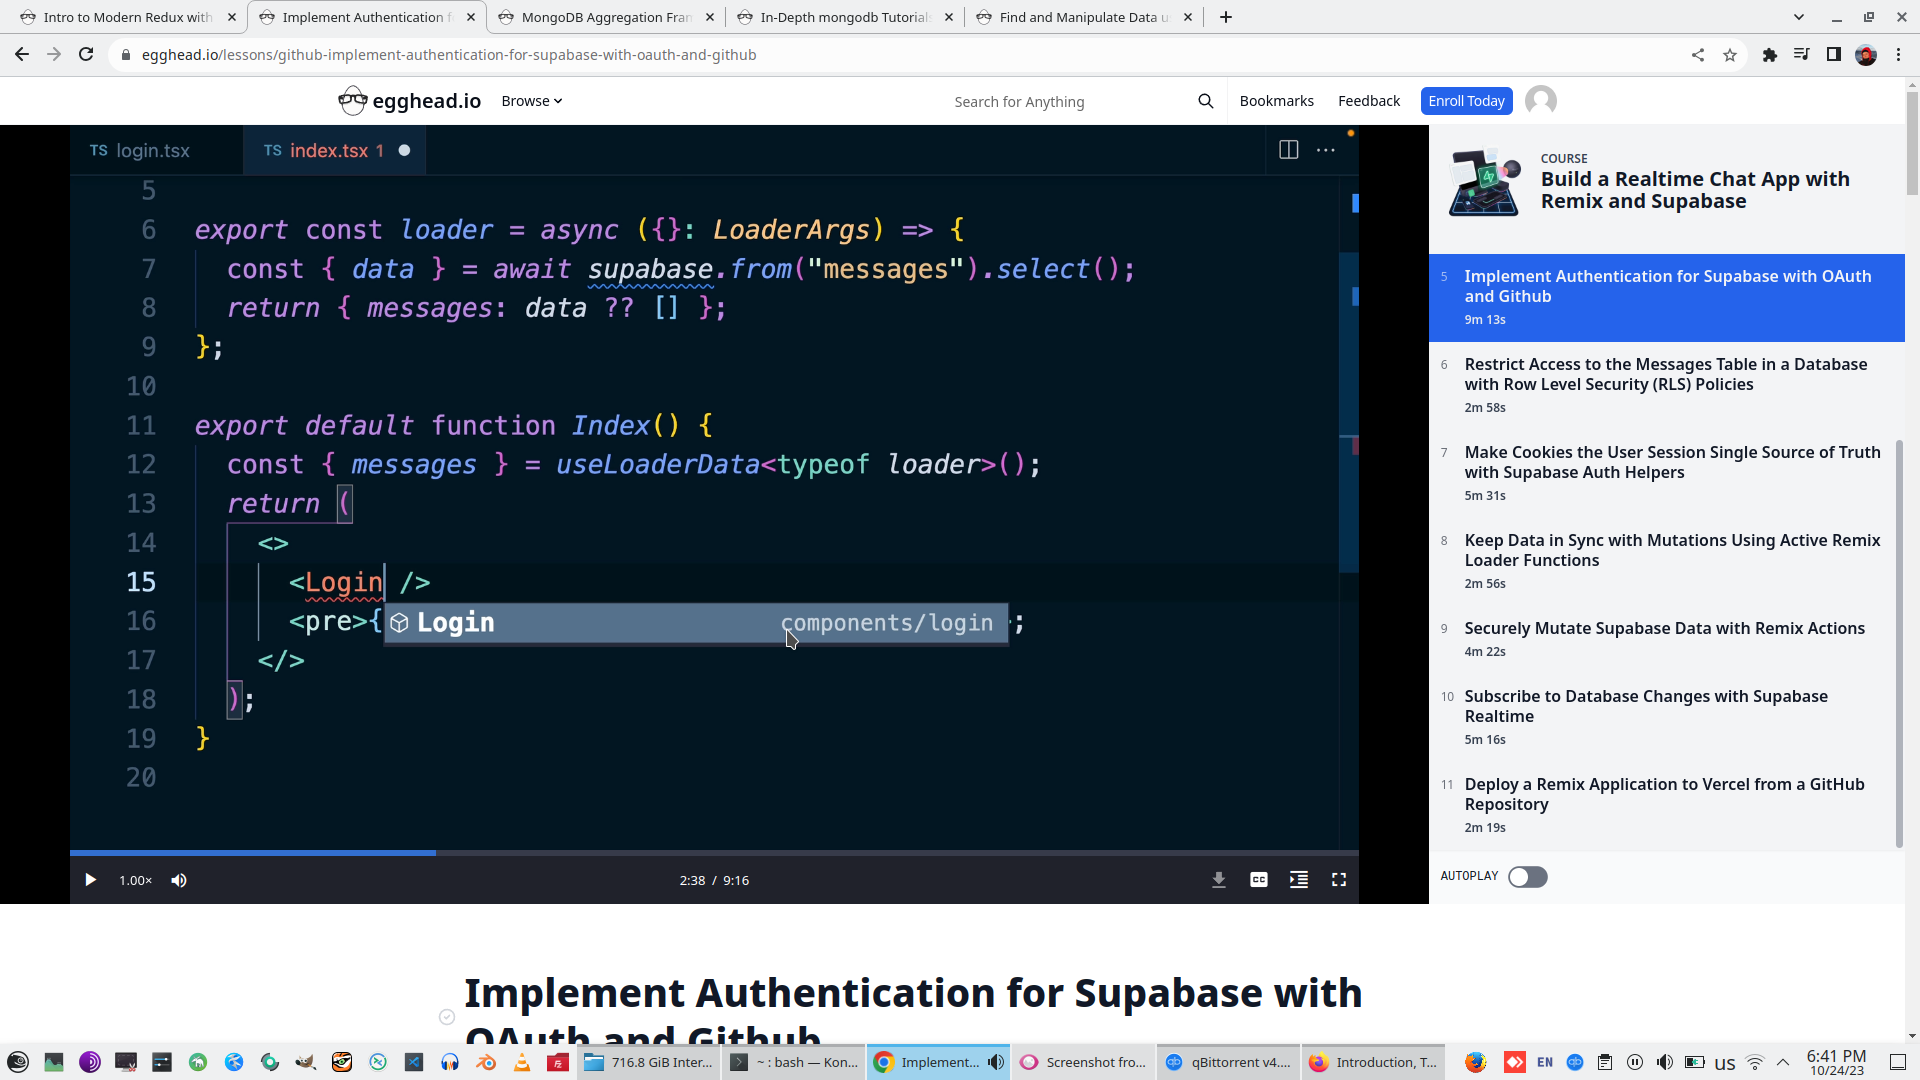
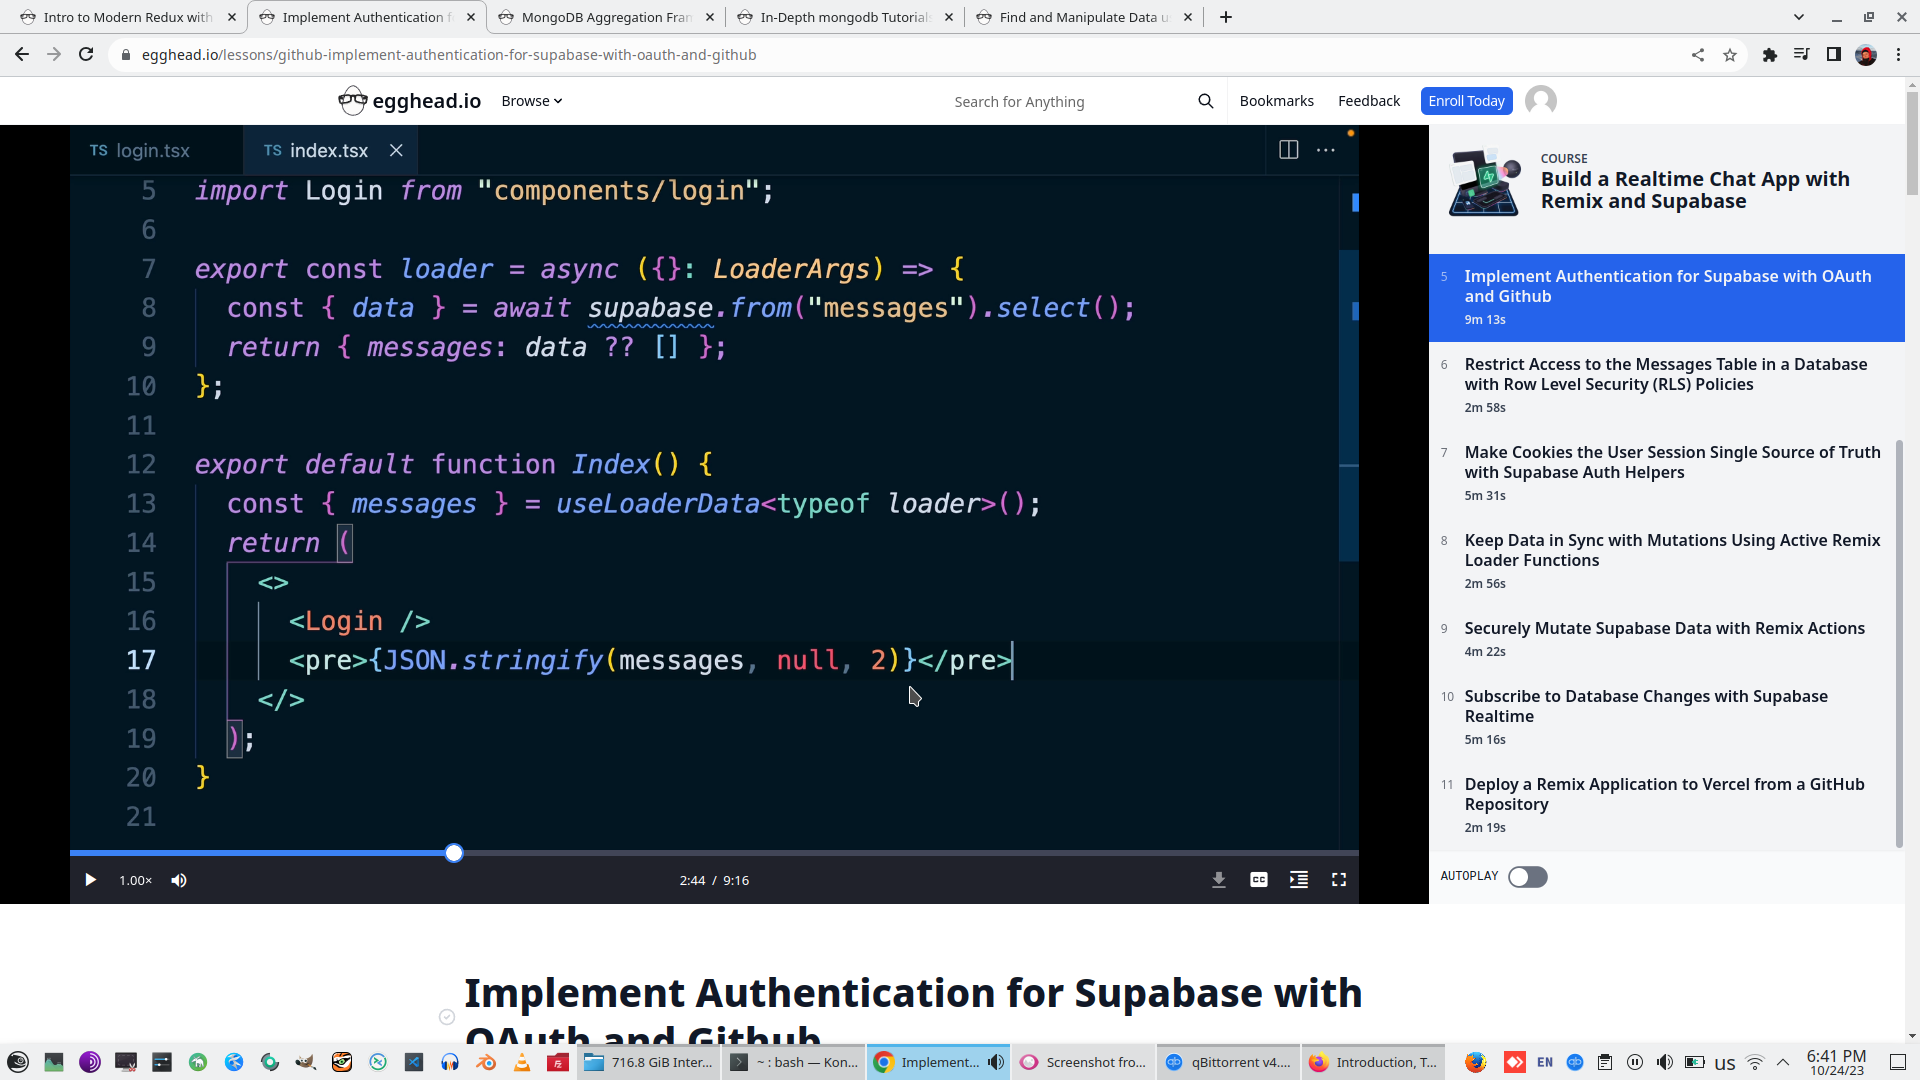
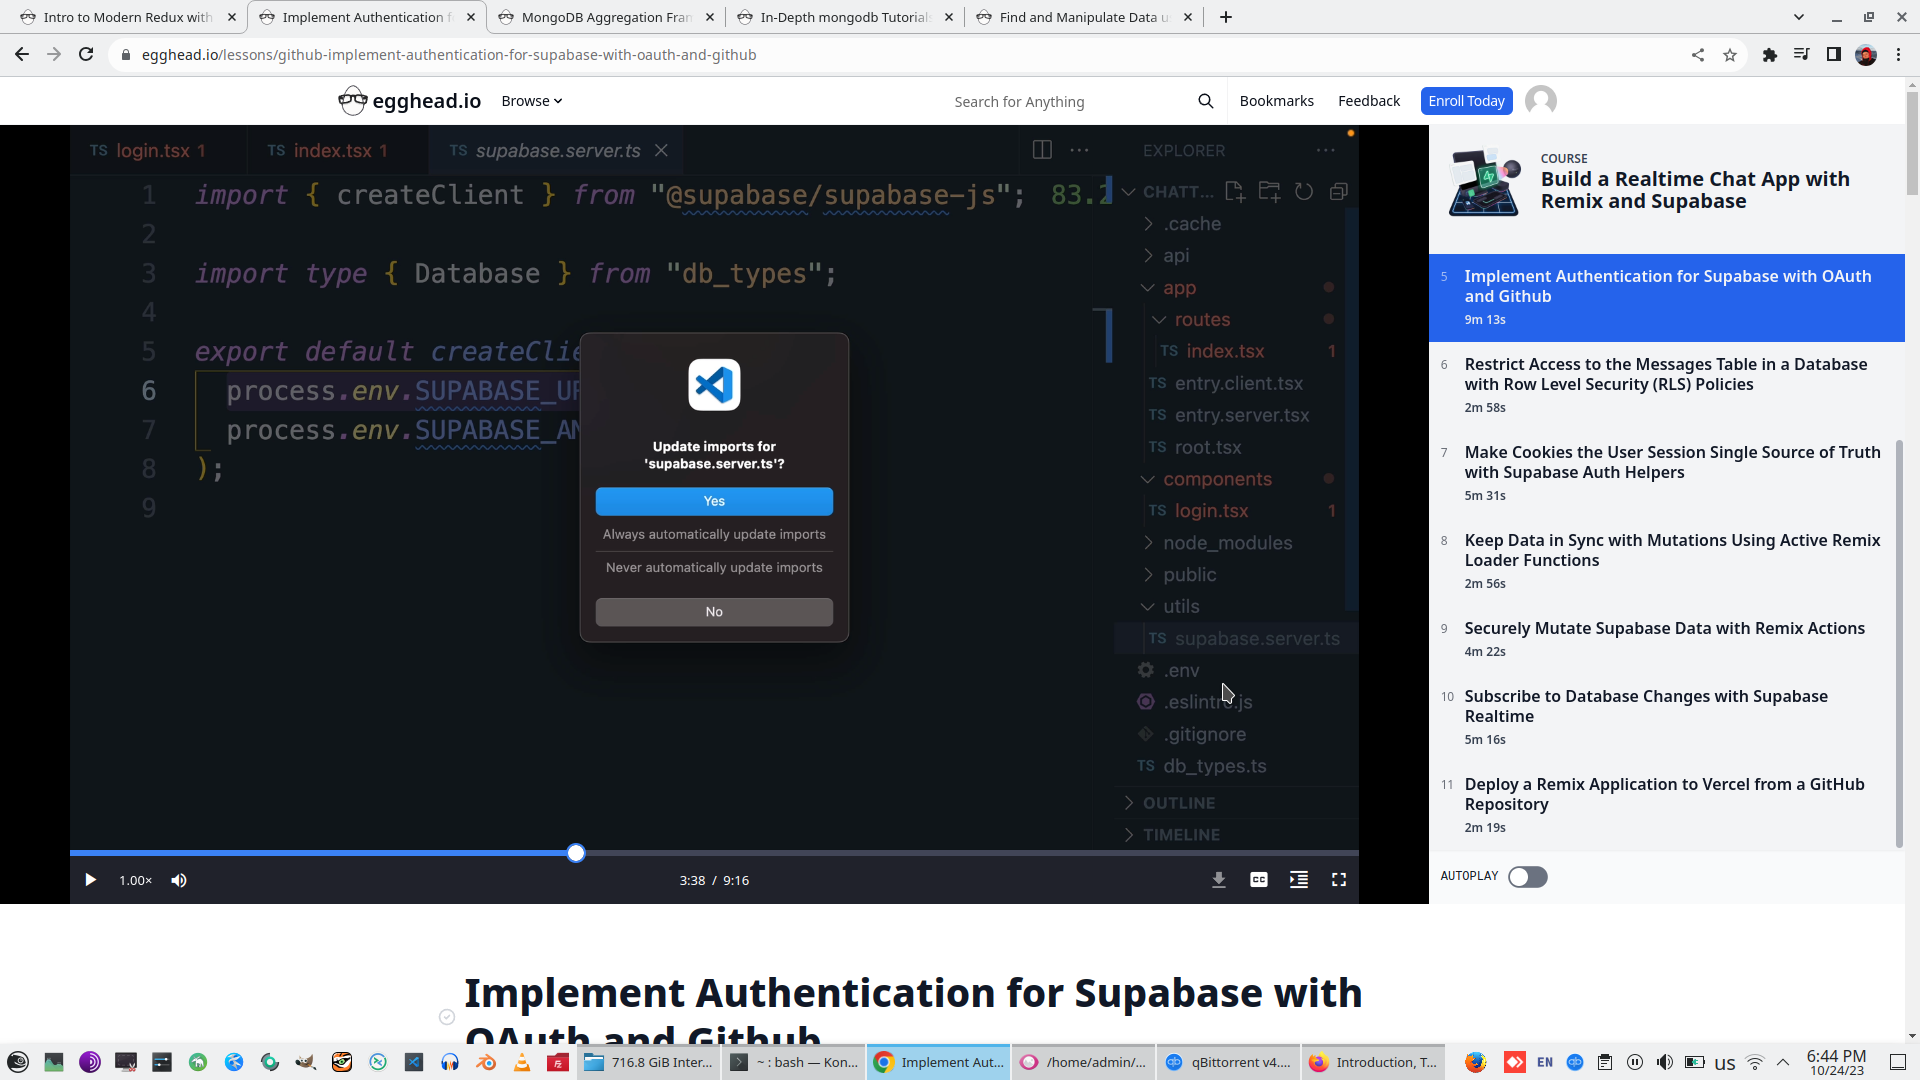
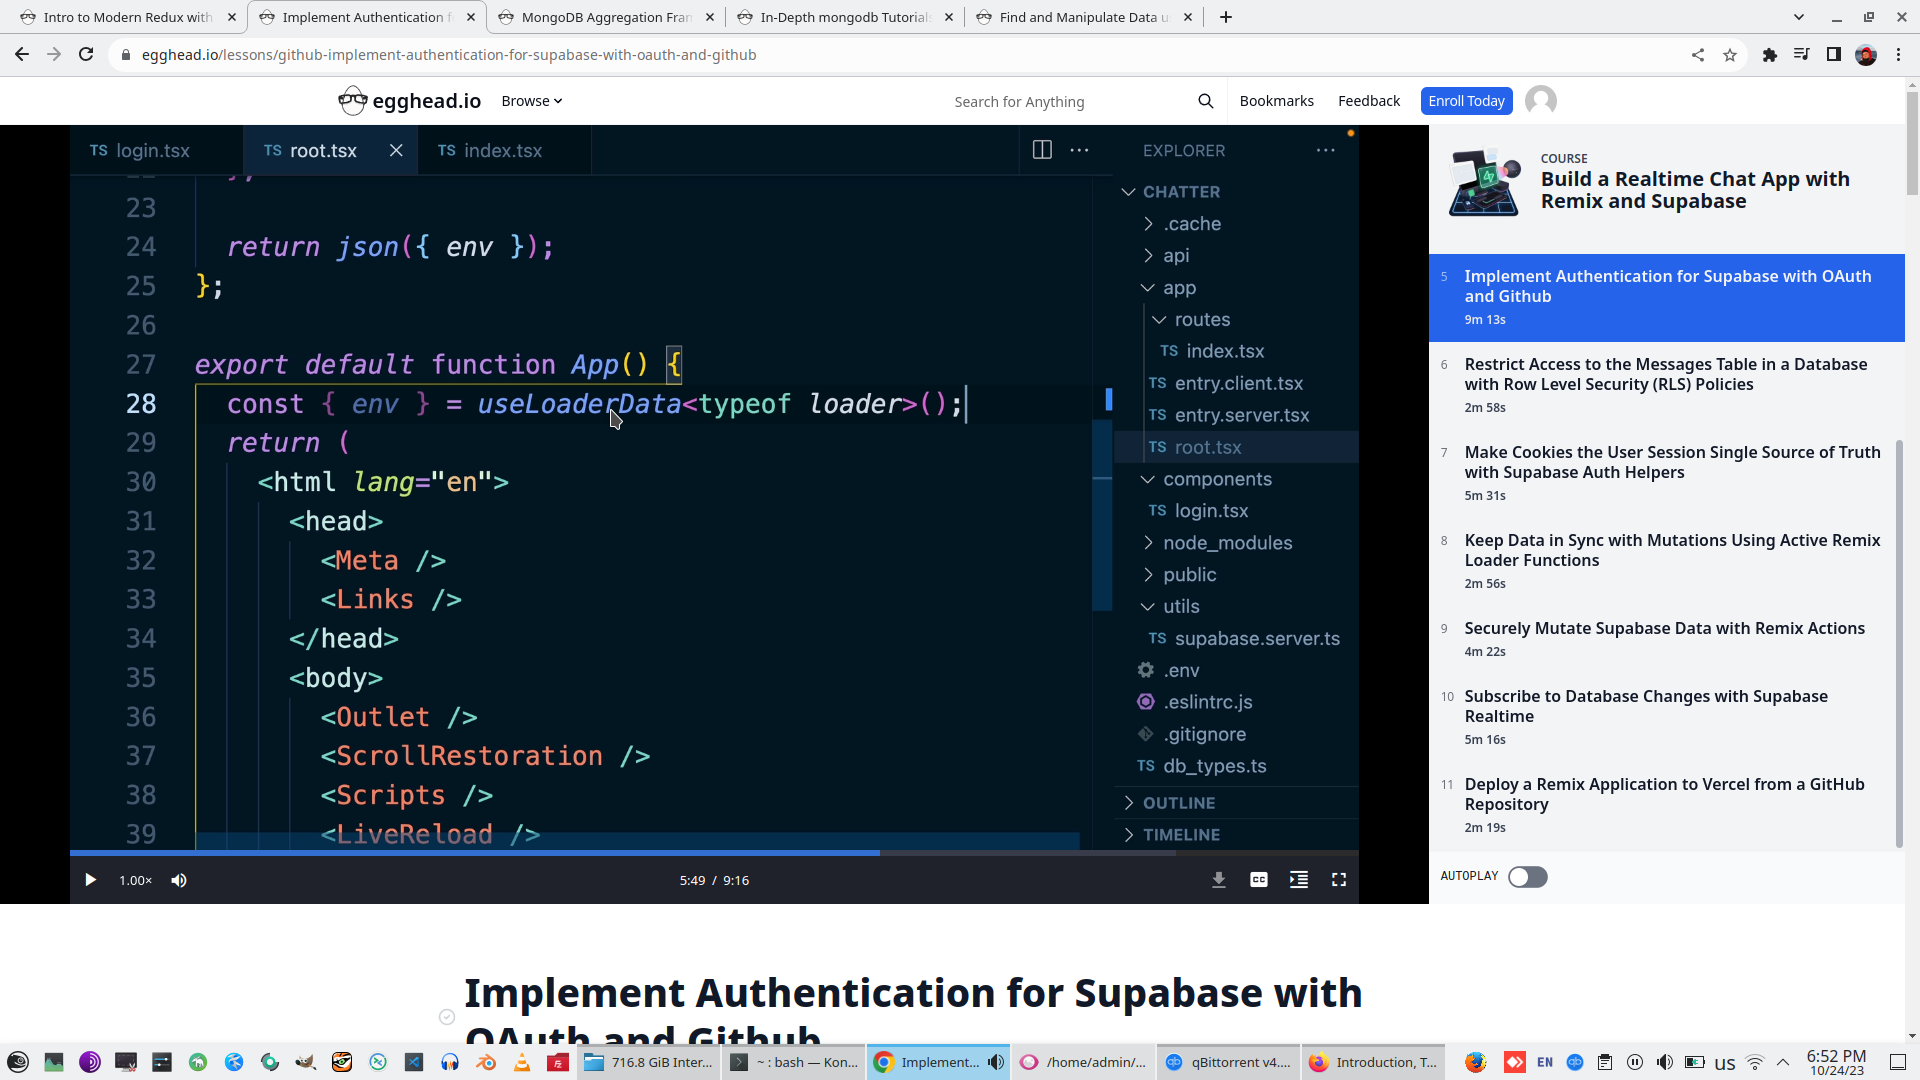
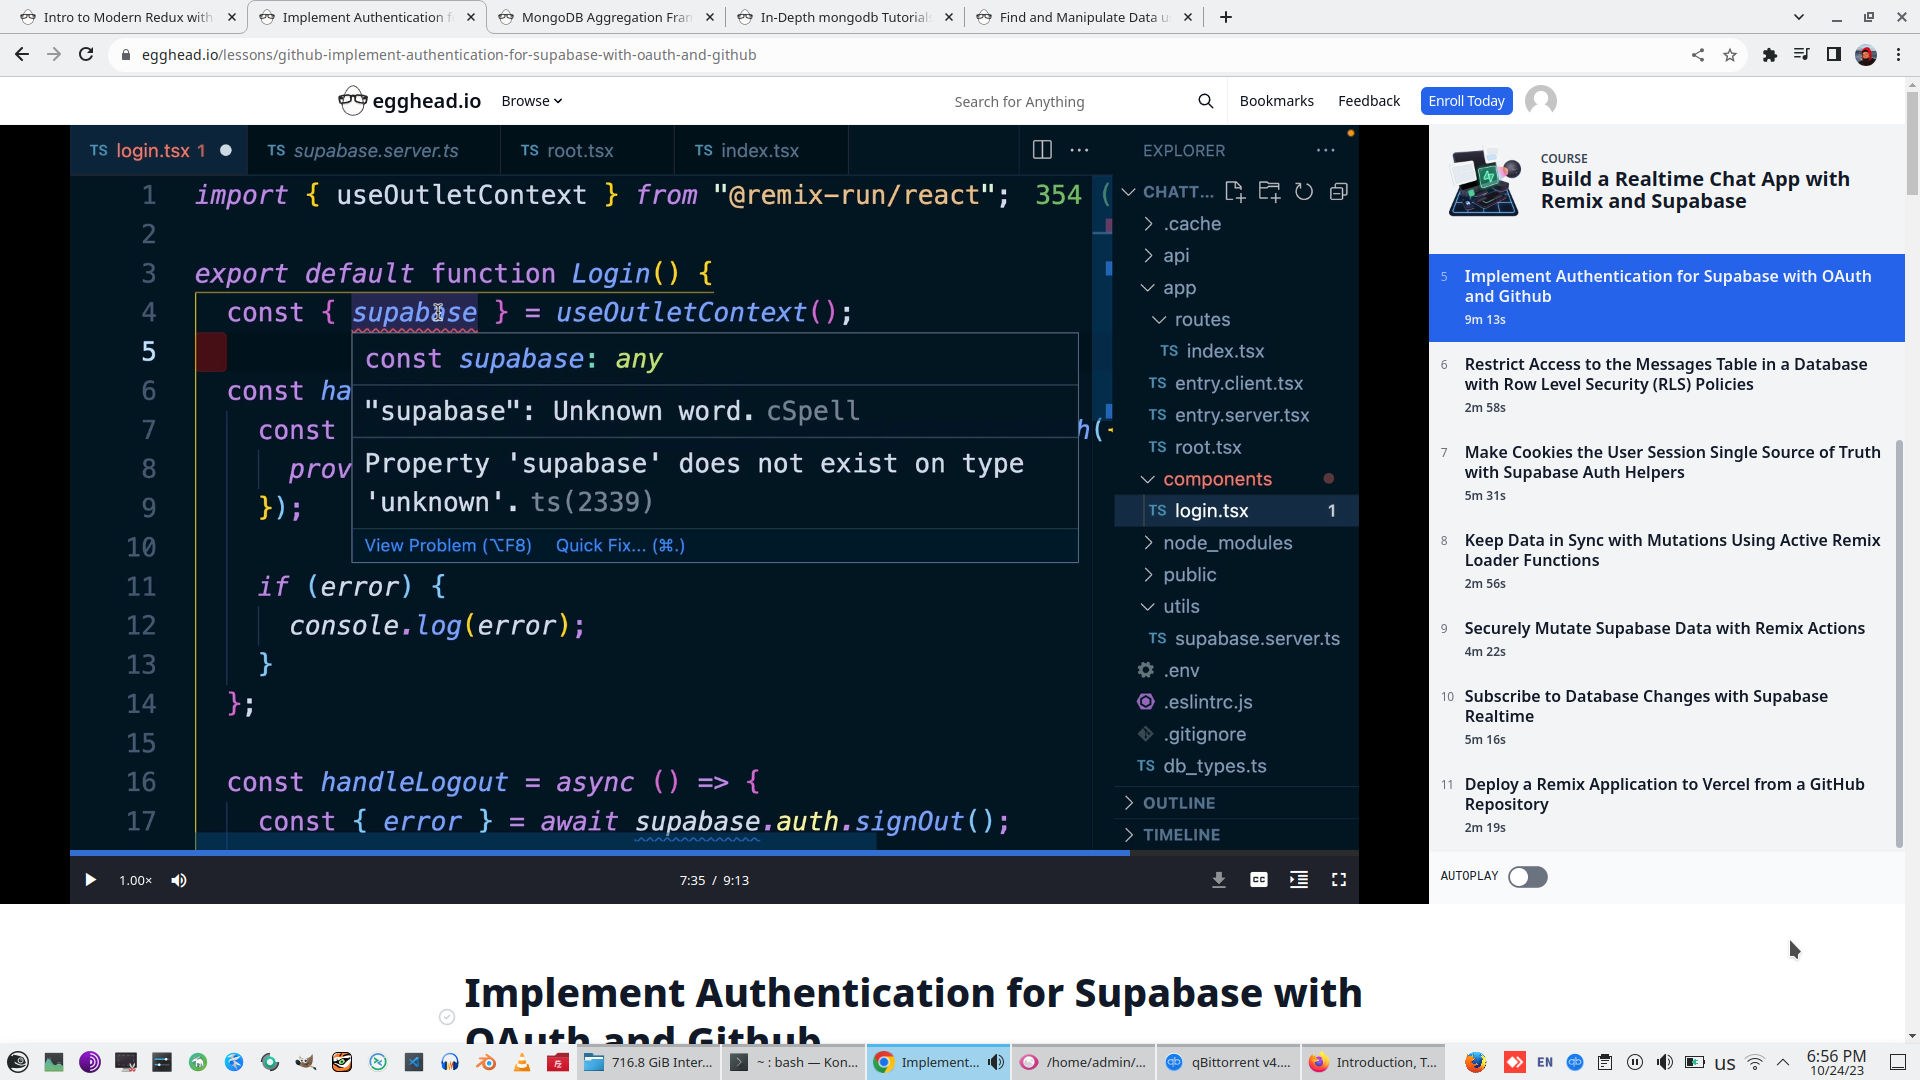
Check login as Login component appears on Index page and Look to trouble - supabase process is absent (process.env.supabase on CreateClient module)

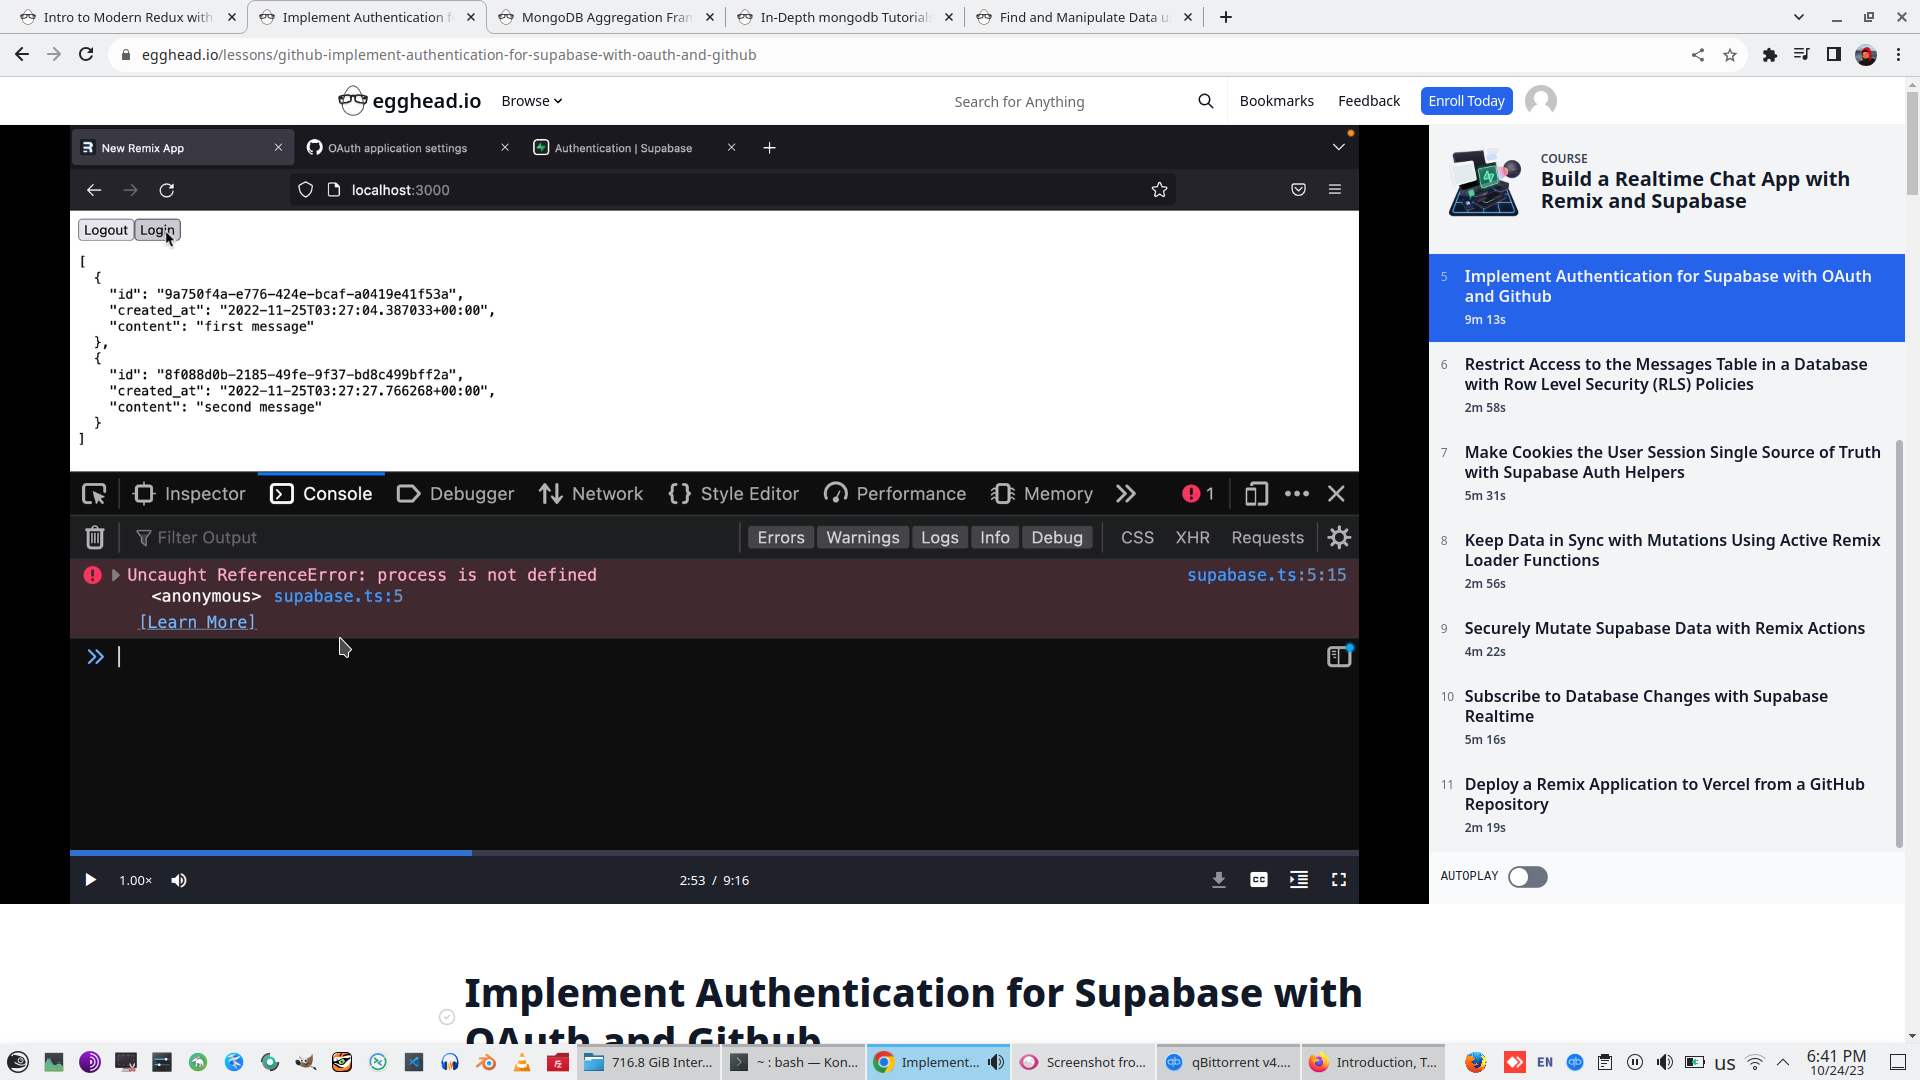
Thes mean we can not connected to supabase and we need to update supabase secrets
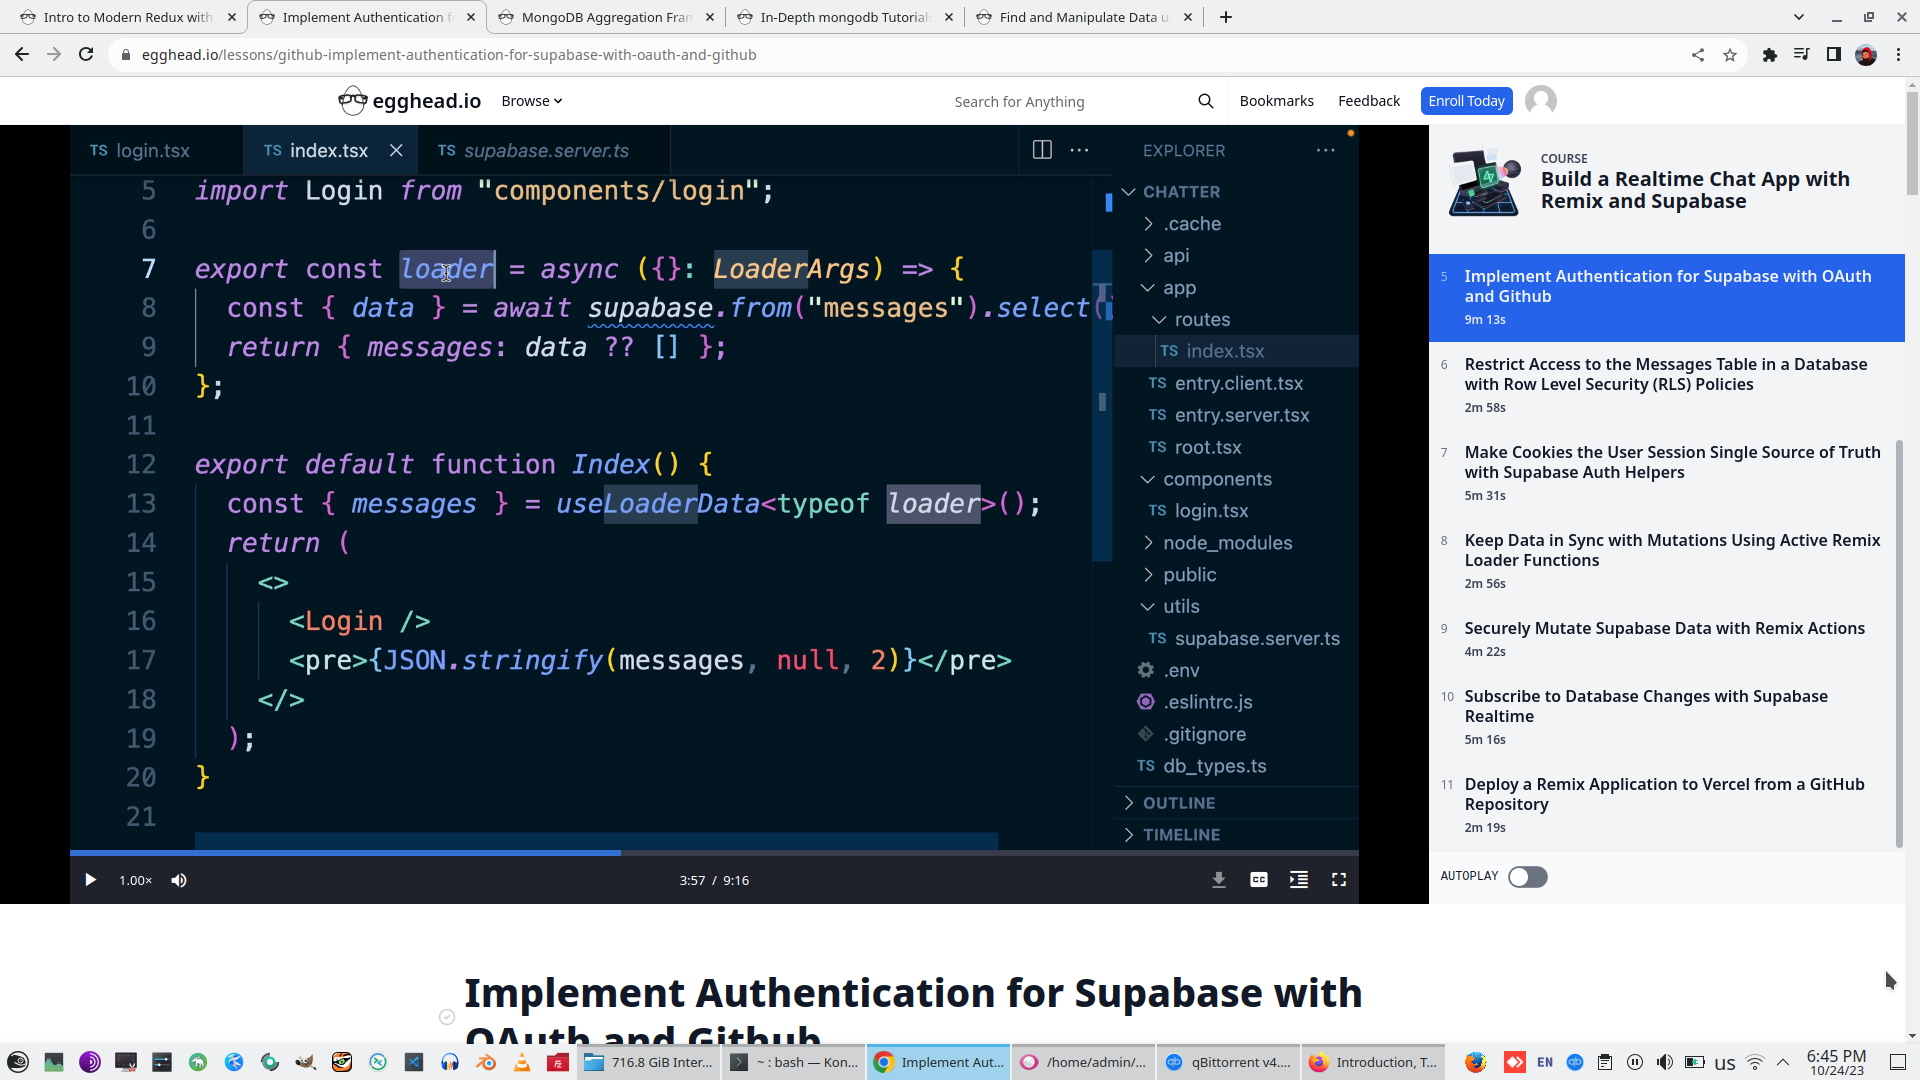
Import functions from Remix-run/React and use it as component on React page

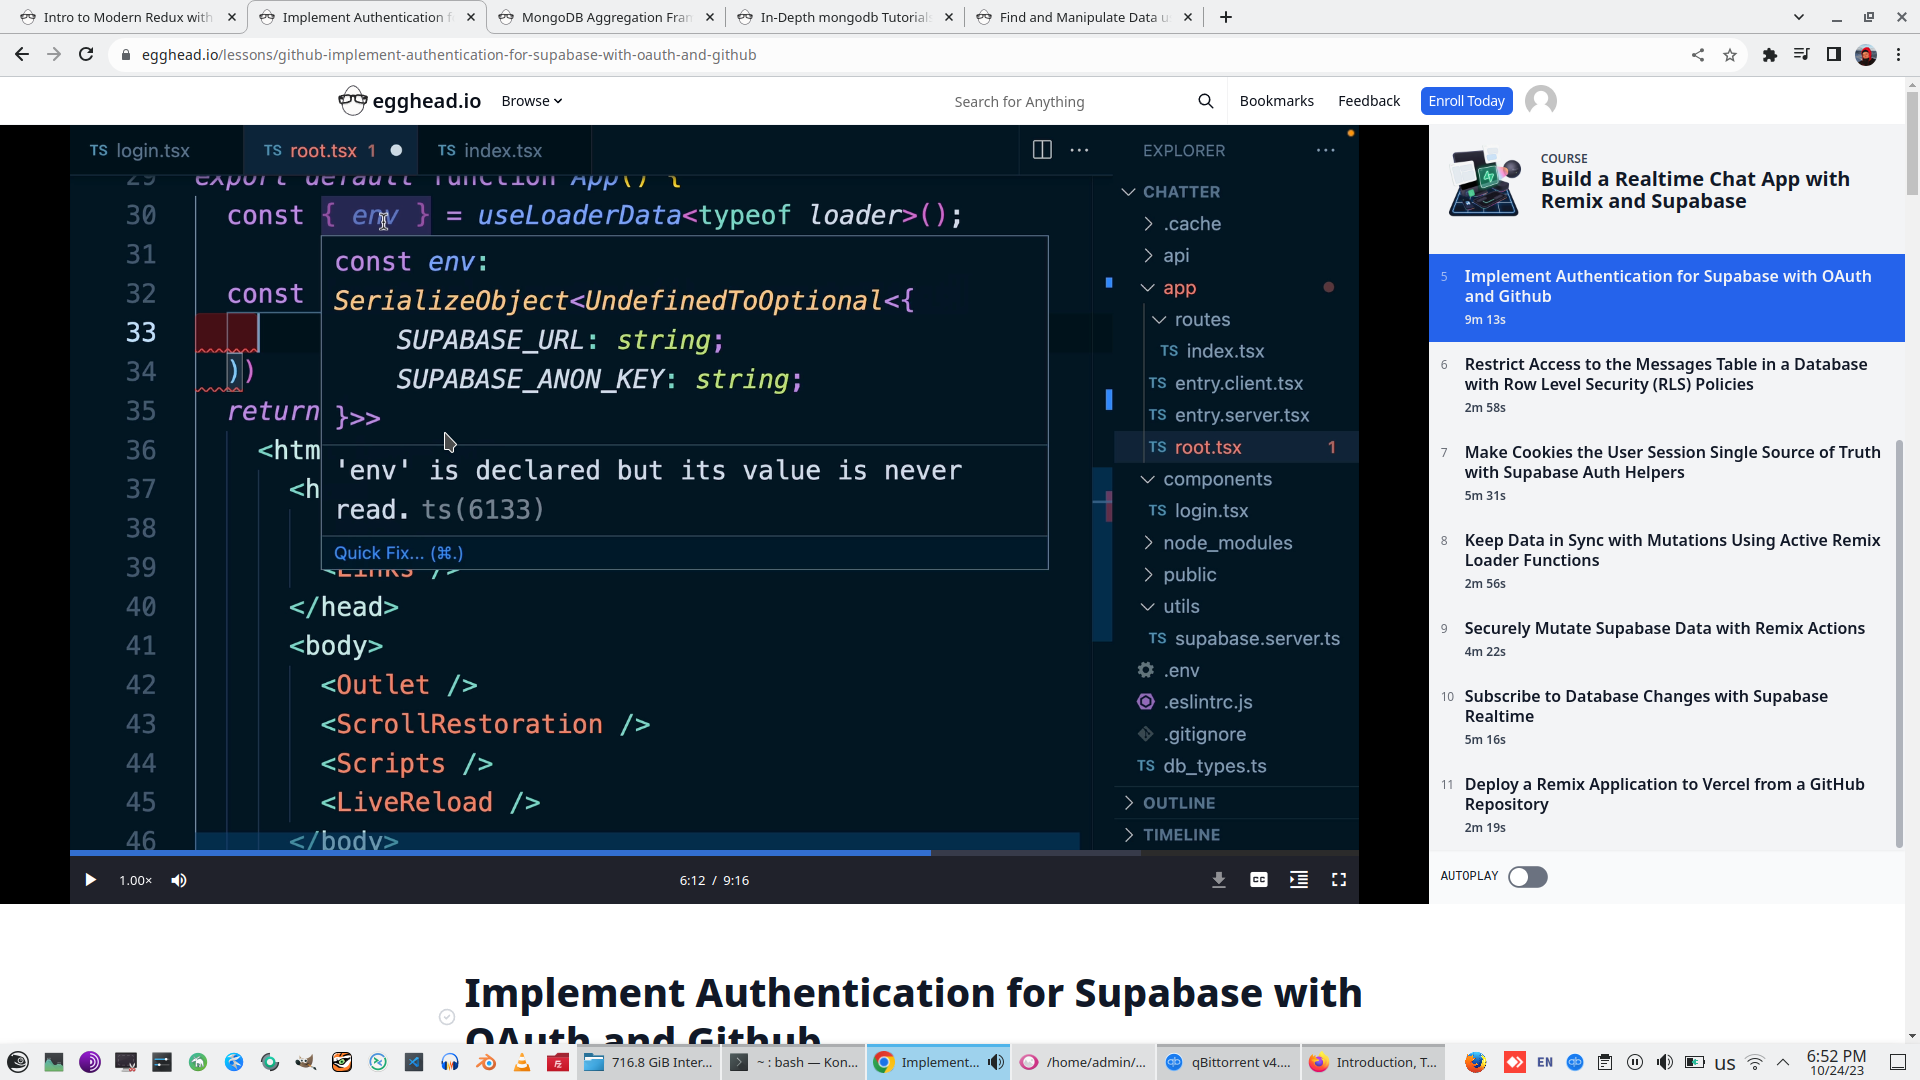
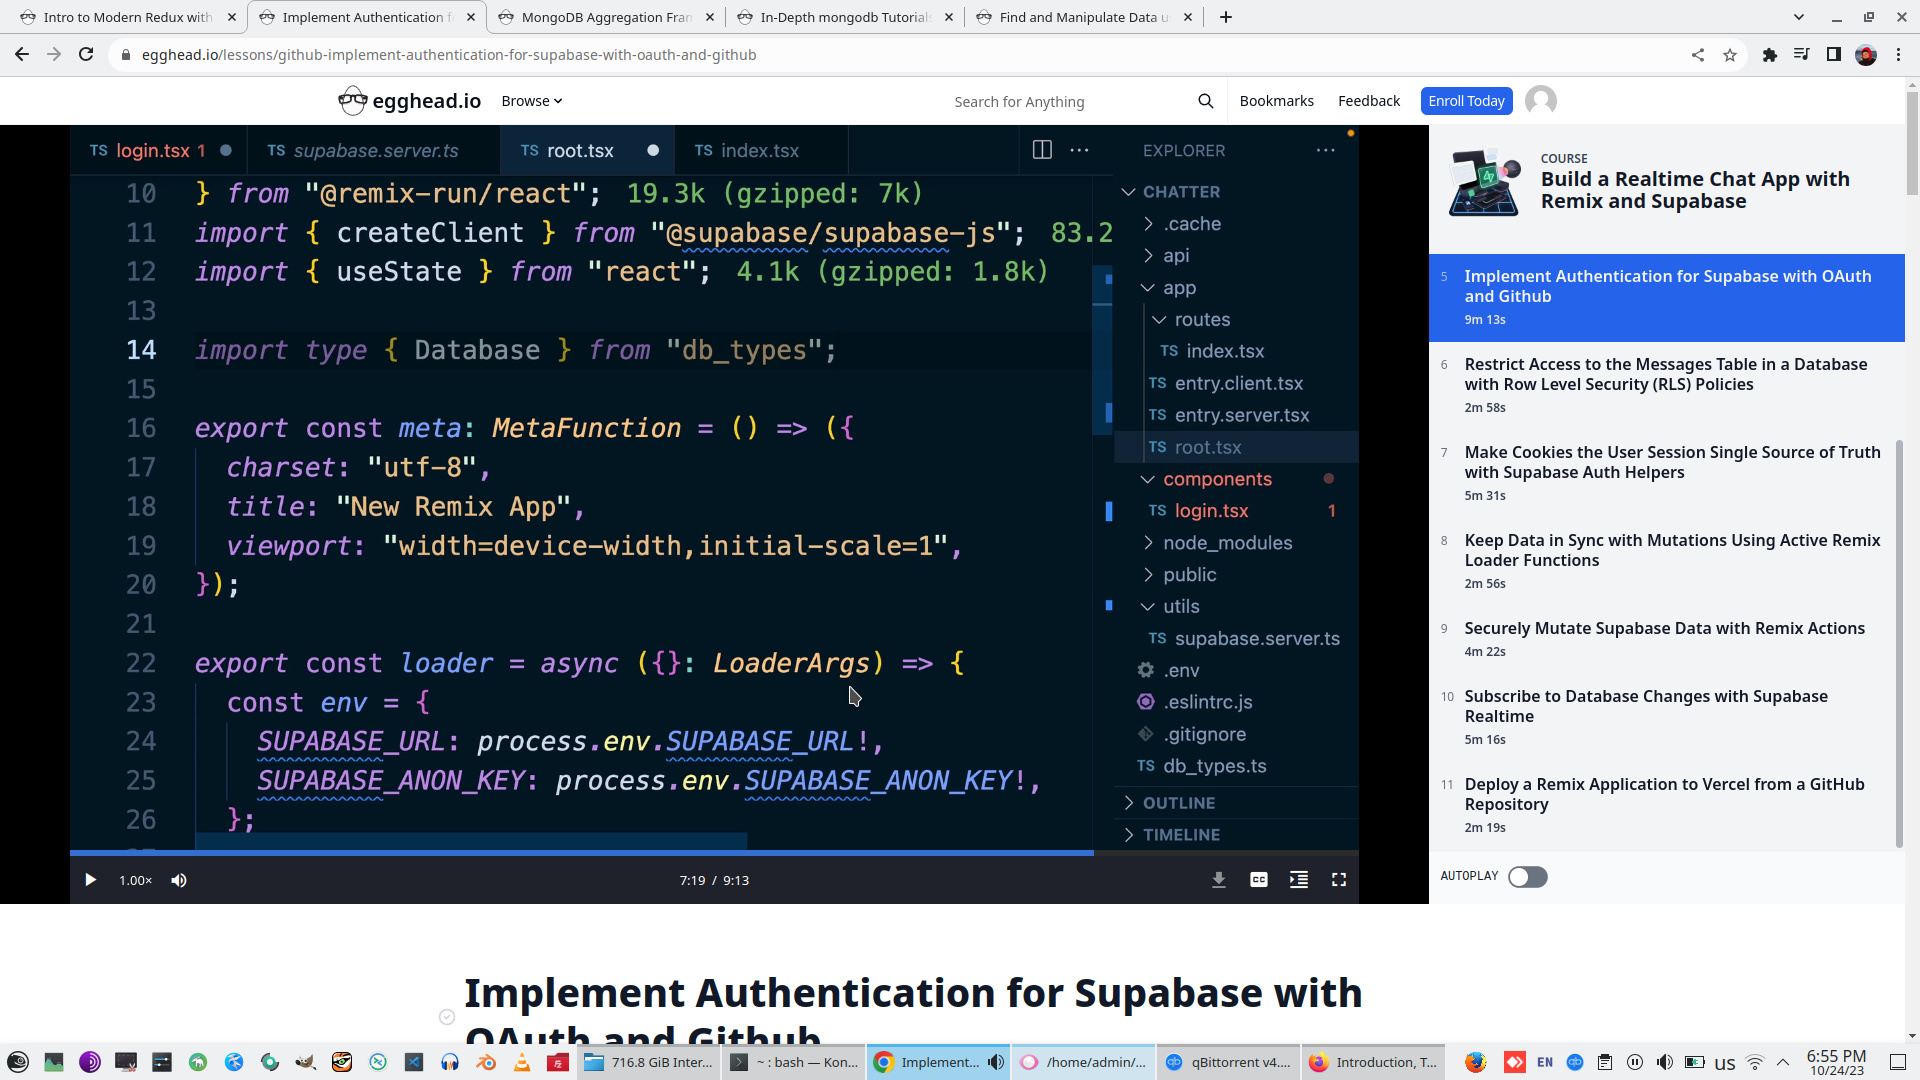
Rebuild Loader, currently it will contains only environment variable for accessing to Supabase

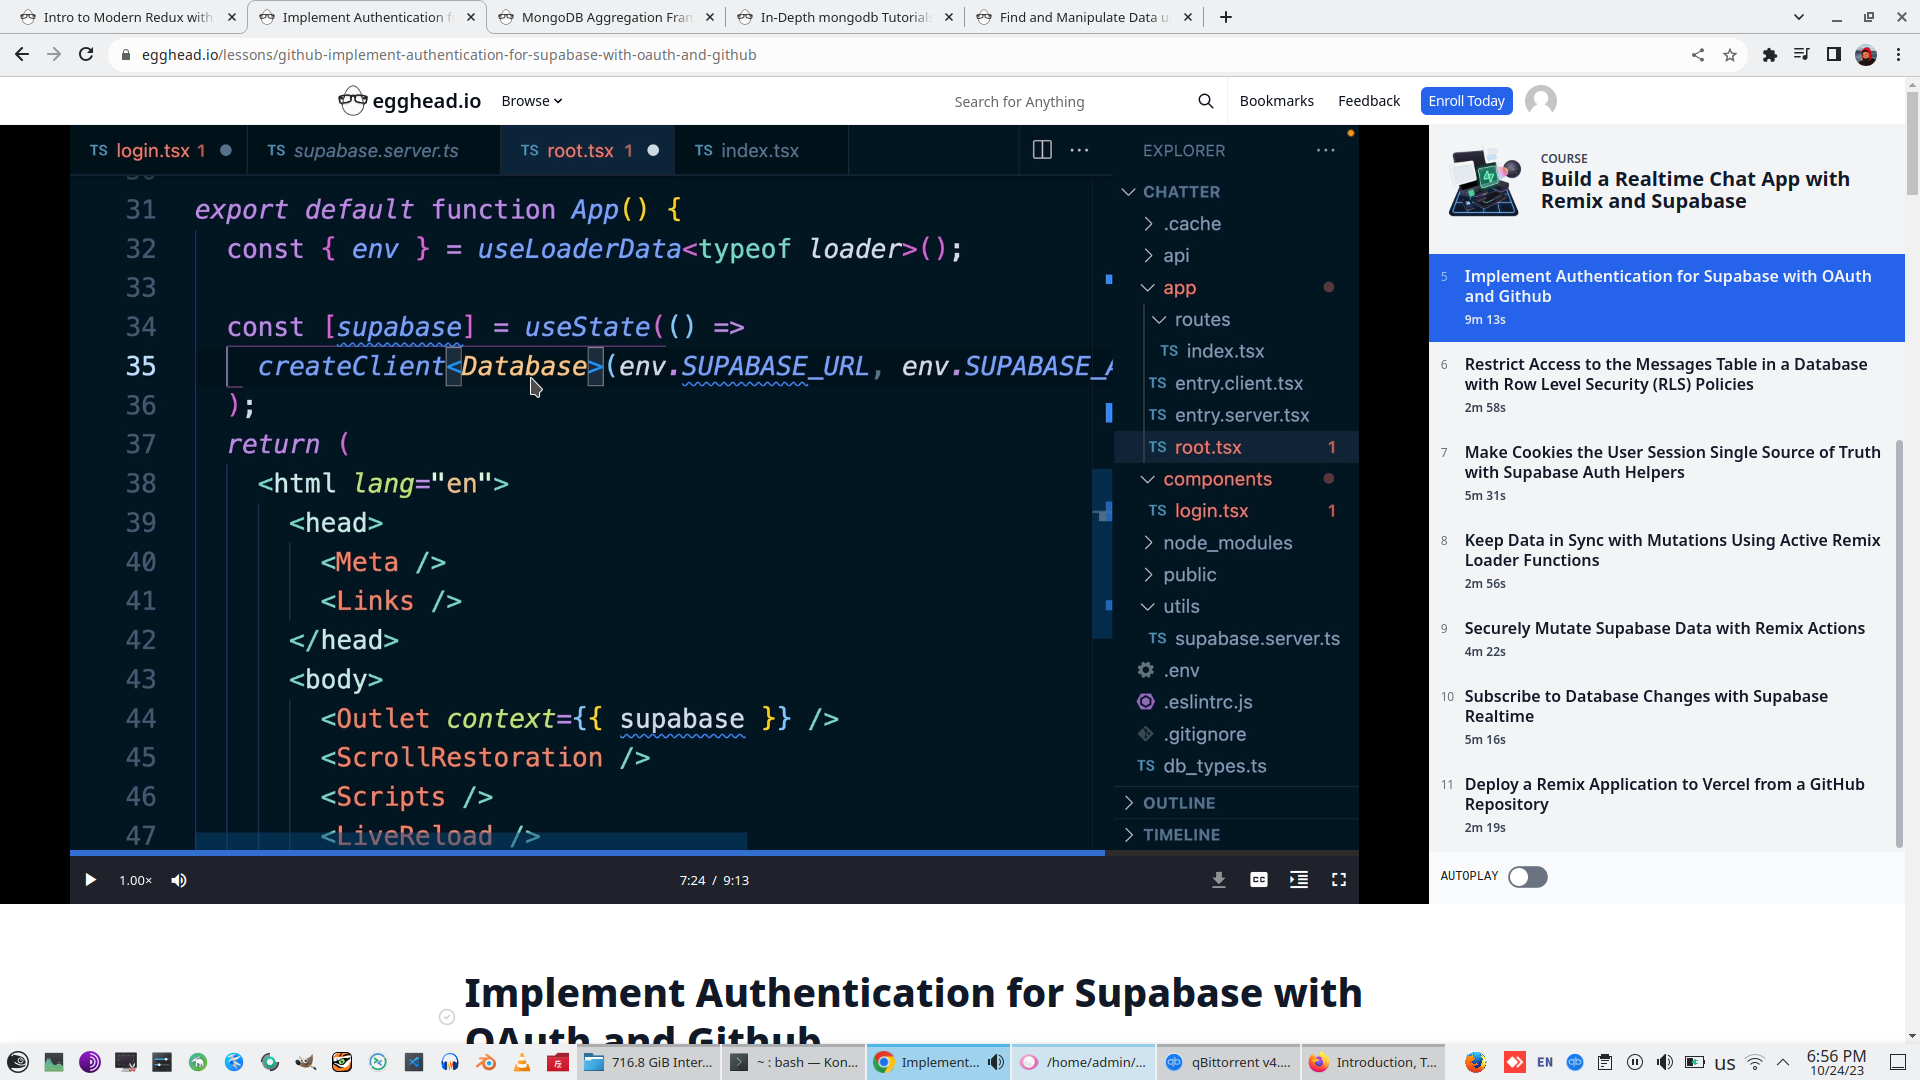
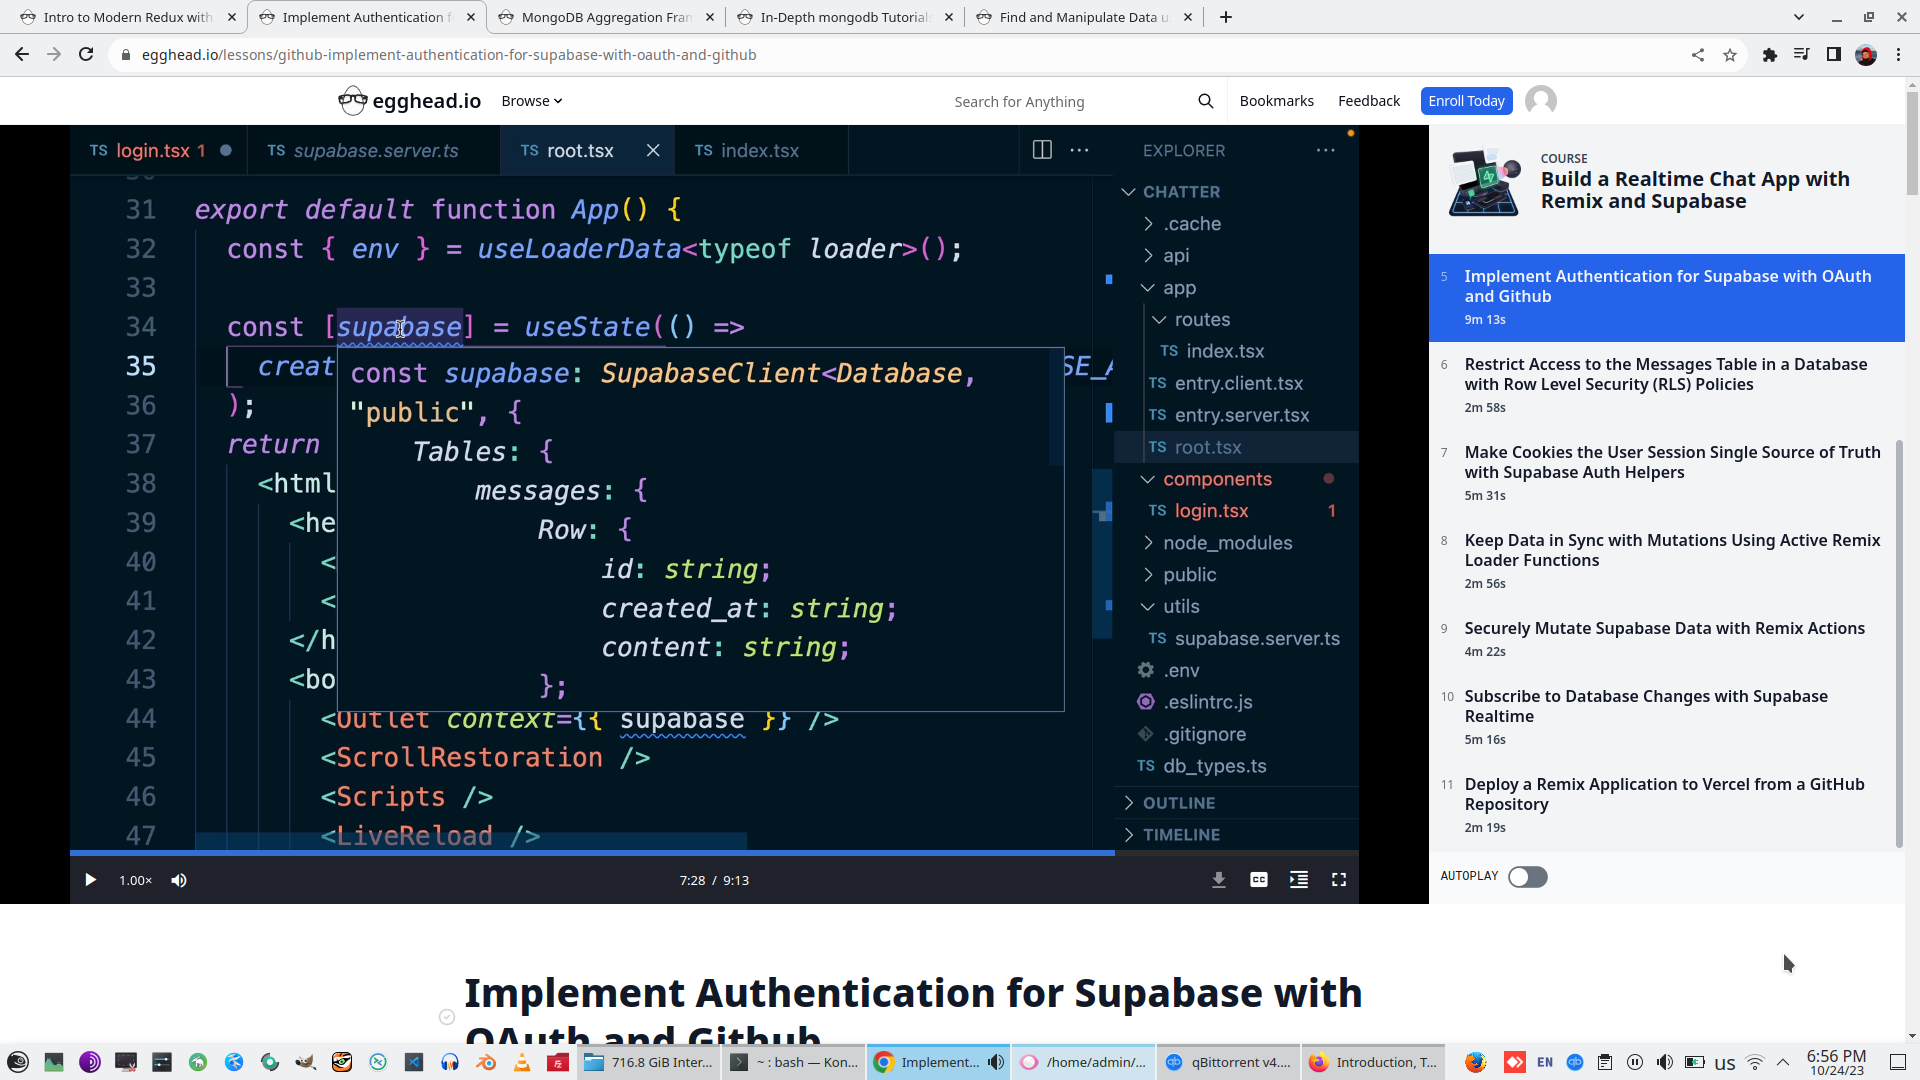
Pass supabase client as router context
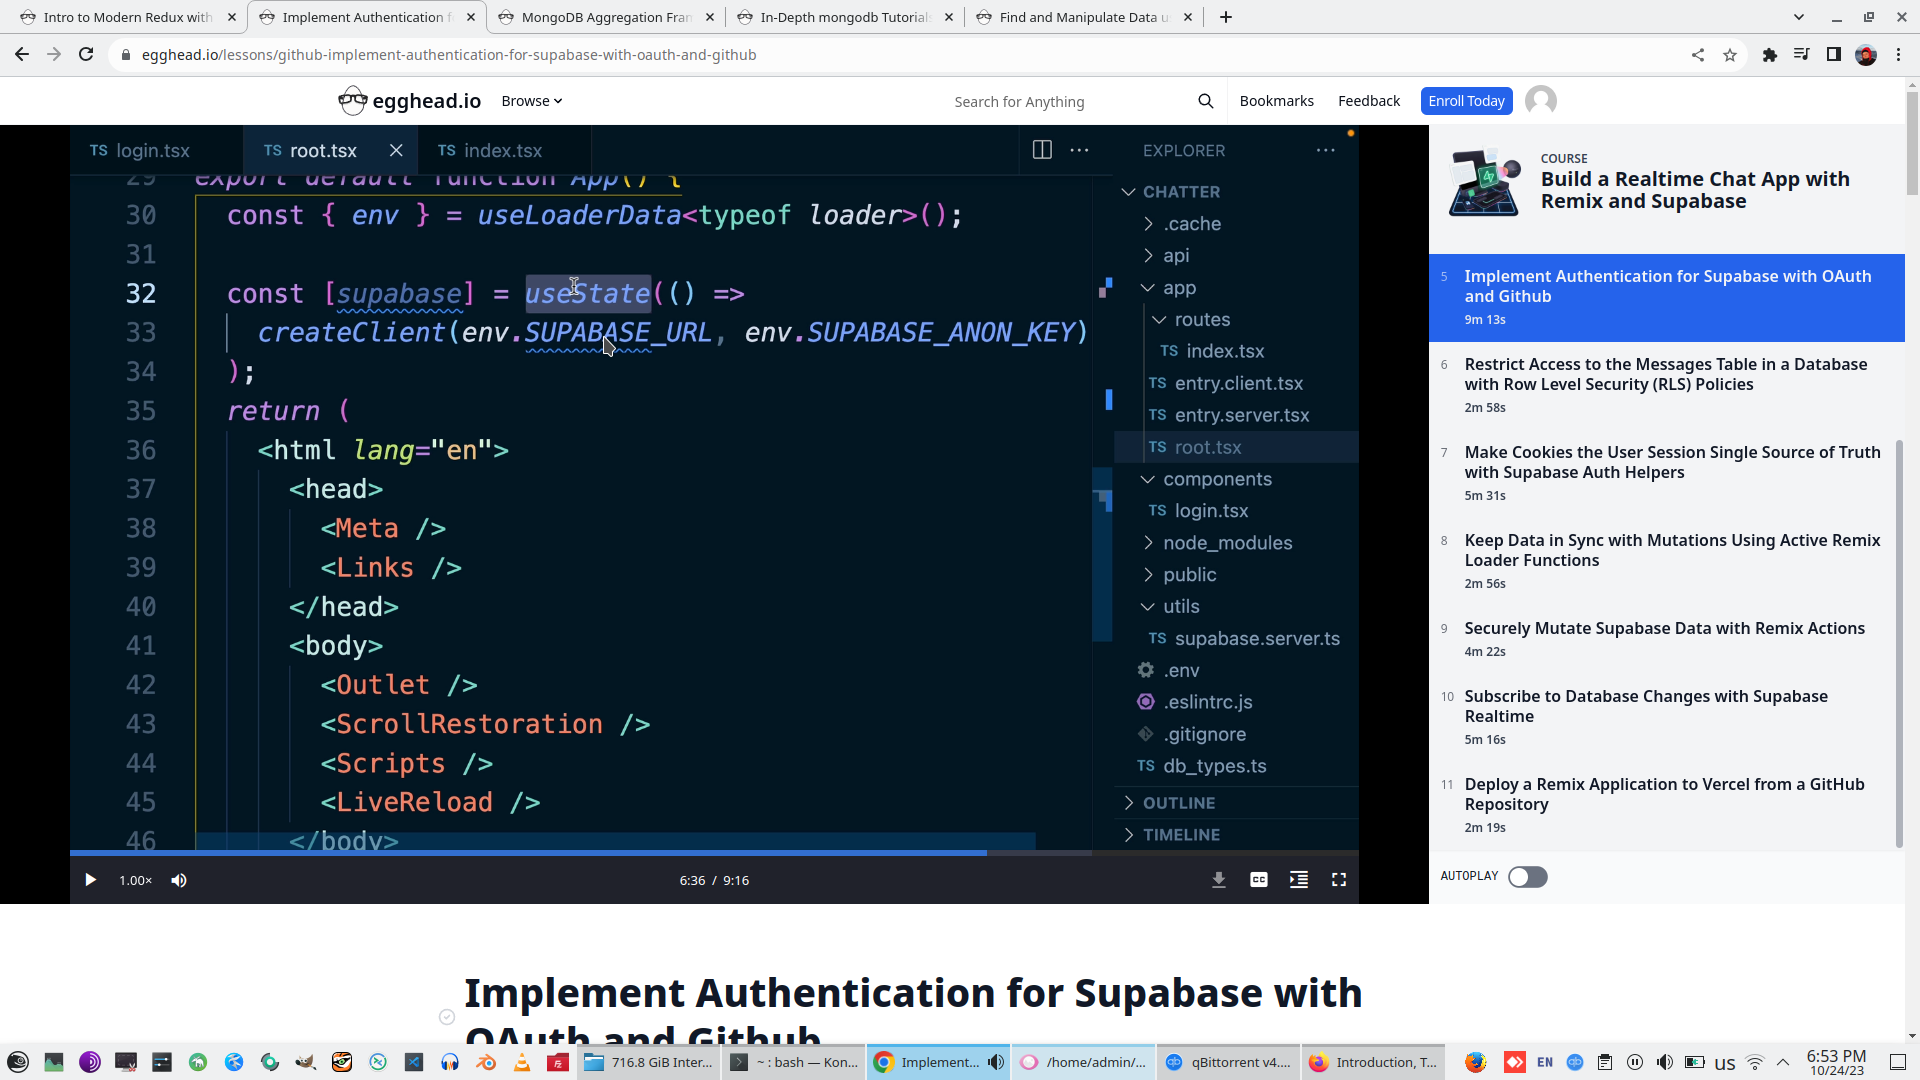

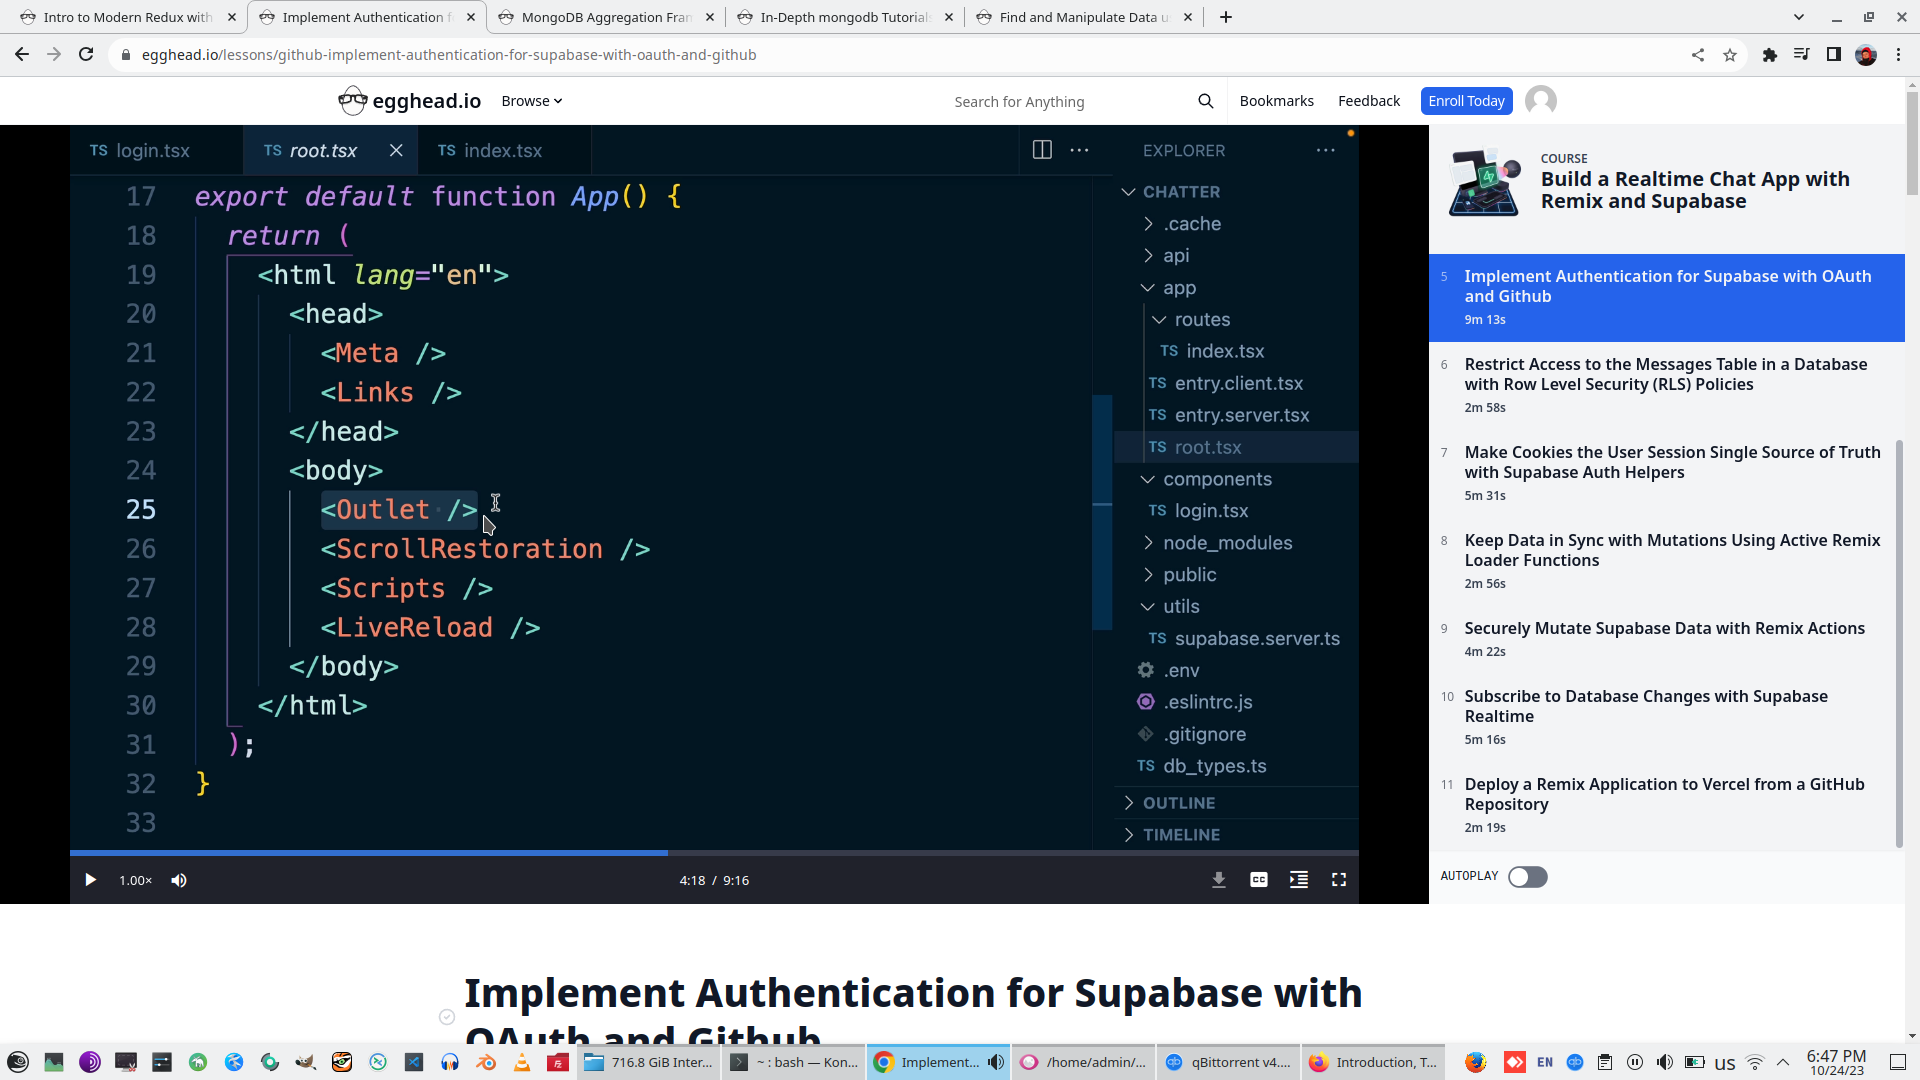
Import db_types and make Supabase client typed on root.tsx.
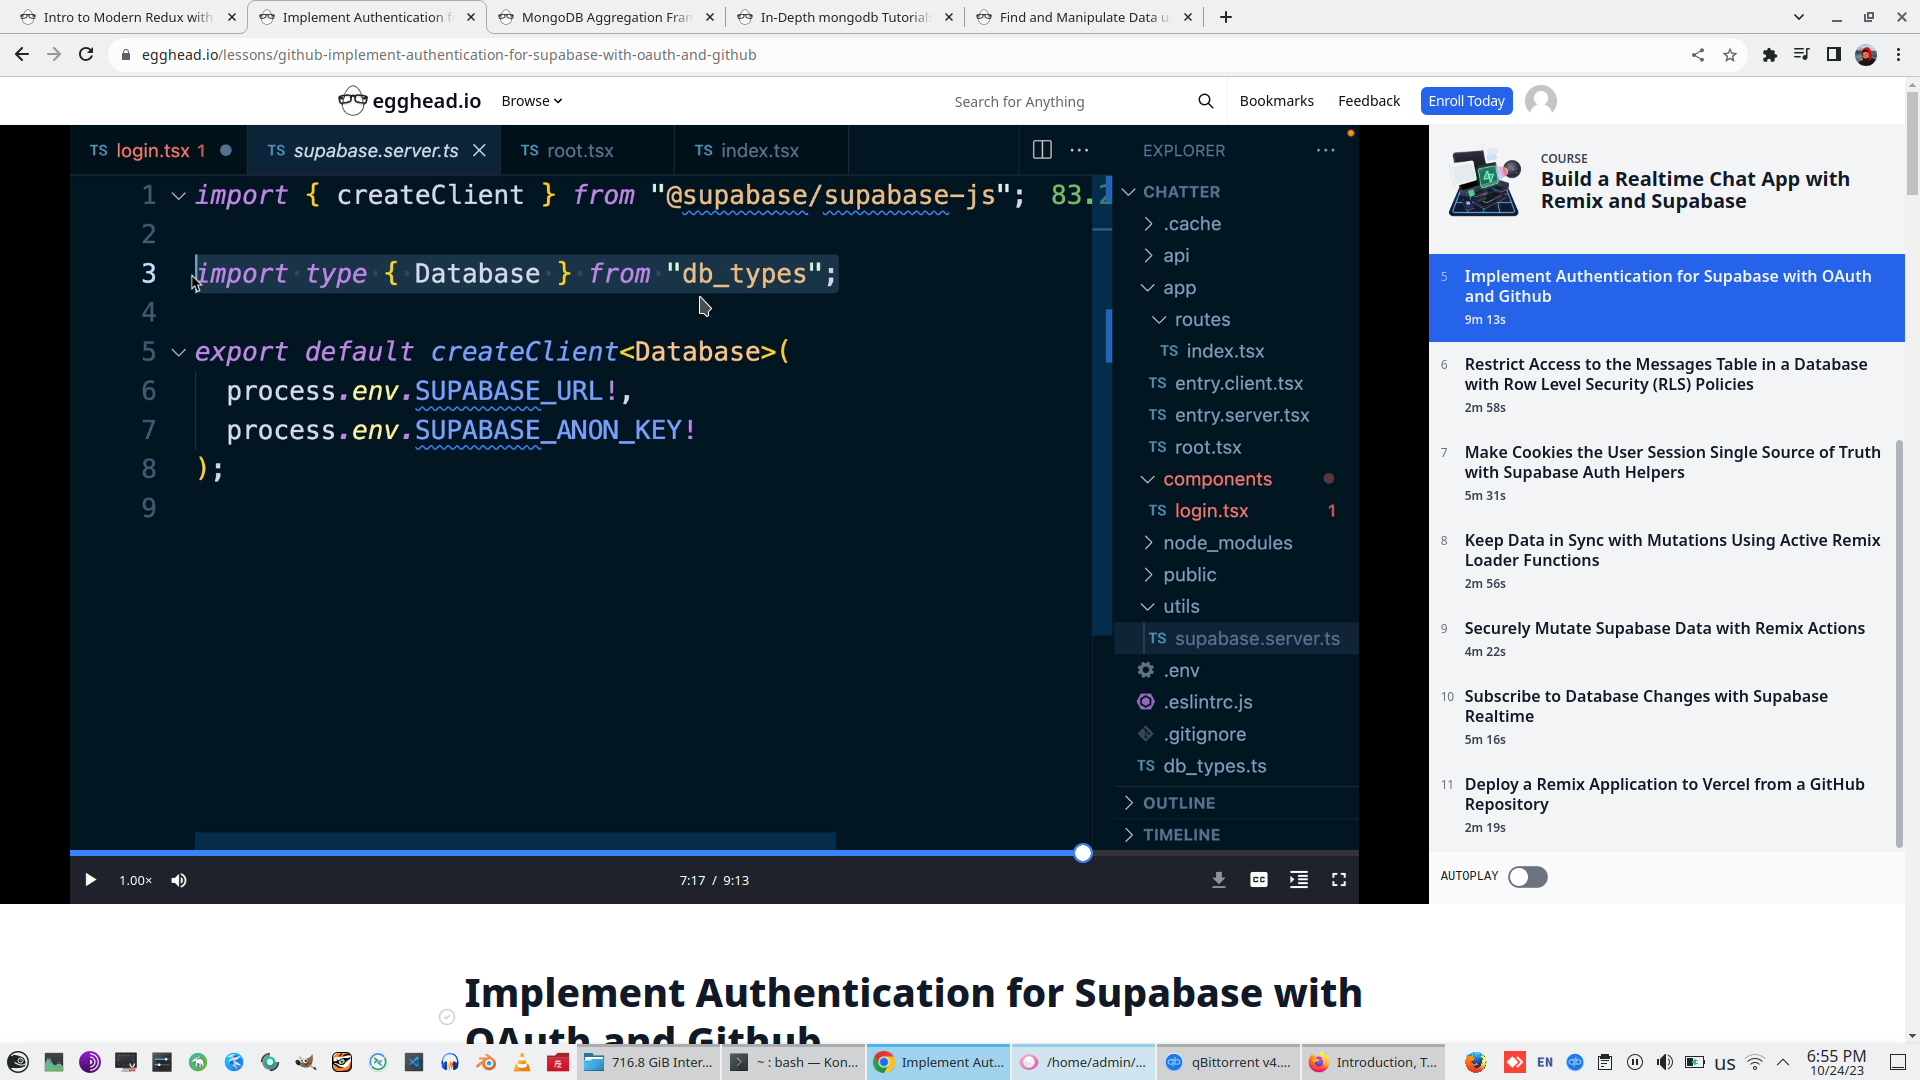
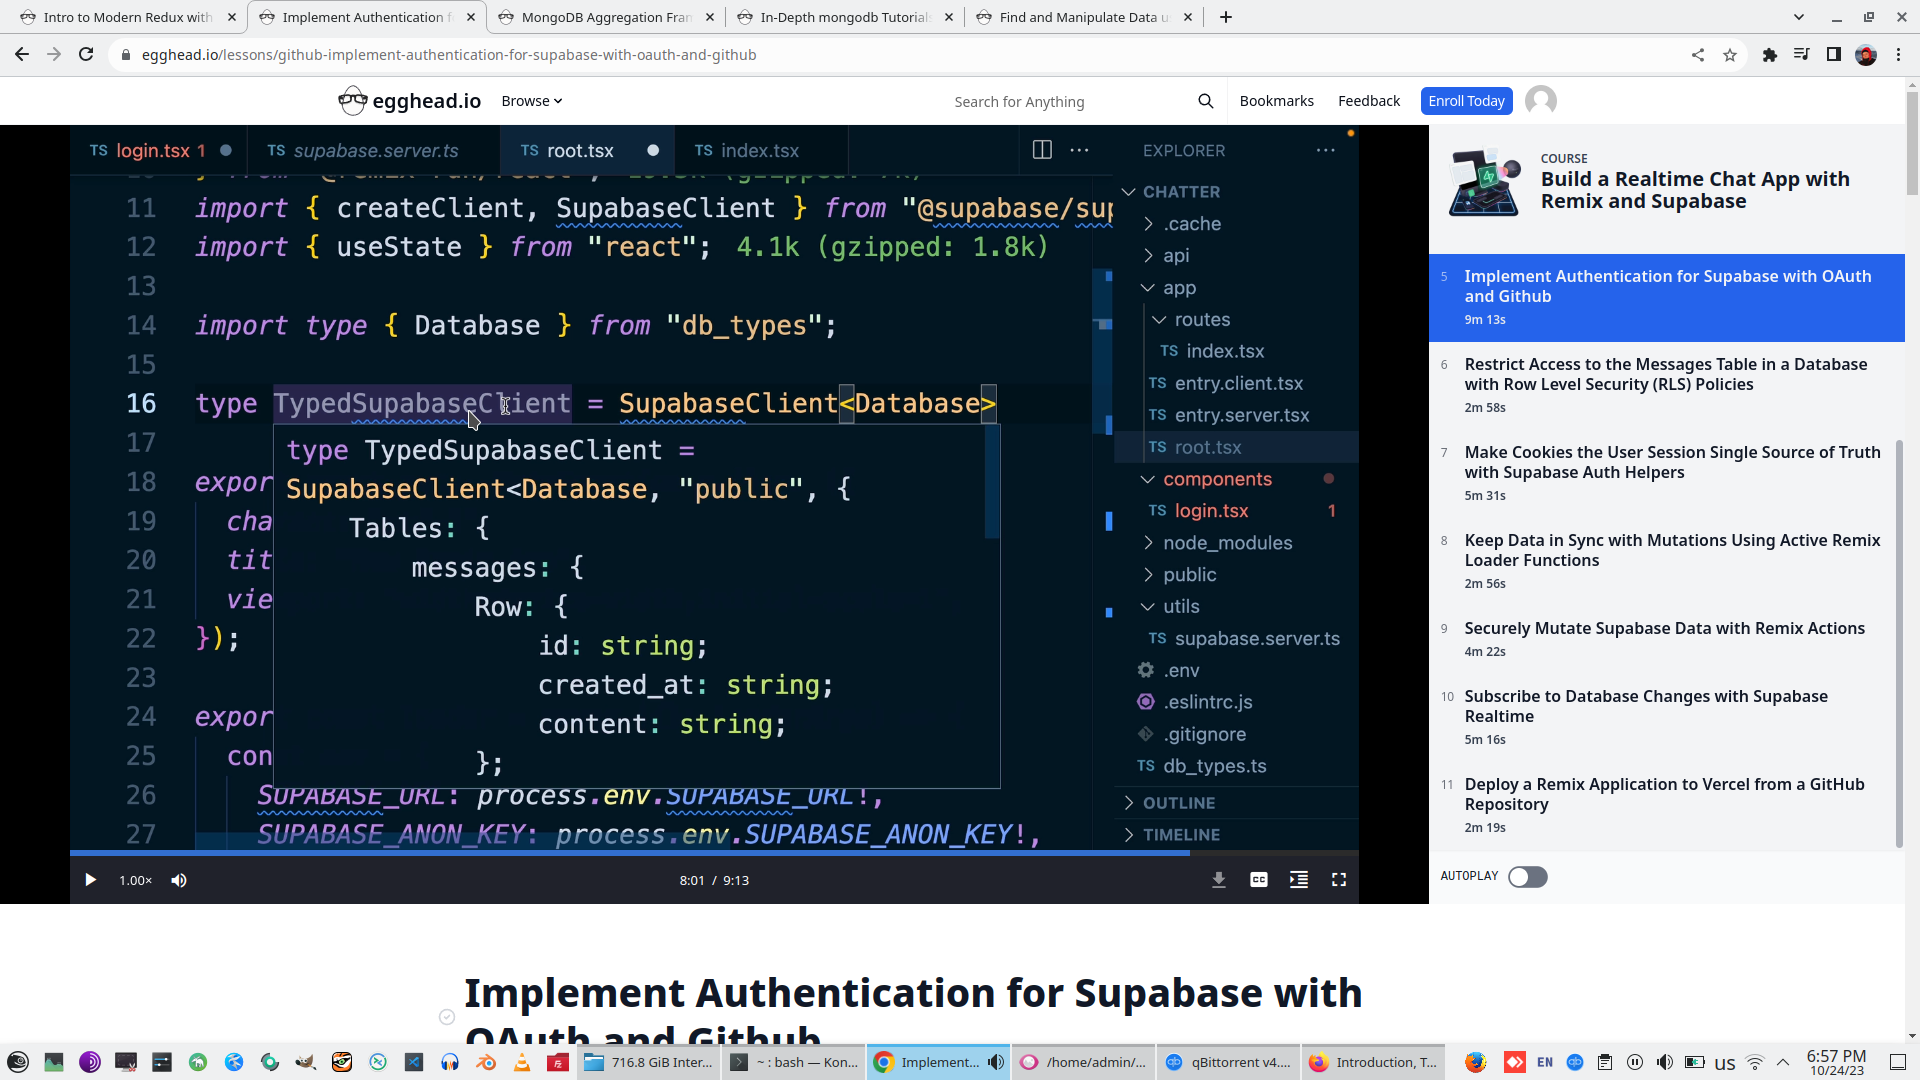
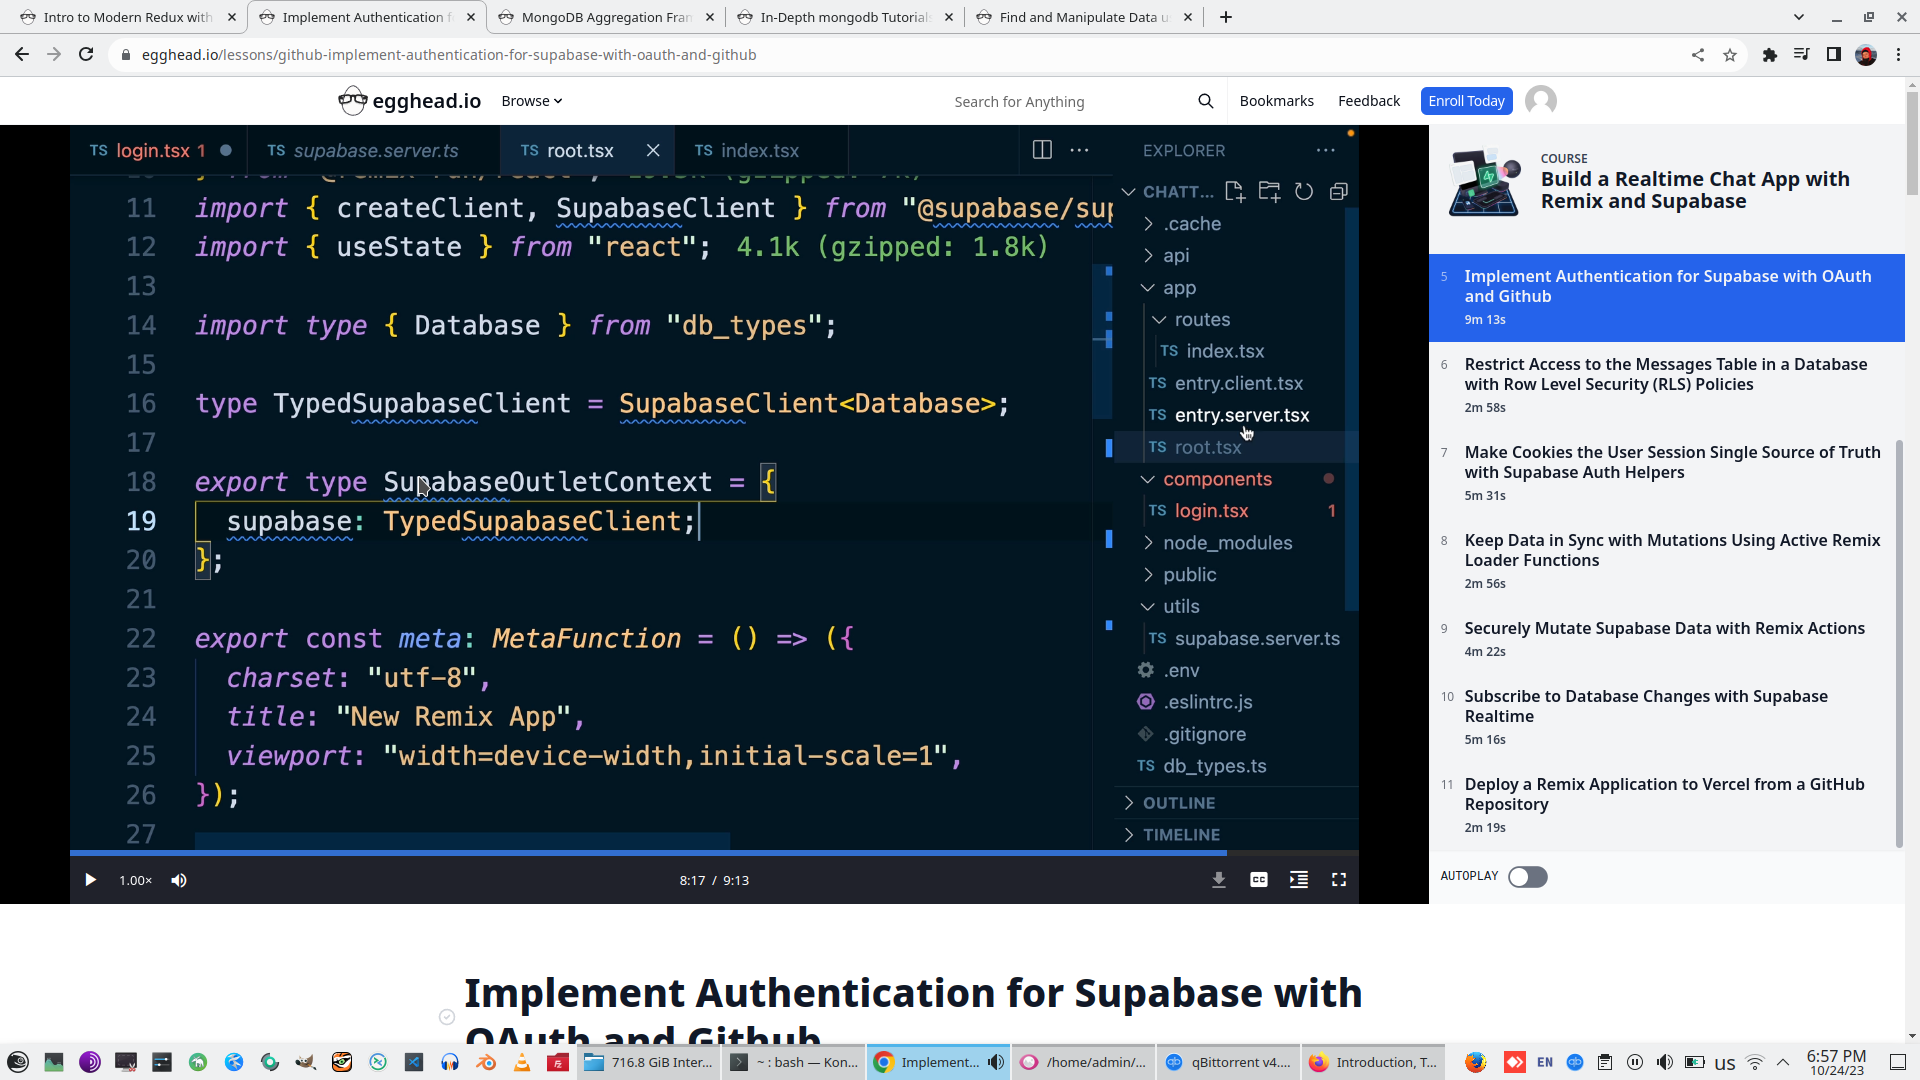
Than make Supabase client typed on Login page
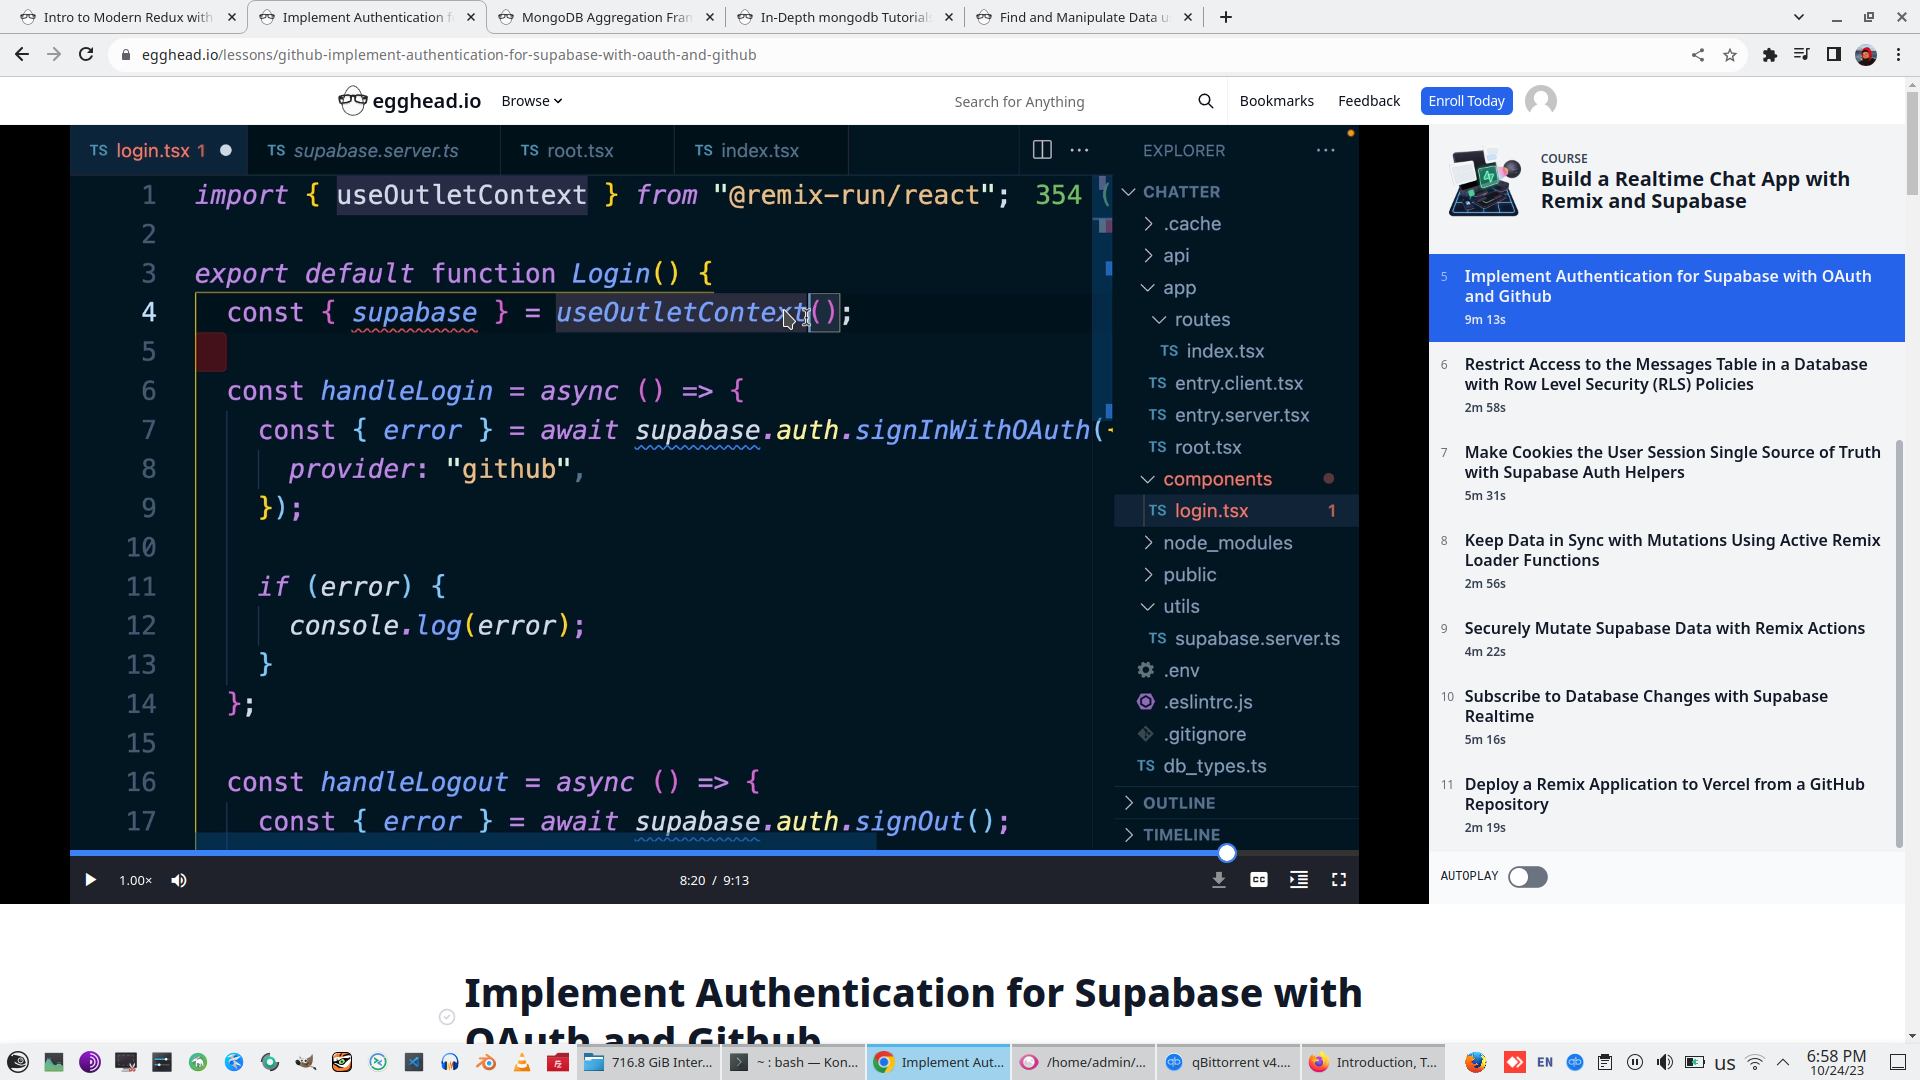
And finally check how OAuth working

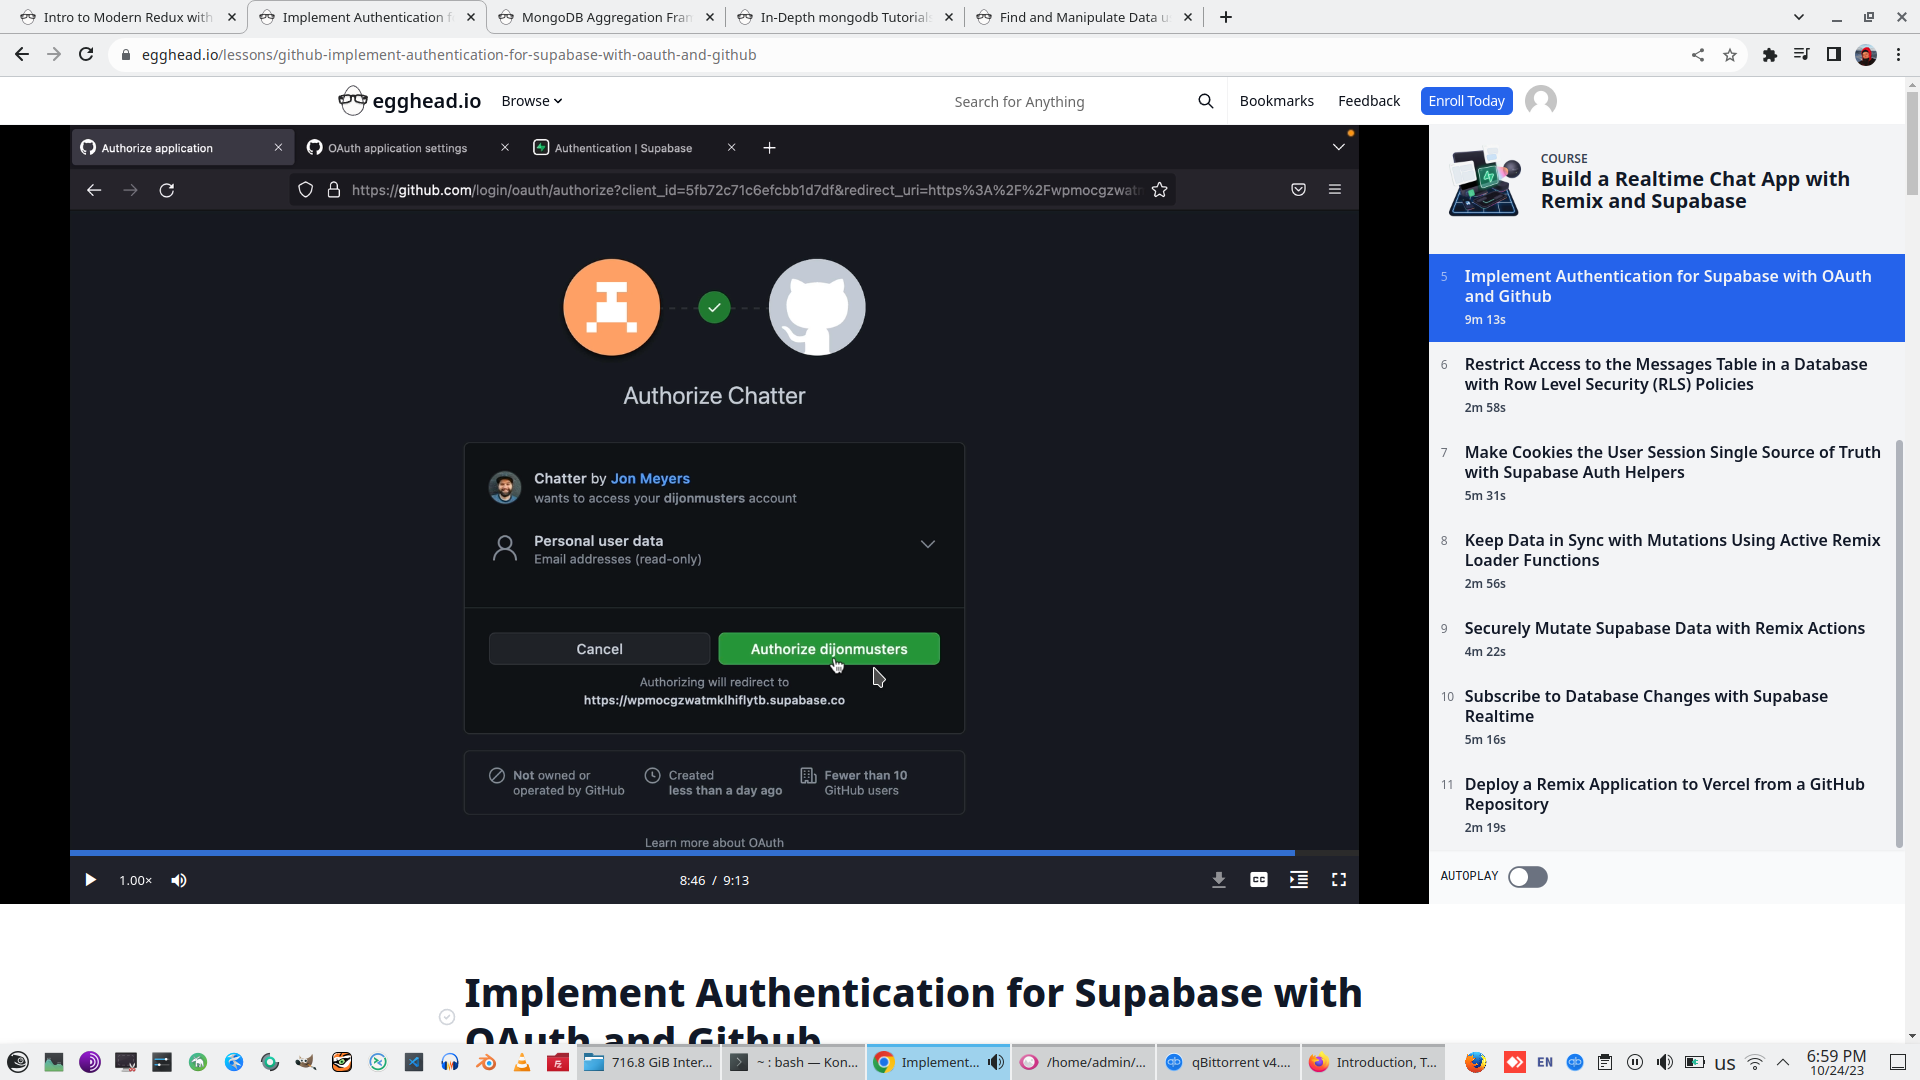
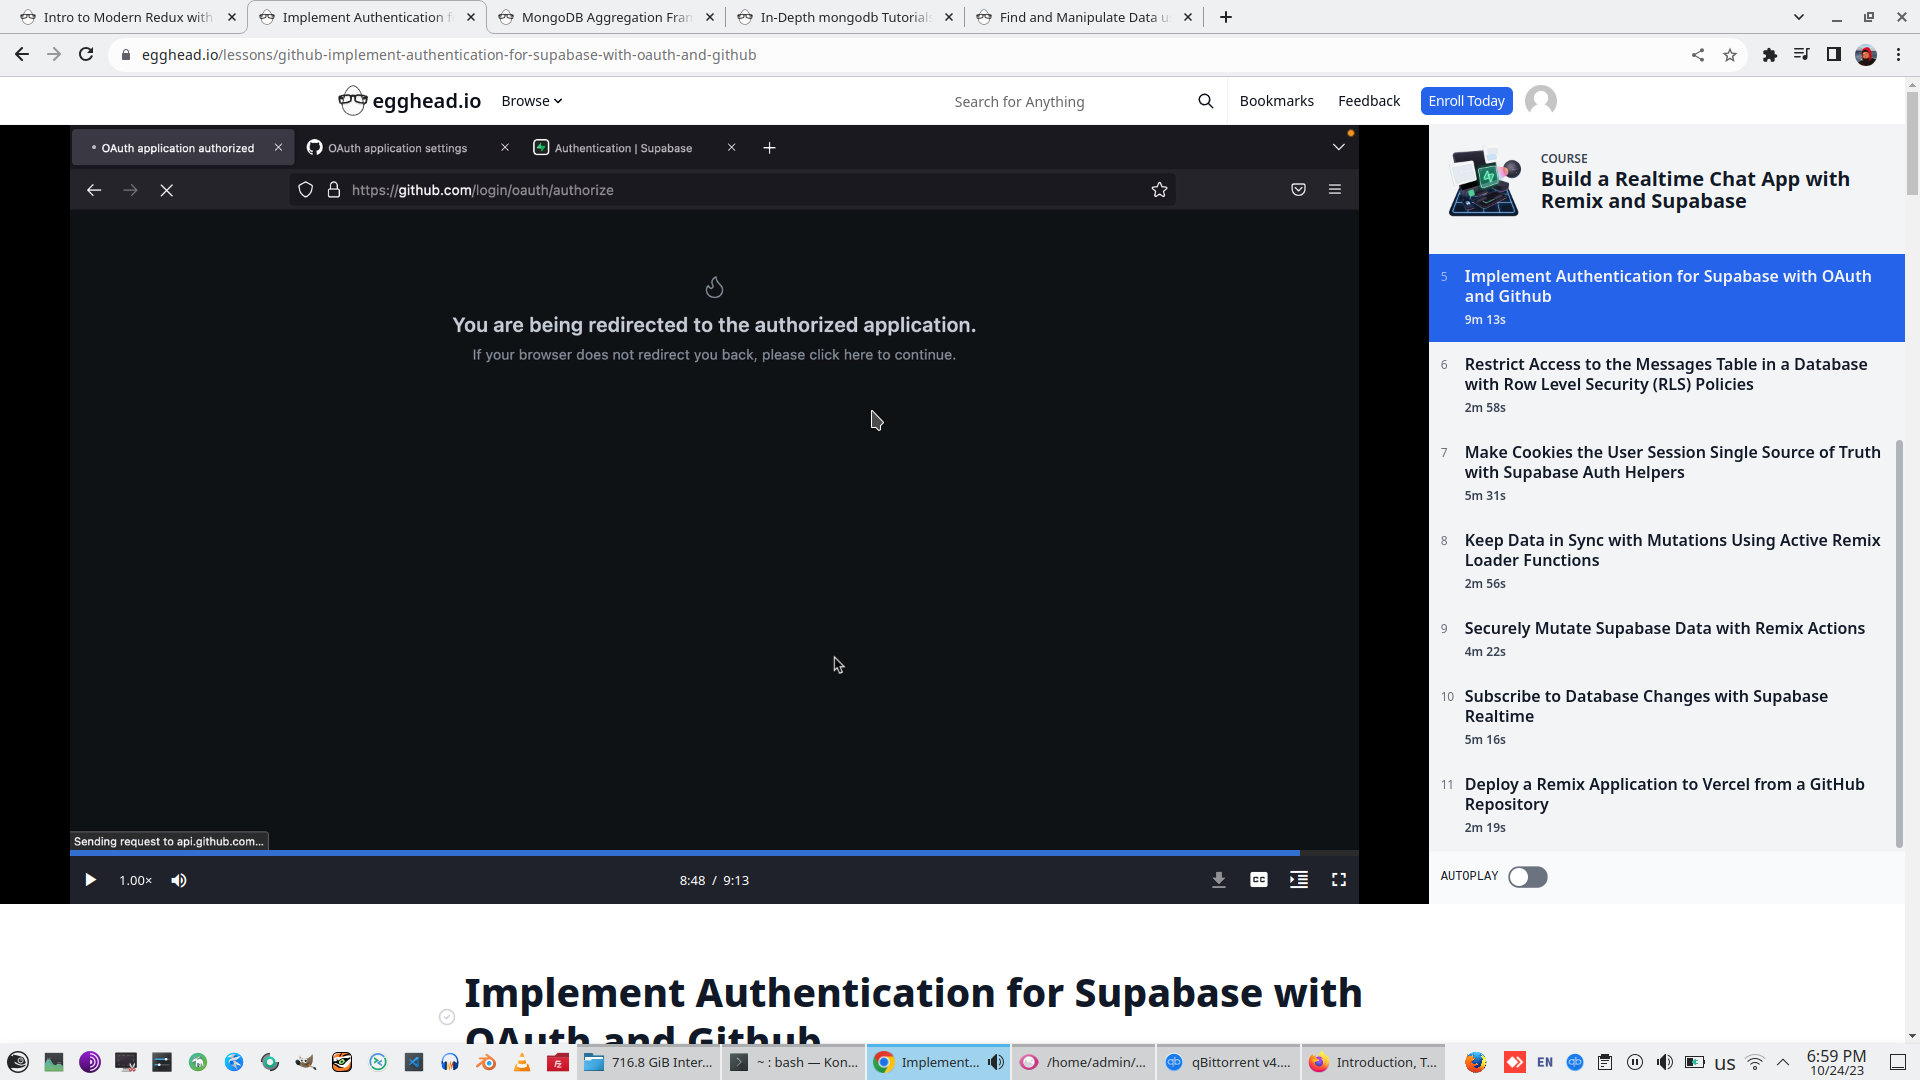
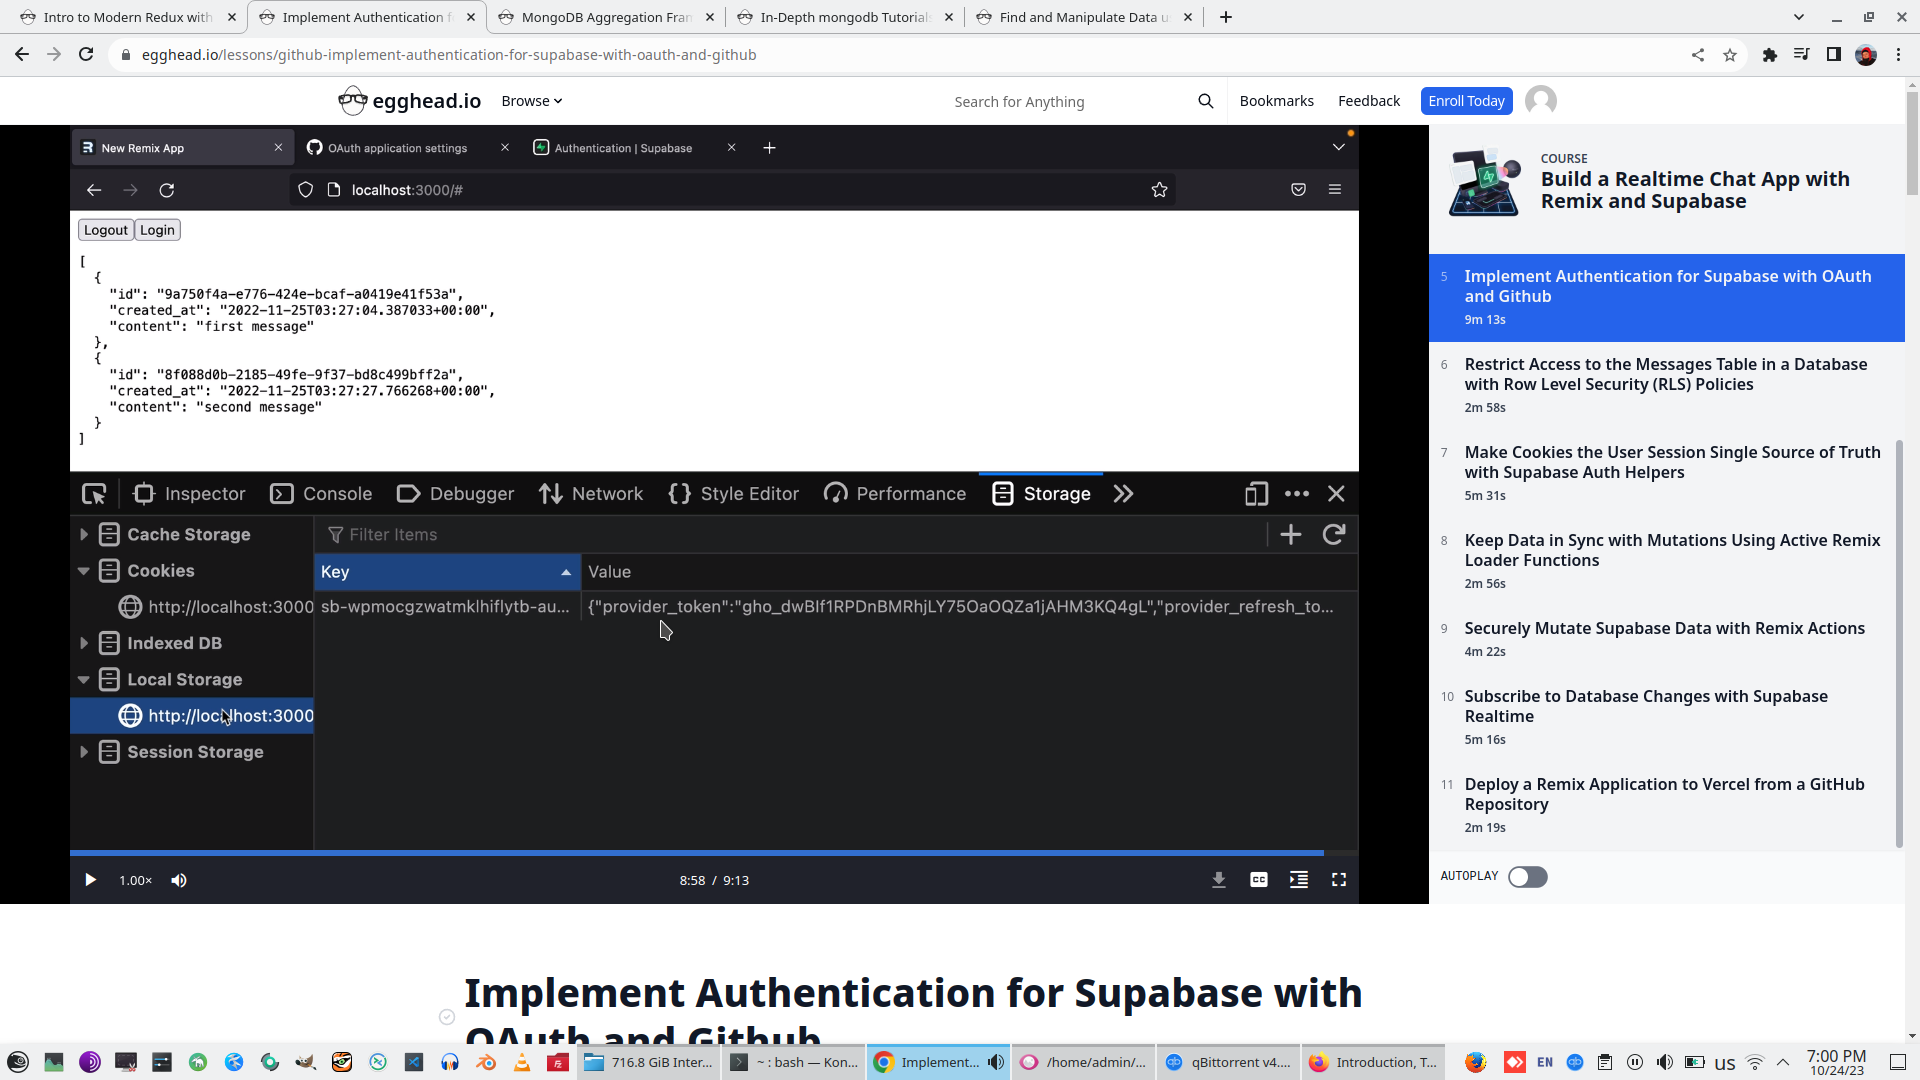
Working fine and we can see access token on LocalStorage and Login log on Supabse

7. Make Cookies the User Session Single Source of Truth with Supabase Auth Helpers
8. Keep Data in Sync with Mutations Using Active Remix Loader Functions
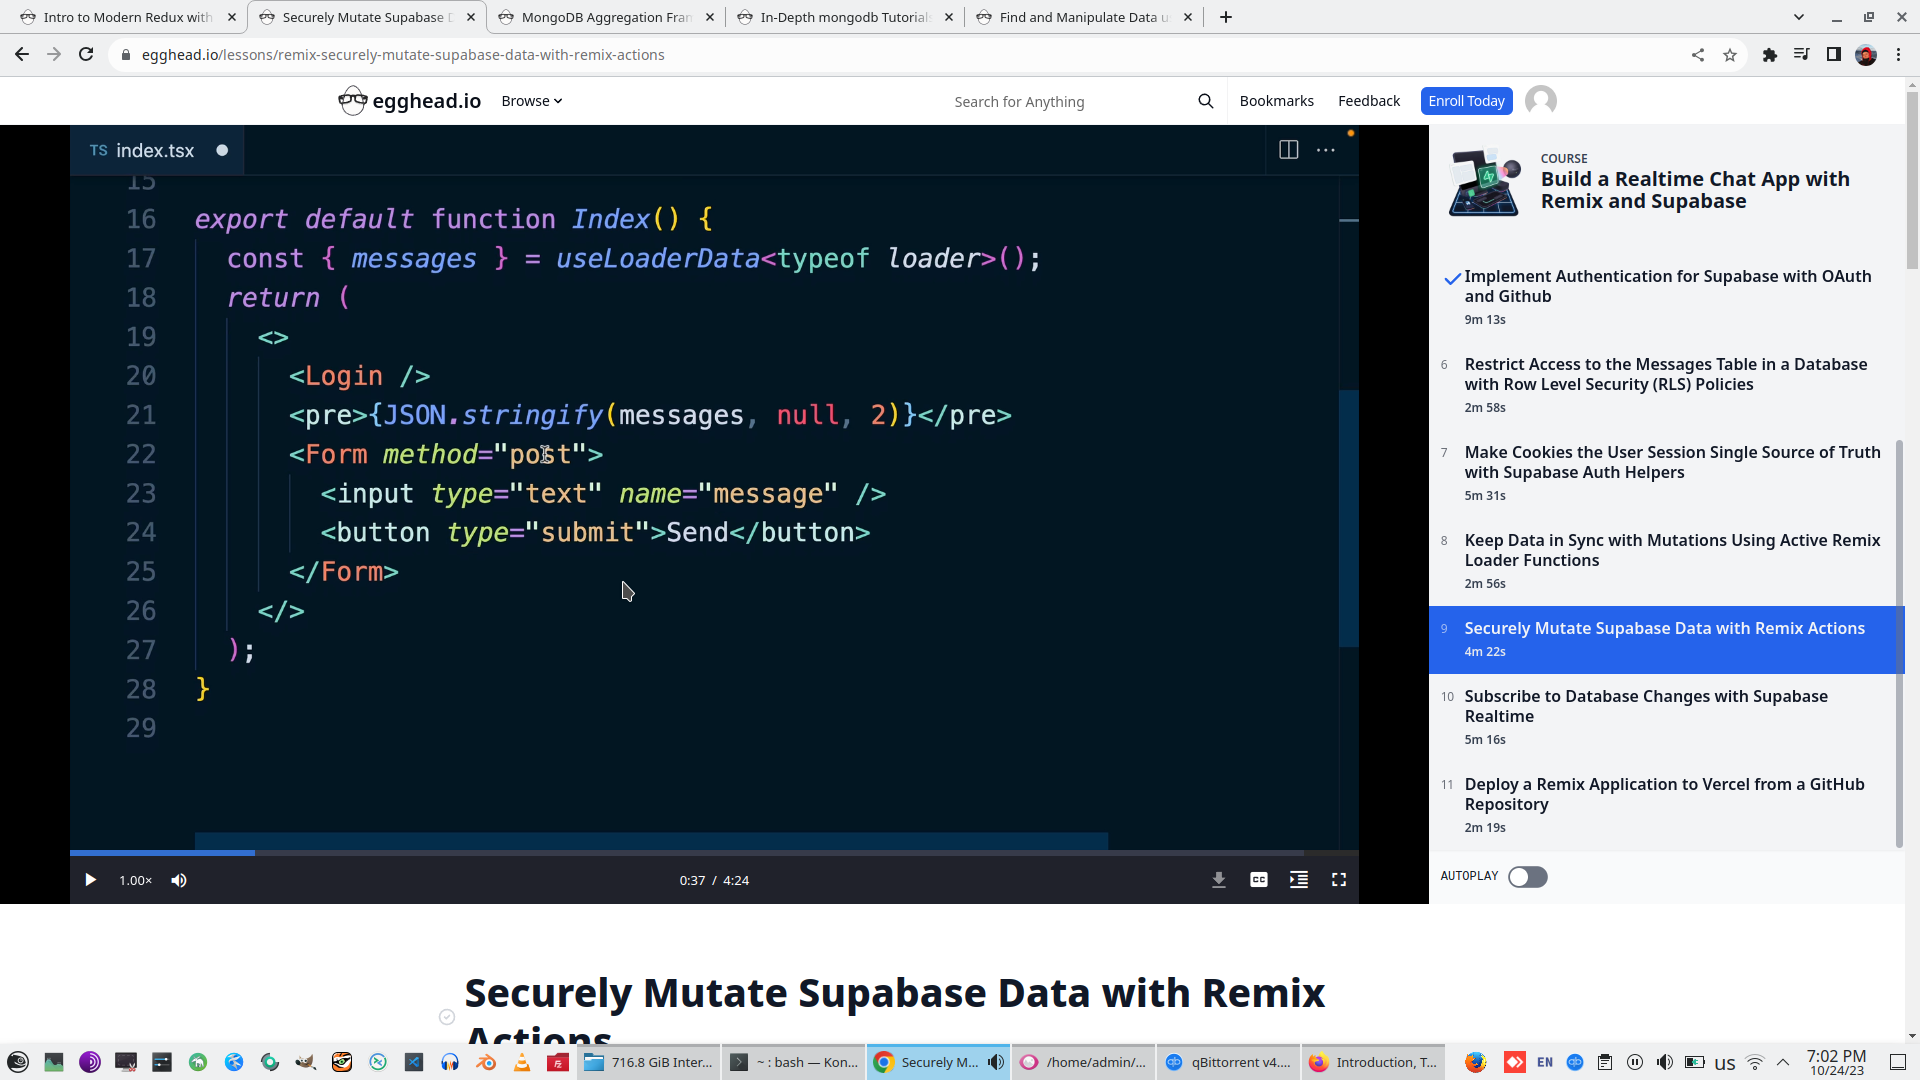
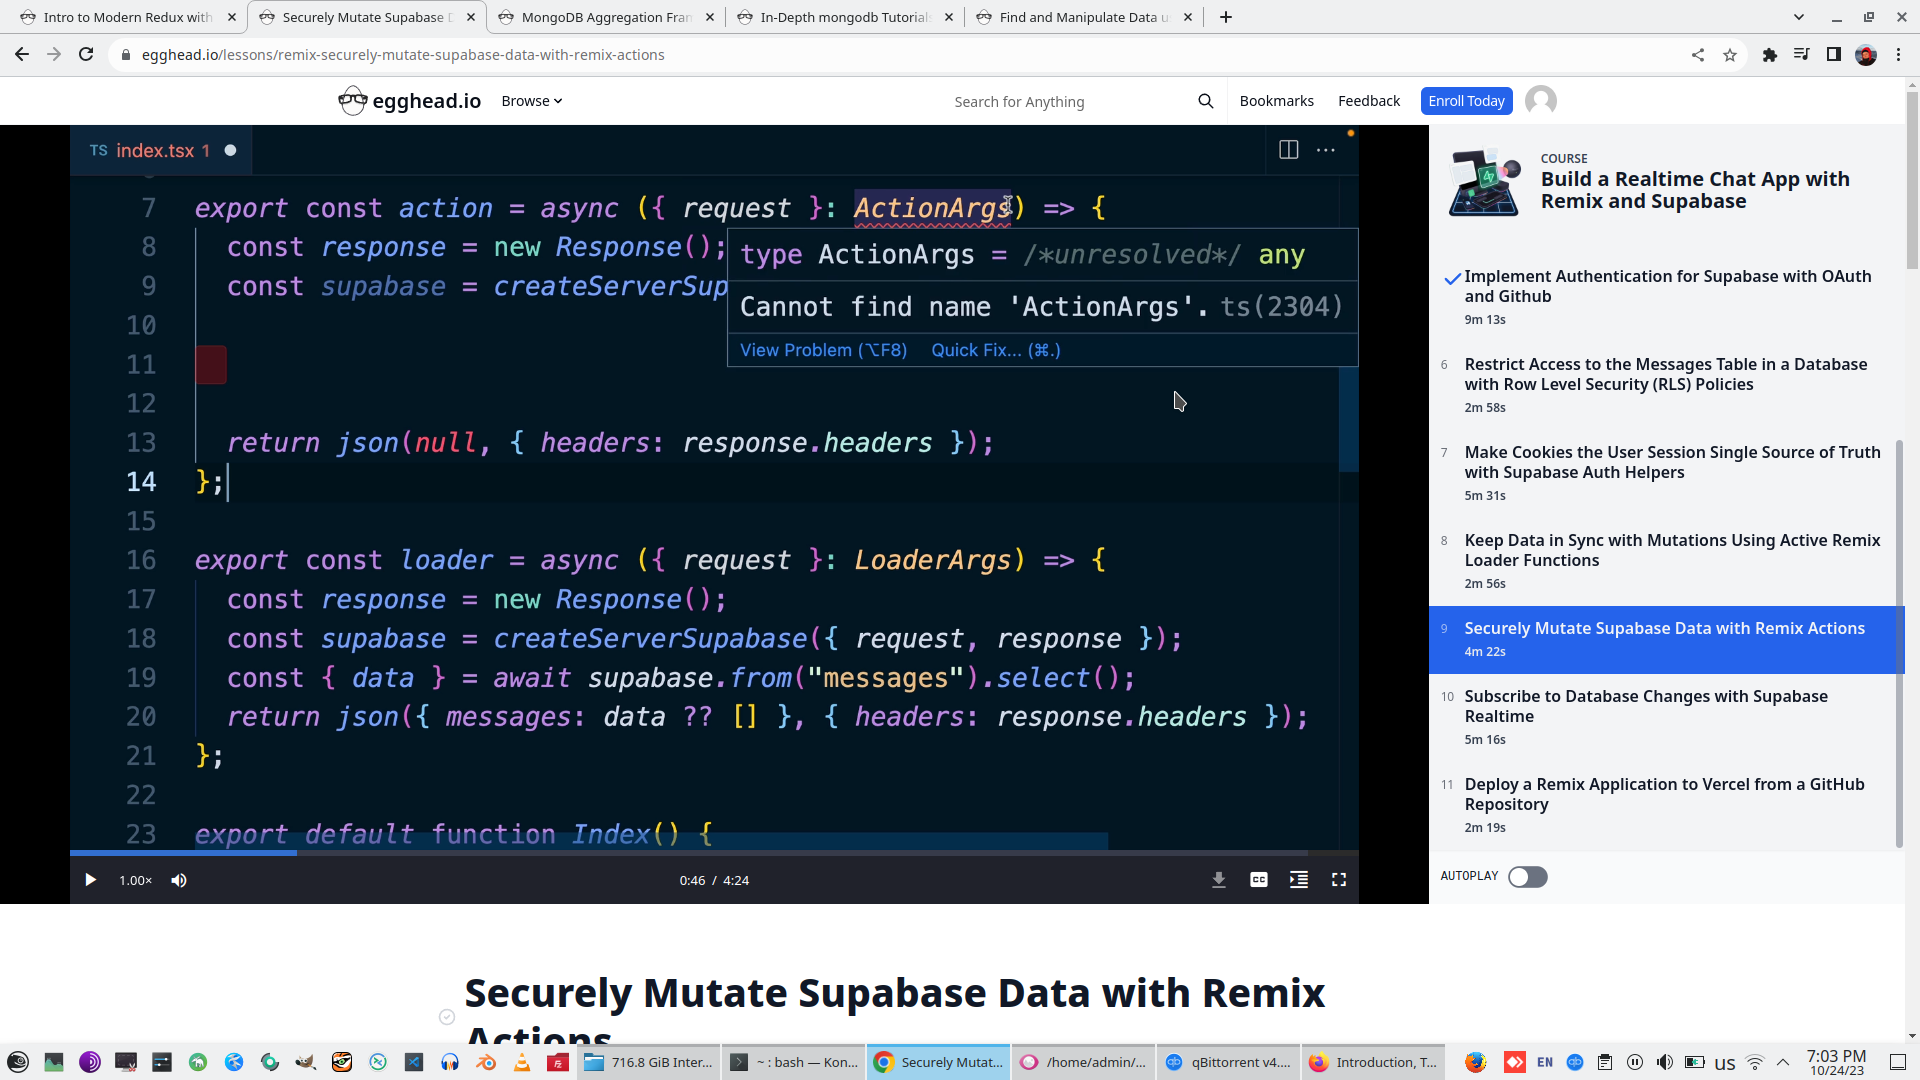
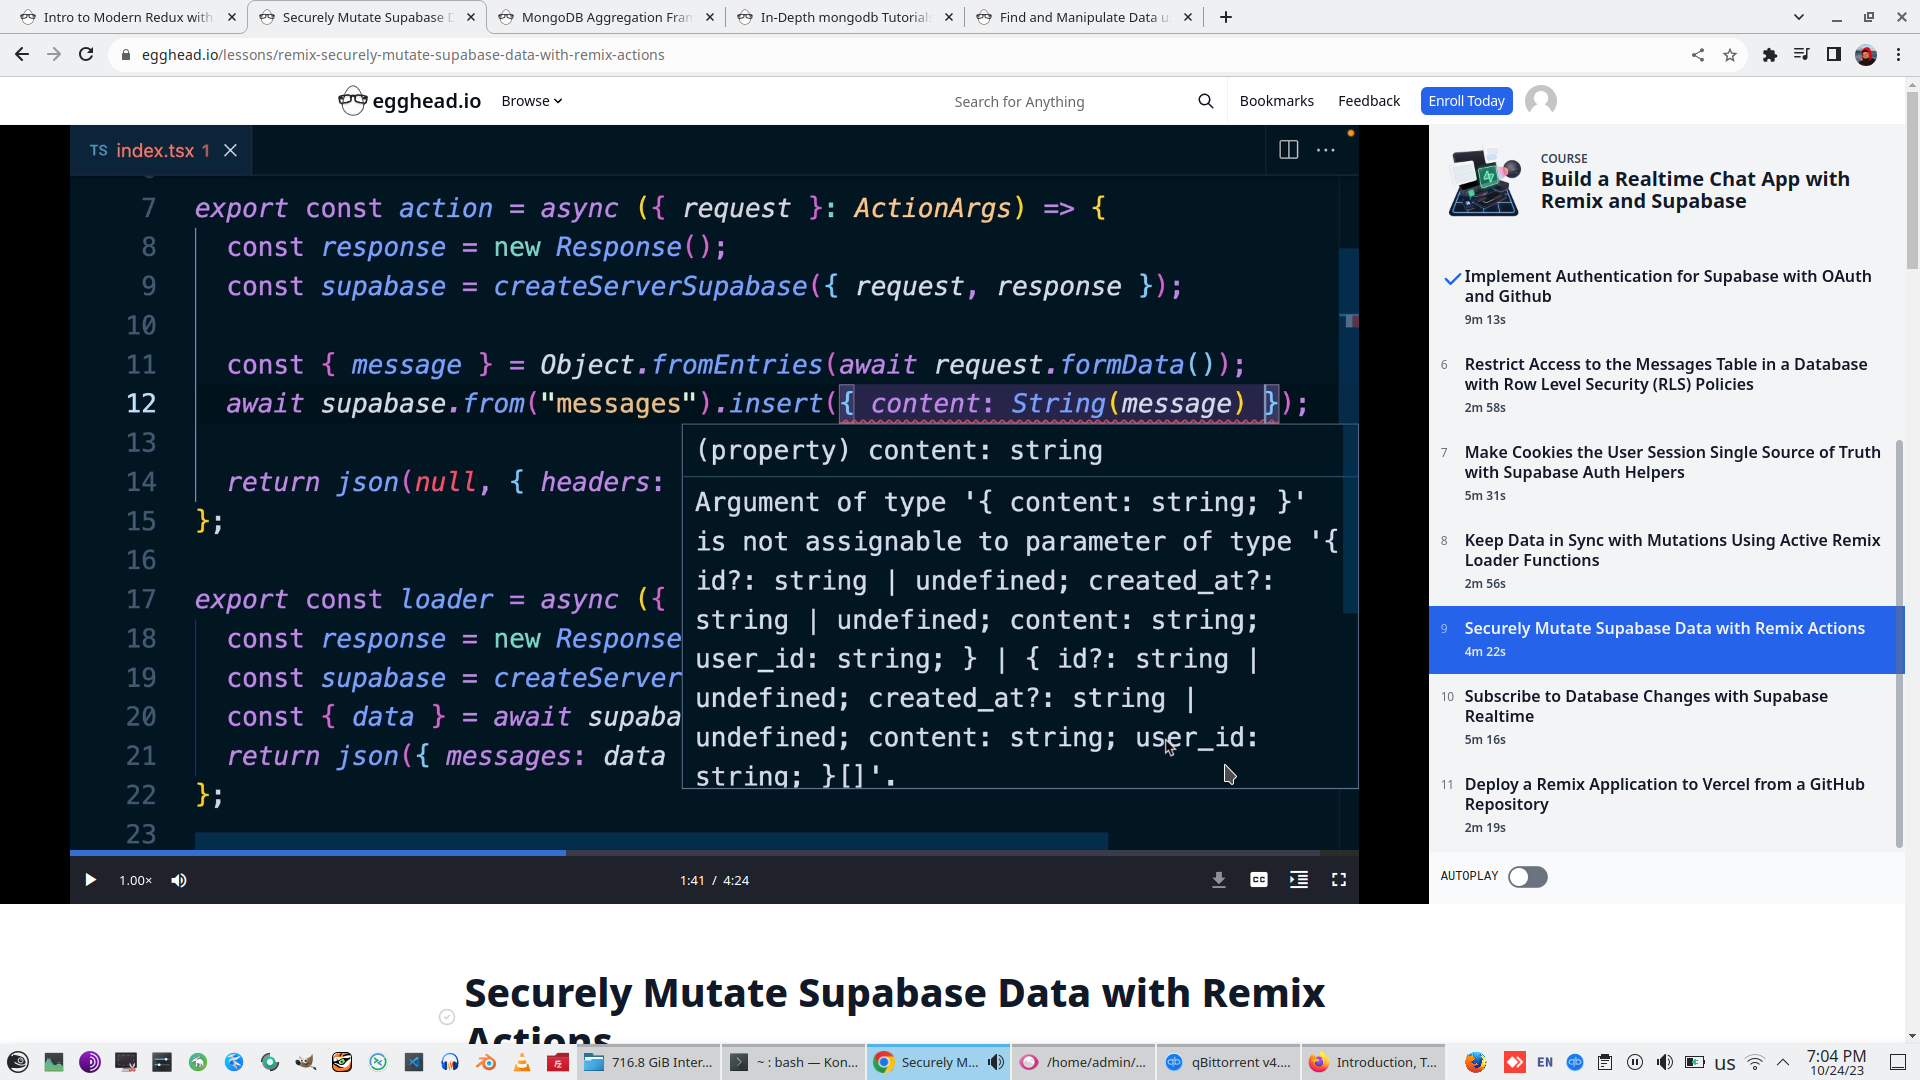
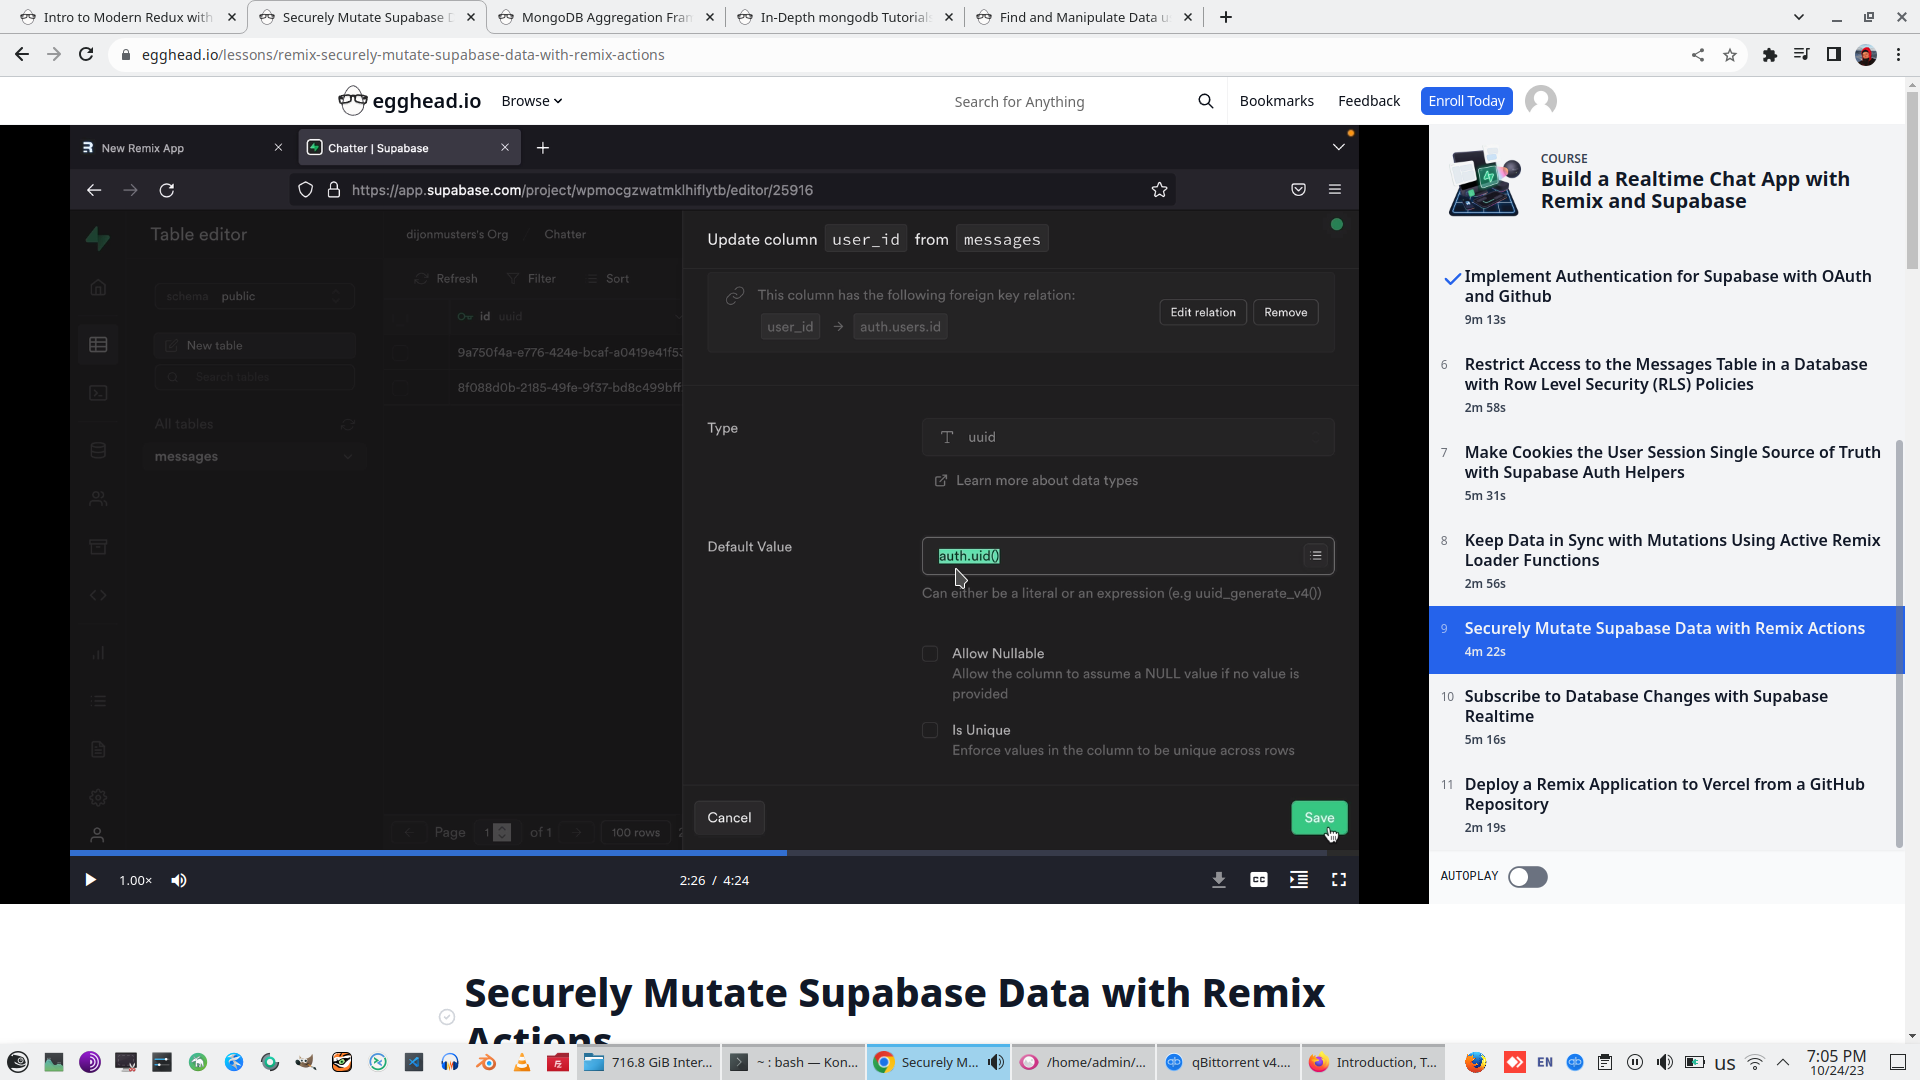
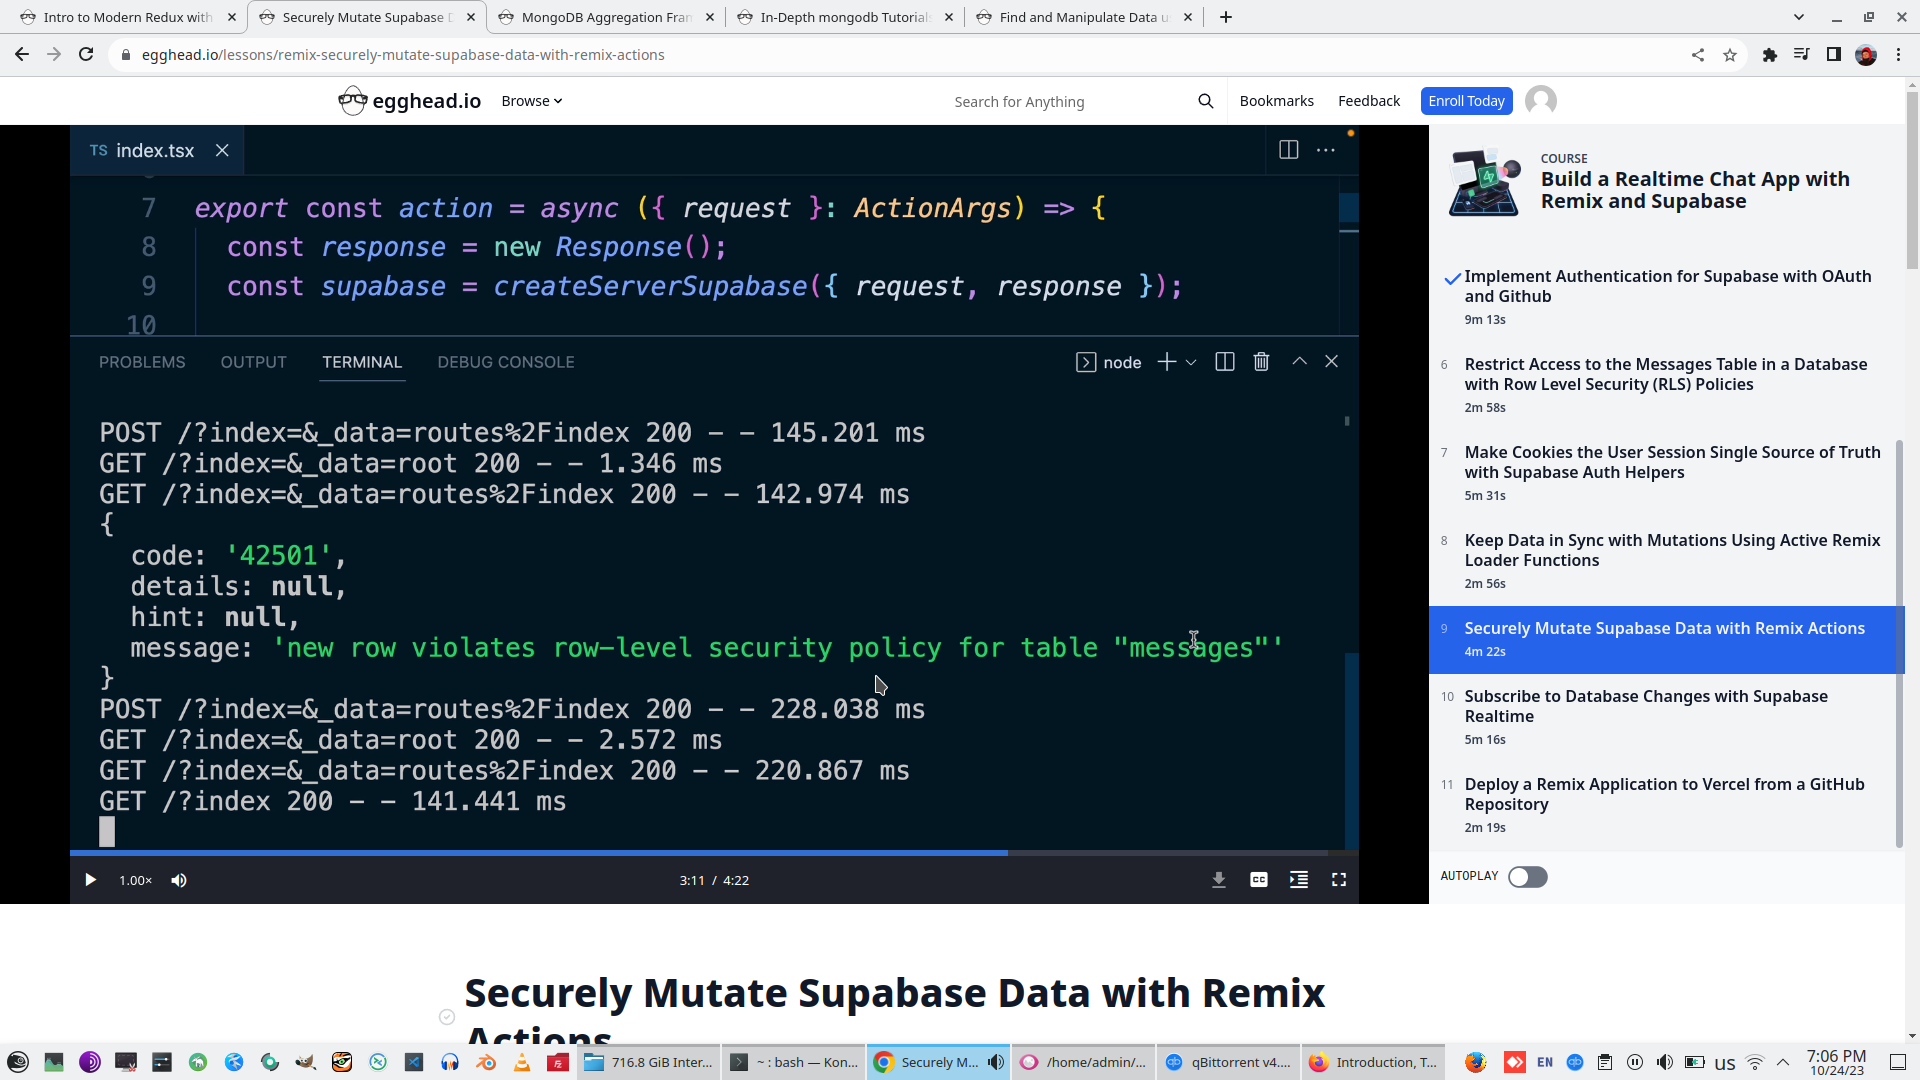
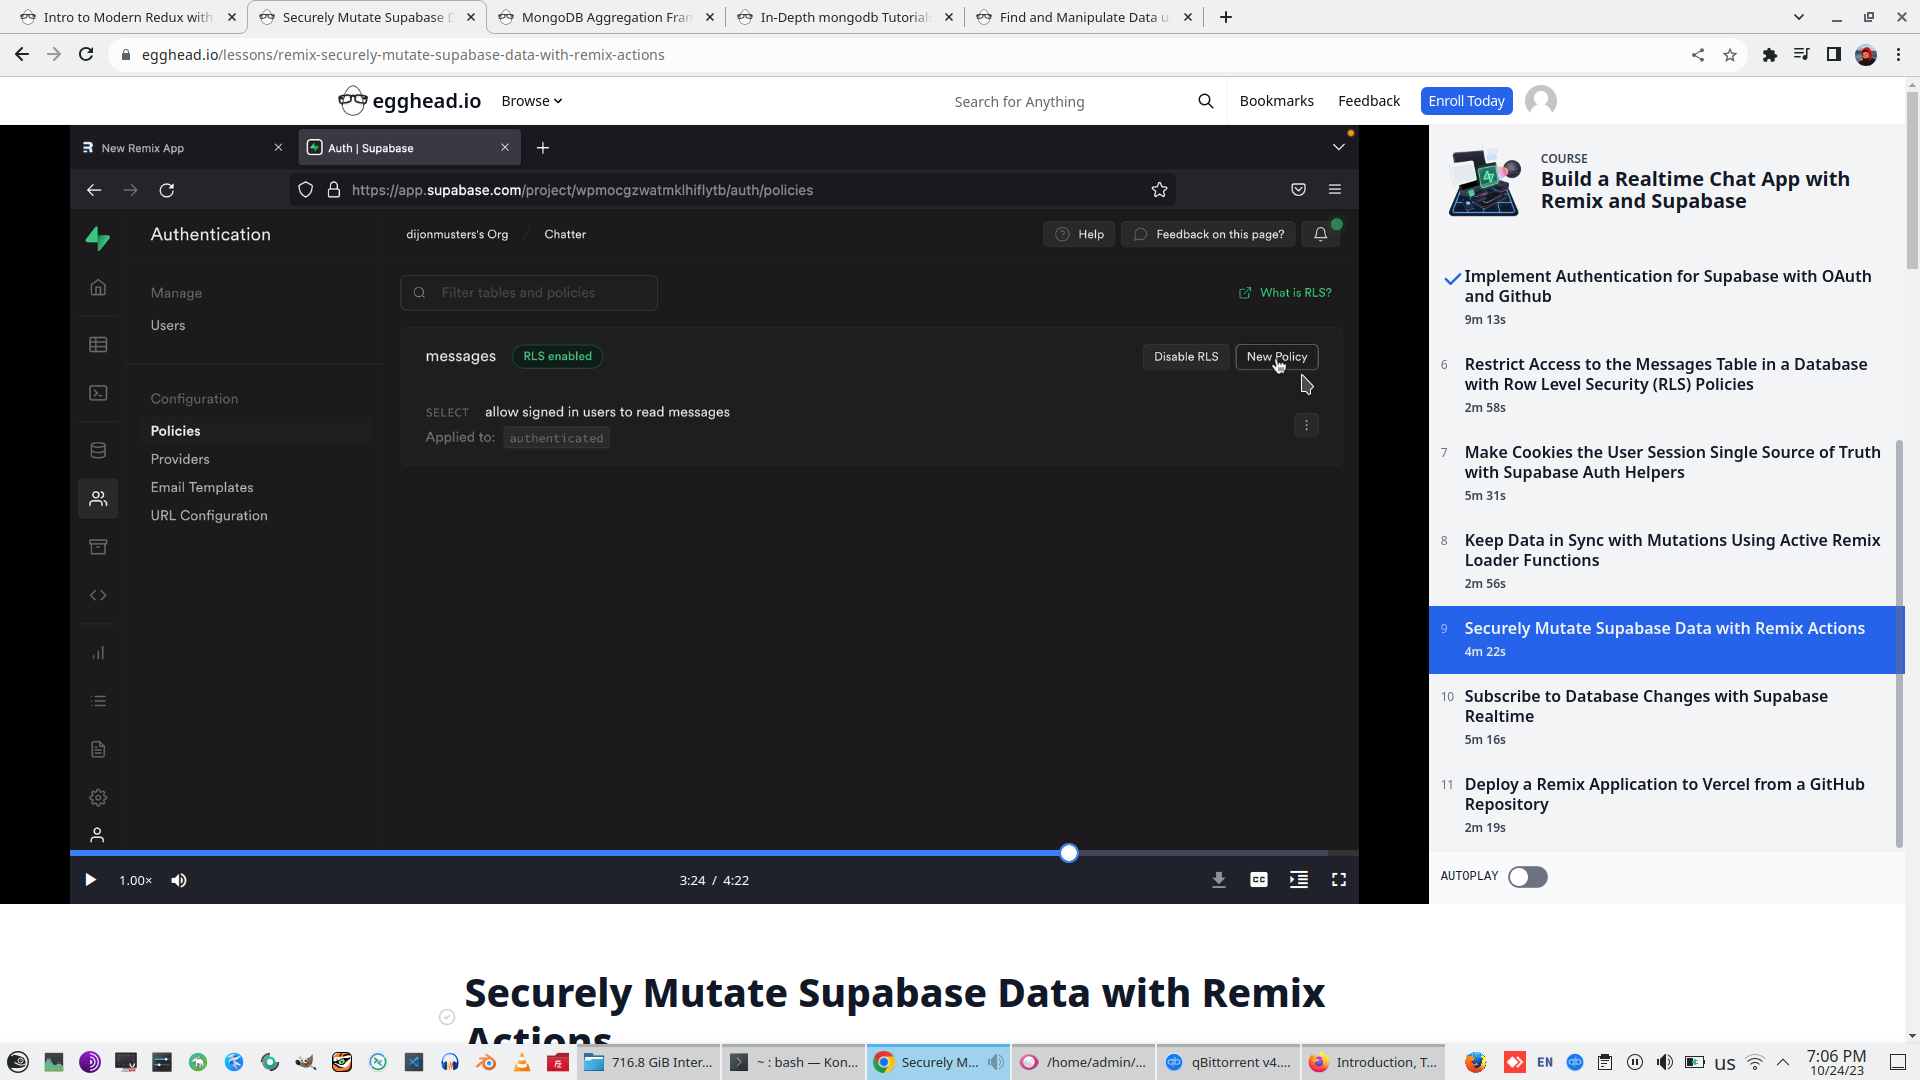
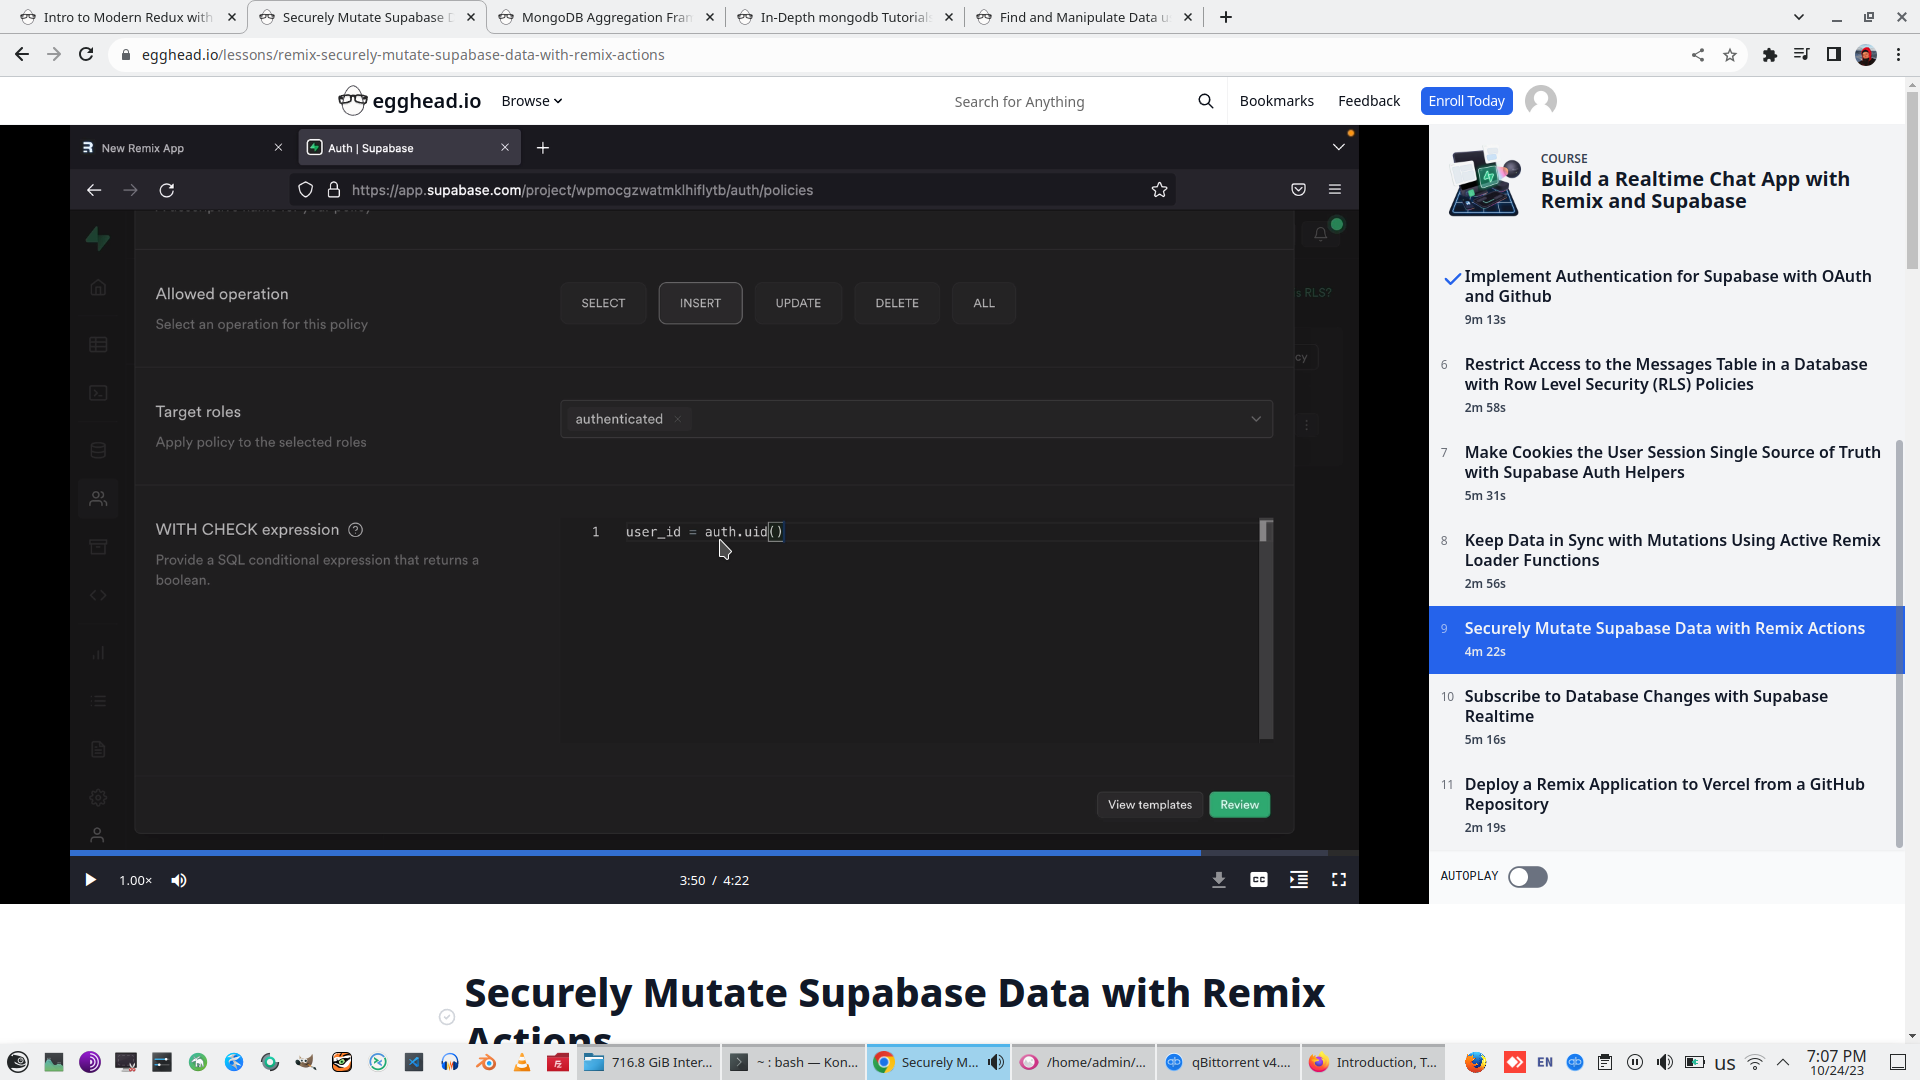
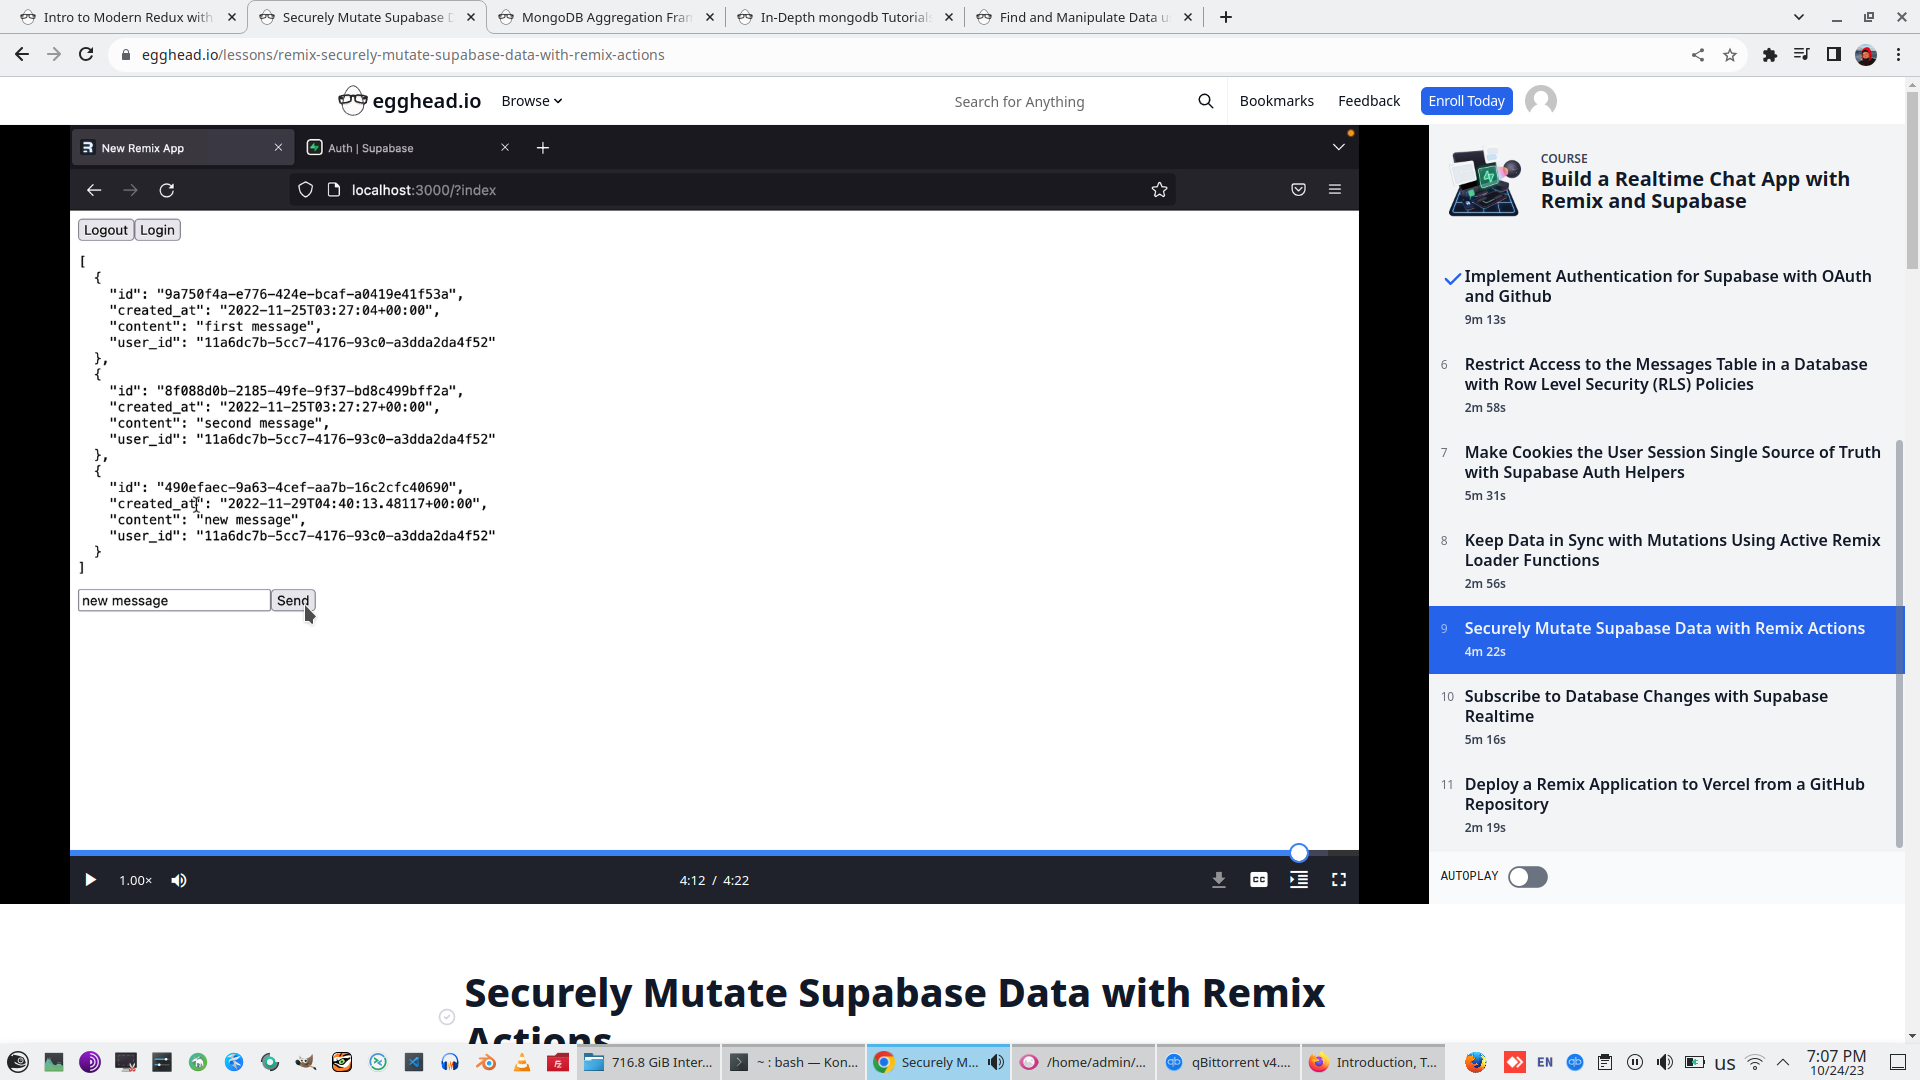
9. Securely Mutate Supabase Data with Remix Actions
Create rules on supabase - only the same identicated users can insert row and only signed user can read Message rows

10. Subscribe to Database Changes with Supabase Realtime
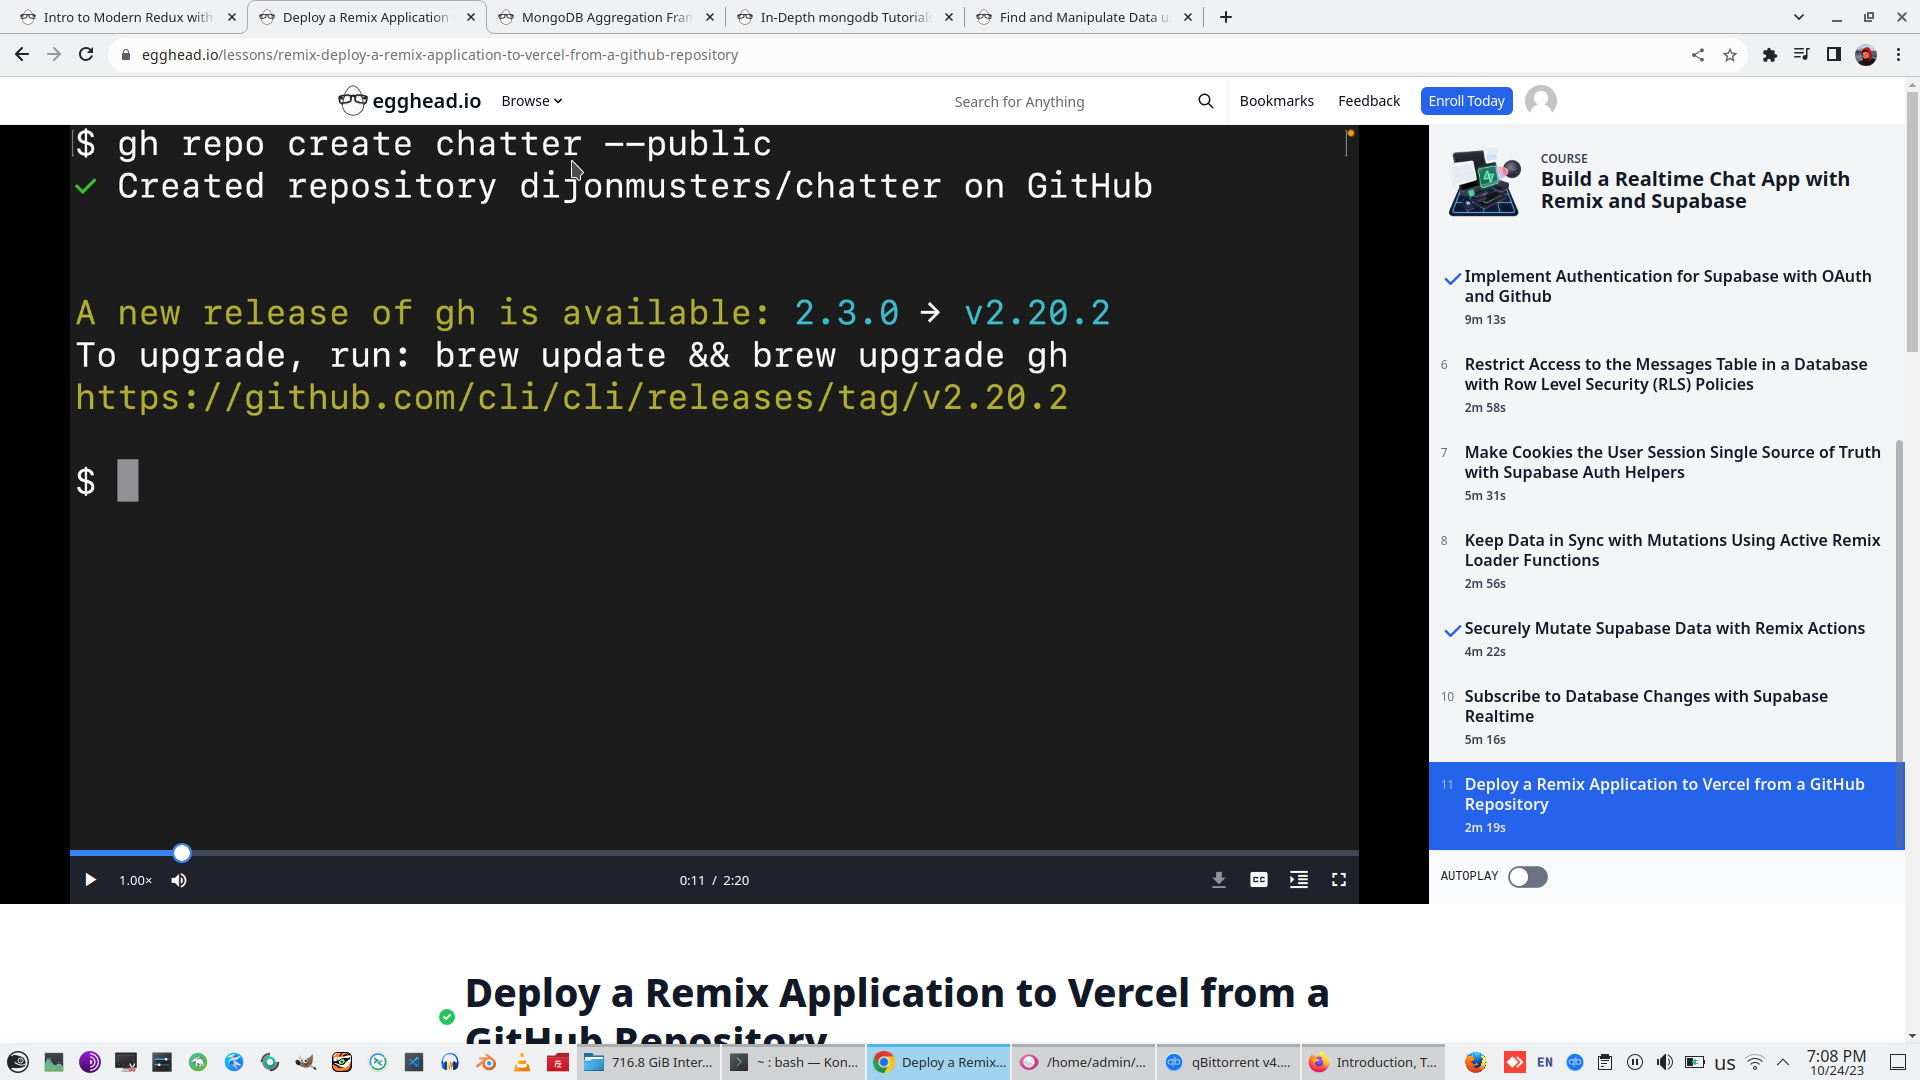
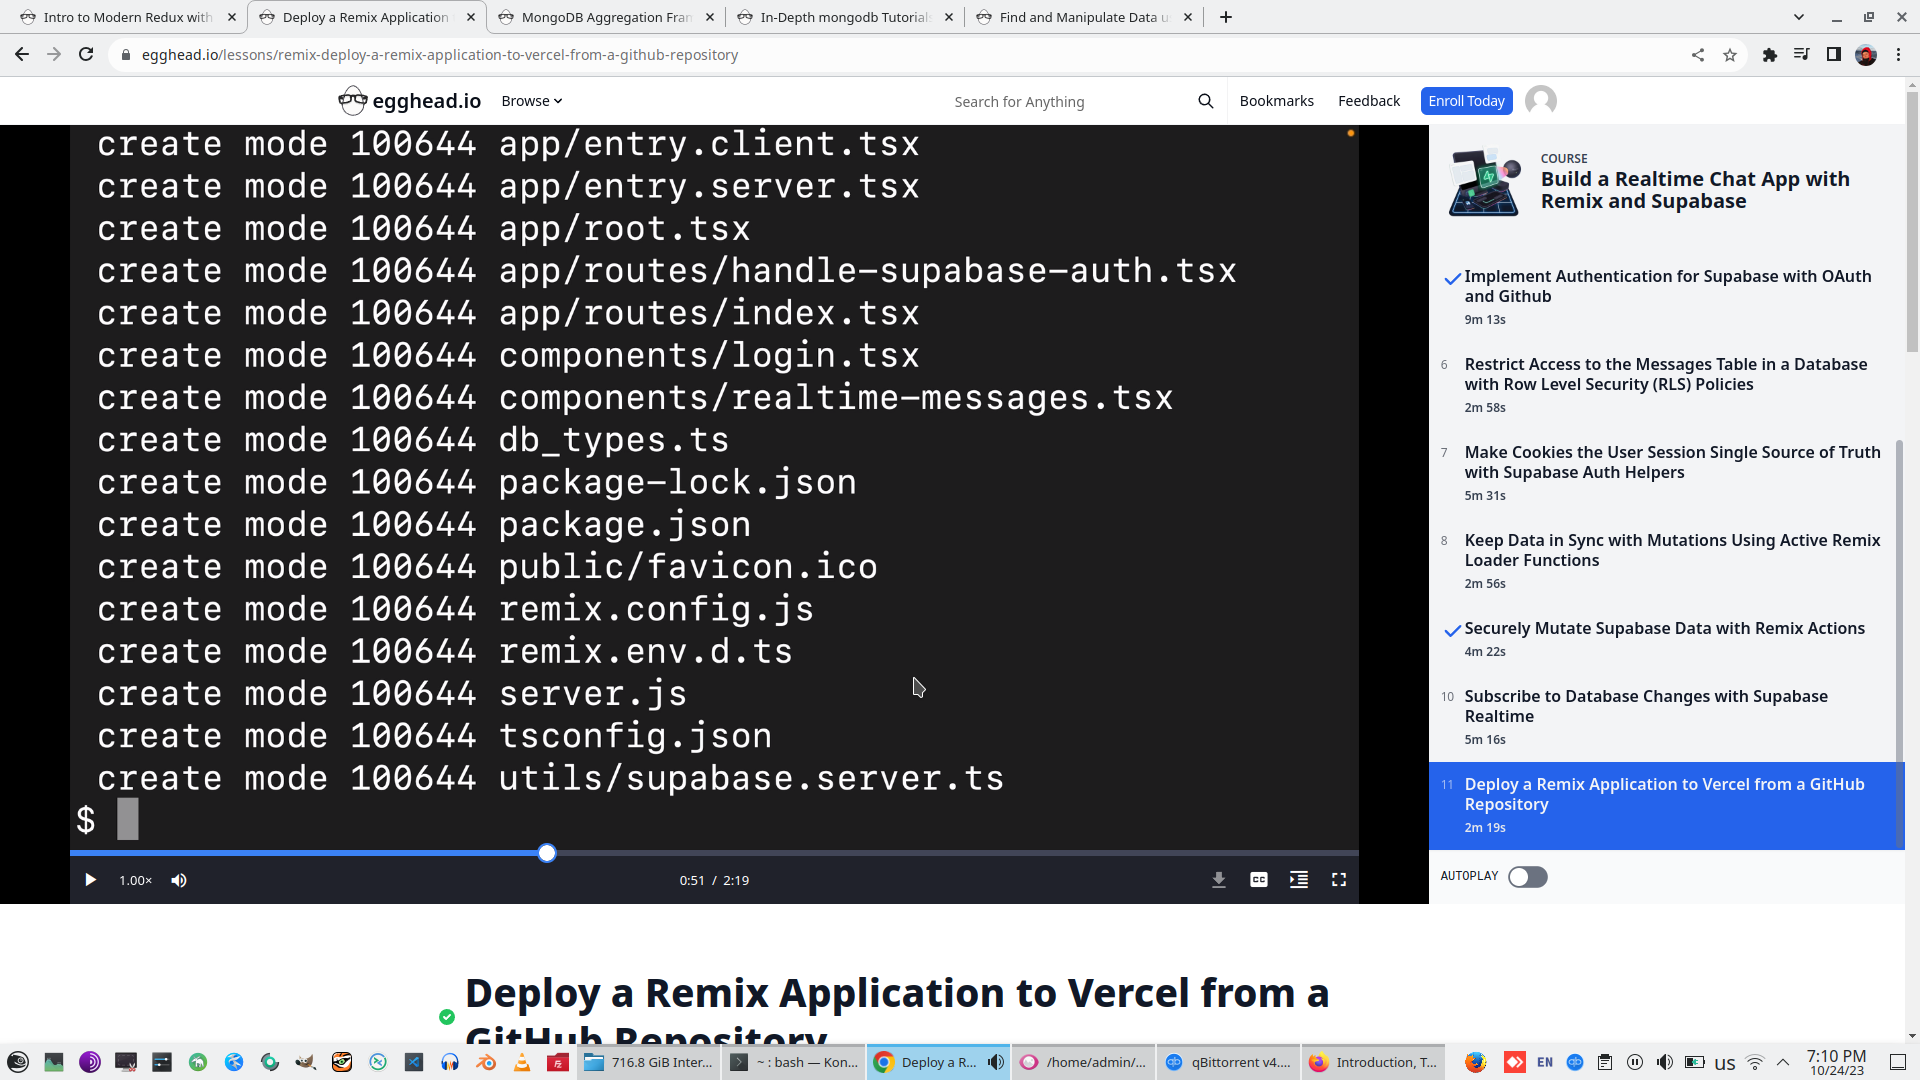
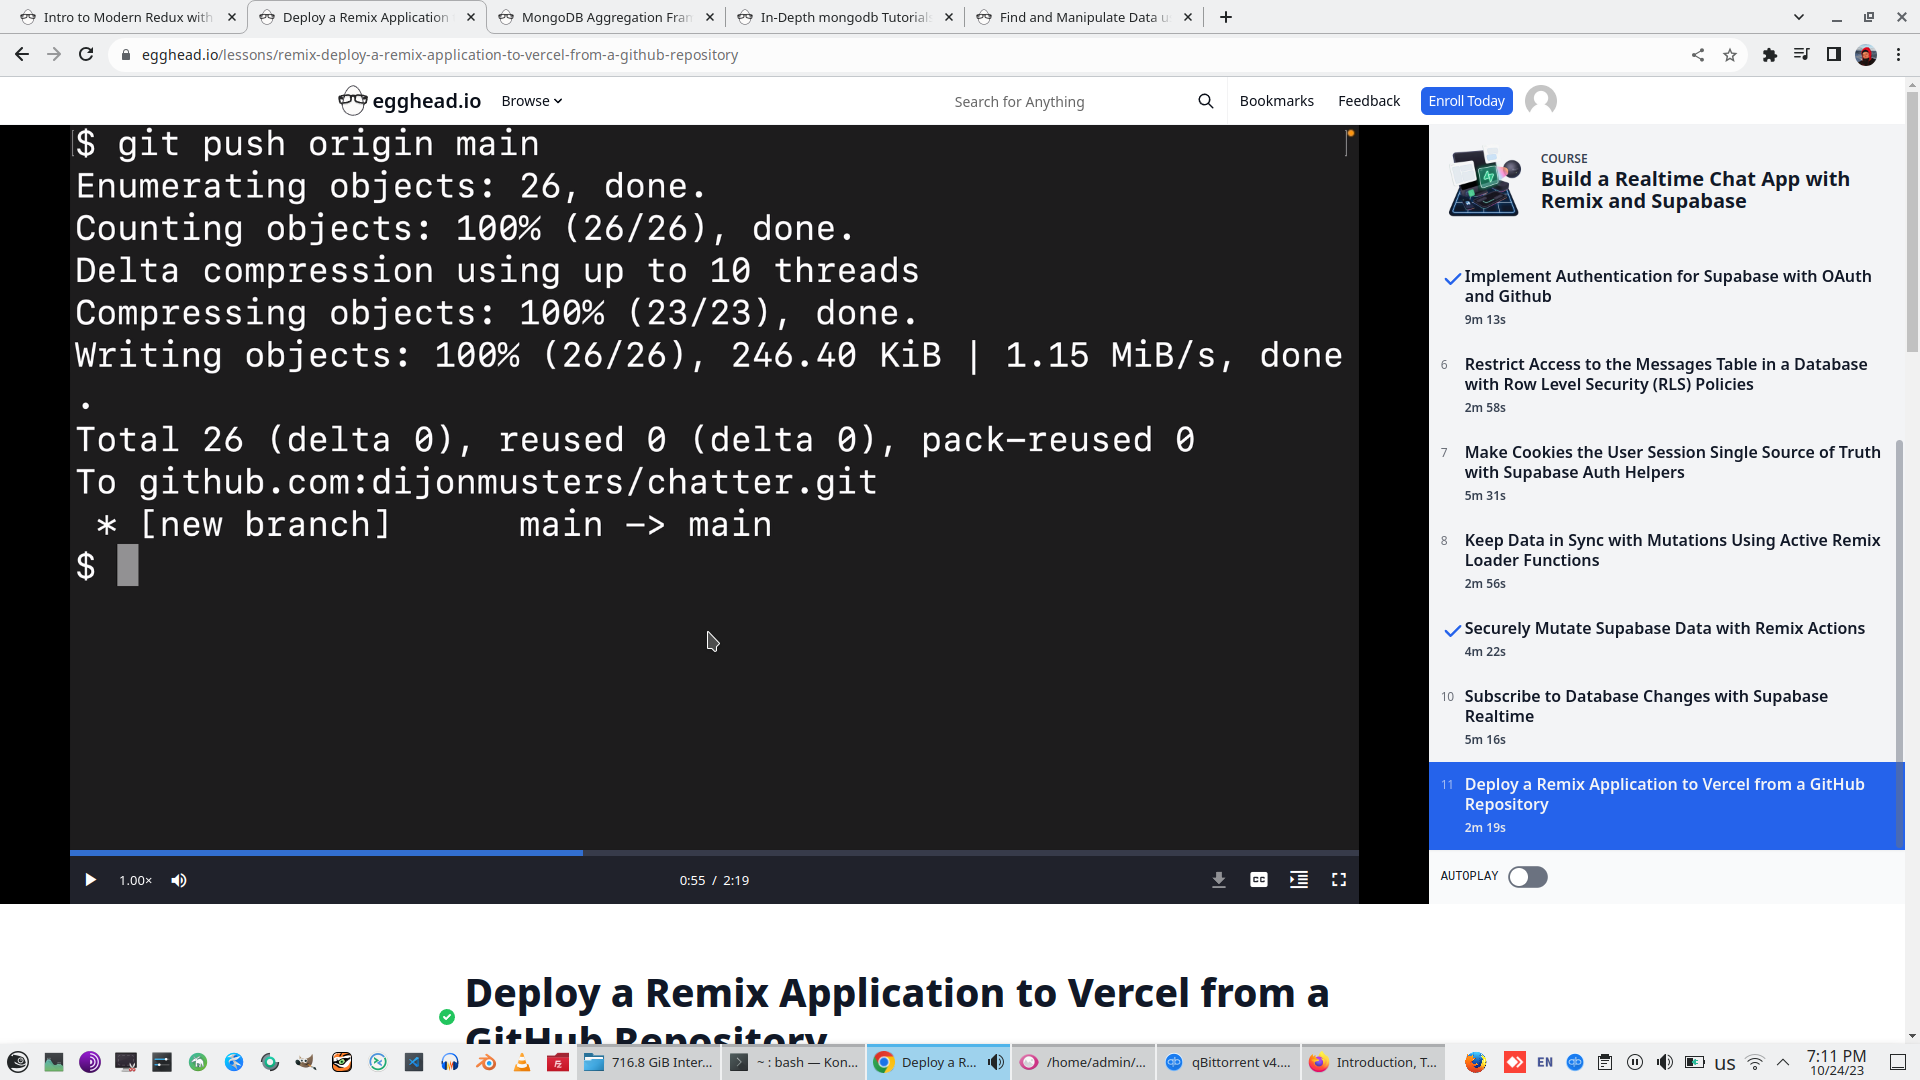
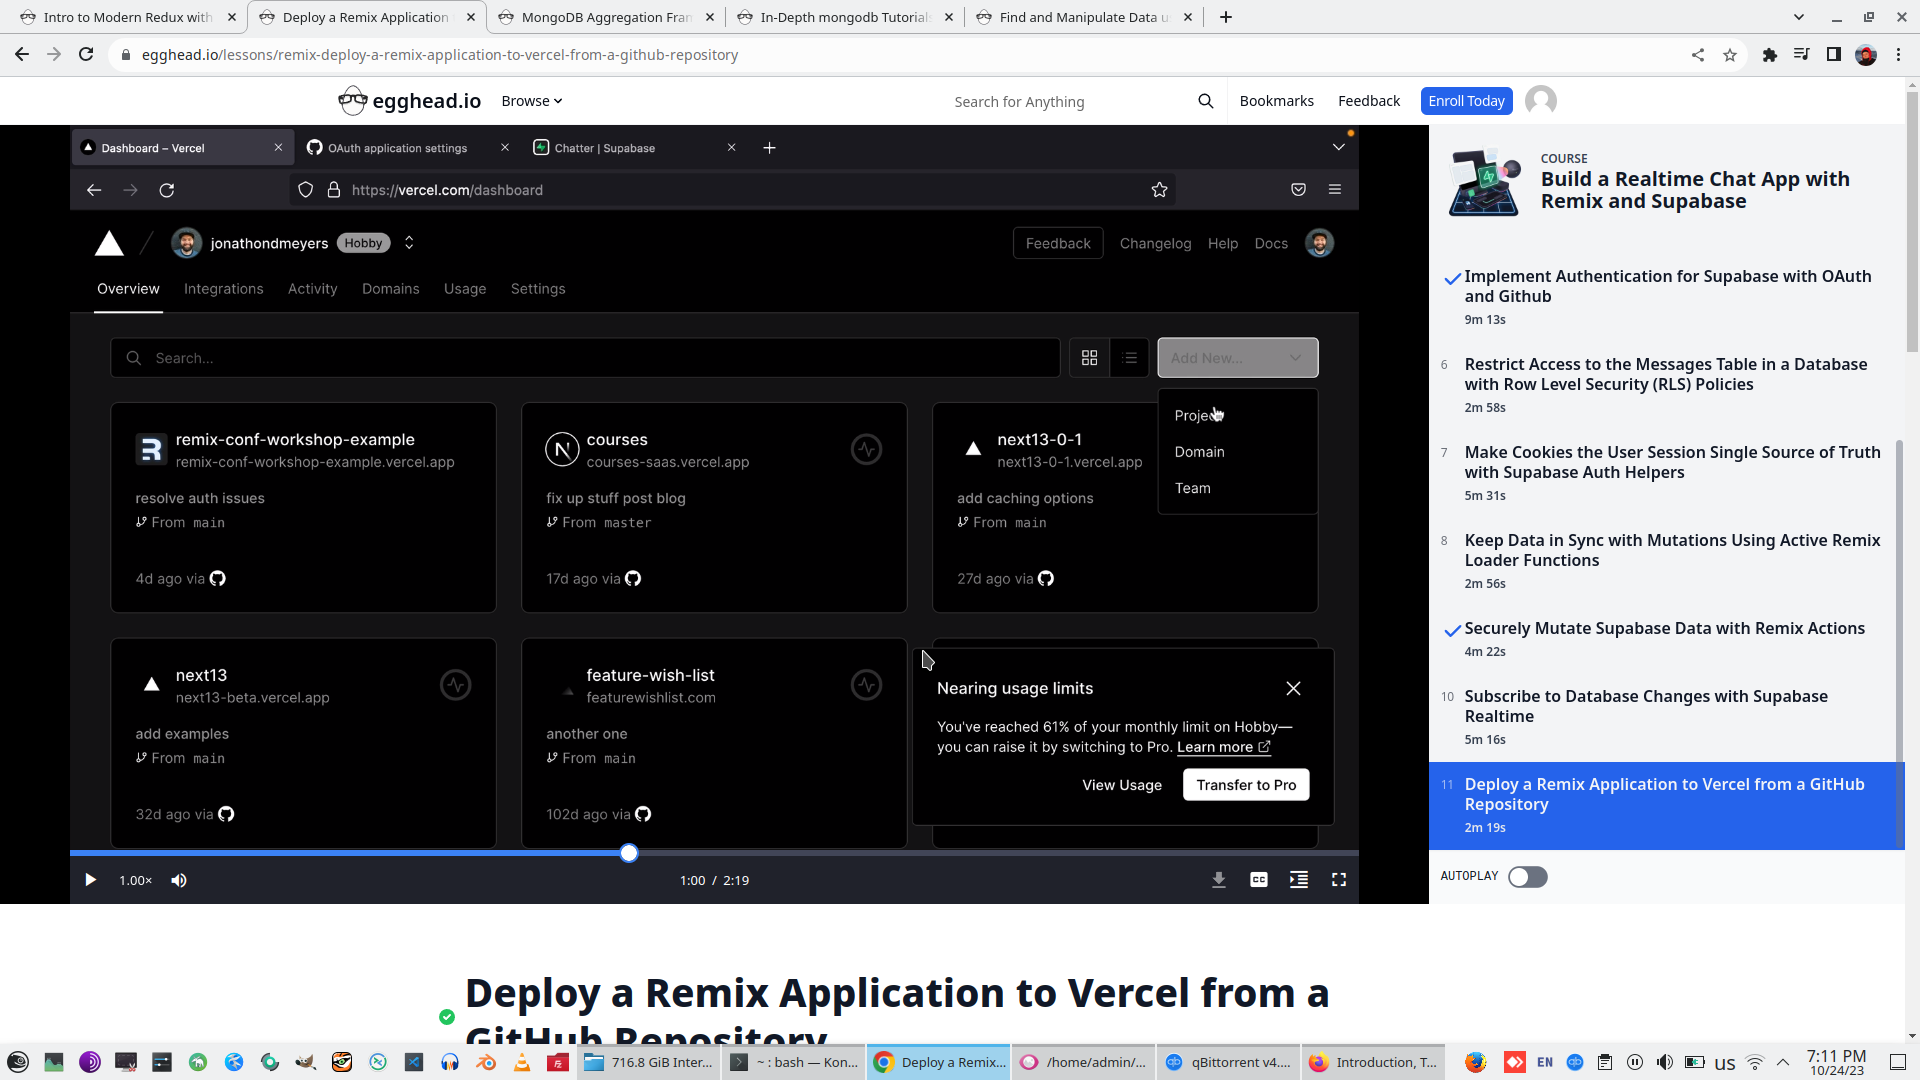
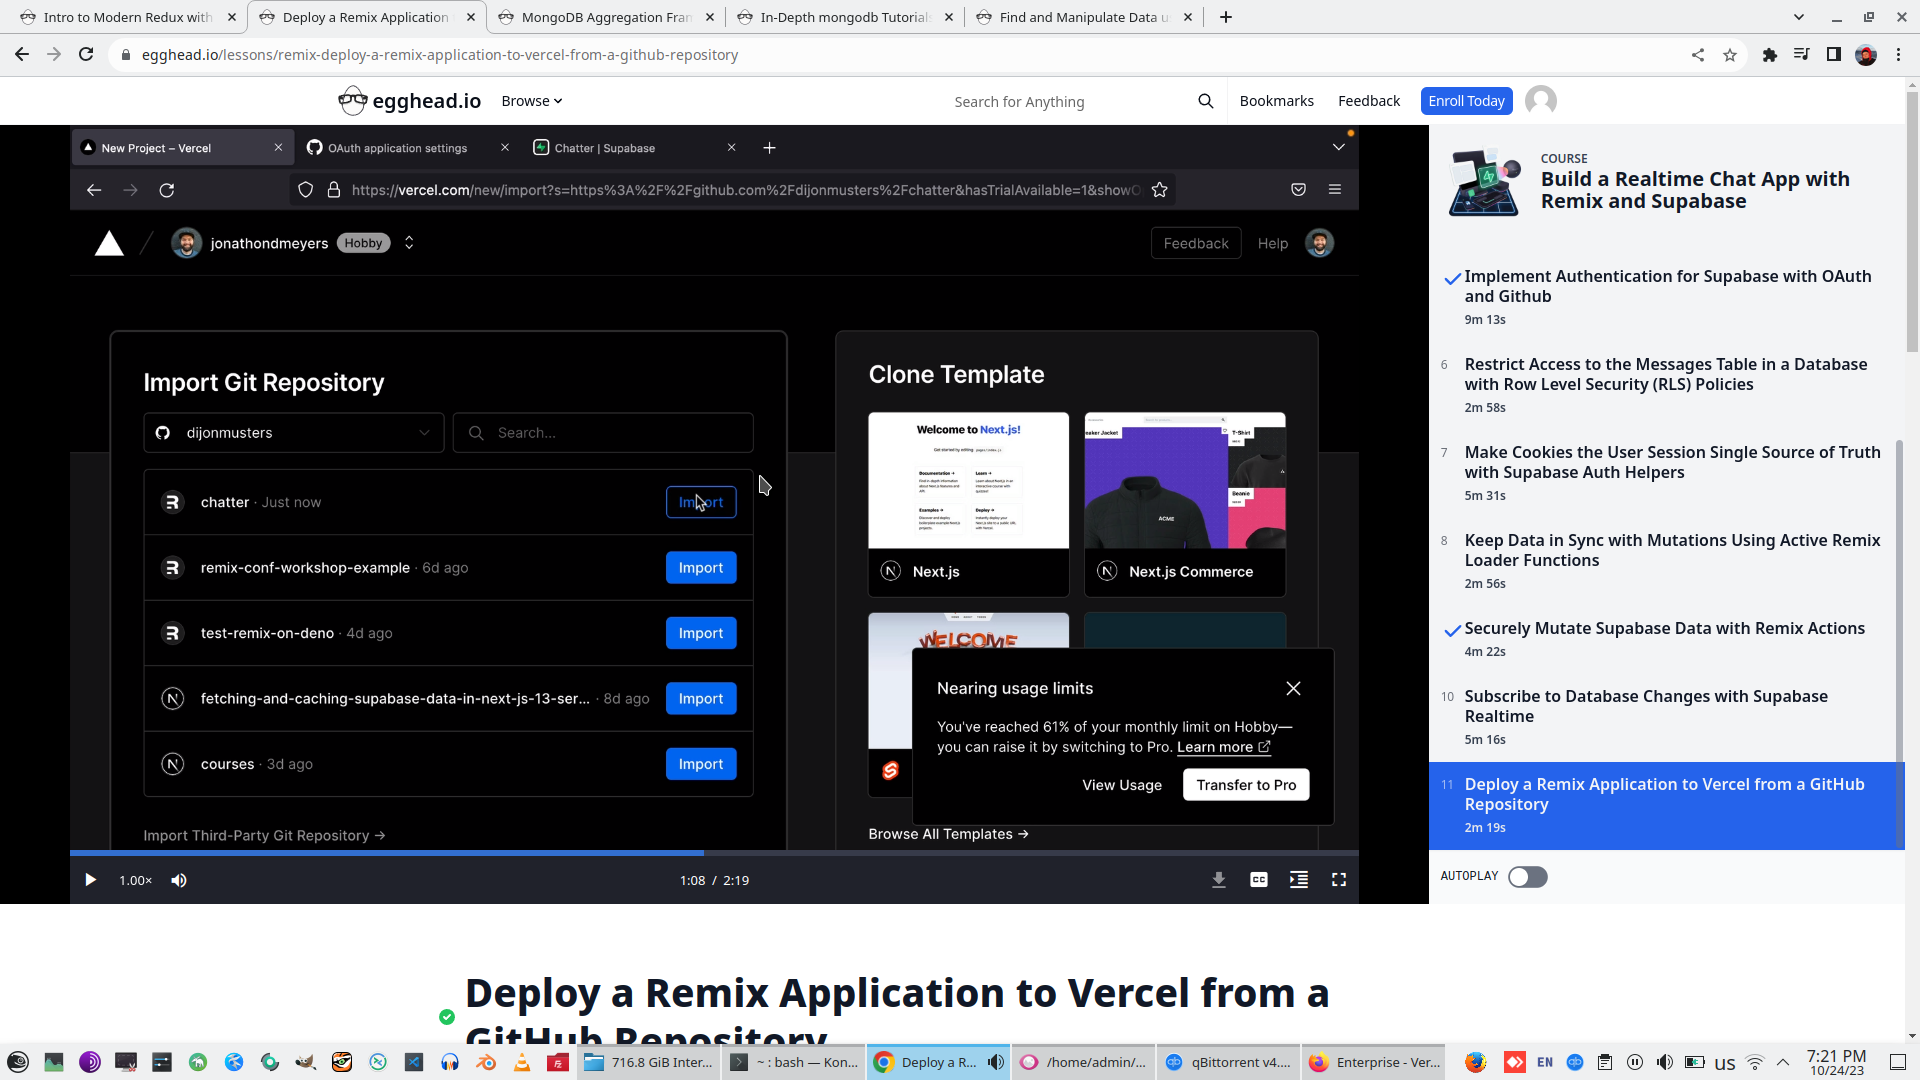
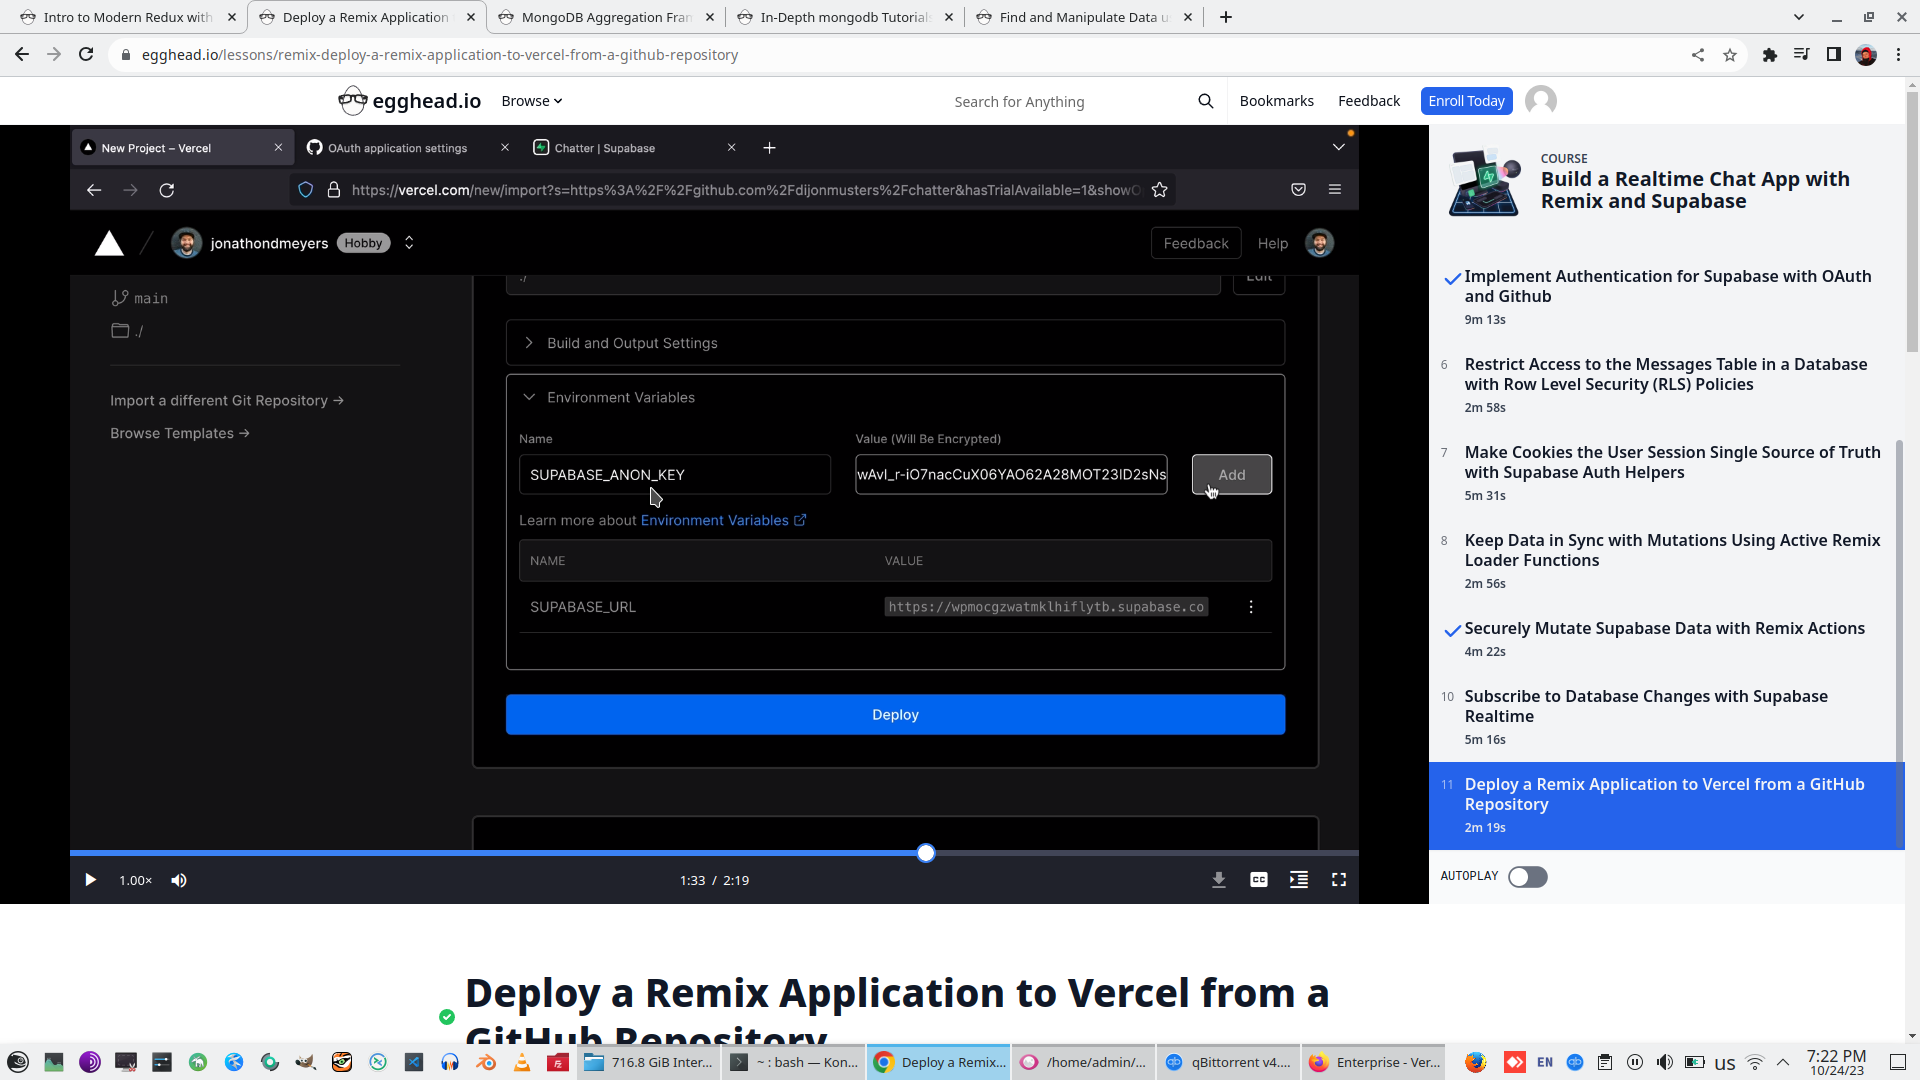
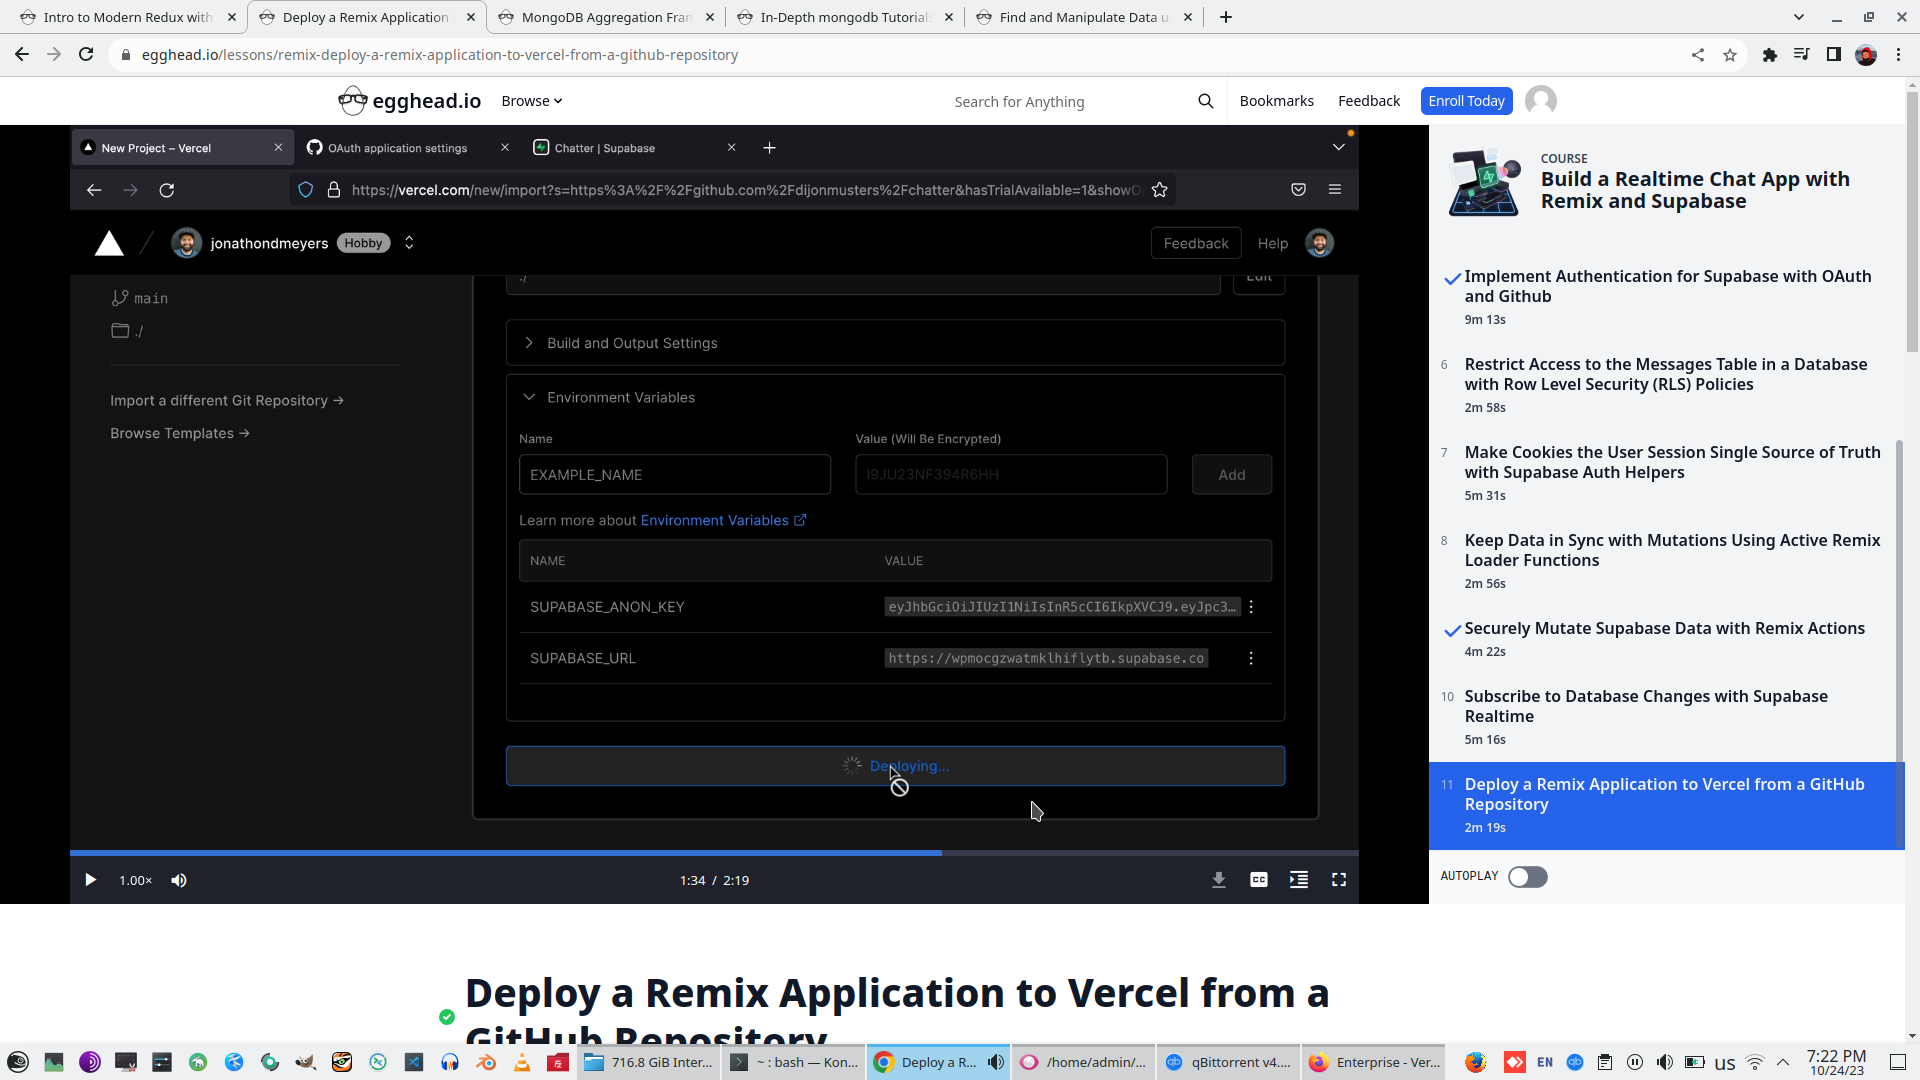
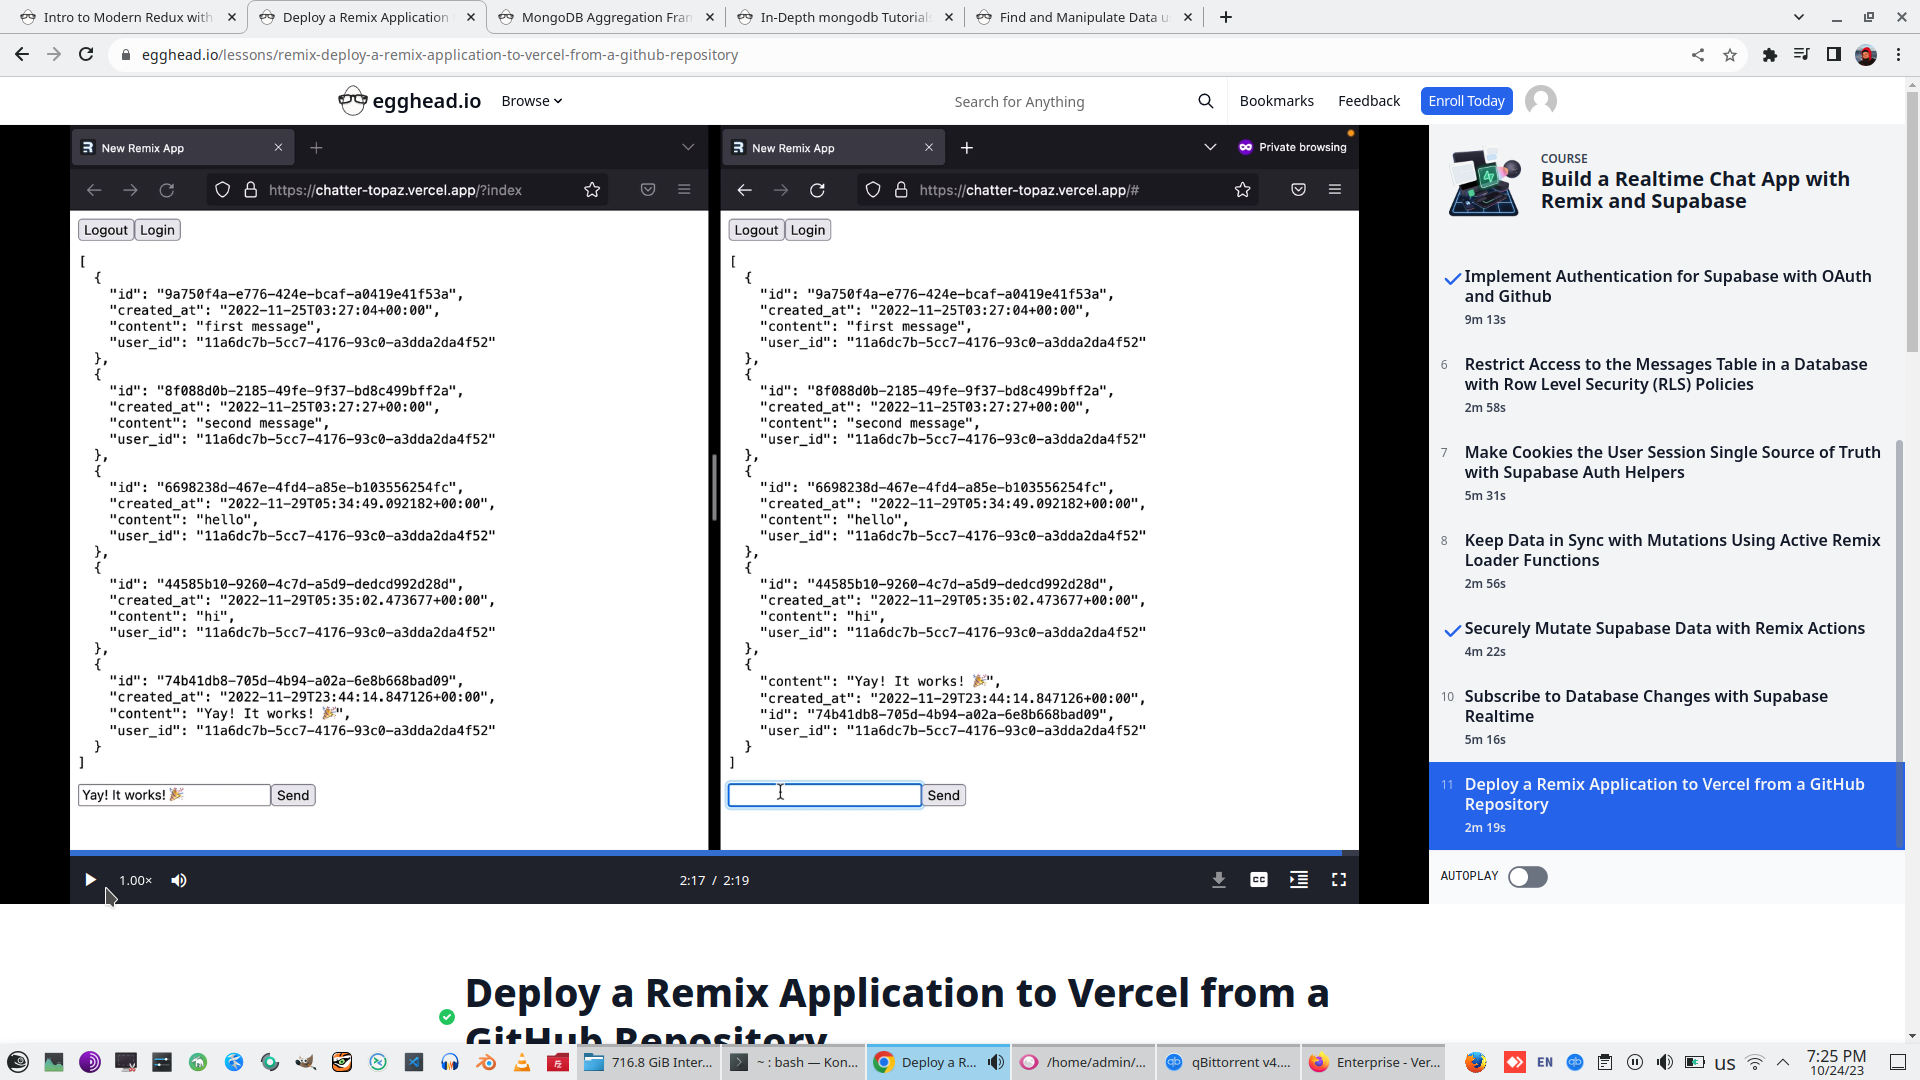
11. Deploy a Remix Application to Vercel from a GitHub Repository https://github.com/dijonmusters/chatter
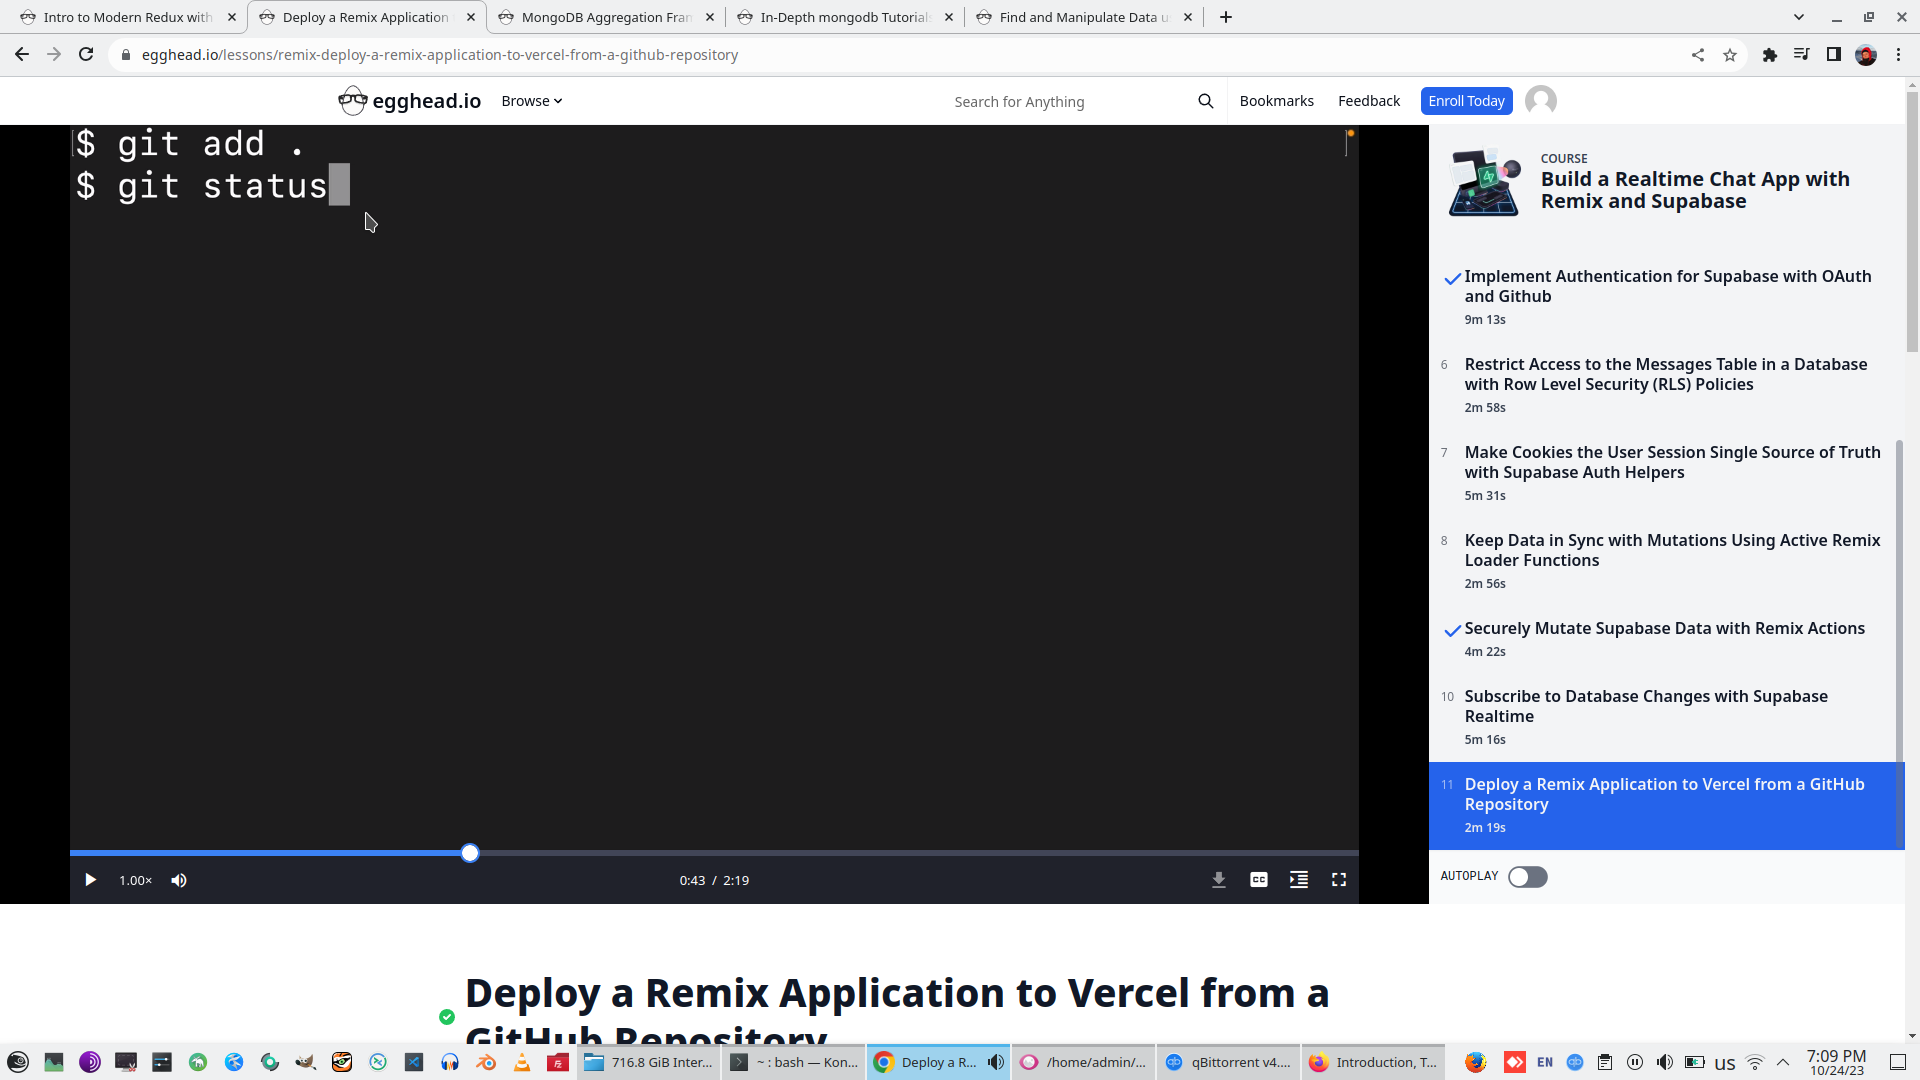
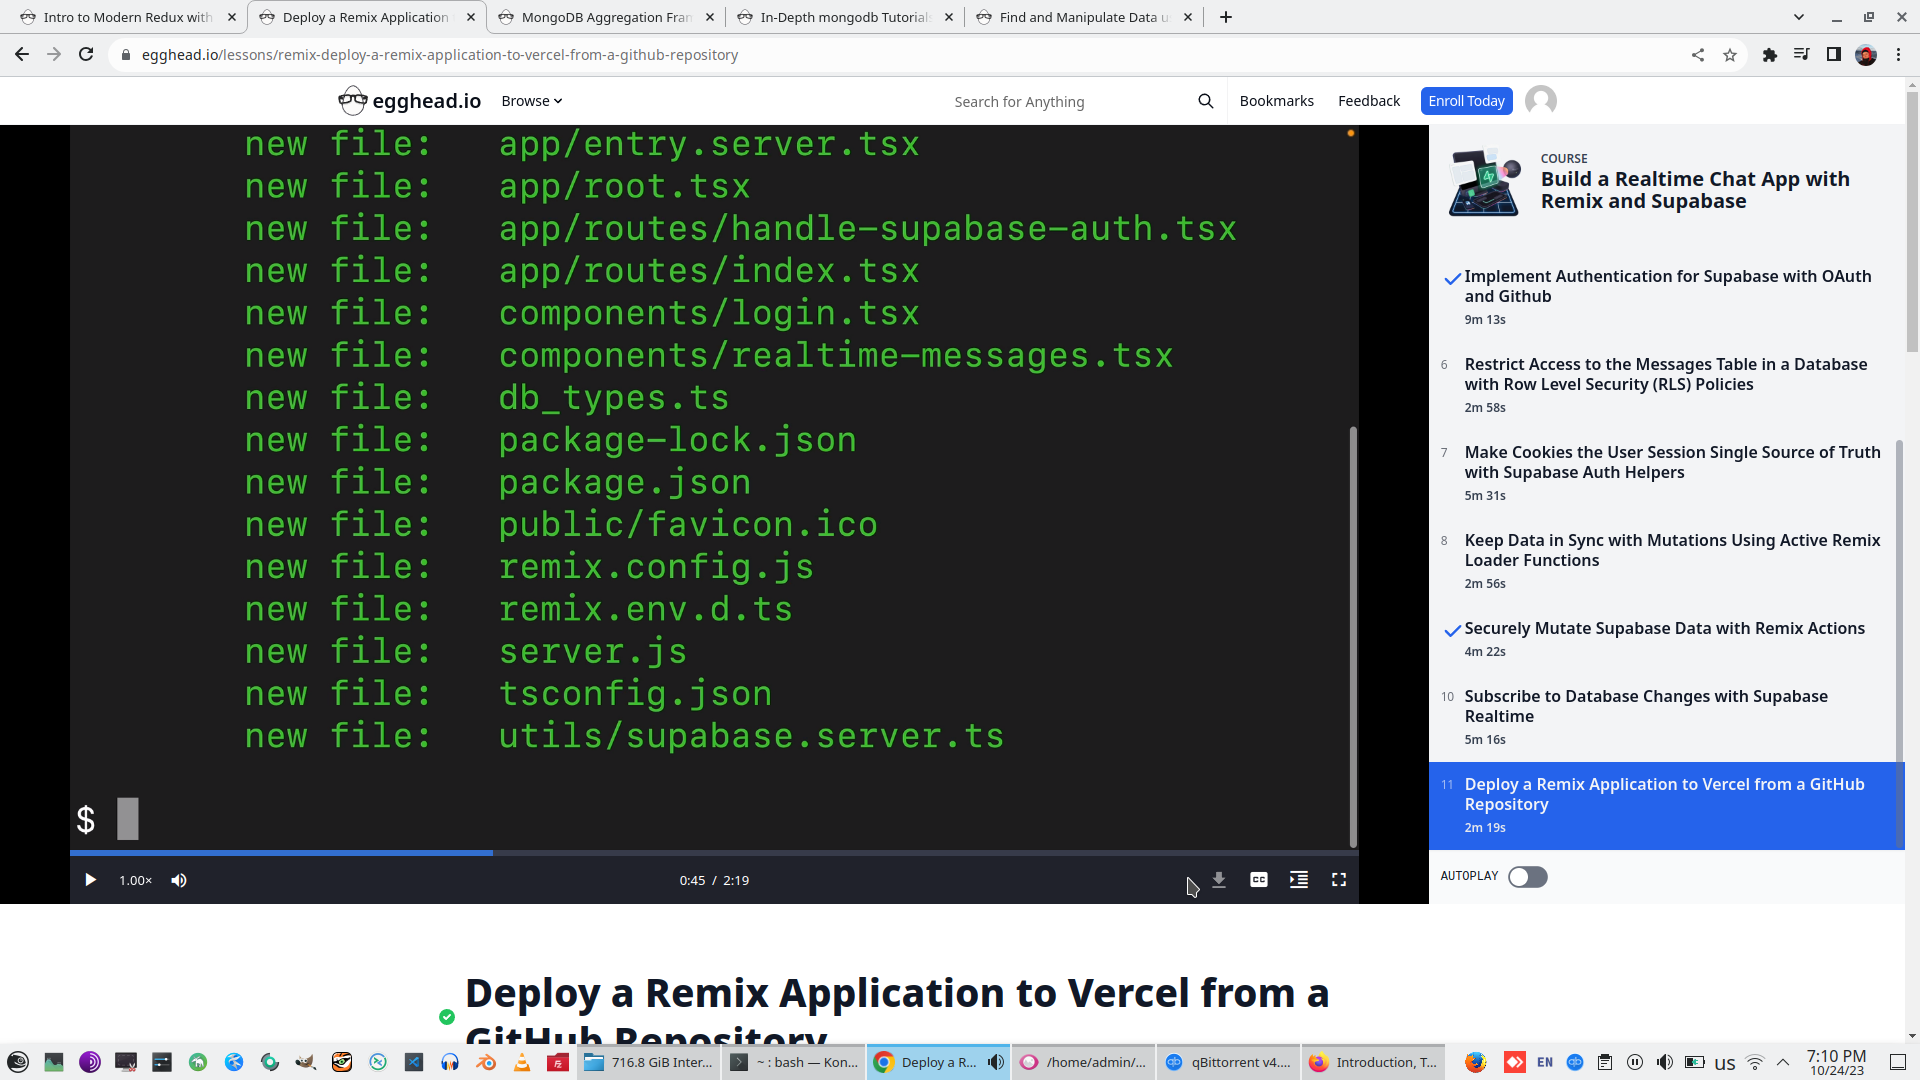
commit code to Github


Publishing to Vercel
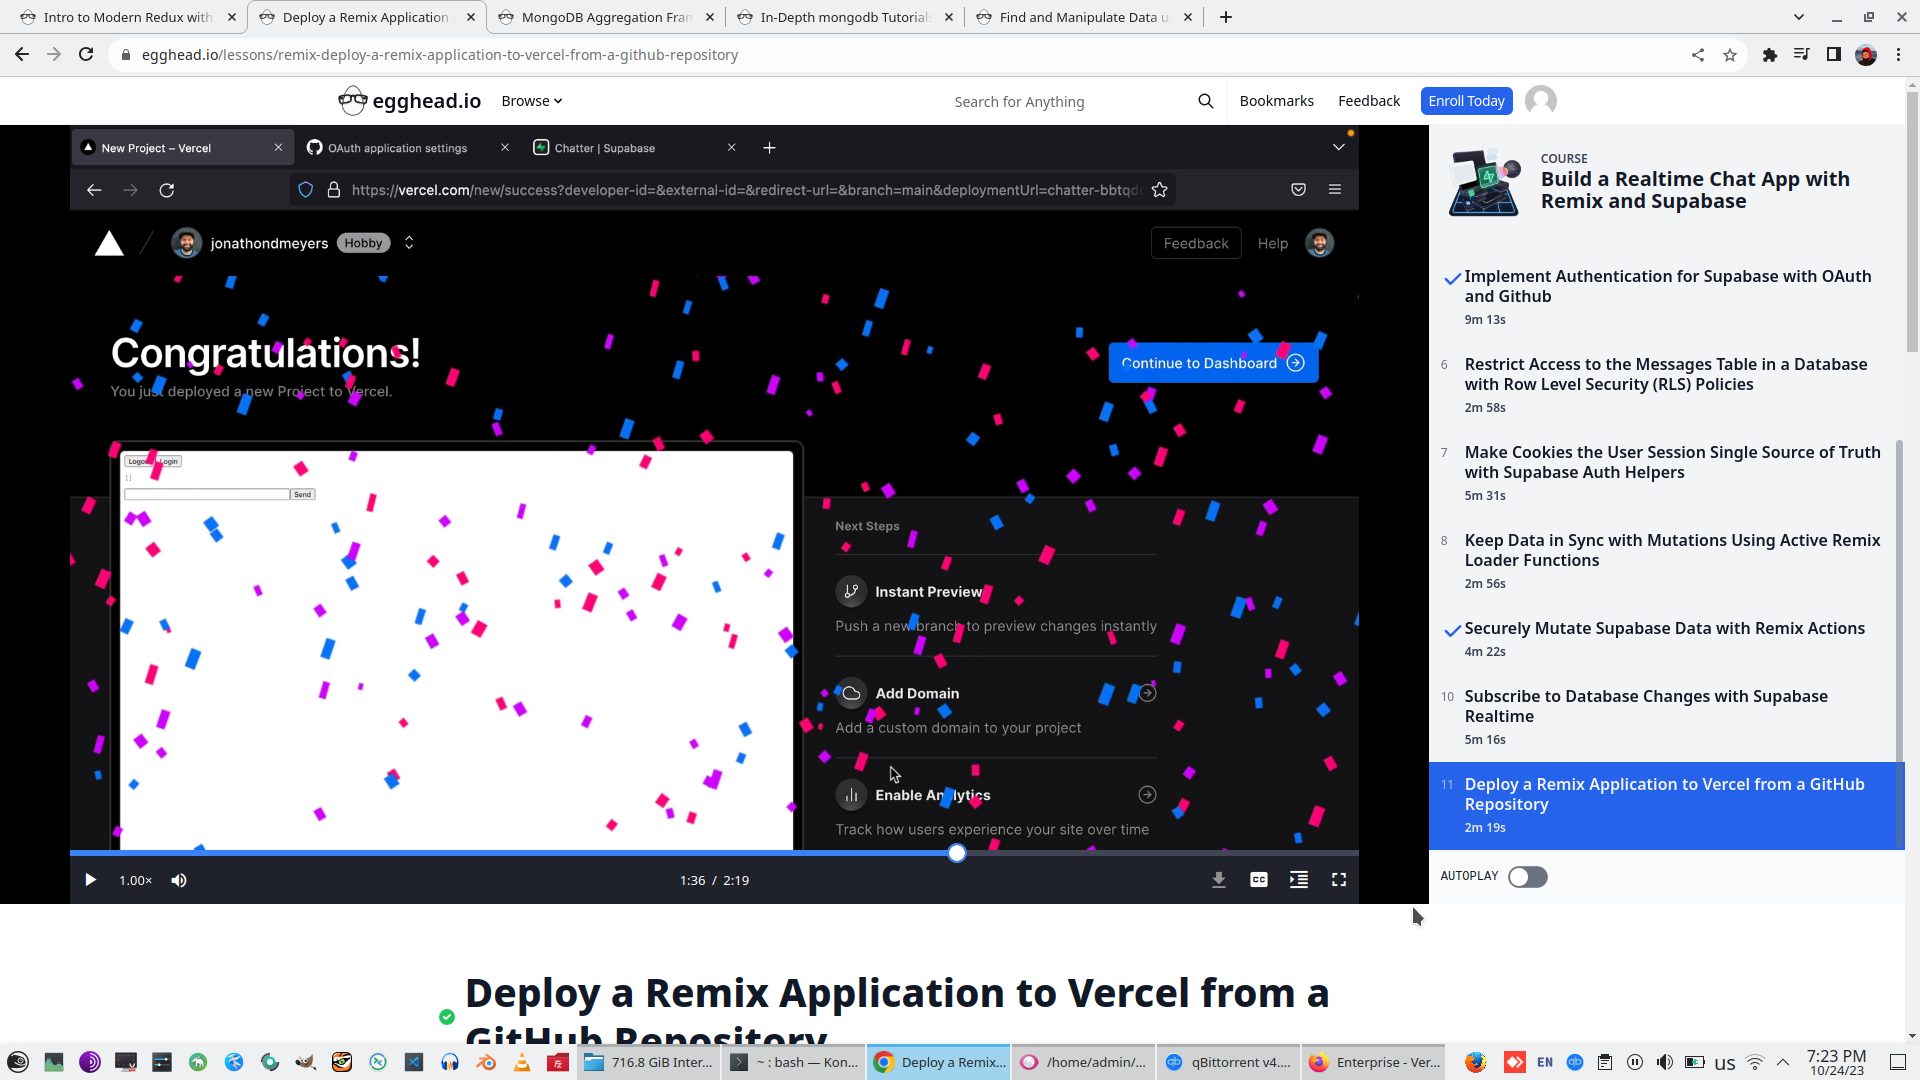
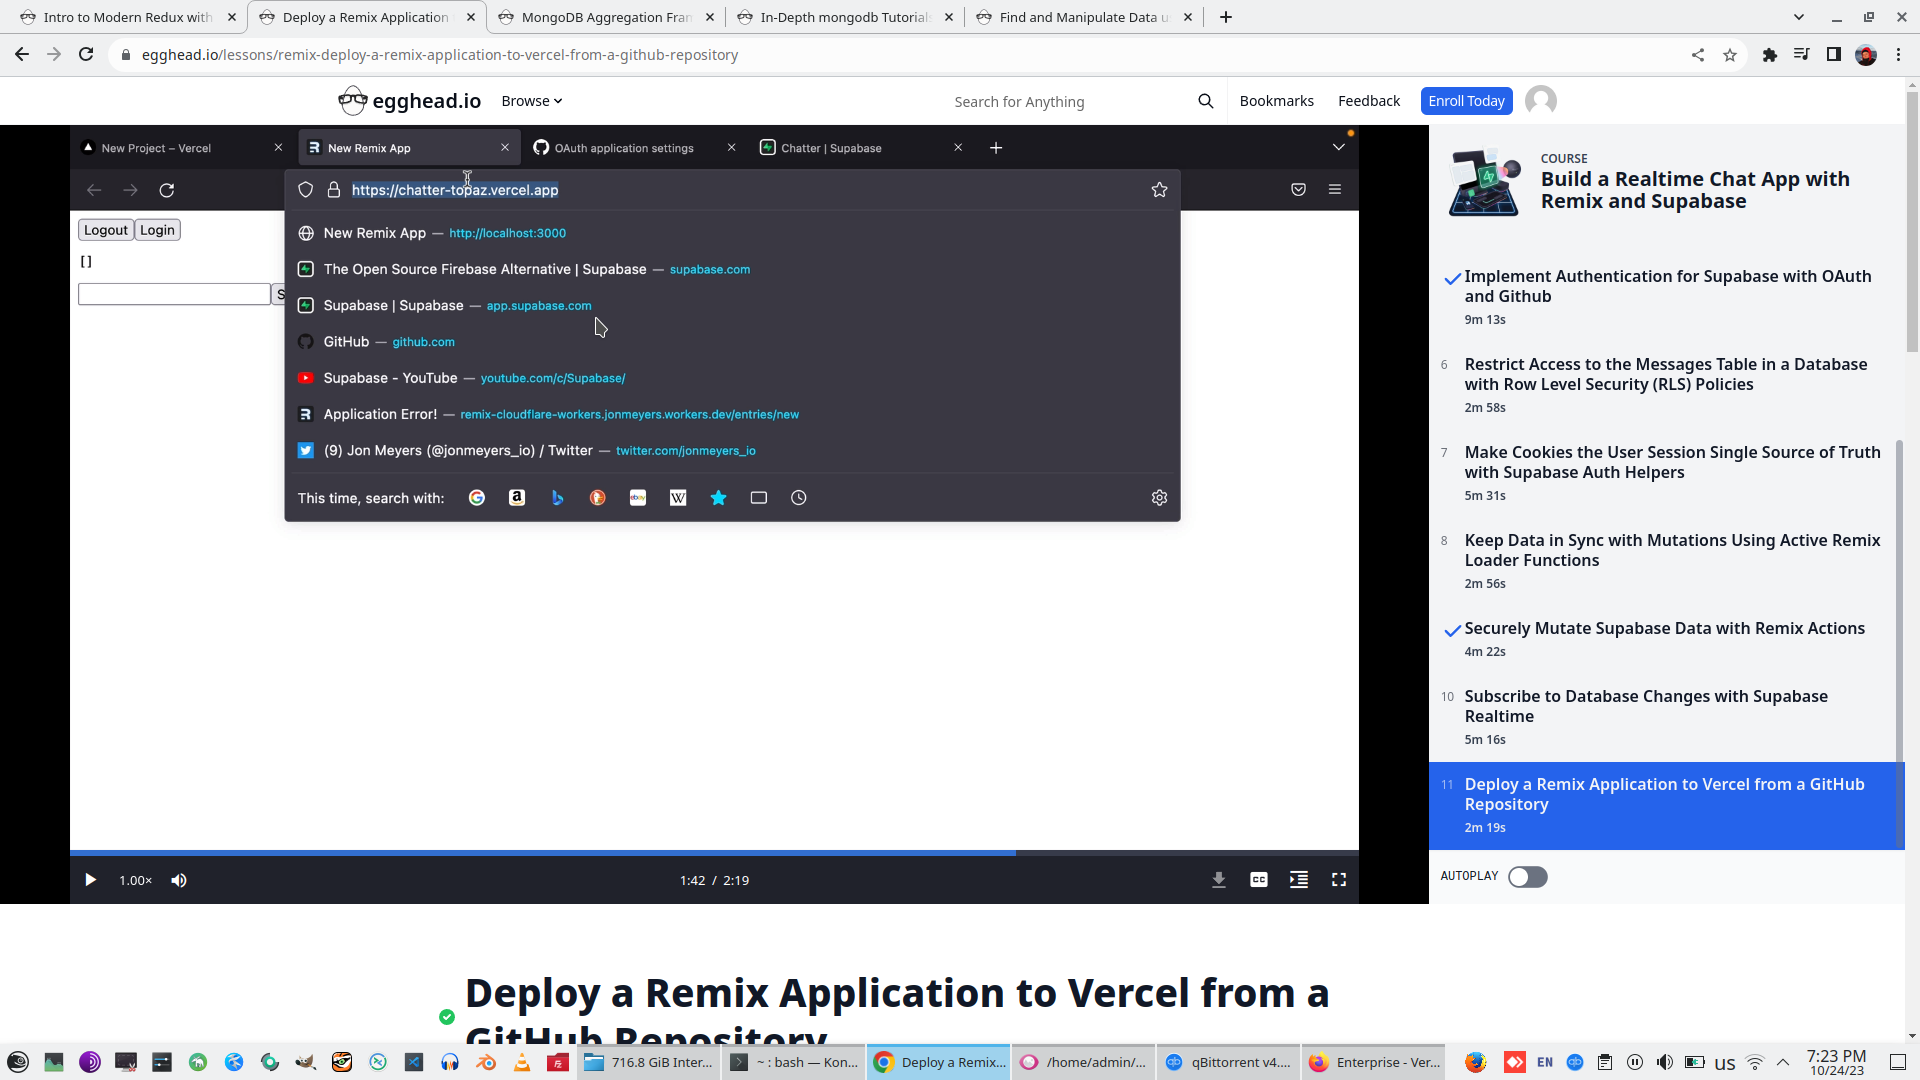
And check how application working

Related page:
Cloudflare context:
JS project context:
Front context:
FrontLearning context:
Supabase context:
 )
)
|
|